
KTTF4BGB-1004 - Refrigerator Kuhla - Free user manual and instructions
Find the device manual for free KTTF4BGB-1004 Kuhla in PDF.


| Product Type | Table Top Refrigerator |
| Brand | Kuhla |
| Model Number | KTTF4BGB-1004 |
| Dimensions (H x W x D) | 492 mm x 472 mm x 450 mm |
| Fresh Food Capacity | 43 L |
| Freezer Capacity | None (ice cube compartment only) |
| Energy Efficiency Class | A+ |
| Annual Energy Consumption | 106 kWh/year |
| Noise Level | 45 dB |
| Climate Class | ST/N (16°C to 38°C) |
| Refrigerant Type | R600a (16g) |
| Voltage / Frequency | 220-240 V ~ 50 Hz |
| Rated Current | 0.5 A |
| Temperature Control | Knob settings 1 (warm) to 6 (cold); recommended setting 5 |
| Defrost Type | Manual (not frost free) |
| Door Reversal | Yes (instructions provided) |
| Adjustable Feet | Yes (2 adjustable feet) |
| Shelves | 1 fixed shelf, door shelves |
| Warranty | 12 months from original purchase |
| Customer Service Contact | 0345 208 8750 (Mon-Fri 8am-8pm, Sat 9am-1pm) or www.productcare.co.uk |
Frequently Asked Questions - KTTF4BGB-1004 Kuhla
User questions about KTTF4BGB-1004 Kuhla
0 question about this device. Answer the ones you know or ask your own.
Ask a new question about this device
Download the instructions for your Refrigerator in PDF format for free! Find your manual KTTF4BGB-1004 - Kuhla and take your electronic device back in hand. On this page are published all the documents necessary for the use of your device. KTTF4BGB-1004 by Kuhla.
USER MANUAL KTTF4BGB-1004 Kuhla
Table Top Fridge Instruction Manual
natural_image
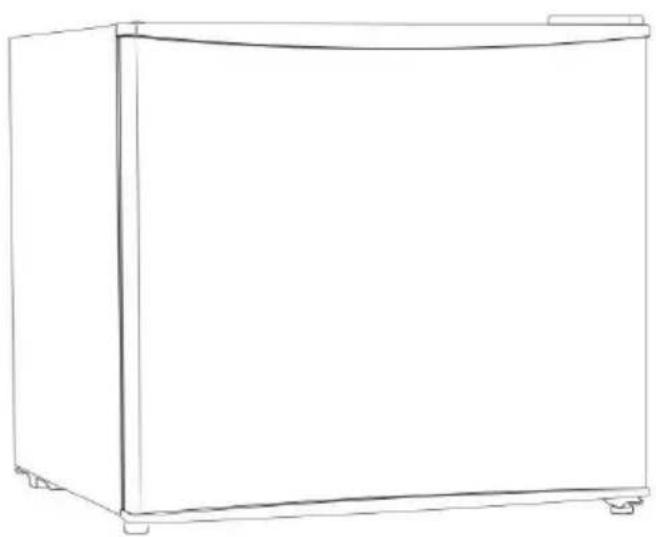
Line drawing of a simple refrigerator with no text or symbolsModelnumber(s): KTTF4 (B) (SS) (GB) (BGB) (SSGB)
For Customer Services & Spare Parts please call 0345 208 8750 Opening times: Monday - Friday 8am – 8pm & Saturday 9am – 1pm or visit us at www.productcare.co.uk
IMPORTANT: RETAIN FOR FUTURE REFERENCE
Contents
Safety Instructions 3-5
Electrical Safety 5
Transportation & Handling 6
Installing & Switch on your Appliance 6-7
Before Switching On 7
Product Overview 8
Unit & Spare Parts 8
Usage 9
Temperature Selection 9
Door Reversal 10-11
Energy Saving Advice 12
Maintenance & Cleaning 13
Internal Cleaning 13
External Cleaning 13
When not in Use 13
Trouble Shooting 14-15
Connection to the Mains Supply 16
Guarantee 17
Technical Specification/Product Fiche 18
Notes 19
Safety Instructions
Important note: Please read this booklet before installing and switching on this appliance. The manufacturer assumes no responsibility for incorrect installation and usage as described in this booklet.
- This model uses natural refrigerant gas as part of its cooling system. This gas is known as R600a (Isobutene) and is environmentally friendly but can be combustible. Care should therefore be taken when handling or transporting the product to ensure that none of the refrigeration circuit components are damaged,
- This appliance can be used by children aged from 8 years and above and persons with reduced physical, sensory or mental capabilities or lack of experience and knowledge if they have been given supervision or instruction concerning use of the appliance in a safe way and understand the hazards involved. Children shall not play with the appliance. Cleaning and user maintenance shall not be made by children without supervision.
- If the supply cord is damaged, it must be replaced by the manufacturer, its service agent or similarly qualified persons in order to avoid a hazard.
- Warning! Do not immerse the electrical parts of the appliance in water or other liquids. Never hold the appliance under running water.
- WARNING: Keep ventilation openings, in the appliance enclosure or in the built-in structure, clear of obstruction.
- WARNING: Do not use mechanical devices or other means to accelerate the defrosting process, other than those recommended by the manufacturer.
- WARNING: Do not damage the refrigerant circuit.
- WARNING: Do not use electrical appliances inside the food storage compartments of the appliance, unless they are of the type recommended by the manufacturer.
- Do not store explosive substances such as aerosol cans with a flammable propellant in this appliance.
Safety Instructions
- This appliance is intended to be used in household and similar applications such as:
- staff kitchen areas in shops, offices and other working environments;
- farm houses and by clients in hotels, motels and other residential type environments;
• bed and breakfast type environments;
• catering and similar non-retail applications.
- During transportation and installation of the appliance, ensure that none of the components of the refrigerant circuit becomes damaged
- Handle, service and dispose of the appliance according to local regulations, for it uses flammable refrigerant.
- The appliance must not be placed or rested on its power cord.
- If this appliance is to replace an old refrigerator with a lock, the lock must be removed as a safety measure before storing it or disposing of it. This is to protect children from locking themselves inside the appliance.
- Old refrigerators and freezers contain insulation gases and refrigerant, they must be disposed of properly. Contact your local authority or your dealer if you have any questions. Please ensure that you do not damage the scrap unit prior to being picked-up by the relevant waste disposal service.
- Do not use adaptors or extension leads when connecting the appliance to the electrical power supply
- Do not plug in damaged plugs
- Do not pull, twist or damage the power cable.
- Do not plug-in or un-plug the appliance with wet hands to prevent electrical shock.
- This appliance is designed to be used by adults, do not allow children to play with the appliance or let them hang over the door.
- Do not place explosive or flammable material in your appliance for your own safety.
- Bottles containing a high percentage of alcohol must be sealed well and placed vertically in the refrigerator.
- Do not cover the body or the top of the appliance
- Fix down the accessories in the appliance during transportation to prevent damage to them.
Electrical Safety
THIS APPLIANCE MUST BE PLUGGED INTO AN EARTHED SOCKET
- Before switching on, make sure that the voltage of your electricity supply is the same as that indicated on the rating plate. This product is designed to operate on 220 – 240V AC; 50Hz. Connection to any other power source may damage the unit.
- This product may be fitted with a non re-wireable plug. If it is necessary to change the fuse in the plug, the fuse cover must be refitted. If the fuse cover becomes lost or damaged, the plug must not be used until a suitable replacement is obtained.
- If the plug has to be changed because it is not suitable for your socket, or becomes damaged in any way, it should be cut off and an appropriate plug fitted following the wiring instructions below. This should be carried out by a qualified electrician. The plug removed must be disposed of safely, as insertion into a 13 Amp socket is likely to cause an electrical hazard.
Transportation and Handling
For safe lifting, tilt the appliance backwards by no more than 45 degrees, hold the base and rear corners of cabinet. Lift the refrigerator carefully. Never use the door handles for lifting. To move the refrigerator on a flat level surface, tilt it slightly backwards and push backwards.
This unit is heavy and could cause injury – ensure there are adequate people present to move the appliance.
Installing and Switching on Your Appliance
- Operating voltage for your appliance is 220-240V at 50Hz.
- Before plugging in the power supply, ensure that the voltage on the rating label corresponds to the working voltage of your electrical system in your home.
- Insert the plug into an efficient Ground (Earth) connection. If the socket has no Ground (Earth) contact or the plug does not match, we suggest you call an authorised electrician for assistance.
- Place your appliance in an area that is not exposed to direct sunlight.
- Your appliance should be placed at least 10cm away from stoves, ovens and other heating cores.
• This appliance should never be used outdoors or left in the rain. - When your appliance is placed next to a chest freezer or freezer, there should be at least 10cms between them to prevent humidity on the outer surface.
- Do not place anything on your appliance and install the unit in a suitable place so that there is at least 30cm clearance above the appliance.
- If placing your appliance next to kitchen cabinets, leave 5cm between them.
- The rear of the appliance should be at least 6cm away from the back wall.
- The appliance must be used in the vertical position and on a flat surface.
• To level the appliance, use the adjustable feet on the appliance. - Do not place your appliance on a carpeted surface as this will prevent adequate ventilation.
• This appliance should only be placed on a flat, firm surface.
- Choose a dry and well-ventilated space.
- The appliance should be positioned so that the plug is easily accessible.
- If you need help or are unsure how to install the unit, please contact Customer Services on 0345 208 8750 or visit www.productcare.co.uk.
Before Switching On
- Before using your appliance, add a teaspoon of bicarbonate of soda to warm water and with a damp cloth wipe down all parts of the new appliance, then repeat the process with a clean damp cloth and dry. (ensure the appliance is not connected to the power when performing this task).
- Remove all transport tapes and foam protection pieces. Clean the interior with a cloth dampened in lukewarm soap and water. Wipe with clean water and wipe dry.
- There may be an odour when you first switch on the appliance, it will disappear when the appliance starts to cool.
- When the appliance has been positioned, adjust the feet to ensure the unit is stable. This is essential to ensure quiet running and proper door opening /closing.
- Connect to the electrical socket but do not switch the power to the refrigerator on for at least 3 hours. The coolant within the product needs time to settle after it has been transported and put in to position, failure to do this will affect the cooling performance of your appliance.
- Once the appliance has settled locate the thermostat knob on the product and set to "5" position and switch on the power. The compressor will begin to work. Close the door
- You may hear faint gurgling or bubbling sounds when the refrigerant is pumped to the cooling system and through the coils or tubing at the rear of the appliance. When the compressor is in operation you may hear a slight whirring sound or pulsating noise. The thermostat controls the operation of the compressor, and you may hear a slight click as it cycles in and out (this is normal).
- To save energy, you should minimize the frequency and duration of door opening.
Product Overview
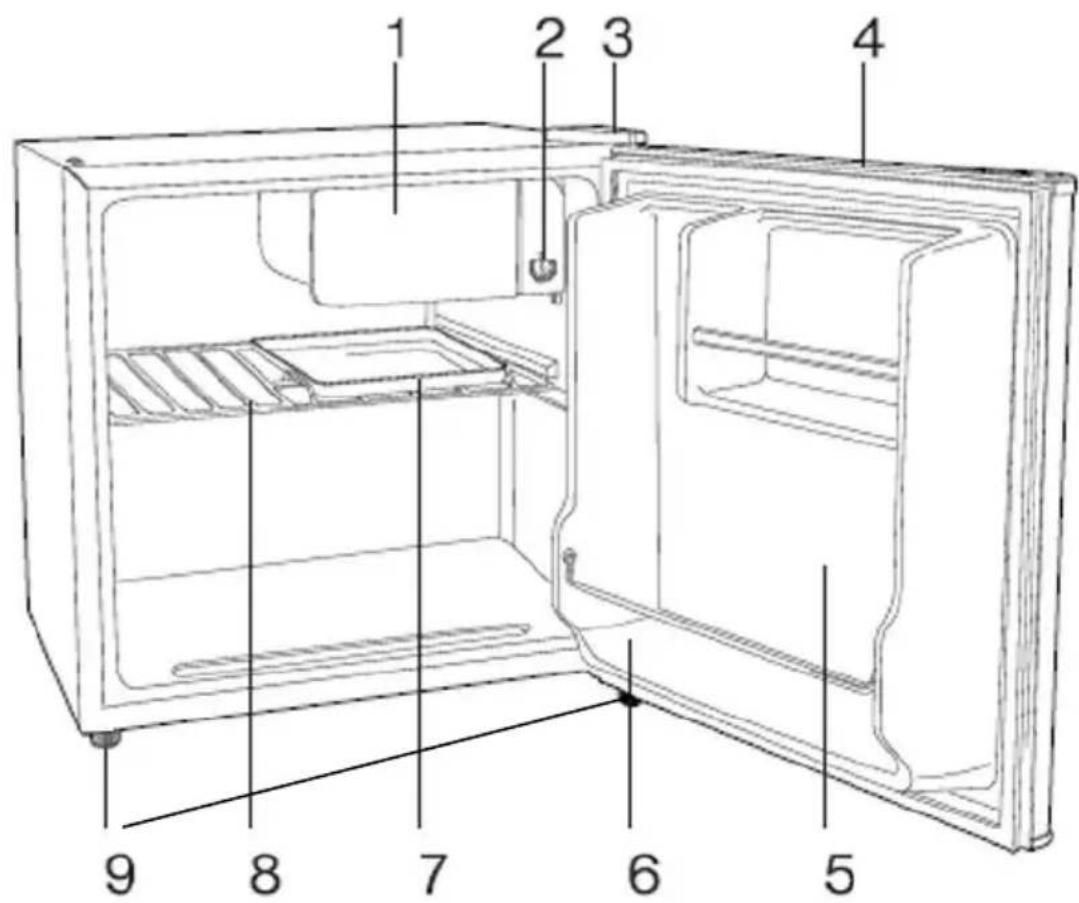
-
Ice-cube compartment
-
Lower hinge
-
Thermostat
-
Driptray
-
Upper hinge
-
Shelf
-
Handle recess
-
Adjustable feet
-
Door shelves
Unit Parts & Spare Parts
Before installation, check that all parts detailed in the product overview are present. If any parts are missing, please contact the Product Care Customer Service team on 0345 208 8750 or visit us at www.productcare.co.uk
Usage
Allow to stand for a minimum of 3 hours before plugging in to the mains
Temperature selection
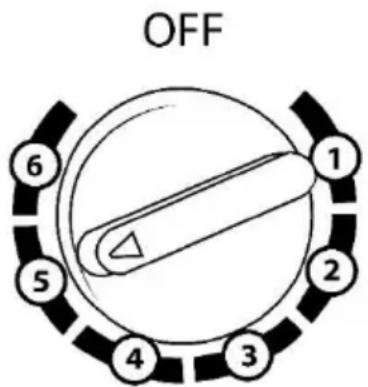
The temperature in the appliance is controlled by the temperature control knob located inside the fridge. Rotate the control knob left or right to regulate the temperature inside the fridge.
On the temperature control, 1 is the warmest setting and 6 is the coldest setting. Under normal conditions the temperature control should be set at setting 5. Setting 6 should be used as a rapid cool setting and should only be set 2 hours before a large amount of food is placed in the fridge. The temperature control should be put back to setting 5 after the food has been placed in the fridge, if this is not done the temperature in the fridge compartment could fall below 0°C as the compressor will run continuously.
Once the temperature control has been set, close the door and plug in the appliance. We recommend that the door is not opened for a minimum of 4 hours to allow the appliance to reach the standard operating temperature.
Note: The standard operating temperature for the fridge compartment should be between 0irc C and 4irc C.
- Note: The temperature of the freshly stored food and how often the door is opened affects the temperature in the refrigerator compartment. If required, change the temperature setting.
Door Reversal
You will need to tilt the fridge backward to access the lower hinge which holds screws. Do not tilt more than 45 degrees and do not lay the fridge flat on its side.
Reversing the door:
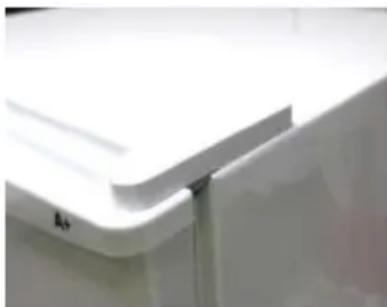
- Remove the top plastic hinge cover and set aside
natural_image
Close-up of a white plastic appliance with a lid and side panel (no visible text or symbols)- Unscrew the two screws from the metal bracket and set aside.
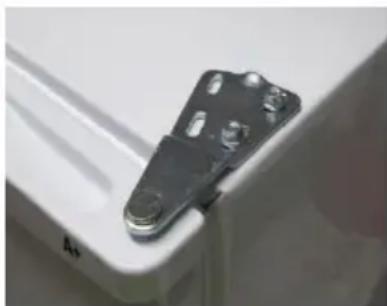
natural_image
Close-up of a metallic hinge component with four bolts, mounted on a white surface (no text or symbols visible)- Remove the three plastic inserts on the opposite side of the fridge and door. Now fix the top door bracket to this side using the screws that was previously removed. Replace the plastic hinge cover.
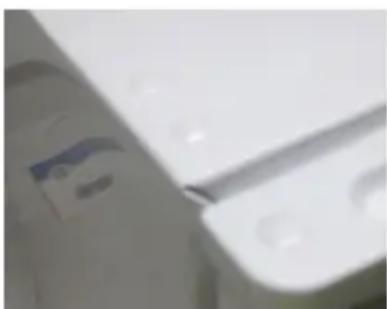
natural_image
Close-up of a white toilet or toilet door with a small blue object on the side (no visible text or symbols)Door Reversal
- Remove the adjustable foot at the bottom of the fridge and set aside.
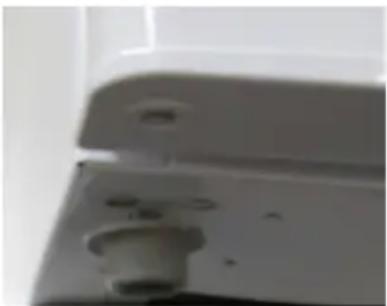
natural_image
Close-up of a mechanical component with a cylindrical fitting and mounting holes (no visible text or symbols)- Unscrew the two screws holding the bottom door hinge and carefully moving it across to the opposite side and fix into position. Care must be taken as the door will be loose. Once this has been completed screw in the adjustable foot to the opposite side of the fridge.
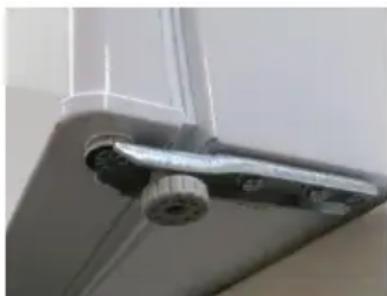
natural_image
Close-up of a metallic mechanical component mounted on a ceiling, no visible text or symbolsCheck that the door opens and shuts correctly after you have completed the door reversal process.
The appliance must now be upright for a minimum of 3 hours before turning it on.
Energy Saving Advice
- Do not install the appliance close to sources of heat, such as a cooker, dishwasher or radiator.
- Locate the appliance in a cool well-ventilated room and make sure that the air vents are clear.
- Try to avoid keeping the doors open for a long time, warm air will enter the cabinet and may cause a build-up of ice as well as affecting the energy consumption. Ensure there are no obstructions preventing the doors from closing properly.
- Ensure that the door seals are clean and there are no tears or splits.
- Keep the most perishable foods, (those with a short shelf-life, such as cooked meats), in the coldest part of the fridge. The Salad Crisper Box is the warmest part of your fridge and should be used for vegetables, salads and fruits etc.
- Do not overload the appliance: the cooling air that circulates to keep the appliance cold gets blocked and pockets of warm air form.
- Do not put hot food into the fridge or freezer – let it cool down first.
Maintenance & Cleaning
Disconnect the appliance from the power supply before cleaning.
Internal Cleaning
- Do not pour water over the appliance.
- The cavity should be cleaned periodically using a solution of bicarbonate of soda and lukewarm water (5ml to 0.5 litre of water)
- Clean the accessories separately with soap and water. Do not put them in the dishwasher.
- Do not use abrasive products, detergents or soaps.
• After washing, rinse with clean water and dry carefully. - When you have finished cleaning reconnect the plug with dry hands.
External Cleaning
- Wash the outer cabinet with warm soapy water. Do NOT use abrasive products.
- There are sharp edges on the underside of the product so care should be taken when cleaning.
- Once or twice a year dust the rear of the appliance and the compressor at the back of the appliance, with a brush or vacuum cleaner, as an accumulation of dust will affect the performance of the appliance and cause increased energy consumption.
When the appliance is not in use
When the appliance is not in use for long periods, disconnect from the electricity supply, empty all of the food and clean the inside. Leave the door open to prevent the build-up of odours.
Trouble shooting
| Problem | Solution |
| The fridge doesn't work | Check that the appliance is switched on. |
| Check that there has not been a power cut. | |
| Check that the plug is not faulty. | |
| Check that the fuse has not blown. | |
| Check that the voltage is correct for the appliance. | |
| Are there any faults with the socket? For this purpose, try the plug of your appliance by connecting it to a socket which you are sure is working. | |
| The temperature inside the appliance is not cold enough | Check that there is not too much food in the appliance. |
| Check that the thermostat is set to a suitable temperature. | |
| Check that the appliance is not placed in direct sunlight, or too near to a heating source. | |
| Check that the ambient temperature is within the operation limits of the appliance. | |
| Are the doors of the appliance opened frequently? Once the door is opened, the humidity found in the air in the room enters the appliance, especially if the humidity levels in the room are very high. The more frequently the door is opened in humid conditions the more chance of the build up of moisture. | |
| The temperature within the appliance is too cold. | Increase the working temperature by adjusting the thermostat to a lower setting.The highest setting should only be used as a rapid cool setting and should only be set 2 hours before a large amount of food is placed in the fridge. If this is not done the temperature in the fridge compartment could fall below 0°C as the compressor will run continuously. |
| The inner surfaces of the appliance are wet | Caused by condensation - dry the inside of the appliance. |
| The outer surfaces of the appliance are wet | Caused by condensation - dry the outer of the appliance carefully. |
Trouble shooting
| Problem | Solution |
| Smell/odour | Check all the food and drink that is in the fridge is in date and correctly packaged. If it isn't then it should be removed immediately or repackaged.Check for spillages on each shelf, rack and drawer. You may need to remove the drawers to check that no spillages have settle underneath them. As spillages that have not been cleaned and have been left can cause smells and unwanted odours. |
| The doors do not close properly | Ensure there are no obstructions preventing door closure. |
| Check the door compartments and shelves are correctly in place. | |
| Check the door seal is not warped or torn. | |
| Check the appliance is level. | |
| Unusual noises | Check that the appliance is on a flat, level surface and is stable. |
| Check the spacing's around the appliance and ensure it is not touching other items. | |
| Bubbling and gurgling sound: • This noise is emitted as the coolant fluid flows through the pipes within the system. This is normal. | |
| Water flowing sound: • This is the normal sound of water flowing into the drain trough during the defrosting process. | |
| If the appliance is operating noisily (compressor noise):This is normal. This noise indicates that the compressor is operating normally. As the compressor is being energized, it might run a bit more noisily for a short period of time. |
Connection to the Mains Supply
WARNING- THIS APPLIANCE MUST BE EARTHED
This appliance is designed to operate from a mains supply of AC220V - 240V; 50HZ. Check that the voltage marked on the product corresponds with your supply voltage.
For UK use only – Plug fitting details (where applicable):
As the colours of the wires in the mains lead of this appliance may not correspond with the coloured markings identifying the terminals in your plug, proceed as follows:
The GREEN/YELLOW wire is the EARTH and must be connected to the terminal which is marked with the letter E or by the earth symbol or coloured GREEN or
GREEN/YELLOW.
The BLUE wire is the NEUTRAL and must be connected to the terminal marked with the letter N or coloured BLACK.
The BROWN wire is the LIVE wire and must be connected to the terminal marked with the letter L or coloured RED.
Always ensure that the plug cord grip is fastened correctly.

natural_image
Warning symbol depicting a lightning bolt inside a triangle (no text or numbers)DANGER Electric Shock Risk
If a 13A (BS1363) fused plug is used it must be fitted with a 13amp fuse conforming to BS1362 and be BSI or ASTA approved.
Guarantee
This product is guaranteed for 12 months from the date of the original purchase. If any defect arises due to faulty materials or workmanship you must contact Product Care with the original proof of purchase so a replacement or refund can be arranged.
Refund or replacement is at the discretion of Product Care.
The following conditions apply:
- Product Care will require a valid proof of purchase at the point of replacement or refund.
- The product must be installed and used in accordance with the instructions contained in this instruction guide and any other instructions for use which has been supplied.
• It must be used for domestic purposes only and for its intended use. - This guarantee does not cover wear and tear, damage, misuse or consumable parts.
This does not affect your statutory rights.
Produced for
G2S LIMITED
WIGAN
WN2 4AY
Technical Specification/Product Fiche
Brand Kuhla
Model number KTTF4 (B) (SS) (GB) (BGB)
(SSGB)
Household refrigeration appliance category Category 1
Energy efficiency class A+
Energy consumption 106kWh per year, based on standard test results for 24 hours. Actual energy consumption will depend on how the appliance is used and where it is located.
Fresh food storage compartment volume 43L
Frozen food storage compartment volume N/A
Frost Free No
Temperature rise time
N/A
Freezing capacity
N/A
Climate class
ST/N
This appliance is intended to be used at an ambient temperature between +16°C and +38°C.
Noise level (dB)
45
Rated current
0.5A
Refrigerant
R600a (16g)
Blowing gas
Cyclopentane
Rated Voltage
220V - 240V \~ 50Hz
External Dimensions(HxWxD)
492mm x 472mm x 450mm
Notes
For Customer Services &
Spare Parts please call
0345 208 8750
Opening times:
Monday – Friday
8am – 8pm
&
Saturday
9am – 1pm
or visit us at
www.productcare.co.uk

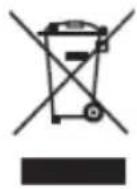
This symbol is known as the 'Crossed-out wheelie bin Symbol'. When this symbol is marked on a product/batteries, it means that the product/batteries should not be disposed of with your general household waste. Only discard electrical/electronic/battery items in separate collection schemes, which cater for the recovery and recycling of materials contained within. Your co-operation is vital to make sure the success of these schemes and for the protection of the environment. For your nearest disposal facility, visit www.recycle-more.co.uk or ask in store for details.
We reserve the right due to possible changes to design to alter the instruction manual without prior notice.



- Contents
- Safety Instructions
- Electrical Safety
- THIS APPLIANCE MUST BE PLUGGED INTO AN EARTHED SOCKET
- Transportation and Handling
- Installing and Switching on Your Appliance
- Before Switching On
- Product Overview
- Unit Parts & Spare Parts
- Usage
- Temperature selection
- Door Reversal
- Energy Saving Advice
- Maintenance & Cleaning
- Internal Cleaning
- External Cleaning
- When the appliance is not in use
- Connection to the Mains Supply
- Guarantee
- The following conditions apply:
- Technical Specification/Product Fiche
- Notes
Brand : Kuhla
Model : KTTF4BGB-1004
Category : Refrigerator