
GLE 5 - Loudspeaker CANTON - Free user manual and instructions
Find the device manual for free GLE 5 CANTON in PDF.


| Product Type | Passive loudspeaker |
| Brand | Canton |
| Model | GLE 5 |
| Design | 2-way bass reflex |
| Drivers | 1 x 25 mm (1") tweeter, 1 x 130 mm (5.25") woofer |
| Frequency Response | 38 Hz - 40 kHz |
| Crossover Frequency | 3,000 Hz |
| Impedance | 8 ohms |
| Sensitivity | 87 dB (2.83 V/1 m) |
| Recommended Amplifier Power | 25 - 120 watts per channel |
| Dimensions (H x W x D) | 330 x 180 x 250 mm (13 x 7.1 x 9.8 in) |
| Weight | 6.5 kg (14.3 lbs) |
| Cabinet Material | MDF with real wood veneer |
| Finish | Black (or other available finishes) |
| Grille | Removable cloth grille |
| Connectors | Gold-plated bi-wire terminals |
| Warranty | 5 years (depending on region) |
| Included Accessories | User manual, warranty card |
| Cleaning | Wipe with a dry, soft cloth. Avoid water and solvents. |
| Safety | Place on a stable surface. Keep away from moisture and heat sources. |
| Spare Parts & Reparability | Contact Canton authorized service center for replacement drivers or crossovers. |
Frequently Asked Questions - GLE 5 CANTON
User questions about GLE 5 CANTON
0 question about this device. Answer the ones you know or ask your own.
Ask a new question about this device
Download the instructions for your Loudspeaker in PDF format for free! Find your manual GLE 5 - CANTON and take your electronic device back in hand. On this page are published all the documents necessary for the use of your device. GLE 5 by CANTON.
USER MANUAL GLE 5 CANTON
CANTON®
German loudspeaker tradition
natural_image
Line drawing of a vintage television setup with two speakers and a monitor (no text or symbols)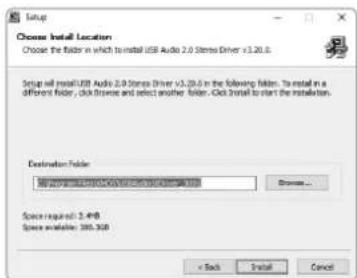
Deutsch
Deutsch
Digital optisch Digital koaxial Computer USB
Ton

German loudspeaker tradition
Welcome to the world of pure music
We are delighted that you have chosen a product from Canton. It combines high-quality components with our many years of development experience and careful production. To give you a carefree sound experience, there are only few things to consider. This operating instructions explains the basic functions and extensive special functions of your speaker system.
We hope you enjoy the sonic delight!
Content
Safety instructions ...... Page 57
Unpacking......Page 62
Running in....Page 62
Starting up the remote control....Page 62
Connection Page 63
Operation......Page 66
Menu Settings Page 68
- SPS (Speaker Setup)...... Page 68
- CHL (Channel Level) Page 68
- DST (Distance) Page 69
- VOI (Voice, Enhancement of speech intelligibility)......Page 69
– EQ (Equalizer) Page 70
- DRC (Dynamic Range Control) Page 70
- SYS (System Setup, System Settings)...... Page 70
- SLP (Sleep Timer) Page 71
- IRM (Infrared Menu)......Page 71
- IRL (Infrared Learning) Page 71
– DIL (Direct input learn, direct selection of signal inputs) Page 72
- CLR (IR Clear function) Page 73
- STB (Stand By Mode) Page 73
- SEL (Automatic Input Selection) Page 74
- INP (Configuration of the inputs) Page 74
- PHA (Phase Subwoofer).... Page 75
- SSM (Subwoofer Stereo Mode)...... Page 75
- LIP (Lip Sync) Page 76
- VOL (System Volume)......Page 76
- ASM (Analog Stereo Mode) Page 76
- SLC (Slave Connection)...... Page 77
- RES (System Reset) Page 77
- WIS (Wireless Setup) Page 78
– WSP (Wireless Speaker Pairing)...... Page 78
- BT (Bluetooth® Menu)......Page 79
- BTP (Bluetooth® Pairing) Page 79
- BTS (Bluetooth® Input Selection) Page 80
- APL (Automatic Bluetooth® Playback) Page 81
- INF (Device Information) Page 81
Playback via Bluetooth® wireless technology....Page 82
USB Playback....Page 83
Configure the computer Page 84
Display Page 92
Troubleshooting Page 94
Technical data......Page 102
EU – Declaration of Conformity....Page 103
Further important information Page 104
Guarantee Page 105
Licensing information Page 106
Safety instructions
Please observe the safety instructions when choosing the correct location for your speaker system and when maintaining and operating it! The user is responsible for the proper handling of the speaker. Canton cannot accept any responsibility for damage or accidents caused by improper installation or connection.
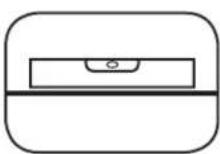
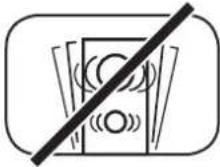
Choose a flat surface Avoid moisture Avoid shocks Do not touch the mains

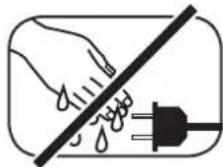
cable with wet hands

Do not throw in household waste

Avoid direct sunlight Protect from

extreme cold
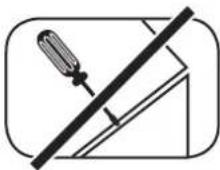
Do not open the housing
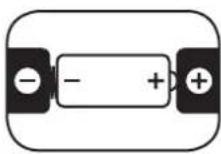
Make sure the polarity of the battery and remote control is correct
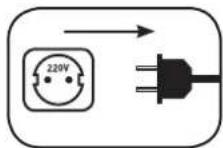
Ensure free access to the power plug
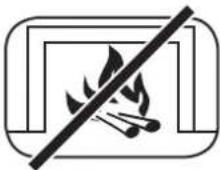
Distance to sources of heat
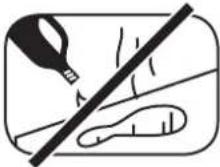
Do not use aggressive, alcoholic or abrasive agents for cleaning
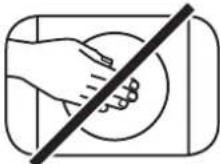
Do not reach into the housing opening
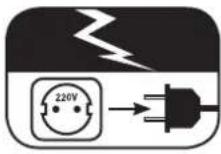
Disconnect mains plug during thunderstorms
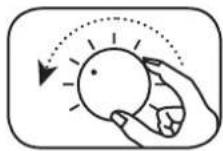
Turn down the system if there is an overload
English
Important safety instruction

| Note |
| Read and follow all instructions. |
| Keep these instructions. |
| Observe all warnings and safety instructions. |
| Operate this device only in a moderate climate (not in a tropical climate). |
| Do not operate this device at altitudes above 2000 m above sea level. |
| Only operate this device indoors, not outdoors or in damp rooms. |
| To avoid the risk of fire or electric shock, the device must not be exposed to rain or moisture. |
| Do not operate this device near water. |
| Do not expose this device to dripping or splashing water. |
English
| Strong temperature fluctuations lead to condensation (water droplets) in the device.Wait until the moisture has evaporated (at least three hours). |
| Do not place objects filled with liquids (such as vases) on the device. |
| Do not place an open fire, such as lit candles, on or near the device. |
| Do not place the device near heat sources such as radiators, heat accumulators, stoves or other devices(including amplifiers) that generate heat. |
| Avoid direct sunlight. |
| Keep a clearance of at least 5 cm around the device. |
| Never prevent the protective function of polarised or grounded plugs: A polarised plug has two pins, one wider than the other.An earthed plug has a third earthing pin. The wide or third pin is for your safety. If the plug does not fit into your outlet, contacta qualified electrician to replace the obsolete outlet. |
| To avoid electric shock, connect the mains plug only to sockets or extensions where the contactpins can be fully inserted to prevent exposed contact pins. |
| Never touch the signal and mains cable with wet hands. |
| Do not step on or pinch the mains cable, especially not in the area of the plugs, sockets or where the cable is led out of the device. |
| For devices without a mains switch, in which the mains plug or the device mains socket serves as an isolating device,the plug of the mains cable or the device mains socket must be freely accessible at all times. |
| Disconnect the device from the mains during thunderstorms or prolonged periods of non-use. |
| To completely disconnect the device from the power supply, unplug the mains cable from the wall outlet. |
| Always switch off the device before connecting or disconnecting connection cables. |
| Always pull the plugs and not the cables. |
| Install the device according to the manufacturer's instructions. |
| Always choose a level surface. The device must be in a vertical position. |
English
Important safety instruction

Note
Do not exert force on operating elements, connections and lines.
The device may only be operated with the voltage and frequency specified on the device or the type plate.
Do not insert any objects or body parts into the openings of the device. Live parts inside the housing could be touched and/or damaged. This can lead to short circuits, electric shocks and fire.
Only use fixing materials and accessories that are approved by the manufacturer and/or supplied with the device.
Only use trolleys, stands, tripods, holders or tables specified by the manufacturer or sold with the device. When using a trolley, be careful when moving the trolley/device assembly to prevent damage and injury from tipping over.
Only clean this device with a clean, dry cloth.
Do not use any aggressive, alcoholic or abrasive agents for cleaning.
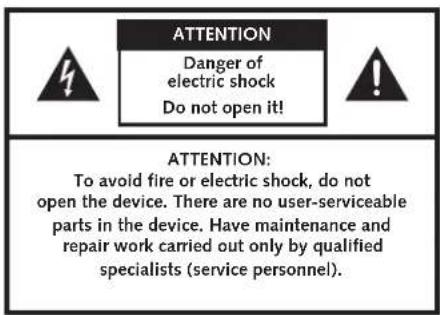
To avoid electric shock, do not open the housing! There are no user-serviceable parts in the device.
Consult qualified personnel for all repair and maintenance work. This is required when the device has been damaged in any way, such as mains cable or plug damage, liquid or objects have been spilled, exposed to rain or moisture, does not operate normally, or has been dropped.
Do not make any changes to the device or accessories. Unauthorised modifications can compromise safety, regulatory compliance or system performance. In this case, the type approval/guarantee may expire.
If sound distortions such as unnatural knocking, throbbing or high-frequency clicking occur during playback, the volume level must be reduced immediately.
To avoid possible hearing damage, do not listen at high levels for long periods of time. Interrupt the playback if you hear ringing or whistling noises in your ears or if you have the impression that you can no longer hear high sounds (even for a short time).


English
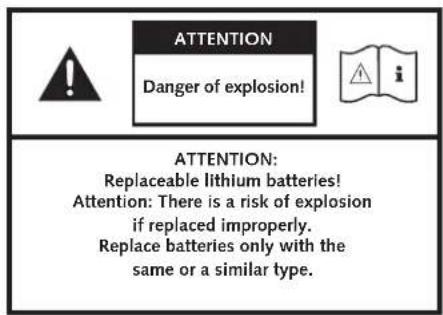
| New and used batteries must be kept away from children. Devices in which the battery compartment cannot be closed securely must not be used any longer and must be kept away from children. | |
| The remote control supplied with this device contains a button cell as battery. Swallowing the button cell can cause serious internal burns and thus death in only 2 hours! | |
| If it is suspected that a button cell has been swallowed or inserted into other body openings, a doctor must be consulted immediately. | |
| Take care of your environment when disposing of the battery. Batteries must be disposed of at a battery collection point. | |
| Do not expose batteries to high temperatures, such as direct sunlight, fire or the like. | |
| Batteries must be inserted correctly according to the polarity imprint. Incorrect insertion can lead to damage. | |
| Only use the batteries or rechargeable batteries specified for the device. | |
| The batteries supplied are not rechargeable batteries, i.e. these batteries must not be recharged. | |
| The device contains permanent magnets. Do not place or lay objects that are sensitive to magnetic fields (e.g. tube TVs, external hard drives, magnetic cards, video cassettes, etc.) on or directly next to the device. |  |
| The device and/or the accessory may contain small parts that can be swallowed.Therefore not suitable for children under three years. |  |
| This symbol indicates uninsulated dangerous voltages inside the case that are sufficiently strong (amplitude) to cause a fire or electric shock. |  |
| This symbol warns you of important operating and maintenance instructions in the accompanying documentation (manual) supplied. |  |
| This symbol indicates Class II devices, where protection against electric shock is provided by double or reinforced insulation during specified use and therefore no protective earth connection is required. |  |
English
Unpacking Running in
Carefully unpack each carton and check that all parts listed here are included:
Master Speaker
- 1x master speaker
- 1x fabric cover
- 1x remote control
- 2x mains cable
• 1x optical digital audio cable
• 1x coaxial digital audio cable
• 1x analogue stereo audio cable
• 1x operating instructions
Slave speaker
- 1x slave speaker
- 1x fabric cover
natural_image
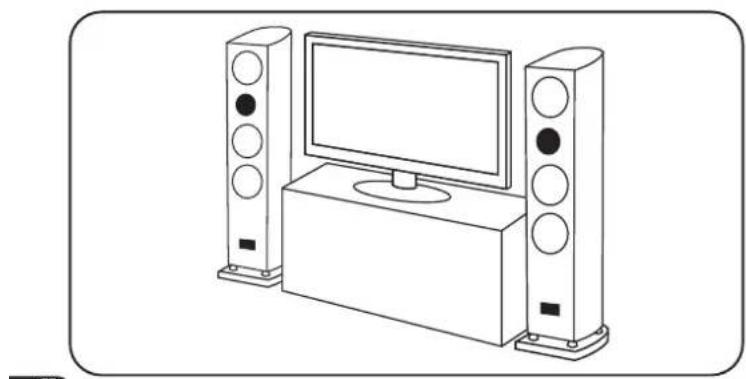
Line drawing of a modern TV setup with two speakers and a monitor (no text or symbols)Running in phase until the development of the maximum sound properties: 15 – 20 operating hours.
- Please listen at normal volume during this time
- Avoid extremely high levels
- Listen to a variety of audio material
Starting up the remote control
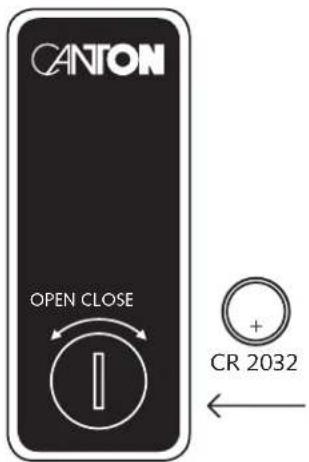
The supplied battery is already inserted in the remote control. For activation, remove only the protective film. Make sure that a replacement battery is inserted correctly according to the polarity markings ( _n +/- “).
Use only the battery specified for this system (CR 2032).
Connection
The Smart floorstanding and compakt speakers work according to the master-slave principle. The sources are connected to the "master", the "slave" is controlled by the "master" and supplied with the corresponding audio signal. The control among each other (on/off, input, volume, etc.) with the Smart series is always done wirelessly. Sound signals are also transmitted by radio as standard, but with a stereo configuration or the two front speakers (FL and FR) in a multi-channel setup they can also be transmitted alternatively using a coaxial digital cable. The analogue inputs are an exception and can or must be connected directly to the source. Decoding of a data stream encrypted with Dolby® Digital or DTS Digital Surround® technologies takes place exclusively in the master speaker. Below you will find a detailed explanation of the connections of the Smart speakers and how they are used.
Please make sure that all electrical components are switched off before connecting. Your speaker system has five freely selectable inputs. When used as a TV speaker, it is sufficient to connect one of the inputs (usually the optical digital input) to the TV and connect all other sources to the TV. However, in order to achieve the best possible sound, it is recommended to connect the sources (such as satellite receiver, BluRay player, etc.) directly to the speaker. Depending on the equipment of the source used, you can choose between the following options:
Digital Input Optical (Digital Optical)
Modern sources such as CD/SACD/BluRay players, music and media servers, and streamers, but also TV sets often have an optical audio output (TOSLINK). Connect it to the input of the master speaker marked "Digital Optical". This connection guarantees optimum signal transmission and the best sound quality.
Attention: Before connecting the supplied optical cable, the transparent protective caps must be removed!
Digital Input Electrical (Digital Coaxial)
To transmit the audio signal, connect the digital coaxial output of your source device (e.g. CD, DVD or BluRay player) to the input of the master speaker marked "Digital Coaxial".
Note: To transmit a visual signal, your source device must also be connected to the TV set.
Attention: Never use the connector marked "Output Digital Coaxial" on the speaker as input.
English
Connection
Analogue input, asymmetrical (Analog Line L/R)
To connect an analogue source (including a TV that has only a headphone jack or "PreOut" marked output), connect them to the "Analog Line" labelled inputs (left and right) of the master speaker using a shielded stereo RCA cable. Alternatively, you can also connect the source directly to the respective master and slave speaker. To do this, a setting must be made in the system menu. Further information can be found in the chapter "Analog Stereo Mode" on Page 76.
Analogue input, symmetrical (Analog Balanced)
Symmetrical analogue outputs can only be found on very high-quality Hi-Fi devices and in the professional sector. This connection technology offers the highest possible freedom from interference for an analogue audio signal. Only one channel (left or right) is transmitted via a symmetrical signal cable (XLR cable). Therefore, to connect the Smart loudspeaker to a source with symmetrical output, you must always connect both speakers directly. It is not enough to connect only the master to the source. You must connect one XLR cable from the left output to the left speaker, and one XLR cable from the right output to the right speaker. In the case of a multi-channel setup, all speakers must be connected directly to your multi-channel preamplifier or the XLR preamp outputs of the AV receiver using XLR cables.
Computer input (Computer USB) (master speakers only)
You can connect this input directly to a computer using a standard USB cable. The computer recognises the speaker as an external sound card and can play music over it, similar to an internal sound card.
Note: Depending on the operating system, it may be necessary to install a device driver. If necessary, the Smart Speaker must be selected manually as the playback device in the system settings. For further information please refer to chapter "Configure the computer" on Page 83.
Output Digital Coaxial
To transmit the audio signal from the master to the slave via coaxial digital cable instead of radio, connect this output on the master speaker to the coaxial digital input (digital coaxial) of the slave speaker.
Note: To select a wired transmission, you must activate the corresponding function in the system menu. For more information, see the chapter "Slave Connection" on Page 77.
English
Connection
Note: This function is only possible in stereo mode or in a multi-channel setup between the two front speakers (FL and FR). Surround speakers cannot be controlled via cable connection.
Mains cable: Do not connect the mains cable until all signal cables are connected.
Note: When delivered, the physically available inputs are already provided with a "source designation". These are as follows: Analog Balanced = XLR, Analog Line = AUX, Digital Coaxial = DVD, Digital Optical = TV, Computer USB = PC, Bluetooth® = BT. You can adapt the name assigned to an input to the corresponding source device if you wish. See chapter Configuration of the inputs on Page 74.
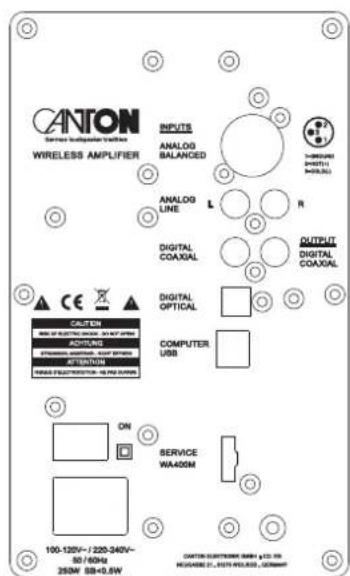
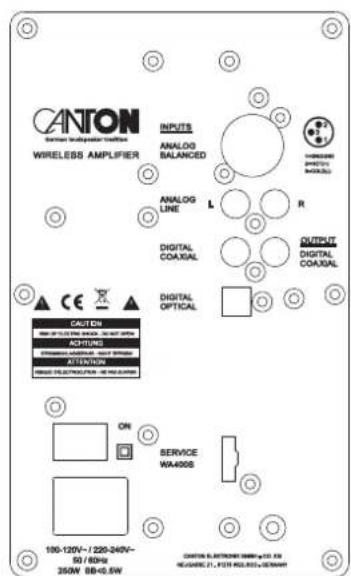
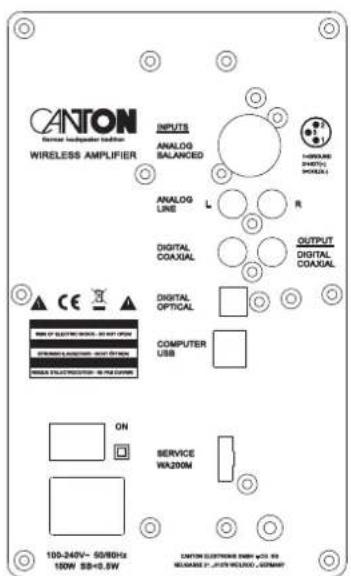
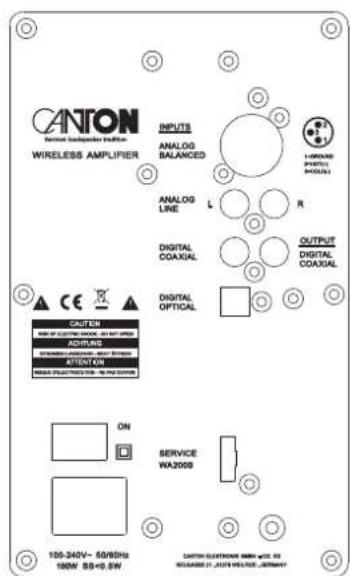
WA 400 Master WA 200 MasterWA 400 Slave WA 200 Slave
English
Operation
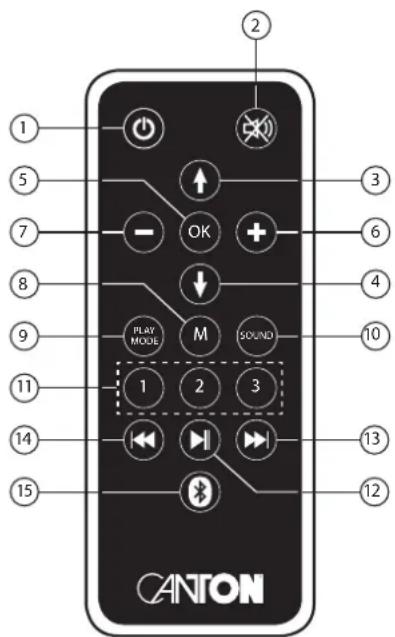
Remote
1) Change of operating state (power)
On - LED on the speaker shines green
Standby - LED on the speaker shines red
Off (disconnected from mains) - LED on speaker not illuminated
2) Mute
3) Upwards - Switches the signal input forwards / moves the selection field up in the menu
4) Downwards - Switches the signal input back / moves the selection field down in the menu
5) Confirmation (OK) – Switches to the next menu level / confirms a setting
6) Plus (+) – Increases the volume / increases the value in the menu
7) Minus (−) – Decreases the volume / decreases the value in the menu
8) Menu (M) – Switches to the setting menu / Switches to the previous menu level
9) Switches between playback modes (Play Mode)
Stereo (ST) - Music playback
Movie (MOV) - (Virtual) Ambient sound for home theatre playback
Music (MUS) - Virtual stereo sound for music playback
Note: Play Mode "MUS" is not available with existing Surround speakers. When using the symmetrical analogue input (XLR) or the asymmetrical analogue input (AUX) with direct connection to the two speakers, only the Play Mode "ST" is available.
10) Change between the sound settings (Sound)
Bass (BAS) – Low-frequency adjustment via “+/-” keys (+6dB...–6dB)
Midrange (MID) – Midrange adjustment via "+/−" keys (+6dB...−6dB)
Treble (TRE) – Treble adjustment via “+/-” keys (+6dB...−6dB)
11) Memory keys 1–3 (Preset 1–3) – Keys for direct access to previously stored settings
12) Play / Pause – Starts / pauses playback on a device connected via Bluetooth
® wireless technology
Note: The response time to the Play / Pause command can be delayed and depends on the device and the APP used.
13) Skip track – Jump to the next track
14) Skip track – Jump to previous track
15) Bluetooth® Pairing – Starts the pairing process to a device with Bluetooth
^® wireless technology
Memory function
After a temporary disconnection from the mains, the speaker system automatically switches to the last selected state.
All settings (e.g. On / Off, volume) remain unchanged.
Preset 1–3
The system can store all sound relevant settings that you make in the Sound and Speaker Setup menus as well as the volume and the input on three presets. To save, set all desired settings and hold down the desired preset key until the display stops flashing. To recall the preset, press the desired preset key briefly. To clear a preset, proceed as when saving a preset. Press and hold the corresponding preset key until the display stops flashing the second time.
Menu Structure and Navigation
Press the "M" key to enter the menu.
Press the "OK" key to reach the next menu level.
Press the “↑/↓” keys to navigate within the menu level
Press the "+/−" keys to change the value of a parameter
Press the "M" key to return to the previous menu level
To exit the menu, wait 30 seconds or press and hold the "M" key or hold it down until the selected input is displayed.
English
Menu Settings
SPS (Speaker Setup)
Press the "M" key, SPS appears in the display. Now press the OK key. Use the navigation keys "↑" and "↓" to select the desired parameter.
CHL (Channel Level)
The system has a test tone generator to make it easier to adjust the volume of the individual speaker channels to each other. Activate this by setting the TON parameter to ON via the “↑” key. To deactivate, select the TON parameter again and press the “↓” key. After activating the test tone generator, the front left speaker plays a pink noise signal. The system volume is automatically set to "60" to avoid a too high volume level. If necessary, the volume of the test tone can be increased using the “+” key, or decreased using the “−” key.
Note: The parameter TON is an exception in menu control. Here, instead of the “+/-” keys the “up/down” buttons are used for switching on/off the test tone generator to be able to use the “+/-” buttons to adjust the system volume.
Use the procedure below to adjust the volume of each speaker:
1 Select the SPS menu as described in the chapter SPS (Speaker Setup) and use the navigation keys “↑” and “↓” the CHL function to select and press OK.
2 Now you can activate the test tone if necessary by pressing the “↑” key. If desired, you can adjust the volume using the “+/-” buttons.
3 Press the "OK" key to enter the speaker selection menu.
4 Select the desired speaker using the “↑” and “↓” navigation keys. The level of the selected speaker can be adjusted separately using the “+/-” keys within a range of -9 dB to +9 dB.
Note: The volume level of each channel should be the same at the listening position. Please adjust the subwoofer to your personal preference.
Note: Speakers that are not physically present are marked with a "V" in front of the name, e.g. VCE, for "Virtual Centre". The test tone of these speakers and that of the subwoofer is not audible in play mode ST. Select the play mode MOV to be able to level the channels marked V as well as the subwoofer.
English
DST (Distance)
Adjusting the distance between the seat position and the speakers is necessary to get the perfect spatial impression in multi-channel recordings. The distance can be adjusted in 10 cm steps from 0.0 m to 9.9 m.
If the distance is higher than 9.9 m, set the difference values of the individual distances in relation to 3 m.
Decisive for the calculation of the spatial effect are the differences between the channels, not the absolute distance values.
1 Select the SPS menu as described in the chapter SPS (Speaker Setup) and select the DST function using the navigation keys "↑" and "↓", then press OK.
2 Use the navigation keys “↑” and “↓” to select the desired speaker. The range of the selected speaker can be changed separately using the “+/-” keys within a range of 0.0 m to 9.9 m.
Note: This menu only lists the physically available speakers.
VOI (Voice, Enhancement of speech intelligibility)
Use the “Voice” function to boost speech intelligibility in both stereo and surround mode. This allows you to better understand dialogues (speech) in films with loud effects, for example.
1 Select the SPS menu as described in the chapter SPS (Speaker Setup), then use the navigation keys “↑” and “↓” the VOI function to select.
2 Use the "+/-" keys to switch the "Voice" function on or off (ON or OFF).
English
Menu Settings
EQ (Equalizer)
The Equalizer menu allows you to select three different equalizers for the FLR (front left and right), CE (Centre), SLR (surround left and right) and SUB (subwoofer) speakers to match the room conditions. Only physically available speakers are displayed. To change the equalizer settings do the following:
1 Select the SPS menu as described in the chapter SPS (Speaker Setup) and select the EQ function using the navigation keys “↑” and “↓”, then press OK.
2 Select the desired speakers using the navigation keys “↑” and “↓” and change the EQ using the “+/-” keys.
• EQ1 for free installation (factory setting).
• EQ2 for installation on a rear or side panel.
• EQ3 for installation in a corner of a room.
DRC (Dynamic Range Control)
"Dynamic Range Control" is a setting option from Dolby Laboratories. When the function is activated, the dynamic range can be automatically reduced when data streams are encoded, which reduces volume differences. Low volume is enhanced and high volume is attenuated.
1 Select the SPS menu as described in the SPS chapter (Speaker Setup) and use the navigation buttons “↑” and “↓” to select DRC.
2 Withthe“+/-” buttons, you can turn the DRC on or off.
SYS (System Setup, System Settings)
Press the "M" button until SPS is displayed. Press the "↓" button now, until SYS is displayed. Press the "OK" button and use the navigation buttons "↑" and "↓" to obtain the desired function.
SLP (Sleep Timer)
Activating this option puts the device in standby mode after a pre-set period of time. 15, 30, 45 and 60 minutes can be chosen as shutdown times. OFF disables the function. To set a specific shutdown time, proceed as follows:
1 Select the SLP function as described in the chapter SYS (System Setup) and choose it using the navigation buttons “↑” and “↓”.
2 After you press the "+" button, OFF appears in the display. Keep on pressing the "+" button until the display shows the desired shutdown time.
Note: After the shutdown process, the sleep timer is automatically disabled.
That means that each time the device is switched on, the shutdown time has to be set again.
IRM (Infrared Menu)
In this menu you will find all of the functions that are relevant to infrared learning.
IRL (Infrared Learning)
The system can learn the infrared code of your TV remote control, allowing you to control the functions of the speaker and the TV with a single remote control. Any button on the TV remote control can be learned by the speaker. When you select buttons, ensure that the commands for the speaker and for the TV unit do not conflict. We recommend that you disable the internal speakers of the TV set once you have connected the speaker system. Have the remote control of your TV set ready.
To teach the infrared codes, proceed as follows:
1 Select the SYS menu as described in the chapter SYS (System Setup) and choose the IRM function using the navigation buttons “↑” and “↓” and press OK.
2 Use the navigation buttons “↑” and “↓” to select the IRL function, then press OK.
3 IRL will flash in the display.
4 Press the desired function on the Canton remote control, e.g. “+”. Now the function you’ve chosen will appear in the display, e.g. “V+”.
5 Within 20 seconds, press the button that you want to program on the TV remote control. If transmission was successful, OK will light up in the display and you can begin programming the next function, e.g. you can continue with “-”. If FAI appears in the display, the transmission has failed and you have to repeat steps 4 to 5.
6 If you would like to exit the menu, you have to press the M button and hold it until FIN appears in the display.
English
Menu Settings
Note: The red "ON/Standby" button on the Canton remote control has a dual function. If you press it once, ON will be displayed. This is how it learns the switch-on function. If you quickly press the red "ON/Standby" button on the Canton remote control twice, STB will appear in the display. That is how the standby resp. switch-off function is learned. If your TV remote control has only one button for the "ON" and "OFF" commands, both functions, "ON" and "Standby", will still have to be assigned this command.
DIL (Direct input learn, direct selection of signal inputs)
In addition to the “↑” and “↓” buttons, you can also select all signal inputs directly when using your TV or universal remote control, e.g. you can assign the desired input to a specific button on your TV remote control.
1 Select the SYS menu as described in the chapter SYS (System Setup), choose the IRM function using the navigation button “↑” and “↓” and press OK.
2 Use the navigation buttons “↑” and “↓” to select the DIL function and then press OK.
3 For example DVD for coax input will flash in the display. You can now assign a button on your TV remote control to the "Coax" input.
Note: If you press this button on your TV remote control during normal operation, the speaker will switch directly to the DVD input
4 Press the desired button on your TV remote control
If the infrared (IR) code has been successfully transmitted to the speaker, the display will briefly show OK and then it will show the next input, e.g. TV. If the code could not be transmitted, or if you do not press a button on your remote control within 10 seconds, the display will briefly show FAI, which indicates that no code has actually been transmitted. After that, the display will continue to flash DVD and you can continue to transmit the code for the coaxial input.
5 If you do not want to assign a button to the Coax input, briefly press the “↓” button to access the next input, manually.
6 To assign a button on your TV remote control to one of the other inputs, repeat the steps described in steps 4–5.
Note: Due to the large number of infrared codes, it cannot be guaranteed that every remote control can be learned by the speaker. Signals from radio frequency (RF) remote controls cannot be learned, generally.
English
CLR (IR Clear function)
To erase the infrared commands learned by the speaker from the TV remote control, please do the following:
1 Select the SYS menu as described in the chapter SYS (System Setup) and select the IRM function using the navigation buttons “↑” and “↓” and press OK.
2 Use the navigation buttons "↑" and "↓" to select the CLR function and then press OK.
3 Now press the "+" button. CLR will appear in the display for approx. 5 seconds.
STB (Stand By Mode)
This function determines how the system is switched on or off, possibly depending on an incoming audio signal. If ECO is selected, the system will switch to standby mode after one hour without a signal and must be switched on again manually by remote control. If the value AUT is selected, the system switches on automatically when an input signal is detected, it switches into standby mode after 1 minute for digital inputs (opt, coax, BT) and after 15 minutes for analog inputs (XLR and Analogue Line as well as USB) without a detected input signal. With the MAN setting, the system will remain permanently switched on even without an input signal and must be switched on or off via the remote control. If the NSB (network standby) option is selected, the system will switch to the standby state after one hour without an input signal, as with the ECO setting, and must be switched on again manually. The difference is that in the ECO setting, the speakers connected via radio are switched off but not switched on again with the master. All speakers must be activated individually. With the NSB and MAN and AUT settings, however, all speakers connected via radio are switched on again when the master is switched on.
Note: When the STB function is set to AUT, and the speaker is set to standby mode manually using the remote control, it is not possible for the speaker to power up automatically.
Note: To avoid inadvertent switching on due to noise on the analogue inputs, the threshold value was set quite high. To ensure that the system switches on safely, raise the volume of your source device to the highest possible value, but no more than 2VRMS.
To change the Stand By Mode, proceed as follows:
1 Select the SYS menu as described in the chapter SYS (System Setup) and select the STB function using the navigation buttons “↑” and “↓”.
2 Use the "+/-" buttons to set the desired value.
English
Menu Settings
SEL (Automatic Input Selection)
If this function is activated (AUT), the system will automatically change the input as soon as the signal disappears at the currently selected input and an input signal is detected at one of the inputs Optical, Coaxial, Analog Balanced, Analog Line or USB. If the MAN setting is selected, the inputs must be selected manually via the remote control as usual.
Note: To automatically switch from the optical or coaxial digital input to one of the other inputs, the source device must be switched off. For USB, Line and Balanced inputs, stopping playback is sufficient.
To change the automatic input selection, proceed as follows:
1 Select the SYS menu as described in the chapter SYS (System Setup) and select the SEL function using the navigation buttons “↑” and “↓”.
2 Use the "+/−" buttons to set the desired value.
INP (Configuration of the inputs)
With the default factory settings all physically available inputs are already assigned with a source designation. These are as follows: Optical (OPT) = TV, Coaxial (COA) = DVD, Analog Line (LIN) = AUX, Analog Balanced = XLR, Bluetooth® = BT, USB = PC. You can change the name assigned to an input to suit your source device.
To change the name, proceed as follows:
1 Select the SYS menu as described in the chapter SYS (System Setup) and select the INP function using the navigation buttons “↑” and “↓” and press OK.
2 Select the physical input (OPT, COA, LIN, BAL, USB) using the “↑” and “↓” buttons.
3 Select the desired name by briefly pressing the "+" resp. "-" buttons. You can choose from the following predefined designations: "---". (input disabled), TV, BDB, SAT, CD, DVD, CAM, REC, PAD, POD, TAB, TUN, DAB, PS, VCR, ATV, PC, AUX, XLR. After selecting the name, press the OK button.
To assign a name to another input, repeat steps 2 and 3.
English
Attention: Should you assign a name to an input that is already assigned, the input previously assigned with this name will be deactivated (---). To continue using this input, you must assign it a different name.
Note: Inputs which have been deactivated “---” are no longer displayed when changing the inputs (Input button). This simplifies the selection of the desired input.
Note: The name for the input BT cannot be changed. If you have deactivated all inputs, BT (Bluetooth ^® ) will be permanently selected as the input.
PHA (Phase Subwoofer)
If you have paired a wireless subwoofer to the system, you can use this parameter to change its phasing relative to the satellite speakers. The values 0^ and 180^ can be selected.
To change the phasing, proceed as follows:
1 Select the SYS menu as described in the chapter SYS (System Setup) and select the PHA function using the navigation buttons “↑” and “↓”.
2 Use the "+/−" buttons to set the desired value.
Note: This parameter is only available when a subwoofer is connected to the system.
SSM (Subwoofer Stereo Mode)
If you have connected a wireless subwoofer to the system, it will output all bass signals regardless of the playback mode (ST, MOV, MUS). For a true stereo experience, the bass signals can be reproduced in stereo mode (ST) via the front speakers (FL, FR), only.
To play back the bass signals in stereo mode (ST) through the front speakers, proceed as follows:
1 Select the SYS menu as described in the chapter SYS (System Setup) and select the SSM function using the navigation buttons “↑” and “↓”.
2 Use the “−” button to set the value to OFF. If you want the subwoofer to play the bass signals, set the value to ON using the “+” button.
Note: This parameter is only available when a subwoofer is connected to the system.
English
Menu Settings
LIP (Lip Sync)
The LIP function allows you to take corrective action when the sound is not lip-synchronous with the pictures on your TV.
For this, proceed as follows:
1 Select the SYS menu as described in the chapter SYS (System Setup) and select the SSM function using the navigation button “↑” and “↓”.
2 The “+/-” buttons can now be used to delay the sound playback in steps of 10 ms to adjust the sound to the “delayed” image.
The maximum possible delay is 80 ms.
VOL (System Volume)
With the VOL function you can limit the maximum value of the volume, displayed in the speaker's display to a value below the maximum of "99".
For this, proceed as follows:
1 Select the SYS menu as described in the chapter SYS (System Setup) and select the VOL function using the navigation buttons “↑” and “↓”.
2 With the "+/−" buttons you can now adjust the maximum volume.
ASM (Analog Stereo Mode)
By default, both channels of the analog source device are connected to the right and left analog line inputs of the master speaker and the signals are transmitted to the slave speakers via radio depending on the selected playback mode and the number of coupled speakers. If the ASM function is set to DST (Dual Stereo), the signal will no longer be transmitted by radio, but the source device must be connected directly to the analog line input of the corresponding speaker. For example, from a source device, the left channel must be connected the left Analog Line input of the left speaker and the right channel of the source device must be connected to the right Analog Line input of the right speaker. If, in the case of a multi-channel setup, all speakers are connected directly to a multi-channel preamplifier or the preamplifier outputs of an AV receiver by means of an RCA cable, the following assignment of the unbalanced input (Analog Line) must be made:
Centre = left OR right input, Surround Left = left input, Surround Right = right input.
To change the value for the parameter ASM, proceed as follows:
1 Select the SYS menu as described in the chapter SYS (System Setup) and select the ASM function using the navigation buttons "↑" and "↓".
2 Change the value using the "+/-" buttons:
DST = Cable connection between source and each individual speaker required.
SST = Cable connection only between source and master required.
SLC (Slave Connection)
By default, the audio signals between the master and the connected speakers are transmitted wirelessly. With this function, however, it is also possible to transmit the audio signals via a digital coax connection. For this you must connect the digital coaxial output of the master with the digital coaxial input of the slave via a RCA cable.
To transmit the signals via the cable connection, proceed as follows:
1 Select the SYS menu as described in the chapter SYS (System Setup) and select the SLC function using the navigation buttons "↑" and "↓".
2 Change the value using the "+/−" buttons:
WRD = Signal is transmitted via the RCA cable
WLS = Signal is transmitted wirelessly.
RES (System Reset)
With this function (RES) you can reset the speaker to factory settings. To perform the reset, proceed as follows:
Attention: ALL settings you have made, transmitted IR codes and paired mobile devices and speakers will be deleted.
1 Select the SYS menu as described in the chapter SYS (System Setup) and select the RES function using the navigation buttons “↑” and “↓”.
2 After you have pressed the "+" key, YES will appear in the display.
3 To complete the reset process, wait for 10 seconds. After this time, all settings will be deleted and all speakers enter standby mode.
4 To cancel the reset process, press the "+" button within the 10 seconds mentioned above. The display shows NO to confirm the abort.
English
Menu Settings
WIS (Wireless Setup)
Press the M button, SPS is displayed. Now press the “↓” button until WIS appears in the display. Press the OK button and use the navigation buttons “↑” and “↓” to obtain the desired setting.
WSP (Wireless Speaker Pairing)
This menu item allows you to connect other wireless speakers of the Canton Smart Series to the master. In this step, one of the speakers will be designated as the master. If you only have devices with the suffix S or M after the type name, you can designate the preferred speaker as the master. However, if you have speakers with the addition M and S after the type name, you should define the speaker with the addition M as the master, as this has a USB input, a Bluetooth® module and a decoder for DTS® and Dolby® Digital bitstreams. By default, the master speaker is designated as the left front speaker. Should it be in a different position, you must first assign the correct channel to it.
Important: Before, the slave must have been disconnected from the mains for at least 30 seconds.
For this, proceed as follows:
Defining the channel assignment of the master:
In the master speaker, select the WIS menu as described in chapter WIS (Wireless Setup) and use the navigation buttons “↑” and “↓” to select the WSP function and press OK.
2 Use the “↑” and “↓” buttons to select the channel for the master speaker.
MFL = front left; MFR = front right, MCE = centre, MSL = surround left; MSR = surround right
3 To exit the menu, press the M button. To pair slave speakers, continue with step 4
Pairing the slave speakers:
Important: Before, the slave must have been disconnected from the mains for at least 30 seconds.
4 First, perform steps 1 and 2 and press OK.
Note: If you have just performed these steps, continue with step 5.
English
5 Use the navigation buttons "↑" and "↓" to select the speaker you want to pair. The following channels are available: FL=front left; FR=front right; CE=centre; SL=surround left; SR=surround right; SUB=Subwoofer.
6 Now press the OK button. The display should show PIR.
7 Now plug only the desired slave speaker into the power outlet and switch it on using the power switch.
8 If the speaker is in standby, turn it on by pressing the power button on the remote control.
Important: The maximum time between pressing the "OK" button and switching on the slave speaker is 30 seconds.
9 Approx. 10 – 20 seconds after switching on the slave speaker the displays should show CON.
If FAI appears in the display, repeat above steps and make sure that
a. the desired slave was disconnected from the mains for at least 30 seconds.
b. no more than 30 seconds have passed between pressing the "OK" button and switching on the slave speaker.
c. the distance between the two speakers may not exceed 10 m and they are in the same room.
Attention! Should you have performed the above steps, never repeat them with the master speaker switched off, as this will automatically designate a new master speaker and would prevent the previous slave speakers from connecting to the previously designated master speaker.
BT (Bluetooth® Menu)
Press the "M" button, SPS is displayed. Now press the "↓" button until WIS appears in the display. Press the "OK" button and use the navigation keys "↑" and "↓" to select BT and press "OK".
BTP (Bluetooth® Pairing)
This menu allows you to set whether the speaker sends a pairing request to mobile devices permanently or whether this is to be done manually via the Bluetooth® paring button.
To change the way in which the paring is done, proceed as follows:
1 Select the Bluetooth® menu according to the BT (Bluetooth® Menu) chapter and select the BTP function using the navigation buttons “↑” and “↓”.
2 Change the value using the "+/−" buttons.
AUT= Device transmits permanently.
MAN= Request is activated by pressing the Bluetooth® pairing button.
English
Menu Settings
Note:
1 If a signal is currently being transmitted via Bluetooth® wireless technology, the device will not send a pairing request to other mobile devices, even if AUT is selected.
2 If the Bluetooth® input is not selected, neither automatic nor manual pairing is possible.
3 To achieve pairing independent of the selected input, the BTS function must be set to AUT. Please refer to the next chapter. Requirements for successful mating and information on the mating process can be found also on Page 82.
Requirements for the mating process:
- The Bluetooth® function must be activated on the mobile device.
- The mobile device must support at least Bluetooth® Standard 2.0.
- The mobile device must be within range of the speaker (max. 10 m).
Mating process
- Select BT Input.
- Press the "Bluetooth® Pairing" button (not valid for AUT setting).
- BTP will appear in the display (does not apply to AUT setting).
- You now have 30 seconds to mate your mobile device (does not apply to AUT setting).
- Start the search on your mobile device.
- Select "Smart speaker" as the playback device.
– The connection is established automatically after confirmation and will be displayed on the display with the message CON.
– If the connection fails, you will receive the message FAI. - If the mobile end device requires an access code, enter 0000.
- If DIS is displayed, your mobile end device is out of range or logged out.
BTS (Bluetooth® Input Selection)
When this function is enabled (AUT), the speaker will automatically switch to the BT input when it detects an audio signal from the mobile device. If this function is deactivated (MAN), the input must be selected manually. This function is deactivated (MAN) by default with the factory settings.
English
To activate/deactivate this function, proceed as follows:
1 Select the Bluetooth® Menu according to the BT (Bluetooth® Menu) chapter and select the BTS function using the navigation buttons “↑” and “↓”.
2 Press the "+" button to activate the function (AUT).
3 Press the “-” button to deactivate the function (MAN).
Note: Depending on the mobile device used, the speaker can also switch to the BT input when typing a message or with other system sounds when the automatic function is activated. A time delay of 5 seconds is programmed to avoid continuous switching (e.g. on arrival of a message).
Note: If the BTS function is activated (AUT), the BT input can no longer be selected via the "Input" button. In this mode, the speaker can be paired with the mobile device, regardless of the selected signal input.
APL (Automatic Bluetooth® Playback)
If this function is activated, the playback of a previously connected playback device with Bluetooth ^® wireless technology will automatically start when the speaker is switched on using the "Power" button. This starts playback of the app last opened in the mobile device.
Enter the following to activate the function.
1 Select the Bluetooth® Menu according to chapter BT (Bluetooth® Menu) and select via the navigation buttons “↑” and “↓” the APL function.
2 Press the "+" key to activate the function (ON).
3 To deactivate, press the “-” key.
Note: Depending on the operating system of the mobile device and the app, the app must run in the foreground or at least in the background. If there is no app or one that does not support background operation, playback will not start.
INF (Device Information)
This menu item provides information about the firmware of the device. For service inquiries, please provide this information.
To retrieve these, please proceed as follows:
Press the "M" button, SPS is displayed. Press the "↓" key until INF is displayed. Press the "OK" button and note the displayed information.
English
Playback via Bluetooth® wireless technology
Requirements for the mating process
- The Bluetooth® function must be activated on the mobile end device.
- The mobile end device must support at least Bluetooth® Standard 2.0.
- The mobile end device must be within range of the speaker system (max. 10 m).
Mating process
- Select input BT.
- Press the "Bluetooth® pairing" key.
- The display shows BTP
- You now have 30 seconds to mate your mobile end device.
- Start the search on your mobile end device.
- Select "Smart Speaker" as the playback device.
- The connection is established automatically after confirmation and will be displayed on the display with the message CON.
- If the connection fails, you will receive the message FAI.
- If the mobile end device requires an access code, enter 0000.
- If DIS is displayed, your mobile end device is out of range or logged out.
Qualcomm aptX

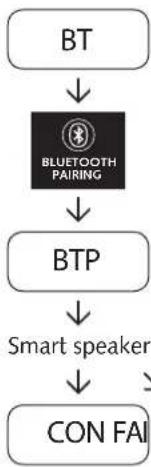
flowchart
graph TD
    A["BT"] --> B["BLUETOOTH PAIRING"]
    B --> C["BTP"]
    C --> D["Smart speaker"]
    D --> E["CON FAI"]
Operation of a mobile end device
- The respective last device connected to the speaker system automatically connects if the Bluetooth® function is activated and the input for Bluetooth® playback is selected. In this case, you will receive the message CON
- Start playing a media on your mobile end device and the sound will automatically be output by the speaker system.
Note: The speaker system can manage up to three Bluetooth ^® devices.
See also the chapter "Bluetooth® Input Selection (BTS)" on Page 80.
English
USB Playback
You can connect a computer to the COMPUTER USB (PC) input using a standard USB cable.
Your PC identifies the speaker as an external sound card and plays the sound of your computer like
an internal sound card. Depending on the operating system, the installation of a device driver might be necessary.
System requirements
Operating systems: Windows ^® 7 and later (32 & 64 Bit); MAC ^® OS 10.6.4 and later
Hardware: min. USB 2.0
Install the USB driver
For MAC® computers from MAC® OS 10.6.4 onwards, no driver installation is required.
Note: This driver only supports playback of PCM signals up to 96kHz / 24bit.
Multi-channel signals such as Dolby® Digital or DTS® are not supported.
Download the driver to your computer from the Canton download site.
2 Using the Windows Explorer, navigate to the just-downloaded file "XMOS-Stereo-USB-Audio-Class2-Driver-XXXX_vX.XX.X.zip" and unzip it.
For this purpose, an auxiliary program such as WinZip, WinRar or 7-Zip is needed.
3 Connect the master speaker to a USB port on your computer.
4 Now double-click on the file "XMOS-Stereo-USB-Audio-Class2-Driver-XXX_vX.XX.X.exe" that has just been unzipped. Depending on the security settings of your computer, you may need to give permission for the driver to make changes to your computer.
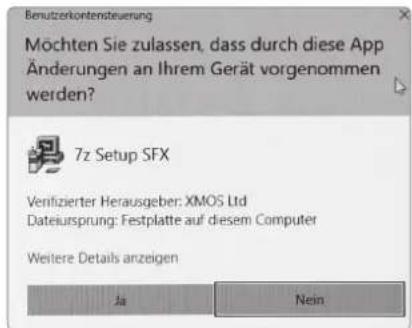
Configure the computer
5 Confirm the following screen by clicking Next.
6 Keep the suggested folders and click Install.
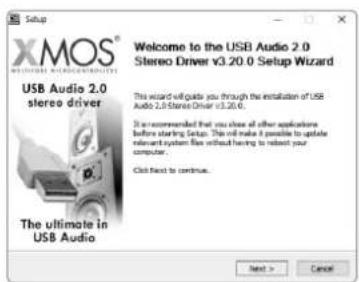
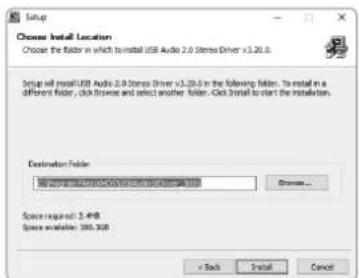
English
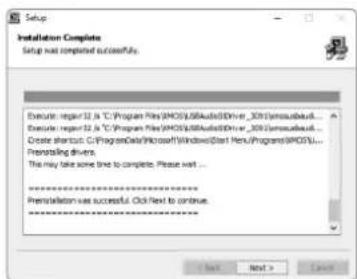
7 After the progress bar indicates that the installation is complete, click Next.
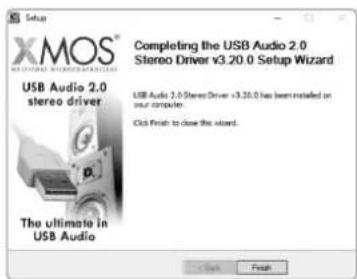
8 Finish the installation by clicking Finish.
English
Configure the computer
9 Click Yes in the following screen and briefly disconnect the USB connection between the speaker and the computer.
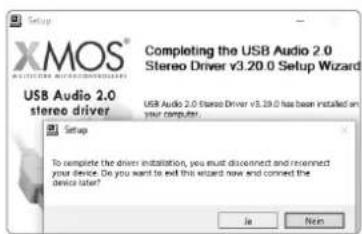
Possibly, the speaker is not automatically recognised by the operating system as a playback device, whereby the playback still takes place via the internal speakers of the computer. To change this, follow the instructions below for your operating system.
English
Windows® 10
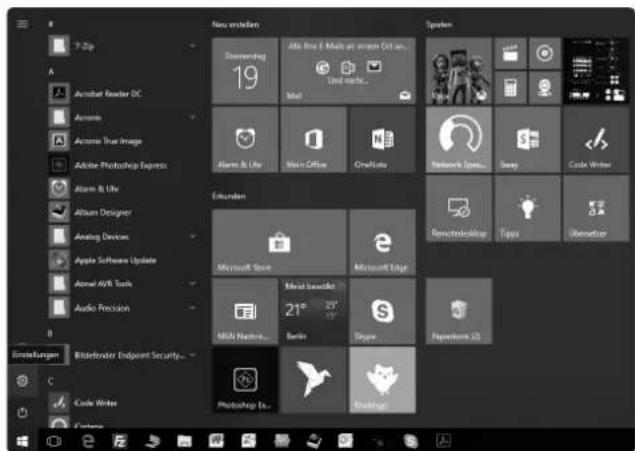
1 Click the Windows button so that the following screen opens.
2 Now click on the gearwheel icon (Settings).
3 Now click on the item Devices.
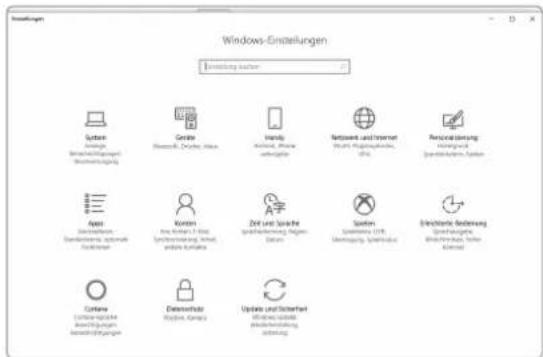
Configure the computer
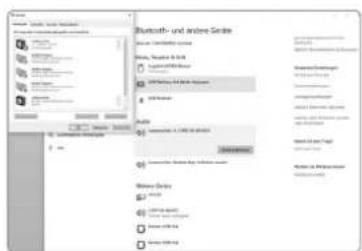
4 Now select the item Sound settings. See red box.
5 In the screen that opens, click on the Canton speaker.
6 Now select the item "By default".
7 Confirm with OK.
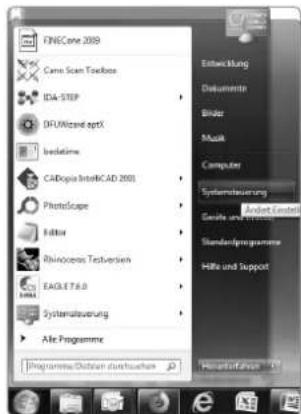
Windows ^® 7
1 Click the Windows Button, the following window opens.
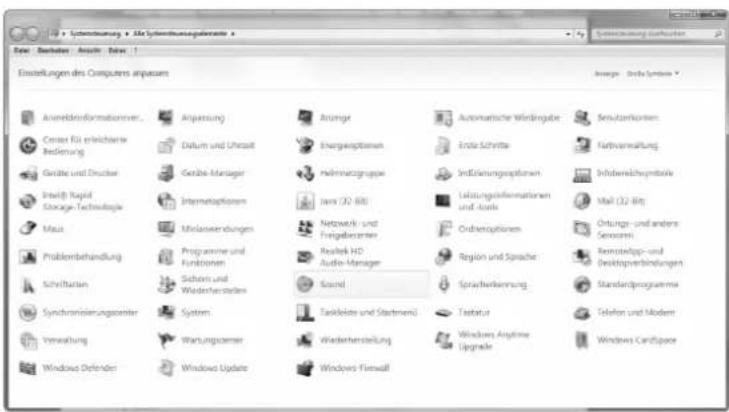
2 SelectControl Panel as shown on the right.
4 Now, click the speaker named XMOS-Audio and click Set as Default.
5 Confirm Selection with OK.
Configure the computer
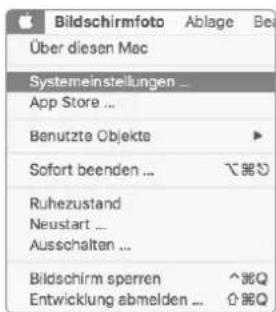
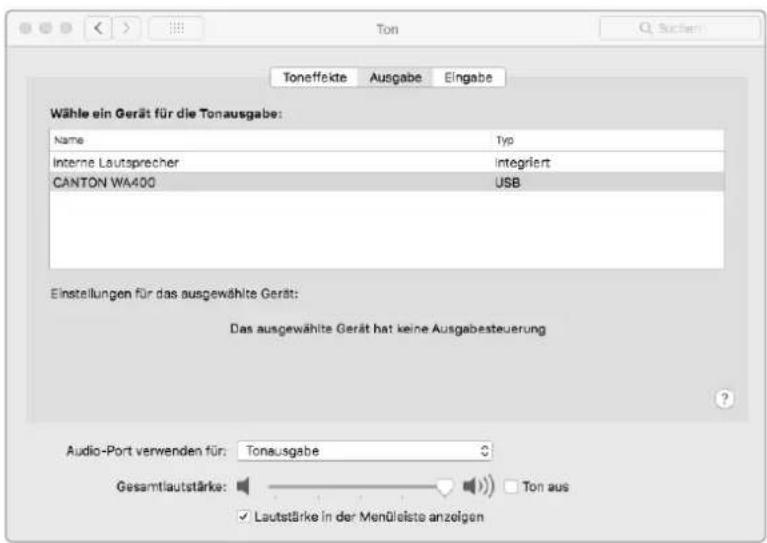
MAC®
1 Click on the "apple" symbol and then System Settings.
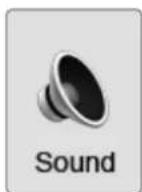
2 Now, click on SOUND.
English
3 Now click on Output and select the Canton speaker.
The speaker system has a multifunction display that lights up for approx. five seconds if a command is sent from the remote control.
The main displays and their meaning are listed here.
The standby mode of the speaker system is indicated by a red LED. If your speaker system is in operation, this LED lights green.
Input
TV
DVD
PC
BT
XLR
RUX
Digital Optical Digital Coaxial Computer USB
Bluetooth®
Analog Balanced Analog Line
Sound
V60
Volume (0 - 99) Mute
...
(input disabled)
8+6
Bass adjustment (+6...−6)
17+6
Midrange adjustment (+6...−6)
T+6
Treble adjustment (+6...−6)
Play Mode
ST
MOV
MUS
Stereo Movie surround Music surround
Note: With existing surround-sound speakers, the mode is not available.
English
Bluetooth®
BTP
CON
DIS
FRI
Pairing mode Connection established Connection lost Error message
Format of the input signal (bitstream) for optical and coaxial digital input
DTS
005
002
PCM
DTS Signal Dolby 5.1
Multi-channel signal
Dolby 2.0 Stereo signal
Digital Stereo signal (PCM)
English
Troubleshooting
Please find attached an overview of the most common problems. If you have further questions, please contact your Canton dealer, contact our service hotline at Tel. +49 (0) 6083 287-0 or send us an e-mail to inf@Canton.de.
| Problem Possible cause | Solution | ||
| Speaker system does not respond to the remote control. | 1. The battery is empty. 1. Replace the battery, make sure the polarity is correct when inserting. | ||
| 2. Protective film not removed. 2. Remove the protective film on the remote control. | |||
| No sound. 1. Sound format of the source device selected is incorrectly. | 1. Please check the correct setting of your source device. | ||
| 2. There is no signal from the player. 2. Unlock the digital output on the source device, the volume control might be set to “zero” and must be increased (please refer to the manual of the device). | |||
| 3. Cable not connected correctly / defective cable. | 3.1. Check the connection between the player and the speaker system and replace the cable if necessary. | ||
| 3.2. Make sure that the protective caps on the connectors of the optical cable are removed. | |||
| Sound reproduction too soft. | 1. Volume of the speaker system or the source device is set too low. | 1. Increase the volume with the “Volume” button. Increase the volume of the source device. | |
| 2. The max. possible volume was limited by means of the “Volume” function (VOL). | 2. Increase the max. possible volume according to instructions. (see Page 76) | ||
| Speaker system does not turn on. | Mains cable not connected to power outlet and / or speaker system. | Establish connection. | |
| Problem Possible cause | Solution | |
| The speaker system does not turn on automatically. | 1. The standby function is factory set to NSB. The system must be turned on manually. | 1. Switch the standby function to AUT. |
| 2. The device has been switched off via the “ON / Standby” button of the remote control or the “Power” button of the TV remote control (when using the IR learning function). | 2.1. Switch on the speaker system via the “ON / Standby” button of the remote control and wait until it automatically switches to the standby mode, next time. | |
| 2.2. Delete the “Power” button of your TV remote from the speaker system to prevent it from switching off together with your TV. | ||
| 3. The signal at the Line, Balanced or USB input is too low. | 3. Increase the output level on your source device. | |
| Speaker system switches off automatically. | 1. The standby function ECO, AUT or NSB is activated. | 1. Select the standby function MAN (see Page 73). |
| 2. The infrared command for STB has been learned incorrectly. | 2. Learn the infrared command for STB again (see Page 71). | |
| Speaker system does not turn off automatically. | 1. The standby function MAN is activated. 1. Activate the standby function ECO, AUT or NSB (see Page 73). | |
| 2. The standby function AUT or NSB is activated and the source device also transmits a carrier signal in standby mode (optical or coaxial digital input, only). | 2. Disconnect the source device from the mains or manually switch off the speaker system. | |
English
| Problem Possible cause | Solution | |
| Speaker system is buzzing. | 1. Signal cables from the source device to the speaker system too long (Analog Line). | 1. Use shorter and/or higher quality signal cables. |
| 2. Used signal cable not shielded or the shield on the cable used is interrupted (defective). | 2. Replace the cable with a shielded and/or higher quality cable. | |
| 3. Ground loop (hum loop) “generated”. A ground loop can occur if at least two interconnected devices with safety plugs (e.g. amplifier and computer) are connected to locally separated power outlets. | 3. Connect all devices connected to the speaker system with a safety plug to a power strip (multiple socket). | |
| 4. A non-interference suppressed consumer (e.g. fridge) on the same mains phase. | 4. For testing purposes, turn off any possible sources of interference; have the relevant device suppressed for interference, if the humming sound disappears, or initially connect the source of interference to another mains phase (L1, L2 or L3) (consult a specialist if necessary); Insert a special “sheath current filter” (available from specialist retailers) between the amplifier and the speaker system to eliminate the humming. Turn the power plug round to reduce the so-called hum voltage (particularly important if the source device is not earthed). | |
| The speaker system unintentionally switches to the BT input. | 1. This can happen when your mobile device issues system sounds, such as typing on the keyboard. | 1. Deactivate the function BTS (setting on MAN, see Page 80). |
| 1.1. Disable these system sounds on your end device. | ||
| The speaker system unintentionally switcheson. | 2. This can happen when your mobile device is playing system sounds such as when typing on the keyboard, a digital source is turned on, or an analog source is playing. | 2. Change the standby function (ECO, MAN or NSB). |
English
| Problem Possible cause | Solution | |
| The BT input cannot be selected via the “Input” buttons. | The function BTS is activated. The switching happens | in this case automatically as soon as the speaker system detects an audio signal from the end device. |
| The speaker system does not automatically switch to the BT input. | 1. The BTS function is deactivated (MAN). 1. Activate | the BTS function (AUT). |
| 2. Bluetooth ^® is disabled on your end device. 2. Activate | on your end device. | |
| 3. The speaker system is connected to another end device. | 3. Disable Bluetooth ^® on the other end device. | |
| 4. The end device is not paired with the speaker system. | 4. Pair your end device with the speaker system (see Page 80 resp. 82). | |
| No playback via Bluetooth ^® wireless technology. | 1. There is no connection between the speaker system and the mobile end device. | 1. Connect mobile end device as described. |
| 2. The mobile end device is paired, but it does not play. | 2.1. The mobile end device needs to be reconnected. | |
| 2.2. Set the volume on the mobile end device to the maximum possible value. | ||
| 2.3. Increase the volume of the speaker system. | ||
| 2.4. Make sure that sources of interference, such as a WiFi router or a laptop, are not placed in close proximity to the speaker system. | ||
| 2.5. Simultaneous operation via WiFi and Bluetooth ^® connection from a mobile end device is not possible without interference in most cases; therefore, disable WiFi on the end device. | ||
| 3. You are out of reach (max. 10 m). 3. Reduce the distance between the speaker and the mobile end device. | ||
English
| Problem Possible cause | Solution | |
| Playback of the Bluetooth® device starts automatically when the speaker is switched on. | The automatic Bluetooth® playback (APL) function is activated (ON). | Set the APL function to OFF, according to the chapter “automatic Bluetooth® playback”. |
| No sound via USB. 1. USB | driver not installed. 1. Install the USB driver according to the chapterInstalling the USB Driver. | |
| 2. Volume on the PC turned down. 2. Increase the volume on the PC. | ||
| 3. Volume on the speaker turned down. 3. Increase the volume on the speaker. | ||
| 4. You are trying to play a Dolby® Digital or DTS® signal. | 4. In the playback software, set the audio output to PCM or downmix. Contact the manufacturer of the playback software. | |
| Coupling of the slave speaker fails. | 1. The slave speaker was not disconnected or was not disconnected from the mains long enough before pairing. | 1. Disconnect the slave speaker to be paired for at least 30 seconds from the mains. |
| 2. The slave speaker was in standby mode during the pairing. | 2. After turning on the power switch of the slave speaker, turn it on by pressing the power button on the remote control. | |
| 3. The slave was connected to the mains before the coupling was initialised on the master. | 3. Always start pairing at the master before connecting the slave to the mains. | |
| 4. The distance between slave and master is too high. | 4. Reduce the distance between master and slave.The maximum distance is 10 m in the same room. | |
| Two speakers play the same channel. | 1. The master was assigned the same channel as a slave speaker when pairing. | 1. First use the test tone to check which speaker is playing the wrong channel. If it is the master, simply change the channel assignment of the master according to the chapter:WSP (Wireless Speaker Pairing, see Page 78).If it is a slave, re-connect this speaker as described in Pairing a Slave Speaker and select the correct channel. |
| 2. Two slave speakers were assigned the same channel when pairing. | 2. First use the test tone to check which speaker is playing the wrong channel. Reconnect this speaker as described in WSP (Wireless Speaker Pairing, see Page 78) and selectthe correct channel. | |
English
| Problem Possible cause | Solution | |
| One or more speakers do not play a signal when the Line or Balanced input is selected. | 1. The parameter ASM is set to DST and the source device is connected to the same Line connector (left resp. right) of both speakers. | 1. If the parameter ASM is set to DST, be sure to connect the left channel of the source unit to the jack marked L of the left speaker and the right channel of the source unit to the jack marked R of the right speaker. |
| 2. The source device was connected only to the master speaker. | 2. If balanced (Analogue Balanced) input is selected, the source must be connected directly to all speakers. Here, pay attention to the correct channel assignment as well. | |
| From one of the speakers, there is no sound. | The parameter SLC is set to WRD but the master was not connected to the slave via a coaxial cable. | If the SLC parameter is on WRD, there must be a cable connection between the master digital coaxial output and the slave digital coaxial input. If this is not the case, set the parameter to WLS or establish the cable connection. |
| The speaker system does not change inputs automatically. | 1. The source device on the coaxial or optical digital input has not been switched off or the source device does not switch off its S/PDIF transmitter in standby mode. | 1. In order to switch from the coaxial or optical digital input, the source device must be switched off. |
| 2. The signal at the Line, Balanced or USB input is too low. | 2. Increase the output level on your source device. |
English
| Problem Possible cause | Solution | |
| The device unintentionally changes the input. | 1. This can happen if the SEL function is set to on AUT and the currently selected input (Line, Balanced, USB) has a long break in the title (>10 seconds) and a signal is present at another input or the source device is turned on at the optical and coaxial input. | 1. Make sure that no signal is present at any other input during playback at the Line, Balanced and USB inputs or that a device is switched on at the optical and coaxial digital input. |
| 2. This can happen when your mobile device issues system sounds, such as typing on the keyboard. | 2. Disable these system sounds on your end device. | |
| 2.2 Set the SEL resp. BTS function to MAN. | ||
| The speakers do not turn on together. | 1. The speakers are not coupled together. 1. Pair all slave speakers according to chapter WSP (Wireless Speaker Pairing, see Page 78) | |
| 2. The parameter STB is set to ECO. 2. If the parameter STB is set to ECO, each speaker must be switched on separately with the remote control. If you want to switch all speakers on together, set the parameter to NSB, MAN or AUT. | ||
| An input cannot be selected via the Input buttons. | The input was deactivated in the INP menu “---”. | Activate the input according to chapter Configuration of the inputs. |
| The volume is limited to a value less than 99. | In the VOL menu, a maximum volume less than 99 was selected. | Increase the value according to chapter VOL (system volume). |
| A speaker shows WLS in the display. | 1. The slave speaker is operated without a master speaker. | 1. Turn on the master speaker. |
| 2. The slave speaker is not yet paired. 2. Pair the slave speaker with the master according to chapter WSP (Wireless Speaker Pairing, see Page 78). | ||
| The subwoofer does not reproduce sound. | 1. The subwoofer is not yet paired. 1. Pair the slave speaker with the master according to chapter WSP (Wireless Speaker Pairing, see Page 78). | |
| 2. The play-mode Stereo (ST) is selected and the SSM function is set to OFF. | 2. Activate the SSM function according to chapter Subwoofer Stereo mode (SSM). | |
English
Technical data
Smart electronics WA 400
Power supply
- Operating voltages 100 - 120 V\~ or 220-240 V\~
- Operating frequency 50/60 Hz
- Power consumption ECO/MAN Standby = 0.5 W
– Power consumption NSB Standby approx. 1.5 W (Factory setting)
– Power consumption AUT Standby approx. 7.2 W
– Power consumption Idle (no Output Signal) approx. 15.2 W - Max. power consumption approx. 250 W
Dimensions
W: 24.7 cm (28.7 cm with base)
H: 110 cm (with base and device feet)
D: 34 cm (38 cm with base)
Smart floorstanding- and compact-speaker (WA400/WA200)
Decoder (only Master)
– DTS Digital Surround
- Dolby Digital
- PCM (32 kHz...96 kHz/8 Bit...24 Bit)
Virtualizer (Only Master)
- DTS TruSurround
Ambient temperature
- Minimum 5 °C (41 °F)
- Maximum 35 °C (95 °F)
Smart electronics WA 200
Power supply
- Operating voltage 100 - 240 V\~
- Operating frequency 50/60 Hz
- Power consumption ECO Standby = 0.35 W
– Power consumption NSB Standby approx. 1.2 W (Factory setting)
– Power consumption AUT Standby approx. 3.4 W
– Power consumption Idle (no Output Signal) approx. 6.6 W
– Max. power consumption approx. 150 W
Dimensions
22 × 40 × 30 cm
Bluetooth ^® (only Master)
- Bluetooth® Standard 3.0 (A2DP)
– Supports Qualcomm® aptX™ decoding - Range of up to 10 m
- Frequency range 2400 - 2483,5 MHz (2.4 GHz ISM Band)
- Max. transmitting power 10 mW (+10dBm)
Input level analogue
- Analogue Line = max. 2.0 V (effective)
- Analogue Balanced = max. 2.0 V (effective)
EU – Declaration of Conformity
CE Labelling
We, the manufacturer / importer
German loudspeaker tradition
confirm and declare in sole responsibility that the products
Smart floorstanding- and compact-speaker
(Powered wireless speakers with five signal inputs, one signal output, Bluetooth ^® wireless technology, radio link module, internal switch mode power supply and infrared remote control)
are in accordance with the Directives of the European Parliament and of the Council
Directive 2014/53/EU (Radio Equipment)
Directive 2014/35/EU (Low Voltage Directive)
Directive 2011/65/EU (Restriction of the Use of Certain Hazardous Substances)
Directive 2012/19/EU (Waste of Electric and Electronic Equipment)
Directive 2009/125/EG (Ecodesign requirements for Energy-related Products)
Operation is permitted in all countries of the European Union.
A complete Declaration of Conformity can be found at: www.canton.de/en/doc
Legally binding signature:____
Date: 1 ^st September 2018 Name: Günther Seitz Function: Managing Director
English
Further important information
Information on "Intended Use"
The speaker system is designed for indoor use and must not be used outdoors or in a wet environment. The device must not be modified or altered in any way. Connect the speaker system as described in the instructions and observe the safety instructions. Only operate the device with the mains voltage and frequency specified on the rating plate.
Information about an environmentally friendly operation
To reduce the power consumption, switch the speaker system to standby mode by pressing the "ON / Standby" button when not in use.
This "saves power" and lowers your electricity bill.

Information about the CE marking
Electrical and electronic devices placed on the market within the European Union must be given a CE mark to indicate that the equipment complies with the applicable requirements (e.g. electromagnetic compatibility or equipment safety).

Disposal instructions
According to the EU Directive on Waste of Electrical and Electronic Equipment, devices marked with this symbol must not be disposed of together with municipal waste (household waste). Please inform yourself, if necessary, contact your local disposal company or the municipal / city administration about the free disposal for you. It serves the environmental and health protection as well as the saving of (rare) raw materials by recycling.
Batteries must also not be disposed of together with general household waste. They must be collected separately and returned to a battery collection point.
You can dispose of empty batteries free of charge in collection containers at e.g. retail outlets. Batteries that are not properly disposed of can be harmful to humans and animals and/or the environment.
DEU GARANTIE
Above and beyond the legally prescribed warranty period Canton offers a guarantee of 5 years on all its passive loudspeakers. A 2-year guarantee is offered for active and semi-active boxes. The guarantee period begins at the time of purchase and only applies to the purchaser. Guarantee claims will only be accepted if accompanied by the original packaging. The guarantee does not cover damages incurred in transit or damages caused by improper use. The guarantee is not extended if parts are exchanged within the period covered by the guarantee. This applies to all loudspeakers purchased from an authorised Canton dealer. In the event of damage please contact your dealer or the Canton Service department direct.
Manufactured under license from Dolby Laboratories. Dolby, Dolby Audio, and the double-D symbol are trademarks of Dolby Laboratories.

Bluetooth®: The Bluetooth® word mark and logos are registered trademarks owned by the Bluetooth® SIG, Inc. and any use of such marks by Canton is under license. Other trademarks and trade names are those of their respective owners.

For DTS patents, see http://patents.dts.com. Manufactured under license from DTS Licensing Limited. DTS, the Symbol, DTS and the Symbol together, and TruSurround are registered trademarks and/or trademarks of DTS, Inc. in the United States and/or other countries. © DTS, Inc. All Rights Reserved.

Qualcomm® aptX™: Qualcomm is a trademark of Qualcomm Incorporated, registered in the United States and other countries, used with permission. aptX is a trademark of Qualcomm Technologies International, Ltd., registered in the United States and other countries, used with permission.

For DTS patents, see http://patents.dts.com. Manufactured under license from DTS Licensing Limited. DTS, the Symbol, DTS and the Symbol together, and Digital Surround are registered trademarks and/or trademarks of DTS, Inc. in the United States and/or other countries. © DTS, Inc. All Rights Reserved.
Notes


- Deutsch
- Ton
- Welcome to the world of pure music
- Content
- Safety instructions
- English
- Important safety instruction
- Unpacking Running in
- Master Speaker
- Slave speaker
- Starting up the remote control
- Connection
- Digital Input Optical (Digital Optical)
- Digital Input Electrical (Digital Coaxial)
- Analogue input, asymmetrical (Analog Line L/R)
- Analogue input, symmetrical (Analog Balanced)
- Computer input (Computer USB) (master speakers only)
- Output Digital Coaxial
- Operation
- Memory function
- Preset 1–3
- Menu Structure and Navigation
- Menu Settings
- SPS (Speaker Setup)
- CHL (Channel Level)
- DST (Distance)
- VOI (Voice, Enhancement of speech intelligibility)
- EQ (Equalizer)
- DRC (Dynamic Range Control)
- SYS (System Setup, System Settings)
- SLP (Sleep Timer)
- IRM (Infrared Menu)
- IRL (Infrared Learning)
- DIL (Direct input learn, direct selection of signal inputs)
- CLR (IR Clear function)
- STB (Stand By Mode)
- SEL (Automatic Input Selection)
- INP (Configuration of the inputs)
- PHA (Phase Subwoofer)
- SSM (Subwoofer Stereo Mode)
- LIP (Lip Sync)
- VOL (System Volume)
- ASM (Analog Stereo Mode)
- SLC (Slave Connection)
- RES (System Reset)
- WIS (Wireless Setup)
- WSP (Wireless Speaker Pairing)
- BT (Bluetooth® Menu)
- BTP (Bluetooth® Pairing)
- Note:
- Requirements for the mating process:
- Mating process
- BTS (Bluetooth® Input Selection)
- APL (Automatic Bluetooth® Playback)
- INF (Device Information)
- Playback via Bluetooth® wireless technology
- Requirements for the mating process
- Qualcomm aptX
- Operation of a mobile end device
- USB Playback
- System requirements
- Install the USB driver
- Configure the computer
- Windows® 10
- Windows ® 7
- Input
- Sound
- Play Mode
- Troubleshooting
- Technical data
- Smart electronics WA 400
- Power supply
- Dimensions
- Smart floorstanding- and compact-speaker (WA400/WA200)
- Decoder (only Master)
- Virtualizer (Only Master)
- Ambient temperature
- Smart electronics WA 200
- Bluetooth ® (only Master)
- Input level analogue
- EU – Declaration of Conformity
- Smart floorstanding- and compact-speaker
- Further important information
- Information on "Intended Use"
- Information about an environmentally friendly operation
- Information about the CE marking
- Disposal instructions
- DEU GARANTIE
- Notes
Brand : CANTON
Model : GLE 5
Category : Loudspeaker