
R606 - Rowing Machine TUNTURI - Free user manual and instructions
Find the device manual for free R606 TUNTURI in PDF.


| Product Type | Rowing Machine (R606) |
| Brand | Tunturi |
| Model | R606 |
| Dimensions (L x W x H) | 163 cm x 37 cm x 41 cm |
| Weight | 35 kg |
| Power Supply | 2 x 1.5V AA batteries (for meter) |
| Max User Weight | 110 kg |
| Display Functions | Strokes, Time, Strokes/min, Calories (Pulse optional on R610) |
| Resistance Adjustment | Adjustable knob (clockwise increase, counterclockwise decrease) |
| Drive System | Flywheel construction with rope |
| Intended Use | Home use only |
| Maintenance | Check screws, clean with damp cloth (no solvents), inspect wire before use |
| Storage | Keep dry, set resistance to 0, use transport wheels |
| Accessories Included | Assembly kit (screws, allen keys), owner's manual, warranty booklet |
| Certifications | EMC directive, EC conformity |
| Spare Parts Availability | Contact local Tunturi distributor; spare part list in manual |
| Safety Features | Auto-off meter after 4 minutes, max weight limit, supervised use for children |
Frequently Asked Questions - R606 TUNTURI
User questions about R606 TUNTURI
0 question about this device. Answer the ones you know or ask your own.
Ask a new question about this device
Download the instructions for your Rowing Machine in PDF format for free! Find your manual R606 - TUNTURI and take your electronic device back in hand. On this page are published all the documents necessary for the use of your device. R606 by TUNTURI.
USER MANUAL R606 TUNTURI
CONTINUOUS ROWING MACHINE R 606 / R 610
GB OWNER'S MANUAL 2-5
I MANUALE D'USO 14-17
ESP MANUAL DEL USUARIO 18-21
NL HANDLEIDING 22-25
S BRUKSANVISNING 26-29
FIN KÄYTTÖOHJE 30-33

INFORMATION AND WARNINGS
PLEASE READ THIS OWNER'S MANUAL THROUGH CAREFULLY BEFORE ASSEMBLING, USING AND SERVICING THE ROWING MACHINE! FOLLOW THE INSTRUCTIONS DESCRIBED IN THIS MANUAL CAREFULLY.
THE EQUIPMENT HAS BEEN DESIGNED FOR HOME USE ONLY. THE TUNTURI WARRANTY APPLIES ONLY FOR FAULTS AND MALFUNCTIONS IN HOME USE. PLEASE NOTICE THAT THE WARRANTY DOES NOT COVER ANY DAMAGES DUE TO NEGLIGENCE OF ASSEMBLY, ADJUSTMENT OR MAINTENANCE INSTRUCTIONS DESCRIBED IN THIS MANUAL!
NOTE ABOUT YOUR HEALTH
* Before you start any training, consult a physician to check your state of health.
* If you experience nausea, dizziness or other abnormal symptoms while exercising, stop your workout at once and consult a physician.
* To avoid muscular pain and strain, begin each workout by warming up and end it by cooling down. Don't forget to stretch at the end of the workout.
NOTE ABOUT THE EXERCISING ENVIRONMENT
* The device is not to be used outdoors.
* Place the rowing machine on a firm, level and protected surface to optimaze training comfort and to avoid any damages to the floor beneath the equipment.
* Make sure that the exercising environment has adequate ventilation. To avoid catching cold, do not exercise in a draughty place.
NOTE ABOUT USING THE EQUIPMENT
* If children are allowed to use the device, they should be supervised and taught to use the rowing machine properly, keeping in mind the child's physical and mental development and their personality.
* Before you start using the rowing machine, make sure that it functions correctly in every way. Do not use a faulty device.
* Only one person may use the device at a time.
* Wear appropriate clothing and shoes when exercising.
* Do not attempt any servicing or adjustment other than those described in this manual. The given instructions must be followed carefully.
* The device must not be used by persons weighing over 110 kg.
ASSEMBLY
Before assembling the device, make sure the following parts are present:
- Frame
- Rail
- Rear support
- Seat
- Plastic covers for the rear support
- Plastic cover for the drawbar holder
- Assembly kit (contents marked with * in the spare part list)
In case of any problems, contact always your local Tunturi distributor.
The spare part list is at the back of the manual.
Assemble the device as follows :
METER AND FRAME
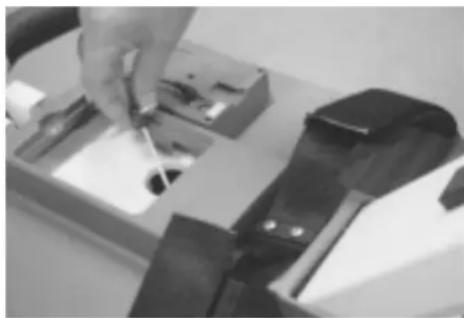
Place the frame on the floor so that it faces upward and remove the meter carefully from the frame. Insert two 1,5 V batteries by opening the bottom of the meter cover. Note the - and + signs marked in the case. Replace the cover (R 606: fasten the meter to the frame). Fit the head of the rail carefully in its place. Thread the heart-rate receiver cable of the model R 610 carefully below the plastic frame cover and attach the cable to the meter. Fasten the meter to the frame.
natural_image
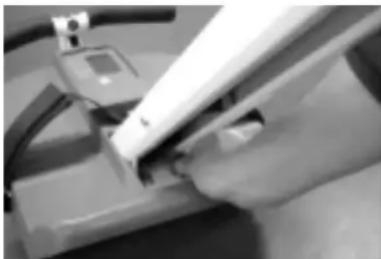
Close-up of a hand using a tool to adjust or install electronic components (no visible text or symbols)Support the rail with one hand, place the fastening screws and sleeves through the holes in the rail, and screw, finger-tight only, into the threaded holes in the frame.
natural_image
Close-up of a hand inserting a component into a device (no visible text or symbols)Lower the device to a horizontal position, open the footstraps and pull them aside, revealing the two holes for the fastening screws. Place the screws with sleeves on the end of the allen key wrench and set them carefully in place through the holes. Tighten all 4 screws securely with the allen key wrench and slip the footstraps back under the metal hooks on the side of the frame. Attach the plastic cover of the R 610 drawbar holder with 4 allen screws.

natural_image
Close-up of a hand using a tool to adjust or install a mechanical component (no visible text or symbols)SEAT AND RAIL
Push the grey plastic covers into place on the ends of the rear support. Attach the end piece to the top of the rear support loosely with the screw and place the rear support into place at the rear of the rail. Tighten the attachment screw and push the white plug over the hole in the rail.

natural_image
Close-up of a white electronic device with a black handle, possibly a sensor or connector (no visible text or symbols)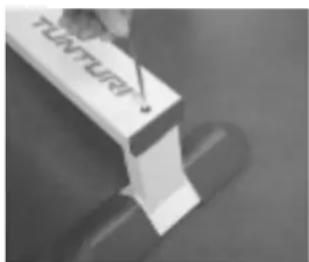
To mount the seat, use the four allen screws in the assembly kit to fix the seat to the carriage on the rail. The edges of the base plate should be inside the edges of the carriage.

natural_image
Close-up of a hand using a white bench press on a wooden table (no visible text or symbols)METER
The meter switches on automatically when you start rowing or press the RESET-key on the meter, and switches off when you have not exercised or pressed the key for about 4 minutes. You can reset the readings by pressing the RESET key.
Protect the meter from direct sunlight, as it may damage the liquid crystal display. Protect the meter from water and avoid severe impacts, as these may also damage the meter.
DISPLAYS
STROKES:
Counts rowed strokes upwards (0-9999).
TIME:
Shows time counted upwards (0:00-59:59).
STROKES/MIN:
Number of strokes per minute (0-999).
CALORIES:
Estimated total calorie consumption (0.0-999 kcal).
Because different people's capacity to produce energy varies, the energy consumption display shows only an approximation of the real consumption: this meter calculates the energy consumption on the basis of fixed and measured values.
PULSE (R 610):
Shows pulse frequency per minute (70-199) beats / minute).
USE
Rowing is a very effective form of exercise. In addition to strengthening the heart and improving circulation, it develops the various groups of large muscles: the back, the abdomen, the arms, the shoulders as well as the pelvis and the legs. Rowing also develops muscular fl exibility without exertion of joints, and it is a recommended form of exercise for those who suffer from pains in the neck and shoulder area.
Working out using a rowing machine is excellent aerobic exercise, the principle being that the exercise should be suitably light, but of long duration. Aerobic exercise is based on improving the body's maximum oxygen uptake, which in turn improves endurance and fitness. The ability of the body to burn fat as a fuel is directly dependent on its oxygen-uptake capacity.
Aerobic exercise should above all be pleasant. You should perspire, but you should not get out of breath during the workout. You should exercise at least three times a week, 30 minutes at a time, to reach a basic fitness level. Maintaining this level requires a few exercise
ROWING MOTION

natural_image
Line drawing of a person using a roller skates on a track (no text or symbols)Tighten the footstraps. Take a grip on the bar and start the rowing stroke by leaning slightly forward, with the knees bent and the arms straight.

natural_image
Line drawing of a person using a rowing machine (no text or symbols)Push yourself backwards straightening your back and your legs simultaneously.

natural_image
Line drawing of a person using a rowing machine (no text or symbols)Continue the movement until you lean slightly backwards and fl ex your arms at the same time. Return to the starting position, lean forward and straighten your arms.
BICEPS (ELBOW FLEXORS)
natural_image
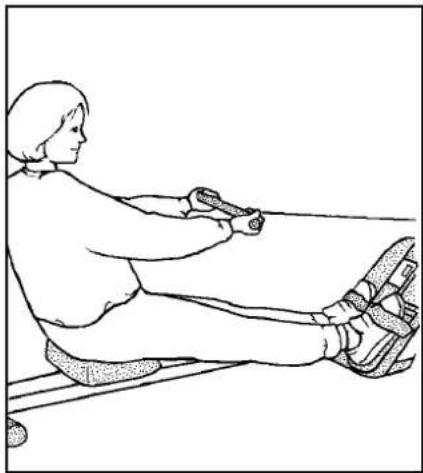
Line drawing of a person performing a seated leg exercise with a tool (no text or symbols)You can develop the biceps while rowing by taking an undergrasp of the bar or in the following way: grasp the bar from underneath, keep your knees straight and your feet under the footstraps. Begin the movement with your arms straight.
TRICEPS (ELBOW EXTENSORS)

natural_image
Line drawing of a person sitting on a bench using a device (no text or symbols)Sit on the seat with your back towards the frame and grasp hold of the bar as indicated in the figure.
CHEST MUSCLES

natural_image
Line drawing of a person using a mobility device (no text or symbols)Stand by the machine as indicated in the figure, with your foot on the rail.

natural_image
Line drawing of a person sitting on a bench using a handheld device (no text or symbols)Bend your arms. NOTE! Make sure the wire hook does not fray the wire!

natural_image
Line drawing of a person performing a sit-up exercise using a balance scale (no text or symbols)Straighten your arms. NOTE! Make sure the wire hook does not fray the wire!

natural_image
Line drawing of a person using a mobility device on a platform (no text or symbols)Pull the bar with the arm bent. Repeat the same with the other arm. NOTE! Make sure the wire hook does not fray the wire!
sessions each week. Once the basic condition has been reached, it is easily improved, simply by increasing the number of exercise sessions.
Exercise is always rewarding for weight loss, because it is the only way of increasing the energy spent by the body. This is why it is always worthwhile to combine regular exercise with a healthy diet. A dieter should exercise daily - at first 30 minutes or less at a time, gradually increasing the daily workout time to one hour. You should start slowly at a low pedalling speed and low resistance, because for an overweight person strenuous exercise may subject the heart and circulatory system to excessive strain. As fitness improves, resistance and speed can be increased gradually.
Short sequences at heavy load increase maximum strength and muscular mass, longer sequences at a lighter load trim the body and develop stamina.
ADJUSTING RESISTANCE
To increase or decrease resistance, turn the adjustment knob clockwise (+ direction) to increase resistance and counterclockwise (- direction) to decrease resistance. The scale of the knob helps you find and reset a suitable resistance.
In rowing machines with flywheel construction, stroke speed is at highest at the end of the rowing stroke with the body leaning slightly backwards and the arms flexed against the chest. The flywheel speed is also at its highest at this point. Stroke speed is at its lowest at the start of the rowing stroke. If you row at a very low resistance at a fast tempo, the flywheel will continue to rotate fast at the beginning of the rowing motion, and there may be an idle stroke. It is therefore recommended to use a higher resistance when the rowing tempo is very fast.
SERVICE
The rower requires a minimum of maintenance. From time to time, check that all fixing screws and nuts are securely tightened. Clean the device with a damp cloth. Do not use solvents. Check the condition of the wire before every training session.
If you notice any defects or malfunctions in the device during the use, contact your dealer immediately.
In spite of continuous quality control, individual defects and malfunctions may occur due to individual components. It is in most cases unnecessary to take the whole rowing machine for repair, as it is usually sufficient to replace the defective part.
CHANGING BATTERIES
If there are only weak or no figures on display, change the batteries (2 x 1,5 V AA). Dismount the meter from the frame and disconnect the meter and the cables. Open the meter cover and change the batteries. Replace the back cover, reconnect the cables and fasten the meter to the frame.
STORAGE
Move the rowing machine according to the following instruction: stand behind the device and grip the rail with one hand and the seat with the other. Tilt the device so that is rests on the transportation wheels. Move the device by wheeling it on transportation wheels. Lower the device onto floor while holding on to the rail and the seat, all the time remaining behind the device.
NOTE: Follow the moving instructions because lifting the device incorrectly may strain your back or cause other risk of accidents.
To prevent malfunctioning of the machine, keep it in a dry place with as little temperature variation as possible, protected from dust.
To minimize the strain on the resistance mechanism, we recommend that the resistance adjustment knob is set to position 0 after every training session.
DIMENSIONS
Length 163 cm Width 37 cm Height 41 cm Weight 35 kg
All Tunturi models are designed to meet the electromagnetic compatibility directive, EMC and are affixed with the EC conformity marking.
Specification may be changed due to our continuous programme of product development.

Ref. no. Part no.
| 1 | 373 200 88 Resistance cable, R606 1 | |
| - | 3,9x13 DIN 7981 Screw 1 | |
| 1 | 373 2006 Resistance cable, R610 1 | |
| - | M5x10 DIN 7991 Screw 1 | |
| 2 | 533 1014 Adjuster knob, R606 1 | |
| 3 | 233 2010 Meter, R606 1 | |
| 3 | 233 2013 Meter, R610 1 | |
| 4 | 173 2010 Foot rest cover 1 | |
| - | M4 DIN 9021 Washer 8 | |
| - | KB 30x8 WN 1441 Screw 8 | |
| 5 | 103 2011 Frame , R606 1 | |
| 5 | 103 2015 Frame , R610 1 | |
| - | M6 DIN 934 Nut 4 | |
| - | M6 DIN 125 Washer 4 | |
| - | M6x30 DIN 603 Screw, T-info 2/99 2 | |
| 6 | 173 2013 Cover, R610 1 | |
| * - | M5x8 DIN 912 Screw 4 | |
| 7 | 433 2005 Rubber moulding, pair 1 | |
| - | M5x16 DIN 603 Screw 4 | |
| - | M5 DIN 934 Nut 4 | |
| 10 | 433 2007 Frame back plate, R606 1 | |
| 10 | 433 2010 Frame back plate, R610 1 | |
| - | M5x8 DIN 7500-C Screw 4 | |
| 13 | 173 2011 Case cover 1 | |
| - | KB 30x8 WN 1441 Screw 4 | |
| 14 | 443 2008 Foot strap 1 | |
| 15 | 443 2009 Foot pad 2 | |
| 16 | 503 2009 Fixing plate 1 | |
| - | M5x16 DIN 7500-C Screw 2 | |
| 18 | 533 618 86 Rope 1 | |
| 19 | 523 2002 Sleeve 2 | |
| - | M8x35 DIN 933 Screw 1 | |
| - | M8 DIN 125 Washer 1 | |
| - | M8 DIN 985 Nut, nylon 1 | |
| 23 | 403 2014 Magnet 1 | |
| - | M5x8 DIN 912 Screw 2 | |
| 25 | 213 2007 Draw bar (incl. 27) 1 | |
| 26 | 223 0001 Rope (incl. 26a, 64) 1 | |
| 26a | 533 2014 Sleeve 1 | |
| 27 | 213 2003 Handle grip 2 | |
| 28 | 403 2017 Receiver, R610 1 | |
| 29 | 173 2015 Cover, R610 1 | |
| - | M3x10 DIN 966 A4 Screw 2 | |
| - | M3 DIN 934 Nut 2 | |
| 30 | M10x120 DIN 931 Bolt 1 | |
| - | M10 DIN 934 Nut 1 | |
| 31 | 72 1016 120 Sleeve, R606 2 | |
| 32 | 523 111 87 Bearing, R606 2 | |
| 33 | 72 1115 305 1 Sleeve, R606 T-info 4/98 1 | |
| 34 | 303 200 88 Flywheel, R606 1 | |
| 34 | 303 2005 Flywheel (incl. 104), R610 1 | |
| 35 | 443 204 88 Brake belt, R606 1 | |
| - | M5 DIN 9021 Washer 1 | |
| - | M5x8 DIN 912 Screw 4 | |
| 36 | 433 1013 Aluminium circle, R610 1 | |
| - | M5x10 DIN 7991 Screw, R610 4 | |
| 39 | 533 227 89 Distance ring, R606 1 | |
| 40 | 263 1002 Freewheel, R606 1 | |
| 40 | 373 2009 Freewheel, R610 1 | |
| - | M5x20 DIN 912 Screw 4 | |
| - | M5 DIN 934 Nut, R606 4 | |
| 41 | 173 203 88 Spring case, R606 1 | |
| 41 | 173 2016 Spring case, R610 1 | |
| - | KB 30x8 WN 1441 PT-screw 4 | |
| 43 | 653 202 88 Spring hub, R606 1 | |
| 43 | 503 2013 Spring hub, R610 1 | |
| - | M5x8 DIN 7991 Screw, R610 2 | |
| 44 | 643 200 88 Spring, R606 1 | |
| 44 | 643 2004 Spring, R610 1 | |
| 45 | 72 1015 90 Sleeve, R606 1 | |
| 45 | 62 1017 20 Washer, R610 1 | |
| 46 | 103 2003 Frame flat bar 1 | |
| - | M8x20 DIN 7991 Screw 2 | |
| 50 | 503 1004 Fastening piece, R610 1 | |
| 52 | 72 0608 205 1 Sleeve 1 | |
| 53 | 213 2008 T-info 18/98 Brake slacker (incl. 23, 2 x screw) 1 | |
| - | M6x35 DIN 912 Screw 1 | |
| - | M6 DIN 985 Nut nylon 1 | |
| 55 | 443 2002 Plastic sleeve 1 | |
| 56 | 72 0608 160 1 Sleeve 1 | |
| 57 | 533 204 88 Rope wheel 1 | |
| - | M6x45 DIN 7991 Screw 1 | |
| - | M6 DIN 125 Washer 1 | |
| - | M6 DIN 934 Nut 1 |
Ref. no. Part no.
| - | M6 DIN 985 | Nut nylon | 1 | |
| 59 | 433 2011 | Seat plate | 1 | |
| 60 | 643 2001 | Spring | 1 | |
| 62 | 153 2001 | Seat | 1 | |
| 63 | 153 2006 | Seat base plate | 1 | |
| - | M6x16 DIN 933 | Screw | 4 |
| - | M6 | DIN 125 | Washer | 4 | ||
| 64 | 533 | 2002 | Plug | 1 | ||
| 65 | 153 | 2007 | Seat roller frame | 1 |
| * - | M5x8 DIN 912 | Screw T-info 5/99 | 4 |
| 66 | 653 207 89 | Sleeve | 2 |
| 67 | 533 232 86 | Bearing roller | 4 |
| 68 | 72 0616 185 1 | Sleeve | 6 |
| 70 | 533 220 84 | Bearing roller | 2 |
| - | M6 DIN 985 | Nut, nylon | 2 |
| - | M6 DIN 125 | Washer | 2 |
| - | M6x35 | DIN 7991 | Screw | 6 |
| 72 | 103 2010 | Rail, R606 | 1 |
| 72 | 103 2013 | Rail, R610 | 1 |
| * - | M8 DIN 125 | Washer 4 |
| * - | M8x12 DIN 912 | Screw 4 |
| 73 | 503 2011 | Rail fixing piece | 1 |
| - | M8 DIN 125 | Washer | 1 |
| - | M8x16 DIN 912 | Screw | 1 |
| *74 | 533 5005 | Plug | 1 |
| 75 | 433 | 2014 | Bumper | 1 |
| 76 | 103 2014 | Rear support | 1 |
| *77 | 533 1007 | Support plug | 2 |
| 78 | 533 225 89 | Rear plug | 1 |
| 79 | 103 230 90 | Moulding | 2 |
| - | 2,9x6 DIN 7981 | Screw | 4 |
| 82 | 433 2012 | Seat stopper | 1 |
| - | M6x12 DIN 912 | Screw | 2 |
| 83 | 533 | 4010 | Bumper | 1 |
| 84 | 423 2022 | Label set, R606 | 1 |
| 84 | 423 2023 | Label set, R610 | 1 |
| 87 | 403 2013 | Sensor | 1 |
| - | M3x10 DIN 966 A4 | Screw | 2 |
| - | M3 DIN 934 | Nut | 2 |
| 90 | 72 0612 100 1 | Sleeve | 1 |
| 91 | 220 065 | Nippel, adjuster, R606 | 1 |
| - | M6 DIN 125 | Washer, R606 | 1 |
| 92 | 533 2021 | Adapter, adjuster, R606 | 1 |
| 92 | 503 2012 | Washer, R610 | 1 |
| 93 | 423 2020 | Membrane | 1 |
| 94 | 533 4005 | Wheel, R606 | 2 |
| 94 | 533 | 1048 | Wheel, R610 | 2 |
| 95 | 672 001 | Retaining ring, R606 | 2 |
| 95 | 673 | 500 | 88 | Push-on fastener, R610 | 2 |
| 96 | 533 | 4018 | Wheel cap, R606 | 2 |
| 96 | 72 0813 100 1 | Sleeve, R610 | 2 |
| 99 | 643 | 1005 | Spring, R610 | 1 |
| - | M6x50 DIN 933 | Screw | 1 |
| - | M6 DIN 934 | Nut | 1 |
| 100 | 343 2006 | Axle, R610 | 1 |
| 101 | 373 | 2007 | Magnet bow, R610 | 1 |
| - | M8 DIN 125 | Washer | 1 |
| - | M8 DIN 985 | Nut, nylon | 1 |
| 102 | 523 | 2018 | Sleeve, R610 | 2 |
| 103 | 373 2008 | Magnet bow, R610 | 1 |
| - | M8 DIN 125 | Washer | 2 |
| - | M8x35 DIN 933 | Screw | 2 |
| 104 | 523 2016 | Plate, R610 | 1 |
| 105 | 523 | 2015 | Plate, R610 | 1 |
| 106 | 673 2002 | Retaining ring, R610 | 1 |
| 107 | 63 | 106798J | Washer, R610 | 2 |
| * | 553 2002 | Assembly kit (incl. *) | 1 |
| * | 556 0001 | Allen key, 6 mm | 1 |
| * | 556 335 | Allen key, 4 mm | 1 |
| - | 583 2006 | Owner's manual | 1 |
| - | 583 0006 | Warranty booklet, GB,F,E,NL | 1 |
| Warranty booklet, D, I,FIN,S | 1 |
| Warranty booklet, GB, F, E 1 |
A = Thermoplastic / Kunststoff, Thermoplast
B = Paper, Carton / Papier, Pappe
C = Metal / Metall
D = Electronics / Elektronik
E = Other / Sonstiges
- CONTINUOUS ROWING MACHINE R 606 / R 610
- INFORMATION AND WARNINGS
- NOTE ABOUT YOUR HEALTH
- NOTE ABOUT THE EXERCISING ENVIRONMENT
- NOTE ABOUT USING THE EQUIPMENT
- ASSEMBLY
- METER AND FRAME
- METER
- DISPLAYS
- STROKES:
- TIME:
- STROKES/MIN:
- CALORIES:
- PULSE (R 610):
- USE
- ADJUSTING RESISTANCE
- SERVICE
- If you notice any defects or malfunctions in the device during the use, contact your dealer immediately.
- CHANGING BATTERIES
- STORAGE
- DIMENSIONS
Brand : TUNTURI
Model : R606
Category : Rowing Machine