
EcoStone SmartPro2000HC - Oven Climastar - Free user manual and instructions
Find the device manual for free EcoStone SmartPro2000HC Climastar in PDF.


| Product Type | Wall-mounted electric radiator |
| Brand | Climastar |
| Model | EcoStone SmartPro2000HC |
| Power | 2000 W (2.0 kW nominal heat output) |
| Voltage | 230 V ~ AC |
| Frequency | 50 Hz |
| Dimensions (W x H x D) | 1000 x 500 x 80 mm |
| Weight | 22 kg |
| IP Rating | IP24 |
| Heating Element | Dual Kherr ceramic |
| Housing Material | Powder coated steel |
| Thermostat | Electronic, range 5°C to 30°C |
| Safety Thermostat | Bimetallic, automatic, rated 90±5°C, reset 65±10°C |
| Modes | Auto, Manual, FP (GIFAM standard for France) |
| Control Panel | Display with MODE, PROG, ▲, ▼, ECO, ⏻ buttons |
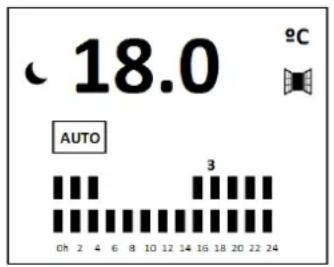
| Open Window Detection | Yes, triggers if temperature drops 3°C in 5 minutes |
| Key Lock Function | Press MODE and ▲ simultaneously for 3 seconds |
| Copy Function | Yes, copy daily program to another day |
| Weekly Programmable | Yes (electronic room temperature control plus week timer) |
| ECO Mode | Quick access to reduce temperature by 3°C |
| Installation | Wall-mounted, minimum 25 cm from floor, clearance from walls: 100 mm top, 200 mm sides, 250 mm bottom |
| Maintenance | Vacuum inner parts annually; clean exterior with damp cloth |
| Warranty | 2 years on spare parts (commercial warranty) |
| Country of Origin | Spain (CLIMASTAR GLOBAL COMPANY S.L.) |
Frequently Asked Questions - EcoStone SmartPro2000HC Climastar
User questions about EcoStone SmartPro2000HC Climastar
0 question about this device. Answer the ones you know or ask your own.
Ask a new question about this device
Download the instructions for your Oven in PDF format for free! Find your manual EcoStone SmartPro2000HC - Climastar and take your electronic device back in hand. On this page are published all the documents necessary for the use of your device. EcoStone SmartPro2000HC by Climastar.
USER MANUAL EcoStone SmartPro2000HC Climastar
- INTRODUCTION......5
- WALL SUPPORT......6
- SETTING UP......8
3.1.- STARTING THE DEVICE ....8
3.2.- DISPLAY CONTROL....8
3.3.- THE SCREEN....9
- Please, read carefully this user’s guide before installing your device.
■ Make sure the supply voltage corresponds with that on the nameplate (located on the left side of the device). - The Schuko plug must be connected to a compatible Schuko socket.
- Do not place the device right under an electrical outlet.
- If the supply cord is damaged, it must be replaced by the manufacturer, its after sales service or any other qualified person.
■ Not intended for children under the age of 3 unless duly supervised. - Children over 3 and below the age of 8 must only turn on/off the device whenever it has been duly placed or installed, has been given supervision or instructions concerning use of the appliance. Children from 3 to 8 must not plug, regulate and clean the device, nor carry out any maintenance activity.
- Not intended for use by persons (including children over 8) with reduced, physical, sensory or mental capabilities, or lack of experience and knowledge, unless they have been given supervision or instruction concerning use of the appliance by a person responsible for their safety. Children must not play with the device. Cleaning and maintenance
must not be carried out by children without prior supervision.
WARNING: some parts of this device may overheat and cause burns. Pay special attention when children and vulnerable people are around.

To avoid possible overheating, do not cover the device
2. WALL SUPPORT
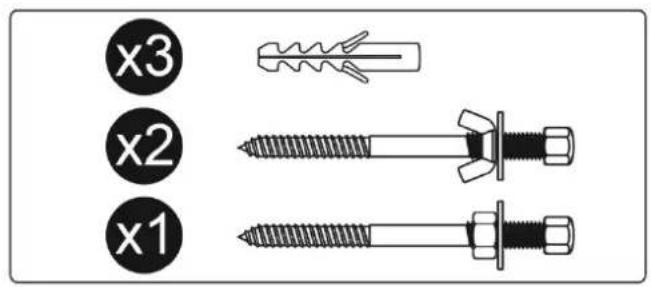
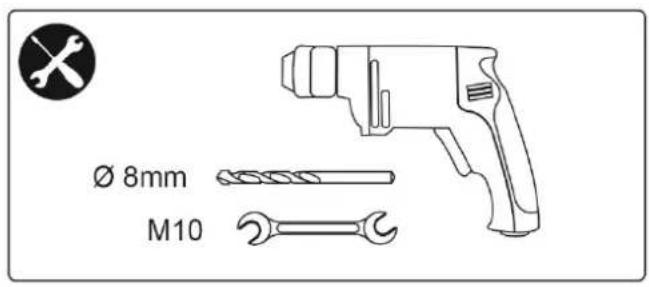
- The device includes a mounting kit with the required hardware-rawlplugs and 6 mm screws- and the wall support.
- The rawlplugs supplied with the mounting kit cannot be used on dry walls. For this type of wall, special rawlplugs must be used.
- When installing the device on the wall, the distance indicated below must be considered:
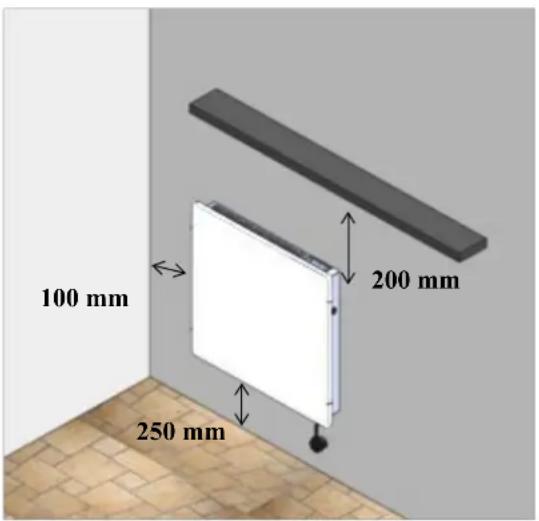
■ Once decided the location to install the device, remove the packaging and extract the device and its mounting kit.
- Fix the radiator to the wall as indicated below:
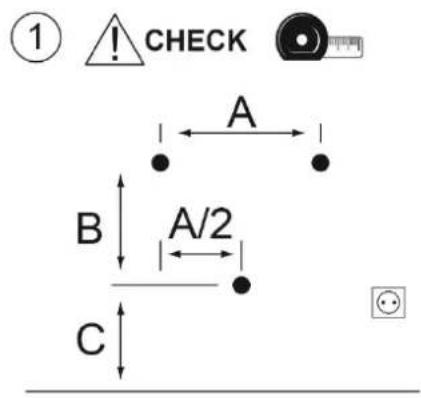
| A | 230 | 730 | 250 |
| A/2 | 115 | 365 | 125 |
| B | 200 | 200 | 630 |
| C_( ) | 300 | 300 | 300 |
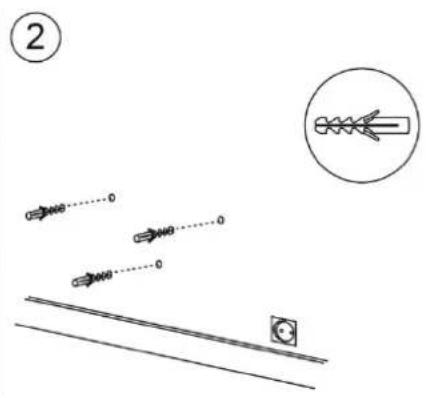
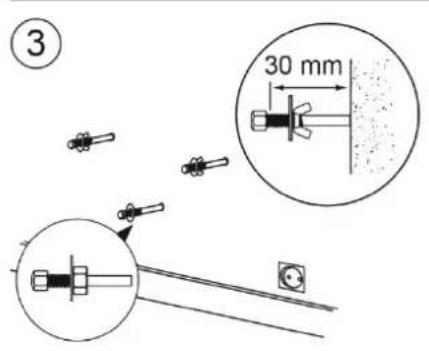
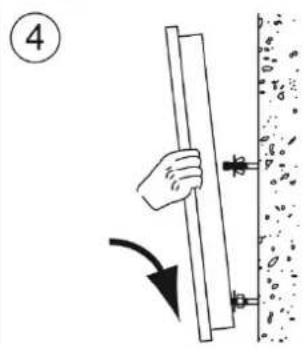
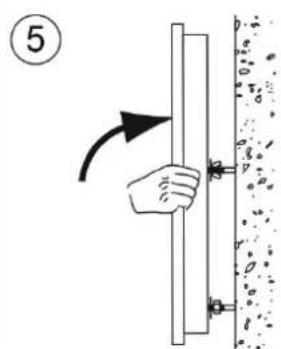

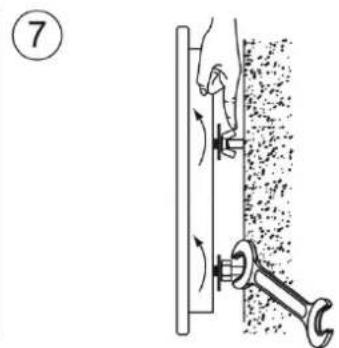
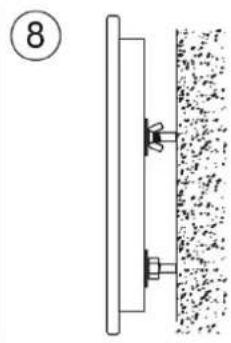
natural_image
Simple line drawing of a vertical panel mounted on a surface with a textured wall below (no text or symbols)⚠️ Check measures and levelling before drilling. Measurements in mm.
3. SETTING UP
3.1.- STARTING THE DEVICE
First, plug in the power cord to a mains power outlet, and click the switch on the right. Press ⏻ to turn on the device.
3.2.- DISPLAY CONTROL
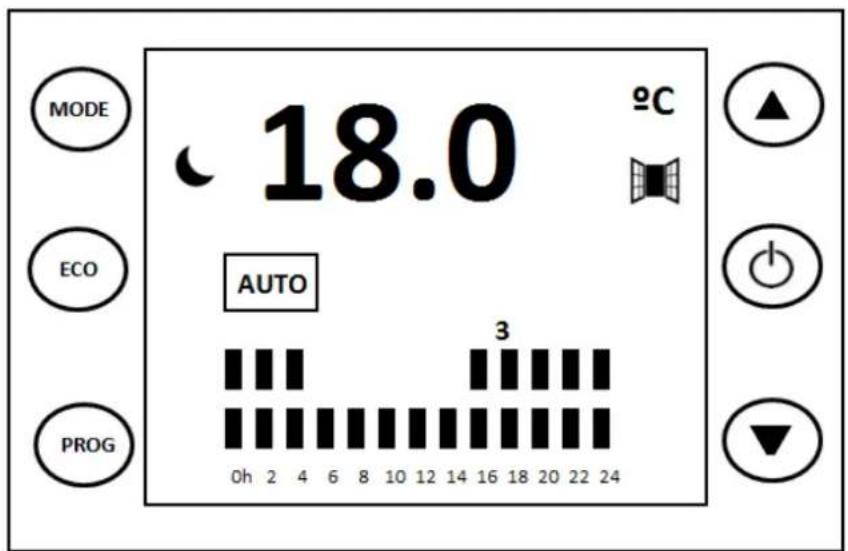
| MODE | Working modes |  | Increase |
| ECO | Quick access to ECO temperature |  | Turn on, turn off and validate |
| PROG | Programme |  | Decrease |
3.3.- THE SCREEN
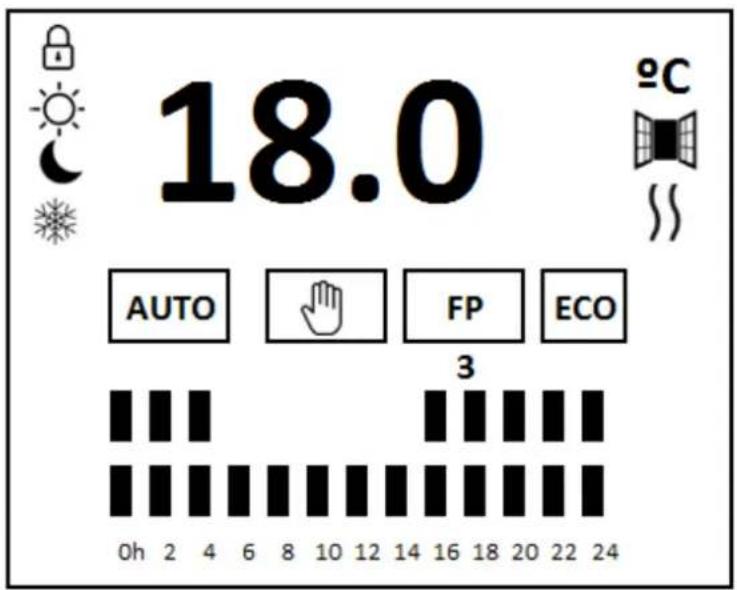
| Temperature selection | 18.0 | Comfort temperature | |
| Working mode Open window detector function | |||
| Daily programme Heating element ON | |||
| Lock function Quick access to ECO temperature |
3.4.- WORKING MODES
There are 3 operating modes:
- Auto. Temperature will automatically vary depending on a predefined setting based on 3 temperatures (comfort, eco, antifrost). Bars show how temperature is programmed per hour.
- Manual. The user selects the setpoint temperature.
- FP. The device follows a centralized programming according to the GIFAM standard (only available in France)
Press key MODE to change the working mode.
3.4.1 MANUAL MODE
- How to select the MANUAL mode
MODE

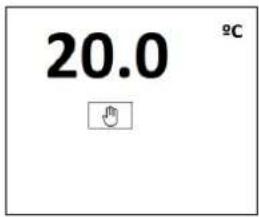

- Select the comfort temperature.

natural_image
Four black icons: two triangles and one hand with circular pulses, arranged in a 2x2 grid (no text or symbols)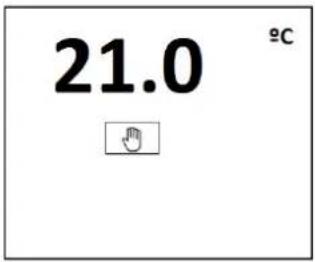
Having selected the manual mode, press ECO button to decrease 3^ C the room temperature.

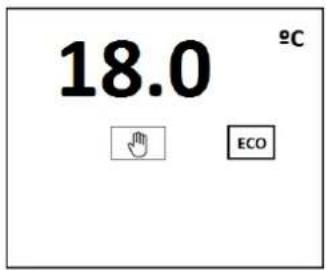

shows on screen
Press ECO button again to turn to comfort temperature.

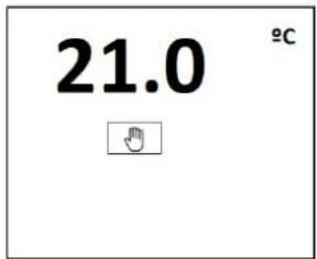
3.4.2 AUTO(MATIC) MODE
- How to select the AUTO mode
MODE

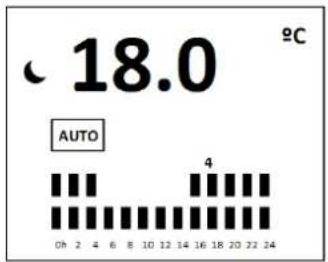

shows on screen
- How to set the temperatures
In this mode, set temperatures will automatically change according to the user's configuration who will assign one of these 3 temperatures to each hour:
- Comfort ( ⚙ ) - selected by the user to get maximum comfort. Being the icon ⚙ on, the user can select the temperature pressing the ▲▼ buttons.
- Economy or saving ( ) - used at night or short absences. It is always 3°C below set/comfort temperature.
- Anti-frost or minimum ( * ) - prevents the room temperature going below 7°C.
3.4.3 FP MODE
The device follows a centralized programming according to the GIFAM standard (only available in France).
3.5- SETTING THE TIME AND USING THE SMART PRO RADIATOR
3.5.1 SETTING THE TIME
- Press and release button PROG until the day of the week flashes.

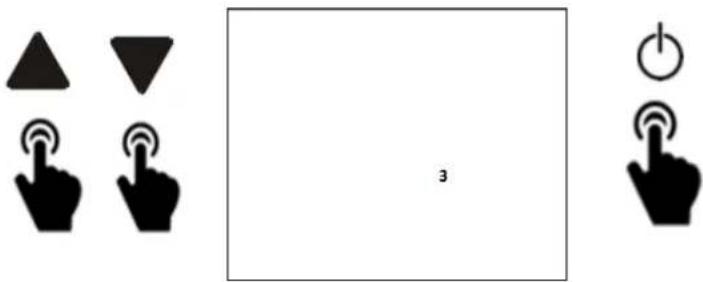
- Press ▲▼ buttons to select the day of the week, click ⏻ to confirm. Hour digits flash.
natural_image
Pure electrical and digital icons without any text or symbols- Press ▲▼ buttons to select the hour, click ⏻ to confirm. Minute digits flash.
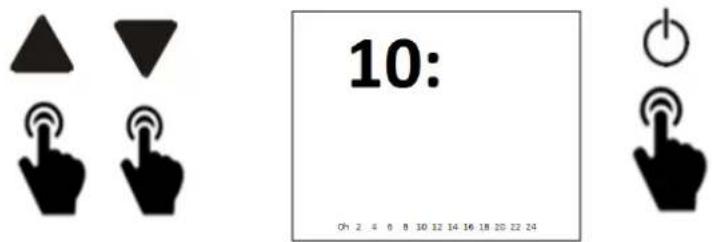
- Press ▲▼ buttons to select the minutes, click ⏻ to confirm
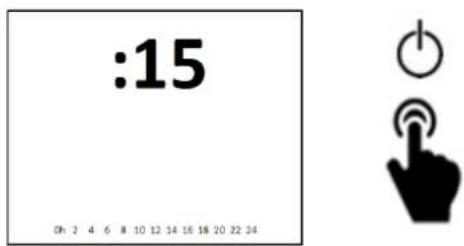
3.5.2 USING THE RADIATOR
If you do not want to programme the radiator at this stage, press twice the PROG button.
PROG

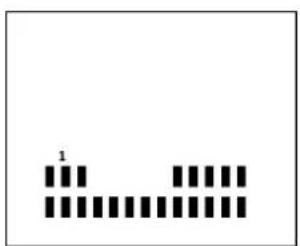

To carry out a custom programming, press ▲ to select the day of the week to programme. To confirm, press ⏻

natural_image
Four black icons: two triangles and one hand with circular pulses, arranged in a 2x2 grid (no text or symbols)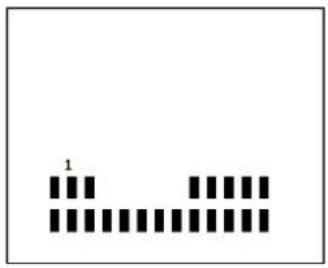

Start at 0h, press ▲▼ to select the temperature: comfort, ah, eco or oh anti frost.
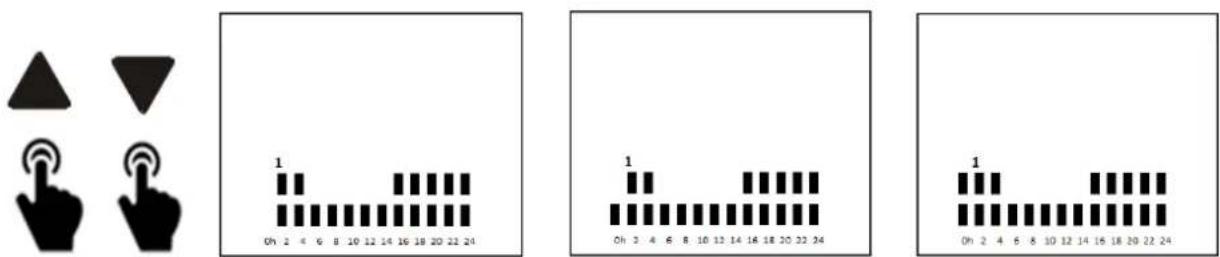
Confirm and programme the following hour.

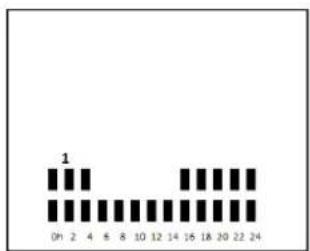
Repeat these steps until you go through all the 24 hours.
To programme other days of the week, press the buttons to select the day and proceed as previously mentioned.

natural_image
Four black icons: two triangles and one hand with circular pulses, arranged in a 2x2 grid (no text or symbols)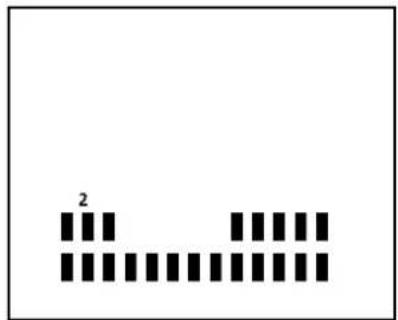
3.5.3 COPY FUNCTION
This function enables you to copy a previously programmed day to any other day.
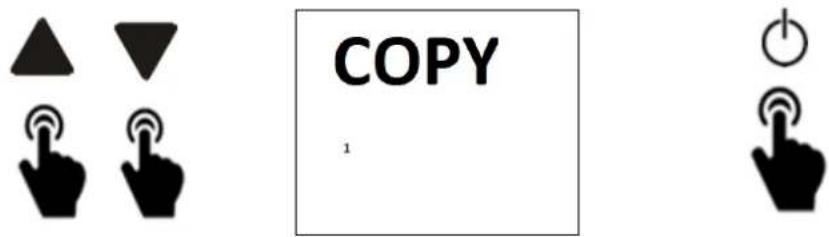
Press the PROG button until COPY shows on the screen.

Press the ▲▼ button to select the programmed day, press ⏻ to validate.
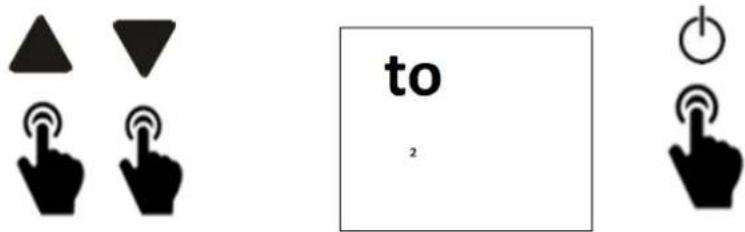
Now, press the ▲▼ button to select the number of the day you are copying to. Press ⏻ to confirm.
3.5.4 KEY BLOCK FUNCTION
To set this function, press both the MODE and UP arrow buttons for 3 seconds.
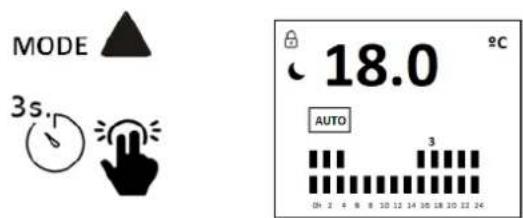
To unblock, do the same.
3.5.5 OPEN WINDOW DETECTOR FUNCTION
The device has a built-in sensor that detects any sudden temperature changes that may occur, i.e. when a window is opened, or any other circumstance that may prevent the radiator from raising the room temperature. This mode activates when the temperature decreases by 3^ C in 5 minutes. This mode stays until this decreasing tendency disappears.
4. MAINTENANCE
- Keep the floor clean to avoid stains on the wall.
- At the beginning of the year's heating season, the inner parts should be vacuumed because dust can be accumulated in the heating element when the radiator is off.
- The device can be washed with a moistened cloth or with any washing conventional product.
5. TECHNICAL CHARACTERISTICS
SMART PRO
| Power: (W) | 500 W | 800 W 1000 W 1500 W 2000 W 800 W 1000 W | ||||
| Dimensions: (mm) | 500 x 500 x 80 | 1000 x 500 x 80 | 500 x 1000 x 80 | |||
| Weight: (Kg) | 11 | 22 | 22 | |||
| Voltage: | 230v ~AC | Clase: | II | |||
| Frequency: | 50 Hz | IP: | 24 | |||
| Ceramic component: | DUAL KHERR | |||||
| External Housing: | Powder coated steel structure | |||||
| Thermostat | Electrónico. Rango de temperatura 5 °C a 30 °C | |||||
| Safety thermostat | Bimetallic, Automatic, Rated Temperature: 90 ±5°C, Reset Temperature: 65 ±10°C | |||||
| Heat output | 500 W | 800 W 1000 | W 1500 W 2000 W | ||
| Nominal heat output | P_nom | 0,5 k W 0,8 | k W 1,0 k W 1 | 5 k W 2,0 k W | |
| Minimum heat output (indicative) | P_min | N.A. N.A. | N.A. N.A. N.A. | ||
| Maximum continuous heat output | P_max,c | 0,5 k W 0,8 | k W 1,0 k W 1 | 5 k W 2,0 k W | |
| Auxiliary electricity consumption | 500 W | 800 W 1000 | W 1500 W 2000 W | ||
| At nominal heat output | el_max | N.A. N.A. | N.A. N.A. N.A. | ||
| At minimum heat output | el_min | N.A. N.A. | N.A. N.A. N.A. | ||
| In standby mode | el_SB | 0,000 k W 0, | 000 k W 0,000 | k W 0,000 k W | 0,000 k W |
| Type of heat input (select one) | |||||
| manual heat charge control, with integrated thermostat | no | ||||
| manual heat charge control with room and/or outdoor temperature feedback | no | ||||
| electronic heat charge control with room and/or outdoor temperature feedback | yes | ||||
| fan assisted heat output | no | ||||
| Type of heat output/room temperature control | |||||
| single stage heat output and no room temperature control | no | ||||
| Two or more manual stages, no room temperature control | no | ||||
| with mechanic thermostat room temperature control | no | ||||
| with electronic room temperature control | no | ||||
| electronic room temperature control plus day timer | no | ||||
| electronic room temperature control plus week timer | yes | ||||
| Other control options (multiple selections possible) | |||||
| room temperature control, with presence detection | no | ||||
| room temperature control, with open window detection | yes | ||||
| with distance control option | no | ||||
| with adaptive start control | no | ||||
| with working time limitation | yes | ||||
| with black bulb sensor | no | ||||
CLIMASTAR GLOBAL COMPANY, S.L
Carretera AS-266 Oviedo-Porceyo, Km 7.
33192 Pruvia (Llanera) - Asturias - Spain
6. FAQs
| PROBLEM | PROBABLE CAUSE | SOLUTION |
| The device does not heat up | The device is in energy-saving mode | Due to the thermal inertia, the device transfers heat to the room; should you need more temperature, increase the device temperature. |
| The room does not reach the desired temperature | Incorrect setting of the set temperature | Check the set temperature on the display to verify it is the desired temperature. |
| Improper sizing | The power is not the adequate for the place in which it has been installed. | |
| Excessive height | Make sure the system is installed at the recommended height or rise set temperature to compensate probe reading | |
| Input and output grids are obstructed | Do not place anything on top of the radiator and do not install it inside a hole made in the septum. | |
| The radiator does not operate | Set temperature below room temperature | Rise the radiator's set temperature until it is 1 degree above the room temperature |
| Control panel switch and protection down | Check that the automatic control is not down. If it is down put it up. | |
| Make sure the installation is correct and that there are independent lines for the heating system with a 2.5 mm2 cable gauge and a maximum power of 3500 w. | ||
| Switch is off | Set the switch in position I. | |
| Program is OFF | Check that the set program is the chosen one or set the one you desire. | |
| The radiator stains the walls | Radiator located at a very low height | The minimum height from the floor to the radiator's lower part must be at least 25 cm. |
| Dust accumulation in the lower grid. | Vacuum it. The vacuuming should be done at the beginning of each heating season. | |
| Type of painting on the wall | Paints with a high content in rutile are likely to darken. | |
| Blocked buttons | No response from operating buttons | Press buttons MODE and ▲ simultaneously for 3 seconds. |
7. GUARANTEE
CLIMASTAR guarantees that in the moment of its purchase the product is free of any defect in the materials and in the work force (limited guarantee). CLIMASTAR offers a commercial and voluntary guarantee; conditions included are similar to those of the legal guarantee, being CLIMASTAR responsible for the non-conformities arisen in the terms and conditions mentioned below. Moreover, CLIMASTAR offers a total warranty of 2 years in the spare parts.
-CLIMASTAR is responsible for the non-conformities arisen within the 6 months following the date of sale. If the non-conformity arises after those 6 months, the user shall prove that the non-conformity already existed when delivered. The user must inform CLIMASTAR of said non-conformity in a period inferior to two months.
-To obtain the service under the terms of this warranty it is important to detail the device's purchasing date because the warranty period starts with the purchase invoice of the system customer. However, in no case this warranty will be liable for defects that may arise after thirty-six months from the manufacture date.
-This warranty is strictly limited to the repairing in the factory of the manufacturing defect part or parts of the device, or to the complete replacement of the system when, in the opinion of the manufacturer, it is not possible or is uneconomical. This does not include any other type of expenditure as an installation, assembly, disassembly or transport.
-This warranty does not cover defects and / or malfunction caused by accidents, misuse, negligence, wears, breakage, an incorrect installation and poor electricity supply to the system. This warranty is also excluded if it is used with another purpose other than heating, for an alteration, modification, tampering or unauthorized repairing of the product, and by other different causes beyond the manufacturer's reach after the delivery of the product.
-The warranty does not cover the costs and expenses incurred to access the device or installation, such as in hidden locations, heights, non-practicable ceilings. Neither does it include the costs derived from removing or replacing any structural element to access the device or the installation.
-No heating system will be returned to CLIMASTAR without a previous codified and official MERCHANDISE RETURN AUTHORIZATION. CLIMASTAR assumes no liability for any equipment that is returned without the previously mentioned MERCHANDISE RETURN AUTHORIZATION.
-CLIMASTAR and/or its agents have the right to decide whether to replace the system or to repair the damaged components. None of these options will extend the original warranty period.
-Any reparation must be done by the Technical Service and authorized by the manufacturer and/or any of its agents; any manipulation done by unauthorized personal will void this warranty. In case of substitution of the device the buyer must go to the selling centre which will be in charge of receiving the system.
-RESPONSIBILITY LIMITATION: CLIMASTAR as a manufacturer is not responsible for any personal or material damage that directly or indirectly might result of a non-proper installation, from an improper handling or neither for the lack of technical qualified staff, nor for the installation costs which are expressly excluded from this warranty.
- None of the present conditions may be extended or modified without the express consent of CLIMASTAR.
CLIMASTAR
silicium technology
CLIMASTAR GLOBAL COMPANY S.L.
Carretera AS-266 OVIEDO-PORCEYO/Km.7 Pruvia
33192 - Llanera (Asturias). SPAIN
Telephone: +34 985 66 80 80
www.climastar.es


Danos tu opinión


- WALL SUPPORT
- SETTING UP
- 3.1.- STARTING THE DEVICE
- 3.2.- DISPLAY CONTROL
- 3.3.- THE SCREEN
- 3.4.- WORKING MODES
- MANUAL MODE
- AUTO(MATIC) MODE
- MODE
- FP MODE
- 3.5- SETTING THE TIME AND USING THE SMART PRO RADIATOR
- SETTING THE TIME
- USING THE RADIATOR
- COPY FUNCTION
- KEY BLOCK FUNCTION
- OPEN WINDOW DETECTOR FUNCTION
- MAINTENANCE
- TECHNICAL CHARACTERISTICS
- FAQs
- GUARANTEE
- CLIMASTAR
- silicium technology
Brand : Climastar
Model : EcoStone SmartPro2000HC
Category : Oven