S120 - Camera EASYPIX - Free user manual and instructions
Find the device manual for free S120 EASYPIX in PDF.


| Product Type | Digital Camera |
| Brand | Easypix |
| Model | S120 |
| Image Sensor | CMOS 2048 x 1536 pixels |
| Lens | F2.8, f=6.3mm, fixed focus |
| Focus Range | 1.5 m to infinity |
| Zoom | 4x digital zoom |
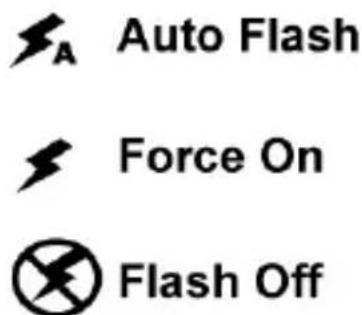
| Flash Modes | Auto, Force on, Flash off |
| Flash Range | Approx. 1.3 m – 2.8 m |
| White Balance | Auto, Sunny, Cloudy, Tungsten, Fluorescent |
| Exposure Compensation | ±2.0 EV in 0.5 steps |
| Still Image Resolutions | 12M (4032x3024 interpolated), 3M (2048x1536), 1M (1280x960) |
| Video Resolution | 640x480, 320x240 (AVI) |
| Display | 1.5" TFT color LCD |
| Storage | SD card slot (no internal memory) |
| Power Source | 2x AAA batteries |
| Dimensions (W x H x D) | 88 x 60 x 20 mm |
| Weight (without batteries) | 80 g |
| PC Interface | USB 1.1 |
| Video Output | NTSC / PAL (selectable) |
| Self-timer | Off, 10 sec, 15 sec, 20 sec |
| Burst Mode | 3 continuous shots |
| Included Accessories | Camera, manual, CD, carry bag, strap, 2xAAA batteries, USB cable, TV cable |
| Cleaning | Wipe with a soft, dry cloth |
Frequently Asked Questions - S120 EASYPIX
User questions about S120 EASYPIX
0 question about this device. Answer the ones you know or ask your own.
Ask a new question about this device
Download the instructions for your Camera in PDF format for free! Find your manual S120 - EASYPIX and take your electronic device back in hand. On this page are published all the documents necessary for the use of your device. S120 by EASYPIX.
USER MANUAL S120 EASYPIX
natural_image
Line drawing of a digital camera with buttons and lens (no text or symbols)USER MANUAL
Table of Contents
- Camera Precautions.... 3
-
Preparation....7
-
Standard Accessories....7
- Parts Names....8
- Battery Installation.... 9
- Loading the SD card.... 10
-
Attaching the Strap.... 11
-
Quick Start.... 12
-
Powering the camera On/ Off...... 12
- Taking Picture.... 13
Holding the camera correctly.... 13
Capturing Still Images.... 14
Recording Video Clips.... 14
-
Basic Shooting Functions.... 15
Using the Zoom.... 15
Flash Setting.... 15 -
Advance Mode.... 16
- Still Mode.... 16
Picture Quality.... 16
Exposure Value.... 17
White Balance.... 17
Burst Snapshot.... 18
Self-timer.... 18
- Video Mode.... 19
Video Resolution.... 19
Exposure Value.... 20
White Balance.... 20
Table of Contents
- Playback Mode.... 21
Pictures/ Video Clips Playback.... 21
Single Video Clip Playback 22
Thumbnail.... 22
Slide Show.... 23
Delete Current Picture or Video Clip..... 23
Delete All.... 24
Protect.... 24
Print.... 25
Playback Zooming.... 25
- Setting.... 26
- Language.... 26
- Format Storage.... 27
• TV Output...... 27
- Auto Power Off.... 28
- Light Frequency.... 28
- Default Setting.... 29
- System Information.... 29
- Making Connections 30
- Install PhotoImpression.... 30
- Install VideoImpression.... 33
- Connecting to PC.... 36
- Download Pictures, Movies.... 37
- Connecting to TV for review...... 37
Table of Contents
7. Appendix.... 38
- Specifications.... 38
- Computer System Requirement.... 39
- Icons & Indicators.... 40
- Standard Number of Available Pictures/Recording Reference Table.... 41
Welcome
Thank you for choosing the Camera to pursue your DSC. Whether you are creating memories of your friends and family or exploring the great outdoors to get the utmost satisfaction from your DSC, please take a moment to read through this manual. Its contents will send you on an educational journey into your camera's multiple capabilities.
1. Camera Precaution
Before using the camera, please ensure that you read and understand the safety precautions described below. Always ensure that the camera is operated correctly.
- Never operate the camera inside of an aircraft or anywhere else where operation of such devices is restricted. Improper use creates the risk of serious accident.
- Do not aim the camera directly into the sun or other intense light sources which could damage your eyesight.
- Do not try to open the case of the camera or attempt to modify this camera in any way. High-voltage internal components create the risk of electric shock when exposed. Maintenance and repairs should be carried out only by authorized service providers.
- Do not fire the flash too close to the eyes of animals or people, especially for young children. Eye damage may result. In particular, remain at least one meter away from infants when using flash.
- Keep the camera away from water and other liquids. Do not use the camera with wet hands. Never use the camera in the rain or snow. Moisture creates the danger of fire and electric shock.
- Keep the camera and its accessories out of the reach of children and animals to prevent accidents or damage to the camera.
- If you notice smoke or a strange odor coming from the camera, turn the power off immediately. Take the camera to the nearest authorized service center for repair. Never attempt to repair the camera on your own.
- Use only the recommended power accessories. Use of power sources not expressly recommended for this equipment may lead to overheating, distortion of the equipment, fire, electrical shock or other hazards.
- Never apply too much force when cleaning the surface of the lens. Doing so can scratch the lens surface and cause malfunction?
- The camera may become slightly warm during use. This does not indicate malfunction.
- If the exterior of the camera needs cleaning, wipe it with a soft, dry cloth.
FCC Notice
This equipment has been tested and found to comply with the limits for a Class B digital device, pursuant to Part 15 of the FCC Rules. These limits are designed to provide reasonable protection against harmful interference in a residential installation. This equipment generates, uses and can radiate radio frequency energy. If not installed and used in accordance with the instruction, it may cause harmful interference to radio communication. However, there is no guarantee that interference will not occur in a particular installation. If this equipment does cause harmful interference to radio or television reception, which can be determined by turning the equipment on the off, the user is encouraged to try to correct the interference by one or more the following suggestion.
- Reorient or relocate the receiving antenna.
- Increase the distance between the equipment and the receiver.
- Connect the equipment to a different power outlet other than the one where the receiver is connected.
- Consult an experienced television or radio technician for help.
CAUTION
To comply with the limits for a Class B digital device, pursuant to Part 15 of the FCC Rules, this device must only be installed on computer equipment certified to comply with the Class B limits.
2. Preparation
Standard Accessories
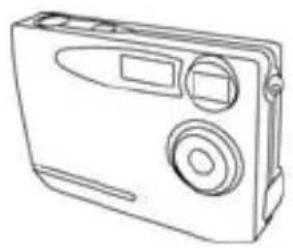
natural_image
Line drawing of a digital camera with two buttons and display screen (no text or symbols)Camera
Manual
natural_image
Simple concentric circle diagram with no text or symbolsCD
natural_image
Simple line drawing of a closed book or document (no text or symbols visible)Carry Bag
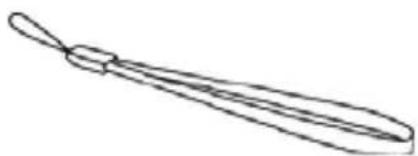
natural_image
Simple line drawing of a pair of scissors (no text or symbols)Strap
2xAAA Battery
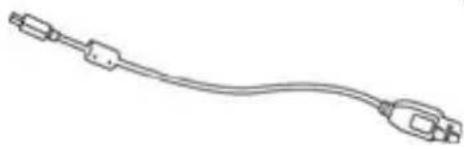
natural_image
Line drawing of a USB cable with multiple connectors (no text or symbols)USB cable
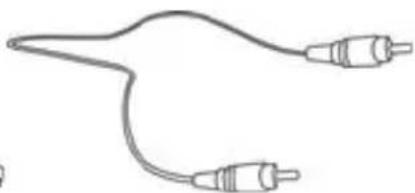
natural_image
Line drawing of a audio jack with two leads (no text or symbols)TV cable
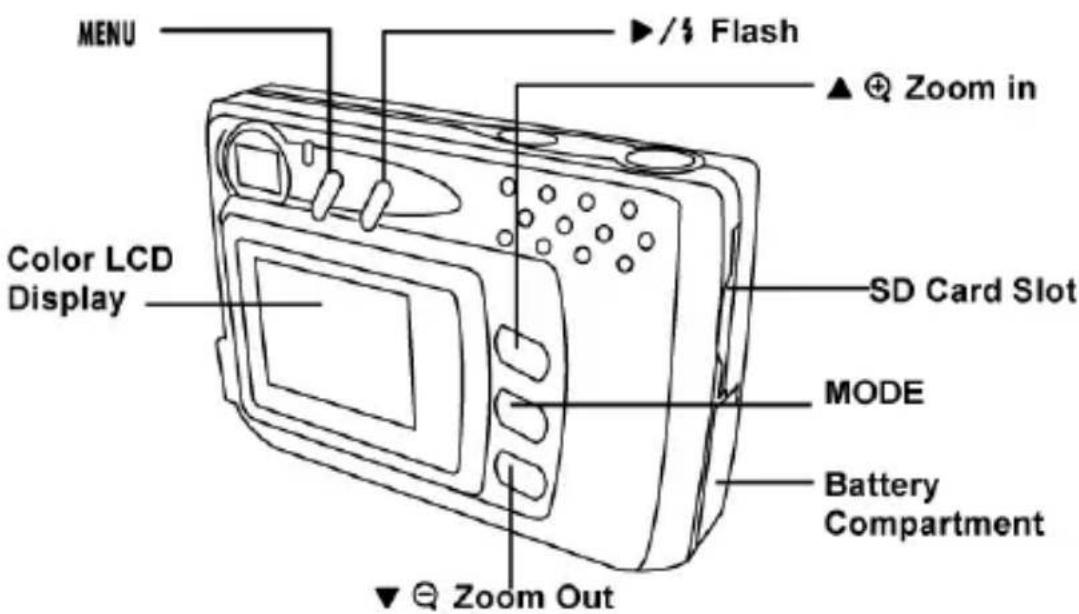
Part Names
Front View
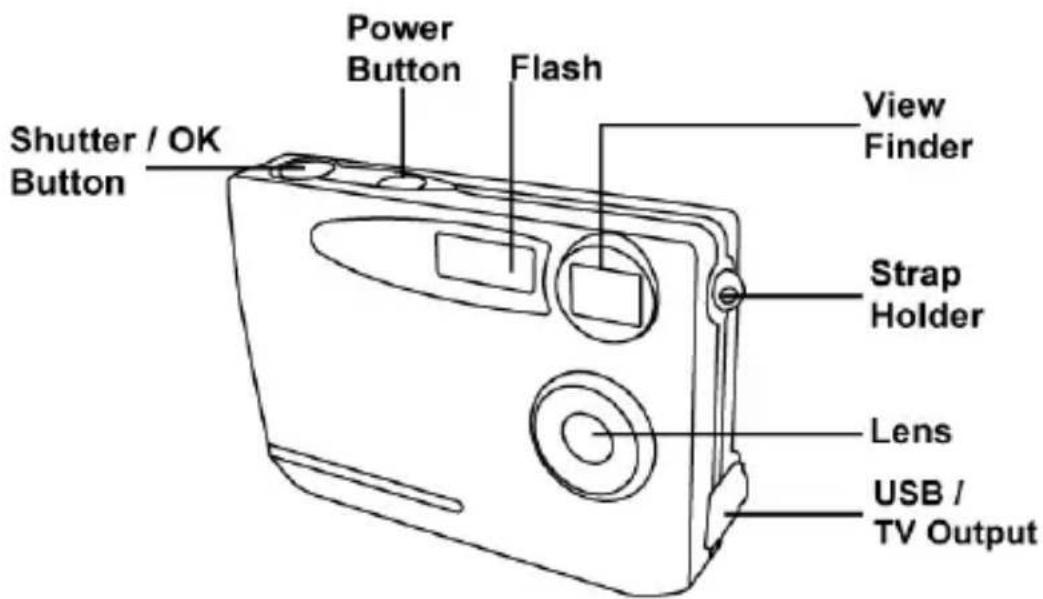
Back View
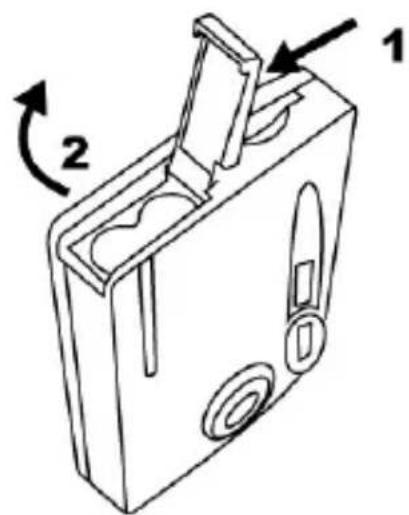
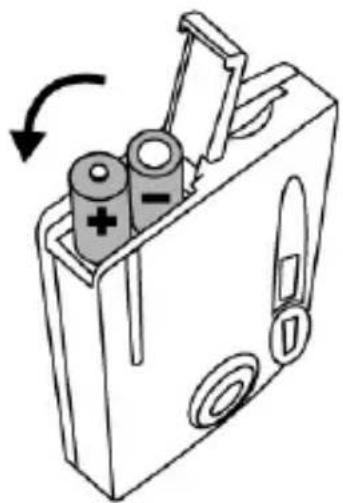
Battery Installation
- Slide the battery compartment door.
- Insert 2X AAA batteries in correct polarity (+ and -) as shown on the inside of the battery compartment.
- Close the battery compartment door.
natural_image
Illustration of a battery pack with three batteries and a switch, showing internal components (no text or symbols)Battery Power Status
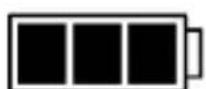
Full
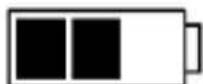
2/3
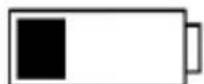
1/3
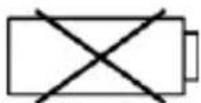
Empty
CAUTION
* Do not mix battery types (use only one battery type at a time) as this may cause or camera performance, fire, or explosion.
* Batteries must be places in the battery compartment with correct polarity.
* Batteries should be replaced when the battery indicator displays the “+” “-” icon.
* To improve battery performance, replace both batteries at the same time.
* Remove the batteries if they will not be used for an extended period of time.
Loading SD Card
Insert SD card into memory card slot and push it all the way in. The LCD will show the SD card indicator when an SD card is in the slot.
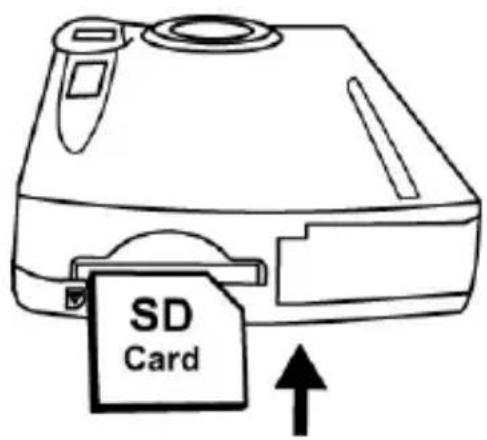
When the optional SD card is installed:
* All images/ movies by default will be automatically stored in SD card
* It may be necessary to format the SD card if the card has been used in devices other than your camera. To format, see Format Storage in page 27.
* “0” display at lower right of the LCD display when the SD card is full, or the SD is write-protected, or there is an error writing to the card. You cannot take picture. To take picture, download the pictures to your computer, or delete some unimportant pictures from the SD card (refer to page 23), or use a writable SD card.
Attaching the Strap
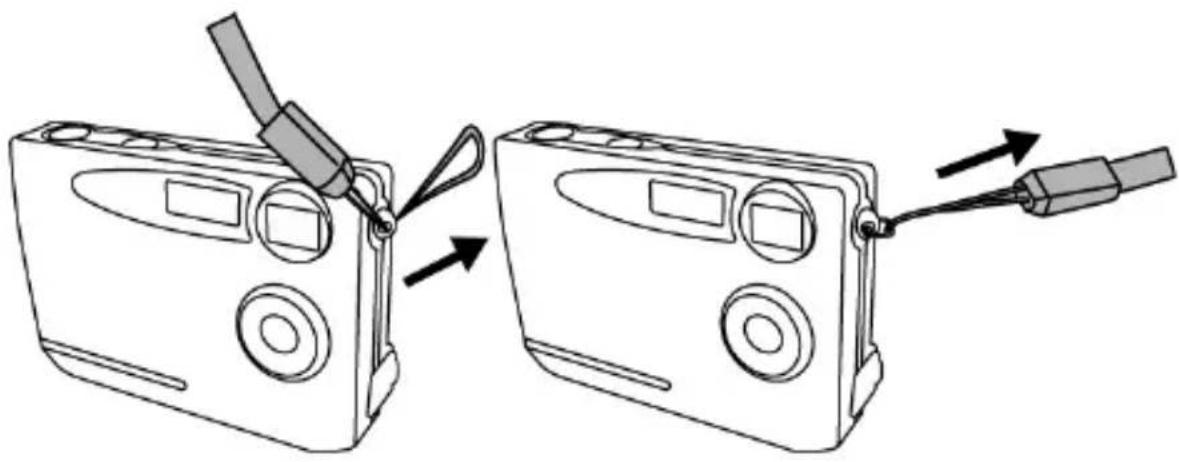
- The small loop goes through the strap holder.
- Then the small loop goes through one clutch of the loop again and pulls tightly.
natural_image
Diagram showing two devices connected by a cable, with arrows indicating motion (no text or symbols present)3. Quick Start
Powering the camera ON/ OFF
Power ON
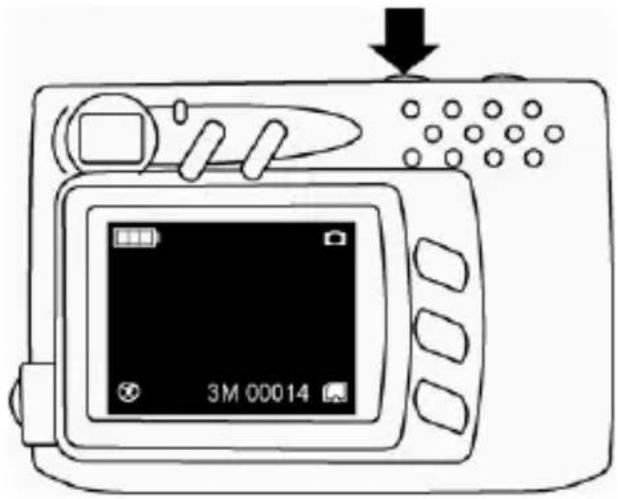
- Press the Power Button to turn on. The red LED light up indicate power is on.
- When the LCD Monitor has been activated, the camera is ready to use.
Power OFF
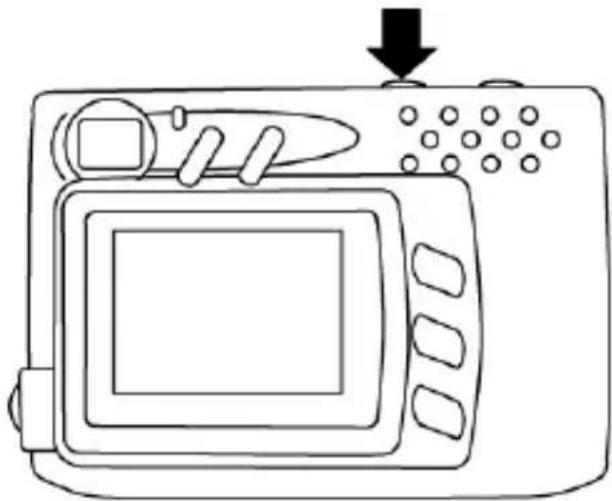
- Press the Power Button again to turn the camera off.
- The camera also turns off automatically for power save reason. To set the Auto Power Off, please refer to page 28.
natural_image
Line drawing of a digital camera with an arrow pointing to the top panel (no text or symbols)Taking Picture
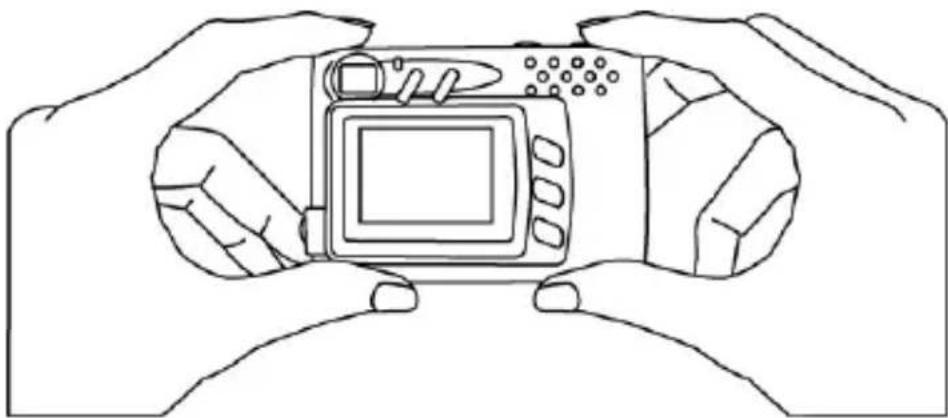
Holding the camera correctly
Due to the compact size and light weight of the camera, it is critical that you hold the camera securely in order to avoid “camera shake”. The camera is particularly sensitive to shake in low light environments. Taking a picture in low light requires a longer exposure time for the image to be captured and any movement during this time might cause a blurred image.
When taking a photo in low light the flash may trigger. Before this happens, try to avoid gripping the camera with your fingers placed on the front face of the camera. Instead, hold the camera on its edges so that the light of the flash does not reflect off your fingers and cause lens flare.
natural_image
Line drawing of two hands holding a digital camera (no text or symbols)Capturing Still Images
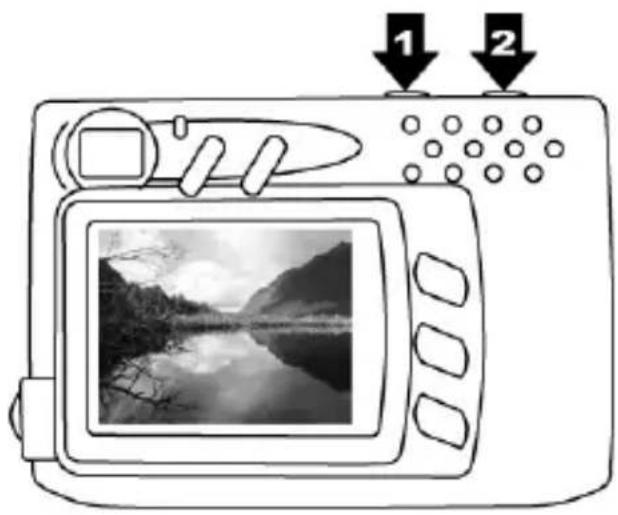
- Power on the camera.
- Press the Shutter Button to take a picture.
Recording Video Clips
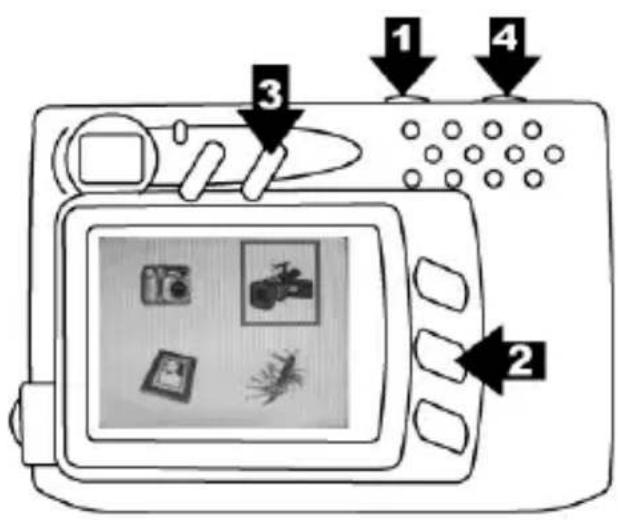
- Power on the camera.
- Press the Mode Button and press ▶ to select the Video Mode. Press OK button for confirmation.
- Press the Shutter Button to start recording a movie.
- Press the Shutter Button again to stop recording.
Basic Shooting Functions
Using the Zoom
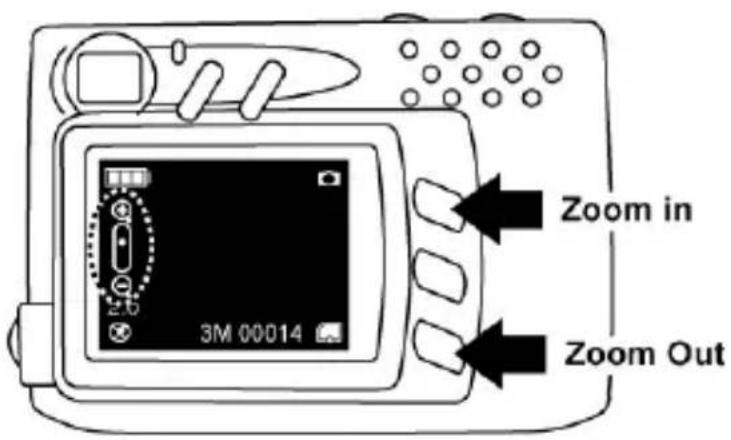
- Under Still mode and Movie mode.
- Use the LCD monitor to frame your subject.
- Press the ▲ zoom in and ▼ zoom out to take a picture or record a movie clip.
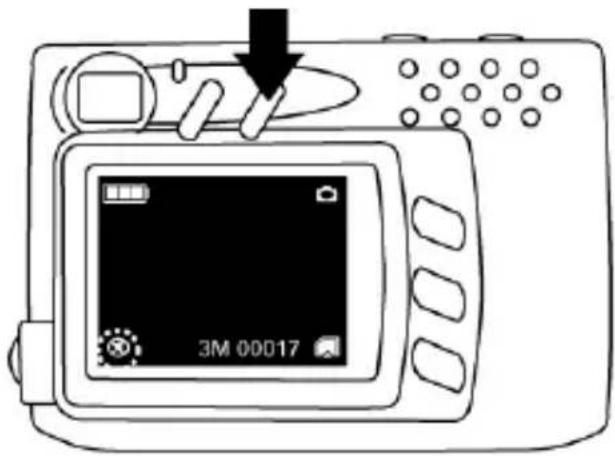
Flash Setting
- Under Still mode.
- Press Flash button directly to change the flash mode- auto/ force on/ off.
The red LED light would quick blinking until the flash is fully charged.
4. Advance Mode
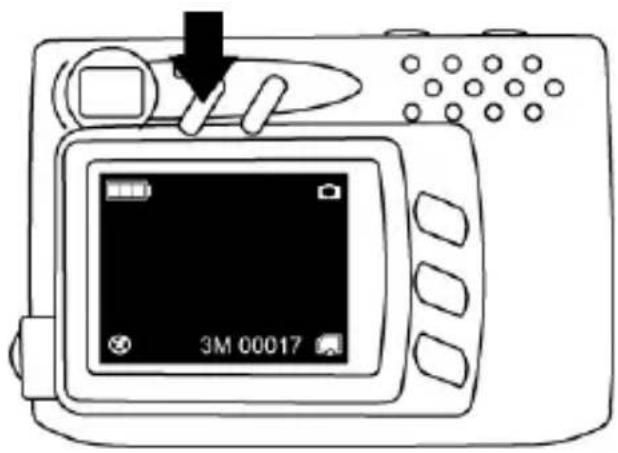
Still Mode
The Camera is default on Still Mode. To press Menu Button for modes setting, press Menu Button again to return the capture mode.
natural_image
Line drawing of a digital camera with a screen displaying '3M 00017' and a black arrow pointing to the top panel (no text or symbols on device body)Picture Quality
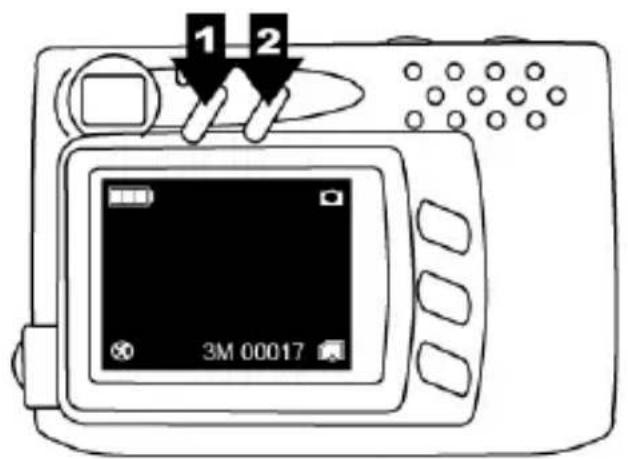
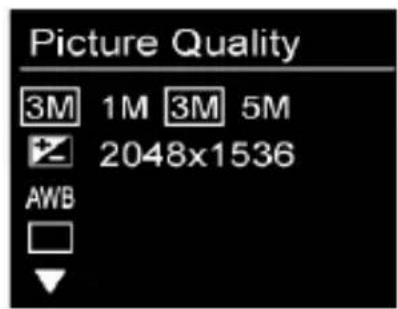
- Under Still Mode.
- Press Menu Button.
- Press ▶ to select 1M (1280x960)/ 3M (2048x 1536)/ 12M (4032x3024 by interpolation) you want to change.
- Press ▼ for next mode setting or press Menu Button to return the capture mode.
Exposure Value
-
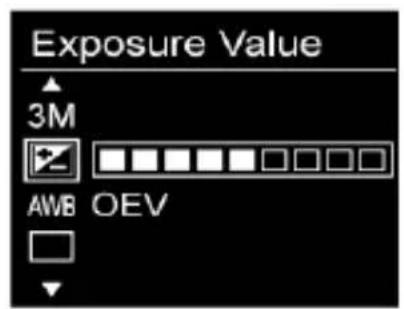
Under Still Mode.
-
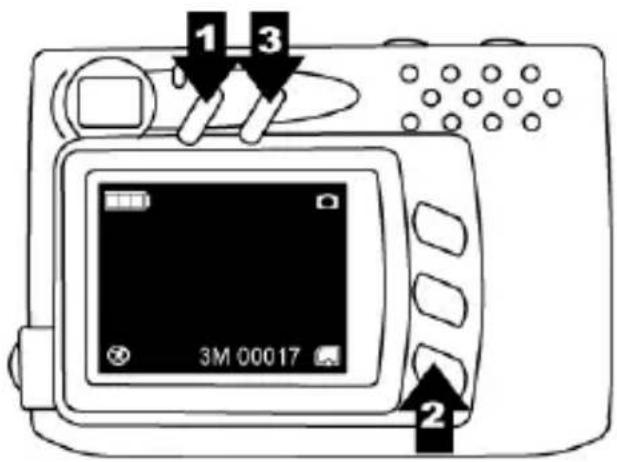
Press Menu Button and press ▼ to select Exposure Value mode.
-
Press ▶ to adjust the exposure compensation from -2 to +2 in 0.5 increments.
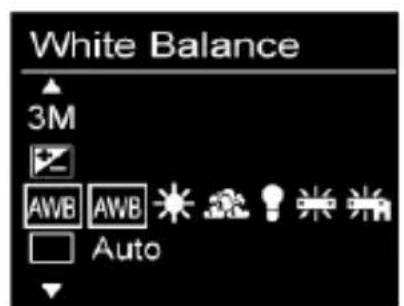
White Balance
-
Under Still Mode.
-
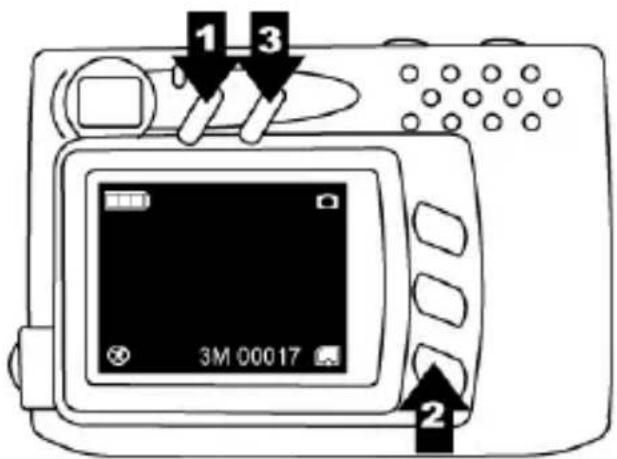
Press Menu Button and press ▼ to select White Balance mode.
-
Press ▶ to select Auto/ Sunny/ Cloudy/ Tungsten/ Fluorescent1/ Fluourscent2 according to various lighting conditions.
Burst Snapshot
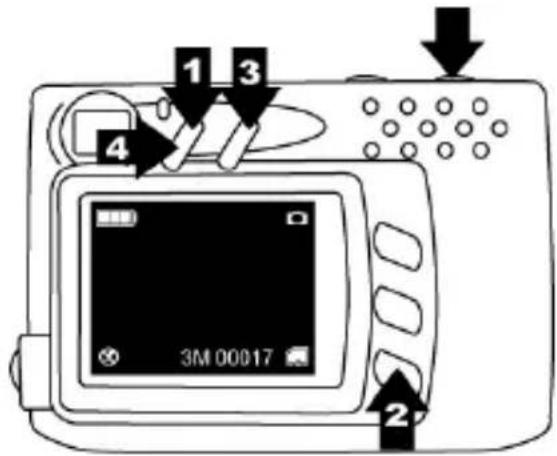
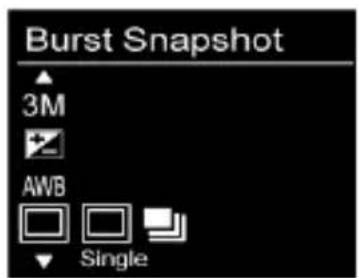
- Under Still mode,
- Press Menu Button and press ▼ to select Burst Snapshot mode.
- Press ▶ to select Single/ Burst.
- Press Menu Button to return the capture mode, and then press Shutter Button to capture 3 images continuously.
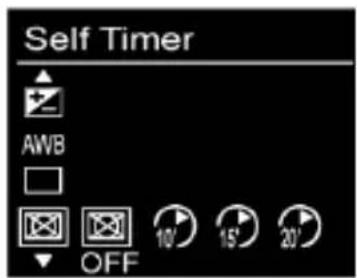
Self-timer
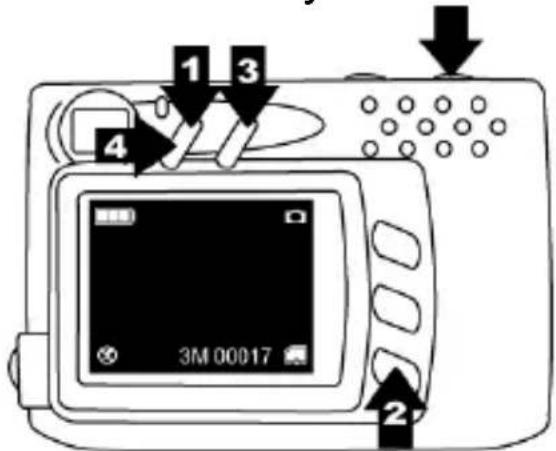
- Under Still mode.
- Press Menu Button and press ▼ to select Self-timer mode.
-
Press ▶ to select Off/ 10 sec/ 15 sec/ 20 sec.
-
Press Menu Button to return the capture mode, and then press Shutter Button to capture images by seconds delay time.
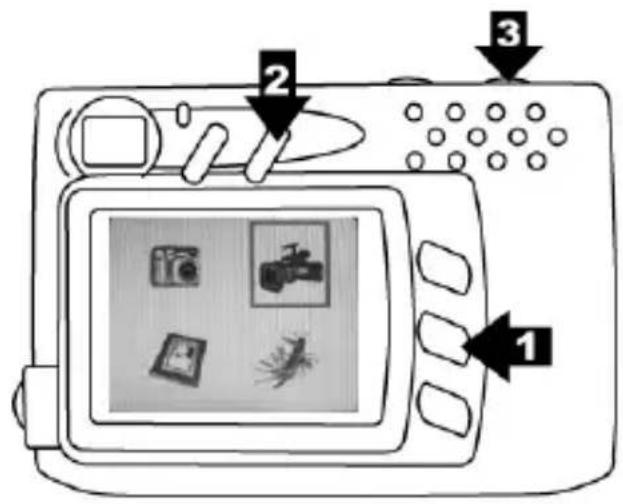
Video Mode
Press the Mode Button and press ▶ to select the Video Mode. Press Shutter/OK button for confirmation. To press Menu Button for modes setting, press Menu Button again to return to recording mode.
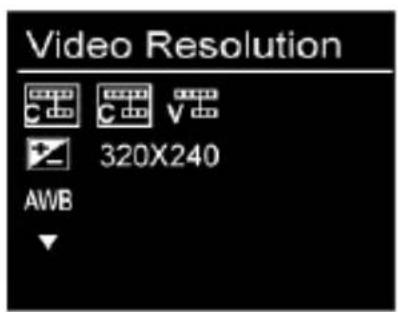
Video Resolution
-
Under Video Mode.
-
Press Menu Button.
-
Press ▶ to select 320x240/ 640x480 movie format you want to change.
-
Press ▼ for next mode setting or press Menu Button to return the capture mode.
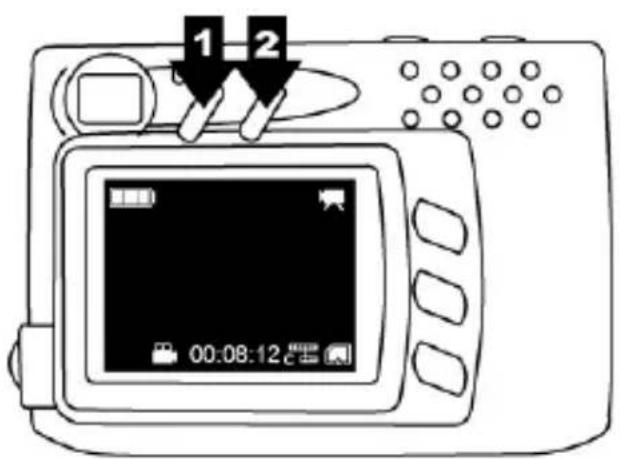
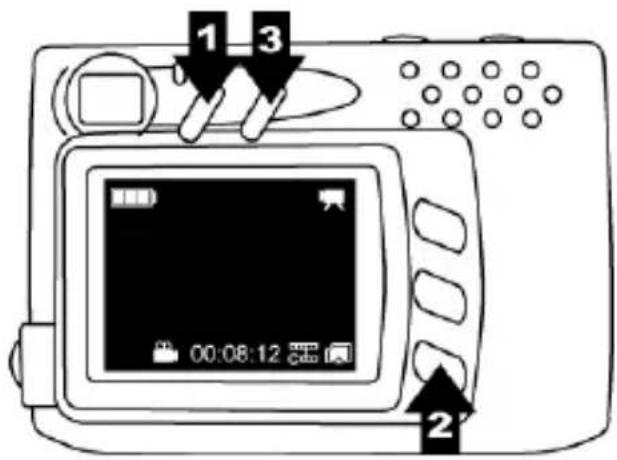
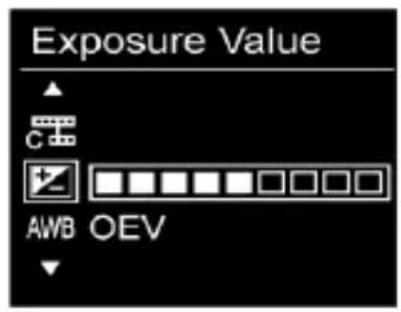
Exposure Value
- Under Video Mode.
- Press Menu Button and press ▼ to select Exposure Value mode.
- Press ▶ to adjust the exposure compensation from -2 to +2 in 0.5 increments.
White Balance
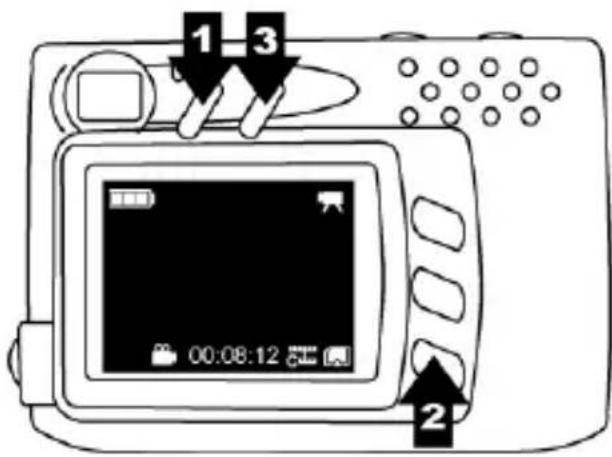
- Under Video Mode
- Press Menu Button and press ▼ to select White Balance mode.
- Press ▶ to select Auto/ Sunny/ Cloudy/ Tungsten/ Fluorescent1/ Fluourscent2 according to various lighting conditions.

Playback Mode
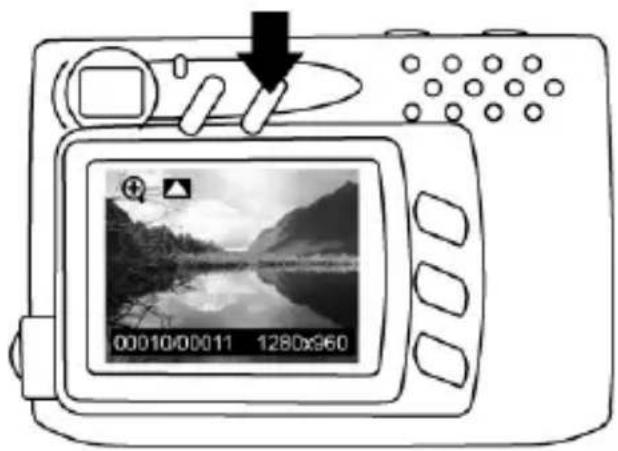
Pictures/ Video Clips Playback
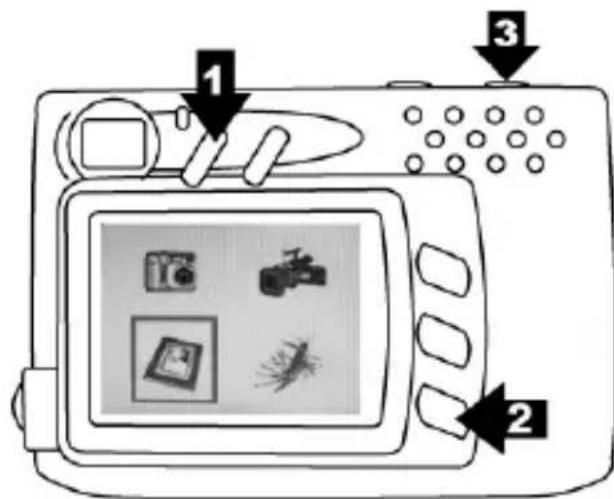
- Press the Mode Button and select Playback Mode.
- Press Shutter/OK button for confirmation.
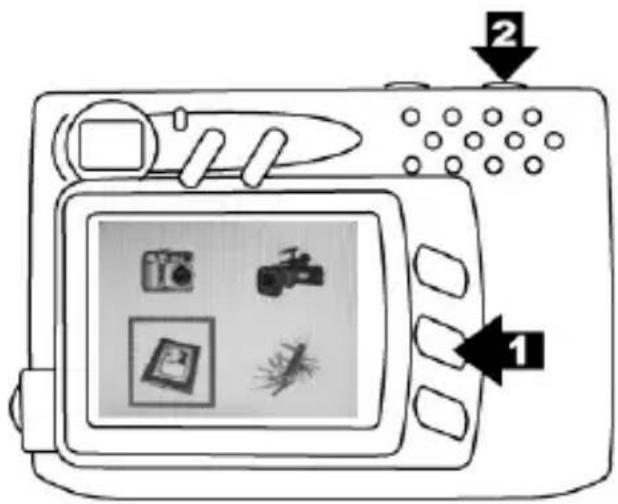
- Press ▶ to select the pictures/ video clips you want to review.
natural_image
Line drawing of a digital camera with a screen displaying a landscape photo and a black arrow pointing to it (no text or symbols on the device itself)Single Video Clip Playback
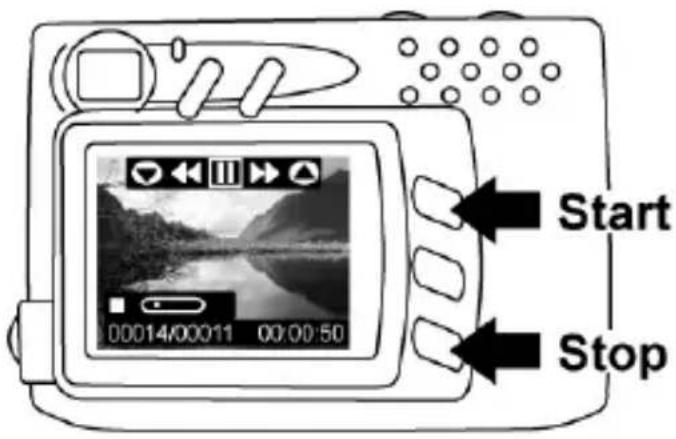
-
Press ▲ to playback, to press twice is quick playback.
-
Press ▼ to stop, to press twice is backward.
Thumbnail
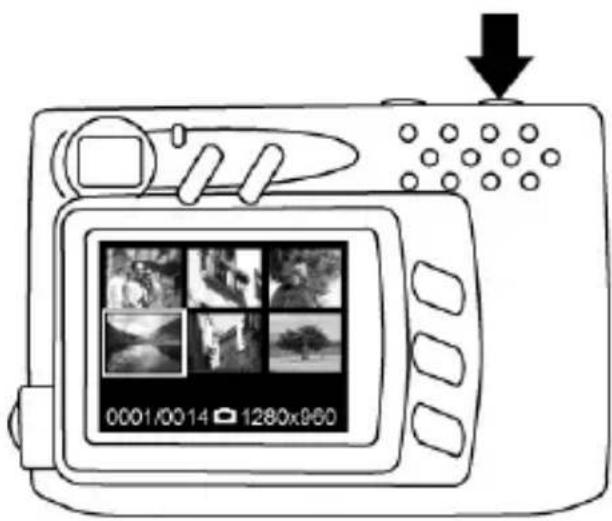
-
Press Shutter/OK Button to enter Thumbnail to show 6 pictures/video clips at the same time on TFT display.
-
To press Shutter/OK Button to return the original picture/video clip playback status.
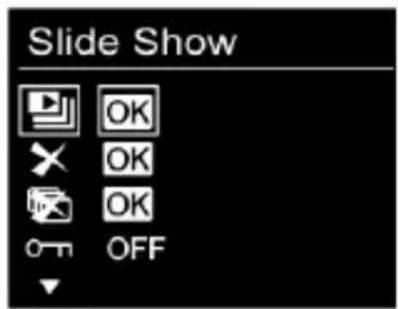
Slide Show
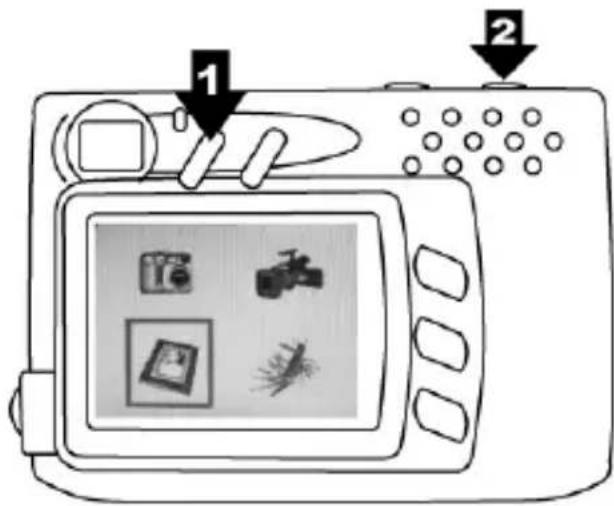
- Under Playback mode.
- Press Menu Button.
- Press Shutter/OK button to start slide show, press Shutter/OK button again to stop.
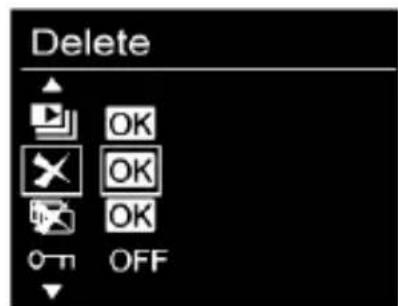
Delete Current Picture or Video Clip
- Under Playback mode.
- Press Menu Button and press ▼ to select Delete mode.
- Press Shutter/OK button to delete current picture or video clip.
- Press Shutter/OK button again for confirmation, press Menu button to exit.
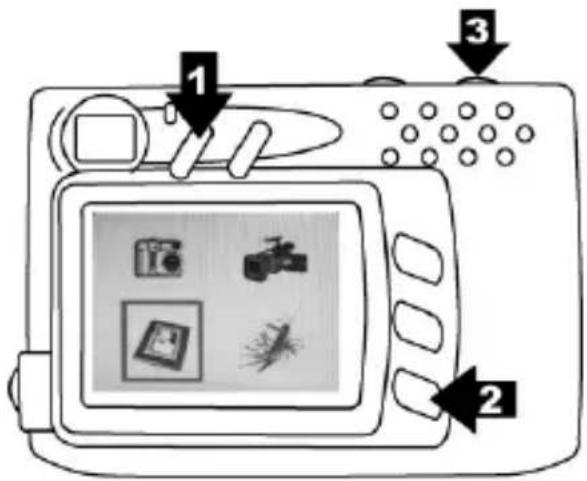
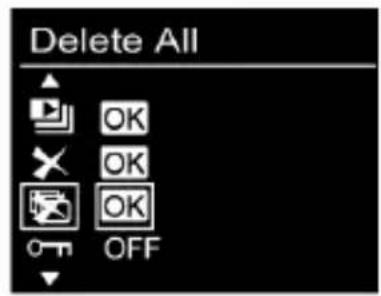
Delete All
- Under Playback mode.
- Press Menu Button and press ▼ to select Delete All mode.
- Press Shutter/OK button to delete all pictures and video clips.
- Press Shutter/OK button again for confirmation, press Menu button to exit.
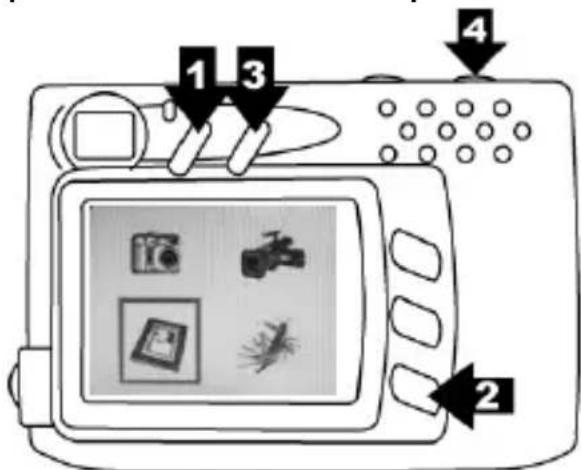
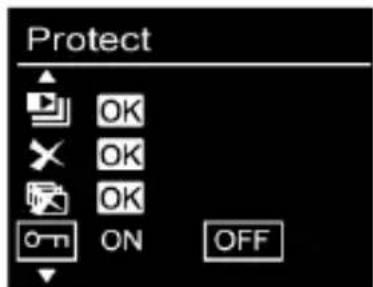
Protect
- Under Playback mode.
- Press Menu Button and press ▼ to select Protect mode.
- Press ▶ to select ON to protect current picture or video clip.
- The Protect symbol will be shown on the top right of picture or video clip.
-
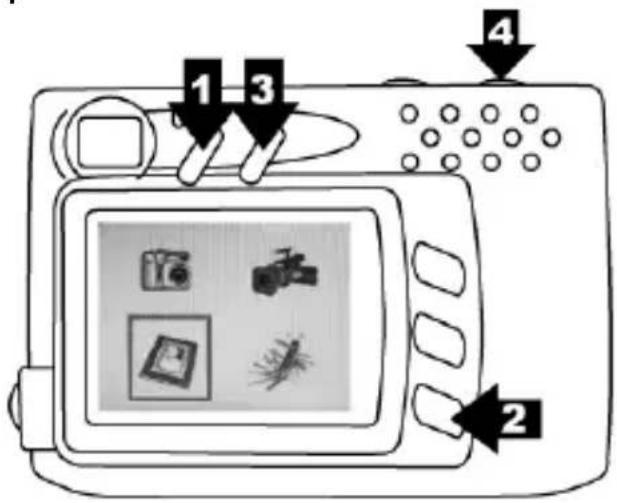
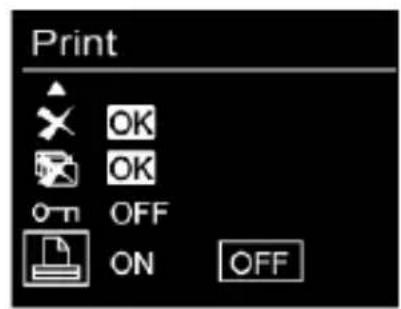
Under Playback mode.
-
Press Menu Button and press ▼ to select Print mode.
-
Press ▶ to select ON to mark current picture to be printed.
-
The Print symbol will be shown on the top right of picture.
Playback Zooming
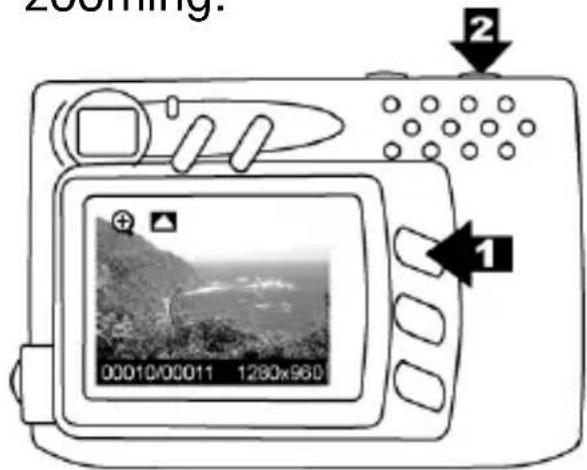
-
Under Picture Playback mode.
-
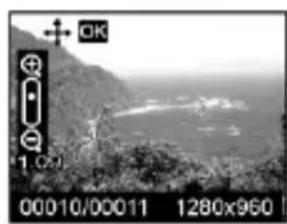
Press ▲ to pan the center of the picture to view.
-
Press OK Button to fix the zoom frame. Press ▲▼ to move to a specific area you want to see.
-
Press OK Button again to return the picture playback zooming.
natural_image
Black-and-white aerial view of a mountainous landscape with a coastal area and no visible text or symbols.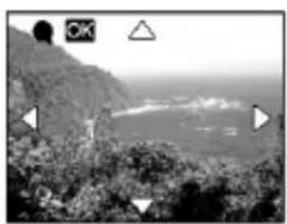
natural_image
Black-and-white landscape photo of a coastal hillside with a distant island and vegetation, no visible text or symbols.5. Settings
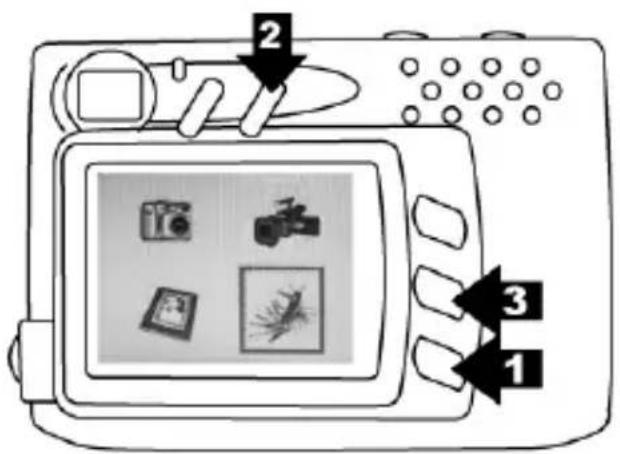
Press the Mode Button and press ▶ to select Setting Mode. Press Shutter/OK button for confirmation. To press the Mode Button again to return the Mode status.
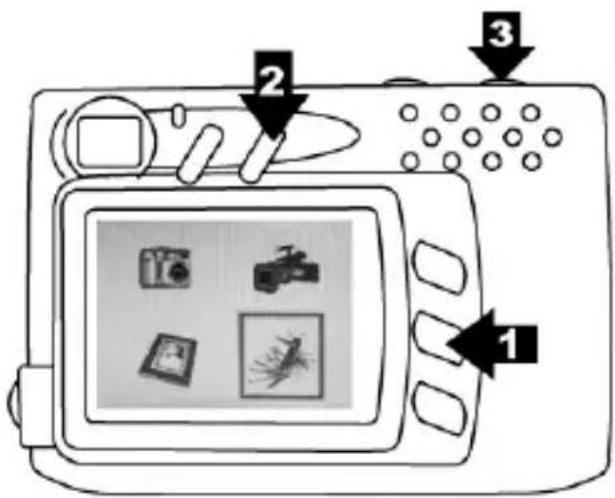
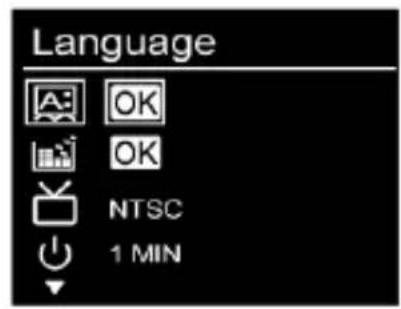
Language
- Under Setting Mode.
-
Press Shutter/OK Button.
-
Press ▼ to select English/ French/ German/ Spanish/ Dutch/ Italian/ Chinese languages you want to change, and press Shutter/OK Button to set, press Menu Button for exit.
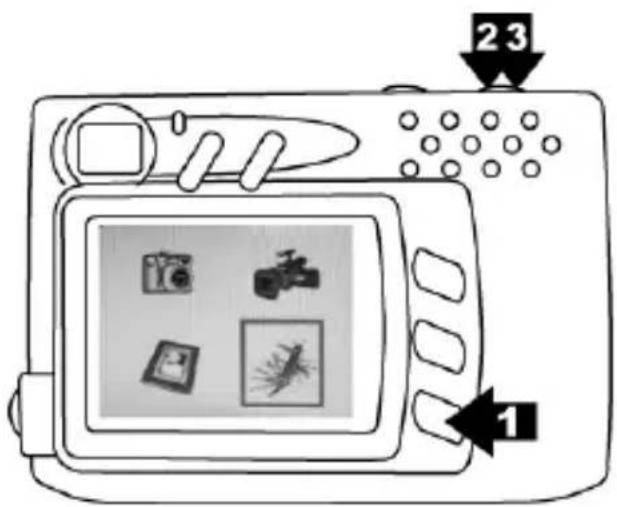
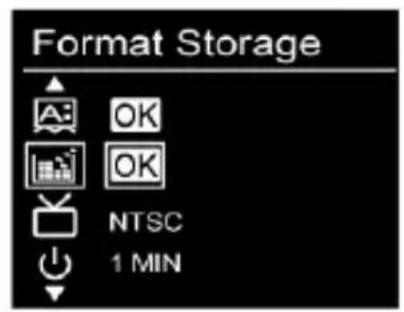
Format Storage
- Under Setting Mode.
- Press ▼ to select Format Storage Mode.
- Press Shutter/OK Button to format memory card, press Menu Button for exit.
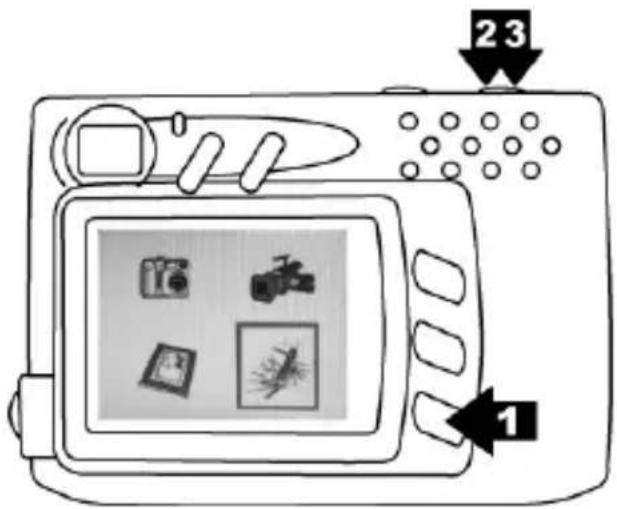
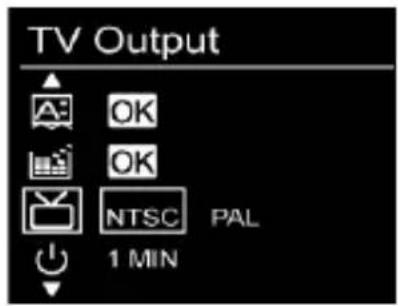
TV Output
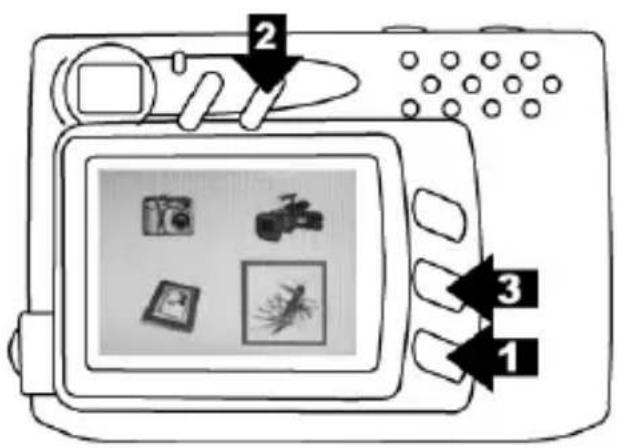
- Under Setting Mode.
- Press ▼ to select TV output Mode.
- Press ▶ to choose the NTSC/ PAL want to change, and then press Mode Button to return the Mode status.
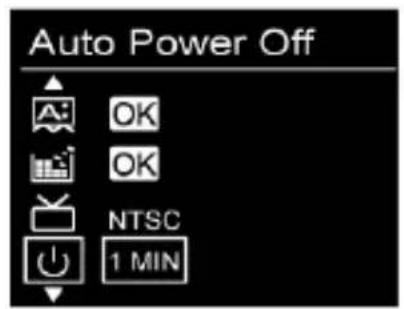
Auto Power Off
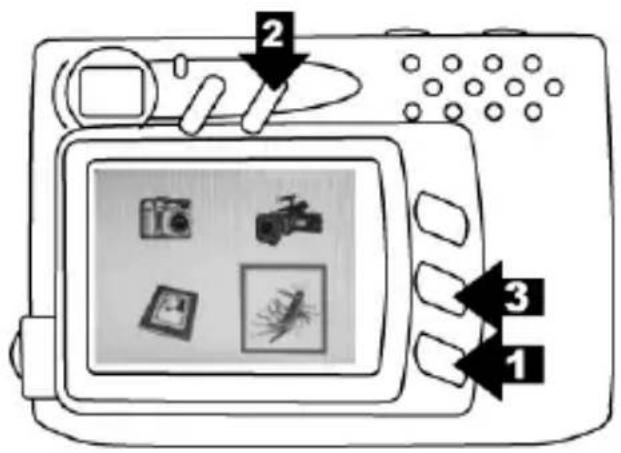
- Under Setting Mode.
- Press ▼ to select Auto Power Off Mode.
- Press ▶ to choose the 30 sec/ 1min/ 3min/ 5min you want to change, and then press Mode Button to return the Mode status.
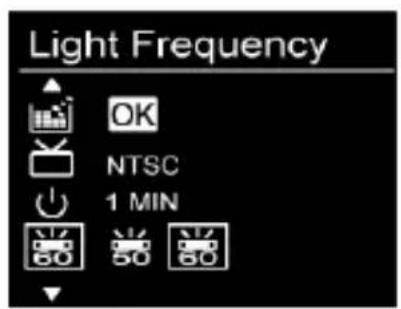
Light Frequency
- Under Setting Mode.
- Press ▼ to select Light Freq. mode.
- Press ▶ to choose the correct frequency- 50Hz/60Hz in your territory when you take picture indoors, and then press Mode Button to return the Mode status.
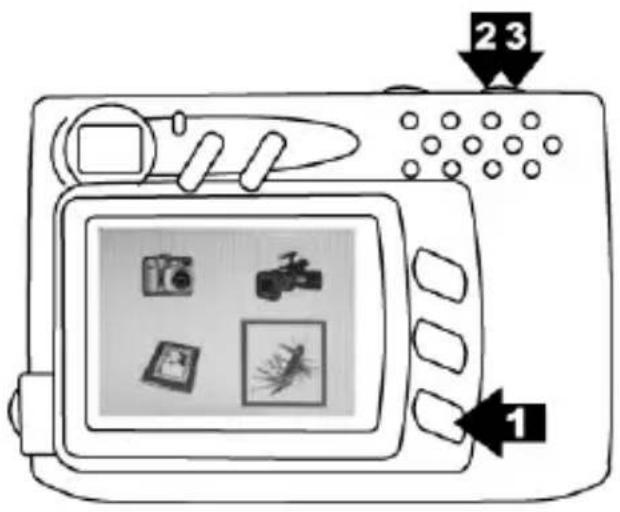
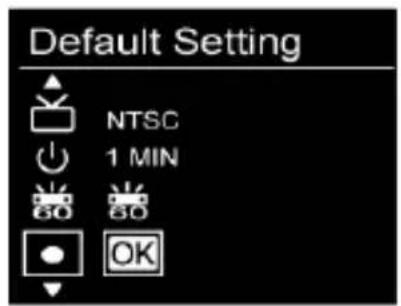
Default Setting
- Under Setting Mode.
- Press ▼ to select Default Setting Mode.
- Press Shutter/OK Button to restore default system setting, press Menu Button for exit.
System Information
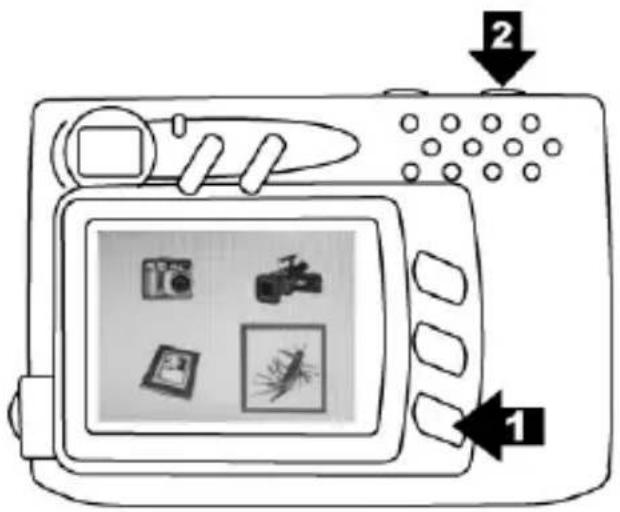
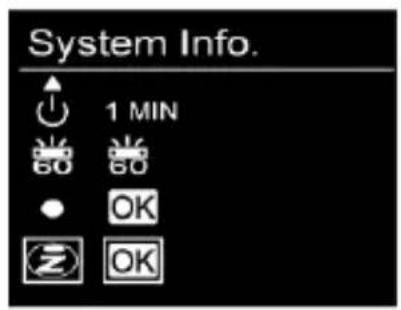
- Under Setting Mode.
- Press ▼ to select System Info. Mode.
- Press Shutter/OK Button to show firmware version for this camera, press Shutter/OK again to return setting mode.
6. Making Connection
Install PhotolImpression
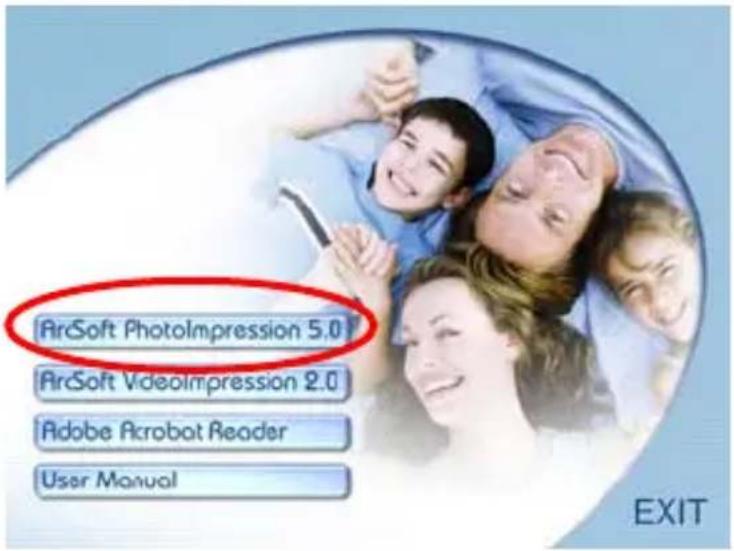
- Insert the installation CD into your PC's CD-ROM drive.
- The introduction screen will appear automatically.
- Click "ArcSoft PhotoImpression"
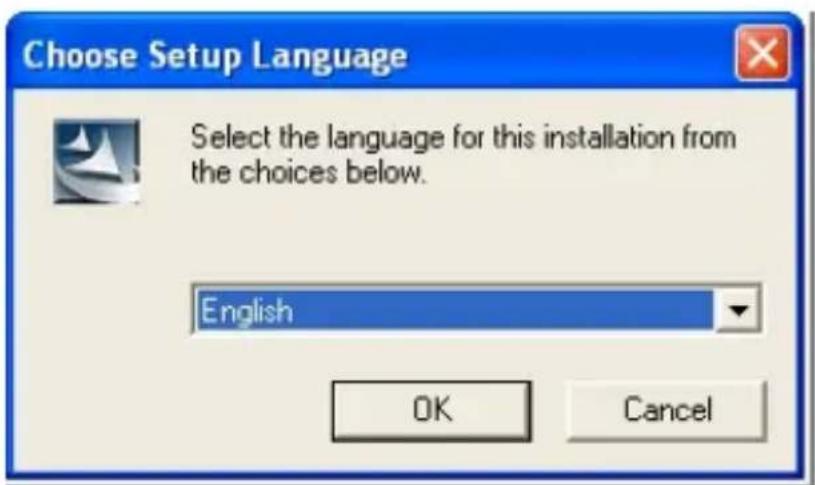
- Choose setup language
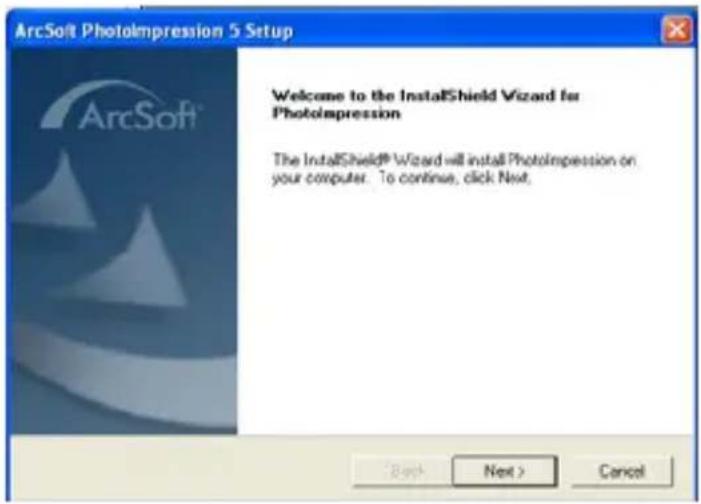
5. Click "NEXT"
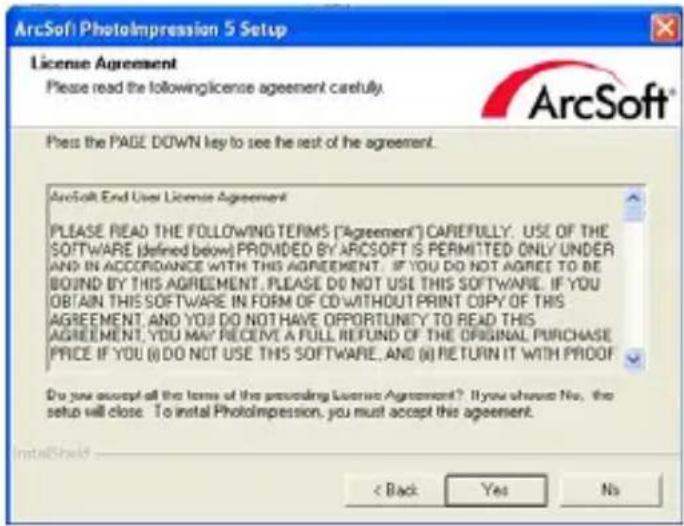
6. Click "YES"
7. Click "NEXT"
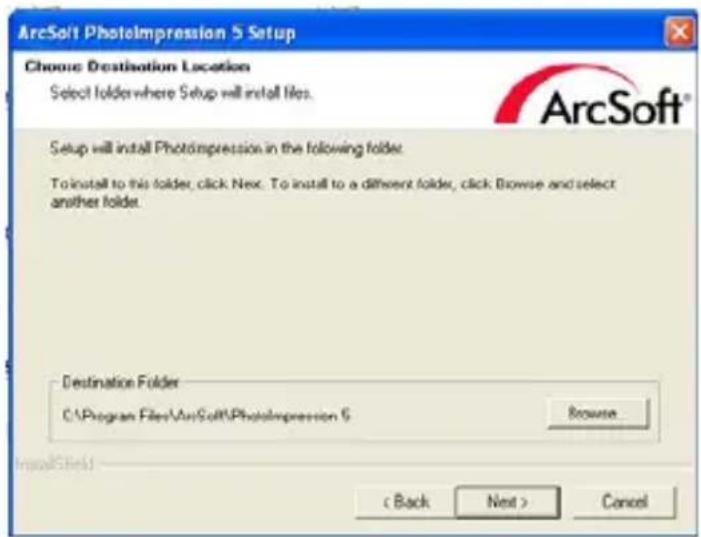
8. Click "NEXT"
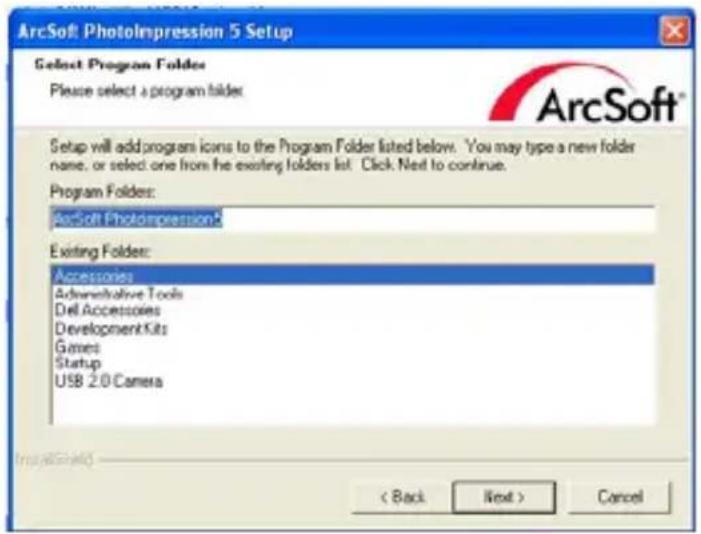
9. Click "Finish"
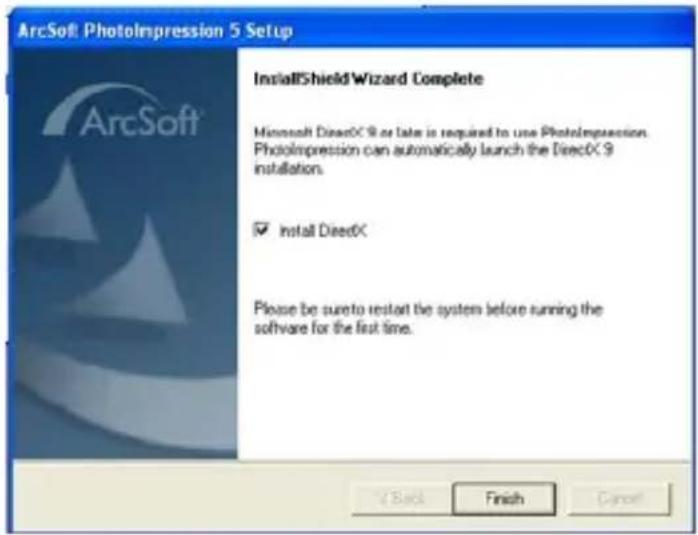
Note: To find out more about PhotoImpression5.0 or how to use it, consult online help by clicking " ? " icon on the top menu bar or website www.acrosoft.com
Install VideoImpression
- Insert the installation CD into your PC's CD-ROM drive.
- The introduction screen will appear automatically.
- Click "ArcSoft VideoImpression"
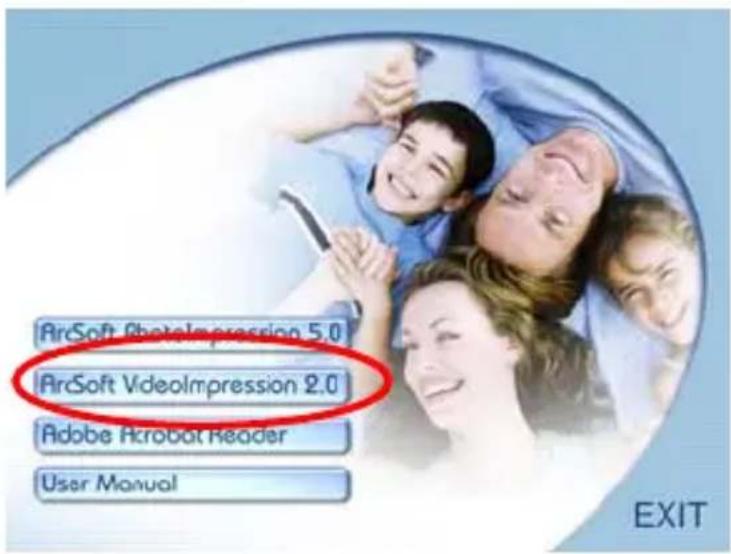
4. Choose setup language
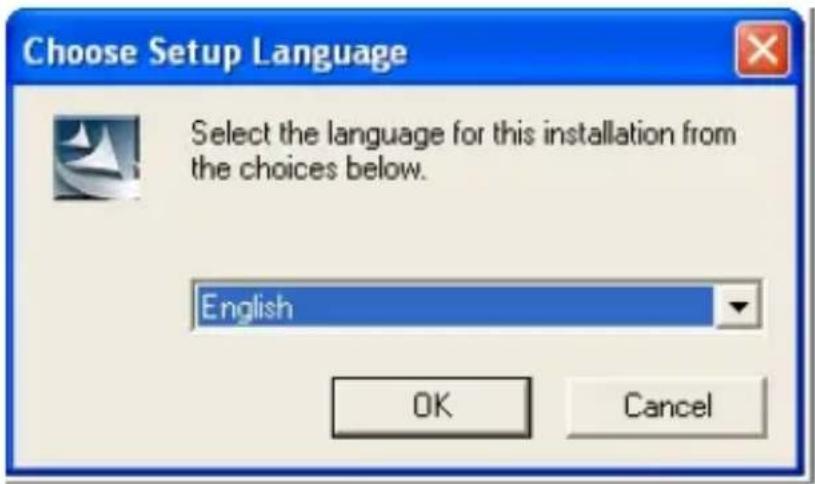
5. Click "NEXT"
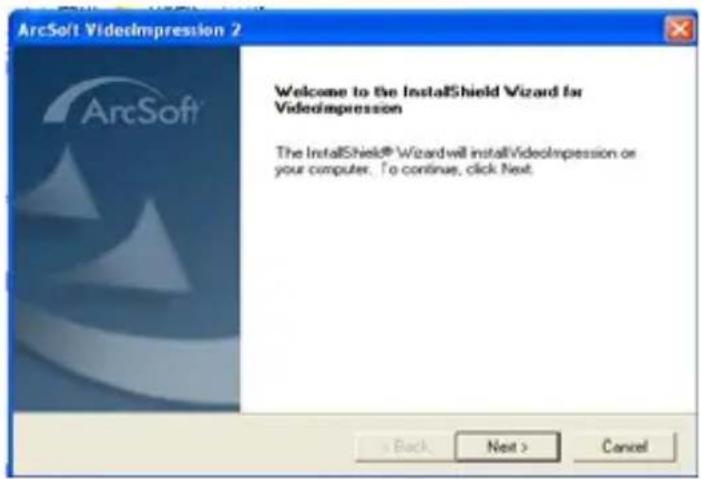
6. Click "YES"
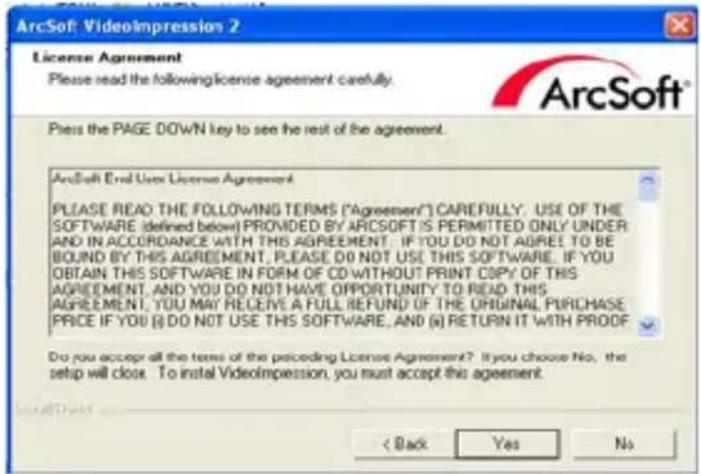
7. Click "NEXT"
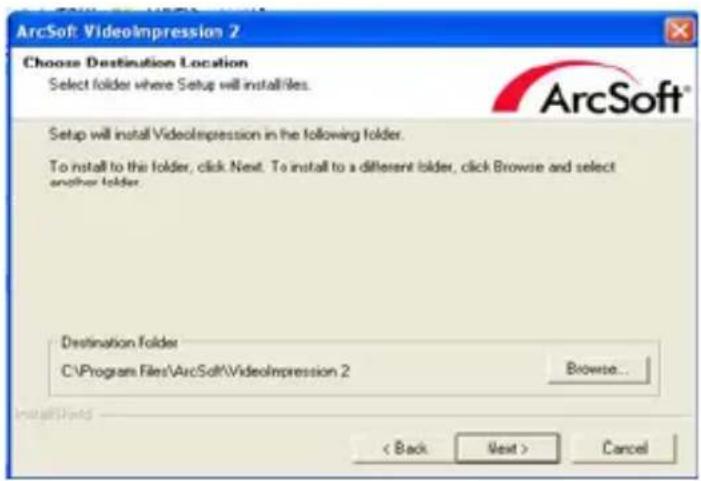
8. Click "NEXT"
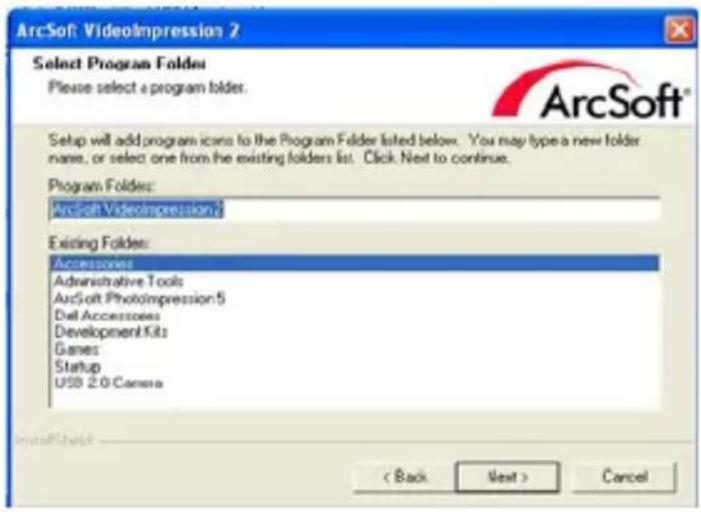
9. Click "Finish"
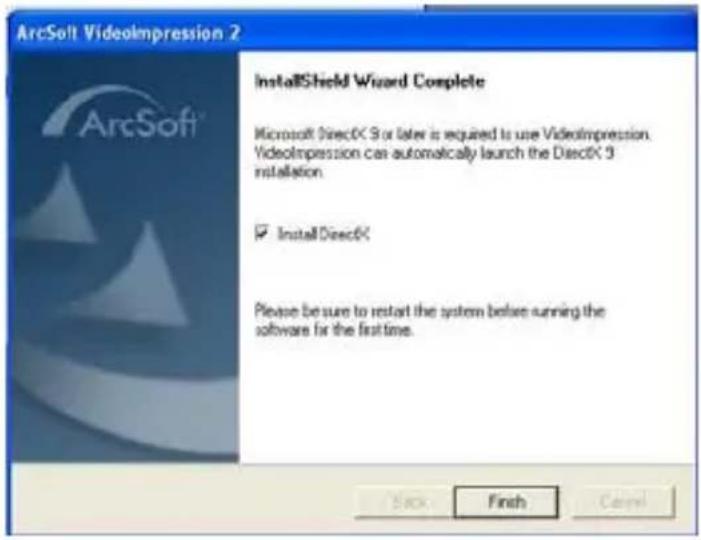
Note: To find out more about VideoImpression or how to use it, consult online help by clicking " ? " icon on the top menu bar or website www.acrosoft.com
Connecting to PC
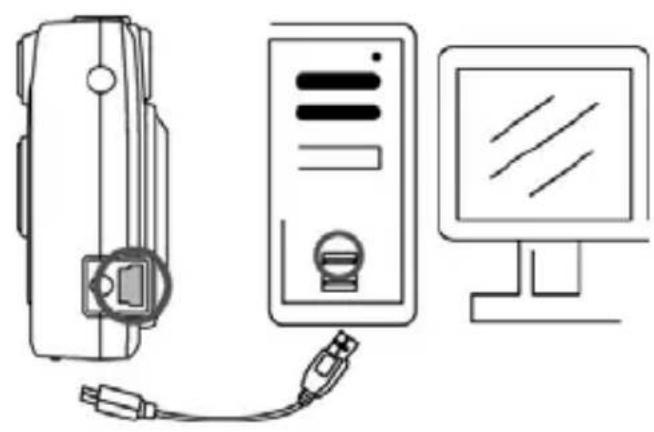
Window 2000/ XP/ Vista- No Driver Required:
- Power on the camera first.
- Plug the USB cable to the camera and computer or notebook properly.
natural_image
Line drawing of a device connected to a server and computer monitor (no text or symbols)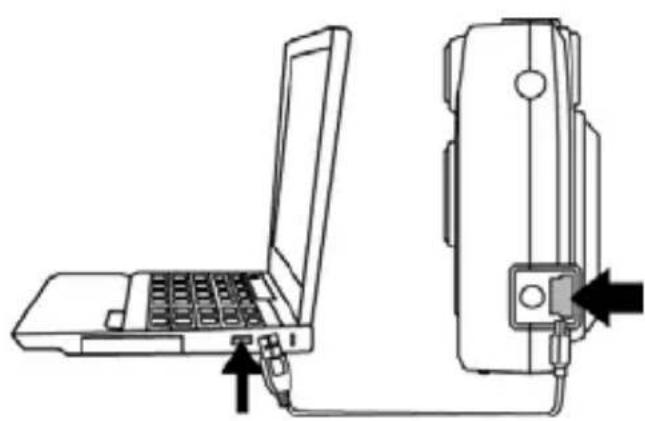
natural_image
Line drawing of a laptop connected to a device via cable, showing internal components and connection points (no text or symbols)Download Pictures, Videos
-
Power on the camera first and plug in USB cable
-
For Windows 2000:
Double click "My Computer" icon on the Windows Desktop.
For Windows XP/ Vista:
Select "Open Folder view files using Windows Explorer" and click "OK"
-
Double click on the DCIM folder to open.
-
Double click on the 100CRESI folder for pictures and movies.
-
You can copy the pictures and movies to your designated folder or album.
Connecting to TV for review
-
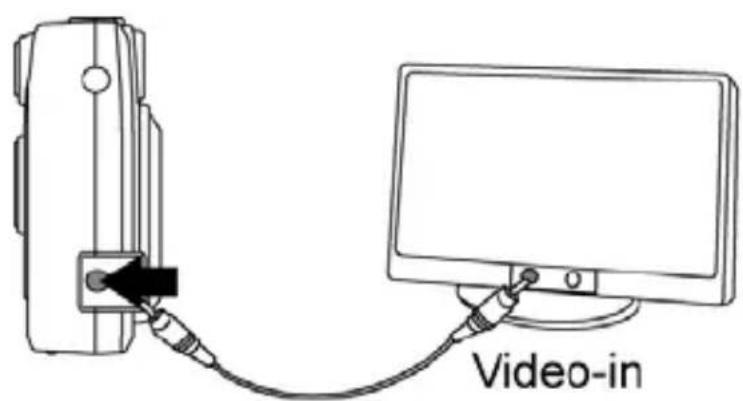
Before you connect to TV, please make sure the correct video signal standard (NTSC or PAL) first.
-
Plug the provided TV cable (the black end) into the AV port of camera and connect the yellow end into the video-in port of your TV.
-
Turn on the camera and TV.
7. Appendix
| Specifications | |
| Image Sensor CMOS 2048 x 1536 pixels | |
| Built-in Memory None | |
| External Memory SD card memory slot | |
| Lens Specification | F2.8, f=6.3mm |
| Lens Focus Fixed, | 1.5m (4.9 ft) to infinity |
| Flash Strobe Auto, | Force on, Flash off |
| Flash Distance Approx. 1.3m ~ 2.8m | |
| White Balance Auto, Sunny, Cloudy, Tungsten, Fluorescent | |
| Exposure | Auto, ±2.0 EV, 0.5 EV steps |
| Still Image Res. 12M(4032x3024) pixels by interpolation3 M (2048x1536) pixels1 M (1280x960) pixels | |
| Video Mode 640x480, 320x240 | |
| Compression | Still- JPEG/ Movie- AVI |
| Zoom | 4X digital zoom |
| Display | 1.5” TFT color display |
| PC Interface | USB 1.1 |
| O/S | Window 2000/ XP/ Vista |
| Power | 2X AAA batteries |
| Dimension | 88 x 60 x 20 mm |
| Weight | 80 g |
| Specifications are subject to change without prior notice. | |
Computer System Requirement
● Windows 2000/ XP/ Vista
● 266 MHz Pentium or better
● 32MB RAM
● 200MB available Hard Drive space
- CD-ROM or DVD Drive
- Color monitor
● Available USB port
Icons & Indicators
 | SD card Indicator Sh |  g g | Hand |
 | Battery Full Auto W |  Balance Balance | |
 | Battery 2/3 Sunny |  | |
 | Battery 1/3 Cloudy |  | |
 | Battery Empty Tung |  | |
 | Still Mode Fluoresce |  | |
 | Video Mode Delete |  | |
 | Still Resolution Dele |  | |
 | Video Resolution Bu |  | |
 | Auto Flash Protect |  | |
 | Force On Print |  | |
 | Flash Off Slide Show |  | |
 | Exposure |  | Zoom |
 | Self-timer Zoom |  |
In
Standard number of available pictures/ recording time reference table
The number of available pictures/ recording time depending on the subjects photographed.
Still Image
| RES. Size | # of Available Shots | ||||
| SD card | |||||
| 16MB | 256MB | 512MB | 1G | 2G | |
| 1M | 40 | 726 | 1464 | 2890 | |
| 3M | 15 | 283 | 571 | 1128 | 2258 |
| 12M | 4 | 73 | 147 | 293 | |
Movie
| RES. Size | # of Available Recording Time | ||||
| SD card | |||||
| 16MB | 256MB | 512MB | 1G | 2G | |
| 320x240 | 00:01:11 | 00:20:47 | 00:41:52 | 01:22:35 | 02:45:15 |
| 640x480 | 00:00:35 | 00:10:23 | 00:20:56 | 00:41:17 | 01:22:37 |

- USER MANUAL
- Table of Contents
- Appendix.... 38
- Welcome
- Camera Precaution
- FCC Notice
- CAUTION
- Preparation
- Standard Accessories
- Part Names
- Front View
- Battery Installation
- Battery Power Status
- Loading SD Card
- When the optional SD card is installed:
- Attaching the Strap
- Quick Start
- Powering the camera ON/ OFF
- Power ON
- Power OFF
- Taking Picture
- Holding the camera correctly
- Capturing Still Images
- Recording Video Clips
- Basic Shooting Functions
- Using the Zoom
- Flash Setting
- Advance Mode
- Still Mode
- Picture Quality
- Exposure Value
- White Balance
- Burst Snapshot
- Self-timer
- Video Mode
- Video Resolution
- Playback Mode
- Pictures/ Video Clips Playback
- Single Video Clip Playback
- Thumbnail
- Slide Show
- Delete Current Picture or Video Clip
- Delete All
- Protect
- Playback Zooming
- Settings
- Language
- Format Storage
- TV Output
- Auto Power Off
- Light Frequency
- Default Setting
- System Information
- Making Connection
- Install PhotolImpression
- Click "NEXT"
- Click "YES"
- Click "NEXT"
- Click "NEXT"
- Click "Finish"
- Install VideoImpression
- Choose setup language
- Connecting to PC
- Download Pictures, Videos
- For Windows XP/ Vista:
- Connecting to TV for review
- Appendix
- Computer System Requirement
- Icons & Indicators
- Standard number of available pictures/ recording time reference table
Brand : EASYPIX
Model : S120
Category : Camera