
DMR-E20 - DVD Recorder PANASONIC - Free user manual and instructions
Find the device manual for free DMR-E20 PANASONIC in PDF.


| Product Type | DVD Recorder |
| Brand | Panasonic |
| Model | DMR-E20 |
| Dimensions (W x D x H) | 430 x 280 x 55 mm |
| Weight | 3.5 kg |
| Power Consumption | 30 W (standby: 0.5 W) |
| Power Supply | AC 220-240 V, 50/60 Hz |
| Disc Compatibility | DVD-R, DVD-RW, DVD+R, DVD+RW, DVD-RAM, CD-R, CD-RW |
| Recording Formats | DVD-Video, VR mode |
| Recording Modes | XP, SP, LP, EP |
| Video Inputs | Composite (RCA), S-Video |
| Video Outputs | Composite (RCA), S-Video, Component (Y/Pb/Pr) |
| Audio Inputs/Outputs | Analog stereo RCA, Optical digital output |
| Tuner | Analog TV tuner (PAL/NTSC) |
| Timer Recording | Up to 8 programs up to 1 month in advance |
| Playback Compatibility | DVD-Video, DVD-R/RW, DVD+R/RW, CD, CD-R/RW, MP3, JPEG |
| Progressive Scan | Yes (via component output) |
| Remote Control | Included (with batteries) |
| Manual | Available for download at notice-facile.com |
Frequently Asked Questions - DMR-E20 PANASONIC
User questions about DMR-E20 PANASONIC
0 question about this device. Answer the ones you know or ask your own.
Ask a new question about this device
Download the instructions for your DVD Recorder in PDF format for free! Find your manual DMR-E20 - PANASONIC and take your electronic device back in hand. On this page are published all the documents necessary for the use of your device. DMR-E20 by PANASONIC.
USER MANUAL DMR-E20 PANASONIC
natural_image
Front view of a CD or DVD drive unit with buttons and front panel (no visible text or labels)Panasonic
DVD Video Recorder Grabadora de DVD vídeo
Operating Instructions
natural_image
Abstract 3D illustration of metallic spheres floating on a grid-like surface, no text or symbols present
VIDEO RAM

DIGITAL VIDEO
SHOWVIEW
G-CODE
G-CODE®

Before connecting, operating or adjusting this product, please read these instructions completely.
Please keep this manual for future reference.
THIS PRODUCT UTILIZES A LASER.
USE OF CONTROLS OR ADJUSTMENTS OR PERFORMANCE OF PROCEDURES OTHER THAN THOSE SPECIFIED HEREIN MAY RESULT IN HAZARDOUS RADIATION EXPOSURE.
DO NOT OPEN COVERS AND DO NOT REPAIR YOURSELF. REFER SERVICING TO QUALIFIED PERSONNEL.
WARNING:
TO REDUCE THE RISK OF FIRE, ELECTRIC SHOCK OR PRODUCT DAMAGE, DO NOT EXPOSE THIS APPARATUS TO RAIN, MOISTURE, DRIPPING OR SPLASHING AND THAT NO OBJECTS FILLED WITH LIQUIDS, SUCH AS VASES, SHALL BE PLACED ON THE APPARATUS.
NORSK
ADVARSEL!
DETTE PRODUKTET ANVENDER EN LASER. BETJENING AV KONTROLLER, JUSTERINGER ELLER ANDRE INNGREP ENN DE SOM ER BESKREVENT I DENNE BRUKSANVISNING, KAN Føre TIL FARLIG BESTRÅLING. DEKSLER MÅ IKKE ÅPNES, OG FORSOK ALDRI Å REPARERE APPARATET PÅ EGENHÅND. ALT SERVICE OG REPARASJONSARBEID MÅ UTFÖRES AV KVALIFISERT PERSONELL.
ADVARSEL:
FOR Å REDUSERE FAREN FOR BRANN, ELEKTRISK ST∅T ELLER SKADER PÅ PRODUKTET, MÅ DETTE APPARATET IKKE UTSETTES FOR REGN, FUKTIGHET, VANDRÅPER ELLER VANNSPRUT. DET MÅ HELLER IKKE PLASSERES GJENSTANDER FYLT MED VANN, SLIK SOM BLOMSTERVASER, OPPÅ APPARATET.
SUOMI
VAROITUS!
LAITTEEN KÄYTTÄMINEN MUULLA KUIN TÄSSÄ KÄYTTÖOHJEESSA MAINITULLA TAVALLA SAATTAA ALTISTAA KÄYTTÄJÄN TURVALLISUUSLUOKAN 1 YLITTÄVÄLLE NÄKYMÄTTÖMÄLLE LASERSÄTEILYLLE.
VAROITUS:
TULIPALO-, SÄHKÖISKUVAARAN TAI TUOTETTA KOHTAAVAN MUUN VAHINGON VÄHENTÄMISEKSI EI LAITETTA SAA ALTISTAA SATEELLE, KOSTEUDELLE, VESIPISAROILLE TAI ROISKEELLE, EIKÄ NESTETTÄ SISÄLTÄVIÄ ESINEITÄ, KUTEN ESIMERKIKSI MALJAKOITA, SAA ASETTAA LAITTEEN PÄÄLLE.
As this equipment gets hot during use, operate it in a well ventilated place;
do not install this equipment in a confined space such as a book case or similar unit.
Important
Your attention is drawn to the fact that the recording of pre-recorded tapes or discs or other published or broadcast material may infringe copyright laws.
Warning
To reduce the risk of fire or shock hazard, do not expose this equipment to rain or moisture.
For your safety
Do not remove outer cover.
Touching internal parts of the unit is dangerous, and may seriously damage it.
To prevent electric shock, do not remove cover. There are no user serviceable parts inside. Refer all servicing to qualified service personnel.
Conserve the environment
See "Power Save" of page 84.
Disposal of old equipment
Batteries, packaging and old equipment should not be disposed of as domestic waste, but in accordance with the applicable regulations.

Cautions before you operate this unit
Avoid:
● Humidity and dust.
●Extreme heat such as direct sunlight.
●Magnets or electromagnetic objects.
- Touching internal parts of the unit.
●Water or some other liquid.
●Lightning. (Disconnect the aerial plug from the unit during lightning storms.)
●Anything heavy on the unit.
- Connecting or handling the equipment with wet hands.
- Using a cell phone near the unit because doing so may cause noise to adversely affect the picture and sound.
Do:
●Wipe the unit with a clean and dry cloth.
- Install the unit in a horizontal position.
- Keep the unit, TV and other equipment switched off until you have finished all connections.
SHOWVIEW is a trademark of Gemstar Development Corporation and is registered in the following countries: Austria, Belgium, Czech Republic, Denmark, Finland, France, Germany, Greece, Hungary, Iceland, Italy, Luxembourg, Netherlands, Norway, Poland, Portugal, Russia, Slovakia, South Africa, Spain, Sweden and Switzerland. The SHOWVIEW system is manufactured under licence from Gemstar Development Corporation.
G-CODE is a registered trademark of Gemstar Development Corporation. The G-CODE system is manufactured under licence from Gemstar Development Corporation.
G-CODE is a trademark of Gemstar Development Corporation and is registered in the following countries: Australia, China, Hong Kong Special Administrative Region of China, Japan, South Korea, New Zealand and Taiwan. The G-CODE system is manufactured under licence from Gemstar Development Corporation.
G-CODE and SHOWVIEW are different trademarks used to represent the same easy recording feature. However, for simplicity, only the term G-CODE will be used. If you use SHOWVIEW system, follow the same steps listed for the G-CODE system.
“i.LINK” is the name of the connector in accordance with the IEEE1394-1995.
“i” is the logo marked on products conforming with the “i.LINK” specifications.
- You cannot control this unit from the digital video equipment even if using the DV cable.
Notes on these instructions
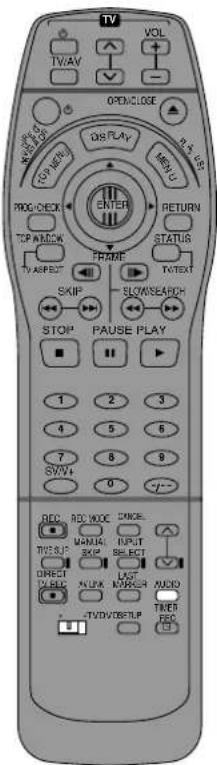
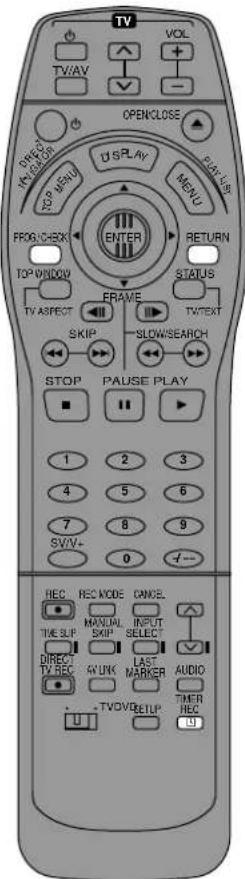
These operating instructions describe operations mainly using the remote control. If the name of the button is the same, the operation described can also be performed with the main unit.
The contents of the screens used in these instructions may not necessarily match what you will see on your screen.
Displays
The displays shown in these instructions are examples only. Actual displays depends on the disc being played.
Manufactured under license from Dolby Laboratories.
"Dolby", "Pro Logic" and the double-D symbol are trademarks of Dolby Laboratories.
"DTS", "DTS Digital Surround" and "DTS Digital Out" are registered trademarks of Digital Theater Systems, Inc.
Standard Accessories
1 pc. RF Coaxial cable
1 pc. Remote Control
(N2QAKB000011 for Continental Europe)
(N2QAKB000013 for Asia, Australia and New Zealand)
2 pcs. R6 size batteries
1 pc. AC mains lead
1 pc. Audio/Video cable
Contents
Warning and Important Information.... 2
Contents 3
The remote control 4
Batteries A 4
Use B 4
Television operation....5
Discs 6
Discs you can use....6
Discs you can use for recording and play.... 6
Play-only discs....6
Discs that cannot be played....7
Audio format logos....7
Types of disc for the type of connected TV 7
Control reference guide 8
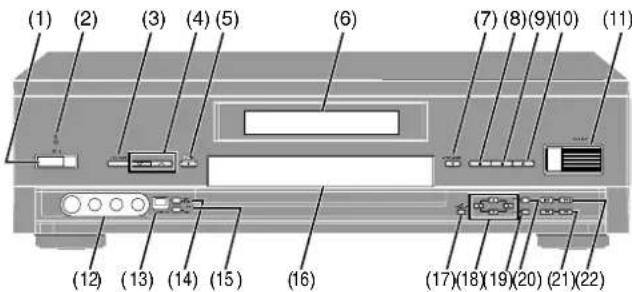
Main unit 8
Remote control 8
The unit's display 9
Connecting and Setting up 10
Preset Download (To Simultaneously set up this unit with a new television) ..... 11
Preset Download (To set up this unit with a television in use)....11
Auto Setup 13
Selecting TV screen type 14
Playing discs.... 15
Starting play from where you stopped it (Resume Function)..... 16
Fast forward and rewind—SEARCH.... 17
Slow-motion play 17
Frame-by-frame viewing 17
Skipping....18
Starting play from a selected programme, title, chapter or track 18
Manual Skip 19
Selecting an amount of time to skip—Time Slip 19
Changing audio....20
Programme play 2
Random play....22
Recording television programmes.... 23
Playing while you are recording.... 26
Playing from the beginning of the programme you are recording—Follow-on play A 26
Simultaneous recording and play B 26
Checking the recording during recording (TIME SLIP) A ...... 27
Watching the television while recording.... 27
Using the top window.... 28
About the top window 28
Using the top window.... 28
Timer recording 30
Manual programming.... 33
To check programmes 35
Starting and canceling programmes.... 35
Recording from a video cassette player.... 36
Entering titles.... 38
DISC INFORMATION.... 39
Enter Title 39
Disc Protection.... 40
Releasing disc protection.... 41
Format 42
Finalize—Creating DVD-Video 43
Using the direct navigator 44
Selecting programmes to play 44
Erasing programmes 46
Entering and editing programme titles 47
Checking programme contents.... 48
Protecting programmes 49
Releasing programme protection....50
Erasing parts of a programme 51
Using play lists to edit programmes.... 53
Displaying play lists 53
Creating play lists....54
Playing play lists....55
Playing play list scenes 56
Adding scenes to a play list.... 56
Moving a scene.... 57
To re-edit a play list scene 58
Erasing a scene from a play list ....58
Copying play lists ....59
Erasing a play list 60
Titling play lists....61
Checking play list's contents 61
Using on-screen menu icons ....62
Common procedures....62
Icons for disc information 63
Icons for unit information.... 64
Repeat play A 65
A-B repeat play B 65
Enjoying virtual surround sound effects (V.S.S.) 65
Marking places to play again—MARKER.... 66
Auto recording from Digital Video (DV) equipment 67
Child Lock....68
To activate the child lock.... 68
To cancel the child lock....68
Upgrading your system 68
Enjoying more powerful sound.... 68
Connecting a digital amplifier or system component A....69
Connecting an analog amplifier or system component B ...... 69
Connecting a Decoder C 70
Connecting a satellite receiver or digital receiver D 70
Connecting a video cassette recorder E....71
Changing the unit's settings.... 72
Common procedures....72
Summary of settings 73
Entering a password 76
Digital output 76
Off Timer Setting 77
Remote Setting 78
Operating other Panasonic DVD equipment with the remote control 78
Clock Settings 79
Channel Settings....81
Power Save Setting....84
Language Settings 85
Country Settings....85
Re-initialize Setting 85
On-screen displays....86
Changing the information displayed....86
Display examples 86
Maintenance and Handling....87
Maintenance....87
Disc handling....87
Glossary....87
Self-diagnosis....90
Error displays 91
Troubleshooting guide 92
Specifications....95
Index....96
A
(1)
B
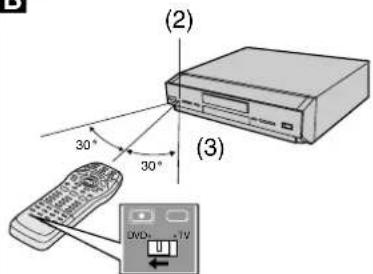
(4)
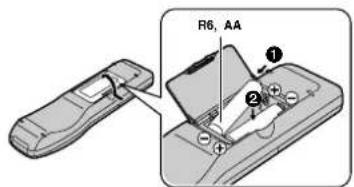
(1) Push in and down on the (-) end.
(2) Remote control signal sensor
(3) 7 m
(4) Switch [DVD, TV] to "DVD".
Batteries A
- Insert so the poles (+ and -) match those in the remote control.
- Do not use rechargeable type batteries.
Do not;
- mix old and new batteries.
- use different types at the same time.
- heat or expose to flame.
●take apart or short circuit. - attempt to recharge alkaline or manganese batteries.
- use batteries if the covering has been peeled off.
Mishandling of batteries can cause electrolyte leakage which can damage items the fluid contacts and may cause a fire.
If electrolyte leaks from the batteries, consult your dealer.
Wash thoroughly with water if electrolyte comes in contact with any part of your body.
Remove if the remote control is not going to be used for a long period of time. Store in a cool, dark place.
Replace if the unit does not respond to the remote control even when held close to the front panel.
Use B
Aim at the sensor, avoiding obstacles, at a maximum range of 7 m directly in front of the unit.
- Keep the transmission window and the unit's sensor free from dust.
- Operation can be affected by strong light sources, such as direct sunlight, and the glass doors on cabinets.
Do not;
- put heavy objects on the remote control.
●take the remote control apart.
● spill liquids onto the remote control.

LUOKAN 1 LASERLAITE KLASS 1 LASER APPARAT
natural_image
Line drawing of a portable electronic device with fan, ports, and antenna (no text or symbols)Inside of unit
Do not disassemble.
Do not service.
Ne Pas Démonter.
Television operation
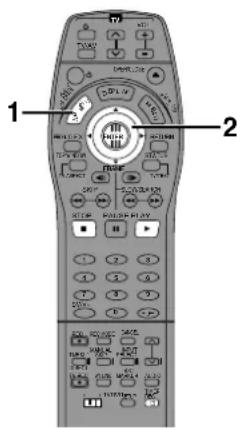
You can control televisions by changing the remote control code.
Preparation
- Turn on the television.
- Switch [DVD, TV] to "TV".
1 Refer to the chart below for the code for your television.
2 Press and hold [TV, ⏻] and enter the two-digit code with the numeric buttons.
- For example: 01, press [0]→[1].
●After entering the code, test the remote control by turning on the television and changing channels.
Note
- If there is more than one code, repeat the procedure until you find the code that allows correct operation.
- Repeat this procedure after you change the batteries.
- If your television brand is not listed or if the code listed for your television does not allow control of your television, this remote is not compatible with your television.
List of TVs Compatible with the unit's Remote Control
| Brand: Code | Brand: Code | ||
| Panasonic 01, 02, 03, 04 | NOKIA | 25, 26, 27 | |
| AIWA 35 | NORDMENDE | 10 | |
| AKAI 27, 30 | ORION | 37 | |
| BLAUPUNKT 09 | PHILIPS | 05, 06 | |
| BRANDT 10, 15 | PHONOLA | 31, 33 | |
| BUSH 05, 06 | PIONEER | 38 | |
| CURTIS 31 | PYE | 05, 06 | |
| DESMET 05, 31, 33 | RADIOLA | 05, 06 | |
| DUAL 05, 06 | SABA | 10 | |
| ELEMIS 31 | SALORA | 26 | |
| FERGUSON 10 | SAMSUNG | 31, 32 | |
| GOLDSTAR/LG | SANSUI 05, 31, 33 | ||
| 31 | SANYO | 21 | |
| GOODMANS 05, 06, 31 | SBR | 06 | |
| GRUNDIG 09 | SCHNEIDER 05, 06, 29, 30, 31 | ||
| HITACHI 22, 23, 31, 40, 41, 42 | SELECO | 06, 25 | |
| INNO HIT | 34 | SHARP | 18 |
| IRRADIO 30 | SIEMENS | 09 | |
| ITT | 25 | SINU DYNE | 05, 06, 33 |
| JVC | 17, 39 | SONY | 08 |
| LOEWE | 07 | TELEFUNKEN | 10, 11, 12, 13, 14 |
| METZ | 28, 31 | THOMSON | 10, 15 |
| MITSUBISHI | 06, 19, 20 | TOSHIBA | 16 |
| MIVAR | 24 | WHITE WESTINGHOUSE | |
| NEC | 36 | 05, 06 | |
Operation: Button
On and off: [TV, ⏻]
Video input mode: [TV, TV/AV]
Channels: [TV, ∧, ∨]
Volume: [TV, VOL, +, -]
Numeric: [0-9, -]
TV aspect: [TV ASPECT]
TV/Teletext mode: [TV/TEXT]
Teletext: Colour buttons
Discs you can use
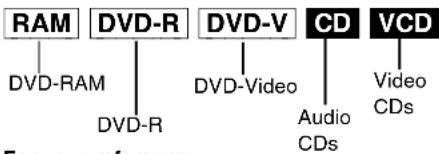
The features you can use with the different types of discs are indicated as follows.
flowchart
graph TD
    A["RAM"] --> B["DVD-R"]
    B --> C["DVD-R"]
    D["DVD-R"] --> E["DVD-V"]
    E --> F["CD"]
    F --> G["Video CDs"]
    F --> H["Audio CDs"]
For your reference
- DVD-R indicates DVD-R that have not yet been finalized (page 43) and can still be recorded on.
- DVD-R that have been finalized can use the same features as DVD-Video. (Refer to features indicated [DVD-V].)
Discs you can use for recording and play Logos for the discs you can record on and play
| Disc type | Logo Regulation Indication used | in instructions | |
| DVD-RAM |  | [4.7 GB / 9.4 GB, 5" (12 cm)] [2.8 GB 3" (8 cm)] | RAM |
| DVD-R |  | 4.7 GB for General Ver.2.0 | DVD-R |
The manufacturer accepts no responsibility and offers no compensation for loss of recorded or edited material due to a problem with the unit or disc, and accepts no responsibility and offers no compensation for any subsequent damage caused by such loss.
Examples of causes of such losses are
(1) A disc recorded and edited with this unit is played in a DVD recorder or computer disc drive manufactured by another company.
(2) A disc used as described in 1) and then played again in this unit.
(3) A disc recorded and edited with a DVD recorder or computer disc drive manufactured by another company is played in this unit.
Note
- Do not allow the disc to become dirty or scratched. Fingerprints, dirt, dust, and scratches on the recording surface may make it impossible to use the disc for recording.
- If you use DVD-RAM cartridges, you can protect your recordings with the write protected tab (page 91). With the tab in this position, you cannot record to the disc, delete programmes with the direct navigator, edit with the play list screen, or format the disc.
- This unit is compatible with both non-cartridge and cartridge DVD-RAM, but cartridge-type discs give better protection to your valuable recordings.
For your reference
- DVD-RAM recorded on this unit cannot be played on incompatible players (including players manufactured by Panasonic).
- Using a Panasonic DVD-RAM, you can record broadcasts that allow you to make one copy, such as some satellite broadcasts.
- This unit cannot record PAL signals to discs containing NTSC signals or vice versa.
- This unit cannot record to discs containing both PAL and NTSC signals. Play of discs recorded with both PAL and NTSC on another unit is not guaranteed.
Play-only discs
Discs you can play-only and their logos
| Disc type | Logo Video system Indication used in instructions | |
| DVD-Video |   | PAL / NTSC DVD-V |
| Audio CD |  | - CD |
| Video CD |  | PAL / NTSC VCD |
Region Management Information (DVD-Video only)
Region number are allocated to DVD players and software according to where they are sold.
- For Continental Europe : "2"
- For Asia : "3"
- For Australia and N.Z.: "4"
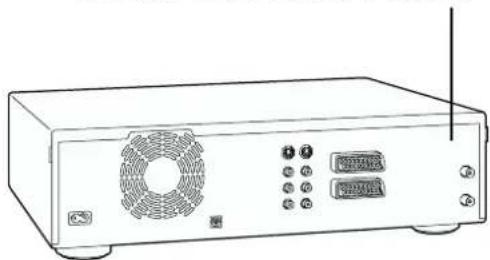
DVD-Video can be played on this unit if their region number is the same or includes the same number, or if the DVD is marked "ALL". Confirm the region number for this unit before choosing discs. The number for this unit is indicated on the rear panel of the unit.
Playing CD-R and CD-RW
This unit can play CD-DA (digital audio) and Video CD format audio CD-R and CD-RW that have been finalized upon completion of recording. It may not be able to play some CD-R or CD-RW due to the condition of the recording.


Note
- The producer of the material can control how these discs are played. This means that you may not be able to control play of a disc with some operations described in these operating instructions. Read the disc's instructions carefully.
Discs that cannot be played
- DVD-Video with a region number other than the number for this unit or "All"
- Some DVD-R
●DVD-RAM (2.6 GB/5.2 GB)
•DVD-ROM
• DVD-RW
• DVD-Audio
• + RW - CD-ROM
•CDV - CD-G
•CVD
•SVCD
•SACD - MV-Disc
• PD - Photo CD
•Divx Video Disc, etc.Discs - Play of non-standard Video CDs and Super Video CDs is not guaranteed.
DVD-R
You can play DVD-R on compatible DVD players by finalizing [the process that allows recordings on DVD-R to be played on compatible DVD players, (page 43)] them on this unit, effectively making them into DVD-Video.
Before finalizing
You can record onto the available space on the disc and perform editing functions, such as giving titles to discs and programs and erasing programmes.
You cannot record to or edit DVD-R with this unit if it was recorded with another unit, whether it is finalized or not.
You cannot record over parts that have been recorded.
Erasing programmes will not increase the discís available time.
■After finalizing
The video and audio is recorded according to the DVD-Video specifications, and your very own DVD-Video is created.
●The titles you entered with this unit appear as menus.
- Programmes longer than 5 minutes are divided into five-minute chapters.
●These DVD-R can no longer be recorded on or edited. - These DVD-R can be played on other DVD players, but this is not guaranteed.
Play may not be possible due to the player you are using, the DVD-R, or the condition of the recording. Use this unit to play the disc if the player is unable.
Visit Panasonic's homepage for more information about DVDs. http://www.matsushita-europe.com/ (For Continental Europe) http://www.panasonic.com.au/dvd_rec (For Australia)
For your reference
- It takes about 30 seconds for the unit to complete recording management information after recording finishes.
- To record on DVD-R, this unit optimizes the disc for each recording. Optimizing is carried out when you start recording after inserting the disc or turning the unit on. Recording may become impossible after the disc is optimized more than 50 times.
- The first 30 seconds of a programme may not be recorded if you make successive timer recordings.
- The video is recorded in a 4:3 aspect irrespective of the video signal input. Use the television's screen modes to change the screen size for play.
- Some broadcasts carry signals that allow you to make one copy, but you cannot record these broadcast with DVD-R. Use DVD-RAM to record these kinds of broadcast.
- Play may be impossible in some cases due the condition of the recording.
- We recommend using DVD-R manufactured by Panasonic as they have been tested to be compatible with this unit.
- You cannot change audio type if a DVD-R is in the unit. Select the audio type (M1 or M2) before recording by going to "Bilingual
Selection for DVD-R" in the "Sound" menu.
For details about the kind of audio recorded when using DVD-R and recording from DV equipment, see page 37.
Audio format logos

Dolby Digital (pages 68 and 87)
This unit can play Dolby Digital in stereo (2 channels). Connect an amplifier with a built-in Dolby Digital decoder to enjoy surround sound.

DTS Digital Surround (pages 68 and 87)
Connect this unit to equipment that has a DTS decoder to enjoy DVDs with this mark.
Types of disc for the type of connected TV
When you use the discs recorded either PAL or NTSC, refer to this table.
| TV type Disc | Yes/No | |
| Multi-system TV | PAL Yes | |
| NTSC Yes | ||
| NTSC TV | PAL No | |
| NTSC Yes* | 1 | |
| PAL TV | PAL Yes | |
| NTSC Yes* | 2 |
*1 If you select "NTSC" in "NTSC Signal Output" (page 75), the picture may be clearer.
*2 If you select "PAL 60" in "NTSC Signal Output" (page 75), the picture may be clearer.
If your television is not equipped to handle PAL 525/60 signals the picture will not be shown correctly.
Discs and accessories
•DVD-RAM
You can also record signals which allow you to make one copy, onto these discs.
9.4-GB, double-sided, type 4 cartridge: LM-AD240E
4.7-GB, single-sided, type 2 cartridge: LM-AB120E
(set of 3, LM-AB120E3)
4.7-GB, single-sided, non-cartridge: LM-AF120E
(set of 3, LM-AF120Q3)
(For Asia, Australia and New Ze
•DVD-R
4.7-GB, single-sided, non-cartridge: LM-RF120E
●DVD-RAM/PD Disc cleaner: FLF-K200DCA1
•DVD-RAM/PD Lens cleaner: FLF-K123LCA1
Control reference guide
The illustration shows DMR-E20 for the Continental Europe.
Main unit
Page
(1) DVD on/off button (⏻/l). 13
- To switch the unit from on to standby mode or vice versa. In the standby mode, the unit is still connected to the mains.
- In standby mode, the unit is still consuming a small amount of power.
(2) Standby indicator
- When the unit in connected to the AC power supply cord, this indicator lights up in standby mode and goes out when the unit is turned on.
(3) Recording mode button (REC MODE) 23
(4) Channel up/down button (∧, ∨).... 23
(5) Recording button (●, REC) 23
(6) Display 9
(7) Disc tray open/close button (▲, OPEN/CLOSE)....15
(8) Stop button (■) 15
(9) Pause button (II). 15
(10)Play button (▶) 15
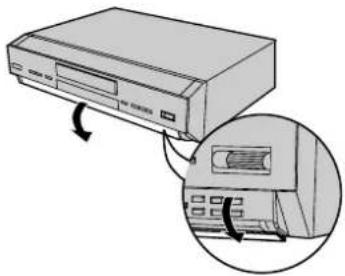
■ Opening the front panel
Open the front panel to access other controls and input terminals.
natural_image
Illustration of a computer monitor with an arrow indicating rotation, showing internal components (no text or symbols)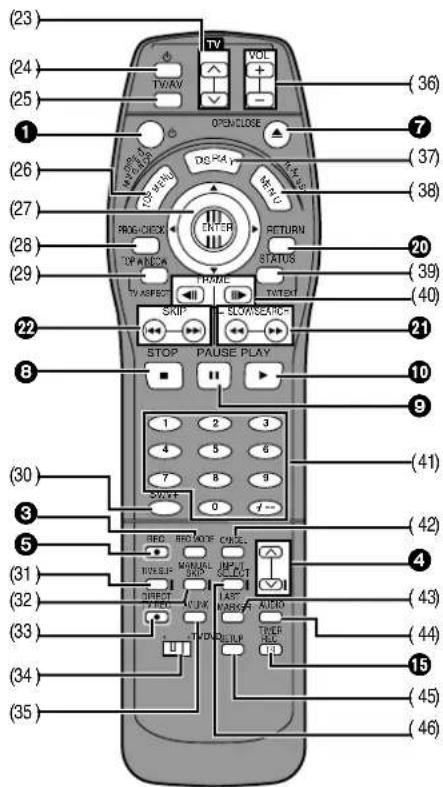
(11)Time slip button and roller (TIME SLIP) 27
(12)AV3 input terminal (AV3 IN) 71
(13)DV input terminal (DV INPUT) 67
(14)External link button (EXT LINK) 25
(15)Timer recording button (☐, TIMER REC) 31
(16)Disc tray.... 15
(17)Top window button (TOP WINDOW) 28
(18)Cursor buttons (▲, ▼, ◀, ▶) 16
(19)Enter button (ENTER). 16
(20)Return button (RETURN) 16
(21)Slow/Search buttons (SLOW/SEARCH, ◀◀, ▶▶).... 17
(22)Skip buttons (SKIP, |◀◀, ▶▶|) 18
- When selecting a title, chapter, track, programme, or play list Example: "5": [0] → [5] Example: "15": [1] → [5]
- When selecting a page of play list scene
Example: "5": [0] → [0] → [5] Example: "15": [0] → [1] → [5] - When selecting a television channel Example: "5": [5] Example: "15": [-, -] → [1] → [5]
(42)Cancel button (CANCEL) 21
(43)Last marker button (LAST MARKER) 16
(44)Audio button (AUDIO). 20
(45)Set up button (SET UP)....14
(46)Input select button (INPUT SELECT).... 36
Buttons such as ① function the same as the controls on the unit.
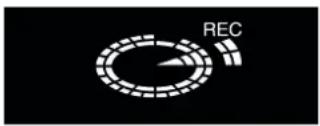
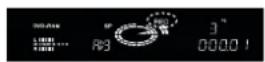
The unit's display
Center circle
Rotating (REC): recording
Stopped (REC): recording paused
Rotating (REC, PLAY):
recording and playing simultaneously or
Time Slip is in progress
Rotating (PLAY): playing
Stopped (PLAY): play paused
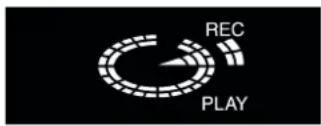
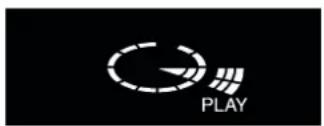
PGM programme repeat play
(3) Multi-angle (page 63)
(4) Audio signal type
MLT.CH: a signal with 3 or more channels
(5) DVD indicator
Illuminated:
in the DVD mode with AV LINK Function (page 70)
(6) Timer programme display
On:
when a programme for timer recording is on (pages 31 and 34)
Flashes:
when there are less than 10 minutes to go before timer
recording is programmed, but the unit is not on standby.
(7) Recording mode (pages 24 and 31)
XP: High-quality mode
SP: Normal mode
LP: Long play mode (4 hours)
EP: Long play mode (6 hours)
XP SP LP EP (all on):
FR (flexible recording) mode (only with timer recording)
(8) Timer indicator
ON: the start time for a timer recording
OFF: the end time for a timer recording or the time left until
recording stops
(9) The display mode of the main display section
TITLE: title number
TRACK: track number
CHAP: chapter number
PG: programme number
PL: play list number
(10)Volume level meter
(11)EXT Link
On:
when EXT LINK function is on (page 25)
(12)Channel
1, 2, 3, ....., 99 / AV1, AV2, AV3, AV4 / DV
(13)Main display section
timer recording
Recording and play counter
Remaining disc time
Current time
Title, track, chapter, direct navigator and play list page numbers
Miscellaneous messages
etc.
Connecting and Setting up
If you are connecting your unit to a television with [Q Link] ^*1 , follow these steps. (For Continental Europe)
Begin here also if you have a television with [DATA LOGIC]^2 , [Easy Link]^3 , [Megalogic]^4 or [SMARTLINK]^5 and a 21-pin Scart socket.
For details, also read your television's operating instructions.
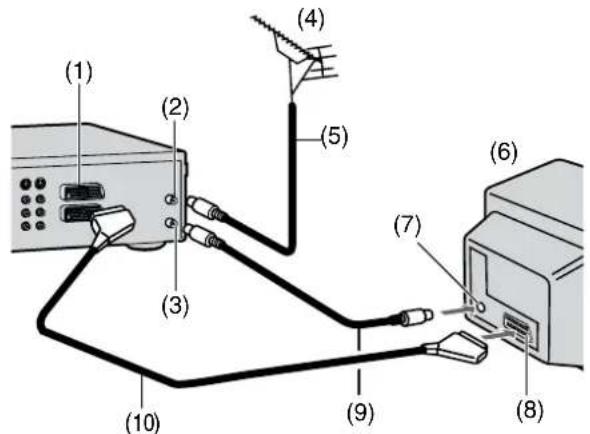
(1) AV1 21-pin Scart socket
(2) Aerial Input socket
(3) Aerial Output socket
(4) Aerial (not supplied)
(5) Aerial lead (not supplied)
(6) TV equipped with the Q Link (not supplied)
(7) Aerial Input socket
(8) 21-pin Scart socket
(9) RF Coaxial cable (supplied)
(10)Fully-wired 21-pin Scart cable (not supplied)
Hints:
- Q Link offers a range of convenient functions. For example, downloading of the tuning positions of all available television stations into your unit's memory if you connect the unit to your television with a fully wired 21-pin Scart cable (not supplied). Features similar to Q Link have different names and may not work the same.
*1 [Q Link] is a registered trademark of Panasonic.
*2 [DATA LOGIC] is a registered trademark of Metz.
*3 [Easy Link] is a registered trademark of Philips.
*4 [Megalogic] is a registered trademark of Grundig.
*5 [SMARTLINK] is a registered trademark of Sony.
For details, refer to your television's operating instructions or consult your dealer.
- Unlike in most commercially available 21-pin Scart cables, all 21 pins of one plug on a fully wired 21-pin Scart cable are connected to the matching pins on the other end of the cable.
Preset Download
(To Simultaneously set up this unit with a new television)
First, switch this unit to standby.
Switch on the television.
- The television starts tuning all available stations and adjusting the clock.
- When the television finishes its own auto setup, this unit switches on and starts downloading the setup data from the television (if it has [Q Link] or [DATA LOGIC]).
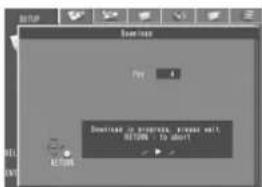
- If your television has [Easy Link], [Megalogic] or [SMARTLINK], the Country setting menu appears on the television. Use the joystick [▲, ▼, ◀, ▶] to select the country and press [ENTER].
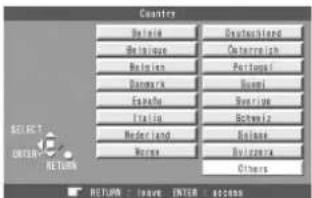
- Downloading starts.
- Downloading is complete when you see the television picture.
Note:
- If you switch on this unit before switching on the television, downloading may not be performed correctly. Follow these steps if this occurs.
1) Wait until Auto Setup is complete on both the television and this unit.
2) Press [SET UP] to display the "Settings" menu on the television.
3) Use the joystick [▲, ▼, ◀, ▶] to select "Tuning" and then "Download".
4) Press [ENTER] and select "Yes". Downloading starts.
- Downloading is complete when you see the television picture.
Hints:
- If you have a Panasonic television, starting downloading will automatically display "Download". If you have a different television, however, "Download" may not appear. Select the AV input on your television to see "Download".
- If you select "Schweiz", "Suisse", or "Svizzera" in the Country setting menu, another menu appears to let you set "Power Save" to "On". In this setting, the unit's power consumption is minimised when it is switched to standby. To turn the unit on, press and hold [⏻/l] on the main unit. On the remote control will not work.
Preset Download
(To set up this unit with a television in use)
1 Switch on the television.
2 Select the AV input on your television.
3 Press [∅/l] to switch the unit on.
- Downloading of the setup data starts (if your television has [Q Link] or [DATA LOGIC]).
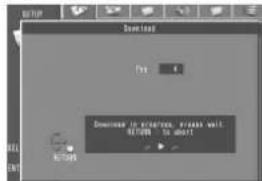
- If your television has [Easy Link], [Megalogic] or [SMARTLINK], the Country setting menu appears on the television. Use the joystick [▲, ▼, ◀, ▶] to select the country and press [ENTER].
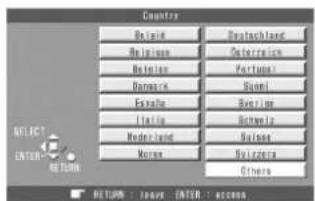
- Downloading starts.
- Downloading is complete when you see the television picture.
Hint:
- If you select "Schweiz", "Suisse", or "Svizzera" in the Country setting menu, another menu appears to let you set "Power Save" to "On". In this setting, the unit's power consumption is minimised when it is switched to standby. To turn the unit on, press and hold [⏻/l] on the main unit. On the remote control will not work.
Use a 21-pin Scart cable or Audio/Video cable (S-Video cable).
Follow these steps if you connect your unit to a television using an RF coaxial cable and a 21-pin Scart cable. (AV Connection) An RF Coaxial cable must be connected to watch television even if a 21-pin Scart cable is also used to connect unit to the television.
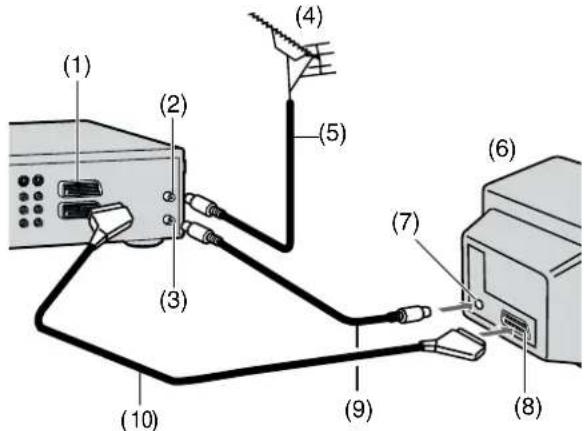
(1) AV1 21-pin Scart socket
(2) Aerial Input socket
(3) Aerial Output socket
(4) Aerial (not supplied)
(5) Aerial lead (not supplied)
(6) TV (not supplied)
(7) Aerial Input socket
(8) 21-pin Scart socket
(9) RF Coaxial cable (supplied)
(10)Fully-wired 21-pin Scart cable (not supplied)
Follow these steps if you connect your unit to a television using an S-Video cable. (S-Video Connection)
An RF Coaxial cable must be connected to watch television.
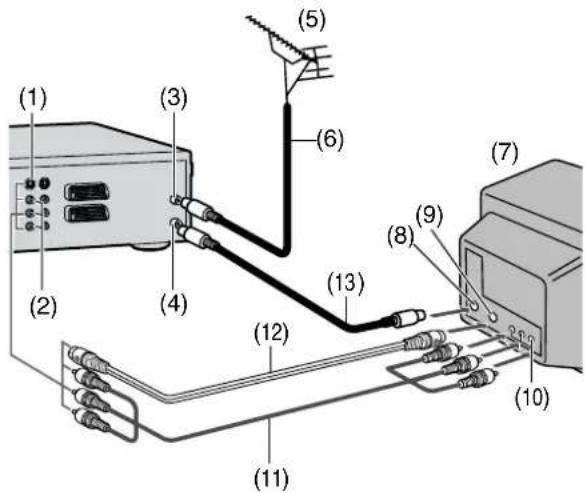
(1) S-Video Output socket
(2) Audio/Video Output socket
(3) Aerial Input socket
(4) Aerial Output socket
(5) Aerial (not supplied)
(6) Aerial lead (not supplied)
(7) TV with S-Video Input socket (not supplied)
(8) Aerial Input socket
(9) S-Video Input socket
(10)Audio/Video Input socket
(11)Audio/Video cable (supplied)
(12)S-Video cable (not supplied)
(13)RF Coaxial cable (supplied)
Auto Setup
Auto Setup automatically tunes all available stations and sets the unit's clock to the current date and time.
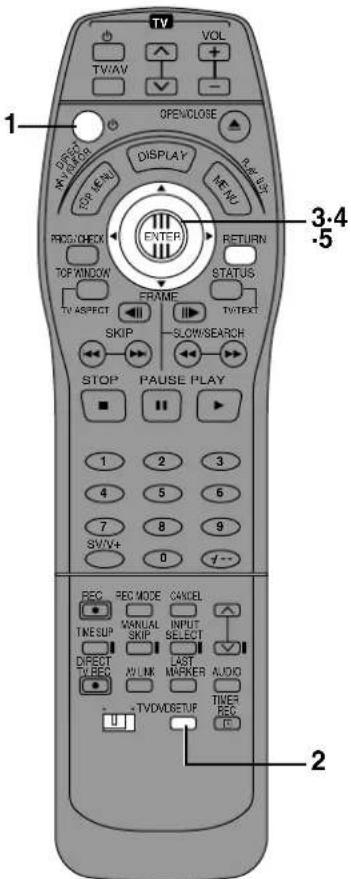
1 Press [∅/l] to switch the unit on.
•The Country setting menu appears on the television.
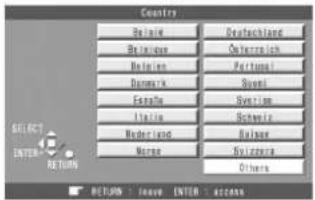
2 Use the joystick [▲, ▼, ◀, ►] to select the country.
3 Press [ENTER].
●Auto Setup starts. This takes about 5 minutes.
●Auto Setup is complete when you see the television picture.
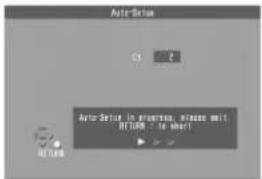
To cancel Auto Setup before it finishes
Press [RETURN].
If the clock setting menu appears after Auto Setup finishes
1) Use the joystick [▲, ▼, ◀, ▶] to set the correct time and date.
2) Press [ENTER] to conclude the setting.
To confirm that stations have been tuned correctly
See page 81.
When no stations have been set, confirm all connections and restart Auto Setup See page 83.
When station names or channel numbers have not been set correctly
See page 81.
Hint:
- If you select "Schweiz", "Suisse", or "Svizzera" in the Country setting menu, another menu appears to let you set "Power Save" to "On". In this setting, the unit's power consumption is minimised when it is switched to standby. To turn the unit on, press and hold [⏻] on the main unit. On the remote control will not work.
Selecting TV screen type
The aspect ratio is factory set to 4:3 for a regular television. You do not have to change this setting if you have a regular 4:3 aspect television.
Preparation
- Turn on the television and select the appropriate video input to suit the connections to this unit. - Switch [DVD, TV] to "DVD".
1 Press [⏻] to turn this unit on.
2 Press [SET UP] to show the menus.
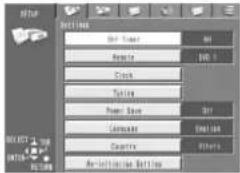
3 Use the joystick [◀, ▶] to select the "Connection" tab.
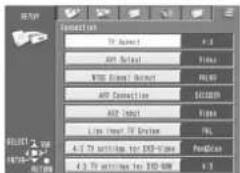
4 Use the joystick [▲, ▼] to select "TV Aspect" and press [ENTER].
5 Use the joystick [▲, ▼] to select the TV aspect and press [ENTER].
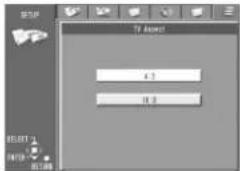
●4:3 (factory setting)
16:9
■To return to the previous screen
Press [RETURN].
For your reference
Apart from "TV Aspect", other settings also affect how video appears on your television. Check the following if video doesn't appear correctly on your television.
- "Connection"—"4:3 TV Settings for DVD-RAM" or "4:3 TV Settings for DVD-Video" (page 75).
- The video setting on the disc. How video appears is often specified by the disc itself.
●The video settings on your television.
Playing discs
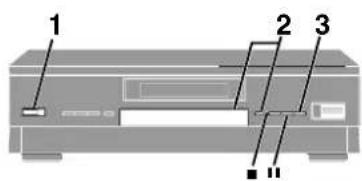
natural_image
Pure diagram of a circular ring with square cutout, no text or symbols presentRAM DVD-R DVD-V CD VCD
Preparation
Switch [DVD, TV] to "DVD".
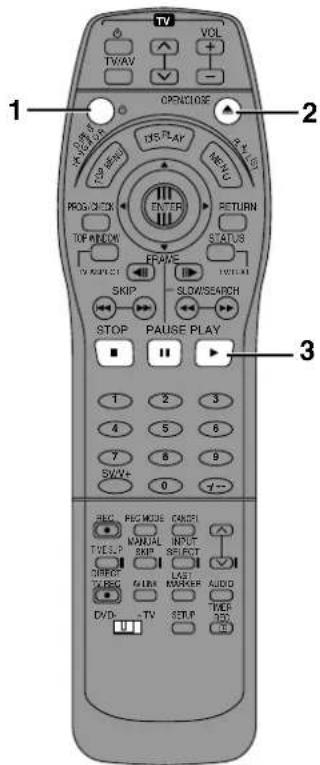
1 Press [⏻] to turn the unit on.
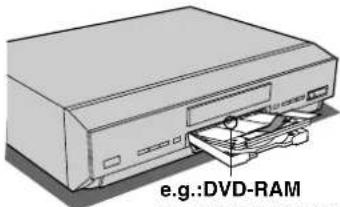
2 Press [▲, OPEN/CLOSE] to open the tray and insert a disc.
natural_image
Illustration of a computer with an open drive and a labeled inset showing 'e.g.: DVD-RAM' (no other text or symbols)- Insert inside the tray's guides.
- Insert one disc only.
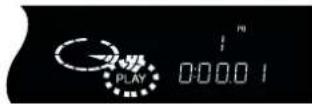
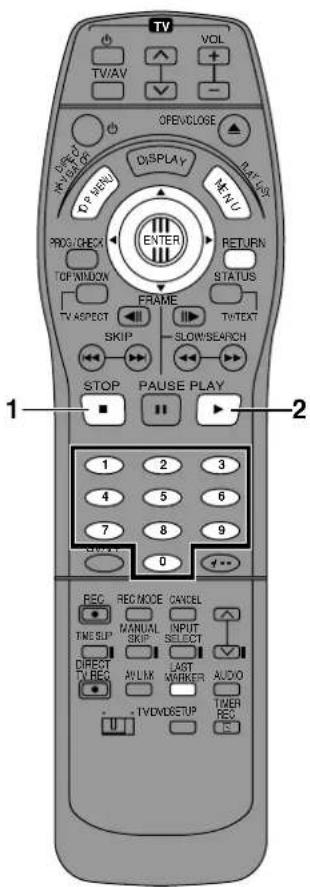
3 Press [▶, PLAY].
●The disc tray closes and play begins.
(The unit takes some time to read the disc before play starts.)
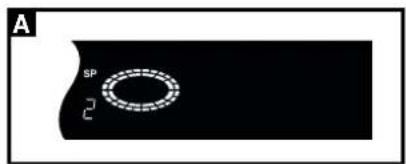
To stop play A
Press [■, STOP] (page 16, Starting play from where you stopped it).
●A screen similar to the illustrated may appear when you stop play.
Press [■, STOP] again and you can use this unit's tuner to watch television.
This screen is also shown when you are playing CDs.

■To pause play
Press [11, PAUSE].
Press again to restart playing.
■Auto power-off
The unit switches to the standby mode after about 2 or 6 hours in the stop mode if you set the time (page 73, Settings—Off Timer).
■With non-cartridge discs
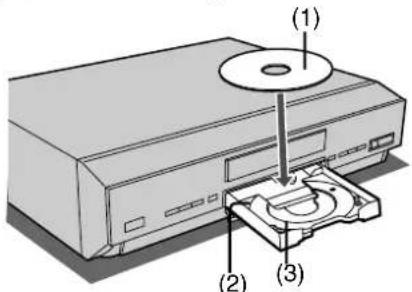
(1) Insert label-up. (With double-sided discs, load so the label for the side you want to play is facing up.)
(2) Guide for 5" (12 cm) disc
(3) Guide for 3^ (8 cm) disc
When a menu screen appears on the television
DVD-V VCD
Operate menus with the following operations. Actual operations depend on the disc. Press the numeric buttons to select an item, or move the joystick [▲, ▼, ◀, ▶] to select an item and press [ENTER].
- You can return to menus after you start play by pressing [TOP MENU] or [MENU] (DVD-Video), or [RETURN] (Video CD).
Note
- The disc continues to rotate while the menu is displayed even after you finish playing an item. Press [■, STOP] when you finish to preserve the unit's motor and your television screen.
- Volume may be lower when playing DVD-Video than when playing other discs or during television broadcasts.
If you turn the volume up on the television or amplifier, ensure you reduce the volume again before playing other sources or returning to the television so that a sudden increase in output does not occur.
For your reference
- If “∅” appears on the television
The operation is prohibited by the unit or disc.
- If a disc is loaded, the unit will come on and play will start when you press [▶, PLAY].
- If you play a disc that includes parts without video, the unit may display the video from the disc you were playing immediately before that disc.
Starting play from where you stopped it (Resume Function)
RAM DVD-R DVD-V CD VCD
1 During play
Press [■, STOP].
●The unit remembers the position.
2 Press [▶, PLAY] while the indicated part of the center circle appears on the display.
- Play starts from where you stopped it.
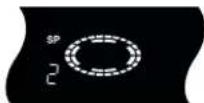
■To cancel the resume function
Press [■, STOP] while the indicated part of the center circle appears on the display. (The position is also cleared when you turn the unit off.)
■To start play from a memorized position after turning the unit off
Press [LAST MARKER] during play.
(The message "Position Memorized" appears on the television.)
Now when you press [▶, PLAY] after switching the unit to standby and back on, play starts from the memorized position.
For your reference
DVD-R DVD-V CD VCD
- The position memorized when you press [■, STOP] or [LAST MARKER] is cleared when you open the disc tray.
RAM
- The last marker is written to the disc and remains intact until you mark a different position. You cannot mark positions if the disc is write-protected with DISC INFORMATION (page 39) or with the write protect tab (page 91). Release the protection before marking position.
- If you press [■, STOP] before switching the unit to standby after pressing [LAST MARKER] to memorize a position, play will resume from the position you pressed [■, STOP] when you press [▶, PLAY].
- The position memorized when you press [■, STOP] is cleared when you switch the unit to standby or if the unit switches to standby automatically (page 73, Settings—Off Timer).
natural_image
Illustration of a CD-ROM drive with front panel and rear-mounted buttons (no text or symbols)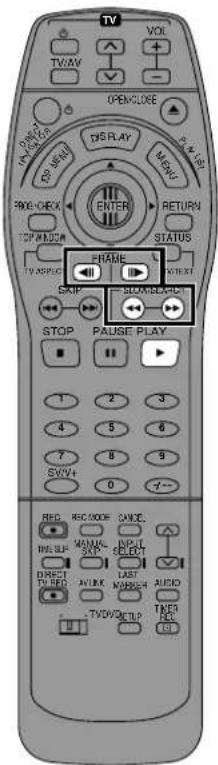
Fast forward and rewind—SEARCH
RAM DVD-R DVD-V CD VCD
During play
Press [◀◀, SLOW/SEARCH] or [▶▶, SLOW/SEARCH].

- There are five search speeds. Each press increases the search speed.
- The search speed is maintained when you release the button.
- Press [▶, PLAY] to restart play.
- You will hear sound at speed one (only forward) when playing DVD-RAM, DVD-R, DVD-Video, and Video CDs. You can turn this sound off if you want to (page 74, Sound—Sound during Search).
●Sound is not heard during follow-on play and simultaneous recording and play.
Slow-motion play
RAM DVD-R DVD-V VCD
While paused
Press [◀◀, SLOW/SEARCH] or [▶▶, SLOW/SEARCH].
- There are five slow-motion speeds. Each press increases the slow-motion speed.
●The slow-motion speed is maintained when you release the button. - Press [▶, PLAY] to restart play.
Frame-by-frame viewing
RAM DVD-R DVD-V VCD
Remote control only
While paused
Press [◀, FRAME] or [▶, FRAME].
● Each press shows the next or previous frame.
- Press [▶, PLAY] to restart play.
Skipping
RAM DVD-R DVD-V CD VCD
You can skip to the beginning of tracks (page 89) and chapters (page 89) and restart play from there.
On DVD-RAM and DVD-R, you can skip to the start of a programme and start play from there. The section between the point where recording is started and the point where it is stopped is called a "programme".
During play or while paused
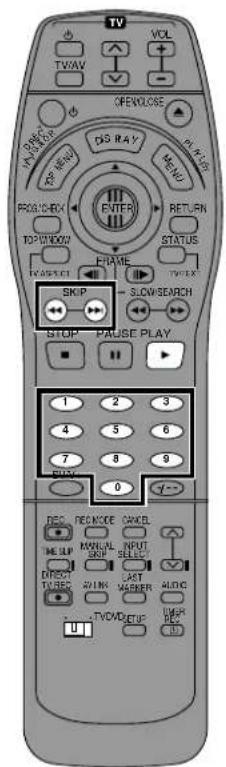
Press [◀◀, SKIP] or ▶▶, SKIP].
Each press increases the number of skips.
For your reference
- After skipping, the unit returns to the previous state, play or pause.
- Press [▶, PLAY] to restart play if it was paused.
- Pressing ◀◀ or ▶▶ while a DVD menu is being shown or while the playback control feature on Video CDs (page 89) is working may take you to a menu screen.
- You can also mark positions to skip to (page 66).
![DVD-V CD VCD (2) (2) (1) (3) (3) (4) (4) (4) [◀◀] [▶◀] →](/content/2026/05/796666/images/063ab92bda37f865ccc9e148a03f0c22ee97f7356ac5d68495f4427ad59116ec.jpg)
(1) Play position
(2) Twice
(3) Once
(4) Chapter/track
![RAM DVD-R (3) (3) (1) (2) (5) (4) (4) (6) (7) (8) ← [◀] → ← [▶] →](/content/2026/05/796666/images/7fb50af592578f90d165f64764e19641b622bd1f078a328e4d03bdc7218eb1f9.jpg)
(1) Play position
(2) Marker
(3) Twice
(4) Once
(5) Three times
(6) The programme before
(7) Current programme
(8) The programme after
Starting play from a selected programme, title, chapter or track
RAM DVD-R DVD-V CD VCD
Remote control only
Preparation
Switch [DVD, TV] to "DVD".
During play or while stopped
Press the numeric buttons to select the item.
(page 8)
- This works only when stopped with some discs (the screen saver is on the television).

Manual Skip
RAM DVD-R
Remote control only
You can skip commercials easily with this feature.
Preparation
Switch [DVD, TV] to "DVD".
During play
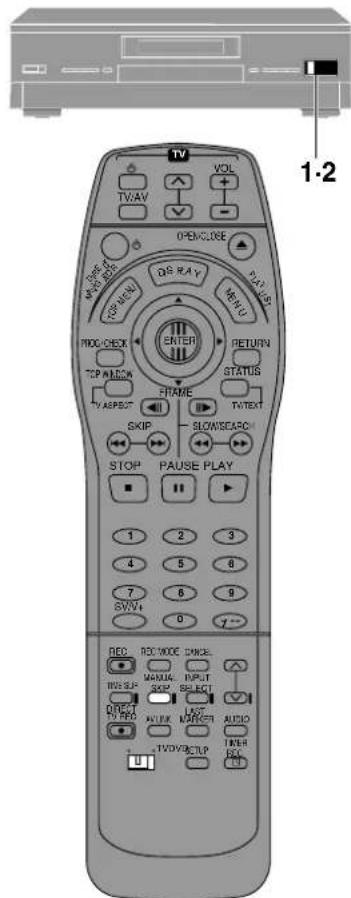
Press [MANUAL SKIP].
Play restarts from approximately 30 seconds later.
Selecting an amount of time to skip—Time Slip
RAM DVD-R
Main unit only
You can set an amount of time and then skip with one press of a button.
Preparation
Switch [DVD, TV] to "DVD".
1 During play
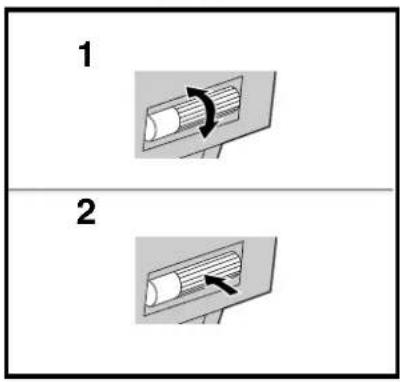
Turn [TIME SLIP] on the main unit.
- Turn up to increase in one-minute units.
- Turn down to decrease in one-minute units.
2 Within 5 seconds
Press [TIME SLIP] on the main unit to enter the time.
- Play skips the time you entered.
Note
You cannot use this feature while a "DIRECT NAVIGATOR" (page 44) or "PLAY LIST" (page 53) screen is being displayed.
Changing audio
RAM DVD-V VCD
Remote control only
You can change the audio being received or played with the following procedure.
Preparation
Switch [DVD, TV] to "DVD".
During reception or play
Press [AUDIO] to select the audio type.
How the type changes depends on when you press the button.
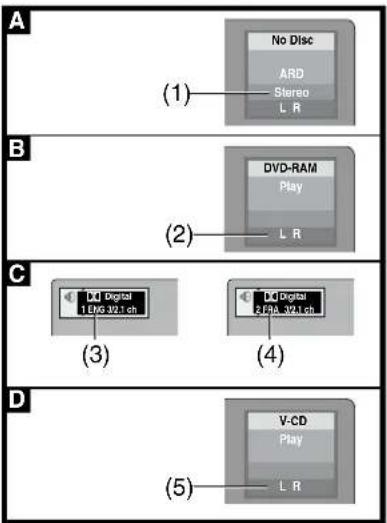
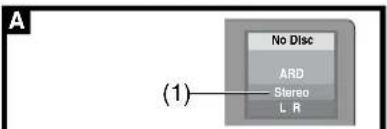
■While receiving a TV programme with Stereo A
When receiving a TV programme with the Stereo, Bilingual or NICAM sound system, the type of sound system in which it is broadcast is automatically indicated.
Stereo: When receiving a STEREO/NICAM stereo broadcast.
M1/M2: When receiving a Bilingual/NICAM dual-sound broadcast.
M1: When receiving a NICAM monaural broadcast.
■While playing a television programme recorded on DVD-RAM B If it is a recording of a stereo broadcast
LR→L→R
■While playing a DVD Video ©
You can change the audio channel number each time you press the button. This allows you to change things like the soundtrack language.
■While playing a Video CD D
LR→L→R
For your reference
- You can also use the on-screen menu icons to change the audio type.
- You can change the audio for the images being played with simultaneous recording and play and Time Slip.
When you have connected the unit to other equipment with an optical digital cable
You cannot change the audio type when you have used only an optical digital cable for connection.
When using DVD-R
You cannot use [AUDIO] or the on-screen menu icons to change audio type while playing or recording with DVD-R.
●While receiving a TV broadcast
You can use the SET UP menus to select which audio type is recorded, either "M1" or "M2". "M1" is the default setting.
- During play
The audio type selected for recording is played. This is displayed as "LR".
(1) e.g.: "Stereo" is selected
(2) e.g.: "LR" is selected
(3) e.g.: English is the selected language
(4) The language is switched to French
(5) e.g.: "LR" is selected
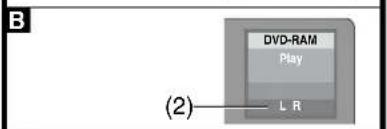
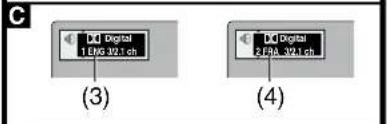
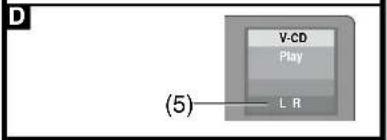
Programme play
CD VCD
You can select up to 100 tracks to play in the order you choose.
Preparation
Switch [DVD, TV] to "DVD".
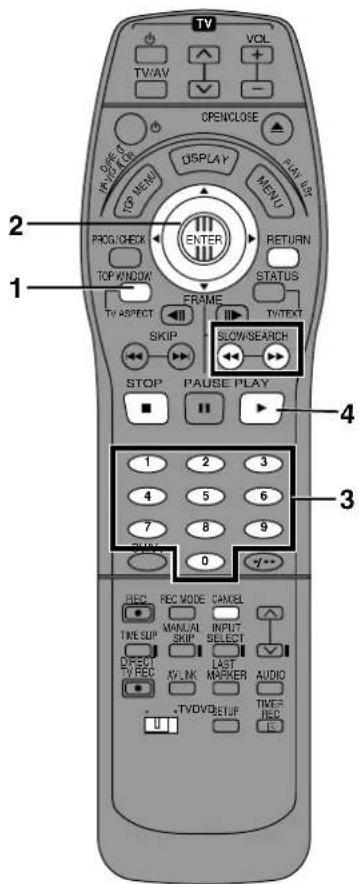
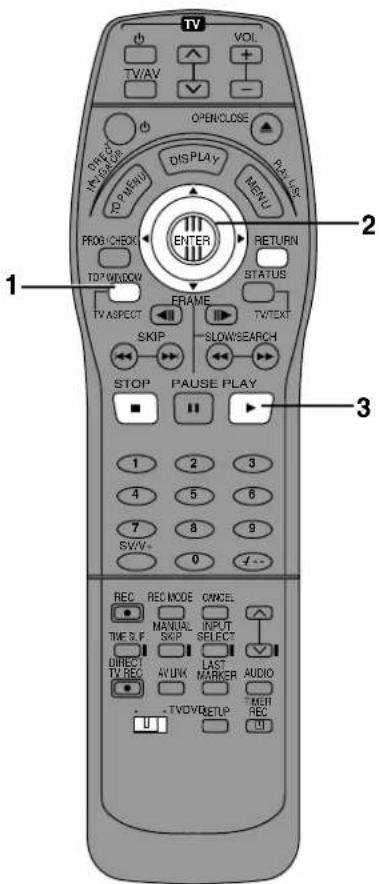
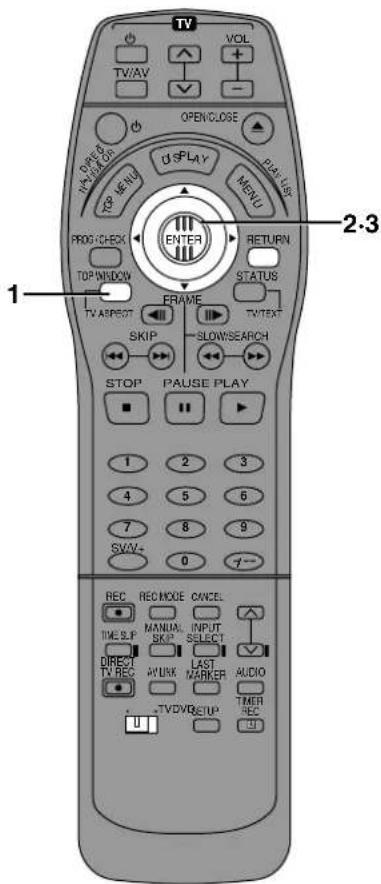
1 While stopped Press [TOP WINDOW].
2 Use the joystick [▲, ▼, ◀, ▶] to select "PROGRAMME PLAY" and press [ENTER].
3 Press the numeric buttons to select the track.
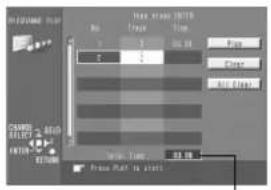
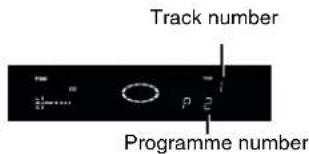
Total time of the programme
Repeat step 3 to select other tracks.
- You can also use the joystick to select tracks.
1) Press [ENTER], then use the joystick [▲, ▼] to select the track.
2) Press [ENTER].
4 Press [▶, PLAY].
- Play starts in the programmed sequence.
■To move to the page before or after the one shown
■To clear the programmed tracks one by one
1) Use the joystick [▲, ▼] to select the track you want to clear.
2) Press [CANCEL].
Alternatively, use the joystick [▲, ▼, ◀, ▶] to select "Clear" and press [ENTER].
■To clear the whole programme
Use the joystick [▲, ▼, ◀, ▶] to select "All Clear" and press [ENTER].
- The whole programme is also cleared when you turn the unit off or open the disc tray.
■To exit the programme mode
1) Press [■, STOP] until the programme play screen is displayed.
2) Press [TOP WINDOW] or [RETURN].
1) Press [■, STOP] until the programme play screen is displayed. 2) Press [TOP WINDOW] or [RETURN].
Random play
CD VCD
The unit plays the tracks on a disc in random order.
Preparation
Switch [DVD, TV] to "DVD".
1 While stopped
Press [TOP WINDOW].
2 Use the joystick [▲, ▼, ◀, ▶] to select "RANDOM PLAY" and press [ENTER].
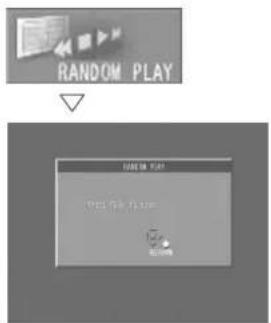
3 Press [▶, PLAY].
■To cancel random play
1) Press [■] until the random play screen appears.
2) Press [TOP WINDOW] or [RETURN].
1) Press [■] until the random play screen appears. 2) Press [TOP WINDOW] or [RETURN].
Recording television programmes
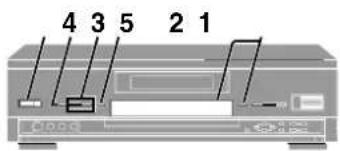
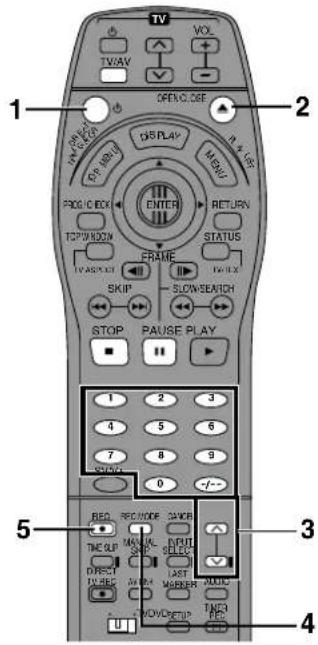
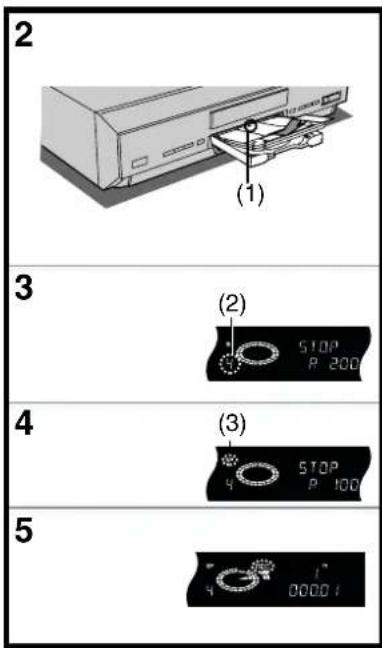
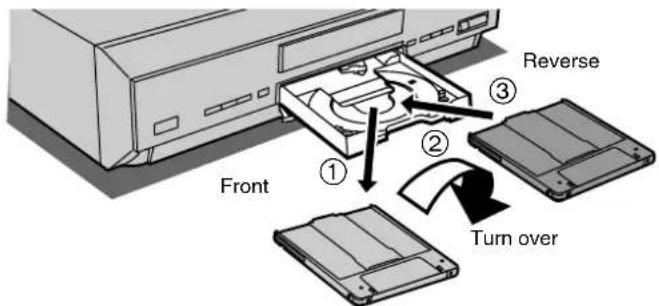
(1) Insert label-up with the arrow facing in. (with double-sided discs, load so the label for the side you want to record is facing up.)
(2) e.g.: When you have selected channel 4
(3) e.g.: When you have selected "XP"
RAM DVD-R
Preparation
Switch [DVD, TV] to "DVD".
1 Press [⏻] to turn the unit on.
2 Press [▲, OPEN/CLOSE] to open the tray and insert a disc.
- Insert one disc only within the tray's guides.
- Use a disc that can be recorded on and that has enough space available.
- Press [▲, OPEN/CLOSE] to close the tray.
- When using a DVD-RAM for the first time with this unit, format it to ensure accurate recording (page 42, "Format"). Check the disc carefully to ensure it doesn't contain programmes you want to keep.
3 Press [, ] to select the channel.
4 Press [REC MODE] to select the recording mode.
- Select "XP", "SP", "LP", or "EP" (page 24).
5 Press [● REC] to start recording.
●Video system recorded on the disc is PAL system only.
- The programme is recorded into the available space on the disc.
■To pause recording
Press [11, PAUSE].
Press again to restart recording.
■To stop recording
Press [■, STOP].
To select channels with the remote control
Press the numeric buttons. (page 8)
■ Convenient features
- Follow-on play—playing from the beginning of the programme you are recording (page 26).
- Simultaneous recording and play—watching a programme you recorded while recording another (page 26).
●Time Slip-checking the images you are recordin (page 27).
Note
- Check that disc can be recorded on (page 6).
- Ensure the write protect tab is not set to "PROTECT" (page 91).
- Ensure the disc is not write-protected with DISC INFORMATION (page 40).
- Set "Input signal-TV System" to "PAL" when recording PAL system (page 75).
- Recording cannot be performed correctly if you try to record PAL system to a disc that already contains recordings using NTSC.
■Re-inserting double-sided discs
You can get up to 12 hours recording when you use double-sided discs and use the "EP" mode.
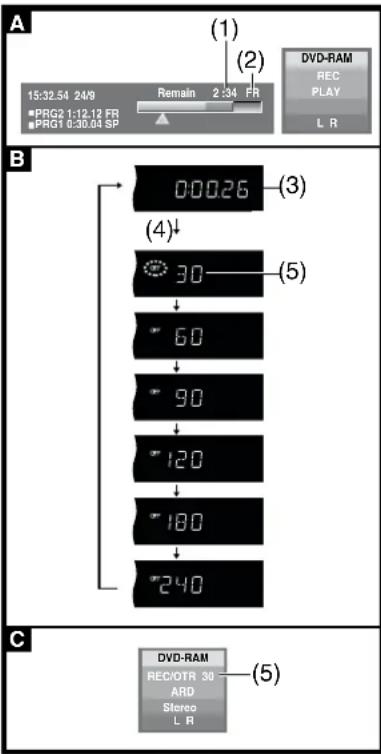
(1) Available recording time
(2) Recording mode
(3) Counter (Timer not set)
(4) Each time you press the button:
(5) Shows recording will stop in 30 minutes
■Recording modes
For example, with a 4.7 GB DVD-RAM
XP: High quality pictures, approximately one hour recording.
SP: Standard quality pictures than LP, approximately two hours recording.
LP: Better quality pictures than EP, approximately four hours recording.
EP: Lesser picture quality than LP, but capable of a maximum of six hours recording.
To check the remaining time and the current mode during recording A Press [STATUS] several times.
For your reference
- You can record up to 99 programmes on one disc.
- You cannot change the channel or recording mode during recording. You can change them while recording is paused, but the material is recorded as a separate programme.
- An error message appears if you try to start recording when a disc is full; the remaining time will be shown as "0:00". To continue recording, erase unneeded programmes (DVD-RAM only (page 46), Erasing programmes) or use another disc.
●There are limitations when recording to DVD-R (page 7). - The message “Can not record on the disc.” is displayed when recording was not completed correctly. Check the discs for dirt or scratches.
One Touch Recording—Specify a time to stop recording B
RAM DVD-R
Main unit only
This is a simple way of making timer recordings when you are in a hurry or before you go to bed. You can set the time up to 4 hours in advance.
While recording
Press [● REC] on the main unit to select the recording time.
The time increases as illustrated each time you press the button.
The counter decreases in 1-minute units after you set a time. You can change the time again with the same operation.
When the time you set is reached, recording stops and the unit switches to standby.
To cancel
During recording, press [● REC] until the counter appears.
- Recording continues.
■To show the time remaining until recording finishes c Press [STATUS] several times.
For your reference
●This does not work during timer recordings.
- You cannot use the remote control to specify a time for recording to stop.
- Recording stops and the set time is cleared if you press [■, STOP].
- The set time is cleared if you pause recording and cause another programme to be recorded.
To Manually Adjust the Audio Recording Level
The unit adjusts the recording level automatically to prevent sound distortion due to excessive peaks.
However, if you want to manually adjust the audio recording level, perform the operation steps below before you start the actual recording. We recommended you to adjust the level so that it peaks at approximately +4 dB on the recording level indicator.
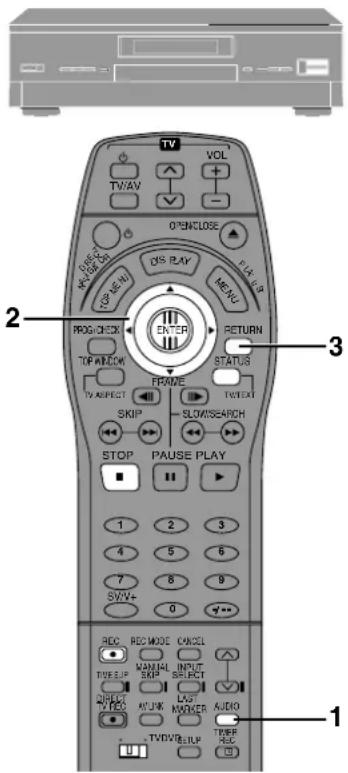
1 Before recording, press [AUDIO] in 5 seconds or more.
To adjust the left (L) and right (R) channels simultaneously:
2 Use the joystick [◀, ▶] to adjust the audio recording level.
3 Press [RETURN] to exit the On Screen Display.
Note
- You cannot adjust the audio recording level when DV input recording.
■To immediately record the same TV programme that you are viewing on the TV (Direct TV Recording)
This function allows you to immediately start recording the same programme that you are viewing on the TV.
The programme position selected on the unit automatically changes to that of the TV programme that you are viewing on the TV. When you stop the recording, the unit automatically switches back to the previously selected programme position.
Conditions for correct operation of the Direct TV Recording function:
- Your TV must be equipped with the [Q Link] function.
- The unit must be connected to the TV via a fully-wired 21-pin Scart cable.
To perform Direct TV Recording:
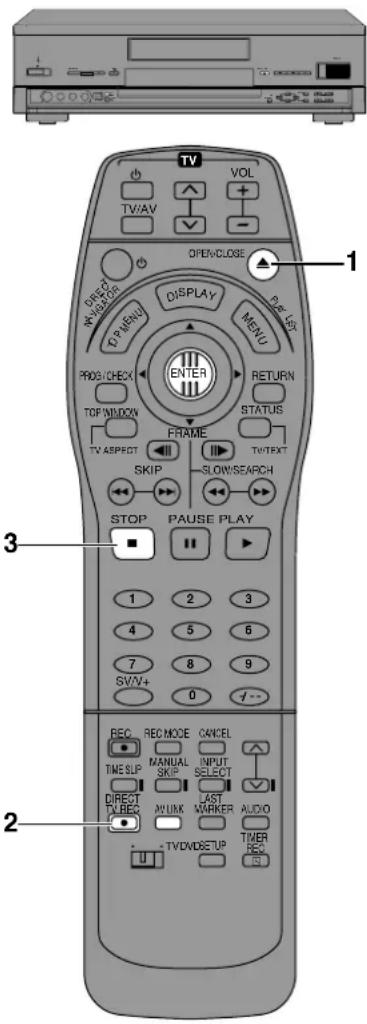
1 Press [▲, OPEN/CLOSE] to open the tray and insert a disc.
2 Press [DIRECT TV REC].
- Recording of the TV programme that you are viewing on the TV starts.
- In some cases, it may not be possible to change the programme position on the TV during Direct TV Recording.
- Do not press [AV LINK] during Direct TV REC, otherwise the recording may not be performed correctly.
3 Press [■, STOP] to stop recording.
■Linked timer recordings with external equipment (EXT LINK)
If an external equipment (for example a satellite receiver) with a timer function is connected to the AV2 socket of this unit by a 21-pin cable, it is possible to control the recording of the unit from this equipment. For the connection to the external equipment, see page 70.
RAM DVD-R
Preparation
- Make sure that "AV2 Connection" is set to "Ext Link 1" or "Ext Link 2". (page 75)
- Timer programming has to be done on the external equipment and switch to the timer recording standby mode. Refer to the equipment's operating instructions.
Press [EXT LINK] on the unit to switch the unit over to the timer recording standby mode.
- The unit continues to record as long as the satellite or digital receiver is transmitting video. To delete it, press [ENTER].
To cancel the external control, turn off the timer recording standby mode of the unit by pressing [EXT LINK] again.
For your reference
- To switch TV automatically to the picture from the unit in playback mode, connect the AV1 socket of this unit to the TV by a 21-pin cable.
- This function does not work with some equipment. Refer to the equipment's operating instructions.
- The beginnings of recordings may not be recorded correctly in some cases.
- When "AV2 Connection" is set to "Ext Link 2", this function does not work if the input signal is NTSC system.
- The play picture or menu picture is not output from AV2 socket during Linked timer recording standby mode.
A
(2)
(4)
B
(6)
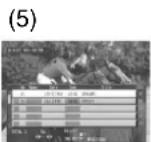
(8)
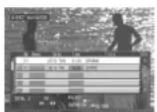
(1) For example: while recording programme 2 (sport)
(2) You want to watch the sports programme currently recording (programme 2)
(3) Do the above operation and...
(4) The same sports programme is recorded while you are watching it.
(5) For example: while recording programme 2 (sport)
(6) You want to watch the soap opera you recorded yesterday (programme 1)
(7) Do the above operation and..
(8) A sports programme is recorded while you watch a soap opera.
Playing while you are recording
Playing from the beginning of the programme you are recording—Follow-on play A
RAM
You can start play from the beginning of a programme while continuing to record it.
Preparation
Switch [DVD, TV] to "DVD".
While recording or timer recording
Press [▶, PLAY].
Play starts from the beginning of the programme being recorded.
■To stop play and recording
1) Press [■, STOP]. Play stops. Wait 2 seconds.
2) Press [■, STOP]. Recording stops.
- You cannot stop recording with [■, STOP] during timer recording. To stop timer recording, press [☐, TIMER REC].
For your reference
●The playback images are displayed during follow-on play.
●Sound is not output while fast-forwarding.
- Play cannot be started until at least 2 seconds after recording starts.
- If you fast-forward and get to within a few seconds of the part being recorded, the picture will change to show the images currently being played.
- The operation is shown on the unit's display (page 9).
- If you fast-forward and get to within a few seconds of the part being recorded, the unit automatically switches to play and shows the images five seconds before. You cannot get any closer than this.
Simultaneous recording and play B
RAM
You can start play of the programme you are recording or play a programme previously recorded.
Preparation
Switch [DVD, TV] to "DVD".
During recording or timer recording
1 Press [TOP MENU, DIRECT NAVIGATOR].
- “●” is displayed in the direct navigator to indicate the programme is being recorded (page 45).
2 Use the joystick [▲, ▼] to select a programme and press [ENTER].
■To stop play and recording
1) Press [■, STOP]. Play stops. Wait 2 seconds.
2) Press [■, STOP]. Recording stops.
- You cannot stop recording with [■, STOP] during timer recording. To stop timer recording, press [□, TIMER REC].
For your reference
- During simultaneous rec and play, you cannot edit with the direct navigator or use play lists.
- If you start play while the unit is on standby for timer recording, recording starts when the time you set is reached.
- The unit returns to recording standby when you stop play while it is on standby for timer recording.
- The operation is shown on the unit's display (page 9).
natural_image
Exterior view of a gray electronic device with drive bays and buttons (no visible text or symbols)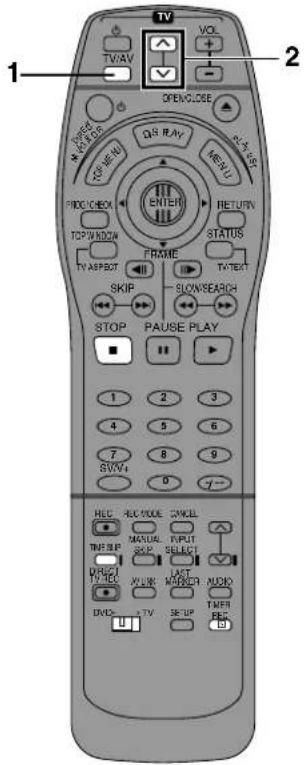
Checking the recording during recording (TIME SLIP) A
RAM
You can play the programme being recorded to check that it is being recorded correctly. You can also check parts that were recorded previously.
Preparation
Switch [DVD, TV] to "DVD".
While recording or timer recording
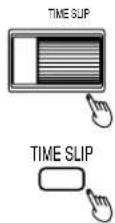
Press [TIME SLIP].
Play starts 30 seconds previous. For 5 seconds the play images are shown together with the recording.
The play images are shown in full once 5 seconds have passed.
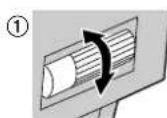
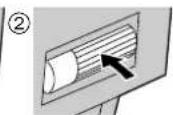
■To change the part being played B
Main unit only
1) Turn [TIME SLIP] on the main unit.
●Turn up to increase in one-minute units.
- Turn down to decrease in one-minute units.
2) Press [TIME SLIP] on the main unit within 5 seconds to enter the time.
Play starts from the time you entered.
Note
You cannot change the position being played with the remote control.
■To show both the recording and play images
Press and hold [TIME SLIP] for about 3 seconds.
- The picture-in-picture(2) screen becomes a full screen(1) if you perform play function other than normal play.
■To stop play and recording
1) Press [■, STOP]. Play stops.
Wait 2 seconds.
2) Press [■, STOP]. Recording stops.
- You cannot stop recording with [■, STOP] during timer recording. To stop timer recording, press [□, TIMER REC].
For your reference
- If you fast-forward, rewind, or skip during Time Slip, only the play images are shown.
●The sound for the images being played is heard during Time Slip.
Watching the television while recording
Preparation
Switch [DVD, TV] to "TV".
1 Press [TV, TV/AV] to change the input mode to "TV".
2 Press [TV, ∧, ∨] to change channels.
- You can also select the channel with the numeric buttons.
For your reference
- You can also do this if the unit is making a timer recording.
●The recording is unaffected.
A
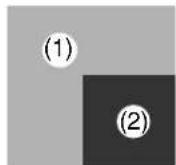
(1) Current recording
(2) Play images (30 seconds before)
B
Using the top window
About the top window
Most of the features and functions of this unit can also be controlled with icons. The examples show the top window when a DVD-RAM is being used. Actual menus depend on the type of disc being used.
Disc display
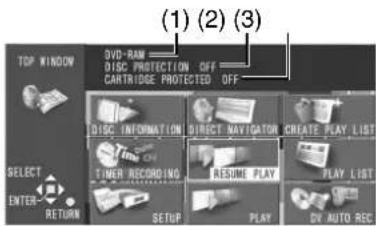
(1) Disc title
- The disc's title is displayed if one is recorded. You can enter titles with Enter Title in DISC INFORMATION (page 39).
(2) Disc protection
- "ON" is displayed if you have used Disc Protection in DISC INFORMATION to protect the disc (page 40).
(3) Cartridge Protection
- "ON" is displayed if the cartridge's write protect tab is switched to "PROTECT" (page 91).
Using the top window
RAM DVD-R DVD-V CD VCD
Preparation
Switch [DVD, TV] to "DVD".
1 While stopped
Press [TOP WINDOW] to show the top window.
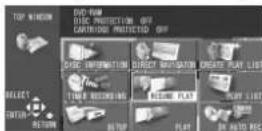
2 Use the joystick [▲, ▼, ◀, ▶] to select an item.
- Refer to the relevant pages for details.
3 Press [ENTER].
- Your selection is entered and the top window disappears. If the operation requires further selections, another screen appears.
■To clear the top window
Press [TOP WINDOW] or [RETURN].
■Top window icons DISC INFORMATION
Enter Title: RAM DVD-R (page 39)
Disc Protection: RAM (page 40)
Format: RAM (page 42)
Finalize: DVD-R (page 43)
TIMER RECORDING
Checking the timer programming: RAM DVD-R (page 35)
Registering programmes and making corrections:
RAM DVD-R (page 33)
Canceling timer recordings: RAM DVD-R (page 34)
SET UP
Settings for the unit and discs:
RAM DVD-R DVD-V CD VCD Settings depend on the type of disc (page 73)
DIRECT NAVIGATOR
Play: RAM DVD-R (page 44)
Erase Programme: RAM DVD-R (page 46)
Enter Title: RAM DVD-R (page 47)
Properties: RAM DVD-R (page 48)
Protection: RAM (page 49)
Partial Erase: RAM (page 51)
PLAY
Disc play:
RAM DVD-R DVD-V CD VCD (page 15)
RESUME PLAY
Start play from the point you stopped play:
RAM DVD-R DVD-V CD VCD (page 16)
CREATE PLAY LIST
Creating play lists: RAM (page 54)
PLAY LIST
Play Scenes: RAM (page 56)
Playing Play Lists:
RAM (page 55)
Edit Scenes:
RAM (page 56, 57, 58)
PL Copy:
RAM (page 59)
PL Erase:
RAM (page 60)
Enter Title: RAM (page 61)
Properties: RAM (page 61)
TOP MENU MENU
Display a disc's menus:
DVD-V (page 16)
PROGRAMME PLAY
Display the programme play screen: CD VCD (page 21)
RANDOM PLAY
Display the random play screen: CD VCD (page 22)
DV AUTO REC
Display the DV input recording screen:
|RAM| (page 67)
Some items will not be shown unless you release disc protection with DISC INFORMATION—Disc Protection (page 41) or release cartridge protection with the write protect tab (page 91).
Timer recording
Using ShowView code\* (G-code) to make timer recording
* ShowView code : for Continental Europe.
G-code : for Australia, N.Z. and Asia.
G-CODE and SHOWVIEW are different trademarks used to represent the same easy recording feature. However, for simplicity, only the term G-CODE will be used. If you use SHOWVIEW system, follow the same steps listed for the G-CODE system.
RAM DVD-R
Remote control only
You can easily programme the unit to make a timer recording of a programme by entering the programme's ShowView code (G-code), which can be found in the television sections of newspapers or in television guides. You can programme up to 16 programmes one month in advance. Programmes for everyday or every week are counted as one programme.
Preparation
- Switch [DVD, TV] to "DVD".
- Ensure that this units clock is set correctly.
- Insert a disc for recording (make sure there is enough room for the programme you are going to record plus a little extra).
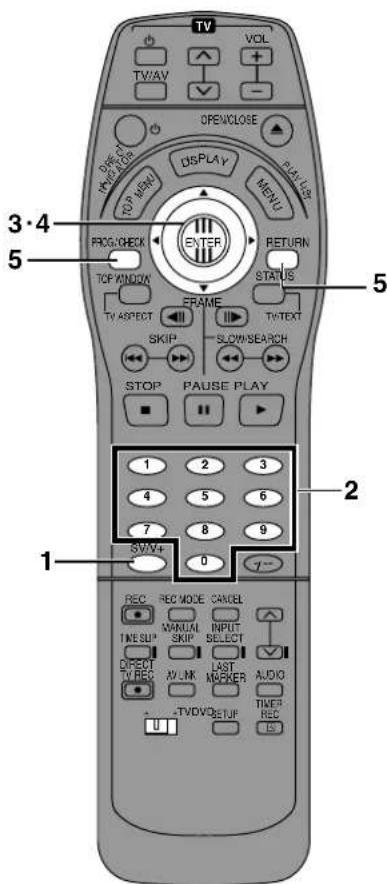
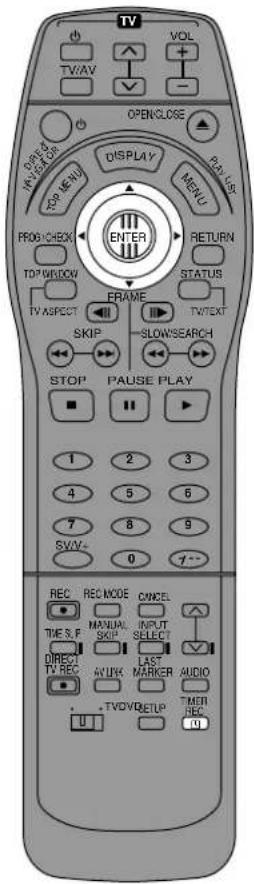
1 Press [SV/V+] ([G-CODE]).
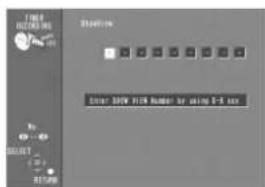
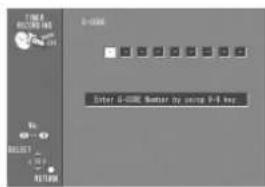
2 Press the numeric buttons to enter the code.
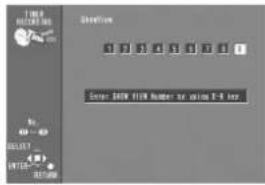
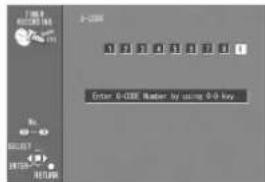
3 Press [ENTER].
- The Timer Programme Correction screen which allows you to confirm the programme appears and make corrections if necessary.
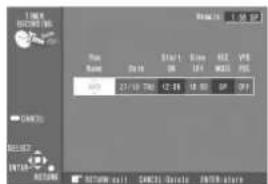
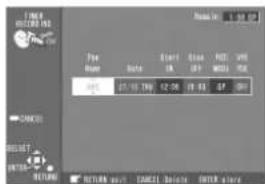
- Check the programme.
To make corrections (page 31).
To programme other recordings, repeat steps 1, 2, and 3.
4 If the programme is correct Press [ENTER].
●The Timer Programme List screen appears.
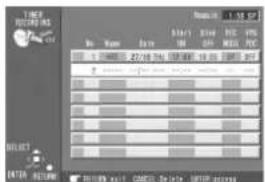
5 Press [PROG/CHECK] or [RETURN].
■To put the unit on recording standby
Press [☐, TIMER REC].
Ensure "☐" lights on the unit's display.
■Flexible recording mode (FR)
- The unit automatically selects a recording mode between "XP" and "EP" that will enable the timer recording to fit in the available recording time on the disc with the best possible recording quality.
●This only works with timer recording. - It may not be possible to record to the finish of the programme if the remaining time doesn't allow.
●This does not work with VPS/PDC.
Note
●The built-in clock employs 24-hour system.
- The actual time recorded may be longer than the programme itself when television programmes are recorded using ShowView (G-code).
- "Invalid Entry" is displayed when you enter the wrong code. Reenter the code.
- "FULL" is displayed in there are already 16 items programmed. Delete unnecessary items (page 46).
- The remaining time displayed is calculated based on the current recording mode.
- Approximately 30 seconds at the beginning of subsequent programmes is not recorded when you used recording to record multiple programmes to a DVD-R.
- Recording is not possible unless you set "Disc Protection" in "DISC INFORMATION" to "Off".
- You can not record to a disc if the write protect tab on a cartridge disc is set to protect. Release this before operation (page 91).
- If the unit is not put in the timer recording standby mode at the latest 10 minutes before the programmed timer recording starting time, the [☐] flashes on the unit display. In this case, press the [☐, TIMER REC] button to put the unit in the timer recording standby mode.
■To change the programme
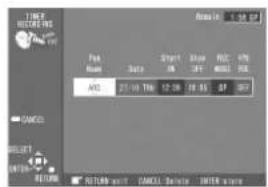
Timer Programme Correction screen (from step 3 on page 30)
1) Use the joystick [◀, ▶] to select the item you want to change.
2) Change the setting with the joystick [▲, ▼].
The items change as follows:
- Pos/Name (Programme Position/TV Station Name)
- Date
Current date→the day before one month later→Daily (Sunday to Saturday)→Daily (Monday to Saturday)→Daily (Monday to Friday)→Weekly (Sundays)→Weekly (Saturdays)
- Start ON (start time)/Stop OFF (finish time)
The time increases or decreases in 30-minute increments if you hold the button.
•REC MODE (Recording mode)
XP→SP→LP→EP→FR (page 24)
•VPS/PDC (For Continental Europe)
ON→OFF(----) (page 32)
3) Press [ENTER] when you have finished making changes.
The Timer Programme List screen appears.
Setting for control of the recording starting and ending time by special signal Included in the broadcasting signal (VPS/PDC Function)
(For Continental Europe)
VPS stands for Video Programme System.
PDC stands for Programme Delivery Control.
If a TV programme, for example a football game runs longer than scheduled, is shortened or starts earlier or later, this function synchronizes the recording start and stop with the actual broadcasting start and stop of the TV programme.
Conditions for correct operation of the VPS/PDC function:
- "ON" must be displayed under [VPS/PDC] on the On Screen Display.
●The TV station must broadcast VPS/PDC signals.
- The programme starting time must be set correctly to the starting time listed in the newspaper/magazine.
To activate the VPS/PDC Function:
Use the joystick [▲, ▼] to make the "ON" indication appear.
If “- -” appears under “Pos/Name” after entering a ShowView code or a G-code
Pos/Name stands for Programme Position/TV Station Name.
Normally, the name of the TV station or the number of the programme position is displayed under "Pos/Name".
However, if the TV station information was not automatically set during Preset Downroad or Auto Setup due to adverse reception conditions, the “—” indication appears instead.
In such a case, follow the operation steps below to correct it.
Use the joystick [▲, ▼] repeatedly to select the programme position on which the TV programme to be recorded will be broadcast.
After you have entered the information of a TV station, it remains stored in the unit's memory, and you do not need to enter it again in the future.
Manual programming
RAM DVD-R
Remote control only
You can set your own programming conditions (up to 16 programmes).
Preparation
- Switch [DVD, TV] to "DVD".
- Ensure that this unit's clock is set correctly.
- Insert a disc for recording (make sure there is enough room for the programme you are going to record plus a little extra).
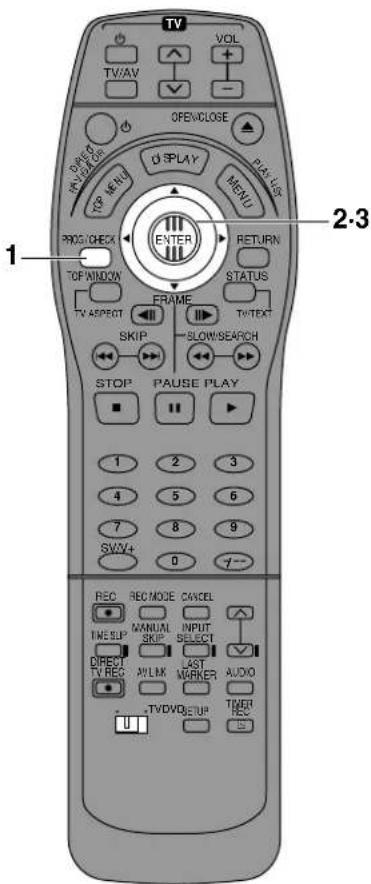
1 Press [PROG/CHECK].
●The Timer Programme List screen appears.
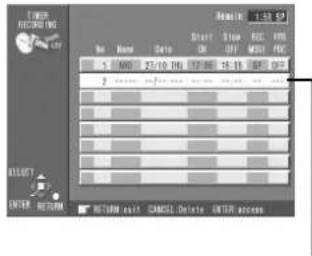
A line that is ready for programming in highlighted.
2 Press [ENTER].
●The Timer Programme Correction screen appears.
![PANASONIC DMR-E20 - Press [ENTER]. - 1](/content/2026/05/796666/images/6f51c5def7393b5bbca6b72f8b84cc2d8fc35d2151a90173b49acbad1074e1c6.jpg)
3 Use the joystick [▶] to move through the items and change the items with the joystick [▲, ▼].
- The current settings are shown each time you press ▶.
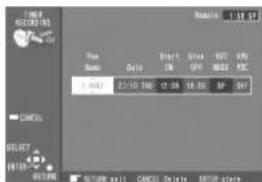
- Pos/Name (Programme Position/TV Station Name)
- Date
Current date→the day before one month later→Daily (Sunday to Saturday)→Daily (Monday to Saturday)→Daily (Monday to Friday)→Weekly (Sundays)→Weekly (Saturdays)
- Start ON (start time)/Stop OFF (finish time)
The time increases or decreases in 30-minute increments if you hold the button.
•REC MODE (Recording mode)
XP→SP→LP→EP→FR (page 24)
• VPS/PDC (For Continental Europe)
ON→OFF(----) (page 32)
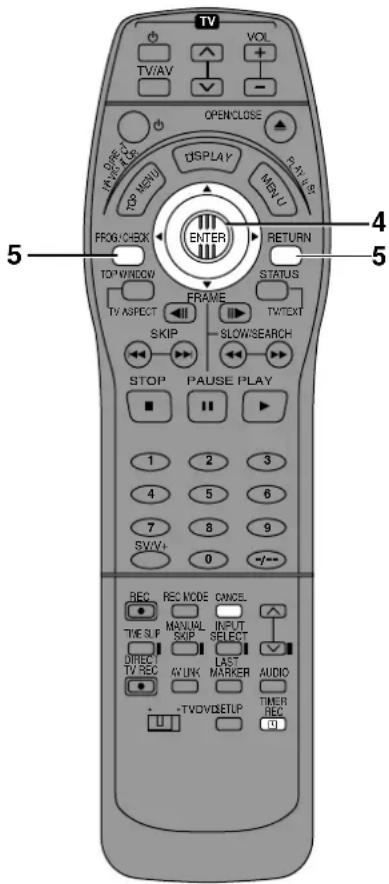
4 Press [ENTER] when you have finished making changes.
- To continue programming: Repeat steps 2, 3, and 4.
5 Press [PROG/CHECK] or [RETURN].
■Flexible recording mode (FR)
- The unit automatically selects a recording mode between "XP" and "EP" that will enable the timer recording to fit in the available recording time on the disc with the best possible recording quality.
●This only works with timer recordings. - It may not be possible to record to the finish of the programme if the remaining time doesn't allow.
●This does not work with VPS/PDC.
To put the unit on recording standby
Press [☐, TIMER REC].
Ensure “☐” lights on the unit's display.
To change the timer recording programme
1) While the Timer Programme List Screen is being shown, use the joystick [▲, ▼] to select the programme you want to change, and press [ENTER] to show the Timer Programme Correction screen.
2) Move through the items with the joystick ▶ and change the settings with the joystick [▲, ▼] and press [ENTER].
To clear a timer recording programme
Press [CANCEL] while the programme's Timer Programme Correction screen is being shown. Alternatively, use the joystick [▲, ▼] to select the programme in the Timer Programme List screen and press [CANCEL].
- You can not delete programmes that are currently recording.
Note
- If the disc is protected or full, the unit switches to standby but does not go on standby for recording. Check the disc carefully.
●The built-in clock employs 24-hour system.
●The remaining time is not shown if you insert discs other than DVD-RAM or DVD-R. - The remaining time displayed is calculated based on the current recording mode.
- Approximately 30 seconds at the beginning of subsequent programmes is not recorded when you used recording to record multiple programmes to a DVD-R.
- Recording is not possible unless you set "Disc Protection" in "DISC INFORMATION" to "Off".
- You cannot record to a disc if the write protect tab on a cartridge disc is set to protect. Release this before operation (page 91).
- If the unit is not put in the timer recording standby mode at the latest 10 minutes before the programmed timer recording starting time, the [☐] flashes on the unit display. In this case, press the [☐, TIMER REC] button to put the unit in the timer recording standby mode.
To check programmes
Press [PROG/CHECK].
The Timer Programme List screen appears.
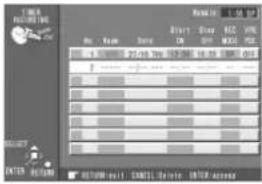
Icon explanations
w The programme contents are repeated in another programme.
●This programme is currently recording.
F The disc was full or the maximum number of programmes or scenes was reached so the programme failed to record.
The television programme was copy-guarded so the programme failed to record.
The programme failed to record for some other reason.
■To change the programme
(page 34)
■To exit from the Timer Programme List screen
Press [PROG/CHECK] or [RETURN]. (The television is shown.)
For your reference
- Programmes that failed to record are displayed grey. These programmes are deleted from the list at 4 a.m. the day after tomorrow.
Starting and canceling programmes
■To put the unit on recording standby
Press [☐, TIMER REC].
The unit turns off and "☐" lights on the unit's display.
Note
- The unit cannot go to timer recording standby if the disc is protected or full ("☐" flashes). Check the disc carefully.
■To release the unit from recording standby
If you want to record something else before the programme start time, for example:
Press [☐, TIMER REC].
The unit turns on and "☐" goes out.
- Be sure to press [☐, TIMER REC] before the programme start time to put the unit on recording standby. The programme only works if “☐” is on.
■To stop recording while a programme is working
Press [☐, TIMER REC].
Recording from a video cassette player
1
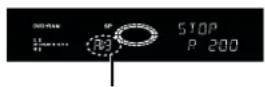
When you have selected "AV3"
3
When connected to non-DV equipment
RAM DVD-R
You can record audio and video being played on a video cassette player or video camera connected to the input terminals.
Preparation
- Before connecting any cables, first make sure that the power for both units is off. Then after connecting any cable, turn on the both units.
- Connect the other equipment to this unit's input terminals (page 71).
- Switch [DVD, TV] to "DVD".
- Insert a disc that can be recorded on.
- Select the recording mode, XP, SP, LP, or EP (page 24).
1 While stopped
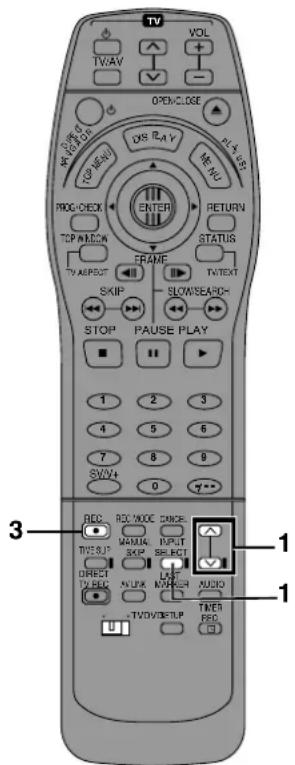
Press [^, v] or [INPUT SELECT] to select the input channel for the equipment you have connected.
- Select AV1, AV2, AV3 or AV4.
2 Start play on the other equipment.
3 Press [●, REC] at the point you want to start recording.
When connected to DV equipment
RAM DVD-R
You can record audio and video being played on a DV equipment connected to the input terminals.
Preparation
- Before connecting any cables, first make sure that the power for both units is off. Then after connecting any cable, turn on the both units.
- Connect the other equipment to this unit's input terminals (page 67).
- Use a DV cable to connect the equipment.
- Switch [DVD, TV] to "DVD".
- Insert a disc that can be recorded on.
- Select the recording mode, XP, SP, LP, or EP (page 24).
1 While stopped
Press [∧, ∨] or [INPUT SELECT] to select the input channel for the equipment you have connected.
- Select DV.
2 Start play on the other equipment.
3 Press [●, REC] at the point you want to start recording.
For your reference
- We recommend connecting one piece of DV equipment at a time.
| DV Source(page 7) | Audio Mode for DV Input | Bilingual Selectionfor DVD-R | REC&Output AUDIO | |
| L ch R ch | ||||
| STEREO | STEREO1 | R2M1 | L1 R1 | |
| STEREO2 L2 | ||||
| Mix L1+L2 | ||||
| Bilingual | STEREO1 L1 | |||
| STEREO2 L2 | ||||
| Mix *L1+L2 | *R1+R2 | |||
| STEREO | STEREO1 | R2M2 | L1 R1 | |
| STEREO2 L2 | ||||
| Mix L1+L2 | ||||
| Bilingual | STEREO1 R1 | |||
| STEREO2 R2 | ||||
| Mix *L1+L2 | *R1+R2 | |||
*The audio is recorded as stereo if the DV source is "Bilingual" and you select "Mix".
■To skip unwanted parts
Press [11, PAUSE] to pause recording.
Press again to restart recording.
■To stop recording
Press [■, STOP].
Note
Stop play on the other equipment as well.
For your reference
Poor video quality or colouring may indicate that the material you are recording has copy protection.
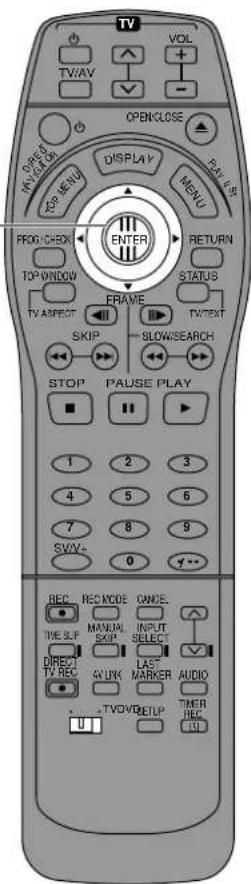
Entering titles
RAM DVD-R
You can:
- Title discs with the DISC INFORMATION in the Top Window (page 39).
- Title programmes with the DIRECT NAVIGATOR (page 47).
- Or title play lists with the PLAY LIST screen (page 61).
Preparation
- Switch [DVD, TV] to "DVD".
- Insert a disc with something recorded on it.
- Select Titling "DISC INFORMATION", Titling "DIRECT NAVIGATOR", or Titling "PLAY LIST" screen.
1 After the titling screen appears
Use the joystick [▲, ▼, ◀, ▶] to select the character you want to enter and press [ENTER].
- You can enter the following characters.
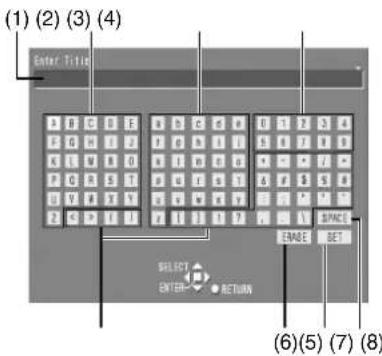
(1) This window shows the text you have entered (Title field)
(2) Capital letters
(3)Lower-case letters
(4)Numbers
(5)Symbols
(6)ERASE
(7) SET (when you have finished entering text)
(8)SPACE
■To enter other characters
Repeat step 1.
2 Use the joystick [▲, ▼, ◀, ▶] to select "SET" and press [ENTER].
●The title is entered and the screen disappears.
■To correct a character
1) Use the joystick [▲, ▼, ◀, ▶] to select the character you want to correct in the title field.
2) Use the joystick [▲, ▼] to move outside the title field.
3) Use the joystick to select "ERASE" and press [ENTER]. The last character is erased.
4) Use the joystick to select the correct character and press [ENTER].
Note
- Even if you have entered up to the maximum number of characters, characters you enter after the position marked with “▼” in the title field and the character immediately prior to the mark will be replaced with “...” when displayed in the direct navigator and play list lists.
- You cannot enter titles if the programme is protected. Release the protection with the direct navigator. (page 50)
- You cannot enter titles unless the "Disc Protection" in DISC INFORMATION is "Off". (page 41)
- You cannot enter titles if the disc is protected with the write protect tab (page 91).
DISC INFORMATION
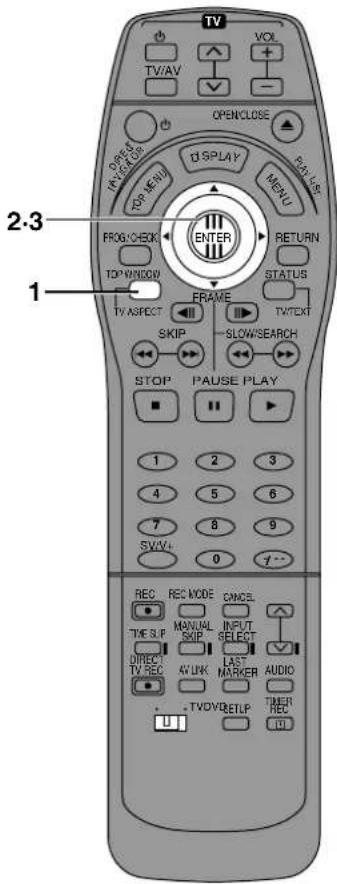
About DISC INFORMATION
RAM DVD-R
- You can give discs titles—Enter Title
- You can write-protect and write-enable DVD-RAM—Disc Protection
- You can format DVD-RAM—Format
- You can finalize DVD-R so they can be played on compatible DVD players—Finalize
Enter Title
RAM DVD-R
Each disc can be given a different title.
Preparation
- Switch [DVD, TV] to "DVD".
- Insert a disc you have recorded on.
1 While stopped Press [TOP WINDOW].
2 Use the joystick [▲, ▼, ◀, ▶] to select "DISC INFORMATION" and press [ENTER].
3 Use the joystick [▲, ▼] to select "Enter Title" and press [ENTER].
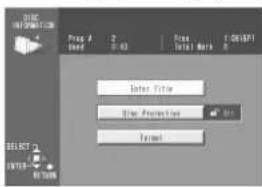
4 Enter the title.
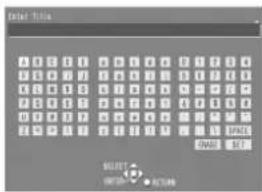
- "Entering titles" (page 38)
Note
- You can give DVD-RAM titles of up to 64 characters and DVD-R titles of up to 40 characters.
- You cannot give DVD-R titles once they have been finalized.
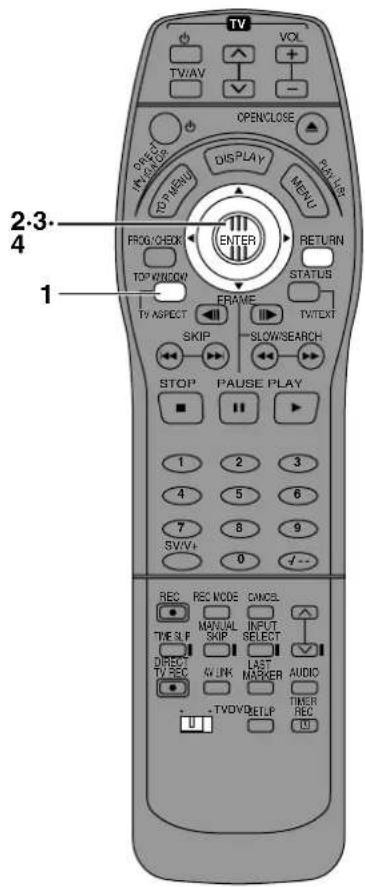
Disc Protection
RAM
This allows you to protect discs from accidental erasure.
Preparation
- Switch [DVD/TV] to "DVD".
- Insert the disc you want to protect.
1 While stopped
Press [TOP WINDOW].
2 Use the joystick [▲, ▼, ◀, ▶] to select "DISC INFORMATION" and press [ENTER].
3 Use the joystick [▲, ▼] to select "Disc Protection" and press [ENTER].
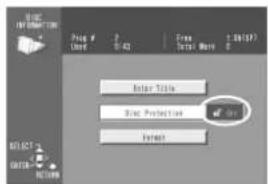
4 Use the joystick [◀] to select "Yes" and press [ENTER].
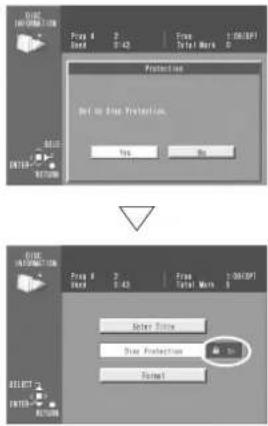
■To stop partway through
Select "No" in step 4 and press [ENTER].
Or
Press [RETURN].
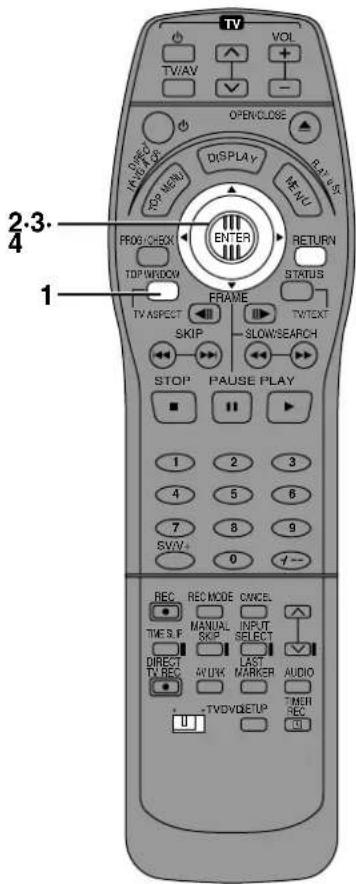
Releasing disc protection
RAM
This allows you to release disc protection.
Preparation
- Switch [DVD, TV] to "DVD".
- Insert the disc you want to release protection.
1 While stopped
Press [TOP WINDOW].
2 Use the joystick [▲, ▼, ◀, ▶] to select "DISC INFORMATION" and press [ENTER].
3 Use the joystick [▲, ▼] to select "Disc Protection" and press [ENTER].
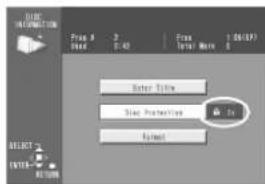
4 Use the joystick [◀] to select "Yes" and press [ENTER].
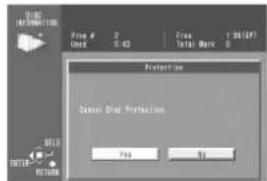
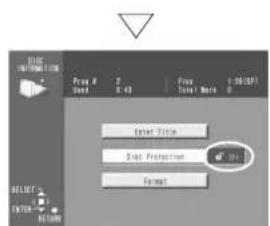
■To stop partway through
Select "No" in step 4 and press [ENTER].
Or
Press [RETURN].
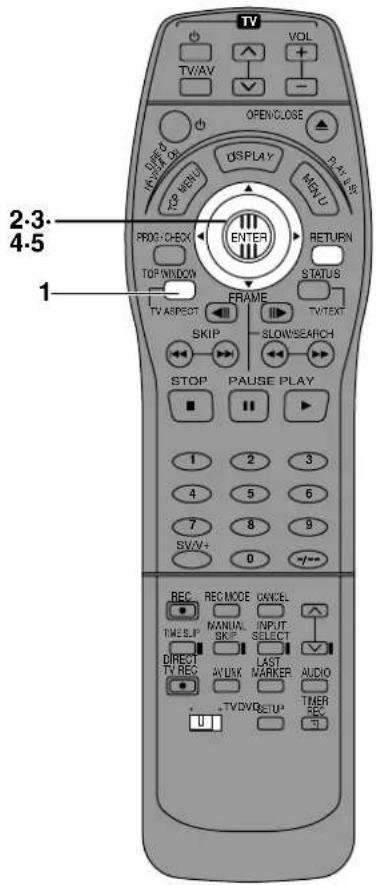
Format
RAM
Some DVD-RAM are unformatted. You must format these discs before you can use them in this unit. Formatting also allows you to erase the entire contents of a disc.
Preparation
- Switch [DVD, TV] to "DVD".
- Insert the disc you want to format.
1 While stopped
Press [TOP WINDOW].
2 Use the joystick [▲, ▼, ◀, ▶] to select "DISC INFORMATION" and press [ENTER].
3 Use the joystick [▲, ▼] to select "Format" and press [ENTER].
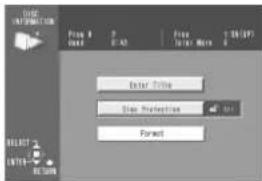
4 Use the joystick [◀] to select "Yes" and press [ENTER].
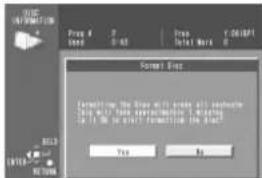
5 Use the joystick [◀] to select "Start" and press [ENTER].
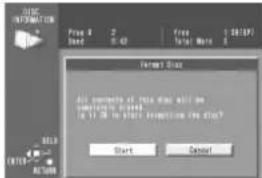
- Formatting starts.
The message "Formatting is completed" appears when formatting is finished.
All recordings are irretrievably erased when a disc is formatted. Check the disc carefully before formatting to ensure it doesn't contain any programmes you want to keep.
■To stop formatting
Select "No" in step 4 or "Cancel" in step 5 and press [ENTER].
Or
Press [RETURN].
Note
- Do not turn the unit off or disconnect the AC power supply cord while the message "Formatting the disc" is on the television.
This can render the disc unusable.
(This can take up to 70 minutes. You can cancel formatting if it takes more than 2 minutes by pressing [RETURN]. The disc must be reformatted if you do this.)
- All data on the disc is erased when it is formatted, including recordings made with this unit.
Data written to the disc by a computer is also erased.
For your reference
- The disc cannot be formatted if the write protect tab is switched to "PROTECT". Release the protection to continue (page 91).
- Formatting cannot be performed on DVD-R or CD-R/RW.
- The message "Unable to format" appears when you try to format discs this unit cannot use.
- If you have used the direct navigator to protect a programme or disc, the message "Contents on the disc have been protected. Start formatting the disc?" appears in step 5. Select "Start" if you want to format the disc. The contents will be erased even if they have been protected.
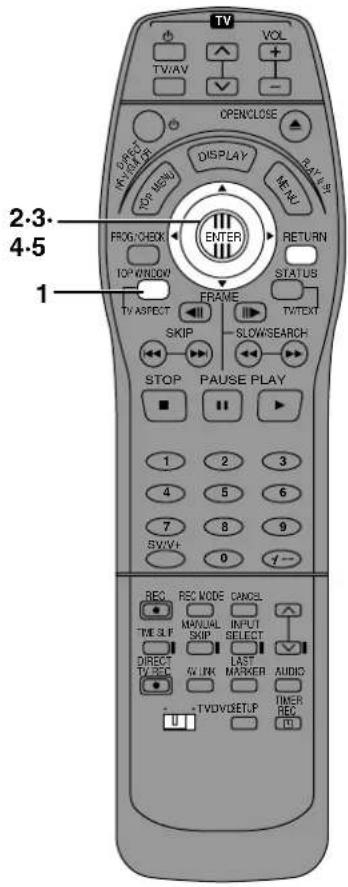
Finalize—Creating DVD-Video
DVD-R
You can play DVD-R on compatible DVD players by finalizing them on this unit, effectively making them into DVD-Video.
The menus you create with this unit can also be used on the player.
Preparation
- Switch [DVD, TV] to "DVD".
- Insert the disc you want to finalize.
1 While stopped Press [TOP WINDOW].
2 Use the joystick [▲, ▼, ◀, ▶] to select "DISC INFORMATION" and press [ENTER].
3 Use the joystick [▲, ▼] to select "Finalize" and press [ENTER].
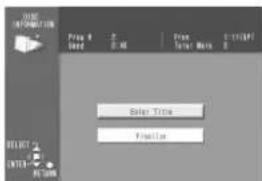
4 Use the joystick [◀] to select "Yes" and press [ENTER].
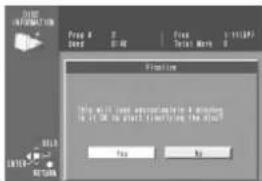
5 Use the joystick [◀] to select "Start" and press [ENTER].
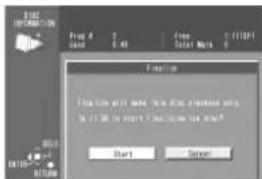
- Finalizing starts.
The message "Finalizing is finished" appears when finalizing is finished.
Note
- Do not turn the unit off or disconnect the power supply cord while the messeage "Finalizing" is on the television. This can render the disc unusable.
- You can only finalize DVD-R that were recorded on this unit.
- You cannot record on DVD-R that have been finalized.
●The markers you entered (page 66) will be lost. - Finalizing takes up to 15 minutes.
■To stop finalizing
Select "No" in step 4 or "Cancel" in step 5 and press [ENTER].
Or
Press [RETURN].
Using the direct navigator
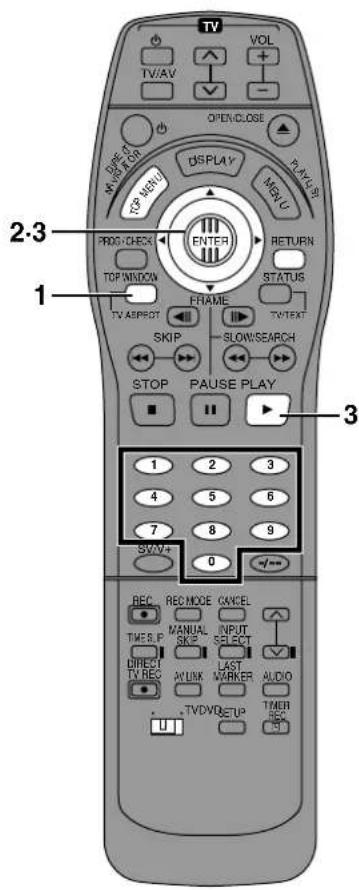
Selecting programmes to play
RAM DVD-R
A list of programmes is created as you record them. You can use this list to find the programmes you want to watch.
Preparation
- Switch [DVD, TV] to "DVD".
- Insert a disc you have recorded on.
1 While stopped
Press [TOP WINDOW].
2 Use the joystick [▲, ▼, ◀, ▶] to select "DIRECT NAVIGATOR" and press [ENTER].
●The programme list appears.
●The images for the currently highlighted list are played in the background.
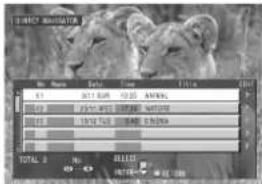
3 Use the joystick [▲, ▼] to select the programme you want to watch and press [ENTER] or [▶, PLAY].
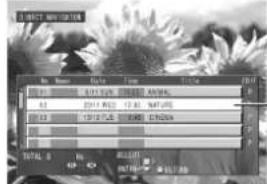
For example, when you select programme number 2.
- Play of the images that were playing in the background continues.
■To clear the programme list
Press [TOP MENU, DIRECT NAVIGATOR] or [RETURN].
For your reference
- You can also display the programme list by pressing [TOP MENU, DIRECT NAVIGATOR] in step 1. The direct navigator works while stopped, playing or recording.
- You can also select programmes from the list in step 3 by entering a 2-digit number with the numeric buttons (page 8) and pressing [ENTER].
If you enter a number larger than the total number of programmes, the last programme is selected.
- Titles are only displayed if you have given the programme a title.
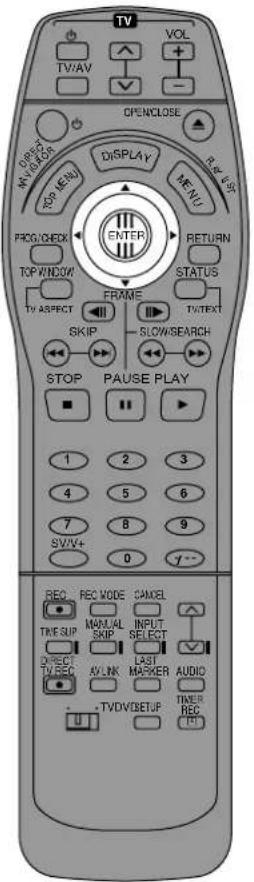
About the programme list
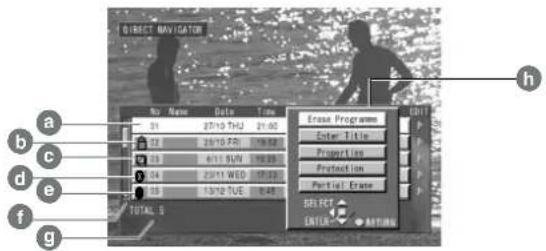
a) Programme number, broadcast name, recording date, time recording started, programme title (if entered).
- Programme 1 is selected in the example.
b) Write-protected:
●Displayed when you have protected the programme. Programme 2 has been protected in the example.
c) Copy-protected:
●Displayed when you have recorded a programme that has copy protection, from broadcast.
d) Unable to play: ✗
● Displayed if you cannot play the programme.
e) Currently recording: ●
- Displayed when the programme is being recorded.
f) Scroll bar
- If there are more than six programmes, you can move down the list by using the joystick [▲, ▼] and this bar shows your approximate position in the list.
g) Total number of programmes
●Shows the total number of programmes.
h) Sub menu
- Displayed when you use the joystick ▶. (You can see this during simultaneous recording and play but you are unable to perform operations.)
- Erase a programme (page 46).
- Enter or edit a title (page 47).
- Check a programme's contents (page 48).
●Write-protect a programme (page 49).
- Erase part of a programme (page 51).
For your reference
- The list can show up to 99 programmes that you have recorded or programmed to record.
- The message “Cannot record. Maximum amount of scenes exceeded” is displayed if you try to start recording when there are already 99 programmes on a disc. Erase unneeded programmes (DVD-RAM only) or use a new disc to continue recording.
- When using DVD-R, "Protection" and "Partial Erase" are not displayed in the submenu.
●The contents of the list are recorded on the disc.
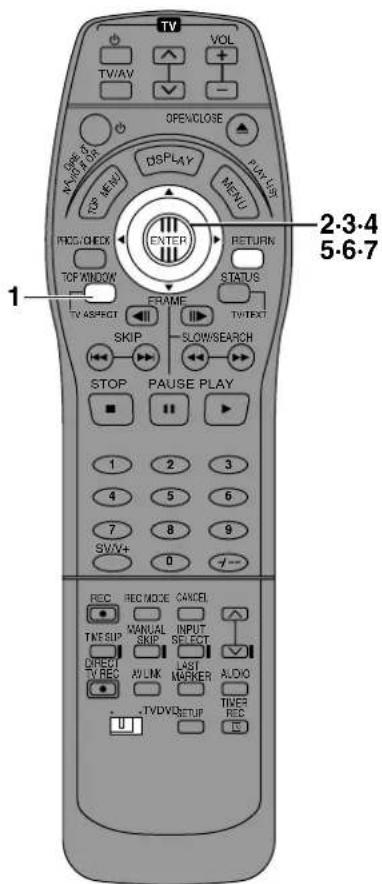
Erasing programmes
RAM DVD-R
The programme is erased completely when you use this procedure and cannot be retrieved. Check the programme carefully before erasing it to ensure it isn't one you want to keep.
Preparation
- Switch [DVD, TV] to "DVD".
- Insert a disc you have recorded on.
1 While stopped
Press [TOP WINDOW].
2 Use the joystick [▲, ▼, ◀, ▶] to select "DIRECT NAVIGATOR" and press [ENTER].
3 Use the joystick [▲, ▼] to select the programme you want to erase.
4 Use the joystick ▶ so the submenu appears.
5 Use the joystick [▲, ▼] to select "Erase Programme" and press [ENTER].
6 Use the joystick [◀] to select "Erase".
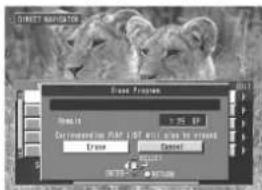
7 Press [ENTER].
■To stop partway through
Select "Cancel" in step 6 and press [ENTER].
Or
Press [RETURN].
For your reference
- The disc's available recording time may not increase after erasing short programmes.
- Computer data is not erased.
- The available recording time on DVD-R does not increase when you erase programmes.
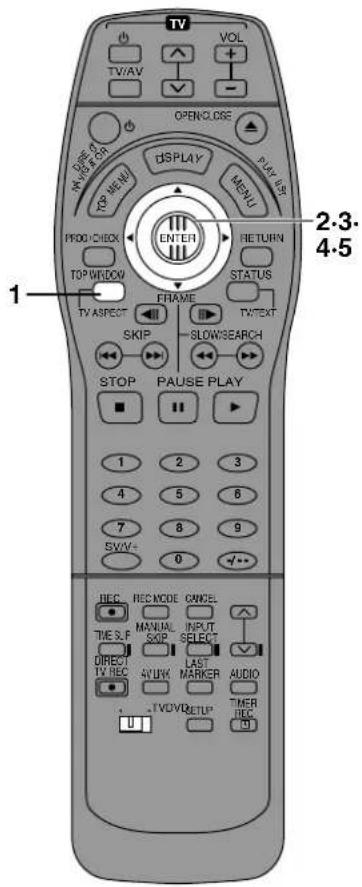
Entering and editing programme titles
RAM DVD-R
Preparation
- Switch [DVD, TV] to "DVD".
- Insert a disc you have recorded on.
1 While stopped
Press [TOP WINDOW].
2 Use the joystick [▲, ▼, ◀, ▶] to select "DIRECT NAVIGATOR" and press [ENTER].
3 Use the joystick [▲, ▼] to select the programme whose title you want to enter or edit.
4 Use the joystick ▶ so the submenu appears.
5 Use the joystick [▲, ▼] to select "Enter Title" and press [ENTER].
6 Enter or edit the title.
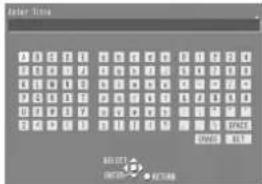
- "Entering titles" (page 38)
For your reference
You can give DVD-RAM titles of up to 64 characters and DVD-R titles of up to 44 characters.
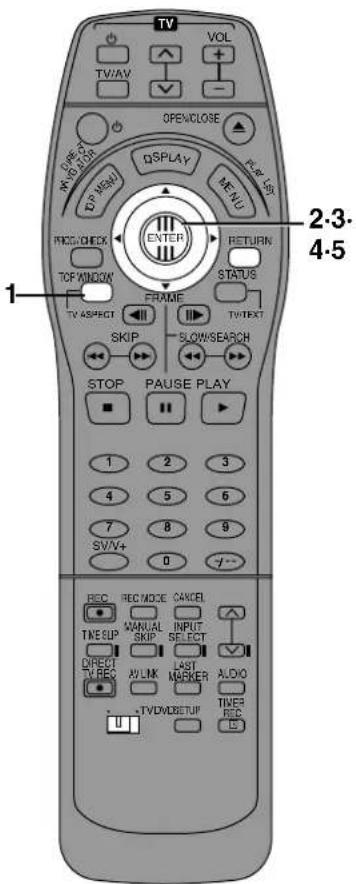
Checking programme contents
RAM DVD-R
You can check the contents of a selected programme.
Preparation
- Switch [DVD, TV] to "DVD".
- Insert a disc you have recorded on.
1 While stopped
Press [TOP WINDOW].
2 Use the joystick [▲, ▼, ◀, ▶] to select "DIRECT NAVIGATOR" and press [ENTER].
3 Use the joystick [▲, ▼] to select the programme whose contents you want to check.
4 Use the joystick ▶ so the submenu appears.
5 Use the joystick [▲, ▼] to select "Properties" and press [ENTER]. The contents of the programme are shown.
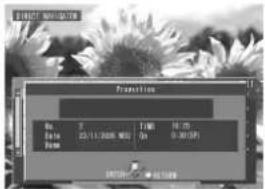
■To return to the previous screen
Press [RETURN].
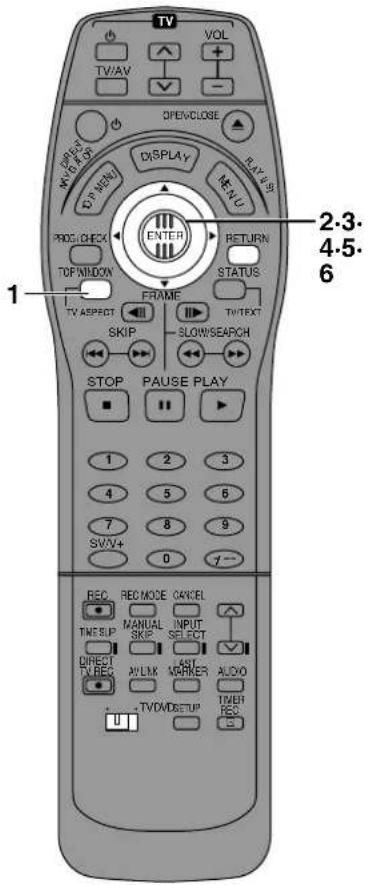
Protecting programmes
RAM
You can prevent accidental erasure of programmes by write-protecting them.
Preparation
- Switch [DVD, TV] to "DVD".
- Insert a disc you have recorded on.
1 While stopped
Press [TOP WINDOW].
2 Use the joystick [▲, ▼, ◀, ▶] to select "DIRECT NAVIGATOR" and press [ENTER].
3 Use the joystick [▲, ▼] to select the programme you want to protect.
4 Use the joystick ▶ so the submenu appears.
5 Use the joystick [▲, ▼] to select "Protection" and press [ENTER].
6 Use the joystick [◀] to select "Yes" and press [ENTER].
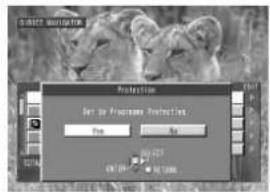
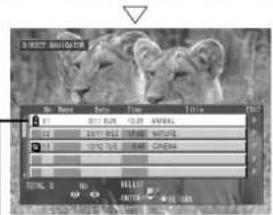
The padlock mark appears.
■To stop partway through
Select "No" in step 6 and press [ENTER].
Or
Press [RETURN].
For your reference
Programmes will be erased even if they are protected if you format the disc with DISC INFORMATION (page 42).
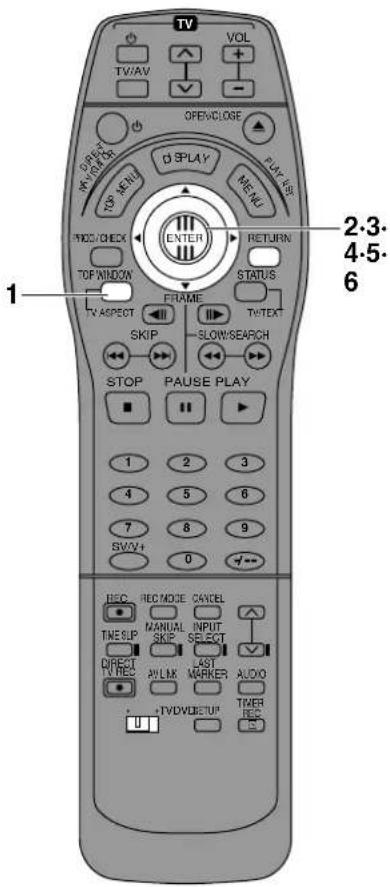
Releasing programme protection
RAM
Preparation
- Switch [DVD, TV] to "DVD".
- Insert a disc you have recorded on.
1 While stopped
Press [TOP WINDOW].
2 Use the joystick [▲, ▼, ◀, ▶] to select "DIRECT NAVIGATOR" and press [ENTER].
3 Use the joystick [▲, ▼] to select the programme you want to unprotect.
4 Use the joystick ▶ so the submenu appears.
5 Use the joystick [▲, ▼] to select "Protection" and press [ENTER].
6 Use the joystick [◀] to select "Yes" and press [ENTER].
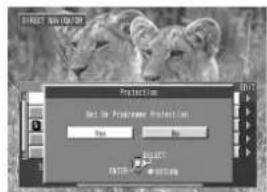
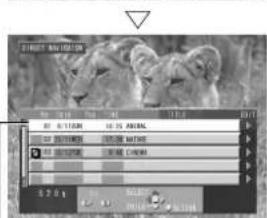
The padlock mark disappears.
■To stop partway through
Select "No" in step 6 and press [ENTER].
Or
Press [RETURN].
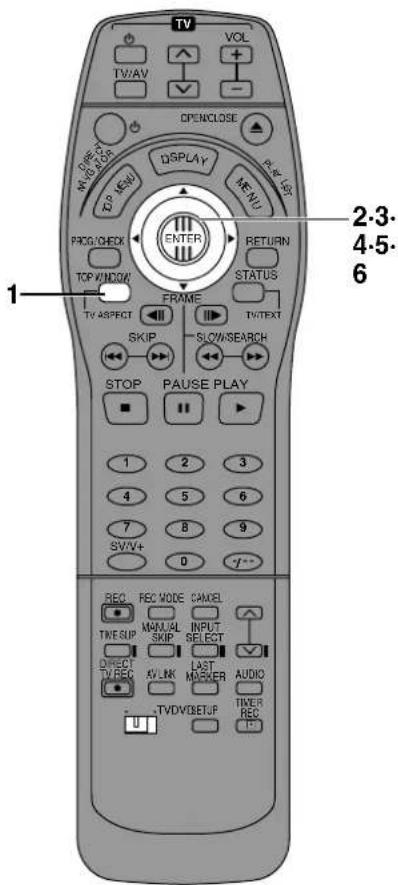
Erasing parts of a programme
RAM
The specified parts of the programme are erased completely when you use this procedure and cannot be retrieved. Check the programme carefully to ensure it isn't one you want to keep.
Preparation
- Switch [DVD, TV] to "DVD".
- Insert a disc you have recorded on.
1 While stopped
Press [TOP WINDOW].
2 Use the joystick [▲, ▼, ◀, ▶] to select "DIRECT NAVIGATOR" and press [ENTER].
3 Use the joystick [▲, ▼] to select the programme which contains the part you want to erase.
4 Use the joystick ▶ so the submenu appears.
5 Use the joystick [▲, ▼] to select "Partial Erase" and press [ENTER].
6 Use search functions such as fast-forward and slow-motion to find the start point of the part you want to erase and press [ENTER].
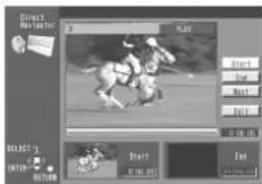
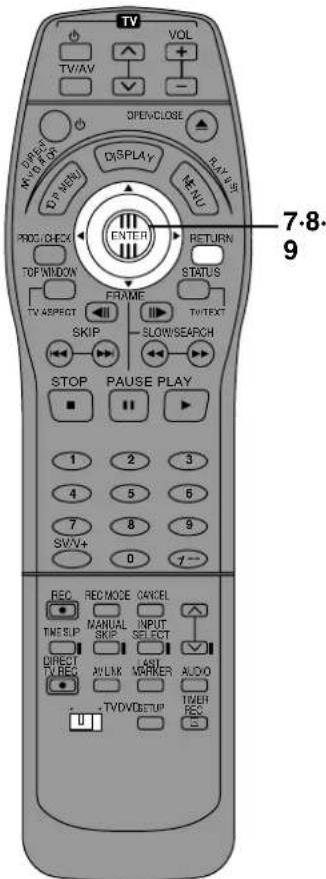
7 Use search functions such as fast-forward and slow-motion to find the end point of the part you want to erase and press [ENTER].
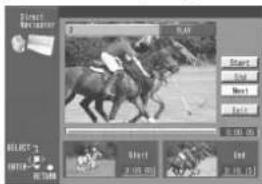
8 Use the joystick [▲, ▼] to select "Exit" and press [ENTER].
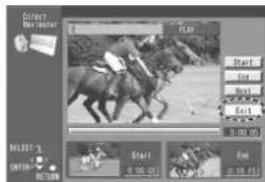
9 Use the joystick [◀] to select "Erase" and press [ENTER].
- Play lists created with the erased part are also erased.
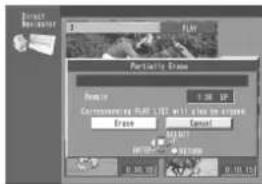
■To stop partway through
Select "Cancel" in step 9 and press [ENTER].
Or
Press [RETURN].
To erase another part of the same programme
Select "Next" in step 8, then repeat steps 6, 7 and 9.
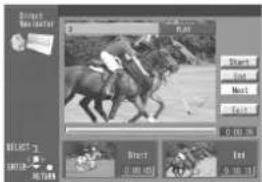
For your reference
- You can respecify the start or end points. The points you specify last are used.
- You cannot specify an end point before a start point or a start point after an end point.
- You may not be able to specify start and end points within 3 seconds of each other.
- You cannot specify start and end points if the picture recorded is stilled.
- The unit pauses play when the end of the programme is reached during this procedure.
- The disc's available recording time may not increase after erasing short parts of programmes.
- You cannot erase parts of protected programmes.
- Play lists created with the erased part are also erased.
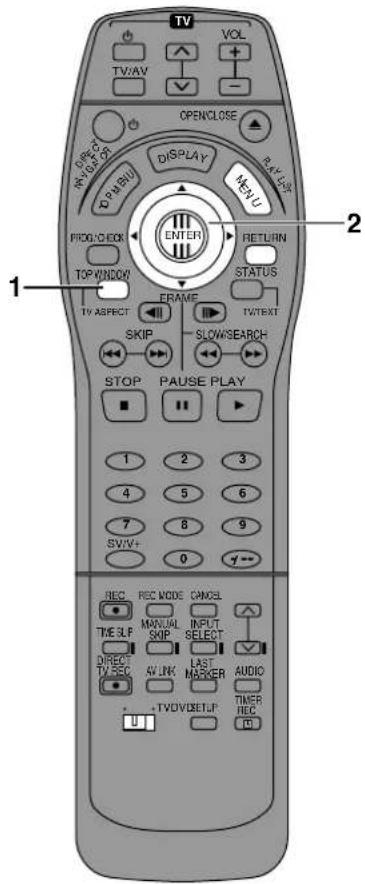
Using play lists to edit programmes
Displaying play lists
RAM
Preparation
- Switch [DVD, TV] to "DVD".
- Insert a disc you have recorded on.
1 While stopped
Press [TOP WINDOW].
2 Use the joystick [▲, ▼, ◀, ▶] to select "PLAY LIST" and press [ENTER].
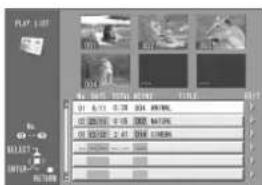
The play list screen appears. Scenes are not displayed if you have not yet created a play list with the disc.
■To clear the play list screen
Press [MENU, PLAY LIST] or [RETURN].
The screen returns to the state it was in before you called up the play list.
What you can do with the play list screen
- Create play lists (page 54)
●Play play lists (page 55) - Select a scene to play (page 56)
- Add, move, re-edit, and erase scenes (pages 56, 57, 58)
• Copy play lists (page 59) - Erase play lists (page 60)
- Give play lists titles (page 61)
- Check a play list's contents (page 61)
For your reference
You can also display the play list by pressing [MENU, PLAY LIST].
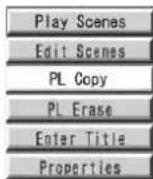
About the play list scene screen
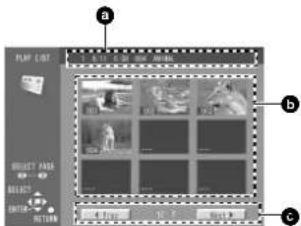
a) Play list information
This shows the play list number, date of creation (month/date), total play time, and the number of scenes it contains and title (if entered).
b) Scenes
9 scenes can be shown on a page.
c) Turning pages
If there are more than 9 scenes, use the joystick [▲, ▼, ◀, ▶] to select “◀ Back” or “Next ▶” and press [ENTER] to move to the previous page or next page. You can also enter the three digits with the numeric buttons.(page 8)
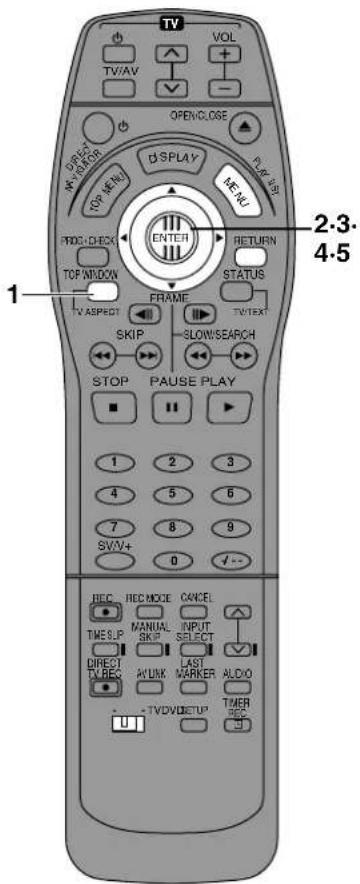
Creating play lists
RAM
You can specify start and end points to create a scene, then specify the order in which these scenes are played. These scenes are not recorded separately so this doesn't use up much of the disc's capacity.
Preparation
- Switch [DVD, TV] to "DVD".
- Insert a disc you have recorded on.
1 While stopped
Press [TOP WINDOW].
2 Use the joystick [▲, ▼, ◀, ▶] to select "CREATE PLAY LIST" and press [ENTER].
3 Use search functions such as fast-forward and slow-motion to find the start point of the scene and press [ENTER].
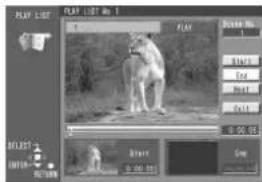
4 Use search functions such as fast-forward and slow-motion to find the end point of the scene and press [ENTER].
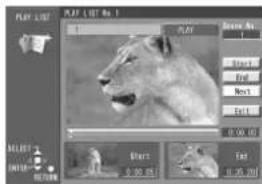
5 Use the joystick [▲, ▼] to select "Exit" and press [ENTER].
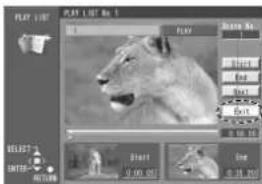
■To stop partway through
Press [RETURN].
■To clear the play list screen
Press [MENU, PLAY LIST] or [RETURN].
The screen returns to the state it was in before you called up the play list.
■To specify another scene
Select "Next" after step 4 and press [ENTER], then repeat steps 3 and 4.
For your reference
- One disc can have a maximum of 99 play lists and 999 scenes. These numbers may be reduced under some conditions.
- You can respecify the start or end points. The points you specify last are used.
- You cannot specify an end point before a start point or a start point after an end point.
- If you specify an end point but not a start point, the unit determines the beginning of the programme as the start point. Similarly, if you specify a start point but not an end point, the unit determines the end of the programme as the end point.
- You may not be able to specify start and end points if the material is still pictures recorded on other equipment.
- The unit pauses play when the end of the last programme on the disc is reached during this procedure.
- You cannot create or edit play lists if "Disc Protection" in "DISC INFORMATION" is "On" (page 40).
- You cannot create or edit play lists if the write protect tab on a cartridge disc is set to protect. Release this before operation (page 91).
- You can also display the CREATE PLAY LIST screen by selecting “—” at the bottom of the play list.
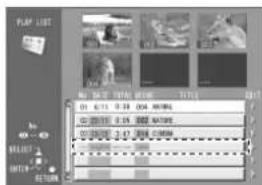
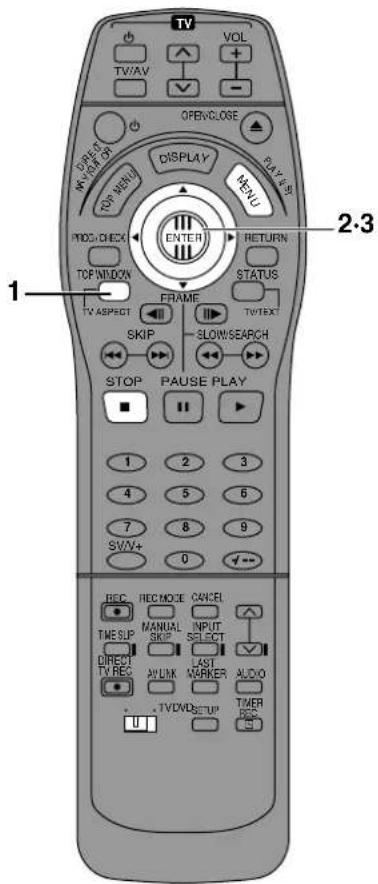
Playing play lists
RAM
Preparation
- Switch [DVD, TV] to "DVD".
- Insert a disc you created play lists on.
1 While stopped
Press [TOP WINDOW].
2 Use the joystick [▲, ▼, ◀, ►] to select "PLAY LIST" and press [ENTER].
3 Use the joystick [▲, ▼] to select the play list you want to play and press [ENTER].
●The play list you select is played.
- You can display the play lists after the sixth one by moving the joystick [▼].
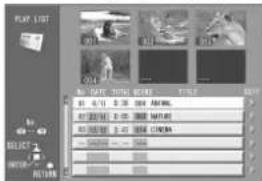
■To stop play list play
Press [■, STOP]
The play list appears.
For your reference
- You can also display the play list screen by pressing [MENU, PLAY LIST] at step 1.
- You can fast-forward, rewind, pause, and slow-motion while playing scenes just as you can during normal play.
- You can also select play lists from the list in step 3 by entering a 2-digit number with the numeric buttons (page 8) and pressing [ENTER].
If you enter a number larger than the total number of play lists, the last play list is selected.
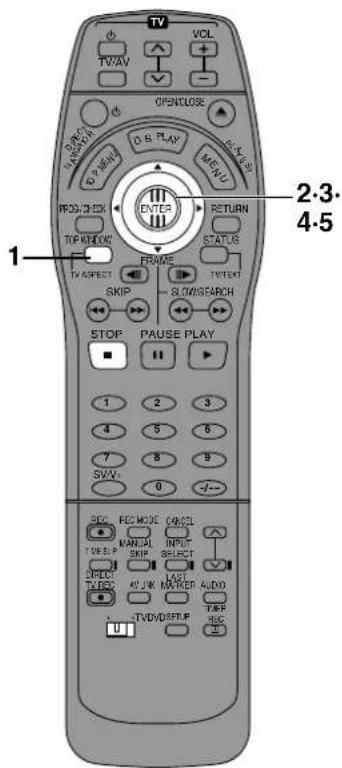
Playing play list scenes
RAM
Preparation
- Switch [DVD, TV] to "DVD".
- Insert a disc you created play lists on.
1 While stopped
Press [TOP WINDOW].
2 Use the joystick [▲, ▼, ◀, ▶] to select "PLAY LIST" and press [ENTER].
3 Use the joystick [▲, ▼] to select the play list that contains the scene you want to play and use the joystick ▶.
4 Use the joystick [▲, ▼] to select "Play Scenes" and press [ENTER].
5 Use the joystick [▲, ▼, ◀, ▶] to select the scene you want to play and press [ENTER].
●The scene you select is played.
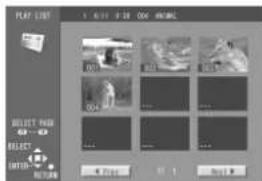
■To stop scene play
Press [■, STOP].
The scene list appears.
■To show scene 10 and later
In step 5, use the joystick [▲, ▼, ◀, ▶] to select "Next ▶" and press [ENTER].
For your reference
- You can fast-forward, rewind, pause, and slow-motion while playing scenes just as you can during normal play.
- You can also select a page of scenes in step 5 by entering a 3-digit number with the numeric buttons (page 8).
Adding scenes to a play list
RAM
Preparation
- Switch [DVD, TV] to "DVD".
- Insert a disc you created play lists on.
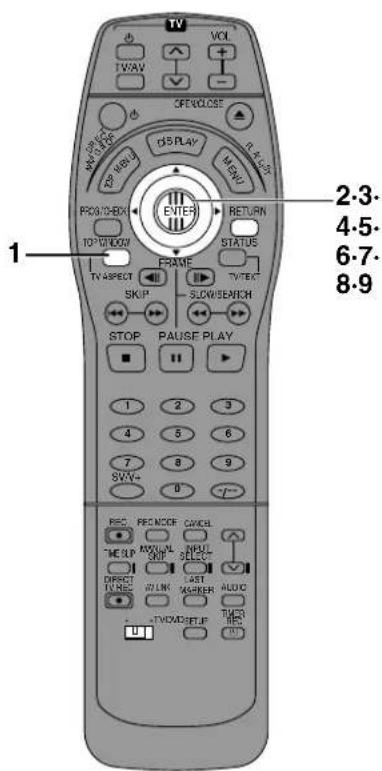
1 While stopped
Press [TOP WINDOW].
2 Use the joystick [▲, ▼, ◀, ▶] to select "PLAY LIST" and press [ENTER].
3 Use the joystick [▲, ▼] to select the play list you want to edit and use the joystick ▶.
4 Use the joystick [▲, ▼] to select "Edit Scenes" and press [ENTER].
5 Use the joystick [◀, ▶] to select "Add" and press [ENTER].
6 Use the joystick [▲, ▼, ◀, ▶] to select the scene after the position you want to add the scene and press [ENTER].
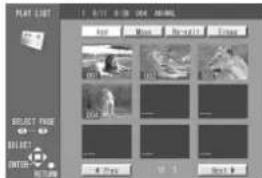
7 Use search functions such as fast-forward and slow-motion to find the start point of the scene and press [ENTER].
8 Use search functions such as fast-forward and slow-motion to find the end point of the scene and press [ENTER].
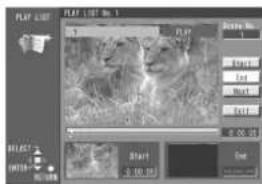
9 Use the joystick [▲, ▼] to select "Exit" and press [ENTER].
●The screen from step 5 reappears.
■To return to the previous screen
Press [RENTER].
■To add other scene
1) Use the joystick [▲, ▼] after step 8 to select "Next" and press [ENTER].
2) Repeat steps 7, and 8.
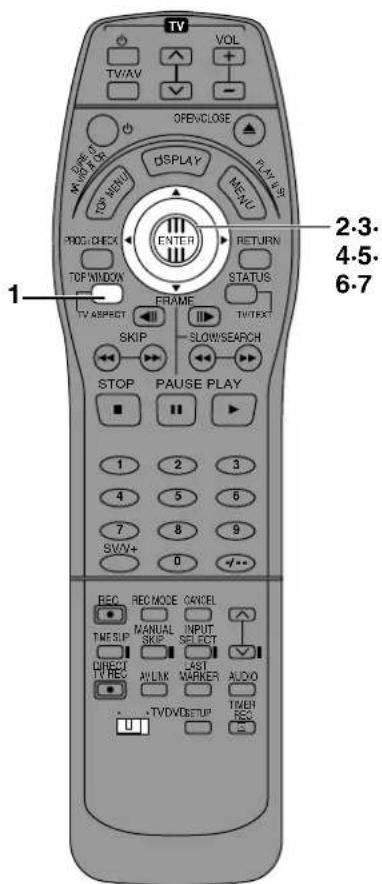
Moving a scene
RAM
Preparation
- Switch [DVD/TV] to "DVD".
- Insert a disc you created play lists on.
1 While stopped
Press [TOP WINDOW].
2 Use the joystick [▲, ▼, ◀, ▶] to select "PLAY LIST" and press [ENTER].
3 Use the joystick [▲, ▼] to select the play list you want to edit and press ▶.
4 Use the joystick [▲, ▼] to select "Edit Scenes" and press [ENTER].
5 Use the joystick [◀, ▶] to select "Move" and press [ENTER].
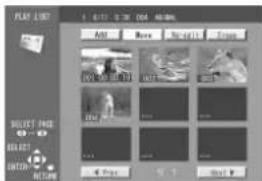
6 Use the joystick [▲, ▼, ◀, ▶] to select the scene you want to move and press [ENTER].
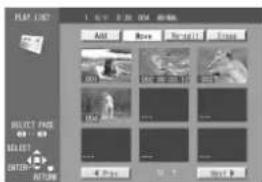
7 Use the joystick [▲, ▼, ◀, ▶] to select the scene currently in the position to which you want to move the scene to and press [ENTER].
The scene you selected in step 6 moves to the position in front of the scene selected.
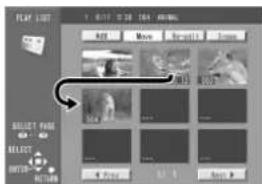
■To move another scene
Repeat steps 6 and 7.
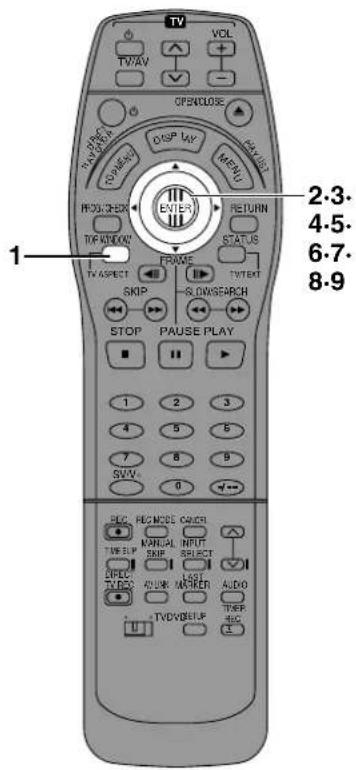
To re-edit a play list scene
RAM
1 While stopped
Press [TOP WINDOW].
2 Use the joystick [▲, ▼, ◀, ▶] to select "PLAY LIST" and press [ENTER].
3 Use the joystick [▲, ▼] to select the play list you want to edit and use the joystick ▶.
4 Use the joystick [▲, ▼] to select "Edit Scenes" and press [ENTER].
5 Use the joystick [◀, ▶] to select "Re-edit" and press [ENTER].
6 Use the joystick [▲, ▼, ◀, ▶] to select the scene you want to re-edit and press [ENTER].
7 Use search function such as fast-forward and slow-motion to find the start point of the scene and press [ENTER].
8 Use search functions such as fast-forward and slow-motion to find the end point of the scene and press [ENTER].
9 Use the joystick [▲, ▼] to select "Exit" and press [ENTER].
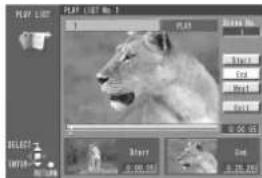
■To re-edit another scene
(1) Use the joystick [▲, ▼] after step 8 to select "Next" or "Back" and press [ENTER] until you find the scene you want to re-edit.
(2) Repeat steps 6 to 8 to continue re-editing other scenes.
Note
You cannot specify an end point before a start point or a start point after an end point.
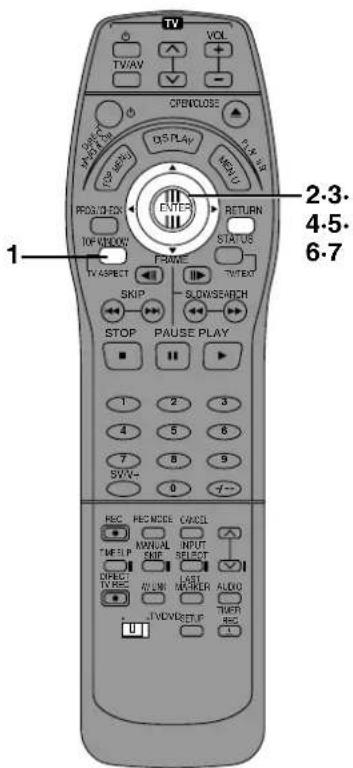
Erasing a scene from a play list
RAM
Preparation
- Switch [DVD, TV] to "DVD".
- Insert a disc you created play lists on.
1 While stopped Press [TOP WINDOW].
2 Use the joystick [▲, ▼, ◀, ▶] to select "PLAY LIST" and press [ENTER].
3 Use the joystick [▲, ▼] to select the play list you want to edit and use the joystick ▶.
4 Use the joystick [▲, ▼] to select "Edit Scenes" and press [ENTER].
5 Use the joystick [◀, ▶] to select "Erase" and press [ENTER].
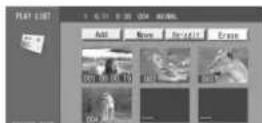
6 Use the joystick [▲, ▼, ◀, ▶] to select the scene you want to erase and press [ENTER].
7 Use the joystick [◀] to select "Yes" and press [ENTER].
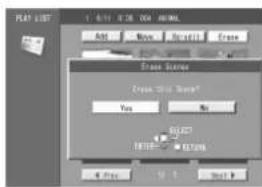
The selected scene is erased from the play list.
■To erase other scene
Repeat steps 6 and 7.
■To stop partway
Select "No" in step 7 and press [ENTER].
Or
Press [RETURN].
For your reference
The play list itself is erased if you erase all the scenes in it.
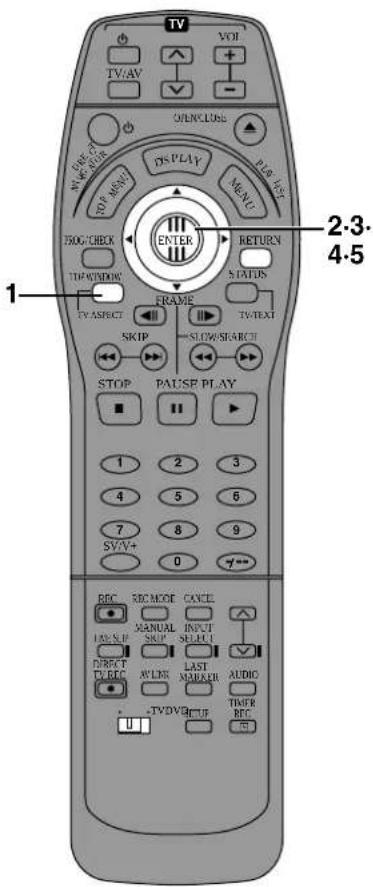
Copying play lists
RAM
Preparation
- Switch [DVD, TV] to "DVD".
- Insert a disc you created play lists on.
1 While stopped
Press [TOP WINDOW].
2 Use the joystick [▲, ▼, ◀, ►] to select "PLAY LIST" and press [ENTER].
3 Use the joystick [▲, ▼] to select the play list you want to copy and then use the joystick ▶.
4 Use the joystick [▲, ▼] to select "PL Copy" and press [ENTER].
5 Use the joystick [◀] to select "Yes" and press [ENTER].
The copied play list appears at the bottom of the list.
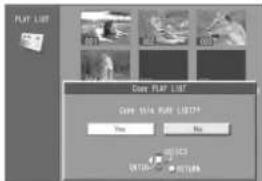
■To stop partway
Select "No" in step 5 and press [ENTER].
Or
Press [RETURN].
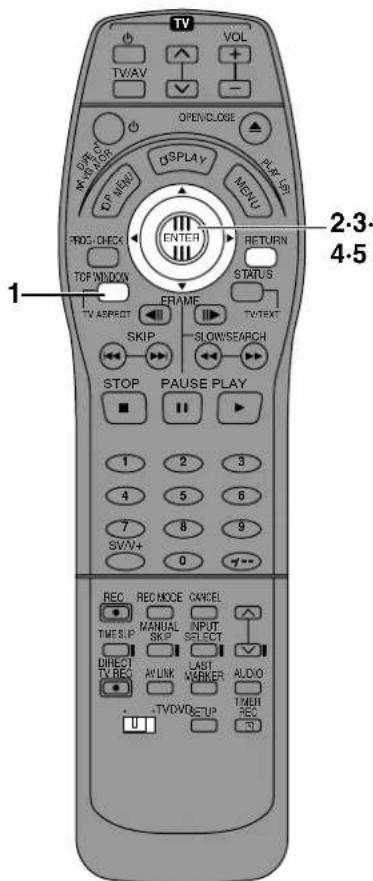
Erasing a play list
RAM
Preparation
- Switch [DVD, TV] to "DVD".
- Insert a disc you created play lists on.
1 While stopped
Press [TOP WINDOW].
2 Use the joystick [▲, ▼, ◀, ►] to select "PLAY LIST" and press [ENTER].
3 Use the joystick [▲, ▼] to select the play list you want to delete and use the joystick ▶.
4 Use the joystick [▲, ▼] to select "PL Erase" and press [ENTER].
5 Use the joystick [◀] to select "Yes" and press [ENTER].
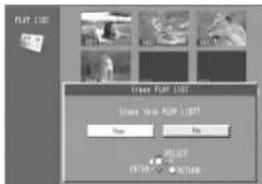
The play list is erased.
■To stop partway
Select "No" in step 5 and press [ENTER].
Or
Press [RETURN].
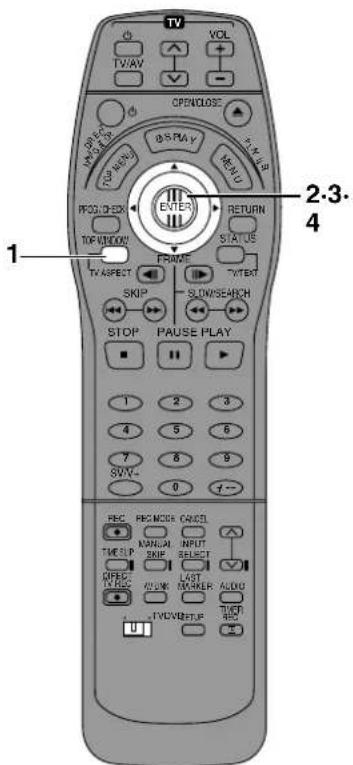
Titling play lists
RAM
Preparation
- Switch [DVD, TV] to "DVD".
- Insert a disc you created play lists on.
1 While stopped
Press [TOP WINDOW].
2 Use the joystick [▲, ▼, ◀, ►] to select "PLAY LIST" and press [ENTER].
3 Use the joystick [▲, ▼] to select the play list you want to title and then move the joystick ▶.
4 Use the joystick [▲, ▼] to select "Enter Title" and press [ENTER].
5 Enter the title.
- "Entering titles" (page 38)
For your reference
You can give play lists on DVD-RAM titles of up to 64 characters.
Checking play list's contents
RAM
Preparation
- Switch [DVD, TV] to "DVD".
- Insert a disc you created play lists on.
1 While stopped
Press [TOP WINDOW].
2 Use the joystick [▲, ▼, ◀, ▶] to select "PLAY LIST" and press [ENTER].
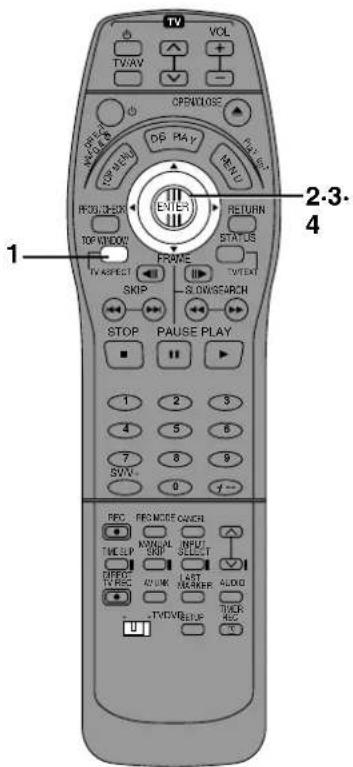
3 Use the joystick [▲, ▼] to select the play list whose contents you want to check and then move the joystick ▶.
4 Use the joystick [▲, ▼] to select "Properties" and press [ENTER].
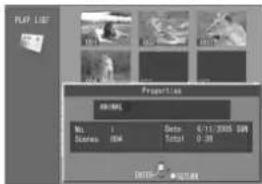
Using on-screen menu icons
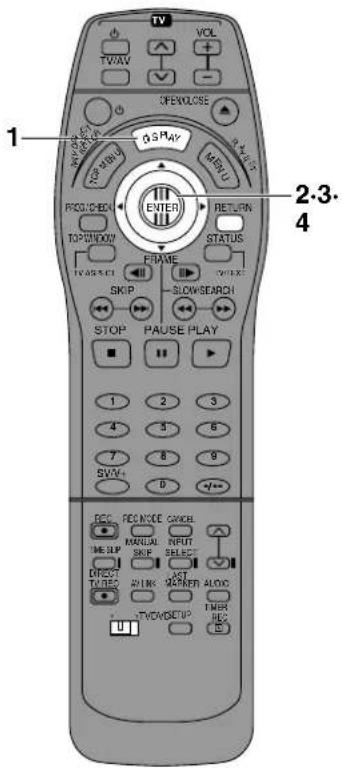
RAM DVD-R DVD-V CD VCD
Remote control only
On-Screen Menu Icons are menus that contain information about the disc or unit. These menus allow you to perform operations by changing this information.
Common procedures
Preparation
Switch [DVD, TV] to "DVD".
1 Press [DISPLAY].
![PANASONIC DMR-E20 - Press [DISPLAY]. - 1](/content/2026/05/796666/images/9f030ab509525cf3de253d7c4f6bfafec2a7494b69b88cb96f098a4a8041537f.jpg)
flowchart
graph TD
    A["● Each time you press the button:"] --> B["Icons for disc information (a)"]
    B --> C["↓"]
    C --> D["Icons for unit information (b)"]
    D --> E["↓"]
    E --> F["Original display (c)"]
2 Icons for unit information only
While the leftmost icon is highlighted Use the joystick [▲, ▼] to select the menu.
●Each time you move the joystick:
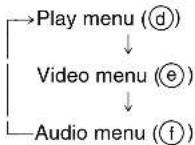
3 Use the joystick [◀, ▶] to select the item.
4 Use the joystick [▲, ▼] to select the setting.
- Some options require different operations. Follow the on-screen instructions and the instructions described later.
![PANASONIC DMR-E20 - Use the joystick [▲, ▼] to select the setting. - 1](/content/2026/05/796666/images/96e87c6dbb35731f37100633d72d0679008f6197422746ac21fe6d398d1d7cb9.jpg)
flowchart
graph TD
    A["1 e.g.: DVD-Video"] --> B["a"]
    B --> C["2"]
    C --> D["1:46:50"]
    D --> E["LDJ Digital 1 ENG 3/2.1 ch"]
    E --> F["31"]
    F --> G["1 SU"]
    B --> H["b"]
    H --> I["A5 OFF"]
    I --> J["--- 12.3★★★"]
    J --> K["C"]
    K --> L["d"]
    L --> M["AB OFF"]
    M --> N["--- 12.3★★★"]
    N --> O["d"]
    O --> P["B"]
    P --> Q["N OFF"]
    Q --> R["c"]
    R --> S["d"]
    S --> T["OFF OFF"]
    T --> U["f"]
To clear the icons
Press [RETURN] until the menus disappear.
■To change the position of the icons
1) Use the joystick [◀, ▶] to select the rightmost icon.
2) Use the joystick [▲, ▼] to move the icons.
There are 5 positions to choose from.
For your reference
●The screens depend on the disc contents.
- Depending on the condition of the unit (playing, stopped, etc.) and the type of software you are playing, there are some items that you cannot select or change.

Icons for disc information
e.g. DVD-Video


Programme number RAM DVD-R
Select the number and press [ENTER].

Play list number RAM
Select the number and press [ENTER].

Title number DVD-V
Track number CD VCD
Select the number and press [ENTER].

Chapter number DVD-V
Select the number and press [ENTER].
Elapsed play time | RAM | DVD-R | DVD-V
Press the numeric buttons to select a time to play from.
For example, to start play from 1 hour, 6 minutes and 37 seconds.
Press [1]–[0]–[6]–[3]–[7], then [ENTER].
Time display CD VCD
Use the joystick [▲, ▼] to change the information displayed.
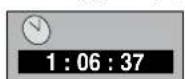
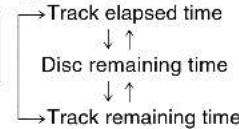
Soundtrack language DVD-V (See A at right.)
Change the number to select a soundtrack.
Audio attribute DVD-V (See B at right.)
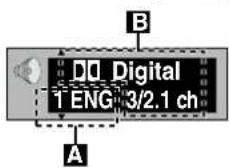
Karaoke vocals, on and off (Karaoke DVD-V only)
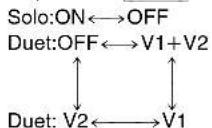
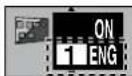
Subtitle number DVD-V (see A below.)
Change the number to select a subtitle language.
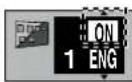
Subtitles on/off DVD-V
Turn the subtitles on or off.

Angle number DVD-V
Change the number to select an angle

Audio channel RAM VCD
Select the audio channel (page 20).

Menu play VCD (with playback control only)
Indicates whether menu play ( playback control) is on or off. Cannot be changed here.
A Soundtrack/Subtitle language
| ENG: EnglishFRA: FrenchDEU: GermanITA: ItalianESP: SpanishNLD: Dutch | SVE: SwedishNOR: NorwegianDAN: DanishPOR: PortugueseRUS: RussianJPN: Japanese | CHI: ChineseKOR: KoreanMAL: MalayVIE: VietnameseTHA: Thai*: Others |
B Audio attributes
LPCM/D Digital/DTS/MPEG: Signal type
k (kHz): Sampling frequency
b (bit): Number of bits
ch (channel): Number of channels
For your reference
- You can only select subtitles, soundtracks, and angles if they are recorded on the disc.
- Some discs allow changes to soundtracks, subtitles, and angles only by using the disc's menus.
- Soundtrack and subtitle languages can be set before play (page 73, Disc—Soundtrack and Subtitle).
- If the subtitles overlap closed captions recorded on discs, turn the subtitles off.
Icons for unit information
Play menu


A-B repeat (page 65)
You can repeat a section between points A and B within a programme, title, or track.

Repeat play (page 65)
You can play a programme, play list, chapter, title, or track repeatedly.

Play mode CD VCD
Cannot be changed here. ---: Normal play
PGM: programme play (page 21)
RND: random play (page 22)
Marker
You can mark points on a disc to return to later (page 66).
RAM DVD-R
DVD-V VCD CD
Audio menu
V.S.S. (page 65) RAM DVD-R DVD-V
Enjoy a surround-like effect if you are using two front speakers only. The effect is broadened and sound seems to come from virtual speakers on either side if the disc has surround signals recorded on it.
1←→2←→OFF

Dialog Enhancer DVD-V
(Dolby Digital, 3-channel or over only, including a center channel)
The volume of the center channel is raised to make dialog easier to hear.
ON←→OFF
Video menu
Digital picture mode
RAM DVD-R DVD-V VCD
To select the picture mode during play: [▲, ▼]
N: Normal mode
S: Soft mode
F: Fine mode
C: Cinema mode (mellows movie, enhances detail in dark scenes.)
U1/U2: User mode
To change the user mode
1) Select User mode and move the joystick ▶.
2) Use the joystick [▲, ▼] to select U1 or U2.
3) Use the joystick [◀, ▶] to select the item you want to change.
4) Use the joystick [▲, ▼] to change the setting.
MPEG DNR
RAM DVD-R DVD-V VCD
(Displayed when the picture mode is N, S, F or C.) You can turn on and off the recommended settings for 3D NR, block NR, and mosquito NR.
ON←→OFF
■U1:Common picture adjustment
Contrast (-7 to +7)
Increases the contrast between light and dark parts of the picture.
Brightness (0 to +15)
Brightens the picture.
Sharpness (-6 to +6)
Adjusts the horizontal resolution of the picture.
Colour (-7 to +7)
Adjust the shade of the picture's colour.

Gamma (0 to +15)
Increases the brightness of the center ranges to improve detail and contrast in dark scenes.
■U2:Reducing picture noise

3D NR (0 to +4)
Reduces overall noise.

Block NR (0 to +3)
Smoothes block noise.

Mosquito NR (0 to +3)
Reduces the smudging that appears around contrasting sections of the picture.
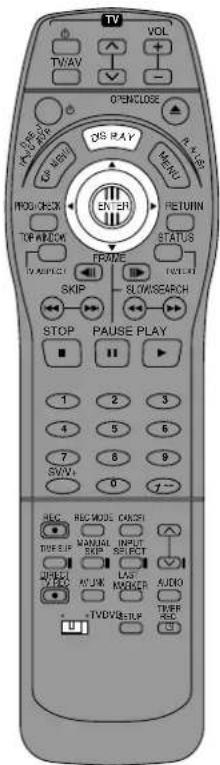
Repeat play A
RAM DVD-R DVD-V CD VCD
Preparation
- Switch [DVD, TV] to "DVD".
- Press [DISPLAY] → [DISPLAY] to display the on-screen menu icons and use the joystick ▶ to highlight the repeat play icon (pages 62 and 64).
During play
Use the joystick [▲, ▼].
The display changes as illustrated.
RAM DVD-R
Programme (PRG)→Entire disc (A)→OFF
While playing a play list
RAM
Play list (PL)→OFF
If the Video CD has playback control
1) While stopped (the screen saver is on the television), press the numbered buttons to select a track (page 8).
2) Do the above operation.
■To repeat only your favorite tracks
CD VCD
(1) Programme the tracks you want (page 21).
(2) Do the above operation.
DVD-V Chapter (C)→Title (T)→OFF
CD VCD Track (T)→Entire disc (A)→OFF

A
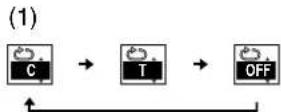
B
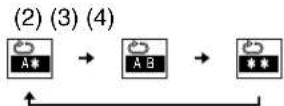
C
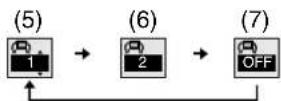
(1) e.g. DVD-Video
(2) Specify point A
(3) Specify point B
(4) Normal play
(5) Natural effect
(6) Emphasized effect
(7) Off
Note
- Repeat play may not work as desired with some discs.
- Repeat play does not work if the disc's elapsed play time is not shown on the unit's display.
- You cannot use repeat play to repeat an entire DVD-Video.
A-B repeat play B
RAM DVD-R DVD-V
You can repeat a section between points A and B within a programme, title, or chapter.
Preparation
- Switch [DVD, TV] to "DVD".
- Press [DISPLAY] → [DISPLAY] to display the on-screen menu icons and use the joystick ▶ to highlight the A-B repeat icon (pages 62 and 64).
During play
Press [ENTER].
The display changes as illustrated.
A-B repeat starts when you specify point B.
Note
- A-B repeat does not work if the DVD's elapsed play time is not shown on the unit's display.
- The unit automatically determines the end of a programme/title as point B when the end of the programme/title is reached.
- Some subtitles recorded around point A or B may fail to appear.
●This does not work while playing a play list.
Enjoying virtual surround sound effects (V.S.S.)
RAM DVD-R DVD-V
(Only with Dolby Digital with 2 or more channels)
Enjoy a surround-like effect if you are using two front speakers only. The effect is broadened and sound seems to come from virtual speakers on either side if the disc has surround signals recorded on it.
Preparation
- Switch [DVD, TV] to "DVD".
- Turn off the surround effects on the other equipment.
- Press [DISPLAY] [DISPLAY] to display the on-screen menu icons and use the joystick ▶ to highlight the V.S.S. icon (pages 62 and 64).
Use the joy stick [▲, ▼] to select the effect.
Note
●V.S.S. will not work, or will have less effect, with some discs, even if you select "1" or "2".
- Turn V.S.S. off if it causes distortion.
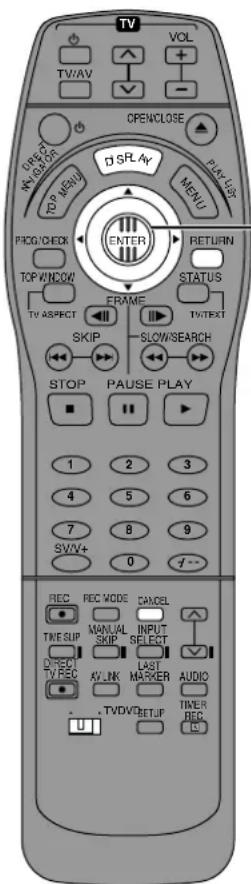
1.2. 3.4
Marking places to play again—MARKER
RAM DVD-R DVD-V CD VCD
Preparation
- Switch [DVD, TV] to "DVD".
- Turn off the surround effects on the other equipment.
- Press [DISPLAY] [DISPLAY] to display the on-screen menu icons and use the joystick ▶ to highlight the marker icon (pages 62 and 64).
Marking Place
RAM DVD-R
You can mark up to 999 points on a disc to return to later. These marks are recorded directly onto DVD-RAM, but are cleared when you removed or finalized DVD-R.
DVD-V CD VCD
You can mark up to 5 points on a disc to return to later. All the markers are cleared when the disc tray is opened.
1 Press [ENTER].
2 Use the joystick [◀, ▶] to select the next asterisk (*).
3 Press [ENTER] at the point you want to mark.
To play from a marked position
Preparation
- Switch [DVD, TV] to "DVD".
- Press [DISPLAY] [DISPLAY] to display the on-screen menu icons and use the joystick ▶ to highlight the marker icon (pages 62 and 64)
1 Press [ENTER].
2 Use the joystick [◀, ▶] to select a marker number.
3 Press [ENTER].
RAM DVD-R
When selecting markers 11 and above
1 Use the joystick [◀, ▶] to highlight the marker pin icon.
2 Use the joystick [▲, ▼] to select "11-20".
- The group of 10 increases each time you move the joystick [▲].
3 Use the joystick ▶ and press [ENTER].
4 Use the joystick [◀, ▶] to select a marker number.
To clear a marker
Use the joystick [◀, ▶] to select a marker number and press [CANCEL].
■To clear the on-screen icons
Press [RETURN].
Note
RAM
- This feature doesn't work while using a play list.
- The markers are ordered by time. This means that the marker numbers can change when you add and erase markers.
- You cannot mark and clear points if you have write-protected the disc, either with the write protect tab (page 91) or with DISC INFORMATION (page 40).
DVD-R
- The markers are ordered by time. This means that the marker numbers can change when you add and erase markers.
DVD-V CD VCD
- This feature only works if the elapsed playing time of the disc is shown on the unit's display.
- Some subtitles recorded around the marker may fail to appear.
Auto recording from Digital Video (DV) equipment
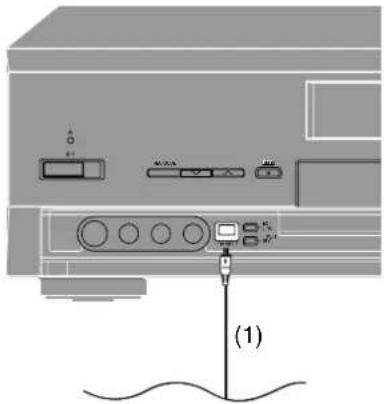
(2)
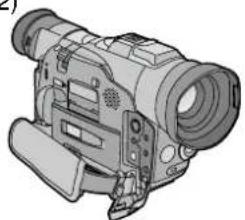
natural_image
Illustration of a video camera with lens and external frame (no text or symbols visible)(1) DV Cable
(2) DV equipment
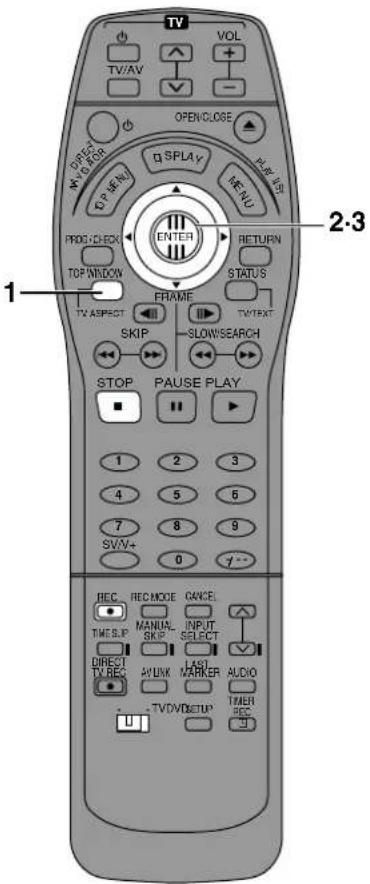
RAM
Preparation
- Before connecting any cables, first make sure that the power for both units is off. Then after connecting any cable, turn on the both units.
- Connect the DV equipment to the DV input terminal on the front panel.
- Pause play of the DV equipment at the point you want recording to start.
- Switch [DVD, TV] to "DVD".
- Insert a disc.
- Select the recording mode (page 24).
1 While stopped
Press [TOP WINDOW].
2 Use the joystick [▲, ▼, ◀, ▶] to select "DV AUTO REC" and press [ENTER].
●The DV AUTO REC screen appears.
●The DV equipment pauses automatically if it was playing.
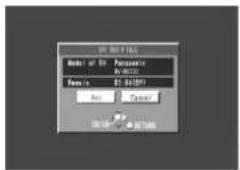
3 Use the joystick [◀, ▶] to select "Rec" and press [ENTER].
- Recording starts.
■To stop recording manually
Press [■, STOP].
■When recording stops
The following screen appears.
Press [ENTER] to finish DV auto recording.
- A programme and play list is added when DV auto recording finishes.
For your reference
- Do not operate the DV equipment during recording, as this will cause recording to stop. One recording session (from where recording is started to where it is stopped) is counted as one programme and a play list is automatically created. You can divide the recording into scenes by detecting the parts that [●REC] is pressed during recording of the DV equipment. The date of the first recording is used as the programme's title. (If "Hybrid VBR Resolution" in the SET UP menus is set to "Fixed", one session may be recorded as multiple cells.)
- The marker is automatically registered by detecting the parts that [●REC] is pressed during recording of the DV equipment.
- Make sure the DV equipment is paused before starting recording.
If recording cannot start (the DV equipment is not connected correctly or a tape isn't loaded) or cannot continue, the screen shows a warning message and cancels recording. Check the equipment carefully before trying to record from it.
●The DV equipment name may not be shown correctly. - You cannot record and play simultaneously.
- You cannot start recording until the images from the DV equipment appear on the television.
- The audio recorded is the audio selected at "Audio Mode for DV Input" (page 74).
- We recommend using NV-MX300.
- Recording may not be performed as desired if the time codes on the tape in the DV equipment are not successive.
- We recommend connecting one piece of DV equipment at a time
- Even if you use device equipped with DV Terminals (such as i.LINK), you may not be able to perform DV auto recording in some cases.
Child Lock
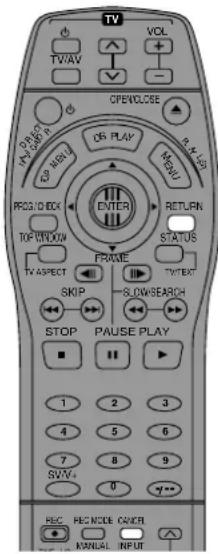
The child lock deactivates all buttons on the unit and remote control. Use it to prevent other people from operating the unit.
To activate the child lock
Hold down [RETURN] and [CANCEL] simultaneously until "X HOLD" appears on the unit's display.
- If you press a button while the child lock is on, "X HOLD" appears on the unit's display and operation is impossible.
To cancel the child lock
Hold down [RETURN] and [CANCEL] simultaneously until "X HOLD" disappears.
- If you cannot cancel the Child Lock, press [RETURN] and then perform the operation.
Upgrading your system
Enjoying more powerful sound
Refer to the relevant pages for details.
Enjoying 5.1-channel surround sound with Dolby Digital and DTS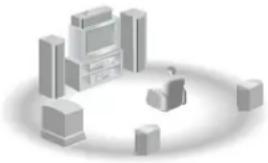 | Digital connectionConnect to an amplifier with built-in decoders. | 69A | SET UP— Sound● Set “PCM Down Conversion” to “Yes”.● Set “Dolby Digital” and “DTS” to suit the equipment.. | 76 |
| Change speaker settings on the amplifier. | — |
To enjoy stereo or Dolby Pro Logic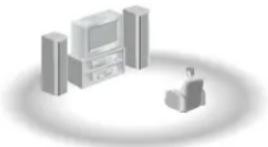 | Analog connectionConnect to an analog amplifier or system component. | 69B | SET UP— Sound● Set “PCM Down Conversion” to “No”. | 76 |
| Digital connectionConnect to a digital amplifier or system component. | 69A | SET UP— Sound● Set “PCM Down Conversion” to “Yes”.● Set “Dolby Digital” to “PCM”.● Set “DTS” to “Off”. | 76 |
■Other uses
Record to digital recording equipment or cassette deck (A B page 69)
Record from an video cassette recorder (E page 71)
Use connection B to enjoy discs recorded with a sampling frequency of 96 kHz. Sound will not be output if you use connection A and set "PCM Down Conversion" to "No" due to copy protection. (Convert the signal to 48 kHz to enjoy this type of audio.)
For your reference
●The equipment connections described are examples.
- Before connection, turn off all equipment and read the appropriate operating instructions.
Note
You can enjoy Dolby Digital in stereo with this unit alone.
(This unit does not have a DTS decoder.)
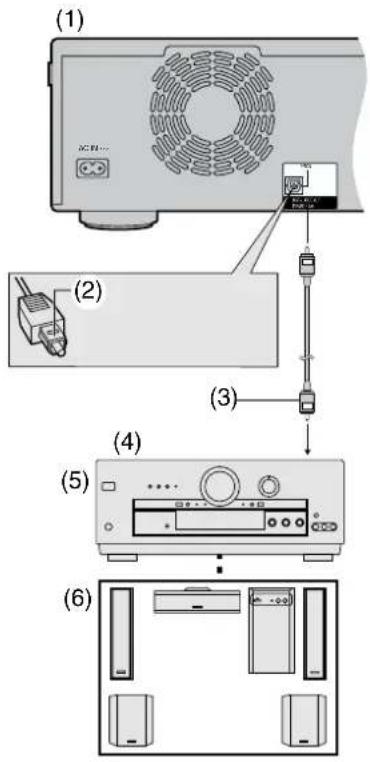
Connecting a digital amplifier or system component A
(1) Rear of this unit
(2) Insert fully, with this side facing up. (Do not bend when connecting.)
(3) Optical digital audio cable (not supplied)
(4) To optical digital input
(5) Amplifier
or
system component (with or without decoders) (not supplied)
(6) Speakers (not supplied)
•Example: Six speakers
For your reference
- Change the settings in the "Sound" menus (page 74) to suit the digital equipment you have connected. If the equipment can decode Dolby Digital, set "Dolby Digital" to "Bitstream" (factory setting). If the equipment can decode DTS, set "DTS" to "Bitstream".
- The DTS decoder must be compatible with the signals recorded on DVD.
You can record the digital signal directly onto digital recording equipment.
The signals on DVDs will be converted to 48 kHz/16 bit linear PCM.
When recording DVDs, ensure the following conditions are met.
- There is no copy guard recorded on the disc.
- The recording equipment can handle a sampling frequency of 48 kHz/16 bit.
If you want to use the synchro recording feature on your digital recording equipment and you use connection A or B to record from CDs or video CDs, first pause at the point you want to record from, activate the synchro feature, then restart play on the unit.
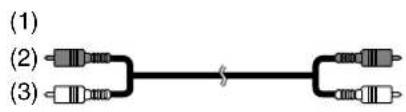
Connecting an analog amplifier or system component B
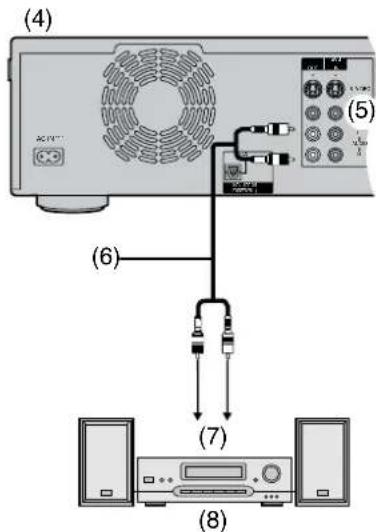
(1) Audio cable
(2) Red (R)
(3) White (L)
(4) Rear panel of this unit
(5) To AUDIO OUT (L/R)
(6) Audio cable (not supplied)
(7) Audio input (L/R)
(8) 2-channel analog amplifier or system component (not supplied)
■To enjoy Dolby Pro Logic (page 87)
You will also need to connect center and surround speakers in addition to the front speakers to enjoy surround sound. Read the instructions for the equipment for connection details. Turn V.S.S. off. Dolby Pro Logic will not function correctly if V.S.S. is on.
Connecting a Decoder ©
Decoder here refers to the device used to decode scrambled broadcasts (Pay TV).
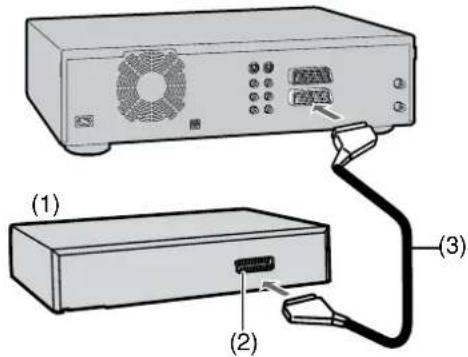
(1) Decoder (not supplied)
(2) 21-pin Scart socket
(3) 21-pin Scart cable (not supplied)
Connect a 21-pin Scart cable (not supplied) to the AV2 21-pin Scart socket on the unit and to the 21-pin Scart socket on the decoder.
Connect the decoder's mains lead to an AC mains socket.
Set "AV2 Connection" to "DECODER". (page 75)
AV Link Function (For Continental Europe)
If the unit is connected to the TV via a 21-pin Scart cable, you can use the [AV LINK] button to switch the TV from normal TV reception over to the video playback channel (AV input) (and vice versa). In the unit mode (when the "DVD" indication in the unit display is lit), the TV is switched to the video playback channel (AV input). In the TV mode (when the "DVD" indication is not lit), the TV is switched to TV reception.
AV link stops working if the "DVD" indicator appears on the display (when you start play or show on-screen displays).
Note
[RGB] means separate Red/Green/Blue colour signals. If you connect a TV equipped with RGB input capability to the AV1 socket on this unit, and a decoder equipped with RGB output capability to the AV2 socket, the TV can receive RGB signal input from the decoder via the unit. RGB output signals only appear when the "DVD" indicator is on. To show RGB output signals while stopped or recording, press [AV LINK] so the "DVD" indicator lights.
Connecting a satellite receiver or digital receiver D
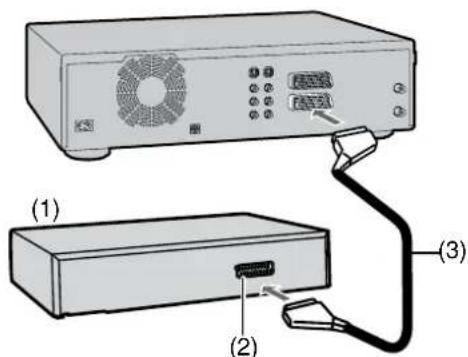
(1) Satellite receiver (not supplied)
(2) 21-pin Scart socket
(3) 21-pin Scart cable (not supplied)
Connect a 21-pin Scart cable (not supplied) to the AV2 21-pin Scart socket on the unit and to the 21-pin Scart socket on the satellite receiver.
Connect the satellite receiver's mains lead to an AC mains socket.
Set "AV2 Connection" to "EXT", "Ext Link 1" or "Ext Link 2". (page 75)
Connecting a video cassette recorder E
When connecting to the AV3/DV input terminals on the front of the unit
Audio/Video cable
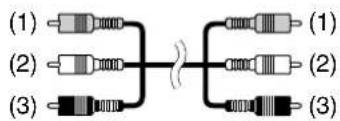
(1) Yellow (VIDEO)
(2) White (L)
(3) Red (R)
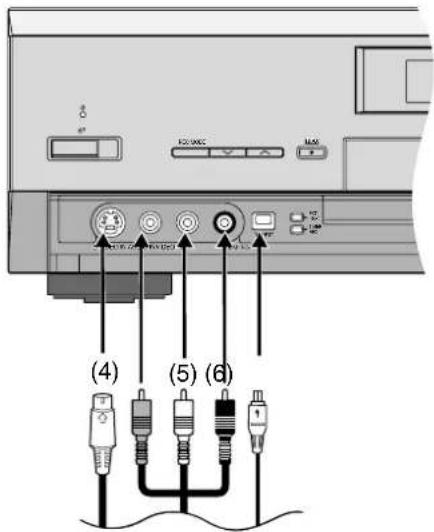
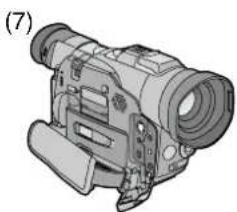
natural_image
Illustration of a digital camera with lens and external components (no text or symbols)(4) S video cable(not supplied)
(5) Audio/Video cable(not supplied)
(6) 4-pin DV cable(not supplied)
(7) Other playback equipment
- Connect to the video and audio output terminals.
Note
If the audio output of the other equipment is monaural, connect to L/MONO. (Both left and right channels are recorded when connected through L/MONO.)
When connecting to the input terminals on the rear of the unit
Audio/Video cable
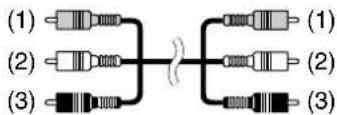
(1) Yellow (VIDEO)
(2) White (L)
(3) Red (R)
Rear panel of this unit
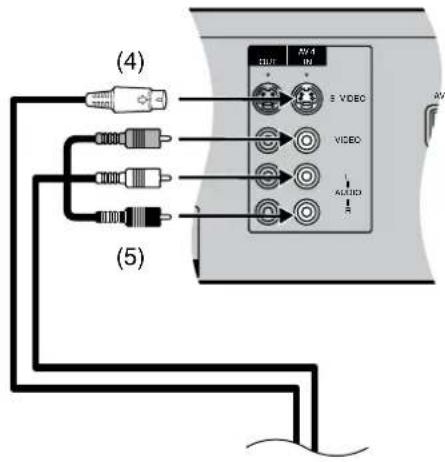
(6)
(4) S video cable(not supplied)
(5) Audio/Video cable(not supplied)
(6) Other playback equipment
- Connect to the video and audio output terminals.
Note
If audio output on the other equipment is monaural, use a stereo-monaural conversion cable (not supplied).
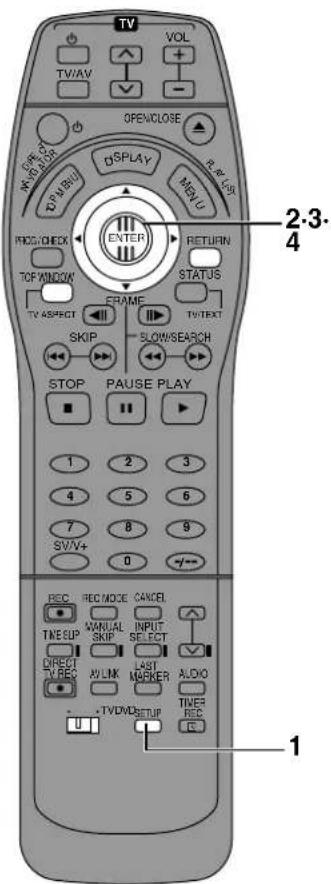
Changing the unit's settings
Common procedures
Refer to the summary of settings table on page 73 and use the following procedure to change the settings if necessary.
Preparation
- Switch [DVD, TV] to "DVD".
1 While stopped
Press [SET UP] to show the menus.
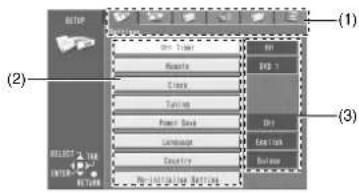
(1) Menus
The SET UP menu is made up of six menus—Settings, Disc, Picture, Sound, Display, and Connection. Select the menu's tab to display the items.
(2)Items
A list of items in the menu you selected.
(3)Options
This shows the current settings. The options are shown when you select an item.
2 Use the joystick [◀, ▶] to select the menu's tab.
3 Use the joystick [▲, ▼] to select the item you want to change and press [ENTER]
4 Use the joystick [▲, ▼] to select the option and press [ENTER]
- Some options require different operations. Follow the on-screen instructions and the instructions described.
■To return to the previous screen
Press [RETURN]. Even if you have changed an option, the change is not accepted unless you press [ENTER]
■When you are finished
Press [SET UP].
For your reference
- The unit retains these settings in its memory until you change them, even if you turn it off.
- You can also display the SET UP menus by pressing [TOP WINDOW], using the joystick
[▲, ▼, ◀, ▶] to select "SET UP", and pressing [ENTER].
Summary of settings
This description shows the initial settings for this unit. See page 72 for details on menu operation.
- Underlined items are the factory presets.
Settings
Off Timer
Select how long the unit remains on when it is not being used. [2 H] [6 H] [Off____]
Remote
Change the remote control code so you can use other Panasonic DVD equipment at the same time.
VD 1] [DVD 2] [DVD 3]
Clock
- Manual Clock Setting (page 79)
You can adjust the clock.
●Auto Clock Setting (page 80)
The unit adjusts the clock automatically. Automatic: [On] [Off]
Tuning
[Manual] [Auto-Setup Restart] [Download] [Shipping Condition]
Power Save
[On] [Off]
Language
[English] [Deutsch] [Français] [Italiano] [Español]
Country
[België] [Belgique] [Belgien] [Danmark] [España]
[Italia] [Nederland] [Norge] [Deutschland]
[Österreich] [Portugal] [Suomi] [Sverige]
[Schweiz] [Suisse] [Svizzera] [Others____]
Re-initialize Setting
The settings for "Picture", "Sound", and "Display" return to the factory settings.
[Yes] [No]
Disc DVD-V

Soundtrack
Choose the preferred audio language. [English] [French] [German] [Italian] [Spanish] [Original] [Other ****]
Subtitle
Choose the preferred subtitle language. [Automatic] [English] [French] [German] [Italian] [Spanish] [Other * * * * ]
Menus
Choose the preferred language for disc menus. [English] [French] [German] [Italian] [Spanish] [Other *****]
Note
Original: The original language of each disc will be selected.
Other ****: Input a code number with the numeric buttons. (See below)
Automatic: If the language selected for "Soundtrack" is not available, subtitles of that language will automatically appear if available on that disc.
- Some discs are designed to start in a certain language despite any changes you make here.
Ratings (page 76)
Set a ratings level to limit DVD play.
Setting ratings (When level 8 is selected)
[8 No Limit]: All DVD-Video can be played
[1] to [7]: Prohibits play of DVD-Video with corresponding ratings recorded on them.
[0 Lock All]: Prohibits play of all DVD-Video.
Changing ratings (When level 0 - 7 is selected)
[Unlock Recorder] [Change Level]
[Change Password] [Temporary Unlock]
Language code list
| Abkhazian: 6566 | Chinese: | 9072 | Hausa: | 7265 | Lithuanian: | 7684 | Romanian: | 8279 | Telugu: | 8469 |
| Afar: 6565 | Corsican: | 6779 | Hebrew: | 7387 | Macedonian: | 7775 | Russian: | 8285 | Thai: | 8472 |
| Afrikaans: 6570 | Croatian: | 7282 | Hindi: | 7273 | Malagasy: | 7771 | Samoan: | 8377 | Tibetan: | 6679 |
| Albanian: 8381 | Czech: | 6783 | Hungarian: | 7285 | Malay: | 7783 | Sanskrit: | 8365 | Tigrinya: | 8473 |
| Ameharic: 6577 | Danish: | 6865 | Icelandic: | 7383 | Malayalam: | 7776 | Scots Gaelic: | 7168 | Tonga: | 8479 |
| Arabic: 6582 | Dutch: | 7876 | Indonesian: | 7378 | Maltese: | 7784 | Serbian: | 8382 | Turkish: | 8482 |
| Armenian: 7289 | English: | 6978 | Interlingua: 7365 | Maori: | 7773 | Serbo-Croatian: | 8372 | Turkmen: | 8475 | |
| Assamese: 6583 | Esperanto: | 6979 | Irish: | 7165 | Marathi: | 7782 | Shona: | 8378 | Twi: | 8487 |
| Aymara: 6588 | Estonian: 6984 | Italian: | 7384 | Moldavian: | 7779 | Sindhi: 8368 | Ukrainian: | 8575 | ||
| Azerbaijani: 6590 | Faroese: | 7079 | Japanese: | 7465 | Mongolian: | 7778 | Singhalese: | 8373 | Urdu: | 8582 |
| Bashkir: 6665 | Fiji: | 7074 | Javanese: 7487 | Nauru: | 7865 | Slovak: | 8375 | Uzbek: | 8590 | |
| Basque: 6985 | Finnish: | 7073 | Kannada: | 7578 | Nepali: | 7869 | Slovenian: | 8376 | Vietnamese: | 8673 |
| Bengali; Bangla: 6678 | French: | 7082 | Kashmiri: 7583 | Norwegian: | 7879 | Somali: | 8379 | Volapūk: | 8679 | |
| Bhutani: 6890 | Frisian: | 7089 | Kazakh: | 7575 | Oriya: | 7982 | Spanish: | 6983 | Welsh: | 6789 |
| Bihari: 6672 | Galician: | 7176 | Kirghiz: | 7589 | Pashto, Pushto: | 8083 | Sundanese: 8385 | Wolof: | 8779 | |
| Breton: 6682 | Georgian: | 7565 | Korean: | 7579 | Persian: | 7065 | Swahili: | 8387 | Xhosa: | 8872 |
| Bulgarian: 6671 | German: | 6869 | Kurdish: | 7585 | Polish: | 8076 | Swedish: | 8386 | Yiddish: | 7473 |
| Burmese: 7789 | Greek: | 6976 | Laotian: | 7679 | Portuguese: 8084 | Tagalog: | 8476 | Yoruba: | 8979 | |
| Byelorussian: 6669 | Greenlandic: | 7576 | Latin: | 7665 | Punjabi: | 8065 | Tajik: | 8471 | Zulu: | 9085 |
| Cambodian: 7577 | Guarani: | 7178 | Latvian, Lettish: 7686 | Quechua: | 8185 | Tamil: | 8465 | |||
| Catalan: 6765 | Gujarati: | 7185 | Lingala: | 7678 | Rhaeto-Romance: | 8277 | Tatar: | 8484 |
Picture

Hybrid VBR Resolution
Switch between automatic and fixed hybrid VBR resolution when recording.
[Automatic] [Fixed]
Note
Automatic: The unit automatically switches compression rates during recording. The unit reduces block noise, which occurs during MPEG compression, by selecting the optimum rate.
Fixed: The compression rate is fixed during recording. This ensures the compression rate is not reduced.
Still Mode
Select the type of picture shown when you pause play. [Automatic] [Field] [Frame]
Note
Field: Less blurred field stills are shown. Select if jittering occurs when "Automatic" is selected.
Frame: Sharper frame stills are shown. Select if small text or fine patterns cannot be seen clearly when "Automatic" is selected.
Seamless Play
Turn seamless play on or off on discs with play lists. [On] [Off]
Note
On: The scenes in play lists created with this unit are played seamlessly. This may cause shifting of the points where scenes change. Some play lists cannot be played seamlessly.
Off: The points where scenes in play lists are played accurately, but this may cause the picture to freeze for a moment when scenes change.
Sound

Sound During Search RAM DVD-R DVD-V VCD
Choose whether to have sound during search.
[On] [Off]
Dynamic Range Compression DVD-V (Dolby Digital only)
Change the dynamic range for late night viewing.
[On] [Off]
Audio Mode for DV Input (page 37)
[Stereo 1] [Stereo 2] [Mix]
Bilingual Selection for DVD-R (page 37)
Select whether to record the main or secondary audio type to DVD-R.
[M1] [M2]
PCM Down Conversion (page 76)
Choose whether to convert 96 kHz LPCM signals to 48 kHz/16 bit. [Yes] [No]
Dolby Digital (page 76)
Choose whether to output Dolby Digital bitstream signals for decoding on other equipment or to convert them to PCM signals for 2-channel output.
[Bitstream] [P C M]
DTS (page 76)
Choose whether to output DTS bitstream signals for decoding on other equipment or to not output signals at all.
[Bitstream] [Off]
MPEG (page 76)
Choose whether to output MPEG bitstream signals for decoding on other equipment or to convert them to PCM signals for 2-channel output.
[Bitstream] [PCM]
Display

On-Screen Messages
Choose whether to show on-screen messages automatically or not.
[Automatic] [Off]
Grey Background
Select whether to show the grey background, normally shown when television reception is poor.
[On] [Off]
Channel Guide
[On] [Off]
Note
ON:
The Channel Guide will appear for a few seconds each time the channel is changed with [v, ] .
OFF:
The Channel Guide will not appear.
FL Display
Changes the brightness of the unit's display.
[Bright] [Dim During Play] [Dim] [Automatic]
Note
Dim during play:
- The display dims during play of discs with video recorded. (The TIME SLIP indicator is off while the display is dimmed.)
Automatic:
In standby mode: Off
During normal play: Dim
Others: Bright
Connection

TV Aspect (page 14)
Choose the setting to suit your television and preference.
[4:3] [16:9]
AV1 Output
[Video] [S-Video] [RGB] (page 70)
NTSC Signal Output
[PAL60] [ N T S C ]
AV2 Connection
[DECODER] [EXT] [Ext Link1] [Ext Link2]
Note
DECODER:
When a decoder is connected.
EXT:
When the VCR or a satellite receiver is connected.
Ext Link1:
When a digital receiver which transmits a special control signal recordings via the 21-pin Scart cable, for example the F.U.N. receiver (TU-DSF30/S3) is connected for the linked timer recordings.
Ext Link2:
When an external equipment with a timer function is connected for the linked timer recordings.
AV2 Input
[Video] [S-Video]
Input signal-TV System
[PAL] [ N T S C ]
Note
PAL:
Select to record television programmes and PAL input from other equipment.
NTSC:
Select to record NTSC input from other equipment. Television programmes cannot be recorded properly.
4:3 TV Settings for DVD-Video
Select how video from DVD-Video is shown on a 4:3 standard aspect television.
[Pan&Scan] [Letterbox]
Note
Pan & Scan: Video recorded for a widescreen is played with the sides cut off if the pan & scan was specified by the producer of the disc. 16:9 software prohibited from being shown in the pan and scan style will appear in the letterbox style (with black bands above and below the picture) despite the setting here.
Letterbox: Video recorded for a widescreen is played in the letterbox style.
4:3 TV Settings for DVD-RAM
Select how video from DVD-RAM is shown on a 4:3 standard aspect television.
[4:3] [Pan&Scan] [Letterbox]
Note
4:3: Programmes played as recorded.
Pan & Scan: Video recorded for a widescreen is played with the sides cut off if the pan & scan format is specified at the time of recording.
Letterbox: Video recorded for a widescreen is played in the letterbox style.
Entering a password
You can limit play of DVDs unsuitable for some audiences, children, for example. Play and changes to the settings are not possible unless you enter a password.
When setting ratings
The password screen is shown when you select levels 0 to 7.
1) Input a 4-digit password with the numeric buttons.
- If you enter a wrong number, press [CANCEL] to erase it before you press [ENTER].
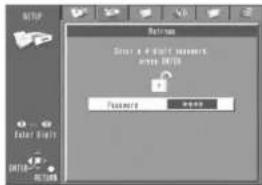
Do not forget your password.
2) Press [ENTER].
3) Press [ENTER].
The password is entered and the unit is locked.
Now, when you insert a DVD-Video that exceeds the ratings limit you set, a message appears on the television.
Follow the on-screen instructions.
When changing ratings
The password screen is shown when you select "Ratings".
1) Input a 4-digit password with the numeric buttons and press [ENTER].
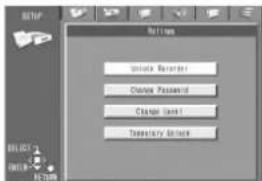
Unlock Recorder: To unlock the unit and return the rating to 8
Change Password: To change your password
Change Level: To change the rating level
Temporary Unlock: To temporarily unlock the unit (the unit locks again if you switch it to standby or open the disc tray)
2) Select the item with the joystick [▲, ▼] and press [ENTER]. Actual screens depend on the operation. Follow the on-screen instructions.
Digital output
Change these settings when you have connected equipment through this unit's OPTICAL DIGITAL AUDIO OUT terminal.
PCM Down Conversion
No (factory setting):
When you have used audio cables to connect the unit to other equipment (analog connection B page 69).
Yes:
When you have used an optical digital cable to connect the unit to other equipment (digital connection A page 69). Output is limited to 48 kHz/16 bit.
Output of audio with a sampling frequency of 96 kHz
Audio is output as follows in accordance with the connections and settings you make.
| Setting | Connection | |
| A (digital) B (analog) | ||
| No No output* | 1 | Output as 96 kHz |
| Yes Converted | and outputas 48 kHz/16 bit | Converted and outputas 48 kHz |
*1Audio is output at 96 kHz if the DVD is unprotected, but the connected equipment must be able to handle such signals in order to play them.
Dolby Digital
Bitstream (Factory preset):
When you have connected a unit with a built-in Dolby Digital decoder.
PCM:
When you have connected a unit that doesn't have a built-in Dolby Digital decoder. ^2
DTS
Off (Factory preset):
When you have connected a unit that doesn't have a built-in DTS decoder. ^*2
Bitstream:
When you have connected a unit with a built-in DTS decoder.
MPEG
Bitstream:
When you have connected a unit with a built-in MPEG decoder.
PCM (Factory preset):
When you have connected a unit that doesn't have a built-in MPEG decoder. ^2
*Set "Dolby Digital" to "PCM", "DTS" to "Off" and "MPEG" to "PCM" if the other equipment doesn't have decoders. Incorrect settings can cause noise to be output which can be harmful to your ears and speakers, and audio will not be recorded properly to digital recording equipment.
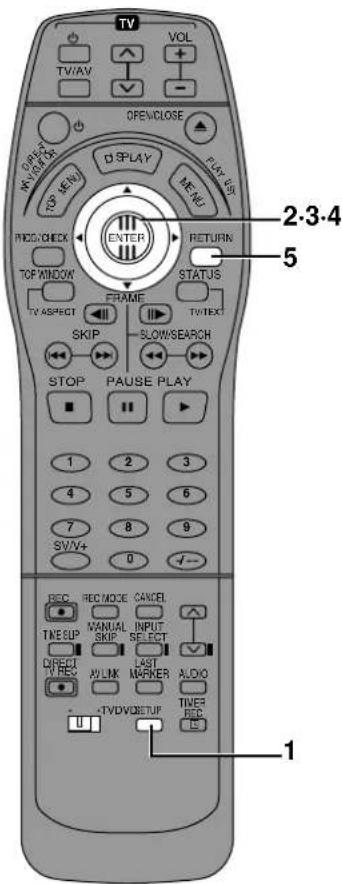
Off Timer Setting
Preparation
Switch [DVD, TV] to "DVD".
1 Press [SET UP].
●The SET UP screen appears.
2 Use the joystick [◀, ▶] to select the "Settings" tab.
3 Use the joystick [▲, ▼] to select "Off Timer" and press [ENTER].
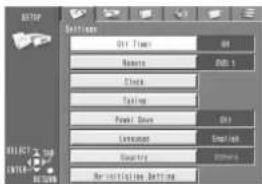
4 Use the joystick [▲, ▼] to select "2H", "6H" or "Off" and press [ENTER].
2H:
The unit's power is automatically turned off if no operation has been performed for about 2 hours or more.
6H:
The unit's power is automatically turned off if no operation has been performed for about 6 hours or more.
- Off (factory setting):
The automatic power-off function is cancelled.
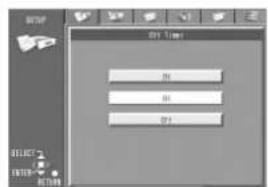
5 Press [RETURN].
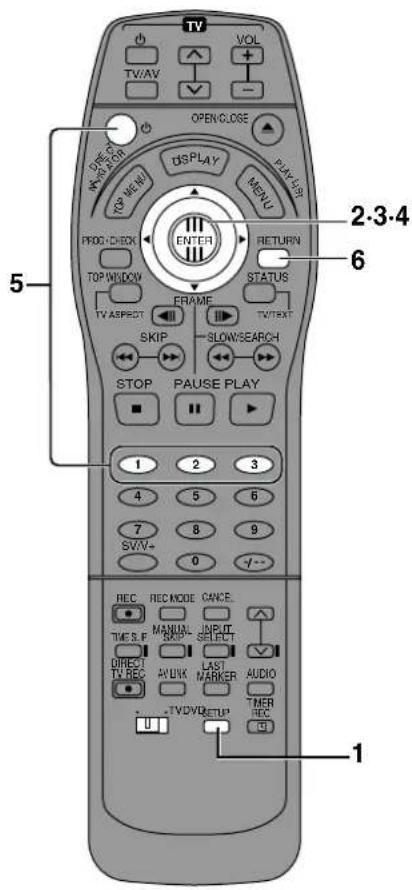
Remote Setting
Preparation
Switch [DVD, TV] to "DVD".
1 Press [SET UP].
●The SET UP screen appears.
2 Use the joystick [◀, ▶] to select the "Settings" tab.
3 Use the joystick [▲, ▼] to select "Remote" and press [ENTER].
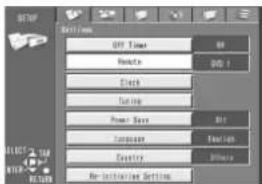
4 Use the joystick [▲, ▼] to select "DVD 1", "DVD 2" or "DVD 3" and press [ENTER].
•DVD 1:
Select this setting on both the unit and the remote control for normal use with one unit.
•DVD 2/DVD 3:
Select this setting on both the unit and the remote control when using this unit and another Panasonic unit in the same place. This ensures that you can operate both units independently with their respective remote control.
It also allows you to operate both units with a single remote control, simply by changing the remote control mode on the remote control.
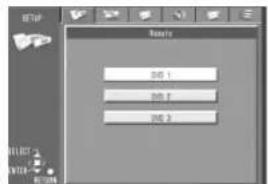
5 To change the remote control mode on the remote control itself, press [☐] and the numeric buttons corresponding to the code you want to set, [1], [2], or [3], at the same time.
6 Press [RETURN].
Operating other Panasonic DVD equipment with the remote control
By changing the remote control code, you can operate other DVD recorders and players manufactured by Panasonic.
Most of the DVD recorders and players manufactured by Panasonic use the same system for their remote controls, so if you operate them in the same place, the controls can be confused by the different pieces of equipment. Use the following procedure to change the remote control code to solve this problem.
- Use "1", the factory set code, under normal circumstances.
Preparation
Switch [DVD, TV] to "DVD".
Press [⏻] and the numeric buttons corresponding to the code you want to set, [1], [2], or [3], at the same time.
Note
- Be sure to set the same remote control code on the main unit as you did for the remote control itself (page 73, Settings—Remote).
- The following display appears on the unit's display if its code and the remote control's code are different. Change the remote control's code to suit the unit.
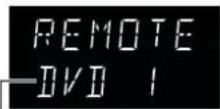
The unit's remote control code
●The display disappears after about 5 seconds.
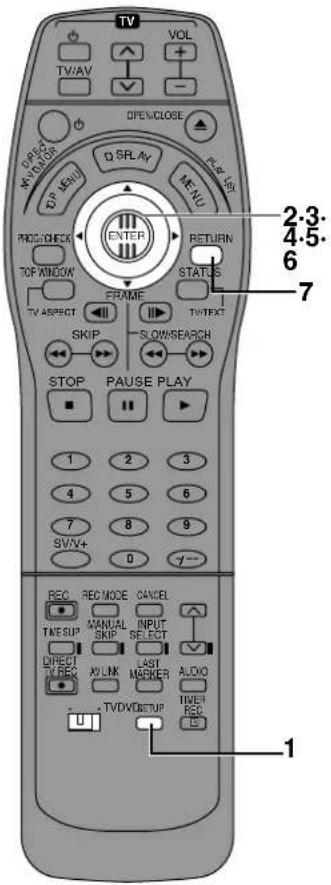
Clock Settings
Usually, the units Auto Setup or Download function automatically adjusts the clock to correct time.
Under some reception conditions, however, the unit cannot set the clock automatically. In this case, follow the operation steps below to manually set the clock.
Manual Clock Setting
Preparation
Switch [DVD, TV] to "DVD".
1 Press [SET UP].
●The SET UP screen appears.
2 Use the joystick [◀, ▶] to select the "Settings" tab.
3 Use the joystick [▲, ▼] to select "Clock" and press [ENTER].
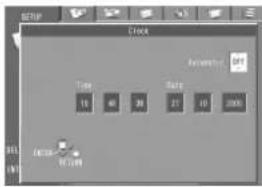
4 Use the joystick [▲, ▼] to select "Off" of "Automatic" and press [ENTER].
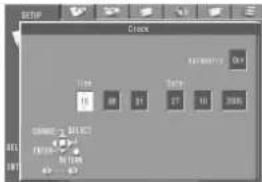
5 Use the joystick [◀, ▶] to select the item you want to change.
●The items change as follows:
Hour→Minute→Second→Day→Month→Year
6 Use the joystick [▲, ▼] to change the setting and press [ENTER].
- You can also use the numeric buttons for setting.
7 Press [RETURN].
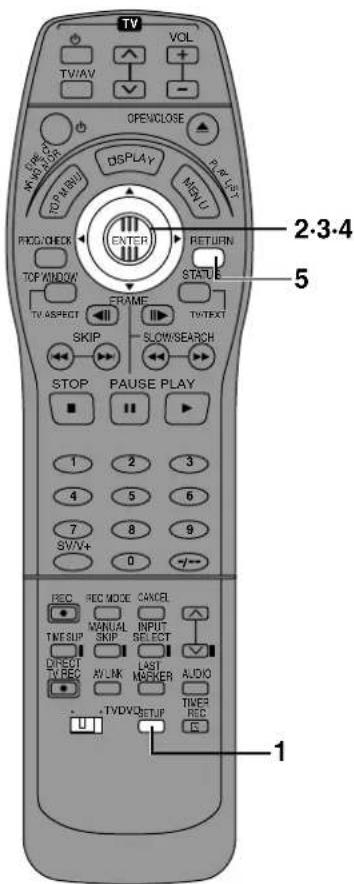
Auto Clock Setting
If a TV station transmits a signal for time setting, performing the operation steps below activates the Automatic time corection function and time is corrected automatically.
Preparation
Switch [DVD, TV] to "DVD".
1 Press [SET UP].
•The SET UP screen appears.
2 Use the joystick [◀, ▶] to select the "Settings" tab.
3 Use the joystick [▲, ▼] to select "Clock" and press [ENTER].
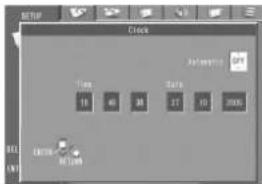
4 Use the joystick [▲, ▼] to select "On" of "Automatic" and press [ENTER].
●Auto clock setting starts.
- Under adverse reception conditions, etc., the automatic time correction function may not work. In this case, the indication for "Automatic" is automatically reset to "Off". If the reception conditions improve later on, it may be possible to activate this function.
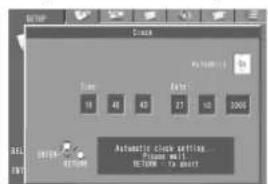
●The following screen appears when setting is complete.
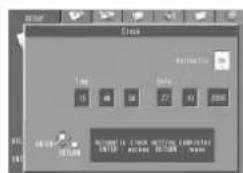
5 Press [RETURN].
Note
- If "Automatic" is set to "On" when you open the Clock screen, do not set it to "Off", otherwise, the automatic time correcting function is deactivated.
- In case of a power failure, an automatic back-up system automatically maintains the operation of the clock for approximate 120 minutes.
- When "Automatic" on the Clock setting menu is set to "On", the automatic time correction function checks and if necessary adjusts the time several times every day.
- If "Automatic" is set to "On" and "Power Save" is "On", the Automatic time correction function does not work while the unit is turned off. However, as soon as it is turned on, the Automatic time correction function is activated and the clock is set correctly.
■To stop auto clock setting
Press [RETURN].
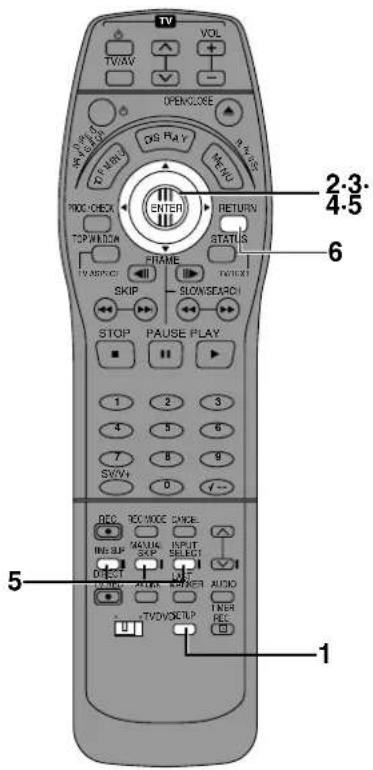
4
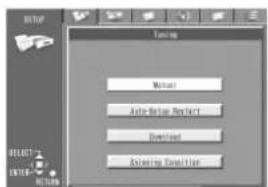
5
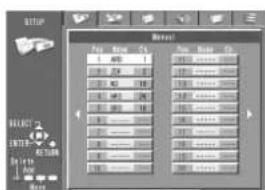
Channel Settings
Preparation
Switch [DVD, TV] to "DVD".
Selecting the manual tuning
1 Press [SET UP].
●The SET UP screen appears.
2 Use the joystick [◀, ▶] to select the "Settings" tab.
3 Use the joystick [▲, ▼] to select "Tuning" and press [ENTER].
4 Use the joystick [▲, ▼] to select "Manual" and press [ENTER].
5 Use the joystick [▲, ▼] to select the TV station that you want to tune and press [ENTER].
●The TUNING BOX screen appears.
Handling the TUNING BOX screen
Use the joystick [▲, ▼, ◀, ▶] to select the desired field and press [ENTER].
Pos:
To change the order in which the TV stations are assigned to the programme positions.
Press the numeric buttons to enter the number of the desired programme position.
Name:
To enter or change the name of a TV station.
Use the joystick [▲, ▼, ◀, ▶] to enter station name and press [ENTER].
- If the station name needs a blank space, select the blank between [Z] and [*].
Channel:
To enter newly available TV stations or change the channel number of an already tuned TV station.
Press the numeric buttons to enter the channel number of the desired TV station.
- Wait a few moments until the desired TV station has been tuned.
Fine Tuning:
To obtain the best tuning condition.
Use the joystick [▲, ▼] to obtain the best tuning condition.
- If you do not want to change the tuning condition, Use the joystick ▶ to return to the original condition [Auto].
Decoder:
To preset pay TV stations.
Use the joystick [▲, ▼] to select "On".
- If "Decoder" is set to "Off", normal TV stations are preset.
Mono:
To select the type of sound to be recorded.
Use the joystick [▲, ▼] to select "Off".
- Select "On" if you want to record the normal (mono) sound during a stereo, bilingual or NICAM broadcast, or if the stereo sound is distorted due to inferior reception conditions.
Title Page: (For Continental Europe)
To select the title extraction from TV guide from TV guide of broadcaster.
Use the joystick [▲, ▼] to select the number between 100 and 899.
6 Press [RETURN].
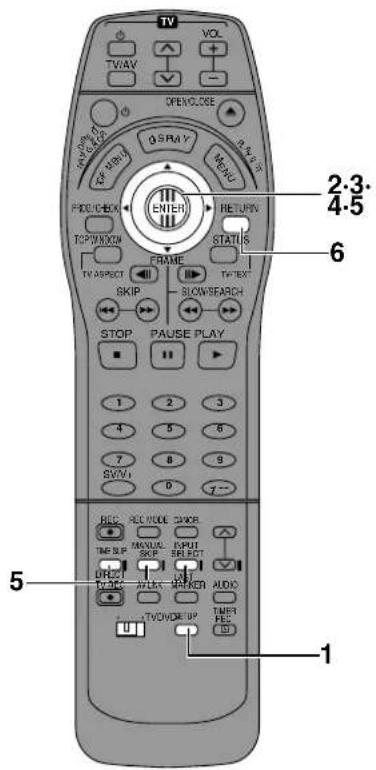
4
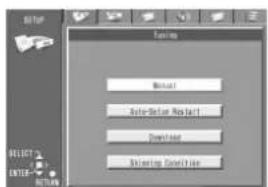
5
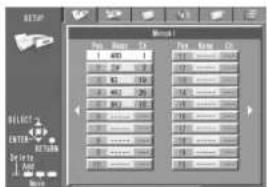
Adding, deleting, and moving channels
Use this function if:
- Channels were not set correctly using automatic tuning.
- A channel that should have been set wasn't.
- A channel's reception is poor and you want to delete it.
Preparation
Switch [DVD, TV] to "DVD".
1 Press [SET UP].
●The SET UP screen appears.
2 Use the joystick [◀, ▶] to select the "Settings" tab.
3 Use the joystick [▲, ▼] to select "Tuning" and press [ENTER].
4 Use the joystick [▲, ▼] to select "Manual" and press [ENTER].
5 Use the joystick [▲, ▼, ◀, ▶] to select the desired TV station and use the colour buttons to select "Delete", "Add", "Move".
Follow the operations below.
To delete a programme position "Delete":
Press the [TIME SLIP] (red).
To insert a blank programme position "Add":
Press the [MANUAL SKIP] (green).
To move a TV station to another programme position "Move":
Press the [INPUT SELECT] (yellow), and then use the joystick [▲, ▼] to select the new programme position to which you want to assign the TV station.
6 Press [RETURN].
Note:
- Setting can take up to 3 minutes approximately.
- If downloading of the setup data has been performed, only the instruction indication "Delete" appears.
Hint:
- If you have performed Manual Tuning to enter TV stations, the [--] indication may appear under [Pos/Name] on the On Screen Display when programming a ShowView (G-code) timer recording.
List of TV Reception Channels
| Channel Indication | TV Channel | |
| Germany/Italy Other Countries | ||
| 2 – 12 | ^*E2 - E12 | E2 – E12 |
| 13 – 20 | A – H (Only Italy) | — |
| 21 – 69 | 21 – 69 | 21 – 69 |
| 74 – 78 | S01 – S05 | S1 – S5 |
| 80 – 82 | S1 – S3 | M1 – M3 |
| 83 – 89 | S4 – S10 | M4 – M10 |
| 90 – 99 | S11 – S20 | U1 – U10 |
| 121 – 141 Hyperband | ^**S21 - S41 | S21 – S41 |
* In Italy: H1...(11), H2...(12) ** Only for 8 MHz channel raster
| Country VHF | CATV | UHF | |
| Australia | 0 – 12 | 45 – 470 MHz | 28 – 69 |
| N.Z. | 1 – 11 | 44 – 470 MHz | 21 – 69 |
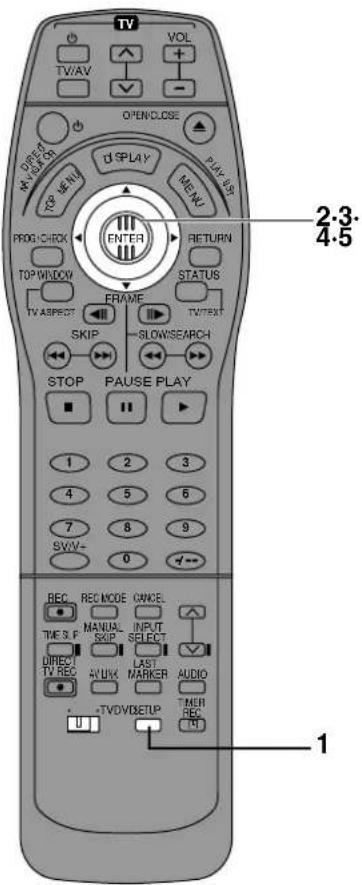
Auto-Setup Restart, Download, Shipping Condition
You can use the SET UP menus to start Auto Channel setting if Auto Setup (page 13) fails for some reason.
Preparation
Switch [DVD, TV] to "DVD".
1 Press [SET UP].
●The SET UP screen appears.
2 Use the joystick [◀, ▶] to select the "Settings" tab.
3 Use the joystick [▲, ▼] to select "Tuning" and press [ENTER].
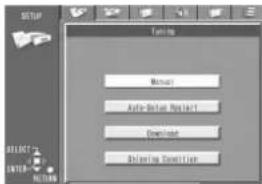
4 Use the joystick [▲, ▼] to select "Auto-Setup Restart", "Download" or "Shipping Condition".
5 Press the [ENTER] prepare for Auto Setup start, Download start or resetting the unit to the shipping condition.
- Press the [ENTER] again to actually start the Auto Setup, start the Download or change the settings back to the shipping condition.
- After returning the unit to the shipping condition, disconnect and reconnect the AC mains lead to re-tune the unit.
6 A message appears asking you to confirm the operation.
- Actual screens depend on the operation. Follow the on-screen instructions.
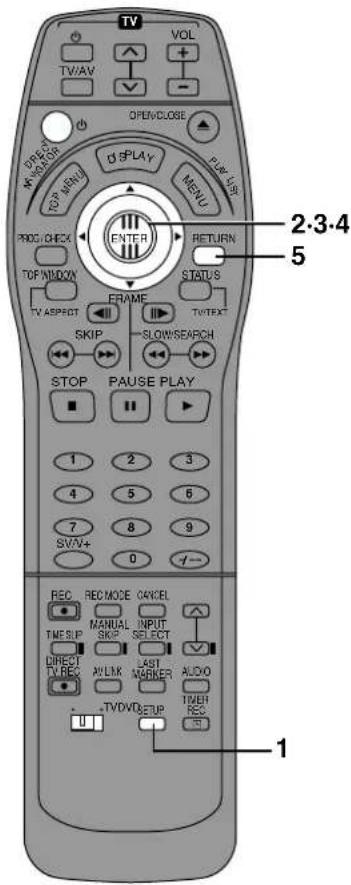
Power Save Setting
Preparation
Switch [DVD, TV] to "DVD".
1 Press [SET UP].
●The SET UP screen appears.
2 Use the joystick [◀, ▶] to select the "Settings" tab.
3 Use the joystick [▲, ▼] to select "Power Save" and press [ENTER].
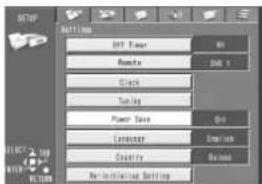
4 Use the joystick [▲, ▼] to select "On" or "Off" and press [ENTER].
• On:
The power consumption is greatly reduced when the unit is turned off.
• Off:
The power consumption is not reduced when the unit is turned off.
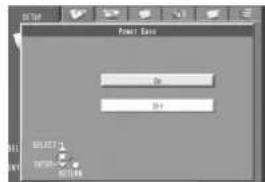
Refer to the followings when "Power Save" is set to "On".
- "FL Display" is automatically set to "Automatic".
- To turn the unit on, keep [⏻] pressed on the main unit. It is not possible to turn it on with the remote control.
- The Power Save function does not work in the timer recording standby mode. After all programmed timer recordings have been made, and after all programmed data have been erased, the unit switches over to the Power Save mode.
- When the unit is off, Pay TV programmes cannot be watched on the TV because the signal from the connected decoder is not looped through. To watch them, turn on the unit.
5 Press [RETURN].
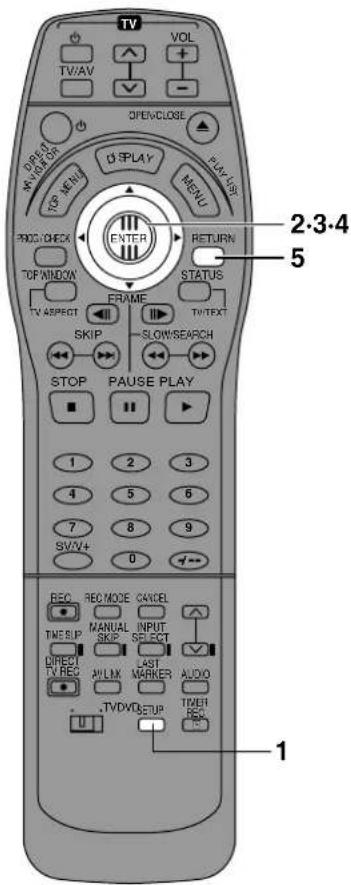
Language Settings
Preparation
Switch [DVD, TV] to "DVD".
1 Press [SET UP].
●The SET UP screen appears.
2 Use the joystick [◀, ▶] to select the "Settings" tab.
3 Use the joystick [▲, ▼] to select "Language" and press [ENTER].
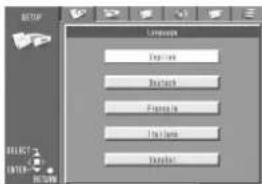
4 Use the joystick [▲, ▼] to select the desired language and press [ENTER].
5 Press [RETURN].
Country Settings
Preparation
Switch [DVD, TV] to "DVD".
1 Press [SET UP].
●The SET UP screen appears.
2 Use the joystick [◀, ▶] to select the "Settings" tab.
3 Use the joystick [▲, ▼] to select "Country" and press [ENTER].
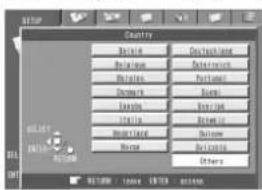
4 Use the joystick [▲, ▼] to select the desired country and press [ENTER].
5 Press [RETURN].
Re-initialize Setting
The settings for "Picture", "Sound", and "Display" return to the factory settings.
Preparation
Switch [DVD, TV] to "DVD".
1 Press [SET UP].
●The SET UP screen appears.
2 Use the joystick [◀, ▶] to select the "Settings" tab.
3 Use the joystick [▲, ▼] to select "Re-initialize Setting" and press [ENTER].
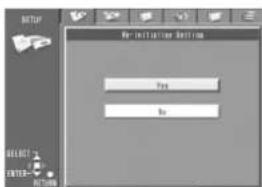
4 Use the joystick [▲, ▼] to select "Yes" and press [ENTER]
5 Press [RETURN].
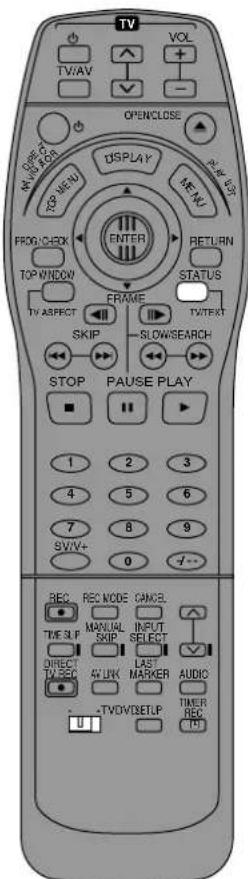
On-screen displays
Changing the information displayed
Displays appear on the television when you operate the unit to let you know what operation was performed and what condition the unit is in.
Remote control only
Preparation
- Switch [DVD, TV] to "DVD".
Press [STATUS] to change the information displayed.
The display changes each time you press the button.
For example, DVD-RAM
![PANASONIC DMR-E20 - Press [STATUS] to change the information displayed. - 1](/content/2026/05/796666/images/0adadb97c39fbd11f52759957b489d70174787c557c0908a515effed81879b04.jpg)
flowchart
graph TD
    A["15:32.54 24/9"] --> B["PRG2 1:12.12 FR"]
    B --> C["PRG1 0:30.04 SP"]
    C --> D["Remain 2:34 FR"]
    D --> E["DVD-RAM Rec Play L R"]
    E --> F["No display"]
Display examples
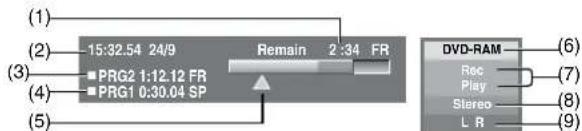
(1) Available recording time and recording mode
(2) The current date and time
(3) Recording time
●Shows recording time, recording mode and a rough guide to how much space has been used for recording on the disc.
(4) Elapsed play time
(5) Play position
(6) Current media
(7) Current recording or play status, input channel
●Shows the current state of the unit, and the input channel.
REC: Recording
PAUSE: Recording paused
PLAY: Playing
II: Playing Paused
▶▶: Fast forwarding (5 speeds)
◀◀: Rewinding (5 speeds)
▶: Slow-motion (5 speeds)
◀: Reverse slow-motion (5 speeds)
(8) Audio type
●Shows the selected audio type.
Stereo: a stereo broadcast is being received
M1/M2: a multiple audio broadcast is being received
M1: a NICAM monaural broadcast is being received
(9) Sound mode
LR, R, L: when you have changed the audio with the remote control's [AUDIO]
For your reference
- These displays may not be shown if "On-Screen Messages" in the "Display" menu is set to "Off" (page 75). If set to "Automatic", displays (6), (7), (8) and (9) appear for 5 seconds and then disappear.
Maintenance and Handling
Maintenance
To clean this unit, wipe with a soft, dry cloth.
- Never use alcohol, paint thinner or benzine to clean this unit.
- Before using chemically treated cloth, read the instructions that came with the cloth carefully.
Dust and dirt may adhere to the unit's lenses over time, possibly making it impossible to record or play discs.
Use the recommended DVD-RAM/PD lens cleaner
(LF-K123LCA1) every 1 to 4 months, depending on frequency of use and the operating environment.
Read the lens cleaner's instructions carefully before use.
The precision parts in this unit are readily affected by the environment, especially temperature, humidity, and dust.
Observe the following points to ensure continued listening and viewing pleasure.
Disc handling
Do not use irregularly shaped discs, such as heart-shaped. (These can damage the unit.)

natural_image
Two identical heart-shaped symbols with a diagonal line and dot, no text or labels present.How to hold a disc
Do not touch the recorded surface.
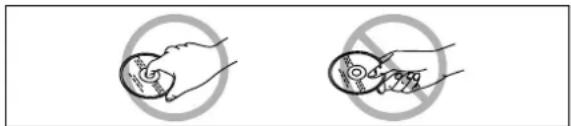
natural_image
Two hand diagrams showing a fish inside a circle and another holding a fish with a crossed-out ring (no text or symbols)If there is dirt or condensation on the disc
If the disc is dirty, wipe with a damp cloth and then wipe dry. Moisture may condense on discs after they are brought inside from the cold.
DVD-RAM and DVD-R
- Clean and dry only with the DVD-RAM/PD disc cleaner available as an optional accessory, part number LF-K200DCA1. Do not use cleaners or clothes for CDs to clean DVD-RAM and DVD-R.
- Never use cloths or cleaners for CDs, etc.
DVD-Video, Video CD and CD
Wipe it with a damp cloth and then wipe dry.
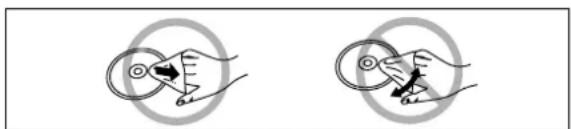
natural_image
Two diagrams showing hand positions with arrows indicating movement, no text or symbols present■Handling precautions
- Do not write on the label side with a ball-point pen or other writing instrument.
- Do not use record cleaning sprays, benzine, thinner, static electricity prevention liquids or any other solvent.
- Do not attach labels or stickers to discs. (Do not use discs with exposed adhesive from tape or left over peeled-off stickers.)
- Do not use scratch-proof protectors or covers.
- Do not use discs printed with label printers available on the market.
- Do not use discs that are badly warped or cracked.
■Do not place or store discs in the following places
- Locations exposed to direct sunlight
● Humid or dusty locations - Locations directly exposed to a heat vent or heating appliance.
Glossary
Bitstream
This is the compressed form of digital signals. A decoder decodes these signals into 5.1 surround and multi-channel signals.
Channel (when referring to DVD)
Sound is divided into channels based on the sound's role. For example, 5.1 channel
●Front speakers—1 left channel and 1 right channel
●Center speaker—1 channel
- Surround speakers—1 left channel and 1 right channel
- Subwoofer—1 channel×0.1 (the ratio of bass to the total amount of sound output)
Examples as shown in the on-screen menus
3/2 .1 ch
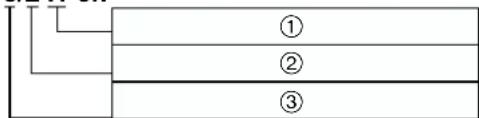
flowchart
graph TD
    A["①"] --> B["②"]
    B --> C["③"]
(1) 1: Subwoofer signal
(not displayed if there is no subwoofer signal)
(2) 0: No surround
1: Mono surround
2: Stereo surround (left/right)
(3) 1: Center
2: Front left+Front right
3: Front left+Front right+Center
Direct navigator
This is a list of programmes you have recorded. You can select programmes from the list to view. The list also shows the date and time of recording, the channel, and the titles of titled programmes.
The selected programme is played in the background, making selection even simpler.
Dolby Digital
This is a method of coding digital signals developed by Dolby Laboratories. Apart from stereo (2 channel) audio, these signals can also be 5.1-channel audio. A large amount of audio information can be recorded on one disc using this method.
Dolby Pro Logic
A surround system where a 4-channel audio track is recorded as 2 channels and then is restored to 4 channels for play. The surround channel is monaural.
DTS Digital Surround
This surround system is used in many movie theaters around the world. The separation between channels is good and the compression ratio is low, so realistic sound effects are possible.
DTS soundtracks are produced with the assumption that all channels will be used.
Finalize
This process allows DVD-R to be played on compatible equipment.
Frame and field
Frames are the still pictures that go together to make a moving picture. A frame is made up of two fields.
Frame Field Field
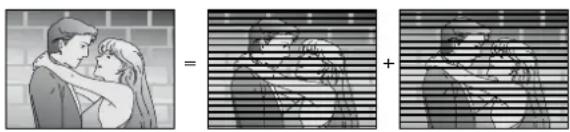
natural_image
Illustration of a couple embracing, with two side-by-side bar charts showing different scenes (no text or symbols)- A frame still is made up of two alternating fields, so the picture may appear blurred, but overall quality is high.
- A field still is not blurred, but it has only half the information of a frame still so picture quality is lower.
Linear PCM
This is a form of signal that has been digitized without compressing it. CDs are recorded with 44.1 kHz/16 bit PCM, while DVDs use PCM between 48 kHz/16 bit and 96 kHz/24 bit, allowing reproduction of greater quality sound.
The linear PCM signals output from the DIGITAL AUDIO OUT, OPTICAL terminal are stereo (2 channel).
NICAM (NICAM Broadcasting System)
This is a 2 channel sound broadcast system which in most instances provides high quality stereo sound. Broadcasters can also transmit two separate mono soundtracks on this system.
Pan&Scan/Letterbox
In general, DVD-Video are produced with the intention that they be viewed on a widescreen television with an aspect ratio of 16:9.
This means you can view most material with the intended aspect ratio on a widescreen television.
Material with this ratio will not fit onto a standard television with an aspect ratio of 4:3. Two styles of picture, "Pan&Scan" and "Letterbox", deal with this problem.
Pan&Scan: The sides are cut off so the picture fills the screen.
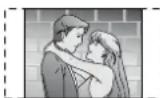
Letterbox: Black bands appear at the top and bottom of the picture so the picture itself appears in an aspect ratio of 16:9.
Playback control (PBC)
This is a method of playing video CDs. You can select parts to play by using menus recorded on the disc.
Play list
This is a collection of scenes. It enables you to play these scenes in succession or to select specific ones to play.
Programme (PRG)
The section between the point where recording is started and the point where it is stopped.
Sampling frequency
This is the number of samples of sound taken per second during conversion to a digital signal. A high sampling frequency results in a sound close to the original when played back.
S-video output
The colour and luminance signals are separated before being sent to the television, making for greater picture clarity.
Q Link (For Continental Europe)
This function works only if the unit is connected via a fully-wired 21-pin Scart cable to a TV featuring the Q Link or similar function.
Q Link offers the following functions:
1) Download from the TV*
When you connect the unit to a TV, the station list data is automatically copied from the TV to the unit, and the TV stations are assigned to the programme positions on the unit in the same order as on the TV.
2) Direct TV Recording
By simply pressing [DIRECT TV REC], you can at once record the same programme that you are watching on the TV.
3) TV/DVD Auto Power On*
Even if the TV and the unit are off (standby mode), pressing
[▶, PLAY], SV/V+ or [PROG/CHECK] automatically turns on both the TV and the unit.
4) DVD Auto Power Off*
When you turn the TV off, the unit is turned off as well. However, this function works in the stop mode. This function does not work during the following operations: Preset Download, Auto Setup, Auto Clock Setting and Manual Tuning.
5) On Screen Display Messages*
When you are watching a TV programme, the following unit messages appear on the TV screen to inform you of the unit's condition:
| Message Message appears when: | |
| This programme has already started | A timer recording has just started. |
| Set DVD to timer standby mode | The unit is not in the timer standby mode 10 minutes before the programmed recording start time of a timer recording (message appears every minute during these 10 minutes). |
| DVD is in timer standby mode | [∅] or [▲, OPEN/CLOSE] was pressed, although the unit is in the timer standby mode. |
| DVD is in timer recording mode | [∅], [■, STOP], [● REC], [■■, PAUSE], [SV/V+]([G-CODE]) or [AUDIO] was pressed while the unit is in the timer recording mode. |
- Depending on the type of TV used, the above messages may not appear correctly.
* The operations marked with asterisk are only available if the unit is connected to a TV featuring the Q Link or the DATA LOGIC function.
Note
If "Power Save" is set to "ON", the Q Link functions do not work when the unit is switched off (standby mode).
VPS/PDC (For Continental Europe)
VPS (Video Programme System)/
PDC (Programme Delivery Control)
VPS or PDC is a very convenient system which assures that the TV programmes you have programmed for timer recording will be recorded exactly from beginning to end, even if the actual broadcasting time differs from the scheduled time due to delayed start or extension of the programme duration. Also, if a programme is interrupted and, for example, some special news is inserted, the recording will also be interrupted automatically and resumed when the programme continues.
Depending on the signals sent from the TV stations, the VPS/PDC system may not operate properly even when "VPS/PDC" has been set to "ON".
Please check with the broadcasters in your area for details.
- In the case of VPS/PDC recording, use the correct time (VPS/PDC time) for recording the TV programmes.
Set "VPS/PDC" to "OFF" when the recording time is not the correct time (VPS/PDC time).
VPS/PDC recording is not performed when the time (VPS/PDC time) is incorrect, even if only by one minute. To find out the correct time (VPS/PDC time), consult Teletext, a newspaper or magazine, or other source.
- If the actual broadcasting times of timer recordings overlap (regardless of whether they are VPS/PDC controlled), the recording that starts first always has priority, and the recording of the later beginning programme will start only after the first timer recording has finished.
- When the VPS/PDC signal drops out because the broadcast signal is weak, or when a TV station does not transmit a regular VPS/PDC signal, the timer recording will be performed in the normal mode (without VPS/PDC) even if it was programmed for VPS/PDC.
In this case, even if the timer recording is performed, whatever has been programmed will not be cancelled at that particular time but at 4 a.m. the day after tomorrow.
- The start times of scheduled programmes listed in the newspaper or magazine may be changed at a later date. Set "VPS/PDC" to "OFF" when programming a programme whose start time has been subsequently changed. Particular care must be taken in this respect with ShowView (G-code) programming since "VPS/PDC" is automatically set to "ON" in some countries.
- If a programme listed in a newspaper or magazine has two ShowView (G-code) numbers, use the ShowView (G-code) number for VPS/PDC if you wish to proceed with VPS/PDC recording using ShowView (G-code) programming.
- The default settings for "VPS/PDC" differ depending on the country concerned. Refer to the following table.
| ShowView (G-code) programming | Changes in ShowView (G-code) programming start time | Non-ShowView (G-code) programming | |
| France, Belgium, Netherlands, Sweden, Denmark, Finland, Norway | ON OFF | OFF | |
| Germany, Switzerland, Austria | ON ON ON | ||
| Italy, Spain, Portugal, Other Countries | OFF OFF | OFF | |
- If the broadcasting station is not transmitting VPS/PDC signals, “—” appears in the menu for timer programming under “VPS/PDC”.
- The beginnings of recordings may not be recorded correctly in some cases.
Title/Chapter (DVD-Video)
DVD-Video are divided up into large sections, titles, and smaller sections, chapters. The numbers allocated to these sections are called title numbers and chapter numbers.
Example

(1) Title 1
(2) Title 2
(3) Chapter 1
(4) Chapter 2
(5) Chapter 3
Track
This is the smallest division on CD, and Video CD, and usually equates to a single song.
Example

(1) Track 1
(2) Track 2
(3) Track 3
(4) Track 4
(5) Track 5
The self-diagnosis displays appear if a problem occurs with the unit.
The service numbers in the table appear when a problem occurs.
- The service numbers are a "U" followed by two digits.
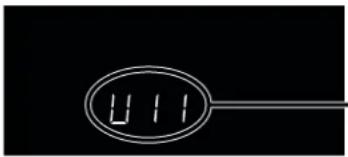
natural_image
Simple line drawing of a magnifying glass with 'U' and 'I' labels, no text or symbols presentService number
| Service number | Unit status Solutions | |
| U11 The disc is dirty or badly scratched. | ●Follow the instructions in “Maintenance and Handling” to clean the disc if it is dirty. (page 87)●The disc cannot be played if it is scratched and this display doesn’t disappear. | |
| You have inserted a disc the unit cannot play or record on. | ||
| U14 | The unit is hot. | ●The unit switches to standby automatically for safety reasons and you cannot operate it. Wait for about 30 minutes for the service number to disappear.●Select a position with good ventilation when installing the unit.●Do not block the cooling fan on the rear of the unit. |
| U99 The unit fails to operate properly. | ●Press [⏻] to switch the unit to standby. Now press [⏻] again to turn the unit on. | |
| REMOTE DVD | The remote control code is wrong. | ●Change to the correct code. (page 78) |
Error displays
| Error messages Causes and solutions | |
| No Disc. | You haven't inserted a disc. Correctly inserted a disc that this unit can play. (page 15)The disc is upside down. If it is a single-sided disc, insert it so the label is facing up. (page 15) |
| This is non-recordable disc. | The unit cannot record on the disc you inserted. The unit cannot record onto finalized DVD-R, DVD-Video, CDs, or video CDs.Insert a DVD-RAM or unfinalized DVD-R. (page 6)You inserted an unformatted DVD-RAM.Format the disc with this unit. (page 42) |
| This disc is not properly formatted. Formatting is necessary using DISC INFORMATION. | You Inserted an incompatible disc. Insert a compatible disc. (page 6) |
| Please check write protect tab on the disc. | The write protect tab on the cartridge is set to “PROTECT”.Use a ballpoint pen or similar to release the write protection.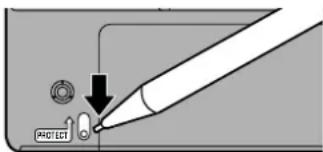 |
| Contents of this disc are protected. | The programme is write-protected.Release the protection with the direct navigator. (page 50)The disc is write-protected.Release the protection with the disc protection sub menu of DISC INFORMATION. (page 41) |
| Cannot finish recording completely. | The programme was copy-protected.The disc is full.Recording was not completed for some other reason. |
| Cannot record on the disc. | The disc is scratched. Use another disc.The disc is dirty. Clean the disc as described in these operating instructions. (page 87) |
| Please set clock. | The clock is not set correctly. Reset the clock using “Manual Clock Setting”. (page 79) |
| This disc may not be played in your region. | You tried to play a disc with a region number different from this unit's region number. This unit can play only play discs with the region numbers compatible with this unit. (page 6) |
| Your selection exceeds the recorder's rating limit. | A ratings level has been set for DVD-Video with this unit. Temporarily unlock the unit with “Ratings” in the disc menu. (page 76) |
Troubleshooting guide
Before requesting service, make the below checks. If you are in doubt about some of the check points, or if the remedies indicated in the chart do not solve the problem, consult your dealer for instructions.
Power
| No power | ●Insert the AC power supply cord securely into the household AC outlet. |
| The unit is on but cannot be operated. | ●The unit is hot (“U14” appears on the display).Wait for “U14” to disappear.●One of the unit’s safety devices may have activated.Reset the unit as follows:1.Press [⏻/l] on the main unit to switch the unit to standby.If the unit doesn’t switch to standby, press and hold [⏻] for about 10 seconds. The unit is forcibly switched to standby.Alternatively, disconnect the AC power supply cord, wait one minute, then reconnect it.2.Press [⏻/l] to turn the unit on. |
| The unit switches to standby automatically. | ●This is a power saving feature. You can turn it off if you would prefer (Settings—Off Timer—Off).(page 73)Press [⏻/l] to turn the unit on.●One of the unit’s safety devices may have activated.Press [⏻/l] to turn the unit on. |
Picture
| No picture. | ●Make sure the television's input setting (e.g., AV1) is correct. |
| Television reception worsens after connecting the unit. | ●This can occur because the signals are being divided between the unit and the television. It can be solved by using a signal booster, available from audio-visual suppliers.Consult your dealer if reception does not improve. |
| Screen size is wrong. | ●Check the settings on your television.●Check the settings for “TV Aspect”, “4:3 TV Settings for DVD-Video” or “4:3 TV Settings for DVD-RAM” in the Connection menu. (pages 14 and 75) |
| The picture flickers. | ●Adjust the television's vertical hold. Read the television's operating instructions or consult your dealer. |
| On-screen messages do not appear. | ●Go to Display in the SET UP menus and select “Automatic” for “On-Screen Messages”.(page 75)Press [STATUS] to show the on-screen messages constantly. |
| The grey background does not appear. | ●Go to Display in the SET UP menus and select “On” for “Grey Background”. (page 75) |
Sound
| No sound.Low volume.Distorted sound. | ●Check the connections. (pages 10 and 12)●Check the input mode on the amplifier if you have connected one.●Turn V.S.S. off if it causes distortion. (page 65) |
| Cannot hear the desired audio type. | ●Press [AUDIO] on the remote control to select the desired audio type. (page 20)DVD-R●Go to Sound in the SET UP menus and choose the correct setting with “Billuingual Selection for DVD-R”. (page 74) |
| Cannot switch audio during stereo or NICAM broadcasts. | ●You have used digital connection. Connect to other equipment using audio cables (analog connection). (pages 12 and 69)●You cannot change the audio type when using DVD-R. |
Displays
| The display is dim. | ●Go to Display in the SET UP menus and change the display's brightness with “FL Display”. (page 75) |
| “0:00” is flashing on the unit's display. | ●The clock is not set.Go to Settings in the SET UP menus and set the clock with “Clock”. (page 79) |
Play
| Play fails to start even when [▶, PLAY] is pressed.Play starts but then stops immediately.“U11”, “NO DISC”, or “Cannot Play” appears on the unit’s display. | ●Insert the disc correctly with the label facing up. (page 15)●This unit cannot play discs other than DVD-RAM, DVD-R, DVD-Video, Video CD, and CD. (page 6)●The disc is dirty. Clean it. (page 87)●The disc may be badly scratched. (page 87)●You inserted a blank DVD-RAM or DVD-R. |
| No response when buttons pressed. | ●Some operations may be prohibited by the disc.●If the unit is not operating at all, press [☐, TIMER REC] to switch the unit to standby, then press [☐, TIMER REC] again to turn the unit on. The unit may not be operating correctly due to lightning, static electricity, or some other external factor.●The Child Lock function is activated. (page 68) |
| A title or chapter doesn’t play when it is selected. | ●Some titles and chapters on DVD-Video are not played when you have changed the ratings level. (page 76) |
| Picture distorted during search. | ●Some distortion is normal. |
| There is ghosting. | ●Change the settings for “3D-NR”, “Block NR”, and “Mosquito NR” to “0”, or turn “MPEG-DNR—off” with the on-screen menu icons. (page 64) |
| Alternative soundtrack and subtitles cannot be selected. | ●The languages are not recorded on the disc.●You may have to use the disc’s menus to select languages. |
| Soundtrack/subtitle language not the one selected with the SET UP menus. | ●The language is not recorded on the disc. (page 73) |
| No subtitles. | ●Subtitles are not recorded on the disc.●Turn the subtitles on. (page 63) |
| Angle cannot be changed. | ●This function depends on software availability. Angles can only be changed during scenes where different angles are recorded (“◀◀” appears on the display). |
| You have forgotten your ratings password. | ●Restore the ratings setting to the factory settings.While the disc tray is open, press and hold [◀◀] and [▶▶] at the same time for 5 or more seconds. |
Remote control
| The remote control doesn’t work. | ●The unit is on standby to make a timer recording (“☐” on the unit’s display is on). (page 30)●[DVD, TV] is not switched to “DVD”.Switch to “DVD” when operating this unit. (page 4)●The remote control code is wrong.Change to the correct code. (page 78)●The batteries are depleted. Replace them with new ones. (page 4)●Point the remote control at the remote control sensor on the main unit. (page 4)●Remove obstacles from between the remote control and main unit. |
| Cannot operate the television. | ●The remote control code is wrong.Change to the correct code. Some televisions cannot be operated even if you change the code. (page 5)●[DVD/TV] is not switched to “TV”.Switch to “TV” when operating the television. (page 4) |
Recording and timer recording
| Cannot record. | You haven't inserted a disc or the disc you inserted cannot be recorded on. Insert a disc the unit can record onto. (page 6)The disc is unformatted.Format the disc so this unit can record on it. (page 42)The write protect tab on the cartridge is set to “PROTECT”.Use a ballpoint pen or similar to release the write protection. (page 91)The disc is full or nearly full.Delete unneeded programmes or use another disc. (page 46)The material you are trying to record is copy-guarded. |
| ShowView (G-code) programming does not work properly. | The clock is wrong.Go to Settings in the SET UP menus and correct the clock with “Clock”. (page 79) |
| Timer recording does not work properly. | The timer programme is incorrect.Make corrections to the programme and check them when you are finished. (pages 31 and 34)The unit is not on standby for timer recording. (“” on the unit's display is not on.)Different timer programme times overlap. (page 30)The clock is wrong.Go to Settings in the SET UP menus and correct the clock with “Clock”. (page 79) |
| The unit switches to standby while making a timer recording. | The unit switches to standby while making a timer recording if the disc runs out of space.Use a disc that has enough space to record the programme. |
| The timer programme remains even after recording finishes. | The programme remains if you select weekly or daily setting. (pages 31 and 33) |
| The available recording time doesn't increase even after erasing all recordings on the disc. | The available recording time does not increase if you erase data written to the disc with the DVD-RAM drive of a computer.Format the disc if necessary. (page 42) |
Discs make sounds as they rotate. This does not indicate a malfunction.
Specifications
Power supply: AC 220-240 V, 50 Hz
Power consumption: 40 W (Approx. 5 W [Power save mode])
Recording system: DVD video recording standards
(DVD-RAM).
DVD video standards (DVD-R)
Recordable discs: 12cm 4.7GB DVD-RAM
12cm 9.4GB DVD-RAM
8cm 2.8GB DVD-RAM
12cm 4.7GB DVD-R (for General Ver.2.0)
Recording time: Maximum 360 min (with 4.7 GB disc)
XP:Approx. 60 min SP:Approx. 120 min
LP:Approx. 240 min EP:Approx. 360 min
playable discs: 12cm 4.7GB DVD-RAM
12cm 9.4GB DVD-RAM
8cm 2.8GB DVD-RAM
12cm 4.7GB DVD-R (for General Ver.2.0)
DVD-Video
CD-Audio (CD-DA)
Video CD
CD-R/RW (CD-DA, Video CD formatted
discs)
Audio
Recording system: Dolby Digital, 2ch
Full scale: 2 Vrms at 1 kHz
Input Impedance: more than 10 kohm
Audio Out: AV1/AV2 (21 pin) Audio Out (pin jack)
Output Level: Standard : 0.5 Vrms
Full scale: 2 Vrms at 1 kHz
Output Impedance: less than 1 kohm
Digital Audio Out: Optical terminal (PCM, Dolby Digital, DTS,
MPEG)
Television System
Tuner System: PAL B/G/H 75 ohm
Channel Coverage:
For Continental Europe
VHF : CH E2-E12 , A-H2(Italy)
UHF:CH21-69
CATV: CH S01-S05(S1-S3)
S1-S20(M1-U10)
S21-S41
[8MHz, RASTER]
For Asia
VHF:CH E2-E12
UHF:CH 21-69
CATV: CH S01-S05
M1-M10
U1-U10
S21-S41
For Australia
VHF:CH0-12
UHF:CH 28-69
CATV: 45MHz-470MHz
For New Zealand
VHF:CH 1-11
UHF:CH 21-69
CATV: 44MHz-470MHz
RF Converter Output: Not provided
Video
Video System: PAL colour signal, 625 lines, 50 fields
NTSC colour signal, 525 lines, 60 fields
Recording system: MPEG2 (Hybrid VBR)
1Vp-p 75 ohm, terminated
1Vp-p 75 ohm, terminated
Video Out: AV1/AV2 (21 pin), Video Out (pin jack)
1Vp-p 75 ohm, terminated
S-Video Out: AV1(21 pin), S-Video Out (S terminal)
1Vp-p 75 ohm, terminated
RGB Out: AV1(21 pin) 0.7Vp-p(PAL) 75 ohm, terminated
DV-Input: i.LINK/IEEE1394 Standard, 4-pin
Dimensions(W)x(H)x(D): Approx. 430x120x351 mm
Weight: Approx. 5.6 Kg
Operating Temperature: 5 °C–40 °C
Operating Humidity range: 10%–80% RH (no condensation)
LASER Specification
Class 1 LASER Product
Wave Length:
Laser Power:
775-815nm, 655-666nm
No hazardous radiation is emitted with the
safety protection
NORSK
Mass and dimensions shown are approximate.
Specifications are subject to change without notice.
- Panasonic
- DVD Video Recorder Grabadora de DVD vídeo
- WARNING:
- NORSK
- ADVARSEL!
- ADVARSEL:
- SUOMI
- VAROITUS!
- VAROITUS:
- Important
- Warning
- For your safety
- Conserve the environment
- Disposal of old equipment
- Cautions before you operate this unit
- Notes on these instructions
- Displays
- Standard Accessories
- Contents
- Batteries A
- Do not;
- Use B
- Inside of unit
- Television operation
- Preparation
- Note
- Operation: Button
- Discs you can use
- For your reference
- Discs you can use for recording and play Logos for the discs you can record on and play
- Examples of causes of such losses are
- Play-only discs
- Discs you can play-only and their logos
- Region Management Information (DVD-Video only)
- Playing CD-R and CD-RW
- Discs that cannot be played
- DVD-R
- Before finalizing
- ■After finalizing
- Audio format logos
- Types of disc for the type of connected TV
- Discs and accessories
- •DVD-RAM
- •DVD-R
- Control reference guide
- Main unit
- ■ Opening the front panel
- The unit's display
- Connecting and Setting up
- Hints:
- Preset Download
- (To Simultaneously set up this unit with a new television)
- Switch on the television.
- Note:
- (To set up this unit with a television in use)
- Hint:
- Use a 21-pin Scart cable or Audio/Video cable (S-Video cable).
- Auto Setup
- Press [∅/l] to switch the unit on.
- Use the joystick [▲, ▼, ◀, ►] to select the country.
- Press [ENTER].
- To cancel Auto Setup before it finishes
- If the clock setting menu appears after Auto Setup finishes
- To confirm that stations have been tuned correctly
- When station names or channel numbers have not been set correctly
- Selecting TV screen type
- ■To return to the previous screen
- Playing discs
- When a menu screen appears on the television
- DVD-V VCD
- Starting play from where you stopped it (Resume Function)
- RAM DVD-R DVD-V CD VCD
- DVD-R DVD-V CD VCD
- RAM
- Fast forward and rewind—SEARCH
- Slow-motion play
- Frame-by-frame viewing
- Skipping
- During play or while paused
- Starting play from a selected programme, title, chapter or track
- Remote control only
- During play or while stopped
- Manual Skip
- During play
- Press [MANUAL SKIP].
- Selecting an amount of time to skip—Time Slip
- Main unit only
- During play
- Within 5 seconds
- Changing audio
- During reception or play
- Press [AUDIO] to select the audio type.
- ■While receiving a TV programme with Stereo A
- ■While playing a television programme recorded on DVD-RAM B If it is a recording of a stereo broadcast
- ■While playing a DVD Video ©
- ■While playing a Video CD D
- When you have connected the unit to other equipment with an optical digital cable
- When using DVD-R
- ●While receiving a TV broadcast
- - During play
- Programme play
- CD VCD
- Random play
- Press [▶, PLAY].
- ■To cancel random play
- Recording television programmes
- ■Recording modes
- For example, with a 4.7 GB DVD-RAM
- To check the remaining time and the current mode during recording A Press [STATUS] several times.
- One Touch Recording—Specify a time to stop recording B
- While recording
- Press [● REC] on the main unit to select the recording time.
- To cancel
- ■To show the time remaining until recording finishes c Press [STATUS] several times.
- To Manually Adjust the Audio Recording Level
- Before recording, press [AUDIO] in 5 seconds or more.
- Use the joystick [◀, ▶] to adjust the audio recording level.
- Press [RETURN] to exit the On Screen Display.
- ■To immediately record the same TV programme that you are viewing on the TV (Direct TV Recording)
- To perform Direct TV Recording:
- Press [▲, OPEN/CLOSE] to open the tray and insert a disc.
- Press [DIRECT TV REC].
- Press [■, STOP] to stop recording.
- ■Linked timer recordings with external equipment (EXT LINK)
- Press [EXT LINK] on the unit to switch the unit over to the timer recording standby mode.
- Playing while you are recording
- Playing from the beginning of the programme you are recording—Follow-on play A
- While recording or timer recording
- Press [▶, PLAY].
- ■To stop play and recording
- Simultaneous recording and play B
- During recording or timer recording
- Press [TOP MENU, DIRECT NAVIGATOR].
- Use the joystick [▲, ▼] to select a programme and press [ENTER].
- Checking the recording during recording (TIME SLIP) A
- Press [TIME SLIP].
- ■To change the part being played B
- ■To show both the recording and play images
- Watching the television while recording
- Using the top window
- About the top window
- ■Top window icons DISC INFORMATION
- TIMER RECORDING
- SET UP
- DIRECT NAVIGATOR
- PLAY
- RESUME PLAY
- CREATE PLAY LIST
- PLAY LIST
- TOP MENU MENU
- DV AUTO REC
- Using ShowView code\* (G-code) to make timer recording
- Press [SV/V+] ([G-CODE]).
- Press the numeric buttons to enter the code.
- If the programme is correct Press [ENTER].
- Press [PROG/CHECK] or [RETURN].
- ■To put the unit on recording standby
- ■Flexible recording mode (FR)
- ■To change the programme
- Timer Programme Correction screen (from step 3 on page 30)
- Setting for control of the recording starting and ending time by special signal Included in the broadcasting signal (VPS/PDC Function)
- (For Continental Europe)
- If “- -” appears under “Pos/Name” after entering a ShowView code or a G-code
- Use the joystick [▲, ▼] repeatedly to select the programme position on which the TV programme to be recorded will be broadcast.
- Manual programming
- Press [PROG/CHECK].
- Press [ENTER].
- Use the joystick [▶] to move through the items and change the items with the joystick [▲, ▼].
- Press [ENTER] when you have finished making changes.
- To put the unit on recording standby
- To change the timer recording programme
- To clear a timer recording programme
- To check programmes
- Press [PROG/CHECK].
- Icon explanations
- ■To exit from the Timer Programme List screen
- Starting and canceling programmes
- Press [☐, TIMER REC].
- ■To release the unit from recording standby
- ■To stop recording while a programme is working
- Recording from a video cassette player
- When connected to non-DV equipment
- While stopped
- Start play on the other equipment.
- Press [●, REC] at the point you want to start recording.
- When connected to DV equipment
- ■To skip unwanted parts
- ■To stop recording
- Entering titles
- RAM DVD-R
- ■To enter other characters
- ■To correct a character
- DISC INFORMATION
- About DISC INFORMATION
- Enter Title
- Disc Protection
- Releasing disc protection
- Format
- ■To stop formatting
- Finalize—Creating DVD-Video
- ■To stop finalizing
- Using the direct navigator
- Selecting programmes to play
- ■To clear the programme list
- About the programme list
- Erasing programmes
- Press [ENTER].
- ■To stop partway through
- Entering and editing programme titles
- Checking programme contents
- Protecting programmes
- Releasing programme protection
- Erasing parts of a programme
- Using play lists to edit programmes
- Displaying play lists
- ■To clear the play list screen
- What you can do with the play list screen
- About the play list scene screen
- a) Play list information
- b) Scenes
- c) Turning pages
- Creating play lists
- Playing play lists
- ■To stop play list play
- Playing play list scenes
- ■To stop scene play
- ■To show scene 10 and later
- Adding scenes to a play list
- ■To add other scene
- Moving a scene
- To re-edit a play list scene
- ■To re-edit another scene
- Erasing a scene from a play list
- ■To erase other scene
- ■To stop partway
- Copying play lists
- Erasing a play list
- Titling play lists
- Checking play list's contents
- Using on-screen menu icons
- Common procedures
- Press [DISPLAY].
- Icons for unit information only
- Use the joystick [◀, ▶] to select the item.
- Use the joystick [▲, ▼] to select the setting.
- To clear the icons
- ■To change the position of the icons
- Icons for disc information
- A Soundtrack/Subtitle language
- Icons for unit information
- Marker
- To change the user mode
- ■U1:Common picture adjustment
- ■U2:Reducing picture noise
- Repeat play A
- Use the joystick [▲, ▼].
- If the Video CD has playback control
- ■To repeat only your favorite tracks
- A
- B
- C
- A-B repeat play B
- Press [ENTER].
- Enjoying virtual surround sound effects (V.S.S.)
- RAM DVD-R DVD-V
- Use the joy stick [▲, ▼] to select the effect.
- Marking places to play again—MARKER
- Marking Place
- DVD-V CD VCD
- To play from a marked position
- When selecting markers 11 and above
- ■To clear the on-screen icons
- Auto recording from Digital Video (DV) equipment
- Use the joystick [▲, ▼, ◀, ▶] to select "DV AUTO REC" and press [ENTER].
- Use the joystick [◀, ▶] to select "Rec" and press [ENTER].
- ■To stop recording manually
- ■When recording stops
- Child Lock
- To activate the child lock
- To cancel the child lock
- Upgrading your system
- Enjoying more powerful sound
- ■Other uses
- Connecting a digital amplifier or system component A
- Connecting an analog amplifier or system component B
- ■To enjoy Dolby Pro Logic (page 87)
- Connecting a Decoder ©
- AV Link Function (For Continental Europe)
- Connecting a satellite receiver or digital receiver D
- Connecting a video cassette recorder E
- Audio/Video cable
- Changing the unit's settings
- Summary of settings
- Settings
- Off Timer
- Remote
- Clock
- Tuning
- Power Save
- Language
- Country
- Re-initialize Setting
- Disc DVD-V
- Soundtrack
- Subtitle
- Menus
- Ratings (page 76)
- Picture
- Hybrid VBR Resolution
- Still Mode
- Seamless Play
- Sound
- Display
- On-Screen Messages
- Grey Background
- Channel Guide
- ON:
- OFF:
- FL Display
- Dim during play:
- Automatic:
- Connection
- NTSC Signal Output
- AV2 Connection
- DECODER:
- EXT:
- Ext Link1:
- Ext Link2:
- AV2 Input
- Input signal-TV System
- PAL:
- NTSC:
- 4:3 TV Settings for DVD-Video
- 4:3 TV Settings for DVD-RAM
- Entering a password
- When setting ratings
- Do not forget your password.
- When changing ratings
- Digital output
- PCM Down Conversion
- Output of audio with a sampling frequency of 96 kHz
- Dolby Digital
- DTS
- MPEG
- Off Timer Setting
- Remote Setting
- Operating other Panasonic DVD equipment with the remote control
- Clock Settings
- Manual Clock Setting
- Auto Clock Setting
- Press [RETURN].
- ■To stop auto clock setting
- Channel Settings
- Selecting the manual tuning
- Handling the TUNING BOX screen
- Pos:
- Name:
- Channel:
- Fine Tuning:
- Mono:
- Press [RETURN].
- Adding, deleting, and moving channels
- Use this function if:
- Press [SET UP].
- Auto-Setup Restart, Download, Shipping Condition
- Power Save Setting
- Language Settings
- Country Settings
- On-screen displays
- Changing the information displayed
- Press [STATUS] to change the information displayed.
- Display examples
- Maintenance and Handling
- Maintenance
- Disc handling
- How to hold a disc
- If there is dirt or condensation on the disc
- DVD-RAM and DVD-R
- DVD-Video, Video CD and CD
- ■Handling precautions
- ■Do not place or store discs in the following places
- Glossary
- Bitstream
- Channel (when referring to DVD)
- Dolby Pro Logic
- DTS Digital Surround
- Finalize
- Frame and field
- Linear PCM
- NICAM (NICAM Broadcasting System)
- Pan&Scan/Letterbox
- Playback control (PBC)
- Programme (PRG)
- Sampling frequency
- S-video output
- Q Link (For Continental Europe)
- VPS/PDC (For Continental Europe)
- Title/Chapter (DVD-Video)
- Track
- Error displays
- Troubleshooting guide
- Specifications
- Audio
- Television System
- For Asia
- For Australia
- For New Zealand
- Video
- LASER Specification
Brand : PANASONIC
Model : DMR-E20
Category : DVD Recorder