
CCT-5001 MK2 - Dash cam DENVER - Free user manual and instructions
Find the device manual for free CCT-5001 MK2 DENVER in PDF.


| Product Type | Dash Cam (Car Video Recorder) |
| Brand | Denver |
| Model | CCT-5001 MK2 |
| Display | 2.7" TFT LCD |
| Lens Angle | 104° |
| Sensor | 5 Mega Pixels CMOS |
| Video Resolution | 1080FHD, 720P, VGA, QVGA |
| Photo Resolution | 14M, 12M, 8M, 5M, 3M |
| Storage | Micro SD card (up to 32GB, not included) |
| Battery | Li-ion (built-in) |
| Power Input | Mini-USB (car charger or PC) |
| Weight | Approx. 60 g |
| Dimensions | 71.8 x 46.6 x 31 mm |
| Loop Recording | Off, 3 min, 5 min, 10 min |
| Motion Detection | Yes (on/off) |
| IR Night Vision | Yes (IR LED, on/off) |
| Audio Recording | Built-in microphone (toggle on/off) |
| TV Output | HDMI and AV out |
| Language Support | Multiple (English, German, Spanish, French, etc.) |
| Tripod Mount | Yes (tripod slot) |
| White Balance | Auto, Daylight, Cloudy, Incandescent, Fluorescent |
| Exposure Control | -3.0 to +3.0 EV |
| Image Stabilization | Anti-shake (on/off) |
| Protection Level | Super low, Low, Middle, High, Super high sensitivity |
Frequently Asked Questions - CCT-5001 MK2 DENVER
User questions about CCT-5001 MK2 DENVER
0 question about this device. Answer the ones you know or ask your own.
Ask a new question about this device
Download the instructions for your Dash cam in PDF format for free! Find your manual CCT-5001 MK2 - DENVER and take your electronic device back in hand. On this page are published all the documents necessary for the use of your device. CCT-5001 MK2 by DENVER.
USER MANUAL CCT-5001 MK2 DENVER
denver-electronics.com
CCT-5001 MK2
USER MANUAL
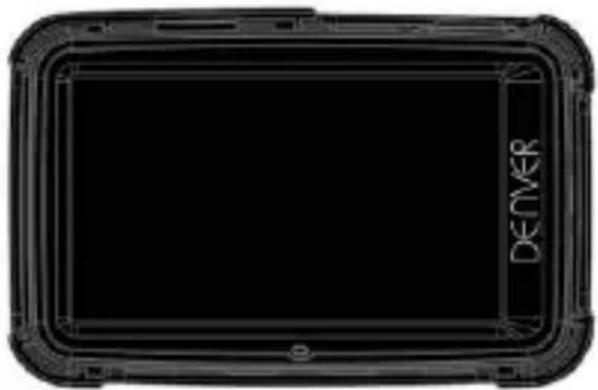
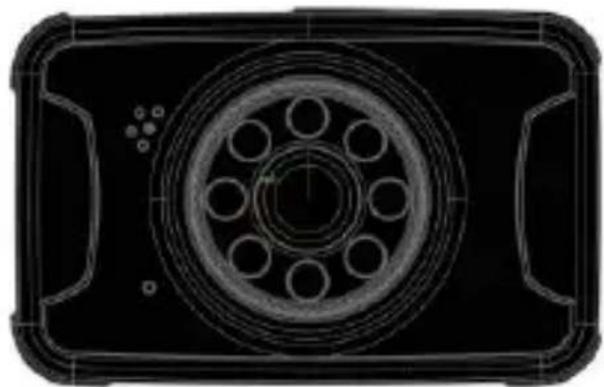
natural_image
Top-down technical drawing of a mechanical component with concentric circles and radial slots (no text or symbols)Part of the camcorder
Preparing for using
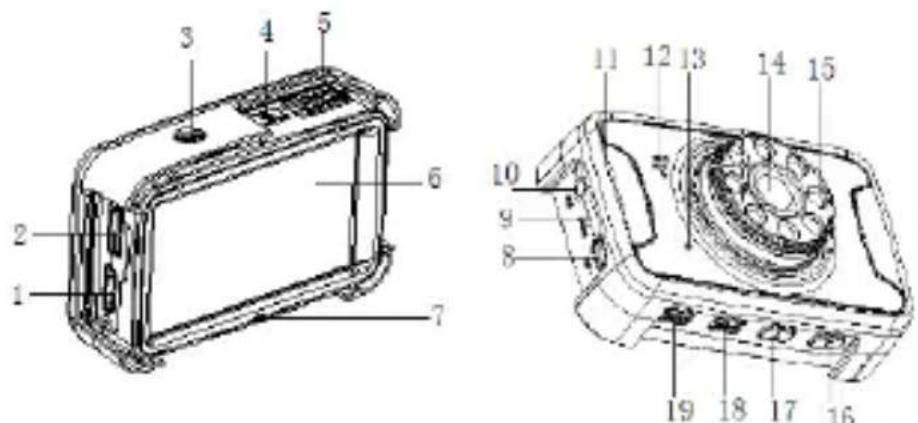
| 1. HDMI port2. Micro SD card slot3. Tripod slot4. ON/OFF5. Shutter | 6. Screen7. Busy indicator light8. USB port9. Reset10. AV out | 11. Protector12. Speaker13. Microphone14. Lens15. LED lamp | 16. UP17. DOWN18. Menu19. Mode |
Power capacity
For the power capacity in the battery, refer to the following icons:

Full

Middle

Low
-
Connect device to car adaptor through Mini-USB port, device will power on automatically & enter standby mode and start charging with green indicator light ON. Once device has been fully charged, red indicator light goes out.
-
Connect device to PC via USB cable, device will power on automatically. A "Mass storage" icon will display on the screen. At this time, it means charging normal, then turning off the camcorder can save more electricity.
Installation and Removal of micro SD card
- In the direction as indicated, insert the SD card into the slot until it is held firmly.
- To take the SD card out, slightly press the SD card to eject it out.
Note:
- Observe the direction to insert the SD card; if the direction is reverse, the device and the SD card may be damaged.
- When the SD card is inserted into the device, the machine will set the SD card as preset
storage unit and the data in the original SD card will be unreadable.
- If the SD card is incompatible with the device, please insert the card again or replace it for retry.
- Max. 32 G supported.
- Always use a high-speed SD card (CLASS 4 above).
Use Guidelines
DVR On/Off
- Press the ON/OFF key for 3 second to switch ON and hold for 3 seconds to switch OFF device manually.
- Connect the device with car charger in the car. When car engine starts up, device will be switched ON automatically. When car engine shuts off or car charger been disconnected, device switches OFF with 10 seconds delay (as per setting).
Switch Working Modes
- Press the Mode key to switch Video/Image/playback, as video mode while as image mode. These icons are screen on the left upper corner of the screen.
How to Enter System Setup Option
In video or image mode, press the Menu - Mode key once and press the shutter key to enter the "System Setup" option,
- Date: [On]/[off]/[Set date]
- Auto power off: [1min]/[3min]/[5min]/[off]
- Protect level: [Super low sensitivity]/[Low sensitivity]/[Middle sensitivity]/[High sensitivity]/[Super high sensitivity]
- Beep sound: [On]/[off]
- Auto display off: [1min]/[3min]/[5min]/[Off]
- Language: [German]/[Danish]/[Spanish]/[French]/[Italian]/[Dutch]/[Polish]/[Portuguese]/[Swedish]/[Finnish]/[English]
- Frequency: [50HZ]/[60HZ]
- TV mode: [NTSC] /[PAL]
- Image rotation: [On]/[Off]
- IR LED: [On]/[Off]
- Format: [Cancel]/[OK]
- Default setting: [OK]/[Cancel]
How to Take Videos and Set Video Options
1. Take Videos
When the DVR enters the video mode and the icon occurs on the left upper corner of the screen, press the Shutter key to start recording; in recoding videos, the icon on the left upper corner of the screen will flash. Press the Shutter key to stop and then the icon on the left upper corner of the screen will disappear. In video taking process, press and hold the UP/DOWN button for a while to zooming in /zooming out the subject.
2. Set Video Options (Press ON/OFF key > Menu key)
- Size: [1080FHD]/[720P]/[VGA]/[QVGA]
- Exposure: [-3]/[-2]/[-1]/[0]/[+1]/[2]/[+3]
- White balance: [Auto]/[Daylight]/[Cloudy]/[Fluorescent]/[Incandescent]
- Anti-shake: [On]/[Off]
- Loop recording: [Off]/[3minutes]/[5minutes]/[10minutes]
- Motion detection: [On]/[Off]. When car is parked and motion detection turned On, DVR will detect moving objects in front of car and trigger recording automatically, or stay at standby state if there's no object moving.
- Record audio: [On]/[Off]
- Date stamp: [On]/[Off]
Take Photo and Set Photos
- Press the On/Off key to enter the video mode; press the Mode key to enter the image mode indicated with the icon 📄 on the left upper corner of the screen.
- When the Shutter key is pressed, when the sound "click" is heard, the image preview waiting will occur. About 1s later, the shooting will be complete. In shooting, be sure to hold the CVR firmly without shock so as to avoid affecting photo quality.
- Set Photo Options (Press power key >Mode key>Menu key)
- Capture mode: [Single]/[2s timer]/[5s timer]/[10s timer]
- Resolution: [14M]/[12M]/[8M]/[5M]/[3M]
- Quality: [Super Fine]/[Fine]/[Normal]
- Sharpness: [Sharp]/[Normal]/[Soft]
- Exposure: Set the exposure value.
- White balance: Adjust the white balance.
- Color: [Standard]/[Sepia]/[Monochrome]/[Vivid]
- ISO: [Auto]/[100]/[200]/[400]
- Scene Mode: [Auto]/[Scenery]/[Portrait]/[Night Scenery]/[Night Portrait]/[High Sensitivity]/[Beach]
- Face Detect: [Off]/[Face Detect]/[Smile Capture]
- Anti-shake: [On]/[Off]
- Continue shot: [On]/[Off]
Playback Mode (After switching on the device, press the Mode key twice to enter the playback mode).
In the playback mode, press the UP/DOWN key to choose the photo or video to be previewed; Choose the desired video file and please press the SHUTTER button to start playing ,and press it again to have a pause , if you want to stop it , press the MODE button ,or you can wait its end;
Tip: In any of the modes of video/image/playback, you may press the Mode key to switch such modes circularly.
Playback menu as below:
- Delete: [Delete Current]/[Delete All]/[Cancel]
- Rotate: [90^]/[180^]/[270^]/[Cancel]
- Protect: [Lock Current]/[Unlock Current]/[Lock All]/[Unlock All]
- Crop: [Crop]/[cancel]
- Slide show: [3 seconds]/[5 seconds]/[10 seconds]
- Picbrige: [Print]/[Cancel]
Data Backup
USB Backup Mode
Connect the DVR and PC with the USB cable, then the device will automatically power on and the "Mass storage" word display on the screen, press the Shutter key to confirm; switch on the PC, then one mobile disc will appear on "My Computer" on the desktop and you may find the desired file in the Mobile Disc/DCIM folder.
PC-CAM:
- Connect the DVR and PC with the USB cable, when the device power on automatically, then turn off by holding down ON/OFF. And then press and hold the ON/OFF and Shutter key to "PC-CAM" display on the screen. At this time, you can enter the PC-CAM mode.
- PC operation system: Windows 2000/XP/Vista/Windows 7 or above.
- Choose "PC-CAM", then the DVR may be used as a camera.
- Remove the USB cable to turn off the DVR.
Connect to TV
- Use the HDMI connection line to connect the DVR to a TV for playback.
- Use a TV cable to connect the DVR to a TV for videoing, shooting and browsing pictures and videos.
Tip: Without driver installed, the mobile disc may be used when the DVR is switched on.
Remarks: When this device crashes due to improper operation, press the Reset button to restart and restore it.
Specification
| Sensor | 5 Mega Pixels CMOS |
| LCD display | 2.7" TFT Screen |
| Lens | F/3.2 , f=7.5mm |
| Shutter | Electronic Shutter. 1/2 ~ 1/800 sec |
| Angle of lens | 104° |
| Resolution | StillImage.14M/12M/8M/5M/3MVideo.1080FHD/720P/VGA/QVGA |
| White balance | Auto/Daylight/Cloudy/Incandescent/Fluorescent |
| Exposure | -3.0 ~ +3.0EV |
| Continue shot | 3 frame/shot |
| ISO | Auto/100/200/400 |
| Sharpness | Sharp/Normal/Soft |
| Storage | External memory. Micro SD card (not included),up to 32GB |
| Power source | Li-ion battery |
| Ambient temperature | Operating. 0°C to 50°CStorage. -20 to 60°C |
| Microphone | Built-in |
| Speaker | Built-in |
| Dimension | 71.8x46.6x31(mm) |
| Weight | About 60 g |
Warning
• Lithium battery inside!
- Do not try to open the product!
- Do not expose to heat, water, moisture, direct sunlight!
- Only charge with the original adaptor supplied with this product!

CAUTION!
ALL RIGHTS RESERVED, COPYRIGHT DENVER ELECTRONICS A/S
DENVER®
www.denver-electronics.com



Electric and electronic equipment and included batteries contains materials, components and substances that can be hazardous to your health and the environment, if the waste material (discarded electric and electronic equipment and batteries) is not handled correctly.
Electric and electronic equipment and batteries is marked with the crossed out trash can symbol, seen below. This symbol signifies that electric and electronic equipment and batteries should not be disposed of with other household waste, but should be disposed of separately.
As the end user it is important that you submit your used batteries to the appropriate and designated facility. In this manner you make sure that the batteries are recycled in accordance with legislature and will not harm the environment.
All cities have established collection points, where electric and electronic equipment and batteries can either be submitted free of charge at recycling stations and other collection sites, or be collected from the households. Additional information is available at the technical department of your city.
Imported by:
DENVER ELECTRONICS A/S
Stavneagervej 22
DK-8250 Egaa
Denmark
www.facebook.com/denverelectronics


- denver-electronics.com
- CCT-5001 MK2
- USER MANUAL
- Part of the camcorder
- Preparing for using
- Power capacity
- Installation and Removal of micro SD card
- Note:
- Use Guidelines
- DVR On/Off
- Switch Working Modes
- How to Enter System Setup Option
- How to Take Videos and Set Video Options
- Take Videos
- Set Video Options (Press ON/OFF key > Menu key)
- Take Photo and Set Photos
- Data Backup
- USB Backup Mode
- PC-CAM:
- Connect to TV
- Warning
- DENVER®
Brand : DENVER
Model : CCT-5001 MK2
Category : Dash cam