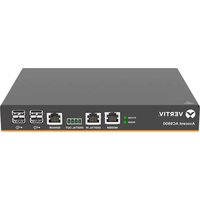
Avocent ACS808EAC-400 - Network management console Emerson - Free user manual and instructions
Find the device manual for free Avocent ACS808EAC-400 Emerson in PDF.


| Product Type | Console Server / Serial Server |
| Model | ACS808EAC-400 |
| Brand | Emerson (Avocent) |
| Serial Ports | 8 RS-232 ports (RJ-45 or DB9) |
| Ethernet Port | 1 x 10/100/1000 Mbps RJ-45 |
| Form Factor | 1U Rackmount |
| Dimensions (W x D x H) | 17.2 x 10.0 x 1.75 inches |
| Weight | 2.5 kg (5.5 lbs) |
| Power Supply | AC 100-240V, 50/60 Hz, internal |
| Power Consumption | 15W typical |
| Operating Temperature | 0°C to 50°C (32°F to 122°F) |
| Storage Temperature | -20°C to 70°C (-4°F to 158°F) |
| Humidity | 5% to 95% non-condensing |
| Network Protocols | SSH, Telnet, HTTP/HTTPS, SNMP, DHCP, DNS |
| Security Features | SSL/TLS, SSH encryption, user authentication, IP filtering |
| Management | Web GUI, CLI (SSH/Telnet), SNMP |
| Maintenance | Clean with a soft, dry cloth. Do not use liquids. |
| Safety Compliance | CE, FCC Class A, UL |
| Warranty | Standard 1-year limited warranty (check manufacturer) |
Frequently Asked Questions - Avocent ACS808EAC-400 Emerson
User questions about Avocent ACS808EAC-400 Emerson
0 question about this device. Answer the ones you know or ask your own.
Ask a new question about this device
Download the instructions for your Network management console in PDF format for free! Find your manual Avocent ACS808EAC-400 - Emerson and take your electronic device back in hand. On this page are published all the documents necessary for the use of your device. Avocent ACS808EAC-400 by Emerson.
USER MANUAL Avocent ACS808EAC-400 Emerson
Avocent® ACS800/8000 Advanced Console System
Command Reference Guide
Technical Support Site
If you encounter any installation or operational issues with your product, check the pertinent sec this manual to see if the issue can be resolved by following outlined procedures. For additional visit https://www.VertivCo.com/en-us/support/
TABLE OF CONTENTS
1 Introduction, Navigation and Commands...1
1.1 Access Options and How to Log in...to...the...CLI...1.....
1.2 Configuration Tasks Performed With the CLI 2
1.3 CLI Navigation..2....
1.4 Autocompletion 4
1.5 Parameters..4....
2 CLI Command Set 5
2.1 Commands Used for the CLI 5
2.1.1 add 5
2.1.2 cd.... 5
2.1.3 commit 6
2.1.4 delete.... 6
2.1.5 exit/quit_6
2.1.6 ftp.... 7
2.1.7 help 7
2.1.8 list_configuration.... 7
2.1.9 Is 8
2.1.10 opiepasswd 8
2.1.11 pwd 9
2.1.12 passwd 9
2.1.13 revert 9
2.1.14 scp....9
2.1.15 set 10
2.1.16 show.... 10
2.1.17 wiz 10
2.1.18 connect.... 11
2.1.19 disconnect 11
2.1.20 cycle, on, off, lock and unlock 11
2.2 Special Multi-session Commands 13
2.2.1 sniff 13
2.2.2 share 13
2.2.3 list_shared_session 14
2.2.4 kill_shared_session 14
2.2.5 sendmsg ....14
2.2.6 show_databuf and show_appliance_databuf 15
2.2.7 cleandbuf and clean_appliance_databuf 15
2.3 CLI Equivalent Actions to Web Manager Checkbox...Selection.... 16
3 Port Access and Configuration Examples..19.
3.1 View Information About the Console System and Connected Devices 19
3.2 Connect to a Device Console Connected to a Serial Port 2
3.3 Accessing Serial Ports using ts_menu_21
3.4 Manage Power for a Device Connected to an Outlet...on...a...PDU...22.....
3.5 Port Configuration Examples..22....
4 CLI Overview for Administrators 25
4.1 System 25
4.2 System/Security 25
4.2.1 System/Date and Time.... 26
4.2.2 System/Help and Language 27
4.2.3 System/General 27
4.2.4 System/Boot Configuration 28
4.2.5 System/Information.... 28
4.2.6 System/Usage 28
4.3 Network 29
4.3.1 Network/Settings 29
4.3.2 Network/IPv4 and IPv6 29
4.3.3 Network/Devices 30
4.3.4 Network/Hosts 31
4.3.5 Network/Firewall 32
4.3.6 Network/IPSec(VPN) 33
4.4 Network/SNMP 33
4.5 Sensors.... 33
4.5.1 Wiz command 34
4.5.1 Wiz command 34
4.6 Ports 35
4.6.1 Auxiliary ports 38
4.7 Pluggable Devices 38
4.8 Authentication 39
4.9 Users 40
4.10 Events_and_Logs 42
4.11 Power Management 43
4.12 Active Sessions Information 44
Appendices 45
Appendix A: Recovering a Console System That Will Not Boot From Flash 45
Appendix B: Migration CLI 47
Appendix C: Su and Sudo Commands 50
1 INTRODUCTION, NAVIGATION AND COMMANDS
The Avocent® ACS800/8000 Advanced Console System is a 1U appliance that serves as a single access and administration of connected devices, such as target device consoles, modems and power devices. Console systems support secure remote data center management and out-of-band management of IT assets from any location worldwide.
This guide describes how to access and navigate the Command Line Interface (CLI) utility and how it after the console system has been installed and assigned an IP address. For information on how or operate your console system using the web user interface (UI), see the Avocent® ACS800/800C Advanced Console System Installation/User Guide.
1.1 Access Options and How to Log in to the CLI
The CLI utility can be accessed in the following ways:
- Through a local terminal or a computer that has a terminal emulation program connected the console port of the console system with session settings of 9600, 8, N and 1, with control. The local console speed can be modified in the device's boot configuration.
-
After the console system is connected to the network and has an IP address, it can be accessed by one of the following methods:
-
An SSH or Telnet client on a remote computer (if the SSH or Telnet protocol is the selected Security Profile)
• With the Web Manager - Access - Appliance Viewer button
• With DSView management software
NOTE: For details on the remote access methods and IP address configuration options, see the Avocent® ACS800/8000 Advanced Console System Installation/User Guide.
Administrators have full access to the CLI and to connected devices. An administrator can authorize regular users to access ports, manage power, manage data buffer storage and use one or more system administration tools. Users can always change their own passwords.
To start the CLI:
- An administrator can access the CLI through the console port, with Telnet, SSH or through web manager.
- Enter the username and password at the prompt. The cli-> prompt appears.
-or-
A root user logs into the Linux shell by default. From the shell, type cli to launch the
Welcome to ACS8000 <host name>. Type help for more information --: / cli->
The default password for admin is avocent and for root is linux. The password for these users may have been changed during installation of the console system. If not, change the default root and admin passwords to avoid potential security breaches.
1.2 Configuration Tasks Performed With the CLI
The navigation structure of the CLI mirrors that of the web manager. Options and parameters are also the same, except that spaces in web manager options and parameters are replaced with underscores ( ), as in system_tools. Examples that show how to select an option in the web manager use a dash surrounded by two spaces (- ). In the CLI, two similar options in a path are separated by a forward slash (/).
For example, in the web manager, user configuration is done when an administrator selects Users - Local Accounts - User Names to get to the User Names screen. To navigate to the equivalent configuration level in the CLI, an administrator would use the cd command followed by the path: cd /users/local_accounts/user_names.
Administrators should log into the CLI in one window and log into the web manager in another window to see how the menu options in the web manager map to the navigation options in the CLI. Configuration with the CLI also requires mastery of the following information on CLI navigation and of the CLI commands. For more information, see CLI Command Set on page 5
1.3 CLI Navigation
The CLI navigation options are in a nested tree configuration.
When a command line is shown in an example, and the step starts with "Enter," or when a syntax example is given, the user should type the command as shown and then press Enter. The Enter key is not shown in command line examples unless needed for clarity.
When a user logs in the CLI, the prompt indicates the user is at the / level.
--:- / cli->
No parameters can be set at this level of the navigation tree.
At any CLI prompt at any level, if you type cd
- When an administrator types the cd command and then presses Tab Tab at the / prompt, the following navigation options (path elements) appear.
--:~/ cli->cd
access/ monitoring/ sensors/
active_sessions/ network/ system/
authentication/ pluggable_ system_
devices/ tools/
change_password/ ports/ users/
events_and_logs/ power_
management
When a regular user types the cd command and then presses Tab Tab at the / prompt, the following navigation options appear.
--:~/ cli->cd
access/ change_password/ power_management/
Enter cd
--:- / cli-> cd system_tools
A prompt like the following appears at each level:
--:- system_tools cli->
NOTE: CLI commands are case sensitive.
At any level, you can press Tab Tab at the prompt to see the commands that can be entered at the current level.
--: / cli->
add pwd
cd quit
clone_ports reboot
commit reset_port_to_factory
configuration_integrity restore_configuration
delete revert
disable_ports save_configuration
echo scp
edit set
enable_ports set_cas
exit set_dial-in
factory_defaults set_dial-out
finish set_power
ftp set_socket-client
generate_/_download_certificate shell
help show
hostname shutdown
list_configuration upgrade_firmware
ls whoami
opiepasswd wiz
passwd
If you know the path, you can enter multiple path elements in a single command separated with slashes (/).
--: / cli-> cd ports/serial_ports/
--: serial ports cli->
Enter cd .. to move up one level of the navigation tree. Enter cd ../../[/..] to move up multiple levels.
--:- serial ports cli-> cd ../..
--:- / cli->
1.4 Autocompletion
Autocompletion allows you to type the first few letters of a command or navigation option and Tab. The rest of the name is filled in automatically if the letters typed are unique to one command or to a navigation option at that level. If the letters match more than one of the commands or navigation for that level, the matching options are listed.
For example, if you type cd acc and press Tab at the CLI prompt from the / level, the access option will be completed.
--:- / cli-> cd acc <tab>
--:- / cli-> cd access
If you then press Enter, you are changed to the access level, and the access level prompt appears.
--:- access cli->
The following example illustrates a case when more than one command matches the letters typed.
--:- / cli-> sh <tab> <tab>
shell show
1.5 Parameters
Some CLI commands take parameters. If you press Tab Tab after a command that requires a parameter, you are prompted to enter the parameter.
2 CLI COMMAND SET
2.1 Commands Used for the CLI
This section describes the general commands used when accessing the console system with the command line interface.
NOTE: Most of the commands work from any location when the path to the command parameter included.
NOTE: The word "node" refers to an entity such as a route, host or user, which can be configured or deleted.
2.1.1 add
Add a node.
Syntax:
--:- / cli-> add <Path>
Example:
--:- / cli-> add network/hosts
--:#- [hosts] cli->
2.1.2 cd
Change directory (level).
Syntax:
--:- / cli-> cd <Path>
Example:
--:- / cli-> cd access
Displays the following:
--:- access cli->
Example:
--:- access cli-> cd ..
-Or-
--:- access cli-> cd ../
Moves up one directory level and displays the following:
--:- / cli->
Example:
--:- access cli-> cd /
Moves to the top level and displays the following:
--:- / cli->
Example:
--:- access cli-> cd /information
Displays the following:
--:- information cli->
2.1.3 commit
Save settings.
Syntax:
**:- settings cli-> commit
2.1.4 delete
Delete a node.
Syntax:
--: - / cli-> delete <Path> <parameter>
2.1.5 exit/quit
Exit the CLI and return to the login prompt.
Syntax:
--:- / cli-> exit
-or-
--:- / cli-> quit
2.1.6 ftp
Connect to a remote FTP server.
Syntax:
--: / cli-> ftp [<server_IP_address>|<hostname>]
NOTE: You must log into the CLI as root to have full control over the local directory path. FTP commands apply.
2.1.7 help
Generate a help message about how to navigate the CLI.
Syntax:
--: / cli-> help
- Thank you for using the cli -
Some basic and useful keys are:
- tab (once/twice) - shows the next possible commands/option(s)
- up/down arrow - navigates up/down in the command history
- ls - shows sub-nodes
- show - shows available configuration in the node
- cntrl e - gets the current parameter value for editing
Other hints:
- Use backslash "\" to escape spaces, "\" and other control characters when assigning values to parameters.
2.1.8 list\_configuration
List the configuration in a format that allows pasting the output directly on the appliance session (console, SSH or Telnet) in order to (re)configure the unit.
All configurable parameters are listed under the current node. When the parameter is not configured, parameter name has the number sign character (#) as its prefix.
Syntax:
--: / cli-> list_configuration
Example:
.list configuration of network device eth0:
--:- cli-> cd network/devices/eth0
--:- cth0 cli-> list_configuration
echo off
cd /network/devices/eth0
batch_mode
set status=enabled
set ipv4_method=dhcp
#set ipv4_method=static #ipv4_address=192.168.160.10 #ipv4_mask=255.255.255.0
#set ipv4_method=ipv4_address_unconfigured
#set ipv6_method=stateless
#set ipv6_method=dhcpv6
#set ipv6_method=static #ipv6_address= #ipv6_prefix_length=
set ipv6_method=ipv6_address_unconfigured
set mode=auto
submit
echo on
commit
--:- eth0 cli->
NOTE: Check the configuration of the program used to open a session against the appliance (SSH/Telnet, TeraTerm / HypertTerminal for console, and so on) to avoid the inclusion of a I character in lines that exceed terminal width, because this will affect the paste operation.
2.1.9 Is
Show the available directories or subnodes at the current location.
Syntax:
--: / cli-> ls
Example:
--: / cli-> ls authentication
appliance_authentication/
authentication_servers/
--: / cli->
2.1.10 opiepasswd
Configure a one time password (OTP) for the local user. After you type the command, you will the passphrase to use for the OTP.
NOTE: Use this command to restart the sequence number.
Syntax:
--:- / cli-> opiepasswd -f -c <username>
Example:
opicpasswd -f -c teste
Adding teste:
Only use this method from the console; NEVER from remote. If you are using telnet, xterm, or a dial-in, type ^C now or exit with no password.
Then run opicpasswd without the -c parameter.
Using MD5 to compute responses.
Enter new secret pass phrase:
Again new secret pass phrase:
ID teste OTP key is 499 AC0241
FOOD HUGH SKI ALMA LURK BRAD
2.1.11 pwd
Display the path to the current level (print working directory).
Syntax:
--:- / cli-> pwd
2.1.12 passwd
Configure the password for the current user. The terminal does not echo the password. Syntax:
--:- / cli-> passwd
2.1.13 revert
Undo a previous parameter setting.
Syntax:
**:- / cli-> revert
2.1.14 scp
Perform a secure shell copy.
Syntax:
--: / cli-> scp [[user@]host1:]file1 [...] [[user@]host2:]file2
2.1.15 set
Set a parameter.
Syntax:
--: / cli-> set <Path> <Parameter>=<Value>
After a parameter has been changed using the set command, a pair of asterisks appear at the of the CLI prompt.
**:- / cli->
Save the change:
**:- / cli-> commit
-or-
Undo the change:
**:- / cli-> revert
NOTE: After a commit or revert command, the asterisks at the beginning of the CLI prompt replaced by hyphens. Asterisks will not appear after the execution of the set command if usi mode, which can be recognized by a prompt that has a pound sign after the colon and the directory in square brackets (example, --:#- [hosts] cli->).
2.1.16 show
Show the content of the current location (shows tables and parameters with current values).
Syntax:
--:- / cli-> show
Example:
--:- language cli-> show
appliance_language = english
--:- / cli->
2.1.17 wiz
Configures the IP parameters for the EthO interface. Shows the current configuration and asks for values for the following parameters:
- Status of the interface (enabled or disabled)
• IPv4 method (dhcp or static)
• IPv6 method (dhcp or static)
• IP address, mask and gateway (if static is chosen for either of the previous parameters)
• DNS Primary Server, Secondary Server, Domain Name and Hostname - Enable or disable IPv6 support
After setting all parameters, confirm that all parameters are correct to save them.
2.1.18 connect
Connect to a serial port.
Syntax:
--:- access cli-> connect <port_name>
Example:
--:- access cli-> connect 77-77-70-p-2
Displays the following:
Password:
-or-
Type the hotkey to suspend the connection:
Ctrl + z
NOTE: The connect, sniff and share commands allow you to connect to serial ports. These cc require authentication when single sign-on is disabled, so the password must be entered to authenticate the user in the authentication type configured for the serial port. If single sign-or enabled or the user has already been authenticated, the session is opened.
2.1.19 disconnect
Use the text session hotkey to suspend the target session and return to the CLI.
Syntax:
Ctrl+z
2.1.20 cycle, on, off, lock and unlock
Control power on outlets on a PDU that is either connected to a serial port or to the AUX/Mi when the port is enabled and configured with the Power Profile.
NOTE: Lock and unlock commands are only supported on Cyclades and Avocent PDUs.
To power control (on, off, cycle) all outlets of PDUs or outlets merged to a target (serial por CAS profile with merged outlets):
- Go to the access level.
--:- / cli-> cd/ access
- Launch the power command with the argument being the target name or PDU ID.
--:- access cli-> [cycle|on|off][<PDU_ID>][<target name>]
To power control (on, off, cycle) outlets of one specific PDU:
- Go to the PDU level under access.
--:- / cli-> cd access/<PDU_ID>
- Launch the power command with a specific outlet (number or name), range of outlets (hyphen to specify the range) or list of outlets (number or name separated by a comma
--:- <PDU_ID> cli-> [cycle|on|off][<outlet name>|<outlet number>]
-or-
--:- <PDU_ID> cli-> [cycle|on|off]<outlet number>-<outlet number]
-or-
--: <PDU_ID> cli-> [cycle|on|off]<outlet number>,<outlet number>
To power control (on, off, cycle, lock, unlock) outlets of one specific PDU under the power ma level:
- Go to the outlet level for the specific PDU.
--: / cli-> cd power_management/pdus/<PDU_ID>/outlets
- Launch the power command with a specific outlet number, range of outlets (use a hyph specify the range) or list of outlets (number or name separated by a comma).
--: outlets cli-> [cycle|on|off] [<outlet number>]
-or-
--:- outlets cli-> [cycle|on|off] <outlet number>-<outlet number]
-or-
--: outlets cli-> [cycle|on|off] <outlet number>,<outlet number>
2.2 Special Multi-session Commands
The following commands require navigation to an enabled and configured port to which one or m users are simultaneously connected. To get to the port, enter the following command.
--: - / cli-> cd access/<serial_port_ID>
2.2.1 sniff
Connect to a serial port as an additional, view-only user.
Syntax:
--:- / <port name> cli-> sniff
Example:
--: / 77-77-70-p-2 cli->sniff
Displays the following:
Password:
-Or-
Type the hotkey to suspend the connection:
Ctrl + z
2.2.2 share
Connect to a serial port as an additional, read/write user.
Syntax:
--:-/ <port_name> cli-> share
Example:
--: / 77-77-70-p-2 cli->share
Displays the following:
Password:
-or-
Type the hotkey to suspend the connection:
Ctrl + z
2.2.3 list\_shared\_session
List the users connected to the shared serial port.
Syntax:
--:- <serial_port_ID> cli-> list_shared_session
2.2.4 kill\_shared\_session
Terminate the connection of a user on the port. The user is returned to the cli-> prompt.
NOTE: You must enable the Kill Multi Session option from the Port Access Rights settings for command to be available.
Syntax:
--: <serial_port_ID> cli-> kill_shared_session <username>
Example:
--:- <serial_port_ID> cli-> kill_shared_session admin@139
2.2.5 sendmsg
Send a message to a user connected to the port.
NOTE: You must enable the Send Message Multi Session option from the Port Access Rights for this command to be available.
Syntax:
--:- <serial_port_ID> cli-> sendmsg <username> <message>
Example:
--:- <serial_port_ID> cli-> sendmsg admin@139 You are being terminated.
2.2.6 show\_databuf and show\_appliance\_databuf
View the data buffer files for the port. Data buffering must be enabled in the CAS Profile for the user must be authorized for data buffer management.
Syntax:
--:- <serial_port_ID> cli-> show_databuf
View the data logging for the appliance. Appliance Session Data logging must be enabled in Ever Logs/Appliance Logging.
Syntax:
--:- / cli -> show_appliance_databuf
The following commands are available for show data buffering:
- Return - Scroll forward one line.
- Ctrl + F - Scroll forward one window.
- Ctrl + B - Scroll backward one window.
• /pattern - Search foward in the file for the first line containing the pattern.
• ?pattern - Search backward in the file for the first line containing the pattern.
• n - Repeat the search.
• q - Quit.
2.2.7 cleandbuf and clean\_appliance\_databuf
Clear the data buffer. Data buffering must be enabled in the CAS Profile for the port and the authorized for data buffer management.
Syntax:
--:- <serial_port_ID> cli-> clean_databuf
Clear the data logging for the appliance. Appliance Session Data logging must be enabled in Ever Logs/Appliance Logging.
Syntax:
--:- / cli -> clean_appliance_databuf
2.3 CLI Equivalent Actions to Web Manager Checkbox Selection
NOTE: The following example procedure, which configures IPv6, illustrates the actions to use in CLI to enable or disable an option when a checkbox would be selected or deselected in the manager. The sub-parameters will be available after the option is enabled.
To configure IPv6 (example of how to perform the equivalent of web manager checkbox selection/deselection):
- Log into the CLI and enter cd network/settings.
--:- / cli-> cd network/settings
- Enter show to view the status of IPv6 configuration.
--:- settings cli-> show
hostname = ACS8048
primary_dns = 110.126.129.4
secondary_dns =
domain = corp.tst.com
search =
enable_lldp = no
enable_ipv6 = no
get_dns_from_dhcpv6 = no
get_domain_from_dhcpv6 = no
multiple_routing = none
enable_bonding = no
- Type set enable_ipv6= and press Tab to view the options for the parameter.
--:- settings cli-> set enable_ipv6= no yes
- Enter set enable_ipv6=no to disable IPv6.
--:- settings cli-> set enable_ipv6=no
-or-
Enter set enable_ipv6=yes to enable IPv6.
--:- settings cli-> set enable_ipv6=yes
- (Optional) Enter either of the following commands to enable subparameters.
**:- settings cli-> set get_dns_from_dhcpv6=yes
**:- settings cli-> set get_domain_from_dhcpv6=yes
- Enter show to verify the change.
**:- settings cli->show
hostname = ACS8048
primary_dns = 110.126.129.4
secondary_dns =
domain = corp.tst.com
search =
enable_lldp = no
enable_ipv6 = yes
get_dns_from_dhcpv6 = no
get_domain_from_dhcpv6 = no
multiple_routing = none
enable_bonding = no
- Enter commit.
This page intentionally left blank.
3 PORT ACCESS AND CONFIGURATION EXAMPLES
By default, all serial ports and the modem port are disabled. An administrator must enable and do the ports before anyone can use them. Configuration of ports differs based on the type of conn device, which can be a device console, PDU or modem.
By default, all users can access all enabled and configured ports. The administrator must decide to restrict user access to ports by the assignment of authorizations to user groups. A user who authorized group is referred to as an authorized user.
Some port configuration tasks are provided as examples of how to use the CLI. See the Avocen 800/8000 Advanced Console System Installation/User Guide for an overview of the tasks the administrator must do to configure restricted access to ports. For more information about how to the web manager procedures in the CLI, see Configuration Tasks Performed With the CLI on page 2.
This section describes the following tasks related to port access, configuration, power management, where the tasks are performed in the CLI.
Table 3.1 Port Access and Configuration Tasks
| TASK WHERE PERFORMED | |
| View information about the console system and the connected devices | access show |
| Authorized users access enabled on configured ports access connect | |
| Authorized users manage power on outlets | access//outlets -or- power_management/PDUs//outlet_table |
| Administrators configure ports connected to the consoles of devices | ports See Chapter 3 for all Ports options |
3.1 View Information About the Console System and Connected Devices
When a regular user or an administrator enters show at the Access level, information about the following appears in the format shown in Access Parameters on page 19.
• The console system
- The serial ports that user is authorized to access (if they are configured with the CAS or Power Profile)
Table 3.2 Access Parameters
| FIELD | DESCRIPTION |
| For Appliance | |
| Name | Name assigned to the appliance (for example, ACS8048-1357908642) |
| Port | N/A |
| Type | N/A |
| Status | N/A |
| For Serial Port | |
| Name | Either the default name [XX-XX-XX-p-n (where n=port_number)], an administrator-assigned alias or an auto-discovered server name |
| Port | Number of the serial port |
| Type | Serial |
| Status | Idle / In-Use |
| For Power | |
| Name | PDU ID (either the default name in the format XX-XX-XXPXX_n or an administrator-assigned alias, such as myPDU) |
FIELD DESCRIPTION
Port Number of the serial port/position on the chain
Type PDU model
Status Number of Outlets ON | Total outlets
For    Enter cd <PDU_ID>/outlets and enter show to see list of outlets and the actions that can be taken (commands that can be executed) for
Outlets    each outlet as shown below.
Name    Either the default XX-XX-XXPXX_n_n or an administrator-assigned name
Port PDU outlet number
Type Outlet
Status ON / OFF
Action None
To view information about the console system and connected devices:
- Log into the CLI and enter cd access to change to the Access level.
-:- / cli-> cd access
- Enter show. Information about the console system and the ports the current user is authorized to access appears.
--: access cli->show
name    port    type    status
----    ----    ----    ----
ACS8048-0011223344
21-67-72-p-1    1    serial    in use
21-67-72-p-2    2    serial    idle
21-67-72-p-3    3    serial    idle
Type ls to see available sub-nodes.
--:- access cli->ls
21-67-72-p-1/
21-67-72-p-2/
21-67-72-p-3/
3.2 Connect to a Device Console Connected to a Serial Port
The following procedure is an example of how an administrator or an authorized user can connect to a device console when the device is connected to a port that is enabled and configured with the CAS Profile.
To connect to a device console connected to a serial port:
NOTE: The serial port must already be configured and enabled prior to this procedure. See Port Configuration Examples on page 22.
- Log into the CLI and enter cd access to navigate to the Access level.
--:- / cli-> cd access
--:- access cli->
- Enter connect
--:- access cli-> connect 77-77-70-p-2
Password:
NOTE: The connect command above shows a connection to a port that has an alias of 77-77
- If prompted, enter the password for the port. The following prompt appears.
Type the hot key to suspend the connection:
- Press Enter to continue. You are connected to the device that is connected to the port window shows the initial display for the device (usually a console banner and login prom example is shown below.
Ubuntu 6.06.1 LTS fremont-techpubs ttyS2
login: fred
Password:
Last login: Tue Oct 2 13:09:04 2007 on :0
Linux fremont-techpubs 2.6.15-28-386 #1 PREEMPT Wed Jul 18 22:50:32 UTC 2007 i68 6 GNU/Linux
#
3.3 Accessing Serial Ports using ts\_menu
The ts_menu is an application to facilitate connection to the serial ports. It displays a menu show server names connected to the serial ports of the console system. You must configure the login the group that the users belong to as ts_menu.
ts\_menu options
-u
Table 3.3 ts_menu Parameters
PARAMETER DESCRIPTION
-u
Invokes ts_menu as the user named by
PARAMETER DESCRIPTION
-1 Generates a list of ports the user can access. Port aliases are shown if defined.
-ro Invokes ts_menu in read-only mode. You may connect in read-only mode to any port you have access to.
<console port> If issued, produces a direct connection to that port. If you have no access rights to the port or if the port does not exist, the application returns a console not found message and terminates. The console port may be the port alias or the port number.
-p Display TCP port.
-i Display Local IP assigned to the serial port.
-u <name> Username to be used in SSH/Telnet or Raw command.
-e <[^]char> Escape character used to close the target session. The default escape character is Ctrl-X.
To close the target session:
- Enter the escape character shown when you connect to the port.
- The menu with ports is displayed.
- Select the exit option to return to the shell prompt.
3.4 Manage Power for a Device Connected to an Outlet on a PDU
See cycle, on, off, lock and unlock on page 11 for how an authorized user can manage power on PDU outlets when the PDU is connected to an enabled port configured with the Power Profile or the PDU is connected to the network and added to the appliance as Network PDU.
3.5 Port Configuration Examples
The following examples show how an administrator can configure a port when a device console is connected, assign the CAS profile, configure a port that is connected to a PDU and assign the Power Profile.
To set up a console access service (CAS) port:
- Log onto the CLI as an administrator.
--: - / cli->
- Enter set_cas ports/serial_ports/followed by a space and the number of the port you want to configure (port 1 is used as an example).
--: / cli-> set_cas ports/serial_ports/ 1
- Enter show to view the status of port 1.
-#: - [serial_ports/physical] cli-> show
port: 1
device name: ttyS1
status = enabled
rj45_pin-out = auto
speed = 9600
parity = none
data_bits = 8
stop_bits = 1
flow_control = none
Type ls to see available sub-nodes.
--:#- [serial_ports/physical] cli->ls
cas/
data_buffering/
alerts/
power/
Type show to see the content of the page.
--:#- [serial_ports/physical] cli->
- Enter set status=enabled, then enter show and save as shown to enable the configured port and verify and save the configuration.
--:#- serial_ports/physical cli-> set status=enabled
--:#- serial_ports/physical cli-> show
--:#- serial_ports/physical cli-> save
To enable a power management port:
- Log onto the CLI as an administrator and enter set_power ports/serial_ports/
to select a port with a PDU connected (port 3 is used as an example).
--:- / cli-> set_power ports/serial_ports/ 3
- Enter show to view the configuration of port 3.
--:#- [serial_ports/physical] cli-> show
port: 3
status = disabled
rj45_pin-out = auto
speed = 9600
parity = none
data_bits = 8
stop_bits = 1
flow_control = none

Type ls to see available sub-nodes
--:- serial_ports/physical cli->
-
Enter set status=enabled then enter save to set the Serial_Profile to Power, enable the port and commit the changes.
-
Enter show to verify the configuration.
--: -serial_ports cli-> show
port device name profile settings
1 ttys1 21-67-p-1 cas 9600_8N1_telnet-ssh_local
2 ttys2 21-67-p-2 cas 9600_8N1_telnet-ssh_local
3 ttys3 21-67-p-3 power 9600_8N1
Type ls to see available sub-nodes
--:-serial_ports/physical cli->
4 CLI OVERVIEW FOR ADMINISTRATORS
This chapter describes using the Command Line Interface (CLI) for administrators. Only administrator and authorized users can access the commands listed in this chapter. These procedures assume y have logged into the CLI as an administrator and are at the --: / cli-> prompt.
NOTE: In the tables that show output from the show command, when an option that is followed by an equal sign (=) is left blank, that option is not assigned a value by default.
4.1 System
- Enter cd system to navigate to the System level.
--:- / cli-> cd system
- Enter Is to view the available options.
--:- system cli-> ls
security/
date_and_time/
help_and_language/
general/
boot_configuration/
information/
usage/
- Enter show followed by an option name to view information about each option.
--:- security cli-> show security_profile
4.2 System/Security
Enter cd system/security to navigate to the security level.
--:- / cli-> cd system/security
Table 4.1 System Navigation Tree
| security_profile |
| idle_timeout = |
| rpc = |
| enable_pluggable_device_detection = |
| enable_pluggable_storage_devices = |
| port access = |
| session = |
| port_access_kill_multi_session = |
port_access_send_message_multi_session =
port_access_power_control =
port_access_data_buffer_management =
port_access_restful_menu =
bootp_enabled=
bootp_interface=
enable_live_configuration_retrieval=
ssh_allows_authentication_via_username|password =
security_profile=
enable_telnet_service=
enable_ftp_service= d
enable_snmp_service=
enable_ipsec=
answer_icmp_message=
ssh_version=
ssh_tcp_port=
ssh_allow_root_access=
ssh_minimum_cipher_and_mac_suite_level =
enable_http_session=
http_port=
enable_https_session
https_tls_version=
https_port=
https_minimum_cipher_suite_level=
redirect_http|https=

dsview
all_appliance_to_be_managed_by_dsview=
fips_140
enable_fips_140-2_module=
4.2.1 System/Date and Time
Enter cd system/date_and_time to navigate to the date_and_time level.
--: / cli-> cd system/date_and_time
Table 4.2 Date and Time Navigation Tree
| date_and_time |
| date_and_time |
| settings= |
| day= |
| hour= |
| minute= |
| month= |
second=
year=
time_zone=
4.2.2 System/Help and Language
Enter cd system/help_and_language to navigate to the online_help level.
--:- / cli-> cd system/help_and_language
To set the online help URL:
Perform this procedure if you have downloaded the online help files to a web server that is ac the console system.
- Enter the following command.
--: / cli> cd system/help_and_language/
- Enter the following command.
--:- help_and_language cli> set url=<online_help_location>
A line similar to the following appears.
**:- help_and_language cli>
- Save your settings.
**:- help_and_language cli> commit.
Table 4.3 Help and Language Navigation Tree
| appliance_language= |
| url= |
4.2.3 System/General
Enter cd system/general to navigate to the login_banner level.
--:- / cli-> cd system/general
To set the login banner:
- Enter the following command.
--:- / cli> cd system/general/
- Enter the following command.
--:- general cli-> set enable_login_banner=yes
**:- general cli> set login_banner=<login banner text>
NOTE:
A line similar to the following appears.
**:- general cli>
- Save your settings.
**:- general cli> commit.
4.2.4 System/Boot Configuration
Enter cd system/boot_configuration to navigate to the boot_configuration level.
--:- / cli-> cd system/boot_configuration
Table 4.4 Boot Configuration Navigation Tree
boot configuration
boot mode=
boot image=
watchdog_timer=
console_speed=
4.2.5 System/Information
- Enter cd system/information to navigate to the Information level.
--:- / cli> cd system/information/
- Enter show to view the system information.
4.2.6 System/Usage
Enter cd system/usage to navigate to the Usage level.
--:- / cli> cd system/usage/
Table 4.5 Usage Navigation Tree
memory flash usage
4.3 Network
- Enter cd network to navigate to the Network level.
- Enter Is to view the list of available options.
settings/
devices/
ipv4_static_routes/
ipv6_static_routes/
hosts/
firewall/
ipsec(vpn)/
snmp/
4.3.1 Network/Settings
- Enter cd network/settings to navigate to the Network settings level.
- Enter show to view the list of available options.
Table 4.6 Network/Settings Navigation Tree
Settings
hostname=
primary_dns=
secondary_dns=
domain=
search=
enable_lldp=
enable_ipv6=
get_dns_from_dhcpv6=
get_domain_from_dhcpv6=
multiple_routing=
enable_bonding=
4.3.2 Network/IPv4 and IPv6
IPv4 addresses are always enabled. An administrator can also enable IPv6 addresses at the appliance settings/network/ipv6 level. A procedure to enable IPv6 is used as an example in CLI Equivalent Actions to Web Manager Checkbox Selection on page 16.
Table 4.7 Network/IPv4 and IPv6 Options
ipv4_static_routes
default_3
gateway=
interface=
metric=
ipv6_static_routes
4.3.3 Network/Devices
The procedure to configure a static IP address for the primary Ethernet interface is usually performed during installation so that administrators have a fixed IP address for access to the web manager finish configuration.
To configure an IPv4 or IPv6 static IP address:
NOTE: This procedure configures either an IPv4 or IPv6 static IP address for the ETH0 (eth0 ETH1 (eth1) port. You can configure an IPv6 static IP address only if IPv6 is enabled.
- Enter cd network/devices/
--:- / cli-> cd network/devices/eth0/
- Enter set ipv<4|6>_method=static to set the method to static for IPv4 or IPv6.
**:- cth0 cli-> set ipv4_method=static
- Enter set ipv<4|6>_address=
to set the IP address and subnet mask, then enter commit to save the change.
--:- eth0 cli-> set ipv4_address=172.26.31.10 ipv4_mask=255.255.255.0
**:- eth0 cli-> commit
- Enter show to view the changes.
--:- cth0 cli-> show
Table 4.8 Devices Navigation Tree
devices
eth0
set_as_primary_interface=
status=
ipv4_method=
ipv6_method=
mode=
eth1
set_as_primary_interface=
status=
ipv4_method=
ipv6_method=
mode=
4.3.4 Network/Hosts
The following procedure describes how to add a host to the hosts table.
To add a host to the host table:
- Enter cd network/hosts to navigate to the Hosts level.
--:- / cli-> cd network/hosts
- Enter show to view the current host settings.
--: hosts cli-> show
ip hostname alias
127.0.0.1 localhost.localdomain localhost
- Type add then press Return.
--:- hosts cli-> add
--:#- [hosts] cli-> ls
ip =
hostname =
alias =
--:#- [hosts] cli->
- Enter set hostname=
ip=
NOTE: Each parameter that follows the add command is separated by a space.
--:#- [hosts] cli-> set hostname=sharedacs8000 ip=172.26.31.164
- Enter commit.
--:#- [hosts] cli-> save
- Enter show to verify the changes took place and to view the new host entry.
--:- hosts cli-> show
--:- hosts cli-> show 127.0.0.1
ip hostname alias
127.0.0.1 localhost.localdomain 172.26.31.164
172.26.31.164 sharedacs8000
127.0.0.1/add 172.26.31.164
- Enter cd
--:- hosts cli-> cd 172.26.31.164
- Enter show to view the additions to the host table and the Settings option.
--:- 172.26.31.164 cli-> show
ip: 172.26.31.164
hostname = sharedacs8000
alias =
Table 4.9 Hosts Navigation Tree
hosts
127.0.0.1
alias=
hostname=
4.3.5 Network/Firewall
Enter cd network/firewall to navigate to the firewall level.
--:- / cli-> cd network/firewall
NOTE: To set a rule, you must enable the interface, set the rule for the interface and physical interface to the network.
Table 4.10 Firewall Navigation Tree
firewall
ipv
ipv4_filter_table
FORWARD
INPUT
OUTPUT
ipv6_filter_table
FORWARD
INPUT
OUTPUT
4.3.6 Network/IPSec(VPN)
Enter cd network/ipsec(vpn) to navigate to the ipsec(vpn) level.
--: / cli-> cd network/ipsec(vpn)
4.4 Network/SNMP
Enter cd network/snmp to navigate to the snmp level.
--: / cli-> cd network/snmp
4.5 Sensors
An administrator can view and configure sensors on the console system.
Sensors
appliance
internal
    current cpu temperature (deg c):
    maximum_cpu_temperature_(deg_c)=
    maximum_cpu_temperature_threshold_(deg_c)=
    minimum_cpu_temperature_(deg_c) =
    minimum_cpu_temperature_threshold_(deg_c) =
    current board temperature (deg c):
    maximum_board_temperature_(deg_c) =
    maximum_board_temperature_threshold_(deg_c) =
    minimum_board_temperature_threshold_(deg_c) =
    minimum_board_temperature_(deg_c) =
    ps internal supply [0.95v ~ 1.05v]:
    pl internal supply [0.95v ~ 1.05v]:
    ps auxiliary supply [1.71v ~ 1.89v]:
    pl auxiliary supply [1.71v ~ 1.89v]:
    ps ddr3 supply [1.31v ~ 1.39v]:
    pl block ram supply [0.95v ~ 1.05v]:
    power supply 1 [11.06v ~ 12.98v]:
1-wire
    name=
    address=
type=
value=
max=
min=
average=
digital_in
<sensor>
name=
location=
type=
alarm=
pdu
<sensor>
name:
pdu:
type:
value:
max:
min:
average:
4.5.1 Wiz command
The wiz command allows administrators to quickly perform the initial network configuration of the
At the command prompt at the / level, enter wiz to view the current IP configuration. To change the IP configuration, press Tab to move through the parameters, and press Esc + Tab to edit the selected parameter. When you are finished, enter yes to confirm that all parameters are correct and to save the new parameters.
--: / cli-> wiz
Current IPv4 address: 172.26.30.249
Current IPv6 address:
eth0:
device_status = enabled
ipv4_method = dhcp
ipv4_address = 192.168.160.10
ipv4_mask = 255.255.255.0
ipv4_ddefault_gateway =
ipv6_method = ipv6_address_unconfigured
ipv6_address =
ipv6_prefix_length =
ipv6_ddefault_gateway =
MAC Address: 00:e0:86:21:67:72
dns:
primary_dns = 172.26.29.4
secondary_dns =
domain = corp.vertivco.com
hostname = ACS8000-0011223344
ipv6:
NOTE: Enabling or disabling IPv6 requires a reboot to be effective.
enable_ipv6 = yes
get_dns_from_dhcpv6 = no
get_domain_from_dhcpv6 = no

Some basic and useful keys are:
- tab (once/twice) - shows the next possible commands/option(s)
- esc tab - gets the current parameter value for editing

Other hints:
- Use backslash '\ to escape spaces, '\ and other control characters when assigning values to parameters.

Current IPv4 address: 172.26.30.249
Current IPv6 address:
cth0:
device_status (disabled, enabled) [enabled]:
4.6 Ports
Enter cd ports to navigate to the Ports level.
--: / cli-> cd ports
Table 4.11 Ports Navigation Tree
serial ports
<port>
cas
    port_name=
    enable_auto_discovery=
    enable_speed_auto_detection=
    protocol=
    authentication_type=
    text_session_hot_key=
    power_session_hot_key=
    restful_hot_key=
    telnet_port_alias=
    ssh_port_alias=
    raw_mode_port_alias=
    port_ipv4_alias=
    port_ipv4_alias_interface=
    port_ipv6_alias=
port_ip6_alias_interface=
dcd_sensitivity=
enable_auto_answer=
dtr_mode=
dtf_off_interval=
line_feed_suppression=
null_after_crSuspension=
transmission_interval=
break_sequence=
break_interval=
show_multi-session_menu=
log_inlout_multi_session_notification=
information_message_notification=
physical
enable_cisco_rj45_pin-out=
status=
speed=
parity=
data_bits=
stop_bits=
flow_control=
data_buffering
status=
type=
local_type=
time_stamp=
loginlogout_message=
serial_session_logging=
alerts
power
auxiliary ports
ttyM1
status=
speed=
init_chat=
ppp_address=
ppp_authentication=
chap-interval=
chap-max-challenge=
chap-restart=
ppp_idle_timeout=
cas_profile
auto_discovery
settings
auto_discovery_timeout_(seconds)+
default_speed_on_auto_discovery_failure=
probe_speed_115200=
probe_speed_1200=
probe_speed_19200=
probe_speed_230400=
probe_speed_2400=
probe_speed_38400=
probe_speed_4800=
probe_speed_57600=
probe_speed_9600=
probe_timeout_(seconds)=
auto_answer
input string
output string
auto_discovery
probe_strings
match_strings
pool_of_ports
pool_name=
pool_telnet_port_alias=
pool_ssh_port_alias
pool_raw_mode_port_alias=
pool_ipv4_alias=
pool_ipv4_alias_interface=
pool_ipv6_alias=
pool_ipv6_alias_interface=
pool_members=
restful_settings
action_name_<#>=
http_method_<#>=
url_<#>=
post_data_<#>=
username_<#>=
password_<#>=
dial-in_profile
secure_dial-in
callback_users
ppp_otp_users
settings
log_in_to_appliance=
otp_login_authentication=
ppp_connection=
ppplpap_authentication=
Table 4.12 Serial Port Commands
| COMMAND SUMMARY | |
| set_cas | Edits the command to configure a list of serial ports with the CAS profile. Syntax: set_cas<serial port number>, |
| This command has five sub-nodes: physical, cas, data_buffering, alerts and power. | |
| set_dial-in | Edits the command to configure one serial port with the Dial-In profile. Syntax: set_dial-in<serial port number> |
| set_dial-out | Edits the command to configure one serial port with Dial-out on demand profile. Syntax: set_dial-out<serial port number> |
| set_power | Edits the command to configure a list of serial ports with the Power profile. Syntax: set_power<serial port number>, [<serial port number>] This edit has two sub-nodes: physical and power. |
| set_socket-client | Edits the command to configure one serial port with Socket Client profile. Syntax: set_socket-client<serial port number> |
| clone_ports | Copies the configuration from one port to a list of serial ports. Syntax: clone_ports<serial port number> |
| reset_port_to_factory | Resets the serial ports to factory configuration. (This is disabled for CAS profile.) Syntax: reset_port_to_factory<serial port number>, [<serial port number>] |
COMMAND SUMMARY
enable_ports Enables serial ports. Syntax: enable_ports<serial port number>, [<serial port number>]
disable_ports Disables serial ports. Syntax: disable_ports<serial port number>, [<serial port number>]
Example of how to set a list of serial ports 2, 5 and 6 with the CAS Profile and enable the
--:- serial_ports cli-> cd /ports/serial_ports
--:- serial_ports cli-> set_cas 2,5,6
--:#- [serial_ports/physical] cli-> set status=enabled
--:#- [serial_ports/physical] cli-> show
selected items: 2,5,6
status = enabled
rj45_pin-out = auto
speed = 9600
parity = none
data_bits = 8
stop_bits = 1
flow_control = none
To copy the configuration from serial port 5 to ports 10 and 15:
--:- serial_ports cli-> clone_ports 5
--:#- [serial_ports] cli-> show
Copy configuration from: 5
copy_configuration_to =
--:#- [serial_ports] cli-> set copy_configuration_to=10,15
--:#- [serial_ports] cli-> save
--:- serial_ports cli->
4.6.1 Auxiliary ports
Enter cd ports/auxiliary_ports to navigate to the auxiliary ports level.
--:-cli-> cd /ports/auxiliary_ports/
If an internal modem is factory installed, the port profile can be set for either Dial-in or Dial-out. The port name is ttyM1.
4.7 Pluggable Devices
Type show to display a list of all detected pluggable devices. Type cd_
| device name | device type | card | device path | device info | status | port |
| \_ | \_ | \_ | \_ | \_ | \_ | \_ |
| ttyACM0 | Console | usb | usbslot | 1-1.4 | inserted | 34 |
| ttyUsB0 | Console | usb | usbslot | 1-1.1.1. | inserted | 35 |
ttyACM1 Console usb usbslot 1-1.1.2 inserted 33
4.8 Authentication
Enter cd authentication to navigate to the authentication level.
--: / cli-> cd authentication
Table 4.13 Authentication Navigation Tree
authentication
    appliance_authentication
    authentication_type=
    enable_fallback_to_local_type_for_root_user_in_appliance_console_port=
    enable_single_sign-on=
    authentication_servers
    radius
    first_authentication_server=
    first_accounting_server=
    second_authentication_server=
    second_accounting_server=
    secret=
    timeout=
    retries=
    enable_servicetype=
    tacacs+
    first_authentication_server=
    first_accounting_server=
    second_authentication_server=
    second_accounting_server=
    service=
    secret=
    timeout=
    retries=
    tacacs+_version=
    enable_user-level=
ldap(s)lad
    server=
    base=
    secure=
    database_user_name=
    database_password=
    login_attributes=
dsview
ip_address_1=
ip_address_2=
ip_address_3=
ip_address_4=
4.9 Users
Enter cd users to navigate to the users level.
--: / cli-> cd users
To add a user and password:
- Enter cd users/local_accounts/user_names to navigate to the user_names level.
--: / cli-> cd users/local_accounts/user_names
- Enter add. Then enter set with the parameters all on one line separated by spaces as shown.
--:- user_names cli-> add
--:#- [user_names] cli-> set user_name=fred password=smith123abc confirm_password=smith123abc
--:#- [user_names] cli->
- Enter save.
--:#- [user_names] cli-> save
- Enter show to verify that the new user has been added.
--:#- [user_names] cli-> show
Table 4.14 Users Navigation Tree
| users | |
| authorization | |
| groups | |
| admin | |
| members | |
| admin | |
| root | |
| login_profile | |
| session_timeout= | |
| enable_log-in_profile=cd | |
| access_rights |
serial
power
appliance
appliance-admin
members
login_profile
enable_log-in_profile=
access_rights
serial
power
appliance
shell-login-profile
members
root
login_profile
session_timeout=
enable_log-in_profile=
profile=
cli_cmd=
exit_after_executing=
access_rights
serial
power
appliance
user
members
login_profile
session_timeout=
enable_log-in_profile=
access_rights
serial
power
appliance
dsview_access_rights
map_to_ =
multi_access_mode=
kill_multi_session=
send_message_multi-session=
local_accounts
user_names
admin
root
settings
user_name=
password=
confirm_password=
password_change_at_next_login=
user_group=
password_minimum_days=
password_maximum_days=
password_inactive_days=
password_warning_days=
account_expiration_date=
access_rights
serial
power
appliance
password_rules
check_password_complexity=
min_digits=
min_upper_case_characters=
min_special_characters=
minimum_size=
def_expiration_min_days=
def_experation_max_days=
def_expiration_warning_days=
number_of_permitted_failed_attempts_ {0|disabled}=
account_lockout_duration_after_each_failed_login_ {min}=
unlock_account_after_{min}_{0|manual_unlock}=
4.10 Events\_and\_Logs
Enter cd events_and_logs to navigate to the events_and_logs level.
--: / cli-> cd events_and_logs
Table 4.15 Events and Logs Navigation Tree
event list
event destinations
syslog
snmp trap
sms
email
dsview
trap_forward
data_buffering
local_data_buffering_settings
segment_size_(kbytes)=
spare_segments=
nfs_data_buffering_settings
nfs_server=
nfs_path=
segment_size_(kbytes)=
spare_segments=
local_nfs_data_buffering_settings
close_log_files_and_open_new_ones_at_time_(hh:mm)=
syslog_data_buffering_settings
syslog_facility=
appliance_loggin
enable_session_logging=
sensors
current_temperature:(deg_c, display only)
maximum_temperature_(deg_c)=
maximum_temperature_threshold_(deg_c)=(positive integer between 0 and 4)
minimum_temperature_(deg_c)=
minimum_temperature_threshold_(deg_c)=(positive integer between 0 and 4)
4.11 Power Management
The Power Management Options are described in the following table.
Table 4.16 Power Management Options Descriptions
| OPTION | DESCRIPTION |
| pdus | Allows an authorized user to reboot, restore factory default settings or to rename PDU(s). Also allows the authorized user to view information about each PDU, monitor sensors, clear sensor values, set up syslogging of events related to the PDU, configure an alarm and the LED display mode, and to manage outlets on the PDU. |
| login Lists the username and password for each type of PDU connected to the console system. | |
| outlet_groups | Lists all configured outlet groups that the current user is authorized to manage (to manage outlet groups, the user must be in a user group that is authorized to manage all the outlets in the outlet group). An administrator can configure outlet group |
| network_pdus | Allows an administrator to add, edit or delete PDUs connected to the network. These PDUs will show up in the PDUs node when they are discovered. Only power control operation is supported by these PDUs. |
| ups | Allows an authorized user to reboot, restore factory default settings, rename or view UPSs. |
| network_ups | Allows an administrator to add, edit or delete UPSs connected to the network. |
To rename a PDU:
- Log onto the CLI as an administrator and enter cd power_management/pdus to navigate to the pdus level.
--: / cli-> cd power_management/pdus
- Type rename and press Tab Tab to expand the parameters.
--: pdus cli-> rename <PDU_ID>
- Enter set newpdu_id=
--:#- [pdus] cli-> set new_pdu_id=mypdu
--:#- [pdus] save
NOTE: See the Avocent® ACS800/8000 Advanced Console System Installation/User guide for how perform other authorized PDU configuration options.
To manage power for a selected outlet:
See cycle, on, off, lock and unlock on page 11 for how to manage power at the power_management level.
4.12 Active Sessions Information
The Active Session information fields are described in the following table. An authorized user can active session with the Kill command.
Table 4.17 Active Sessions Field Descriptions
| FIELD DESCRIPTION | |
| user Logged in user | |
| client_ip Source of the connection | |
| creation_time Time of the session creation | |
| session_type Type of session (console, http) | |
| connection_type Type of connection (cli, wmi - that is, Web Manager) | |
| target_name Target name or alias if session is an access session | |
| id Session ID | |
| parent id Parent ID if session is a subsession |
To view and kill Active_Sessions:
- From the / level CLI prompt, enter cd active_sessions.
--:- / cli-> cd active_sessions
--:- active_sessions cli->
- Enter show. Information displays as shown about all active sessions.
| user | client ip | creation time | session type | connection type | target name | id | parent id |
| ---- | ---- | ---- | ---- | ---- | ---- | ---- | ---- |
| admin | none | 14 Feb 2017 03:53:22 PM UTC | console | cli | 37 |
- To kill a session (if authorized), enter kill_session followed by the session number.
APPENDICES
Appendix A: Recovering a Console System That Will Not Boot From Flash
The following procedure should only be used as a last resort for a console system that will not flash. You will need physical access to both the console system and the console port using a F serial port using PuTTY or another terminal emulation program.
IMPORTANT! This procedure will completely re-initialize the console system flash to its factory defaults and erase all configuration and data.
To recover a console system that will not boot from flash:
- Turn off the console system.
- Connect a PC to the console port of the console system using 9600 baud and 8, N, 1 bits, parity and stop bits.
- Turn on the console system.
- Press any key on your keyboard to obtain the U-Boot prompt when you see the messa any key to stop autoboot."
- Place a Vertiv-provided firmware file named firmware-ngacs.fl on a fresh 1GB, 2GB or 4GB USB stick.
- Insert the USB stick into any USB port on the console system.
NOTE: The USB stick should be the only USB device connected to the console system.
- At the U-Boot prompt, type usb_boot single.
- Wait for the console system to boot to a "#" prompt, t then type recover-flash.sh.
- A warning, followed by a second warning, displays. Type yes at each warning to begin initialization of the console system.
After the console system reboots, you can upgrade the firmware from the web UI.
This page intentionally left blank.
Appendix B: Migration CLI
The Migration CLI is a tool that allows you to configure an Avocent® ACS800/8000 Advanced Console System that is running scripts based in the ACS Advanced Console Server or ACS5000 Advanced Console Server. Scripts based in the ACS6000 Advanced Console Server can be run directly on a ACS800/8000 Advanced Console System. For full configuration and management commands, it is recommended you use the CLI of the Avocent® ACS800/8000 Advanced Console System.
NOTE: References to an ACS Advanced Console Server in this section refer to the ACS Adva Console Server or the ACS5000 Advanced Console Server.
In the ACS800/8000 console system, the login profile for the user "root" goes directly to the sh. This will allow the root user to run Migration CLI commands out of the ACS800/8000 console's new group, "login-profile-shell," is created with only root as a member. To run commands based from ACS advanced console server, a root user should type CLI before the command.
B.1 Access rights
The access rights on the ACS8000 console system are based on authorization groups. The admini configures the serial ports the group can access. To allow you to configure access rights, the fo table displays authorization groups that will be created on the ACS8000 console system when usir Migration CLI.
Table B.1 Access Rights Groups
| GROUP MEMBERS PERMISSIONS | ||
| cli_mus_ttySxx | Users who can open a second session to a serial port. | Access to a serial port in a multi-session (read/write or read only) |
| cli_power_ttySxx | Users who have power control in a serial port. | Power control (on/off/cycle) of outlets merged to a serial port. |
| cli_access_ttySxx | Users who can access a serial port in a single session. | Access to a serial port in a single read/write session. |
| cli_pmd_ | Power control of the outlet | |
B.2 Exceptions
This section will list all console system CLI commands not available in the Migration CLI for the ACS800/8000 console system. For a list of available commands, see the Avocent® ACS Advanced Server Installation/User Guide or Avocent® ACS5000 Advanced Console Server Installation/User Guide.
The following commands or values are not supported by the Migration CLI:
Table B.2 Commands Not Supported by the Migration CLI
| COMMAND | VALUE OR DESCRIPTIONS |
| administration | |
| backupconfig loadfrom sd N/A | |
| backupconfig saveto sd N/A | |
| upgradew checkum N/A | |
| application | |
| connect N/A | |
| pm N/A | |
| view N/A | |
| config administration bootconf | |
| bootype | bootp/both/ftp |
| flashtest | full/skip |
COMMAND VALUE OR DESCRIPTIONS
maxevents
ramtest full/quick/skip
configadministration notifications
addemail N/A
addpager N/A
addsnmptrap N/A
alarm N/A
delete N/A
edit N/A
configapplication pmdconfig general
add N/A
delete N/A
configapplication terminalmenu
add N/A
delete N/A
menutitle N/A
confignetwork hostSettings
secipaddress
secsubnetmask
mtu N/A
configphysicalports access
users/groups accepts only list of usernames
authtype assume local
termshell
logintimeout
configphysicalports databuffering
mode cir/lin
showmenu file/fileanderase/no/noerase/yes
syslogsize
configphysicalports general
pmsessions none/ssh/ssh_telnet/telnet
protocol bidirectionaltelnet, consoleraw, cslip, local, rawsocket, slip, sshv1, sshv2, telnet
configphysicalports multiuser
users accepts only list of users
sniffmode in/inout/no/out
configphysicalports other
SSHexitkey
banner
host
sttyoptions
tcpkeepalive
terminaltype aixterm, att6386, linux-lat, vt100, vt320, xtermcolor, ansi, ibm3151, scoansi, vt102, vt52, at386, linux, sun, vt220, xterm
winems no/yes
idletimeout
configphysicalports power management
enable|PMI N/A
disable|PMI N/A
key N/A
COMMAND VALUE OR DESCRIPTIONS
server N/A
configsecurity
addgroup/delgroup N/A
config security adduser
shell
comments
config security profile custom
ports auth2sport no/yes
ports bidirect no/yes
ports raw2sport no/yes
ports ssh2sport no/yes
ports telnet2sport no/yes
ssh ssh_x509 no/yes
config virtualport
config ipmi
security authentication
authtype Otp, Otp/Local
pppauthtype Otp, Otp/Local
timeout
-t
-T Disable the idle time-out. Same as -t0
config security loadkey
url N/A
username N/A
Appendix C: Su and Sudo Commands
The su and sudo commands allow a user to execute commands as a different user.
C.1 Su command
Using the su (switch user) command, a user can switch to another user account to execute con not authorized with their normal account. If used without a username, the su command defaults to Only users who are members of the wheel group can execute the su command to log in as r
NOTE: The wheel group is a Linux group and is included in the firmware by default.
You will be prompted for the password of the account you're trying to switch to with the suit, which will remain logged into that account until you either press Ctrl-D or type exit.
NOTE: The su command will open a shell session instead of the restricted shell. The user w the shell prompt. Improper use of shell commands could lead to data loss. Double-check your when using shell commands.
Syntax:
su [options][-][username[arguments]]
The following table describes options that can be used with the su command.
Table B.3 Su Command Options
| OPTION DESCRIPTION | |
| -, -l, --login | Uses an environment similar to that had the user logged in directly. When - is used, it must be specified as the last su option. |
| -m, -p, --preserve-environment | Preserves the current environment. |
Optional arguments may be provided after the username, in which case they are supplied to the (/bin/sh).
To add a member to the wheel group:
- Create the user using the web manager or CLI.
- Open a session in the appliance and log in as root.
- In the shell prompt, run the usermod command to add the user to the wheel group.
<h1 id="usermod-g-wheel-username">usermod -G wheel <username></h1>
- Run the groups command to verify.
<h1 id="groups-username">groups <username></h1>
To delete a member from the wheel group:
- Edit the file /etc/group.
- Remove the username from the line with wheel::XX:
, , .
C.2 Sudo command
Using the sudo (superuser do) command, a user can execute a command using the privileges of user (often root), as specified in the /etc/sudoers file. The user is authenticated using his own p not the root password. The /etc/sudoers file logs all commands and arguments.
Syntax:
sudo <command>
Configuring sudo
A system administrator configures the /etc/sudoers file to give groups or users access to some of commands not authorized with their normal account. An administrator should log into the console as a root user and edit the /etc/sudoers file by using the /usr/sbin/visudo command to configure sudo.
The sudoers file is composed of aliases and user specifications. When multiple entries match for a they are applied in order. Where there are conflicting values, the last match is used.
Since the sudoers file is parsed in a single pass, order is important. You should structure sudoer the Host_Alias, User_Alias, and Cmnd_Alias specifications come first, followed by any Default_Entry line and finally the Runas_Alias and user specifications.
An example of an /etc/sudoers file:
#User alias specification
User_Alias FULLTIMERS = millert, mikef, dowdy
User_Alias PARTTIMERS = bostley, jwfox, crawl

#Cmnd alias specification
Cmnd_Alias KILL = /bin/kill
Cmnd_Alias SHUTDOWN = /sbin/shutdown
Cmnd_Alias REBOOT = /sbin/reboot
Cmnd_Alias SU = /bin su

FULLTIMERS ALL = KILL, SHUTDOWN, REBOOT, SU
PARTTIMERS ALL = SHUTDOWN, REBOOT
In the preceding example, the users millert, mikef and dowdy can execute the kill, shutdown, rebo su commands while the users bostley, jwfox and crawl can only shut down and reboot the cons
This page intentionally left blank.

VERTIV™
VertivCo.com | Vertiv Headquarters, 1050 Dearborn Drive, Columbus, OH, 43085, USA
© 2017 Vertiv Co. All rights reserved. Vertiv and the Vertiv logo are trademarks or registered trademarks of Vertiv Co. All other names and logos referred to are trade names, trademarks or registered trademarks of their respective owners. While every precaution has been taken to ensure accuracy and completeness herein, Vertiv Co. assumes no responsibility, and disclaims all liability, for damages resulting from use of this information or for any errors or omissions. Specifications are subject to change without notice.
- Avocent® ACS800/8000 Advanced Console System
- Technical Support Site
- TABLE OF CONTENTS
- Introduction, Navigation and Commands...1
- CLI Command Set 5
- Port Access and Configuration Examples..19.
- CLI Overview for Administrators 25
- Appendices 45
- INTRODUCTION, NAVIGATION AND COMMANDS
- Access Options and How to Log in to the CLI
- Configuration Tasks Performed With the CLI
- CLI Navigation
- NOTE: CLI commands are case sensitive.
- Autocompletion
- Parameters
- CLI COMMAND SET
- Commands Used for the CLI
- add
- cd
- commit
- delete
- exit/quit
- ftp
- help
- list\_configuration
- Is
- opiepasswd
- pwd
- passwd
- revert
- scp
- set
- show
- wiz
- connect
- disconnect
- cycle, on, off, lock and unlock
- Special Multi-session Commands
- sniff
- share
- list\_shared\_session
- kill\_shared\_session
- sendmsg
- show\_databuf and show\_appliance\_databuf
- cleandbuf and clean\_appliance\_databuf
- CLI Equivalent Actions to Web Manager Checkbox Selection
- PORT ACCESS AND CONFIGURATION EXAMPLES
- View Information About the Console System and Connected Devices
- Connect to a Device Console Connected to a Serial Port
- Accessing Serial Ports using ts\_menu
- ts\_menu options
- Manage Power for a Device Connected to an Outlet on a PDU
- Port Configuration Examples
- CLI OVERVIEW FOR ADMINISTRATORS
- System
- System/Security
- System/Date and Time
- System/Help and Language
- System/General
- System/Boot Configuration
- System/Information
- System/Usage
- Network
- Network/Settings
- Network/IPv4 and IPv6
- Network/Devices
- Network/Hosts
- Network/Firewall
- Network/IPSec(VPN)
- Network/SNMP
- Sensors
- Wiz command
- Ports
- COMMAND SUMMARY
- Auxiliary ports
- Pluggable Devices
- Authentication
- Users
- Events\_and\_Logs
- Power Management
- To rename a PDU:
- Active Sessions Information
- APPENDICES
- Appendix A: Recovering a Console System That Will Not Boot From Flash
- Appendix B: Migration CLI
- B.1 Access rights
- B.2 Exceptions
- COMMAND VALUE OR DESCRIPTIONS
- configadministration notifications
- configapplication pmdconfig general
- configapplication terminalmenu
- confignetwork hostSettings
- configphysicalports access
- configphysicalports databuffering
- configphysicalports general
- configphysicalports multiuser
- configphysicalports other
- configphysicalports power management
- configsecurity
- config security adduser
- config security profile custom
- security authentication
- config security loadkey
- Appendix C: Su and Sudo Commands
- C.1 Su command
- C.2 Sudo command
- Configuring sudo
Brand : Emerson
Model : Avocent ACS808EAC-400
Category : Network management console