DigiScope - Uncategorized EASYPIX - Free user manual and instructions
Find the device manual for free DigiScope EASYPIX in PDF.


| Product Type | Digital Microscope |
| Brand | Easypix |
| Model | DigiScope |
| Sensor Resolution | CMOS 1280 x 1024 pixels |
| Lens | F8.0, f = 7.45 mm, View Angle 55°, 2G2P |
| Magnification (Optical) | 3.5x and 35x (on 2.4" screen); up to 190x on 17" screen |
| Digital Zoom | 4x |
| Display | 2.4" TFT LCD |
| Illumination | Built-in LED x 4 |
| Still Image Resolution | VGA (640x480), 1.3M (1280x960) |
| Video Mode | VGA 640x480 pixels @ 30 fps, MJPEG (AVI) |
| Storage | SD Card (not included) |
| Power Source | 2 x AA 1.5V alkaline batteries |
| Interfaces | USB 1.1 (MSD), TV Out (NTSC/PAL) |
| Dimensions (Microscope) | 54.5 x 73 x 96.5 mm |
| Weight (Approx.) | 200 g (with batteries, estimated) |
| Operating System | Windows 98 SE/2000/ME/XP/Vista/7 |
| Bundled Software | ArcSoft Media Impression 2 |
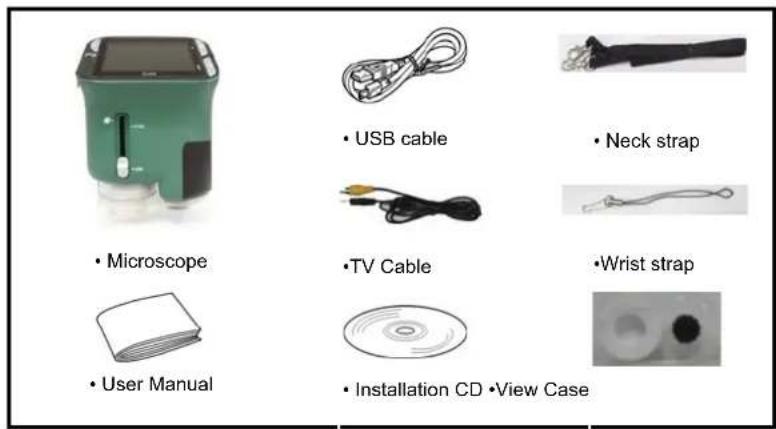
| Accessories Included | USB cable, TV cable, hand strap, view case, installation CD, user manual |
| Certifications | FCC Part 15, CE, Canadian ICES-003 |
| White Balance | Auto |
| Exposure Control | Automatic, EV compensation (-2 to +2 EV) |
Frequently Asked Questions - DigiScope EASYPIX
User questions about DigiScope EASYPIX
0 question about this device. Answer the ones you know or ask your own.
Ask a new question about this device
Download the instructions for your Uncategorized in PDF format for free! Find your manual DigiScope - EASYPIX and take your electronic device back in hand. On this page are published all the documents necessary for the use of your device. DigiScope by EASYPIX.
USER MANUAL DigiScope EASYPIX
natural_image
Green handheld electronic device with digital display and control buttons (no visible text or symbols)User Manual
For customers in North and South America
For customers in USA
This device complies with Part 15 of the FCC rules. Operation is subject to the following two conditions:
Digital Camera

Tested To Comply
With FCC Standards
FOR HOME OR OFFICE USE
(1) This device may not cause harmful interference.
(2) This device must accept any interference received, including interference that may cause undesired operation.
For customers in Canada
This Class B digital apparatus meets all requirements of the Canadian Interference-Causing Equipment Regulations.
For customers in Europe

“CE” mark indicates that this product complies with the European requirements for safety, health, environment and customer protection. “CE” mark microscopes are intended for sales in Europe.
Table of Contents
- System Requirements 3
2.Package Contents 3
3.About the Microscope 4
4.Quick Start 5
•Install Batteries 5
- Insert an SD Card 5
•Turn On the Microscope 6
•Take a Picture 6
•Use Digital Zoom 6
•Use Optical Zoom 6
5.Display Information 7
6.Select Function 8
•DV Mode----8
- Setup 8
•Exposure Value---- 10
•Take Continuous Pictures---- 10
- DC mode 10
7.Playback 11
•Single 11
•Slide Show 11
- Delete One 11
- Delete All 11
•Copy to Card 12
-Exit 12
-
Download Images to PC 12
-
Use the Microscope as a PC Cam 13
10.Arcsoft Media Impression 2---- 13
- Appendix 20
1. System Requirements
• PC with Pentium 166 MHz or faster processor,
- An active USB (Universal Serial Bus) port on the computer.
- Windows 98SE/ME/2000/XP/7, CD ROM drive, color monitor, mouse and keyboard.
• Color printer for printing color pictures.
- For transferring still images via the Internet, the computer must have modem and communication software for Internet connection.
2. Package Contents
All of the items shown below are included in the package.
3. About the Microscope
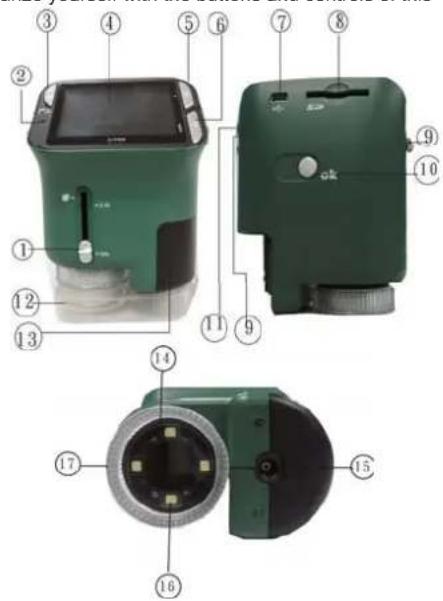
Refer to the following illustrations to familiarize yourself with the buttons and controls of this microscope. ③ ④ ⑤ ⑥ ⑦ ⑧
- Optical Zooming switch
- Power LED
- POWER & ZOOM IN & MENU button
- LCD monitor
- FUNCTION (Right) button
- PLAYBACK (left) button
- USB Port
- SD Card Socket
- Strap Eyelet
- SHUTTER/OK button
- TV OUT port
- View case (optional)
- Battery Compartment Cover
- Lens
- Tripod /Screw Socket
- LED lights
- Magnification Revolving Switch
4. Quick Start

CAUTION
- Please install the microscope driver before connecting your microscope to a PC.
- The best way to transfer pictures to PC is by using the Mass Storage mode. Copy all pictures to your computer in this mode.
• Install Batteries:
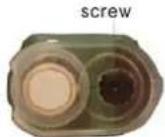
- Rotate the screw .Take off the View case.
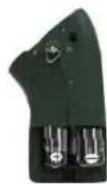
- Slide and open the battery compartment cover.
- Put in the batteries in the correct direction.+ and terminals has shown.
- Slide and close the battery compartment cover.
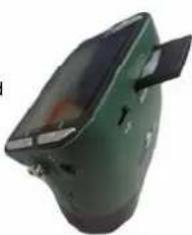
- Insert an SD card:
- At first, turn off the microscope.
- Then, insert the card in the correct direction as shown. Push the card into the slot and be locked.
- To remove the card, push it in, then release it. When the card is partially ejected, pull it out.
Note: If the "MEMORY FULL" warning message appears on the
LCD monitor, it means the SD card is full. Please transfer all the files to your computer and delete the files on the card. Then you can use the card again.
natural_image
Green portable electronic device with black handle and ventilation slots (no visible text or symbols)Note: The microscope supports SD card only.
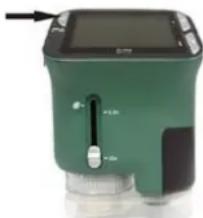
- Turn on the microscope:
- Press the POWER button as shown.
- The indicator (power LED) will light.
The welcome screen will show on the LCD monitor. - Long press the POWER button to shutdown the microscope.
natural_image
Green handheld device with digital display and control knob (no visible text or symbols)• Take a Picture
- Turn on the microscope.
- icon will show on the upper left corner of the screen.
- Move the microscope to aim at the target. The target will show on the screen.
- Hold the microscope firmly and gently press the shutter button to take a picture.
Note: 1.User can press the ZOOM (Power) button for zooming out/in.
- The image will be grainier as the image is digitally zoomed.
• Take a Video
- Turn on the microscope.
- Press the FUNCTION (Right) button, select the
- Press the OK button again to take a video. Press the OK button again to stop.
- Press the right button to return the function menu.
- Use Digital Zoom
During taking a picture, user can press the POWER button to zoom in or zoom out. The Digital Zoom provides 1X up to 4X magnification of your pictures.
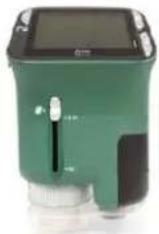
•Use Optical ZOOM
User can slide Optical Zooming switch

to adjust optical zoom. The optical zoom provides
3.5x and 35x magnification of the target. User can also screw the Magnification Revolving Switch to make fine adjustment.
-
Slide the switch to "→" station, keep 60mm distance between the view case (optional) and the target. The user can view the target in its original size.
-
Slide the switch in "3.5X" station and "35X" station, the target will be magnified by 3.5X and 35X.
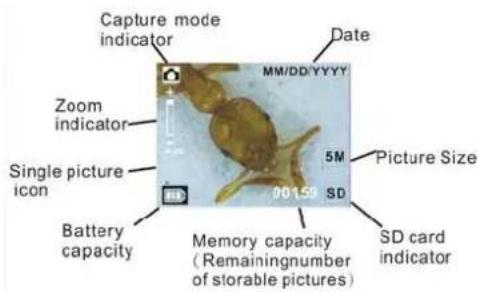
5. Display Information
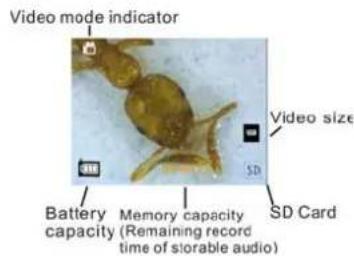
6. Select Function
Press the Function button to enter function menu. You can see the icons on the screen as shown. Press the Left or Right buttons to select function.
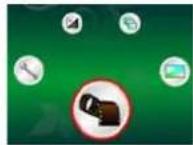
• DV Mode

Select the DV Mode button and press the OK button to confirm.
Press the OK button to take the video, and press it again to stop recording.
- SETUP

In SETUP, You can see the icons show on the screen.
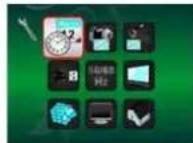
1. Set time and date

Press the left or right button to select the date format from MM/DD/YYYY, DD/MM/YYYY or YYYY/MM/DD. Press the OK button to confirm. Then it will go to date and time setting. Press Left or Right button to adjust the date and time. Press the OK button to confirm the setting and return to main menu.
2. Set the picture size

Select the image quality setting to set a picture resolution. Press the left or right button to select the picture size, and press OK button to confirm and return to main menu. The Options would be 2M (1600x1200 pixels), 1.3M (1280x 960 pixels), VGA (640x480 pixels).
3. Setting the video size

Select the video quality setting to set the resolution. Press the left or right button to select the video size, and press OK button to confirm and return to main menu. The Options would be VGA (640x480 pixels); QVGA (320x240 pixels).
- USB Connection

Select USB Connection and press OK button to confirm.
PC Cam: Use your microscope as a PC camera (PC microscope).
Disk Driver: Use your microscope as a mass storage for transferring files to your computer.
- anti-flicker Frequency

Set the anti-flicker frequency to 50Hz. (Please use 50Hz if using the microscope in Europe, Japan and Asia)
Set the anit-flicker frequency to 60 Hz. (Default setting. Please select if using the microscope in the United States)
- TV Output

Connect the scanner to the TV with TV cable.
NTSC :Setting the TV Output to NTSC
PAL: Setting the TV Output to PAL
- Format

Select Format and press OK button to confirm. Select '√', press OK button to format. Select 'X' and press OK button to abort.
Caution: Formatted files cannot be recovered.
- Automatic Shutdown

Select Automatic Shutdown, press OK button to confirm.
5MIN: Set the microscope to power off automatically in approximately 5 minutes.
'X': Do not use this function.
- Exit

Select Exit to exit SETUP and back to Function menu.
- Exposure value

Select EV mode and press OK button to confirm.
Exposure compensation helps you increase or decrease the EV to adjust the results. This feature is applied to render the subject appropriately.
The adjustment unit is 1/3, within the range -2EV \~ +2EV
You can check the result of the compensation by viewing the image on the screen.
• Take Continuous Pictures

Select Take Continuous Pictures and press the OK button to confirm. The icon will appear on the bottom left corner of the screen.
Move the microscope to aim at the target. The target will show on the screen.
Hold the microscope firmly and gently press the shutter button to take a picture.
Back to the function menu, select , press OK button to go back to Single-shot Mode
- DC MODE

Select the DC Mode button and press the OK button to confirm. Press the OK button to take a picture.
7. Playback
Turn on the microscope. Press the Playback button you will see some pictures on the screen. Then press the POWER button to playback mode.
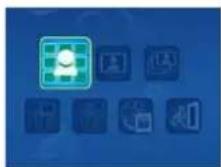
You will see the icons on the screen as shown.
Press the Left or Right buttons to select one function.
- Single


When you select the icon, press OK button to
confirm. You need press Left or Right button to review the previous or next picture. Press the POWER button to go back to the Playback mode.
- Slide Show

Select the Slide Show Mode and press OK button to confirm. The microscope will automatically play the photos continuously. Press any button to stop the slide show. Press the POWER button to go back to the Playback mode.
- Delete One

Select , press OK button and confirm with '√' to delete current image; 'X' to abort.
- Delete All

Select 📊, press OK button to delete all the stored images from the internal memory or SD card. Deleted files are impossible to be recovered.
- Copy to card

Select , press OK button to confirm. All files will be copied into the SD card.
- Exit

Select 1 , press OK button to confirm. It will return to be ready to capture image.
8. Download Files to PC
• For Windows 98 SE/ME customers:
Connect the microscope to PC via USB cable. "USB Mass Storage driver" will appear on the computer screen.
• For Windows 2000:
Double click on "My computer", and then double click on Removable Disk Drive. Check the folder in the drive.
• For Windows XP/ Vista /7 :
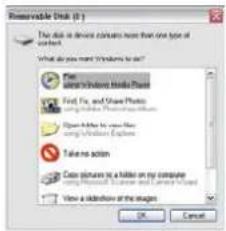
Connect the microscope to PC via USB cable. A dialogue box with options will appear as shown. You could select "Open folders to View files" to open the folder. Or select "Take no action" and find Removable disk drive in "My Computer" ("Computer" for Windows Vista) and check the folder.
9. Use the microscope as a PC-Cam
Note: Please install microscope drive before you connect it to your PC.
- Setup PC-Cam
-
Turn on the microscope and press the Function button to select SETUP. Press the OK button to confirm. Press Right / Left button to select USB Connection ☐: . Select PC Cam. Press OK button to confirm.
-
Connect the microscope to PC via USB cable.
-
You could use this PC-cam with other video software you prefer.
E.g. In Windows XP, Double click "my computer" (or "Computer" in Windows Vista), then click the "standard camera", you can live view in PC-Cam mode now.
10. ArcSoft Media Impression 2
ArcSoft Media Impression 2 enables users to easily, creatively, and productively manage their multimedia with simple workflow and powerful tools. Organize your media easily and create simple projects with editing tools. There are endless ways to present and share; worry-free media file backup & restore.

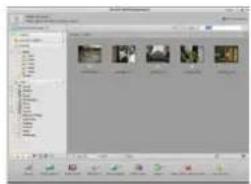
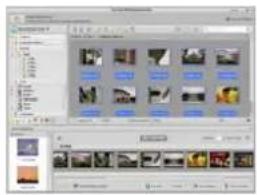
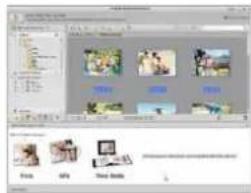
Click "Media Impression 2"→ "Setup.exe"→ "choose language"→ "next" → "Yes" → "next" → "next" → "finish" to download it. Double click "Media Impression 2" icon on the desktop and you will see a window as shown.
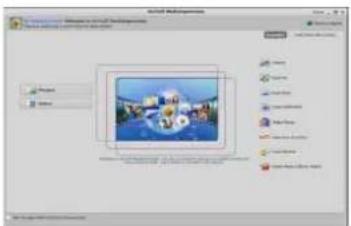
Connect the Digital Microscope to PC via USB cable .Click Import, and then you can enter the Organize groups.
- Auto face tagging automatically finds all faces in photos, groups them, and then tags them
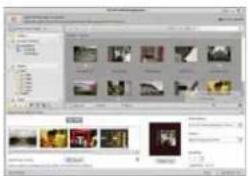
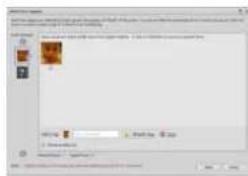
- Auto scene tagging automatically analyzes content of photos then tags them with different scenes
- Auto rating automatically detects and rates poor-quality and high-quality photos Ratings & tags compatible with Windows Vista (XMP support)
- Search media files with multiple criteria combinations (such as combining folders, ratings, tags, Share and time)
- Geotag photos and view photos in the exact spot you took them in Google Earth
- Quick Text Search: search by File Name, Folder Name, and Tag
- Calendar Year/Month/Day View
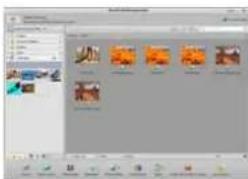
- Present
Click the pictures / videos then you can view / editing / share your photo files.
- A quick Photo Viewer to view photos in a window or full screen mode with frequently used editing tools
2.View photos in a slideshow mode with background music and cool themes

natural_image
Close-up photo of a koala with visible eye and mouth, no text or symbols present
natural_image
Two penguins standing on a beach with a computer monitor in the background (no visible text or symbols)-
Light weight Media Player plays video/music in a window or full screen
-
View photos as a Photo Book
natural_image
Two-panel image showing a dark electronic circuit board and a close-up of green foliage (no text or symbols visible)• Photo and video editing
- Easy Fix – Simply fixes in a few clicks mouth, and skin of the face
natural_image
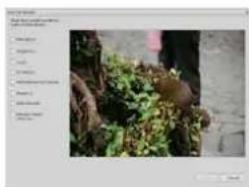
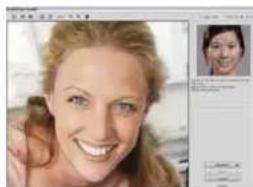
Close-up of a green mossy plant with rocks and foliage, no visible text or symbols2.Face beautify helps beautify the eyes, mouth, and skin of the face
-
Creativity – Text and clip art, frames and edges, color effects
-
Video Editing: trim, dynamic lighting, adjust brightness, contrast and saturation
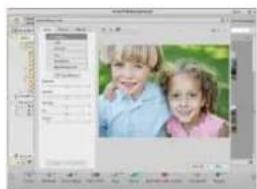
- Burn slideshow and video as a VCD or DVD
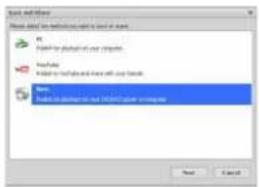
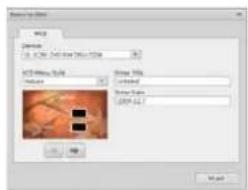
- Make Movie: combine photos, music, and video with cool themes
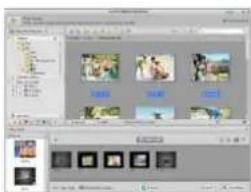
- Share
-
Export photos to a digital photo frame
-
Upload pictures to Flickr and Facebook
-
Upload video to YouTube
-
Order Photo Prints, Photo Book, Mug, Canvas, T-shirt, Puzzle, and Mouse Pad right in application
5.Stream photos, music, and videos to DLNA compatible players such as Sony PS3, TV, DPF, and mobile phones etc
-
Send photos & videos to friends and family via email
-
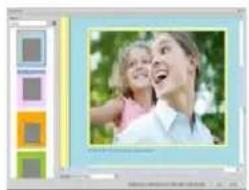
Make home printing a breeze
natural_image
Digital photo frame showing a smiling woman and child in a joyful pose, displayed within a software interface (no text or symbols visible)- Protect
- Archive media files to CD/DVD
- Back Up & Restore from/to CD/DVD, external hard drive and online websites (available in early 09)
Appendix:
| Specifications | |
| Sensor Resolution CMOS 1280 x 1024 Pixels, Sensor Area 1 / 3" | |
| Lens Specification F8.0, f = 7.45 mm, View Angle 55°, 2G2P | |
| Illumination Built-in LED x 4 (TBD) | |
| O / S Microsoft Windows 98 SE / 2000 / ME / XP/ Vista / Win 7 | |
| Magnification 2.4" Screen: 3.5x / 35x 17" Screen: 19x /190x | |
| White Balance Auto | |
| Exposure Control Automatic, | |
| Still image size | VGA---640 x 480 Pixels1.3M ---1280 x 960 Pixels |
| TV OUT NTSC/PAL | |
| Video Mode | Video: ( w/o Audio function)VGA 640 x 480 pixels 30 fps |
| Compression JPEG / | MJPEG (AVI) |
| Digital zoom 4 x Digital Zoom for Preview & Playback(TBD) | |
| Display | 2.4" TFT |
| PC Interface | USB 1.1, MSD Function |
| Storage Type SD Card | Slot (SD card not included) |
| Power | 2 x "AA" 1.5V, Alkaline |
| Dimension (LxWxH) | 54.5 x 73 x 96.5 mm , 40x 64.5x15 mm (view case ) |
| Accessories | USB cable,User Manual,CD software,TV cable,Hand Strap,View Case |
| Bundled Software | ArcSoft Media Impression 2 |
WEEE Directive & Product Disposal
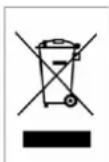
At the end of its serviceable life, this product should not be treated as household or general waste. It should be handed over to the applicable collection point for the recycling of electrical and electronic equipment, or returned to the supplier for disposal.
- For customers in North and South America
- For customers in USA
- For customers in Canada
- For customers in Europe
- Table of Contents
- System Requirements
- Package Contents
- About the Microscope
- Quick Start
- CAUTION
- • Install Batteries:
- - Insert an SD card:
- - Turn on the microscope:
- • Take a Picture
- • Take a Video
- - Use Digital Zoom
- •Use Optical ZOOM
- Display Information
- Select Function
- • DV Mode
- - SETUP
- Set time and date
- Set the picture size
- Setting the video size
- - Exposure value
- • Take Continuous Pictures
- - DC MODE
- Playback
- - Single
- - Slide Show
- - Delete One
- - Delete All
- - Copy to card
- - Exit
- Download Files to PC
- Use the microscope as a PC-Cam
- - Setup PC-Cam
- ArcSoft Media Impression 2
- - Present
- • Photo and video editing
- - Share
- - Protect
- WEEE Directive & Product Disposal
Brand : EASYPIX
Model : DigiScope
Category : Uncategorized