
EL-HS800 - Surveillance Camera TRENDNET - Free user manual and instructions
Find the device manual for free EL-HS800 TRENDNET in PDF.


| Product Type | Outdoor Camera Enclosure with Gooseneck Mount |
| Brand | TRENDnet |
| Model | EL-HS800 |
| Compatibility | Designed for TRENDnet TV-IP400/TV-IP400W cameras |
| Mounting Type | Wall mount with gooseneck, circular base |
| Dimensions (Approx.) | Gooseneck: 12 inches length; Base diameter: 6 inches |
| Weight (Approx.) | 2.5 lbs (1.13 kg) |
| Material | Metal and plastic construction |
| Color | White |
| Power Supply | AC/DC power adapter (included, 12V DC output) |
| Power Cable | Requires cutting and splicing for connection |
| Environmental Rating | Outdoor use, weather-resistant |
| Installation Tools Required | Precision knife, wire stripper, Allen wrench, screwdriver |
| Included Accessories | Mounting screws, nuts, thumbscrew, protective plating, wire connectors |
| Warranty | 1 year limited warranty |
| Certifications | FCC, CE |
| Maintenance | No user-serviceable parts; clean exterior with damp cloth |
Frequently Asked Questions - EL-HS800 TRENDNET
User questions about EL-HS800 TRENDNET
0 question about this device. Answer the ones you know or ask your own.
Ask a new question about this device
Download the instructions for your Surveillance Camera in PDF format for free! Find your manual EL-HS800 - TRENDNET and take your electronic device back in hand. On this page are published all the documents necessary for the use of your device. EL-HS800 by TRENDNET.
USER MANUAL EL-HS800 TRENDNET
Quick Installation Guide


1. How to Install
- Rotate the EL-HS800's cover counter-clockwise to begin cable installation.


- Remove the thumbscrew and protective plating from the goose neck wall mount.
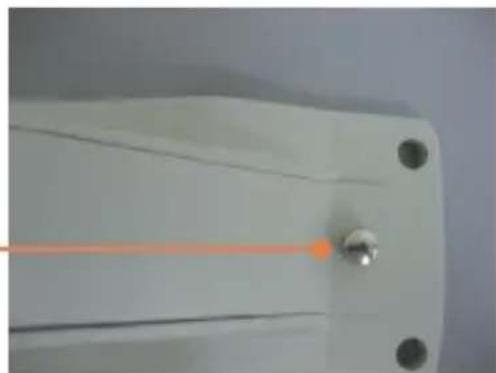
- Run all necessary cables (CAT 5 cable, Power Adapter cable, and the EL-HS800's power terminals) through the goose neck wall mount. When using a wireless camera, please run the Antenna cable also.
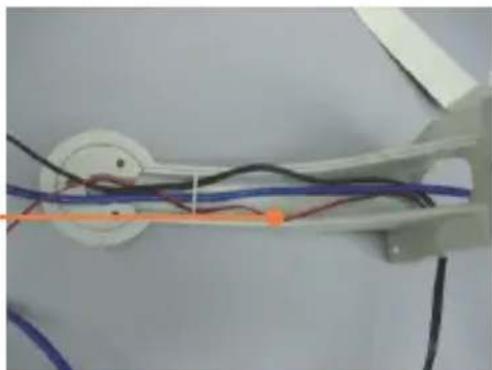
- Run each cable through the opening located at the top of the EL-HS800. DO NOT run all cables through the opening simultaneously. Serious blockage can occur.

- After inserting the appropriate cables, extend each cable to 6 inches for camera installation.

- Caution: Before cutting any power cord, make sure that the power cord is NOT PLUGGED into an electrical source. Now take a power cord with a two-prong plug and cut the wire.

- Use a precision knife or a sharp object to split the wire in two halves.
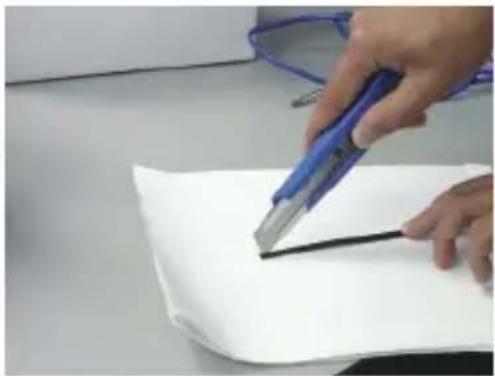

- Peel the plastic sheath to expose the copper wiring. It is recommended that you use a wire stripper to remove the plastic sheath effectively.

- You should have two halves of exposed copper wire as shown below.

- Pair one half of the power cable with the red terminal of the enclosure's power supply.
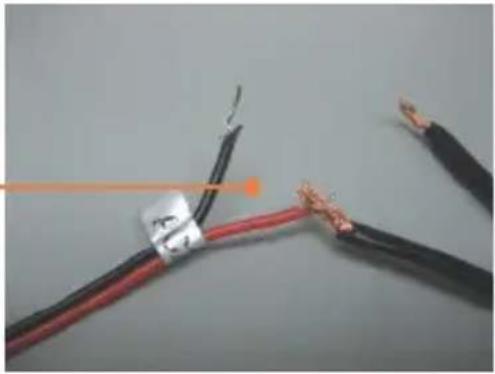
- Place the yellow wire connector over the assembly in step 10, and twist the wire connector clockwise to secure the contact between the wired pair.
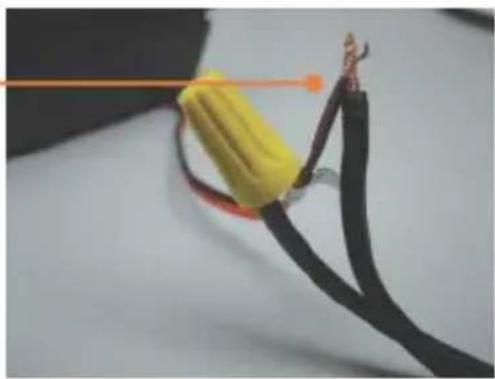
- Repeat steps 10-11 for the next pair of terminals.
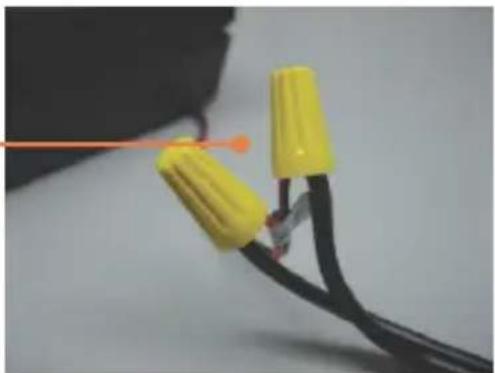
- Pull in the power terminals into the goose neck wall mount.
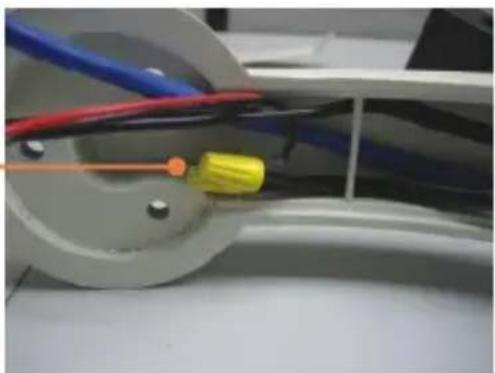
- Slide the protective plating into the goose neck wall mount and tighten the thumb screw.
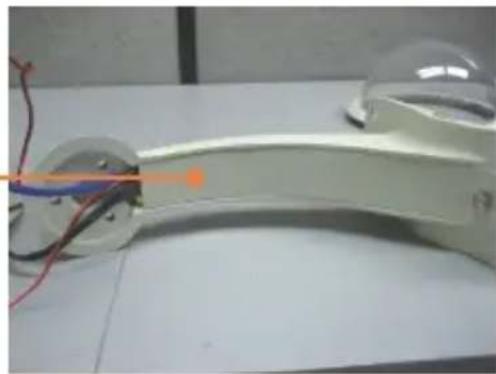
- Screw the goose neck wall mount on top of the EL-HS800 with an Alan wrench and three hexagon socket screws.
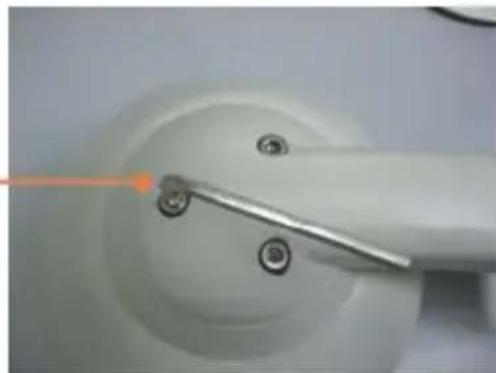
- Take the circular base and connect three 2-inch Mounting screws and three nuts to create this assembly.
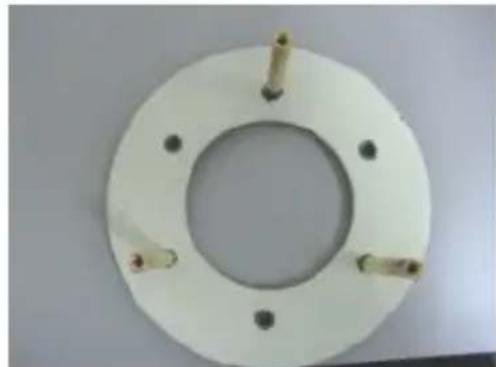
View from below

View from above
- Mount the assembly in step 16 using three screws.

- Take the assembly in step 18, and use three countersunk head screws to mount the assembly on top of the 2-inch mounting screws.

- Take the TV-IP400/TV-IP400W and turn to the bottom of the camera. Remove the rubber molding to prepare the camera for the mounting.

- Attach the mounting plate for the camera with a small screw.

- Take the assembly in step 21 and mount the assembly on top of the mounting screws with regular screws.

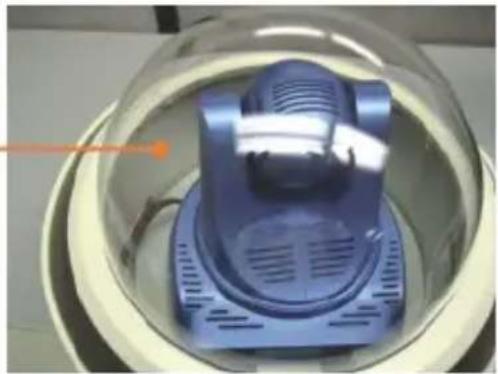
- Place the EL-HS800's cover over the camera and rotate the cover clock-wise.
Limited Warranty
TRENDnet warrants its products against defects in material and workmanship, under normal use and service, for the following lengths of time from the date of purchase.
EL-HS800 - 1 Years Warranty
If a product does not operate as warranted above during the applicable warranty period, TRENDnet shall, at its option and expense, repair the defective product or part, deliver to customer an equivalent product or part to replace the defective item, or refund to customer the purchase price paid for the defective product. All products that are replaced will become the property of TRENDnet. Replacement products may be new or reconditioned.
TRENDnet shall not be responsible for any software, firmware, information, or memory data of customer contained in, stored on, or integrated with any products returned to TRENDnet pursuant to any warranty.
There are no user serviceable parts inside the product. Do not remove or attempt to service the product by any unauthorized service center. This warranty is voided if (i) the product has been modified or repaired by any unauthorized service center, (ii) the product was subject to accident, abuse, or improper use (iii) the product was subject to conditions more severe than those specified in the manual.
Warranty service may be obtained by contacting TRENDnet office within the applicable warranty period for a Return Material Authorization (RMA) number, accompanied by a copy of the dated proof of the purchase. Products returned to TRENDnet must be pre-authorized by TRENDnet with RMA number marked on the outside of the package, and sent prepaid, insured and packaged appropriately for safe shipment.
WARRANTIES EXCLUSIVE: IF THE TRENDnet PRODUCT DOES NOT OPERATE AS WARRANTED ABOVE, THE CUSTOMER'S SOLE REMEDY SHALL BE, AT TRENDnet'S OPTION, REPAIR OR REPLACEMENT. THE FOREGOING WARRANTIES AND REMEDIES ARE EXCLUSIVE AND ARE IN LIEU OF ALL OTHER WARRANTIES, EXPRESSED OR IMPLIED, EITHER IN FACT OR BY OPERATION OF LAW, STATUTORY OR OTHERWISE, INCLUDING WARRANTIES OF MERCHANTABILITY AND FITNESS FOR A PARTICULAR PURPOSE. TRENDnet NEITHER ASSUMES NOR AUTHORIZES ANY OTHER PERSON TO ASSUME FOR IT ANY OTHER LIABILITY IN CONNECTION WITH THE SALE, INSTALLATION MAINTENANCE OR USE OF TRENDnet'S PRODUCTS.
TRENDnet SHALL NOT BE LIABLE UNDER THIS WARRANTY IF ITS TESTING AND EXAMINATION DISCLOSE THAT THE ALLEGED DEFECT IN THE PRODUCT DOES NOT EXIST OR WAS CAUSED BY CUSTOMER'S OR ANY THIRD PERSON'S MISUSE, NEGLECT, IMPROPER INSTALLATION OR TESTING, UNAUTHORIZED ATTEMPTS TO REPAIR OR MODIFY, OR ANY OTHER CAUSE BEYOND THE RANGE OF THE INTENDED USE, OR BY ACCIDENT, FIRE, LIGHTNING, OR OTHER HAZARD.
LIMITATION OF LIABILITY: TO THE FULL EXTENT ALLOWED BY LAW TRENDnet ALSO EXCLUDES FOR ITSELF AND ITS SUPPLIERS ANY LIABILITY, WHETHER BASED IN CONTRACT OR TORT (INCLUDING NEGLIGENCE), FOR INCIDENTAL, CONSEQUENTIAL, INDIRECT, SPECIAL, OR PUNITIVE DAMAGES OF ANY KIND, OR FOR LOSS OF REVENUE OR PROFITS, LOSS OF BUSINESS, LOSS OF INFORMATION OR DATE, OR OTHER FINANCIAL LOSS ARISING OUT OF OR IN CONNECTION WITH THE SALE, INSTALLATION, MAINTENANCE, USE, PERFORMANCE, FAILURE, OR INTERRUPTION OF THE POSSIBILITY OF SUCH DAMAGES, AND LIMITS ITS LIABILITY TO REPAIR, REPLACEMENT, OR REFUND OF THE PURCHASE PRICE PAID, AT TRENDnet'S OPTION. THIS DISCLAIMER OF LIABILITY FOR DAMAGES WILL NOT BE AFFECTED IF ANY REMEDY PROVIDED HEREIN SHALL FAIL OF ITS ESSENTIAL PURPOSE.
Governing Law: This Limited Warranty shall be governed by the laws of the state of California.
AC/DC Power Adapter, Cooling Fan, and Power Supply carry 1 Year Warranty
Certifications
This equipment has been tested and found to comply with FCC and CE Rules. Operation is subject to the following two conditions:
(1) This device may not cause harmful interference.
(2) This device must accept any interference received. Including interference that may cause undesired operation.



Waste electrical and electronic products must not be disposed of with household waste. Please recycle where facilities exist. Check with you Local Authority or Retailer for recycling advice.

NOTE: THE MANUFACTURER IS NOT RESPONSIBLE FOR ANY RADIO OR TV INTERFERENCE CAUSED BY UNAUTHORIZED MODIFICATIONS TO THIS EQUIPMENT. SUCH MODIFICATIONS COULD VOID THE USER'S AUTHORITY TO OPERATE THE EQUIPMENT.
ADVERTENCIA
TRENDnet Technical Support
US · Canada
Toll Free Telephone: 1(866) 845-3673
24/7 Tech Support

Europe (Germany • France Italy Spain Switzerland UK)
Toll Free Telephone: +00800 60 76 76 67
English/Espanol - 24/7
Francais/Deutsch - 11am-8pm, Monday - Friday MET
Worldwide
Telephone: +(31) (0) 20 504 05 35
English/Espanol - 24/7
Francais/Deutsch - 11am-8pm, Monday - Friday MET
Product Warranty Registration
Please take a moment to register your product online.
Go to TRENDnet's website at http://www.trendnet.com
TRENDNET®
20675 Manhattan Place
Torrance, CA 90501
USA
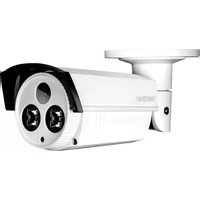
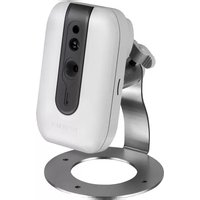
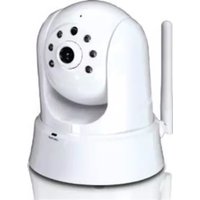
Brand : TRENDNET
Model : EL-HS800
Category : Surveillance Camera