
SCD293 - Electric sterilizer PHILIPS - Free user manual and instructions
Find the device manual for free SCD293 PHILIPS in PDF.


| Type | Electric steam steriliser |
| Model Numbers | SCF287, SCF286, SCF285, SCF284 |
| Capacity | Up to 6 bottles (330 ml / 11 oz) |
| Water Reservoir Capacity | 100 ml |
| Sterilising Time | Approximately 6 minutes |
| Heating Time | Approximately 4 minutes |
| Power Consumption | 650 W (typical) |
| Voltage | 220-240 V (check local voltage) |
| Materials | BPA-free plastics, silicone, stainless steel heating element |
| Safety Features | Auto shut-off, cool-down period, overheat protection |
| Cleaning | Baskets and lid: hand wash with mild detergent; base: wipe with damp cloth |
| Descaling | Every 1-2 weeks using white vinegar (5% acetic acid) or citric acid |
| Accessories Included | Large basket, small basket, lid, tongs, dishwasher basket (SCF287/SCF286 only) |
| Indicators | Sterilising light, ready light (SCF287/SCF286) |
| Dishwasher Safe | Baskets and lid are not dishwasher-proof; hand wash recommended |
| Warranty | See separate worldwide guarantee leaflet; descaling required for validity |
Frequently Asked Questions - SCD293 PHILIPS
User questions about SCD293 PHILIPS
0 question about this device. Answer the ones you know or ask your own.
Ask a new question about this device
Download the instructions for your Electric sterilizer in PDF format for free! Find your manual SCD293 - PHILIPS and take your electronic device back in hand. On this page are published all the documents necessary for the use of your device. SCD293 by PHILIPS.
USER MANUAL SCD293 PHILIPS
Always here to help you
Register your product and get support at
www.philips.com/welcome
SCF287
SCF286
SCF285
SCF284


natural_image
White Philips AVENT baby washing machine with transparent casing and plastic casing (no visible text or symbols on main body)
Introduction
Congratulations on your purchase and welcome to Philips! To fully benefit from the support that Philips offers, register your product at www.philips.com/welcome.
General description (Fig. 1)
A Lid with grip
B Small basket
C Large basket
D Heating element with water reservoir
E Base
F Mains cord
G Power-on button
H SCF287/SCF286:Sterilising light
I SCF287/SCF286: Ready light
J SCF285/SCF284:Sterilising light
K Dishwasher basket (SCF287/SCF286 only)
L Tongs
Note: You can find the type number of your steriliser on the bottom of the appliance.
Important
Read this user manual carefully before you use the appliance and save it for future reference.
Danger
- Never immerse the base, the mains cord or the mains plug in water or any other liquid.
- Failure to follow the descaling instructions may cause irreparable damage.
- Never disassemble the base to avoid the risk of electric shock.
Warning
- This appliance can be used by persons with reduced physical, sensory or mental capabilities or lack of experience and knowledge if they have been given supervision or instruction concerning use of the appliance in a safe way and if they understand the hazards involved.
- This appliance shall not be used by children. Keep the appliance and its cord out of the reach of children.
- Children shall not play with the appliance.
- Check if the voltage indicated on the appliance corresponds to the local mains voltage before you connect the appliance.
- Do not use the appliance if the plug, the mains cord or the appliance itself is damaged.
- If the mains cord is damaged, it must be replaced by Philips, a service centre authorised by Philips or similarly qualified persons in order to avoid a hazard.
- There are no serviceable parts inside the electric steam steriliser. Do not attempt to open, service or repair the electric steam steriliser yourself.
- The appliance becomes extremely hot during sterilisation and may cause burns if it is touched.
- Beware of hot steam that comes out of the vent in the lid or when you remove the lid. Steam can cause burns.
- Do not touch the base, the baskets and the lid during or shortly after sterilisation because they are very hot. Only lift the lid by its grip.
- Never move or open the appliance when it is in use or when the water in it is still hot.
- Never place items on top of the appliance when it is in use.
- Only use water without any additives.
- Do not put bleach or other chemicals in the appliance.
- Only sterilise baby bottles and other items that are suitable for sterilisers. Check the user manual of the items you want to sterilise, to make sure they are suitable for sterilisers.
- If you want to stop the sterilisation process, unplug the appliance (SCF285/SCF284) or press the power-on button (SCF287/SCF286).
- This appliance is intended for household use only.
Caution
- Never use any accessories or parts from other manufacturers or that Philips does not specifically recommend. If you use such accessories or parts, your guarantee becomes invalid.
- Do not expose the appliance to extreme heat or direct sunlight.
- Always let the appliance cool down before you move or store it.
- Do not sterilise very small items which can fall through the holes in the bottom of the basket.
- Never place items directly on the heating element when the appliance is switched on.
- Do not use the appliance if it has fallen or is damaged in any way. Take it to an authorised Philips service centre for repair.
- Always place and use the appliance on a dry, stable, level and horizontal surface.
- Do not place the appliance on a hot surface.
- Do not let the mains cord hang over the edge of the table or worktop on which the appliance stands.
- Always pour any remaining water out of the appliance after use and when the appliance has cooled down.
ENGLISH5
- Always unplug the appliance after use.
- Environmental conditions, such as temperature and altitude, may affect the functioning of this appliance.
Electromagnetic fields (EMF)
This Philips appliance complies with all applicable standards and regulations regarding exposure to electromagnetic fields.
Before first use
When you use the appliance for the first time, we advise you to let it complete one sterilisation process with empty baskets.
Note: Heating up takes approx. 4 minutes and sterilising takes approx. 6 minutes.
1 Use for example a baby bottle and pour exactly 100ml tap water directly into the water reservoir of the base (Fig. 2).
2 Place the large basket on the base (Fig. 3).
3 Place the small basket on the large basket (Fig. 4).
4 Place the lid on top of the small basket (Fig. 5).
5 Put the plug in the wall socket.
6 Press the power-on button to switch on the appliance (Fig. 6).
Note: If you plug in the appliance after you have pressed the power-on button, the steriliser starts to heat up immediately.
SCF287/SCF286
The sterilising light lights up to indicate that the appliance starts operating.
When the sterilisation process is finished, the ready light goes on. After 3 minutes, the ready light goes out to indicate that you can now safely open the steriliser.
SCF285/SCF284
The sterilising light lights up to indicate that the appliance starts operating.
When the sterilisation process is finished, the appliance switches off automatically.
7 After the appliance has cooled down completely, remove the lid, the small basket and the large basket and wipe them dry.
8 Let the appliance cool down completely for approx. 10 minutes before you use it again.
Note: The appliance does not work for 10 minutes after a sterilising cycle, it needs to cool down first.
Preparing for use
Preparing for sterilising
Before you put the items to be sterilised in the steriliser, clean them thoroughly in the dishwasher or clean them by hand with hot water and some washing-up liquid.
Using the dishwasher basket (SCF287/SCF286 only)
Use the dishwasher basket to preclean the items you want to sterilise.
1 Open the two sections of the lid of the dishwasher basket and place the bottles and accessories in the basket (Fig. 7).
Note: Make sure that the bottles are placed upside down.
2 Close the two sections of the lid of the dishwasher basket (Fig. 8).
3 Place the basket in the dishwasher.
4 Switch on the dishwasher and let it complete the dishwashing cycle.
5 When the dishwasher is finished, take out the dishwasher basket and make sure that the dishwasher basket and all items to be sterilised are clean. If not, clean them by hand.
6 Place the dishwasher basket completely into the large basket of the steriliser.
Note: You can leave the dishwasher basket inside the large basket with the two sections of the lid opened.
Assembling the steriliser
There are several ways to assemble the steriliser.
1 With only the small basket on the base to sterilise small items such as soothers (Fig. 9).
2 With only the large basket on the base to sterilise medium-sized items such as breast pumps, toddler plates or toddler cutlery (Fig. 10).
3 With the large basket and the small basket on the base to sterilise up to 6 11oz/330ml bottles. Place the bottles upside down in the large basket and place the bottle dome caps, screw rings and teats in the small basket (Fig. 11).
Note: When you fill the small basket, put the teats on the bottom, place the screw rings loosely on top of the teats and clip the bottle caps onto the two pillars in the small basket.
Note: Make sure all parts that need to be sterilised are completely disassembled and place them in the basket with their openings pointing down to prevent them from filling up with water.
Using the appliance
Only place items in the steriliser which are suitable for sterilising. Do not sterilise items that are filled with liquid, e.g. a teether with cooling fluid.
Note: Before you sterilise bottles and other items, clean them first.
1 Use for example a baby bottle and pour exactly 100ml tap water directly into the water reservoir of the base (Fig. 2).
2 Assemble the steriliser (see section ‘Assembling the steriliser’) and place the items to be sterilised in it.
3 Place the lid on top of the small or large basket (Fig. 5).
4 Put the plug in the wall socket.
5 Press the power-on button to switch on the appliance (Fig. 6).
Note: If you plug in the appliance after you have pressed the power-on button, the steriliser starts to heat up immediately.
SCF287/SCF286
The sterilising light lights up to indicate that the appliance starts operating.
When the sterilisation process is finished, the ready light goes on. After 3 minutes the ready light goes out to indicate that you can now safely open the steriliser.
SCF285/SCF284
The sterilising light lights up to indicate that the appliance starts operating.
When the sterilisation process is finished, the appliance switches off automatically.
ENGLISH7
6 Remove the lid.
Wait until the appliance has cooled down before you remove the lid.
Be careful, hot steam may come out of the steriliser.
7 Remove the bottles and other items from the basket. Use the tongs to remove the smaller items.
Be careful, the sterilised items may still be hot.
Note: Make sure you wash your hands thoroughly before you touch sterilised items.
8 Unplug the appliance and wait until the appliance has cooled down completely.
9 Pour out any remaining water from the water reservoir and wipe the water reservoir dry.
Note: The appliance does not work for 10 minutes after a sterilising cycle; it needs to cool down first.
Cleaning
Do not use abrasive or aggressive cleaning agents (e.g. bleach) or a scouring pad to clean this appliance.
Never immerse the base, the mains cord or the mains plug in water or any other liquid.
Note: The steriliser is not dishwasher-proof. The baskets and the lid can be cleaned with hot water and some washing-up liquid.
1 Always unplug the appliance and let it cool down before you clean it.
2 Clean the base with a moist cloth.
3 Clean the other parts in hot water with some washing-up liquid.
Note: After cleaning, store the steriliser in a clean, dry place.
Descaling
When you use the steriliser, small spots may appear on the heating element in the base. This is scale that is building up. The harder the water, the faster scale builds up. Descale the steriliser at least every 1 or 2 weeks to ensure that it continues to work effectively.
1 Pour 80ml/2.7oz of white vinegar (5% acetic acid) and 20ml/0.7oz of water into the water reservoir.
2 Leave the solution in the water reservoir until the scale has resolved.
3 Empty the water reservoir, thoroughly rinse it and wipe the base with a damp cloth.
Ordering accessories
To buy accessories or spare parts, visit www.shop.philips.com/service or go to your Philips dealer. You can also contact the Philips Consumer Care Centre in your country (see the worldwide guarantee leaflet for contact details).
Environment
- This symbol on a product means that the product is covered by European Directive 2012/19/EU. Inform yourself about the local separate collection system for electrical and electronic products. Follow local rules and never dispose of the product with normal household waste. Correct disposal of old products helps prevent negative consequences for the environment and human health (Fig. 12).
Guarantee and support
If you need information or support, please visit www.philips.com/support or read the separate worldwide guarantee leaflet.
Note: This appliance needs to be descaled regularly for optimal performance. If you do not do this, the appliance may eventually stop working. In this case, repair is NOT covered by your warranty.
Descaler for sterilizer
4203.064.5850.2

We would like to help you keep your steriliser clean and sterile. If you see white or brown spots on the steriliser or on sterilised items, this means scale has built up.
Descale the steriliser in the following way:
1 Pour 80ml/2.7oz of white vinegar (5% acetic acid) and 20ml/0.7oz of water into the water reservoir.
2 Leave the solution in the water reservoir until the spots resolve.
3 Empty the water reservoir and rinse it thoroughly.
4 Wipe the base with a damp cloth. If there is a lot of scale on the heating plate, you can use citric acid to remove the scale.
Always here to help you
Register your product and get support at
www.philips.com/welcome

natural_image
Illustration of four AVENT brand baby diapers with visible branding and pacifiers (no text or symbols on the diapers themselves)10 ENGLISH

For your child's safety and health WARNING!
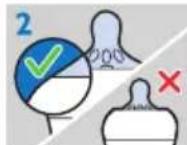
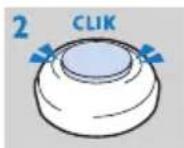
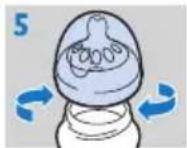
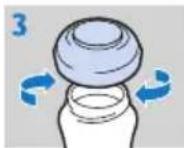
Always use this product with adult supervision. • Never use feeding teats as a soother. • Continuous and prolonged sucking of fluids will cause tooth decay. • Always check food temperature before feeding. • Keep all components not in use out of the reach of children. • Before first use, clean the product. Inspect before each use and pull the feeding teat in all directions. Throw away at the first signs of damage or weakness. Do not store a feeding teat in direct sunlight or heat, or leave in disinfectant ('sterilising solution') for longer than recommended, as this may weaken the teat. • Do not place in a heated oven. • Before first use place in boiling water for 5 minutes. This is to ensure hygiene. Clean before each use. • Wash and rinse thoroughly, then sterilise using a Philips Avent steriliser or boil for 5 minutes. • Do not warm contents in a microwave oven, as this may cause uneven heating and could scald your baby. • Dishwasher safe - food colourings may discolour components. • Do not allow child to play with small parts or walk/run while using bottles or cups. • Drinks other than milk and water: such as fruit juices and flavoured sugary drinks are not recommended. If used they should be well diluted and only used for limited periods. • Expressed breast milk can be stored in sterilised Philips Avent polypropylene bottles/containers in the refrigerator for up to 48 hours (not in the door) or in the freezer for up to 3 months. Never refreeze breast milk or add fresh breast milk to already frozen milk. • Do not use abrasive cleaning agents or anti-bacterial cleaners. Do not place components directly on surfaces that have been cleaned with anti-bacterial cleaners. • Excessive concentration of detergents may eventually cause plastic components to crack Should this occur, replace immediately. • Plastic material proper ties may be affected by sterilising and high temperatures. This can affect the fit of the cap. Cleaning Before first use, disassemble all parts, clean and sterilise the product. After every use, take all items apart wash in warm soapy water and rinse thoroughly. Make sure that you wash your hands thoroughly and that the surfaces are clean before contact with sterilised components. Assembly When you assemble the bottle, make sure you place the cap vertically onto the bottle so that the leaf sits upright. To remove the cap, place your hand over the cap and your thumbs in the dimple of the cap. The teat is easier to assemble if you wrigge it upwards instead of pulling it up in a straight line. Make sure you pull the teat through until its lower part is even with the screw ring Maintenance Before first use place in boiling water for 5 minutes. • Before each use, inspect all items. • Pull the feeding teat in all directions. • For optimum per formance, pinch and massage the number on the teat between index finger and thumb prior to a feed. Throw away at the first signs of damage or weakness. For hygiene reasons, we recommend replacing teats after 3 months. Keep teats in a dry, covered container. When not in use, do not store in sunlight or heat, or leave in disinfectant ('sterilising solution') for longer than recommended, as this may weaken the teat. Do not place in a heated oven. Glass Natural bottle Glass bottles may break. Do not use metal inside the bottle to stir contents or for cleaning. This can damage the glass on the inside of the bottle. Before each use, inspect bottles for sharp edges or glass fragments inside. Do not use bottles if there are any cracks on or glass fragments in the bottle. Do not let babies drink unsupervised with this bottle. Compatibility Only use Philips Avent Natural tears with Philips Avent Natural feeding bottles. Spare teats are available separately. Make sure you use a test with the correct flow rate when you feed your baby. When you use an older Philips Avent steriliser, please check on the website how to place the Natural bottle. Do not mix classic bottle parts and teats with parts of the Natural bottle. They may not fit and could cause leakage. • The polypropylene Natural bottle is compatible with Philips Avent breast pumps, spouts, sealing discs and cup tops • The glass Natural bottle is compatible with Philips Avent breast pumps and sealing discs. For safety reasons, it is not recommended to use glass Natural bottles with handles, spouts and cup tops. If the bottle falls, it may break Philips Avent is here to help: GB: 0844 33 80 489 national call rate (mobiles vary) IRL: 0818 21 01 41 national call rate (mobiles vary). AU: 1300 364 474 www.philips.com/Avent


natural_image
Line drawing of a baby pump bottle with lid and bulb (no text or symbols)



natural_image
Illustration of a baby ear ear with a bottle and pump, showing a circular motion arrow (no text or symbols)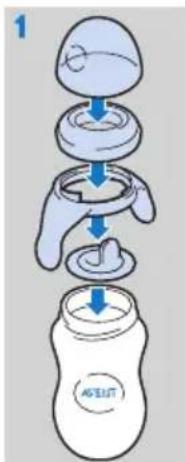



Do not use with glass bottle Nepoužvejte se skienėnou lahvi Ne hasznája Ľveghčil készült rumisžvegega Ne uporolajte s steldeno sieklenčko I fe vanovabaiřte cac strukvěni gytnivki Nemojte koristí sa stakenom bodkom Nu utilzați cu un biberon din stica Nemojte da koristí se stadenom făšicom
Soother
4213.354.2223.6
GB
For your child's safety
WARNING! I expect carefully before each use. Full the soother in all directions Throw away at the first signs of damage or weakness. Only use dedicated soother holders tested to FN 12586. Never attach other ribbons or cords to a sooner, your child may be strangled by them. Do not store a sooner in direct sunlight or near a source of heat, or store in disinfectant (sterilising solution) for longer than recommended, as this may weaken the seat. Keep the removable teat protector away from ch dren to avoid suffocation. Before first use, place in boiling water for 5 minutes allow to cool and squeeze out any trapped water from the soother. This is to ensure hygiene. Clean before each use. Never dip teat in sweat substances or medication, your child may get tooth decay. Replace the soother after 4 weeks of use, for safety and hygiene reasons. In the event the sooner becomes lodged in the mouth. DO NOT PANIC, it cannot be swallowed and is designed to cope with such an event. Remove from the mouth with care, as gently as possible. Always use this product under adult supervision. Keep it in a dry covered container. Soothers and caps are suitable for all commonly used forms of sterilisation.
Teat
4213.354.4127.1
GB: For your child's safety and health WARNING! Always use this product with adult supervision. • Never use feeding teats as a soother. • Continuous and prolonged sucking of fluids will cause tooth decay. • Always check food temperature before feeding. • Keep all components not in use out of the reach of children. • Before first use, clean the product. • Inspect before each use and pull the feeding teat in all directions. • Throw away at the first signs of damage or weakness. • Do not store a feeding teat in direct sunlight or heat, or leave in disinfectant ('sterilising solution') for longer than recommended, as this may weaken the teat. • Do not place in a heated oven. • Before first use place in boiling water for 5 minutes. This is to ensure hygiene.
- Clean before each use. • Wash in warm soapy water and rinse thoroughly, then sterilise using a Philips Avent steriliser suitable for Natural bottles or boil for 5 minutes. • Do not warm contents in a microwave oven, as this may cause uneven heating and could scald your baby. • Dishwasher safe - food colourings may discolour components. • Do not allow child to play with small parts or walk/run while using bottles or cups. • For hygiene reasons, we recommend replacing teats after 3 months. • For optimum performance, pinch and massage the number on the teat between index finger and thumb prior to feed. • Keep in a dry, covered container. • Only use Philips Avent Natural teats with Philips Avent Natural feeding bottles.
Wash your hands thoroughly and ensure surfaces are clean before contact with sterilised components. Night time scooters – expose handles to light before use. The soother can be cleaned by washing with warm water. DO NOT use abrasive cleaning agents or anti-bacterial cleaners on the soothers. Excessive combinations of detergents may eventually cause plastic components to crack. Should this occur, replace your soother immediately. DO NOT sterilise the display case. If you need information or support, please visit the Phillips website at www.philips.com/support.
12 ENGLISH
Manual breast pump
4213.354.1565.1

Introduction
Congratulations on your purchase and welcome to Philips AVENT! To fully benefit from the support that Philips AVENT offers, register your product at www.philips.com/welcome.
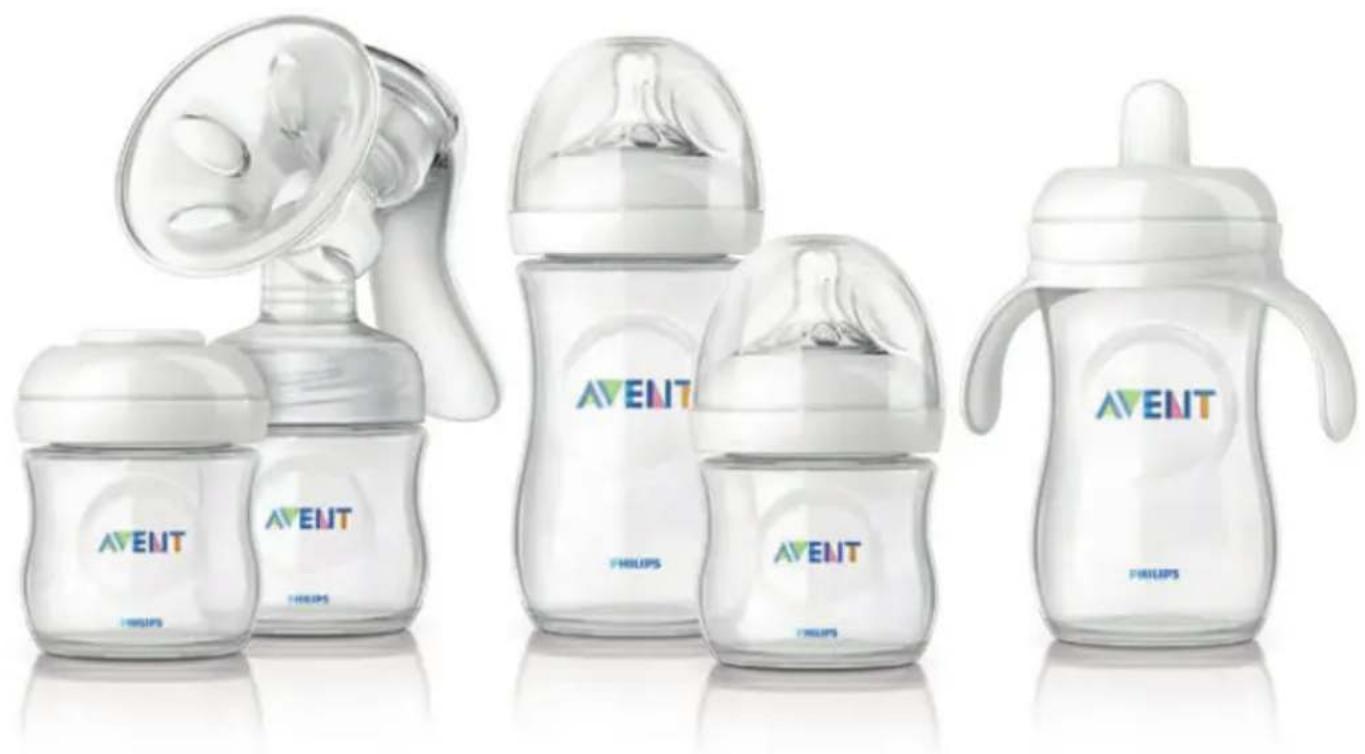
The Philips AVENT manual breast pump has a unique design that enables you to sit in a more comfortable position while expressing. The soft massage cushion* is designed to feel soft and warm and imitates your baby's sucking action to provide fast milk flow - quietly, comfortably and gently. The pump is compact, easy to assemble and all parts are dishwasher-safe and BPA-free.
Healthcare professionals say that breast milk is the best nutrition for babies during the first year, combined with solid food after the first 6 months. Your breast milk is specially adapted to your baby's needs and contains antibodies which help protect your baby against infection and allergies.
A breast pump can help you to breastfeed longer. You can express and store your milk so that your baby can still enjoy the benefits of it, even if you cannot be there to provide it yourself. As the pump is compact and discrete to use, you can take it with you anywhere, allowing you to express milk at your own convenience and maintain your milk supply.
*The cushion included with this pump was designed to comfortably fit the majority of mothers. However, should you need it, you can buy a cushion for larger nipples separately.
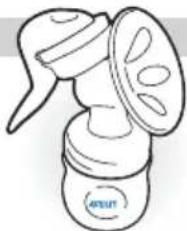
General description (Fig. 1)
1 Handle
2 Silicone diaphragm with stem
3 Pump body
4 Massage cushion
5 Cover
6 White valve
7 Philips AVENT natural bottle
8 Cap
9 Screw ring
10 Teat
11 Sealing disc
12 Lid of storage cup (SCF330/12 only)
13 Philips AVENT storage cup (SCF330/12 only)
14 Adapter (SCF330/12 only)
Important
Read this user manual carefully before you use the breast pump and save it for future reference.
Warning
- This breast pump is not intended for use by persons (including children) with reduced physical, sensory or mental capabilities, or lack of experience and knowledge, unless they have been given supervision or instruction concerning use of the product by a person responsible for their safety.
- Children should be supervised to ensure that they do not play with the breast pump.
- Inspect the breast pump for signs of damage before each use. Do not use the breast pump if it does not work properly.
- Never use the breast pump while you are pregnant, as pumping can induce labour.
- Never use the breast pump while you are sleepy or drowsy.
- Do not expose the breast pump to extreme heat and do not place it in direct sunlight.
15 ENGLISH
Caution
- The breast pump is only intended for repeated use by a single user.
- Never drop or insert any foreign object into any opening.
- Never use any accessories or parts from other manufacturers or that Philips AVENT does not specifically recommend. If you use such accessories or parts, your guarantee becomes invalid.
- Wash, rinse and sterilise all pump parts before each use.
- Do not use antibacterial or abrasive cleaning agents when you clean breast pump parts.
- Do not continue pumping for more than five minutes at a time if you do not succeed in expressing any milk.
- If the pressure generated is uncomfortable or causes pain, break the seal between the breast and the pump body with your finger and remove the pump from your breast.
Preparing for use
Clean and sterilise all parts of the breast pump before first use as described in chapter 'Cleaning and sterilising'. Clean all parts after each subsequent use and sterilise all parts before each subsequent use.
Assembling the breast pump
Note: Make sure you have cleaned and sterilised all parts of the breast pump. Wash your hands thoroughly before you handle the cleaned parts.
Be careful, the cleaned parts may still be hot.
Tip: You may find it easier to assemble the breast pump while it is wet.
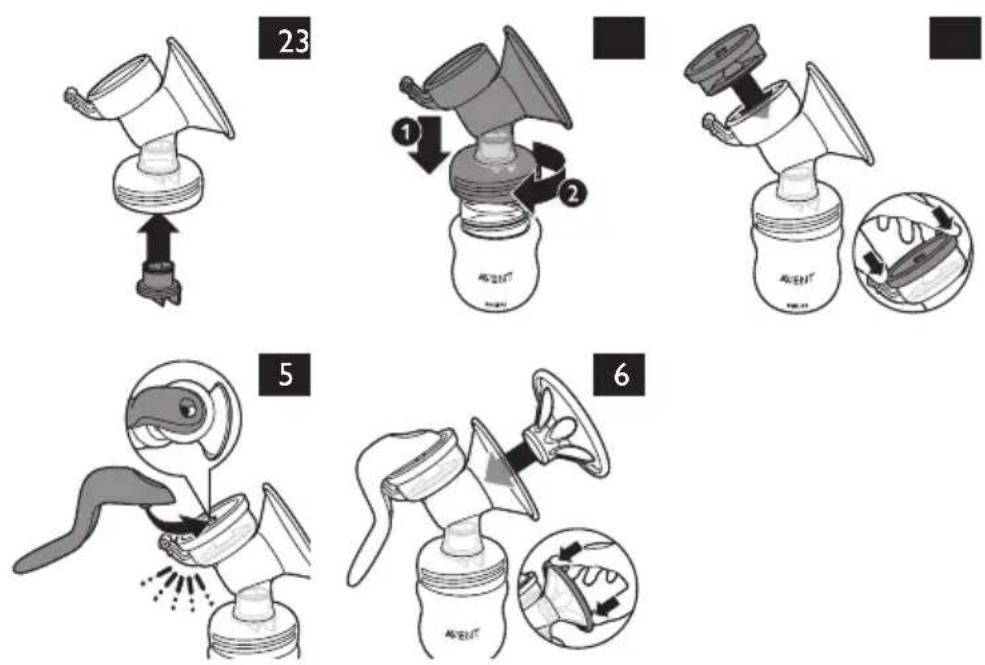
1 Insert the white valve into the pump body from underneath. Push in the valve as far as possible (Fig. 2).
2 Screw the pump body clockwise onto the bottle or storage cup until it is securely fixed (Fig. 3).
Note: If you use a storage cup, you have to screw the adapter onto the storage cup first.
3 Place the silicone diaphragm with stem into the pump body from above. Make sure it fits securely around the rim by pressing down with your fingers to ensure a perfect seal (Fig. 4).
4 Attach the handle onto the diaphragm with stem by hooking the hole in the handle over the end of the stem. Push down the handle onto the pump body until it clicks into place (Fig. 5).
5 Place the massage cushion into the funnel-shaped section of the pump body. Push in the inner part of the massage cushion as far as possible and make sure that it is perfectly sealed all around the rim of the pump body. Press in between the petals to remove any trapped air (Fig. 6).
Note: Place the cover over the massage cushion to keep the breast pump clean while you prepare for expressing.
Using the breast pump
When to express milk
It is advisable (unless advised otherwise by your healthcare professional/breastfeeding advisor) to wait until your milk supply and breastfeeding schedule are established (normally at least 2 to 4 weeks after giving birth).
Exceptions:
- If you are expressing milk for your baby to be given in hospital.
- If your breasts are engorged (painful or swollen): you can express a small amount of milk before or between feeds to ease the pain and to help your baby latch on more easily.
- If you have sore or cracked nipples, you may wish to express your milk until they are healed.
- If you are separated from your baby and wish to continue to breastfeed when you are reunited, you should express your milk regularly to stimulate your milk supply.
You need to find the optimum times of the day to express your milk, for example just before or after your baby's first feed in the morning when your breasts are full, or after a feed if your baby has not emptied both breasts. If you have returned to work, you may need to express during a break. Using a breast pump requires practice and it may take several attempts before you succeed.
Fortunately, the Philips AVENT manual breast pump is easy to assemble and use so you will soon get used to expressing with it.
Tips
- Familiarise yourself with the breast pump and how to operate it before you use it for the first time.
- Choose a time when you are not in a rush and will not be interrupted.
- A photograph of your baby can help encourage the 'let-down' reflex.
- Warmth can also help: try to express after a bath or shower, or place a warm cloth or Philips AVENT Thermopad on the breast for a few minutes before you start expressing.
- You may find it easier to express while your baby is feeding from the other breast, or immediately after a feed.
- If expressing becomes painful, stop and consult your breastfeeding advisor.
Operating the breast pump
1 Wash your hands thoroughly and make sure your breasts are clean.
2 Relax in a comfortable chair (you may wish to use cushions to support your back). Make sure you have a glass of water nearby.
3 Press the assembled breast pump against your breast. Make sure that your nipple is centered, so that the massage cushion creates an airtight seal.
4 Gently start to press down the handle until you feel the suction on your breast. Then allow the handle to return to its resting position.
Note: You do not have to press down the handle fully, only as much as is comfortable. Your milk will soon start flowing, even though you are not using all the suction the pump can generate.
5 Repeat step 4 rapidly 5 or 6 times to initiate the 'let-down' reflex.
6 Adopt a slower rhythm by pressing down the handle and keeping it pressed down for up to 3 seconds before you let it return to its resting position. Continue in this way while your milk is flowing. If your hand becomes tired, try to use the other hand to operate the breast pump or rest your arm across your body to pump from the opposite breast.
Note: Do not worry if your milk does not flow immediately. Relax and continue pumping. Repositioning the breast pump on your breast from time to time can help stimulate milk flow.
17 ENGLISH
Do not continue pumping for more than 5 minutes at a time if you do not succeed in expressing any milk. Try to express at another time during the day. If the process becomes very uncomfortable or painful, stop using the pump and consult your breastfeeding advisor.
7 On average, you need to pump for 10 minutes to express 60-125ml (2-4fl oz) of breast milk. However, this is just an indication and varies from woman to woman.
8 When you have finished expressing, carefully remove the breast pump from your breast and unscrew the bottle or breast milk container from the pump body ready for feeding/storage. Clean the other used parts of the breast pump according to the instructions in the chapter 'Cleaning and sterilising'.
Note: If you regularly express more than 125ml per session, you can use a 260ml/9fl oz Philips AVENT bottle or 240ml/8fl oz Philips AVENT storage cup to prevent overfilling and spillage.
After use
Storing breast milk
Only store breast milk collected with a sterile pump.
Breast milk can be stored in the fridge (not in the door) for up to 48 hours. Expressed milk should be refrigerated immediately. If you store milk in the fridge to add to during the day, only add milk that has been expressed into a sterilised bottle or breast milk container.
Breast milk can be stored in the freezer for up to three months as long as it is kept in either sterilised bottles fitted with a sterilised screw ring and sealing disc or in sterilised storage cups with a sterilised lid. Clearly label the bottle or storage cup with the date and time of expression and use older breast milk first.
If you intend to feed your baby with the expressed breast milk within 48 hours, you can store the breast milk in the fridge in an assembled Philips AVENT bottle or storage cup:
1 Unscrew the bottle or storage cup and remove it from the pump body.
2 Assemble a sterilised teat and screw ring onto the bottle or storage cup according to the separate instructions provided with the bottle or storage cup.
3 Seal the teat with the dome cap.
Do's
- Always refrigerate or freeze expressed milk immediately.
- Only store milk collected with a sterilised breast pump in sterilised bottles or sterilised storage cups.
Don'ts
- Never refreeze thawed breast milk.
- Never add fresh breast milk to frozen breast milk.
Feeding your baby expressed breast milk
You can feed your baby with breast milk from Philips AVENT bottles and storage cups:
1 If you use frozen breast milk, let it defrost completely before you heat it.
Note: In case of an emergency, you can defrost the milk in a bowl of hot water.
2 Heat the bottle or storage cup with defrosted or refrigerated breast milk in a bowl of hot water or in a bottle warmer.
3 Remove the screw ring and sealing disc from the bottle or remove the lid from the storage cup.
4 If you are using a storage cup, screw the adapter ring onto the cup.
5 Screw a sterilised screw ring with sterilised teat onto the bottle or onto the storage cup with adapter ring.
Do's
- Always check the temperature of the milk before you feed it to your baby.
- Always discard any breast milk that is left over at the end of a feed.
Don'ts
- Never heat milk in a microwave, as this can cause uneven heating, which can lead to hot spots in the milk. It may also destroy nutrients in the milk.
- Never immerse a frozen storage cup in boiling water, as this may cause it to crack.
- Never fill a storage cup with boiling water. Let the water cool down for 20 minutes before you pour it into the storage cup.
Cleaning and sterilising
Clean and sterilise all parts of the breast pump before first use. Clean all parts after each subsequent use and sterilise all parts before each subsequent use.
1 Disassemble the breast pump completely. Also remove the white valve.
Be careful when you remove the white valve and when you clean it. If it gets damaged, your breast pump does not function properly. To remove the white valve, gently pull at the ribbed tab on the side of the valve.
2 Clean all parts in hot water with some mild washing-up liquid and then rinse them thoroughly. You can also clean the parts in the dishwasher (on the top rack only).
To clean the valve, rub it gently between your fingers in warm water with some washing-up liquid. Do not insert objects into the valve, as this may cause damage.
3 Sterilise all parts in a Philips AVENT steam steriliser or by boiling them for 5 minutes.
Storage
Keep the breast pump out of direct sunlight as prolonged exposure may cause discolouration.
1 Store the breast pump and its accessories in a safe and dry place.
Compatibility
The Philips AVENT manual breast pump is compatible with Philips AVENT bottles in our range. When you use bottles that feature our two-piece anti-colic system, always insert the ring in the top of the bottle before you attach it to the breast pump. When you use other Philips AVENT bottles, use the same type of teat that was supplied with that bottle. For details on how to assemble the teat and general cleaning instructions, refer to the user manual that came with your bottle. These details can also be found on our website, www.philips.com/support.
Ordering accessories
To purchase accessories for this breast pump, please visit our website www.philips.com/shop. If you have any difficulties obtaining accessories for your breast pump, please contact the Philips Consumer Care Centre in your country. You find its contact details in the worldwide guarantee leaflet. You can also visit www.philips.com/support.
Guarantee and service
If you need service or information or if you have a problem, please visit the Philips AVENT website at www.philips.com/support or contact the Philips AVENT Consumer Care Centre in your country. You find its phone number in the worldwide guarantee leaflet. If there is no Consumer Care Centre in your country, go to your local Philips AVENT dealer.
Troubleshooting
This chapter summarises the most common problems you could encounter with the breast pump. If you are unable to solve the problem with the information below, contact the Consumer Care Centre in your country or visit us online at www.philips.com/support.
Problem Solution
| I experience pain when I use the breast pump. | Stop using the breast pump and consult your breastfeeding advisor. If the pump does not come away easily from the breast, it may be necessary to break the vacuum by placing a finger between the breast and the massage cushion or between the breast and the pump funnel. |
| The breast pump is scratched. | In case of regular use, some light scratching is normal and does not cause problems. However, if a part of the breast pump becomes badly scratched or if it cracks, stop using the breast pump and contact the Philips Consumer Care Centre or visit www.philips.com/shop to obtain a replacement part. Be aware that combinations of cleaning agents, sterilising solution, softened water and temperature fluctuations may, under certain circumstances, cause the plastic to crack. Avoid contact with abrasive or antibacterial detergents as these can damage the plastic. |
| The breast pump is discoloured. | You can still use the breast pump. For replacement parts, please contact the Philips Consumer Care Centre in your country or visit www.philips.com/shop for spare parts. |
| I do not feel any suction. | Follow the steps in chapter ‘Preparing for use’, to reassemble the breast pump. Make sure the massage cushion is sealed around the rim of the breast pump and make sure the white valve is firmly in place. |
- Always here to help you
- Introduction
- General description (Fig. 1)
- Important
- Danger
- Warning
- Caution
- ENGLISH5
- Electromagnetic fields (EMF)
- Before first use
- SCF287/SCF286
- SCF285/SCF284
- Preparing for use
- Preparing for sterilising
- Using the dishwasher basket (SCF287/SCF286 only)
- Assembling the steriliser
- Using the appliance
- ENGLISH7
- Cleaning
- Descaling
- Ordering accessories
- Environment
- Guarantee and support
- Descaler for sterilizer
- Descale the steriliser in the following way:
- ENGLISH
- For your child's safety and health WARNING!
- Soother
- GB
- For your child's safety
- Teat
- ENGLISH
- Manual breast pump
- ENGLISH
- Assembling the breast pump
- Using the breast pump
- When to express milk
- Exceptions:
- Tips
- Operating the breast pump
- ENGLISH
- After use
- Storing breast milk
- Do's
- Don'ts
- Feeding your baby expressed breast milk
- Cleaning and sterilising
- Storage
- Compatibility
- Guarantee and service
- Troubleshooting
Brand : PHILIPS
Model : SCD293
Category : Electric sterilizer