
PSG-161-SEG-PL-NP - Logiciel de partitionnement Paragon - Free user manual and instructions
Find the device manual for free PSG-161-SEG-PL-NP Paragon in PDF.


| Type de produit | Software - Partition Management & Backup Utility |
| Version | Partition Manager Server 11 (2010) |
| Plateformes supportées | Windows 2000/XP/Vista/7/Server 2000/2003/2008 (32 & 64-bit) |
| Configuration minimale (Windows) | Intel Pentium 300 MHz, 128 MB RAM, 460 MB espace disque |
| Configuration minimale (Linux/DOS Recovery) | IBM AT compatible, i486+ CPU, 256 MB RAM |
| Configuration minimale (WinPE Recovery) | Intel Pentium III 1 GHz, 512 MB RAM |
| Fonctions principales | Partitionnement (créer, supprimer, redimensionner, fusionner, déplacer), copie de disques/partitions, sauvegarde et restauration, gestion de l'amorçage, conversion de systèmes de fichiers |
| Systèmes de fichiers supportés | FAT16/FAT32 (lecture/écriture), NTFS (lecture/écriture), Ext2/Ext3/Ext4 (lecture/écriture), Apple HFS+ (lecture limitée) |
| Types de disques supportés | Disques MBR et GPT (jusqu'à 1,5 To testés), IDE, SCSI, SATA, FireWire, USB 1.0/2.0, PC Card |
| Technologies clés | Paragon Hot Backup™, Adaptive Restore™, Hot Resize™, Smart Partition™, Volume Shadow Copy Service (VSS) |
| Environnements de récupération | Linux/DOS bootable, WinPE 3.0 bootable |
| Médias de sauvegarde | Partitions locales, disques externes, CD/DVD (CD-R/RW, DVD±R/RW, DVD+R DL, Blu-ray), réseau |
| Particularités | Prise en charge des disques dynamiques (simple, spanned, striped, mirrored, RAID-5), Apple Boot Camp, dé fragmentation NTFS/FAT, correction de l'amorçage |
| Langues | Multilingue (interface et documentation en anglais inclus) |
Frequently Asked Questions - PSG-161-SEG-PL-NP Paragon
User questions about PSG-161-SEG-PL-NP Paragon
0 question about this device. Answer the ones you know or ask your own.
Ask a new question about this device
Download the instructions for your Logiciel de partitionnement in PDF format for free! Find your manual PSG-161-SEG-PL-NP - Paragon and take your electronic device back in hand. On this page are published all the documents necessary for the use of your device. PSG-161-SEG-PL-NP by Paragon.
USER MANUAL PSG-161-SEG-PL-NP Paragon
Partition Manager™ Server
User Manual
Contents
Introduction ....4
What's New in Partition Manager Server.... 4
Product Components....5
Features Overview....5
Key Features 5
Supported Technologies....7
Supported File Systems 8
Supported Media 8
Getting Started....8
Distribution 9
Contacting Paragon Technology GmbH....10
System Requirements ....11
Installation 12
First Start....13
Building Recovery Media....14
Booting from the Linux/DOS Recovery Media....15
Booting from the WinPE Recovery Media....18
Basic Concepts....20
System and Data Protection....20
Paragon Hot Processing & Volume Shadow Copy Service....21
Dynamic Disks....23
GPT versus MBR....23
Apple Boot Camp....24
64-bit Support....24
Copy Operations....24
Drive Partitioning....25
Windows Components 25
Interface Overview 25
Settings Overview....37
Getting Information on Disks and Backup Images 47
Data Backup and Rescue ....50
Copy Tasks....55
Boot Management....59
Partition Management....61
Hard Disk Management 86
Extra Functionality....89
Typical Scenarios 99
Backup Scenarios....99
Recovery Scenarios 105
Resize Scenarios....138
Creating Dual Boot Systems 152
System Migration Scenarios....162
Hard Disk Optimization....166
Extra Scenarios for WinPE 167
Troubleshooter....170
Glossary....172
Introduction
Paragon Partition Manager™ Server is an integrated set of powerful tools that is specially designed to tackle most of the problems the user might face while using PC. A highly intelligent program engine together with built-in advanced recovery facilities make it possible to securely carry out partitioning operations of any complexity, optimize performance of NTFS and FAT file systems, migrate the system to another hard disk, etc. without fear to lose precious data.
In this manual you will find the answers to many of the technical questions, which might arise while using the program.

Our company is constantly releasing new versions and updates to its software, that's why images shown in this manual may be different from what you see on your screen.
What's New in Partition Manager Server
- Next generation Adaptive Restore™ (P2P Adjust OS) to successfully migrate a Win2K+ physical system to a different hardware platform (P2P) by allowing automatic injection of all required drivers and the other actions crucial for a migration of this kind.
- Smart Driver Injector to make the process of adding new drivers for P2P operations smooth and easy.
- Selective Restore to easily extract files and folders from a backup image with the Restore Wizard without the need to restore the whole image.
- Boot Corrector for WinPE to fix most of the system boot problems not only with the Linux and PTS DOS bootable recovery environments, but WinPE 3.0 as well.
- The latest Linux kernel to enjoy support of a wider range of hardware configurations, including the brand new Intel ICH9 chipset.
- WinPE 3.0 based bootable recovery environment to enjoy support of a wider range of hardware configurations with the option to add drivers for specific hardware on-the-fly.
- More flexibility for online data processing techniques to provide for easier configuration for both, Paragon Hot Processing and Microsoft Volume Shadow Copy Service (VSS).
- Better support for 64-bit platforms to reboot your computer to one of the three special modes (Windows native, Linux, or DOS) to automatically complete operations, which cannot be accomplished under 64-bit Windows.
- Better support for GUID Partition Table (GPT) to back up and restore not only single GPT volumes but entire disks, including the option of resize during the restore operation.
- Better support for the Apple Boot Camp Configuration with the option not only to back up and restore this kind of configurations, but to copy single volumes or entire disks with resize.
- Better support for Linux ExtFS starting from Ext2FS up to the brand new Ext4FS.
Product Components
In order to cope with different tasks, the product contains several components:
- Windows based set of utilities is the crucial part of the product. With the help of an easy to use launcher you may find and run tasks of any complexity in the field of data and system protection, hard disk partitioning and cloning, etc.
- Linux/DOS based recovery environment is a multi-platform bootable media that enables to run utilities under Linux or PTS DOS, and that way to get access to your hard disk for maintenance or recovery purposes. Both platforms have their strong sides, for instance Linux can boast support of FireWire (i.e. IEEE1394) or USB devices. It enables to burn CD/DVD disks. However there can be some difficulties with detecting new hardware. DOS in its turn has no problems of that kind but is limited in features. The Linux/DOS recovery environment requires no installation and can be of great help when the system fails to boot. Besides it offers a Windows XP like environment.
- WinPE based recovery environment. Especially for keen followers of Windows, our product also offers a WinPE 3.0 based bootable media. Unlike the Linux/DOS recovery environment it can boast an excellent hardware support and the same interface as the Windows version can. However its system requirements are much tougher.
Features Overview
This chapter dwells upon key benefits and technical highlights of the product.
Key Features
Let us list some of the key features:
User Friendly Fault Minimizing Interface
• Graphical representation of the data to gain a better understanding.
• A handy Launcher to easily find and run the required tasks.
- Comprehensive wizards to simplify even the most complex operations.
- Resize partitions directly on the Disk Map with the drag-and-drop technique.
- A context sensitive hint system for all functions of the program.
- Previewing the resulting layout of hard disks before actually executing operations (so-called virtual operations).
Backup Facilities
• Support of major techniques to store backup images:
- Backup to local mounted/unmounted (without drive letter assigned) partitions;
- Backup to an external mounted storage to provide for a higher level of data protection and system independence;
- Backup to external media (CD/DVD) to guarantee a high level of data protection as long as the backup media is kept secure;
- Backup to a network drive to stand a better chance of success in case of a hard disk failure.
Restore Facilities
- Restore an entire disk, separate partitions or only files you need from the previously created backup image.
- Restore with Shrink to restore a backup image to a free block of smaller size taking into account only the amount of actual data of the image.
- Adaptive Restore to successfully migrate a Win2K+ physical system to a different hardware platform (P2P) by allowing automatic injection of all required drivers and the other actions crucial for a migration of this kind.
Copy Facilities
- Partition/hard disk copy to successfully transfer all on-disk information including standard bootstrap code and other system service structures, thus maintaining the operating system's working capability.

Copy functionality can also be used as an alternative way of data protection.
Boot Management Facilities
- Boot Manager Setup Wizard to easily manage several operating systems on one computer.
Partition/Hard Disk Management Facilities
- Basic functions for initializing, partitioning and formatting hard disks (create, format, delete). Instead of the standard Windows disk tools, the program supports all popular file systems.
- Express Create Partition Wizard to create a new partition in the most appropriate place of a hard disk, format it to NTFS and then make it available in the system by assigning a drive letter.
- Merge Partitions Wizard to consolidate the disk space, which originally belongs to two adjacent partitions (NTFS, FAT16/FAT32), into a single, larger partition.
- Redistribute Free Space Wizard to increase free space on one partition by up-taking the on-disk unallocated space and the unused space of other partitions.
- Express Resize Partitions Wizard to increase free space on one partition by up-taking the unused space of an adjacent partition of a hard disk (including partitions of Apple Boot Camp).
- NTFS hot resize upward to enlarge an NTFS partition (system, locked) without rebooting Windows and interrupting its work.
- Convert a file system (FAT16/32, NTFS, Ext2/Ext3) without reformatting.
- Mount a partition (assign a drive letter) of any file system type to make it available for your operating system.
- Modify file system parameters (make active/inactive, hide/unhide, change serial number, partition ID, volume label, etc.).
• Install New OS Wizard to make a system ready to install a new operating system. - Undelete Partitions Wizard to recover an accidentally deleted partition.
File System Optimization Facilities
• 27 defragmentation strategies available to defragment FAT and NTFS file systems.
• MFT defragmentation and shrinking to improve performance of NTFS.
- Safe Defragmentation Mode to guarantee data loss free defragmentation of any version of NTFS and FAT.
- Low free space defragmentation (less than 1% of the free space required) to successfully defragment almost full disks.
Auxiliary Facilities
- File Transfer Wizard to make such operations as transferring of files/directories or burning of them to CD/DVD as easy and convenient as possible. Providing access to Paragon backups as regular folders, it may also help to replace corrupted data from a previously created image in case of an operating system failure.
- Volume Explorer is a handy tool when you have different file systems on the disk, whether they contain an operating system or just data. Volume Explorer will let you explore a file system of any type and provide access to the necessary files and directories regardless of their security attributes.
- Recovery Media Builder to create a bootable recovery media based on Linux/DOS or WinPE 3.0 on a CD, DVD disc, or flash memory, which can later be used to boot and recover your computer in case of an operating system failure. Moreover, with its help you can save data from partitions of your hard disk directly to compact discs or burn ISO-images. The utility supports various formats of laser discs: CD-R/RW, DVD-R/RW, DVD+R/RW, DVD-R, DVD+R double layer, Blu-ray and can handle multi-session burning.
- Network Configuration Wizard to establish a network connection under Linux or WinPE either to save a backup of a partition/hard disk or just several files on a network computer or retrieve a previously made backup from a network computer for recovery purposes.
- Boot Corrector to fix most of the system boot problems that can be a result of a human factor, program error or a boot virus activity.

Boot Corrector is only available for the WinPE 3.0 or Linux/DOS bootable recovery environment.
Supported Technologies
Along with using innovative technologies from outside, Paragon has developed a number of its own original technologies that make its products unique and attractive for customers:
- Paragon Hot Backup™ technology to back up locked partitions and hard disks under Windows NT+ family operating systems providing both high operating efficiency as well as low hardware requirements.
- Paragon Adaptive Restore™ technology to successfully migrate a Win2K+ physical system to a different hardware platform (P2P).
- Paragon Power Shield™ technology to provide data consistency in case of a hardware malfunction, power outages or an operating system failure.
-
Paragon UFSD™ technology to browse partitions of any file system including hidden and unmounted, modify and copy files and folders, etc.
-
Paragon Hot Resize™ technology to enlarge NTFS partitions (system, locked) without rebooting Windows and interrupting its work.
- Paragon Restore with Shrink™ technology to restore a backup image to a free block of smaller size taking into account only the amount of actual data of the image.
- Paragon Smart Partition™ technology to securely perform hard disk partitioning operations of any complexity.
- Paragon BTE™ technology to set tasks for execution in the Windows blue screen mode, thus saving from the need to use a bootable media when modifying system partitions.
- Microsoft Volume Shadow Copy Service (VSS) to provide the copy/backup infrastructure for the Microsoft Windows XP/Vista/7/Server 2003/2008 operating systems. It offers a reliable mechanism to create consistent point-in-time copies of data known as shadow copies. Developed by Microsoft in close cooperation with the leading copy/backup solution vendors on the market, it is based on a snapshot technology concept.
- Microsoft Dynamic Disk (simple, spanned, striped, mirrored, RAID-5) to offer more management flexibility without the partition limitation of basic disks. Dynamic storage can be particularly beneficial for large-scale businesses when dealing with many physical hard disks involving complex setup.
- GUID Partition Table (GPT). It is the next generation of a hard disk partitioning scheme developed to lift restrictions of the old MBR. GPT disks are now supported by Windows Vista/7, Server 2008, Mac OS X and Linux.
Supported File Systems
• Full read/write access to FAT16/FAT32 partitions.
- Full read/write access to NTFS (Basic and all five types of Dynamic Disks) under Windows 95/98/ME, Linux and PTS DOS. Compressed NTFS files are also supported.
• Full read/write access to Ext2FS/Ext3FS/Ext4FS partitions under all versions of Windows, DOS 5.0 and later.
- Limited read/write access to Apple HFS+ partitions.

Unfortunately, support of non-Roman characters for the HFS+ file system is unavailable at the moment. The company is about to implement it in the nearest future.
Supported Media
• Support of both MBR and GPT hard disks (up to 1,5 TB tested)
• IDE, SCSI and SATA hard disks
- CD-R, CD-RW, DVD-R, DVD+R, DVD-RW, DVD+RW, DVD-R, DVD+R double layer and also Blu-ray discs
- FireWire (i.e. IEEE1394), USB 1.0, USB 2.0 hard disks
• PC card storage devices (MBR and GPT flash memory, etc.)
Getting Started
In this chapter you will find all the information necessary to get the product ready to use.
Distribution
Paragon Partition Manager Server is distributed in two ways:
- Boxed package from Paragon Technology GmbH and resellers
- Downloadable package over the Internet at the company's web-site
Distributive CD
The boxed package includes a distributive CD that is in fact a bootable Linux/DOS recovery environment with auto-run of the Windows installation, thus it can be used as a ready-made solution (see Booting from the Linux/DOS Recovery Media). But if you're going to run the Windows components, you need to install them first (see Installation).
If you want to download an update/upgrade of the product, it will be in form of the downloadable installation package as described in Online Distribution).

The WinPE recovery environment can only be obtained through the company's web service. You will get the required download link after the product has been purchased.
Online Distribution
Partition Manager Server purchased over the Internet will be in form of an MSI package. After installing the product you can launch the Recovery Media Builder to build the Linux/DOS or WinPE recovery media.

The WinPE recovery environment can only be obtained through the company's web service. You will get the required download link after the product has been purchased.
Registration
Paragon Technology GmbH provides a wide range of online services through its web-portal - www.paragon-software.com/support/:
- Registration of new users;
- Registration of purchased products for registered users;
- Available around-the-clock downloading center, where registered users can get product updates/upgrades as well as all the necessary documentation;
- Downloadable free demo versions and open documentation for all users.

It is recommended to use Internet Explorer 5+ or any compatible browser.
To register as a new user
To register as a new user, please do the following:
- Run an Internet browser and visit the page: www.paragon-software.com/my-account/;
- Click Create of the Create a Paragon Account section;
- Fill out a registration form;
4. Click Register.
The most important field in the form is an E-mail address, as it serves as a login to enter the system. Besides your access password will be sent to this address as well.
To register a new product
If you are a registered user and would like to register Partition Manager Server, please do the following:
- Run an Internet browser and visit the page: www.paragon-software.com/my-account/;
- In the Email field of the Authorization section, enter an E-mail used for registration;
- In the Password field enter a password received after registration;
- Click Sign in;
- If the user name and password are valid, you will get to your account;
- Click Register new product of the Products section;
- Enter your product serial number in the Serial Number field. You can find it in the product box or obtain from your reseller. Click Next;
- On the next page you will be asked to provide some additional data. Also you will need to decide whether you want to get confirmation on registering the product by E-mail or not. Click Next, and then click Finish.
That is all. The product is now registered.
How to Download Updates/Upgrades
Downloading of updates/upgrades can be fulfilled in the following way:
- Run an Internet browser and visit the page: www.paragon-software.com/my-account/;
- In the Email field of the Authorization section, enter an E-mail used for registration;
- In the Password field enter a password received after registration;
- Click Sign in;
- If the user name and password are valid, you will get to your account;
- Select My Downloads of the Products section to see what updates are available for you;
- Select the desired update and click Download.
Contacting Paragon Technology GmbH
If you have any questions about the company products, please do not hesitate to contact Paragon Technology GmbH.
| Service | Contact |
| Visit Paragon GmbH web site | www.paragon-software.com |
| Registration & updates web-service | www.paragon-software.com/support |
Copyright© 1994-2010 Paragon Software Group. All rights reserved.
| Knowledge Base & Technical Support | kb.paragon-software.com |
| Pre-sale information | sales@paragon-software.com |
System Requirements
Windows based set of utilities
To use the Windows utilities, you should install them first. But before that, please make sure your computer meets the following minimum system requirements:
- Operating systems: Windows 2000/XP/Vista/7/Server 2000/2003/2008 and XP SP2/Vista/7/Server 2003/2008 64-bit
- Internet Explorer 5.0 or higher
• Intel Pentium CPU or its equivalent, with 300 MHz processor clock speed
• 128 MB of RAM (256+ recommended) - Hard disk drive with 460 MB of available space
• SVGA video adapter and monitor - Mouse
Linux/DOS based recovery environment
To use the Linux/DOS recovery environment on your computer (it doesn't matter what operating system is installed), please make sure that it meets the following minimum system requirements:
- IBM AT compatible computer with i486 or higher CPU
• 256 MB of RAM
• SVGA-compatible monitor - Mouse (recommended)
WinPE based recovery environment
To use the WinPE based recovery environment on your computer, (it doesn't matter what operating system is installed), please make sure that it meets the following minimum system requirements:
• Intel Pentium III CPU or its equivalent, with 1000 MHz processor clock speed
- At least 512 MB of RAM
• SVGA-compatible monitor
- Mouse (recommended)
Additional requirements
There may be additional requirements if you want to use advanced features:
• Network card to send/retrieve data to/from a network computer
- Recordable CD/DVD drive to burn data to compact discs
- External USB hard drive to store backup data.
Installation
As we have already mentioned only Windows components of the product require installation. So to install Paragon Partition Manager Server under Windows, please do the following:
- Run Setup Application. Click on the *.MSI file. This application will guide you through the process of the program installation. The setup utility is compiled with the InstallShield SDK, hence it contains the standard user interface and set of installation steps.

In case there is some previous version of the program installed on the computer, the program will offer the user to uninstall it first.
- Starting Setup. The Welcome page informs that the application is being installed. Click the Next button to continue.
- Confirm License Agreement. The License Agreement page displays the Paragon License Agreement. Read the agreement and then select the appropriate option to accept. If you do not agree with any conditions stated there, the installation process will be interrupted. By clicking the Print button, the License Agreement may also be printed out.
- Provide Registration Information. On the Registration page you are to provide your product key and serial number.
- Provide Customer Information. On the Customer Information page you are to provide the standard information, i.e. a user name and an organization. Besides you need to decide whether to make the program available for all users of this computer (if several) or only for the current one.
- Select an Installation Folder. The Destination Folder page allows you to choose a folder where the program will be installed. By default, the installation folder will be created as:
C:\Program Files\Paragon Software\Paragon Partition Manager Server. To select another folder, click the Change... button.
After you have selected the required folder, click the Next button to continue.

Do not install the program on network drives. Do not use Terminal Server sessions to install and run the program. In both cases, the program functionality will be limited.
- Confirm Installation. On the Ready to Install the Program page click the Install button to start the installation or the Back button to return to any of the previous pages and modify the installation settings.
- Copying Files. The Copying Files page shows the overall progress of the installation. Click the Cancel button to abort the setup.
- Finishing the Installation. The Final page reports the end of the setup process. Click the Finish button to complete the wizard.

To accomplish online backup/copy of locked partitions/hard disks the program uses a kernel mode hotcore driver, thus the system reboot is required to complete the installation procedure.
First Start
To start Paragon Partition Manager Server under Windows, please click the Windows Start button and then select Programs > Paragon Partition Manager™ Server > Paragon Partition Manager™.

The program provides wide opportunities in the field of hard disk structure modification, so just to be on the safe side, please make a backup of your data before carrying out any operation.
The first component that will be displayed is called the Express Launcher. Thanks to a well thought-out categorization and hint system, it provides quick and easy access to wizards and utilities that we consider worth using on a regular basis. With its help you can also start up the traditional launcher, the help system or go to the program's home page.
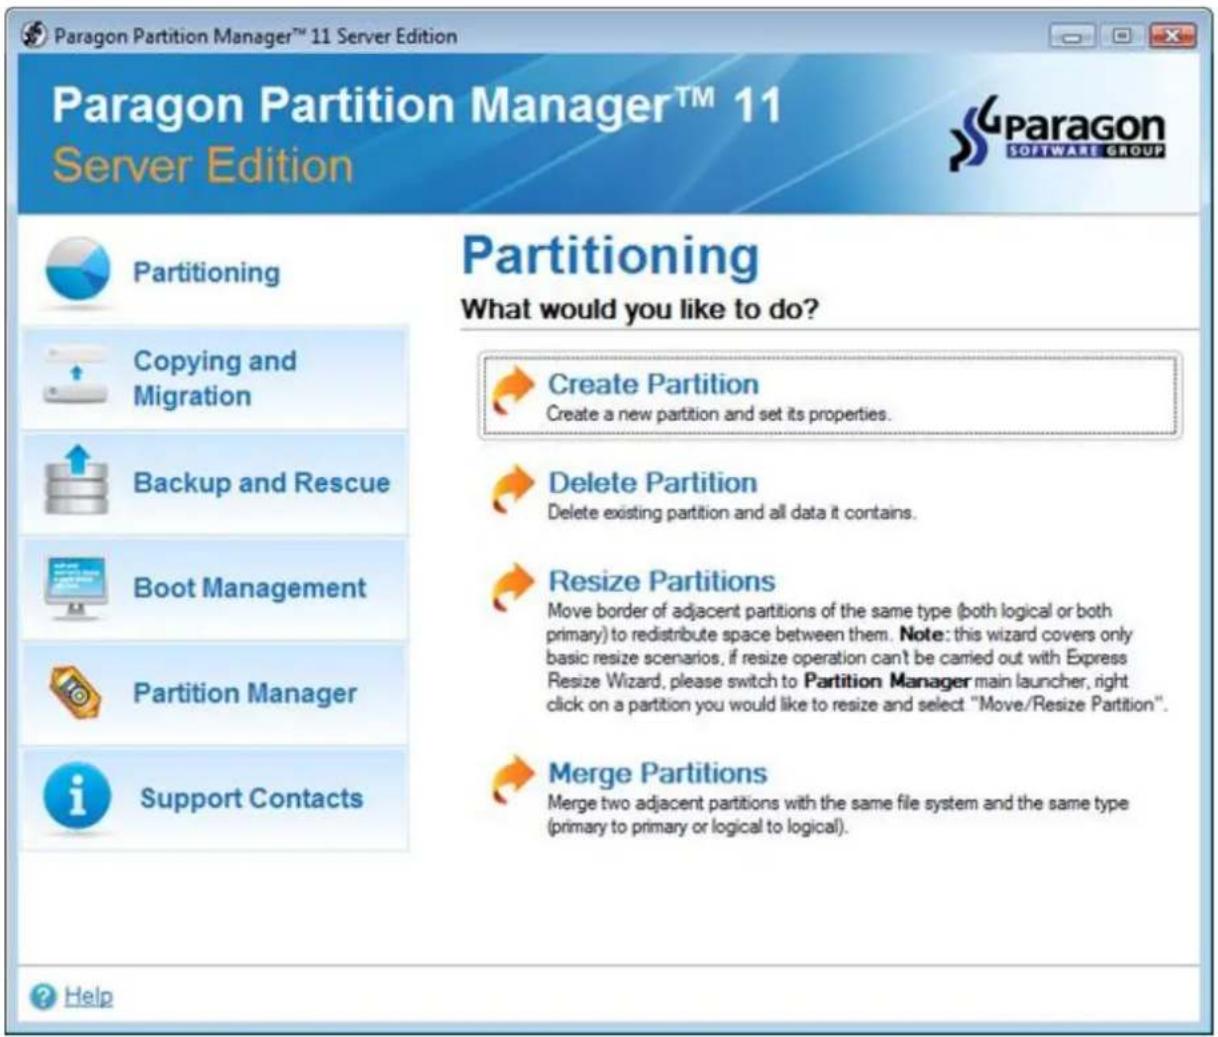

To start up the traditional Launcher, please click the Partition Manager button and then Partition Manager.
To know more on how to handle the product's interface and accomplish typical operations,
Building Recovery Media
Recovery Media Builder can help you accomplish the following operations:
- Prepare the Linux/DOS recovery environment (included in the installation package) on external media (CD, DVD, or flash memory) to boot and run utilities under Linux or PTS DOS, and that way to get access to your hard disk for maintenance or recovery purposes (strongly recommended);
• Prepare a custom Linux/DOS recovery environment by adding any data you like to the standard image; - Prepare a bootable recovery environment from any ISO image, including our WinPE 3.0 image (strongly recommended);
- Create from the master CD the Linux/DOS or WinPE recovery environment on a CD/DVD disc, or flash memory.
Below you can find how to build our WinPE 3.0 based recovery environment on a thumb drive:
- Plug in a thumb drive of at least 250 MBs in size. Please note all data on that drive will be deleted.
- Launch the Recovery Media Builder. There are several ways to do it:
• In the Main Menu: select Tools > Recovery Media Builder...
- On the Common Tasks Bar: click the Recovery Media Builder item of the Wizards menu.
-
On the Wizard's Welcome page, click the Next button.
-
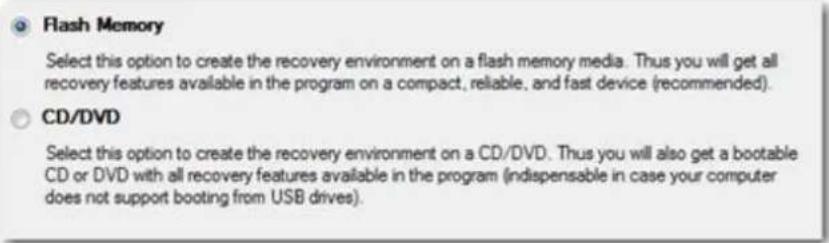
Select the Flash Memory option.
- Select the User specified CD/DVD image (.iso file) option, then browse for an ISO image of our WinPE 3.0 recovery environment or manually type in a full path to it. By selecting the Typical option you can build our Linux/DOS recovery environment, which we highly recommend you to do as well.
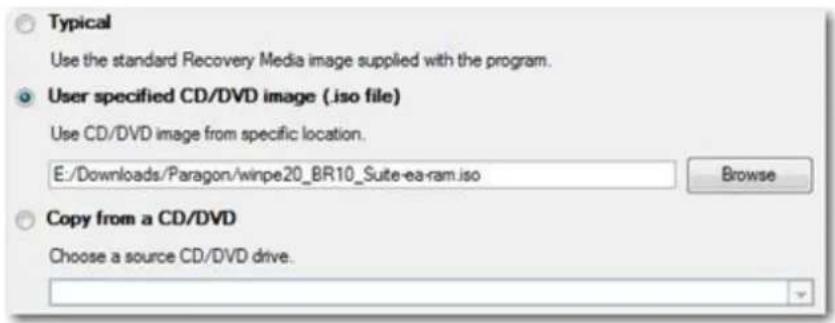

You can get an ISO image of our WinPE 3.0 recovery environment through the company's web service.
- Select the required thumb drive from the list of flash memory devices available in the system at the moment (if several).
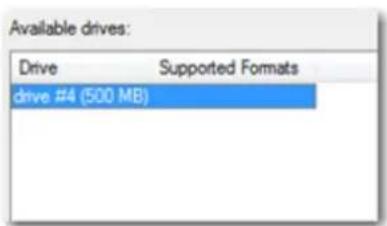
- You will have to confirm the operation.

Booting from the Linux/DOS Recovery Media
The Linux/DOS recovery environment can be used to boot your computer into Linux or PTS DOS to get access to your hard disk for maintenance or recovery purposes. It also has the PTS DOS safe mode, which may help in a number of non-standard situations such as interfering hardware settings or serious problems on the hardware level. In this case, only basic files and drivers (such as hard disk drivers, a monitor driver, and a keyboard driver) will be loaded.
Startup
To start working with the Linux/DOS recovery environment, please take the following steps:
- Start up the computer from our Linux/DOS recovery media.

Recovery Media Builder can help you prepare the Linux/DOS or WinPE recovery environment either on a CD/DVD disc or a thumb drive.
To automatically boot from the recovery media please make sure the on-board BIOS is set up to boot from CD/USB first.
- Launch a boot mode you need (Normal, Safe, Low- Graphics Safe) in the Boot menu.

By default the Normal Mode will be automatically initiated after a 10 second idle period.
- Click on the required operation to start. Hints on the selected at the moment item will help you make the right choice.
- Consult the help system by pressing ALT+F1 to know more on the subject.
Boot menu
The Boot menu contains the following commands:
| Normal Mode Safe Mode Low- Graphics Safe Mode Floppy disk Hard disk 0 MBR Find OSes on your hard disks | Main recovery environment |
- Normal Mode. Boot into the Linux normal mode. This mode uses the full set of drivers (recommended);
- Safe Mode. Boot into the PTS DOS mode. This mode can be used as an alternative of the Linux normal mode if it fails to work properly;
- Low- Graphics Safe Mode. Boot into the PTS DOS safe mode. In this case, only the minimal set of drivers will be included, like hard disk, monitor, and keyboard drivers. This mode has simple graphics and a simple menu;
- Floppy Disk. Reboot the computer from a system floppy disk;
• Hard Disk 0. Boot from the primary hard disk; - Find OS(s) on your hard disks. The program will scan hard disks of your computer to find any bootable operating system.
To move within the menu, please use the arrow keys of the computer keyboard.

While working with the recovery environment you might experience some inconvenience caused by possible video artifacts. It is just a result of changing video modes and in no way will affect the program functionality. If this is the case, please wait a bit and everything will be OK.
Normal Mode
When the Normal mode is selected, the Linux launch menu appears:
 | Paragon Partition ManagerTM | You can create, delete and format hard disk partitions using Paragon Partition ManagerTM, which will start now. Upon the start, please select the drive and one of its partitions or its free space. Then activate the 'Partition' pull-down menu and select one of the partitioning operations. |
 | Restore Wizard | |
 | File Transfer Wizard | |
 | Boot Corrector | |
 | Network Configurator | |
 | Log Saver | |
 | View the mounted partitions | |
 | Start the command line | |
 | Eject CD/DVD | |
 | Reboot the computer | |
 | Power off |
- Partition Manager (enables to copy and back up separate partitions or entire hard disks, carry out partitioning operations, etc.);
- Simple Restore Wizard (allows restoring hard disks and partitions);
- Express Resize Wizard (enables to increase free space on one partition by up-taking the unused space of an adjacent partition);
- File Transfer Wizard (allows coping files/folders to another disk or a partition as well as recording them to CD/DVD);
- Boot Corrector (helps to correct the Windows System Registry without Windows being loaded);
• Network Configurator (enables to establish a network connection under Linux);

If you are going to use network resources, first launch the Network Configuration Wizard to establish a network connection.
- Log Saver (helps to collect and send the necessary log files to the Technical Support);
• View the mounted partitions (the list of all mounted partitions will be displayed);

The Linux/DOS recovery environment assigns drive letters to partitions the way it is done in DOS, i.e. one after another, primary partitions at first. Thus mounted partitions may have different drive letters from Windows.
- Eject CD/DVD;
• Command Line (allows experienced users to execute any operation); - Reboot the computer;
• Power off the computer.
To move within the menu, please use the arrow keys of the computer keyboard.
Safe Mode
When the Safe mode is selected, the PTS DOS launch menu appears. It has nearly the same functionality as for the Normal mode except the Network Configurator and Log Saver commands. Besides due to certain limitations of the PTS DOS environment, there is no possibility to burn CD/DVD discs.
Low Graphics Safe Mode
When the Low Graphics mode is selected, the PTS DOS launch menu appears. It has the same functionality and looks similar to the Safe mode but graphically simpler.
| Partition Manager 11 Simple Restore Wizard File Transfer Wizard Boot Corrector Start the command line Reboot the computer | You can create, delete and format hard disk partitions using this program, which will start now. Upon the start, please select the drive and one of its partitions or its free space. Then activate the 'Partition' pull-down menu and select one of the partitioning operations. |
Booting from the WinPE Recovery Media
The WinPE recovery environment can be a real alternative to the Linux/DOS recovery environment. Providing nearly the same level of functionality it offers an excellent hardware support and the same interface as the Windows version does.
Startup
To start working with the WinPE recovery environment, please take the following steps:
- Start up the computer from our WinPE recovery media.

Recovery Media Builder can help you prepare the Linux/DOS or WinPE recovery environment either on a CD/DVD disc or a thumb drive.
To automatically boot from the recovery media please make sure the on-board BIOS is set up to boot from CD/USB first.
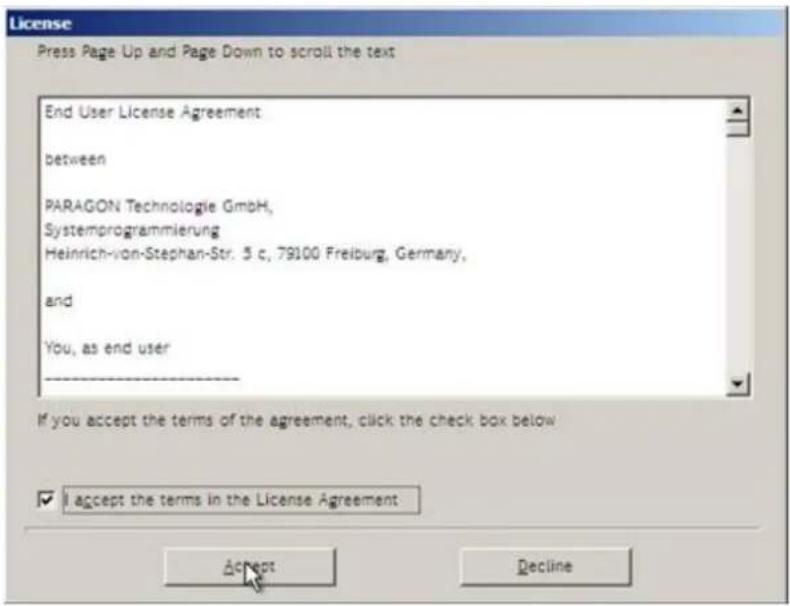
- Once it has been loaded, you will see the License Agreement. Read the agreement and then mark the appropriate checkbox to accept. If you do not agree with any conditions stated there, you won't be able to use the program.
- Once you accept the agreement, you will see the Universal Application Launcher. In general it enables to run components of the product, load drivers for undefined hardware or establish a network connection.
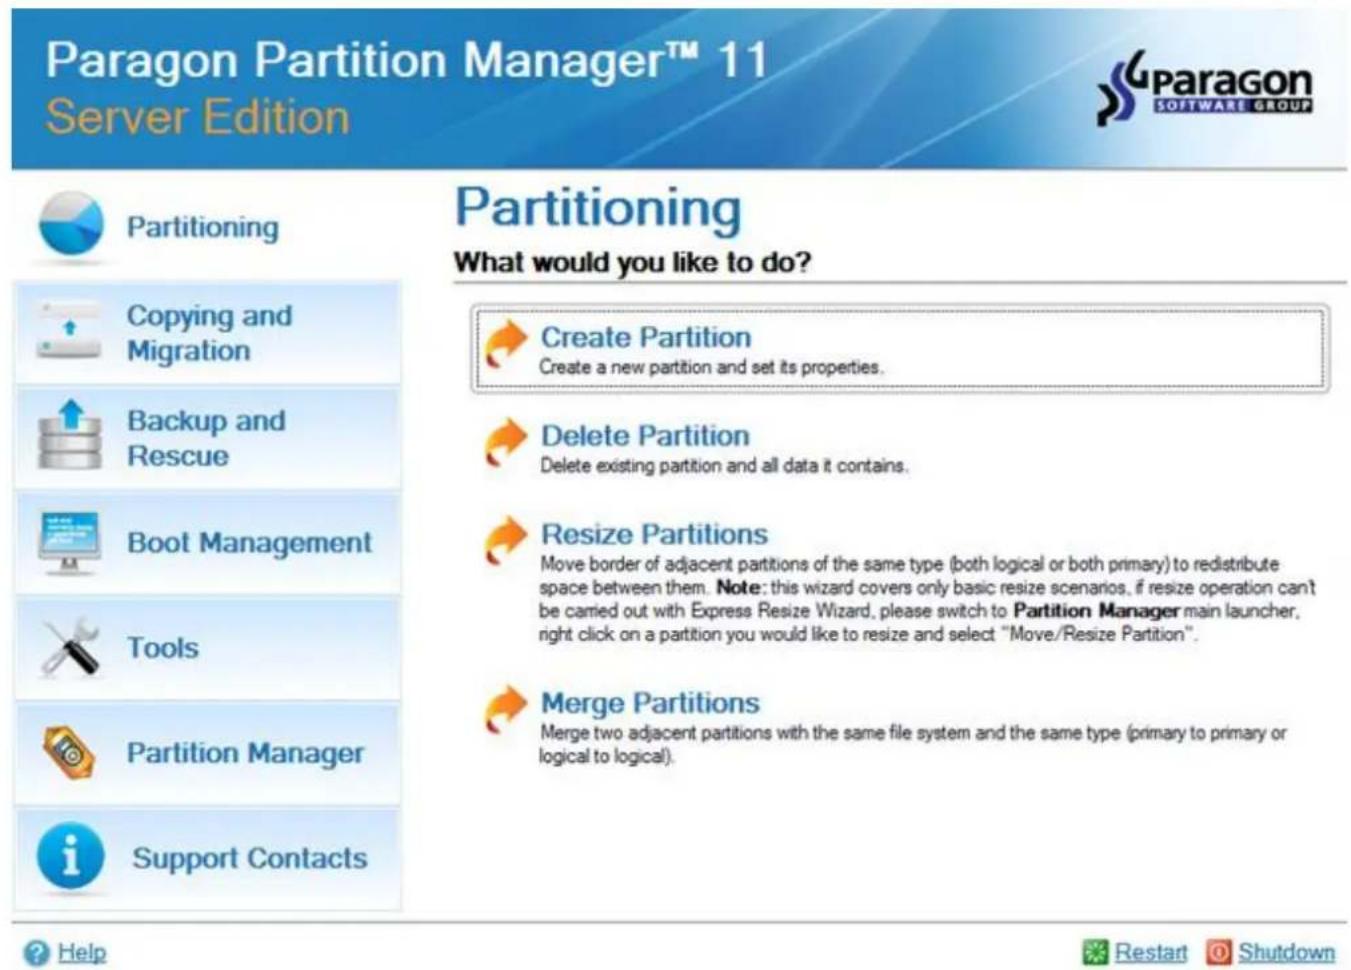
- Click on the required operation to start. Hints on the selected at the moment item will help you make the right choice.
- Consult the help system by pressing ALT+F1 to know more on the subject.

Our WinPE 3.0 based recovery environment offers excellent hardware support. However in case it doesn't have a driver for your disk controller, your hard disks will be unavailable.
Please consult the Adding specific drivers scenario to know how to tackle this issue.
Basic Concepts
This chapter explains terms and ideas that show how the program works. To understand these helps to obtain a general notion of the operation performance and makes it easier for the user to operate the program.
System and Data Protection
The data protection issue is a growing cause of worrying for more and more people today. Indeed, it is hardly to find a person who will be particularly happy when all precious information on the hard disk is irreversible lost as a result of its malfunction. So how this tragedy can be prevented?
Backup Storage
Our program supports major present day techniques of storing backup images. Let's take a closer look at them all to understand what kind of storage is able to provide better security:
- You can place a backup image to a local mounted or unmounted (without drive letter assigned) partition.
Despite the fact that it is the most convenient way, try not to use it. You can delete your backup just by accident or lose it as a result of a hardware malfunction, or a virus attack; - You can place a backup image to an external mounted storage to provide for a higher level of data protection and system independence;
- You can place a backup image to external media (CD/DVD) to guarantee a high level of data protection as long as the backup media is kept secure;
- You can place a backup image to a network drive to stand a better chance of success in case of a hard disk failure. Moreover, by storing it on a special-purpose server you may be pretty sure nothing will happen to it.
Adaptive Restore
Windows family operating systems are notorious for their excessive sensibility to hardware, especially when it turns to replacement of such a crucial device as HDD controller or motherboard – actually Windows will most likely fail to boot as a result of this operation.
With our technology (available in the P2P Adjust OS Wizard) you can make your Windows bootable on some other computer by allowing automatic injection of all required drivers and the other actions crucial for a migration of this kind. Actually, this operation for Windows 2000/XP/Server 2003 and Windows Vista/7/Server 2008 differs a bit, so does the wizard's work algorithm.
Adaptive Restore for Windows 2000/XP/Server 2003
It actually implies three operations:
- Providing the ability to change the Windows kernel settings to the most suitable for your new configuration. The program will automatically add all available Windows HAL and kernels to the boot menu (the boot.ini file) to choose the required platform in case your system fails to boot (Uniprocessor, Multiprocessor, or Old legacy PC without ACPI). You can later remove them from the menu either under Windows or with Boot Corrector.

If you've got a 64-bit operating system, no options will be added to the boot menu.
- Automatic replacement of the boot critical drivers (HDD controller, PS/2 and USB mouse and keyboard) to the default Windows drivers to provide the maximum level of compatibility. Once your Windows starts up, it will initiate reconfiguration of all Plug'n'Play devices, so we do recommend you to provide the latest drivers for your motherboard and processor at this step, as it can considerably improve the overall performance of your system.
- The option to inject 3rd party drivers to guarantee your system will start up on the new hardware. Actually you've got two options, either provide a path to your own driver repository (collection of all drivers to your hardware devices located in one folder) for the program automatically pick and install only those drivers required for your OS (recommended), or manually specify drivers critical for the guaranteed startup of your system on the new hardware.
Adaptive Restore for Windows Vista/7/Server 2008
It is based on the fact that these operating systems do not delete their distributive driver repositories after the setup, but simply make them inactive in the Windows Registry. So thanks to our technology these driver repositories can be made available during the restore procedure to let Windows Vista/7 or 2008 Server automatically find and install any lacking driver with no action from your side required, what is very convenient.
Anyway, not all drivers can be found in the built-in driver repositories, especially when you've got to do with specific SCSI or Serial ATA controllers. For situations of this kind you've got the option to inject any 3rd party driver, either by providing a path to your own driver repository (collection of all drivers to your hardware devices located in one folder) for the program automatically pick and install only those drivers required for your OS (recommended), or manually specifying drivers critical for the guaranteed startup of your system on the new hardware.
Adaptive Restore Application
Let's consider a number of situations when the Adaptive Restore feature can help you out:
- If you need to upgrade to newer hardware while keeping all your programs and settings intact;
- If you need to replace failed hardware and cannot find an exact match for your original system specifications.
Known Issues
- After transferring Microsoft Vista and later versions to different hardware, you will need to re-activate license of the system. It's normal behavior as these systems keep tracking any change of hardware. Re-activation is legally justified in this case, as you transfer your system to another PC.
- If you've installed several operating systems on one partition, we can only add drivers to the latest version of OS. Microsoft highly recommends that you install an operating system on a separate partition.
- Please note drivers are not cached during selection. That's why if you select a driver to add to the system, but it's already unavailable during the operation, the program will end the operation with an error.
Paragon Hot Processing & Volume Shadow Copy Service
Offline versus Online Data Processing
In the course of time there have been developed various methods of data processing. Despite different work concept, all of them can be divided into two principal groups: offline (cold) and online (hot) data processing techniques.
As the name infers, offline data processing can only be accomplished when the data is in consistent state (the operating system and all the applications are completely shut down). Actually it is the most preferable way of image creation or data cloning, since software can obtain an exclusive right to process data that guarantees high level of operating efficiency. However, the offline data processing is absolutely out of question when dealing with 24/7 production environments.
In contrast, online data processing enables to create a consistent snapshot even as the data is currently modified. It is particularly useful for systems with high availability requirements, but it won't be accomplished until all active transactions are complete. The point is to provide a coherent state of all open files and databases involved in a process, taking into account that applications may still keep writing to disks. As a result an online data processing cannot boast high operating speed.
Our program supports both offline and online methods of data processing. As far as online method is concerned it offers its own hot processing algorithm together with the possibility to use snapshot technologies provided by the Microsoft VSS framework.
Paragon Hot Processing Technology
Paragon Hot Processing is an online copy/backup technology for Windows NT+ family operating systems. Developed back in 2001, nowadays it is integrated with all copy/backup solutions offered by the company.
Paragon Hot Processing is not exactly a snapshot technology, though it has much in common with it. During an online copy/backup, the program uses the kernel mode driver HOTCORE.SYS to intercept and control disk write activity of applications and the operating system. The hotcore driver as an integral part of the program is installed during the setup procedure (that's why the system reboot is required to complete the setup procedure). For the most part the driver is in the idle mode until it is activated with the program. While in this mode it bypasses any calls having no effect on the overall system performance, but a few kilobytes of the system memory.
Paragon Hot Processing technology offers copy/backup of locked partitions and hard disks under Windows NT+ family operating systems providing both high operating efficiency as well as low hardware requirements.

It is not recommended to use Paragon Hot Processing with active SQL Server, Exchange or Oracle databases since the backup image contents may be corrupted.
Volume Shadow Copy Service
Microsoft Volume Shadow Copy Service (VSS) is designed to provide the copy/backup infrastructure for the Microsoft Windows XP/Vista/Server 2003/2008 operating systems. It offers a reliable mechanism to create consistent point-in-time copies of data known as shadow copies. Developed by Microsoft in close cooperation with the leading copy/backup solution vendors on the market, it is based on a snapshot technology concept.
Initiated by a VSS aware copy/backup utility, VSS creates snapshots for the selected volumes and represents them as virtual read-only devices, called volume shadow copies. Once the shadow copies are created, the copy/backup utility starts processing the data while applications keep writing to original volumes.
Unlike Paragon Hot Processing the VSS technology provides a unique possibility to make a synchronous snapshot of multiple volumes. This very feature can be particularly beneficial when backing up active SQL Server 2003, Exchange 2003 or Oracle databases located on multiple volumes the way it is recommended by Microsoft to improve the level of database performance and reliability, thus providing 100-percent data consistency.
Dynamic Disks
As you probably know, MS-DOS, Microsoft Windows 95/98/Me/NT/2000/XP/Vista/Server 2003/2008 support four primary partitions per physical hard disk, one of which can be extended. Certainly there is the possibility to create logical drives within the extended partition. Such types of disks are called basic. Windows XP Professional, Windows 2000, Windows Vista and Windows Server 2003/2008 follow the same strategy: You can have a maximum of four primary partitions, one of which can be an extended partition with logical drives. However, these operating systems also introduce a new disk configuration type - dynamic disk - which must be understood to effectively configure and manage hard disks.
Dynamic disk is a physical disk that doesn't use partitions or logical drives. Instead, it contains only dynamic volumes. Regardless of what format you use for the file system, only Win2K computers can access dynamic volumes directly. However, computers that aren't running Win2K can access the dynamic volumes remotely when connected to the shared folders over the network.
Dynamic disks can co-exist on a system with basic disks. The only limitation is that you cannot mix Basic and Dynamic disks on the same hard drive.
There are five types of dynamic volumes: simple (uses free space from a single disk), spanned (created from free disk space that is linked together from multiple disks), striped (a volume the data of which is interleaved across two or more physical disks), mirrored (a fault-tolerant volume the data of which is duplicated on two physical disks, and RAID-5 volumes (a fault-tolerant volume the data of which is striped across an array of three or more disks).
With dynamic storage, you can perform disk and volume management without the need to restart Windows.
Limitations:
- Dynamic disks are not supported on portable computers.
• Dynamic disks are not supported on Windows XP Home Edition-based computers. - You cannot create mirrored volumes or RAID-5 volumes on Windows XP Home Edition, Windows XP Professional, or Windows XP 64-Bit Edition-based computers.
Thus, the dynamic disk is a new way of looking at hard disk configuration. Dynamic disks offer you more management flexibility without the partition limitation of basic disks. Dynamic disks can contain an unlimited number of volumes, but they cannot contain partitions or logical drives. Dynamic storage can be particularly beneficial for large-scale businesses when dealing with many physical hard disks involving complex setup.
GPT versus MBR
GUID Partition Table (GPT) is the next generation of a hard disk partitioning scheme developed to lift restrictions of the old MBR. Being a part of the Extensible Firmware Interface (EFI) standard proposed by Intel to replace the outdated PC BIOS, it offers a number of crucial benefits:
- Up to 128 primary partitions for the Windows implementation (only 4 in MBR);
-
The maximum allowed partition size is 18 exabytes (only 2 terabytes in MBR);
-
More reliable thanks to replication and cyclic redundancy check (CRC) protection of the partition table;
- A well defined and fully self-identifying partition format (data critical to the platform operation is located in partitions, but not in un-partitioned or hidden sectors as this is the case with MBR).
Apple Boot Camp
Boot Camp is a special utility to help you set up a dual boot system (Mac OS X and 32-bit Windows XP/Vista) on Intel-based Macs. It enables to securely re-partition your hard disk (resize an existing HFS+ partition to create a separate partition for Windows) and then launch the installation process. With Boot Camp all the necessary drivers will be at your disposal. Moreover after Windows has been installed it will serve as a boot manager to choose what operating system to start up.

It is strongly recommended not to modify the hard disk configuration with Windows Disk Manager. Otherwise it may lead to unexpected consequences, right up to BSOD and inability to boot in Windows XP/Vista. Please use our program to correctly update both MBR and GPT.
64-bit Support
The bulk of software today is written for a 32-bit processor. It can meet the requirements of almost any end user. However that is not the case when dealing with servers processing large amounts of data with complex calculations of very large numbers. That is where 64-bit architecture comes into play.
It can boast improved scalability for business applications that enables to support more customer databases and more simultaneous users on each server. Besides a 64-bit kernel can access more system resources, such as memory allocation per user. A 64-bit processor can handle over 4 billion times more memory addresses than a 32-bit processor. With these resources, even a very large database can be cached in memory.
Although many business applications run without problems on 32-bit systems, others have grown so complex that they use up the 4 GB memory limitation of a 32-bit address space. With this large amount of data, fewer memory resources are available to meet memory needs. On a 64-bit server, most queries are able to perform in the buffers available to the database.
Some 32-bit applications make the transition to the 64-bit environment seamlessly others do not. For instance, system-level utilities and programs that provide direct hardware access are likely to fail. Our program offers a full-fledged support of the 64-bit architecture providing fault-tolerant work for such system dependent modules as Hot Processing.
Copy Operations
Hard drive duplication nowadays is becoming highly popular among PC users. That is due to some definite advantages it can offer. First of all, many people clone hard disks just to back up data for security reasons. The present day copy utilities enable to successfully transfer all on-disk information including standard bootstrap code and other system service structures, thus maintaining the operating system's working capability. In case of a system malfunction, the user can get the system back on track in minutes. No additional configuration is required, what is very convenient.
The second possible application is the upgrade of a hard disk to a new one. The capacity of a modern hard drive doubles every two years, thus opening up new possibilities for software developers. As a result programs become more complicated and require considerable amount of free space. One day the user realizes that there is no more free space left on the hard disk and the only way out is to upgrade. Usually that means that besides purchasing a new hard disk,
the user is to face a large re-installation procedure spanning several days of tedious work. But all of this can be avoided just by copying the contents of the old hard disk to a new one proportionally resizing the partitions.
And the last but not least is the copying of hard disks for cloning purposes. It may be of great use when setting up similar computers. There is no need for a system administrator to install an operating system from scratch on every one of them. It is enough just to configure one and then clone it to the others.
Drive Partitioning
As you probably know a hard drive is to be split into one or more partitions, since it cannot hold data until it is carved up and space is set aside for an operating system. Until recently most PCs used to have just one partition, which filled the entire hard disk and contained an OS. The situation has changed however, thanks to new cost-effective high capacity hard drives, thus opening up numerous possibilities for PC users, such as editing video, archiving music, backing up CD images, etc. Huge increase in space is great, but it poses a number of problems, most important of which are effective data organization and speed.
Large drives are always going to take longer to search than smaller volumes, and an operating system is going to have its work cut out both finding and organizing files. It is for this reason that many people decide to invest in multiple hard drives, but there is an easy solution – drive partitioning. Partitioning lets you divide a single physical drive into a number of logical drives, each of which servers as a container with its own drive letter and volume label, thus enabling the operating system to process data more efficiently. Besides partitioning makes it possible to organize data so that it is easy to find and manage. You can set aside, for instance, 40 GB of a 160 GB hard drive for the OS, 70 GB for storing video and another 50 GB for your favorite music collections to provide transparent data storage.
It is also worth mentioning to that with a hard drive properly partitioned, such routine operations as files defragmentation or consistency check will not be that annoying and time-consuming any more.
By detaching the OS from the rest of the data you can tackle one more crucial issue – in case of a system malfunction, you can get the system back on track in minutes by recovering it from a backup image located on the other partition of the hard drive.
But that is not all drive partitioning may be used for. If you are willing to play games in Windows while browsing the Internet in Linux, 100-percent sure that no virus will attack your PC, drive partitioning is a necessity. In order to run several OSs on a single hard drive you are to create a corresponding number of partitions to effectively delineate the boundaries of each OS.
Windows Components
In the given section you can find all the information necessary to successfully work with the Windows version of the product.
Interface Overview
This chapter introduces the graphical interface of the program. The design of the interface precludes any mistake being made on the part of the user. Most operations are performed through the system of wizards. Buttons and menus are accompanied by easy understandable icons. Nevertheless, any problems that might occur while managing the program can be tackled by reading this very chapter.
General Layout
When you start the program, the first component that is displayed is called the Launcher. It enables to run wizards and dialogs, to specify program settings, to visualize the operating environment and the hard disk configuration.
The Launcher's window can be conditionally subdivided into several sections that differ in their purpose and functionality:
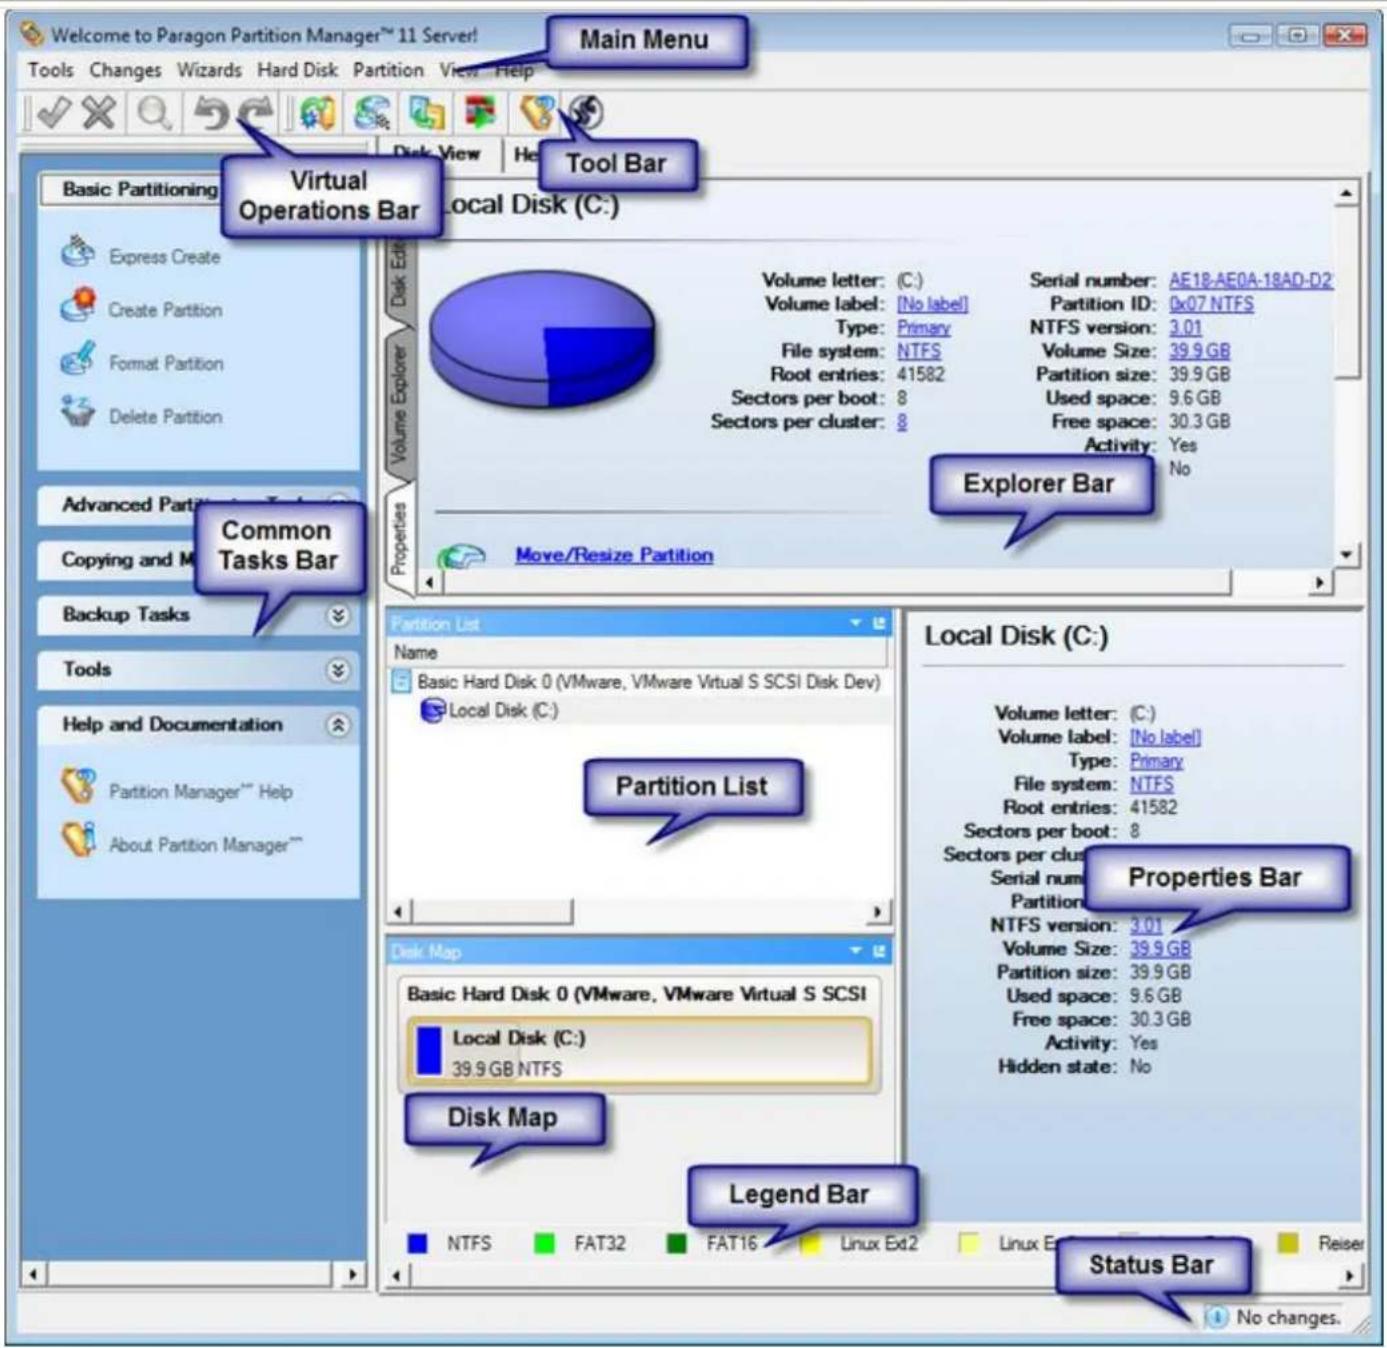
- Main Menu
- Tool Bar
- Virtual Operations Bar
- Common Tasks Bar
-
Explorer Bar
-
Disk Map
- Partition List
- Properties Bar
- Legend Bar
- Status Bar
A number of panels offer similar functionality with a synchronized layout. The program enables to conceal some of them to simplify the interface management.
All panels are separated by vertical and horizontal expandable sliders, allowing the user to customize the screen layout.
Main Menu
The Main Menu provides access to the entire functionality of the program. The available functions are as listed below:
| MENU ITEM | FUNCTIONALITY |
| Tools | |
| View Log Files | View logs on the carried out operations |
| Send Log Files | Compress and send the log to the Paragon Support Team |
| Setup Boot Manager... | Manage several operating systems on one computer |
| Recovery Media Builder... | Restore the system even when the current operating system cannot boot anymore |
| File Transfer Wizard... | Transfer data from any media |
| Settings... | Edit the general settings of the program |
| Exit | Exit the program |
| Changes | |
| Undo `the last virtual operation` | Cancel the last virtual operation on the List of Pending Operations |
| Redo `the last virtual operation` | Cancel the last undo virtual operation on the List of Pending Operations |
| View Changes... | Display the List of Pending Operations |
| Apply Changes | Launch the real execution of virtual operations |
| Discard All Changes | Cancel all virtual operations on the List of Pending Operations |
| Reload Disk Info | Refresh the current information about disks |
| Wizards | |
Copyright© 1994-2010 Paragon Software Group. All rights reserved.
| Express Create Partition... | Create an NTFS partition and make it ready for work |
| Create Partition... | Create a partition of any file system |
| Format Partition... | Format a partition of any file system |
| Delete Partition... | Delete a partition of any file system |
| Express Resize Partitions... | Increase free space on one partition by up-taking the unused space of an adjacent partition |
| Undelete Partitions... | Recover an accidentally deleted partition |
| Merge Partitions... | Merge adjacent partitions of NTFS, FAT or FAT32 file systems |
| Redistribute Free Space... | Redistribute available disk space of existed partitions |
| Install New OS... | Make your system ready to install a new operating system |
| Back up Disk or Partition... | Create a sector-based archive of an entire hard disk or separate partitions |
| Restore... | Restore an entire hard disk or separate partitions from the backup image |
| P2P Adjust OS... | Make your system bootable on different hardware |
| Copy Hard Disk... | Create a hard disk copy |
| Copy Partition... | Create a partition copy |
| Hard Disk | |
| Convert to Basic... | Convert a dynamic MBR disk containing simple volume(s) into a basic MBR disk |
| Convert to Basic MBR... | Convert a basic or a dynamic GPT disk containing simple volume(s) into a basic MBR disk |
| Update MBR | Update MBR (Master Boot Record) of the selected hard disk |
| Change Primary Slots... | Modify the primary partitions enumeration for the selected hard disk |
| Edit/View Sectors... | View/edit sectors of the selected hard disk |
| Properties... | Get in-depth information on the properties of selected hard disk |
| Partition | |
| Create Partition... | Create a partition |
| Format Partition... | Format a partition |
| Delete Partition... | Delete a partition |
| Move/Resize... | Move/Resize the selected partition |
| Convert File System... | Convert file system of the selected partition |
| Assign Drive Letter... | Assign drive letter to the selected partition |
| Remove Drive Letter... | Remove drive letter for the selected partition |
| Hide Partition... | Make the selected partition unavailable for the operating system |
| Unhide Partition... | Make the selected partition available for the operating system |
| Mark Partition as Active | Make the selected partition bootable by default |
| Mark Partition as Inactive | Make the selected partition non-bootable by default |
| Change Cluster Size... | Change cluster size of the selected partition |
| Change Volume Label... | Change volume label of the selected partition |
| Change Serial Number... | Change serial number of the selected partition |
| Downgrade NTFS version... | Decrease version of the selected NTFS partition |
| Change Partition ID... | Change identifier of the selected partition |
| Make Partition Primary... | Make the selected partition Primary |
| Make Partition Logical... | Make the selected partition Logical |
| Test Surface... | Test surface of the selected partition/block of free space |
| Check File System Integrity... | Check the selected partition for possible file system errors |
| Edit/View Sectors... | View/edit sectors of the selected partition |
| Properties... | Get in-depth information on the properties of selected partition |
| View | |
| Layouts | Manage the Launcher layout with several predefined profiles |
| Toolbar | Manage the Tool Bar representation: show / hide standard and navigation buttons, text labels and large icons |
| Status Bar | Display the Status Bar |
| Common Tasks Bar | Display the Common Tasks Bar |
| Disk Map Legend | Display the Disk Map legend |
| Properties and Commands | Display the Explorer Bar |
| Disk Map Location | Select whether the Disk Map will be located on the top of the main window or at the bottom |
Copyright© 1994-2010 Paragon Software Group. All rights reserved.
| Help | |
| Help | Open the Help system (you can also do it by pressing F1) |
| About | Open the dialog with information about the program |

The Main Menu contents available at the moment may vary depending on the selected object.
Tool Bar
The Toolbar provides fast access to the most frequently used operations:
| BUTTON | FUNCTIONALITY |
 | Create an image of a hard disk or partition |
 | Resize two adjacent partitions |
 | Copy a hard disk |
 | Defragment the selected partition |
 | Open the Help system |
Virtual Operations Bar
The program supports previewing the resulting layout of hard disks before actually executing operations (so-called virtual mode of execution). In fact, when the virtual mode is enabled, the program does not accomplish operations immediately, but places them on the List of Pending Operations for later execution.
The Virtual Operations Bar enables to manage pending operations.
| BUTTON | FUNCTIONALITY |
 | Cancel the last virtual operation on the List of Pending Operations |
 | Cancel the last undo virtual operation on the List of Pending Operations |
 | Display the List of Pending Operations |
 | Launch the real execution of virtual operations |

Cancel all virtual operations on the List of Pending Operations
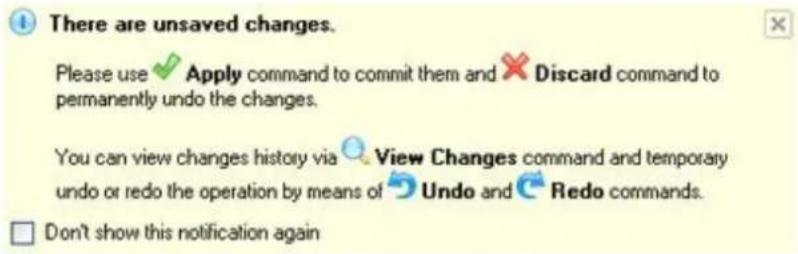
Virtual mode is an effective way of protection from any troubles, since no operations will be executed until clicking the Apply button for confirmation, thus giving a second chance to weigh all pros and cons of this or that particular operation. The program politely reminds the user that there are unsaved changes by showing the following window:

Common Tasks Bar
The Common Tasks Bar is located on the left side of the main window. It is intended for easy access to the program's wizards.
The bar contains several tabs named Basic Partitioning Tasks, Advanced Partitioning Tasks, Copy and Migration Tasks, Backup Tasks, Tools and News and Documentation. Each of these contains a separate button bar which can be folded by clicking it.
| Basic Partitioning Tasks | |
 Express Create Express Create | Starting the Express Create Partition Wizard to create an NTFS partition and make it ready for work. |
 Create Partition Create Partition | Starting the Create Partition Wizard to create a partition of any file system. |
 Format Partition Format Partition | Starting the Format Partition Wizard to format an existing partition to one of the file systems supported by the program. |
 Delete Partition Delete Partition | Starting the Delete Partition Wizard to delete a partition of any file system. |
| Advanced Partitioning Tasks | |
 Express Resize Express Resize | Starting the Express Resize Partitions Wizard to redistribute free space between two adjacent partitions. |
 Merge Partitions Merge Partitions | Starting the Merge Partitions Wizard to merge adjacent partitions of NTFS, FAT, FAT32 file systems. |
 Redistribute Free Space Redistribute Free Space | Starting the Redistribute Free Space Wizard to redistribute available disk space of existing partitions. |
 Undelete Partitions Undelete Partitions | Starting the Undelete Partitions Wizard to recover accidentally deleted partitions. |
| Copy and Migration Tasks | |
 Copy Hard Disk Copy Hard Disk | Starting the Copy Hard Disk Wizard to copy a hard disk. |
 Copy Partition Copy Partition | Starting the Copy Partition Wizard to copy a partition. |
 P2P Adjust OS P2P Adjust OS | Starting the P2P Adjust OS Wizard to make your system bootable on different hardware |
| Backup Tasks | |
 Back up Disk or Partition Back up Disk or Partition | Starting the Sector Backup Wizard to create an archive of a hard disk or separate partitions. |
 Restore Disk or Partition Restore Disk or Partition | Starting the Restore Wizard to restore a hard disk, separate partition, or files from the backup image. |
| Tools | |
 File Transfer Wizard File Transfer Wizard | Starting the File Transfer Wizard to transfer data from any media. Besides it provides access to Paragon backups as regular folders to browse through their contents or copy required files. |
 Boot Manager Wizard Boot Manager Wizard | Starting the Boot Manager Setup Wizard to easily manage several operating systems on one computer. |
 Install new OS wizard Install new OS wizard | Starting the Install New OS Wizard to install a new operating system. |
| Help and Documentation | |
 Partition ManagerTM Help Partition ManagerTM Help | Launching the help system (you can also do it by pressing F1). |
 About Partition ManagerTM About Partition ManagerTM | Opening the page which contains information about the program. This page will be displayed in the Explorer Bar. |
Disk Map
The Disk Map is displayed in the Explorer Bar when the Disk View tab is selected. It is located either at the top or at the bottom of the window, depending on the state of the Disk Map Location option (Main Menu: View > Disk Map Location).
As the name infers, the Disk Map displays the layout of physical and logical disks. Physical disks are represented with rectangle bars that contain small-sized bars. These small-sized bars represent logical disks. Their color depends on the file system of the appropriate partition.

Large-sized bars display the following information about physical disks:
- Manufacturer,
- Model.
Small-sized bars display the following information about logical disks:
- Serial number,
- Drive letter,
- Total size,
- File system.
Furthermore, it is possible to estimate the used disk space by looking at the size of the bar's shaded area. The program offers to choose from several types of the disk layout scaling. It's done especially to increase the program usability. For instance, if you've got a high capacity hard drive containing both very large (more than 100 GB) and rather small (less than 10 GB) partitions, you can select the logarithmic type to make all partitions readable, otherwise (selecting the linear type) you won't be able to see small partitions at all, but thing strips. On the other hand, if the proportional disk layout is critical for you, the linear type is exactly what you need.
Nevertheless there's a compromise solution – linear scaling with the minimal limit to small partitions. So if a partition is too small it will remain readable.
Just click on the arrow icon on the top right side of the Disk Map to select the desired scaling type.
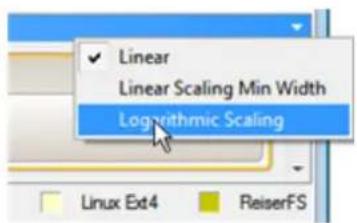
Disk Map is synchronized with the Explorer Bar. Thus by selecting a disk on the Disk Map, the Explorer Bar will automatically display detailed information on it.

The drag-and-drop functionality is not available when the logarithmic type of the disk layout is selected.
Explorer Bar
The Explorer Bar is located in the center of the main window which emphasizes its importance. The bar displays reference information including:
• The help system;
- General information on the product including its name, version and a list of helpful links;
• Detailed information about disks selected on the Disk Map;
• Volume Explorer utility; - Disk Editor utility.
According to these categories the Explorer Bar has several tabs:
- Disk View, which offers the user the following options:
- Partition List to get a clear-cut picture of the current state of the system hard disks/partitions;
- Disk Editor to view/edit sectors of the selected partition/hard disk;
- Volume Explorer to browse and export contents of the selected partition/hard disk;
- Properties to view detailed information on the selected partition/hard disk in the bright graphical form.

You can switch between these three components by clicking tabs on the left side of the Explorer Bar.
- Help, which contains the program help and general information on the product.
You can access the desired information by clicking on the appropriate tab.
The Explorer Bar is a fully-functional embedded HTML browser, which offers the possibility to address, for example, the company's website to look through important technical notes or download the latest updates without having to close the program.
The program help is also HTML-oriented. You can read it and follow external links from to get additional information.
To easily navigate through browsed pages, the program provides the following functionality:
| BUTTON | FUNCTIONALITY |
| Return to the previously browsed page | |
| Open the next browsed page | |
| Stop loading the current page | |
| Refresh the contents of the current page |
Partition List
The Partition List is another helpful tool that enables you to get a clear-cut picture of the current state of the system hard disks/partitions. Partitions are sorted according to their starting position. For every item of the list there is the possibility to call the context-sensitive popup menu with available operations. Besides, the program provides detailed information on all hard disks/partitions found in the system including the following properties:
- Name,
- Volume label (if exists),
- Partition type (Primary/Extended /Logical),
- File system type,
- Size,
- Amount of used and unused (free) space,
- Start/End cylinder,
- Start/End head,
- Start/End sector
- Free size in sectors/bytes
- Active/Inactive attribute
- Hidden/Unhidden attribute
You may customize outlook of the Partition List by clicking on the arrow icon on the top right side of the panel.
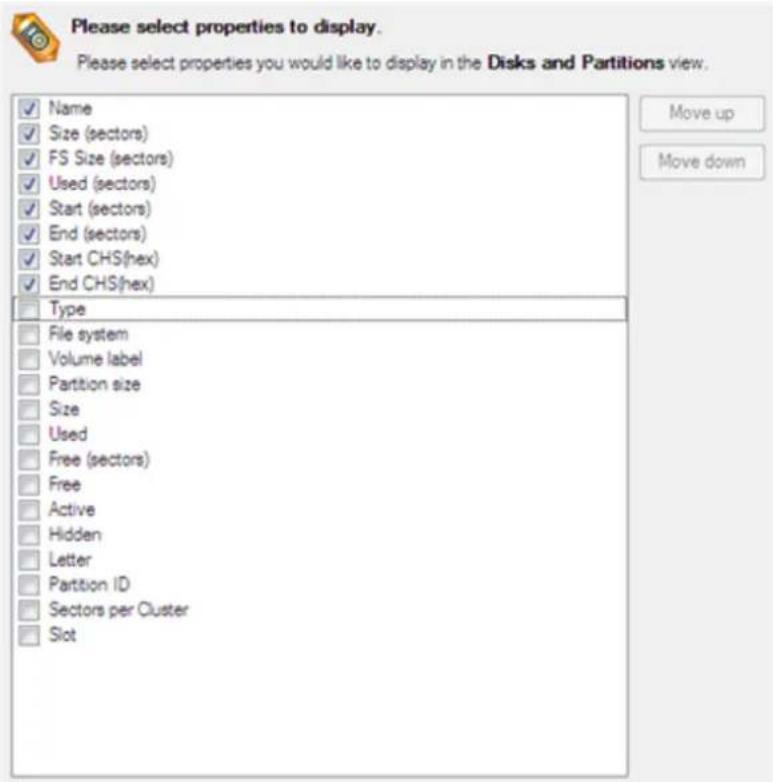
By marking a checkbox opposite the required item you can choose whether to display it or not. Besides, you can change its order by pressing the Move up or Move down buttons.
If you don't need the Disk Map, please click the shown below icon to disable it:
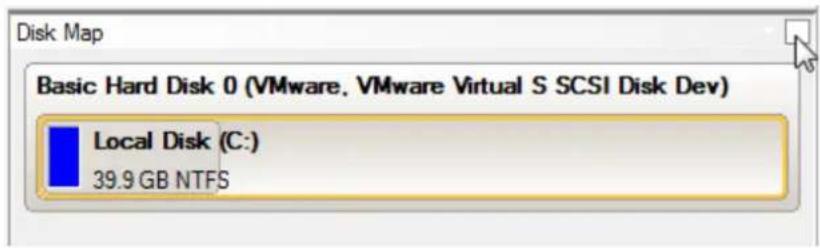
Properties Bar
The Properties Bar provides information on the selected at the moment partition/hard disk:
For a hard disk
- Model,
- Serial number,
• Type of hard disk (basic or dynamic),
• Total size (in GB),
• Information on geometry of the disk (amount of sectors per track, heads and cylinders).
For a partition
- Drive letter assigned to the disk,
• Volume label (if available),
• Type of the logical disk, - File system (represented by the color of the graph and the selected bar),
• Total size, used space and free space (in GB or MB).
Besides you can modify practically any partition property by clicking on the required value.
Legend Bar
The Legend Bar explains the color scheme used for disk and partition presentation. You can hide (or show) the bar with the appropriate Main Menu item: View > Disk Map Legend. When it is activated it can be found at the bottom of the Explorer Bar.
The program distinguishes between the following types of known file systems:
- FAT16/32,
- NTFS,
- Linux Ext2/3/4,
- Linux ReiserFS,
- Apple HFS.
Status Bar
This is the bottom part of the main window. The Status Bar displays menu hints, for each item the cursor points to.
The user can hide (or show) the bar with the appropriate Main Menu item: View > Status Bar.
Settings Overview
The Settings dialog is available from the Main Menu: Tools > Settings. All the settings are grouped into several sections, which functions are described in the following paragraphs. The list of sections is placed on the left side of the dialog. By selecting a section from the list, you can open a set of options.

To get a detailed description to any setting, control, or field of the program just click the hint button and then the object you need.
General Options
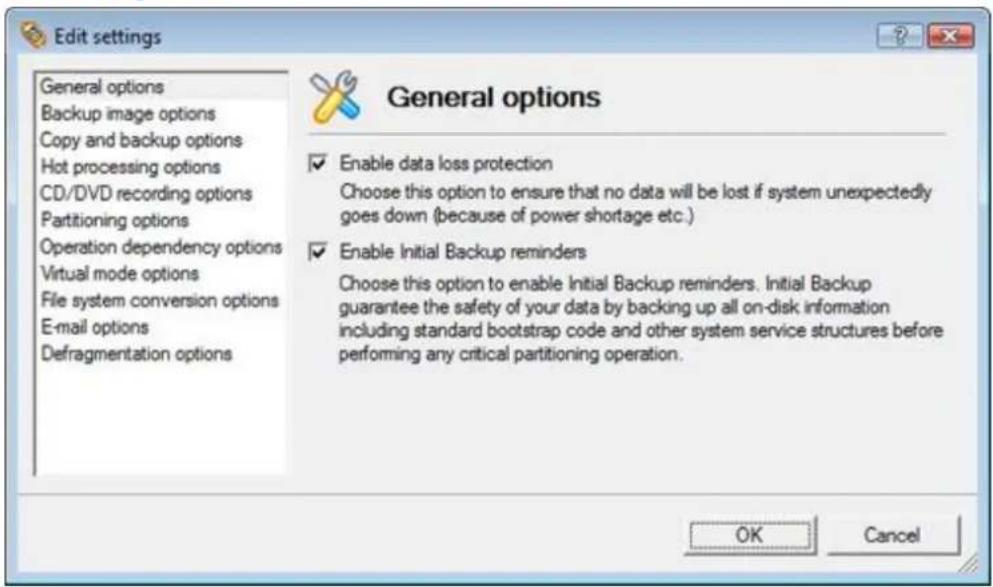
This section contains a set of general options that will be taken into account during any operation carried out with the program:
- Enable data loss protection. Mark the checkbox to make the program work in the fail-safe mode (also referred to as the data-loss protection mode), which ensures reliability for operations by maintaining a special journal. In case of a hardware malfunction, power outage or an OS failure happened in the middle of a data-sensitive operation (resize, move, merge, redistribute, change cluster size, etc.), the program will ask to insert the bootable recovery media and automatically complete the interrupted operation, thus reviving the corrupted partition.

It is strongly recommended to enable this option.
- Enable Initial Backup reminders. If this option is marked, the program will automatically offer to make a backup before accomplishing any critical partitioning operation, thus minimizing the risk of data loss.
Backup Image Options

This section contains a set of options that will be taken into account during restore operations:
- Control archive integrity. Mark the checkbox to guarantee that all backup images created with the program are 100 percent flawless. If you decided not to control the archive integrity, the backup operation would take about 3-5% less time.
- Set image file names automatically. Mark the checkbox to make the program automatically set a file name for every volume of a complex backup image. Otherwise you will need to do it manually during the backup operation.
- Compression level. From the pull-down list you can select the desired compression level for backup images that will be used by default.
- Enable image splitting. Mark the checkbox to automatically split every backup image to volumes of a particular size.

Splitting images enables to tackle problems caused by a maximum file size limitation of some file systems.
• Maximum split size. With the spinner control you can specify a maximum size for backup volumes.
Partitioning Options
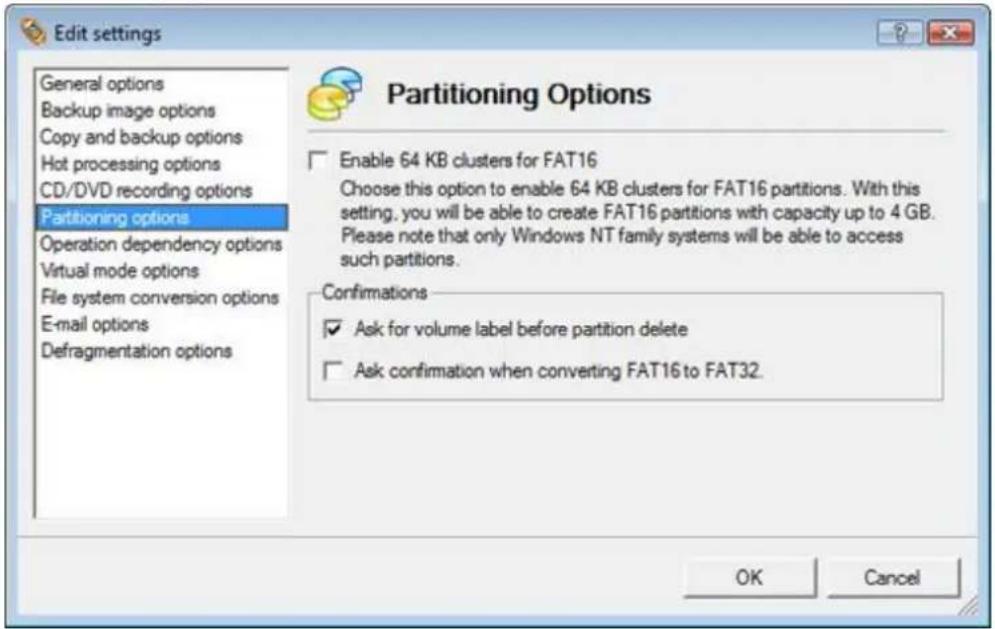
This section contains a set of options that will be taken into account during partitioning operations:
- Enable 64 KB cluster size for FAT16. Mark the checkbox to enable 64KB clusters for FAT16 partitions. Thus you will be able to create FAT16 partitions up to 4GB in size

Due to the maximum cluster size of 32KB for Windows 95/98/ME or MS DOS, FAT16 partitions larger than 2GB are not reliably accessible under these operating systems.
- Request confirmation before partition deletion. Mark the checkbox to activate an additional security mechanism. Thus when going to delete a partition you will be automatically requested to enter its label.
- Request confirmation when converting FAT16 to FAT32. Mark the checkbox to automatically request confirmation before converting FAT16 to FAT32. There are a number of situations when this kind of conversion is the only way out to accomplish the operation. For instance, you are going to migrate your system to a larger hard disk with the proportional resize of existing partitions, what is very convenient. As a result you can get original FAT16 partitions go beyond the 4GB limit. Thus without conversion to FAT32, this operation will in no way be possible to accomplish. The same goes for any copy hard disk/partition or restore hard disk/partition operation involving an extra upsizing.
General Copy and Backup Options
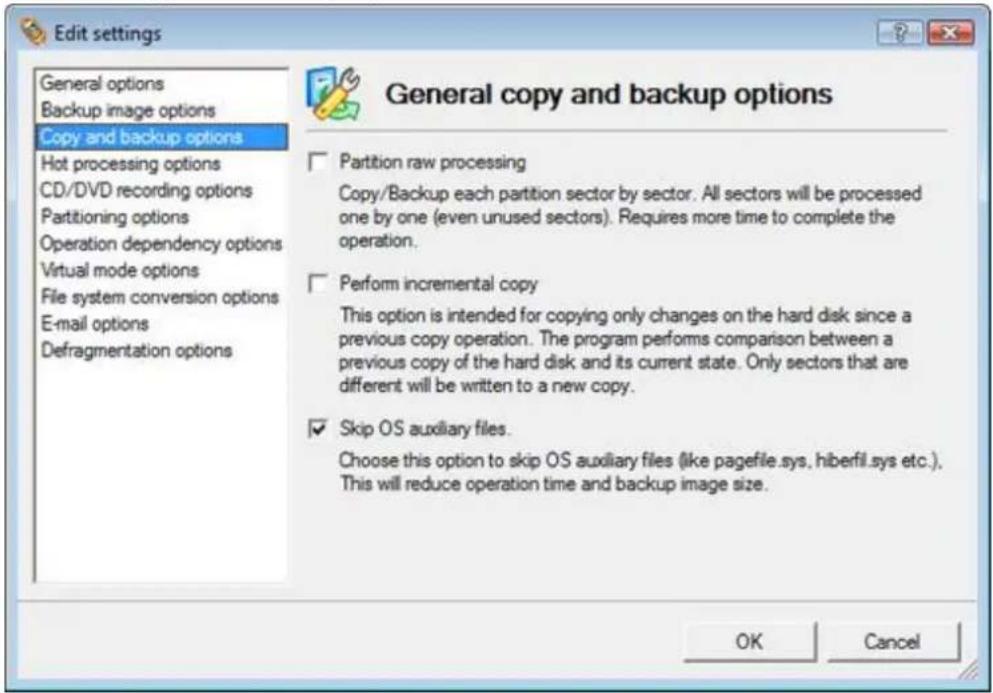
This section contains a set of options that will be taken into account during copy and backup operations:
- Partition raw processing. Mark the checkbox to copy a partition in the sector-by-sector mode to successfully process unknown file systems. However it is not recommended to enable this option when working with supported file systems as it takes more time to accomplish the operation.
- Perform incremental copy. Mark the checkbox to only copy changes on the hard disk from the moment of the last copy operation. The program will perform comparison between a previous copy of the hard disk and its current state. Only sectors that are different will be updated, thus considerably decreasing the amount of data to write.
- Skip OS auxiliary files. Mark the checkbox to skip OS auxiliary files (like pagefile.sys, hiberfil.sys, etc.), thus reducing the operation time and the resulted size of the backup image.
CD/DVD Recording Options
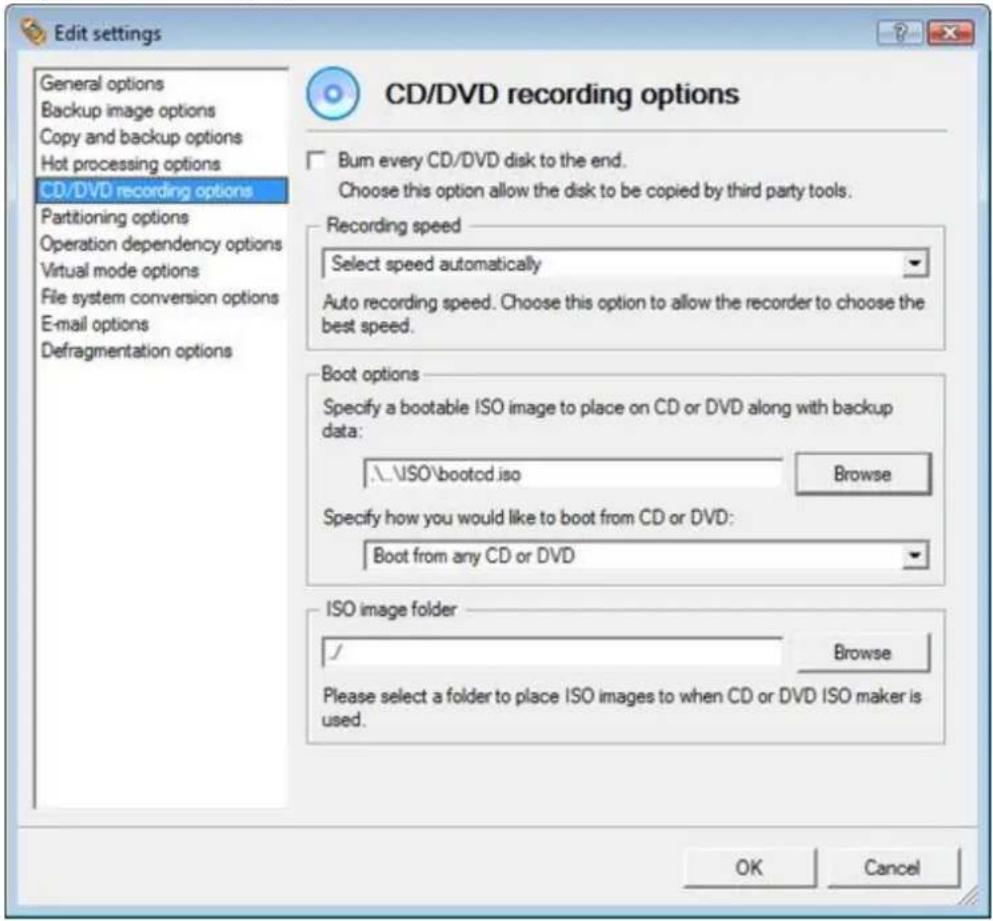
This section contains a set of options that will be taken into account during CD/DVD burn operations:
- Burn every CD/DVD to the end. By default, the program does not create ISO 9660 compliant burning sessions, as it processes data on-the-fly and can only estimate the resulted session size. That's why no third party tool will get access to the recorded data. To tackle the issue, mark the checkbox to make the program create a standard Disk-at-Once session. It may slow down the burning process, as every CD/DVD will be recorded up to the end, no matter how much actual information to contain.
- Recording speed. The user may define how fast a CD/DVD will be recorded (minimum, normal and maximum). Besides there is an automatic mode when the program will set the most appropriate speed for every CD/DVD.
- Bootable ISO image. That's the image to be placed together with the backup data. By default, the program offers its own bootable ISO image, which contains a Linux/DOS recovery environment. However, the user is free to use any bootable ISO image.
- CD/DVD boot capability. The program enables to choose whether any recorded CD/DVD will be bootable, or only the first one for a session, or without that function at all.
- Folder where the ISO image is to be placed. When the user decides not to physically burn a CD/DVD, but create an ISO image file, this very folder will be used to contain these images.
Hot Processing Options
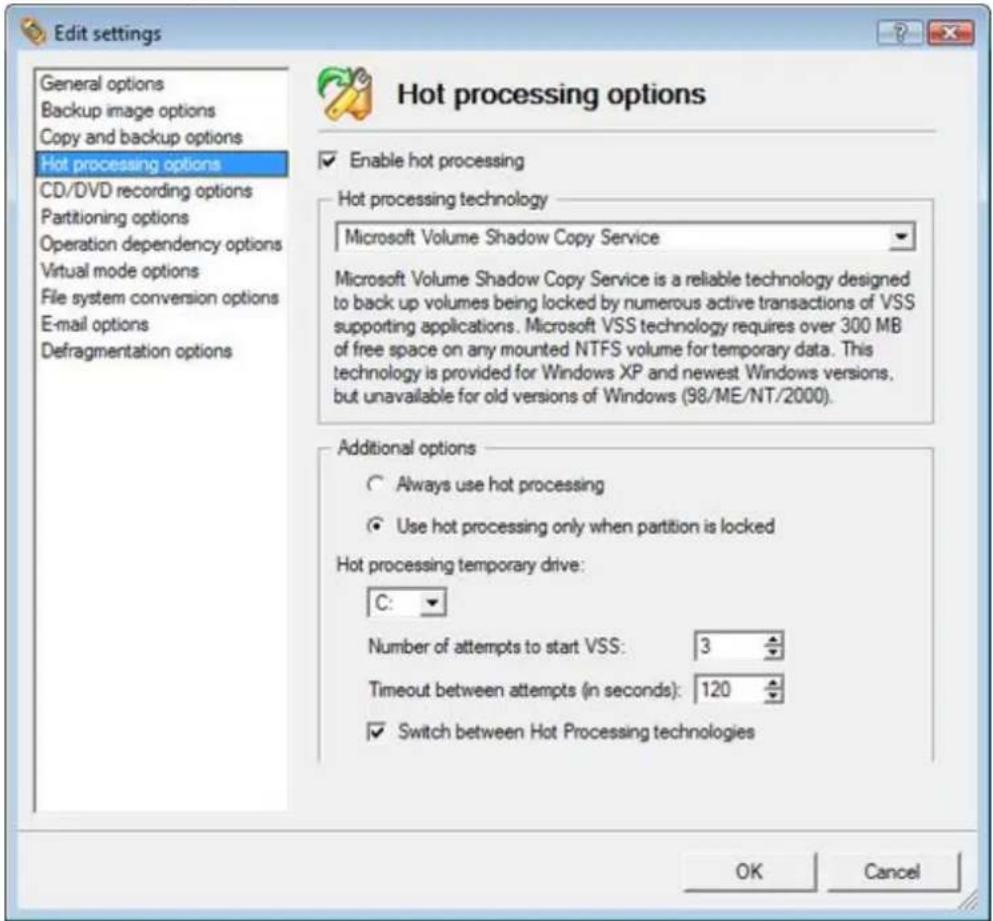
In this section you may configure the hot processing mode:
- Enable hot processing. Mark the checkbox to enable the so called hot data processing mode that is specially designed to process data without restarting your operating system.
• Hot processing technology. From the pull-down list you can select the required hot processing technology. - Always use hot processing. Select the option to process partitions without making them locked. Thus you will be able to keep working with them as usual.
- Use hot processing only when partition is locked. Select the option to use the hot processing only when partitions are locked and cannot be processed without restarting the computer. Please keep in mind, that once you start any operation on a partition in this mode, it will automatically be locked by the program, thus you won't be able to keep working with it as usual.
- Hot processing temporary drive. Here you can select a disk drive that will be used to store the temporary hot backup data (by default – C:).
- Attempts to start VSS. Here you can set how many attempts to start Microsoft VSS the program is to do before automatically rebooting the system and accomplishing the operation in a special boot-up mode.
- Timeout between attempts (in seconds). Here you can set a time period between different attempts to start Microsoft VSS.
- Switch between hot processing technologies. Mark the checkbox to automatically switch between Paragon Hot Processing and Microsoft VSS if one of them is unavailable at the moment.
E-Mail Options
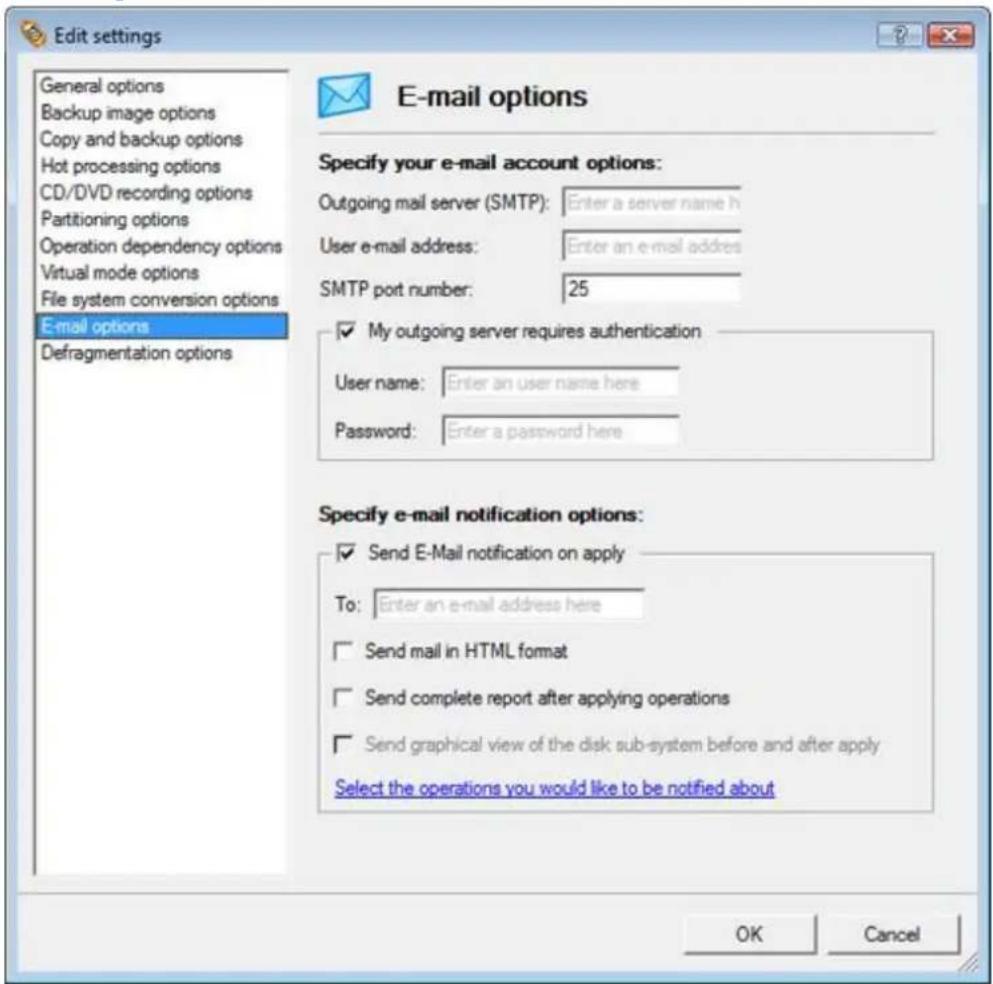
This section contains a set of options that will be taken into account during the Send log files and Send e-mail notification operations:
- Outgoing mail server (SMTP). To send messages by using the built-in mail client, it is necessary to have access to a computer running an SMTP (Simple Mail Transfer Protocol) server. All outgoing messages are first sent to the SMTP server, which in its turn delivers them to the required recipients. The address may be represented as a traditional Internet host name (e.g.: mail.com) or as an IP numeric address (e.g. xxx.xxx.xxx.xx).
- User e-mail address. Specify an e-mail address that has been assigned by the Internet Service Provider or organization's e-mail administrator.
- My outgoing server requires authentication. Activate the option to allow the program to make authentication on the server before sending messages.
- User name. Enter the name that will be used to log in to the e-mail account.
- Password. Enter the password that will be used to access the mail server.
- Send e-mail notification on apply. Specify an e-mail to send notifications on the carried out operations.
- Send mail in HTML format. Activate the option to create messages in the HTML format instead of plain text.
- Send complete report after applying operations. Activate the option to create an in-depth report on the carried out operations and send it after performing the last operation.
- Send graphical view of the disk sub-system before and after apply. Activate the option to allow the program to attach two pictures of the disk layout made before and after the operation is completed.

By clicking the link at the bottom of the window you can jump to the Operation Dependency Options.
Operation Dependency Options
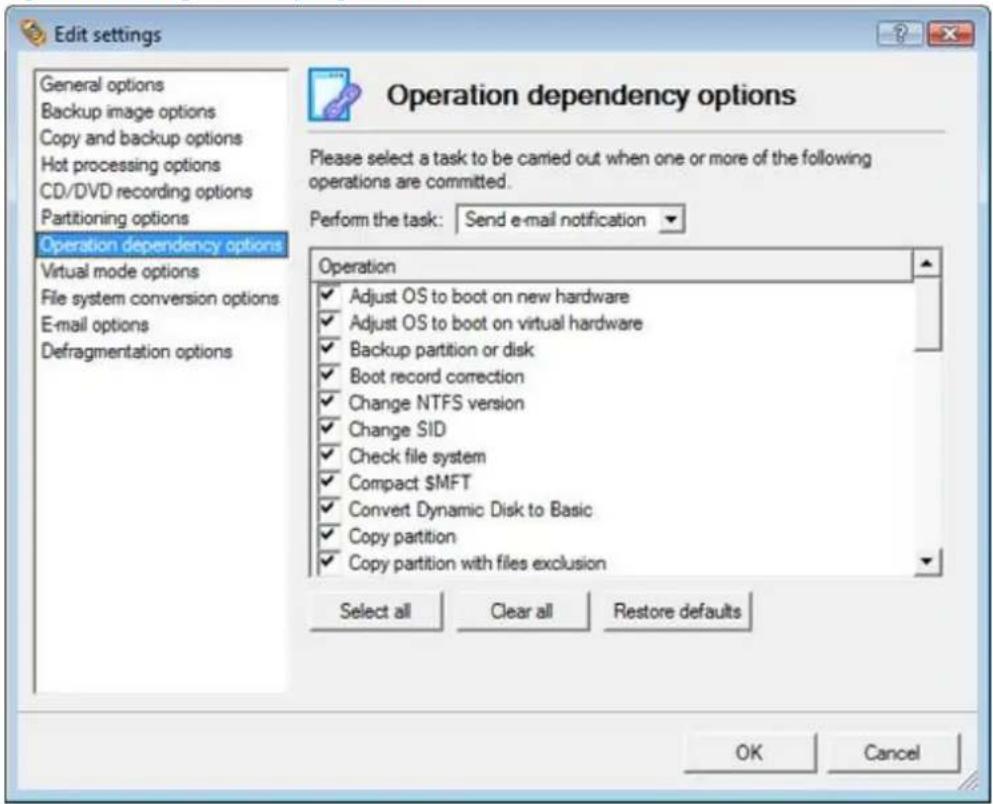
This section contains a set of options that will be taken into account when the Send e-mail notification on apply function is enabled. By marking/unmarking a checkbox opposite the required operation you can choose whether to receive an e-mail notification on its completion or not.

You won't be notified if an operation requires the system restart.
Virtual Mode Options
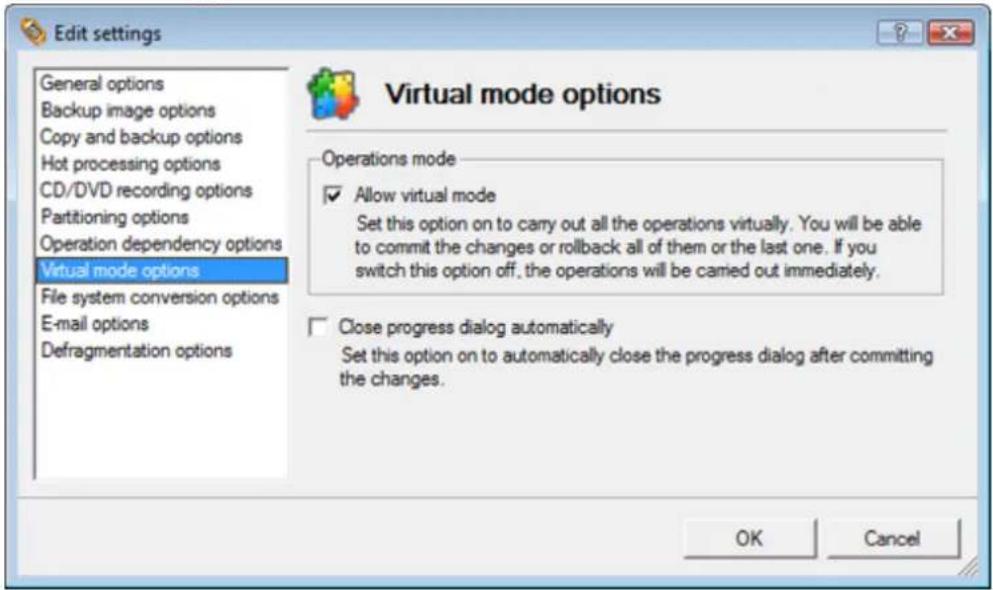
In this section you may configure the virtual mode:
- Allow virtual mode. Mark the checkbox to enable the virtual mode. It is an effective way of protection from any troubles, since no operation will be executed until confirmation, thus giving you a second chance to weigh all pros and cons of this or that particular operation.

We strongly recommend you to enable this mode.
- Close progress dialog automatically. Mark the checkbox to automatically close the progress dialog after accomplishing operations.
File System Conversion Options
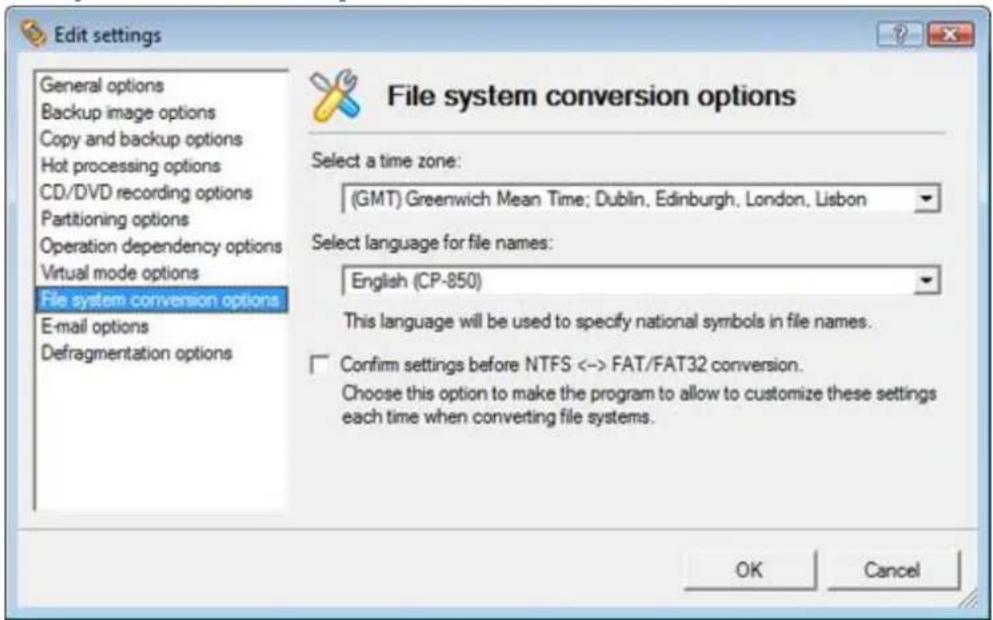
This section contains a set of options that will be taken into account when converting FAT and NTFS file systems. By default, the program takes locale (regional) settings from the system. Problems might occur however because of
different standards for file names and file time stamps (Created, Modified and Last Access Time) of NTFS and FATxx file systems.
To tackle problems of that kind you can manually set:
- Time zone to use during the convert operation. NTFS keeps file timestamps in GMT (Greenwich Mean Time) while FAT uses a fixed local date and time. The program takes proper account of these differences and enables to adjust timestamp values.

An incorrectly chosen time zone might lead to inability to launch certain software.
- Language for file names to use during the convert operation. NTFS stores file names in Unicode while FAT/FAT32 uses ANSI to save short file names (also called the DOS aliases). The codepage information is required for the correct conversion of non-English file names from Unicode to ANSI and vice versa.

An incorrectly chosen codepage will certainly result in corruption of non-English file names.
- Request confirmation of settings before NTFS < - > FAT/FAT32 conversion. Mark the checkbox to automatically display the local settings dialog to check and modify (if necessary) the default parameters before launching the convert file system operation.
Defragmentation Options
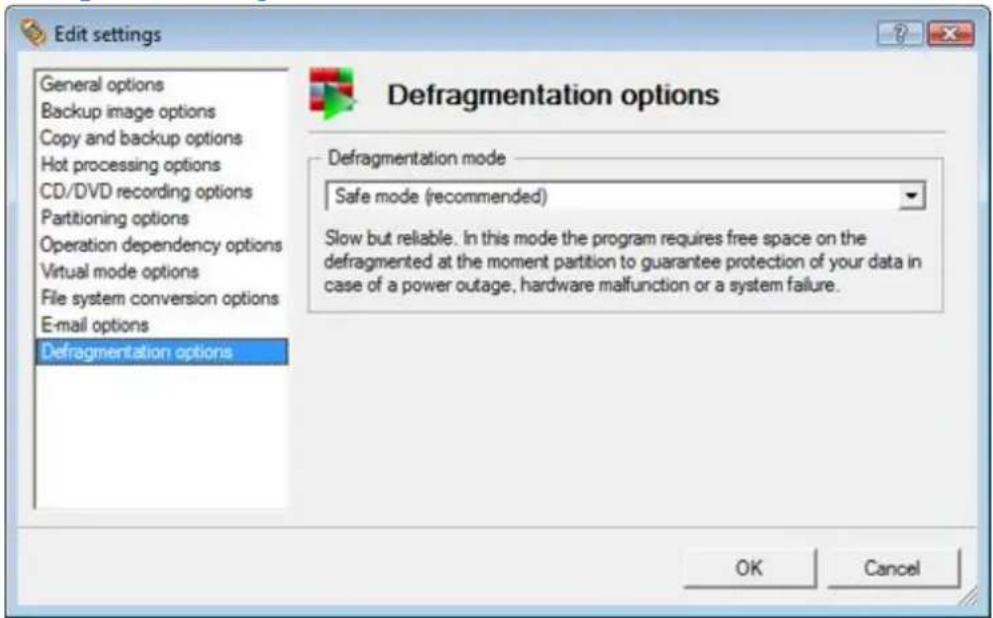
In this section you may set the preferable defragmentation mode:
- Fast mode. Partitions will be defragmented rather fast (a 10-30% gain depending on the fragmentation level), but a power outage, hardware malfunction or a system failure during the operation might lead to the data loss.
- Safe mode. To guarantee protection of your data during the operation, the program will allocate some free space (not less than the on-disk largest file) on the defragmented at the moment partition to make a duplicate of every processed file. Thus we strongly recommend you to use this very mode.
Getting Information on Disks and Backup Images
The program provides some helpful tools to get information on the properties of disks and peculiarities of existing backup images.
Viewing Disk Properties
The main tool to view in-depth information on the properties of hard disks is the Disk Map. It represents the actual state of the computer's hard disks.
Generally the hard disks are represented on the map by rectangular bars, which also contain small-sized bars. The small-sized bars represent logical disks (partitions). When you select a large-sized bar, the Explorer Bar displays information about the disk in a bright, graphical form.
Basic Hard Disk 1 (FUJITSU MPF3102AT)
Type: Basic Hard Disk Drive
Total size: 9.5 GB
Sectors per track: 63
Heads: 255
Cylinders: 1245

Create an image of the entire disk
Back up all the data this hard disk contains. All the partitions on this disk will be added to the archive.

Restore an image of the entire disk
Warning: This operation will delete all the data on this hard disk. All the partitions will be replaced with ones from
the image you have chosen. You may also be asked to restart your computer during this operation.

Copy the entire hard disk
Create a copy of the entire hard disk.
All the partitions on this disk will be copied on the specified target disk.
The model and serial number of the disk serve as the title of the browsed page. The disk layout is shown in form of a circular graph, where the color of a sector corresponds to a file system of an appropriate partition. On the right you may see a table, which contains the following information:
• Type of hard disk (basic or dynamic),
• Total size (in GB),
• Information on geometry of the disk (amount of sectors per track, heads and cylinders).
Below there is a list of available wizards. If you click a corresponding record the appropriate wizard will be started. All default values for the operation parameters will correspond to the disk's settings. The list of wizards contains a detailed description of tasks that can be performed by the wizard. This nullifies the possibility of selecting the wrong wizard.
Logical Disk (G:)

Volume letter: [G:]
Volume label: FAT32-LINUX
Type: Primary
File system: FAT32
Sectors per boot: 36
Sectors per cluster: 8
Serial number: 7493EA8F
Partition ID: 0x0B FAT32
Total size: 6.8GB
Used space: 5.7GB
Free space: 1 GB
Activity: Inactive
Hidden state: Not hidden

Create an image of the logical disk
Back up all the data this logical disk contains.

Restore the logical disk from an image
Warning: This operation will delete all the data on this logical disk and replace them from the image you have
chosen. You may also be asked to restart your computer during this operation.

Copy the selected partition
Create a copy of the partition. A new partition will be created and all the data will be copied there.
You can create an exact copy, or copy only the area that is occupied by data.
When you select a small-sized bar (i.e. corresponding to a logical disk) the Explorer Bar will display information on it as well. The page title will contain a drive letter, which is assigned to the disk. The disk layout graph will be colored in accordance with the volume ratio of the used space to the free space (the light colored sector). The table on the right will contain the following information:
• Volume label (if available),
• Type of the logical disk,
- File system (represented by the color of the graph and the selected bar),
• Total size, used space and free space (in GB or MB).
Below there is a list of wizards, which may be called for this disk. All default values of parameters will correspond to the disk settings.
Viewing Image Properties
General information on backup archives can be obtained with the help of the Restore Wizard:
There are several ways to launch the Restore Wizard:
• In the Main menu: select Wizards >Restore...
• In Common Tasks bar: click the Restore item of the Wizards menu
- Select a hard disk/partition and then click the Restore an image of the entire disk/Restore the logical disk from an image link on the Explorer Bar page.
At first, the wizard displays the Welcome page – simply click the Next button at the foot of the dialog window.
The next page refers to Browse for Archive.
You can find the required image in the browser-like window.
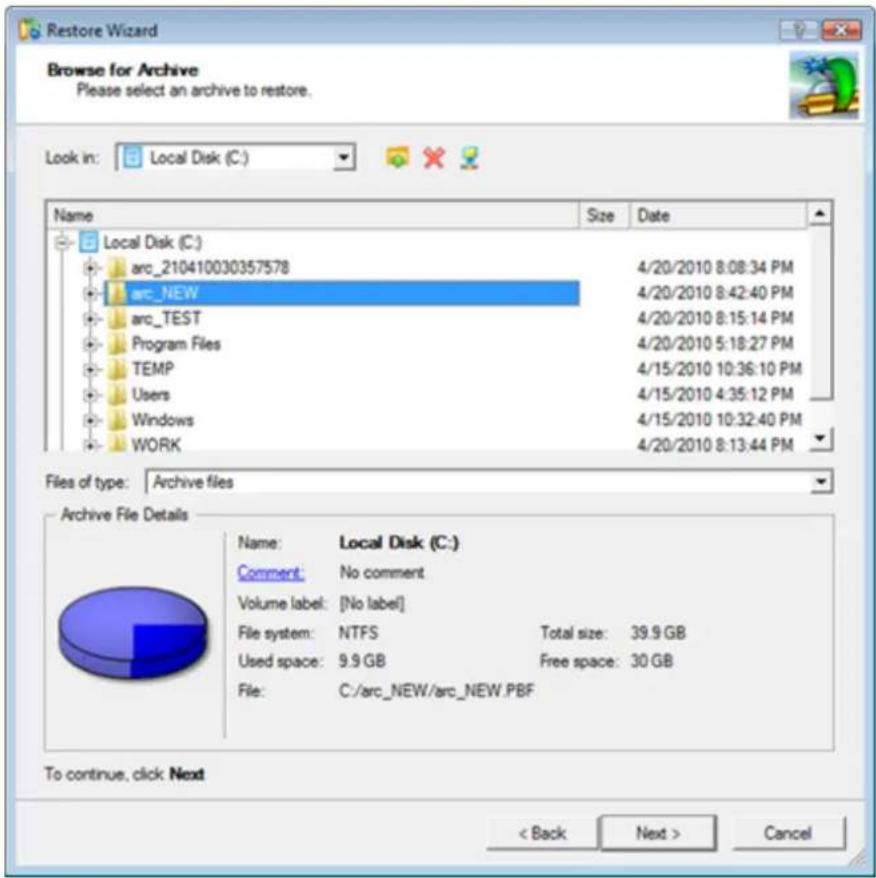
The section below (i.e. Archive File Details) displays a short description of the selected image, including:
• Information on a type of the archive contents (whether it is sector-based or file-based),
- Whether the archive is compressed or not,
- Whether the archive is password protected or not,
• The date, when the archive was created.
Moreover, on this page you've got the possibility to create new folders, delete existing files/folders or map network drives by clicking the appropriate buttons.
The next page (i.e. What to restore) displays detailed information about the contents of the archive.
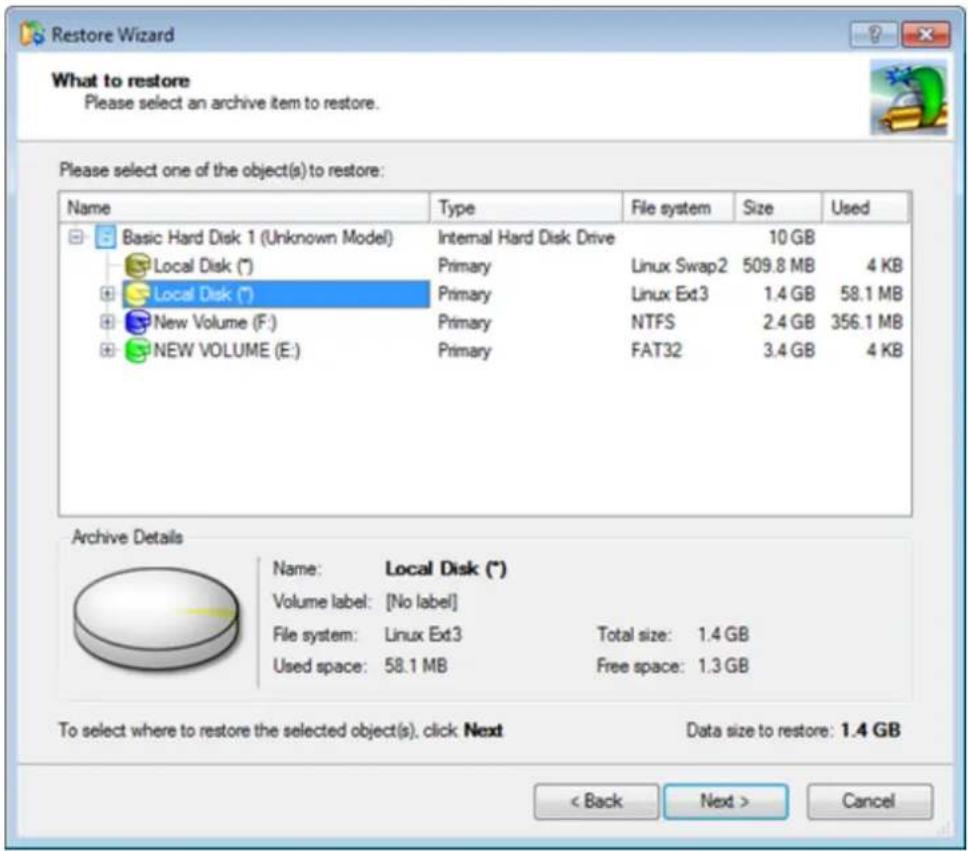
If you want to restore the image contents, click the Next button. In order to cancel, click the Cancel button.
Data Backup and Rescue
In this chapter you will find all the information necessary to establish a reliable data protection system.
Creating Backup Images
We have already mentioned that the most prevalent way to protect valuable data is to create backup copies (backup images in terms of the program) of it.
Startup
There are several ways to start the Sector Backup Wizard:
Express Launcher
- Click the Backup and Rescue button and then select Backup.
Launcher
• In the Main Menu: select Wizards > Back up a Disk or Partition...
- On the Common Tasks Bar: click the Back up a Disk or Partition item of the Wizards menu.
• In the Toolbar: click the Back up a Disk or Partition button.
Setup
The wizard offers the following steps to accomplish the backup operation:
- The object to back up. You can back up either an entire disk or separate partitions of the disk (primary, extended or logical). In case of backing up an entire disk, you've got the possibility to include into the image
Copyright© 1994-2010 Paragon Software Group. All rights reserved.
such disk elements as the Master Boot Record (MBR) and the first track of the hard disk. This can be very helpful for serious disk recovery procedures.
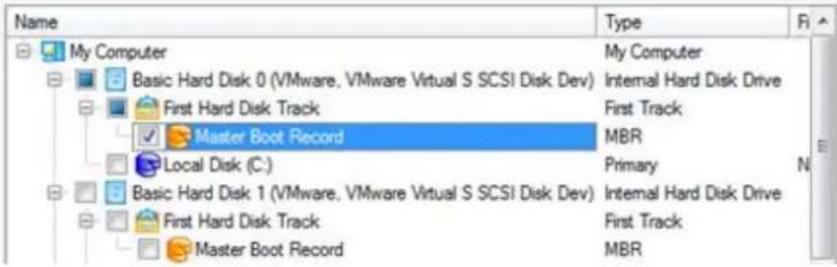
- Backup destination. The wizard allows saving backup archives to local or network drives, to physical partitions (without drive letters assigned), or burning them to CD/DVDs. You need to select a destination, taking the estimated archive size and available space on the backup destination into account.
There are several ways the Wizard can store your data. Please select how would you like to save the archive:
Save data to local/network drives.
C Bum the data to CD or DVD.
- Name and location of the resulted image. Provide a file name for the new image and its exact location. The program automatically offers an easy to understand name containing the date and the time of the archive creation, which can anyway be modified.
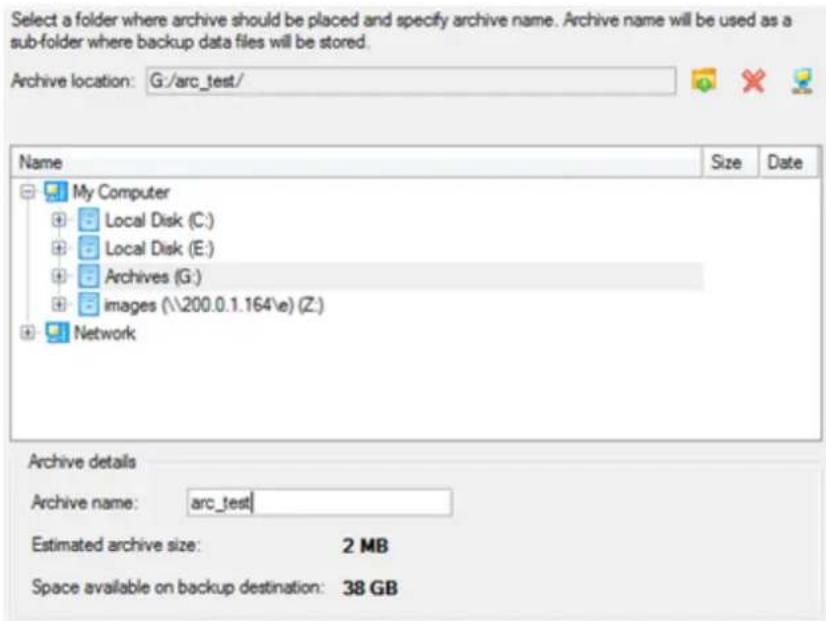

The program automatically calculates size of the future archive and informs the user about space available on the selected destination.
- Archive Comment. You can add some additional description to the archive that will later help to distinguish it from the others.

In addition, there is the possibility to make further detailed settings (although the default values will do in most cases). To activate the advance mode, you need to mark the appropriate option on the second page of the wizard. When it is marked, the next page enables to define:
- Whether the archive integrity will be controlled.

Checking archive integrity enables to guarantee that all backup images created with the program are 100 percent flawless. Nevertheless if you decided not to control the archive integrity, the backup operation would take about 3-5% less time.
- Whether image file names will be set automatically in complex archives.
- Compression level for the backup image (including the No compression variant).
- Whether the archive will be split (if yes, you can set the maximum size for the archive files).

Splitting images enables to tackle issues caused by a file size limitation of some file systems.
- Whether the archive will be protected by password.
- Whether the selected disk (or the selected partition) will be copied in the sector-to-sector mode (including unused sectors as well).
- Whether the OS auxiliary files (pagefile.sys, hyberfil.sys) will be included in the backup image.
- Recording speed when the user wants to burn the backup image onto CD/DVDs.
• ISO image folder where the archive that is to be recorded on a disc, is placed. - Whether the operation will be performed without rebooting the system. The program needs to reboot the system in order to have exclusive access to processing data. In a Windows environment this is difficult to achieve because even when all the other applications are closed, the system service programs are still running. However, there is a way to avoid rebooting. The mode of processing the backup operation without rebooting is named Hot Processing. You can also define specific parameters for the Hot Processing mode.
Result
After the backup operation is completed you receive an image of the selected disk (or the selected partition). This image is placed into the specified destination, its features defined by the wizard.
Available operation scenarios:
- Backing up a hard disk or partition to external media (CD/DVD)
- Backing up a hard disk or partition to a network drive
• Backing up a dual boot Mac to an external USB drive
Restoring System and Data
The program includes a convenient and reliable restore wizard. With its help you can restore all types of backup images created with the program. It provides easy to understand instructions to configure and perform all the necessary
settings. Moreover you can get an in-depth description to any setting, control, or field of the wizard just by clicking the hint button and then the object you need.
Startup
There are several ways to start the Restore Wizard:
Express Launcher
- Click the Backup and Rescue button and then select Restore.
Launcher
• In the Main Menu: select Wizards > Restore...
- On the Common Tasks Bar: click the Restore item of the Wizards menu.
• In the Toolbar: click the Restore Wizard button.
Setup
The wizard offers the following steps to accomplish the restore operation:
- A backup image to be restored. The Browse for Archive page enables to find a backup image you need.
You can find the required image in the browser-like window. The section below (i.e. Archive File Details) will also display a short description of the selected image.
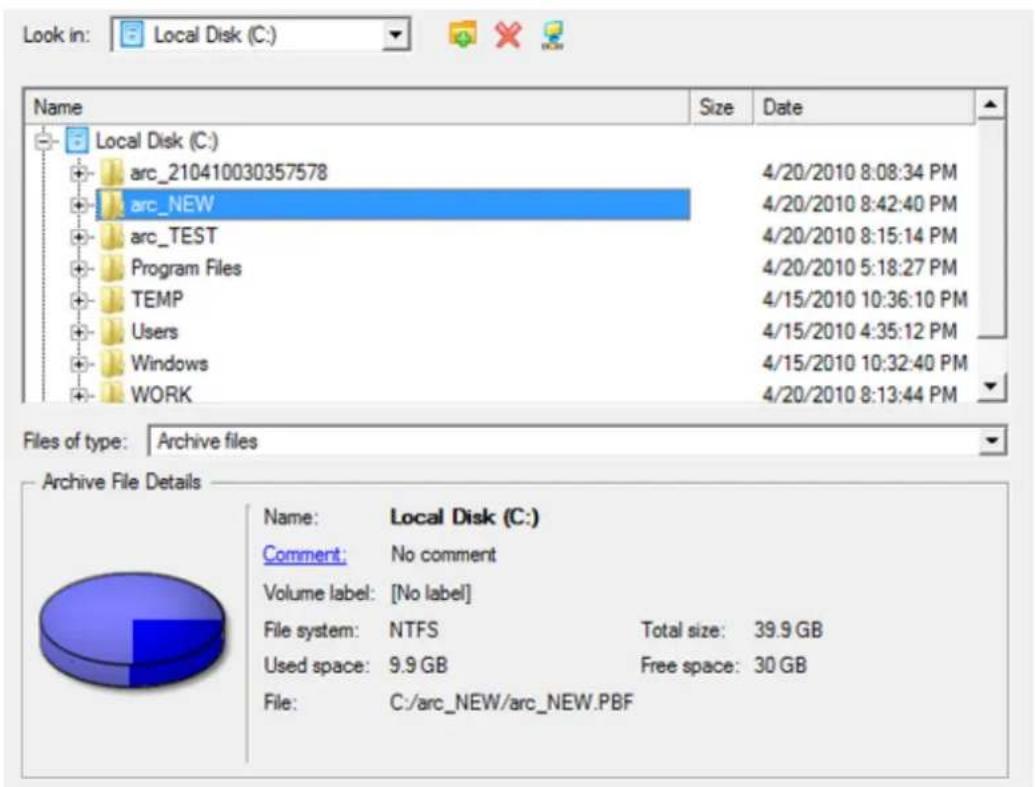
Moreover, on this page you've got the possibility to create new folders, delete existing files/folders or map network drives by clicking the appropriate buttons.

To know more on the subject, please consult the Viewing Image Properties chapter.
Sector Backup Restore
- Data to restore. You've got the option to restore not only the entire archive, but separate items of it (the so called selective restore functionality) by marking checkboxes next to the data items you need.
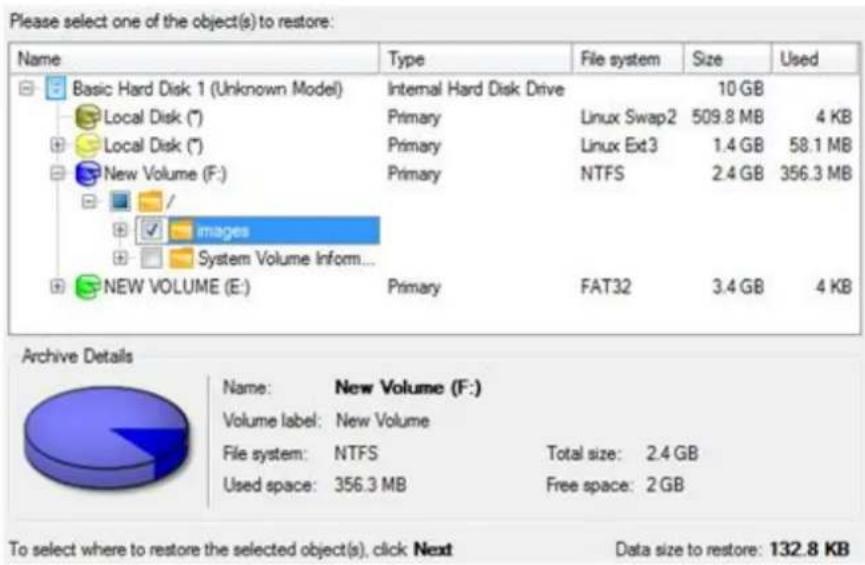
- A place to restore. Selecting the destination, please note - all contents on the disk selected for restoring purposes will be deleted during the operation.
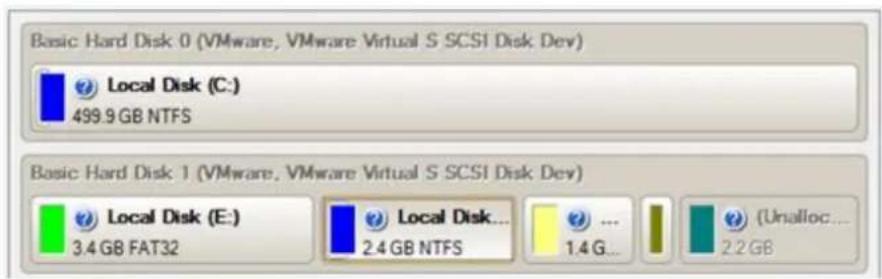
To help you get a clear-cut picture of the operation outcome, the program allows inspecting the resulted disk layout.
Restoring Partition:
• Size of the restored volume and free space before and after it on the disk.
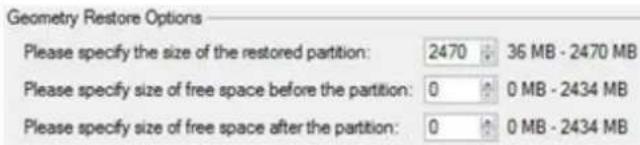
- Drive letter assignment after restore. The pull-down list contains vacant drive letters that can be associated with the restored partition.

Restoring Hard Disk:
- Copy data and resize partitions proportionally. If this option is activated, the program proportionally changes the size of partitions keeping their relative order intact. The option can be useful when restoring to a larger hard disk.
• Perform surface test. Define whether the surface test will be accomplished during the operation or not.
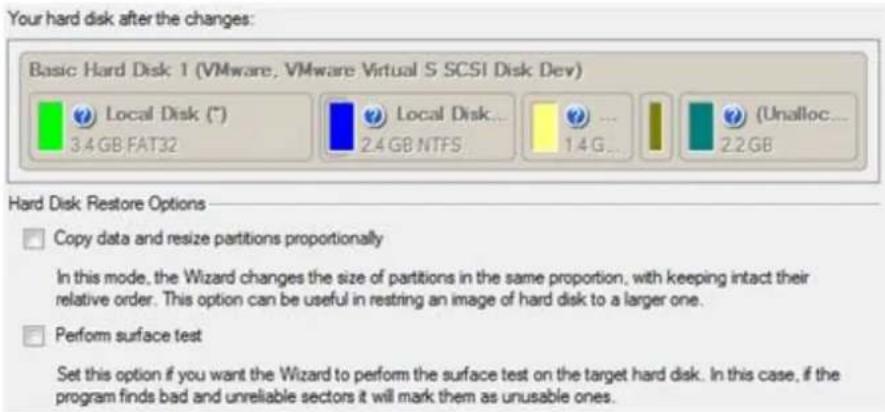

All contents on the disk selected for restoring purposes will be deleted during the operation.
Result
The wizard will restore the archived data, and make it available to use in the operating system.

To make a Win2K+ operating system bootable on different hardware, please additionally complete the P2P Adjust OS Wizard.
Available operation scenarios:
• Restoring a system partition from external media (CD/DVD)
• Restoring a system partition from a network drive
• Restoring a system partition from a local drive
• Restoring a dual boot Mac from an external USB drive
• Copying of data from the corrupted system disk to another hard disk
• Burning of data from the corrupted system disk to CD/DVD
• Copying of data from a backup to the corrupted system partition
• Restoring separate files and folders from a backup
Copy Tasks
In this chapter you will find all the information necessary to make a copy of a hard disk or a separate partition.
Cloning Hard Disks
You can clone a hard disk of any file system. During the hard disk copying process, the program moves controlling records of used partitioning scheme, the bootstrap code and on-disk partitions. That's why this operation cannot be substituted by simply copying all on-disk partitions.
The program offers the Copy Hard Disk Wizard that can help to clone a hard disk.
Copy Hard Disk Wizard
The Copy Hard Disk Wizard is a traditional-like wizard. By going through its steps, you configure all the necessary settings to launch the copy operation. To minimize the possibility of making any mistake, the wizard provides auxiliary information on every single option. Moreover you can get an in-depth description to any setting, control, or field of the wizard just by clicking the hint button and then the object you need.

You need at least two hard disks to carry out this operation.
Startup
There are several ways to start the Copy Hard Disk Wizard:
Express Launcher
- Click the Copying and Migration button and then select Disk Migration.
Launcher
• In the Main Menu: select Wizards > Copy Hard Disk...
- On the Common Tasks Bar: click the Copy Hard Disk item of the Wizards menu.
• In the Toolbar: click the Copy Hard Disk button.
Setup
The wizard offers the following steps to accomplish the copy hard disk operation:
• The hard disk to copy. Select a hard disk you want to copy.

- The target hard disk. Select a hard disk (if several) where all data of the source disk will be copied to.
Select a target hard disk. All data from the source hard disk will be copied there. During copy operation, target disk content will be deleted.

- Copy parameters. The wizard enables to specify the following options:
Choose copy options that suit best your task:
Copy options:
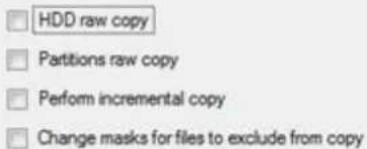
Resize options:


Mark the checkbox to copy the hard disk in the sector-by-sectormode, thus ignoring its information structure (e.g. unallocated space or unused sectors of existing partitions will be processed as well). This can help to avoid problems with hidden data created by certain applications or the system administrator. However, it will take more time to accomplish the operation.
Copy options
- HDD raw copy to copy the hard disk in the sector-by-sector mode, thus ignoring its information structure (e.g. unallocated space or unused sectors of existing partitions will be processed as well). This can help to avoid problems with hidden data created by certain applications or the system administrator. However, it will take more time to accomplish the operation.
- Partition raw copy to copy the on-disk partitions in the sector-by-sector mode to successfully process unknown file systems. However it is not recommended to enable this option when working with supported file systems as it takes more time to accomplish the operation.
- Perform incremental copy to only copy changes on the hard disk from the moment of the last copy operation. The program will perform comparison between a previous copy of the hard disk and its current state. Only sectors that are different will be updated, thus considerably decreasing the amount of data to write.
Resize options
- Remove free blocks between partitions not to keep blocks of free space between partitions on the targeted hard disk.
- Copy data and resize partitions proportionally to make the program proportionally change the size of partitions keeping their relative order intact. The option can be useful when upgrading the hard disk to a larger one.
Verification options
This section allows you to define whether the Surface and/or the Writing verification tests will be accomplished during the operation.
Result
After the operation is completed, you receive a fully functional duplicate of the existing hard disk.

To make a Win2K+ operating system bootable on different hardware, please additionally complete the P2P Adjust OS Wizard.
Available operation scenarios:
• Migrating system to another hard disk (Clone HDD)
Cloning Partitions
You can duplicate partitions to protect oneself from downtime in case of a system malfunction or for cloning sample partitions. The program enables to duplicate all partition data including files, the exact structure of directories and file system metadata (location of files, security information, access quotas, etc.).
The Copy Partition Wizard will help you copy a partition of any file system. To minimize the possibility of making any mistake, the wizard provides auxiliary information on every single option. Moreover you can get an in-depth description to any setting, control, or field of the wizard just by clicking the hint button and then the object you need.
Startup
There are several ways to start the Copy Partition Wizard:
Express Launcher
- Click the Copying and Migration button and then select Copy Partition.
Launcher
• In the Main Menu: select Wizards > Copy Partition...
- On the Common Tasks Bar: click the Copy Partition item of the Wizards menu.
• In the Toolbar: click the Copy Partition button.
Setup
The wizard offers the following steps to accomplish the copy partition operation:
• The partition to copy. Select a partition you want to copy.
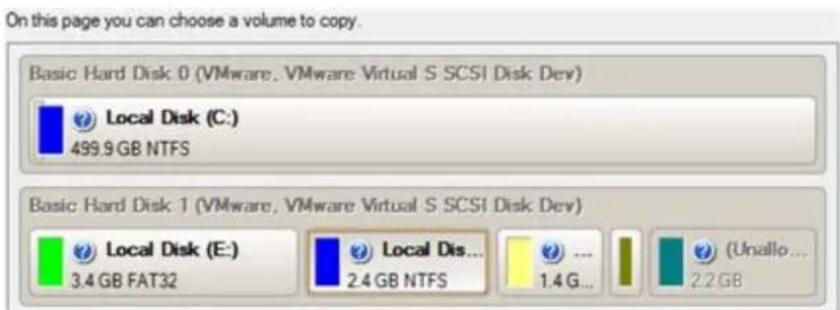
- Destination disk. Select a hard disk with enough unallocated space to perform the operation.
The wizard will create a copy of Local Disk (F:) from Basic Hard Disk 1 (VMware, VMware Virtual S SCSI Disk Dev). The copy will be created on Basic Hard Disk 3 (VMware, VMware Virtual S SCSI Disk Dev) Please select where to create a copy:


The program enables to copy a partition to a block of free space, which is smaller than the partition itself, taking into account only actual amount of data.
- Copy parameters. The wizard enables to specify the following options:
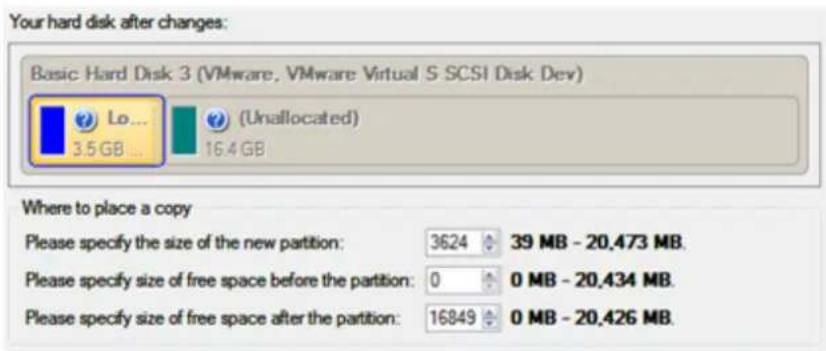
- Partition size. Define the size (in Mb) of the copied partition.
- Free space before. Define the position (in Mb) of the copied partition relative to the beginning of the available range of disk space.
- Free space after. Define the amount of trailing free space (in Mb) at the end of the available range of disk space.

Partition size and position may also be defined by using the drag-and-drop technique. To do that, just carry out the required operation on the Disk Map.
Result
After the operation is completed you receive a fully functional duplicate of the existing partition.

To make a Win2K+ operating system bootable on different hardware, please additionally complete the P2P Adjust OS Wizard.
Boot Management
Our program enables to easily manage several operating systems on one computer with the help of the Boot Manager Setup Wizard. Among the key features of the wizard the following should be mentioned:
- Up to 16 operating systems on one PC;
- Secure adding/removing of the Boot Manager startup record to/from the MBR;
• Auto Boot option to automatically start up the previously chosen OS after a certain time period;
- Hiding of any primary partition except selected at the moment.
Startup
Express Launcher
- Click the Boot Management button and then select Boot Manager.
Launcher
• In the Main menu: select Tools > Setup Boot Manager...
- On the Common Tasks Bar: click the Boot Manager Wizard item of the Wizards menu.
Setup
The wizard offers the following steps to accomplish the operation:
- Hiding other primary partitions. By marking this checkbox the program will automatically assign the hidden flag to all primary partitions of the hard disk(s) except the one selected to boot. This will help to avoid any problems when dealing with different operating systems or different versions of one and the same OS, as they will be unaware of each other.
- Boot menu options. In this section you can switch between the following modes:
- Normal mode. Choose this mode to display the boot menu every time the computer starts up and define a timeout on the expiry of which the program will automatically select the previously chosen item of the menu.
- Hidden mode. Choose this mode not to display the boot menu until pressing a hot key. For this mode you should define a hot key used to enable the Boot Manager and a time period in seconds the startup message will be displayed.
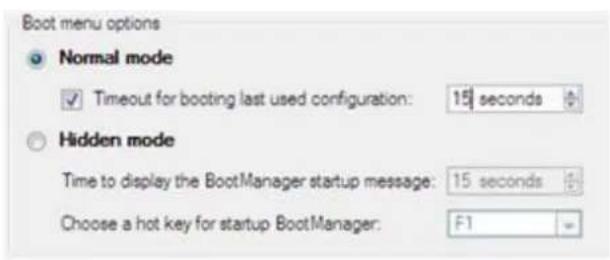
- Deactivating/Configuring the Boot Manager. These two options will only be available once the wizard has been completed and launched again. Select the Deactivate option to remove the Boot Manager from the MBR (Master Boot Record) or Configure to modify the previously set parameters of the startup process.
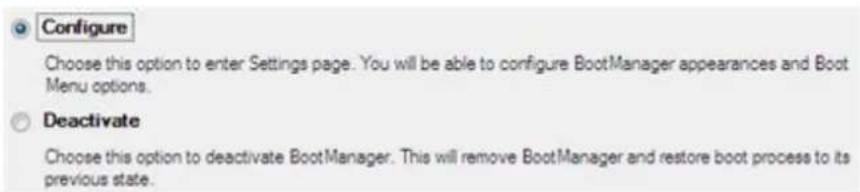
Result
After the Boot Manager Setup Wizard is completed the program updates the original record in the MBR to get control of the booting process and to be able to display the boot menu.
Available operation scenarios:
Copyright© 1994-2010 Paragon Software Group. All rights reserved.
- Creating Dual Boot Systems
Partition Management
In this chapter you will find all the information necessary to carry out partitioning operations supported by the program.
Basic Partitioning Operations
Here you can learn how to accomplish basic partitioning operations (create, format, delete).
Creating Partitions
The program provides the ability to create a new partition by using the DOS partitioning scheme. This operation can be accomplished either with the Create Partition Wizard or the Create Partition Dialog.
Besides there's the Express Create Partition Wizard that will analyze your disk subsystem to help you create an NTFS partition in the most appropriate place of your hard disk by up-taking all the unallocated disk space (if any) and/or an innocuous slice of the unused space of an adjacent partition, and then make it available in the system by assigning a drive letter.
Restrictions
- Do not use the Create Partition function in order to undelete the last deleted partition.
- The program cannot create new partitions on Dynamic Disks. The current version of the program supports only hard disks that use the DOS partitioning scheme (in Windows 2000 and XP these disks are named Basic Disks).
- According to the rules of the DOS partitioning scheme, the following combinations of partitions cannot be created:
- Two Extended Partitions on one hard disk
- Five or more Primary partitions on one hard disk
-
If there is an Extended Partition on the disk, only three Primary partitions are allowed
-
The program allows creating new partitions only within blocks of un-partitioned space. It cannot convert a free space on an existing partition to a new partition.
Express Create Partition Wizard Startup
There are several ways to start the Express Create Partition Wizard:
Launcher
• In the Main menu: select Wizards > Express Create Partition...
- On the Common Tasks bar: click the Express Create item of the Wizards menu.
Create Partition Wizard Startup
There are several ways to start the Create Partition Wizard:
Express Launcher
- Click the Partitioning button and then select Create Partition.
Launcher
• In the Main menu: select Wizards > Create Partition...
- On the Common Tasks bar: click the Create Partition item of the Wizards menu.
Dialog Startup
In order to start the operation you should take the following steps:
Launcher
- Select a block of free space on the Disk Map;
- Call the Create Partition Dialog to set up the operation. There are several ways to do it:
- Select in the Main Menu: Partition > Create Partition.
- Call the popup menu for the block of free space (right click of the mouse button) then select the menu item: Create Partition.
Express Create Partition Wizard Setup
Thanks to a highly intelligent work algorithm, the wizard requires minimal involvement in the operation, thus you only need to choose a method you find the most suitable to create the partition (if several available), which actually differ in the amount of space to allocate. For easy perception, you can see the resulted disk layout on the disk map by selecting this or that mode.
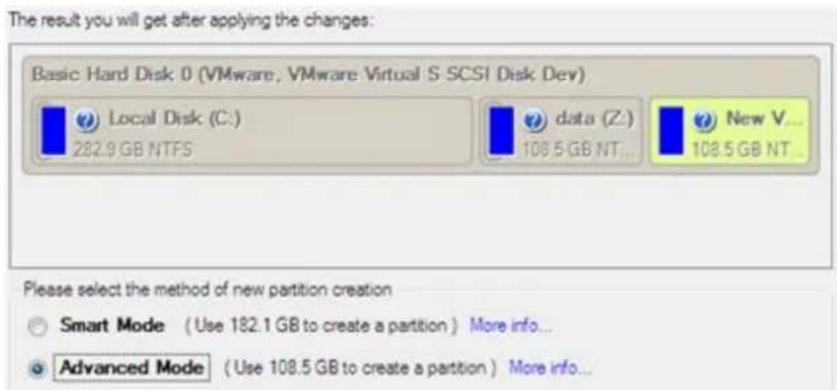

The number of available methods depends on your disk layout.
To learn more on the way the wizard works, please click the corresponding link on the first page of the wizard.
Create Partition Wizard Setup
The wizard offers the following steps to accomplish the operation:
- Partition destination. Select a hard disk (if the computer has several hard disks) and then choose position for the future partition on the disk: at the end (preferable), at the beginning or somewhere in the middle between other partitions.
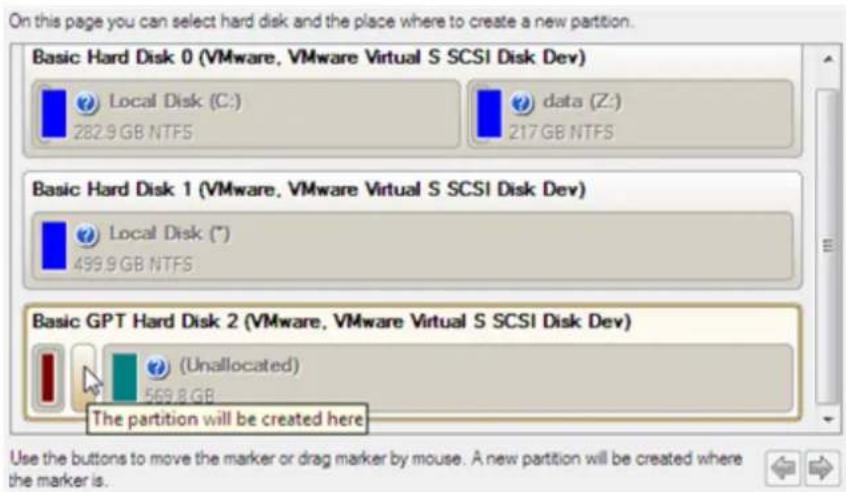

By default, the program allows you to create a new partition only as the last primary or as the last logical drive within the extended partition. However, by activating the advance mode on the first page of the wizard you can remove this restriction that in its turn might result in some boot problems.
- Partition size. There is no restriction on size of the future partition, merely depending on space available on the hard disk.
If there is not enough free space in one block, the wizard enables to redistribute free space, joining all free space blocks together into one united block and moving partitions when necessary. If the total amount of free space is still not enough, it is possible to split a fragment of space from one of the existing partitions, thus resizing it.
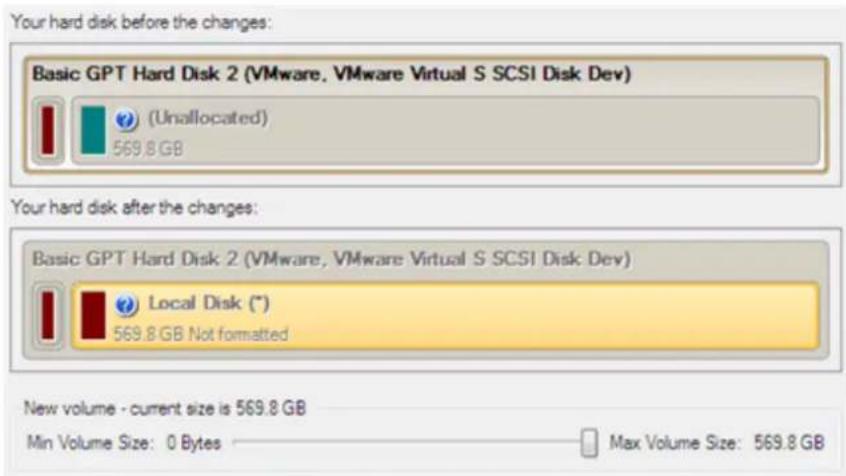

If a partition to resize is locked and cannot be processed, the wizard makes the system reboot to create the partition and then automatically boots the system again. (The rebooting mechanism is different for different versions of Windows.)
You can also choose whether the future partition will be primary or logical by marking the appropriate checkbox.
- Partition properties. On the next page of the wizard you can set a number of additional parameters:
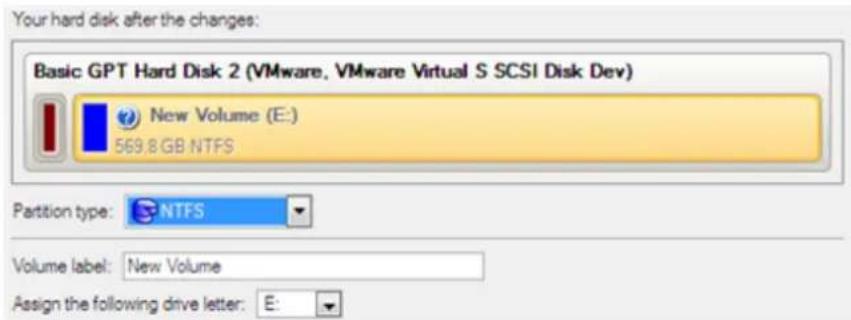
- Partition type. From the pull-down list select a file system the newly created partition will be formatted to, otherwise the partition will remain unformatted (so that it will not be ready to use).
- Volume label. Enter a label for the selected partition in this textual field. It is an irrelevant parameter usually used for drive identification.
- Surface test level. Define the level of the surface check to make the program find bad and unstable sectors and mark them unusable in the file system metadata.
Dialog Setup
Initially the program suggests some consistent values for all parameters. In most cases, you can just press the Yes button to confirm the operation.
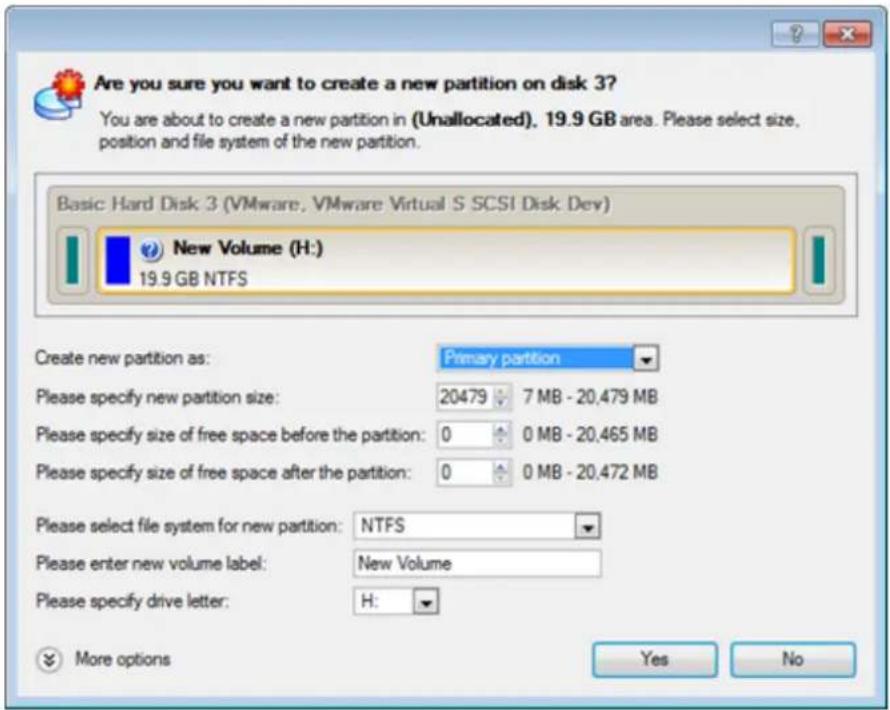
- Define whether the partition will be Primary, Extended or Logical. You can choose the desired partition type from the pull-down list. As a matter of fact, the available alternatives fundamentally depend on the selected block of free space - within the Logical free space, only Logical partitions can be created; Within the Primary free space, both Primary partitions or the Extended Partition can be created.
- Partition Size. Define the size (in Mb) of the new partition.
- Free space before. Define the position (in Mb) of the new partition relative to the beginning of the block of free space.
- Free space after. Define the amount of trailing free space (in Mb) at the end of the new partition.

Partition size and position may also be defined by using the drag-and-drop technique. To do that, just carry out the required operation on the Disk Map. The virtual operations are to be available.
- File system for new partition. From the pull-down list select a file system the newly created partition will be formatted to, otherwise the partition will remain unformatted (so that it will not be ready to use).
- Volume label. Enter a label for the selected partition in this textual field. It is an irrelevant parameter usually used for drive identification.
- Drive letter assignment. The pull-down list contains vacant drive letters that can be associated with the newly formatted partition.
In addition, there is the possibility to make further detailed settings (although the default values will do in most cases). To activate the advance mode, you need to click the More options button at the foot of the dialog page. Depending on the chosen file system, the following options become available:
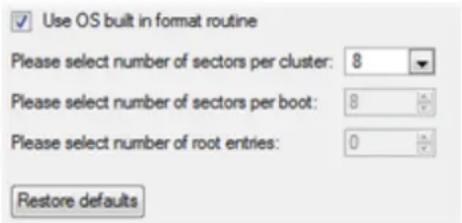
- Use OS built-in routine. Mark the option to restrict the available values according to the used OS.
- Whether the surface test will be performed. Define the level of the surface check to make the program find bad and unstable sectors and mark them unusable in the file system metadata.
- The amount of sectors per boot. This parameter is available exclusively for FAT16 and FAT32 file systems. Set the number of sectors to be reserved for the boot area on the partition with this spinner control.
- The amount of root entries. This parameter is available exclusively for FAT16 file system. Set the maximum amount of files/directories to be placed in the Root Directory on the FAT16 partition.
- The amount of sectors per cluster. Define the Cluster Size for the formatted partition with this spinner control.

Number of available options depends on the selected file system type.
Result
After the operation is completed you receive a fully functional partition.
Available operation scenarios:
- Creating a new partition to detach operating system from the rest of data
Formatting Partitions
Any partition should contain some file system to be used for keeping data. The process of installing a file system is commonly known as formatting. A huge variety of file systems have been developed these days.
Supported File Systems
The program provides the ability to format partitions of the following file systems:
- FAT12 & FAT16
- FAT32
- NTFS
- Ext2
- Ext3
- Ext4
- Linux Swap v. 2
This operation can be accomplished either with the Format Partition Wizard or the Format Partition Dialog.
Wizard Startup
There are several ways to start the Format Partition Wizard:
Express Launcher
- Click the Partitioning button and then select Format Partition.
Launcher
• In the Main menu: select Wizards > Format Partition...
- On the Common Tasks bar: click the Format Partition item of the Wizards menu.
Dialog Startup
In order to start the operation you should take the following steps:
Launcher
- Select a partition on the Disk Map;
-
Call the Format Partition Dialog to set up the operation. There are several ways to do it:
-
Select in the Main Menu: Partition > Format Partition.
- Call the popup menu for the selected partition (right click of the mouse button) then select the menu item: Format Partition.
Wizard Setup
The wizard offers the following steps to accomplish the operation:
- Partition to format. Select a hard disk (if the computer has several hard disks) and then the required partition to format.
Copyright© 1994-2010 Paragon Software Group. All rights reserved.
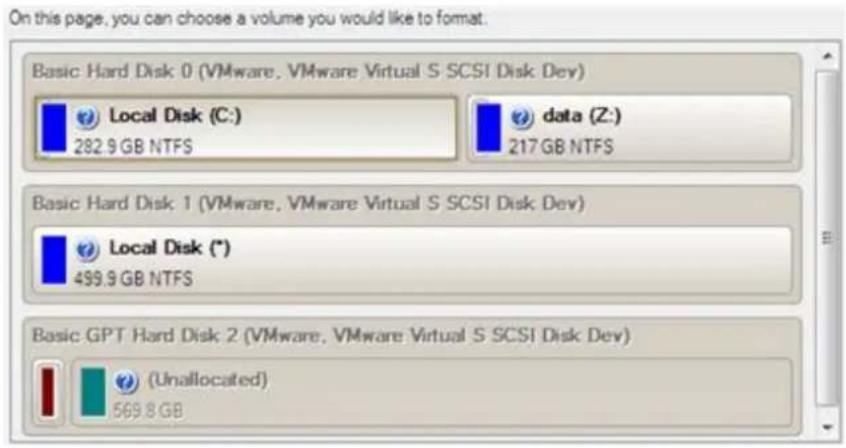

As a result of this operation contents of the selected partition will be lost.
- Partition properties. On the next page of the wizard you can set the following partition parameters:
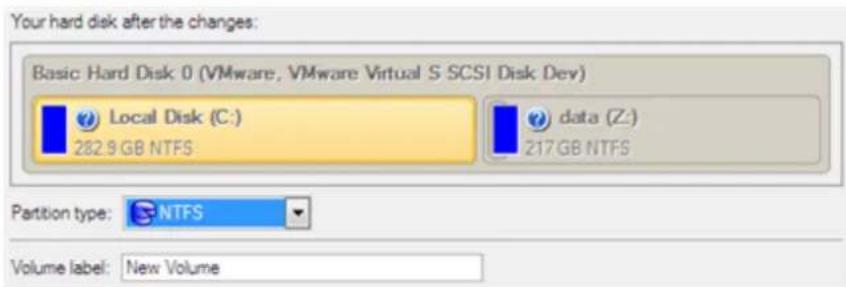
- Partition type. From the pull-down list select the desired file system type. In fact, the program displays only those file systems that can correctly be placed to the selected partition, taking its capacity into account.
- Volume label. Enter a label for the selected partition in this textual field. It is an irrelevant parameter usually used for drive identification.
- Drive letter assignment. The pull-down list contains vacant drive letters that can be associated with the newly formatted partition.
In addition, there is the possibility to make further detailed settings (although the default values will do in most cases). To activate the advance mode, you need to mark the appropriate option at the foot of the page. When it is marked, the next page enables to define:
- Use OS built-in routine. Mark the checkbox to restrict the available values according to the used OS.
- Whether the surface test will be performed. Define the level of the surface check to make the program find bad and unstable sectors and mark them unusable in the file system metadata.
-
The amount of sectors per boot. This parameter is available exclusively for FAT16 and FAT32 file systems. Set the number of sectors to be reserved for the boot area on the partition with this spinner control.
-
The amount of root entries. This parameter is available exclusively for FAT16 file system. Set the maximum amount of files/directories to be placed in the Root Directory on the FAT16 partition.
- The amount of sectors per cluster. Define the Cluster Size for the formatted partition with this spinner control.

Number of available options depends on the selected file system type.
Dialog Setup
Initially the program suggests some consistent values for all parameters. In most cases, you can just press the Format button to confirm the operation.
![Are you sure you want to format volume (F?) You are about to format volume (F:) [No label]. NTFS. Your computer may no longer boot or work correctly. Please select new file system: FAT16 Please enter new volume label: New Volume More options Format No](/content/2026/05/788696/images/a4d52794ef36296adce982319a9d1e9ca7fcfad2c13fb94c7af03bbb7200bffa.jpg)
- File system. From the pull-down list select the desired file system type. In fact, the program displays only those file systems that can correctly be placed to the selected partition, taking its capacity into account.
- Volume label. Enter a label for the selected partition in this textual field. It is an irrelevant parameter usually used for drive identification.
In addition, there is the possibility to make further detailed settings (although the default values will do in most cases). To activate the advance mode, you need to click the More options button at the foot of the dialog page. Depending on the chosen file system, the following options become available:
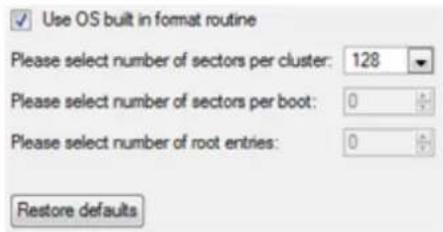
- Use OS built-in routine. Mark the checkbox to restrict the available values according to the used OS.
- Whether the surface test will be performed. Define the level of the surface check to make the program find bad and unstable sectors and mark them unusable in the file system metadata.
- The amount of sectors per boot. This parameter is available exclusively for FAT16 and FAT32 file systems. Set the number of sectors to be reserved for the boot area on the partition with this spinner control.
- The amount of root entries. This parameter is available exclusively for FAT16 file system. Set the maximum amount of files/directories to be placed in the Root Directory on the FAT16 partition.
- The amount of sectors per cluster. Define the Cluster Size for the formatted partition with this spinner control.

Number of available options depends on the selected file system type.
Result
After the operation is completed you receive a fully functional partition formatted to the specified file system.
Deleting Partitions
With the Delete Partition Wizard or the Delete Partition Dialog you can delete a partition on a hard disk partitioned with the DOS partitioning scheme. Unlike the majority of other utilities (Windows Disk Manager included), the program can not only remove references to the deleted partition from the Partition Table, thus making it unavailable for the operating system, but also enables to irreversibly destroy its data. This feature will guarantee security of your personal information.
Wizard Startup
There are several ways to start the Delete Partition Wizard:
Express Launcher
- Click the Partitioning button and then select Delete Partition.
Launcher
• In the Main menu: select Wizards > Delete Partition...
- On the Common Tasks bar: click the Delete Partition item of the Wizards menu.
Dialog Startup
In order to start the operation you should take the following steps:
Launcher
- Select a partition on the Disk Map;
-
Call the Delete Partition Dialog to set up the operation. There are several ways to do it:
-
Select in the Main Menu: Partition > Delete Partition.
- Call the popup menu for the selected partition (right click of the mouse button) then select the menu item: Delete Partition.
Wizard Setup
The wizard offers the following steps to accomplish the operation:
- Partition to delete. Select a hard disk (if the computer has several hard disks) and then the required partition to delete.
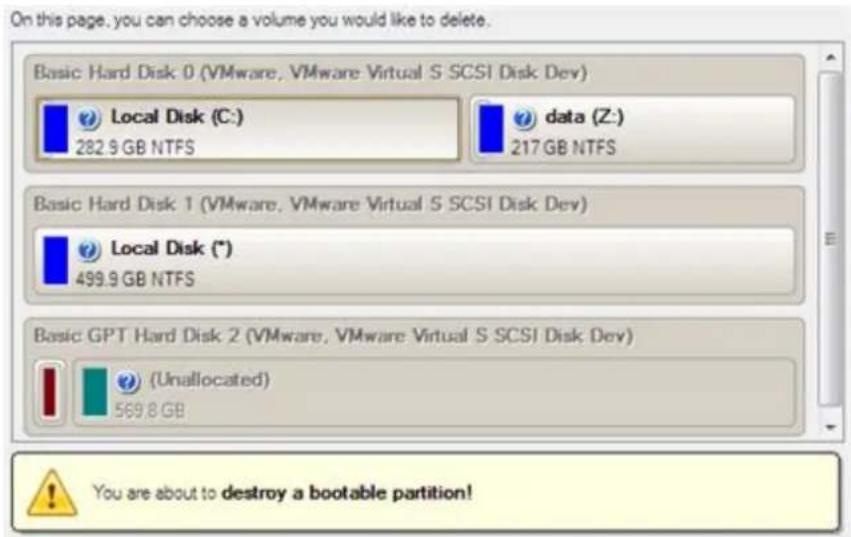

As a result of this operation contents of the selected partition will be lost.
- Merge free blocks. As a result of the operation you may get several blocks of the unallocated space on the hard disk. So choose whether to merge them all and place at the beginning of the disk or at the end by selecting the required operation from the pull-down list.

Dialog Setup
Initially the program suggests you just to remove references to the selected partition from the Partition Table.
![Are you sure you want to delete volume (F?) You are about to delete volume (F:) [No label]. NTFS. Your computer may no longer boot or work correctly. Please enter the volume label to confirm deleting ✓ Do not ask volume label next time Yes No](/content/2026/05/788696/images/be17b06f460ff5604bbe15c65d2bb759efdec8615b5190f7581ae42ade1f0d2a.jpg)
- Enter the volume label to confirm deleting. To confirm deletion of the selected partition, enter its Volume Label. The current volume label is displayed above.
- Do not ask volume label next time. Mark the option to inhibit confirmation next time you start the dialog.
Result
By default, the operation takes only a fraction of a second. However, the program waits until Windows completes the modification of the disk layout.
Advanced Partitioning Operations
Here you can learn how to accomplish advanced partitioning operations (merge, redistribute free space, undelete, etc.).
Merging Partitions
The Merge Partitions Wizard enables to consolidate the disk space, which originally belongs to two adjacent partitions, into a single, larger partition. The order, in which two partitions have been chosen, is important since all contents of the second selected partition will be placed in a folder on the resulted joined partition.
The program provides the ability to merge only NTFS, FAT16 or FAT32 partitions.
Startup
There are several ways to start the Merge Partitions Wizard:
Express Launcher
- Click the Partitioning button and then select Merge Partitions.
Launcher
• In the Main menu: select Wizards > Merge Partitions...
- On the Common Tasks bar: click the Merge Partitions item of the Wizards menu.
Setup
The wizard offers the following steps to accomplish the operation:
- The partition to expand. Select a partition, the size of which you need to increase by up-taking contents of an adjacent partition.
On this page, you can choose a partition that will be expanded to include adjacent partition. Please note that it is possible to select only FAT, FAT32 or NTFS partitions. You will not be able to proceed further if no adjacent partitions of these types are present on the disk.

- The partition to merge with. Choose the second partition for the merge operation, the contents of which will be placed in a folder on the resulted joined partition. By default, the program offers an easy-to-understand folder name to store files of the second partition, which however can be customized.
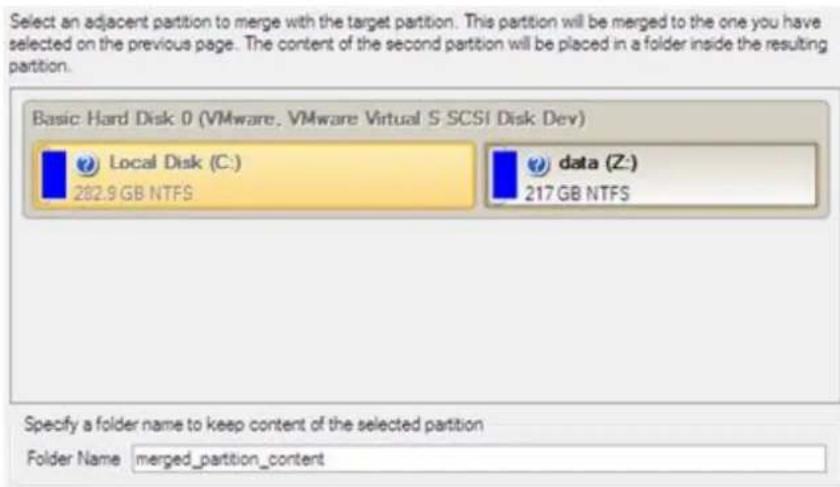

Be particularly careful when selecting system partitions to process, since the incorrect order, in which two partitions have been chosen, will result in inability to boot the operating system.
Result
After the operation is completed the disk space of the two adjacent partitions will be consolidated.
Redistributing Unused Space between Partitions
This operation can be accomplished either with the Express Resize Partitions Wizard or the Redistribute Free Space Wizard.
Express Resize Partitions Wizard
The Express Resize Partitions Wizard enables to easily increase free space on one partition by up-taking the unused space of an adjacent partition of your hard disk.
Startup
There are several ways to start the Express Resize Partitions Wizard:
Express Launcher
- Click the Partitioning button and then select Resize Partitions.
Launcher
• In the Main menu: select Wizards > Express Resize Partitions...
- On the Common Tasks Bar: click the Express Resize item of the Wizards menu.
Setup
The wizard offers the following steps to accomplish the operation:
- Adjacent partitions to resize. Click on the left partition of the pair of partitions you need to redistribute the unused space between, as the right one will be selected automatically.
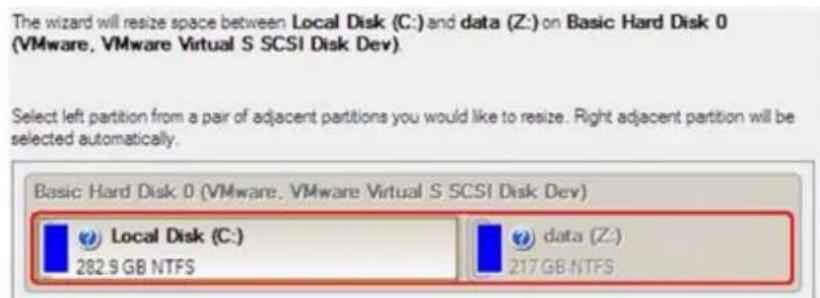
- Resulted size of partitions. Redistribute the unused space between the partitions with the slider or manually by entering the required value.
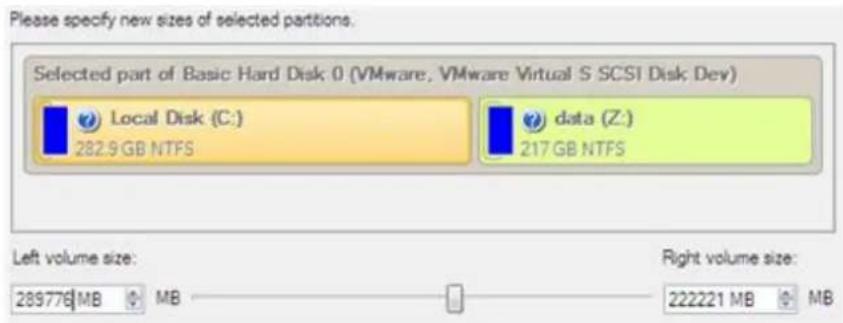
Result
After the operation is completed the unused space between the specified partitions will be redistributed according to your needs.
Available operation scenarios:
• Increasing size of a system partition by taking unused space of an adjacent partition
• Resizing partitions of Apple Boot Camp
Redistribute Free Space Wizard
The Redistribute Free Space Wizard helps to increase free space on one partition by up-taking the on-disk unallocated space and the unused space of other partitions. By default, the wizard adds to the target partition all existing blocks of the free space. Besides you can specify partitions to act as a space donor. The wizard will automatically recalculate positions of the partitions and move their contents to new locations.
Startup
There are several ways to start the Redistribute Free Space Wizard:
Launcher
• In the Main menu: select Wizards > Redistribute Free Space...
- On the Common Tasks bar: click the Redistribute Free Space item of the Wizards menu.
Setup
The wizard offers the following steps to accomplish the operation:
- Partition to enlarge. Select a partition, the size of which will be increased at the expense of other partitions. Blocks of the free space (if any) will be automatically added to the target partition.
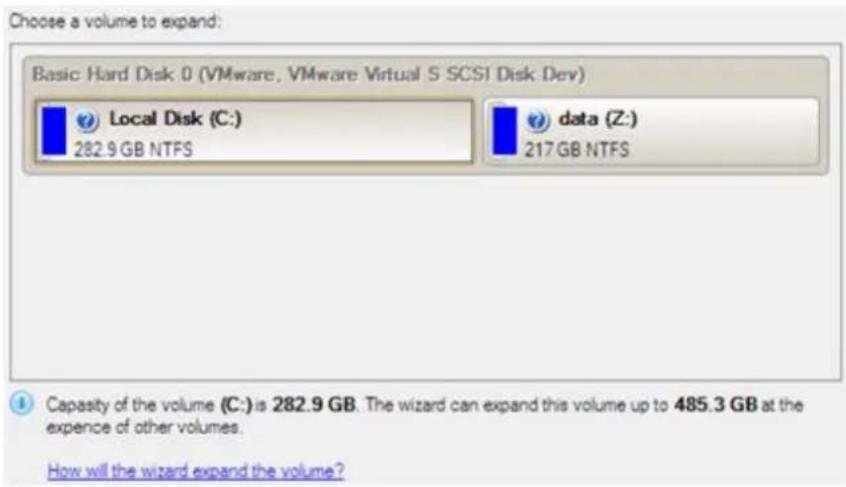
- Partition to donate. Choose any partition(s) (not only adjacent) to donate free space.
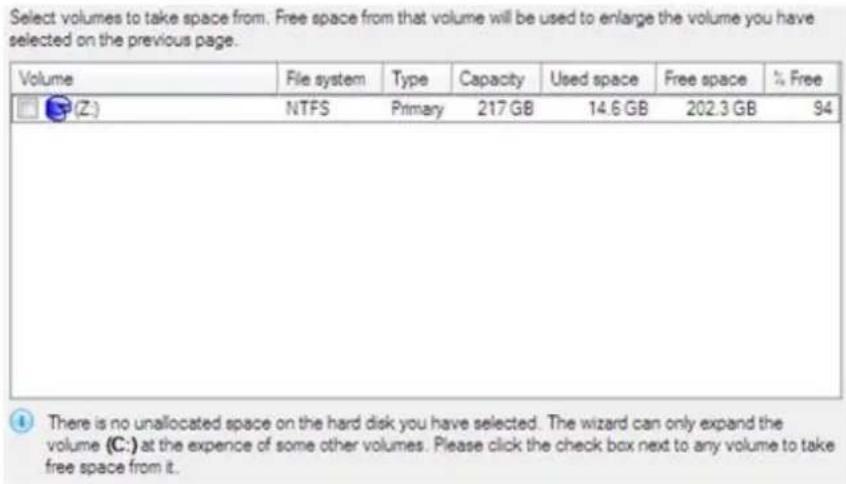
- Partition size. By default, the program leaves 50% of the unused space on a partition and removes another 50% to add it to the target partition. However, the size to take can be customized by moving the slider or by manually entering the exact value.
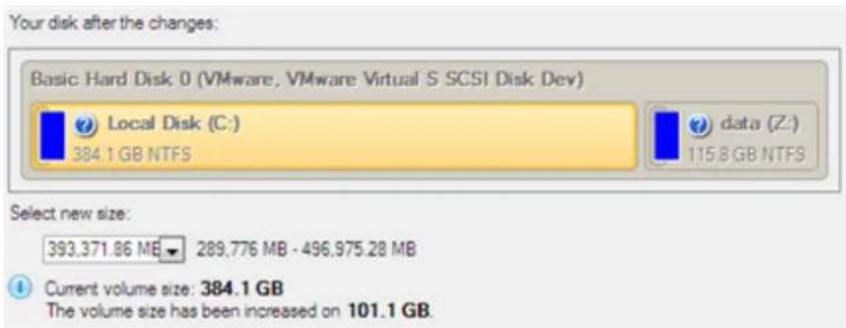
Result
After the operation is completed free space of the specified partition will be increased by up-taking the on-disk unallocated space and the unused space of other partitions.
Undeleting Partitions
When simply deleting a partition (without additional wiping) disk management software only removes references to it in the Partition Table, thus leaving the possibility to recover it later.
The program enables to find and recover these partitions. A restored partition will be fully functional, as long as other partitions were not created, moved or exceeded the disk space occupied by that partition. That is why the program offers this function only for blocks of free space.
The operation can be accomplished with the Undelete Partition Wizard.
Startup
There are several ways to start the Undelete Partition Wizard:
• In the Main Menu: select Wizards > Undelete Partitions...
- On the Common Tasks Bar: click the Undelete Partition item of the Wizards menu.
- Select a block of free space on the Disk Map and click the Recover Lost Partitions item on the page that appears in the Explorer Bar.
- Call the popup menu for the block of free space (right click of the mouse button) then select the menu item: Recover Lost Partitions...
Setup
The wizard offers the following steps to accomplish the undelete partition operation:
• Free blocks to scan for lost partitions. Choose a free block from a tree-like list of available hard disks.
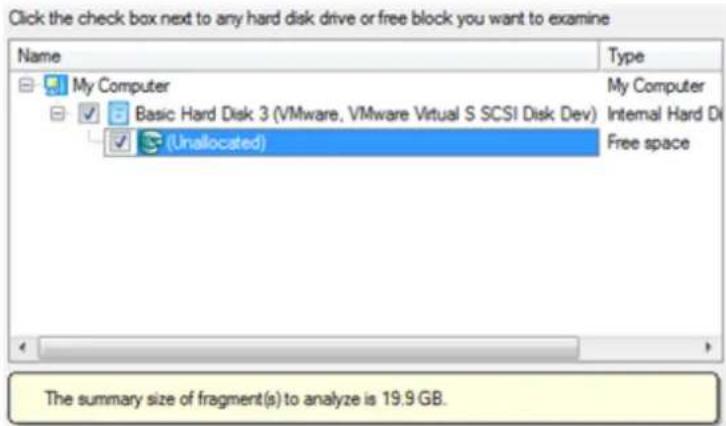
- Search method. By default, the wizard selects the fastest search method for your operating system. In most cases that will do to find any accidentally deleted partition. However if you're under Windows XP for instance (the Conventional Search option is selected), but the deleted partition you're looking for has been created with the Disk Management utility under Vista, the wizard won't be able to find this partition, unless you manually select the appropriate option (Quick Search for Partitions Created by Vista or Later OS). Moreover if the wizard still fails to find the partition you need, you can select the Thorough Search option to scan every single sector in the specified search area to get the most accurate results.
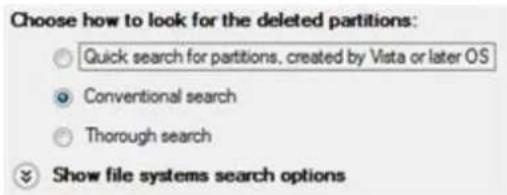

To know more on the available search methods, please use the context sensitive hint system.
- File system filter. By default, the wizard will search for all known file systems. However, by clicking on the appropriate option on the second page of the wizard, you can specify only those file systems you need.
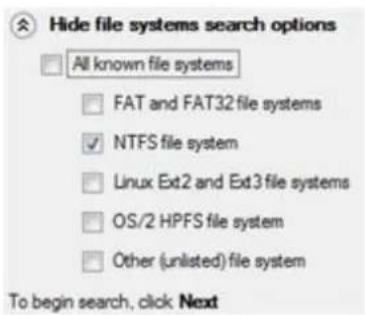
- A partition to undelete (if several). By default, the program searches records of any deleted partition ever existed on the selected block of free space. So you can get several partitions to choose from.
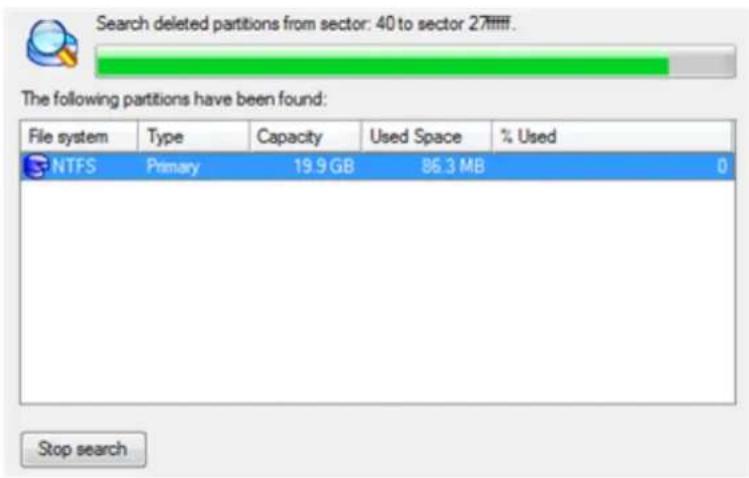
Most likely the required partition will be found first. If so, you may abort the search operation by pressing the Stop search button.
Result
After the operation is completed you receive a fully functional partition.
Installing a New Operating System
Getting your computer ready to install a new operating system, especially when it is going to be an additional OS in the system, is a rather complicated task that implies quite a number of operations, from allocating space to create a new partition (resize, redistribution of free space) to formatting of the newly created partition to a particular file system and checking its surface for bad sectors to avoid possible data loss. Operating systems today are being supplied with basic tools of partitioning that only enable to create a partition (in case there is enough unallocated space on the disk) and then format it to the specified file system type. Our program offers a handy Install New OS Wizard to easily carry out all the necessary operations to install a new operating system.
Startup
There are several ways to start the Install New OS Wizard:
Express Launcher
- Click the Boot Management button and then select Install New OS.
Launcher
• In the Main menu: select Wizards > Install New OS...
- On the Common Tasks bar: click the Install New OS item of the Wizards menu.
Setup
The wizard offers the following steps to accomplish the operation:
- Partition to install a new operating system. The program offers two ways of installing a new OS, i.e. to create a new primary partition for it or use an existing one.
Where would you like to install an operating system?
I want to create a new primary partition to install OS.
A new partition will be created by using unallocated space of your hard disk or unused space of existing partitions. It is the most preferable way as no system or user's data will be affected during the installation process.
I want to use an existing primary partition to install OS.
In case creation of a new primary partition is not possible (there are already four primary partitions on the disk) or not desirable, you are free to select any of existing primary partitions. Please note that all data on the selected partition will be deleted if you choose to format it later in this wizard. Besides make sure no operating system has already been installed on that partition.

Only primary partitions can be used to install an operating system.
- In case the first option has been marked, the wizard enables to specify:
A hard disk (if several) where a new partition will be created. Thanks to an advanced program engine it is possible to use unallocated space of the disk (if any) and unused space of existing partitions to create a new partition;
On this page you can choose a hard disk (if several) where you would like to create a new primary partition.
![Basic Hard Disk 0 (Maxtor 7Y250P0) (*) 193.9 GB NTFS Total size: 193.9 GB Used: 77.2 GB Free: 116.7 GB Basic Hard Disk 1 (ST3160815AS) [9] ... [D:] 63.4 GB NTFS [E:] 66 GB NTFS](/content/2026/05/788696/images/1381f99e9f1b58daeef0118daa92ac388e1b574dac9f296adfe65ecd4f3a4958.jpg)

To avoid any possible problems, the new partition will in no way be created as the first partition of the disk which already contains at least one partition.
And its size. If there are blocks of the free space on the disk, the wizard will merge them all and allocate the resulted space for a new partition in the first place. If not, it will take 50% of the unused space of an adjacent partition. However, the size to take can be customized by moving the slider.
You can select either a block of unallocated space from the disk or an existing partition for which the unused space will be used to create a new partition.
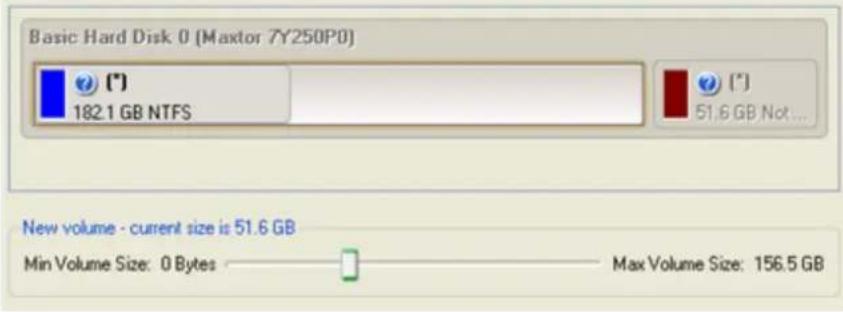
- In case the second option has been marked, the wizard enables to choose an existing primary partition to install a new operating system.
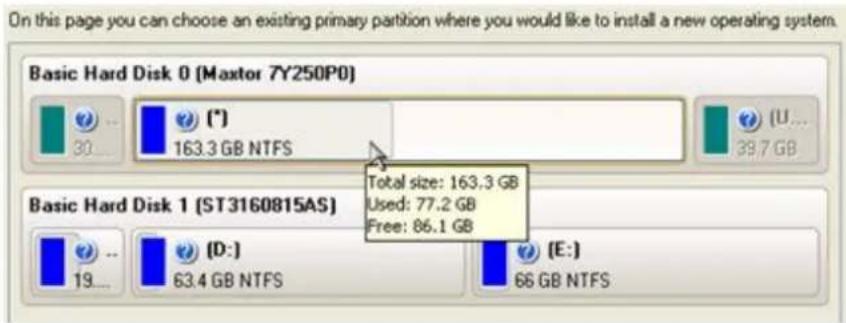

Your computer may fail if any other OS has already been installed on the selected partition.
- Partition properties.
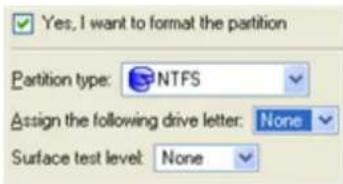
- Partition type. From the pull-down list select the desired file system type. In fact, the program displays only file systems that can be correctly placed to the selected partition, taking its capacity into account.
- Drive letter assignment. The pull-down list contains vacant drive letters that can be associated with the newly formatted partition.
- Surface test level. Define the level of the surface check to make the program find bad and unstable sectors and mark them unusable in the file system metadata.
- OS Label. Enter a label for the selected partition in the textual field. It will later be used for the drive identification.

Result
As the final step the wizard will offer you to insert a distributive CD/DVD of the new operating system and restart the computer to launch the installation procedure.

The program will update your MBR, so most likely you won't be able to start up any of the previously installed operating systems. Please launch the Boot Manager Setup Wizard after the installation has been completed to fix this issue.
Available operation scenarios:
- Creating Dual Boot Systems
Moving/Resizing Partition
The Move/Resize Partition function allows you to resize or change location of any partition without destroying its data.
In order to move/resize a partition you should take the following steps:
Launcher
- Select a partition on the Disk Map.
-
Call the Move/Resize Partition dialog to set up the operation. There are several ways to do it:
-
Select in the Main menu: Partition > Move/Resize Partition...
- On the Explorer bar: click on the current total size value.
-
Call the popup menu for the selected partition (right click of the mouse button) on the Disk Map or on the Partition List, then select the menu item: Move/Resize Partition...
-
Define parameters of the operation.
![Are you sure you want to move/resize system volume (C?) You are about to move/resize NTFS volume [No label]. (C:) Basic Hard Disk 0 (VMware, VMware Virtual S SCSI Disk Dev) Local Disk (C:) 282.9 GB NTFS Volume size: 289,776 MB 11,923 MB - 289,781 MB Free space before: 0.97 MB 0 bytes - 277,850.73 MB…](/content/2026/05/788696/images/5b97820816b57f28147de5d62e51cfa55cafec1c575b3a290f0d94207ba12ec8.jpg)
• Volume size. Define size (in Mb) of the modified partition.
- Free space before. Define the partition position (in Mb) relative to the beginning of the available range of disk space.
- Free space after. Define the amount of trailing free space (in Mb) at the end of the available range of disk space.
- Sector to sector move. Mark the checkbox to move the partition in the sector-by-sector mode to process its unused space as well. This can help to avoid problems with hidden data created by certain applications or the system administrator. However, it will take more time to accomplish the operation.
Partition size and position may also be defined by using the drag-and-drop technique. To do that, just carry out the required operation on the Disk Map. The virtual operations are to be available.

When resizing a FAT16 partition beyond the 2GB limit (maximum file system size), the partition will automatically be converted to FAT32.
The program enables to enlarge NTFS partitions (system, locked) without rebooting Windows and interrupting its work, providing 100 percent guarantee that your data is kept intact.
- The operation will be performed immediately after confirmation.
Available operation scenarios:
- Increasing size of a system partition by taking unused space from any other
- Shrinking a system partition to increase size of a data partition
Converting File System
With our program you can change type of the used file system without destroying its data. While performing the operation, it first checks the current file system for consistency and then verifies whether the on-partition data meet the requirements of the desired file system or not. After having passed the testing, the program re-organizes the file system metadata and user files.
The program enables to convert the following file system types:
- FAT16 > NTFS, FAT32
- FAT32 > NTFS, FAT16
- NTFS > FAT16, FAT32
- Ext2 > Ext3
In order to convert a file system you should take the following steps:
Launcher
- Select a partition on the Disk Map.
-
Call the Convert File System of Partition dialog to set up the operation. There are several ways to do it:
-
Select in the Main menu: Partition > Convert file system...
- On the Explorer bar: click on the current file system type.
-
Call the popup menu for the selected partition (right click of the mouse button) on the Disk Map or on the Partition List, then select the menu item: Convert File System...
-
Initially the program suggests some consistent values for all parameters. In most cases, you can just press the Convert button to confirm the operation.
![Are you sure you want to convert system volume (C?) You are about to convert file system on volume (C:) [No label]. NTFS. Your computer may no longer boot or work correctly. Please select new file system: FAT32 Select new cluster size: 8 Convert No](/content/2026/05/788696/images/e7cd84f2cd2efbdb3bb5372bb4f2cebf01926e4f650f90f739c393aa5cc43caf.jpg)
- New file system. From the pull-down list choose a file system you would like to convert to. Actually the program only displays variants available for the operation, taking into account the current parameters of the selected partition and limitations of the used file system.
- New cluster size. Define the cluster size for the partition. This parameter can have a profound effect on the overall performance. In a nutshell, larger clusters waste more space, but generally provide for slightly better performance, because of less fragmentation. So be particularly careful with it.

The cluster size value is expressed in sectors per cluster. To get it in Kbytes, please divide it into half.
You may only decrease the current cluster size.
- Surface test level. Define the level of the surface check to make the program find bad and unstable sectors and mark them unusable in the file system metadata.
- The operation will be performed immediately after confirmation.
Changing Cluster Size
Cluster size is one of the crucial parameters of any file system. Its value implicitly affects the performance of the files input-output activity since it defines the size of the file system metadata. Besides, the so-called waste space factor also depends on the cluster size.
In order to change the cluster size of a partition you should take the following steps:
Launcher
- Select a partition on the Disk Map.
- Call the Change Cluster Size dialog to set up the operation. There are several ways to do it:
- Select in the Main menu: Partition > Modify > Change Cluster Size...
- On the Explorer bar: click on the current sectors per cluster value.
- Define the cluster size for the partition. This parameter can have a profound effect on the overall performance. In a nutshell, larger clusters waste more space, but generally provide for slightly better performance, because of less fragmentation. So be particularly careful with it.
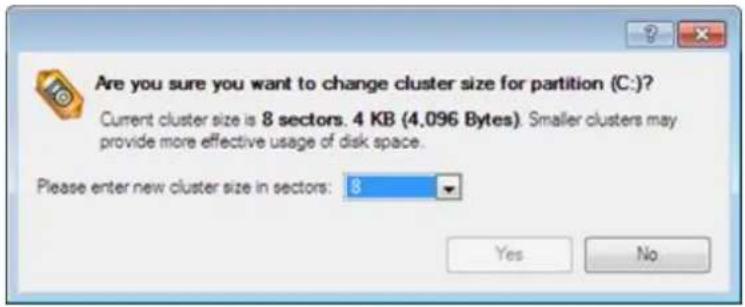

The Cluster Size value is expressed in Sectors Per Cluster. To get the Cluster Size in Kbytes, divide it into half.
- The operation will be performed immediately after confirmation.
Making Logical/Primary
The program allows you to include a primary partition in the extended partition.
In order to change a partition type you should take the following steps:
Launcher
- Select a primary or logical partition on the Disk Map.
-
Call the Make Partition Logical/Primary dialog to set up the operation. There are several ways to do it:
-
Select in the Main menu: Partition > Modify > Make Partition Logical/Primary.
- On the Explorer bar: click on the current partition type.
![Are you sure you want to make the partition logical? You are about to make the partition (C:) [No label]. NTFS logical. Yes No](/content/2026/05/788696/images/d15884b30e17cee9a63d120037007f71b65b05d02815235e32157679ae3ba221.jpg)

The Make Primary > Logical option is only available when the selected partition is adjacent to the extended partition and vice versa.
The Make Primary > Logical option of the system partition will result in inability to boot the operating system.
The operation will be performed immediately after confirmation.
Changing Partition Attributes
This chapter explains how you can change partition attributes (Active flag, Hidden flag, Partition ID, Volume Label, etc.).
Mark Partition Active/Inactive
The program enables to set an active/inactive flag for primary partitions of a hard disk. By default, an operating system will boot only if its partition is active or bootable.
In order to mark a partition active/inactive you should take the following steps:
Launcher
- Select a primary partition on the Disk Map.
-
Call the Mark Partition Active/Inactive Dialog to set up the operation. There are several ways to do it:
-
Select in the Main Menu: Partition > Mark Partition as Active/Inactive.
- Call the popup menu for the selected partition (right click of the mouse button) on the Disk Map, then select the menu item: Mark Partition as Active/Inactive.
![Are you sure you want to set the volume as active? You are about to set the volume (F:) [No label]. NTFS as active. If you already have active volumes, this action might render your system unbootable. Yes No](/content/2026/05/788696/images/1e341c17262ec67a50cda4d74d0c748e94472614033e9accec75ac3a1d92f7d7.jpg)
- The operation will be performed immediately after confirmation.

There can only be one active partition on a hard disk, otherwise your operating system will fail to boot.
Hide/Unhide Partition
The program allows you to hide/unhide primary and logical partitions. By default, an operating system does not mount hidden partitions, thus preventing access to their contents.
In order to hide/unhide a partition you should take the following steps:
Launcher
- Select a partition on the Disk Map.
-
Call the Hide/Unhide Partition Dialog to set up the operation. There are several ways to do it:
-
Select in the Main Menu: Partition > Hide/Unhide Partition.
-
Call the popup menu for the selected partition (right click of the mouse button) on the Disk Map, then select the menu item: Hide/Unhide Partition.
-
The operation will be performed immediately after confirmation.

It is strongly recommended not to hide the system partition. Otherwise your operating system will fail to boot.
Set Label of a Partition
The Partition Label is a small textual field (up to 11 characters) that is located in the partition's boot sector. It is detectable by any partitioning tool and is used for notification purposes only.
In order to change a partition label you should take the following steps:
Launcher
- Select a partition on the Disk Map.
-
Call the Change Volume Label dialog to set up the operation. There are several ways to do it:
-
Select in the Main Menu: Partition > Modify > Change Volume Label.
- On the Explorer Bar: click on the current volume label.
-
Call the popup menu for the selected partition (right click of the mouse button) on the Disk Map, then select the menu item: Change Volume Label.
-
Enter a label for the selected partition.
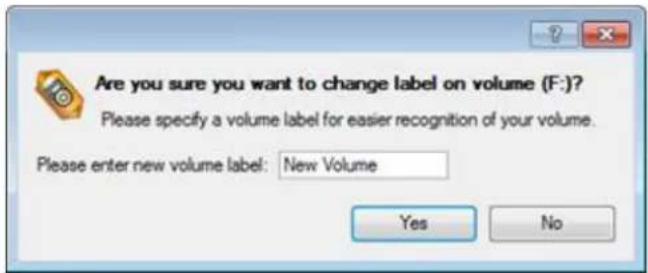
- The operation will be performed immediately after confirmation.
Change Partition ID
Partition ID is a file system identifier. It is saved in the Partition Table and is used to quickly detect a partition of the supported type. By manually changing its value, you can manipulate accessibility of partitions.
In order to change a partition ID you should take the following steps:
Launcher
- Select a partition on the Disk Map.
-
Call the Change Partition ID dialog to set up the operation. There are several ways to do it:
-
Select in the Main Menu: Partition > Modify > Change Partition ID...
- On the Explorer Bar: click on the current partition ID.
-
Call the popup menu for the selected partition (right click of the mouse button) on the Disk Map, then select the menu item: Change Partition ID...
-
Set a new ID for the selected partition.

- Predefined ID. Select from the pull-down list the required ID.
-
Enter ID manually. With the spinner control set the required ID value. It has to be a 1-2 digit hexadecimal number.
-
The operation will be performed immediately after confirmation.
Change Serial Number of a Partition
FAT16, FAT32, and NTFS file systems include the Serial Number parameter. A partition's serial number is saved in the boot sector. Its value is generated while formatting.
The program enables to modify the serial number parameter for FAT16, FAT32, or NTFS partitions without re-formatting.
In order to change a serial number you should take the following steps:
Launcher
- Select a partition on the Disk Map.
-
Call the Change Partition Serial Number dialog to set up the operation. There are several ways to do it:
-
Select in the Main Menu: Partition > Modify > Change Serial Number.
-
On the Explorer Bar: click on the current serial number.
-
Enter a new serial number for the selected partition. It should contain 8 hexadecimal figures (0..9 or A..F). The operation cannot proceed until you enter all 8 symbols.
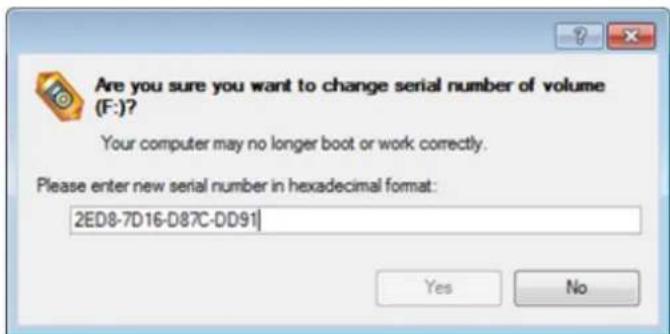
- The operation will be performed immediately after confirmation.
Hard Disk Management
In this chapter you will find all the information necessary to carry hard disk operations supported by the program (Update MBR, Convert to Basic, Change Primary Slot).
Updating MBR
The program enables to overwrite the current bootable code in the MBR (Master Boot Record) by the standard bootstrap code. This can help to repair a corrupted bootable code of a hard disk resulted from a boot virus attack or a malfunction of boot management software.
In order to update MBR of a hard disk you should take the following steps:
Launcher
- Select a hard disk on the Disk Map.
-
Call the Update MBR dialog to set up the operation. There are several ways to do it:
-
Select in the Main Menu: Hard Disk > Update MBR.
- Call the popup menu for the selected hard disk (right click of the mouse button) on the Disk Map, then select the menu item: Update MBR.
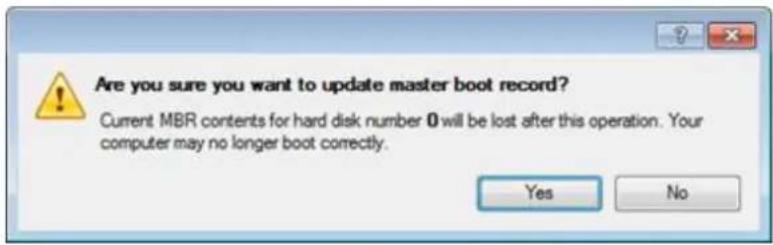
- The operation will be performed immediately after confirmation.
Converting Dynamic MBR to Basic
The program allows you to convert a dynamic MBR disk containing simple volumes into a basic one while keeping its contents intact.
In order to convert a dynamic MBR disk into basic you should take the following steps:
Launcher
- Select a dynamic MBR disk containing simple volumes on the Disk Map.
- Call the Convert to Basic dialog selecting in the Main Menu: Hard Disk > Convert to Basic...
- Set the required number of primary partitions if necessary. According to the DOS partitioning scheme a hard disk can have up to four Primary partitions. If there is an Extended partition on the disk, only three primary partitions are allowed. That is why if a dynamic disk contains several simple volumes the program enables to choose the number of primary partitions. The rest of them if any will automatically be converted to logical disks within the Extended partition.
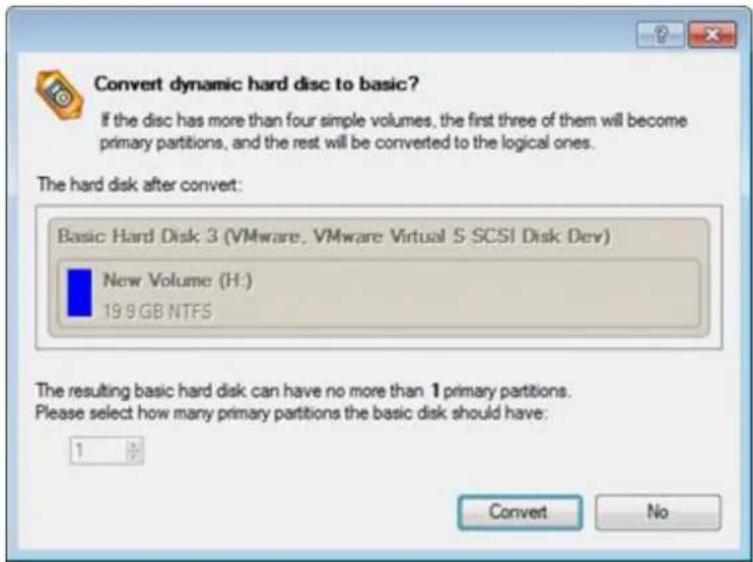

The program can only process dynamic disks containing solid simple volumes (without extension).
Converting GPT to Basic MBR
The program allows you to convert a basic or a dynamic GPT disk containing simple volumes into a basic MBR disk while keeping its contents intact.
In order to convert a basic or a dynamic GPT disk into a basic MBR disk you should take the following steps:
Launcher
- Select a basic or a dynamic GPT disk containing simple volumes on the Disk Map.
- Call the Convert to Basic MBR Hard Disk dialog selecting in the Main Menu: Hard Disk > Convert to Basic MBR Hard Disk...
- Set the required number of primary partitions if necessary. According to the DOS partitioning scheme a hard disk can have up to four Primary partitions. If there is an Extended partition on the disk, only three primary partitions are allowed. That is why if a GPT disk contains several volumes the program enables to choose the number of primary partitions. The rest of them if any will automatically be converted to logical disks within the Extended partition.
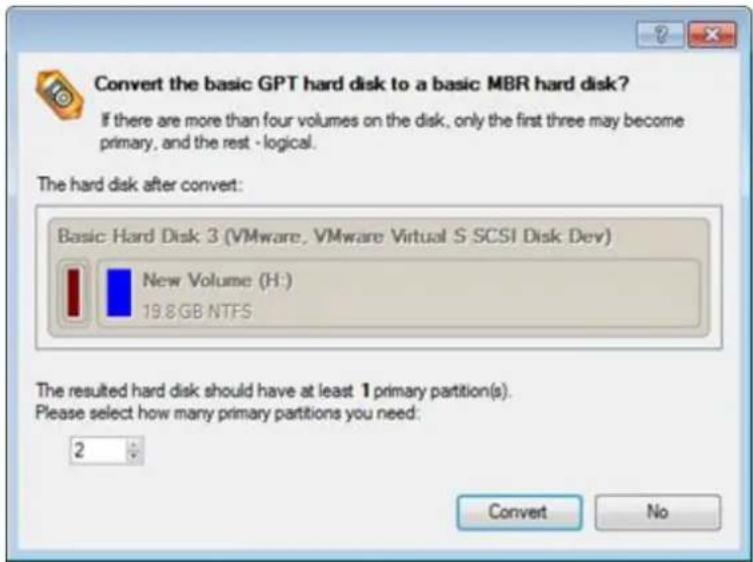

The program can only process dynamic GPT disks containing solid simple volumes (without extension).
Changing Primary Slot
Different operating systems apply different approaches to enumeration of the primary partitions.
In Linux:
In Linux, every partition has a special symbolic name that encodes a hard disk containing a partition, and a partition itself. Partitions are addressed and accessed by using their symbolic names. Symbolic names are automatically generated by Linux in accordance with the order of hard disks in BIOS and the order of partition records in the Partition Table. Thus changing enumeration of the primary partitions can lead to changing of paths to some important resources.
In DOS:
The last versions of MS-DOS use a rather sophisticated algorithm for a drive letter assignment. A drive letter, which is assigned to a partition, depends on the order of records in the Partition Table. Thus changing enumeration of the primary partitions affects the drive letters assignment. In early versions of MS-DOS, it could even lead to the unavailability of a partition.
The program provides the ability to change enumeration of the primary partitions. This feature will allow you to fix problems concerning an inappropriate order of partitions.
In order to modify enumeration of the primary partitions you should take the following steps:
Launcher
- Select a hard disk on the Disk Map.
- Call the Change Primary Slot dialog to set up the operation. There are several ways to do it:
- Select in the Main Menu: Hard Disk > Change Primary Slot.
- Call the popup menu for the selected hard disk (right click of the mouse button) on the Disk Map, then select the menu item: Change Primary Slot.
![Are you sure you want to change primary slots order? You are about to change primary slots order on Basic Hard Disk 1 (VMware, VMware Virtual S SCSI Disk Dev). Your computer may no longer boot correctly. Slot No sac Object type File System Volume label 0 Primary FAT32 [No label] 1 Primary NTFS [No l…](/content/2026/05/788696/images/3fcae5e7c63f00a4b2d8faad9cbe55b4a58727c847ace4254ccc577a5c340737.jpg)
-
In the opened dialog you can see the current enumeration of the primary partitions of the selected hard disk in the Partition Table. To help you distinguish partitions from one another, the program provides the following parameters for every partition:
-
Slot
- Volume
- Partition type
- File system
- Partition size
- Volume label
There are two buttons on the right to move the selected partition up and down within the primary part of the Partition Table.
- The operation will be performed immediately after confirmation.
Extra Functionality
This chapter describes the supplementary functionality available in the program.
View Partition/Hard Disk Properties
The program enables to obtain in-depth information on the properties of hard disks and partitions. Besides the general information, such as capacity, used space or file system type it provides the possibility to get info on hard disk geometry, cluster size, exact partition location, etc.
There are several ways to get properties on a partition/hard disk:
Launcher
-
Choose a partition/hard disk on the Disk Map, then select in the Main Menu: Partition/Hard Disk > Properties...; Copyright© 1994-2010 Paragon Software Group. All rights reserved.
-
Call the popup menu for the selected partition/hard disk (right click of the mouse button) on the Disk Map, then select the menu item: Properties...
![Local Disk (C:) | Category | Value | | :--- | :--- | | Volume label: [No label] | | | File system: NTFS | | | Type: Primary | | | Capacity: 499.9 GB | | | 536,868,814,848 Bytes | | | 1,048,571,904 Sectors | | | Used by data: 9.3 GB (1%) | | | 10,016,497,664 Bytes | | | 19,563,472 Sectors | | | Free…](/content/2026/05/788696/images/477d72d9316125b9569112ced5335e3d88adebf6920763422704a2333a878566.jpg)
In the opened dialog information will be grouped according to its properties, thus by clicking tabs you can get information you need.
Volume Explorer
Volume Explorer is a special tool to browse and export contents of the local mounted/unmounted volumes formatted to FAT16, FAT32, NTFS, Ext2FS, Ext3FS, ReiserFS file systems. Besides it enables to access Paragon backups as regular folders to explorer their contents or to retrieve certain files.
Launcher
To launch the Volume Explorer you should click Disk View tab in the Explorer Bar and then choose Volume Explorer:
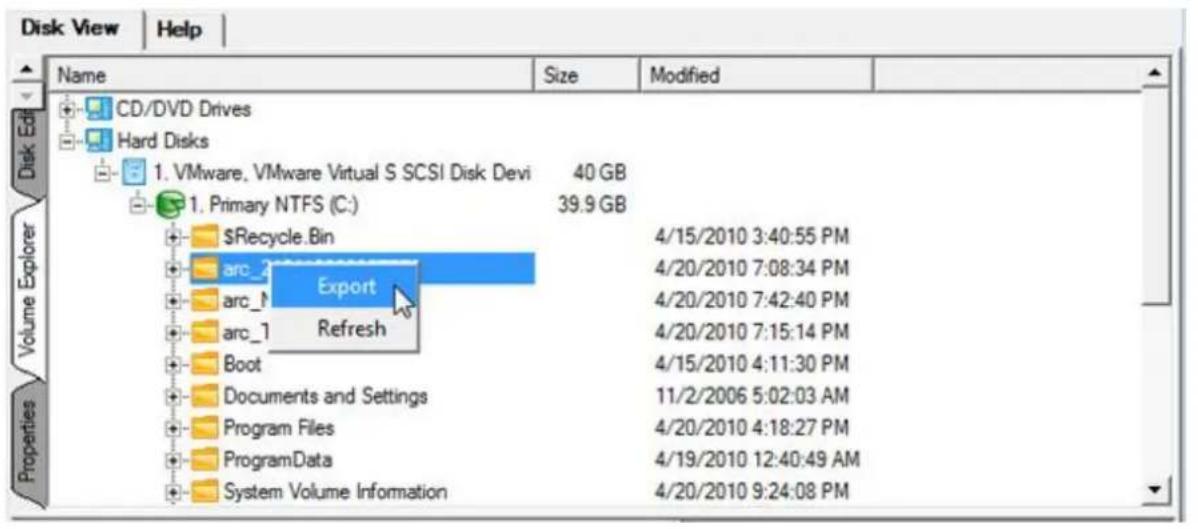
Call the popup menu for the selected file/folder (right click of the mouse button) to export it to some other location (local or network drive, etc.).
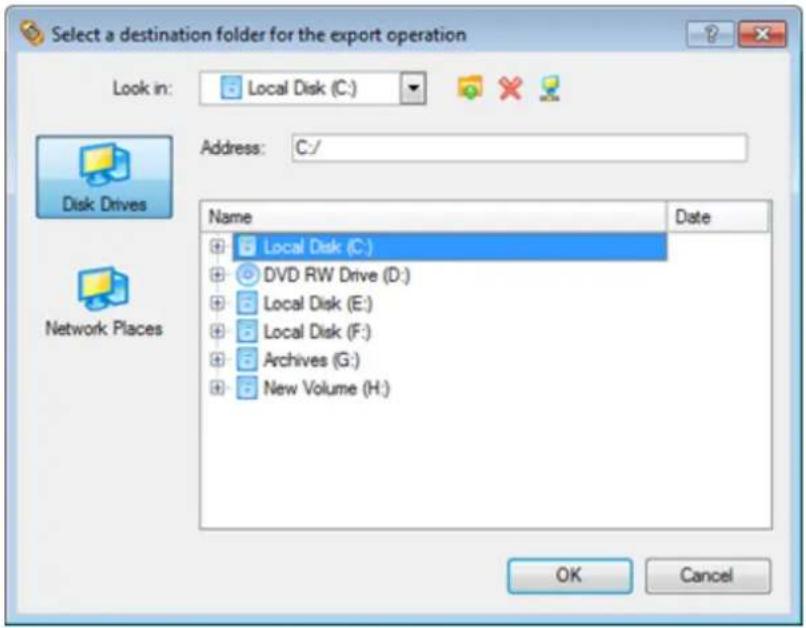
Available operation scenarios:
• Restoring separate files and folders from a backup
File Transfer Wizard
File Transfer Wizard is designed to make such operations as copying of separate files/directories or burning of them to CD/DVD as easy and convenient as possible. It may be of particular use in case of a system malfunction, caused either by a virus attack or files corruption, in order to get the system back on track again. Besides it provides access to Paragon backups as regular folders to browse through their contents or copy required files.
Startup
There are several ways to start the File Transfer Wizard:
Express Launcher
- Click the Backup and Rescue button and then select Transfer Files.
Launcher
- Select in the Main Menu: Tools > File Transfer Wizard.
- Select the Transfer Files item of the Wizards menu on the Common Tasks Bar.
Setup
The wizard offers the following steps to accomplish the transfer operation:
- Place to look for files/directories. Select a source disk from the pull-down list in the left pane of the page. The program enables to process both mounted and unmounted (without drive letter assigned) partitions. Besides it is possible to map a network drive.
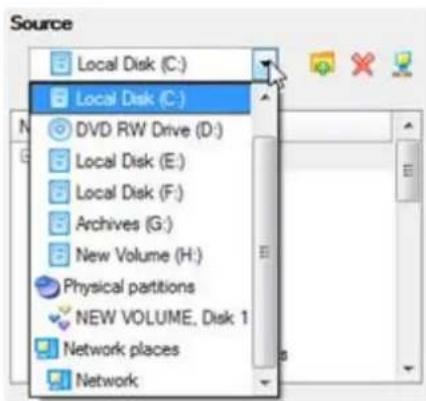
- Object(s) of operation. Choose files/directories you want to copy and place them to Clipboard by pressing the Add button. To delete a file/directory from the Clipboard, select it in the Clipboard pane and press the Remove button. You can also create a new folder, rename or irreversibly delete existing files/directories of the left pane by pressing the appropriate buttons.
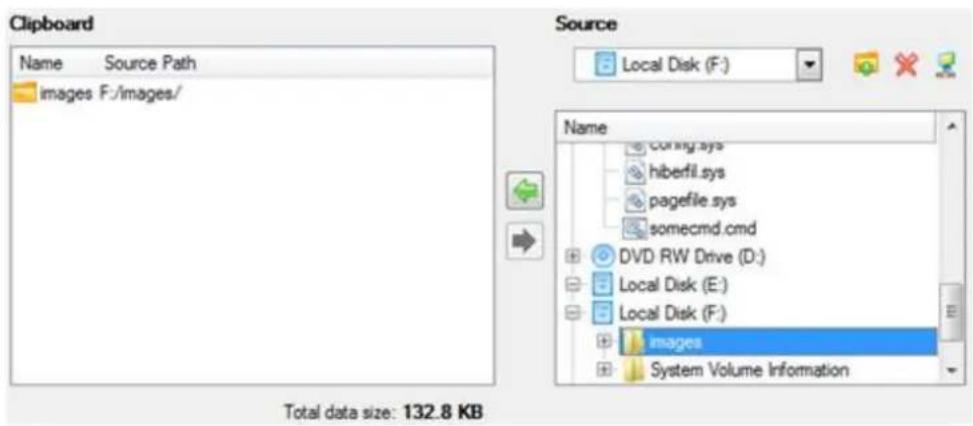

Files/directories deleted from the Clipboard remain intact on source disks.
- Destination to store the object(s). The File Transfer Wizard allows copying data to local or network drives, to physical partitions (without drive letters assigned), or burning them to CD/DVDs. Choose the way the data will be stored.
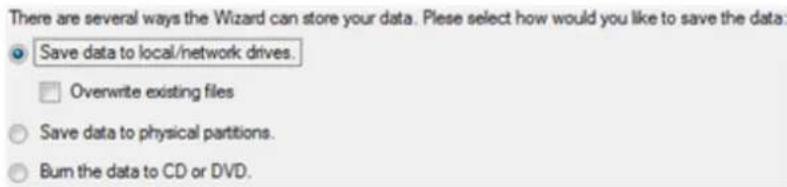
- Revision of changes. The Transfer Summary page provides structurally divided information on all the actions made in the wizard. Check the changes and come back to any step of the wizard (if necessary) by following the required hyperlink.
Please overview the transfer options. You can return to the corresponding page and change the options by clicking on title hyperlinks.
| Objects to transfer | |
| Object(s) selected: | 1 |
| Total data size: | 132.8 KB (136,024 Bytes) |
| Transfer destination | |
| Destination path: | C:/ |
| Space available on destination: | 490.6 GB (526,821,834,752 Bytes) |
| Overwrite existing files: | No |
Result
After the operation is completed the required data will be placed into the specified destination.
Available operation scenarios:
• Copying of data from the corrupted system disk to another hard disk
• Burning of data from the corrupted system disk to CD/DVD
• Copying of data from a backup to the corrupted system partition
• Restoring separate files and folders from a backup
Mount Partition
The program enables to assign or remove drive letters of existing formatted partitions.
Assign Drive Letter
In order to mount a partition you should take the following steps:
Launcher
- Select a partition on the Disk Map.
-
Call the Add Drive Letter dialog to set up the operation. There are several ways to do it:
-
Select in the Main Menu: Partition > Assign Drive Letter...
-
Call the popup menu for the selected partition (right click of the mouse button) on the Disk Map, then select the menu item: Assign Drive Letter...
-
Specify a drive letter for the selected partition. Initially the program suggests some consistent value for this parameter. So you may just press the Yes button to confirm the operation.
However you can manually define the required letter by selecting it from the pull-down list of available drive letters.
- The operation will be performed immediately after confirmation.
Remove Drive Letter
In order to un-mount a partition you should take the following steps:
Launcher
- Select a partition on the Disk Map.
-
Call the Remove Drive Letter dialog to define appropriate settings. There are several ways to do it:
-
Select in the Main Menu: Partition > Remove Drive Letter.
-
Call the popup menu for the selected partition (right click of the mouse button) on the Disk Map, then select the menu item: Remove Drive Letter.
-
The operation will be performed immediately after confirmation.

Modifying drive letter of the system partition will result in inability to boot the operating system.
After having processed partitions with installed software, some programs may not run properly.
Downgrade NTFS Version
With our program you can decrease version of an existing NTFS partition. This feature can be particularly useful when, for instance, dealing with different versions of the Windows NT family operating systems.
In order to start the operation you should take the following steps:
Launcher
- Select a partition on the Disk Map.
-
Call the Downgrade NTFS Version dialog to set up the operation. There are several ways to do it:
-
Select in the Main menu: Partition > Modify > Downgrade NTFS Version...
- On the Explorer bar: click on the current NTFS version.
- Call the popup menu for the selected partition (right click of the mouse button) on the Disk Map or on the Partition List, then select the menu item: Downgrade NTFS Version...
- Decrease version of the selected NTFS partition by selecting the one you need from the pull-down list.
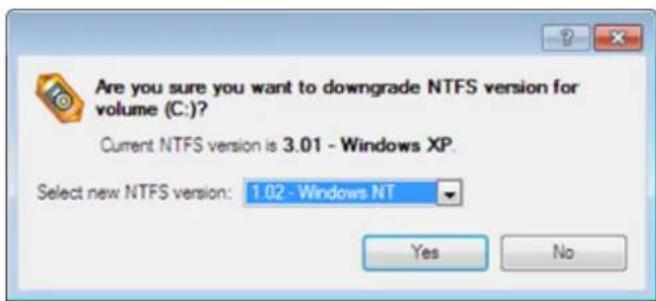
- The operation will be performed immediately after confirmation.
Test Surface
The program enables to test surface of existing partitions and blocks of free space for bad or unstable sectors. If found any it automatically marks them unusable in the file system metadata, thus minimizing the risk of data loss.
In order to start the surface test you should take the following steps:
Launcher
- Select a partition or a block of free space on the Disk Map.
-
Call the Test Surface dialog to set up the operation. There are several ways to do it:
-
Select in the Main Menu: Partition > Test Surface...
-
Call the popup menu for the selected partition (right click of the mouse button) on the Disk Map, then select the menu item: Test Surface...
-
From the pull-down list choose the level of the surface check.
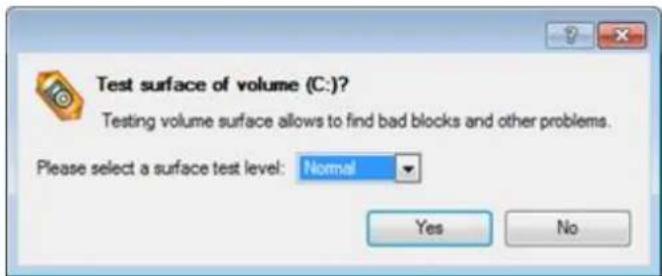
- The operation will be performed immediately after confirmation.
Check File System Integrity
The program allows you to check integrity of a file system. It can be used to detect possible file system errors before performing any operation on a partition.
To start the system integrity check you should take the following steps:
Launcher
- Select a partition on the Disk Map
-
Call the Check File System Integrity dialog to set up the operation. There are several ways to do it:
-
Select in the Main Menu: Partition > Check File System Integrity
-
Call the popup menu for the selected partition (right click of the mouse button) on the Disk Map, then select the menu item: Check File System Integrity.
-
Initially the program suggests some consistent values for all parameters. In most cases, you can just press the Yes button to confirm the operation.
![Check volume (C:) [No label], NTFS for errors? Please note that check operation needs exclusive access to the volume. You may be asked to restart your computer to complete the operation. Check disk options: □ Scan for and attempt recovery of bad sectors Yes No](/content/2026/05/788696/images/350c907be5f0f6e6c1421dd7f6ecca4232a1539d88e734d0ff0c747215669315.jpg)
- Scan for and attempt to recover bad sectors. Mark the checkbox to additionally process sectors marked bad in the file system metadata for the purpose of their possible recovery.
- The operation will be performed immediately after confirmation.
Edit/View Sectors
With the built-in Edit/View Sectors tool the program enables to view/edit sectors on existing partitions/hard disks providing the possibility to directly access and modify sectors, save and restore sectors from specified files, navigate through the system metadata, etc.
In order to edit/view sectors of a hard disk/partition you should take the following steps:
Launcher
- Select a hard disk/partition on the Disk Map.
-
Call the Edit/View Sectors dialog to set up the operation. There are several ways to do it:
-
Click the Disk View tab and then choose Disk Editor.
- Select in the Main Menu: Partition/Hard Disk > Edit/View Sectors.
- Call the popup menu for the selected partition/hard disk (right click of the mouse button) on the Disk Map, then select the menu item: Edit/View Sectors.
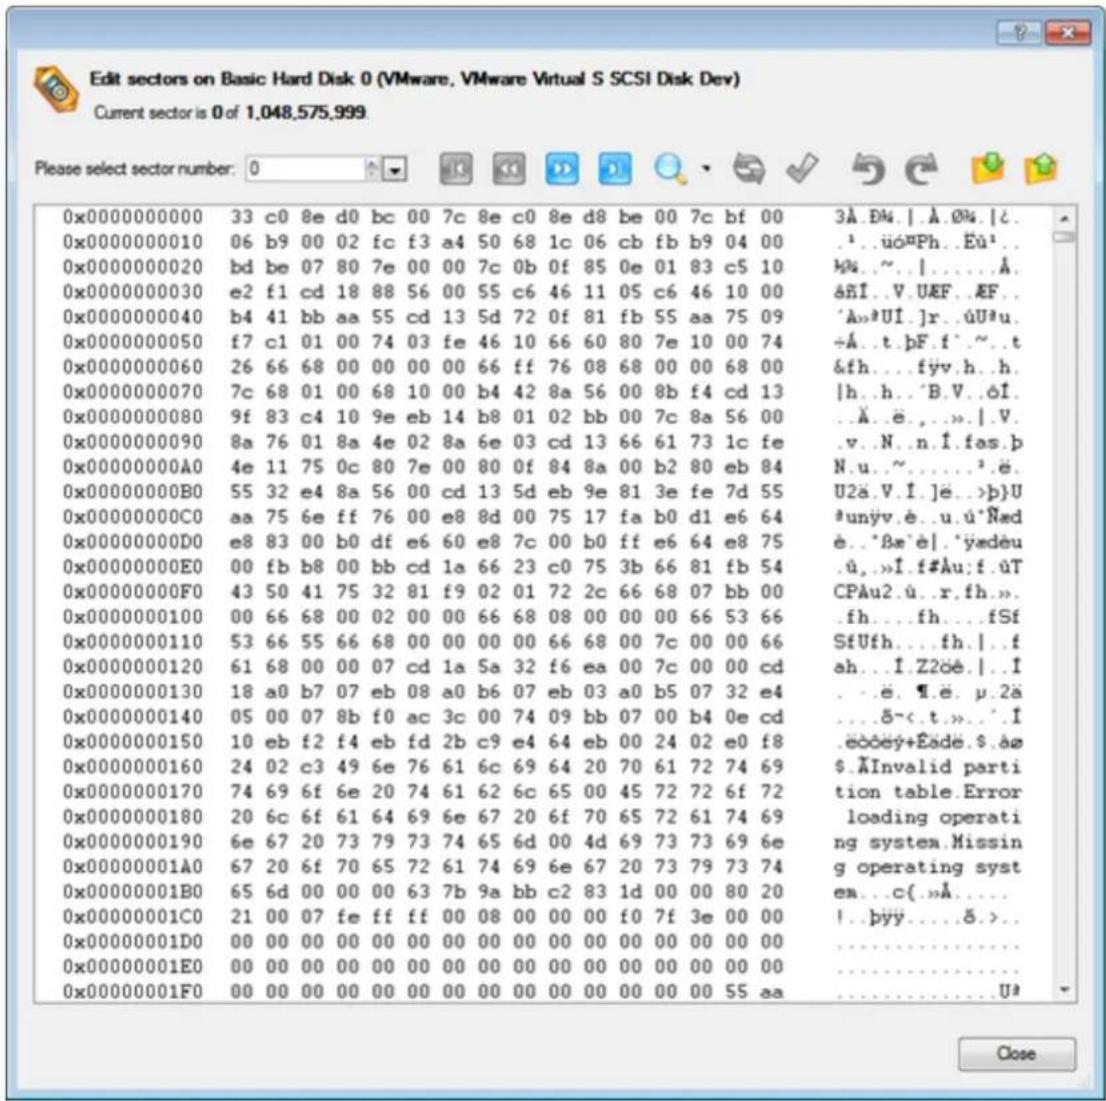

Careless use of the Edit Sectors function may result in the irreversible data corruption.
Send Log Files
The program enables to simplify the procedure of sending support requests to the Paragon Support Team. In case of having difficulties with handling the program, you, with the help of this very function, can address the company support engineers and provide them with all the information they need such as the disk layout, performed operations, etc. in order to tackle the encountered problem. Information of that kind is stored in Log files.
In order to send log files to the Paragon Support Team you should take the following steps:
Launcher
- Call the Send Log Files dialog in the Main Menu: Tools > Send Log Files;
- Provide a customer name and a product serial number;
- Give a detailed description on the encountered problem.
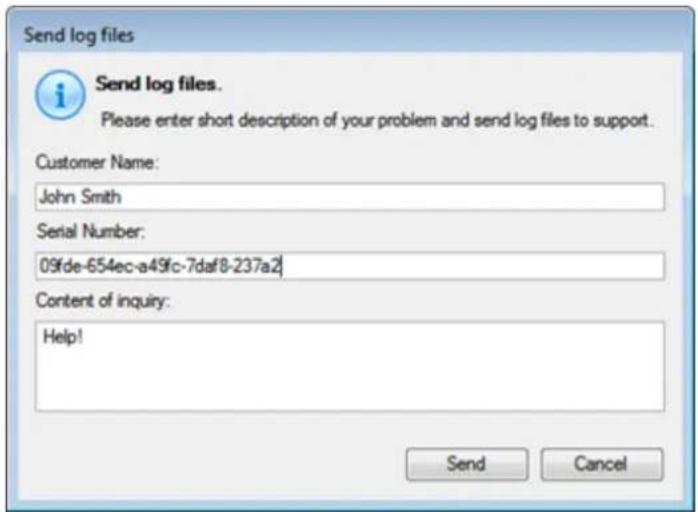
By clicking the Send button the built-in mail client will generate a template request with attached compressed log files and then send it to the Paragon Support Team.
Log Files
Log files are simple textual files that can be opened by any text editor. There are several log files automatically generated by the program:
| Stubact.log | Contains in-depth information on parameters and performance of all operations carried out by the program |
| Pwlog.txt | Besides brief overview on operations it also contains detailed information about the state of all hard disks |
| Cdb.log | Contains low-level information on the CD/DVD devices used in the system |
| BioNTlog.txt or Bio95log.txt | It is an OS-dependent supplementary log file derived from Bioxx.dll. It may contain valuable information on Windows family operating systems |

Log files do not contain any confidential information on the operating system settings or the user documents.
The Send Log Files function is only available when outgoing mail server (SMTP) and the user e-mail address are properly set. To learn more about it please consult the Settings Overview chapter.
View Logs
With a handy dialog you can study logs on any operation carried by the program. To make this job as easy as possible, all the information is structurally divided, besides there is the possibility to see the disk layout before and after an operation, what is very convenient.
In order to view logs on carried out operations call the View Logs dialog in the Main Menu: Tools > View Log Files
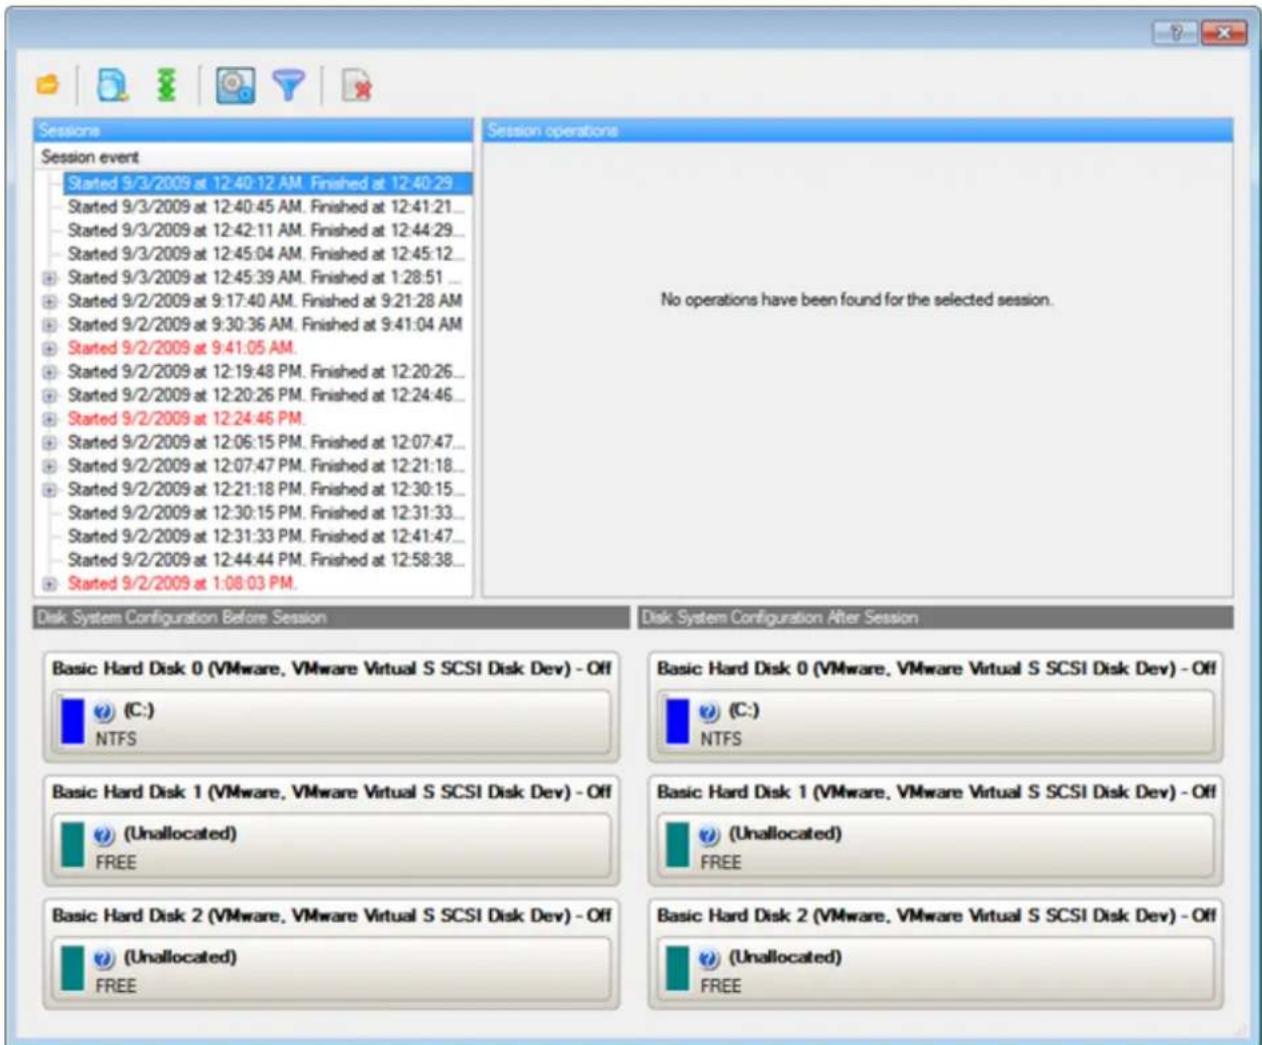
Typical Scenarios
This chapter lists a number of the most frequently used scenarios that may be accomplished with the program. You can find here useful recommendations and descriptions of operations.
Backup Scenarios
Backing up a hard disk or partition to external media (CD/DVD)
To back up an entire hard disk or a separate partition and then burn the resulted image to CD/DVD, please do the following:
Launcher
- Click the Back up a Disk or Partition item of the Wizards menu (any of the ways described earlier can also be used here).
- On the Wizard's Welcome page, click the Next button.
- On the What to back up page, mark the appropriate option opposite a hard disk's name or a partition's name depending on the chosen task.


You've got the option to modify the default backup settings by marking the appropriate checkbox on this page.
- On the Backup Destination page, select the Burn the data to CD or DVD option.

- Select a recordable device on the list of available CD/DVD devices and edit the archive name, if necessary.
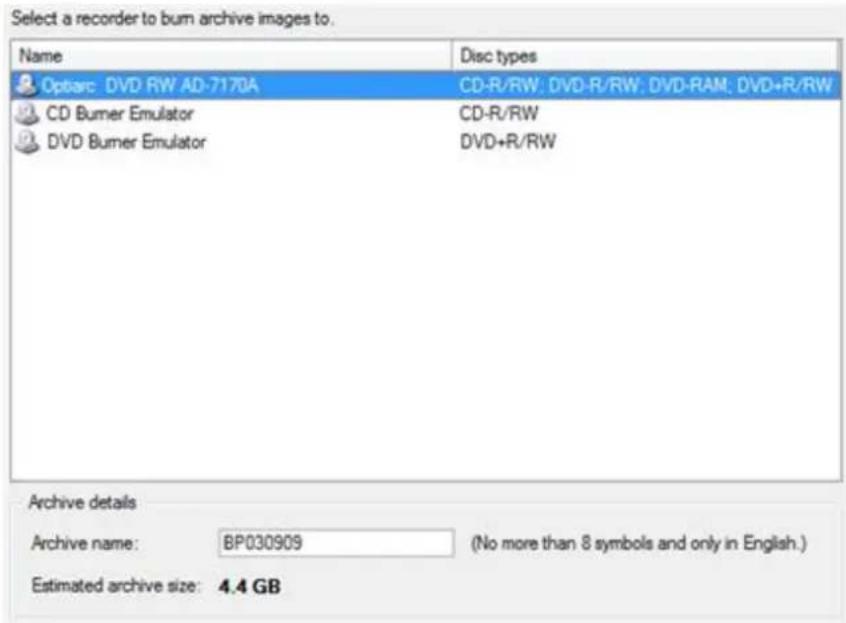

Please take into account the Estimated archive size value. It can give you a hint about the number of CD/DVD discs required for the operation.
- Add comments to your backup describing its contents.
Please enter a short comment to describe the archive

No comment
- On the Backup Summary page review all parameters of the operation and modify them if necessary. Click the Next button to start the backup process.

This operation can also be accomplished with the Linux/DOS or WinPE recovery environments.
Backing up a hard disk or partition to a network drive
To back up an entire hard disk or a separate partition and then place the resulted image to a network share, please do the following:
Launcher
- Click the Back up a Disk or Partition item of the Wizards menu (any of the ways described earlier can also be used here).
- On the Wizard's Welcome page, click the Next button.
- On the What to back up page, mark the appropriate option opposite a hard disk's name or a partition's name depending on the chosen task.
Click the check box next to any hard disk drive or partition you want to back up
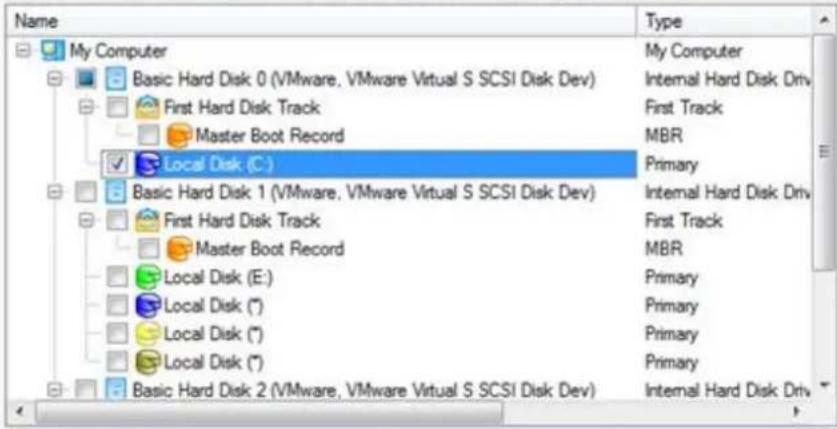

The size of objects to back up: 499.9 GB Estimated archive size 7.2 GB

You've got the option to modify the default backup settings by marking the appropriate checkbox on this page.
- On the Backup Destination page, select the Save data to local/network drives option.
There are several ways the Wizard can store your data. Please select how would you like to save the archive:
Save data to local/network drives.
C Bum the data to CD or DVD.
- Map a network disk to place your backup image to:
- Call the Map Network Drive dialog by clicking the appropriate button;
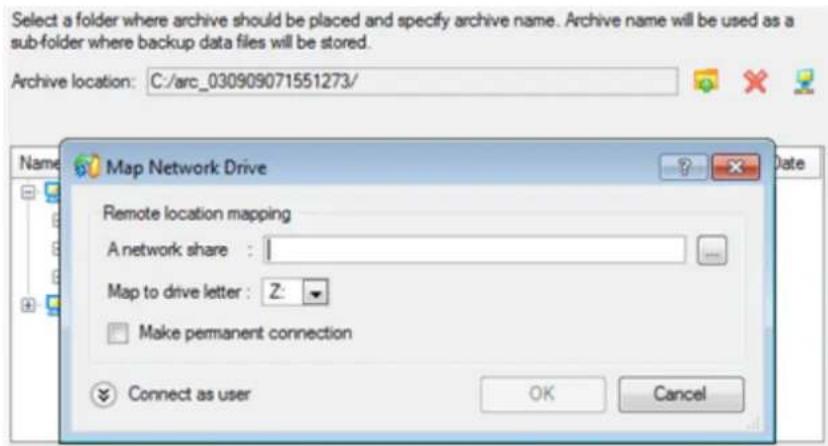
- Click the standard browse button [...] to browse for the required network share or manually enter a path to it;
- Define a letter from the pull-down list of available drive letters;
- Mark the checkbox to make this connection permanent. Otherwise it will only be available for the current Windows session;
-
Click the Connect as user button at the foot of the dialog page to specify a user name and password to access the selected network share if necessary.
-
Edit the archive name if necessary.
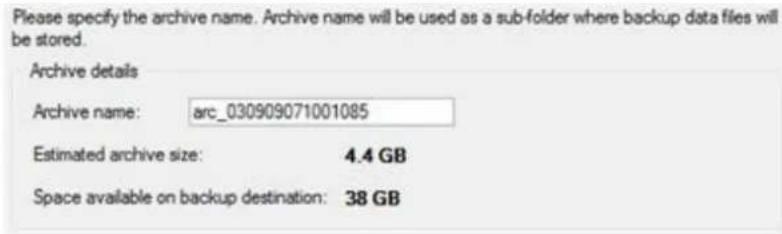

Please take into account values of the parameters Estimated archive size and Space available on backup destination - if the archive size exceeds the available space, another network drive needs to be selected.
- Add comments to your backup describing its contents.

- On the Backup Summary page review all parameters of the operation and modify them if necessary. Click the Next button to start the backup process.

This operation can also be accomplished with the Linux/DOS or WinPE recovery environments.
Backing up a dual boot Mac to an external USB drive
To back up a dual boot Mac (Mac OS X and Windows XP/Vista/7) and then place the resulted image to an external USB drive, please do the following:
- Start up the computer from our Linux/DOS recovery media.

Recovery Media Builder can help you prepare the Linux/DOS or WinPE recovery environment either on a CD/DVD disc or a thumb drive.
To automatically boot from the recovery media please make sure the on-board BIOS is set up to boot from CD/USB first.
- Connect an external USB drive to the computer.
- Restart the computer. It will be automatically started up into the Linux recovery environment (Normal Mode), since it's the only mode that provides support for Mac computers.
- In the Linux launch menu select Partition Manager.

Paragon Partition Manager™

Restore Wizard

File Transfer Wizard

Boot Corrector

Network Configurator

Log Saver

View the mounted partitions

Start the command line

Eject CD/DVD

Reboot the computer

Power off
You can create, delete and format hard disk partitions using Paragon Partition Manager™, which will start now. Upon the start, please select the drive and one of its partitions or its free space. Then activate the 'Partition' pull-down menu and select one of the partitioning operations.
- Launch the Backup Wizard by selecting in the Main Menu of the program: Wizards > Backup Wizard.
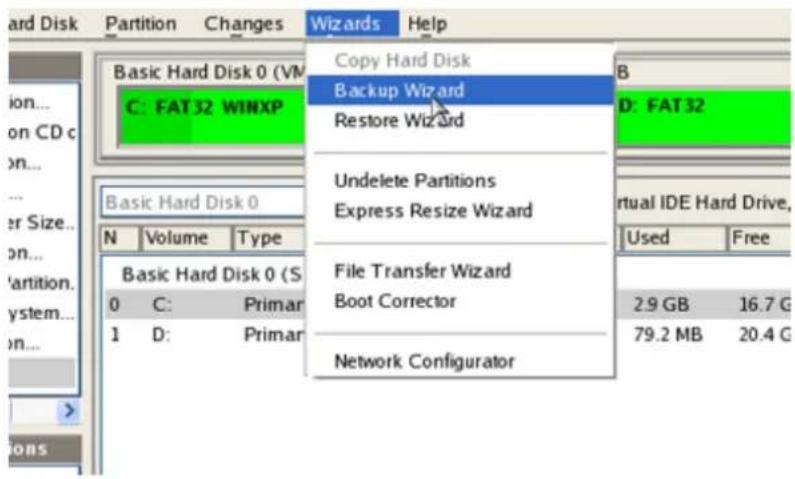
- On the Wizard's Welcome page, click the Next button.
- On the What to back up page, select your Mac hard disk.
![Retained GPT Disk 0 Model VMware Virtual IDE Hard Drive, Size 112 Gb N Volume Type File System Size Used Volume label Active Retained GPT Disk 0 (Size 112 Gb) 1 *: Primary Apple HFS 54.9 Gb 14.2 Gb leopard No 3 *: Primary NTFS 56.6 Gb 10.9 Gb [No label] Yes](/content/2026/05/788696/images/6e5f3c0c3bb7027ea6910c128166aac72d11889fa0f3947f75cf66c96d6eed30.jpg)
- On the Backup Destination page, select the Save data to any local drive or a network share option.
Please select how would you like to save the archive:
Save data to any local drives or a network share Choose this option if you want to save your data to local mounted or physical partition, to USB or FireWare external drives and to a mounted network share. You will be prompted to choose a location you want to save the archive to.
Burn data to CD/DVD Choose this option if you want the Wizard to burn the archive to CD or DVD. You will be prompted to choose a CD or DVD RW drive.
- Select an external USB drive as a backup destination.
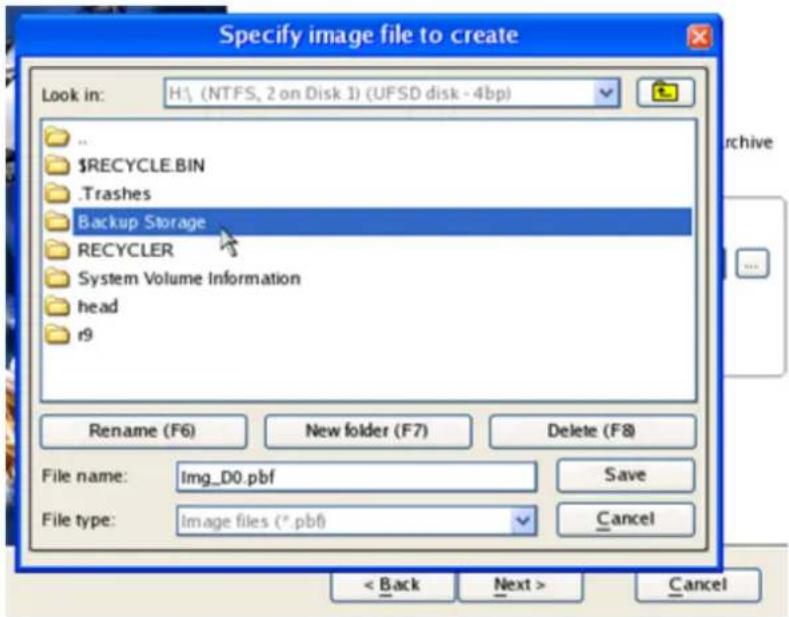
- Edit the archive name if necessary.
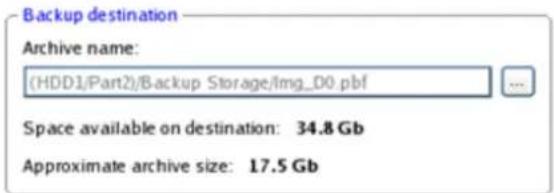

Please take into account values of the parameters Estimated archive size and Space available on backup destination - if the archive size exceeds the available space, another drive needs to be selected.
- Add comments to your backup describing its contents.
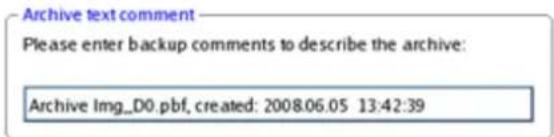
- On the Backup Summary page review all parameters of the operation and modify them if necessary. Click the Next button to start the backup process.

This operation can also be accomplished with the WinPE recovery environment or under Windows.
Recovery Scenarios
Fixing MBR after a boot virus attack
Let's assume that the MBR (Master Boot Record) of your hard disk has been corrupted as a result of a boot virus attack, thus your system fails to boot.
To fix the MBR of your hard disk, please do the following:
- Start up the computer from our Linux/DOS recovery media.

Recovery Media Builder can help you prepare the Linux/DOS or WinPE recovery environment either on a CD/DVD disc or a thumb drive.
To automatically boot from the recovery media please make sure the on-board BIOS is set up to boot from CD/USB first.
- In the boot menu select Normal Mode to use the Linux recovery environment (more preferable) or Safe Mode to use the PTS DOS recovery environment (in case you've got problems with Linux). Moreover you've got the option to boot into the Low- Graphics Safe Mode (PTS DOS safe mode) to cope with a serious hardware incompatibility. In this case, only the minimal set of drivers will be included, like hard disk, monitor, and keyboard drivers. This mode has simple graphics and a simple menu.
| Normal Mode Safe Mode Low- Graphics Safe Mode Floppy disk Hard disk 0 MBR Find OSes on your hard disks | Main recovery environment |

By default the Normal Mode will be automatically initiated after a 10 second idle period.
- In the Linux launch menu select Boot Corrector. You can find it in PTS DOS as well.
| Paragon Partition Manager™ | You can create, delete and format hard disk partitions using Paragon Partition Manager™, which will start now. Upon the start, please select the drive and one of its partitions or its free space. Then activate the 'Partition' pull-down menu and select one of the partitioning operations. |
| Restore Wizard | |
| File Transfer Wizard | |
| Boot Corrector | |
| Network Configurator | |
| Log Saver | |
| View the mounted partitions | |
| Start the command line | |
| Eject CD/DVD | |
| Reboot the computer | |
| Power off |
- On the Wizard's Welcome page, select the Correct the Master Boot Record (MBR) option.
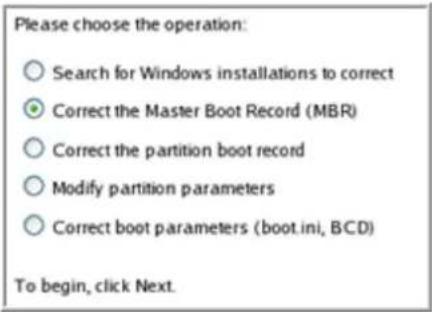
- On the next page choose the required hard disk from the pull-down list (if several) and then select the Update the MBR executable code option.

- Confirm the operation.
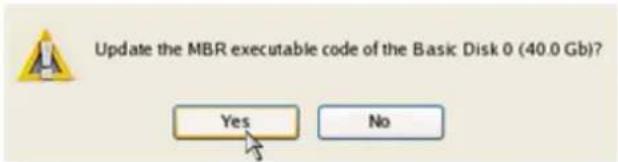
- After the operation is completed click the Report button to see a well informative summary page. The program also enables to store the resulted report. To do that, just press the Save button and choose the exact location in the opened dialog.
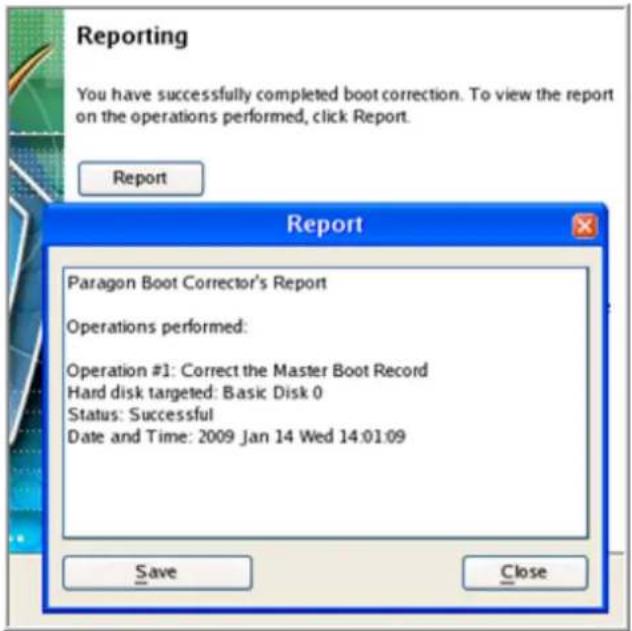
-
Click the Finish button to close Boot Corrector.
-
Reboot the computer.
Fixing Windows startup ability
Let's assume that due to an unknown reason your Windows fails to complete the startup procedure. At first everything seems quite OK, you can see the standard startup messages on the screen, but at some moment it hangs up.
To fix your Windows startup ability, please do the following:
- Start up the computer from our Linux/DOS recovery media.

Recovery Media Builder can help you prepare the Linux/DOS or WinPE recovery environment either on a CD/DVD disc or a thumb drive.
To automatically boot from the recovery media please make sure the on-board BIOS is set up to boot from CD/USB first.
- In the boot menu select Normal Mode to use the Linux recovery environment (more preferable) or Safe Mode to use the PTS DOS recovery environment (in case you've got problems with Linux). Moreover you've got the option to boot into the Low- Graphics Safe Mode (PTS DOS safe mode) to cope with a serious hardware incompatibility. In this case, only the minimal set of drivers will be included, like hard disk, monitor, and keyboard drivers. This mode has simple graphics and a simple menu.
| Normal Mode Safe Mode Low- Graphics Safe Mode Floppy disk Hard disk 0 MBR Find OSes on your hard disks | Main recovery environment |

By default the Normal Mode will be automatically initiated after a 10 second idle period.
- In the Linux launch menu select Boot Corrector. You can find it in PTS DOS as well.
| Paragon Partition Manager™ | You can create, delete and format hard disk partitions using Paragon Partition Manager™, which will start now. Upon the start, please select the drive and one of its partitions or its free space. Then activate the 'Partition' pull-down menu and select one of the partitioning operations. |
| Restore Wizard | |
| File Transfer Wizard | |
| Boot Corrector | |
| Network Configurator | |
| Log Saver | |
| View the mounted partitions | |
| Start the command line | |
| Eject CD/DVD | |
| Reboot the computer | |
| Power off |
- On the Wizard's Welcome page, select the Search for Windows installations to correct option.
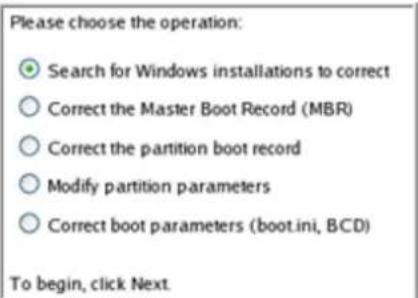
- On the next page choose the required Windows installation from the list of found installations (if several), then select the Edit the Boot.ini file option. If you're not sure which installation you need, please use the Properties button to get more info on the selected item.
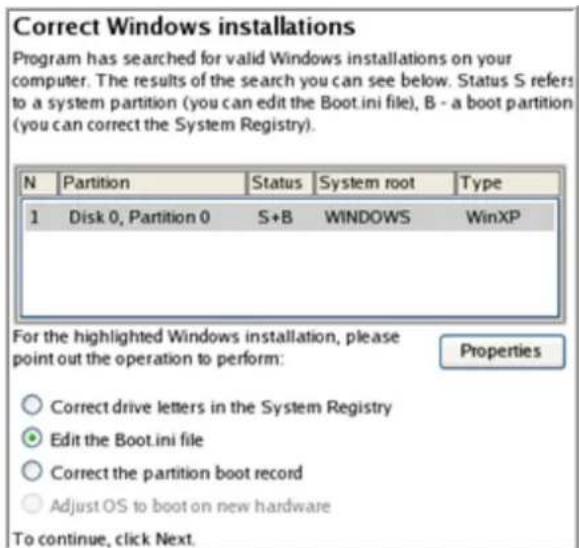
- Examine the file – maybe that's where the problem is. If it contains a mistake, correct it by using the appropriate buttons.
![[boot loader] timeout=10 default=multi(0)disk(0)rdisk(0)partition(1)\WINDOWS [operating systems] multi(0)disk(0)rdisk(0)partition(1)\WINDOWS="Paragon VMWare Windows XP Partition 01" /fastdetect /t Copy Insert Add Delete Edit Insert the sample Add the sample](/content/2026/05/788696/images/57496a7ed55d60b6e4ea6ce518c18a3bcd3065a7a7fac1021178a760465d59e1.jpg)
- If the Boot.ini file does not contain any mistake, please return to the Correct Windows Installations page to correct drive letters in the Windows System Registry.
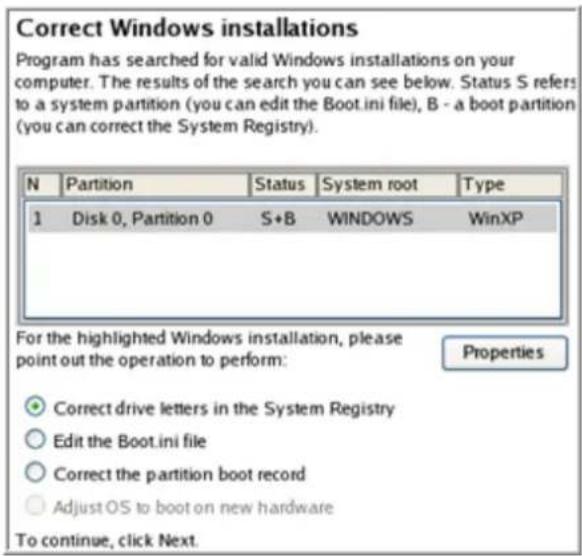
- On the next page choose a hard disk from the pull-down list (if several), then the required partition. If you're not sure which installation you need, please use the Properties button to get more info on the selected item.
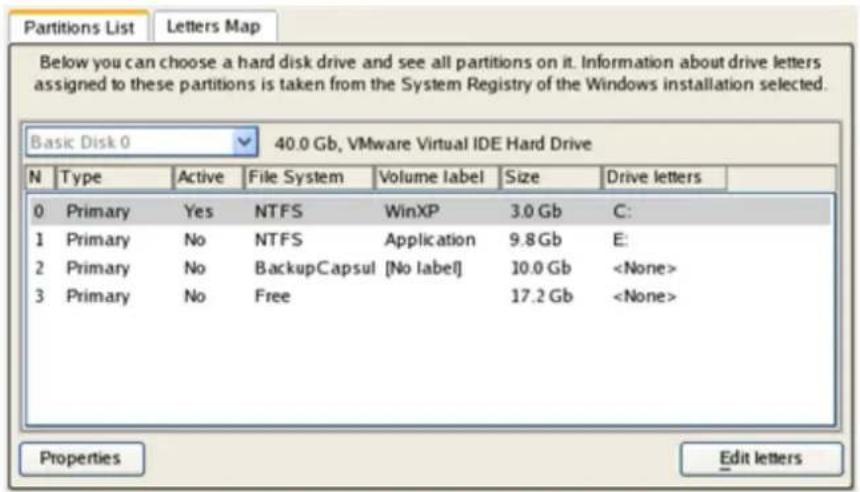
- Click the Edit Letters button to correct an existing drive letter or assign a new one in the Windows System Registry.
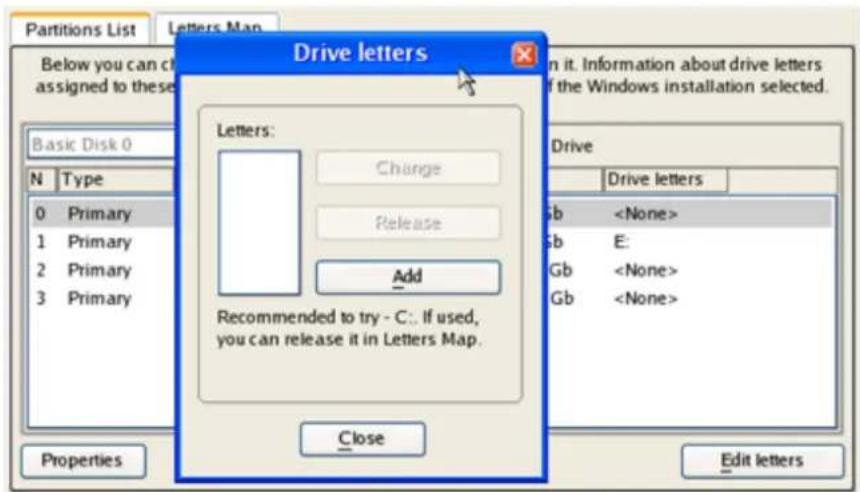
- Once you've assigned the appropriate drive letter, close the dialog, then click the Apply button.
- Confirm the operation.
- After the operation is completed click the Report button to see a well informative summary page. The program also enables to store the resulted report. To do that, just press the Save button and choose the exact location in the opened dialog.
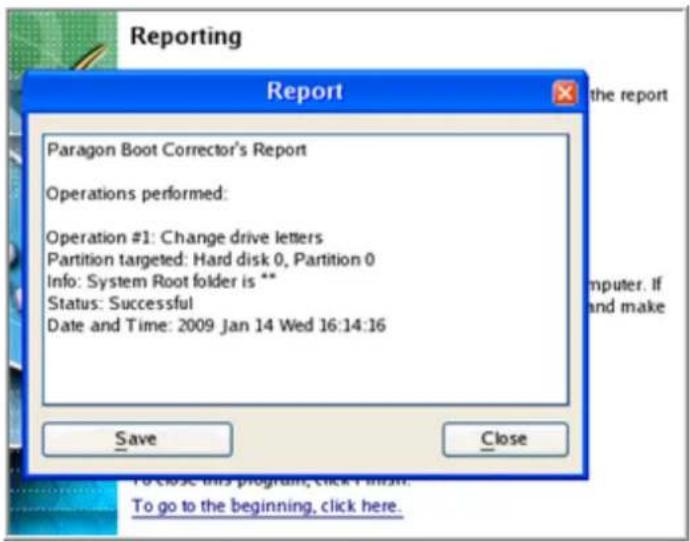
- Click the Finish button to close Boot Corrector.
- Reboot the computer.
Restoring a system partition from external media (CD/DVD)
Let's assume that your computer fails to boot because of a virus attack or corruption of some system critical files. But you've got a backup of your system partition on a bootable DVD disc. That's just enough to easily get your system back on track again.
To restore your system partition from a backup image located on CD/DVD when the current OS is down, please do the following:
- Insert a CD/DVD disc containing the previously prepared backup image into a CD/DVD drive (the BIOS must be enabled to boot the system from the CD/DVD device).

This scenario implies that you have got a bootable archive on your CD/DVD.
In case the backup image is stored on several CD/DVD disks, please insert the first one.
- Restart the computer.
- In the boot menu select Normal Mode to use the Linux recovery environment (more preferable) or Safe Mode to use the PTS DOS recovery environment (in case you've got problems with Linux). Moreover you've got the option to boot into the Low- Graphics Safe Mode (PTS DOS safe mode) to cope with a serious hardware incompatibility. In this case, only the minimal set of drivers will be included, like hard disk, monitor, and keyboard drivers. This mode has simple graphics and a simple menu.
| Normal Mode Safe Mode Low- Graphics Safe Mode Floppy disk Hard disk 0 MBR Find OSes on your hard disks | Main recovery environment |

By default the Normal Mode will be automatically initiated after a 10 second idle period.
- In the PTS DOS launch menu select the Restore Wizard. You can find the same wizard in Linux as well.
| Paragon Partition Manager™ Restore Wizard File Transfer Wizard Boot Corrector Start the command line Reboot the computer | Provides Restore for hard disks/partitions. All drives (including NTFS) are already mounted as c:, d:, e:, etc. It is possible to eject your CDROM. |
- On the Wizard's Welcome page, click the Next button.
- On the What to Restore page, you can see a list of available images (if several). Most likely the required archive will be there too. If not, click the standard browse button [...] to find it. When you find your image, double click on it to proceed.

You can select image from list below (on Double click):
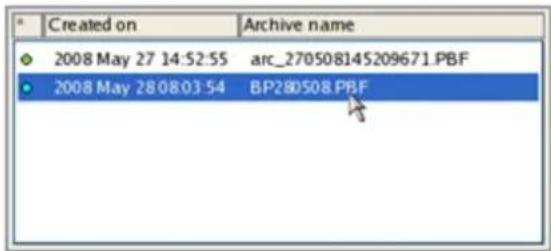
- On the Image Properties page, make sure that you select the correct image by viewing the provided information about the archive.
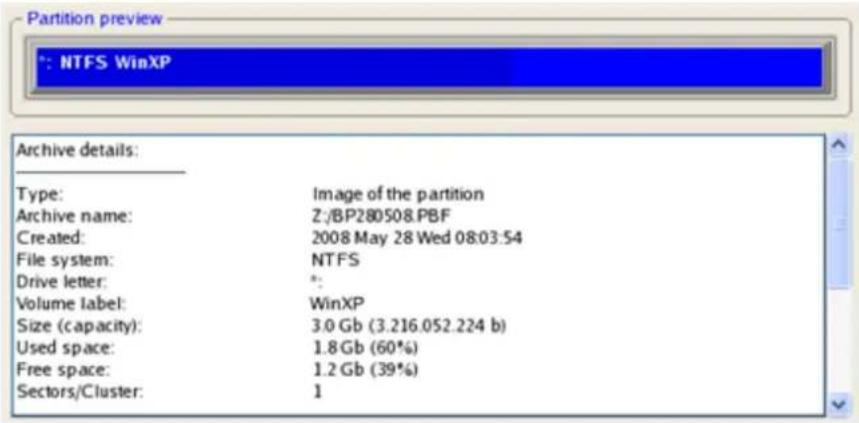
- On the next page specify a hard disk, then one of its partitions to restore the image to (if several in your computer). By default, the program offers to restore the archive exactly where it belongs. That's what we actually need.
![Basic Disk 0 - 40.0 Gb NTFS BackupCapsule Free Basic Disk 0 Size 40.0 Gb N Volume Type File System Size Volume label Active Hidden 0 *: Primary NTFS 3.0 Gb WinXP Yes No 1 *: Primary NTFS 9.8 Gb Application No No 2 *: Primary BackupCapsule 10.0 Gb [No label] No Yes 3 *: Primary Free 17.2 Gb No No](/content/2026/05/788696/images/9252bc6ad794eca19471eae0c1069860ed239cb8b746dac6df19376a8c3ce8b9.jpg)

All contents on the partition selected for restoring purposes will be deleted during the operation.
- On the Partition Start and Size page you can change size of the partition and its location if necessary.
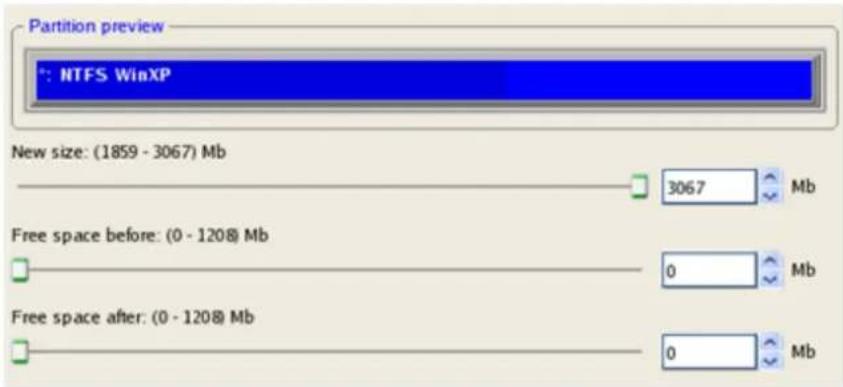
- On the Restore Summary page you can see your hard disk layout before and after the operation. Click the Next button to initiate the restore process.
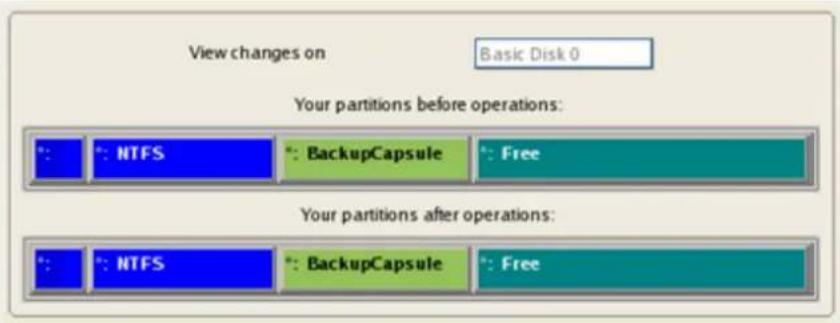
- In the Progress window you can see in real-time a detailed report on all actions carried out by the program.
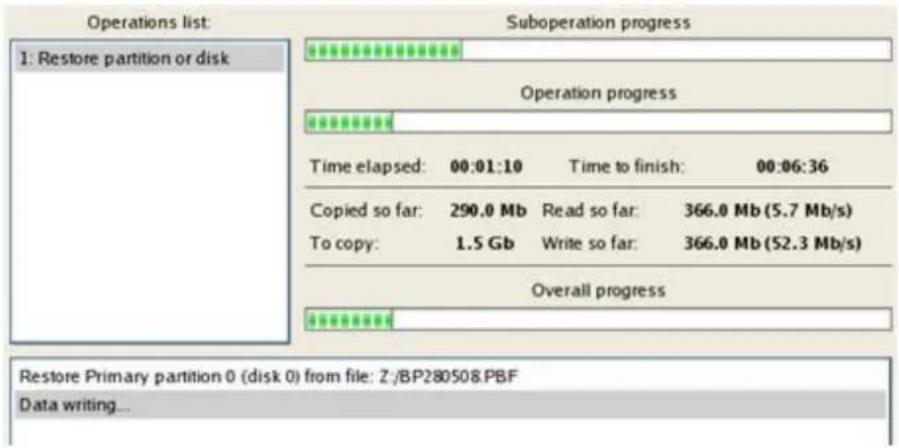
- After completing the operation close the wizard, and then reboot the computer.

This operation can also be accomplished with the WinPE recovery environment.
To make a Win2K+ operating system bootable on different hardware, please additionally complete the P2P Adjust OS Wizard.
Restoring a system partition from a network drive
Let's assume that your computer fails to boot because of a virus attack or corruption of some system critical files. But you've got a backup of your hard disk on a remote backup server. That's just enough to easily get your system back on track again.
To restore your system partition from a backup image located on a network drive, please do the following:
- Start up the computer from our WinPE recovery media.

Recovery Media Builder can help you prepare the Linux/DOS or WinPE recovery environment either on a CD/DVD disc or a thumb drive.
To automatically boot from the recovery media please make sure the on-board BIOS is set up to boot from CD/USB first.
- Once it has been loaded, read the agreement and then mark the appropriate checkbox to accept.
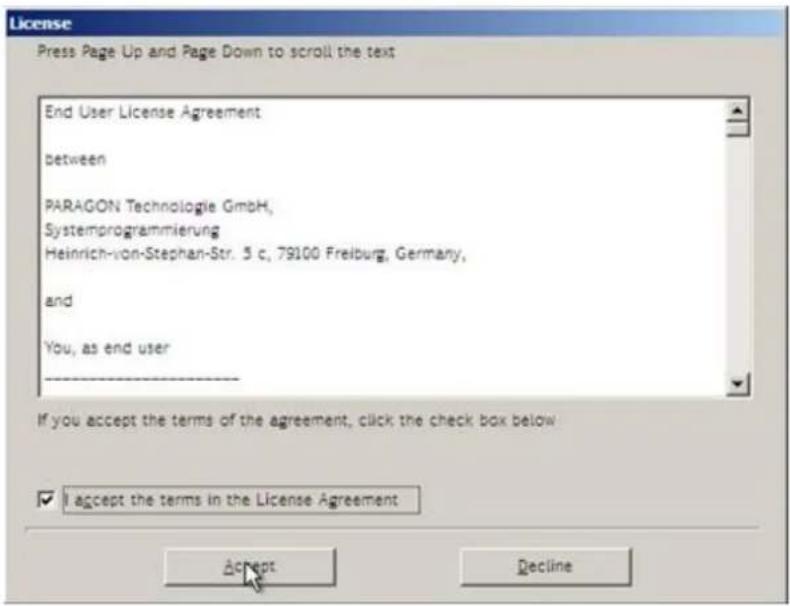

If you do not agree with any conditions stated there, you won't be able to use the program.
- Once you accept the agreement, you will see the Universal Application Launcher. Select the Restore Wizard.
- On the Restore Wizard's Welcome page, click the Next button.
- On the Browse for Archive page you need to specify the required backup image. So you should take the following steps to do that:
- Select Network as a backup destination;
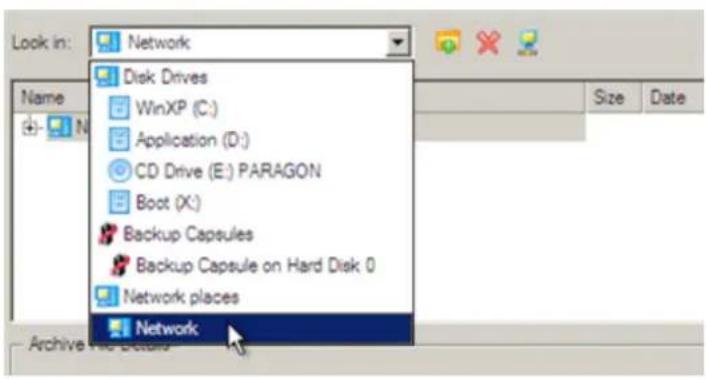
- Map a network disk where your archives are placed:
- Call the Map Network Drive dialog by clicking the appropriate button;
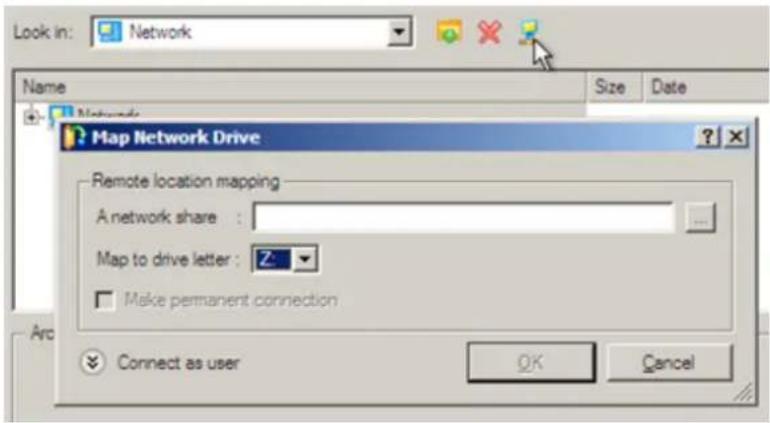
- Click the standard browse button [...] to browse for the required network share or manually enter a path to it;
- Define a letter from the pull-down list of available drive letters;
- Click the Connect as user button at the foot of the dialog page to specify a user name and password to access the selected network share if necessary.

You can also map a network disk with Network Configurator.
- Choose the required archive in the browser-like window. The Archive File Details section displays a short description of the selected image.
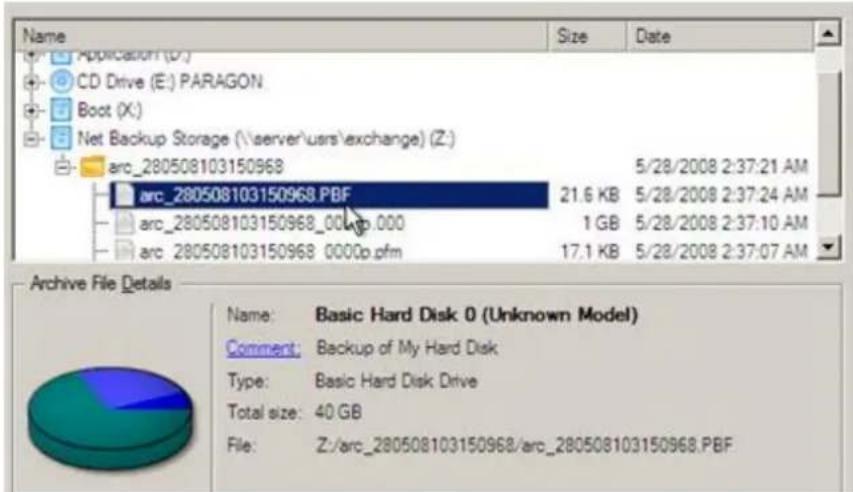
- The What to Restore page displays detailed information about the contents of the archive. Select the required item to restore. In our case it is the first partition of the disk.
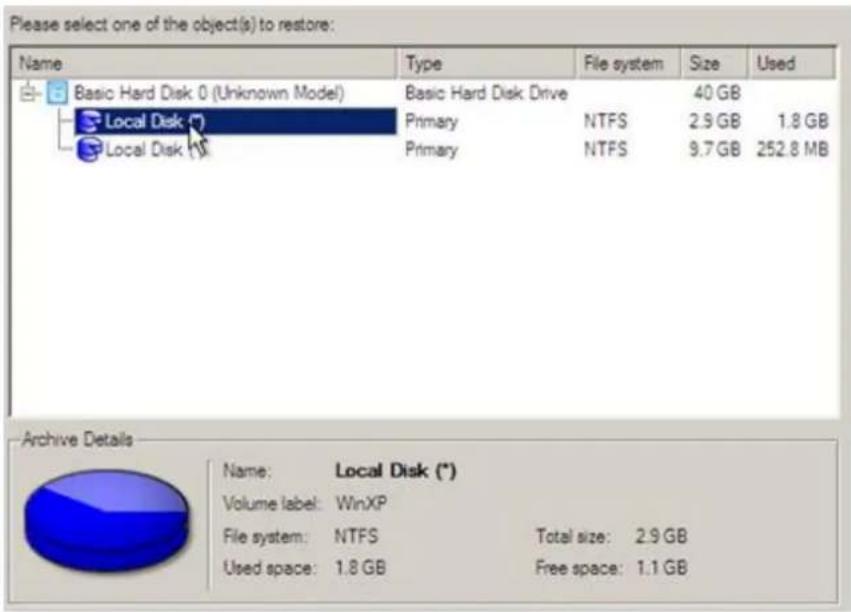
- On the Where to Restore page specify a hard disk, then one of its partitions to restore the image to (if several in your computer). By default, the program offers to restore the archive exactly where it belongs. That's what we actually need.
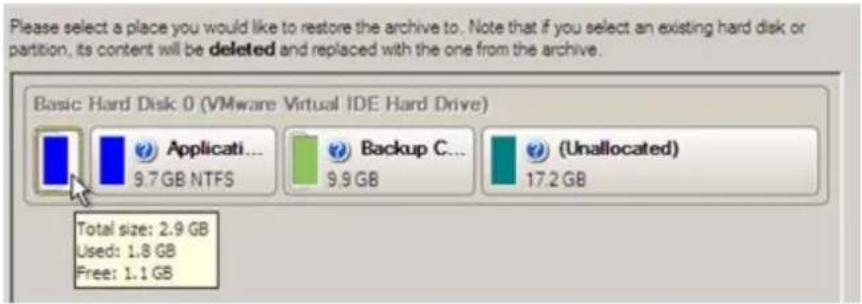

All contents on the partition selected for restoring purposes will be deleted during the operation.
- On the Restore Results page you can see the resulted disk layout. Besides there's the possibility to change size of the partition and its location if necessary as well as assign a particular drive letter.
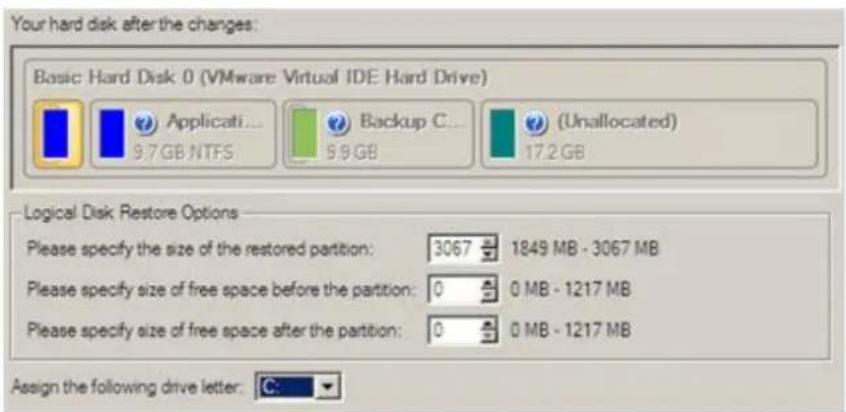
- On the next page of the wizard confirm the operation by selecting the appropriate option.
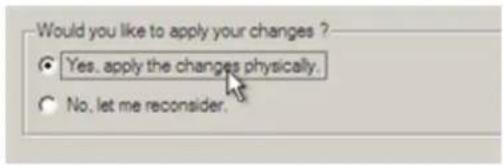
- In the Progress window you can see in real-time a detailed report on all actions carried out by the program.
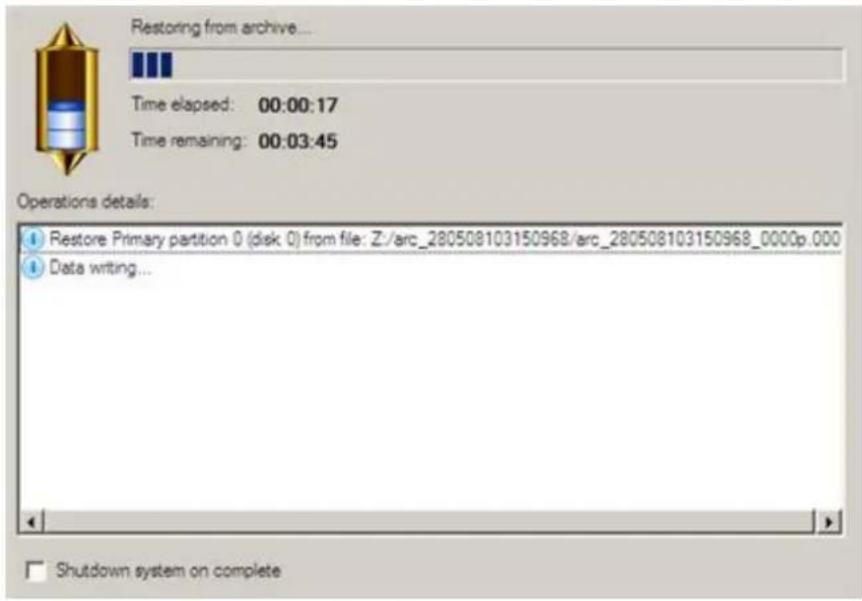
Mark the checkbox at the bottom of the window to automatically switch off the computer on the successful accomplishment of the restore operation.
- After completing the operation close the wizard, and then reboot the computer.

This operation can also be accomplished with the Linux/DOS recovery environment.
To make a Win2K+ operating system bootable on different hardware, please additionally complete the P2P Adjust OS Wizard.
Restoring a system partition from a local drive
Let's assume that your operating system gives trouble after having installed brand new software. But you've got a backup of the system partition on a local disk. That's just enough to easily roll it back to the point when run smoothly.
To restore your system partition from a backup image located on a local disk, please do the following:
Launcher
- Click the Restore item of the Wizards menu (any of the ways described earlier can also be used here).
- On the Restore Wizard's Welcome page, click the Next button.
- On the Browse for Archive page, specify the required archive:
- By clicking the Switch to File View link, you can find the required image in the browser-like window. The section below (i.e. Archive File Details) will also display a short description of the selected image.


To know more on the subject, please consult the Viewing Image Properties chapter.
- On the Where to Restore page specify a hard disk, then one of its partitions to restore the image to (if several in your computer). By default, the program offers to restore the archive exactly where it belongs. That's what we actually need.
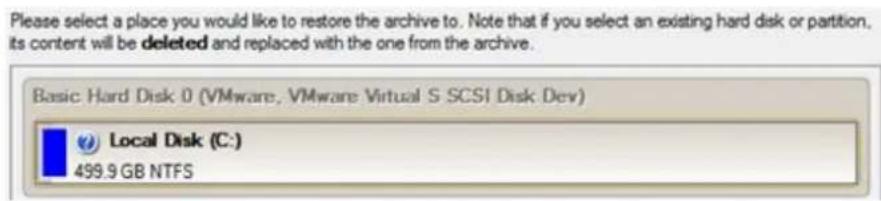

All contents on the partition selected for restoring purposes will be deleted during the operation.
- On the Restore Results page you can see the resulted disk layout. Besides there's the possibility to change size of the partition and its location if necessary as well as assign a particular drive letter.
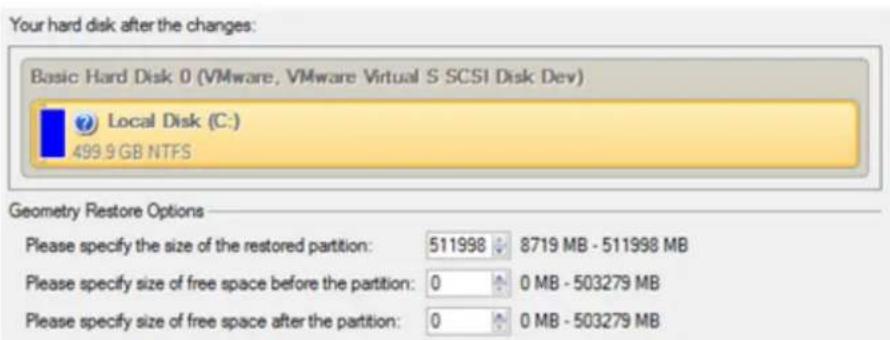
- Complete the wizard and then apply the pending changes.
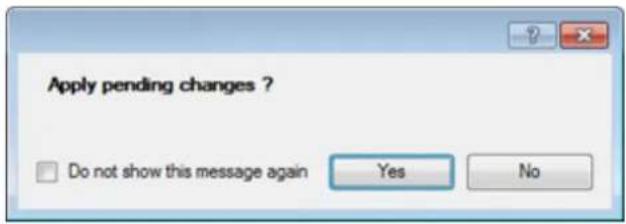
- The program will require the system restart to accomplish the operation in a special boot-up mode. Click the appropriate button to agree.
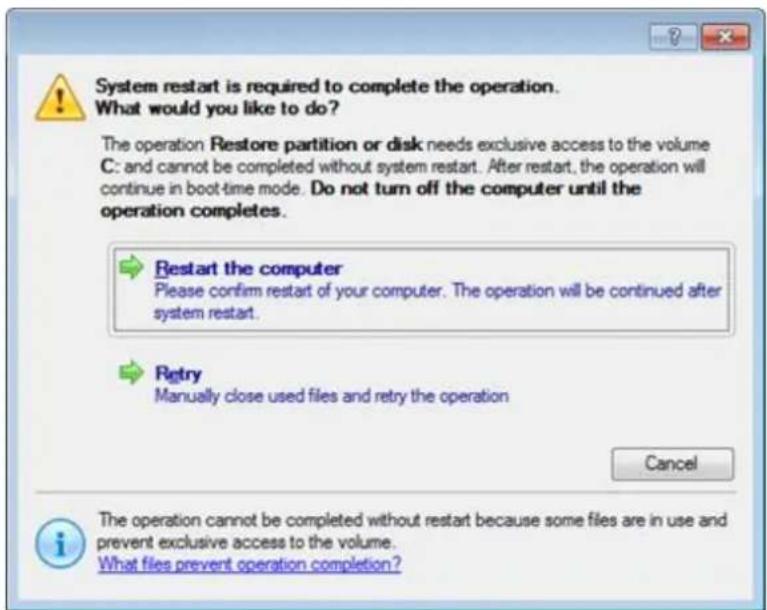
- In the Progress window you can see in real-time a detailed report on all actions carried out by the program.
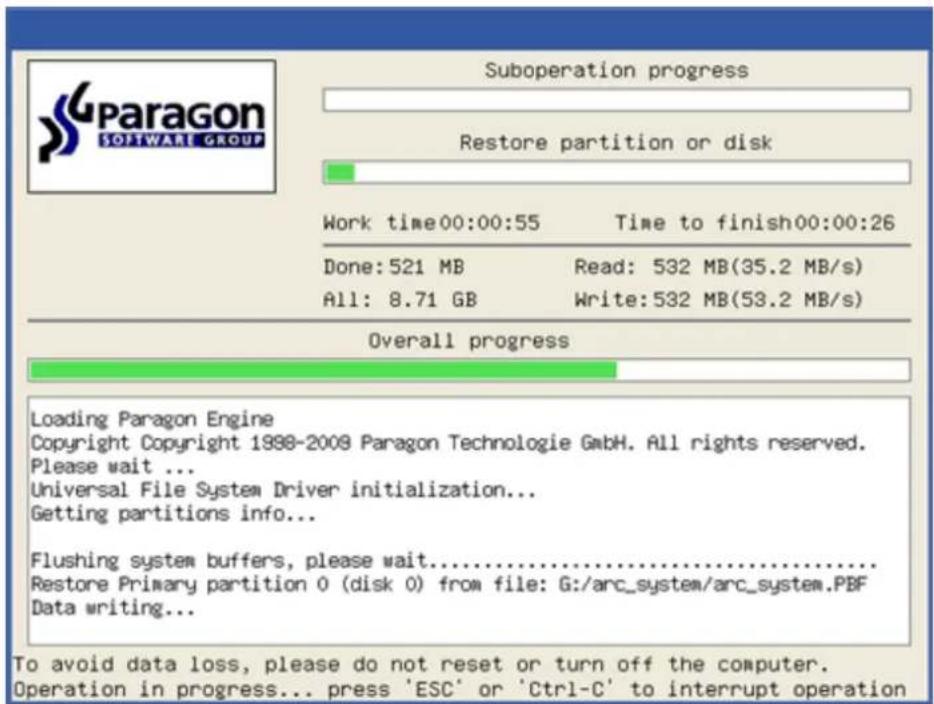
After completing the operation the program will automatically reboot the computer.

This operation can also be accomplished with the Linux/DOS or WinPE recovery environments.
To make a Win2K+ operating system bootable on different hardware, please additionally complete the P2P Adjust OS Wizard.
Restoring a dual boot Mac from an external USB drive
Let's assume that your Mac fails to boot because of a hard disk malfunction. But you've got a backup of your hard disk on an external USB drive. Just replace the failed disk with a new one and carry out a bare metal restore.
To restore a dual boot Mac from a backup image located on an external USB drive, please do the following:
- Start up the computer from our Linux/DOS recovery media.

Recovery Media Builder can help you prepare the Linux/DOS or WinPE recovery environment either on a CD/DVD disc or a thumb drive.
To automatically boot from the recovery media please make sure the on-board BIOS is set up to boot from CD/USB first.
- Connect an external USB drive to the computer.
- Restart the computer.
- In the boot menu select Normal Mode to use the Linux recovery environment, since it's the only mode that enables to work with USB devices.
| Normal Mode Safe Mode Low- Graphics Safe Mode Floppy disk Hard disk 0 MBR Find OSes on your hard disks | Main recovery environment |

By default the Normal Mode will be automatically initiated after a 10 second idle period.
- In the Linux launch menu select the Restore Wizard.
| Paragon Partition Manager™ Restore Wizard File Transfer Wizard Boot Corrector Network Configurator Log Saver View the mounted partitions Start the command line Eject CD/DVD Reboot the computer Power off | You can create, delete and format hard disk partitions using Paragon Partition Manager™, which will start now. Upon the start, please select the drive and one of its partitions or its free space. Then activate the 'Partition' pull-down menu and select one of the partitioning operations. |
- On the Wizard's Welcome page, click the Next button.
- On the What to Restore page, click the standard browse button [...] to find the required archive. When done, double click on it to select.
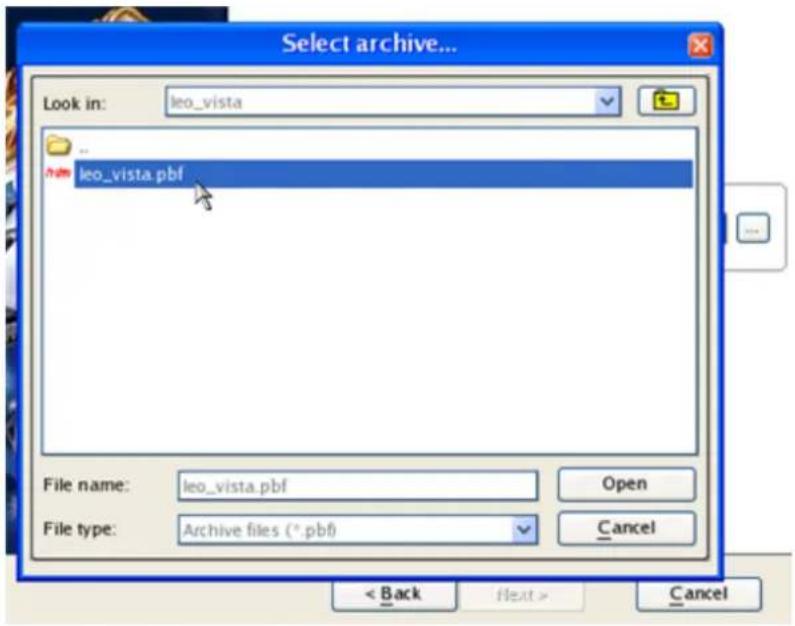
- On the Image Properties page, make sure that you select the correct image by viewing the provided information about the archive.
![Disk preview : Apple HFS leopard : NTFS [No label] Volume Type File System Size Used Volume label Basic Disk 0 (Size 112 Gb) *: Primary FAT16 200 Mb 15.0 Mb [No label] *: Primary Apple HFS 54.9 Gb 14.2 Gb leopard *: Primary NTFS 56.6 Gb 10.9 Gb [No label] Archive details: Type: Image of the hard dis…](/content/2026/05/788696/images/777b9566d614ae41e01bec16b2d32779965ea305aac9760c05f7609b30b5bbd2.jpg)
- On the next page specify a hard disk to restore the image to.
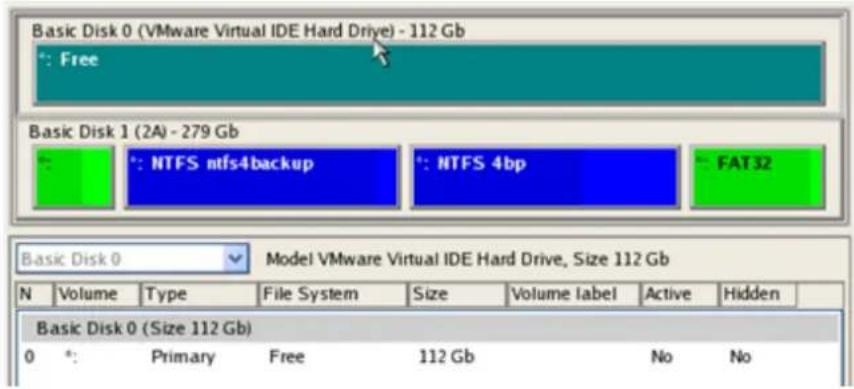

All contents on disk selected for restoring purposes will be deleted during the operation.
- On the Restore Summary page you can see your hard disk layout before and after the operation. Click the Next button to initiate the restore process.
![View changes on Basic Disk 0 Your partitions before operations: *: Free Your partitions after operations: *: Apple HFS leopard *: NTFS [No label]](/content/2026/05/788696/images/03a3fa0b311e934b7f33329cbfe022a5830f37dc7bb255fbeb066307d1e895e3.jpg)
- In the Progress window you can see in real-time a detailed report on all actions carried out by the program.
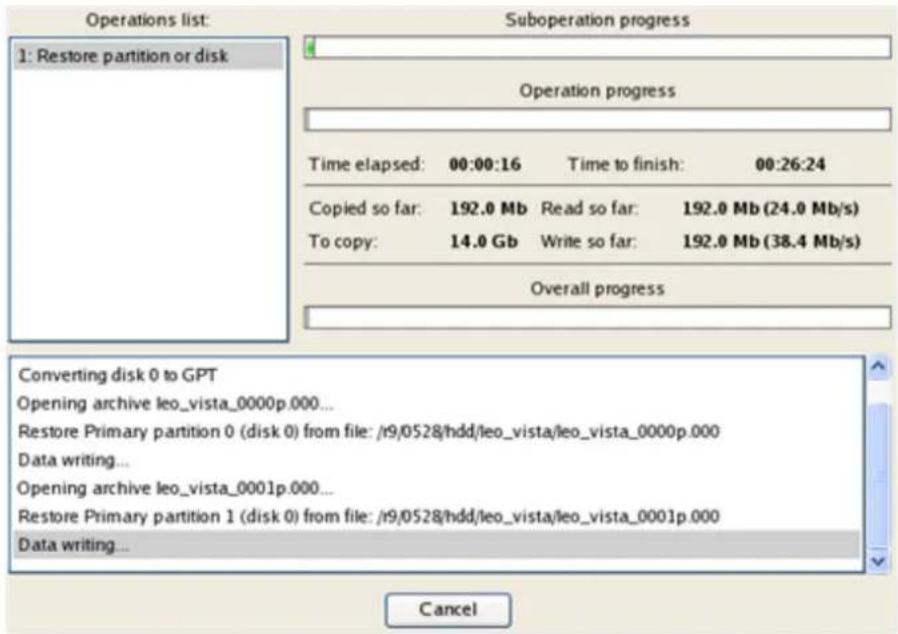
- After completing the operation close the wizard, and then reboot the computer.
Copying of data from the corrupted system disk to another hard disk
To retrieve valuable information from your hard disk and copy it to another hard disk when the system fails to boot, please do the following:
- Connect the second hard disk to the computer.
- Start up the computer from our Linux/DOS recovery media.

Recovery Media Builder can help you prepare the Linux/DOS or WinPE recovery environment either on a CD/DVD disc or a thumb drive.
To automatically boot from the recovery media please make sure the on-board BIOS is set up to boot from CD/USB first.
- In the boot menu select Normal Mode to use the Linux recovery environment (more preferable) or Safe Mode to use the PTS DOS recovery environment (in case you've got problems with Linux). Moreover you've got the option to boot into the Low- Graphics Safe Mode (PTS DOS safe mode) to cope with a serious hardware incompatibility. In this case, only the minimal set of drivers will be included, like hard disk, monitor, and keyboard drivers. This mode has simple graphics and a simple menu.
| Normal Mode Safe Mode Low- Graphics Safe Mode Floppy disk Hard disk 0 MBR Find OSes on your hard disks | Main recovery environment |

By default the Normal Mode will be automatically initiated after a 10 second idle period.
- In the Linux launch menu select the File Transfer Wizard. You can find the same wizard in PTS DOS as well.
| Paragon Partition Manager™ | You can create, delete and format hard disk partitions using Paragon Partition Manager™, which will start now. Upon the start, please select the drive and one of its partitions or its free space. Then activate the 'Partition' pull-down menu and select one of the partitioning operations. |
| Restore Wizard | |
| File Transfer Wizard | |
| Boot Corrector | |
| Network Configurator | |
| Log Saver | |
| View the mounted partitions | |
| Start the command line | |
| Eject CD/DVD | |
| Reboot the computer | |
| Power off |
- On the Wizard's Welcome page, click the Next button.
- Select a disk where the files you need are stored from the pull-down list in the right pane of the page.
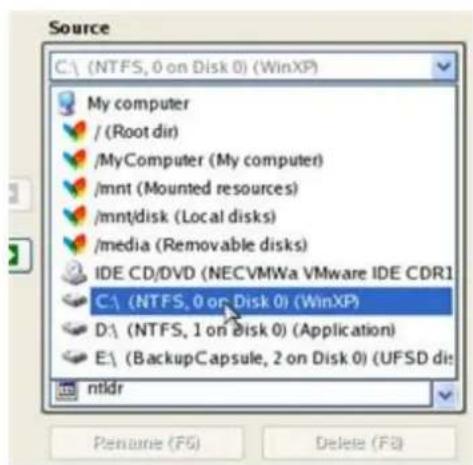
- Select files you want to copy and place them to Clipboard by pressing the left arrow-button.
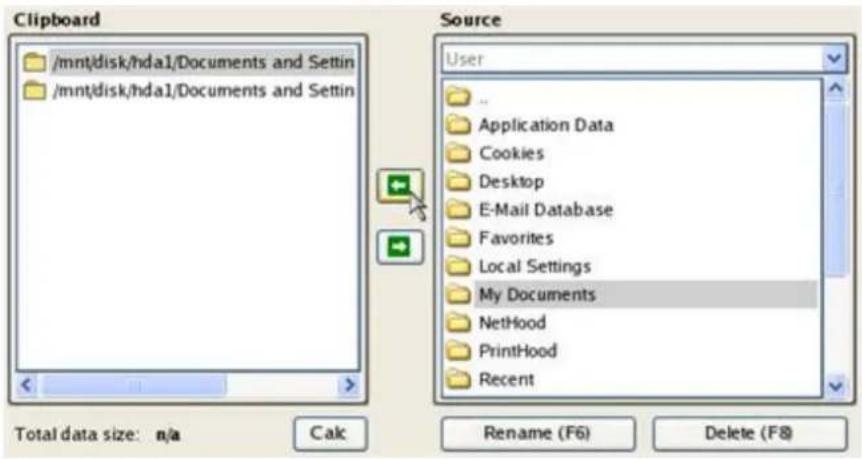
Click the Calc button to estimate the resulted data size.
- On the Select Destination Type, choose the way the data will be stored. Select the Save data to any local drive or a network share item.
Please select how would you like to save the data:
Save data to any local drives or a network share
Choose this option if you want to save your data to local mounted or physical partition, to USB or FireWare external drives and to a mounted network share. You will be prompted to choose a location you want to save the archive to.
Burn data to CD/DVD
Choose this option if you want the Wizard to burn the data to CD or DVD. You will be prompted to choose a CD or DVD RW drive.
- On the Select Destination Path page, select a hard disk to copy the data to by pressing the standard browse button [...].
- On the Transfer Summary page check all parameters of the operation. Click the Next button to accomplish the operation.
- In the Progress window you can see in real-time a detailed report on all actions carried out by the program.
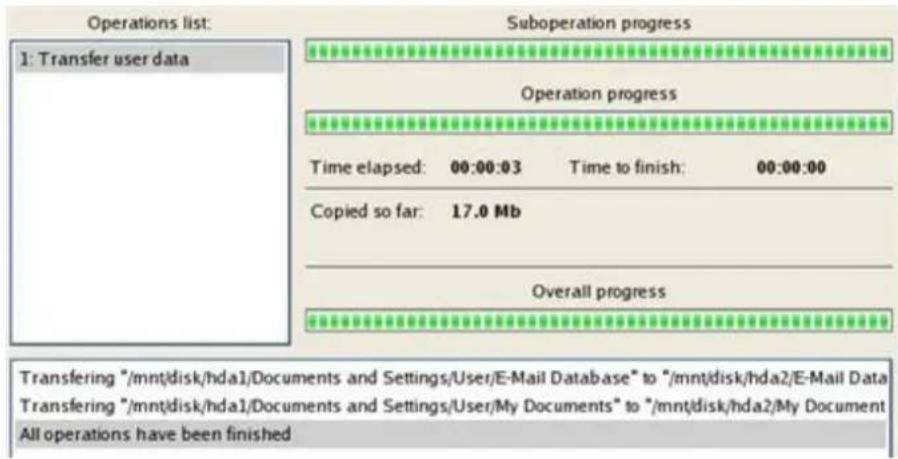
- After the operation is completed, close the wizard by pressing the appropriate button.
- Turn off the computer.

This operation can also be accomplished with the WinPE recovery environment.
Burning of data from the corrupted system disk to CD/DVD
To retrieve valuable information from your hard disk and burn it to CD/DVD when the system fails to boot, please do the following:
- Start up the computer from our Linux/DOS recovery media.

Recovery Media Builder can help you prepare the Linux/DOS or WinPE recovery environment either on a CD/DVD disc or a thumb drive.
To automatically boot from the recovery media please make sure the on-board BIOS is set up to boot from CD/USB first.
- In the boot menu select Normal Mode to use the Linux recovery environment, since it's the only mode that enables to burn CD/DVD discs.
| Normal Mode Safe Mode Low- Graphics Safe Mode Floppy disk Hard disk 0 MBR Find OSes on your hard disks | Main recovery environment |

By default the Normal Mode will be automatically initiated after a 10 second idle period.
- In the Linux launch menu select the File Transfer Wizard. You can find the same wizard in PTS DOS as well.
| Paragon Partition Manager™ Restore Wizard File Transfer Wizard Boot Corrector Network Configurator Log Saver View the mounted partitions Start the command line Eject CD/DVD Reboot the computer Power off | You can create, delete and format hard disk partitions using Paragon Partition Manager™, which will start now. Upon the start, please select the drive and one of its partitions or its free space. Then activate the 'Partition' pull-down menu and select one of the partitioning operations. |
- On the Wizard's Welcome page, click the Next button.
- Select a disk where the files you need are stored from the pull-down list in the right pane of the page.
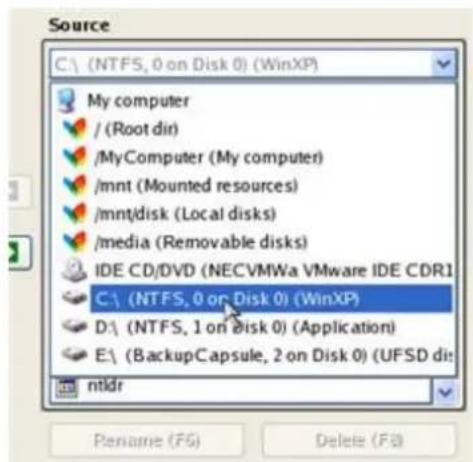
- Select files you want to copy and place them to Clipboard by pressing the left arrow-button.
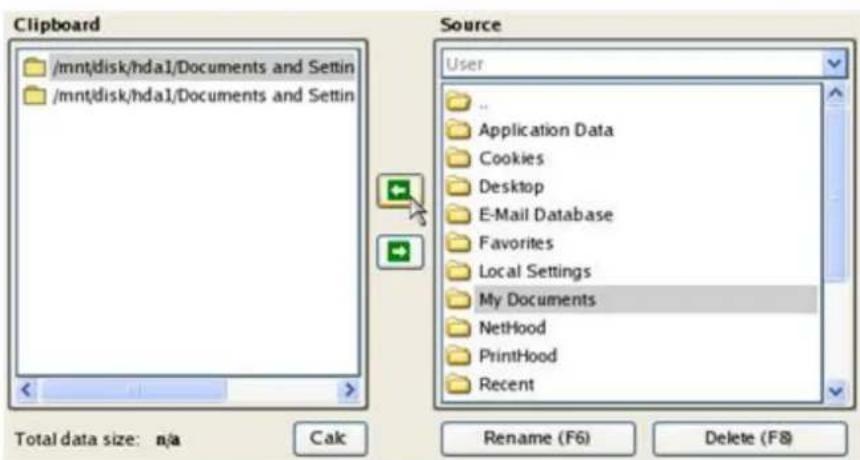
Click the Calc button to estimate the resulted data size.
- On the Select Destination Type, choose the way the data will be stored. Select the Burn data to CD/DVD item.
Please select how would you like to save the data:
Save data to any local drives or a network share Choose this option if you want to save your data to local mounted or physical partition, to USB or FireWare external drives and to a mounted network share. You will be prompted to choose a location you want to save the archive to.
Burn data to CD/DVD Choose this option if you want the Wizard to burn the data to CD or DVD. You will be prompted to choose a CD or DVD RW drive.
- On the Choose a Recorder page, select a recorder from the list of available devices and then set a volume label by entering it in the appropriate field.
Select a recorder to burn data to:
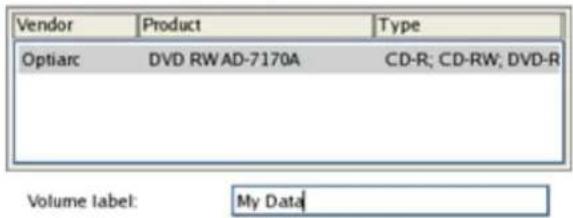
-
On the Transfer Summary page check all parameters of the operation. Click the Next button to accomplish the operation.
-
In the Progress window you can see in real-time a detailed report on all actions carried out by the program.
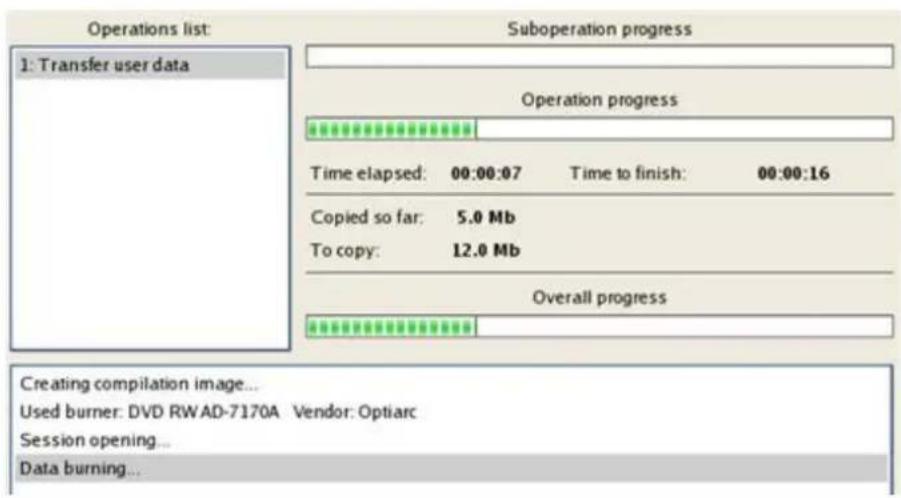
-
After the operation is completed, close the wizard by pressing the appropriate button.
-
Turn off the computer.

This operation can also be accomplished with the WinPE recovery environment.
Copying of data from a backup to the corrupted system partition
The system fails to boot since some files are damaged. If you have a backup of the system partition, you can recopy these files to make the system be operable again:
- Start up the computer from our Linux/DOS recovery media.

Recovery Media Builder can help you prepare the Linux/DOS or WinPE recovery environment either on a CD/DVD disc or a thumb drive.
To automatically boot from the recovery media please make sure the on-board BIOS is set up to boot from CD/USB first.
- In the boot menu select Normal Mode to use the Linux recovery environment (more preferable) or Safe Mode to use the PTS DOS recovery environment (in case you've got problems with Linux). Moreover you've got the option to boot into the Low- Graphics Safe Mode (PTS DOS safe mode) to cope with a serious hardware incompatibility. In this case, only the minimal set of drivers will be included, like hard disk, monitor, and keyboard drivers. This mode has simple graphics and a simple menu.
| Normal Mode Safe Mode Low- Graphics Safe Mode Floppy disk Hard disk 0 MBR Find OSes on your hard disks | Main recovery environment |

By default the Normal Mode will be automatically initiated after a 10 second idle period.
- In the Linux launch menu select the File Transfer Wizard. You can find the same wizard in PTS DOS as well.
| Paragon Partition Manager™ Restore Wizard File Transfer Wizard Boot Corrector Network Configurator Log Saver View the mounted partitions Start the command line Eject CD/DVD Reboot the computer Power off | You can create, delete and format hard disk partitions using Paragon Partition Manager™, which will start now. Upon the start, please select the drive and one of its partitions or its free space. Then activate the 'Partition' pull-down menu and select one of the partitioning operations. |
- On the Wizard's Welcome page, click the Next button.
- Select a disk where the system backup is stored from the pull-down list in the right pane of the page.
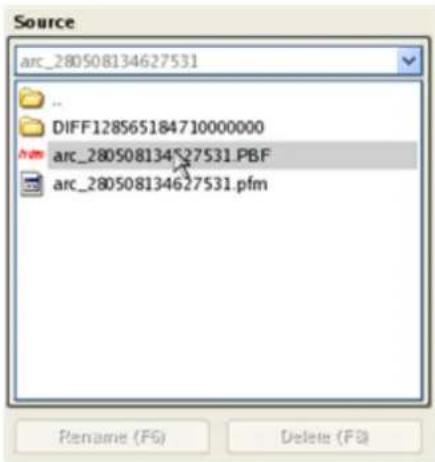
- Double click on the required backup to open.
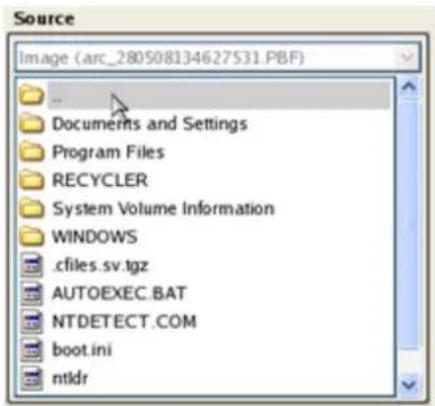
- Select files you want to copy and place them to Clipboard by pressing the left arrow-button.
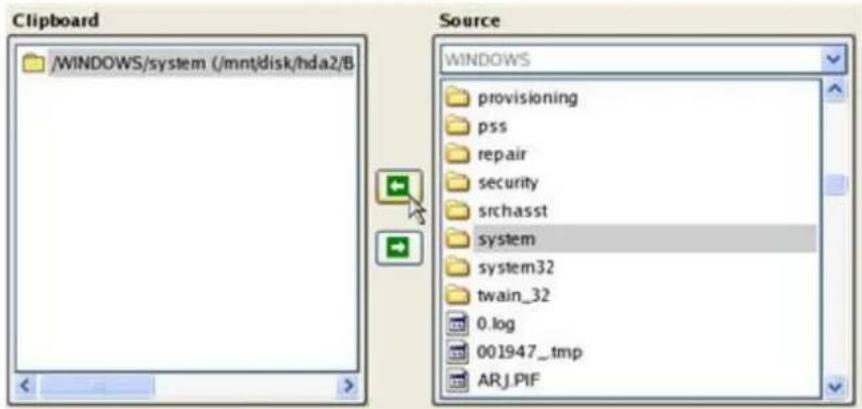
Total data size: 904 Kb
Click the Calc button to estimate the resulted data size.
- On the Select Destination Type, choose the way the data will be stored. Select the Save data to any local drive or a network share item.
Please select how would you like to save the data:
Save data to any local drives or a network share
Choose this option if you want to save your data to local mounted or physical partition, to USB or FireWare external drives and to a mounted network share. You will be prompted to choose a location you want to save the archive to.
Burn data to CD/DVD
Choose this option if you want the Wizard to burn the data to CD or DVD. You will be prompted to choose a CD or DVD RW drive.
- On the Select Destination Path page, select your system disk to copy the data to by pressing the standard browse button [...].
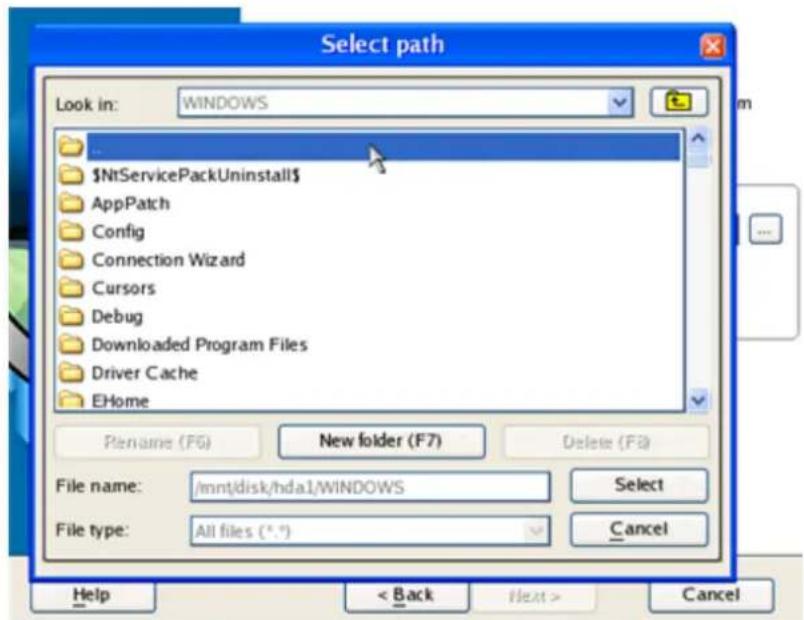
- On the Transfer Summary page check all parameters of the operation. Click the Next button to accomplish the operation.
- In the Progress window you can see in real-time a detailed report on all actions carried out by the program.
![| Operation list | Suboperation progress | | :--- | :--- | | 1: Transfer user data | [Value not fully visible] | | Time elapsed: | 00:00:04 | | Time to finish: | 00:00:00 | | Copied so far: | 0.9 Mb | | Overall progress | [Value not fully visible] | | Transferring "/WINDOWS/system" to "/mnt/disk/hda…](/content/2026/05/788696/images/8f19cfb35dae09b636467ed9f84ee49660eeaa67377b44b3816d9baedae72d6d.jpg)
- After the operation is completed, close the wizard by pressing the appropriate button.
- Turn off the computer.

This operation can also be accomplished with the WinPE recovery environment.
Restoring separate files and folders from a backup
The program provides a very convenient option to access backup archives and restore only data you need (the so called selective restore functionality). This operation can be accomplished either with the Restore Wizard, File Transfer Wizard or Volume Explorer.
Restore Wizard
To restore separate files and folders from a backup image with the Restore Wizard, please do the following:
- Start up the computer from our WinPE recovery media.

Recovery Media Builder can help you prepare the Linux/DOS or WinPE recovery environment either on a CD/DVD disc or a thumb drive.
To automatically boot from the recovery media please make sure the on-board BIOS is set up to boot from CD/USB first.
- Once it has been loaded, read the agreement and then mark the appropriate checkbox to accept.
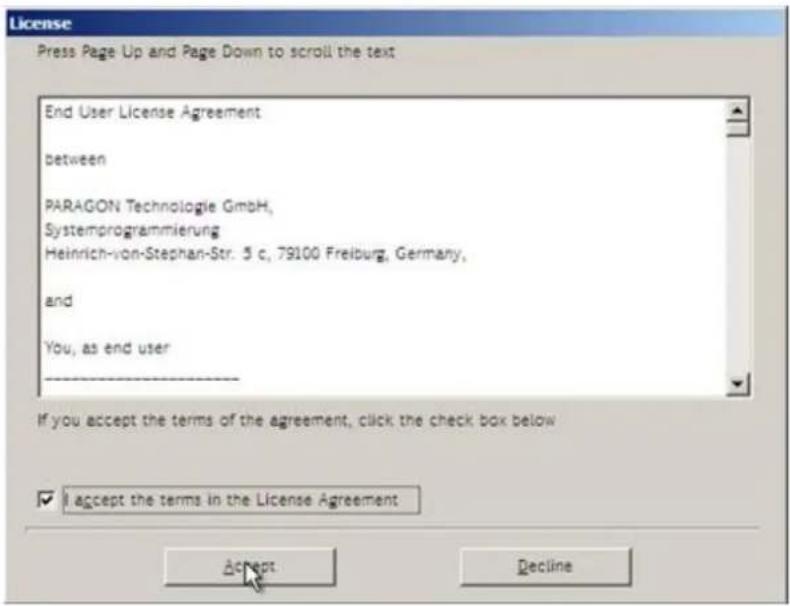

If you do not agree with any conditions stated there, you won't be able to use the program.
- Once you accept the agreement, you will see the Universal Application Launcher. Select the Restore Wizard.
- On the Restore Wizard's Welcome page, click the Next button.
- On the Browse for Archive page choose the required archive in the browser-like window. The Archive File Details section displays a short description of the selected image.
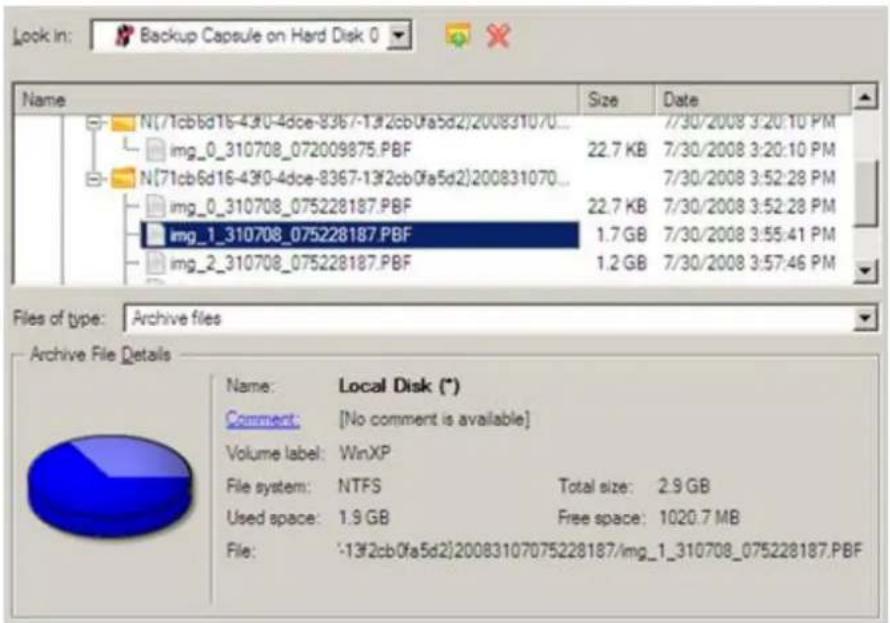
- On the next page specify what you need to extract from the backup by marking checkboxes next to the required data items. At the right lower corner of the window you can see the resulted amount of the selected data.
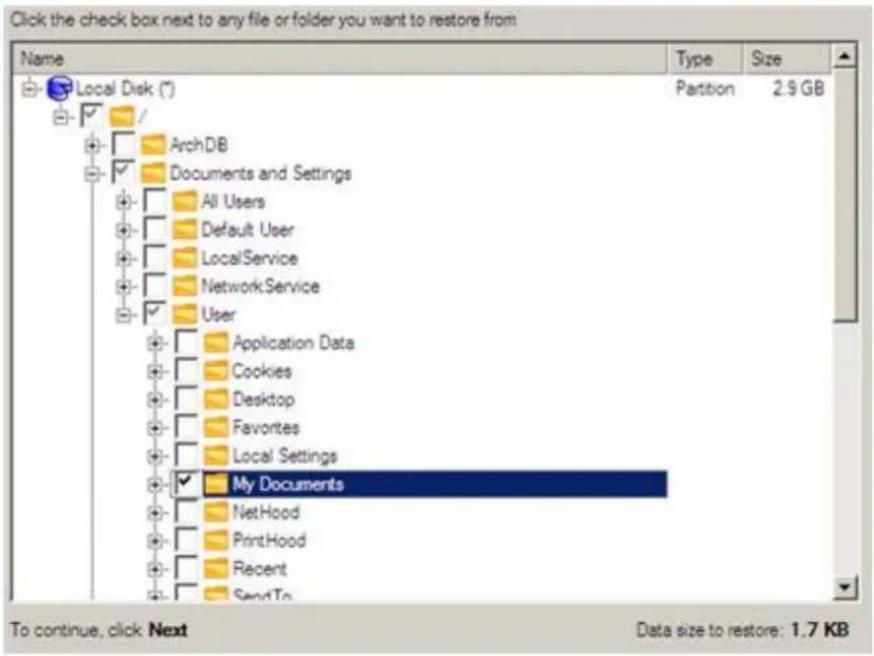
- On the How to Restore page specify the way the selected data will be restored. In our case we'd rather restore contents of the backup to its original location with replacing existing files as well.
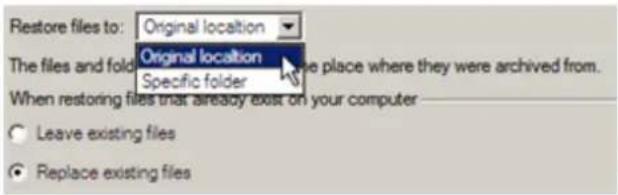
- On the Restore Summary page review all parameters of the operation and modify them if necessary.
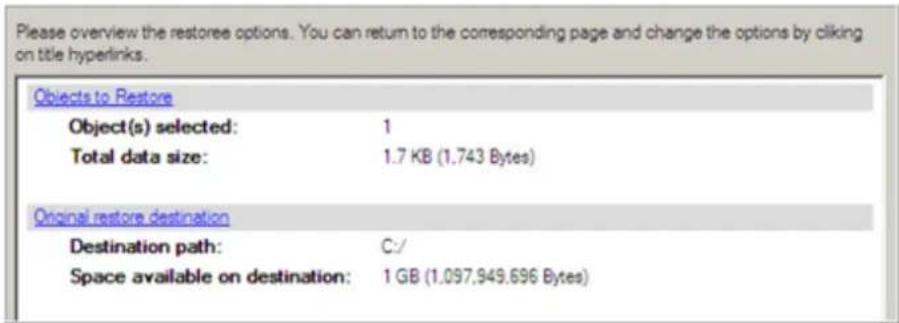
- On the next page of the wizard confirm the operation by selecting the appropriate option.
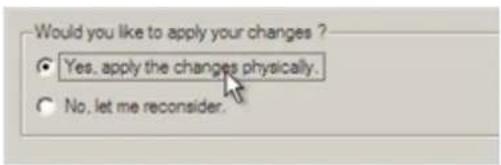
- In the Progress window you can see in real-time a detailed report on all actions carried out by the program.
- After completing the operation close the wizard, and then reboot the computer.

This operation can also be accomplished under Windows.
Volume Explorer
To restore separate files and folders from a backup image with Volume Explorer, please do the following:
Launcher
- Click the Disk View tab and then choose Volume Explorer;
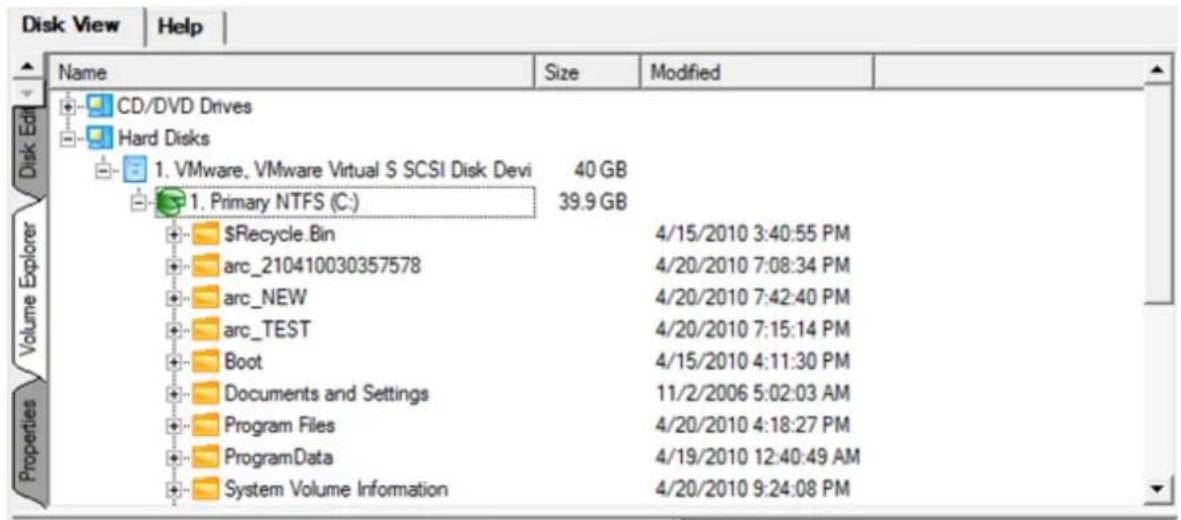
- Browse for the required archive and then open it by double click of the left mouse button.
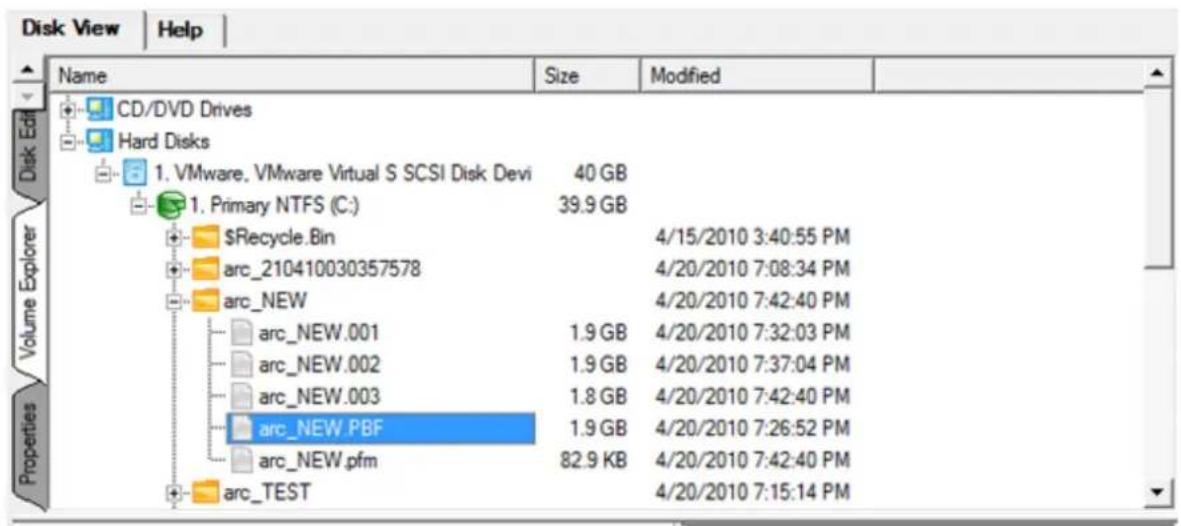
- Call the popup menu (right click of the mouse button) for a file/folder you need and then select the Export item.
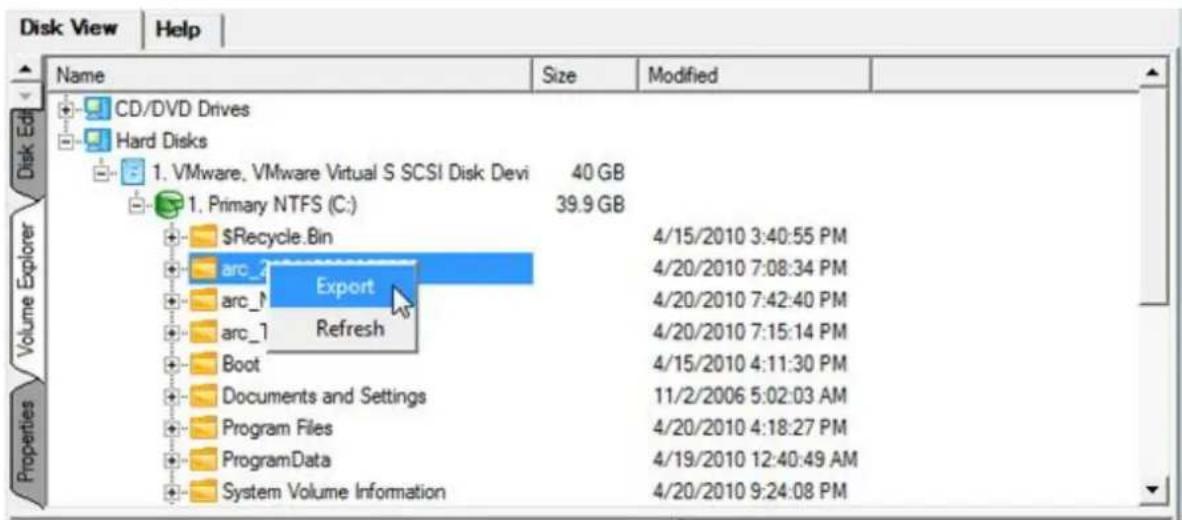
- Select a place on the disk where the file/folder will be extracted to.
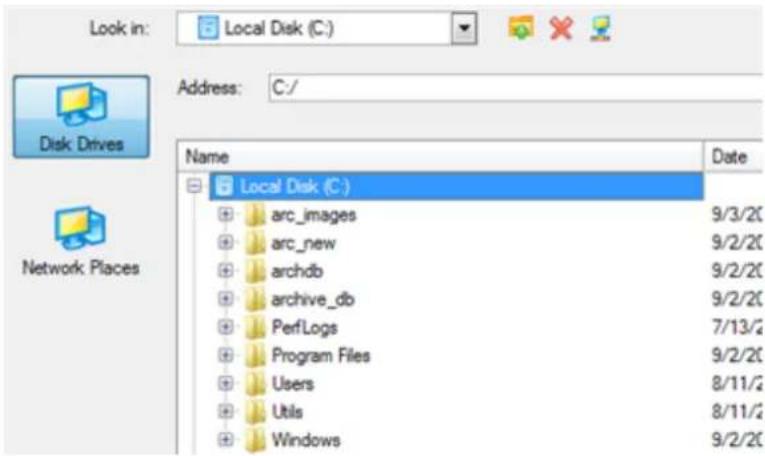
- Click the OK button to accomplish the operation.

The current version of the program does not enable to access file archives with Volume Explorer.
Resize Scenarios
Creating a new partition to detach operating system from the rest of data
Let's assume that you're a rank and file user who is most likely to have only one hard disk with only one partition (the only partition is always system). To secure yourself against a system malfunction or a virus attack you've got nothing to do, but make a backup of the whole partition, which besides the operating system itself contains all your family photos, favorite films and music, program distributives, whatever. As a result you'll get a very huge backup image. You can easily tackle this issue however by detaching your operating system from the rest of data.
To create a new partition on your hard disk, please do the following:
Express Launcher
Click the Partition Manager button and then Partition Manager in the Express Launcher.
- Click the Express Create Partition item of the Wizards menu (any of the ways described earlier can also be used here).
- On the Wizard's Welcome page, click the Next button.
- Choose a method you find the most suitable to create the partition. The wizard is especially designed to minimize your participation in finding an appropriate place for it and its resulted size. The only thing you're to do is to choose between several modes. The most relevant thing here is the amount of space that will be allocated for that partition. For easy perception, you can see the resulted disk layout on the disk map by selecting this or that mode.
The result you will get after applying the changes:
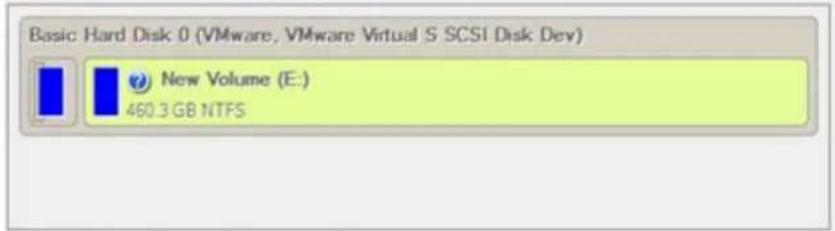
Please select the method of new partition creation
Take all unallocated space at the end of the disk
Smart Mode (Use 243.3 GB to create a partition) More info...
Advanced Mode (Use 141.4 GB to create a partition) More info...

The number of available methods depends on your disk layout.
To learn more on the way the wizard works, please click the corresponding link on the first page of the wizard.
- That's basically it. By clicking the Next button the wizard will start modifying your disk layout. If you've got to do with the system partition resize, like we do in our case, you will be asked to restart your computer in a special boot-up mode to accomplish the operation. So click the appropriate button to agree.
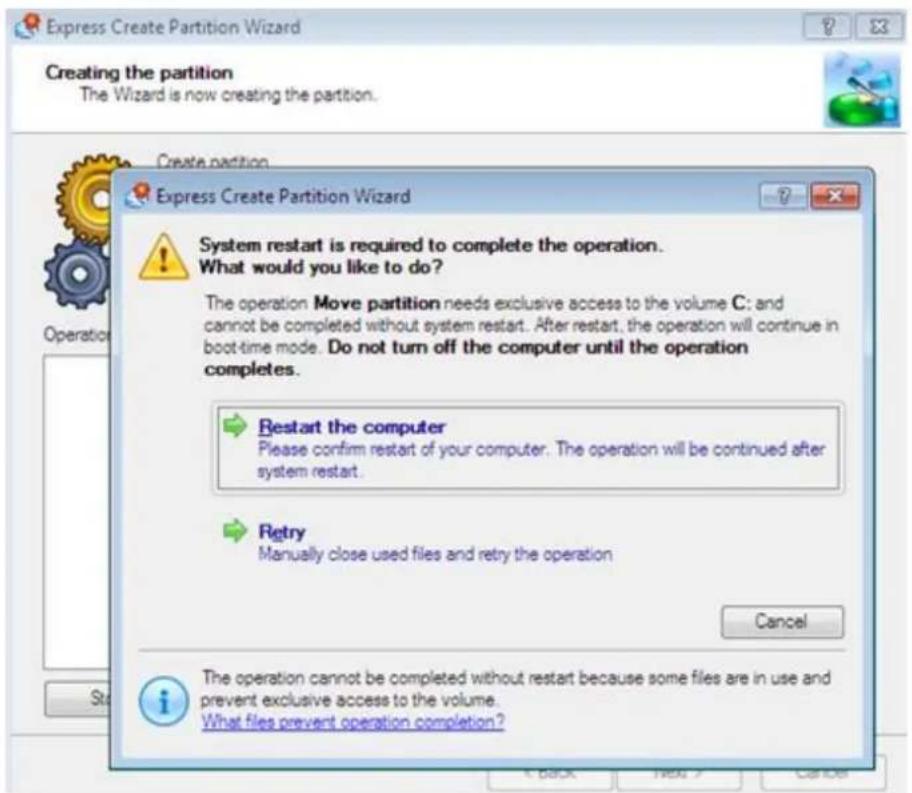
- In the Progress window you can see in real-time a detailed report on all actions carried out at the moment.
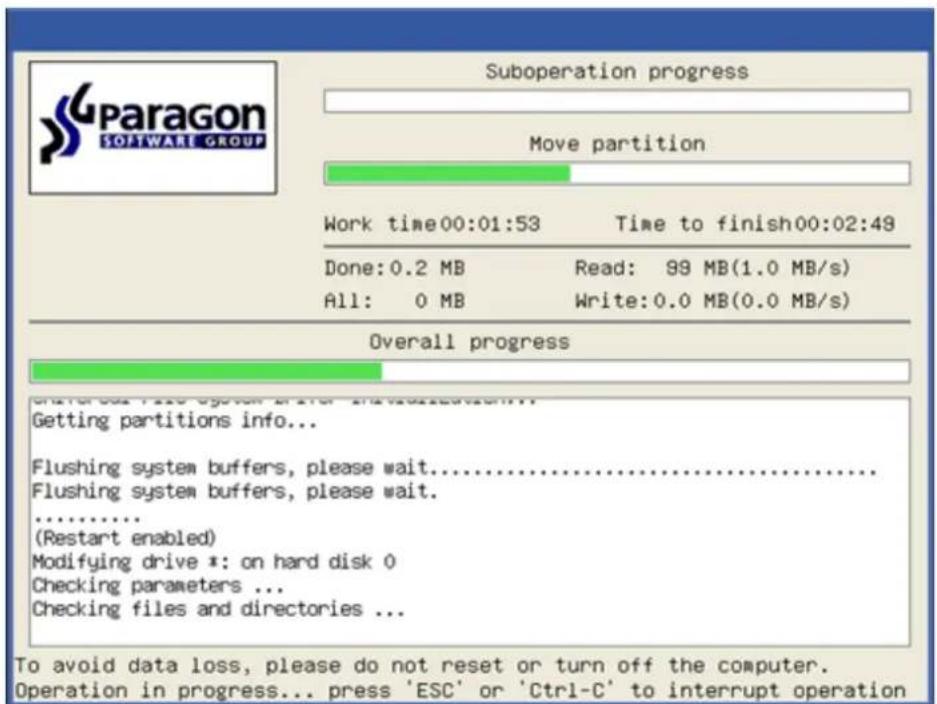
After completing the operation your computer will be automatically restarted back to Windows where you can see the newly created NTFS partition. Now you've got a place to keep your stuff apart from Windows.
Increasing size of a system partition by taking unused space of an adjacent partition
Let's assume you've got several partitions on your hard disk. After installing a number of resource-consuming applications and system updates your system partition has started to suffer from the lack of free space. But an adjacent partition has a plenty of redundant space. That's just enough to make your system partition suffer no more.
To increase size of a system partition by taking unused space from an adjacent partition, please do the following:
Express Launcher
- Click the Partitioning button and then select Resize Partitions.
- On the Wizard's Welcome page, click the Next button.
- Click on your system partition. By doing that, the wizard will automatically select an adjacent partition as well. This partition will later act as a space donor.
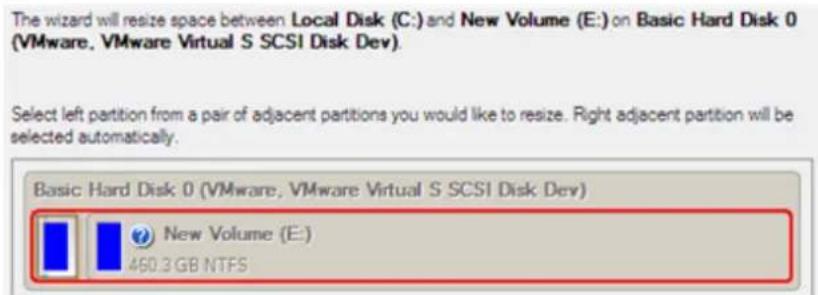

If you've got more than two partitions on your hard disk and a partition you need to increase is surrounded by other partitions, you've got the choice to choose which partition will act as a space donor. Just click on the left partition of the pair, as the right one will be selected automatically.
- Increase size of the system partition with the slider or manually by entering the required value. Please note, when you change size of one partition the size of the other will be changed as well, thus redistributing the unused space between the partitions.
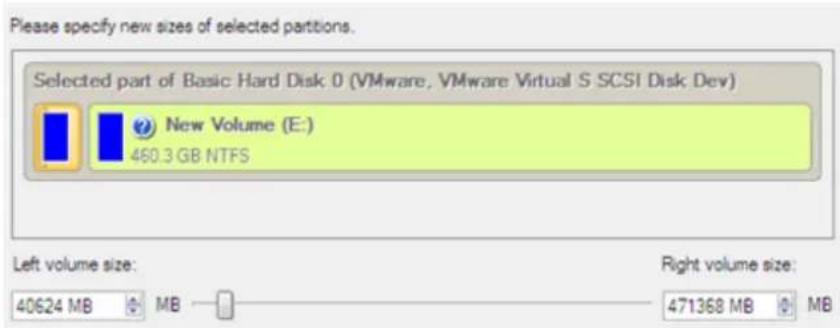
- On the next page of the wizard you need to confirm the operation by selecting the appropriate option.
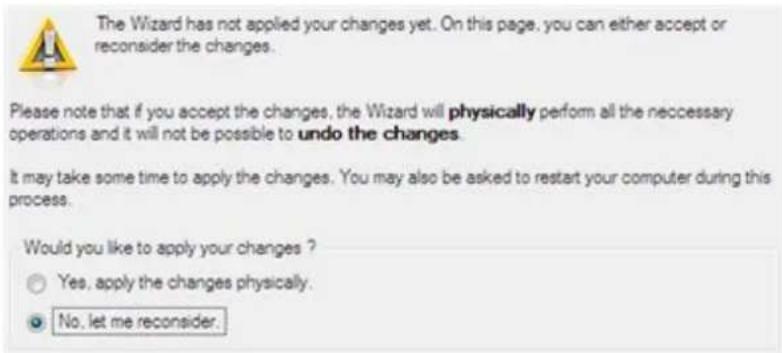
- That's basically it. By clicking the Next button the wizard will start modifying your disk layout. If you've got to do with the system partition resize, like we do in our case, you will be asked to restart your computer in a special boot-up mode to accomplish the operation. So click the appropriate button to agree.

System restart is required to complete the operation. What would you like to do?
The operation Redistribute partitions needs exclusive access to the volume C: and cannot be completed without system restart. After restart, the operation will continue in boot-time mode. Do not turn off the computer until the operation completes.

Restart the computer
Please confirm restart of your computer. The operation will be continued after system restart.

Retry
Manually close used files and retry the operation
Cancel
- In the Progress window you can see in real-time a detailed report on all actions carried out at the moment.
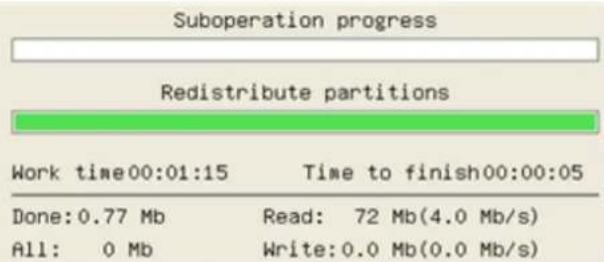
Overall progress
Quick data moving ...
Flushing system buffers, please wait.
.....
Modifying drive #: on hard disk 0
Checking parameters ...
Scanning dir structure ...
Scanning data structure (may be a few
step 1 ...
step 2 ...
) o not reset or turn off your computer - to avoid the data loss. Operation in progress... press 'ESC' or 'Ctrl-C' to interrupt operation
After completing the operation your computer will be automatically restarted back to Windows where you can see that your system partition is bigger now.
Increasing size of a system partition by taking unused space from any other
Let's assume you've got several partitions on your hard disk. After installing a number of resource-consuming applications and system updates your system partition has started to suffer from the lack of free space. But one of your partitions has a plenty of redundant space. That's just enough to make your system partition suffer no more.
To increase size of a system partition by taking unused space from any other on-disk partition, please do the following:
Express Launcher
Click the Partition Manager button and then Partition Manager.
- In the main window select the required hard disk (if several) on the Disk Map.
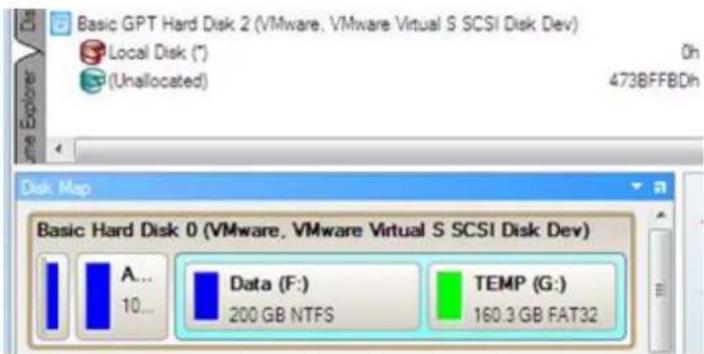
- Choose a space donor partition and then call the context menu for it (right click of the mouse button) to launch the Move/Resize dialog.
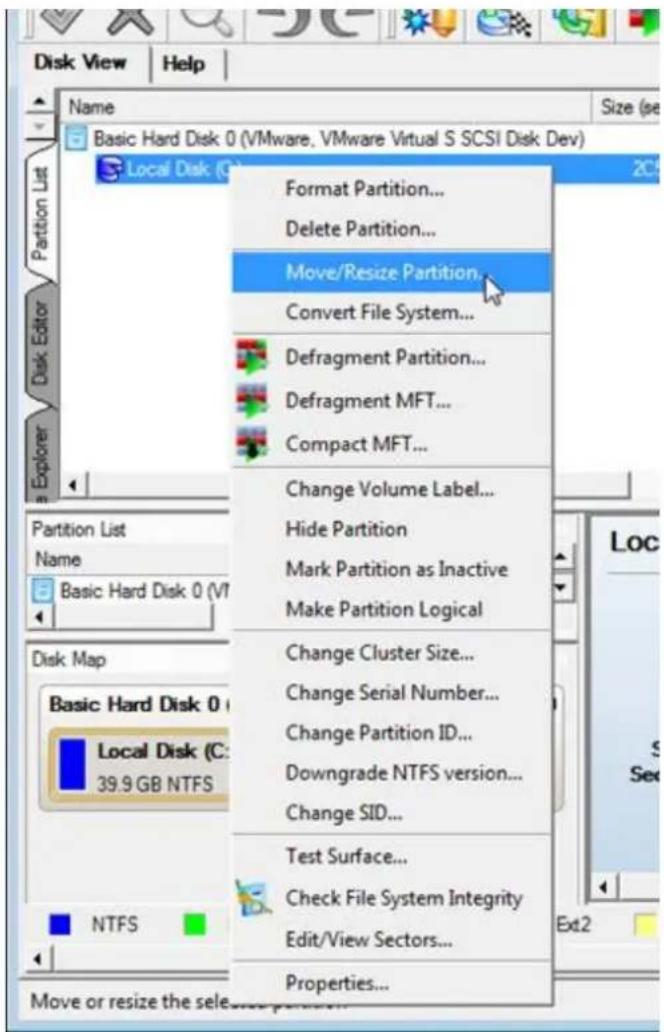
- In the opened dialog shift the edge of the partition to the right by the drag-and-drop technique. While doing this, free space from the partition will be released (displayed in aqua-green). You can also do it manually by entering the exact size of free space. Click the Yes button to continue.
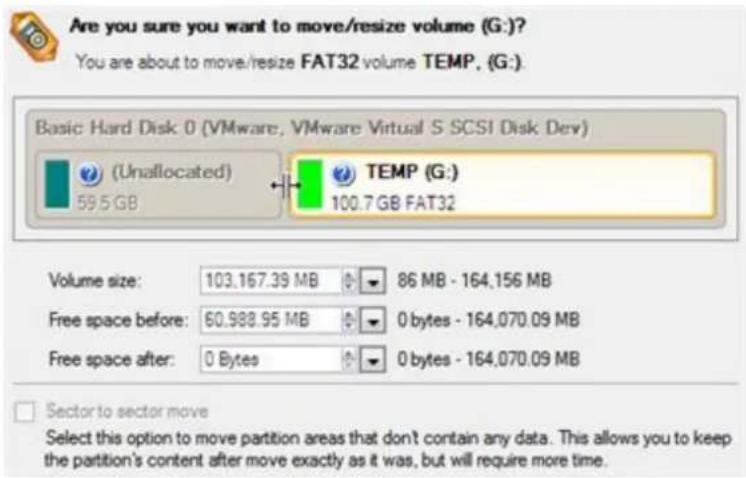
- Now you've got a block of free space to add to the system partition. You cannot do it directly however, but by carrying out a number of extra move/resize operations.
- Since the block of free space is within the extended partition, you need to take it out first. The program enables to resize the extended partition only when there's a block of free space adjoining its borders. In our case it's between two logical disks. So we need to move it. To do that, please select the first logical partition and then call the context menu for it (right click of the mouse button) to launch the Move/Resize dialog.
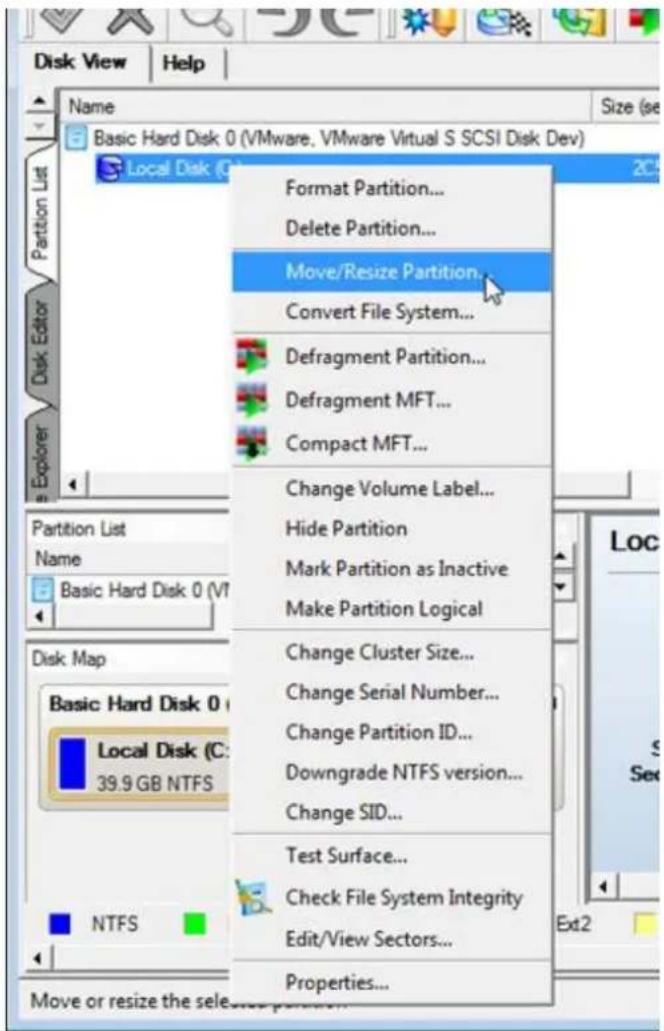
- At first shift the right edge of the partition to the right, then do the same with the left edge. Make sure the partition size has been left unchanged.
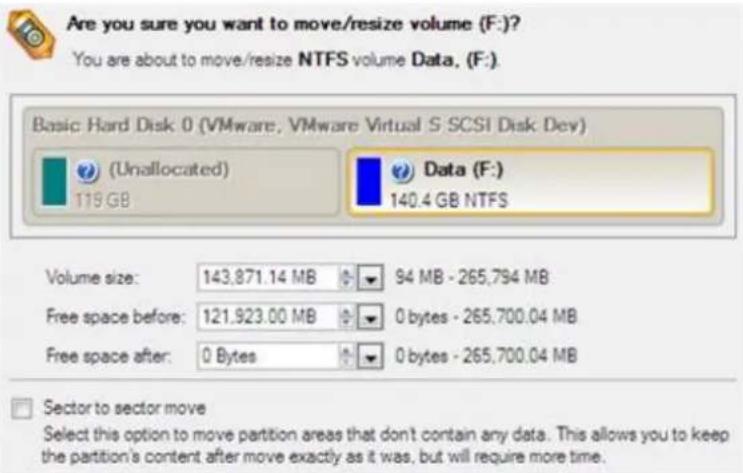
- Now you can resize the extended partition to take the block of free space out of it. Call the context menu for it (right click of the mouse button) to launch the Move/Resize dialog.
- In the opened dialog shift the edge of the extended partition to the right.
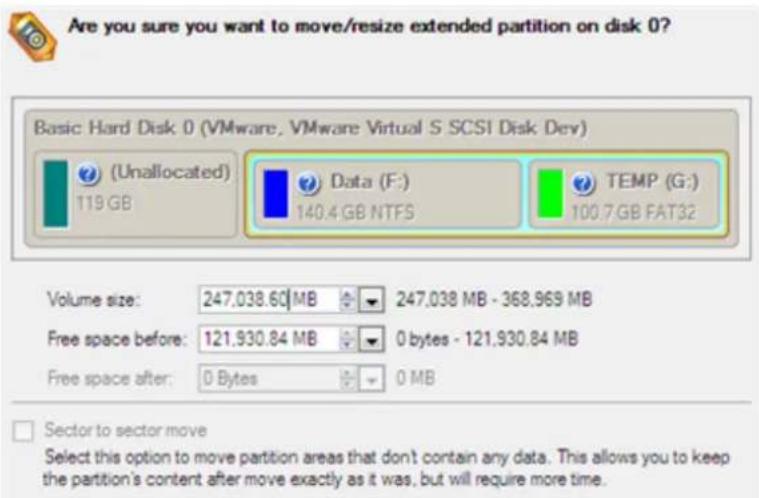
- The block of free space has been released.
- Now you need to move the second primary partition just the way we did it with the logical partition to make the block of free space adjoin the system partition.
- Finally increase size of the system partition. Call the context menu for it (right click of the mouse button) to launch the Move/Resize dialog.
- In the opened dialog shift the edge of the partition to the right, thus increasing its size.
![Are you sure you want to move/resize system volume (C:) You are about to move/resize NTFS volume [No label]. (C: Basic Hard Disk 0 (VMware; VMware Virtual S SCSI Disk Dev) Local Disk (C:) 158.7 GB NTFS Volume size: 162,547.31 MB 11,680 MB - 162,548 MB Free space before: 0.97 MB 0 bytes - 150,868.20…](/content/2026/05/788696/images/a0c14b71f77764760a0fefb070bcd8f2c5e3a4b4495cb52e53ecd133538d6ed9.jpg)
- Apply all introduced changes. By default, our program works in the virtual mode of execution, so you have to confirm all operations to let the program accomplish them. To do that, just click the Apply button on the Virtual Operations Bar.
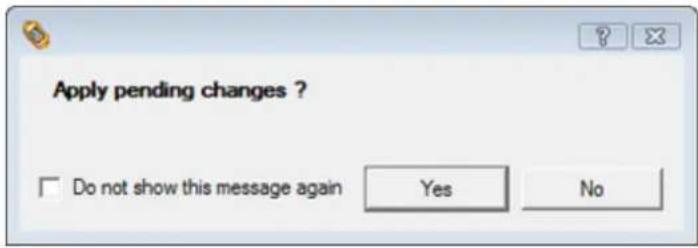
- The program will require the system restart to accomplish the operation in a special boot-up mode. Click the appropriate button to agree.
Shrinking a system partition to increase size of a data partition
Let's assume you've got two partitions on your hard disk, the first one takes about 40 % of all the disk space and is exclusively used for Vista 64-bit, while the second servers as a data storage. One day you realize that your system partition doesn't need so much disk space, that's what your data partition really requires at the moment. You can easily tackle this problem with Paragon Linux/DOS Recovery CD.
To increase size of a data partition by taking unused space from a system partition, please do the following:
- Start up the computer from our Linux/DOS recovery media.

Recovery Media Builder can help you prepare the Linux/DOS or WinPE recovery environment either on a CD/DVD disc or a thumb drive.
To automatically boot from the recovery media please make sure the on-board BIOS is set up to boot from CD/USB first.
- In the boot menu select Normal Mode to use the Linux recovery environment (more preferable) or Safe Mode to use the PTS DOS recovery environment (in case you've got problems with Linux). Moreover you've got the option to boot into the Low- Graphics Safe Mode (PTS DOS safe mode) to cope with a serious hardware incompatibility. In this case, only the minimal set of drivers will be included, like hard disk, monitor, and keyboard drivers. This mode has simple graphics and a simple menu.
| Normal Mode Safe Mode Low- Graphics Safe Mode Floppy disk Hard disk 0 MBR Find OSes on your hard disks | Main recovery environment |

By default the Normal Mode will be automatically initiated after a 10 second idle period.
- In the Linux launch menu select Partition Manager. You can find it in PTS DOS as well.
| Paragon Partition Manager™ Restore Wizard File Transfer Wizard Boot Corrector Network Configurator Log Saver View the mounted partitions Start the command line Eject CD/DVD Reboot the computer Power off | You can create, delete and format hard disk partitions using Paragon Partition Manager™, which will start now. Upon the start, please select the drive and one of its partitions or its free space. Then activate the 'Partition' pull-down menu and select one of the partitioning operations. |
- In the main window select the required hard disk (if several) on the Disk Map.
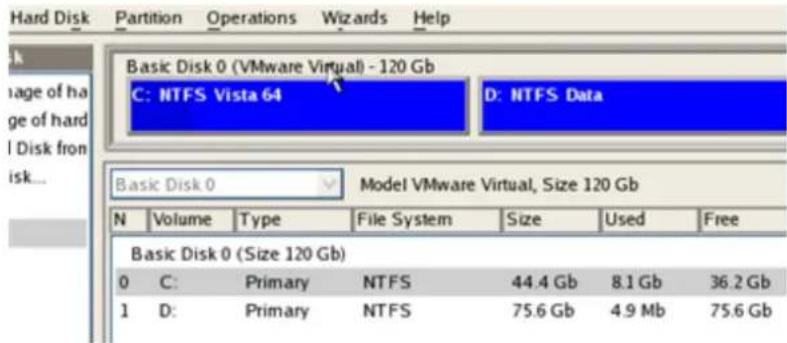
- Choose your system partition and then call the context menu for it (right click of the mouse button) to launch the Move/Resize dialog.
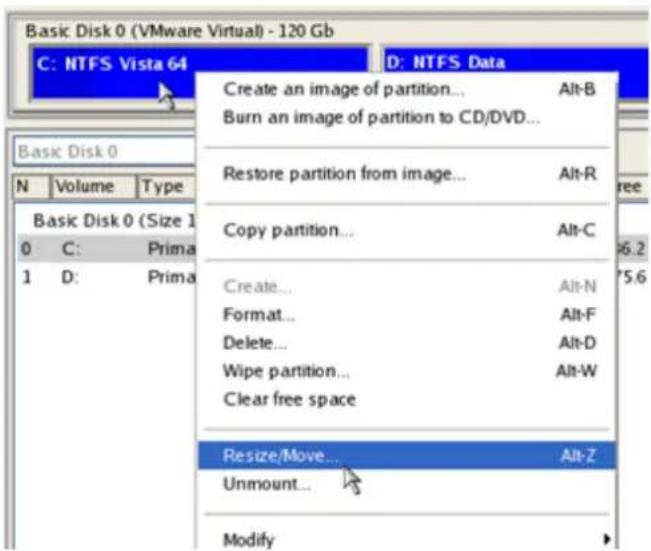
- In the opened dialog set a new size for the partition by moving the slider or by entering the exact value in the appropriate field. While doing this, free space from the partition will be released (displayed in aqua-green). Click OK to continue.
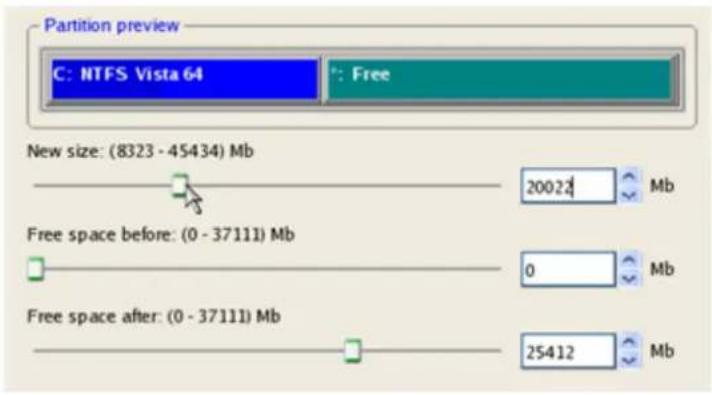
- Now you've got a block of free space to add to your data partition.

- Choose the data partition and then call the context menu for it (right click of the mouse button) to launch the Move/Resize dialog.
- Move the slider to the right to increase size of the partition. Click OK to continue.
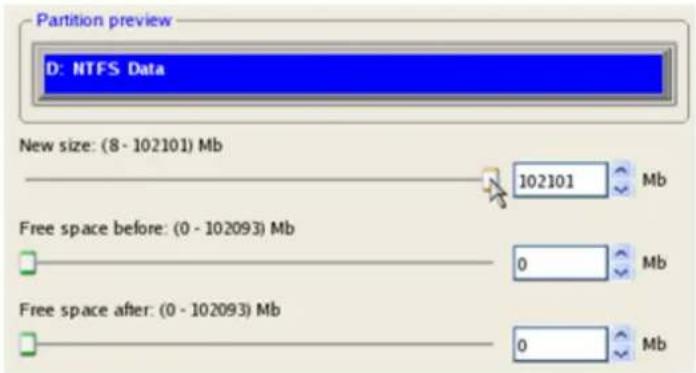
- Apply the pending changes.
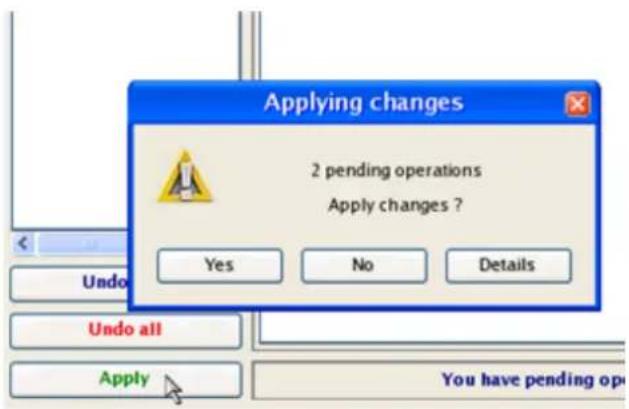
- In the Progress window you can see in real-time a detailed report on all actions carried out by the program.
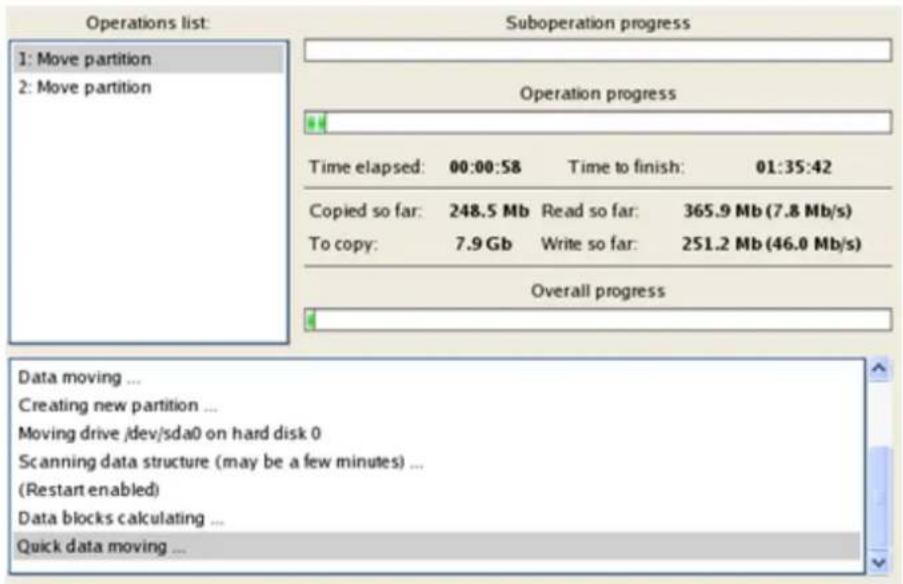
Resizing partitions of Apple Boot Camp
Let's assume you're a Boot Camp user who's got Windows XP as the second operating system. Initially allocated space for the Windows partition has turned out to be insufficient for your current needs. The only way out is to take some space from your Mac partition, thus redistributing the unused space between the partitions.
To increase size of the Windows partition by taking unused space from the Mac partition, please do the following:
Express Launcher
- Click the Partitioning button and then select Resize Partitions.
- On the Wizard's Welcome page, click the Next button.
- The wizard will automatically select Windows (the NTFS file system) and Mac (the Apple HFS file system) partitions of your Boot Camp configuration.
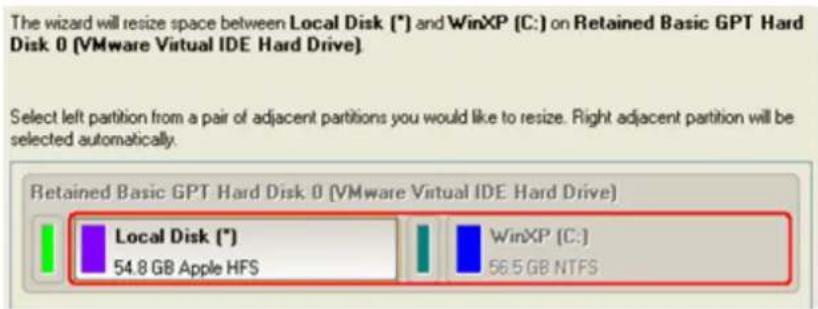

On the disk map you can also see the GPT service partition (called EFI) as well as a 128-megabyte free block between Mac and Windows partitions made with Boot Camp. It's just for your information.
- Increase size of your Windows partition with the slider or manually by entering the required value. Please note, when you change size of one partition the size of the other will be changed as well, thus redistributing the unused space between the partitions.
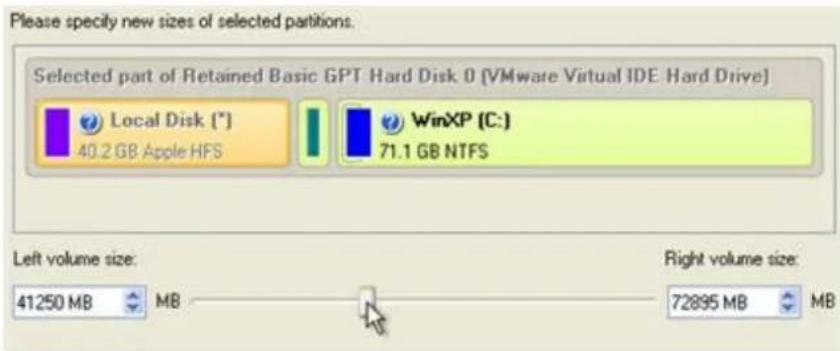
- On the next page of the wizard you need to confirm the operation by selecting the appropriate option.
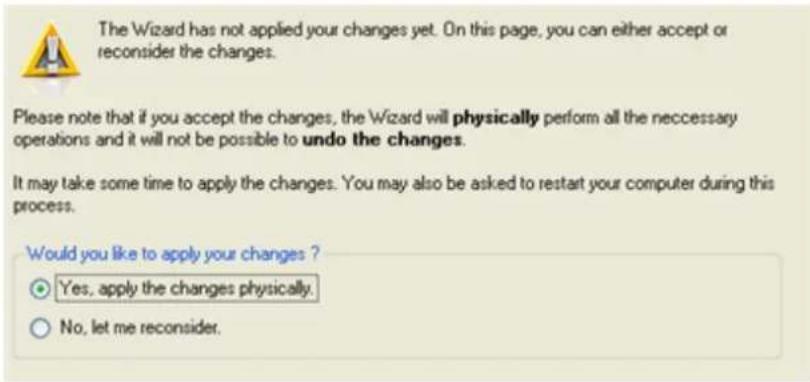
- That's basically it. By clicking the Next button the wizard will start modifying your disk layout. If you've got to do with the system partition resize, like we do in our case, you will be asked to restart your computer in a special boot-up mode to accomplish the operation. So click the appropriate button to agree.
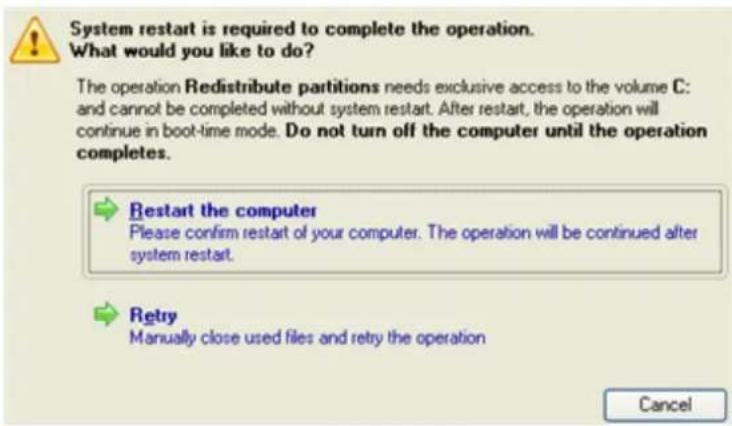
- In the Progress window you can see in real-time a detailed report on all actions carried out at the moment.
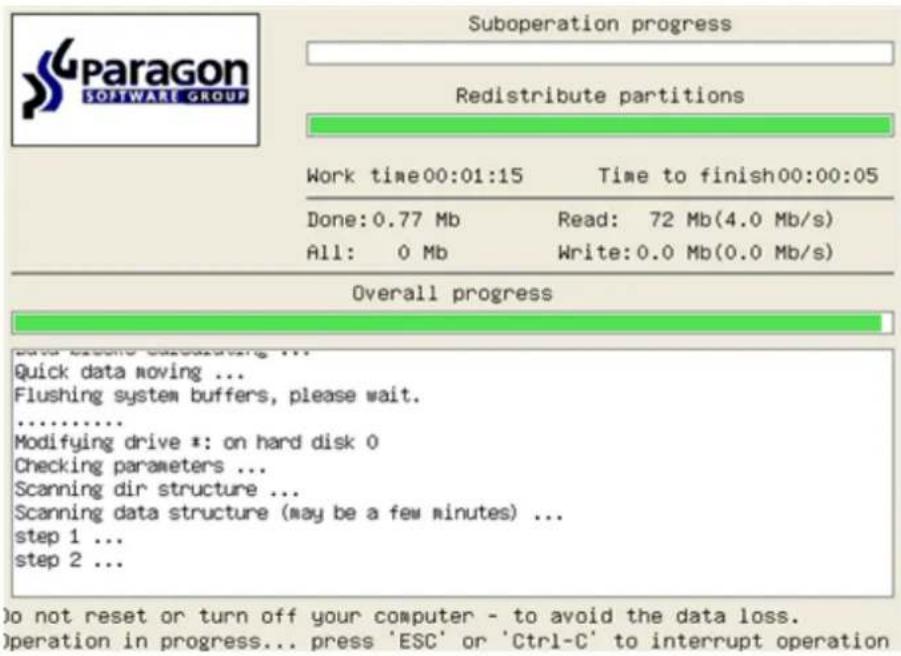
After completing the operation your computer will be automatically restarted back to Windows where you can see that your system partition is bigger now.
Creating Dual Boot Systems
For Windows computers
Release of Windows Vista has given a new impetus to the problem of establishing a dual boot system. In this connection we decided to consider two the most frequently used situations a rank and file user may face, i.e. Windows Vista + Windows XP and Windows XP + Windows Vista. Please note that for reasons of better security and system independence these operating systems will be installed on different partitions. That is why we need to hide the first system partition before installation of the second OS.
Windows Vista + Windows XP
Suppose you have got Windows Vista coming with your brand new computer. Everything is great except one thing – your favourite applications simply reject to work correctly on it. Software updates are expected to release in the near future, but you cannot wait any more. Thus the best way out is to leave Windows Vista intact and install the time-proved Windows XP.
Most likely you have only one hard disk with only one partition (the only partition is always system). To install the second operating system you need to repartition your drive first, as it requires a separate primary partition. If this is the case, you can do your job either with the Install New OS Wizard (a specially designed tool for that) or traditionally with a number of the corresponding wizards and dialogs.
Install New OS Wizard

This scenario implies that operating systems will be installed on different partitions to provide better security and system independence.
Express Launcher
- Click Boot Management and then select Install New OS in the Express Launcher.
-
On the Wizard's Welcome page, click the Next button.
-
Select the appropriate option to create a new primary partition on your hard disk.
Where would you like to install an operating system?
I want to create a new primary partition to install OS.
A new partition will be created by using unallocated space of your hard disk or unused space of existing partitions. It is the most preferable way as no system or user's data will be affected during the installation process.
I want to use an existing primary partition to install OS.
In case creation of a new primary partition is not possible (there are already four primary partitions on the disk) or not desirable, you are free to select any of existing primary partitions. Please note that all data on the selected partition will be deleted if you choose to format it later in this wizard. Besides make sure no operating system has already been installed on that partition.
- On the next page of the wizard, define size of the new partition. If the selected hard disk contains blocks of free space, the wizard will automatically merge them all and allocate the resulted space to create the partition. If not, it will take 50% of the unused space of an adjacent partition, thus resizing it.
You can select either a block of unallocated space of the disk or an existing partition, unused space of which will be served to create a new partition.
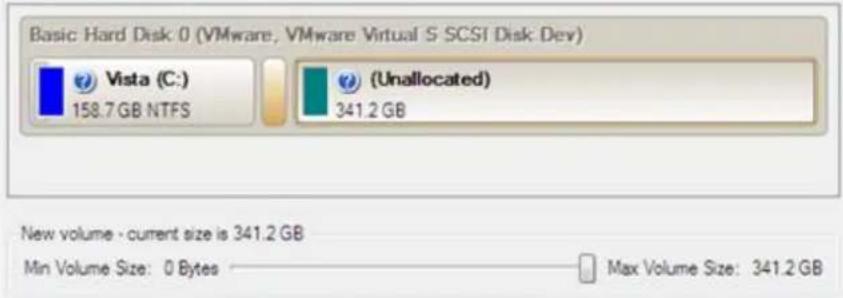
- The next page enables to specify a file system and a number of additional parameters. Since we are going to install Windows XP, the most preferable file systems are NTFS and FAT32. Click the Yes button to continue.
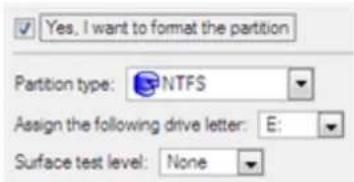

On this page you can specify a number of additional parameters that can also be of help. However here we pay attention to the most relevant to fulfill our task.
- Enter a label for the future partition in the textual field. It will later be used for the drive identification.

- The program will carry out all the necessary operations and then automatically restart the computer to initiate the installation process.

If you've changed your mind on installing a new operating system, don't insert its distributive CD but press ESC when the following message appears:

All the mentioned above operations can also be accomplished with the WinPE recovery environment.
-
Install Windows XP on the newly created partition. We won't go into details as for its installation, as you can find all the necessary information in documentation that comes with the product. However to avoid any problems, we consider it necessary to draw your attention on the following issues:
-
You need a bootable distributive CD of Windows XP to install it;
- To automatically start your computer from this CD, make sure the on-board BIOS is set up to boot from CD first or press F12 during startup to select a bootable device;
- Do not forget to select the newly created partition as destination.

- So if everything is OK, you've got to have by this moment Windows XP successfully installed. Your Windows Vista however is still non-bootable. To fix this issue you need to launch the Boot Manager Setup wizard. To do that, please install our program once again, but this time in Windows XP to activate Boot Manager.

To avoid double installation, please use our WinPE recovery environment to activate Boot Manager.
- Click Boot Management and then select Boot Manager in the Express Launcher.
- Set up the Boot Manager wizard. The most relevant option here is the possibility to hide other primary partitions except the one selected to boot and it is by all means should be activated to make Windows Vista and Windows XP unaware of each other. The rest of the parameters offered by default will do in our case, so just complete the wizard and it will automatically find the two operating systems and update the MBR.
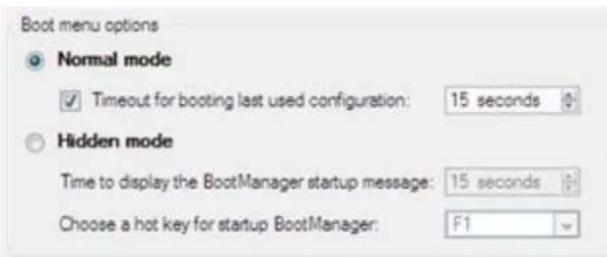
- Now restart the computer to make sure you have got a dual boot system.
Traditional way

This scenario implies that operating systems will be installed on different partitions to provide better security and system independence.
Express Launcher
Click the Partition Manager button and then Partition Manager.
- In the main window select your hard disk on the Disk Map to make a block of free space on it.
![Local Disk (E:) Volume letter: (E:) Volume label: [No label] Type: Primary File system: NTFS Root entries: 32 Sectors per boot: 8 Sectors per cluster: 8 Serial number: Partition ID: NTFS version: Volume Size: Partition size: Used space: Free space: Activity: Hidden state: Move/Resize Partition Resiz…](/content/2026/05/788696/images/1afbdb4874675a1a1afc7376801bd83df1766287ba89315ca727c040795d673c.jpg)
- Release some free space (not less than 10 GB to install Windows XP) from the partition. To do that, please call the context menu for the selected partition (right click of the mouse button) and launch the Move/Resize dialog.
![Are you sure you want to move/resize system volume (C:)? You are about to move/resize NTFS volume [No label]. (C:). Basic Hard Disk 0 (VMware, VMware Virtual S SCSI Disk Dev) Local Disk (C:) 39.9 GB NTFS Volume size: 40,958 MB 18,261 MB - 40,958 MB Free space before: 0.97 MB 0 bytes - 22,693.35 MB F…](/content/2026/05/788696/images/fa0835484baf8c0f6b16fed0e595f83a5a8106de2246649a2c51610261122e32.jpg)
- In the opened dialog shift the edge of the partition to the left by the drag-and-drop technique. While doing this, free space from the partition will be released (displayed in aqua-green). You can also do it manually by entering the exact size of free space. Click the Yes button to continue.
![Are you sure you want to move/resize volume (E?) You are about to move/resize NTFS volume [No label]. (E): Basic Hard Disk 1 (VMware, VMware Virtual S SCSI Disk Dev) Local Disk (E:) 268.3 GB NTFS (Unallocated) 231.6 GB Volume size: 274.790.513 MB 101 MB - 511.993 MB Free space before: 0.97 MB 0 byte…](/content/2026/05/788696/images/58a987fd2ccb8769d61ce8f7f665a217517f2fc43eb4e257297bef75b85d3af9.jpg)

The Move/Resize dialog offers a number of additional parameters that can also be of help. However here we pay attention to the most relevant to fulfill our task.
- Now you have a block of free space sufficient in size to hold a new partition.

- Create a new partition to install Windows XP. To do that, please call the context menu for a newly created block of free space (right click of the mouse button) and launch the Create Partition dialog.
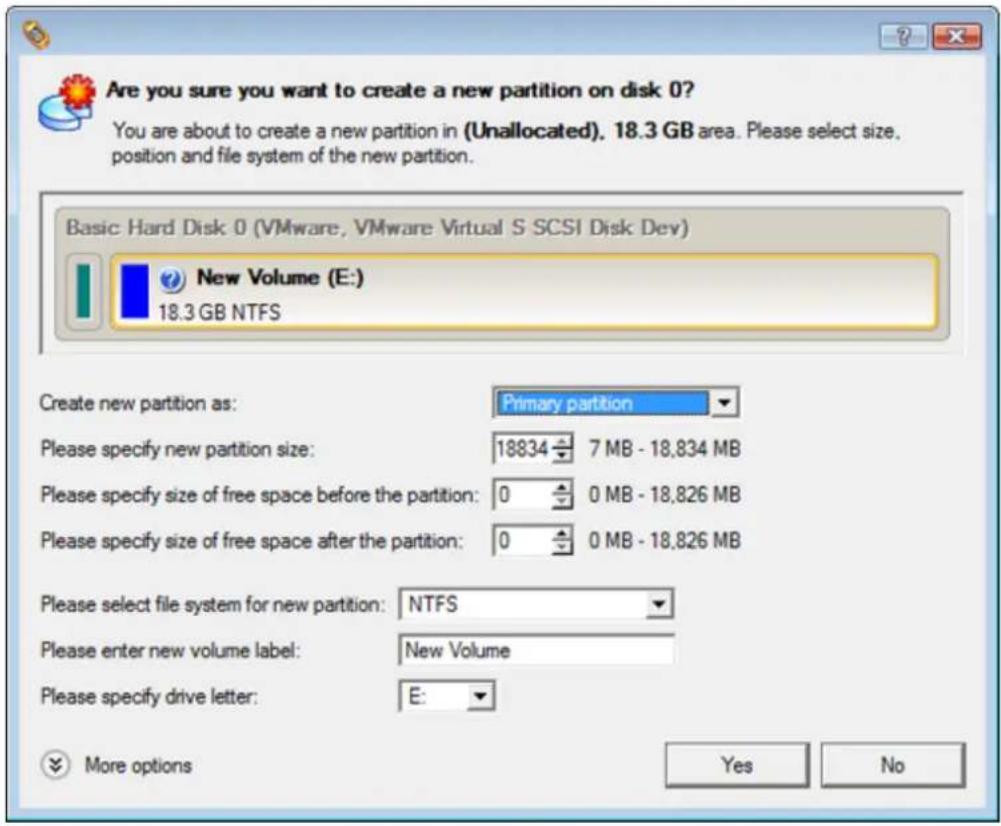
- Define parameters of the future partition. By all means it has to be primary and since we are going to install Windows XP, the most preferable file systems are NTFS and FAT32. Click the Yes button to continue.
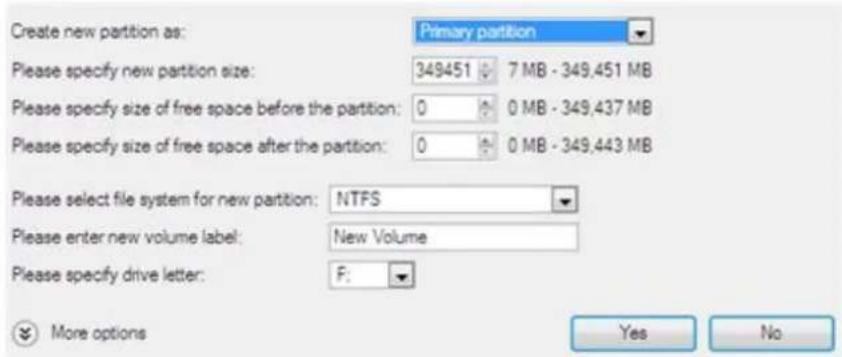

The Create Partition dialog offers a number of additional parameters that can also be of help. However here we pay attention to the most relevant to fulfill our task.
- As a result of the operation we have got a newly created FAT32 partition just enough in size to comfortably work with Windows XP.

- Hide the Windows Vista partition to avoid writing any data on it during the Windows XP installation, as it is the best way to provide system independence. To do that, please call the context menu for it (right click of the mouse button) and launch the Hide Partition dialog. Click the Yes button to continue.
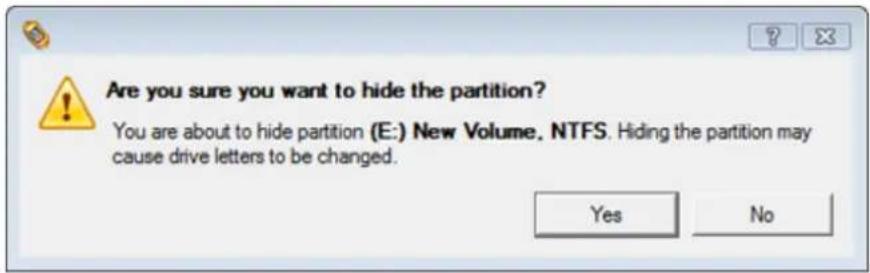

Hiding of the system partition will make OS non-bootable, what is quite normal.
- Apply all introduced changes. By default, our program works in the virtual mode of execution, so you have to confirm all operations to let the program accomplish them. To do that, just click the Apply button on the Virtual Operations Bar.
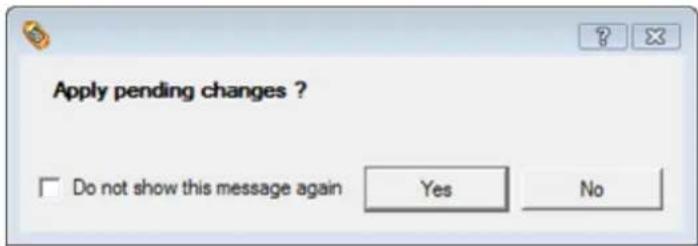
- The program will require the system restart to accomplish the operation in a special boot-up mode. Click the appropriate button to agree.
After all the operations are completed you will not be able to restart the system, what is quite normal. Nevertheless if you do try it, the following error will occur:

STOP: c000021a {Fatal System Error} The initial session process or system process terminated unexpectedly with a status of 0x00000000 (0xc0000034 0x0010037c). The system has been shut down.
All the mentioned above operations can also be accomplished with the WinPE recovery environment.
- Install Windows XP on the newly created partition. We won't go into details as for its installation, as you can find all the necessary information in documentation that comes with the product. However to avoid any problems, we consider it necessary to draw your attention on the following issues:
- You need a bootable distributive CD of Windows XP to install it;
- To automatically start your computer from this CD, make sure the on-board BIOS is set up to boot from CD first or press F12 during startup to select a bootable device;
- Do not forget to select the newly created partition as destination.
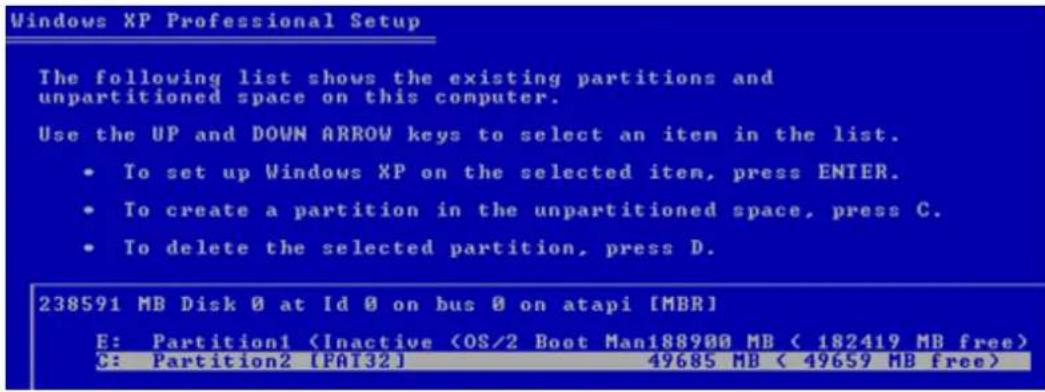

Installation of Windows XP will make Windows Vista non-bootable.
- Launch the Boot Manager Setup wizard. As your Windows Vista is non-bootable any more, you need to install our program once again, but this time in Windows XP to activate Boot Manager.

To avoid double installation, please use our WinPE recovery environment to activate Boot Manager.
- Click Boot Management and then select Boot Manager in the Express Launcher.
- Set up the Boot Manager wizard. The most relevant option here is the possibility to hide other primary partitions except the one selected to boot and it is by all means should be activated to make Windows Vista and Windows XP unaware of each other. The rest of the parameters offered by default will do in our case, so just complete the wizard and it will automatically find the two operating systems and update the MBR.

- Now restart the computer to make sure you have got a dual boot system.
Windows XP + Windows Vista
If you've got Windows XP and are willing to try the latest Windows Vista but not sure your favorite applications will flawlessly work on it, the best way out is to leave the time-proved Windows XP intact and install Windows Vista for studying purposes.
As this very situation is very close to the previous one, please use the Windows Vista + Windows XP scenario. However, please take into consideration one more step you need to accomplish if you decide to use the traditional scenario:
- Besides hiding of the system partition before installation of the second OS you need to make it inactive as well. To do that, please call the context menu for it (right click of the mouse button) and launch the corresponding dialog. Click the Yes button to continue;
![Are you sure you want to set the volume as inactive? You are about to set the volume (C:) [No label]. NTFS as inactive. You computer may no longer boot correctly. Yes No](/content/2026/05/788696/images/fb62bcb63cc81642fdf201f970eb8215536f63d04bfc2ed049f1a251e7312c8c.jpg)
Reviving the system partition
In case you are not able or not willing to complete the mentioned above scenarios, but have already reached the point when all changes are applied and everything is ready to install the second OS, please do the following to make your system bootable once again (only relevant for the traditional scenario):
- Start up the computer from our Linux/DOS recovery media.

Recovery Media Builder can help you prepare the Linux/DOS or WinPE recovery environment either on a CD/DVD disc or a thumb drive.
To automatically boot from the recovery media please make sure the on-board BIOS is set up to boot from CD/USB first.
- In the Linux launch menu select Partition Manager.
| Paragon Partition Manager™ | You can create, delete and format hard disk partitions using Paragon Partition Manager™, which will start now. Upon the start, please select the drive and one of its partitions or its free space. Then activate the 'Partition' pull-down menu and select one of the partitioning operations. |
| Restore Wizard | |
| File Transfer Wizard | |
| Boot Corrector | |
| Network Configurator | |
| Log Saver | |
| View the mounted partitions | |
| Start the command line | |
| Eject CD/DVD | |
| Reboot the computer | |
| Power off |
- In the main window select your non-bootable Windows partition on the Disk Map.
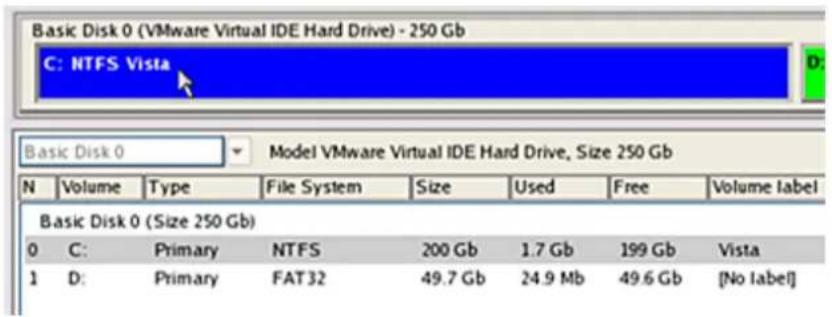
- Unhide the partition by calling the context menu for it (right click of the mouse button) and then selecting Unhide.
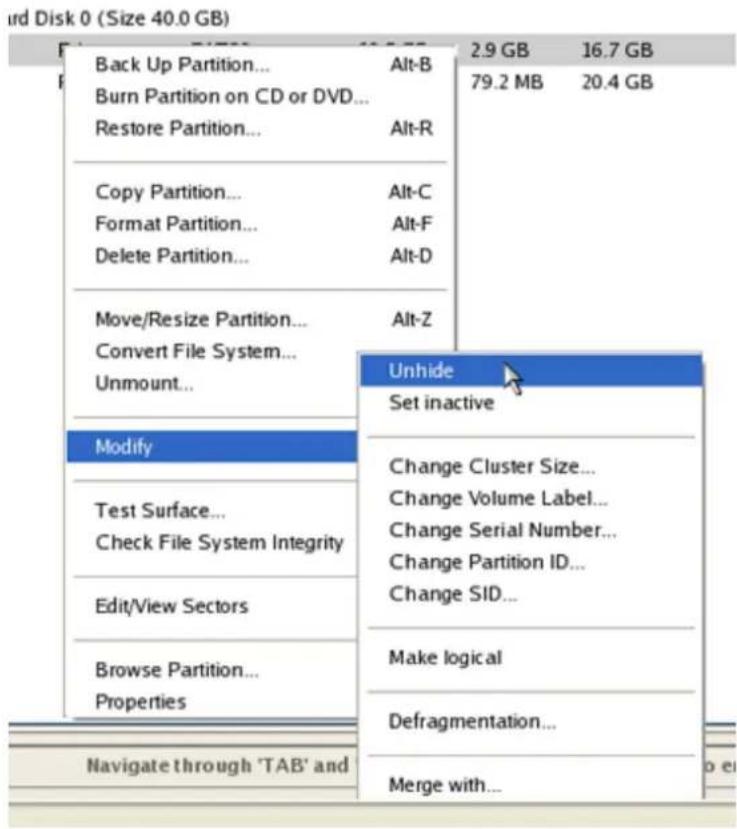
- Only for the Windows XP + Windows Vista scenario you need to make the system partition active as well by calling the context menu for it (right click of the mouse button) and then selecting Set Active.
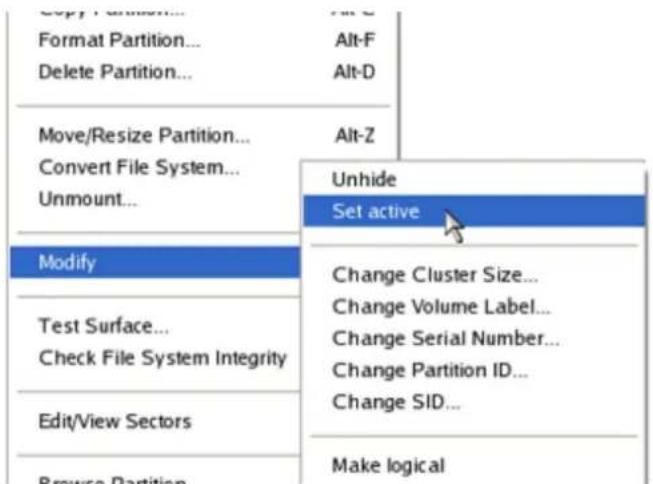
- You will be notified after the operations are completed.
- Restart the computer.
System Migration Scenarios
Migrating system to another hard disk (Clone HDD)
Let's assume that you've bought a new hard disk. It's faster and of much higher capacity than your current system disk, so it's quite natural you start thinking about system migration. We can help you do that.
To migrate your system from one hard disk to another, please do the following:
Launcher
- Connect both source and destination disks to the computer.
- Turn on the computer.
- Click the Copy Disk item of the Wizards menu (any of the ways described earlier can also be used here).
- On the Wizard's Welcome page, click the Next button.
- On the Select Hard Disk to Copy page, select a source disk (a hard disk you want to copy).
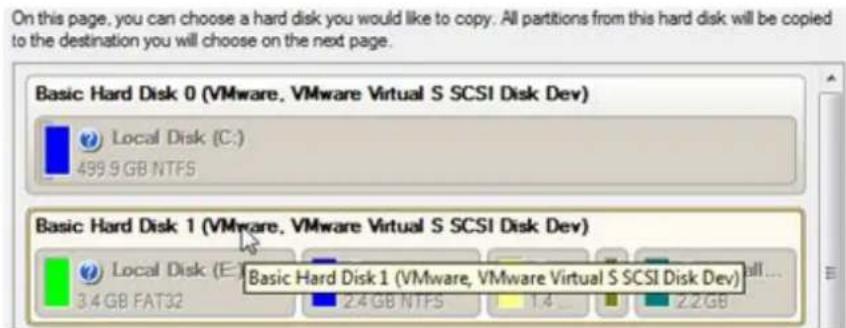
- On the Select Target Hard Disk page, select a destination disk (a hard disk to copy contents of the source disk).
Select a target hard disk. All data from the source hard disk will be copied there. During copy operation, target disk content will be deleted.
Basic Hard Disk 0 (VMware, VMware Virtual S SCSI Disk Dev)

Local Disk (C:)
499.9 GB NTFS
Basic Hard Disk 2 (VMware, VMware Virtual S SCSI Disk Dev)

Archives (G:)
41.9GBNTFS

Backup Capsule
38 GB
Basic Hard Disk3 (VMware, VMware Virtual S SCSI Disk Dev)

(Unalloc
499.9 GB
Basic Hard Disk 3 (VMware, VMware Virtual S SCSI Disk Dev)

During the operation all contents of the destination disk will be deleted.
- On the next page of the wizard, define the copy options. In our case we'd rather copy data with a proportional resize to occupy the entire disk. Besides we recommend you to enable the surface test to make sure your new hard disk is flawless.
Choose copy options that suit best your task:
Copy options:

HDD raw copy

Partitions raw copy

Perform incremental copy
Resize options:

Remove free blocks between partitions

Copy data and resize partitions proportionally

Mark the checkbox to proportionally change the size of partitions while keeping their relative order intact.
Tip: This can be very convenient when migrating to a larger hard disk.
- On the Revise Copy Results page review all parameters of the operation.
Original hard disk:
Basic Hard Disk 1 (VMware, VMware Virtual S SCSI Disk Dev)

⑦ Local Disk (E)
3.4 GB FAT32

Local Dis.
2.4GBNTFS

②
14G

-
(Unallo
2.2GB
Hard disk copy:
Basic Hard Disk 3 (VMware, VMware Virtual S SCSI Disk Dev)

Local Disk (*)
173 GB FAT32

Local Di
120.5 GB NTFS

②
712

(Unallocat
134.6GB
Proportional resize - the copy will take 500 GB (100 % of target disk space)
Min Copy Size
627.5 MB
Max Copy Size
500 GB

Select the range of the disk space that will be occupied on the destination disk with copied partitions.
- Complete the wizard and then apply the pending changes.
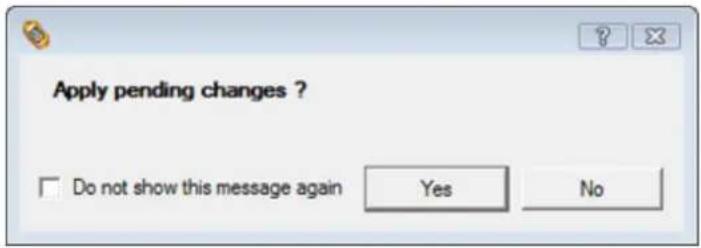
- When copying is completed, shut down the computer.
- Disconnect (physically) the source hard disk.
- Boot the computer from the destination hard disk.

To make a Win2K+ operating system bootable on different hardware, please additionally complete the P2P Adjust OS Wizard.
Making system bootable on different hardware (P2P Adjust OS)
Let's assume you had to migrate to a new hardware platform. You just connected your system hard disk to the brand new PC and tried to start up the operating system - you do know for sure now that this operation had been doomed to failure from the very beginning. With our program you can easily tackle this naughty problem.
But before you start, please make sure the following conditions are met:
- You've got drivers for the new hardware ready to use, not zipped or in .exe files.
- Your OS is unrolled on the new computer, not in a backup image.
To recover bootability after migrating your physical system to different hardware, please do the following:
- Start up the computer from our WinPE media.
- Once it has been loaded, read the agreement and then mark the appropriate checkbox to accept.

If you do not agree with any conditions stated there, you won't be able to use the program.
- Once you accept the agreement, you will see the Universal Application Launcher. Launch P2P Adjust OS Wizard.
Our WinPE 3.0 based environment offers excellent hardware support. However in case it doesn't have a driver for your disk controller, your hard disks will be unavailable. Please consult the Adding specific drivers scenario to know how to tackle this issue.

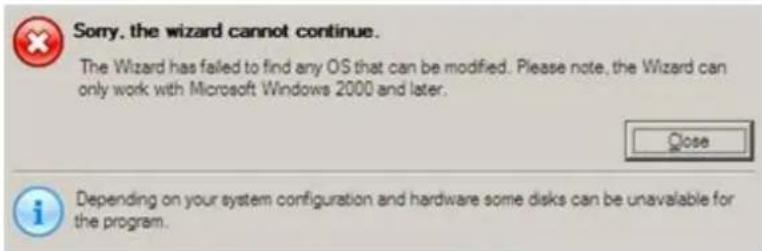
-
On the Wizard's Welcome page, click the Next button.
-
From the list of all found Windows based operating systems (if several) select one you need to adjust to your new hardware. If you're willing to adjust them all, just re-launch this wizard for each.
![OS Volume Label Capacity Windows 2000 Local Disk (C:) [No label] 1.9 GB Windows XP Local Disk (D:) [No label] 4.8 GB](/content/2026/05/788696/images/c650904ef47788fa61fe4758b4d967201ed630c0ac8dda2d287001767b21dddd.jpg)

The wizard can only work with Microsoft Windows 2000 and later operating systems.
-
Choose whether you're going to add drivers for the new hardware to the selected operating system or not and the way it's to be done. Actually you've got three options:
-
Upload drivers automatically from the provided driver repository. Generally together with new hardware you get its drivers for different operating systems on removable media (mostly CD or DVD). By collecting all these drivers in one folder you can let the wizard automatically pick and install only those required for your OS (recommended);
- Upload drivers manually. If you know exactly what drivers your operating system is lacking to successfully start up, you can manually provide them for the wizard.
- Do not upload drivers. And finally you can just refuse providing 3rd party drivers.
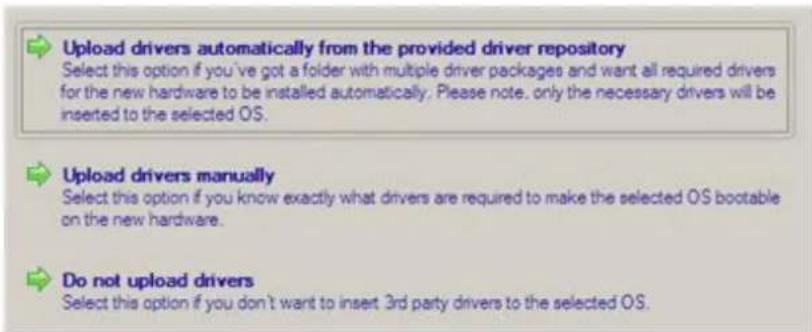
We prefer the wizard to decide what drivers are to be installed.
- Browse for a folder with drivers for the new hardware or type in a full path to it manually.

- Apply the changes by confirming the operation.

After the operation is completed your system will be bootable on the new hardware.
Hard Disk Optimization
To defragment an NTFS or FAT partition, please do the following:
Launcher

You must have administrator's privileges to accomplish defragmentation of the system partition.
- Click the Partition Manager button and then Partition Manager in the Express Launcher.
- In the main window, select a partition you want to defragment on the Disk Map.
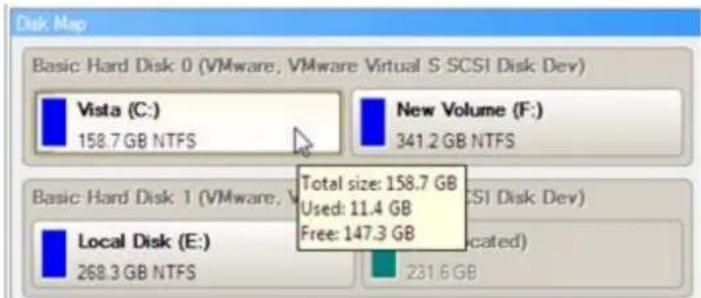
- Launch the Defragment Partition dialog by calling the popup menu for the selected partition (right click of the mouse button) and then selecting the menu item: Defragment Partition...
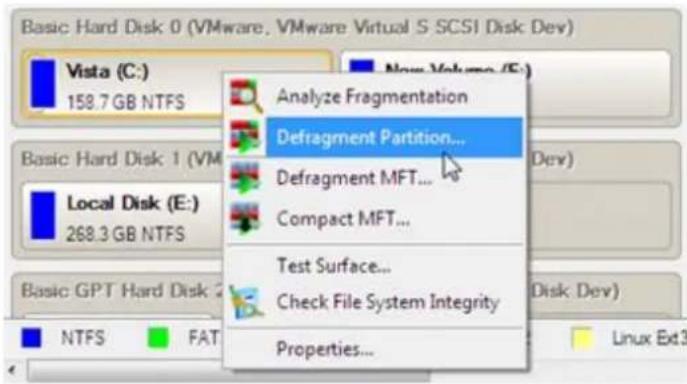
- In the opened dialog define settings of the operation. To improve the performance we recommend you to mark the Do not save content of the Pagefile.sys or (and) Hiberfile.sys checkbox as these files are only needed for the current Windows session.
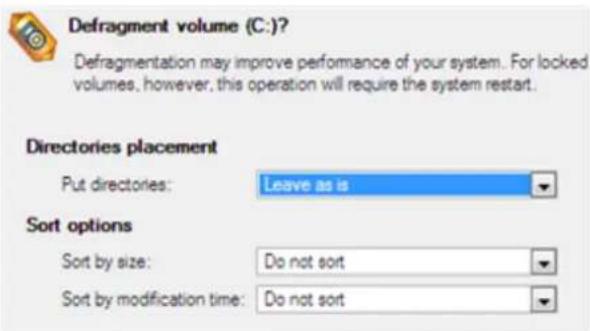

The Defragment Partition dialog offers a number of additional parameters that can also be of help. However here we pay attention to the most relevant to fulfill our task.
- Start the operation by clicking the Yes button.
Extra Scenarios for WinPE
Adding specific drivers
Our WinPE 3.0 based recovery environment offers excellent hardware support. Anyway you've got the option to add drivers for specific hardware with a handy dialog.
To add drivers for specific hardware, please do the following:
- Once you accept the agreement, you will see the Universal Application Launcher. Click Load Drivers.
- In the opened dialog browse for an .INF file of the required driver package located on a floppy disk, local disk, CD/DVD or a network share. Then click the Open button to initiate the operation
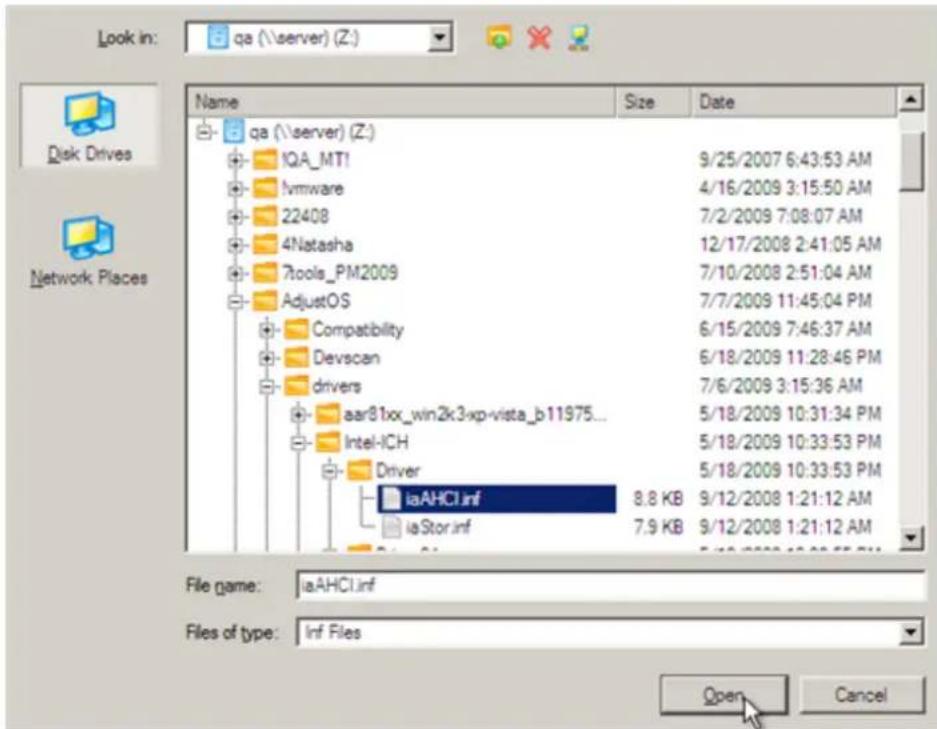

To know how to map a network share, please consult the Configuring network scenario.
- You will be notified on the successful accomplishment of the operation. Click Yes to load another driver or No to close the dialog.
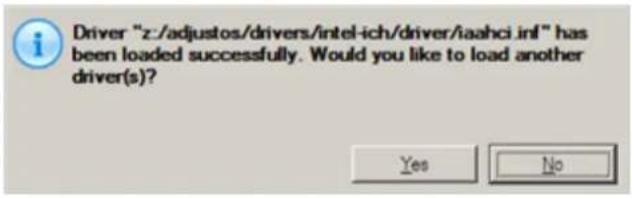

Our WinPE 3.0 recovery environment is 32-based, thus you need to use 32-bit drivers for injection.
Configuring network
If your local network has a DHCP server, a network connection will be automatically configured once our WinPE recovery environment has been started up. Otherwise you will need to do it manually with a handy dialog by providing an IP address, a network mask, default gateway, etc. Besides with its help you can easily map network shares.
To manually set up a network connection and map a network share, please do the following:
- Once you accept the agreement, you will see the Universal Application Launcher. Click Configure Network.
- In the opened dialog provide an IP address, a network mask, default gateway, etc. for your network device.
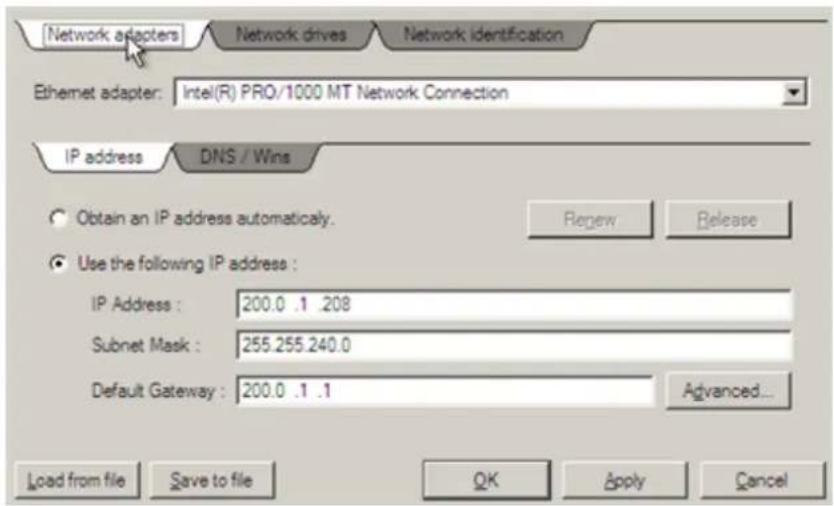
- Click the Network drivers tab to map a network share.
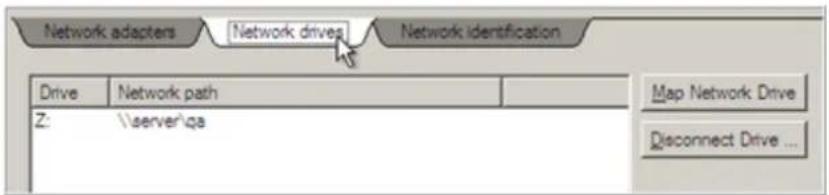
- Click Map Network Drive and provide all the necessary information to map a network share in the opened dialog:
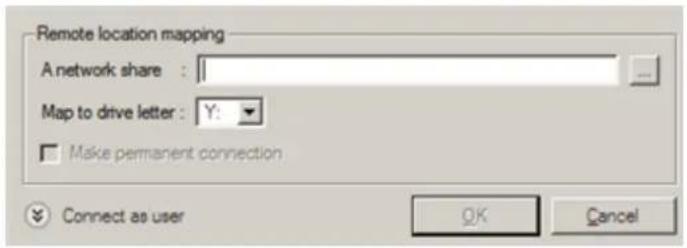
- Click the standard browse button [...] to browse for the required network share or manually enter a path to it;
- Define a letter from the pull-down list of available drive letters;
- Click the Connect as user button at the foot of the dialog page to specify a user name and password to access the selected network share if necessary.
By clicking Disconnect Drive... you can delete an existing network share if necessary.
- Click the Network identification tab to change a network name of your computer (generated automatically) and a workgroup name.
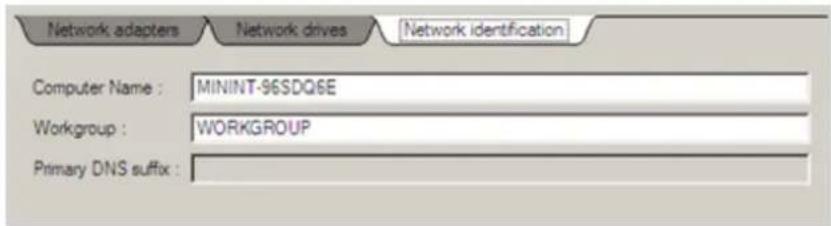
- By default, the wizard saves all network settings in the netconf.ini file located on the WinPE RAM drive, thus it will only be available until you restart the computer. However, you can just once configure your network device and then save this file to some other destination, for instance a local drive, and this way avoid constant re-configuration, just by providing a path to it. So Click Save to file to save the netconfig.ini file to the required destination.
Saving log files
The program enables to simplify the procedure of sending support requests to the Paragon Support Team. In case of having difficulties with handling the program, you, with the help of this very function, can address the company support engineers and provide them with all the information they need such as the disk layout, performed operations, etc. in order to tackle the encountered problem. Information of that kind is stored in log files.
To prepare a log files package, please do the following:
- Once you accept the agreement, you will see the Universal Application Launcher. Click Log Saver.
- In the opened dialog browse for the required location of the log files package or manually provide a full path to it. Click Collect to initiate the operation.
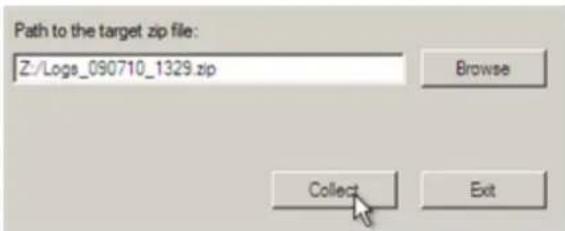

Log files do not contain any confidential information on the operating system settings or the user documents.
Troubleshooter
Here you can find answers to the most frequently asked questions that might arise while using the program.
- I try to run an operation, but the program claims my partition is in use and suggests restarting the computer.
There are a number of operations that cannot be performed while your partition is in use (or locked in other words). Please agree to reboot your machine to make the program accomplish the operation in a special boot-up mode.
- I run an operation and restart the machine as required, but it just boots back into Windows without accomplishing the operation.
Please run 'chkdsk /f' for the partition in question.
- I cannot create a new partition on the disk.
There can be a number of reasons for that:
- The program cannot create a new partition on a dynamic disk, but only on a hard disk that uses the DOS partitioning scheme.
- According to the rules of the DOS partitioning scheme, the following combinations of partitions cannot be created:
- Two Extended Partitions on one hard disk;
- Five or more Primary partitions on one hard disk;
- If there is an Extended Partition on the disk, only three Primary partitions are allowed.
- The program allows creating new partitions only within blocks of un-partitioned space. It cannot convert a free space on an existing partition to a new partition.
- I cannot copy a partition.
There can be a number of reasons for that:
- The source or target disk you select is a dynamic disk;
- 4 primary partitions (or three primary partitions and an extended one) already exist on the target disk.
- I need to copy a partition. But when selecting a place where to make a copy, I always get a crossed circle sign no matter which partition is selected.
The program enables to copy a partition only to a block of un-partitioned space. If you don't have a block of free space on your hard disk, please delete or reduce an existing partition to accomplish the operation.
- I cannot do anything with my USB flash drive. I get a crossed circle sign when trying to select any area on it.
Some USB flash drives don't have the MBR (Master Boot Record), that's the cause of your problem. To fix the issue please use the Update MBR function of our program or 'fixmbr' of the Windows installation disc to write a standard code to your flash drive.
- When trying to back up my system the program asks to restart the computer.
Most likely the Hot Processing mode is disabled. Please make it active in the program settings.
- When backing up a partition with the VSS (Volume Shadow Copy Service) mode, the program throws "VSS could not be started for processed volume".
Most likely you try to back up a FAT32 partition, which is not supported by VSS. Please use the Paragon Hot Processing mode instead.
- I cannot back up my hard disk to an external hard drive. Once started, the operation is aborted with the following error: Hard Disk management, Error Code 0x1100a. What is wrong here?
The problem is that the Microsoft VSS service is set as the default Hot Processing mode in the program. But this service has not been started in your WindowsXP/Windows2003/Vista. Please start this service (right click on My Computer > Manage > Services > find Microsoft Volume Shadow Copy Service and make it active. Set also to start it automatically).
- When running a backup operation with the Paragon Hot Processing mode enabled, I get an error: error code 0x1200e "Internal error during Hot Backup"
Most likely your hard disk contains bad blocks. Please fix the issue with your HDD manufacturer's tool.
You can find a name of the tool you need here: http://kb.paragon-software.com
- When running a backup operation with the Microsoft VSS mode enabled, I get the following error: error code 0x12016 "VSS: can't read volume data"
Most likely your hard disk contains bad blocks. Please fix the issue with your HDD manufacturer's tool.
You can find a name of the tool you need here: http://kb.paragon-software.com
- When trying to back up to a network share, I get the following error: "i/o error" or "can't open/create file"
Please check whether you've got a permission to write to the selected destination or not.
- When trying to restore a backup archive, I get the following error: "Can't restore to current selection" or "Archive does not fit"
Most likely you're trying to restore a backup of the whole hard disk to a partition or vice versa.
- I set up a timetable for a task, but it fails to execute.
There can be a number of reasons for that:
- Windows Task Scheduler does not work properly. Check whether it is so or not by scheduling a simple task (call Notepad through scheduling);
- You don't have permission to write to the selected backup destination.
Glossary
Active Partition is a partition from which an x86-based computer starts up. The active partition must be a primary partition on a basic disk. If you use Windows exclusively, the active partition can be the same as the system volume.
In the DOS partitioning scheme, only primary partitions can be active due to limitations of the standard bootstrap.
The term backup originates from the time when the best way to protect valuable information was to store it in form of archives on external media. It's become now a general notion to mean making duplications of data for protection purposes.
Bootable Archive is created by adding a special bootable section when backing up the data to CD/DVDs. Thus you will be able to restore the data from these archives without having to run the program, but by simply booting from these CD/DVDs.
Cluster is the smallest amount of disk space that can be allocated to hold a file. All file systems used by Windows organize hard disks based on clusters, which consist of one or more contiguous sectors. The smaller the cluster size, the more efficiently a disk stores information. If no cluster size is specified during formatting, Windows picks defaults based on the size of the volume. These defaults are selected to reduce the amount of space that is lost and the amount of fragmentation on the volume. A cluster is also called an allocation unit.
Extended Partition is a partition type you create only on a basic MBR (Master Boot Record) disk. Extended partition is used if you want to create more than four volumes on a disk, since it may contain multiple logical drives.
File System Metadata. The servicing structures of a file system, which contain information about allocating files and directories, security information etc, are named the file system metadata. It is invisible for users and regular applications because its accidental modification usually makes a partition unusable.
Hard Disk Geometry. Traditionally, the usable space of a hard disk is logically divided into cylinders, cylinders are divided into tracks (or heads), and tracks are divided into sectors.
The triad of values {[Sectors-per-Track], [Tracks-per-Cylinder], [Amount-of-Cylinders]} is usually named the Hard Disk Geometry or C/H/S geometry.
Tracks and cylinders are enumerated from "0", while sectors are enumerated from "1". These disk parameters play an essential role in the DOS Partitioning scheme.
Modern hardware uses an advanced scheme for the linear addressing of sectors, which assumes that all on-disk sectors are continuously enumerated from "0". To allow backward compatibility with older standards, modern hard disks can additionally emulate the C/H/S geometry.
Hidden Partition. The concept of a "hidden" partition was introduced in the IBM OS/2 Boot Manager. By default, an operating system does not mount a hidden partition, thus preventing access to its contents.
A method of hiding a partition consists in changing the partition ID value saved in the Partition Table. This is achieved by XOR-ing the partition ID with a 0x10 hexadecimal value.
Master File Table (MFT) is a relational database that consists of rows of file records and columns of file attributes. It contains at least one entry for every file on an NTFS volume, including the MFT itself. MFT is similar to a FAT table in a FAT file system.
MBR & 1st track of the hard disk is the 0th sector of the disk. MBR (Master Boot Record) contains important information about the disk layout:
- The used partitioning scheme;
- The starting records of the Partition Table;
- The standard bootstrap code (or the initial code of boot managers, disk overlay software or boot viruses).
Generally, the 0th sector is used for similar purposes in all existing partitioning schemes.
The MBR capacity is not sufficient to contain sophisticated boot programs. That's why the on-boot software is allowed to use the entire 0th track of the disk. For example, boot managing utilities such as LILO, GRUB and Paragon Boot Manager are located in the 0th track.
Partition ID (or File system ID) is a file system identifier that is placed in the partition. It is used to quickly detect partitions of supported types. A number of operating systems completely rely on it to distinguish supported partitions.
Partition ID is saved in appropriate entries of the Partition Table and takes only 1 byte of space.
Partition Label (or Volume Label) is a small textual field (up to 11 characters) that is located in the partition's boot sector. This value is used for notification purposes only. It is detectable by any partitioning tool including the DOS FDISK utility.
Modern operating systems save it within a file system, e.g. as a special hidden file. Thus it is able to contain a relatively large amount of text in multiple languages.
Partitioning Scheme is a set of rules, constraints and format of the on-disk structures to keep information on partitions located on a hard disk.
There are known several partitioning schemes. The most popular of them is the so-called DOS partitioning scheme. It was introduced by IBM and Microsoft to use multiple partitions in the disk subsystems on IBM PC compatible computers.
Another popular partitioning scheme is the so-called Logical Disks Model (LDM) that originates from the UNIX mainframe systems. Veritas Executive accommodates a simplified version of LDM to the Windows 2000 operating system.
Windows 2000 and XP support two quite different partitioning schemes: the old DOS partitioning scheme and the new Dynamic Disk Management (DDM). The problem is that earlier versions of Windows do not support DDM. In addition, most hard disk utilities do not support it as well.
Recovery Media is a CD/DVD disc, a USB flash card or even a floppy disk from which you can boot for maintenance or recovery purposes.
Root Directory is the top-level directory of a formatted logical drive to include other files and directories. In modern file systems (Ext2/Ext3, NTFS and even FAT32) it does not differ from other directories. This is not the case for old FAT12 and FAT16 file systems.
Serial Number. In the DOS partitioning scheme, every hard disk and every partition has a 32-bit serial number represented by an 8-figure hexadecimal value. It is stored in the MBR and its value is assigned when the MBR sector is initialized by Microsoft standard disk managing tools, such as Windows Disk Administrator and the FDISK utility.
In fact, a hard disk's serial number is not important for most operating systems and software. It is known that Windows NT, 2000 and XP store its value in the database of assigned drive letters.
A partition's serial number is stored in its boot sector (in FAT16, FAT32 and NFTS file systems). Its value is assigned when the partition is formatted. It does not play an important role for most operating systems and software as well.

- PARTITION MANAGER™ SERVER
- CONTENTS
- INTRODUCTION
- WHAT'S NEW IN PARTITION MANAGER SERVER
- PRODUCT COMPONENTS
- FEATURES OVERVIEW
- KEY FEATURES
- USER FRIENDLY FAULT MINIMIZING INTERFACE
- BACKUP FACILITIES
- RESTORE FACILITIES
- COPY FACILITIES
- BOOT MANAGEMENT FACILITIES
- PARTITION/HARD DISK MANAGEMENT FACILITIES
- FILE SYSTEM OPTIMIZATION FACILITIES
- AUXILIARY FACILITIES
- SUPPORTED TECHNOLOGIES
- SUPPORTED FILE SYSTEMS
- SUPPORTED MEDIA
- GETTING STARTED
- DISTRIBUTION
- DISTRIBUTIVE CD
- ONLINE DISTRIBUTION
- REGISTRATION
- TO REGISTER AS A NEW USER
- CLICK REGISTER
- TO REGISTER A NEW PRODUCT
- HOW TO DOWNLOAD UPDATES/UPGRADES
- CONTACTING PARAGON TECHNOLOGY GMBH
- SYSTEM REQUIREMENTS
- WINDOWS BASED SET OF UTILITIES
- LINUX/DOS BASED RECOVERY ENVIRONMENT
- WINPE BASED RECOVERY ENVIRONMENT
- ADDITIONAL REQUIREMENTS
- INSTALLATION
- FIRST START
- BUILDING RECOVERY MEDIA
- BOOTING FROM THE LINUX/DOS RECOVERY MEDIA
- STARTUP
- BOOT MENU
- NORMAL MODE
- SAFE MODE
- LOW GRAPHICS SAFE MODE
- BOOTING FROM THE WINPE RECOVERY MEDIA
- BASIC CONCEPTS
- SYSTEM AND DATA PROTECTION
- BACKUP STORAGE
- ADAPTIVE RESTORE
- ADAPTIVE RESTORE FOR WINDOWS 2000/XP/SERVER 2003
- IF YOU'VE GOT A 64-BIT OPERATING SYSTEM, NO OPTIONS WILL BE ADDED TO THE BOOT MENU
- ADAPTIVE RESTORE FOR WINDOWS VISTA/7/SERVER 2008
- ADAPTIVE RESTORE APPLICATION
- KNOWN ISSUES
- PARAGON HOT PROCESSING & VOLUME SHADOW COPY SERVICE
- OFFLINE VERSUS ONLINE DATA PROCESSING
- PARAGON HOT PROCESSING TECHNOLOGY
- VOLUME SHADOW COPY SERVICE
- DYNAMIC DISKS
- LIMITATIONS
- GPT VERSUS MBR
- APPLE BOOT CAMP
- 64-BIT SUPPORT
- COPY OPERATIONS
- DRIVE PARTITIONING
- WINDOWS COMPONENTS
- INTERFACE OVERVIEW
- GENERAL LAYOUT
- MAIN MENU
- TOOL BAR
- VIRTUAL OPERATIONS BAR
- COMMON TASKS BAR
- DISK MAP
- EXPLORER BAR
- PARTITION LIST
- PROPERTIES BAR
- FOR A HARD DISK
- FOR A PARTITION
- LEGEND BAR
- STATUS BAR
- SETTINGS OVERVIEW
- GENERAL OPTIONS
- BACKUP IMAGE OPTIONS
- GENERAL COPY AND BACKUP OPTIONS
- CD/DVD RECORDING OPTIONS
- HOT PROCESSING OPTIONS
- E-MAIL OPTIONS
- OPERATION DEPENDENCY OPTIONS
- VIRTUAL MODE OPTIONS
- FILE SYSTEM CONVERSION OPTIONS
- AN INCORRECTLY CHOSEN TIME ZONE MIGHT LEAD TO INABILITY TO LAUNCH CERTAIN SOFTWARE
- AN INCORRECTLY CHOSEN CODEPAGE WILL CERTAINLY RESULT IN CORRUPTION OF NON-ENGLISH FILE NAMES
- DEFRAGMENTATION OPTIONS
- GETTING INFORMATION ON DISKS AND BACKUP IMAGES
- VIEWING DISK PROPERTIES
- BASIC HARD DISK 1 (FUJITSU MPF3102AT)
- LOGICAL DISK (G:)
- VIEWING IMAGE PROPERTIES
- DATA BACKUP AND RESCUE
- CREATING BACKUP IMAGES
- EXPRESS LAUNCHER
- LAUNCHER
- SETUP
- RESULT
- AVAILABLE OPERATION SCENARIOS
- RESTORING SYSTEM AND DATA
- SECTOR BACKUP RESTORE
- RESTORING PARTITION
- RESTORING HARD DISK
- COPY TASKS
- CLONING HARD DISKS
- COPY HARD DISK WIZARD
- YOU NEED AT LEAST TWO HARD DISKS TO CARRY OUT THIS OPERATION
- COPY OPTIONS
- RESIZE OPTIONS
- VERIFICATION OPTIONS
- CLONING PARTITIONS
- BOOT MANAGEMENT
- PARTITION MANAGEMENT
- BASIC PARTITIONING OPERATIONS
- CREATING PARTITIONS
- RESTRICTIONS
- DIALOG STARTUP
- EXPRESS CREATE PARTITION WIZARD SETUP
- CREATE PARTITION WIZARD SETUP
- DIALOG SETUP
- FORMATTING PARTITIONS
- WIZARD STARTUP
- WIZARD SETUP
- AS A RESULT OF THIS OPERATION CONTENTS OF THE SELECTED PARTITION WILL BE LOST
- NUMBER OF AVAILABLE OPTIONS DEPENDS ON THE SELECTED FILE SYSTEM TYPE
- DELETING PARTITIONS
- ADVANCED PARTITIONING OPERATIONS
- MERGING PARTITIONS
- REDISTRIBUTING UNUSED SPACE BETWEEN PARTITIONS
- EXPRESS RESIZE PARTITIONS WIZARD
- REDISTRIBUTE FREE SPACE WIZARD
- UNDELETING PARTITIONS
- TO KNOW MORE ON THE AVAILABLE SEARCH METHODS, PLEASE USE THE CONTEXT SENSITIVE HINT SYSTEM
- INSTALLING A NEW OPERATING SYSTEM
- ONLY PRIMARY PARTITIONS CAN BE USED TO INSTALL AN OPERATING SYSTEM
- TO AVOID ANY POSSIBLE PROBLEMS, THE NEW PARTITION WILL IN NO WAY BE CREATED AS THE FIRST PARTITION OF THE DISK WHICH ALREADY CONTAINS AT LEAST ONE PARTITION
- MOVING/RESIZING PARTITION
- CONVERTING FILE SYSTEM
- CHANGING CLUSTER SIZE
- MAKING LOGICAL/PRIMARY
- CHANGING PARTITION ATTRIBUTES
- MARK PARTITION ACTIVE/INACTIVE
- HIDE/UNHIDE PARTITION
- SET LABEL OF A PARTITION
- CHANGE PARTITION ID
- CHANGE SERIAL NUMBER OF A PARTITION
- HARD DISK MANAGEMENT
- UPDATING MBR
- CONVERTING DYNAMIC MBR TO BASIC
- CONVERTING GPT TO BASIC MBR
- CHANGING PRIMARY SLOT
- IN LINUX
- IN DOS
- EXTRA FUNCTIONALITY
- VIEW PARTITION/HARD DISK PROPERTIES
- VOLUME EXPLORER
- FILE TRANSFER WIZARD
- FILES/DIRECTORIES DELETED FROM THE CLIPBOARD REMAIN INTACT ON SOURCE DISKS
- MOUNT PARTITION
- ASSIGN DRIVE LETTER
- REMOVE DRIVE LETTER
- DOWNGRADE NTFS VERSION
- TEST SURFACE
- CHECK FILE SYSTEM INTEGRITY
- EDIT/VIEW SECTORS
- SEND LOG FILES
- LOG FILES
- VIEW LOGS
- TYPICAL SCENARIOS
- BACKUP SCENARIOS
- BACKING UP A HARD DISK OR PARTITION TO EXTERNAL MEDIA (CD/DVD)
- BACKING UP A HARD DISK OR PARTITION TO A NETWORK DRIVE
- BACKING UP A DUAL BOOT MAC TO AN EXTERNAL USB DRIVE
- RECOVERY SCENARIOS
- FIXING MBR AFTER A BOOT VIRUS ATTACK
- FIXING WINDOWS STARTUP ABILITY
- RESTORING A SYSTEM PARTITION FROM EXTERNAL MEDIA (CD/DVD)
- BY DEFAULT THE NORMAL MODE WILL BE AUTOMATICALLY INITIATED AFTER A 10 SECOND IDLE PERIOD
- RESTORING A SYSTEM PARTITION FROM A NETWORK DRIVE
- IF YOU DO NOT AGREE WITH ANY CONDITIONS STATED THERE, YOU WON'T BE ABLE TO USE THE PROGRAM
- YOU CAN ALSO MAP A NETWORK DISK WITH NETWORK CONFIGURATOR
- RESTORING A SYSTEM PARTITION FROM A LOCAL DRIVE
- RESTORING A DUAL BOOT MAC FROM AN EXTERNAL USB DRIVE
- COPYING OF DATA FROM THE CORRUPTED SYSTEM DISK TO ANOTHER HARD DISK
- BURNING OF DATA FROM THE CORRUPTED SYSTEM DISK TO CD/DVD
- COPYING OF DATA FROM A BACKUP TO THE CORRUPTED SYSTEM PARTITION
- RESTORING SEPARATE FILES AND FOLDERS FROM A BACKUP
- RESTORE WIZARD
- RESIZE SCENARIOS
- CREATING A NEW PARTITION TO DETACH OPERATING SYSTEM FROM THE REST OF DATA
- INCREASING SIZE OF A SYSTEM PARTITION BY TAKING UNUSED SPACE OF AN ADJACENT PARTITION
- INCREASING SIZE OF A SYSTEM PARTITION BY TAKING UNUSED SPACE FROM ANY OTHER
- SHRINKING A SYSTEM PARTITION TO INCREASE SIZE OF A DATA PARTITION
- RESIZING PARTITIONS OF APPLE BOOT CAMP
- CREATING DUAL BOOT SYSTEMS
- FOR WINDOWS COMPUTERS
- WINDOWS VISTA + WINDOWS XP
- ALL THE MENTIONED ABOVE OPERATIONS CAN ALSO BE ACCOMPLISHED WITH THE WINPE RECOVERY ENVIRONMENT
- TO AVOID DOUBLE INSTALLATION, PLEASE USE OUR WINPE RECOVERY ENVIRONMENT TO ACTIVATE BOOT MANAGER
- TRADITIONAL WAY
- WINDOWS XP + WINDOWS VISTA
- REVIVING THE SYSTEM PARTITION
- SYSTEM MIGRATION SCENARIOS
- MIGRATING SYSTEM TO ANOTHER HARD DISK (CLONE HDD)
- MAKING SYSTEM BOOTABLE ON DIFFERENT HARDWARE (P2P ADJUST OS)
- THE WIZARD CAN ONLY WORK WITH MICROSOFT WINDOWS 2000 AND LATER OPERATING SYSTEMS
- HARD DISK OPTIMIZATION
- EXTRA SCENARIOS FOR WINPE
- ADDING SPECIFIC DRIVERS
- CONFIGURING NETWORK
- SAVING LOG FILES
- TROUBLESHOOTER
- GLOSSARY
Brand : Paragon
Model : PSG-161-SEG-PL-NP
Category : Logiciel de partitionnement