
Pro - Rice cooker Gastroback - Free user manual and instructions
Find the device manual for free Pro Gastroback in PDF.


| Product Type | Rice Cooker |
| Model | Pro |
| Brand | Gastroback |
| Capacity | 1.5 liters (approx. 8 cups uncooked rice) |
| Power Consumption | 600 W |
| Voltage | 220-240 V, 50/60 Hz |
| Dimensions (W x D x H) | 25 x 25 x 20 cm |
| Weight | 2.5 kg |
| Material | Stainless steel housing, non-stick inner pot |
| Cooking Functions | White rice, brown rice, steam, slow cook, keep warm |
| Keep Warm Function | Automatic keep warm after cooking (up to 12 hours) |
| Timer | Delay start up to 24 hours |
| Lid | Removable, transparent lid with steam vent |
| Inner Pot | Non-stick coating, removable and dishwasher safe |
| Accessories | Measuring cup, rice paddle, steamer basket |
| Safety Features | Overheat protection, automatic shut-off, locking lid |
| Cleaning | Inner pot and lid are dishwasher safe; wipe exterior with damp cloth |
| Spare Parts Availability | Inner pot, lid seal, measuring cup available separately |
| Repairability | Repairable by authorized service centers; user replaceable parts: inner pot, seal |
| Warranty | 2 years |
| Certifications | CE, GS |
Frequently Asked Questions - Pro Gastroback
User questions about Pro Gastroback
0 question about this device. Answer the ones you know or ask your own.
Ask a new question about this device
Download the instructions for your Rice cooker in PDF format for free! Find your manual Pro - Gastroback and take your electronic device back in hand. On this page are published all the documents necessary for the use of your device. Pro by Gastroback.
USER MANUAL Pro Gastroback
natural_image
Gastrobatic saucer with wooden cutting tool and spatula, black and white photo (no text or symbols on main body)natural_image
Black-and-white photo of a plated dish featuring rolled steamed buns with berries and a spoon (no text or symbols visible)IHREN DESIGN CRÊPE MAKER PRO KENNEN LERNEN!
natural_image
Close-up of a hand pouring white liquid into a dark, curved substance on a surface (no text or symbols visible)natural_image
Exterior view of a portable grating with a black and silver casing, featuring cutlery and a handle (no text or symbols visible)natural_image
Close-up of a hand pouring white liquid into a black, curved substance (no text or symbols visible)Operating Instructions
DESIGN CRÊPEMAKER PRO
natural_image
Gastrobatic saucer with wooden cutting tool and spatula, black and white photo (no text or symbols on main body)Read all provided instructions before first use! Model and attachments are subject to change! For household use only!
TABLE OF CONTENTS
KNOWING YOUR DESIGN CRÊPE MAKER PRO....28
IMPORTANT SAFEGUARDS....29
Safeguards for daily operation 29
Important safeguards for electrical appliances ....31
Hot surfaces – risk of burns....32
Important advice for the non-stick coating....33
TECHNICAL SPECIFICATIONS....33
OPERATION....34
Before first use....34
Using your Design Crêpe Maker Pro....35
TIPS FOR BEST RESULTS....36
CARE AND CLEANING....36
STORAGE 37
NOTES FOR DISPOSAL 38
INFORMATION AND SERVICE....38
WARRANTY 38
RECIPES....39
DEAR CUSTOMER!
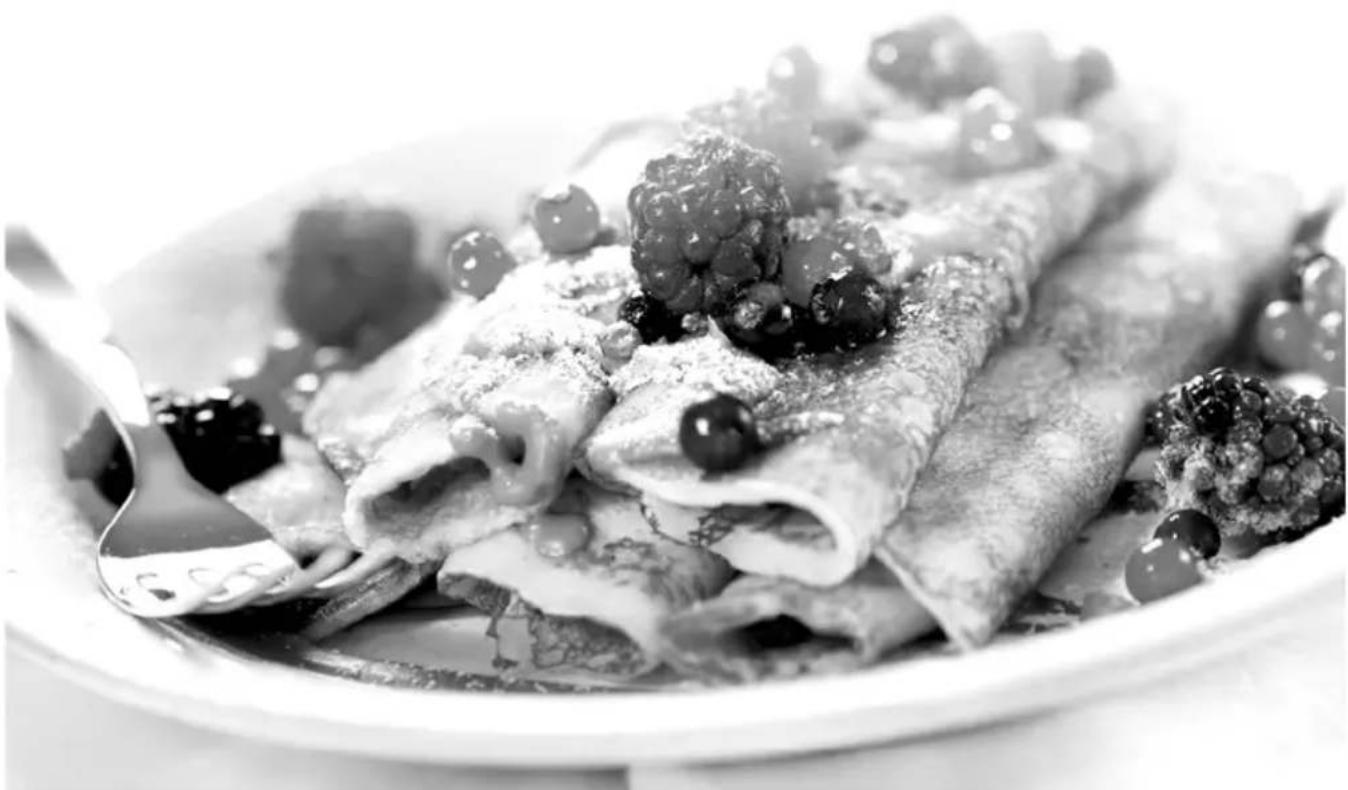
Congratulations! Your new Design Crepe Maker Pro comes with some remarkable features for preparing your crêpes.
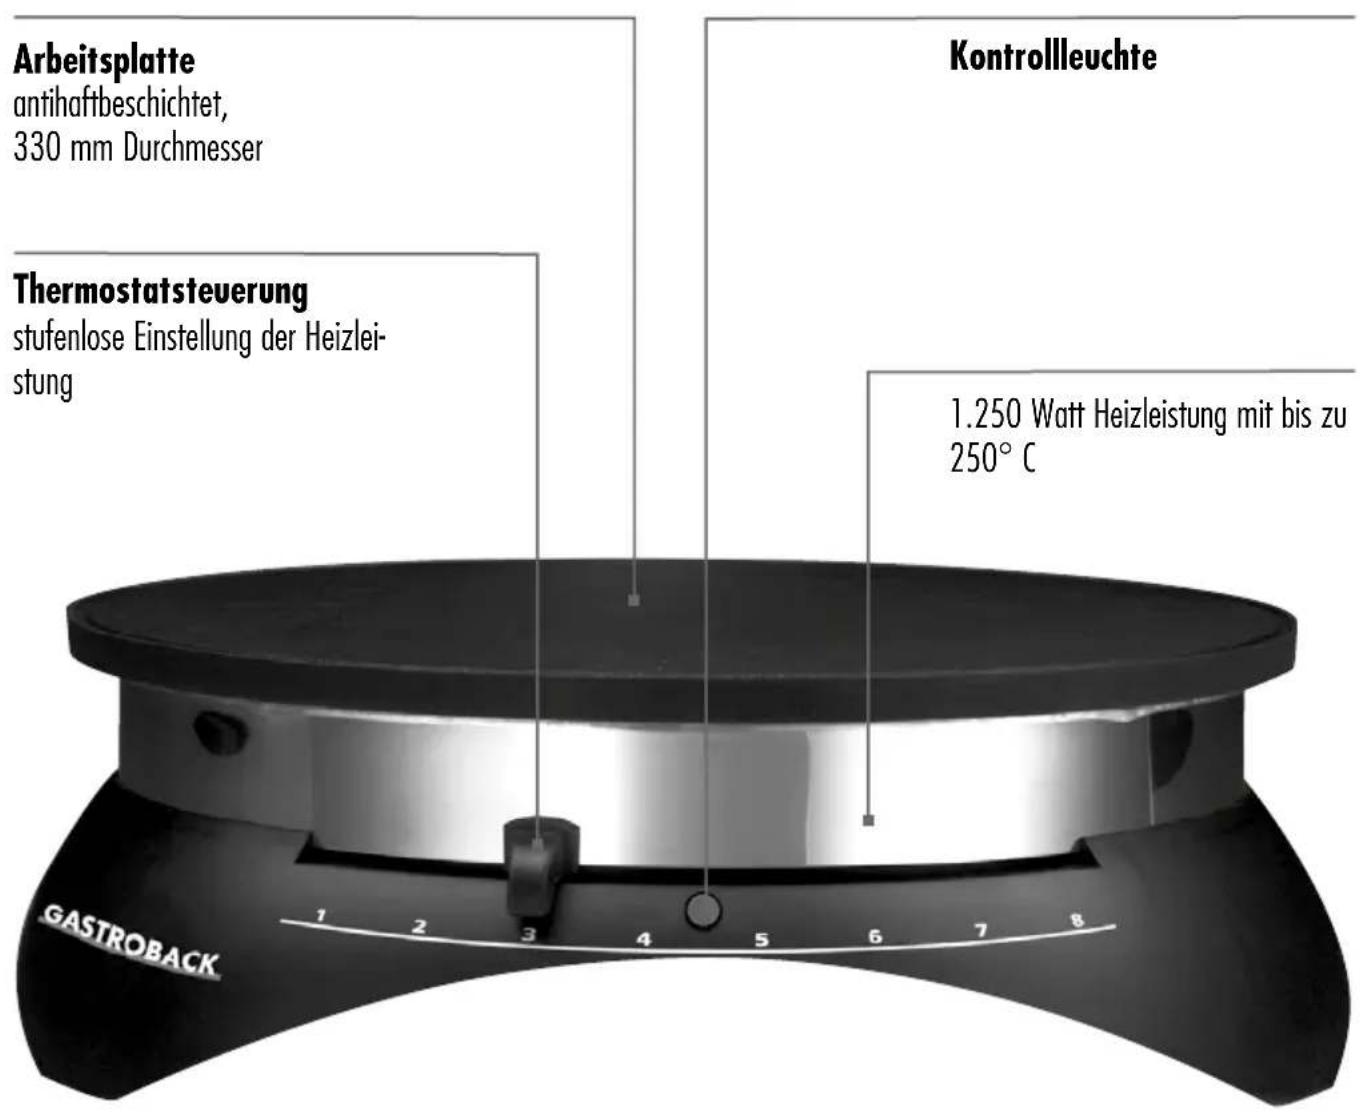
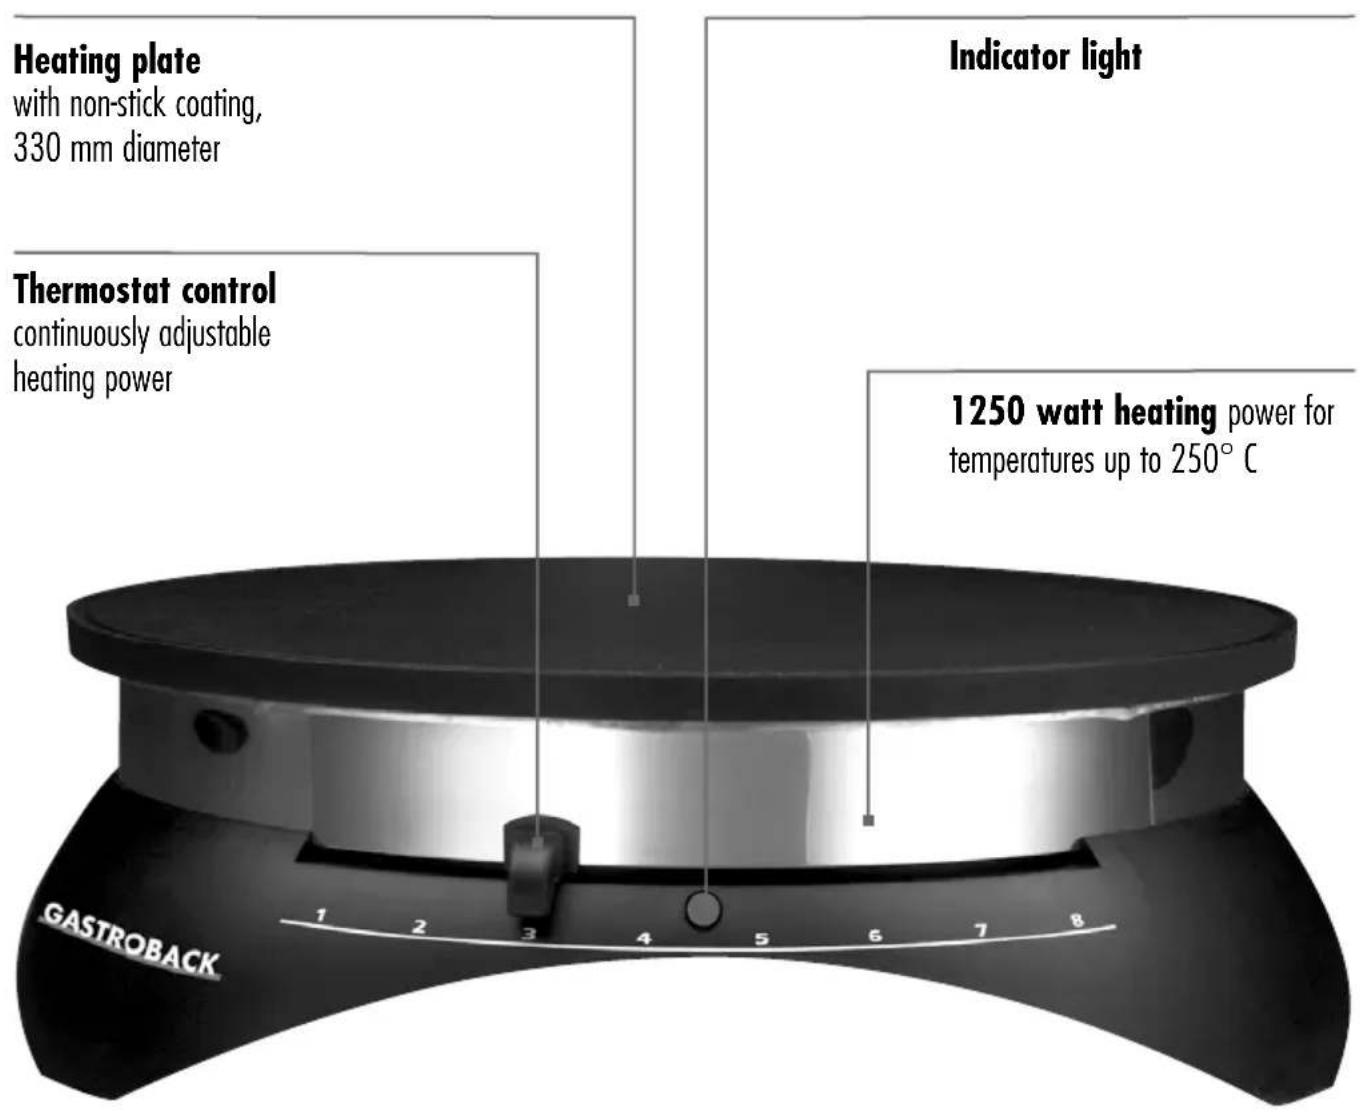
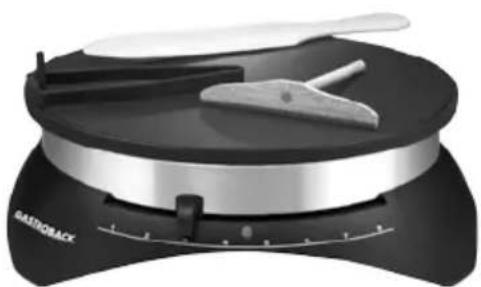
Real french crêpes are a true delight. The appliance comes with an especially large round heating plate with a diameter of 33 cm. The heating plate is absolutley plane. This is a huge advantage when it comes to distributing the batter. With the batter spreader is the distribution of the batter a child's play. Thanks to the high power consumption of 1250 W the crêpes bake fast and evenly.
With the non-stick coating on both heating plates less oil is needed. Easy handling with the continuously adjustable heating power and extensive accessories.
These instructions for use will inform you about the various functions and features, which make it easy to take pleasure in your new crêpemaker.
We hope that you will enjoy your new crêpemaker.
Your Gastroback GmbH
natural_image
Black-and-white photo of a plated dish featuring rolled steamed buns with berries and a spoon (no text or symbols visible)KNOWING YOUR DESIGN CRÊPE MAKER PRO
natural_image
Close-up of a hand pouring white liquid into a black, curved substance on a white surface (no text or symbols visible)Included accessories:
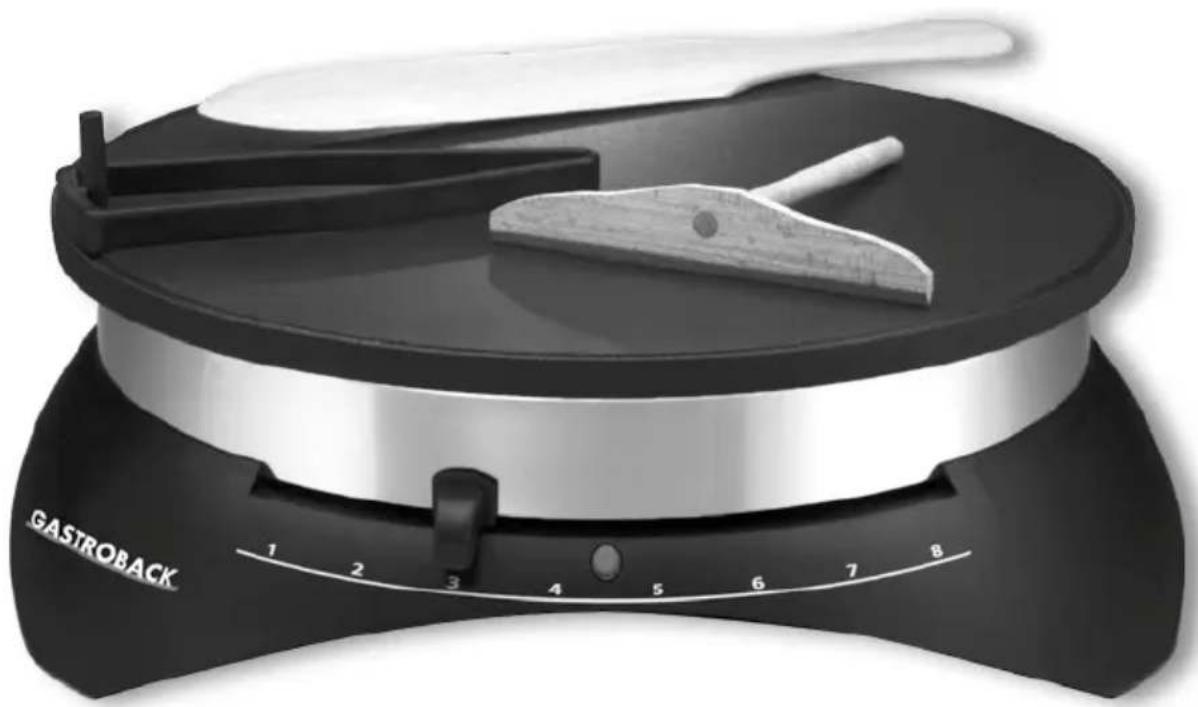
batter spreader, measuring ladle, wooden batter spreader, spatula, brush, water tray (not shown)
natural_image
Exterior view of a modern electric grating with a black base and white handle (no text or symbols visible)IMPORTANT SAFEGUARDS
Carefully read all instructions before operating this appliance and save for further reference. Do not attempt to use this appliance for any other than the intended use, described in these instructions. Any other use, especially misuse, can cause severe injuries or damage by electric shock, heat, or fire. This product complies with all binding CE labelling directives.
These instructions are an essential part of the appliance. Do not pass the appliance without this booklet to third parties.
Any operation, repair and technical maintenance of the appliance or any part of it other than described in these instructions may only be performed at an authorised service centre. Please contact your vendor.
Never leave the appliance unattended when in operational mode.
- Do not use any cooking cutlery made of metal or similar hard material on the heating surface to avoid damaging the non-stick coating. Only use cooking cutlery made of wood or heat insensitive plastic. Never cut on or try to scrape off batter from the heating surface using hard, sharp-edged items.
- The exterior and the heating surface of the Design Crêpe Maker Pro get hot during operation. Do not touch the exterior or the heating surface of the Design Crêpemaker Pro while the appliance is in use.
Note:
Do not cover the heating surface with too much batter. If the batter has baking agents (such as soda, baking powder or yeast) the batter will leak to the sides of the crêpemaker.
⚠ WARNING! Allow the appliance to cool down, before cleaning or moving the appliance. Do not place the appliance or power cord in an automatic dishwasher. Do not immerse the motor housing or power cord in any liquids or spill any liquids on them.
The appliance is for household only.
This appliance is for household use only and NOT intended for use in moving vehicles. Do not operate or store the appliance in humid or wet areas or outdoors. Any use of accessories, attachments or spare parts that are not recommended by the manufacturer or damaged in any way may result in injuries to persons and/or damage.
- Do not attempt to operate the appliance using any parts or accessories not recommended by the manufacturer. Do not operate the appliance, when the appliance
or any part of it is likely to be damaged, to avoid risk of fire, electric shock or any other damage or injuries to persons. Do not attempt to open the appliance housing or to repair the power cord. Check the entire appliance regularly for proper operation. The appliance is likely to be damaged if the appliance is subject to inadmissible strain (i.e. overheating, mechanical or electric shock) or if there are any cracks, excessively frayed parts or distortions. In this case, immediately unplug the appliance and return the entire appliance (including all parts and accessories) to an authorised service centre for examination and repair.
- Close supervision is necessary when the appliance is used near young children. Do not let young children play with any parts of the appliance or the packing. The appliance is not intended for use by children or infirm persons without supervision. Take care that no one pulls the appliance by the power cord, especially when young children are near. Place the appliance on a clean, dry and stable surface where it is protected from inadmissible strain (i.e. mechanical or electric shock, overheating, frost, moisture) and where young children cannot reach it.
- Do not place damageable or precious objects near the appliance while operating to avoid damage by grease spilling.
- This appliance is not intended for use by persons (including children) with reduced physical, sensory or mental capabilities, or lack of experience and knowledge, unless they have been given supervision or instruction concerning use of the appliance by a person responsible for their safety. Children should be supervised to ensure that they do not play with the appliance.
- Do not place the appliance near the edge of the surface or on inclined or touching wet surface or where it can fall.
- During operation keep the appliance in an appropriate distance of at least 20 cm on each side and 1 m on top to furniture, walls, boards, curtains and other objects for the air to circulate. Do not place any cloth or tissue beneath or on the appliance, to avoid any risk of fire, electric shock and overheating.
- Always keep the table or counter clean and dry and immediately wipe off spilled liquids. Do not place the appliance near the edge of the table or counter or on inclined or wet surfaces or where it can fall.
- Do not operate the appliance near inflammable liquids (i.e. high-proof alcohol) or beneath any heat-sensitive or moisture-sensitive materials to avoid damage caused by steam, condensate or fire.
-
Do not place the hot appliance on an uneven surface or where it can tilt. Hot grease or batter could leak out of the appliance and can cause personal injury or material damage.
-
This appliance is not intended for use in moving vehicles. Do not operate or store the appliance in humid or wet areas or outdoors. Do not attempt to operate the appliance using any parts or accessories not recommended by the manufacturer.
- Always turn the appliance off, unplug the appliance and wait for the appliance to cool down, before cleaning or storing the appliance.
- This appliance is intended to be used in household and similar applications such as:
– staff kitchen areas in shops, offices and other working environments; - farm houses;
– by clients in hotels, motels and other residential type environments; - bed and breakfast type environments.
- Always connect or disconnect the power cord to the power outlet with the thermostat control set at a minimum position.
IMPORTANT SAFEGUARDS FOR ALL ELECTRICAL APPLIANCES
The Design Crêpe Maker Pro is electrical heated. Ensure that the voltage rating of your mains power supply corresponds to the voltage requirements of the appliance (230 - 240 V, 50 - 60 Hz, AC). Always connect the appliance directly to a mains power supply wall socket with protective conductor (earth) connected properly. The installation of a residual current safety switch with a maximum rated residual operating current of 30 mA in the supplying electrical circuit is strongly recommended. If in doubt, contact your local electrician for further information. Do not use multiple electrical adapters.
- Do not leave the appliance unattended while connected to the power supply. Always turn the appliance off and immediately unplug the appliance after operation, if it is not in use and before cleaning. Always grasp the plug to disconnect the appliance from the power outlet.
- Always handle the power cord with care. Do not pull or strain the power cord. The power cord may never be knotted or squeezed. Do not let the power cord hang over the edge of the table or counter. Take care not to entangle in the power cord.
- Do not immerse the motor housing or power cord in water or any other liquid.
- Do not pour or drip any liquids on the appliance or power cord. When liquids are spilled on the appliance, immediately unplug the appliance and dry it to avoid risk of electric shock or fire. Do not attempt to operate the appliance, when liquids are on or in the electrical section of the appliance. With the appliance connected to the power supply, do not touch the appliance with wet hands or when the appliance is damp or wet or is touching wet surfaces in order to avo-
id risk of electric shock. In this case do not touch the appliance but immediately unplug the power cord from the power supply and dry the appliance (see: >Care and cleaning<).
- Do not place the appliance or power cord in an automatic dishwasher!
- ⚠ WARNING: Do not insert any tin foil or any other material or objects (risk of damage) between the cooking surface and the frame (ventilation area) of the appliance.
- ⚠ WARNING: Do not block the ventilation holes of the base, under the frame.
- The appliance is intended for making crêpes. Do not use the appliance for any other purpose.
- ⚠ WARNING: Do not use this appliance with wood, coal or any other energy source than that for which this appliance is suited (electrical energy).
• We recommend you keep the original packaging in order to store the appliance.
HOT SURFACES - RISK OF BURNS
CAUTION: HOT SURFACE!
- The exterior of the Design Crêpe Maker Pro and the heating surfaces are getting hot during operation. Do not touch the exterior of the Design Crêpe Maker Pro or the heating surface while the appliance is in use. Always keep your hands, face and arms as well as any clothing and other heat-sensitive objects away from the Design Crêpemaker Pro during operation and only touch the handle, attachment, or the control panel.
- The appliance is electrically heated. The heating starts as soon as the power switch is turned on. Do not place any foreign burnable substance (such as papers, plastics, textiles or alike) on the heating surface, to avoid risk of fire. The appliance needs some time to cool down after switching off the appliance. Do not leave any cooking cutlery on the hot heating surface. Be aware of not touching the hot heating surface with any parts of your body or heat-sensitive items.
- Be especially careful when you have to move the appliance while operating or shortly after use when it is still hot. Hot liquids (such as grease or hot batter) could leak out of the appliance and cause personal injury or material damage. Always pull the plug and let the appliance cool down before moving or cleaning the appliance.
- Operate the appliance on a well accessible, stable, level, dry, heat insensible and suitable surface (such as glass, ceramics, stone or metal). Do not place it on a surface made of plastic (or plastic covered) or vanished or coated wood to avoid
damage caused by overheating. Do not place any cloth or tissue beneath or on the appliance, to avoid any risk of fire, electric shock and overheating. Always keep the table or counter clean and dry and immediately wipe off spilled liquids. Do not place the appliance near the edge of the table or counter or on inclined or wet surfaces or where it can fall.
- Do not place the appliance or any parts of it on or near hot surfaces (heater, gas burner, grill or oven). Do not place the appliance on the power cord. If the power cord warms up during operation or is likely to be damaged, it must be replaced by an authorised service centre. Do not attempt to repair the power cord!
IMPORTANT ADVICE FOR THE NON-STICK COATING
The heating surface has a non-stick coating. If the coating is damaged, grazed or parts of it detach from the heating surface do not use the appliance anymore.
- Do not use any cooking cutlery made of metal or similar hard material on the heating surface to avoid damaging the coating. Only use cooking cutlery made of wood or heat insensitive plastic. Never cut on or try to scrape off batter from the heating surface using hard, sharp-edged items.
- Never use abrasive cleaners, cleaning pads or any hard and sharp objects (i.e. metal scouring pads) for cleaning. Clean the Design Crêpe Maker Pro with a damped sponge or tissue and carefully dry the exterior of the appliance after cleaning. Do not handle the appliance or any part of it with violence. Never place the appliance in an automatic dishwasher.
- Never use non-stick spray as this may damages the non-stick coating of the appliance.
TECHNICAL SPECIFICATIONS
| Model: | Art.-N. 44005 Design Crêpe Maker Pro |
| Power supply: | 230-240 V AC, 50 - 60 Hz |
| Maximum power consumption: | 1.250 W |
| Length of power cord: | approx. 115 cm |
| Weight: | approx. 2.8 kg |
| Dimensions: | approx. 330 x 115 mm (∅ x height) |
| Certification: | CE |
OPERATION
BEFORE FIRST USE
Before first use and after a long period of storage, clean the appliance with a damp soft cloth and warm soapy water (see >Care and cleaning<).
⚠ WARNING: Always unplug the appliance and wait for the appliance to cool down, before cleaning. Do not pour or drip any liquids on the appliance or power cord. When liquids are spilled on the appliance, immediately unplug the appliance and dry it to avoid risk of electric shock or fire. Do not attempt to operate the appliance, when liquids are on or in the electrical section of the appliance. Do not clean the appliance in the dishwasher.
- Remove all promotional materials and packing and place the appliance on a convenient surface (explained in >Safeguards<).
- Wipe the heating surface with a damp soft cloth. Dry it properly after cleaning.
Note:
When using the Design Crêpe Maker Pro for the first time, you may notice a fine smoke haze, because of the first heating of some of the components. There is no need for concern. To prevent smell and taste of your food from being affected, you should heat the appliance on the highest level without any batter. If the burnt smell occurs again on later use, clean the appliance (see: >Care and cleaning). If the burnt smell persists stubbornly even after thoroughly cleaning the appliance, return the appliance to an authorised service centre for examination and repair.
- Grease a paper towel lightly with oil. Whipe the heating plate with the paper towel to prepare the non-stick coating for use.
The temperatures given in the recipes are for information purposes only. You can change them to suit your requirements.
In between each crêpe, clean the batter spreader or the wooden batter spreader with the brush provided for this purpose and leave these accessories soak in the water tray.
The minimum adjustment of the thermostat will not stop the appliance from heating. At this adjustment, the heating plate is regulated at around 155^ C. The appliance stops heating completely only when disconnected from the power outlet.
Note:
The batter spreader may only be used between positions 1 and 6. Never leave it permanently on the hot plate (risk of damage). The wooden batter spreader must be used to spread the batter between positions 7 and 8.
USING YOUR DESIGN CRÊPE MAKER PRO
- Prepare the batter. You will find recipes on page 33 and following.
- Place the appliance on a well accessible, stable, level, dry, and suitable large table or counter. Do not place any cloth or tissue beneath or on the appliance, to avoid any risk of fire, electric shock and overheating. Always keep the table or counter clean and dry and immediately wipe off spilled liquids. Ensure that there is no foreign substance on the heating surface.
Do not touch the exterior of the Design Crêpe Maker Pro while the appliance is in use. Always keep your hands, face and arms as well as any clothing and other heat-sensitive objects away from the crepemaker during operation and only touch the handle, attachment, or the control panel. Do not touch the heating surface (see: >Important safeguards<)
Connect the appliance directly to a separately protected mains power supply wall socket with protective conductor (earth/ground; 230 - 240 V, 50 - 60 Hz, AC, rated for 16 A). The indicatorlight will light up as soon as the plug is connected to the power outlet. The appliance is preheating. It is important to preheat and grease with a little oil the appliance before use. Grease a paper towel lightly with oil. Whipe the heating plate with the paper towel to prepare the non-stick coating for use. In between two crêpes whipe the heating plate with the same paper towel. No more oil is needed.
-
Select the desired heating level.
-
After the indicator light goes out (approx. 6 - 7 minutes) check if the batter spreader is clean and place it in a water tray. If required wipe the heating plate with a greased paper towel.
natural_image
Close-up of a hand pouring white liquid from a small container onto a dark surface (no text or symbols visible)-
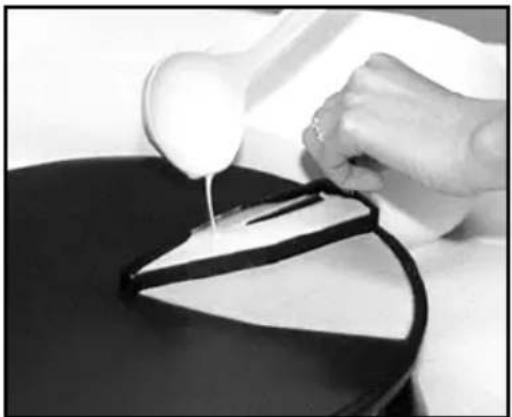
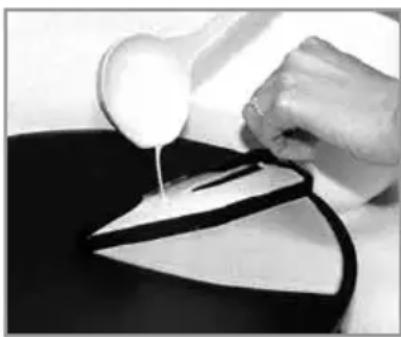
With one hand, fill the measuring ladle right to the top. With the other, place the batter spreader facing towards you in the groove of the hot plate.
-
Pour the whole ladle of batter into the batter spreader in one go without trying to spread it out inside it and immediately turn it clockwise. The first turn must be made in 2-3 seconds. Continue to rotate gently until the remaining batter in the spreader is spread out then put the batter spread
der back in the tray of water. You can also spread out this remaining batter with the wooden batter spreader.
⚠ WARNING! Pouring batter onto the preheated heating plate batter or grease might spurt out. Keep enough distance to the appliance during operation and do not touch the hot exterior or heating surface of the crêpe maker.
- Leave the crêpe to cook for approximately 10 to 15 seconds before turning it
over. To do this, slide the spatula gently under the edge of the crêpe, turn your wrist and lift up the crêpe confidently, then turn it over onto the other side. For crêpes to be served cold, cook the other side only slightly. For crepes to be filled, follow the instructions in the recipe section. Wipe the heating plate and guide groove with the cloth, clean the spreader with the brush and put it in the tray of water.
⚠ WARNING! The appliance is very hot during operation. Pay attention not to touch the appliance while it is hot.
⚠ WARNING! Never cut on or try to scrape off batter from the heating surface using hard, sharp-edged items. This would damage the non-stick coating.
TIPS FOR BEST RESULTS
Always spread out the batter with the batter spreader clockwise, never turn the batter spreader the other way around.
If required, apply gentle pressure to the batter spreader on the hot plate when rotating it.
Always make sure the batter has no lumps, sieve it if required.
To reheat crêpes, use thermostat position 3.
Certain ready-made batters are not designed to be spread out with the batter spreader.
To ensure the non-stick coating of the hot plate has a long life expectancy, do not overgrease it and only use wooden or plastic accessories.
For especially airy and crispy crêpes add 50 ml of sparkling water to the batter. Reduce the amount of milk accordingly.
Let the batter swell for approx 30 min to 1 hour before baking.
CARE AND CLEANING
Always ensure that the appliance is switched off. Then remove the plug from the power outlet before cleaning and storing the appliance.
⚠ WARNING! Allow the appliance to cool down, before cleaning or moving the appliance. Do not place the appliance or power cord in an automatic dishwasher. Do not immerse the appliance or power cord in any liquids or spill any liquids on them. Always wipe off spilled liquids immediately. Do not pour or drip any liquids on the motor housing or power cord. Do not place the appliance on wet or damp surfaces. When liquids are spilled on the motor housing, immediately unplug the appliance and dry the motor housing to avoid risk of electric shock or fire.
For easy cleaning – immediately after each use clean the appliance. This way no leftover food will stick, burn-in or carbonise to the heating surface.
ATTENTION: Abrasive and strong cleaners will damage the surface of the non-stick coating. Never clean the appliance with abrasive and strong cleaners. Never use hard or sharp-edged objects when using or cleaning the appliance as this will also damage the non-stick coating. Do not use force when using the appliance to avoid damages.
Carefully clean the heating plate with a damp sponge or cloth and warm soapy water. Wipe the exterior of the crêpe maker and power cord with a damp soft cloth. Take care not to spill or drip water or any other liquids on the appliance.
Do not immerse the appliance in water or any other liquids. Avoid using sharp or metallic utensils for cleaning. This will damage the non-stick coating.
Thoroughly dry the crêpe maker and all parts of the appliance after each cleaning. Polish the surface with a dry towel.
Do not use cleansers or oven cleaners on the cooking plates.
STORAGE
⚠ WARNING: Young children must be supervised that they do not play with the appliance or any part of it. When the appliance is not in use, always unplug the appliance. Do not leave the appliance unattended while connected to the power supply to avoid risk of electric shock or fire. Always clean the appliance before storing to avoid accumulation of dried-on food. Operate according to the instructions >Care and cleaning>. Make sure that there are no foreign substances on the heating plate. Ensure to store the appliance where it is clean, dry and safe from frost, direct sunlight and inadmissible strain (mechanical or electric shock, heat, moisture) and where it is out of reach of young children. Place the appliance on a clean and stable surface, where it cannot fall. Do not place any hard or heavy objects on the appliance or any part of it.
- Clean the appliance according to the instructions >Care and cleaning<.
- Make sure there are no foreign objects on the heating plate.
- Store the appliance on a clean and stable surface, where it cannot fall.
We recommend storing the appliance and the accessories in the original packaging box.
CAUTION: Do not hold the appliance by the power cord for moving the appliance. To move the appliance, always grasp the appliance at the handle or at both sides of the housing, to avoid damage.
NOTES FOR DISPOSAL
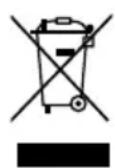
Dispose of the appliance and packaging must be effected in accordance with the corresponding local regulations and requirements for electrical appliances and packaging. Please contact your local disposal company. Do not dispose of electrical appliances as unsorted municipal waste, use separate collection facilities. Contact your local government for information regarding the collection systems available. If electrical appliances are disposed of in landfills, dumps, or refuse incineration, hazardous substances can leak into the groundwater or can be emitted into air, thus getting into the food chain, and damaging your health and well-being. When replacing old appliances with new once, the retailer is legally obligated to take back your old appliance for disposal at least for free of charge.
INFORMATION AND SERVICE
Please check www.gastroback.de for further information. For technical support, please contact Gastroback Customer Care Center by phone: +49 (0)4165/22 25-0 or e-mail info@gastroback.de.
WARRANTY
We guarantee that all our products are free of defects at the time of purchase. Any demonstrable manufacturing or material defects will be to the exclusion of any further claim and within 2 years after purchasing the appliance free of charge repaired or substituted. There is no Warranty claim of the purchaser if the damage or defect of the appliance is caused by inappropriate treatment, over loading or installation mistakes. The Warranty claim expires if there is any technical interference of a third party without a written agreement. The purchaser has to present the sales slip in assertion-of-claim and has to bear all charges of costs and risk of the transport.
Note:
Customers from Germany and Austria: For repair and service, please send Gastroback products to the following address: Gastroback GmbH, Gewerbestr. 20, D-21279 Hollenstedt, Germany.
Customers from other countries: Please contact your dealer.
Please agree that we cannot bear the charge of receipt. Submission of appliances: Please ensure packing the appliance ready for shipment without accessories. Add the sales slip and a short fault description. The processing time after receipt of the defective appliance will be approx. 2 weeks; we will inform you automatically. After the warranty period, please send defective appliances to the given address. You will get a free quotation and, thereafter, can decide, whether we shall repair the appliance to the costs possibly accrued, send back the defective appliance for free
of charge, or dispose of the appliance for free of charge.
The appliance is intended for household use only and NOT suited for commercial usage. Do not attempt to use this appliance in any other way or for any other purpose than the intended use, described in these instructions. Any other use is regarded as unintended use or misuse, and can cause severe injuries or damage. There is no warranty claim of the purchaser if any injuries or damages are caused by unintended use.
RECIPES
SAVOURY BUCKWHEAT GALETTES
Ingredients: for 20 galettes
1 cup buckwheat flour (112 g)
1 ¼ cup all-purpose flour (165 g)
1 tsp salt
1 tbsp sugar (10 g)
1 egg
1 cup water (250 ml)
1 1/3 cup low-fat milk (320 ml)
To make the batter:
Preparation time: 10 min.
In a large mixing bowl, combine the buckwheat flour, the all-purpose flour, the salt, the sugar and stir to mix well. In a medium mixing bowl, whisk together the egg, the water and the milk. Make a well in the center of the dry ingredients, pour half of the liquid mixture into the well and whisk until the batter is smooth and lump-free. Add the remaining liquid and stir until smooth.
Cooking: Thermostat 5
To spread the galettes, refer to the advice for using the spreader in the crepe maker's instruction leaflet. Between cooking each galette, grease the griddle with a cotton cloth moistened with oil. Pour a ladle of batter into the spreader and perform two full clockwise rotations in order to spread all the batter. Leave to cook for 10-15 seconds before flipping it over. Let it cook for no more than 5-10 seconds. Flip back over add fillings, fold and remove from griddle.
Egg - ham - cheese galette: With the crepe on the griddle, break an egg onto the galette and spread the white evenly using the spatula, sprinkle with grated cheese and add half a slice of ham cut into thin slices. Fold the edges of the galette to form a hexagon.
Suggestions for fillings:
Mushrooms, tomatoes with garlic and parsley, scallops.
SWEET CRÊPES
Ingredients: for 15 crêpes
1/3 cup sugar (70 g), or less, if desired
1 tbsp buckwheat flour (10 g)
1 tbsp canola oil or melted unsalted butter
1/3 cup water (80 ml)
1 tsp salt
1 tsp vanilla extract
2 eggs
1 3/4 cup all-purpose flour (200 g)
2 ¼ cups low-fat milk (540 ml)
To make the batter:
Preparation time: 10 min.
In a bowl mix together the sugar, buckwheat flour, melted unsalted butter or canola oil, water, salt, vanilla extract and the eggs. Alternate adding the all-purpose flour and the low-fat milk, mixing well after each addition.
Cooking: Thermostat 5
To spread the crêpes, refer to the advice for using the spreader in the pancake maker's instruction leaflet. Between cooking each crêpe, lightly grease the griddle with a cotton cloth moistened with oil. Pour a ladle of batter into the spreader and perform one full rotation in order to spread all the batter. If any is left you can rotate a second time. Leave to cook for 15 seconds, remove with the spatula, place on a plate and fill the crêpe.
Strawberry and kiwi crêpe: Spread strawberry jam over the crêpe and then place a few pieces of kiwi on it. Decorate with whipped cream and split almonds.
Suggestions for fillings: Any sweet fillings such as: sugar, jams or jellies, ice cream or sorbet, chocolate, fruit, lemon juice, honey.
Decoration: mint leaves, grated coconut, crystallized fruit, etc.
»Crêpes flambées«: heat the alcohol you have chosen, pour over the crêpe and set light. (Rum, Brandy, Cointreau, etc.)
BLINIS
Ingredients: for 80 mini-blinis or 40 blinis
2 2/3 cups all-purpose flour (350 g)
^3/_4 cup buckwheat flour (85 g)
2 eggs, separated
2 tsp active dry yeast
2 tbsp warm water
12 tsp salt
pinch sugar
3 34 cups low-fat milk (900 ml), warmed to 110°
2 tbsp melted unsalted butter
To make the batter:
Preparation time: 20 min.
Resting time: 2 hours
Place the two types of flour, egg yolks, the yeast (diluted in 2 tbsp of warm water), salt and sugar in a mixing bowl. Gradually add 3 cups (750 ml) of the warmed milk and the melted butter to obtain a smooth batter. Leave to rise in a double-boiler pan and cover with a tea cloth for an hour; it should double in volume. Add the remaining 34 cup of milk and egg whites beaten to stiff peak. Carefully mix then leave to rise for another hour.
Cooking: Thermostat 6 - 7
Lightly grease the griddle with a cotton cloth moistened with oil. Pour 1/3 of a ladle of batter on the griddle. You can make 8 mini-blinis at a time. Cook for one minute on each side; the blinis should swell as then cook.
Seafood blinis: Serve with pre-dinner drinks, garnished with smoked salmon, salmon roe and sour cream. Decorate with lemon and dill.
Suggestions for fillings: Spread with melted butter, fresh double cream, all kinds of smoked fish, shellfish spreads, caviar, potted meats.
TORTILLAS
Ingredients: For 8 tortillas
1 ½ cup all-purpose flour (200 g)
1 ½ cup fine corn meal (150 g)
^3/_4 cup + 1 tbsp water (20 cl)
1 egg white
pinch of salt
To make the batter:
Preparation time : 15 min.
In a mixing bowl, mix by hand the flour, corn meal, water, egg white and salt until you can form a soft ball. Separate this into 8 equal parts. Prepare a well-floured work surface. Using a rolling pin, roll out each part to make a pancake of about 5" (12 cm) in diameter and 1/16" (2 mm) thick. To prevent the dough from sticking to the rolling pin, you can roll it between two sheets of plastic.
Cooking: Thermostat 5
Place four tortillas on the griddle and leave to cook for approximately 1 min. on each side. Keep the tortillas in a cloth so they remain soft and easy to fold.
For 8 Tacos (Filled tortillas): Brown 12 oz (330 g) of minced beef in a frying pan and season with taco sauce to taste. Leave to cook over gentle heat for 10 min. Reheat the tortillas in a medium hot oven for 2 to 3 min. Place lettuce leaves on the tortillas, then the minced beef. Add strips of cheese, slices of tomato and additional taco sauce or salsa. Decorate with a few slices of olive. To serve, fold them to form a shell.
Suggestions for fillings: Tacos can be filled with breast of chicken, shelled prawns, hard-boiled eggs in slices, kidney beans, avocado, onion, sweet corn, capers, chili peppers, sour cream.
PANCAKES
Ingredients: For 24 pancakes
1 2/3 cup all-purpose flour (220 g)
2 eggs
1 tbsp sugar
1 tsp yeast
1 2/3 cup low-fat milk (40 cl)
To make the batter:
Preparation time: 5 min.
Resting time: 30 min.
Mix the flour, eggs, sugar and yeast (diluted in a Tablespoon of warm water) in a mixing bowl. Gradually add the milk and leave to rest for 30 min.
Cooking: Thermostat 6
Lightly grease the griddle with a cot-
ton cloth moistened with oil. Pour half a ladle of batter and spread with the base of the ladle until you have formed a pancake approximately 5 inch (12 cm) in diameter. You can spread a second pancake on the griddle. Leave to cook until the batter is set (about 30 seconds). Flip with the spatula and cook for 30 seconds.
Pancakes are served at breakfast and spread with honey, apricot and cherry jam. Decorate with slices of apple, segments of mandarin and roasted split almonds.
Suggestions for fillings: You can serve your pancakes with maple syrup, chocolate, butter, sugar, fresh fruit, grated coconut.
CRESPELLE
Ingredients: For 12 crespelle
1 2/3 cup all-purpose flour (220 g)
5 eggs
1 tbsp olive oil pinch of salt
1 tsp chopped fresh herbs such as ore-gano, basil and parsley
1 2/3 cup low-fat milk (400 ml)
To make the batter:
Preparation time: 5 min.
Resting time: 30 min.
Mix the flour, eggs, oil, salt, herbs and half of the milk in a bowl. Then gradually mix in the rest of the milk. Leave to rest for 30 minutes.
Cooking: Thermostat 5 - 6
Pour a ladle full of batter onto the griddle and gently spread with the base of the ladle until you have formed a cres-pella about 8 inch (20 cm) in diameter. As soon as the batter is set, flip the cres-pella with the spatula and leave to cook for 30 seconds on the other side.
Crespelle with mozzarella cheese and chorizo spicy sausage.
For one crespella: Melt together 4 ounces each of mozzarella cheese and cooked chorizo. Spread this filling over a crespella. Fold the two sides towards the middle so that part of the filling can be seen. Decorate with chives and cherry tomatoes.
Suggestions for fillings: Use the following ingredients to fill your crespelle to suit your taste:
– Salami, minced beef or veal, breast of chicken, Parma ham
– Sorrel, tomato sauce, mushrooms
– Ricotta, Parmesan
– Basil, chopped hazelnuts, olives.
PALAT HAM
Ingredients: For 10 - 12 palat ham
2 cups all-purpose flour (260 g)
5 eggs, separated
1 tbsp sugar
pinch of salt
2 cups low-fat milk (500 ml)
2 tbsp melted unsalted butter (30 g)
To make the batter:
Preparation time: 15 min.
Resting time: 30 min.
Put the flour, 5 egg yolks, sugar and salt into a mixing bowl and mix. Gradually add the milk to obtain a smooth, lump-free batter. Whip 4 egg whites until
they are stiff and carefully mix them into the batter. Leave to rest for 30 minutes. Before cooking, add the cooled melted butter.
Cooking: Thermostat 6
Pour a ladle and a half of batter and spread with the base of the ladle over the griddle to form a palatschinken 8 inch (20 cm) in diameter. Leave to cook for approximately 30 seconds. When the edges start to brown, turn over with the spatula and cook the other side for 30 seconds.
Spread apricot jam on a palat ham and roll it up on a plate. Pour melted chocolate over it and decorate with whipped cream, toasted split almonds, crystallized fruit, slices of kiwi and mint leaves.
Suggestions for fillings: To suit your taste, vary the types of jam and garnish with fruit purées, custard, fresh fruit, scoops of ice cream or sorbet. Don't forget a few mint leaves for decoration.
BRICKS
Ingredients: For 8 - 10 bricks
^3/_4 cup + 2 tbsp all-purpose flour (100 g)
12 cup + 1 tbsp semolina flour (100 g)
12 tsp salt
1 2/3 cup water (400 ml)
To make the batter:
Preparation time: 5 min.
In a mixing bowl, mix the flour, semolina, salt. Very gradually add the water so that you obtain a runny batter. If lumps form, strain the batter.
Cooking: Thermostat 5
To spread the bricks, refer to the advice for using the spreader in the instruction leaflet. Grease the griddle with a cotton cloth moistened with oil. Pour a ladle full of the batter in the spreader and perform one full clockwise rotation so as to spread all the batter. Leave to cook for 30 seconds on one side, then turn the brick over with the spatula and cook the other side for approximately 15 seconds.
Tuna fish bricks: For 8 tuna fish bricks: Chop 4 hard-boiled eggs, an onion, a sprig of parsley. Mix in a can of tuna fish, then sprinkle with juice from one lemon.
To serve the brick folded in a cornet: Fold the brick in half. Roll it up to form a cornet. Fill it with the stuffing.
Suggestions for fillings: The bricks can also be served in the shape of cigars, little drawstring-type purses, half-moons or triangles and filled with eggs, vegetables, meat, fish or shellfish.
CHAPATIS
Ingredients: For 15 chapatis
1^2/3 cup whole wheat flour (220 g)
2 tbsp melted unsalted butter (30 g)
12 cup warm water (120 ml)
12 tsp salt
To make the batter:
Preparation time: 15 min.
Resting time: 30 min.
Place the flour, salt and melted butter in a mixing bowl and mix by hand. Gradually add the water. Knead until you form a soft, smooth ball of dough. Lea-
ve to rest for 30 min. Divide the dough into 15 equal parts. Using a rolling pin, roll out each part so you obtain a very thin chapati of about 5 inch (12 cm) in diameter.
Cooking: Thermostat 5
Place 4 chapatis on the griddle. After 20 seconds, lightly press their surface in several places with the end of the spatula. In this way, you help the formation of air bubbles, which will make the chapatis rise. Leave to cook approximately 1 min., then flip with the spatula and cook for one more minute. Wrap the chapatis in a cloth to keep them warm.
Chapatis are eaten hot with butter and served as bread to accompany Indian dishes: chicken curry, vegetable dishes, saffron rice.
Suggestions for fillings: Chapatis can also be served with sweet and sour lamb, chutney.
BEGHRIRS
Ingredients: For 16 to 18 Beghrirs
1 ½ cup water (350 ml)
12 cup + 2 tbsp low-fat milk (200 ml)
1 tsp yeast
1 cup semolina flour (170 g)
^3/_4 cup all-purpose flour (100 g), sifted
1 tsp sugar
12 tsp salt
2 eggs
To make the batter:
Preparation time: 25 min.
Resting time: 2 hours.
Place the water and milk on low heat to warm. Dilute the yeast in two table-
spoons of warm water. In a mixing bowl, mix the semolina, flour, sugar and salt. Beat the eggs for 30 seconds with a whisk, add the diluted yeast, then the warmed water and milk. Gradually add this mixture to the flour. Whip for a few minutes to obtain a thick, creamy batter. Cover with a cloth and leave to rise for 2 hours in a warm place.
Cooking: Thermostat 5-7
Grease the griddle with a cotton cloth lightly moistened with oil. Pour about 2/3 of a ladle of batter and gently spread with the base of the ladle so that you form a beghrir 5 inch (12 cm) in diameter. You can make 3 beghrirs at a time. Leave to cook for approximately 2 minutes, a lot of little holes will form. When the beghrirs are cooked, do not turn them over, but place them on a cookie sheet, smooth side down in a single layer.
Light and melt-in-the-mouth, beghrirs are eaten hot. Spread every other beghrir with melted butter and pile them up on a plate. On the last one, pour honey. When you serve them, each individual can add honey and sugar to his beghrir.
Suggestions for fillings: Eaten hot, beghirs can also be spread with grated coconut, jam.
SPRING ROLL SKINS
Ingredients: For 20 spring roll skins
2 cups + 2 tbsp rice flour (250 g)
12 cup all-purpose flour (70 g)
2 eggs
Pinch salt
1 34 cup + 2 tbsp water (45 cl)
To make the batter:
Preparation time: 5 min.
Mix the two types of flour, eggs and salt in a mixing bowl. Gradually add the water so as to obtain a runny batter.
Cooking: Thermostat 3
Spreading the spring roll skins calls for great dexterity. Pour 34 of a ladle of batter in the center of the griddle and rapidly spread with the rake to form a fine pancake 9 inch (23cm) in diameter. Leave to cook for 30 seconds, flip with the spatula and cook for another 30 seconds. Keep in a cloth so they remain moist.
For 10 spring rolls:
Ingredients:
32 oz (250 g) cooked pork cut in strips,
4 oz (100 g) shelled prawns,
3 sliced green onions,
1 cup (250 g) bean sprouts,
14 cup (60 g) cucumber, garlic, salt, chives, green salad, mint.
Preparation: slice and mix the ingredients. Place the equivalent of 2 tablespoons of the preparation on the skin, roll over once, fold in the edges and then finish rolling. Serve on a bed of lettuce leaves, garnish with pieces of avocado and accompany with a prepared Asian dipping sauce.
BANH XEO
Ingredients: for 8 Banh xèo
^3/_4 cup + 2 tbsp rice flour (100 g)
1/3 cup all-purpose flour (45 g)
1 egg
pinch of salt
3 tbsp coconut (25 g) unsweetened
1 tsp potato flour
12 tsp ground cumin
1 tsp vegetable oil
^3/_4 cup water (20 cl)
finely chopped chives
To make the batter:
Preparation time: 15 min.
Resting time: 1 hour.
Place the 2 types of flour, egg, salt, coconut, potato flour, cumin and oil in a bowl. Mix while gradually adding the water so as to obtain a semi-liquid batter. Add the chopped chives. Cover with a cloth and leave to rise for an hour.
Cooking: Thermostat 3
Pour a ladle of batter onto the griddle. Rapidly spread with the rake so as to obtain a thin pancake about 9 inch (22 cm) in diameter. Leave to cook for 30 seconds on each side.
Prepare a mixture of sliced onions, bean sprouts, shelled prawns and pork cut in thin strips. Brown this filling in a frying pan and spread it on one half of the Banh xèo. Fold in two like a turnover and garnish with a few lettuce leaves. Accompany with soy sauce and decorate with chives and a slice of lemon.
Suggestions for fillings
With the same preparation you can make sweet pancakes by replacing the
salt with sugar, and filling with grated coconut and lemon.
OKONOMIYAKI
Ingredients: for 6 Okonomiyaki
Okonomiyaki:
2 cups all-purpose flour (260 g)
1 egg
1 2/3 cups water (400 ml)
Filling:
8 oz diced bacon (220 g)
4 oz leeks, white parts only, cut lenght-wise into thin strips (100 g)
3 oz cabbage cut lengthwise into thin strips (80 g)
3 oz peeled and deveined shrimps or prawns (80 g), diced
To make the batter: Preparation time: 15 min.
Brown the bacon pieces in a frying pan. Remove and drain on a paper towel. In a bowl, mix the thinly sliced leek and cabbage with the prawns and bacon pieces. Divide this filling into 6 equal parts. In a separate bowl, mix the flour and egg. Gradually add the water so as to obtain a runny batter.
Cooking: Thermostat 4
Pour 34 of a ladle of batter onto the griddle and spread with the rake to form an okonomiyaki 8 inch (20 cm) in diameter. Immediately spread one part of the filling onto the still liquid pancake. Then spread a ladle full of batter all over the filling to fix it in place. Leave to cook for 2 min., then turn over with the spatula and cook 1 14 mins. on the other side, pressing the okonomiyaki with the spatula. The okonomiyaki is served sprinkled with soy sauce.
Suggestions for fillings: Okonomiyakis can be prepared with all kinds of raw vegetables, meat and fish cut into thin strips.
PIKELETS
Ingredients: For 24 pikelets
1 ½ cup all-purpose flour (200 g)
2 tsp sugar
1 tsp active dry yeast
1 tbsp warm water (110 °)
2 eggs
^3/_4 cup milk (180 ml)
2 tbsp melted unsalted butter (30g) pinch of salt
To make the batter:
Preparation time: 6 min.
Resting time: 30 min.
Mix together the flour and sugar. Dilute the yeast in a Tablespoon of warm water. Mix the eggs, milk, melted butter, salt and diluted yeast in a mixing bowl. Gradually add this mixture to the flour and sugar, mixture until you obtain a smooth batter. Leave to rise for 30 min.
Cooking: Thermostat 5
Lightly grease the griddle with a cotton cloth moistened with oil. Pour 12 ladle full of batter onto the griddle to make a pikelet 3 in (7 cm) in diameter. You can make 2 pikelets at a time. Wait until the batter sets about 45 seconds before turning them over with the spatula. Leave to cook for 1 min. on the other side. Serve hot with apricot, strawberry or cherry jam and accompany with mandarin or orange segments.
Suggestions for fillings: Spread the pikelets with butter, chocolate, lemon juice, maple syrup, honey, or pieces of fresh fruit.
POTATO BUCKWHEAT GALETTES
Ingredients: For 20 potato buckwheat galettes
^3/_4 lb. russet potatoes (300 g) peeled and cubed
1 small yellow onion, peeled and quartered
1 34 cup + 2 tbsp buckwheat flour (240 g)
2 eggs
1 tsp salt, or more to taste
12 cup water (120 ml)
2 ½ cup low-fat milk (600 ml)
Freshly ground pepper, to taste
To make the batter:
Preparation time: 30 min. including cooking time for the potatoes
In 12 gallon water, boil the peeled potatoes and onion until a fork can be easily inserted.
In a mixing bowl, mix the flour, eggs, salt, pepper, water and milk so as to obtain a smooth batter. Mash the cooked potatoes and onion. Add this mixture to the batter.
Cooking: Thermostat 6
Fill the ladle and pour the batter onto the griddle so as to form a galette approximately 5 inch (12 cm) in diameter. You can make 3 galettes at a time on the griddle. Leave the first side to cook until the batter is set (approx. 1 min.). Flip with the spatula and cook 45 seconds on the other side.
Potato galettes with hot preserved gizzards: Place 3 potato galettes on a plate garnished with lettuce leaves. Put slices of tomato and chopped walnuts on the galettes. Season with vinaigrette dressing. In a frying pan, brown some slices of gizzard and then spread them on the galettes.
Suggestions for fillings: Goat cheese, ratatouille.
GASTROBACK GmbH

- IHREN DESIGN CRÊPE MAKER PRO KENNEN LERNEN!
- TABLE OF CONTENTS
- DEAR CUSTOMER!
- KNOWING YOUR DESIGN CRÊPE MAKER PRO
- Included accessories:
- IMPORTANT SAFEGUARDS
- Never leave the appliance unattended when in operational mode.
- Note:
- IMPORTANT SAFEGUARDS FOR ALL ELECTRICAL APPLIANCES
- HOT SURFACES - RISK OF BURNS
- CAUTION: HOT SURFACE!
- IMPORTANT ADVICE FOR THE NON-STICK COATING
- OPERATION
- BEFORE FIRST USE
- USING YOUR DESIGN CRÊPE MAKER PRO
- TIPS FOR BEST RESULTS
- CARE AND CLEANING
- STORAGE
- NOTES FOR DISPOSAL
- INFORMATION AND SERVICE
- WARRANTY
- RECIPES
- SAVOURY BUCKWHEAT GALETTES
- To make the batter:
- Suggestions for fillings:
- SWEET CRÊPES
- Ingredients: for 15 crêpes
- Preparation time: 10 min.
- Cooking: Thermostat 5
- BLINIS
- Resting time: 2 hours
- Cooking: Thermostat 6 - 7
- TORTILLAS
- PANCAKES
- CRESPELLE
- PALAT HAM
- Cooking: Thermostat 6
- BRICKS
- CHAPATIS
- BEGHRIRS
- Cooking: Thermostat 5-7
- SPRING ROLL SKINS
- For 10 spring rolls:
- Ingredients:
- BANH XEO
- Cooking: Thermostat 3
- Suggestions for fillings
- OKONOMIYAKI
- Okonomiyaki:
- Cooking: Thermostat 4
- PIKELETS
- POTATO BUCKWHEAT GALETTES
- GASTROBACK GmbH
Brand : Gastroback
Model : Pro
Category : Rice cooker