
ScissorPro 500 - Knife sharpener Chef's Choice - Free user manual and instructions
Find the device manual for free ScissorPro 500 Chef's Choice in PDF.


| Product Type | Scissors Sharpener |
| Brand | Chef's Choice |
| Model | ScissorPro 500 |
| Power Source | 120V AC, 60Hz (polarized plug) |
| Sharpening Stages | Coarse and Fine diamond abrasive stages |
| Blade Guides | Magne-Flex™ system with magnetic guides and hold-down springs |
| Abrasive Type | Omni-Curve™ rotating diamond disks |
| Suitable Scissors | Kitchen, household, sewing, arts & crafts scissors (standard and knife-edge) |
| Not Suitable | Pinking shears, serrated blades, hair styling scissors, manicure scissors, tin snips, scissors over 12" |
| Safety Features | Polarized plug; do not immerse; unplug when not in use; avoid contact with moving parts |
| Maintenance | Wipe with damp cloth; remove metal dust via bottom plug every 18 months |
| Service | Return to EdgeCraft Corporation (USA) or local distributor for repair |
| Dimensions (approx.) | 8 x 4 x 3 inches (20.3 x 10.2 x 7.6 cm) |
| Weight (approx.) | 1.5 lbs (0.68 kg) |
| Accessories Included | Knife-Edge Scissors Accessory |
| Country of Assembly | Assembled in the USA |
Frequently Asked Questions - ScissorPro 500 Chef's Choice
User questions about ScissorPro 500 Chef's Choice
0 question about this device. Answer the ones you know or ask your own.
Ask a new question about this device
Download the instructions for your Knife sharpener in PDF format for free! Find your manual ScissorPro 500 - Chef's Choice and take your electronic device back in hand. On this page are published all the documents necessary for the use of your device. ScissorPro 500 by Chef's Choice.
USER MANUAL ScissorPro 500 Chef's Choice
Read these instructions before use.
It is essential that you follow these
instructions to achieve optimum results.
ImPorTANT SAfeGUArDS
When using electrical appliances, basic safety precautions should always be followed including the following:
- Read all instructions.
- To protect against electrical hazards, do not immerse the ScissorPro ® in water or other liquid.
- Make sure only clean scissor blades are inserted in the ScissorPro ® .
- Unplug from outlet when not in use, before putting on or taking off parts and before cleaning.
- Avoid contacting moving parts.
- Do not operate any appliance with a damaged cord or plug, or after the appliance malfunctions, or is dropped or damaged in any manner.
U.S. customers: You may return your sharpener to EdgeCraft's factory for service where the cost of repair or electrical or mechanical adjustment can be estimated. If the electrical cord on this appliance is damaged, it must be replaced by the Chef's Choice distributor or other qualified service to avoid the danger of electrical shock.
Outside U.S.: Please return your sharpener to your local distributor where the cost of repair or electrical or mechanical adjustment can be estimated. If the supply cord of this appliance is damaged, it must be replaced by a repair facility appointed by the manufacturer because special tools are required. Please consult your Chef's Choice distributor.
-
CAUTION! This appliance may be fitted with a polarized plug (one blade is wider than the other). To reduce the risk of electric shock, this plug will fit in a polarized outlet only one way. If the plug does not fit fully in the outlet, reverse the plug. If it still does not fit, contact a qualified electrician. Do not modify the plug in anyway.
-
The use of attachments not recommended or sold by EdgeCraft Corporation may cause fire, electric shock or injury.
-
The ScissorPro ® Model 500 is designed to sharpen kitchen, household, sewing and arts and crafts scissors. Do not attempt to sharpen pinking shears, serrated blades or knives. Do not attempt to sharpen any scissor blades that does not fit freely in the slots.
-
Do not let the cord hang over edge of table or counter, or touch hot surfaces.
-
When in the “ON” position the ScissorPro® should always be on a level, stable countertop or table.
-
WARNING: SCISSORS PROPERLY SHARPENED ON YOUR ScissorPro® WILL BE SHARPER THAN YOU EXPECT. TO AVOID INJURY, USE AND HANDLE THEM WITH EXTREME CARE. DO NOT CUT TOWARD ANY PART OF YOUR FINGERS, HAND OR BODY. DO NOT RUN FINGER ALONG EDGE. STORE IN A SAFE MANNER.
-
Do not use outdoors.
-
Close supervision is necessary when any appliance is used by or near children.
-
Do not use honing oils, water or any other lubricant with the ScissorPro®.
-
For household use only.
-
SAVE THESE INSTRUCTIONS.
CoNGrATULATIoNS
You are the owner of the world's finest scissors sharpener designed to permit everyone to sharpen scissors to professional standards, simply and easily. The ScissorPro® will put an incredibly sharp edge on your kitchen, household, sewing and arts and crafts scissors. It is important to completely read this booklet to optimize your sharpening results.
ScissorPro® owes much of its uniqueness to its precision magnetic guides, designed to hold the scissors blade securely at a precise angle against the specially contoured, Omni-Curve™ rotating diamond abrasive disks. These guides (see Figures 1 and 2) incorporate a unique hold-down spring mechanism and, in combination with the magnets, comprise the unique Magne-Flex™ scissors hold-down system. Before sharpening your first scissors it is important to read the following section:
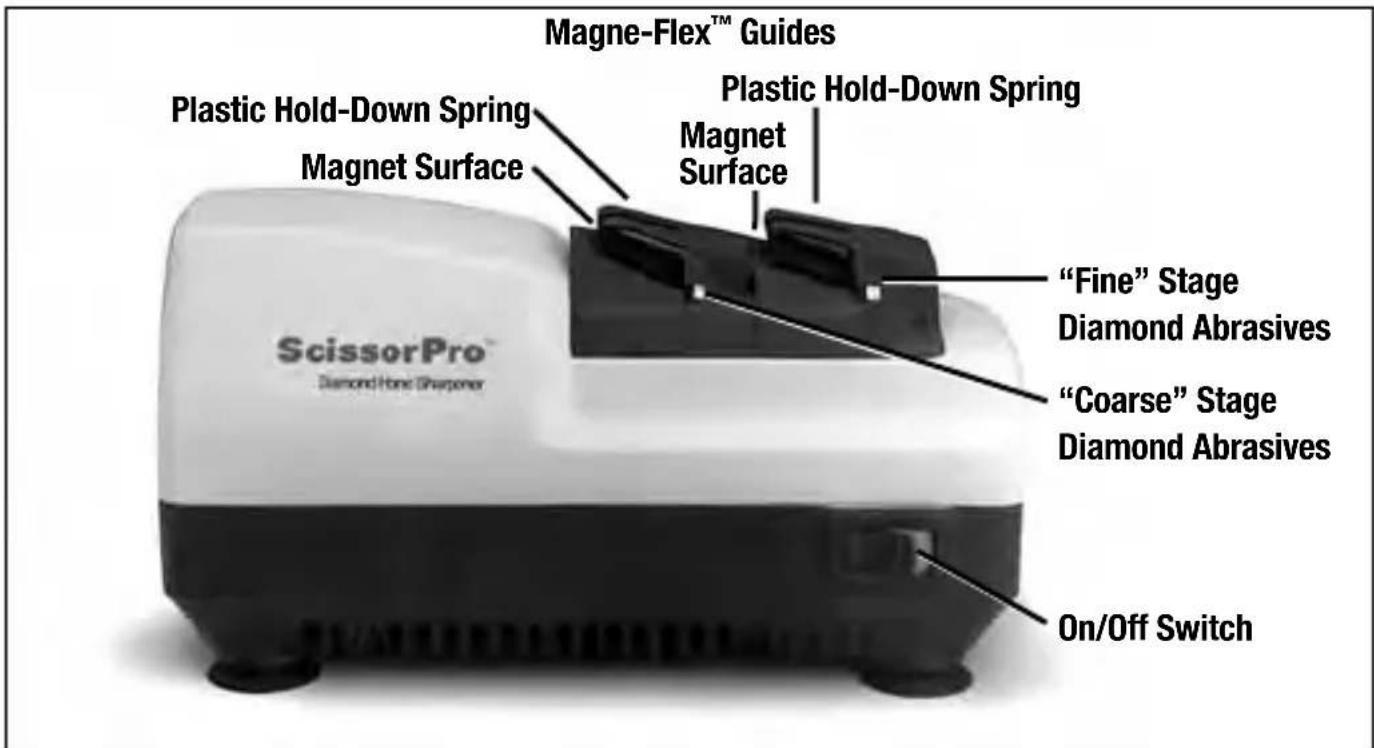
Figure 1. ScissorPro® Model 500.
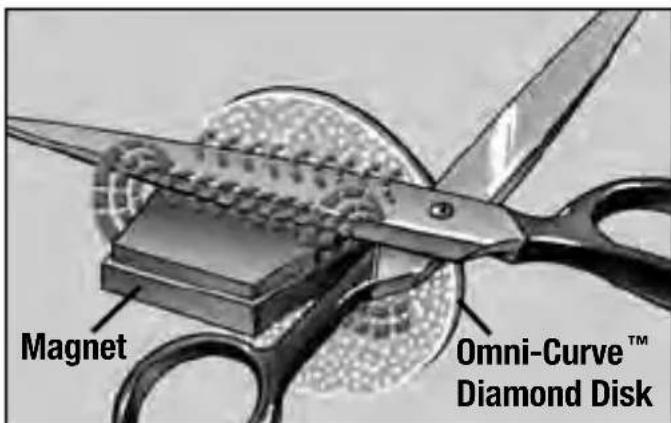
Figure 2. Magnets control the blade angle and keep scissors in contact with diamond abrasive disk.
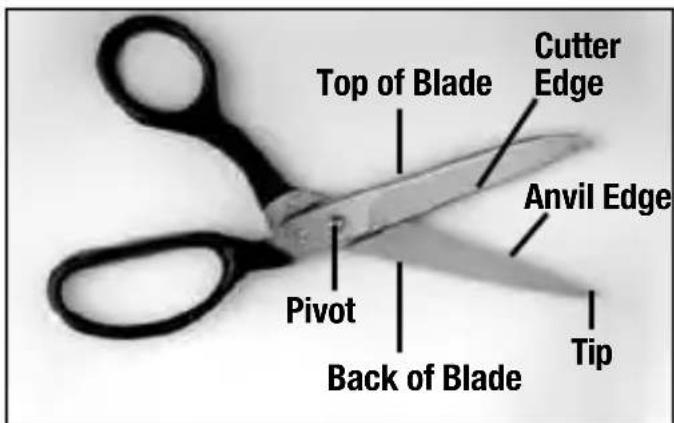
Figure 3. Typical scissors.
- WARNING: EVEN THOUGH ALL SCISSORS MAY APPEAR TO BE SIMILAR, THERE ARE MAJOR DIFFERENCES AMONG THEM THAT MUST BE UNDERSTOOD BEFORE YOU USE THIS SHARPENER. THE ScissorPro® WILL SHARPEN MOST, BUT NOT ALL TYPES OF SCISSORS. DO NOT ATTEMPT TO SHARPEN HAIR STYLING SCISSORS, PINKING SHEARS, MANICURE SCISSORS, SERRATED BLADES, TIN SNIPS, SCISSORS GREATER THAN 12" IN LENGTH OR ANY BLADE THAT DOES NOT FIT READILY IN THE SHARPENING POSITION.
ScissorPro® will sharpen most other blades, including those of knife-edge scissors, as described later. It is essential that you follow the instructions to optimize your results.
- Obviously, all scissors have two blades, Not so obvious is that often these blades are very different. When you cut with scissors, one blade (the anvil blade) is below the material, and the other blade (the cutter blade) is above the material, as shown in Figure 4. With certain scissors, the blade on top of the material (the cutter blade) does most of the cutting.
There are several ways to distinguish the cutter and anvil blades. Referring to Figures 3 and 4, note the cutter blade usually has the oblong finger-hold and a more rounded tip. The anvil blade has a more pointed tip and a round finger hold.
- It is important to be able to identify the special knife-edge type scissors. They have a cutter blade factory sharpened at a very low angle to form a knife like edge that is extremely sharp. THE KNIFE-EDGE BLADE MUST BE SHARPENED ONLY WITH THE KNIFE-EDGE ACCESSORY SUPPLIED WITH EACH ScissorPro®. With these scissors, the knife-edge cutter blade does virtually all the cutting. When sharpening this type of scissors, only the knife-edge cutter blade needs to be sharpened. If you have any doubt about whether you have this type of scissors, ask your nearest fabric or sewing center to help you identify these special blades before you sharpen them.
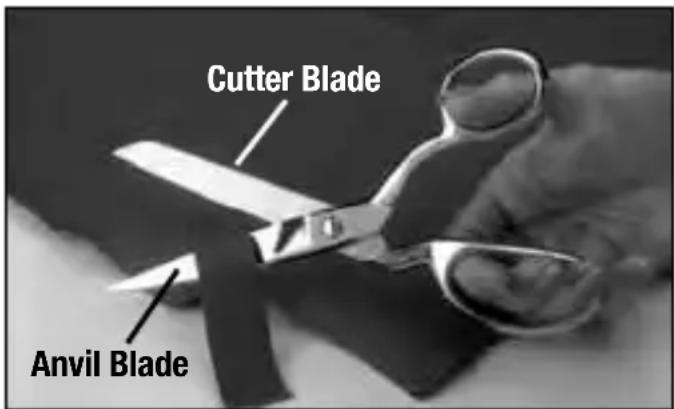
Figure 4. Typical position of the Cutter Blade and Anvil Blade.
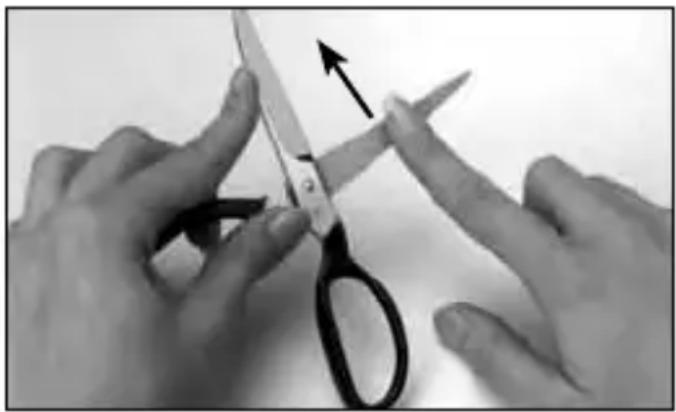
Figure 5. Carefully feel for a burr along the entire back of the blade. Note arrow for direction of finger movement when in contact with blade.
- During the sharpening process, you will be asked to feel for a burr on the scissors blade in order to know when sharpening is complete. It is essential that you understand how this is done.
Feeling for a burr involves running your finger carefully across (NOT ALONG) the back of the blade as shown in Figure 5. A burr is a microscopic protrusion of metal produced during the sharpening process under the edges of the blade that can be felt but is not always visible. It will feel rough and jagged compared to the smooth finish of the back of the blade.
- Your ScissorPro® will sharpen either right hand or left hand scissors without any need to disassemble them. If you are left handed, you probably have purchased left hand scissors. To sharpen right hand scissors, turn the sharpener so you face the switch side of the ScissorPro® (see Figure 6). To sharpen left hand scissors, you should face the opposite side of the sharpener (see Figure 7). From this point onward, these instructions are written as they apply to right hand scissors.
- Before you turn on your ScissorPro ® , take a minute to get the feel of the Magne-Flex ™ hold-down system and to learn how to insert a blade into the sharpener. Select a blade and insert it—cutting edge first—under the fingers of the hold-down spring of the FINE sharpening slot using the grip shown in Figure 6. If inserted correctly, the blade being sharpened is the top blade, and the free blade will be hanging below the blade being sharpened.
Practice inserting the scissors blade under the hold-down spring, as close to the scissors pivot as feels comfortable and pulling the blade smoothly toward you. Feel the effect of the magnet and hold-down spring as they establish the sharpening angle for you. Light pressure is required to slide the blade down the magnet slope and underneath the hold-down spring as the blade approaches the diamond sharpening disk. Allow the Magne-Flex ™ hold-down system to control the sharpening angle for you. It is also important to prevent the free blade (that is the one not being sharpened) from hitting the sharpener in a way that might influence the sharpening angle. It is convenient to stabilize the free blade using your forefinger and thumb as shown in Figure 6. Turn over the scissors and repeat with the other blade.
- Generally, most scissors can be sharpened by using only the FINE stage (Figure 1). The highly efficient diamond abrasive used in the ScissorPro® will quickly develop a superbly sharp edge. The COARSE stage sharpens at a larger angle using somewhat large diamonds.
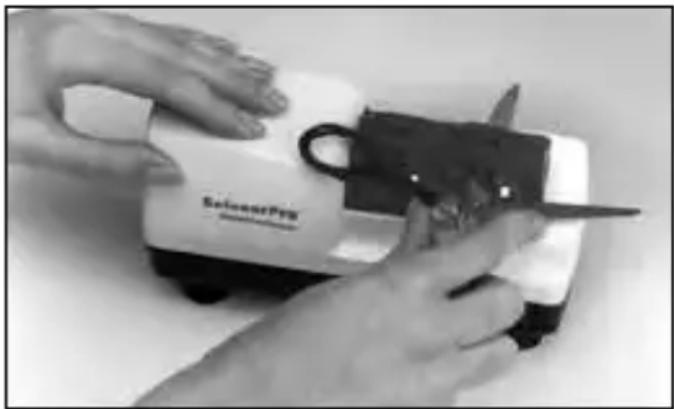
Figure 6. Suggested hold for right hand scissors.
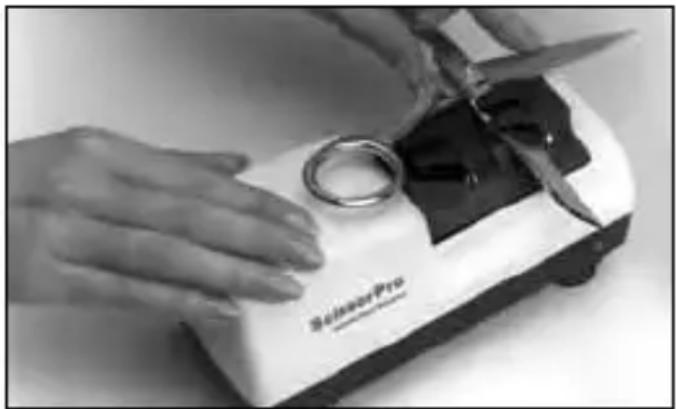
Figure 7. Suggested hold for left hand scissors.
GeNerAL ProCeDUre
Read this before starting to sharpen.
Either blade may be sharpened first. You will find when sharpening correctly that the blade you are sharpening always ends up to be the top blade. The free blade always hangs freely below the blade being sharpened. In any sharpening stage you should lay the back of the blade on the magnet surface as close to the pivot of the scissors as feels comfortable. Then, slide the scissors blade—cutting edge first—under the hold-down spring using slight thumb pressure as shown in Figure 8.
Make sure that you allow the hold-down mechanism to control the sharpening angle for you. Continue moving the scissors blade into the hold-down slot until gentle contact is made with the rotating diamond disk. Upon contact, you should pull the scissors promptly but slowly and evenly toward you, keeping the blade in contact with the diamond disk all the way to the tip of the blade. Each sharpening stroke should take 1-2 seconds for a 6" scissors. Longer scissors require more time; for example, 3-4 seconds for a 10" scissors. It is convenient to complete all sharpening steps on one blade before beginning to sharpen the second. Proceed as follows:
for STANDArD SCISSorS
(Note: for knife-edge scissors blades use only the special procedure on page 7).
Press switch to "ON".
Step 1—Fine Stage
Always start with the FINE stage. Use the General Procedure outlined above; select one blade and pull it through that slot three (3) times.
a. If a uniform burr is felt (see item 4, page 4) along the entire back of the blade, give the blade one (1) faster pull (1 second per pass) to reduce the size of the burr. Proceed to Cleaning step below. You are now finished with this blade and you can start sharpening the next blade.
b. If no burr is felt proceed to Step 2 below.
Step 2—Coarse Stage
Following the General Procedure, pull the blade through the COARSE stage (Figure 9) 4-5 times and check for a burr. With some blades it may take 10-15 strokes to develop a burr along the entire blade length. When a burr has developed, give one last fast pull (1 second) and then repeat Step 1 in the FINE stage.
CLeANING
After each blade is sharpened, clean the blade with a soft cloth of folded paper towel. CAUTION: the blade and burrs are now very sharp. Then slowly close the scissors, which will cut off the burr. Then clean off with the cloth any burr fragments that may remain.
for KNIfe-eDGe SCISSorS
Knife-edge scissors, designed particularly for cutting heavy fabric layers, have one or both blades capable of cutting like a knife. Commonly, only the cutter blade of this type scissors has the knife edge. When that is the case, and you can properly identify and sharpen that blade, sharpening the other (anvil) blade is optional or even unnecessary. Only the knife-edge scissors blade is sharpened by this special procedure. If you elect to sharpen the anvil blade, use the standard sharpening procedure described above. Do not confuse these blades.
Proceed as follows:
a. Insert the Knife-Edge Scissors Accessory to the FINE Stage.
b. Press switch to "ON".
c. Using the general procedure, pull the blade through the slot two (2) times.
- If a burr is felt along the entire back of the blade, sharpening is complete. Then clean the scissors as described above.
- If no burr exists, make 2-3 additional stroke. If a burr still has not developed, then this is not a knife-edge blade.
d. Remove the Knife-Edge Scissors Accessory and proceed to sharpen this blade as with standard scissors.
e. Never store the ScissorPro ® with the Knife-Edge Scissors Accessory positioned in the Magne-Flex ™ guide. Always remove and store the accessory in a safe place when not in use.
SUGGeSTIoNS
Your ScissorPro ® Diamond Hone ® Scissors Sharpener Model 500 is designed to produce scissor edges that are like new, quickly and easily. To ensure you get the very best scissor edges every time, we suggest:
- Loosen your grip on the scissors and use your thumb to advance the blade gently against the rotating disk. Never apply excessive pressure when the blade is against the diamond disk.
- Make sure the loose blade does not interfere with alignment of the blade being sharpened.
- Pull the blade through the sharpening slots with an even and continuous motion. Do not stop the motion. Be sure to make fast pulls after sharpening in each stage. This minimizes the burr.
- On each stroke, start at the pivot and pull the scissors handle as necessary to maintain the blade in contact with the diamond disk as the curved section of the blade is pulled through the slot.
- It is essential to learn how to feel for the burr. This is the best indication sharpening in a given stage is complete. Make certain the burr has formed along the entire blade... from pivot to tip.
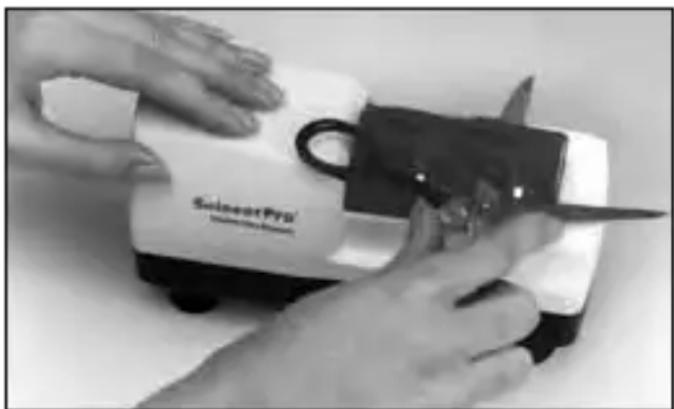
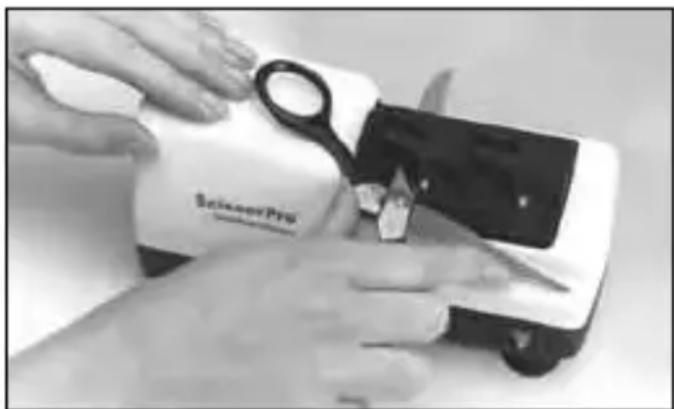
Figure 9. Coarse Stage. Figure 8. Start with the "Fine
- With poultry shears, you need to sharpe only the smooth convex blade. The concave (usually serrated) blade will not need sharpening.
- Do not attempt to sharpen serrated blades. However, where only one blade is serrated, the other can be sharpened using the procedure for standard scissors. Look carefully for serrations. They can be very small and difficult to see.
- Scissors Adjustment: All “professional” scissors and many other scissors have a screw tensioner at the pivot. The performance of your scissors and your scissors life may be improved by adjusting this pivot to establish and maintain a smooth edge contact when you close the scissors. Proper adjustment is determined by opening scissors to 50% of blade length, then tightening until blade looseness is just barely removed. It is important that the pivot not be overtightened. (If you are uncomfortable with this adjustment—seek assistance.)
NORMAL MAINTENANCE OF THE ScissorPro®
No lubrication is required for any moving parts, motor bearing surfaces or sharpening surfaces. Your sharpener may be cleaned by carefully wiping with a damp cloth. Do not use detergents or abrasives.
To clean metal dust that may accumulate in the sharpening section, simply remove the circular plastic plug that is located on the underneath side of the sharpener. Shake out the metal dust and replace plug. Do this once every eighteen months for normal use or more often with heavy use.
SERVICE
In the event post-warranty service is needed, return your sharpener to the EdgeCraft factory where the cost of repair can be estimated before the repair is undertaken.
Please include your return address, daytime telephone number and a brief description of the problem or damage to the sharpener on a separate sheet inside the box. Retain a shipping receipt as protection against loss in shipment.
Send your sharpener (insured and postage prepaid) to:
EdgeCraft
World Leader in Cutting Edge Technology®
EdgeCraft Corporation
825 Southwood Road, Avondale, PA 19311 U.S.A.
Customer Service (800) 342-3255 or 610-268-0500
Assembled in the U.S.A. www.chefschoice.com
This product may be covered by one or more EdgeCraft patents and/or patents pending as marked on the product.
Chef'sChoice®, EdgeCraft®, Diamond Hone®, ScissorPro® and the overall design of this product are registered trademarks of EdgeCraft Corporation, Avondale, PA.
Conforms to UL Std. 982 Certified to CAN/CSA Std. C22.2 No. 1335.1
Certified to EN 60335-1, EN 60335-2, EN 55014-1+A1, EN 61000-3-2, EN 61000-3-3
© EdgeCraft Corporation 2012 Printed in China.
A12 2012-01 C158200


- IMPORTANT SAFEGUARDS
- WHEN USING ELECTRICAL APPLIANCES, BASIC SAFETY PRECAUTIONS SHOULD ALWAYS BE FOLLOWED INCLUDING THE FOLLOWING
- CONGRATULATIONS
- GENERAL PROCEDURE
- FOR STANDARD SCISSORS
- STEP 1—FINE STAGE
- STEP 2—COARSE STAGE
- CLEANING
- FOR KNIFE-EDGE SCISSORS
- PROCEED AS FOLLOWS
- SUGGESTIONS
- NORMAL MAINTENANCE OF THE SCISSORPRO®
- SERVICE
Brand : Chef's Choice
Model : ScissorPro 500
Category : Knife sharpener