
7M11TA - Air-conditioner AMANA - Free user manual and instructions
Find the device manual for free 7M11TA AMANA in PDF.


| Brand | Amana |
| Model | 7M11TA |
| Product Type | Window Air Conditioner |
| Cooling Capacity (BTU) | 11000 BTU |
| Energy Efficiency Ratio (EER) | 12.0 |
| Power Supply | 115V / 60Hz |
| Current | 10A |
| Dimensions (W x H x D) | 26" x 20" x 18" |
| Weight | 70 lbs |
| Refrigerant Type | R-410A |
| Temperature Range (Cooling) | 64°F - 86°F |
| Fan Speeds | 3 (Low, Medium, High) |
| Control Type | Remote Control & Manual Controls |
| Timer | 24-hour On/Off Timer |
| Air Direction | Adjustable Louvers (Horizontal & Vertical) |
| Filter Type | Washable Filter |
| Noise Level (dB) | 56 dB |
| Installation | Window Kit Included |
| Features | Dehumidification, Sleep Mode, Energy Saver Mode |
| Safety Features | Auto Restart, Child Lock |
| Maintenance | Clean Filter Every 2 Weeks |
| Certifications | Energy Star |
| Color | White |
| Remote Battery | 2 x AAA |
Frequently Asked Questions - 7M11TA AMANA
User questions about 7M11TA AMANA
0 question about this device. Answer the ones you know or ask your own.
Ask a new question about this device
Download the instructions for your Air-conditioner in PDF format for free! Find your manual 7M11TA - AMANA and take your electronic device back in hand. On this page are published all the documents necessary for the use of your device. 7M11TA by AMANA.
USER MANUAL 7M11TA AMANA
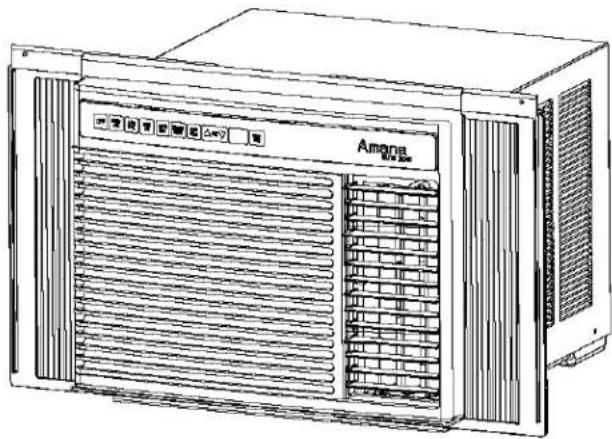
Quiet Zone Room Air Conditioner
Use And Care Manual
Contents
Electrical Requirements 2
Electrical Grounding Instructions 2
Safety Features 2
Compressor Lockout 2
Low Voltage Protection 2
Advantages of Amana's Electronic Controls ..... 2
Operation 3
Vent Control 3
Unit Control 3
General Information 6
Changing Air Flow Direction 6
Air Flow Around Unit 6
Care and Maintenance 6
Air Filter 6
Before Calling For Service 7
Fan Motor....7
Slide out Chassis 7
Model Identification 8
Any Questions? 8
natural_image
Line drawing of a server rack unit with ventilation grilles and control panel (no text or symbols)
C

As an ENERGY STAR® partner, AMANA APPLIANCES has determined that models
5M11TA, 5M11TB, 7M11TA, and 18M23TB meet the ENERGY STAR® guidelines for energy efficiency.
Please read this Use and Care Manual thoroughly. This manual provides proper maintenance information for maximum benefit of the features selected.

WARNING
To avoid death, personal injury or property damage due to overheating, do not leave this room air conditioner unattended when used as cooling or life support for persons or animals unable to react to unit failure. Take precautions to warn or guard against such an occurrence.

RECOGNIZE THIS SYMBOL AS A SAFETY PRECAUTION
Electrical Requirements
Electrical Grounding Instructions
This appliance is equipped with a three-prong grounding plug for protection against possible shock hazards. If a two-prong wall receptacle is encountered, the customer is required to contact a qualified electrician and have the two-prong wall receptacle replaced with a properly grounded three-prong wall receptacle in accordance with the National Electrical Code.
Room air conditioners are designed to operate according to requirements on the nameplate and as shown in Table 1. Fuse or circuit breaker ratings must be according to the fuse instruction label and as shown in Table 1. Do not plug models marked "Use on Single Outlet Circuit Only" into a circuit with another appliance or light fixture.

WARNING
To avoid death, personal injury or property damage due to electrical shock, this unit must be grounded. Do not under any circumstances cut or remove the round grounding prong from the plug. Do not use a two-prong adapter.

WARNING
To avoid death, personal injury or property damage due to electrical shock, do not use an extension cord. Do not pinch the power cord. Do not remove the warning tag from the power cord.
| Unit Plug Type | Receptacle Required | Circuit Rating, Breaker or Time Delay Fuse | Voltage Rating On Unit Nameplate |
 NEMA No. 5-15P NEMA No. 5-15P |  NEMA No. 5-15R NEMA No. 5-15R | 125V-15AMP | 115V |
 NEMA No. 6-15P NEMA No. 6-15P |  NEMA No. 6-15R NEMA No. 6-15R | 250V-15AMP | 230/208V rated at 12 amperes or less |
 NEMA No. 6-20P NEMA No. 6-20P |  NEMA No. 6-20R NEMA No. 6-20R | 250V-20AMP | 230/208V rated over 12 amperes but not more than 18 amperes |
 NEMA No. 6-30P NEMA No. 6-30P |  NEMA No. 6-30R NEMA No. 6-30R | 250V-30AMP | 230/208V rated at 24 amperes or less |
Table 1
Safety Features
This room air conditioner is equipped with an electronic control to improve comfort and ensure reliability.
Compressor Lockout
To extend the life of the compressor a three minute time delay will occur when:
• Electrical power is first supplied to the unit
• The thermostat is turned down immediately after the compressor stops running.
• The Fan Control is quickly turned from FAN ONLY to COOLING mode or vice versa.
Low Voltage Protection
This unit is equipped with "brownout" protection. In case of an extreme brownout, the Amana control will interrupt power to the unit to prevent compressor failure. When the line voltage reaches at least 100 VAC, the control will re-energize your unit.
Note: A compressor lockout will occur after the unit is re-energized.
Advantages of Amana's Electronic Controls
Digital Temperature Setting
- Temperature can be set from 60°F to 90°F in 1°F increments
Digital Temperature Display
- Shows indoor room temperature in FAN ONLY mode
- Shows desired temperature setting in other modes
Computer Memory that Remembers
- The unit remembers the last settings used when last turned on.
TempAsure® Thermostat
- Maintains set temperature within 1.5°F for maximum comfort
Smart Cool
Energy Saver with TempAsure® air sampling
Delay Timer
Operation
Vent Control
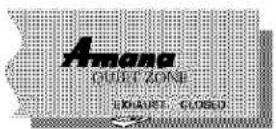
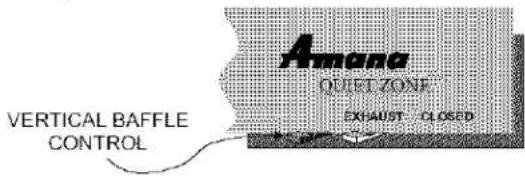
Open or close the vent by sliding the vent control lever to the appropriate setting.
EXHAUST - This setting opens the vent to move indoor air out.
Note: To conserve energy, the unit should be set to the FAN ONLY mode when using this setting.
CLOSED - In this position the vent is closed and room air is recirculated and filtered. This position should be used for all normal cooling operations (see underlined cooling options on control panel).
Unit Control
ENERGY SAVER
ENERGY SAVER (HIGH, MED and LOW) - ENERGY SAVER mode provides the most energy efficient use of your room air conditioner. In ENERGY SAVER mode, the fan stops when the compressor stops cooling. This feature can be used with SMART COOL or cooling with any fan speed.
Amana's new air sampling system works to maintain set temperature within 1.5°F while in ENERGY SAVER mode. Approximately every 5 minutes the fan will turn on and "sample" the room air to determine if cooling is needed. If the room is cool enough, the fan will cycle off. If the room needs further cooling, the compressor will start along with the fan until the set temperature is reached.
ENERGY SAVER has a soft start fan feature. This feature starts the fan in low speed to reduce noise.
FAN ONLY
FAN ONLY - FAN ONLY circulates room air at the set fan speed without cooling. This feature can be turned off by pressing the FAN ONLY,
the SMART COOL, or the ENERGY SAVER button. Indoor temperature is displayed in FAN ONLY mode.

Control Panel

OFF - Completely shuts off the unit.

SMART COOL - SMART COOL adjusts the fan speed of the unit to achieve the selected temperature. The SMART COOL feature uses computer logic to cool the room quickly and quietly. The fan speed starts on high, automatically switches to medium, and finally goes to low as the room temperature nears the set temperature.


LOWFAN, MED FAN, HIGH FAN
- These three buttons are used to select either a low, medium or high
fan speed to cool. If FAN ONLY is selected these buttons change fan speed without cooling. Selecting the fan speed starts normal cooling.
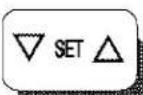
SET Temperature - These key pads increase or decrease the set temperature.

DELAY TIMER - This button provides a means of delaying the start up or shut down of the air conditioner from 1 to 24 hours from the present
time. After setting the delay timer, the displayed time will countdown to unit start or stop. See next page for details.

Brightness Adjust Feature
(some models) - Display brightness can be changed using the "up" or "down" keypad. To decrease brightness, simultaneously press and hold OFF pad with "down" arrow. To increase brightness, simultaneously press and hold OFF pad with "up" arrow.
Note: Changes can be made only while display is flashing. You will have 5 seconds between each temperature, operating mode, and fan speed selection. If a selection is not made during this time frame, the unit will select the default and proceed to the next step: Setting the delay time. If you wish to reset a missed selection, press the DELAY TIMER button and begin again.
| Procedure | Button | Display Indicator |
| 1Turn the unit off. |  |  |
| 2Press the DELAY TIMER button. |  | 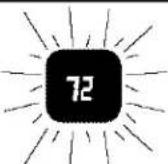 The current temperature setting will flash. The current temperature setting will flash. |
| 3Select the desired temperature,operating mode, andfan speed. | 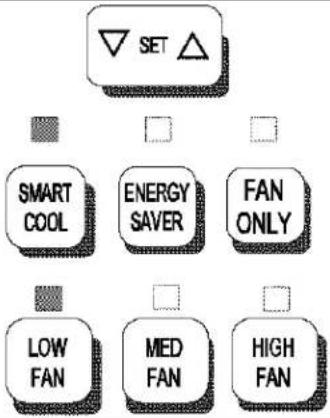 |  Display and selected setting lights will flash.The display will show the current temperature setting. Display and selected setting lights will flash.The display will show the current temperature setting. |
| 4Press the DELAY TIMER button. | 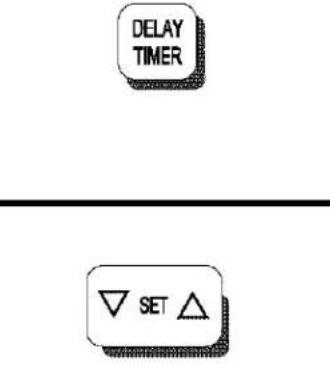 |  The current delay time will flash. The current delay time will flash. |
| 5Change the delay time, if desired. |  |  |
| Note: The minimum setting for the timer is 1 hour | ||
| 6Press the DELAY TIMER button to start the time or select nothing and the unit will start automatically. |  |  The display will show the countdown time to activation. The display will show the countdown time to activation. |
| Procedure | Button | Display Indicator | |
| 1 With unit running, press the DELAY TIMER button.* |  |  | Display flashes. |
| 2 Change the delay time, if desired. |  |  | |
| 3 Press the DELAY TIMER button to start the time or select nothing and the unit will start automatically. |  |  The display shows the countdown hours. The display shows the countdown hours. | |
| 4 To cancel, press the DELAY TIMER or OFF button |  | ||
* A setting must be selected within a 5-second time period, while flashing, or the unit will select the default as the new setting.
**If there is no loss of power, the unit will keep the last setting.
Note: If a power failure occurs, the last delay settings will be lost and the default setting will be active.
General Information
Changing Air Flow Direction
- Adjust horizontal baffles for directing air up or down
- Adjust vertical baffles with handle to direct air left or right
Air Flow Around Unit
Check indoor grille and outdoor louvers for air flow obstructions. Do not block air flow to and from unit. The outdoor coil should be checked and periodically cleaned for debris that
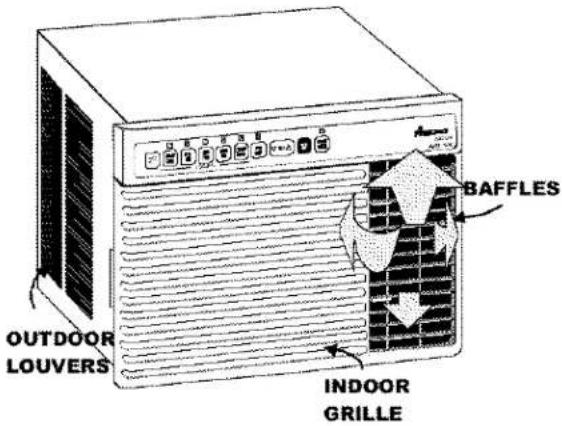
may collect and block unit air flow. If air flow is obstructed or deflected back into unit, the compressor may cycle on and off rapidly, causing early compressor failure.
Care and Maintenance

WARNING
To avoid death or personal injury due to electrical shock, turn fan control off and unplug power cord before cleaning or performing maintenance. After cleaning or performing maintenance, reconnect power.
Note: The unit should be inspected by an authorized servicer once a year to ensure proper function of the unit.
- Once a year, remove chassis from outer case and thoroughly clean air conditioner.
-
Wash air conditioner with warm, soapy water as needed. Rinse and dry thoroughly.
-
If using concentrated liquid detergent, dilute in warm water first.
- Do not use abrasive cleaners such as Comet ^TM , Ajax ^TM , etc. These items can scratch, crack, and discolor surfaces.
Oceanside or Corrosive Environment
Salt air or a corrosive environment may greatly reduce the life of the unit. After cleaning, sand and repaint any scratches or blisters on painted surfaces. In humid areas where algae formation is common, place an algaecide tablet in outdoor side of unit base pan.
Air Filter
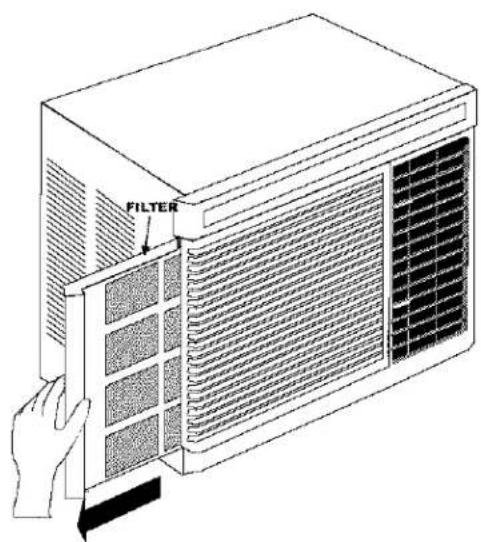
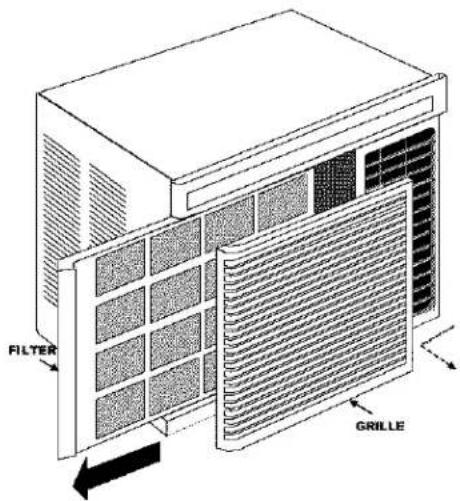
The front contains a removable grille that provides easy access to the air filter. The filter can be removed two ways: METHOD ONE:
Grasp the filter handle and slide the filter to the left until it clears the unit.
METHOD TWO:
- Remove the front grille.
Slide the grille to the left until it clears the unit clips and pull out.
- Grasp the filter handle and slide the filter to the left until it clears the unit clips and pull out.
Reinstall air filter by reversing above procedure.
NOTE: A charcoal air purification filter accessory is available that reduces smoke, odor, pollen, and fine dust particles. See your store dealer for details or call Amana at 1-800-843-0304.
IMPORTANT NOTE: A dirty air filter reduces operating efficiency. Inspect filter at least once every week during operation. Clean filter with a vacuum cleaner or warm, soapy water. Thoroughly dry filter before replacing. Do not operate unit without filter.
Fan Motor
Fan motor is permanently lubricated so there is no need to oil motor.
Slide out Chassis
Some models feature a slide out chassis for easier installation. Refer to Installation Instructions provided with unit for details on removing chassis from outer case.
Before Calling For Service
| Difficulty | Possible Cause | Suggested Solution |
| Air conditioner will not operate. | No power to unit. | Set fan control to position other than off. |
| Confirm power cord is plugged in. | ||
| Check fuse or circuit breaker. | ||
| Little or no cooling. | Compressor lockout on initial plug-in. | Wait 3 to 4 minutes and recheck compressor. |
| Dirty air filter. | Clean air filter. | |
| Air conditioner undersized for application. | Check with dealer to determine proper unit capacity for application. | |
| Power interruption or changing unit settings. | Let fan run. Compressor will automatically restart in approximately 3 to 4 minutes. | |
| Noisy unit. | Loose parts. | Tighten any loose parts. |
| Weak building construction. | Provide additional support. | |
| Water hitting fan blade. | Normal in high humidity. | |
| Mounting support cannot be installed. | Storm window frame has been installed into window. | Some models require the window sill to be adapted to accept the mounting support. Refer to Installation Instructions provided with the unit for details. |
| Odors in cooling. | Mold, mildew or algae formation on wet surfaces. | Place algaecide tablet in base pan. |
| Water in base pan. | Water in base pan is picked up by the fan blade and thrown onto the warm outdoor coil where the water then evaporates. | Normal in high humidity |
Model Identification
Complete enclosed registration card and promptly return card to Amana's Product Registration department. If registration card is missing, call Amana's Consumer Information Line, (1-800-843-0304).
When contacting Amana, provide product information. Locate product information on the nameplate, found underneath front grille. Record the following information:
Model Number: ____
Manufacturing Number: ____
Serial or S/N Number: ____
Date of purchase:
Dealer's name and address: ____
Keep a copy of sales receipt for future reference or in case warranty service is required. If something is operating incorrectly, read "Before Calling for Service" section.
Any Questions?
Most of your questions can be answered by your local Amana dealer. Check with your dealer first if you need any further information regarding the operation, maintenance, or service of your unit. Then, if you should have any matters which are not resolved locally, or if you would like information on other heating and cooling products or kitchen appliances offered by Amana - please call us:

CONSUMER INFORMATION LINE Amana Toll-Free
1-800-843-0304
(Not a technical assistance line for dealers.)
Asure ^TM Extended Service Plan

Amana is pleased to offer long-term service protection on this new room air conditioner. Asure™ Extended Service Plan is specially designed to supplement Amana's strong warranty. Asure™ provides budget-protecting coverage on room air conditioner for up to five full years and includes parts, labor, and travel charges.
A participating Amana dealer has details or contact:
Amana Appliances
Consumer Affairs Department
Amana, IA 52204
1-800-528-2682
Part No. 20058004 (1)
Printed in U.S.A.
©2000 Amana
2800 220th Trail
Amana, Iowa 52204
- Quiet Zone Room Air Conditioner
- Use And Care Manual
- Contents
- WARNING
- Electrical Requirements
- Electrical Grounding Instructions
- Safety Features
- Compressor Lockout
- Low Voltage Protection
- Advantages of Amana's Electronic Controls
- Digital Temperature Setting
- Digital Temperature Display
- Computer Memory that Remembers
- TempAsure® Thermostat
- Smart Cool
- Delay Timer
- Operation
- ENERGY SAVER
- FAN ONLY
- LOWFAN, MED FAN, HIGH FAN
- Brightness Adjust Feature
- General Information
- Changing Air Flow Direction
- Air Flow Around Unit
- Care and Maintenance
- Air Filter
- METHOD TWO:
- Fan Motor
- Slide out Chassis
- Model Identification
- Any Questions?
Brand : AMANA
Model : 7M11TA
Category : Air-conditioner