MPSD-1 - Mp3 player Citronic - Free user manual and instructions
Find the device manual for free MPSD-1 Citronic in PDF.


| Product Type | Portable MP3 Player |
| Brand | Citronic |
| Model | MPSD-1 |
| Dimensions (approx.) | 85 x 40 x 10 mm |
| Weight (approx.) | 45 g |
| Power Source | Built-in rechargeable lithium-ion battery (USB charging via micro-USB) |
| Battery Life (approx.) | 12 hours of continuous playback |
| Supported Audio Formats | MP3, WMA, WAV |
| Storage Capacity | Internal memory (size not specified) + microSD card slot (up to 32 GB) |
| Display | 1.8-inch LCD color screen |
| FM Radio | Yes, with presets and recording |
| Voice Recording | Yes, built-in microphone |
| Equalizer | Multiple presets (Rock, Pop, Classical, etc.) |
| Playback Modes | Repeat, shuffle, folder play |
| Connectivity | USB 2.0 for data transfer and charging, 3.5 mm headphone jack |
| Additional Functions | Alarm clock, calendar, e-book reader |
| Care and Cleaning | Wipe with a dry, soft cloth. Do not use liquids or abrasives. |
| Safety Instructions | Keep away from moisture, extreme temperatures, and magnetic fields. Do not disassemble. |
| Spare Parts and Repairability | Non-user-serviceable. Contact Citronic support for repairs. |
| General Information | Designed for personal audio entertainment. Suitable for use with headphones. |
Frequently Asked Questions - MPSD-1 Citronic
User questions about MPSD-1 Citronic
0 question about this device. Answer the ones you know or ask your own.
Ask a new question about this device
Download the instructions for your Mp3 player in PDF format for free! Find your manual MPSD-1 - Citronic and take your electronic device back in hand. On this page are published all the documents necessary for the use of your device. MPSD-1 by Citronic.
USER MANUAL MPSD-1 Citronic
IMPORTANT SAFETY INSTRUCTIONS
Please read these instructions carefully Please keep these instructions for future reference
-
Do not use the apparatus near water.
-
Clean only with dry cloth.
-
Do not block any ventilation openings. Install in accordance with the manufacturer's instructions.
-
Do not install near any heat sources such as radiators, heat registers, stoves, or other apparatus (including amplifiers) that produce heat.
-
Do not defeat the safety purpose of the polarized or grounding-type plug. A polarized plug has two blades with one wider than the other. A grounding-type plug has two blades and a third grounding prong. The wide blade or the third prong is provided for your safety. If the provided plug does not fit into your outlet, consult an electrician for replacement of the obsolete outlet.
-
Protect the power cord from being walked on or pinched particularly at plugs, convenience receptacles, and the point where they exit from the apparatus.
-
Only use attachments/ accessories specified by the manufacturer.
-
Use only with a cart, stand, tripod, bracket or table specified by the manufacturer, or sold with the apparatus. When a cart is used, use caution when moving the cart/apparatus combination to avoid injury from tip-over.
-
Unplug this apparatus during lighting storms or when unused for long periods of time.
-
Refer all servicing to qualified service personnel. Servicing is required when the apparatus has been damaged in any way, such as power-supply cord or plug is damaged, liquid has been spilled or objects have fallen into the apparatus, the apparatus has been exposed to rain or moisture, does not operate normally, or has been dropped.

WARNING
To reduce the risk of fire or electric shock, do not expose this apparatus to rain or moisture. The apparatus shall not be exposed to dripping or splashing and that no objects filled with liquids, such as vases, shall be placed on the apparatus.
CAUTION
DO NOT OPEN RISK OF ELECTRIC SHOCK

CAUTION: To reduce the risk of electric shock, do not remove any cover. No user-serviceable parts inside. Refer servicing to qualified service personnel only.
The lightning flash with arrowhead symbol within the equilateral triangle is intended to alert the use to the presence of un-insulated “dangerous voltage” within the product’s enclosure that may be of sufficient magnitude to constitute a risk of electric shock.

The exclamation point within the equilateral triangle is intended to alert the user to the presence of important operation and maintenance (servicing) instructions in the literature accompanying this appliance.
CAUTION
To prevent electric shock, do not use this polarized plug with an extension cord, receptacle or other outlet unless the blades can be fully inserted to prevent blade exposure.
MAIN FEATURES
- Auto cue
- Auto BPM
- Pitch Bend
- Fader start
- Pitch display• Folder Search
• Fast Track Search • Single/Continuous
• Music Master Tempo • Mp3 Track Listings, ID3 Tags
• SD & SDHC cards available
• Full Functional MP3 Playback
• 1/75th second frame search
• Big LCD Display with Backlight - Selectable elapsed and remain time display
• Jog Wheel Pitch Bend +/-100% - Seamless Loop (uninterrupted loop playback)
USB mass storage device available
• Adjustable pitch percentages: +/-4%, +/-8%, +/-16%
CONTROLS AND FUNCTIONS
CONTROL UNIT
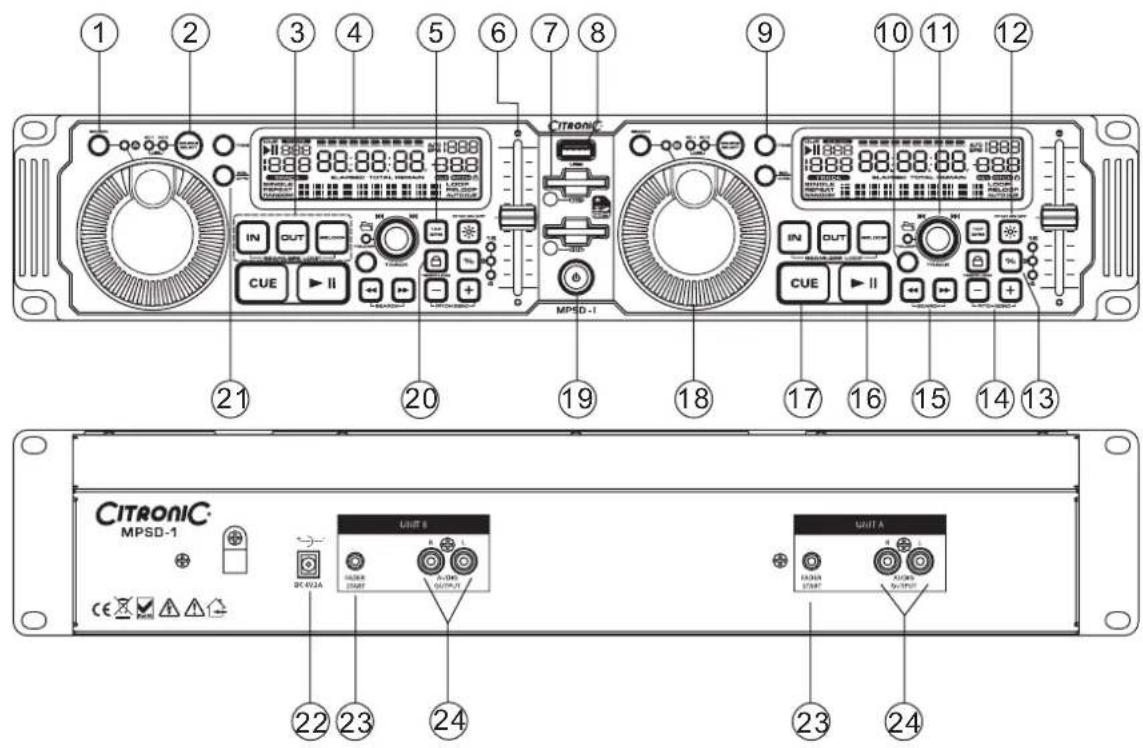
-
SEARCH MODE BUTTON – Press this button to toggle the function of the JOG WHEEL between fast search mode (the LED is lit) and normal mode. The fast search function is automatically turned off when the JOG WHEEL is not used for more than 15 seconds.
-
PLAY MODE: normally the JOG WHEEL is used as pitch bend tool to synchronize the beats of the playing track to another track. When the fast search mode is turned on, you can use the JOG WHEEL to search very quickly forward /backward inside the current track.
-
PAUSE MODE: normally the JOG WHEEL is used to search very precisely (1 frame precision) for the exact cue point. When the fast search mode is turned on, you can use the JOG WHEEL to search very quickly forward/backward inside the current track.
-
SOURCE SELECT BUTTON –This button lets you toggle between USB Port and SD Card slots. This lets you choose which music source device will play on either side. The LEDs will verify which source is active. Glowing red LED signifies slot 1, green LED signifies slot 2; glowing red LED and green LED signifies USB port. The function can only be selected under pause mode.
-
SEAMLESS LOOP (See basic operation for more information.)
-
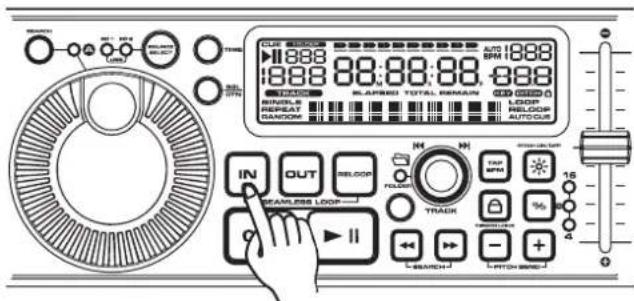
IN BUTTON – Allow you to set the cue point without stopping the playback. This button also sets the beginning of a seamless loop. When the button contains a cue point it lights up.
- OUT BUTTON – Used to set the endpoint when looping music. The point where you press the button will be memorized as an endpoint of the loop. The player starts to loop seamlessly until you press this button again to exit.
-
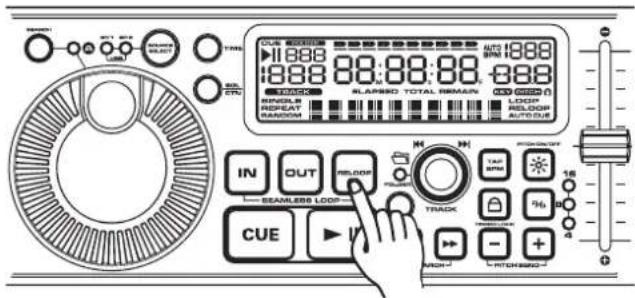
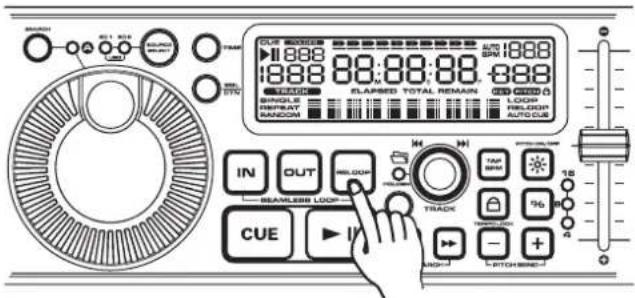
RELOOP BUTTON –When a loop is programmed but not active you can also restart the loop. press the RELOOP button to enter the loop again. To exit the loop presses the OUT button.
-
LCD DISPLAY – This high quality LCD display indicates all the functions, as they are occurring. The display ICONS will be explained in the next section.
- TAP/BPM BUTTON – The unit has a full automatic BPM-counter. In some rare cases the automatic beat counter doesn't count as it should do (beat are out of the normal range or there's simply no beat to detect). In these cases you can help the beat counter by manually tapping this button to the rhythm of the beat.
See basic operation for more information. - PITCH SLIDER –This slider is used to adjust the playback pitch percentage. The slider is a set adjustment and will remain set until the pitch slider is move or the pitch function has been turned off. This adjustment can be made with or without a music source device (USB stick or SD card) in the player. The pitch adjustment will remain even if a music source device (USB stick or SD card) has been removed and will reflect on any other music source device inserted into the player. That is to say, if you set a +2% pitch on one music source device, remove that device and insert another, that music source device too will have a +2% pitch. The amount of pitch being applied will be displayed in the LCD.
- SD CARD SLOT – Gently insert a SD card into the slot. Press the SD card while in Pause/Cue mode to eject the SD card.
- USB PORT – This is the USB port where you insert your USB mass storage device for playing MP3 files.
- TIME BUTTON – The TIME button switches between elapsed playing time and remain time in a track. The default mode is remain time.
- FOLDER BUTTON - Use to switch between FOLDER and TRACK search modes. When the LED of FOLDER button is lit, the player is in the FOLDER search mode, otherwise it is in TRACK search mode.
- TRACK KNOB - Use this knob to select track or folder, depending on these two different modes as below.
- In TRACK mode, use to select a track. Turning track knob will navigate between tracks. Holding down and turning track knob will rapidly forward / back skip through the tracks by 10 tracks per click.
- In FOLDER mode, turning track knob will forward / back skip between folders. You can also switch between displaying Folder Name/FILE NAME / TITLE / ARTIST/GENRE/BITRATE for easy searching by each pressing the TRACK button. Release the TRACK button when you see the information you want to keep on the display. You can find more information in basic operation paragraph.
- PITCH ON/OFF BUTTON – Use to turn the PITCH SLIDER function on and off. When ON, the button will glow.
- PITCH SELECT BUTTON – Press the button in order to change pitch percentage of 4%, 8%, 16%. When the pitch range is selected, the related LED will glow.
- PITCH BEND BUTTONS – The speed rises while the “+button” is pressed and returns to the original pitch when the button is released. The speed drops when the “-button” is pressed and returns to the original pitch when the button is released. These buttons can be used to synchronize the beats of 2 tracks.
- SEARCH BUTTONS
This search button allows you to quickly scan backwards through a track.
▶ This search button allows you to quickly scan forwards through a track.
-
PLAY/PAUSE BUTTON – Every time you press the PLAY/PAUSE button the player changes from play to pause or from pause to play. The button blinks as long as the player is set to pause.
-
CUE BUTTON –Pressing the CUE button during playback immediately pauses playback and returns the track to the last set cue point. The CUE LED will glow when the unit is in cue mode. The LED will also flash every time a new CUE POINT is set. The CUE button can be held down to momentarily play the music. When you release the CUE button it instantly returns to the CUE POINT. You can also tap the CUE button to create a STUTTER EFFECT.
-
JOG WHEEL – This jog wheel serves 3 functions depending on the mode you are working in.
-
The wheel works as a pitch bend during Playback. Turning the wheel clockwise can increase the pitch percentage up to 100%, and turning the wheel in the counterclockwise direction can decrease the pitch percentage down to -100%. The pitch bend will be determined on how long you turn the jog wheel continuously.
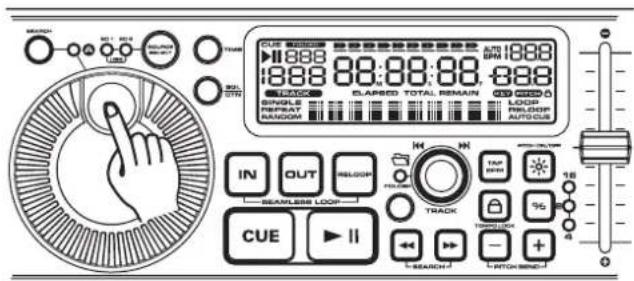
- The jog wheel acts as a slow frame search (1/75 sec) control when the music is not playing but either paused or set to a cue point. To set a new cue point, spin the wheel then press PLAY or IN when you have determined the proper position. Press CUE to return to the “CUE POINT”.
-
If the search function is active, you will be able to search at a higher speed through all the tracks.
-
POWER SWITCH button – It is used to switch the power on/ standby. When power cord plug into the rear socket to be the STANDBY mode, all LED are off but STANDBY LED.
(a) In the STANDBY mode, press power button to POWER ON," Please insert memory device" is displayed in the LCD.
(b) In the POWER ON mode, press and hold the power button more than 2sec. to standby.
- TEMPO LOCK BUTTON – This button is used to choose the tempo lock mode and the pitch control mode. Tempo lock mode allows speeding up or slow down playback speed without altering the tonality of music.
- SGL/CTN BUTTON – You can choose between "single track mode" and "continuous play".
• Continuous play: the complete memory device will be played without interruption. (mostly used in pubs)
- Single track: player stops at the end of each track and waits at the beginning of the next track. (mostly used by deejays) Push the SGL/CTN button for more than 1 second to switch between normal and “auto cue” mode. See basic operation for more information.
- POWER CONNECTOR – Plug in power adapter here. It is a switching adapter to suitable to each voltage.
- FADER START – This connection allows two players to be linked for relay play. This can also be connected to a mixing board that supports automatic fader start.
- AUDIO OUTPUTS –Output for the audio signals is from each player. Use the supplied cinch/cinch cables to connect these outputs to the CD/line inputs of your mixing unit.
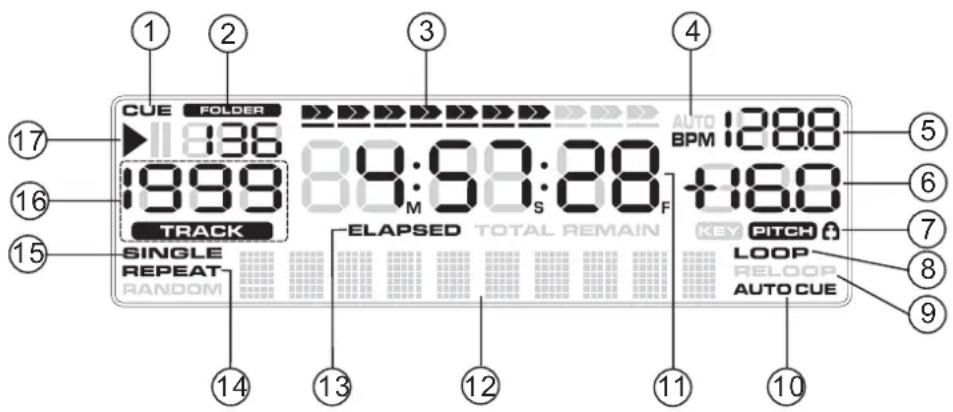
- CUE INDICATOR –This indicator will glow when the device is in CUE mode and will flash every time a new CUE POINT is set.
- FOLDER INDICATOR – Indicates the number of the currently playing folder.
- TIME BAR INDICATOR – Shows either time remaining or elapsed depending on the setting of the TIME BUTTON. This bar will begin to flash shortly before the end of a track. The flashing bar is a great visual reminder a track is about to end regardless of which time mode the unit is.
- BPM STATUS – This will indicate that the AUTO BPM counter is active.
- BPM METER – Indicates the BPM value of the currently playing track.
- PITCH METER – Indicates the percentage of a track's pitch.
- TEMPO LOCK- Indicates if the tempo lock is activated (lock symbol).
- LOOP INDICATOR – Indicates if LOOP function is activated.
- RELOOP INDICATOR – Indicates if a loop has been set which can be activated with the Reloop function ("Reloop").
- AUTO CUE STATUS – Indicates if Auto Cue is activated ("AUTO CUE"). Press and hold the SGL/CTN for 1 second to turn the Auto Cue function on and off.
- TIME DISPLAY – Indicates the time of the chosen Time mode in minutes, seconds and frames.
- INFORMATION INDICATOR – Indicates the current name of the track, of the folder and the sampling rate.
- TIME MODE – Indicates the elapsed time of a track ("ELAPSED") or the remaining time of a track ("Remain"). Change between these two modes with the Time button.
- REPEAT INDICATOR – Indicates whether the unit is in REPEATED play mode.
- SINGLE INDICATOR – Indicates whether the play mode is set to single ("SINGLE") or continuous mode (no display).
- TRACK INDICATOR – Indicates the number of the currently playing track.
- PLAY/PAUSE INDICATOR – Indicates the device play mode ("▶"), if the player is in pause mode ("||").
SOURCE SELECT functions
1. MUSIC SOURCE DEVICE SELECT
There is a SOURCE SELECT BUTTON to select the music source playback in each PLAYER by your desires.
You have three different choices as below:
(a) THE SAME CARD PLAYBACK
To play the same card in both player 1 and player 2; insert the card into either SDA or SD B slot. Press the SOURCE SELECT and both SD A LEDs in the player panel are on when card is in SD A slot; either does when card is in SD B slot.

flowchart
graph LR
    A["Stage A: SD1 SD2"] --> B["Source SELECT"]
    B --> C["Stage B: SD1 SD2"]
    C --> D["Source SELECT"]
    D --> E["Stage B: SD1 SD2"]
    E --> F["Source SELECT"]
(b) TWO CARDS PLAYBACK
Each SD slot inserts a card to play. And each player select different SD slot to play.

flowchart
graph LR
    A["Stage A: SD1, SD2"] --> B["Source SELECT"]
    B --> C["Stage B: SD1, SD2"]
    C --> D["Source SELECT"]
    D --> E["Stage C: SD1, SD2"]
    E --> F["Source SELECT"]
    style A fill:#f9f,stroke:#333
    style B fill:#ccf,stroke:#333
    style C fill:#cfc,stroke:#333
    style D fill:#fcc,stroke:#333
    style E fill:#cff,stroke:#333
    style F fill:#ffc,stroke:#333
(c) THE USB PLAYBACK
Press the SOURCE SELECT button and both SD A/B LEDs are on to play the USB device. When connecting a USB stick, USB card reader, or external hard drive make sure you are correctly lined up with the USB port and gently insert the USB connection. To disconnect a USB drive, stop playback and "pull out" the USB connection.

flowchart
graph LR
    A["SD1 SD2"] --> B["SOURCE SELECT"]
    B --> C["SD1 SD2"]
    C --> D["SOURCE SELECT"]
    D --> E["SD1 SD2"]
    E --> F["SOURCE SELECT"]
    F --> G["SD1 SD2"]
    G --> H["SOURCE SELECT"]
2. CHANGE MUSIC SOURCE DEVICE DURING PLAYBACK
It must in the pause mode, to press the SOURCE SELECT BUTTON you can select the other card. It will no function when in the play mode.
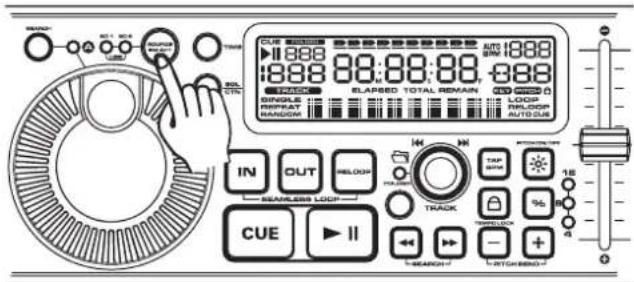
This function will automatically set a cue point to the first music note of each track. If a new track is selected, a new CUE POINT will be set to reflect the new starting point.
Push the SGL/CTN button for more than 1 second, you can switch between normal and "AUTO CUE" mode.
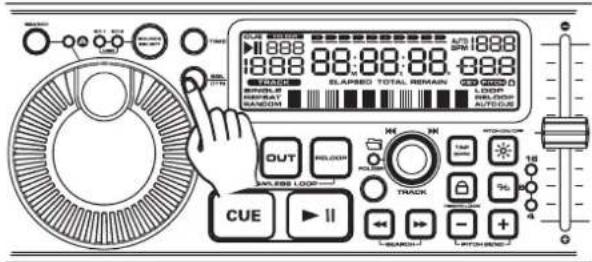
SETTING A CUE POINT
A cue point is the exact point playback will begin when the PLAY/PAUSE BUTTON is pressed.
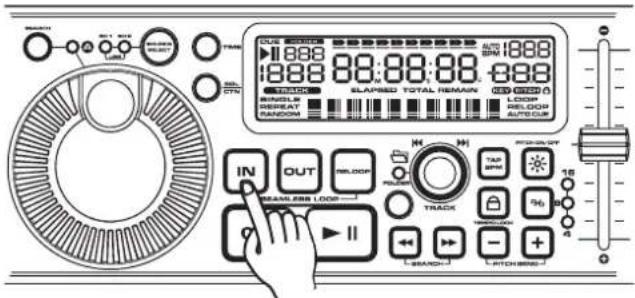
(1) You may press the IN BUTTON on the fly (while the music is playing). This will set a CUE Point without music interruption. Pressing the CUE BUTTON will now return you to the same point that you pressed the IN BUTTON. Pressing the CUE BUTTON will now return you to this exact point.
(2) You may also use the SEARCH KNOB to set a cue point. While the music is in PAUSE or CUE mode, use the SEARCH KNOB to scroll through a track to find your desired starting point. Once you have found your desired position press the PLAY BUTTON to set your cue point. Pressing the CUE BUTTON will return you to this exact point.
(3) You may also use the jog Wheel to set a cue point. While the music is PAUSE or CUE mode, use the jog Wheel to scroll through a track and find your desired starting point. Once you have found your desired CUE point press the play Button to set your cue point. Pressing the cue Button will now return you to this exact point.
SEAMLESS LOOP
1. CREATING AND PLAYING A SEAMLESS LOOP
A seamless loop is a sound loop that plays continuously without sound interruption. You can use this loop to create dramatic effect in your mixing. This loop has no time limit and you could actually loop the entire length of the current folder. You can create a seamless loop between two continuous points of a music source device as below:
(1) Press PLAY/PAUSE BUTTON to activate playback mode.
(2) Press the IN BUTTON. This will set the starting point of the SEAMLESS LOOP. The IN BUTTON LED will blink.
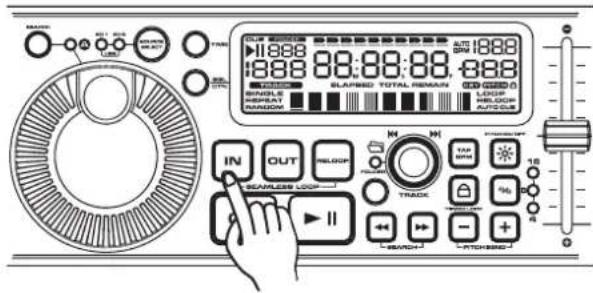
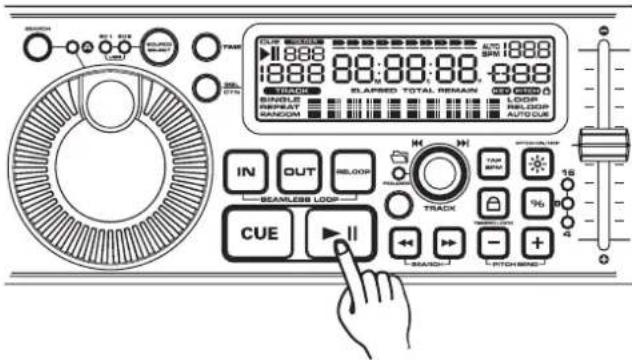
(3) Press the OUT BUTTON to set the ending point for your SEAMLESS LOOP. The IN BUTTON and OUT BUTTON LEDs will immediately begin to flash rapidly, indicating the SEAMLESS LOOP mode has been activated.
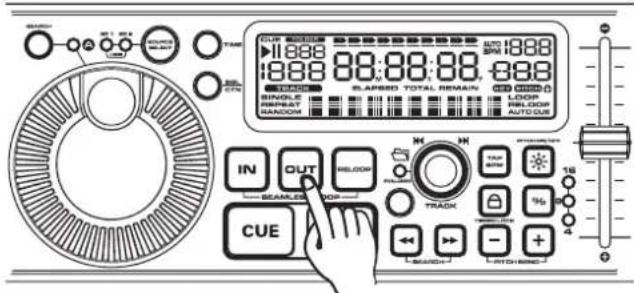
2. EXITING A LOOP
To exit a SEAMLESS LOOP, press the OUT BUTTON. The IN BUTTON and OUT BUTTON LEDs will remain on, but will stop flashing. Music playback will resume normal play. The IN BUTTON, OUT BUTTON LEDs and RELOOP/LOOP indicator in the LCD will remain on to remind you that a loop is stored in memory.
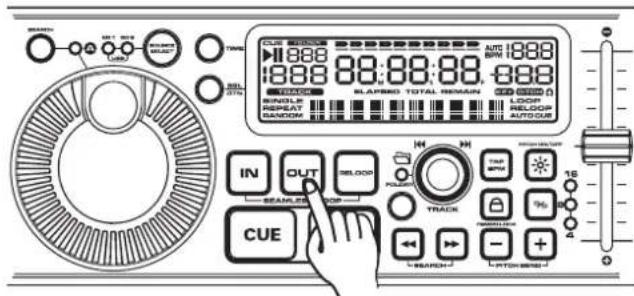
3. REPLAY LOOP
The RELOOP function allows you to return to your stored loop at any time. The IN BUTTON and OUT BUTTON LEDs will indicate a loop is stored in memory, and may be played at any time. To replay the loop, press the RELOOP BUTTON. The IN BUTTON and OUT BUTTON LEDs will again begin to flash indicating SEAMLESS LOOP mode has been activated and your stored loop will immediately begin to play.
BASIC OPERATION
4. EDITING A LOOP
You can edit your seamless loop you obviously must first have created a seamless loop to edit. If you haven't created a SEAMLESS LOOP, follow the instructions in step 1 to create a loop.
There are three methods as below:
(1) Edit a seamless loop's ending point
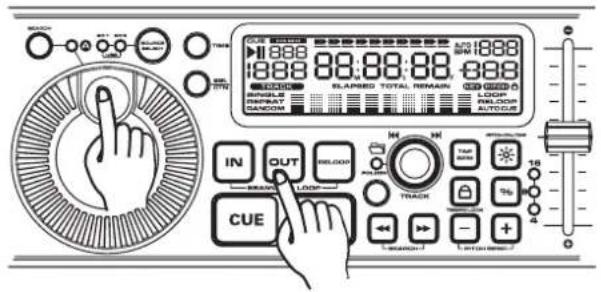
You can edit the end point of the loop to make your loop shorter or longer. Make sure the loop that you want to edit is not in reloop mode. Turn the JOG WHEEL or press search buttons to make the loop shorter/ longer. Press the OUT button to set the new ending point of your loop.
(2) Edit a seamless loop's starting point
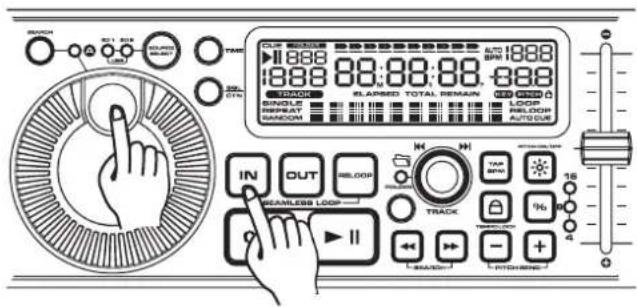
You can edit the starting point of the loop to make your loop shorter. Under the reloop mode, turn the JOG WHEEL clockwise or press search buttons to make the loop shorter. Please make sure the new starting point must before the ending point. Press the IN button to set the new starting point of your loop.
(3) Reset a loop
You can reset a new loop under the play or pause mode. Whenever you find a more desired starting point press the IN button, the LED of OUT button will go out. Find a new ending point and press the OUT button to set the ending point of your new loop.
5. STUTTER EFFECT
You can use your loop to create a stutter effect and it will add extra creativity to your performance. Every time the RELOOP button is pressed, whether the loop is playing or not, it will restart the pre-programmed loop at once. You can press the RELOOP BUTTON repeatedly to create the stutter effect.
BASIC OPERATION
TRACKS KNOB has three functions as below:
1. TRACK SEARCH
When FOLDER LED is off, left turning the TRACK knob to backward search and forward search on the right turn. You can select the desired up to 999 tracks in a folder.
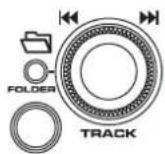
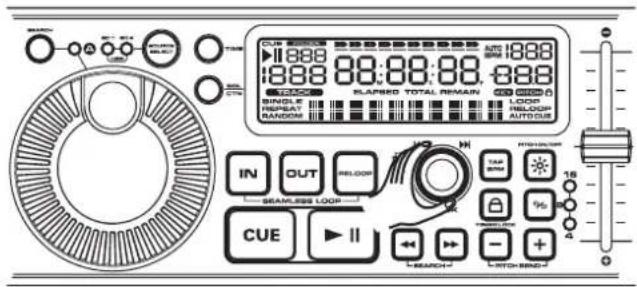
Turning the track knob counterclockwise will take you to the previous track.
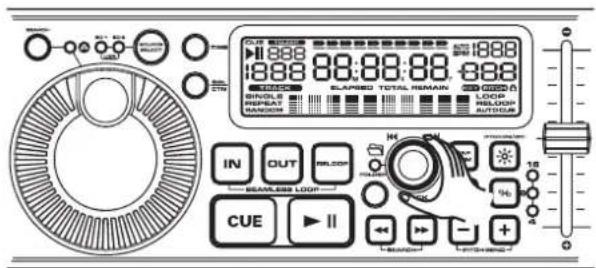
Turning the track knob clockwise will take you to the to the next track.
2. FOLDER SEARCH
When FOLDER LED is on, to select folder number by turning the TRACK knob. You can select the desired up to 999 folders.
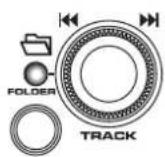
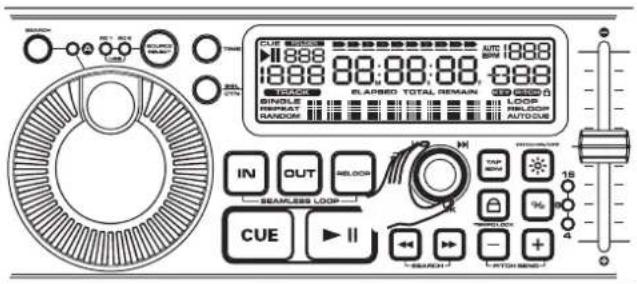
Turning the track knob counterclockwise will take you to the previous folder.
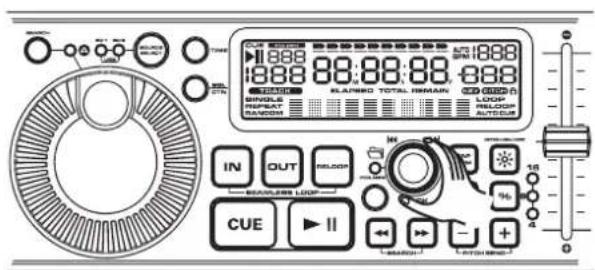
Turning the track knob clockwise will take you to the to the next folder.
3. VIEW THE CONTENT OF TITLE
You can view the title content of Folder Name/FILE NAME/TITLE NAME/ARTIST/GENRE/BITRATE by each pressing the TRACK knob.
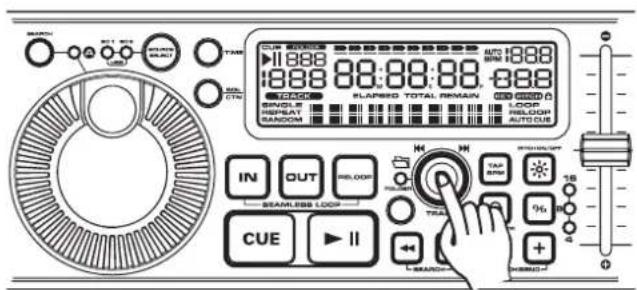
Displayed "Folder Name" is for folder contents
Displayed "FILE NAME" is for file contents
Displayed "TITLE NAME" is for title contents
Displayed "ARTIST" is for artist contents
Displayed "GENRE" is for genre contents
Displayed bitrate contents directly.
Note: Each display for 20 sec. It will auto return to "TITLE NAME" when no action more than 20 sec.
BASIC OPERATION
TAP BPM
AUTO BPM is the default mode when power on. You can switch Manual /Auto BPM by pressing the "TAP BPM" button.
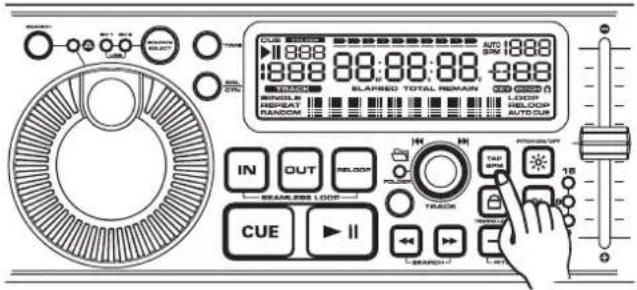
Notice:
Switch Manual BPM on just need one touch the button.
Switch Auto BPM on by pressing the "TAP BPM" button more than 1 sec. and then the LCD will display "AUTO BPM".
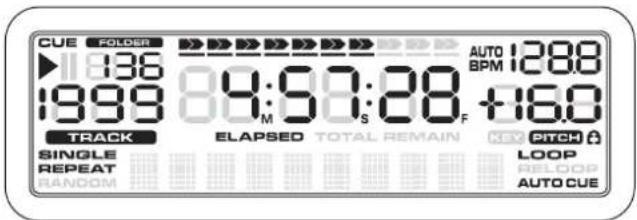
There are two modes for BPM count as below:
- Manual BPM: following the music tempo and press the "TAP BPM" button to count BPM value; from the auto BPM to manual mode, the value won't change until the correct BPM value is counted.
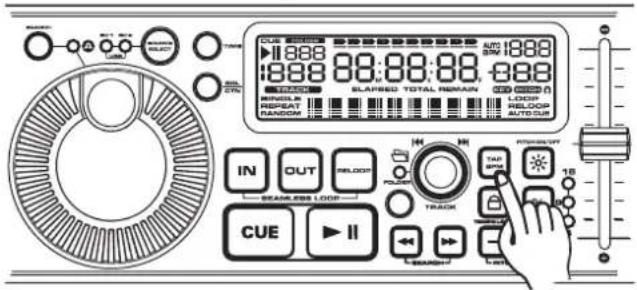
- AUTO BPM: counting BPM value automatically without pressing "TAP BPM" button.
BASIC OPERATION
SYSTEM SETTING
Press the TIME BUTTON for 2 sec. until "PRESET" is displayed.
Note: System setting will be closed automatically when more than 5 sec no function.
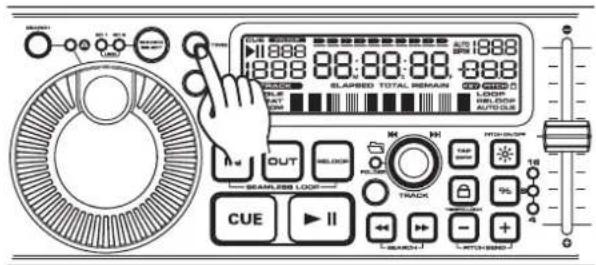
Turn the TRACK KNOB to scroll through the different submenus including: REPEAT, Reset all, and, FIRMWARE VERSION..
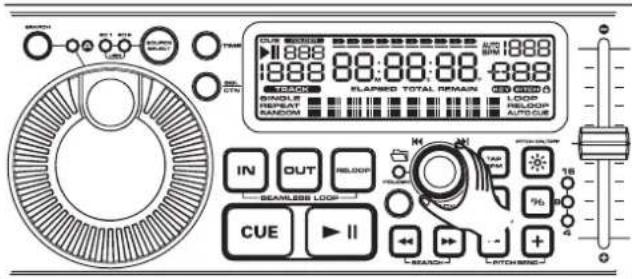
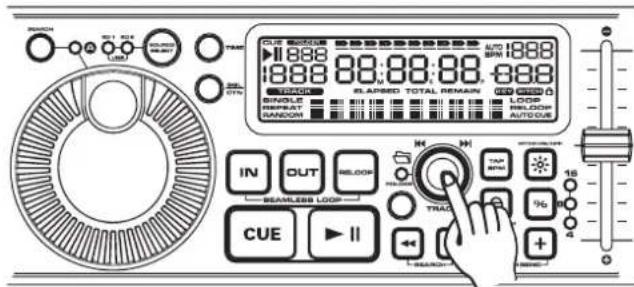
You can adjust the setting by stopping on the desired submenu and pushing the TRACK KNOB. To exit the menu settings press the TIME BUTTON again.
REPEAT
"REPEAT: OFF" – All the tracks in the memory device will play in the normal mode.
"REPEAT: ON" – All the tracks in the current folder will play track by track until the repeat function is deactivated.
RESET
In the "Reset all?" section, you may reset the system memory. This will reset all your programmed menus and restore the unit to its default settings. Press the TRACK knob will return all function setting to default value automatically and then "reset OK" will display in the LCD.
BASIC OPERATION
FIRMWARE VERSION
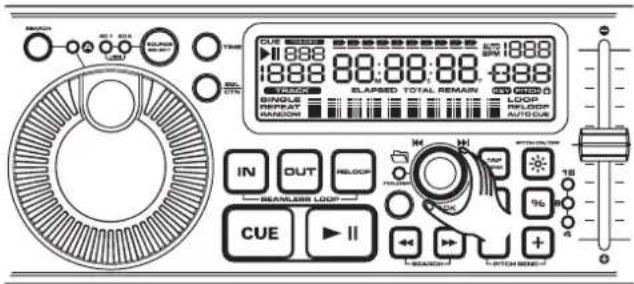
You may display the unit firmware version Firmware is the unit internal programming code. Once enter preset menu and then turn the TRACK KNOB until Vxx.xx is displayed. "x's" are the version number.
FIRMWARE upgrade:
Step1: Copy the controller code or DSP code from PC and then save into memory device (Files must be in root directory).
Step2. Off the controller power cord and re-plug in.
Step3: Press STANDBY button to power on
Step4: Insert memory device into player A, USB port or SD card slot 1 to upgrade and "Update 10%\~100%" will show in the display (for DSP code), "UpdateUIxx" will show in the display (for controller code)
Step5: When upgrade is done "COMPLETE" will display, removed memory device
Step6: Off the controller power cord and re-plug in. After pressing the STANDBY to power on, if "UpdateUI --" is displayed (failure), please repeat procedure step2 to step5.
Step7: Check the version number of the new firmware in the RESET MENU
Step8: Done
Note:
-
Please delete the code within memory device when upgrade has already done.
-
Power disconnection during processing or unknown memory device will cause failure
SPECIFICATION
MODEL: MPSD - 1,
USB And Dual SD Card MP3 Player
(compatible with USB mass storage device 1.0/1.1/2.0)
POWER SOURCE: DC 6V, 2A
DIMENSIONS: 482 x 88 x 120.4 mm
WEIGHT: 2.03kg
GENERAL:
| Display | LCD |
| Pitch control range | Within ± 4% , ± 8% , ± 16% |
| Pitch bend | ± 4% , ± 8% , ± 16% |
| Pitch accuracy | ± 0.15% |
AUDIO CHARACTERISTICS (LOAD: LINE=100Kohm, TEST SIGNAL FORMAT: MP3,128Kbps)
ITEM TYPICAL LIMIT CONDITION
| OUTPUT LEVEL | 2V +/-0.5dB | 2V +/-1dB | 1KHz, 0dB (TCD-782 TRK.2) | |
| CHANNEL BALANCE | WITHIN 0.5dB | WITHIN 1dB | 1KHz, 0dB (TCD-782 TRK.2) | |
| THD+N(*1): | 0.006% | 0.02% | 1KHz, 0dB (TCD-782 TRK.2) | |
| S/N RATIO(*2): | 98dB | 90dB | 1KHz, 0dB (TCD-782 TRK.2, 8) | |
| L/R SEPARATION(*2): | 98dB | 90dB | 1KHz, 0dB (TCD-782 TRK.9, 11) | |
| DYNAMIC RANGE(*2): | 93dB | 85dB | 1KHz, -60dB (TCD-782 TRK.18) | |
| FREQUENCY RESPONSE: | 17-16KHz +/-0.2dB | 17-16KHz +/-1dB | (TCD-781 TRK.1,4 & 16) | |
NOTES:
*1: WITH 20KHz LOW PASS FILTER.
*2: WITH 20KHz LOW PASS FILTER, "IHF-A" WEIGHTED.
MP3 FORMAT
| Disc Format | Applicable file extensions | mp3. MP3. mP3. Mp3 |
| Max. number of Folders | 999 | |
| Max. number of files | max. 999 files | |
| MP3 Format | MPEG 1 Layer 3 standard (ISO/IEC 11172-3), which provides for single channel ('mono') and two-channel ('stereo') coding at sampling rates of 32, 44.1 and 48kHz. | 32/40/48/56/80/96/112/128/160/192/224/256/320 kbpsXing/VBRI VBR |
| MPEG 2 Layer 3 standard (ISO/IEC 13818-3), which provides for similar coding at sampling rates of 16, 22.05 and 24 kHz. | 32/40/48/56/64/80/96/112/144/160 Kbps | |
| MPEG 2.5 Layer 3 standard, which provides for similar coding at sampling rates of 8, 11.025 and 12 kHz. | 32/40/48/56/64/80/96/112/144/160 Kbps |
- IMPORTANT SAFETY INSTRUCTIONS
- WARNING
- CAUTION
- MAIN FEATURES
- CONTROLS AND FUNCTIONS
- CONTROL UNIT
- SOURCE SELECT functions
- MUSIC SOURCE DEVICE SELECT
- CHANGE MUSIC SOURCE DEVICE DURING PLAYBACK
- SETTING A CUE POINT
- SEAMLESS LOOP
- CREATING AND PLAYING A SEAMLESS LOOP
- EXITING A LOOP
- REPLAY LOOP
- BASIC OPERATION
- EDITING A LOOP
- STUTTER EFFECT
- TRACK SEARCH
- FOLDER SEARCH
- VIEW THE CONTENT OF TITLE
- TAP BPM
- SYSTEM SETTING
- REPEAT
- RESET
- FIRMWARE VERSION
- FIRMWARE upgrade:
- Note:
- SPECIFICATION
- NOTES:
Brand : Citronic
Model : MPSD-1
Category : Mp3 player