
CD-9010 - CD Player TASCAM - Free user manual and instructions
Find the device manual for free CD-9010 TASCAM in PDF.


| Product Type | CD/Solid State Player |
| Brand | Tascam |
| Model | CD-9010 |
| Supported Media | Audio CD, CD-R (CD-DA, data CD with WAV), CF card (512 MB–64 GB, Type I) |
| Supported File Formats | WAV (44.1/48 kHz, 16/24-bit), CD-DA (44.1 kHz, 16-bit) |
| Analog Inputs | MIX INPUTS (balanced XLR, +4 dBu nominal) |
| Analog Outputs | LINE OUTPUTS (balanced XLR), MONITOR OUTPUTS (balanced XLR), PHONES (6.3 mm stereo jack) |
| Digital Output | AES-3id (BNC, 75 Ω) |
| Control Interfaces | Serial (D-sub 15), Parallel (D-sub 37), USB keyboard, Word Clock IN/THRU |
| Playback Modes | Continuous, Single, Program, Repeat (all tracks, one track, program) |
| Player Functions | Auto cue, auto ready, incremental play, pitch control (±12.5%), time fit, EOM, end check |
| Cue/Program Memory | Up to 9 cue points per disc, up to 99 tracks per program |
| Display | LCD with level meters, time display, playback mode and info |
| Power Supply | AC 100–240 V, 50/60 Hz; consumption 18 W |
| Dimensions (W × H × D) | 220 × 136.8 × 385.2 mm |
| Weight | 6 kg |
| Operating Temperature | 5 °C to 35 °C (41 °F to 95 °F) |
| Installation Angle | ≤5° from horizontal |
| Cleaning | Wipe with soft dry cloth; do not use benzene, thinners, or alcohol |
| Safety | Class 1 laser product; complies with FDA and IEC 60825-1:2007 |
| Included Accessories | Power cord, security screw, warranty card, owner's manual |
| Optional Remote | Tascam RC-9010/RC-9010S (sold separately) |
| Repairability | Manual eject mechanism; user‑serviceable parts; refer servicing to qualified personnel |
Frequently Asked Questions - CD-9010 TASCAM
User questions about CD-9010 TASCAM
0 question about this device. Answer the ones you know or ask your own.
Ask a new question about this device
Download the instructions for your CD Player in PDF format for free! Find your manual CD-9010 - TASCAM and take your electronic device back in hand. On this page are published all the documents necessary for the use of your device. CD-9010 by TASCAM.
USER MANUAL CD-9010 TASCAM
CD/Solid State Player
OWNER'S MANUAL
![TASCAM CD-9010CF CD CF ST MONO PHONES CF MANUAL ELECT [WHEN POWER OFF] BROWSE TIME DISPLAY PLAY MODE HOME MENU DATA PUSH ENTER OPEN/ CLOSE CD STOP MONITOR STANDBY PLAY I←← TRACK →→I ←← SEARCH →→I PD](/content/2026/05/771302/images/2a1c786d86389a612510245360e83f45af0067a274c42e834211a46b5de38942.jpg)
Important Safety Information

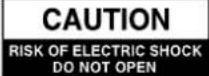

CAUTION: TO REDUCE THE RISK OF ELECTRIC SHOCK, DO NOT REMOVE COVER (OR BACK). NO USER-SERVICEABLE PARTS INSIDE. REFER SERVICING TO QUALIFIED SERVICE PERSONNEL.

The lightning flash with arrowhead symbol, within equilateral triangle, is intended to alert the user to the presence of uninsulated "dangerous voltage" within the product's enclosure that may be of sufficient magnitude to constitute a risk of electric shock to persons.

The exclamation point within an equilateral triangle is intended to alert the user to the presence of important operating and maintenance (servicing) instructions in the literature accompanying the appliance.
WARNING: TO PREVENT FIRE OR SHOCK HAZARD, DO NOT EXPOSE THIS APPLIANCE TO RAIN OR MOISTURE.
1 Read these instructions.
2 Keep these instructions.
3 Heed all warnings.
4 Follow all instructions.
5 Do not use this apparatus near water.
6 Clean only with dry cloth.
7 Do not block any ventilation openings. Install in accordance with the manufacturer's instructions.
8 Do not install near any heat sources such as radiators, heat registers, stoves, or other apparatus (including amplifiers) that produce heat.
9 Do not defeat the safety purpose of the polarized or grounding-type plug. A polarized plug has two blades with one wider than the other. A grounding type plug has two blades and a third grounding prong. The wide blade or the third prong are provided for your safety. If the provided plug does not fit into your outlet, consult an electrician for replacement of the obsolete outlet.
10 Protect the power cord from being walked on or pinched particularly at plugs, convenience receptacles, and the point where they exit from the apparatus.
11 Only use attachments/accessories specified by the manufacturer.
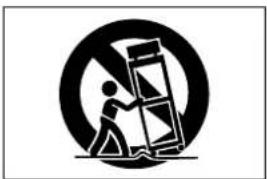
12 Use only with the cart, stand, tripod, bracket, or table specified by the manufacturer, or sold with the apparatus. When a cart is used, use caution when moving the cart/apparatus combination to avoid injury from tip-over.
natural_image
Symbolic icon of a person pushing a large object, enclosed in a circle (no text or symbols)13 Unplug this apparatus during lightning storms or when unused for long periods of time.
14 Refer all servicing to qualified service personnel. Servicing is required when the apparatus has been damaged in any way, such as power-supply cord or plug is damaged, liquid has been spilled or objects have fallen into the apparatus, the apparatus has been exposed to rain or moisture, does not operate normally, or has been dropped.
- The apparatus draws nominal non-operating power from the AC outlet with its POWER or STANDBY/ON switch not in the ON position.
- The mains plug is used as the disconnect device, the disconnect device shall remain readily operable.
- Caution should be taken when using earphones or headphones with the product because excessive sound pressure (volume) from earphones or headphones can cause hearing loss.
CAUTION
- Do not expose this apparatus to drips or splashes.
- Do not place any objects filled with liquids, such as vases, on the apparatus.
- Do not install this apparatus in a confined space such as a book case or similar unit.
- The apparatus should be located close enough to the AC outlet so that you can easily grasp the power cord plug at any time.
- If the product uses batteries (including a battery pack or installed batteries), they should not be exposed to sunshine, fire or excessive heat.
- CAUTION for products that use replaceable lithium batteries: there is danger of explosion if a battery is replaced with an incorrect type of battery. Replace only with the same or equivalent type.
WARNING
Products with Class I construction are equipped with a power supply cord that has a grounding plug. The cord of such a product must be plugged into an AC outlet that has a protective grounding connection.
In North America use only on 120V supply.
or U.S.A.
TO THE USER
This equipment has been tested and found to comply with the limits for a Class A digital device, pursuant to Part 15 of the FCC Rules. These limits are designed to provide reasonable protection against harmful interference when the equipment is operated in a commercial environment. This equipment generates, uses, and can radiate radio frequency energy and, if not installed and used in accordance with the instruction manual, may cause harmful interference to radio communications.
Operation of this equipment in a residential area is likely to cause harmful interference in which case the user will be required to correct the interference at his own expense.
CAUTION
Changes or modifications to this equipment not expressly approved by TEAC CORPORATION for compliance could void the user's authority to operate this equipment.
■or European Customers
CE Marking Information
a) Applicable electromagnetic environment: E4
b) Peak inrush current: 14 A
Disposal of electrical and electronic equipment
(a) All electrical and electronic equipment should be disposed of separately from the municipal waste stream via collection facilities designated by the government or local authorities.
(b) By disposing of electrical and electronic equipment correctly, you will help save valuable resources and prevent any potential negative effects on human health and the environment.
(c) Improper disposal of waste electrical and electronic equipment can have serious effects on the environment and human health because of the presence of hazardous substances in the equipment.
(d) The Waste Electrical and Electronic Equipment (WEEE) symbol, which shows a wheeled bin that has been crossed out, indicates that electrical and electronic equipment must be collected and disposed of separately from household waste.
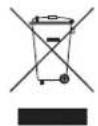
(e) Return and collection systems are available to end users. For more detailed information about the disposal of old electrical and electronic equipment, please contact your city office, waste disposal service or the shop where you purchased the equipment.
Disposal of batteries and/or accumulators
(a) Waste batteries and/or accumulators should be disposed of separately from the municipal waste stream via collection facilities designated by the government or local authorities.
(b) By disposing of waste batteries and/or accumulators correctly, you will help save valuable resources and prevent any potential negative effects on human health and the environment.
(c) Improper disposal of waste batteries and/or accumulators can have serious effects on the environment and human health because of the presence of hazardous substances in them.
(d) The WEEE symbol, which shows a wheeled bin that has been crossed out, indicates that batteries and/or accumulators must be collected and disposed of separately from household waste.
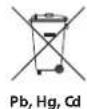
If a battery or accumulator contains more than the specified values of lead (Pb), mercury (Hg), and/or cadmium (Cd) as defined in the Battery Directive (2006/66/EC), then the chemical symbols for those elements will be indicated beneath the WEEE symbol.
(e) Return and collection systems are available to end users. For more detailed information about the disposal of waste batteries and/or accumulators, please contact your city office, waste disposal service or the shop where you purchased them.
WARNING
This is a Class A product. In a domestic environment, this product may cause radio interference in which case the user may be required to take adequate measures.
For Canada
THIS CLASS A DIGITAL APPARATUS COMPLIES WITH CANADIAN ICES-003.CET
APPAREIL NUMERIQUE DE LA CLASSE B EST CONFORME A LA NORME NMB-003 DU CANADA.
Safety precautions
■AUTIONS ABOUT LASER RADIATION
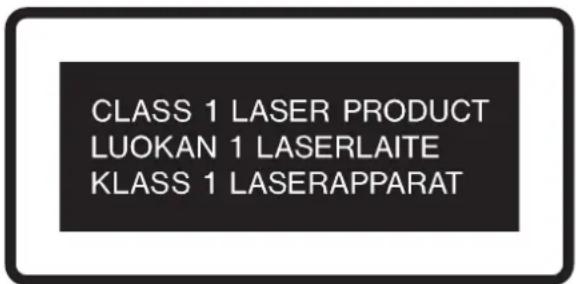
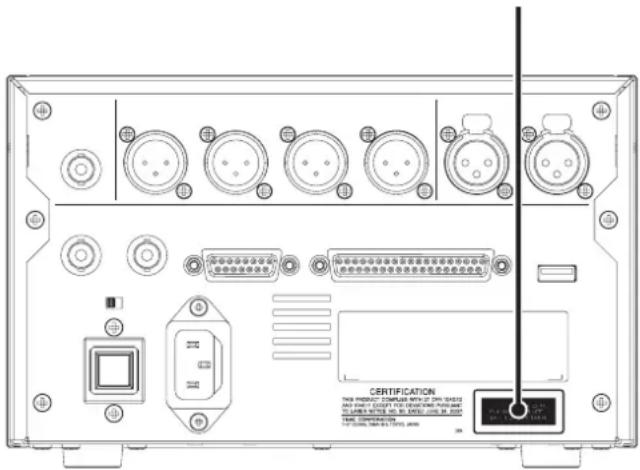
This product has been designed and manufactured according to FDA regulations "title 21, CFR, chapter 1, subchapter J, based on the Radiation Control for Health and Safety Act of 1968," and is classified as a class 1 laser product. There is no hazardous invisible laser radiation during operation because invisible laser radiation emitted inside of this product is completely confined in the protective housings.
The label required in this regulation is shown at ①.
CAUTIONS
- DO NOT REMOVE THE PROTECTIVE HOUSING USING A SCREWDRIVER.
- USE OF CONTROLS OR ADJUSTMENTS OR PERFORMANCE OF PROCEDURES OTHER THAN THOSE SPECIFIED HEREIN MAY RESULT IN HAZARDOUS RADIATION EXPOSURE.
- IF THIS PRODUCT DEVELOPS TROUBLE, CONTACT YOUR NEAREST QUALIFIED SERVICE PERSONNEL, AND DO NOT USE THE PRODUCT IN ITS DAMAGED STATE.
Optical pickup
Type: HOF-1501XB
Manufacturer: Hitachi Media Electronics
Laser output: Less than 0.5 mW on the objective lens
Wavelength: 785 nm ±22 nm
Standard: IEC60825-1 : 2007
This appliance has a serial number located on the rear panel. Please record the model number and serial number and retain them for your records.
Model number
Serial number
1 - Introduction ......7
Features 7
Included items 7
Conventions used in this manual ....7
Intellectual property rights ....8
Precautions for placement and use ....8
Connecting the power 8
Beware of condensation 8
Cleaning the unit 8
About CF cards 8
Precautions for use ....8
Card formatting 8
About discs 9
Handling of compact discs 9
2 – Names and Functions of Parts .....10
Front panel 10
Rear panel 12
Home Screen 13
Menu structure ....14
Menu operation basics ....16
Menu operation procedures ....16
3 – Preparations ......17
Turning the power ON and OFF 17
Turning the power OFF 17
Setting the date and time 17
Adjusting the display 18
Adjusting display contrast 18
Adjusting display and indicator brightness .....18
Inserting and ejecting CF cards ....19
Inserting CF cards 19
Ejecting CF cards ....19
Using the security screw 19
Connecting headphones ....20
Setting the panel lock function ....20
4 - Playback....21
Monitoring and online playback 21
Monitoring playback 21
Online playback 21
Setting the playback mode ....21
Playing a track once from the beginning .....22
Playing a track from the middle 22
Automatic cue point memory (last cue) .....22
Setting the playback point 23
Selecting tracks 23
Operation after selection of a track ....23
Searching within tracks 23
Auto cue function 23
Auto ready function 24
Incremental playback function ....24
ONLINE BACK CUE function 25
PLAY KEY FUNCTION setting 25
MONITOR PLAY STBY function 26
ONLINE PLAY STBY function 26
Repeat playback 26
Ordinary repeat playback 26
EOM functions 27
Setting EOM tally output trigger 27
How to use the EOM 27
Checking the ends of tracks 27
Setting the amount of time checked ....27
How to use the end check function .....27
Pitch control playback 28
Turning pitch control playback ON/OFF ......28
Setting the pitch control value ....28
PITCH/TIME FIT function 28
5 - Program and cue playback 29
Program playback 29
Program menu operation 29
Adding tracks to a program 29
Clearing a program 30
Removing tracks from a program ....30
Moving tracks within a program ....30
Importing programs ....31
Exporting programs ....31
Cue point playback 31
Using the cue menu ....31
Adding cue points ....31
Clearing the cue list ....32
Clearing a cue point ....32
Editing cue point names 33
Editing text ......33
Importing cue lists 34
Exporting cue lists ....34
Automatic cue point loading options ....34
Contents
6 - Working with files and folders .....35
Opening the BROWSE screen ....35
Navigating the BROWSE screen ....35
Icons on the BROWSE screen ....35
File operations ....35
Folder operations 36
Editing folder names (CF cards) 36
Editing file names (CF cards) 37
Deleting folders and files (CF cards) 37
Creating new folders (CF cards) 38
File and folders on CF cards and data CDs ....38
7 - Managing CF cards ....39
Formatting CF cards quickly ....39
Formatting CF cards (full format) 39
Ripping CD tracks to CF cards ....40
8 – Other settings and information display.41
Setting the digital reference level ....41
Setting the analog reference level ....41
Adjusting R/L analog reference levels ....42
Setting the online function 42
Setting the master word clock ....43
Mono mix setting 43
Master clock and digital output combinations .....43
Setting the level meter display type ....44
Fail safe function setting 44
Monitoring point setting....45
Muting monitoring when online 45
Importing menu settings 45
Exporting menu settings 45
Restoring the factory settings 46
Viewing media information 46
Viewing system information 46
9 - Operation using a computer keyboard ...47
Setting the keyboard language ....47
Using a keyboard to input text 47
10 - Using the remote connectors .....48
Using the serial connector ....48
Fader use setting 48
Fader start function setting....48
Fader stop function setting 48
Fader stop action setting 49
Setting the fader scale used 49
Transmission speed setting 49
Using the parallel connector ....50
Parallel port 3-pin/13-pin setting ....50
11 - Message list ....51
Error messages 51
Warning messages ....51
Operation messages ....51
12 - Troubleshooting ....52
13 - Specifications ....53
Media and file formats ....53
Inputs and outputs ....53
Analog audio inputs and outputs ....53
Digital audio output 53
Control inputs and outputs ....53
Audio performance ....53
Backup memory 54
General 54
Dimensional drawings 54
产品有毒有害物质或元素的名称及含量
Thank you very much for purchasing a TASCAM CD-9010CF CD/Solid State Player.
Please read this manual thoroughly before using the unit so that you understand correct operating procedures and can use its functions fully. We hope that you enjoy using this unit for many years.
Please keep this manual so that you can refer to it at any time. A digital copy of this manual can also be downloaded from our website (http://tascam.com/).
Features
This professional CD player is designed for a variety of uses, including broadcasting, postproduction and installation applications. Here are some of its features.
- In addition to commercially-available audio CDs, CD-DA format audio CDs and CD-R discs with WAV format files (except unfinalized data CDs) can be played back
- 44.1/48kHz linear PCM audio (WAV format) files on CF cards can be played back (Maximum file size is 2GB)
- Analog inputs: MIX INPUTS stereo pair (signal can mixed with the CD/CF playback signal or passed through as is to the LINE OUTPUTS)
- Analog outputs: LINE OUTPUTS stereo pair, MONITOR OUTPUTS stereo pair and stereo PHONES monitoring output
• Digital output: 1 stereo output with sample rate conversion - Playback signals of the two playback modes—online playback for live/on-air use and monitoring playback for confirmation/rehearsal use—can be output from different connectors
- Auto cue function enables standby at the point when audio begins in a track
- Auto ready function enables automatic standby at the beginning of the next track after one track completes playback
• JOG dial enables searching one frame at a time
• Searching by index is possible - Fail safe function prevents misoperation during critical playback situations
- Synchronization with external word clock (44.1 or 48 kHz) is possible and the CD playback signal can be output digitally with a 48kHz sampling frequency when synchronized with 48kHz external clock
• ±12.5% pitch control function - Connect a TASCAM RC-9010/RC-9010S remote control (sold separately) to enhance operation and increase functionality
• End check function allows playback of the ends of tracks - Up to 9 cue points can be remembered for each disc
- Manual eject mechanism allows CDs to be removed even when the power is off
Included items
This product includes the following items.
Take care when opening the package not to damage the items. Keep the packing materials for transportation in the future.
Please contact TASCAM if any of these items are missing or have been damaged during transportation.
- Main unit .... 1
• Power cord....1
• Security device....1 - Warranty card .... 1
- Owner's Manual (this manual)....1
Conventions used in this manual
In this manual, we use the following conventions:
- When instructed to select an item, use the controls so that item appears to be light letters on a dark background.
- Buttons, connectors and other parts of the unit and external devices are indicated like this: STOP
- Messages on the unit's display are shown like this:MENU
• CD-DA format discs are sometimes called "audio CDs" - A CD with WAV files is sometimes called a "data CD"
- "CompactFlash card" is abbreviated as "CF card"
- The device that is currently selected (CD or CF card) is called the "current device".
- Additional information is provided as necessary as tips, notes and cautions.
TIP
These are tips about how to use the unit.
NOTE
These provide additional explanations and describe special cases.
CAUTION
Failure to follow these instructions could result in injury, damage to equipment or lost recording data, for example.
Intellectual property rights
• TASCAM is a trademark of TEAC Corporation, registered in the U.S. and other countries.
- CompactFlash is a registered trademark of SanDisk Corporation in the USA and other countries.
- Other company names, product names and logos in this document are the trademarks or registered trademarks of their respective owners.
Any data, including, but not limited to information, described herein are intended only as illustrations of such data and/or information and not as the specifications for such data and/or information. TEAC Corporation disclaims any warranty that any use of such data and/or information shall be free from infringement of any third party's intellectual property rights or other proprietary rights, and further, assumes no liability of whatsoever nature in the event of any such infringement, or arising from or connected with or related to the use of such data and/or information.
This product is designed to help you record and reproduce sound works to which you own the copyright, or where you have obtained permission from the copyright holder or the rightful licensor. Unless you own the copyright, or have obtained the appropriate permission from the copyright holder or the rightful licensor, your unauthorized recording, reproduction or distribution thereof may result in severe criminal penalties under copyright laws and international copyright treaties. If you are uncertain about your rights, contact your legal advisor. Under no circumstances will TEAC Corporation be responsible for the consequences of any illegal copying performed using the recorder.
Precautions for placement and use
- The operating temperature should be between 5°C and 35°C (41°F and 95°F).
- Do not install in the following types of places. Doing so could degrade the sound quality and/or cause malfunctions.
- Places with significant vibrations or that are otherwise unstable
- Near windows or other places exposed to direct sunlight
• Near heaters or other extremely hot places - Extremely cold places
- Places with bad ventilation or high humidity
• Very dusty locations
• This unit can be installed at an angle of ±5^ . - In order to assure good heat dissipation, do not place any object on top of the unit.
- Do not install this unit on top of any heat-generating electrical device such as a power amplifier.
Connecting the power
- Insert the included power cord into the AC IN connector completely.
- Hold the power cord by the plug when connecting or disconnecting it.
Beware of condensation
If the unit is moved from a cold to a warm place, or used immediately after a cold room has been heated or otherwise exposed to a sudden temperature change, condensation could occur. Should this happen, leave the unit for one or two hours before turning the unit on.
Cleaning the unit
To clean the unit, wipe it gently with a soft dry cloth. Do not wipe with chemical cleaning cloths, benzene, paint thinner, ethyl alcohol or other chemical agents to clean the unit as they could damage the surface.
About CF cards
This unit uses CF cards for playback and recording.
A list of CF cards that we have confirmed to work with this unit is provided on our website (http://tascam.com/).
Precautions for use
CF cards are delicate media. In order to avoid damaging a memory/card or the memory/card slot, please take the following precautions when handling them.
- Do not leave them in extremely hot or cold places.
• Do not leave them in extremely humid places. - Do not let them get wet.
- Do not put things on top of them or twist them.
- Do not hit them.
- Do not insert or remove them during recording, playback, data transfer or other operations that access the card.
- Do not carry them with terminals exposed. Use the protective cover.
Card formatting
CF cards that have been formatted by this unit are optimized for performance during recording. Using a card that has been formatted by a computer, for example, could result in errors during recording. We recommend that whenever possible you use CF cards after they have been formatted by this unit.
About discs
In addition to commercially-available music CDs, this unit can play CD-R discs that have been recorded in audio CD (CD-DA) format, as well as CD-R discs that have WAV audio files recorded on them. It can also playback 8cm discs.
Handling of compact discs
• Always load compact discs with their labels facing upward.
- To remove a disc from its case, press down on the center of the disc holder, then lift the disc out, holding it carefully by the edges.
- Do not touch the signal side (the unlabeled side). Fingerprints, oils and other substances can cause errors during playback.
- To clean the signal side of a disc, wipe gently with a soft dry cloth from the center towards the outside edge. Dirt on discs can lower the sound quality, so clean them and always store them in a clean state.
- Do not use any record spray, anti-static solutions, benzene, paint thinner or other chemical agents to clean CDs as they could damage the delicate playing surface. It may cause CDs to become unplayable.
- Do not apply labels or other materials to discs. Do not use discs that have had tape, stickers or other materials applied to their surface. Do not use discs that have sticky residue from stickers, etc. Such discs could become stuck in the unit or cause it to malfunction.
- Never use a commercially available CD stabilizer. Using stabilizers with this player will damage the mechanism and cause it to malfunction.
- Do not use cracked discs.
- Only use circular compact discs. Avoid using non-circular promotional discs, etc.

- Music discs with copy control, a copy-protection system, have been released from several record companies in an attempt to protect the copyright. Since some of these discs do not comply with the CD specifications, they may not be playable on the unit.
Front panel
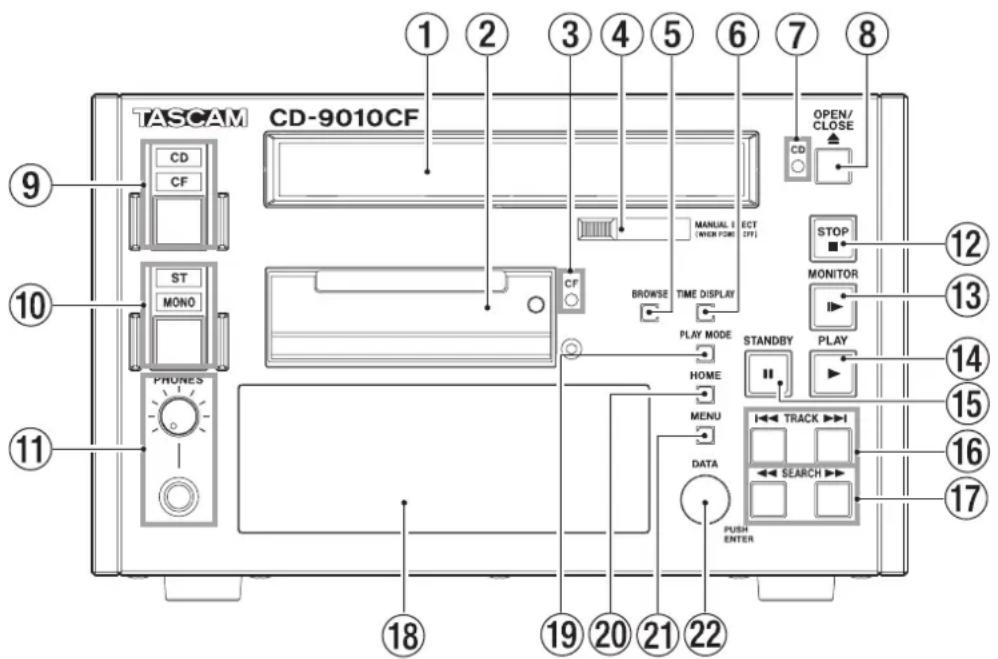
① Disc tray
Press the OPEN/CLOSE button to open the disc tray to load or remove discs.
Press the OPEN/CLOSE button again to close the disc tray.
② CF card slot
Insert and eject CF cards here. (See "Inserting and ejecting CF cards" on page 19.)
③ CF indicator
This blinks when a CF card is inserted and data is being read from the card. When data reading is complete, the indicator stays lit and playback is possible.
④ MANUAL EJECT
Use this to remove a disc when the power is off.
⑤ BROWSE button
Press to open the BROWSE screen.
With data CDs and CF cards, use this screen to look inside folders, for example.
With audio CDs, use the screen to see its tracks.
⑥ TIME DISPLAY button
Press when the Home Screen is open to switch the time display between elapsed track time and remaining track time. This button only changes the display on this unit.
To change the time display on a connected TASCAM RC-9010/RC-9010S remote control (sold separately), press the TIME DISPLAY button on the remote.
When the Home Screen is open, press and hold this button while turning the DATA dial to adjust the display contrast.
NOTE
This operation only adjusts the contrast of this unit. It does not adjust the contrast of a connected TASCAM RC-9010/RC-9010S remote control (sold separately).
⑦ CD indicator
This blinks when a CD is loaded. When data reading is complete, the indicator stays lit and playback is possible.
⑧ OPEN/CLOSE button
Press this to open the disc tray.
NOTE
In order to reduce the amount of time required to remove a disc, the disc tray will open before the disc has completely stopped.
⑨ CD/CF button and indicators
Press to switch between the CD and the CF card as the playback media. The indicator above the button for the selected media lights.
⑩ ST/MONO button and indicators
Press to switch between stereo and mono output from the LINE OUTPUTS, MONITOR OUTPUTS and PHONES jack. The indicator for the selected format lights above the button.
When set to MONO, stereo audio tracks will be played back in mono. Use the MONOMIX item on the SYSTEM menu screen to set the format of the output mono mix. (See "Mono mix setting" on page 43.)
⑪ PHONES jack/knob
Use this standard stereo jack to connect stereo headphones. Use the PHONES knob to adjust the headphones output level.
The knob can be pushed in and locked, allowing the unit to be stored and transported safely. To unlock it, push it in again. (See "Connecting headphones" on page 20.)
CAUTION
Before connecting headphones, use the PHONES knob to lower the volume. Failure to do so might result in sudden loud sounds, which could harm your hearing or result in other trouble.
⑫ STOP button/indicator
Press this button at any time to stop playback at the current point.
Press this button during online or monitoring playback or when in playback standby to stop playback.
This button lights when playback is stopped.
⑬ MONITOR button/indicator
Press this button to start monitoring playback.
The playback signal is output through the MONITOR OUTPUTS (R/L) and the PHONES jack.
2 – Names and Functions of Parts
This button lights during monitoring playback.
⑭ PLAY button/indicator
Press when playback is stopped or in standby to start playback. This button lights during playback or when in playback standby.
When the ON LINE button on a connected TASCAM RC-9010/RC-9010S remote control (sold separately) is lit, or the SYSTEM menu ONLINE FUNCTIONitem is set to AlwaysON online playback occurs and the playback signal is output through the LINE OUTPUTS (R/L) and the DIGITAL OUTPUT.
To send the signal through the MONITOR OUTPUTS (R/L) and PHONES jack, set the SYSTEM menu MON MUTE ONLINE item to OFF. (See "Muting monitoring when online" on page 45.)
This button lights during online playback.
⑮ STANDBY button/indicator
When playback is stopped or during jog playback, press this button to pause and start playback standby at the current point.
When in monitoring playback mode and MONITOR PLAY STBY is set to BACK CUEin the PLAY menu, press this button to return to the point at which monitoring playback last started and enter standby. WhenMONITOR PLAY STBYs set toNORMAL, press to enter playback standby at the current point.
When using online playback, pressing this button has a different function depending on the playback mode.
| Playback mode | Function |
| CONTINUE or SINGLE | When ONLINE PLAY STB's set to NORMAL in the PLAY menu, enter playback standby at the current position.When set to BACK CUE, locate to the last cue point and enter playback standby. |
| PROGRAM | When ONLINE PLAY STB's set to NORMAL in the PLAY menu, enter playback standby at the beginning of the next track.When set to BACK CUE, locate to the last cue point and enter playback standby. |
This button lights when in playback standby.
⑯ TRACK ◀◀◀/▶▶1 buttons
Use these buttons to skip between and select tracks.
⑰ SEARCH ◀◀/▶▶ buttons
Search while pressing these buttons.
While pressing the SEARCH ▶▶ (or SEARCH ◀◀) button to search, you can change the search speed by pressing the other SEARCH ◀◀/▶▶ button.
⑱ Display
This shows disc information, the operation mode, menus and other data.
⑲ PLAY MODE button
When the Home Screen is open, press this button to cycle through the playback modes in the following order.
→ CONTINUE mode → SINGLE mode → PROGRAM mode
⑳ HOME button
When the MENU screen, BROWSE screen, PROGRAM screen or CUE LISTscreen is open, press this to return to the Home Screen.
Press this button when the Home Screen is open to scroll CD-TEXT file names and data in the information area of the Home Screen.
Press the MENU button while pressing and holding this button to turn the panel lock function ON and OFF. (See "Setting the panel lock function" on page 20.)
When the Home Screen is open, press and hold this button while turning the DATA dial to adjust the brightness of the display and the indicators.
You can adjust the brightness of the display alone by pressing and turning the DATA dial while pressing and holding this button.
NOTE
This operation only adjusts the contrast of the display and indicators of this unit. It does not adjust the contrast of a connected TASCAM RC-9010/RC-9010S remote control (sold separately).
②1 MENU button
Press to open the MENU screen.
Press this button while pressing and holding the HOME button to turn the panel lock function ON and OFF. (See "Setting the panel lock function" on page 20.)
⑳ DATA dial
Turn the DATA dial to select items on the MENU screen.
Press the dial to use it as an ENTER button when confirming operations on the MENU screen.
When the Home Screen is open, press and hold the HOME button while turning the dial to adjust the brightness of the display and the indicators.
To adjust the brightness of the display alone, press and turn this dial while pressing and holding the HOME button.
Press and hold the TIME DISPLAY button while turning the DATA dial to adjust the display contrast.
NOTE
These operations only adjust the brightness and contrast of the display and indicators of this unit. They do not adjust the brightness and contrast of a connected TASCAM RC-9010/RC-9010S remote control (sold separately).
Rear panel
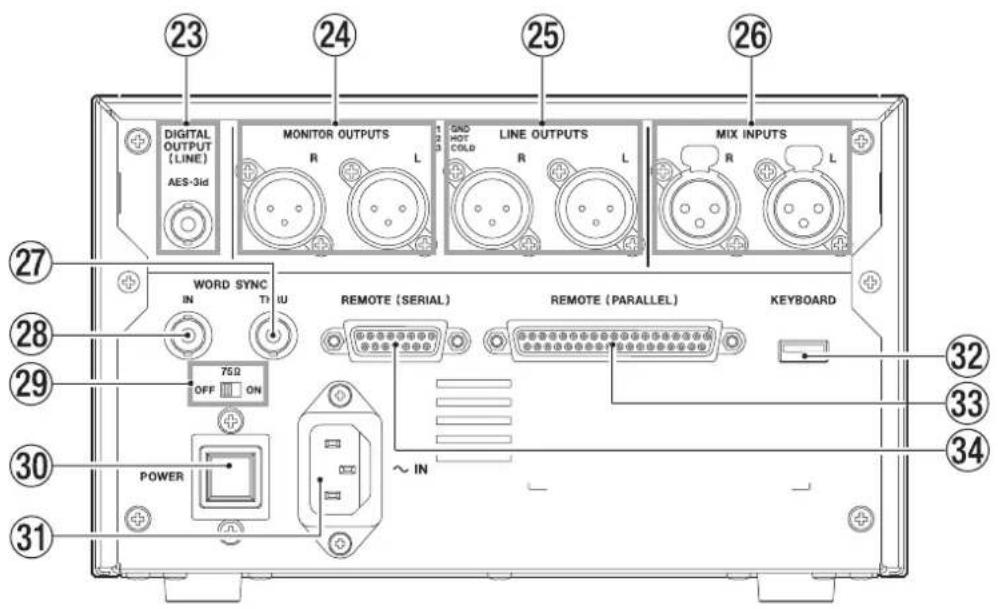
②3 DIGITAL OUTPUT
This is an AES-3id digital output.
The digital output signal depends on the master clock setting. (See "Setting the master word clock" on page 43.)
⑳ MONITOR OUTPUTS (R/L) (balanced)
These balanced analog XLR outputs can be connected to a monitoring system.
The nominal output level is +4 dBu (or +6 dBu only when the maximum output level is +15 dBu).
(1: GND, 2: HOT, 3: COLD)
⑲ LINE OUT OUTPUTS (R/L) (balanced)
These are balanced analog XLR outputs.
The default nominal output level is +4 dBu (+6 dBu only when the maximum output level is +15 dBu), but can be set to -20 dBu.
(1: GND, 2: HOT, 3: COLD)
②6 MIX INPUTS (R/L) (balanced)
These balanced analog XLR inputs are used for mix input with a nominal output level of +4 dBu.
(1: GND, 2: HOT, 3: COLD)
Signals input here are mixed with the playback signal from the CD or CF card and output from the LINE OUTPUTS.
Even when the power is off, signals input here will be output unchanged through the LINE OUTPUTS.
⑳ WORD SYNC THRU
The input word clock signal is thru output from this connector, allowing it to be sent to other digital devices.
⑳ WORD SYNC IN
Input a word clock signal through this connector. When this unit is set to use an external clock (EXT), the word clock input through this connector is used.
⑲ 75Ω (ON/OFF) switch
Turns the 75Ω word clock terminator ON or OFF.
③0 POWER switch
Turns the power ON or OFF.
CAUTION
Before turning on the power, turn down the volume of other equipment connected to this unit. Failure to do so might cause sudden loud sounds, which could harm your hearing or result in other trouble.
③1 AC IN connector
Connect the included power cord here.
③2 KEYBOARD connector
Connect a USB keyboard here.
By default, the unit is set to use a Japanese keyboard. To use a US English keyboard, which is arranged differently from Japanese keyboards, change the setting in the SYSTEM menu. (See "Setting the keyboard language" on page 47.)
CAUTION
Do not connect any USB device other than a USB keyboard here.
③3 REMOTE (PARALLEL)
This D-sub 37-pin I/O connector is for parallel control. Use it for external control, including fader starting. (See "Using the parallel connector" on page 50.)
③4 REMOTE (SERIAL)
This D-Sub 15-pin I/O connector is for serial control. Connect a TASCAM RC-9010/RC-9010S remote control (sold separately) here.
2 – Names and Functions of Parts
Home Screen
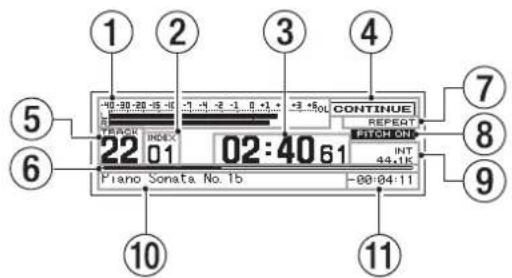
The following information is shown on the display of the unit.
Home Screen with audio CD
Home Screen with data CD or CF card
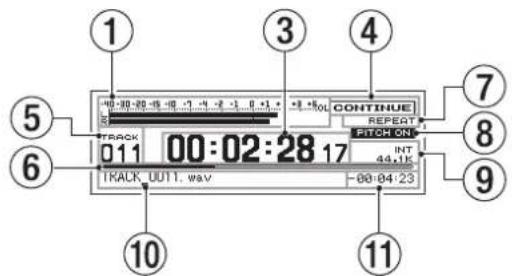
① Playback level meters
These show the playback level.
If you press the ST/MONO button to light the MONO indicator, only one level bar will be shown and the indicator on the left end will change from LR to 3M, 6M,L, or R, depending to the SYSTEM menu MON MIX item setting. (See "Mono mix setting" on page 43.)
Even when set to ST, if a mono WAV file is played back, the display will change to M and a single level bar will be shown. If you switch the SYSTEM menu METER TYPEItem to UU from PEAK, the display will change to a VU-type meter display. (See "Setting the level meter display type" on page 44.)
② Index
This shows the currently playing or selected index number (audio CD only).
③ Track time display (main area)
This shows the time of the current track.
The contents depend on the playback media.
| Media Contents shown | |
| Audio CD Minutes, seconds, frames | |
| Data CD | Hours, minutes, seconds, frames |
| CF card | |
Pressing the TIME DISPLAY button switches between elapsed time display and remaining time display.
A “-” appears before the remaining time when shown. When an EOM tally signal is being output, the “:” blinks. (See "EOM functions" on page 27)
④ Playback mode
Shows the current playback mode.
| Indicator Meaning | |
| CONTINUE | Continuous playback mode |
| SINGLE | Single playback mode |
| PROGRAM | Program playback mode |
⑤ Track number
Shows the current track number.
⑥ Track playback position
Shows the current playback position as a bar. As playback proceeds, the bar extends from the left.
⑦ Repeat playback function indicator
This shows the ON/OFF status of the repeat playback function.
| Indicator Meaning | |
| No indicator Repeat playback function is OFF | |
| REPEAT | Repeat playback function is ON |
| REPEAT A- | A-B repeat playback function starting point set |
| REPEAT A-B | A-B repeat playback function is ON |
NOTE
The A-B repeat playback function will only be displayed if selected using a TASCAM RC-9010/RC-9010S remote controller (sold separately).
⑧ PITCH indicator
The PITCH ONindicator appears if the pitch control function is on.
⑨ Master clock indicator
This shows the current master clock.
| Indicator Meaning | |
| INT | Unit's internal clock in use |
| EXT | Synchronized with the word clock input through the WORD SYNC IN connector |
| EXT NO CLK | No signal input through the WORD SYNC IN connector |
| EXT UNLOCK | WORD SYNC IN connector input signal unlocked |
| EXT (blinking) | Synchronization with word clock input through the WORD SYNC IN connector possible (after playback completes, the unit will automatically resynchronize with the word clock) |
| 44.1K | Master clock frequency is 44.1 kHz |
| 48K | Master clock frequency is 48 kHz |
⑩ Information area
CD-TEXT will be shown if available.
File names will be shown when using data CDs and CF cards. When the playback mode is set to PROGRAM, information for the next program item is shown.
The time of the current track is shown. When the main display area shows the elapsed time, this shows the remaining time, and vice versa.
A “-” appears before the remaining time when shown.
Menu structure
Press the MENU button to show the MENU screen.
| MENU | |
| 1 | PLAY 1 AUTO CUE |
| 2 | PROGRAM/CUE 2 AUTO CUE LEVEL |
| 3 | REMOTE 3 AUTO READY |
| 4 | CF 4 INCREMENTAL PLAY |
| 5 | SYSTEM 5 ONLINE BACK CUE |
| 6 | INFORMATION 6 PLAY KEY FUNCTION |
The menu has six submenus.
| 1 PLAY Settings related to playback |
| 2 PROGRAM/CUE Settings related to program playback and cue point |
| 3 REMOTE Settings related external remote settings |
| 4 CF Settings related to CF-specific operations |
| 5 SYSTEM Settings related to the unit's system. |
| 6 INFORMATION Settings related to media information and the system version, and operating time confirmation. |
The submenu items are as follows.
| Main menu item Sub | menu item Function/Setting | Reference | |||
| 1 | PLAY | 1 | AUTO CUE | Auto Cue P. 23 | |
| 2 | AUTO CUE LEVEL | Auto Cue level | P. 23 | ||
| 3 | AUTO READY | Auto Ready | P. 24 | ||
| 4 | INCREMENTAL PLAY | Incremental playback | P. 24 | ||
| 5 | ONLINE BACK CUE | Online back cue function | P. 25 | ||
| 6 | PLAY KEY FUNCTION | Function of PLAY and MONITOR buttons when online OFF | P. 25 | ||
| 7 | MONITOR PLAY STBY | STANDBY button function during monitoring playback | P. 26 | ||
| 8 | ONLINE PLAY STBY | STANDBY button function during online playback | P. 26 | ||
| 9 | REPEAT | Repeat playback function | P. 26 | ||
| 10 | EOM | EOM function | P. 27 | ||
| 11 | END CHECK | END CHECK function | P. 27 | ||
| 12 | PITCH | Pitch control function | P. 28 | ||
| 13 | PITCH % | Pitch control value | P. 28 | ||
| 14 | PITCH/TIME FIT | Time and pitch control playback | P. 28 | ||
| 2 | PROGRAM/CUE | 1 | PROGRAM EDIT | Edit programs | P. 29 |
| 2 | PROGRAM IMPORT | Import programs from a CF card | P. 31 | ||
| 3 | PROGRAM EXPORT | Export programs to a CF card | P. 31 | ||
| 4 | CUE LIST EDIT | Edit cue lists | P. 31 | ||
| 5 | CUE LIST IMPORT | Import cue lists from CF cards | P. 34 | ||
| 6 | CUE LIST EXPORT | Export cue lists to CF cards | P. 34 | ||
| 7 | CUE POINT LOAD | Cue point loading | P. 34 | ||
| 3 | REMOTE | 1 | FADER MODE | Fader function for TASCAM RC-9010/RC-9010S or other external remote (sold separately) | P. 48 |
| 2 | FADER START MODE | Fader start function for TASCAM RC-9010/RC-9010S or other external remote (sold separately) | P. 48 | ||
| 3 | FADER STOP MODE | Fader stop function for TASCAM RC-9010/RC-9010S or other external remote (sold separately) | P. 48 | ||
| 4 | FADER STOP ACT | Fader stop function action | P. 49 | ||
| 5 | FADER SCALE | Fader scale switching | P. 49 | ||
| 6 | OPERATION PANEL | Panel lock function | P. 20 | ||
| 7 | P.PORT P3/13 A5GN | Parallel remote connector 3-pin and 13-pin functions | P. 50 | ||
| 8 | SERIAL BAUD RATE | Serial remote connector transmission speed (baud rate) | P. 49 | ||
2 – Names and Functions of Parts
| Main menu item Sub | menu item Function/Setting | Reference | |||
| 4 | CF | 1 | FORMAT (Quick) | Quickly format a CF card P. 39 | |
| 2 | FORMAT (Full) | Fully format a CF card P. 39 | |||
| 3 | RIP CD | Copy a CD to a CF card P. 40 | |||
| 5 | SYSTEM | 1 | DIGITAL REF LVL | Digital reference level P. 41 | |
| 2 | ANALOG REF LVL | Analog output reference level P. 41 | |||
| 3 | ANALOG REF ADJ L | Adjust the analog output reference level of the L channel P. 42 | |||
| 4 | ANALOG REF ADJ R | Adjust the analog output reference level of the R channel | P. 42 | ||
| 5 | ONLINE FUNCTION | Online function P. 42 | |||
| 6 | CLOCK MASTER | Master clock | P. 43 | ||
| 7 | MONO MIX | Mono playback | P. 43 | ||
| 8 | METER TYPE | Meter display | P. 44 | ||
| 9 | FAIL SAFE | Fail-safe function | P. 44 | ||
| 10 | MONITORING POINT | Set monitoring output to before or after the online fader | P. 45 | ||
| 11 | MON MUTE ONLINE | Set automatically mute monitoring during online playback | P. 45 | ||
| 12 | LCD BRIGHTNESS | Display brightness | P. 18 | ||
| 13 | LCD CONTRAST | Display contrast | P. 18 | ||
| 14 | LED BRIGHTNESS | Indicator brightness | P. 18 | ||
| 15 | KEYBOARD | Keyboard type | P. 47 | ||
| 16 | CLOCK ADJUST | Built-in clock adjustment | P. 17 | ||
| 17 | MENU IMPORT | Import and apply MENU settings saved on a CF card | P. 45 | ||
| 18 | MENU EXPORT | Save MENU settings to a CF card | P. 45 | ||
| 19 | FACTORY PRESET | Restore factory settings | P. 46 | ||
| 6 | INFORMATION | 1 | MEDIA INFO | Show information about the media in the current device | P. 46 |
| 2 | SYSTEM INFO | Check the system version and operating time | P. 46 | ||
Menu operation basics
You can perform the following operations using the MENU screen.
To select an item (vertically on the screen)
• Turn the DATA dial.
The selected menu item appears as light letters on a dark background (highlighted in inverse).
To confirm the selected item
- Press the DATA dial.
To go back one menu level
- Press the MENU button.
To return directly to the Home screen from the Menu screen
- Press the HOME button.
NOTE
If there are items above or below the currently displayed items in the list, ▲ and/or ▼ will be shown at the top and/or bottom of the list.
Menu operation procedures
This example explains how to set the auto ready function.
- Press the MENU button to open the MENU screen.
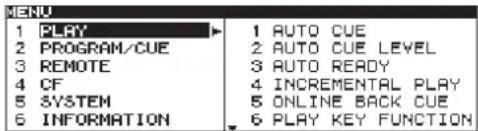
- Turn the DATA dial to select PLAY, and press the DATA dial to open the PLAY menu.
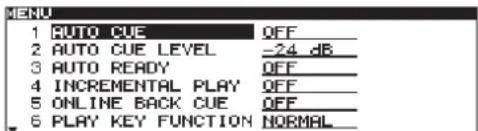
- Turn the DATA dial to select AUTO READY and press the DATA dial to highlight the setting value.
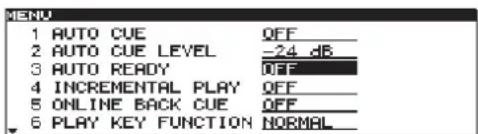
- Turn the DATA dial to set the AUTO READY item ON or OFF.
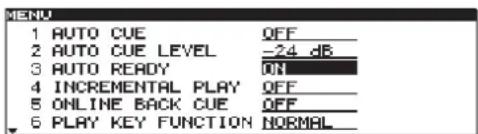
-
Press the DATA dial to return to the PLAY menu screen.
-
Repeat steps 3–5 as necessary to set other items.
-
To change a menu item or a setting item, press the MENU button to show submenu items and return to step 1.
-
To change the selected setting item, turn the DATA dial.
-
Press the HOME button to return to the Home screen.
Turning the power ON and OFF
Press the POWER switch on the rear panel to turn the power ON.
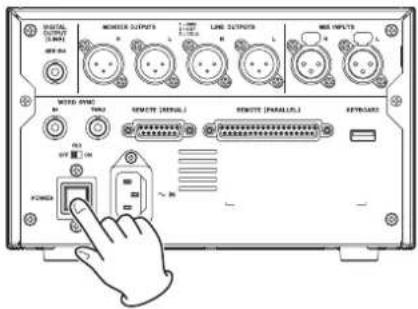
Startup screen
Home Screen
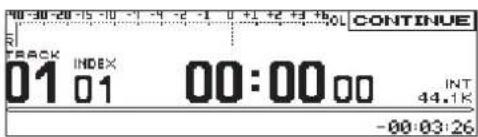
The unit starts and the startup screen appears.
If no media has been loaded in the current device, the screen shows NO MEDIA
If media has been loaded in the current device, the screen shows MEDIA READING while the unit reads the media. When this process is complete, the Home Screen is displayed.
Turning the power OFF
Press the POWER switch to turn the power OFF. No special shutdown procedures are necessary.
CAUTION
Do not turn the power OFF when the unit is in use (recording, playing back, writing data to a CF card, etc.). Doing so could cause data transfers to fail, corruption of data, sudden loud noise to be emitted from monitoring equipment, damage to equipment and harm to hearing.
Setting the date and time
The internal clock is used to add the date and time to files ripped to CF cards.
- Press the MENU button to open the MENU screen.
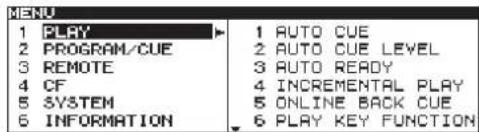
- The SYSTEM menu screen appears.
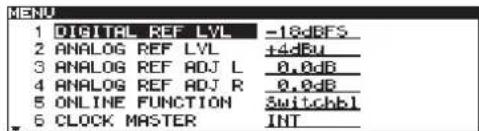
- Select CLOCK ADJUST.
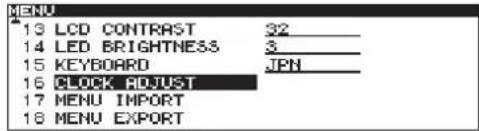
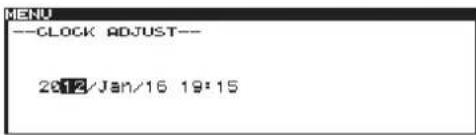
- Press the DATA dial to open the CLOCK ADJUSTscreen.
-
Follow these procedures to change the date and time.
-
Press the DATA dial to cycle through the year, month and date and select the item to set.
-
Turn theDATA dial to change the selected item.
-
After completing the setting, press the DATA dial to confirm the set date and time and return to the SYSTEM menu screen.
-
Press the HOME button to return to the Home Screen.
Adjusting the display
You can adjust the display contrast and brightness as necessary.
Adjusting display contrast
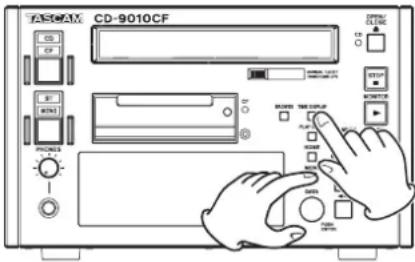
When the Home Screen is open, use the TIME DISPLAY button and DATA dial to adjust the display contrast.
You can also use SYSTEM menu's LCD CONTRAST to adjust it.
NOTE
- This operation only adjusts the contrast of this unit. It does not adjust the contrast of a connected TASCAM RC-9010/RC-9010S remote control (sold separately).
- The display contrast setting is retained even when the power is OFF.
Setting using the controls
With the Home Screen open, while pressing and holding the TIME DISPLAY button, turn the DATA dial to adjust the unit's display contrast.
Setting using the menu
- Press the MENU button to open the MENU screen.
- Open the SYSTEM menu.
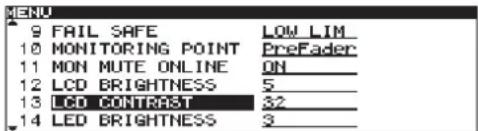
- Select LCD CONTRAST.
-
Press the DATA dial to move the cursor (selected area) right to select the value.
-
Turn the DATA dial to adjust the contrast.
- Options:8–63 (default value: 32)
- Press the HOME button to return to the Home Screen.
Adjusting display and indicator brightness
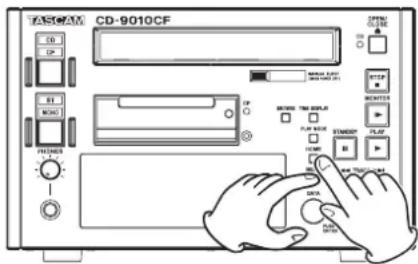
When the Home Screen is open, use the HOME button and DATA dial to adjust the brightness of the display backlight and the indicators.
You can also use the SYSTEM menu screen LCD BRIGHTNESS and LED BRIGHTNESS items to adjust them.
NOTE
• These operations only adjust the brightness and contrast of the display and indicators of this unit. They do not adjust the brightness and contrast of a connected TASCAM RC-9010/RC-9010S remote control (sold separately).
- The display and indicator BRIGHTNESS settings are retained even when the power is turned OFF.
Setting using the controls
When the Home Screen is open, while pressing and holding the HOME button, turn the DATA dial to adjust the brightness of the unit's display and indicators.
You can also adjust the brightness of the display alone by pressing and turning the DATA dial while pressing and holding the HOME button.
Setting using the menu
- Press the MENU button to open the MENU screen.
- Open the SYSTEM menu.
- Select LCD BRIGHTNESSorLED BRIGHTNESS
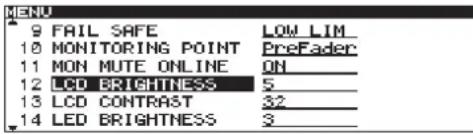
- Press the DATA dial to move the cursor (selected area) right to select the value.
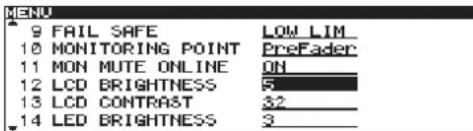
- Turn the DATA dial to adjust the brightness.
• LCD options:8-7 (default value:5)
• LED options:0-7 (default value:3)
- Press the HOME button to return to the Home Screen.
Inserting and ejecting CF cards
Inserting CF cards
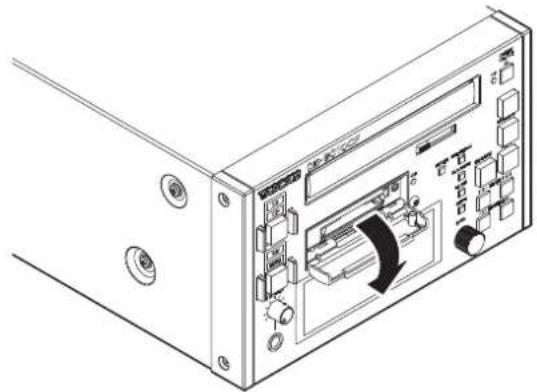
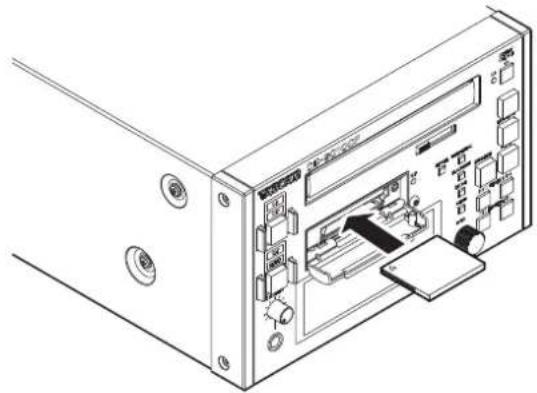
Insert a CF card into the card slot on the front panel to use it for playback and ripping.
NOTE
You can insert CF cards whether the power is ON or OFF.
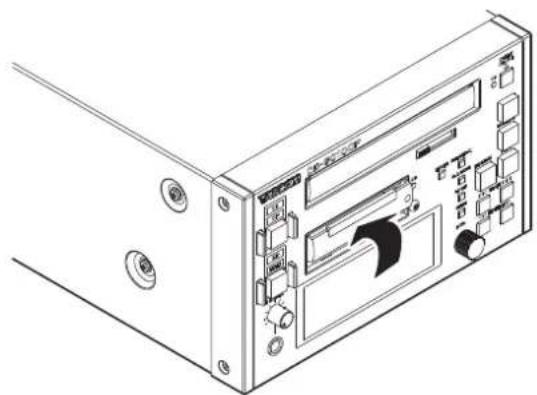
- Pull the card slot door forward to open it.
natural_image
Technical line drawing of a computer rack unit with internal components and a directional arrow indicating motion (no text or symbols)- Insert the CF card with the label facing up and the contacts facing in.
natural_image
Technical line drawing of an internal device casing with ports and connectors (no text or symbols)- Close the card slot door.
natural_image
Technical line drawing of a computer rack unit with ports and control panel (no text or symbols)Ejecting CF cards
Either turn the power off, OR stop all operations before ejecting a CF card.
CAUTION
Never remove a CF card when the unit is in use (playing back, writing data to the card, etc.). Doing so could cause ripping to fail, recorded data to be damaged, sudden loud noises to be emitted from monitoring equipment, damage to equipment and harm to hearing.
-
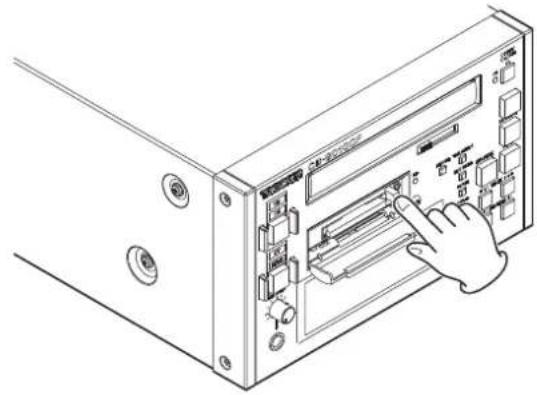
Pull the card slot door forward to open it.
-
To eject a CF card, press the square button located at the right of the card slot. The CF card will be partially ejected.
natural_image
Line drawing of a computer tower internal panel with a hand pointing to the front panel (no text or symbols present)- Pull the CF card out the rest of the way.
Using the security screw
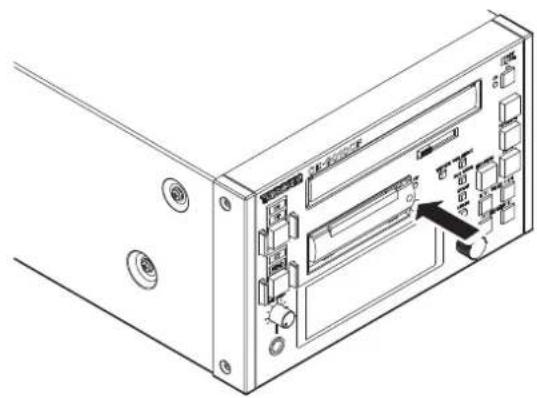
The included security screw can be used to lock the card slot door. Use a Phillips screwdriver to install or remove the security screw.
natural_image
Technical line drawing of a computer tower internal panel with ports and connectors (no text or symbols)Connecting headphones
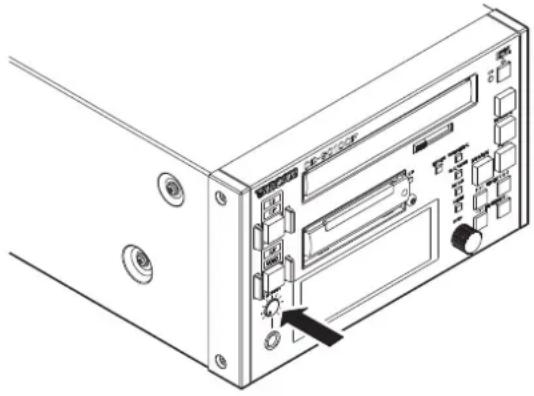
Connect stereo headphones to the PHONES jack on the front panel. Use the PHONES knob to adjust the headphones output level.
CAUTION
Before connecting headphones, use the PHONES knob to lower the volume. Failure to do so might result in sudden loud sounds, which could harm your hearing or result in other trouble.
NOTE
The PHONES knob can be pushed in to prevent the level from being accidentally changed. The knob can be used when out.
natural_image
Technical line drawing of a computer rack unit with ports and control panel (no text or symbols)The PHONES knob when pushed in
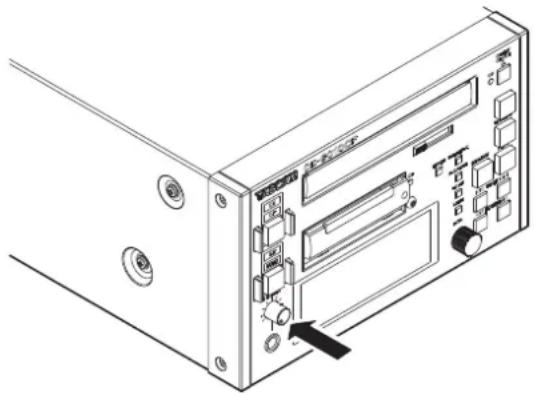
natural_image
Technical line drawing of a computer tower rear panel with ports and control buttons (no text or symbols)The PHONES knob when out
Setting the panel lock function
The unit can be set so that it can only be operated using a TASCAM RC-9010/RC-9010S remote control (sold separately).
- Press the MENU button to open the MENU screen.
- Open the REMOTE menu screen.
- Select OPERATION PANEL,
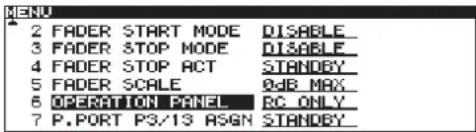
- Press the DATA dial to move the cursor (selected area) right to select the setting.
-
Turn the DATA dial to set whether or not you can use the front panel controls to control the unit.
-
CD+RC: The unit can be controlled using a TASCAM RC-9010/RC-9010S remote control (sold separately) and the unit's front panel buttons.
-
RC ONLY(default value): When a TASCAM RC-9010/RC-9010S remote control (sold separately) is connected, the unit's front panel buttons (other than the OPEN/CLOSE, CD/CF and ST/MONO buttons) are disabled.
-
After completing the setting, press the HOME button to return to the Home Screen.
NOTE
- When a remote is not connected, even when this item is set to RC ONLY, the panel controls will not lock.
- To unlock the panel, press the MENU button, while pressing and holding the HOME button. When the "OPERATION PANEL Change to CD+RC?" pop-up message appears, select "Yes" to unlock the panel.
- You can also lock the panel controls by pressing the MENU button while pressing and holding the HOME button. When the pop-up message appears, select "Yes".
- The panel lock function setting is stored even when the power is turned OFF.
Monitoring and online playback
This unit has two playback modes: monitoring playback and online playback. The outputs for the two playback modes can be set to be independent of each other.
For example, you can use the monitoring playback mode for broadcast use and on location to cue tracks and playback points in advance to prepare for online playback from those points.
Monitoring playback
The SYSTEM menu ONLINE FUNCTIONItem must be set to SWITCH. OK to enable monitoring playback. (See "Setting the online function" on page 42.)
NOTE
- If set as above, pushing the PLAY button will output the playback signal to the monitoring destination.
• If set as above, the playback signal will be output to the monitoring destination when jogging and searching.
Starting monitoring playback
When stopped, in playback standby or during jog playback, press the MONITOR button.
Status of outputs
| Output Status | |
| DIGITAL OUTPUT Off | |
| LINE OUTPUTS Off | |
| MONITOR OUTPUTS On |
Online playback
The SYSTEM menu screen ONLINE FUNCTIONitem must be set to AlwaysON to enable online playback. (See "Setting the online function" on page 42.)
Starting online playback
When in playback standby, monitoring playback or during jog playback, press the PLAY button.
Status of outputs
| Output Status | |
| DIGITAL OUTPUT On | |
| LINE OUTPUTS On | |
| MONITOR OUTPUTS Off |
NOTE
Set the SYSTEM menu MON MUTE ONLINE item to OFF to always send the signal through the MONITOR OUTPUTS. (See "Muting monitoring when online" on page 45.)
Setting the playback mode
Tracks on the current device can be played using one of the following three playback modes.
Continuous playback mode (default setting)
- The CONTINUE indicator appears in the playback mode area of the Home Screen.
- The tracks on the current device are played in track number order.
Single playback mode
- The SINGLE indicator appears in the playback mode area of the Home Screen.
- Only the currently selected track is played before playback stops.
Program playback mode
- The PROGRAM indicator appears in the playback mode area of the Home Screen.
- Tracks will be played in the order programmed in advance. (See "Program playback" on page 29.)
The current playback mode appears in the playback mode area of the Home Screen.
Use the PLAY MODE button to set the playback mode.
Press this button to cycle through the playback modes in the following order.
→ CONTINUE mode → SINGLE mode → PROGRAM mode —
NOTE
- In this manual, unless otherwise specified, explanations assume that the playback mode is set to CONTINUE (continuous playback mode).
- The playback mode setting is retained even when the power is turned OFF.
Playing a track once from the beginning
Follow these steps to select and check the desired track (monitoring playback), and then play it through the main outputs (online playback). These procedures assume that all menu items are at their default settings.
- Press the PLAY MODE button to select single mode.
- Press thePLAY MODE button as many times as necessary until the SINGLE playback mode indicator appears on the Home Screen.
- Press the MENU button to open the MENU screen, and set AUTO CUE in the PLAY menu to ON.
- Press the HOME button to open the Home Screen.
- Use the TRACK ◀◀◀/▶▶1 buttons to select a track for playback.
- The unit enters playback standby at the position where an audio signal is detected in the selected track (and the STANDBY button lights).
NOTE
When the playback mode is set to CONTINUE or SINGLE, you can use the number buttons (0 through 9) to select tracks. Enter two digits for audio CDs or three digits for data CDs or CF cards. (For example, press the 0 button followed by the 2 button to select track 2 on an audio CD.)
- To check the playback signal, press the MONITOR button to start monitoring playback (the MONITOR button lights).
- In addition to using an external monitoring system, you can also monitor the playback signal using headphones connected to the unit's PHONES jack.
- After checking the signal, press the STANDBY button.
- The playback position is set to the point where the track starts and the unit enters playback standby mode (the STANDBY button lights).
-
Press the PLAY button to start online playback.
-
When the track ends, the unit re-enters playback standby.
- Press the STOP button to stop playback immediately.
Playing a track from the middle
Follow these steps to find a point in the middle of a track and start playback from the main outputs from that point.
- When stopped or during playback standby, you can search within a track using the SEARCH ◀◀/▶▶ buttons to locate a desired point and put the unit in playback standby there. (See "Searching within tracks" on page 23.)
- At the desired playback point, press the MONITOR button to start monitoring playback and check it.
- After checking, press the STANDBY button to return to the point set earlier and start online playback standby (STANDBY button lights).
• To adjust the set point, return to step 1.
- Press the PLAY button to start online playback.
When the track ends, the unit will enter playback standby mode.
NOTE
Press the STOP button to stop playback immediately.
Automatic cue point memory (last cue)
When you start monitoring playback from a stopped or playback standby state, the starting position is automatically memorized as a cue point.
The most recently added cue point is the "last cue point". Press the STANDBY button to locate to the last cue point (where monitoring playback last started) and enter playback standby.
NOTE
- When using a TASCAM RC-9010/RC-9010S remote control (sold separately), you can assign automatic cue points to the number (0–9) buttons.
- In jog mode, pressing the STANDBY button saves the current position as a cue point.
Setting the playback point
Selecting tracks
Use the TRACK I◄◄/►►1 buttons to select tracks.
button
Press to move to the start of the current track when the elapsed time of the current track is greater than one second. When the elapsed time is less than one second, press this to skip to the beginning of the previous track.
▶▶| button
Press to skip to the beginning of the next track. Press again to skip to the beginning of the track after that.
NOTE
- When in program playback mode, tracks will be skipped in the program order.
- When at the beginning of the first track, press the ◀◀◀ button to skip to the beginning of the last track. When at the beginning of the last track, press the ▶▶▶1 button to skip to the beginning of the first track.
Operation after selection of a track
When the TRACK I◄◄/►►1 buttons are used to select a track, what happens next depends on the unit's status and auto cue function setting. (See "Auto cue function" on page 23.)
When Auto Cue is ON
The unit enters playback standby at the first position within the track where the signal reaches the level set using the PLAY menu AUTO CUE LEVELitem.
When Auto Cue is OFF
The unit enters playback standby at the beginning of the track.
Searching within tracks
When playback is stopped, the unit is in playback standby, or during monitoring or jog playback, press and hold the SEARCH ◀◀/▶▶ buttons to search for a cue point.
While pressing one of the SEARCH ▶▶ or ◀◀ buttons to search within a track, you can change the search speed by pressing the other SEARCH ◀◀/▶▶ button.
Auto cue function
If the auto cue function is ON, and you select a track for playback, any "silence" at the beginning of the track will be skipped, and the unit will enter playback standby at the first point where the track's "signal" is audible. As a result, sound will be heard immediately when playback starts.
NOTE
- When using the cue function, the Auto Cue function is disabled.
- If a track is selected when AUTO CUE is ON, the unit enters playback standby at the first point where the track is audible.
- The AUTO CUE function setting is retained even when the power is turned OFF.
You can specify the threshold level (AUTO CUE LEVEL) used to detect the audio signal when the Auto Cue function is activated. In other words, any signal higher than the AUTO CUE LEVEL will be treated as "signal," and any signal lower than this level will be treated as "silence."
- Press the MENU button to open the MENU screen.
- Open the PLAY menu.
- Select AUTO CUE.
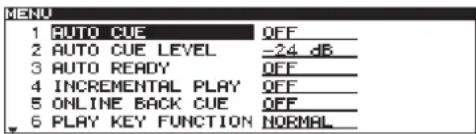
- Press the DATA dial to move the cursor right to select the setting.
- Turn the DATA dial to set the value to ON (default is OFF).
- Press the DATA dial to move the cursor to the left, and return to menu item selection.
- Select AUTO CUE LEVEL
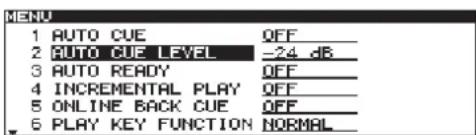
- Press the DATA dial to move the cursor right to select the setting.
- Turn the DATA dial to set the desired auto cue level.
- Values:-24 dB to -72 dB (6 dB steps, default-24 dB)
- After setting the value, press the HOME button to return to the Home Screen.
Auto ready function
If the auto ready function is ON, when a track finishes playing, playback standby will occur at the beginning of the next track.
- Press the MENU button to open the MENU screen.
- Open the PLAY menu screen.
- Select AUTO READY
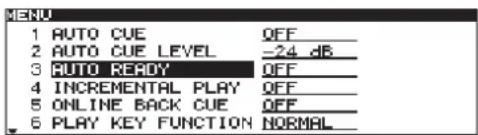
- Press the DATA dial to move the cursor right to select the setting.
- Turn the DATA dial to set the value to ON (default is OFF).
- After setting the value, press the HOME button to return to the Home Screen.
NOTE
- If the auto cue function is set to ON, the unit enters playback standby at the point where sound starts in the next track rather than at the very beginning of the track.
- The auto ready function setting is retained even when the power is turned OFF.
Incremental playback function
When the incremental playback function is ON, and the unit is playing back, you can use the PLAY button to start playback from the beginning of the next track or the STOP button to enter playback standby at the beginning of the next track.
- Press the MENU button to open the MENU screen.
- Open the PLAY menu screen.
- Select INCREMENTAL PLAY
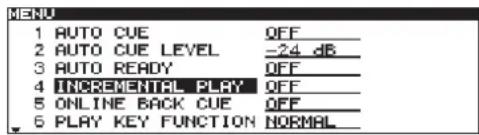
- Press the DATA dial to move the cursor right to select the setting.
- Turn the DATA dial to set the value to ON (default is OFF).
- After setting the value, press the HOME button to return to the Home Screen.
NOTE
- When the incremental playback function is set to ON and the unit is in playback standby mode, pressing the PLAY button will start playback from that position. In playback standby, pressing the STOP button will stop playback.
- When the last track of the current device is being played, pressing PLAY starts playback of the first track on the current device media. Pressing STOP pauses at the beginning of the first track on the current device.
- The incremental playback function setting is retained even when the power is turned OFF.
ONLINE BACK CUE function
If this function is on, when the ON LINE button is turned OFF on a connected TASCAM RC-9010/RC-9010S remote control (sold separately), the unit immediately enters playback standby at the last cue point (the last point where monitoring playback started).
- Press the MENU button to open the MENU screen.
- Open the PLAY menu screen
- Select ONLINE BACK CUE
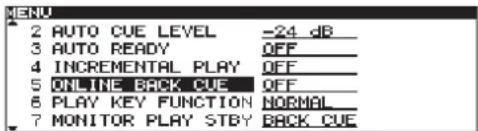
- Press the DATA dial to move the cursor right to select the setting.
- Turn the DATA dial to set the value to ON (default is OFF).
- After setting the value, press the HOME button to return to the Home Screen.
NOTE
The ONLINE BACK CUE function setting is retained even when the power is turned OFF.
PLAY KEY FUNCTION setting
When the ON LINE button is turned OFF on a connected TASCAM RC-9010/RC-9010S remote control (sold separately), the PLAY button operates as described below.
When set to Normal
Pressing the PLAY button during playback has no effect. If INCREMENTAL PLAVIS set to ON, however, pressing the PLAY button during playback allows incremental playback.
When set to Back Cue
If the incremental play function is OFF, pressing the PLAY button skips to the last cue point and continues playback. Pressing the PLAY button in this case activates monitoring playback (monitoring outputs ON, line outputs OFF).
- Press the MENU button to open the MENU screen.
- Open the PLAY menu screen.
- Select PLAY KEY FUNCTION
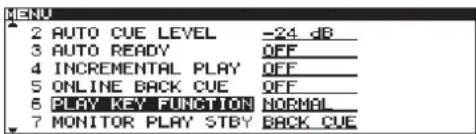
- Press the DATA dial to move the cursor right to select the setting.
- Turn the DATA dial to set the function when online playback mode is OFF (default is OFF).
Values are NORMAL (default value) and BACK CUE.
- After setting the value, press the HOME button to return to the Home Screen.
NOTES
- Similar operation is possible using the MONITOR button.
- The PLAY KEY FUNCTION setting is retained even when the power is turned OFF.
MONITOR PLAY STBY function
You can set how the STANDBY button functions during monitoring playback.
- Press the MENU button to open the MENU screen.
- Open the PLAY menu screen
- Select MONITOR PLAY STBY
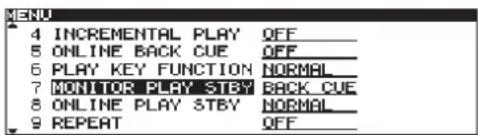
- Press the DATA dial to move the cursor right to select the setting.
- Turn the DATA dial to set the STANDBY button function during monitoring playback.
• NORMAL: Start playback standby at that point
- BACK CUE(default value): Pause and enter playback standby mode at the last cue point
6. After setting the value, press the HOME button to return to the Home Screen.
NOTE
The MONITOR PLAY STBY setting is retained even when the power is turned OFF.
ONLINE PLAY STBY function
You can set how the STANDBY button functions during online playback.
- Press the MENU button to open the MENU screen.
- Open the PLAY menu screen
- Select ONLINE PLAY STBY
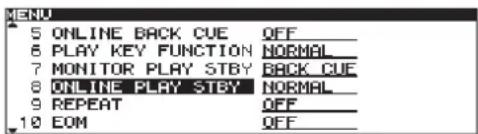
- Press the DATA dial to move the cursor right to select the setting.
-
Turn the DATA dial to set the function of the STANDBY button during online playback
-
NORMAL (default value): If the playback mode is CONTINUE or SINGLE, start playback standby at that point. If the playback mode is PROGRAM, start playback standby at the beginning of the next track.
-
BACK CUE Pause and start playback standby at the last cue point.
-
After setting the value, press the HOME button to return to the Home Screen.
NOTE
The ONLINE PLAY STBY setting is retained even when the power is turned OFF.
Repeat playback
You can repeatedly play back all tracks on the media in the current device.
Ordinary repeat playback
When the repeat playback function is ON, depending on the current playback mode, the following will occur:
• CONTINUE: the entire disc is played back repeatedly
• SINGLE: the current track is played back repeatedly
• PROGRAM: the entire program is played back repeatedly
- Press the MENU button to open the MENU screen.
- Open the PLAY menu screen.
- Select REPEAT.
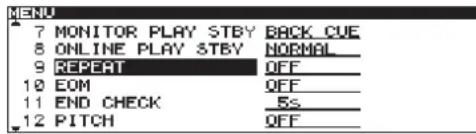
- Press the DATA dial to move the cursor right to select the setting.
- Turn the DATA dial to set the value to ON (default is OFF).
- After completing the setting, press the HOME button to return to the Home Screen.
To turn repeat playback OFF
- Set the PLAY menu REPEAT item to OFF.
NOTE
The repeat playback setting is retained even when the power is turned OFF.
EOM functions
You can set the unit to output EOM tally signals from the CONTROL I/O PARALLEL connector when the remaining time on the track is less than the time set here using the EOM function.
Setting EOM tally output trigger
Set the track remaining time that triggers output of an EOM tally signal.
- Press the MENU button to open the MENU screen.
- Open the PLAY menu screen.
- Select EOM.
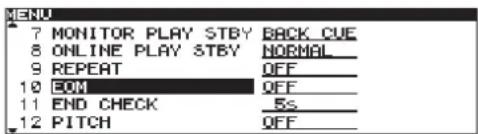
- Press the DATA dial to move the cursor right to select the setting.
- Turn the DATA dial to set the track remaining time to trigger the EOM tally.
- Options: OFF (default value), 0s, 5s–35s (in 5-second increments)
NOTE
If EOM TRACK is set to 0s, when the track ends, a pulse of about 100 ms will be output.
5. After completing the setting, press the HOME button to return to the Home Screen.
NOTE
The EOM function setting is retained even when the power is turned OFF.
How to use the EOM
- Connect the device that will receive the EOM tally signal to the REMOTE (PARALLEL) connector.
- Turn ON the power of this unit and the receiving device.
- Begin playback from this unit.
- When the remaining time of the current track falls below the specified time, an EOM tally signal is output from the REMOTE (PARALLEL) connector.
While the EOM tally signal is being output, the "": in the Home Screen track time display (main display area) blinks.
Checking the ends of tracks
To check how tracks end, turn the END CHECK function ON.
Setting the amount of time checked
Set the time before the end of the track when checking starts.
- Press the MENU button to open the MENU screen.
- Open the PLAY menu screen.
- Select END CHECK
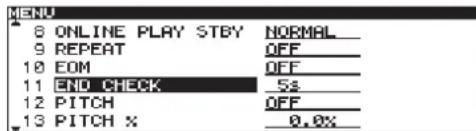
- Press the DATA dial to move the cursor right to select the setting.
- Turn the DATA dial to set the time before the end of the track that checking starts.
Options: 5 (default value) -35 (in 5 second increments)
- After completing the setting, press the HOME button to return to the Home Screen.
NOTE
The END CHECK function setting is retained even when the power is turned OFF.
How to use the end check function
When using a TASCAM RC-9010/RC-9010S remote control (sold separately), press the TRACK/[END CHK] button while pressing and holding the SHIFT button to locate to a point at the set number of seconds before the end of the currently selected track and start monitoring playback.
After playback of the last part of the track completes, the unit enters playback standby mode at the last cue point.
Pitch control playback
You can modify the pitch and speed of the playback, following the procedures here.
Turning pitch control playback ON/OFF
- Press the MENU button to open the MENU screen.
- Open the PLAY menu screen.
- Select PITCH.
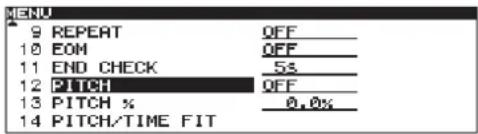
- Press the DATA dial to move the cursor right to select the setting.
- Turn the DATA dial to set pitch control ON or OFF (default isOFF).
- After completing the setting, press the HOME button to return to the Home Screen.
NOTE
When you turn pitch control playback ON or OFF during playback, the playback sound may be momentarily interrupted.
Setting the pitch control value
- Press the MENU button to open the MENU screen.
- Open the PLAY menu screen.
- Select PITCH %.
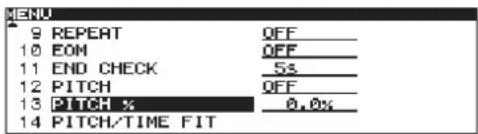
- Press the DATA dial to move the cursor right to select the setting.
- Turn the DATA dial to set the pitch control value.
- You can set the pitch control to ± 12.5% of normal.
- After completing the setting, press the HOME button to return to the Home Screen.
NOTE
- Even when the pitch control function is turned OFF, the pitch control value set above is stored and will be used when the pitch control function is turned ON again.
- The pitch step setting is retained even when the power is turned OFF.
PITCH/TIME FIT function
You can adjust the time remaining of the current track to a defined value and play it back.
The possible setting range corresponds to a pitch control value range of ±12.5% .
This setting can be made when stopped or in playback standby.
- Press the MENU button to open the MENU screen.
- Open the PLAY menu screen.
- Select PITCH/TIME FIT.
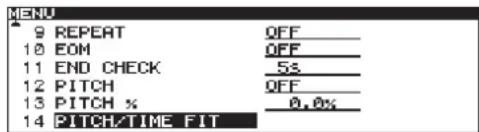
- Press the DATA dial to open the PITCH/TIME FIT screen.
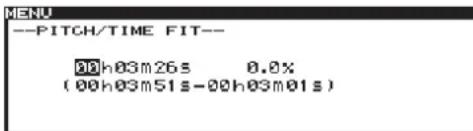
-
Set the playback time as follows:
-
The current track remaining time is shown initially.
- Turn the DATA dial to change the selected item.
-
Press the DATA dial to select the playback time units in hours, minutes and seconds order. The permissible range (maximum and minimum) is shown beneath the input line.
-
After completing the setting, press the DATA dial to confirm the setting.
The setting is saved and reflected in the pitch control value, and the PLAY menu screen re-opens.
- Press the HOME button to return to the Home Screen.
5 – Program and cue playback
Program playback
You can create a program in advance to play up to 99 tracks you want in the desired order.
Program menu operation
Select PROGRAM EDIT and press the DATA dial to open the PROGRAM screen (program list). Select the desired item, and press the DATA dial to open the PROGRAM MENU pop-up with the following options.
ADD PROGRAM
Adds the highlighted track to the program.
DELETE ALL PROGRAM
Removes all tracks from the program.
DELETE PROGRAM
Removes the selected program track.
MOVE
Move the selected program track to a different position in the program order.
CANCEL
Close the PROGRAM MENU without conducting any operation and return to the PROGRAM screen.
Adding tracks to a program
Follow these procedures to set up a program.
- With playback stopped, press the PLAY MODE button and set the playback mode to PROGRAM (See "Setting the playback mode" on page 21.)
- Press the MENU button to open the MENU screen.
- Open the PROGRAM/CUE menu.
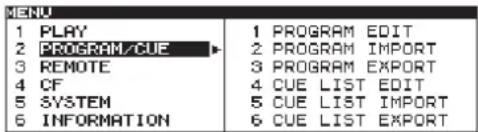
- Select PROGRAM EDIT.
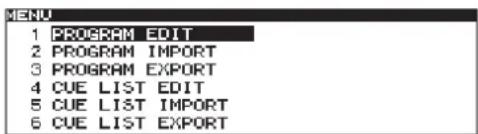
- Press the DATA dial to open the PROGRAM screen.
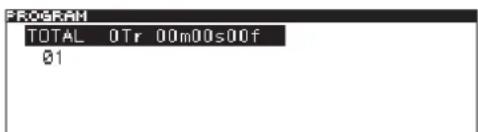
- Turn the DATA dial to select the number in the program where a track will be added, and press the DATA dial to open the PROGRAM menu.
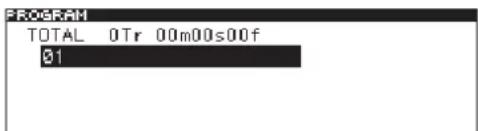
- Turn the DATA dial to select ADD PROGRAM
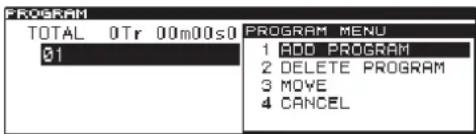
- Press the DATA dial to open the BROWSE (ADD PROGRAM) screen.
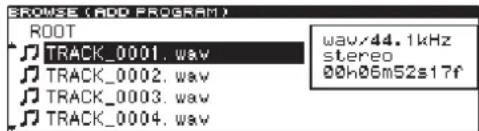
- Turn the DATA dial to program to select a track, and press the DATA dial to add the track to the program.
NOTE
You can create programs that include tracks from both a CD and a CF card. Press the CD/CF button when the BROWSE (ADD PROGRAM) screen is open to switch devices. A program can only include tracks from one CD and one CF card.
- Repeat steps 6–9 to add more tracks to the program as desired.
The screen shows the number of tracks in the program and the total program time.
NOTES
- You can add the same track to the program more than once.
- You can add a maximum of 99 tracks to a program. If you try to program a 100th track, a PROGRAM FULL warning message pop-up appears.
- If the total time of the programmed tracks exceeds 99 hours 59 minutes, 59 seconds, “- - - - -” appears on the display.
- A program can only include tracks from one CD and one CF card. After tracks have been added to a program from one CD (CF card), if you try to add a track using a different CD (CF card), a "-Cannot Program-" message will appear and the track will not be added.
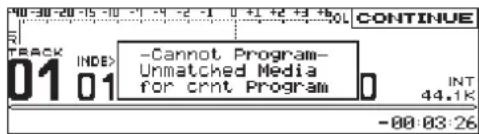
- When you have finished entering tracks to the program, press the HOME button to return to the Home Screen.
- Press the MONITOR button or PLAY button to start program playback.
NOTES
- If you set PROGRAM playback mode but no tracks have been added to the program, the setting will change to CONTINUE when playback starts.
- Program settings are retained even when the power is turned OFF.
- If you try to start program playback when a CD (CF card) that is different from the one used by the program, a “-Can't Play Program--” message will appear and playback will not start.
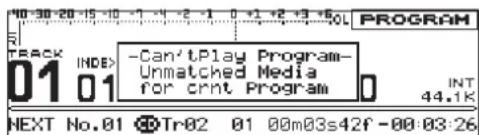
Clearing a program
- Press the MENU button to open the MENU screen.
- Open the PROGRAM/CUE menu screen
- Select PROGRAM EDIT.
- Press the DATA dial to open the PROGRAM screen.
- Turn the DATA dial to select TOTAL.
- Press the DATA dial to open the PROGRAM menu.
- Turn the DATA dial to select DELETE ALL PRGRM
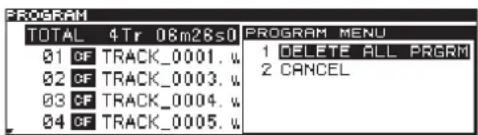
- Press the DATA dial to clear the entire program. When the program has been cleared, thePROGRAM screen reopens and TOTAL 0Tr 00m00s00fappears.
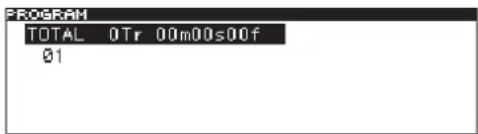
- Press the HOME button to return to the Home Screen.
Removing tracks from a program
- Press the MENU button to open the MENU screen.
- Open the PROGRAM/CUE menu screen
- Select PROGRAM EDIT
- Press the DATA dial to open the PROGRAM screen.
- Turn the DATA dial to select the track you want to remove.
- Press the DATA dial to open the PROGRAM menu.
- Turn the DATA dial to select DELETE PROGRAM
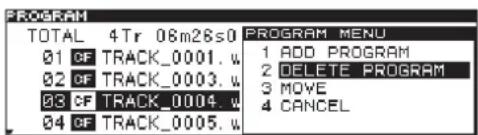
- Press the DATA dial to remove the selected track.
After the track is removed, the PROGRAM screen reopens.
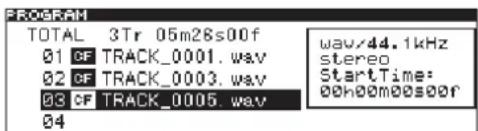
- Press the HOME button to return to the Home Screen.
Moving tracks within a program
- Press the MENU button to open the MENU screen.
- Open the PROGRAM/CUE menu screen
- Select PROGRAM EDIT.
- Press the DATA dial to open the PROGRAM screen.
- Turn the DATA dial to select the track to move
- Press the DATA dial to open the PROGRAM menu.
- Turn the DATA dial to select MOVE.
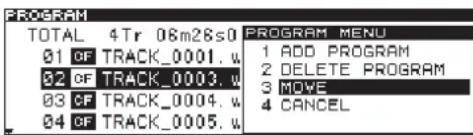
- Press the DATA dial. The track to be moved blinks.
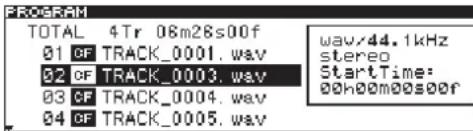
- Turn the DATA dial to move the track to the desired position.
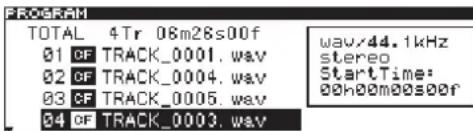
- Press the DATA dial to confirm the new position. When the track move is confirmed, the PROGRAM screen reopens.
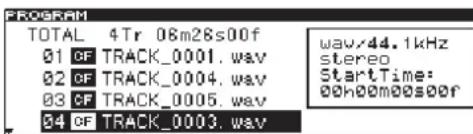
- Press the HOME button to return to the Home Screen.
Importing programs
- Insert a CF card containing a program list into the CF card slot.
- Press the MENU button to open the MENU screen.
- Open the PROGRAM/CUE menu screen
- Select PROGRAM IMPORT.
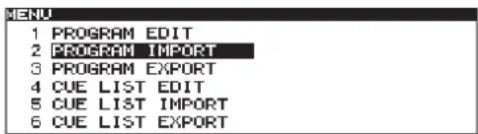
- Press the DATA dial. A confirmation pop-up message appears.
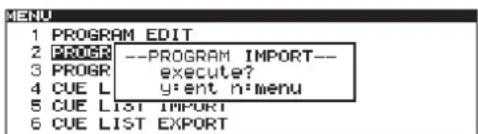
- Press the DATA dial once more to start importing the program.
- When the program import is complete, the pop-up disappears and the PROGRAM/CUE menu reopens.
- Press the HOME button to return to the Home Screen.
Exporting programs
- Insert the CF card on which the exported program list will be saved into the CF card slot.
- Press the MENU button to open the MENU screen.
- Open the PROGRAM/CUE menu screen
- Select PROGRAM EXPORT.
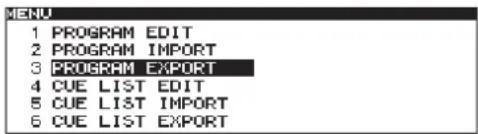
- Press the DATA dial. A confirmation pop-up message appears.
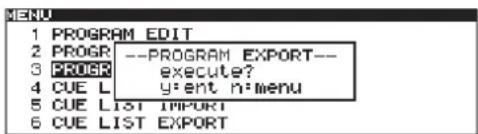
- Press the DATA dial again to start exporting the program.
- When the program export is complete, the pop-up disappears and the PROGRAM/CUE menu screen reopens.
- Press the HOME button to return to the Home Screen.
Cue point playback
You can locate to and play back from cue points you have set earlier. You can set up to nine cue points for each CD and CF card. CD cue points can be save for up to 500 discs. CF card cue points are saved on the card itself, so there is no limit to the number of cards with saved cue points.
Using the cue menu
Select CUE LIST EDIT and press the DATA dial to open the CUE screen (cue list). Select the desired item, and press the DATA dial to open the CUE MENU pop-up.
ADD CUE
Add a cue point at the current playback position.
DELETE ALL CUE
Clear all cue points from the cue list.
DELETE CUE
Clear the selected cue point.
EDIT CUE TITLE
Open the EDIT CUE TITLEScreen where you can edit the name of the selected cue point. (See "Editing cue point names" on page 33.)
CANCEL
Close the CUE menu without performing any operation, and return to the CUE screen.
Adding cue points
Follow these procedures to add cue points.
- Press the MENU button to open the MENU screen.
- Open the PROGRAM/CUE menu screen and select CUE LIST EDIT.
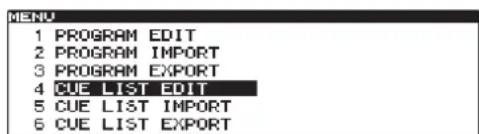
- Press the DATA dial to open the CUE list screen.
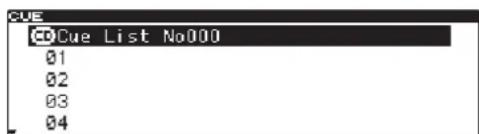
- Turn the DATA dial to select the cue point number to add.
- Press the DATA dial to open the CUE menu.
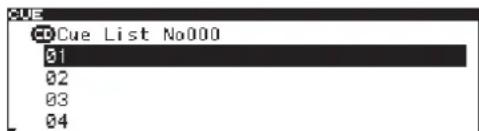
- Turn the DATA dial to select ADD CUE.
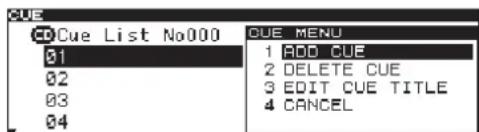
5 – Program and cue playback
- Press the DATA dial to add the cue point. The current time of the track being played back (or in standby) will be added as a cue point to the cue list.
- Repeat steps 5–7 to add cue points as desired.
The screen shows the track numbers and cue points.
- When you are done adding cue point, press the HOME button to return to the Home Screen.
NOTE
CUE settings are retained even when the power is OFF.
Clearing the cue list
- Press the MENU button to open the MENU screen.
- Open the PROGRAM/CUE menu screen and select CUE LIST EDIT.
- Press the DATA dial to open the CUE screen.
- Turn the DATA dial to select Cue List,
- Press the DATA dial to open the CUE menu.
- Turn the DATA dial to select DELETE ALL CUE
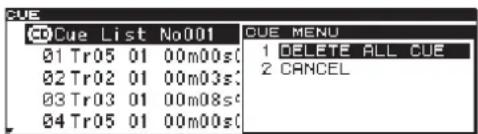
- Press the DATA dial to clear all cue points in the cue list.
After the cue points have been cleared, the CUE list screen reopens.
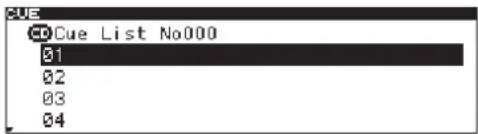
- Press the HOME button to return to the Home Screen.
Clearing a cue point
- Press the MENU button to open the MENU screen.
- Open the PROGRAM/CUE menu screen and select CUE LIST EDIT.
- Press the DATA dial to open the CUE list screen.
- Turn the DATA dial to select the cue point to be cleared
- Press the DATA dial to open the CUE menu.
- Turn the DATA dial to select DELETE CUE
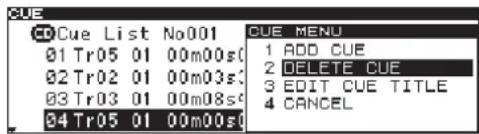
- Press the DATA dial to clear the highlighted cue point.
After the cue point has been cleared, the reopens. CUE list screen
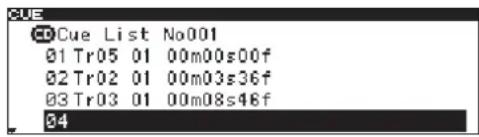
- Press the HOME button to return to the Home Screen.
Editing cue point names
- Press the MENU button to open the MENU screen.
- Open the PROGRAM/CUE menu screen
- Select CUE LIST EDIT
- Press the DATA dial to open the CUE screen.
- Turn the DATA dial to select the cue point with the name to be edited, and press the DATA dial to open the CUE menu.
- Turn the DATA dial to select EDIT CUE TITLE
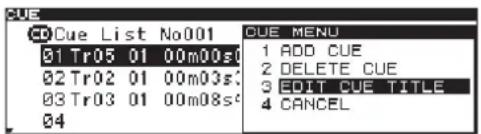
- Press the DATA dial to open the EDIT CUE TITLEscreen.
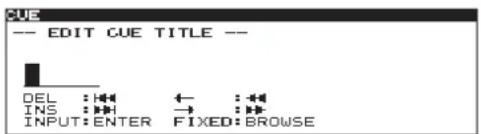
- Edit the cue point name. See "Editing text" below for instructions
- When you are done editing the name, press the BROWSE button to confirm the name change and return to the CUE list screen.
NOTE
- Names containing characters other than the letters of the alphabet, numbers and symbols cannot be edited.
• The following symbols and punctuation marks cannot be used in names.
$$ \yen /;; ^ {*}? ^ {\prime \prime} < > | $$
- Cue point names can be up to six single-byte characters in length.
- You can connect a USB computer keyboard to the KEYBOARD connector on the rear panel of the unit and use it to edit text. (See "9 – Operation using a computer keyboard" on page 47.)
Editing text
Edit text using the following operations.
To move the editing (cursor) position Use the SEARCH ◀◀/▶▶ buttons.
To change the character at the cursor position Turn the DATA dial.
To confirm the character at the cursor position Press the DATA dial.
To insert an empty space Press the TRACK ▶▶1 button.
To delete a character Press the TRACK ◀◀ button.
To confirm and end editing Press the BROWSE button.
Importing cue lists
- Insert a CF card containing a cue list into the CF card slot.
- Press the MENU button to open the MENU screen.
- Open the PROGRAM/CUE menu screen
- Select CUE LIST IMPORT
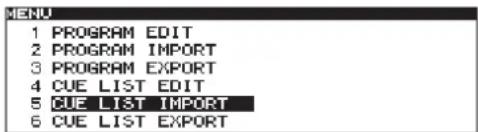
- Press the DATA dial and a confirmation pop-up message appears.
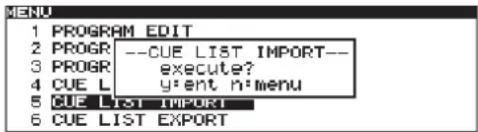
- Press the DATA dial again to start importing the cue list.
- When the cue list has finished importing, the pop-up disappears and thePROGRAM/CUE menu screen reopens.
- Press the HOME button to return to the Home Screen.
Exporting cue lists
- Insert the CF card where the cue list will be exported into the CF card slot.
- Press the MENU button to open the MENU screen.
- Open the PROGRAM/CUE menu screen.
- Select CUE LIST EXPORT.
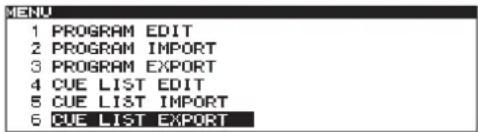
- Press the DATA dial and a confirmation pop-up message appears.
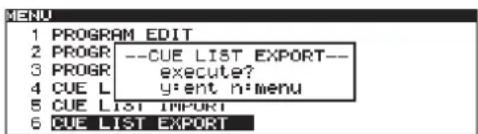
- Press the DATA dial again to start exporting the cue list.
- When the cue list has finished exporting, the pop-up disappears, and the PROGRAM/CUE menu screen reopens.
- Press the HOME button to return to the Home Screen.
Automatic cue point loading options
Usually when a disc for which cue points have already been saved is loaded, the previous cue points are automatically loaded. Sometimes, though, you might not want to use the memorized cue points.
You can set whether or not memorized cue points are automatically loaded.
- Press the MENU button to open the MENU screen.
- Open the PROGRAM/CUE menu screen.
- Select CUE POINT LOAD.
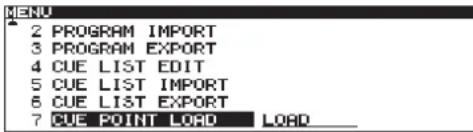
- Press the DATA dial to move the cursor to the right and select the setting.
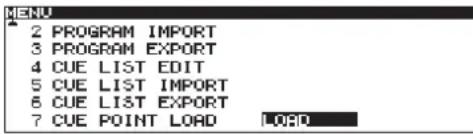
-
Turn the DATA dial to change the setting for memorized cue point loading.
-
LOAD (default): Automatically load previously memorized cue points
- UNLOAD: Do not load memorized cue points
- SELECT: Every time the power is turned ON, a pop-up menu appears that lets you decide whether or not to load cue points. The setting you select stays active until the power is turned OFF again.
Pop-up that appears when set to SELECT
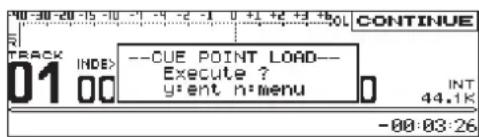
- Press the DATA dial again to set the cue list load setting, and return to the PROGRAM/CUE menu screen.
- Press the HOME button to return to the Home Screen.
NOTE
When set to UNLOAD (or when set to SELECT and you chose not to load cue points), the unit will function as follows.
- New cue points that are added will not be saved.
- When the active device is changed, all cue points will be cleared.
- When the setting is changed from UNLOAD to LOAD (and vice versa), the change will become effective the next time the unit is turned ON again. (The cue list will not be loaded immediately when set to LOAD.)
- When set to UNLOAD, exporting the cue points will not export the recently added ones. (It will export the points added when last set to LOAD.)
6 – Working with files and folders
Using the BROWSE screen, you can manage audio files on CF cards in a folder structure. You can also manage WAV files on a data CD in a folder structure. You can select folders and files, and then enter folders and work with files.
When working with CF cards, you can create folders, edit the names of folders and files, and delete folders and files, for example.
NOTE
You cannot use this screen with unfinalized data CDs containing WAV files.
TIP
By using a card reader or other interface connected to a computer to read files on a CF card, you can modify the folder structure, edit folder and file names, and delete folders and files using the computer. If you perform this type of editing from your computer, be aware that the playback order of the files on the unit may change.
Opening the BROWSE screen
The following operations assume that a CF card or a data CD containing WAV files is loaded.
When stopped, in playback standby or playing back, press the BROWSE button to open the BROWSE screen.
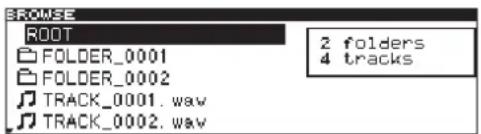
When in playback standby, the BROWSE screen for the folder containing the currently selected file opens and that file is highlighted.
Navigating the BROWSE screen
When the BROWSE screen is open, use the DATA dial to select folders and files.
- Press the DATA dial to open the BROWSE MENU pop-up for that file or folder. (See "File operations" on page 35 and "Folder operations" on page 36.)
- When the BROWSE menu is open, press the BROWSE button to close the BROWSE menu.
- When a folder or file is selected, press the BROWSE button to scroll through folder and file names.
- When the BROWSE screen is open, press the HOME button to return to the Home Screen.
- When a file or folder is selected, press the PLAY button to return to the Home Screen and play that file or folder.
- When a file or folder is selected, press the STANDBY button to return to the Home Screen and put that file or folder into playback standby.
Icons on the BROWSE screen
The icons that appear on the BROWSE screen have the following meanings.
Folder (
Folders are shown with this icon.
Audio file (J)
The names of music files appear next to these icons. Track titles are shown when CD-TEXT is available.
File operations
Select the desired audio file on the BROWSE screen, and press the DATA dial to open the fileBROWSE MENU pop-up.
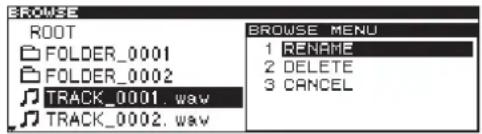
Turn the DATA dial to select the desired item, and press the DATA dial to execute one of the following operations.
RENAME
Opens the RENAME screen where you can edit the selected file name. (See "Editing file names (CF cards)" on page 37.)
DELETE
Deletes the selected file. (See "Deleting folders and files (CF cards)" on page 37.)
CANCEL
Cancels any operation with the selected file, closes the BROWSE MENU and returns to the BROWSE screen.
Folder operations
Select the desired folder on the BROWSE screen, and press the DATA dial to open the folder BROWSE MENU pop-up.
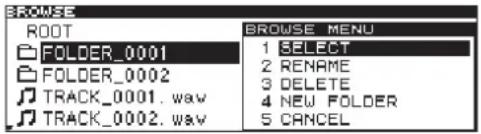
Turn the DATA dial to select the desired item, and press the DATA dial to execute one of the following operations.
NOTE
All the BROWSE MENU functions can be used with CF cards. Only some of the functions can be used with data CDs with WAV files.
SELECT
Opens the selected folder.
RENAME (CF card)
Opens the RENAME screen where you can edit the selected folder name. (See "Editing folder names (CF cards)" on page 36.)
DELETE (CF card)
Deletes the selected item. (See "Deleting folders and files (CF cards)" on page 37.)
NEW FOLDER (CF card)
Creates a new folder. (See "Creating new folders (CF cards)" on page 38.)
CANCEL
Cancels any operation with the selected folder, closes the BROWSE MENU and returns to the BROWSE screen.
Editing folder names (CF cards)
- Select the folder that you want to edit, and turn the DATA dial to select RENAME.
- Press the DATA dial to open the RENAME screen.
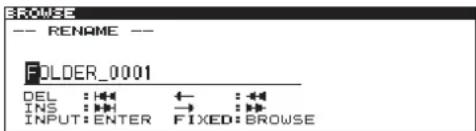
- Edit the folder name. Follow the instructions in "Editing text" on page 33.
- When you have finished editing the folder name, press the BROWSE button to confirm the change.
The words -- FILE ACCESS -and a progress bar appear in a pop-up while the folder name is being changed.
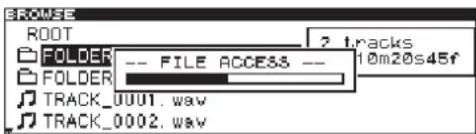
After the folder name has been changed, the screen reopens.
BROWSE
NOTE
- Names containing characters other than the letters of the alphabet, numbers and symbols cannot be edited (the name will not appear when the RENAME function is being used).
- The following symbols and punctuation marks cannot be used in names.
$$ \yen /:;; ^ {*}? ^ {\prime \prime} < > | $$
- Folder names can be up to 52 characters (single-byte) long. The full path on the BROWSE screen cannot exceed 255 characters (system limitation). So, the maximum number of characters for a subfolder within a folder, including the names of all folders above it and separators, is 255.
- You can connect a USB computer keyboard to the KEYBOARD connector on the rear panel of the unit and use it to edit text. (See "9 – Operation using a computer keyboard" on page 47.)
Editing file names (CF cards)
- Select the folder that you want to edit, and turn the DATA dial to selectRENAME.
- Press the DATA dial to open the RENAME screen.
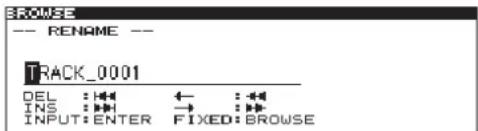
- Edit the file name. Follow the instructions in "Editing text" on page 33.
- When you have finished editing the file name, press the BROWSE button to confirm the change.
The words -- FILE ACCESS -- and a progress bar appear in a pop-up while the file name is being changed.
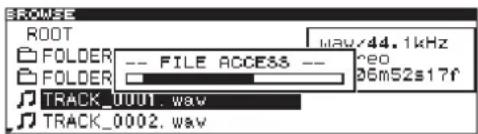
After the file name has been changed, the reopens. BROWSE screen
NOTE
- You can also directly access CF cards from a computer to change the names of files, but doing so could change the previous playback order of the files.
- Changing file names using the procedures above will reorder the files by character code and might cause the playback order to change.
- Names that contain characters other than the letters of the alphabet, numbers and symbols cannot be edited (the name will not appear when the RENAME function is being used).
- The following symbols and punctuation marks cannot be used in names.
$$ \yen /:;; ^ {*}? ^ {\prime \prime} < > | $$
- File names can be up to 52 characters (single-byte) long. The full path on the BROWSE screen cannot exceed 255 characters (system limitation). So, the maximum number of characters for a file within a folder, including the names of all folders above it and separators, is 255.
- You can connect a USB computer keyboard to the KEYBOARD connector on the rear panel of the unit and use it to edit text. (See "9 – Operation using a computer keyboard" on page 47.)
Deleting folders and files (CF cards)
You can delete folders and files from CF cards. If you delete a folder, all the files in it will also be deleted.
- Select the folder or file to delete, and turn the DATA dial to select DELETE.
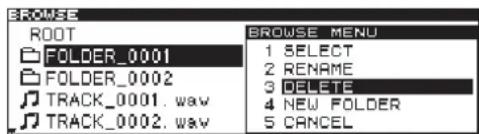
- Press the DATA dial and a confirmation pop-up message appears.
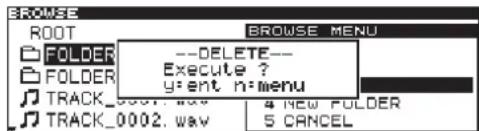
To cancel the deletion, press the MENU button.
- To confirm the deletion, press the DATA dial.
The words -- FILE ACCESS --and a progress bar appear in a pop-up while the item is being deleted from the card.
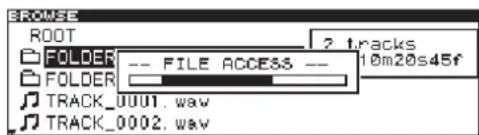
After deletion is complete, the BROWSE screen reopens.
NOTE
If you try to delete a file that has been added to a program, a "P.LIST Registered DELETE Execute?" confirmation message will appear.
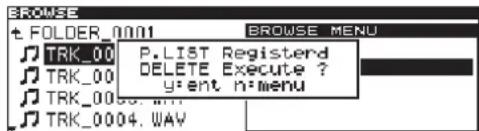
Creating new folders (CF cards)
- Select the folder where you want to create a new subfolder, and turn the DATA dial to select NEW FOLDER.
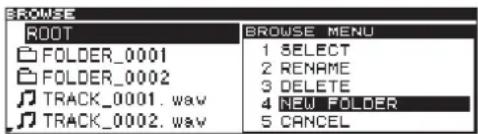
- Press the DATA dial to open the NEW FOLDER screen.
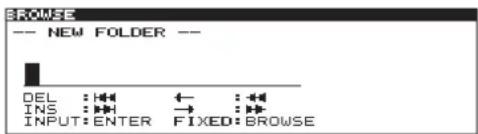
- Input the name for the new folder. Follow the instructions in "Editing text" on page 33.
- After you have completed entering the folder name, press the BROWSE button to confirm it.
The words -- FILE ACCESS -- and a progress bar appear in a pop-up while the folder is created and the new folder is created.
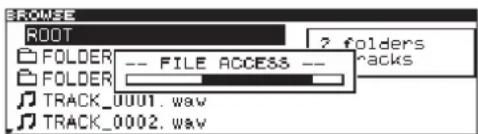
After creation is complete, the BROWSE screen reopens.
NOTE
- Names containing characters other than the letters of the alphabet, numbers and symbols cannot be edited (the name will not appear when the RENAME function is being used).
- The following symbols and punctuation marks cannot be used in names.
$$ \yen /:; *? ^ {\prime \prime} < > | $$
- A maximum of 52 characters (single-byte) can be used for folder names. Moreover, due to limitations of the system, the full path on the BROWSE screen cannot exceed 255 characters. For example, the maximum number of characters for a file or subfolder within a folder, including the folders above it and separators, is 255.
• Up to 255 folders can be created on a single CF card. - When using media with a capacity of 2 GB or less, the maximum number of folders created in the root folder might be less than 255 (file system limitations). A maximum of 255 folders, including subfolders, can be created.
- You can connect a USB computer keyboard to the KEYBOARD connector on the rear panel of the unit and use it to edit text. (See "9 – Operation using a computer keyboard" on page 47.)
File and folders on CF cards and data CDs
Some CF cards and data CDs store files inside folders in the same way that ordinary computers do. In addition, several folders can be stored inside another folder, creating a multilevel structure.
This unit assigns a folder number to each folder to manage them. Folder numbers are assigned sequentially starting with the folders at the highest level followed by the folders (subfolders) inside them.
If the root folder of a CF card or data CD contains one or more audio files, it will be numbered as the first folder.
Each audio file is also assigned a number. File numbers are assigned in order starting from those in the lowest numbered folder.
During ordinary playback of CF cards and data CDs, tracks are played back in the assigned numerical order just like those on audio CDs.
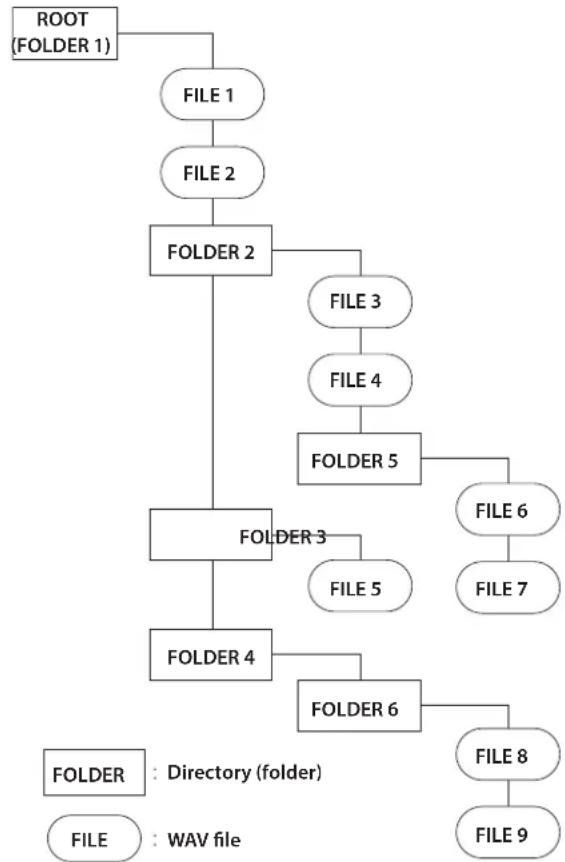
flowchart
graph TD
    A["ROOT (FOLDER 1)"] --> B["FILE 1"]
    B --> C["FILE 2"]
    C --> D["FOLDER 2"]
    D --> E["FILE 3"]
    E --> F["FILE 4"]
    F --> G["FOLDER 5"]
    G --> H["FILE 6"]
    H --> I["FILE 7"]
    D --> J["FOLDER 3"]
    J --> K["FILE 5"]
    J --> L["FOLDER 4"]
    L --> M["FOLDER 6"]
    M --> N["FILE 8"]
    N --> O["FILE 9"]
    P["FOLDER : Directory (folder)"]
    Q["FILE : WAV file"] --> R
Data CD structure
Formatting CF cards quickly
UseFORMAT (Quick) to format a CF card in a short amount of time.
Formatting a CF card erases all the data on it.
- Press the CD/CF button to activate the CF card. The CF indicator above the CD/CF button lights when it is active.
- Press the MENU button to open the MENU screen.
- Open the CF menu screen.
- Select FORMAT (Quick)
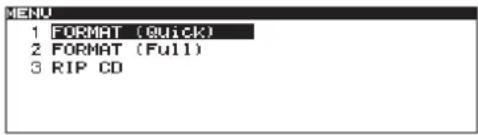
- Press the DATA dial and a confirmation pop-up message appears.
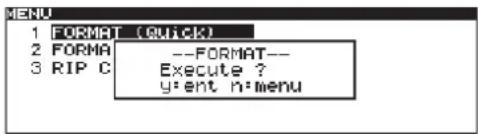
- Press the DATA dial again to start formatting.
The words --FORMAT-- and a progress bar appear in a pop-up while the card is being formatted.
- Select: menu to cancel formatting.
7.. When formatting is complete, the pop-up disappears and the Home Screen reopens.
Formatting CF cards (full format)
Use the FORMAT (Full)item to format a CF card completely. Formatting a CF card will erase all the data on it.
Full formatting checks the CF card's memory for errors while formatting, so the process takes more time than quick formatting.
- Press the CD/CF button to activate the CF card. The CF indicator above the CD/CF button lights when it is active.
- Press the MENU button to open the MENU screen.
- Open the CF menu screen.
- Select FORMAT (Full)
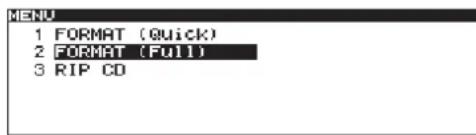
- Press the DATA dial and a confirmation pop-up message appears.
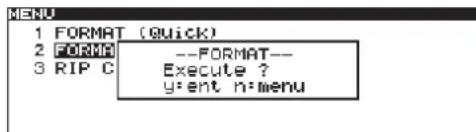
- Press the DATA dial again to start formatting.
The words --FORMAT-- and a progress bar appear in a pop-up while the card is being formatted.
- Select n:menu to cancel formatting.
- When formatting is complete, the pop-up disappears and the Home Screen reopens.
Ripping CD tracks to CF cards
You can rip (convert and copy) audio from audio CDs to CF cards. The audio from CDs is converted into and written as WAV files.
The following procedures assume that the current device is set to CD, and the CD with the track that you want to copy and a CF card are loaded.
- Press the MENU button to open the MENU screen.
- Open the CF menu screen.
- Select RIP CD.
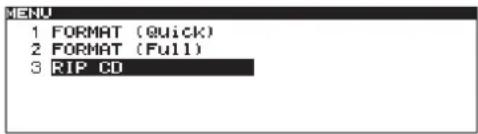
- Press the DATA dial.
The words --MEDIA READING-- and a progress bar appear in a pop-up.
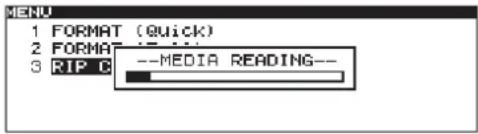
NOTE
If a CF is not loaded, after MEDIA READING, --ERROR-- and CF READ appear in a pop-up. Insert a CF card.
- After a CF card has been completely loaded, the RIP SOURCE SELECT screen opens.
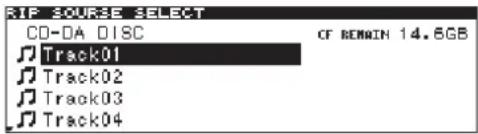
- Turn the DATA dial to select the source track to be copied.
Select CD-DA DISC to select the entire disc as the source. The remaining available space on the CF card is shown at the top right of the screen.
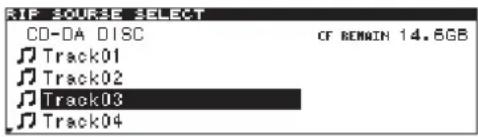
- After selecting the tracks to copy, press the DATA dial to confirm the selection.
The RIP TARGET SELECTscreen opens where you can select the destination for the copied tracks opens.
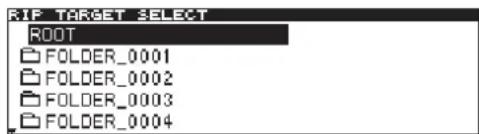
NOTE
When selecting source files, if the size of the ripped data would exceed the remaining capacity of the CF card, or the number of source tracks would cause the number of files to exceed the CF card limit, CAPACITY OVER or TRACK FULL will appear and you will not be able to continue to step 8.
- On the RIP TARGET SELECTscreen, turn the DATA dial to select the destination for the copied tracks (a folder) and press the DATA dial to open it. Then turn the DATA dial and select -RIP HERE-in the first line of a folder to select it as the destination folder.
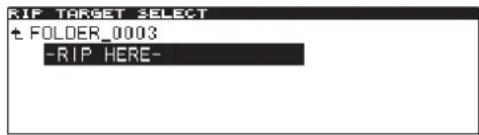
- With -RIP HERE-selected, press the DATA dial to confirm the destination. A confirmation pop-up message appears.
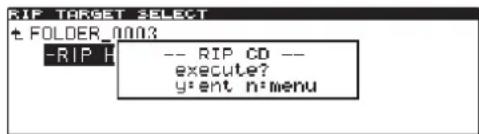
- Press the DATA dial again to start writing to the CF card. During this process, -- RIPPING -- and a progress bar appear in a pop-up.
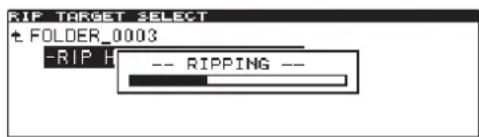
When writing is complete, the CD menu screen reopens.
8 – Other settings and information display
Setting the digital reference level
You can set the digital headroom (number of dB below maximum analog output reference level (full scale).
- Press the MENU button to open the MENU screen.
- Open the SYSTEM menu.
- Select DIGITAL REF LVL
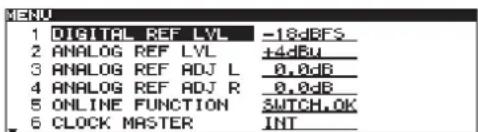
- Press the DATA dial to move the cursor right to select the setting.
- Turn the DATA dial to set the digital reference level.
- Options: -20dBFS, -18dBFS (default value), -16dBFS, -14dBFS, -9dBFS
- After completing the setting, press the HOME button to return to the Home Screen.
NOTE
The digital reference level setting is retained even when the power is turned OFF.
Setting the analog reference level
You can set the analog output reference level.
The analog audio output reference level settings that are possible depend on the digital reference level setting.
- Press the MENU button to open the MENU screen.
- Open the SYSTEM menu.
- Select ANALOG REF LVL
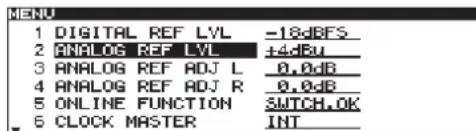
- Press the DATA dial to move the cursor right to select the setting.
- Turn the DATA dial to set the analog reference level. The analog reference setting value options depend on the DIGITAL REF Lvlsetting.
| DIGITAL REF LVL setting ANALOG REF LVL setting | |
| -9dBFS | +6dBu only |
| Settings other than -9dBFS | -20dBu , +4dBu (default value) |
- After completing the setting, press the HOME button to return to the Home Screen.
NOTE
- The -20dBu setting does not effect the MONITOR OUTPUTS. When this setting is selected, the output from the MONITOR OUTPUTS will be +4 dBu unless the digital reference level is set to -9 dBFS.
- This analog reference level setting is retained even when the power is turned OFF.
8 – Other settings and information display
Adjusting R/L analog reference levels
You can adjust the analog output reference level separately for the left and right channels.
- Press the MENU button to open the MENU screen.
- Open the SYSTEM menu
- Select ANALOG REF ADJ lor ANALOG REF ADJ R
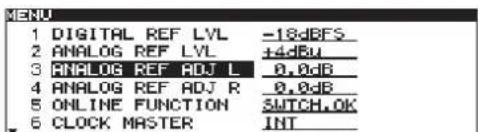
- Press the DATA dial to move the cursor right to select the setting.
- Turn the DATA dial to adjust the analog reference level.
- Setting range: ±6.0 dB (default value: 0dB, 0.1dB increments)
- After completing the setting, press the HOME button to return to the Home Screen.
NOTE
The analog reference level settings are retained even when the power is turned OFF.
Setting the online function
You can set whether or not to use the online function.
- Press the MENU button to open the MENU screen.
- Open the SYSTEM menu.
- Select ONLINE FUNCTION
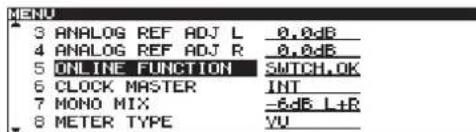
- Press the DATA dial to move the cursor right to select the setting.
-
Turn the DATA dial to set the online function.
-
SWITCH. OK (default value): Online playback mode can be controlled through the parallel remote connector, the serial remote connector, and by a TASCAM RC-9010/RC-9010S remote controller (sold separately). When this unit is used alone, online playback mode is ON by default.
• Always ON: Online playback mode is always ON and cannot be switched. -
After completing the setting, press the HOME button to return to the Home Screen.
NOTE
The online function setting is retained even when the power is turned OFF.
Setting the master word clock
You can set the source to use for word synchronization.
- Press the MENU button to open the MENU screen.
- Open the SYSTEM menu.
- Select CLOCK MASTER.
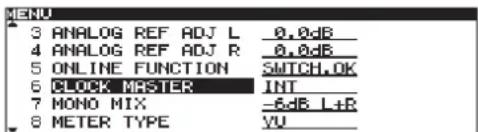
- Press the DATA dial to move the cursor right to select the setting.
-
Turn the DATA dial to set the master word clock.
-
INT (default value): Use the unit's internal clock
- EXT: Synchronize with the word clock input through the WORD SYNC IN connector
-
44.1K FIX: Regardless of the file sampling frequency, digital audio is always output at 44.1k FS.
-
After completing the setting, press the HOME button to return to the Home Screen.
NOTE
- The master clock setting is retained even when the power is turned OFF.
- Depending on the combination of master clock and playback file sampling frequency settings, the digital output sampling frequency will differ. (See "Master clock and digital output combinations" below.)
Mono mix setting
You can set the mono mix output for when the STEREO/MONO button is used to set the output to mono. The setting state is shown to the left of the level meters.
- Press the MENU button to open the MENU screen.
- Open the SYSTEM menu.
- Select MONO MIX
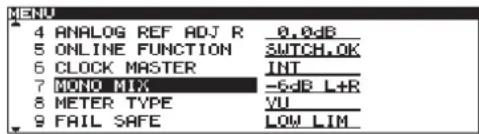
- Press the DATA dial to move the cursor right to select the setting.
- Turn the DATA dial to set the mono mix.
| -6dB L+R (default value) | The left and right channels of the stereo audio track are each attenuated by -6 dB, summed and then output. |
| -3dB L+R | The left and right channels of the stereo audio track are each attenuated by -3 dB, summed and then output. |
| L Mono | The left channel of the stereo audio track is output from both L and R outputs. |
| R Mono | The right channel of the stereo audio track is output from both L and R outputs. |
- After completing the setting, press the HOME button to return to the Home Screen.
NOTE
The mono mix setting is retained even when the power is turned OFF.
Master clock and digital output combinations
Depending on the combination of the master clock setting and the playback file sampling frequency, the digital output sampling frequency varies. This table shows the combinations.
| Master clock | Master clock setting | Playback file sampling frequency | SRC (automatic) | Digital output sampling frequency | Notes |
| Internal | INT | 44.1 kHz OFF 44.1 kHz | The whole system uses 44.1kHz internal clock | ||
| 44.1kHz FIX | 44.1 kHz OFF 44.1 kHz | Digital output is always 44.1 kHz | |||
| 44.1kHz FIX | 48 kHz ON 44.1 kHz D | digital output is always 44.1 kHz | |||
| INT | 48 kHz OFF 48 kHz The whole system uses 48kHz internal clock | ||||
| External (44.1kHz) | EXT | 44.1 kHz OFF 44.1 kHz | The whole system uses 44.1kHz external clock | ||
| External (48kHz) | EXT | 44.1 kHz ON 48 kHz | While syncing to 48kHz external clock, the system uses 44.1kHz internal clock | ||
| EXT | 48 kHz OFF 48 kHz The whole system uses 48kHz external clock | ||||
NOTE
• The sampling rate converter (SRC) function is turned ON and OFF automatically.
- If the clock is interrupted when synchronized with a 48kHz external clock, the unit will switch to internal clock, the sampling rate converter (SRC) function will turn ON and output will continue at 48 kHz.
8 – Other settings and information display
Setting the level meter display type
You can change the type of the playback level meters on the Home Screen.
- Press the MENU button to open the MENU screen.
- Open the SYSTEM menu.
- Select METER TYPE
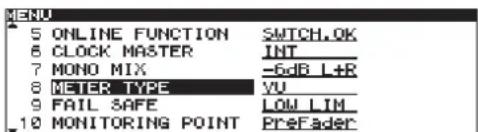
- Press the DATA dial to move the cursor right to select the setting.
- Turn the DATA dial to set the type of level meters shown.
• PEAK: Peak meters shown
• VU (default value): VU meters shown.
6. After completing the setting, press the HOME button to return to the Home Screen.
NOTE
The level meter type setting is retained even when the power is turned OFF.
Fail safe function setting
The fail safe function prevents the accidental operation of buttons. Different buttons are disabled during playback and online playback. See the table below for details
- Press the MENU button to open the MENU screen.
- Open the SYSTEM menu.
- Select FAIL SAFE
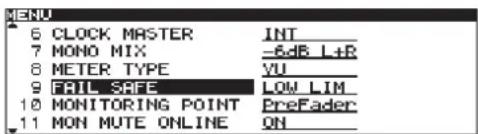
- Press the DATA dial to move the cursor (selected area) right to select the setting.
- Turn the DATA dial to set the fail safe function.
Options: LOW LIM(default value), UP LIM, OFF
- After completing the setting, press the HOME button to return to the Home Screen.
NOTE
The fail safe setting is retained even when the power is turned OFF.
Buttons disabled according to fail safe setting
| Fail safe setting | Disabled buttons during playback standby | Disabled buttons during online playback |
| LOW LIM | None | CD/CF button |
| ST/MONO button | ||
| BROWSE button | ||
| PLAY MODE button | ||
| MENU button | ||
| ENTER button | ||
| OPEN/CLOSE button | ||
| TRACK I◄◄/►►I buttons | ||
| SEARCH ◀◄/►► buttons | ||
| MONITOR button | ||
| UP LIM | CD/CF button CD/CF button | |
| ST/MONO button ST/MONO button | ||
| BROWSE button BROWSE button | ||
| --- PLAY MODE button | ||
| MENU button MENU button | ||
| ENTER button ENTER button | ||
| OPEN/CLOSE button OPEN/CLOSE button | ||
| --- STANDBY button | ||
| TRACK I◄◄/►►I buttons | TRACK I◄◄/►►I buttons | |
| SEARCH ◀◄/►► buttons | SEARCH ◀◄/►► buttons | |
| --- MONITOR button | ||
| OFF | None | None |
Monitoring point setting
You can set whether the monitoring output signal is from before or after the Online fader.
- Press the MENU button to open the MENU screen.
- Open the SYSTEM menu.
- Select MONITORING POINT
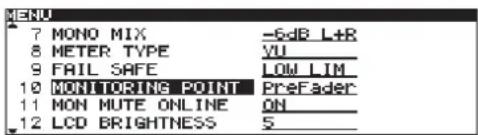
- Press the DATA dial to move the cursor right to select the setting.
-
Turn the DATA dial to set the monitoring point.
-
Prefader (default value): Monitor the signal before the Online fader
- PstFader: Monitor the signal after the Online fader
- After completing the setting, press the HOME button to return to the Home Screen.
NOTE
The monitoring point setting is retained even when the power is turned OFF.
Muting monitoring when online
You can set whether or not monitoring output is automatically muted during online playback.
- Press the MENU button to open the MENU screen.
- Open the SYSTEM menu.
- Select MON MUTE ONLINE
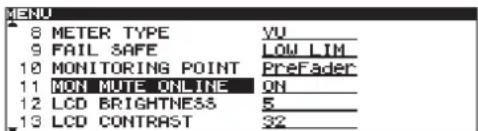
- Press the DATA dial to move the cursor right to select the setting.
- Turn the DATA dial to set whether monitoring output muting during online playback is ON or OFF.
- Options: OFF, ON (default value)
- After completing the setting, press the HOME button to return to the Home Screen.
NOTE
The monitor mute online setting is retained even when the power is turned OFF.
Importing menu settings
You can import settings that have been saved on a CF card and use them as the unit's menu settings.
Load a CF card containing saved menu settings.
- Press the MENU button to open the MENU screen.
- Open the SYSTEM menu.
- Select MENU IMPORT.
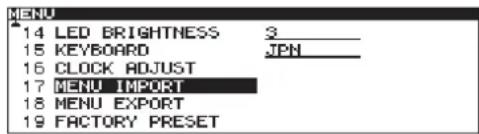
- Press the DATA dial to open a confirmation pop-up message.
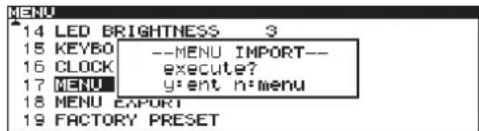
- Press the DATA dial again to import settings from the CF card.
- When importing completes, the pop-up disappears and the SYSTEM menu screen reopens.
- Press the HOME button to return to the Home Screen.
NOTE
The LCD CONTRAST, LCD BRIGHTNESS and LED BRIGHTNESS settings of the SYSTEM menu are not imported.
Exporting menu settings
You can save the unit's MENU screen settings to a CF card.
- Press the MENU button to open the MENU screen.
- Open the SYSTEM menu.
- Select MENU EXPORT.
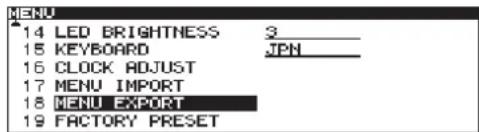
- Press the DATA dial to open a confirmation pop-up message.
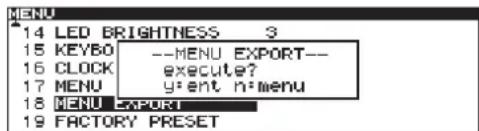
- Press the DATA dial again to export the settings to the CF card.
- When exporting complete, the pop-up disappears and the SYSTEM menu screen reopens.
- Press the HOME button to return to the Home Screen.
NOTE
The LCD CONTRAST, LCD BRIGHTNESS and LED BRIGHTNESS settings of the SYSTEM menu are not exported.
8 – Other settings and information display
Restoring the factory settings
You can restore all the settings that are stored in the unit's backup memory to the values when shipped from the factory. Follow these steps to restore the settings.
NOTE
The factory settings cannot be restored if media is loaded in the current device. Change the current or remove the media from it and conduct the operation again.
- Press the MENU button to open the MENU screen.
- Open the SYSTEM menu.
- Select FACTORY PRESET.
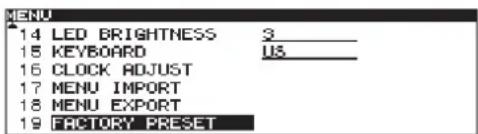
- Press the DATA dial to open a confirmation pop-up message.
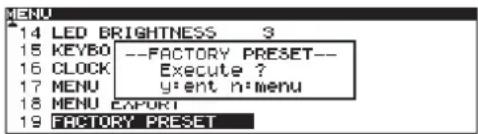
- Press the DATA dial again to restore all settings to their factory defaults. COMPLETE appears as a pop-up message when done and the Home Screen automatically reopens.
Viewing media information
You can view information about the media in the current device. Follow these steps to access this information.
- Press the CD/CF button to select the device containing the media you want to check.
The indicator above the CD/CF button lights. - Press the MENU button to open the MENU screen.
- Open the INFORMATION menu screen.
- Select MEDIA INFO
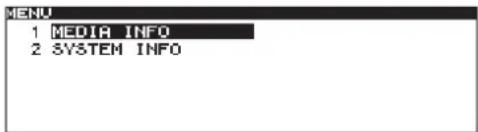
- Press the DATA dial to show information about the media in the current device, including its used space and amount of free space.
CD INFORMATION screen example
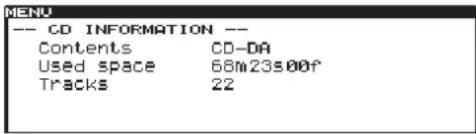
CF INFORMATION screen example
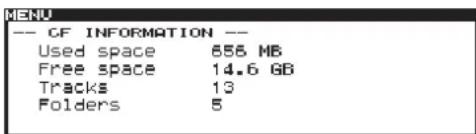
- When you are finished checking, press the HOME button to return to the Home Screen.
Viewing system information
You can view information about the system. Follow these steps to access this information.
- Press the MENU button to open the MENU screen.
- Open the INFORMATION menu screen.
- Select SYSTEM INFO
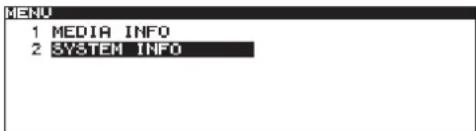
- Press the DATA dial to show the SYSTEM INFORMATION screen, where you can check system versions and operating time.
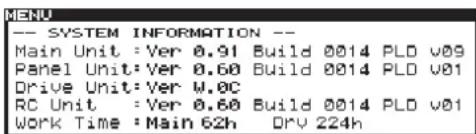
- When you are finished checking, press the HOME button to return to the Home Screen.
9 – Operation using a computer keyboard
You can connect a USB computer keyboard to the KEYBOARD connector on the rear panel to input text efficiently.
Setting the keyboard language
Set the keyboard language according to the one you are connecting.
- Press the MENU button to open the MENU screen.
- Open the SYSTEM menu.
- Select KEYBOARD.
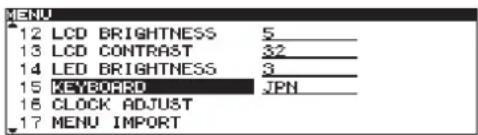
- Press the DATA dial to move the cursor right to select the setting.
- Turn the DATA dial to set the connected keyboard type to US (US English-language keyboard) or JPN (Japanese-language keyboard).
- Options:US, JPN (default value)
- After completing the setting, press the HOME button to return to the Home Screen.
NOTE
The KEYBOARD setting is retained even when the power is turned OFF.
Using a keyboard to input text
You can edit or enter a folder name or track name in the same manner as when typing text on a computer.
To edit the name of a file or folder, from the BROWSE screen, open the BROWSE MENU and select RENAME to open the RENAME screen.
To select the case
As when using a computer, use the Shift and Caps Lock keys to change the case of characters.
To input text
Use the number, letter and symbol keys for direct input.
To move the cursor
Use the keyboard's ↑/↓/←/→ arrow keys.
To delete a character
Delete key: Deletes the character at the cursor location. Backspace key: Deletes the character to the left of the cursor location.
To insert a character
Press the Insert key at the desired location.
To edit a character
Move the cursor to the character and overwrite it.
NOTE
- The following symbols and punctuation marks cannot be used in names.
$$ \yen /:;; *? ^ {\prime \prime} < > | $$
• Japanese katakana cannot be used.
10 - Using the remote connectors
Using the serial connector
Using the REMOTE (SERIAL) connector (15-pin, D-sub, RS-232C standard), you can control the unit using a TASCAM RC-9010/RC-9010S remote control (sold separately), a computer or other external device.
Use the menu to make communication-related settings.
Fader use setting
Set whether or not the use of a fader on a TASCAM RC-9010/RC-9010S remote control (sold separately) is enabled.
- Press the MENU button to open the MENU screen.
- Open the REMOTE menu screen.
- Select FADER MODE
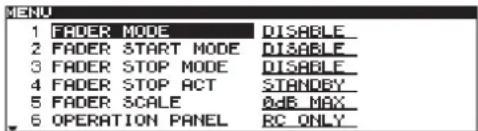
-
Press the DATA dial to move the cursor right to select the setting.
-
Turn the DATA dial to enable or disable fader use.
- Options: ENABLE, DISABLE (default value)
NOTE
When set to DISABLE, the internal fader is fixed at 0 dB.
- After making the setting, press the HOME button to return to the Home Screen.
NOTE
The fader mode setting is retained even when the power is turned OFF.
Fader start function setting
Fader start allows playback to start by moving the fader of a connected TASCAM RC-9010/RC-9010S remote control (sold separately) from when the unit is in playback standby.
Enable or disable this function when fader starting is also enabled on the remote.
- Press the MENU button to open the MENU screen.
- Open the REMOTE menu screen.
- Select FADER START MODE
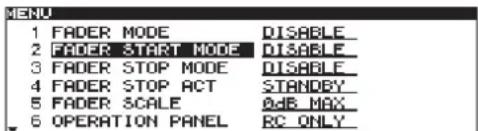
-
Press the DATA dial to move the cursor right to select the setting.
-
Turn the DATA dial to set enable or disable the fader start function.
- Options: ENABLE, DISABLE (default value)
- After completing the setting, press the HOME button to return to the Home Screen.
NOTE
The fader start mode setting is retained even when the power is turned OFF.
Fader stop function setting
The fader stop function that allows playback to be stopped or paused (playback standby) by moving the fader of a connected TASCAM RC-9010/RC-9010S remote control (sold separately) to . Set whether or not this function is enabled when fader starting in also enabled on the remote.
NOTE
If you set both the FADER START MODE and FADER STOP MODE to DISABLE, the fader start function of the TASCAM RC-9010/RC-9010S remote control (sold separately) will be turned OFF automatically, and its FADER START button indicator will be unlit. In this state, if you press the FADER START button on the remote control, the pop-up message "Can't Change Now, Fixed in crnt mode" appears.
- Press the MENU button to open the MENU screen.
- Open the REMOTE menu screen.
- Select FADER STOP MODE
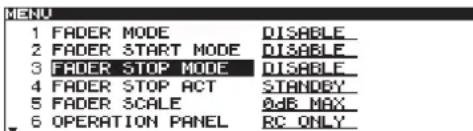
-
Press the DATA dial to move the cursor right to select the setting.
-
Turn the DATA dial to enable or disable the fader stop start function.
- Options: ENABLE, DISABLE (default value)
- After completing the setting, press the HOME button to return to the Home Screen.
NOTE
The fader stop mode setting is retained even when the power is turned OFF.
Fader stop action setting
When the fader start function is ON, you can set whether using the fader stop function (lowering the fader to ) on a TASCAM RC-9010/RC-9010S remote control (sold separately) causes playback to stop or pause (playback standby).
- Press the MENU button to open the MENU screen.
- Open the REMOTE menu screen.
- Select FADER STOP ACT
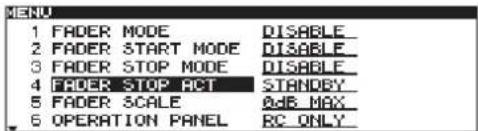
- Press the DATA dial to move the cursor right to select the setting.
- Turn the DATA dial to set the action when fader stop occurs.
- Options: STOP, STANDBY (default value)
- After completing the setting, press the HOME button to return to the Home Screen.
NOTE
- Depending on the PLAY menu screen MONITOR PLAY STBY item and ONLINE PLAY STBY settings, BACK CUE operation might take place.
- The fader stop act setting is retained even when the power is turned OFF.
Setting the fader scale used
You can set whether to use the scale shown on the left or right side of the fader on a TASCAM RC-9010/RC-9010S remote control (sold separately). The indicator above the active scale lights.
- Press the MENU button to open the MENU screen.
- Open the REMOTE menu screen.
- Select FADER SCALE
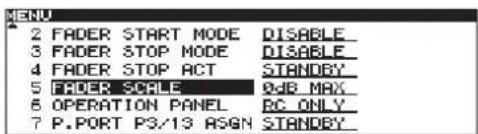
- Press the DATA dial to move the cursor right to select the setting.
- Turn the DATA dial to set the fader scale used.
- Options:10dB MAX(left scale), 0dB MAX(right scale, default value)
- After completing the setting, press the HOME button to return to the Home Screen.
NOTE
The fader scale setting is retained even when the power is turned OFF.
Transmission speed setting
You can set the transmission speed (baud rate) used with a TASCAM RC-9010/RC-9010S remote control (sold separately) or other remote control using serial protocol.
NOTE
The following serial transmission values are fixed: 8 data bits, No parity bit, 1 stop bit.
- Press the MENU button to open the MENU screen.
- Open the REMOTE menu screen.
- Select SERIAL BAUD RATE
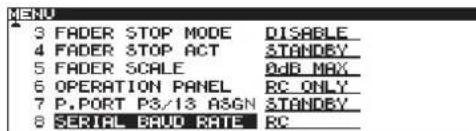
- Press the DATA dial to move the cursor right to select the setting.
- Turn the DATA dial to set the baud rate used to communicate with external remotes.
- Options:9600bps, 19200bps, 38400bps, RC (for TASCAM RC-9010/RC-9010S, default value)
- After completing the setting, press the HOME button to return to the Home Screen.
NOTE
The serial baud rate setting is retained even when the power is turned OFF.
10 - Using the remote connectors
Using the parallel connector
Using the REMOTE (PARALLEL) connector, you can control this unit with an external controller.
The pin assignments are as follows.
| Pin Function IN/OUT | ||
| 1 ON LINE | PLAY IN IN | |
| 2 MONITOR | PLAY IN IN | |
| 3 STANDBY | IN/PAUSE (JOG ON) IN** IN | |
| 4 STANDBY | IN IN | |
| 5 STOP IN | IN | |
| 6 TRACK S | SEARCH REV IN [←←] IN | |
| 7 N.C - | ||
| 8 TRACK S | SEARCH FWD IN [▶▶1] IN | |
| 9 SEARCH | REV IN [◀◀] IN | |
| 10 | SEARCH FWD IN [▶▶] | IN |
| 11 | MONITOR PLAY TALLY OUT | |
| 12 | STANDBY TALLY | OUT |
| 13 | STANDBY TALLY/ PAUSE (JOG ON) TALLY** | OUT |
| 14 | STOP TALLY | OUT |
| 15 | INDEX SEARCH REV IN [ ← ] | IN |
| 16 | INDEX SEARCH FWD IN [ → ] | IN |
| 17 | ON LINE PLAY TALLY | OUT |
| 18 | CUE UP | IN |
| 19 | ON LINE IN | IN |
| 20 EOM OUT | OUT | |
| 21 | FADER START/STOP IN | IN |
| 22 ON LINE TALLY | OUT | |
| 23 TEN KEY 0 | IN | |
| 24 TEN KEY 1 | IN | |
| 25 TEN KEY 2 | IN | |
| 26 TEN KEY 3 | IN | |
| 27 | TEN KEY 4 | IN |
| 28 TEN KEY 5 | IN | |
| 29 TEN KEY 6 | IN | |
| 30 TEN KEY 7 | IN | |
| 31 | TEN KEY 8 | IN |
| 32 | TEN KEY 9 | IN |
| 33 | CD_TALLY | OUT |
| 34 CF_TALLY | OUT | |
| 35 | CUE UP_TALLY | OUT |
| 36 GND | - | |
| 37 | +5V* | - |
IN: Active low external command reception (operates when at ground 50 ms or longer)
OUT: Signal for tally output display by open collector (50V maximum voltage, 100mA maximum current)
*100mA maximum supplied current
**Use the P.PORT P3/13 ASGN item on the REMOTE menu screen to set their functions. (See "Parallel port 3-pin/13-pin setting" below.)
The following is an example of a connection for playback control of this unit using fader start/stop.
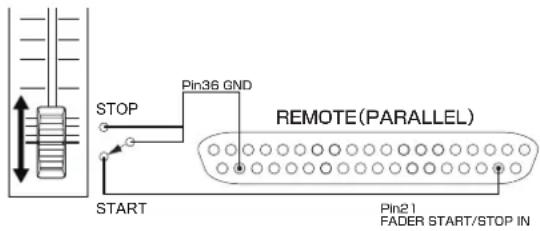
Parallel port 3-pin/13-pin setting
You can set the functions of the unit's REMOTE (PARALLEL) connector 3-pin and 13-pin.
- Press the MENU button to open the MENU screen.
- Open the REMOTE menu screen.
- SelectP.PORT P3/13 ASGN.
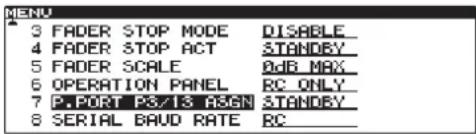
- Press the DATA dial to move the cursor right to select the setting.
- Turn the DATA dial to set the REMOTE (PARALLEL) connector 3-pin and 13-pin functions.
Options: PAUSE, STANDBY (default value)
| Pin number | P.PORT P3/13 ASGN setting | |
| PAUSE | STANDBY | |
| 3 PAUSE (JOG ON) IN STANDBY IN | ||
| 13 | PAUSE (JOG ON) TALLY | STANDBY TALLY |
- After completing the setting, press the HOME button to return to the Home Screen.
NOTE
The pin assignment setting is retained even when the power is turned OFF.
Error messages
If one of the following error messages appears in a pop-up, press the DATA dial to close the message. Then try to resolve the issue. If you are still unable to correct the problem, please contact the dealer from which you purchased the unit or a TASCAM service center (see the back cover of this manual).
| 1st line 2nd line Meaning | ||
| 1 | - error - DECODE | Failed to play WAV file. |
| 2 | - error - MIX DISC | The disc has both WAV format files and audio CD format files on it. |
| 3 | - error - MEMORY READ | Ripping cannot be executed because media is not loaded in the selected device. |
| 4 | - error - TRACK | Playback is not possible because the file on the CD is of an unplayable format. |
| 5 | - error - CF WRITE | Failed to write to the CF card. |
Warning messages
When an operation cannot be conducted, one of the following pop-up warning messages will appear on the display. After appearing for about two seconds, warning messages automatically disappear.
| 1st line 2nd line Meaning | |||
| 1 | - caution - | MEDIA FULL | Ripping is not possible because the media does not have enough open space. |
| 2 | - caution - | TRACK FULL | Ripping is not possible because the maximum number of tracks (999) has been reached. |
| 3 | - caution - | NOT EXECUTE | Failed to execute the editing operation. |
| 4 | - caution - | CAN'T EDIT | Editing was not possible due to system limitations. |
| 5 | - caution - | CAN'T SELECT | Selection/execution was not possible due to system limitations. |
| 6 | - caution - | TRK PROTECT | Editing was not possible because the track is protected. |
| 7 | - caution - | NAME FULL | The maximum number of characters for the name (text field) has been reached. |
| 8 | - caution - | PROGRAM FULL | The track cannot be added because the maximum number of tracks in a program has been reached. |
| 9 | - caution - | SAME NAME | An item with the same name already exists. |
Operation messages
As necessary, the following messages will appear in the time display area.
| 1st line Meaning | ||
| 1 | CLOSE | The disc tray is closed. |
| 2 | DEVICE ERROR | The device cannot be detected. Please contact TASCAM customer support. |
| 3 | MEDIA ERROR | The media is not playback media. |
| 4 | MEDIA READING | Now reading from media. |
| 5 | NO MEDIA | Media is not loaded in the current device. |
| 6 | OPEN | The disc tray is open. |
| 7 | POWER ON | The system is starting up and initializing. |
| 8 | RIPPING | The CD contents are being converted and copied to the CF card. |
| 9 | UNKNOWN | The media is in a format other than FAT. Format the media with the unit in order to use them together.The disc is an incompatible format (DVD, non-hybrid SACD, etc.). Use an audio CD, or data CD with WAV files. |
12 - Troubleshooting
If the unit is not functioning properly, please check the following items before calling for service. If you are still unable to resolve the problem please contact the retailer where you purchased the unit or TASCAM customer support (see the back cover).
■ Power does not turn on
Confirm that the power plug is inserted completely.
■Media is not detected
Confirm that the CD or CF media is loaded properly. Stop playback or recording once.
■nit cannot be controlled
Confirm that the panel lock function is not on.
■nable to playback a file
If it is a WAV file, confirm that it uses a sampling frequency (44.1 kHz or 48 kHz) and a bit rate (16 or 24) that are supported by this unit.
lo sound
Confirm the connections with the monitoring system and check the volume of the amplifier.
■hanged settings are not saved
This unit backs up settings whenever you change them. This backup could fail if you turn off the power while this data is being written, so do not turn the power off immediately after changing a setting.
hear noise
Check if any connecting cable might have a bad connection.
■When editing text, "Name Full" appears
Due to limitations of the system, folder names can be a maximum of 52 characters (single-byte) long. A full path on the BROWSE screen cannot exceed 255 characters. For example, for a file or folder within a subfolder, the maximum number of characters is 255, including folders above it and all separators.
Media and file formats
Supported media
CF card (512MB - 64GB, Type I only)
CD, CD-R (CD-DA audio discs, ISO9660 Level1/Joliet/Romeo data discs)
Playback file formats
WAV: 44.1/48kHz, 16/24-bit, Maximum file size 2GB
CD-DA: 44.1kHz, 16-bit
Number of channels
2 (stereo)
1 (mono)
Inputs and outputs
Analog audio inputs and outputs
MIX INPUTS (BALANCED)
Connector: XLR-3-31 (1: GND, 2: HOT, 3: COLD)
Input impedance: 10 kΩ
Nominal input level: +4 dBu (1.23 Vrms)
Maximum input level: +24 dBu (12.28 Vrms)
LINE OUTPUTS (BALANCED)
Connector: XLR-3-32 (1: GND, 2: HOT, 3: COLD)
Output impedance: 200 Ω
Nominal output level: +4 dBu (1.23 Vrms)
Maximum output level: +24 dBu (12.28 Vrms)
MONITOR OUTPUTS (BALANCED)
Connector: XLR-3-32 (1: GND, 2: HOT, 3: COLD)
Output impedance: 200 Ω
Nominal output level: +4 dBu (1.23 Vrms)
Maximum output level: +24 dBu (12.28 Vrms)
PHONES
Connector: 6.3mm (1/4") standard stereo jack
Maximum output level: 45 mW+45 mW
(THD+N 0.1%, 32 Ω)
Digital audio output
DIGITAL OUT
Connector: BNC
Format: AES3-2003/AES-3id-2001/IEC60958-4 (AES/EBU)
Output impedance: 75 Ω
Control inputs and outputs
WORD IN
Connector: BNC
Input voltage: 5V TTL equivalent
Input impedance: 75 Ω
Permissible frequency variation during
external synchronization: ±100 ppm
Switchable clock terminator
WORD THRU
Connector: BNC
Output voltage: 5V TTL equivalent
Output impedance: 75 Ω
REMOTE IN (SERIAL)
Connector: D-sub 15-pin
REMOTE IN (PARALLEL)
Connector: D-sub 37-pin
Maximum input voltage: +5.5 V
High-level minimum input voltage: +3.75 V
Low-level maximum input voltage: +1.25 V
Output format: open drain (withstand voltage 50 V, maximum 100 mA)
Low-level maximum output voltage: 0.5 V
+5V power maximum supplied current: 100 mA
KEYBOARD
Connector: USB A-type 4-pin
Protocol: USB 1.1 Low Speed (1.5 Mbps)
+5V power maximum supplied current: 500 mA
Audio performance
Frequency response
20 Hz–20 kHz: ±0.5 dB
Distortion
0.005% or less
S/N ratio
100 dB or more
Dynamic range
95 dB or more
Channel separation
95 dB or more
NOTE
All audio performance ratings are for playback according to JEITA CP-2150 standards
Backup memory
The following settings are backed up even when the power is turned OFF.
- Playback mode settings
• Program playback settings
• Cue playback settings (for up to 500 CDs) - Menu item settings: auto cue, auto ready, incremental playback, online back cue, play key function, monitor playback standby, online playback standby, repeat playback, EOM, end check, pitch control value, external remote, jog playback, RS-232C, digital output, analog output, online, master clock, mono mix playback, level meter display, fail safe, monitoring point, online monitor muting, display and indicator brightness, display contrast, keyboard type
General
Power
AC 100-240 V, 50-60 Hz
Power consumption
18W
Dimensions (width × height × depth)
220 x 136.8 x 385.2 mm
Weight
6 kg
Operating temperature range
5-35^(41-95^)
Installation angle
5^ or less
Dimensional drawings
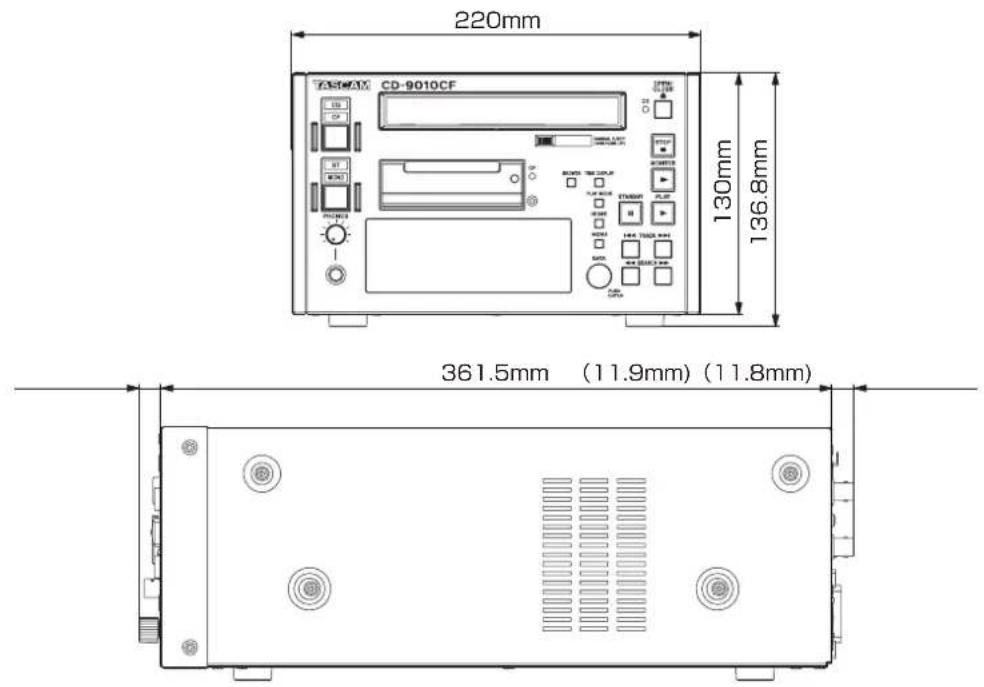
TASCAM
CD-9010CF
TEAC CORPORATION tascam.jp
Phone: +81-42-356-9143
1-47 Ochiai, Tama-shi, Tokyo 206-8530 Japan
TEAC AMERICA, INC. tascam.com
Phone: +1-323-726-0303
7733 Telegraph Road, Montebello, California 90640 USA
TEAC CANADA LTD. tascam.com
Phone: +1905-890-8008 Facsimile: +1905-890-9888
5939 Wallace Street, Mississauga, Ontario L4Z 1Z8, Canada
TEAC MEXICO, S.A. de C.V. teacmexico.net
Phone: +52-55-5010-6000
TEAC UK LIMITED tascam.co.uk
Phone: +44-8451-302511
Suites 19 & 20, Building 6, Croxley Green Business Park, Hatters Lane, Watford, Hertfordshire, WD18 8TE, UK



- Important Safety Information
- WARNING: TO PREVENT FIRE OR SHOCK HAZARD, DO NOT EXPOSE THIS APPLIANCE TO RAIN OR MOISTURE.
- CAUTION
- WARNING
- or U.S.A.
- TO THE USER
- ■or European Customers
- CE Marking Information
- Disposal of electrical and electronic equipment
- Disposal of batteries and/or accumulators
- For Canada
- Safety precautions
- ■AUTIONS ABOUT LASER RADIATION
- CAUTIONS
- Optical pickup
- Model number
- Serial number
- - Introduction ......7
- – Names and Functions of Parts .....10
- – Preparations ......17
- - Playback....21
- - Program and cue playback 29
- Contents
- - Working with files and folders .....35
- - Managing CF cards ....39
- – Other settings and information display.41
- - Operation using a computer keyboard ...47
- - Using the remote connectors .....48
- - Message list ....51
- - Troubleshooting ....52
- - Specifications ....53
- Features
- Included items
- Conventions used in this manual
- TIP
- NOTE
- Intellectual property rights
- Precautions for placement and use
- Connecting the power
- Beware of condensation
- Cleaning the unit
- About CF cards
- Precautions for use
- Card formatting
- About discs
- Handling of compact discs
- Front panel
- – Names and Functions of Parts
- ⑭ PLAY button/indicator
- ⑮ STANDBY button/indicator
- ⑯ TRACK ◀◀◀/▶▶1 buttons
- ⑰ SEARCH ◀◀/▶▶ buttons
- ⑱ Display
- ⑲ PLAY MODE button
- ⑳ HOME button
- ②1 MENU button
- ⑳ DATA dial
- Rear panel
- ②3 DIGITAL OUTPUT
- ⑳ MONITOR OUTPUTS (R/L) (balanced)
- ⑲ LINE OUT OUTPUTS (R/L) (balanced)
- ②6 MIX INPUTS (R/L) (balanced)
- ⑳ WORD SYNC THRU
- ⑳ WORD SYNC IN
- ⑲ 75Ω (ON/OFF) switch
- ③0 POWER switch
- ③1 AC IN connector
- ③2 KEYBOARD connector
- ③3 REMOTE (PARALLEL)
- ③4 REMOTE (SERIAL)
- Home Screen
- ① Playback level meters
- ② Index
- ③ Track time display (main area)
- ④ Playback mode
- ⑤ Track number
- ⑥ Track playback position
- ⑦ Repeat playback function indicator
- ⑧ PITCH indicator
- ⑨ Master clock indicator
- ⑩ Information area
- Menu structure
- Menu operation basics
- To select an item (vertically on the screen)
- To confirm the selected item
- To go back one menu level
- To return directly to the Home screen from the Menu screen
- Menu operation procedures
- Turning the power ON and OFF
- Turning the power OFF
- Setting the date and time
- Adjusting the display
- Adjusting display contrast
- Setting using the controls
- Setting using the menu
- Adjusting display and indicator brightness
- Inserting and ejecting CF cards
- Inserting CF cards
- Ejecting CF cards
- Using the security screw
- Connecting headphones
- Setting the panel lock function
- Monitoring and online playback
- Monitoring playback
- Starting monitoring playback
- Online playback
- Starting online playback
- Setting the playback mode
- Continuous playback mode (default setting)
- Single playback mode
- Program playback mode
- Playing a track once from the beginning
- Playing a track from the middle
- Automatic cue point memory (last cue)
- Setting the playback point
- Selecting tracks
- button
- ▶▶| button
- Operation after selection of a track
- When Auto Cue is ON
- When Auto Cue is OFF
- Searching within tracks
- Auto cue function
- Auto ready function
- Incremental playback function
- ONLINE BACK CUE function
- PLAY KEY FUNCTION setting
- NOTES
- MONITOR PLAY STBY function
- ONLINE PLAY STBY function
- Repeat playback
- Ordinary repeat playback
- EOM functions
- Setting EOM tally output trigger
- How to use the EOM
- Checking the ends of tracks
- Setting the amount of time checked
- How to use the end check function
- Pitch control playback
- Turning pitch control playback ON/OFF
- Setting the pitch control value
- PITCH/TIME FIT function
- – Program and cue playback
- Program playback
- Program menu operation
- ADD PROGRAM
- DELETE ALL PROGRAM
- DELETE PROGRAM
- MOVE
- CANCEL
- Adding tracks to a program
- Clearing a program
- Removing tracks from a program
- Moving tracks within a program
- Importing programs
- Exporting programs
- Cue point playback
- Using the cue menu
- ADD CUE
- DELETE ALL CUE
- DELETE CUE
- EDIT CUE TITLE
- Adding cue points
- Clearing the cue list
- Clearing a cue point
- Editing cue point names
- Editing text
- Importing cue lists
- Exporting cue lists
- Automatic cue point loading options
- – Working with files and folders
- Opening the BROWSE screen
- Navigating the BROWSE screen
- Icons on the BROWSE screen
- Folder (
- Audio file (J)
- File operations
- RENAME
- DELETE
- Folder operations
- SELECT
- RENAME (CF card)
- DELETE (CF card)
- NEW FOLDER (CF card)
- Editing folder names (CF cards)
- Editing file names (CF cards)
- Deleting folders and files (CF cards)
- Creating new folders (CF cards)
- File and folders on CF cards and data CDs
- Formatting CF cards quickly
- Formatting CF cards (full format)
- Ripping CD tracks to CF cards
- – Other settings and information display
- Setting the digital reference level
- Setting the analog reference level
- Adjusting R/L analog reference levels
- Setting the online function
- Setting the master word clock
- Mono mix setting
- Master clock and digital output combinations
- Setting the level meter display type
- Fail safe function setting
- Monitoring point setting
- Muting monitoring when online
- Importing menu settings
- Exporting menu settings
- Restoring the factory settings
- Viewing media information
- Viewing system information
- – Operation using a computer keyboard
- Setting the keyboard language
- Using a keyboard to input text
- To select the case
- To input text
- To move the cursor
- To delete a character
- To insert a character
- To edit a character
- - Using the remote connectors
- Using the serial connector
- Fader use setting
- Fader start function setting
- Fader stop function setting
- Fader stop action setting
- Setting the fader scale used
- Transmission speed setting
- Using the parallel connector
- Parallel port 3-pin/13-pin setting
- Error messages
- Warning messages
- Operation messages
- - Troubleshooting
- ■ Power does not turn on
- ■Media is not detected
- ■nit cannot be controlled
- ■nable to playback a file
- lo sound
- ■hanged settings are not saved
- hear noise
- ■When editing text, "Name Full" appears
- Media and file formats
- Supported media
- Playback file formats
- Number of channels
- Inputs and outputs
- Analog audio inputs and outputs
- MIX INPUTS (BALANCED)
- LINE OUTPUTS (BALANCED)
- MONITOR OUTPUTS (BALANCED)
- PHONES
- Digital audio output
- DIGITAL OUT
- Control inputs and outputs
- WORD IN
- WORD THRU
- REMOTE IN (SERIAL)
- REMOTE IN (PARALLEL)
- KEYBOARD
- Audio performance
- Frequency response
- Distortion
- S/N ratio
- Dynamic range
- Channel separation
- Backup memory
- General
- TASCAM
- CD-9010CF
Brand : TASCAM
Model : CD-9010
Category : CD Player