
586 - Hi-Fi System MERIDIAN - Free user manual and instructions
Find the device manual for free 586 MERIDIAN in PDF.


| Product Type | CD Player / Transport |
| Brand | Meridian |
| Model | 586 |
| Dimensions (W x H x D) | 17.5 x 4.0 x 13.5 inches (445 x 102 x 343 mm) |
| Weight | 15.4 lbs (7.0 kg) |
| Power Supply | AC 120V/240V, 50/60Hz |
| Power Consumption | 25 W (standby <0.5 W) |
| Digital Outputs | Coaxial (RCA), Optical (Toslink), AES/EBU (XLR) |
| Analog Outputs | Stereo RCA, XLR balanced |
| Supported Media | CD, CD-R, CD-RW (audio) |
| Remote Control | Infrared, included (Meridian MSR+) |
| Finish | Silver or black anodized aluminum |
| Display | Fluorescent dot matrix (blue/white) |
| DAC Type | Delta-Sigma (24-bit/192kHz capable) |
| Signal-to-Noise Ratio | > 110 dB |
| Total Harmonic Distortion | < 0.002% |
| Frequency Response | 20 Hz – 20 kHz ±0.2 dB |
| Maintenance | Clean lens with dry, anti-static cloth; avoid exposure to dust and moisture |
| Safety Warnings | Do not open chassis; no user-serviceable parts inside; use only specified voltage |
| Spare Parts Availability | Contact Meridian authorized service centers; some parts may be discontinued |
| Repairability Index | 6/10 (requires professional servicing) |
| Accessories Included | Remote control, power cord, user manual (74 pages) |
Frequently Asked Questions - 586 MERIDIAN
User questions about 586 MERIDIAN
0 question about this device. Answer the ones you know or ask your own.
Ask a new question about this device
Download the instructions for your Hi-Fi System in PDF format for free! Find your manual 586 - MERIDIAN and take your electronic device back in hand. On this page are published all the documents necessary for the use of your device. 586 by MERIDIAN.
USER MANUAL 586 MERIDIAN
Meridian 586 DVD Player
Sales and service in the UK
Meridian Audio Ltd
Stonehill
Stukeley Meadows
Cambs
PE18 6ED
England
Tel (01480) 52144
Fax (01480) 459934
World Wide Web
http://www.meridian-audio.com
Part no: 586US/2
Sales and service in the USA
Meridian America Inc
3800 Camp Creek Parkway
Building 2400
Suite 122
Atlanta
GA 30331
Tel (404) 344 7111
Fax (404) 346 7111
Designed and
manufactured in the UK by
Digital Gramophone and Wireless Ltd
Stonehill
Stukeley Meadows
Cambs
PE18 6ED
England
Copyright © 1997 Digital Gramophone and Wireless Ltd.
Dolby, Dolby Digital, Pro Logic, AC-3, and the double-D symbol are trademarks of Dolby Laboratories Licensing Corporation.
BoothroydlStuart Meridian, Meridian, and Meridian Digital Theatre are registered trademarks of Meridian Audio Ltd.
This product incorporates copyright protection technology that is protected by method claims of certain U.S. patents and other intellectual property rights owned by Macrovision Corporation
and other rights owners. Use of this copyright protection technology must be authorized by Macrovision Corporation, and is intended for home and other limited viewing uses only unless otherwise authorized by Macrovision Corporation. Reverse engineering or disassembly is prohibited.
This guide was produced by Human-Computer Interface Ltd, Cambridge, England.
Contents
Introduction 1
Introduces the 586 DVD Player, and provides an overview of the other products available in the Meridian 500 Series.
The Meridian 500 Series ...... 2
Sample configurations .... 3
Specification and accessories ...... 6
Using the DVD player 7
Provides step-by-step instructions on how to operate the DVD player, using either the front panel or the DVD remote.
DVD remote 8
Front panel 10
Playing a disc 11
Locating a specific title, chapter, or track 13
Stopping, pausing, and resuming play 15
Disc information 16
Advanced features 19
Describes the more advanced features of the DVD player.
Selecting options from a menu 20
Fast and slow-motion play 21
Playing repeatedly 23
Programming a selection 24
Selecting a playback audio setting ..... 26
Displaying subtitles 27
Selecting the camera angle and zooming the picture 28
Setting the parental lock 29
Language codes 32
Setting default options 33
Explains how to set up the default options using the DVD player's Setup Menu.
Setting default options 34
Selecting the audio settings 36
Selecting the function settings ...... 39
Selecting the display settings 42
Configuring the DVD player 47
Explains how to configure the DVD player to suit the other equipment in your system.
Choosing standard settings 48
Configuring the 586 DVD Player ...... 49
Setting up the DVD player 53
Describes how to unpack and install the DVD player, and gives information about cleaning and servicing your DVD player.
Unpacking 54
Back panel 55
Connecting video 57
Connecting audio 58
Connecting to other Meridian
equipment 60
Troubleshooting 61
Maintenance 64
Service and guarantee 65
Index 67
Introduction
A single DVD video disc can contain a whole motion picture, complete with multi-channel sound and many other features such as subtitles and related information. The picture quality is close to that of the film's original format, and it does not suffer from the degradations of quality experienced with analogue storage. The DVD format also supports a range of audio formats, including recordings with multi-channel sound or at higher resolutions or sampling rates than can be provided on conventional CD.
The Meridian 586 DVD Player allows you to take advantage of the whole range of video and audio releases available in this versatile new format. It uses the proven Meridian drawer-loading system to combine the convenience of tray loading with the extremely important performance benefits of top loading. In addition, the high-quality circuitry and de-jittering technology result in the highest audio and video quality achievable with DVD.
This user guide explains how to operate the DVD player, to enable you to get the best results from your video and music discs.
The Meridian 500 Series
The Meridian 500 Series is a unique system of digital, analogue, and video components designed to meet the demand for absolute quality, ease of use, and lasting value.
The flexibility of the Meridian 500 Series is such that you can assemble a system as simple or as complex as you need, which is perfectly suited to your musical and environmental requirements and is able to be added to or changed at a later date should your requirements alter.
Each Meridian 500 Series component is housed in a matching slim line case. Front panel controls provide access to the most important functions, and the full range of functions is available from the appropriate remote control using a simple and intuitive control interface.
500 Series communications
The Meridian 500 Series includes a sophisticated communications link to ensure that any configuration of units will work together as a fully integrated system.
The 500 Series communications system allows you to control any combination of units using a single remote, and ensures that your commands from the remote are interpreted correctly. The communications system also allows you to extend your hi-fi system into two or three rooms, with the ability to control the sources in one room from the controller in another room.
Professional features
The 500 Series also includes features for professional users, including RS232 computer control and balanced connections.
The following pages give examples of four suggested configurations to illustrate the flexibility of the Meridian 500 Series.
Sample configurations
Stereo music/video system
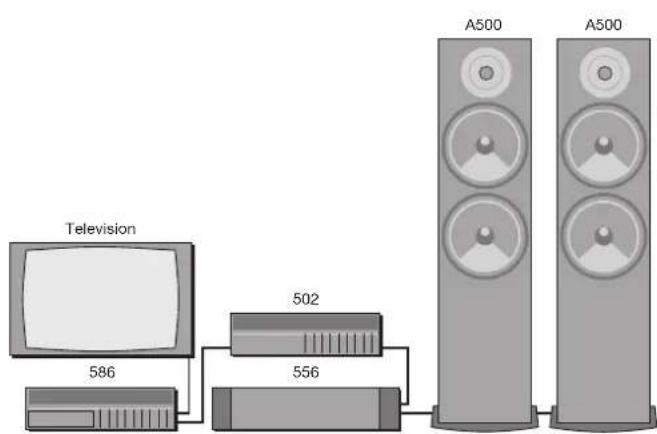
The 586 DVD Player provides a two-channel analogue audio output, normally encoded in Dolby Surround, to allow direct connection to an analogue pre-amplifier such as the 502 Analogue Controller.
In addition to playing DVD discs, the 586 includes a second lens to enable it to play audio CDs (although not recordable CDs). By careful design Meridian have achieved a sound quality with audio CDs which approaches that of their dedicated CD players.
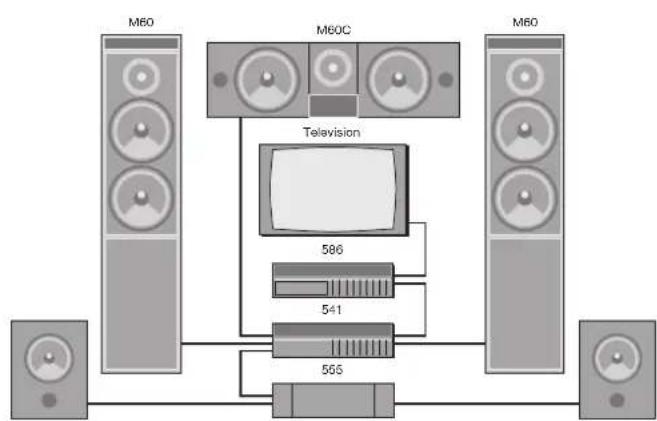
Meridian Analogue Theatre
flowchart
graph TD
    A["M60"] --> B["Television"]
    C["M60C"] --> B
    D["M60"] --> E["586"]
    E --> F["541"]
    F --> G["555"]
    G --> H["Ground"]
    I["Speaker"] --> A
    J["Speaker"] --> C
    K["Speaker"] --> D
The 586 DVD Player is also ideal for use with the Meridian 541 Surround Controller to decode movie soundtracks to the loudspeakers in a multi-channel surround system.
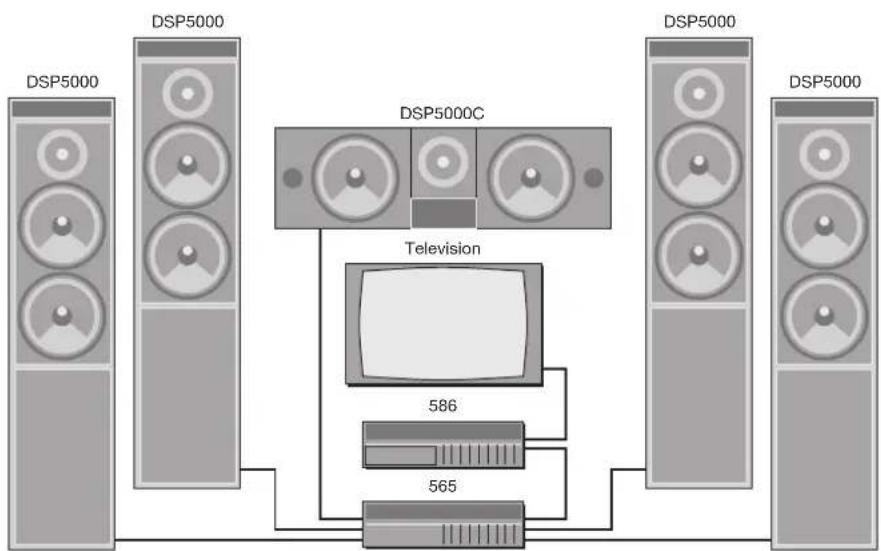
Meridian Digital Theatre™
flowchart
graph TD
    A["DSP5000"] --> B["DSP5000C"]
    C["DSP5000"] --> D["DSP5000"]
    E["DSP5000"] --> F["DSP5000"]
    G["DSP5000"] --> H["DSP5000"]
    I["Television"] --> J["586"]
    K["565"] --> L["Television"]
The Meridian 586 DVD Player provides a digital audio output, making it ideal for use with the 565 Digital Surround Processor as the heart of a Meridian Digital Theatre system.
The Meridian 565 Digital Surround Processor can decode Dolby Digital (AC-3), MPEG Surround, DTS Audio, and Dolby Surround soundtracks.
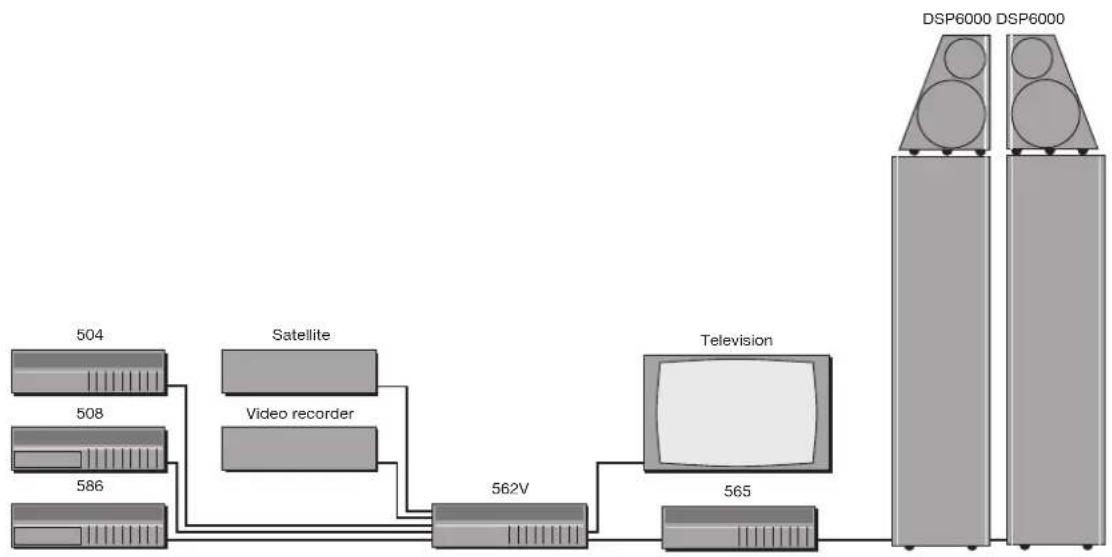
Multimedia system
flowchart
graph LR
    A["Satellite"] --> B["Video recorder"]
    B --> C["562V"]
    C --> D["Television"]
    D --> E["DSP6000 DSP6000"]
    A --> F["504"]
    A --> G["508"]
    A --> H["586"]
    F --> I["565"]
The Meridian 562V Multimedia Controller is the ideal control unit for use as the heart of a versatile multimedia system, giving flexible control of video, digital audio, and analogue audio sources. It provides direct digital inputs for digital sources, such as the 508 Compact Disc Transport and DVD sound from the 586 DVD Player.
In addition it provides Precision Delta Sigma analogue to digital conversion, for conventional analogue sources such as the 504 Stereo FM Tuner and video or television sound.
It also includes video switching for CVBS and S-Video signals such as from the 586 DVD Player, a satellite receiver, or video recorder.
Specification and accessories
Specification
THD Less than -93dBFS.
Noise Less than -93dBFS.
Mechanism Dual-lens pickup with red laser.
Formats DVD, CD.
Conversion 20-bit Delta Sigma.
Display 12-character dot-matrix display for title, chapter, track, or time.
Finish Black textured enamel and glass.
Dimensions 88mm x 321mm x 332mm (3.46" x 12.64" x 13.07").
Weight 6.4kg (14lbs).
Audio outputs 2-channel Dolby Surround, with on-board decoding from Dolby Digital (AC-3). Low-jitter digital output for connection to an external decoder (44.1kHz, 48kHz). AC-3 and PCM supported.
Video outputs Composite video.
S-Video.
Component (Y, Pr, Pb).
Communications Two 5 pin 240° DIN sockets.
Consumption 20VA.
Available accessories
The following accessories are available from your dealer:
○ Power cord Europe.
○ Power cord Canada and USA.
The Meridian System Remote provides access to the basic facilities of the 586 DVD Player, including those available from the front panel controls. In addition, it allows you to control any other 500 Series units in your system.
If you have problems purchasing these items, you can order them direct from Meridian Audio Limited, who can also supply a range of cables suitable for connecting the 586 DVD Player to other equipment.
Using the DVD player
This chapter provides a summary of the functions of the DVD player in order to identify the controls which you will use to operate the unit.
It also describes the basic aspects of using the DVD player to play DVD video discs and audio CDs.
Unless otherwise specified, each function is available from the front panel or the DVD remote. In addition, if you have the Meridian System Remote you can use this to operate all the basic functions of the DVD player.
DVD remote
1 OPEN/CLOSE
Opens or closes the drawer.
2 SUBTITLE ON/OFF
Turns subtitles on or off.
3 SETUP
Displays the Setup Menu.
4 TITLE
Displays the Title Menu.
5 RETURN
Exits from a menu.
6 ANGLE
Changes the viewing angle.
7 SKIP
Skips to the previous chapter/track.
8 REV
Selects fast reverse play.
9 PLAY ▶
Plays and unpauses a disc.
10 PAUSE/STEP
Pauses a disc and steps a frame at a time.
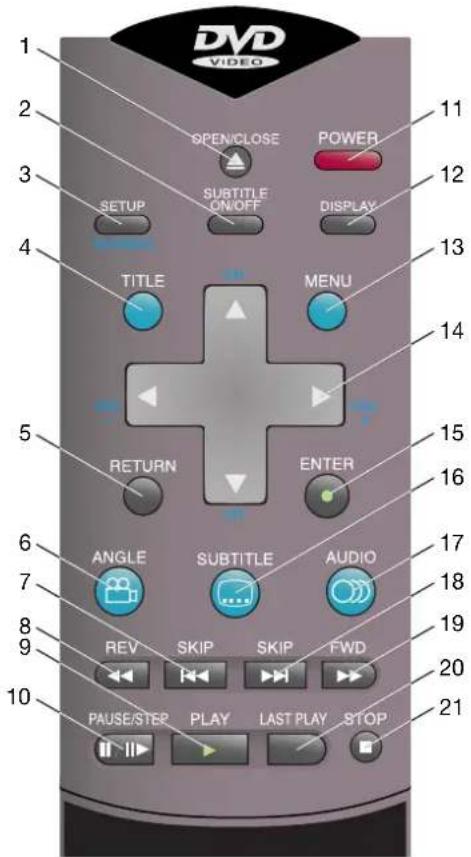
11 POWER
Switches to standby.
12 DISPLAY
Displays on-screen information.
13 MENU
Displays the disc menu.
14 ◀▶ ▲▼
Let you highlight options on menus.
15 ENTER
Selects a highlighted menu option.
16 SUBTITLE
Changes the subtitle language.
17 AUDIO
Changes the soundtrack.
18 SKIP ▶▶▶
Skips to the next chapter/track.
19 FWD ▶▶
Selects fast forward play.
20 LAST PLAY
Continues playing from stop.
21 STOP ■
Stops a disc playing.
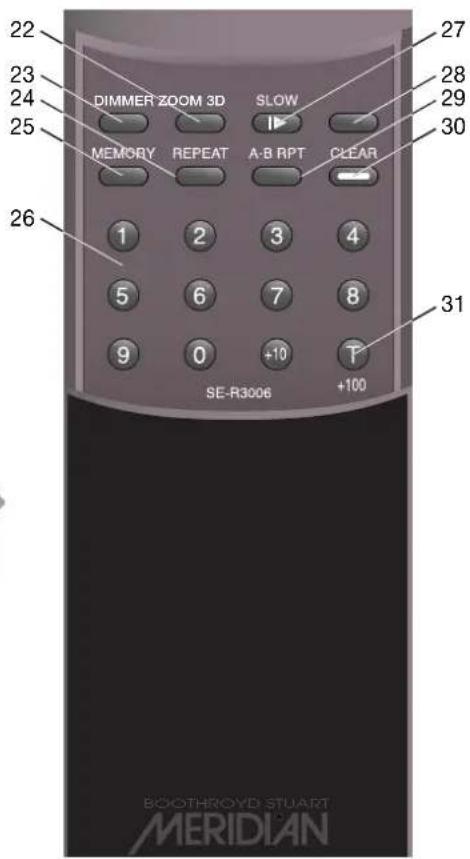
22 ZOOM
Enlarges a portion of the picture.
23 DIMMER
No action.
24 REPEAT
Selects a repeat play mode.
25 MEMORY
Allows you to programme a selection.
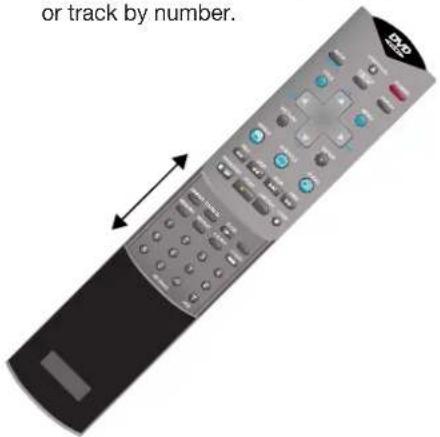
26 Number keys
Allows you to select a title, chapter, or track by number.
27 SLOW
Selects slow-motion play.
28 3D
No action.
29 A-B RPT
Repeats a selection.
30 CLEAR
Clears a special play mode.
31 T
Enters a title number.
Front panel
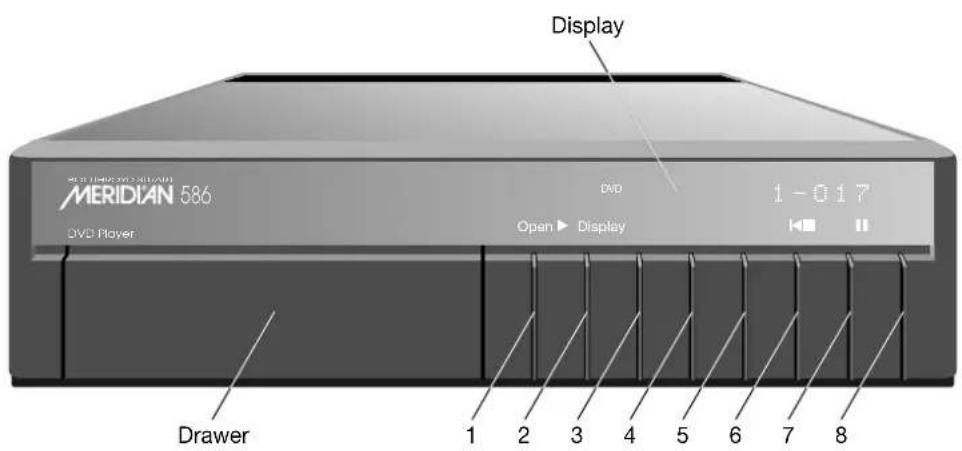
1 Open
Opens and closes the disc drawer.
2 ▶ (Play)
Plays a selected chapter/track.
3 ■ (Stop)
Stops the disc.
4 II (Pause)
Pauses the disc.
5 Display
Selects the information displayed.
6 ◀ (Previous)
Selects the previous chapter/track.
7 ▶ (Next)
Selects the next chapter/track.
8 Off
Switches to standby.
Playing a disc
During normal use the DVD player should be left in the standby state. This uses a negligible amount of electricity, but ensures that the components of the DVD player operate at maximum efficiency from the moment you start playing a disc.
If you are not going to use the DVD player for a period of several days you should switch the unit completely off, at the back panel, and disconnect it from the AC power supply.
To switch on from standby
- Press Open (OPEN/CLOSE) or ■ (STOP).
- Switch on any other equipment connected to the CD player which is not part of the Meridian 500 Series.
The display will flash for a few seconds. The DVD player is then ready for use.
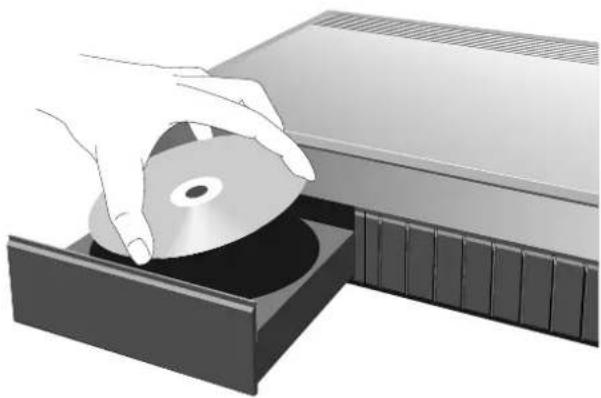
To insert a disc
- Press Open (front panel) or OPEN/CLOSE (remote) to open the drawer.
IMPORTANT: Never touch the lenses which are accessible when the drawer is open.
- Place your disc, label side up, over the hub, as shown below.
IMPORTANT: Ensure that the disc is correctly seated on the disc spindle before closing the drawer.
- Press Open (OPEN/CLOSE) again or ▶ (PLAY) to close the drawer.
Most DVD videos start playing automatically when you close the drawer.
Some DVD videos are double-sided, and need to be turned over during play.
natural_image
Illustration of hands inserting a CD into a drive into a folder (no text or symbols visible)To play the disc
- Press ▶ (front panel) or PLAY (remote).
The display will show the title and chapter, or track number:
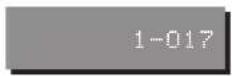
For example, on chapter 17 of title 1:
To restart the current chapter or track
- Press ◀ (front panel) or SKIP ◀◀ (remote).
To move to the next chapter or track
- Press ▶I (front panel) or SKIP ▶▶I (remote).
To switch to standby
- Press Off (front panel) or POWER (remote).
The display will show:
If you have other Meridian 500 Series equipment connected to the DVD player, these units will also switch to standby.
If a disc is currently playing, switching to standby will stop the disc, and the disc can safely be left in the unit.
Note that if the 586 DVD Player is part of a Meridian system, and you select another source (such as the radio), the DVD player switches to a low-power mode.
The display shows:
Locating a specific title, chapter, or track
Normally, DVD video discs are divided into one or more titles, and the titles are subdivided into chapters. Audio CDs are divided into tracks.
The DVD player allows you to play an entire disc, or start playing from any chapter or track number. While a disc is playing you can go back to the start of the chapter or track or skip to the start of the next chapter or track.
You can also enter a specific title, chapter, or track number to locate the appropriate title or chapter/track directly.
To play starting from a particular chapter or track
- Press ▶I or ◀ (front panel) or SKIP ▶▶I or ◀◀ (remote) to step through the track numbers until the display shows the track you want to play:
For example, to play chapter 23:
After a short delay the chapter or track you have selected will start to play.
To locate a title or chapter/track by number
- Press T (remote) or • (Meridian System Remote) to highlight the title or track number, and enter the number you want:

- If you also want to specify a chapter number press ▼ (remote) or • (Meridian System Remote) to highlight the chapter number, and enter the number of the chapter you want:

- Press ▶ (PLAY).
The DVD player starts playing from the title and chapter numbers, or track number, you specified.
To locate a specific location within a title
- Press T (remote) twice until the TIME display appears:

- Enter the time using the number buttons:

- Press ▶ (PLAY).
The DVD player starts playing from the location you specified.
Stopping, pausing, and resuming play
You can stop or pause a disc, and then resume play at the same position.
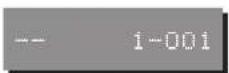
To stop play
- Press ■ (STOP).
The display will return to chapter or track 1:
To resume after stopping
- Press LAST PLAY (remote only).
Provided you have not opened the disc tray the disc will resume playing slightly before the position where you stopped playback.
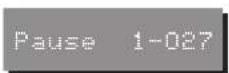
To pause play
- Press II (front panel) or PAUSE/STEP (remote).
The display shows the title and chapter, or track:
To step forward frame by frame
If you are playing a DVD video disc you can step forward, frame by frame, while it is paused:
- Press II (front panel) or PAUSE/STEP (remote).
To continue after pausing
- Press ▶ (PLAY).
Disc information
You can display information about a disc on the front panel or on-screen display.
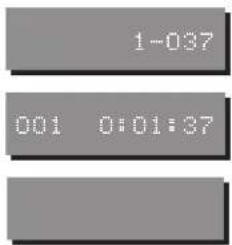
To change the front panel display
- Press Display (front panel or Meridian System Remote).
Each time you press Display, the display will step between the following options:
Display Example
Title and chapter numbers (DVD video disc) or track number (audio CD).
Chapter or track number and elapsed time.
Blank.
To display disc information on screen
- Press DISPLAY (remote).
For a DVD video disc this shows the following information:
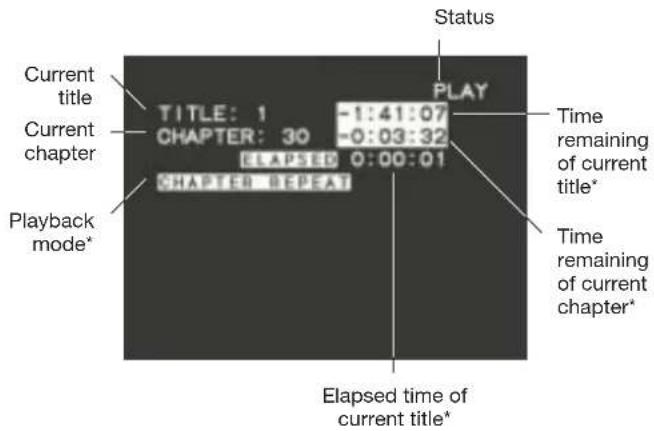
*Shown only when a disc is playing.
For an audio CD this shows the following information:
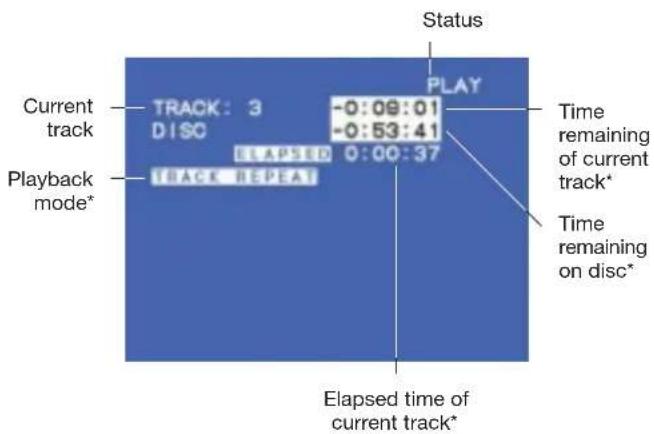
* Shown only when a disc is playing.
To display information about DVD video disc features
- Press DISPLAY (remote) twice while a DVD disc is playing.
In addition to the status and timing information this shows the following information about DVD features:
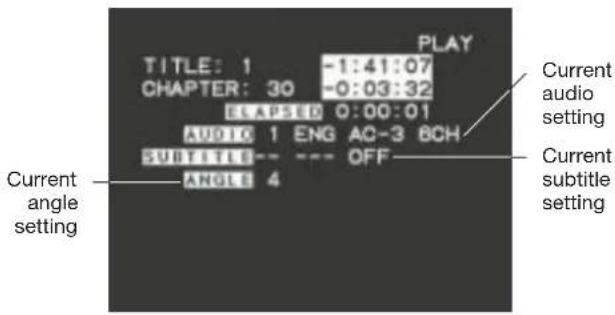
To turn off the on-screen display
- Press DISPLAY (remote) again.
Advanced features
This chapter describes the more advanced features of the 586 DVD Player. These features are not essential if you simply want to enjoy DVD video discs or audio CDs, but they allow you to take full advantage of the range of options available with the DVD format.
Note that many of the advanced features depend on the content of the particular DVD disc you are playing.
The advanced features described in this chapter are only available using the DVD remote.
Selecting options from a menu
Many DVD video discs provide additional sections of video or special options, which you can select from an on-screen menu.
Some DVD video discs which contain several titles also provide a Title Menu, from which you can select one of the titles.
To select an option from the disc menu
- Press MENU to display the disc menu on the screen.
A typical disc menu looks like this:
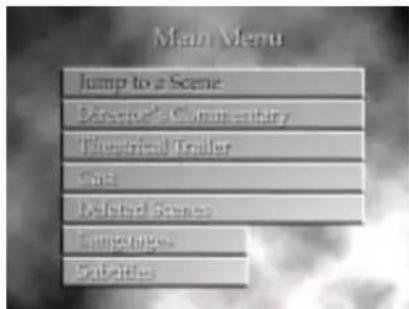
- Press ▲, ▼, ◀, or ▶ to highlight an option, and press ENTER to select it.
To select a title using the Title Menu
- Press TITLE to display the Title Menu on the screen.
- Press ▲, ▼, ◀, or ▶ to highlight a title, and press ENTER to select it.
The DVD player starts playback from chapter 1 of the title you selected.
Fast and slow-motion play
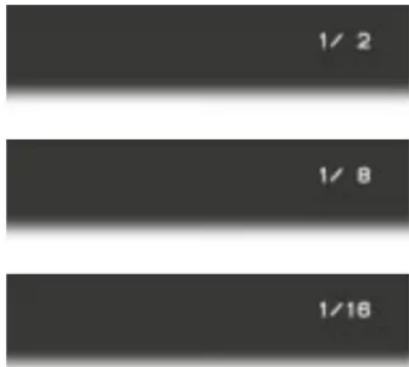
You can play back DVD video discs faster than normal, at between twice and 30 times normal speed, or in slow motion, at between half and one-sixteenth of normal speed.
You can also play back audio CDs faster than normal.
Note that the sound is muted when playing back DVD video discs faster or slower than normal.
To play DVD video discs faster than normal
- Press FWD or REV during playback.
Each time you press the key the speed switches between twice, eight times, and 30 times normal speed, as shown by the on-screen display:
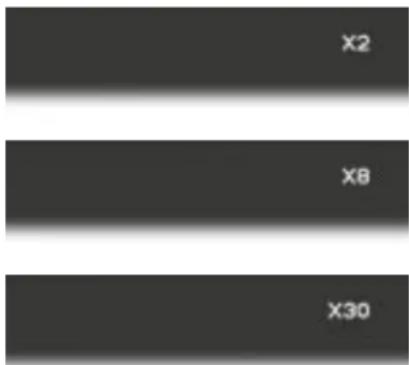
To play DVD video discs in slow motion
- Press SLOW during playback.
The speed switches between 12 , 18 , and 116 normal speed, as shown by the on-screen display:
To play audio CDs faster than normal
- Press FWD or REV during playback.
Each time you press the key the speed alternates between two speeds, FF1 and FF2 (or FR1 and FR2):

To resume normal speed
- Press ▶ (PLAY).
Playing repeatedly
You can play back a specified title, chapter, track, or section of a disc repeatedly.
To repeat a title, chapter, or track
- Select the title, chapter, or track you want to repeat.
- Press REPEAT to switch between the alternative repeat modes.
The current repeat mode is displayed on the on-screen display:
CHAPTER REPEAT
It can be one of the following options:
Option Description
Chapter/track repeat Repeats the same chapter (DVD video disc) or track (audio CD).
Title/all repeat Repeats the same DVD video disc title or the entire audio CD.
Repeat off Resumes normal playback.
To repeat a specific section of a disc
- Press A-B RPT at the beginning of the section you want to play back repeatedly.
- Press A-B RPT again at the end of the section.
The DVD player automatically returns to the start of the section and plays it back repeatedly.
To cancel the repeat press A-B RPT a third time.
To resume normal playback
- Press CLEAR.
Any repeat mode you have selected will be cancelled.
Programming a selection
The DVD player's memory function lets you program a selection of titles and chapters (DVD video discs) or tracks (audio CDs), and play them back in any order. Note that some DVD video discs do not support this function.
You program a selection on a DVD video disc by specifying the title and chapter number of each chapter you want to play. Alternatively, you can leave the chapter number blank to play all the chapters in a title.
You program a selection on an audio CD by specifying the track number of each track you want to play.
To program a selection
- With a disc inserted and stopped press MEMORY to display the MEMORY menu:
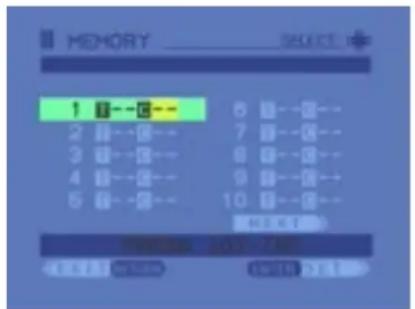
- Press ◀◀▶ highlight the first title number, shown as T--, and enter the title number of the first item you want to play.
- Press ▶to highlight the chapter number, shown as C--, and enter the chapter number, or leave the chapter number blank to play all the chapters in the specified title.
You do not need to enter the title number if it is the same as the previous selection.
- Press ENTER to enter the selection.
- Repeat this procedure for the other selections you want to program.
You can program up to 30 items.
To change the selection you have programmed
- Press ▲ or ▼ to highlight the item you want to change.
- Edit the item by pressing T and the number keys, or press CLEAR to remove the item from the list.
To play the selection you have programmed
- If necessary, press MEMORY to display the MEMORY menu showing the selection you have programmed.
- Press ▶ (PLAY).
Selecting a playback audio setting
You can select one of the audio soundtracks from those included on a DVD video disc during playback. The audio setting shows the following information:
Information Examples
Soundtrack number 1, 2.
Soundtrack language ENG, FRE, GER.
Recording system AC-3, PCM, DTS.
Number of channels 2CH, 6CH.
For a full list of the language codes see Language codes, page 32.
To select the audio setting
- Press AUDIO.
The first time you press AUDIO the currently-selected audio setting is displayed:

- Press AUDIO to cycle between the available soundtracks.
The audio setting is displayed for three seconds, or until you press CLEAR.
Displaying subtitles
Many DVD video discs include subtitles in up to 32 different languages. While you are playing a disc you can turn the subtitles on or off, and select the subtitle language from those provided on the DVD video disc.
To select a subtitle language
- Press SUBTITLE during playback.
The on-screen display shows the current subtitle setting:
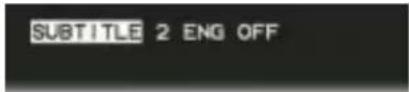
This gives the number of the subtitle option, the language code, and whether the subtitles are on or off. For a full list of language codes see Language codes, page 32.
- Press SUBTITLE to switch between the alternative subtitle languages.
To display subtitles
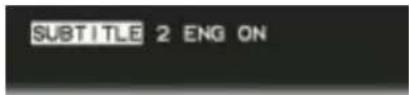
- Press SUBTITLE ON/OFF.
The on-screen displays shows the current subtitle setting:
Selecting the camera angle and zooming the picture
Some DVD video discs include scenes recorded from up to nine different camera angles, and you can select the camera angle while you are playing the disc.
You can choose to display an icon on the on-screen display to indicate when a scene contains multiple camera angles:

natural_image
Pure black background with a small white icon in the top-right corner (no text or symbols)For more information see To display the angle icon, page 44.
To change the camera angle
- Press ANGLE, ▲, or ▼, while viewing a scene with multiple camera angles.
Each time you press ANGLE, ▲, or ▼, the next camera angle is selected.
Alternatively you can select a specific camera angle directly by pressing one of the number keys 1 to 9.
To turn off the angle number indicator
- Press CLEAR.
To zoom the picture
- Press ZOOM during playback or slow motion.
The DVD player magnifies the central portion of the screen.
- Press ◀, ▶, ▲, or ▼ to move the magnified area.
- Press CLEAR to revert to magnifying the central part of the screen.
- Press ZOOM again to turn off the zoom feature.
Setting the parental lock
Some DVD video discs are provided with a parental lock function to allow you to lock out playback of scenes whose content exceeds a specified rating.
To set the parental lock
- Press SET UP while the disc is stopped.
The SET UP MENU is displayed on the on-screen display.
- Press 9 twice.
The PRESET SECURITY CODE menu appears:
![PARENTAL, LOCK PRESET SECURITY CODE PRESS [0] - [9]](/content/2026/05/770733/images/99b9588d0d0a02d8c4cefc30d9281ac7992ea8d40f55c5dd8803cc6eb1d01d79.jpg)
- Enter a four-digit security code, and press ENTER.
The PARENTAL LOCK menu appears:
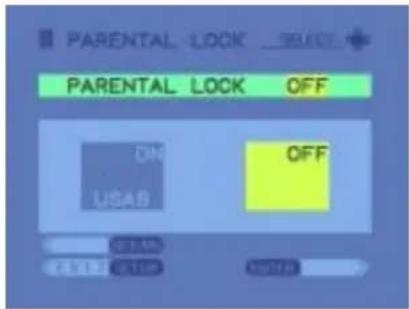
- Press ◀ or ▶ to select ON, and then press ENTER.
The COUNTRY menu appears:
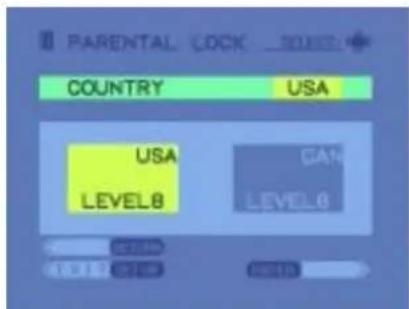
- Press ◀ or ▶ to select the country whose standards were used to rate the DVD video disc, then press ENTER.
The following menu appears:
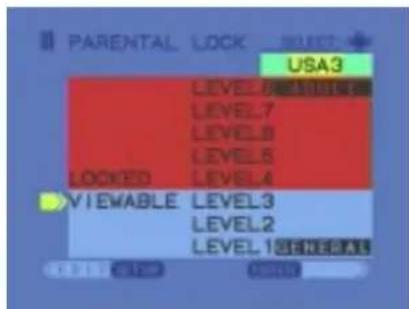
- Press ▲ or ▼ to select the parental lock level, then press ENTER to return to the SET UP MENU.
DVD video discs rated higher than the level you select will not be playable unless you cancel the parental lock.
Level 3 is equivalent to the USA movie rating PG.
- Press SET UP to exit from the SET UP MENU.
To change the parental lock setting
- Press SET UP while the disc is stopped.
The SET UP MENU is displayed on the on-screen display.
- Press 9 twice.
The ENTER SECURITY CODE menu appears:
![PARENTAL LOCK ENTER SECURITY CODE PRESS [0] - [8]](/content/2026/05/770733/images/a661c80ae5eac4e2c6c5e22c099ad523b9e7286a85660181186a9353d2c0c128.jpg)
- Enter your four-digit security code, and press ENTER.
• Proceed as described in To set the parental lock, page 29.
To change the four-digit security code
- Display the ENTER SECURITY CODE menu as described in the previous section.
- Press the STOP button four times to clear the existing security code.
- Enter a new four-digit security code, then press ENTER.
• Proceed as described in To set the parental lock, page 29.
To cancel the parental lock function
- In the PARENTAL LOCK menu select the OFF option, then press ENTER.
Language codes
The following table gives the abbreviation used for each language in the 586 menus.
Abbreviation Language
| --- No alternate language | |
| CHI | Chinese |
| DUT | Dutch |
| ENG | English |
| FRE | French |
| GER | German |
| ITA Italian | |
| JPN | Japanese |
| KOR | Korean |
| MAY | Malay |
| SPA | Spanish |
AA Afar
AB Abkhazlan
AF Afrikaans
AM Ambaric
AR Arabic
AS Assamese
AY Aymara
AZ Azerbaijani
BA Bashkir
BE Belorussian
BG Bulgarian
BH Bihari
BI Bislama
BN Bengali, Bangla
BO Tibetan
BR Breton
CA Catalan
CO Corsican
CS Czech
CY Welsh
DA Danish
DZ Bhutani
EL Greek
EO Esperanto
Abbreviation Language
ET Estonian
EU Basque
FA Persian
FI Finnish
FJ Fiji
FO Faroese
FY Frisian
GA Irish
GD Scottish Gaelic
GL Galician
GN Guarani
GU Gujarati
HA Hausa
HI Hindi
HR Croatian
HU Hungarian
HY Armenian
IA Interlingua
IE Interlingue
IK Inupiak
IN Indonesian
IS Icelandic
IW Hebrew
JI Yiddish
JW Javanese
KA Georgian
KK Kazakh
KL Greenlandic
KM Cambodian
KN Kannada
KS Kashmiri
KU Kurdish
KY Kirghiz
LA Latin
LN Lingala
Abbreviation Language
LO Laotian
LT Lithuanian
LV Latvian, Lettish
MG Malagasy
MI Maori
MK Macedonian
ML Malayalam
MN Mongolian
MO Moldavian
MR Marathi
MT Maltese
MY Burnese
NA Nauru
NE Nepali
NO Norwegian
OC Occitan
OM (Afan) Oromo
OR Oriya
PA Panjabi
PL Polish
PS Pashto, Pushto
PT Portuguese
QU Quechua
RM Rhaeto-Romance
RN Kirundi
RO Rumanian
RU Russian
RW Kinyarwanda
SA Sanskrit
SD Sindhi
SG Sango
SH Serbo-Croatian
SI Singhalese
SK Slovak
SL Slovenian
Abbreviation Language
SM Samoan
SN Shona
SO Somali
SQ Albanian
SR Serbian
SS Siswati
ST Sesotho
SU Sundanese
SV Swedish
SW Swahili
TA Tamil
TE Telugu
TG Tajik
TH Thai
TI Tigrinya
TK Turkmen
TL Tagalog
TN Setswana
TO Tongan
TR Turkish
TS Tsonga
TT Tatar
TW Twi
UK Ukrainian
UR Urdu
UZ Uzbek
VI Vietnamese
VO Volapük
WO
Wolof
XH Xhosa
YO Yoruba
ZU Zulu
Setting default options
The DVD format allows disc manufacturers to provide a wide range of options on DVD video discs, and the 586 DVD Player allows you to choose between these options while a disc is playing.
Which of these features is available depends on the DVD video disc you are playing. For information about changing these options refer to the chapter Advanced features, page 19.
For convenience the 586 DVD Player allows you to set a default choice for most of these options, so that when you first insert a disc it starts playing with your preferred settings. This chapter explains how to set up the default options using the DVD player's SET UP MENU.
The options described in this chapter are only available using the DVD remote.
Setting default options
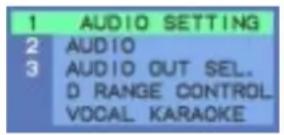
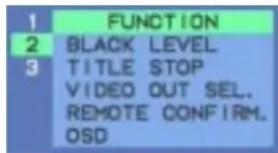
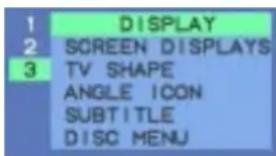
The default options are divided into the following three menus of settings:
Menu Description
AUDIO SETTING The audio language and sound format.
FUNCTION The video and operational settings.
DISPLAY The display settings, and menu and subtitle languages.
You choose the menu of settings you want from the main SET UP MENU.
To display the SET UP MENU
- If necessary switch on the DVD player and press STOP if a disc is currently playing.
- Press SET UP.
The main SET UP MENU will be displayed:
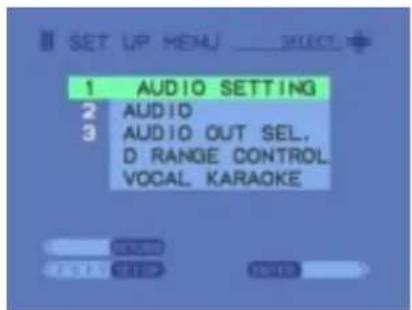
To select a set up menu
- Press ▲ or ▼ to display the set up menu you want.
As you display each menu, the settings available on that menu are shown:
- Press ENTER to select the menu.
To change a setting
- Press ▲ or ▼ to highlight the setting you want to change.
- Press ENTER to select the setting.
A second display then shows all the options available for the setting you have selected, and allows you to choose one as the default.
For more information about changing individual settings refer to the following sections in this chapter.
To return to the previous menu
- Press RETURN.
To exit from the set up menus
- Press SET UP.
Selecting the audio settings
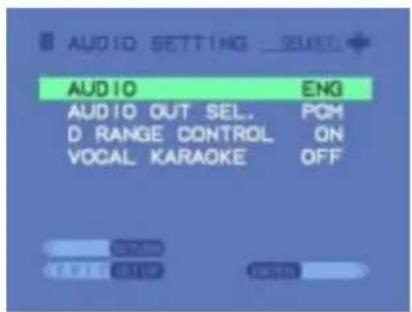
The AUDIO SETTING menu lets you select the preferred soundtrack language and audio format, and choose dynamic range control and vocal karaoke options:
To select the default soundtrack language
Most DVD video discs include a selection of soundtrack languages. English is usually the default soundtrack language, but you can use the SET UP MENU to set a different default language if you prefer.
Some DVD video discs also include a description of the actions on screen (descriptive service) for visually impaired users.
- Highlight AUDIO in the AUDIO SETTING menu, and press ENTER.
The AUDIO menu is displayed:
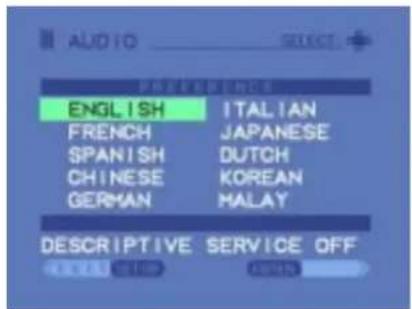
- Press ◀, ▶, ▲, or ▼ to highlight the default soundtrack language you want to use.
- If you want the descriptive service press AUDIO to set the DESCRIPTIVE SERVICE option to ON.
- Press ENTER to return to the AUDIO SETTING menu.
To select the audio output format
- Highlight AUDIO OUT SEL. in the AUDIO SETTING menu, and press ENTER.
The AUDIO OUT SEL menu is displayed:
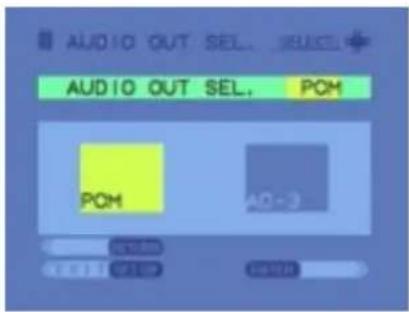
- Press ◀ or ▶ to highlight the format you want, and press ENTER.
Choose AC-3 if you are connecting the 586 DVD Player to an external digital surround processor.
Choose PCM to use the 586 on-board AC-3 decoder to provide two channel PCM audio on the digital and analogue outputs, suitable for feeding to a preamplifier or DSP loudspeakers.
To select dynamic range control
The DVD player's on-board AC-3 decoder provides dynamic range control, which is a feature available with Dolby Digital (AC-3) discs that makes quiet sounds easier to hear. It is ideal for low-level listening, such as late at night.
- Highlight D RANGE CONTROL in the AUDIO SETTING menu, and press ENTER.
The D RANGE CONTROL menu is displayed:
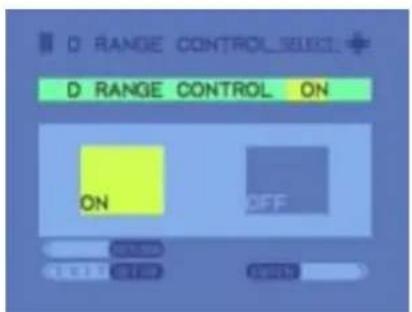
- Press ◀ or ▶ to turn dynamic range control on or off, and press ENTER.
Note that this feature is only available if you have chosen PCM in the AUDIO OUT SEL. menu. If you are using the DVD player with a 565 or 861 digital surround processor, these provide an equivalent function.
To select vocal karaoke
This option allows you to turn on or off the vocal track of DVD KARAOKE discs.
- Highlight VOCAL KARAOKE in the AUDIO SETTING menu, and press ENTER.
The VOCAL KARAOKE menu is displayed:
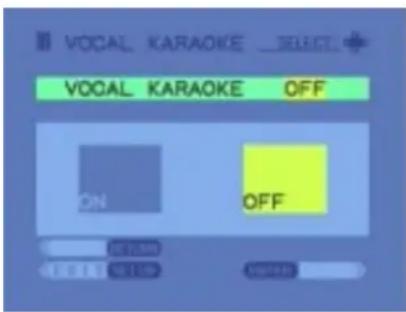
- Press ◀ or ▶ to turn the vocal track on or off, and press ENTER.
Selecting the function settings
The FUNCTION menu lets you change the video and operational settings of the 586 DVD Player:
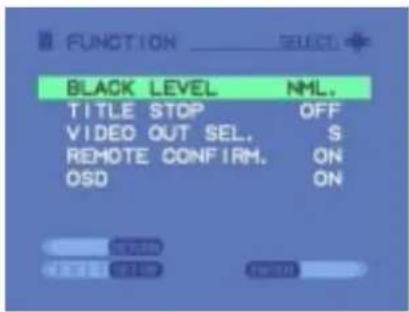
Note that the REMOTE CONFIRM option has no effect in the 586 DVD Player.
To select the black level
- Highlight BLACK LEVEL in the FUNCTION menu, and press ENTER.
The BLACK LEVEL menu is displayed:
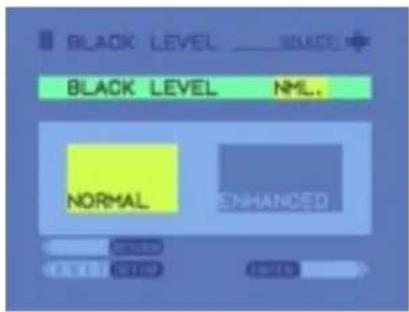
- Press ◀ or ▶ to choose between NORMAL, to give a standard black level, or ENHANCED, to give an expanded black level.
If you are using the COMPOSITE or S video outputs of the DVD player select the NORMAL option.
If you are using the COMPONENT video outputs select the option that corresponds to the combination of your display.
To select title stop
If title stop is selected the DVD player stops after playing each title.
- Highlight TITLE STOP in the FUNCTION menu, and press ENTER.
The TITLE STOP menu is displayed:
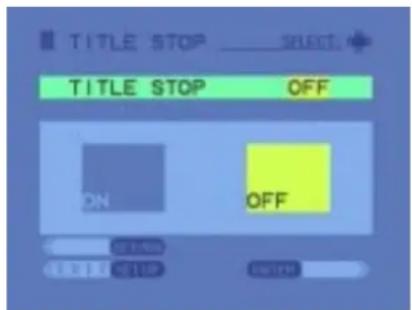
- Press ◀ or ▶ to turn title stop on or off, and press ENTER.
To select the video output format
This option determines which of the S-Video or COMPONENT video outputs is active.
- Highlight VIDEO OUT SEL. in the FUNCTION menu, and press ENTER.
The VIDEO OUT SEL. menu is displayed:
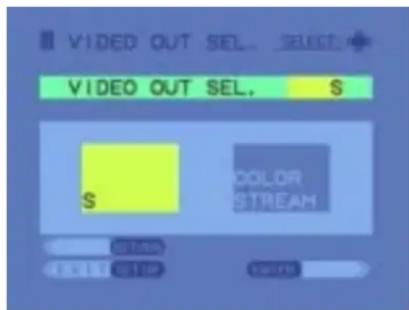
- Press ◀ or ▶ to highlight S or COLOR STREAM (COMPONENT video), and press ENTER.
Note that if you change this option while using the S-Video or COMPONENT video outputs the on-screen display will be lost. In this case connect the COMPOSITE video output, which is active irrespective of this setting, or use the Video toggle configuration option; see To change the video output format, page 49.
To select the on-screen display
This option allows you to turn on or off the on-screen displays shown during operation, such as PLAY and PAUSE.
- Highlight OSD in the FUNCTION menu, and press ENTER.
The OSD menu is displayed:
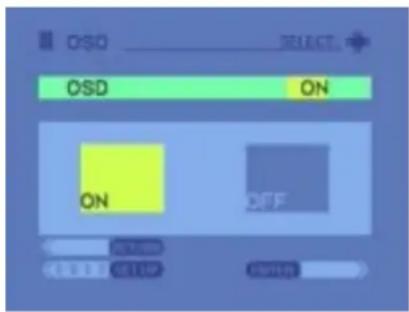
- Press the ◀ or ▶ to turn the on-screen displays on or off, and press ENTER.
Selecting the display settings
The DISPLAY menu lets you change the language for screen displays, the default picture format, the angle icon, and the default language for subtitles and disc menus.
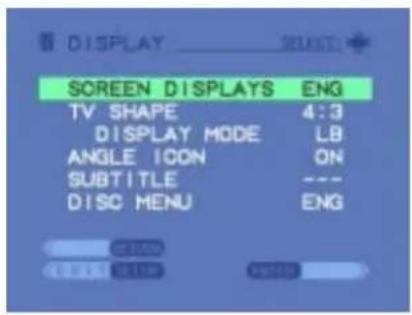
To select the language for screen displays
The 586 DVD Player allows you to display the SET UP MENU and on-screen displays in English, French, or Spanish.
- Highlight SCREEN DISPLAYS in the DISPLAY menu and press ENTER.
The SCREEN DISPLAYS menu is displayed:
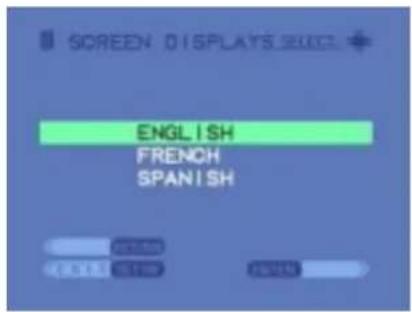
- Use ▲ or ▼ to highlight the language you want to use, and press ENTER.
The screen displays will change to the language you have selected.
To set the default picture format
Some DVD video discs allow you to choose between the 4:3 (normal television) or 16:9 (widescreen) picture formats.
If you have a standard 4:3 television you also have the choice of displaying widescreen pictures cropped to fill your television screen (pan-scan), or with black bars above and below the picture (letterbox).
- Highlight TV SHAPE in the DISPLAY menu, and press ENTER.
The TV SHAPE menu is displayed:
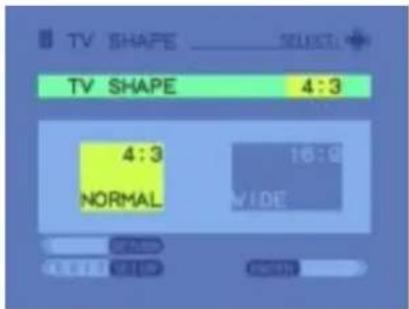
- Press ◀ or ▶ to select the format of your TV, and press ENTER (remote).
If you selected 4:3 NORMAL an additional DISPLAY MODE menu appears:
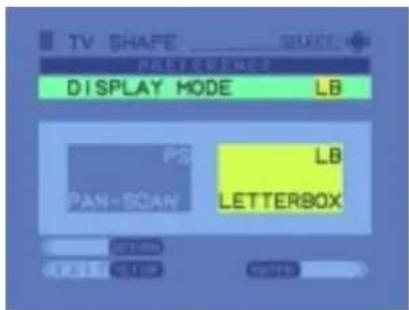
- Press ◀ or ▶ to select the display mode you want to use for widescreen videos, and press ENTER.
Note that the pan-scan feature is not available on some discs, in which case letterbox format will be used.
To display the angle icon
Some DVD video discs contain movies recorded from up to 9 alternative angles, and while the disc is playing you can choose which angle to watch from.
You can choose to have an angle icon displayed on the screen to show if a scene has been recorded from multiple angles.
- Highlight ANGLE ICON in the DISPLAY menu, and press ENTER.
The ANGLE ICON menu is displayed:
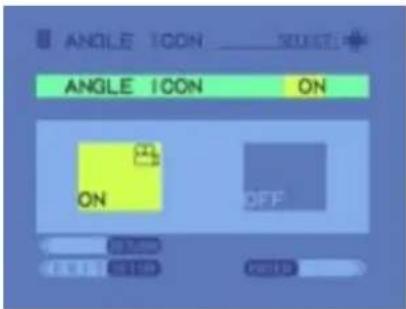
- Press ◀ or ▶ to turn the angle icon ON or OFF, and press ENTER.
To set the default subtitle language
DVD video discs can include subtitles in up to 32 different languages.
Some DVD video discs also include special subtitles for hearing impaired users (extended features), describing the sounds in the soundtrack.
The 586 DVD Player allows you to select whether subtitles are displayed by default, and specify the preferred language if it is available on the disc.
- Highlight SUBTITLE in the DISPLAY menu, and press ENTER.
The SUBTITLE menu is displayed:
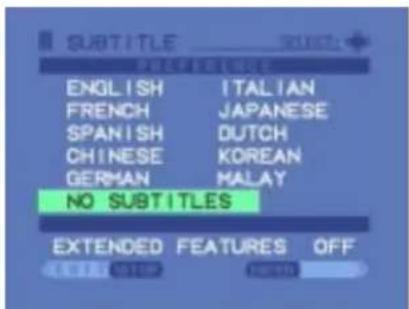
- Press ◀, ▶, ▲, or ▼ to highlight the language you want to use, or NO SUBTITLES if you do not want to display subtitles.
- If you want extended features press SUBTITLE to turn EXTENDED FEATURES to ON.
- Press ENTER to set the default subtitle options you have chosen.
To set the default disc menu language
Many DVD video discs include a disc menu to allow you to select different sections of the disc or to display other information provided on the disc.
If the disc menu is provided on a disc in alternative languages you can select the default language.
- Highlight DISC MENU in the DISPLAY menu, and press ENTER.
The DISC MENU is displayed:
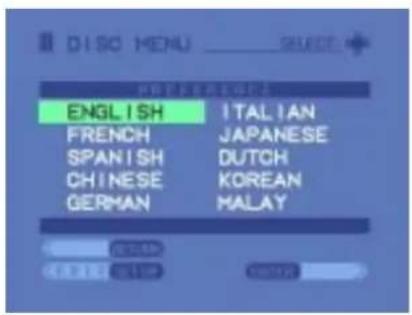
- Press ◀, ▶, ▲, or ▼ to highlight the default disc menu language you want to choose, and press ENTER.
Configuring the DVD player
Many advanced aspects of the 586 DVD Player can be configured to alter the way it operates with the other Meridian equipment in your system.
These settings are initially set to standard values, which are suitable for most situations, and this chapter describes how to restore the standard settings.
It then gives details of the more advanced settings and explains how to change them.
Choosing standard settings
The DVD player provides a standard setting, called Type 1, which configures the 586 into the most commonly needed configuration.
Choosing Type 1 overrides any other configuration you may have performed, and so can be used to reset the configuration of the unit.
To restore the standard settings
- Switch off the 586, using the power switch on the back panel.
- Switch off any power amplifiers that are connected to the 586 and put any digital speakers to standby.
- Switch on the power again while holding down the Off key on the front panel.
After a short delay the display will show:
Type 1
- Wait for one second, and then switch off the 586 using the power switch on the back panel.
- Switch on again to use the 586 with the standard setting.
Configuring the 586 DVD Player
To configure specific options
- Switch off the 586, using the power switch on the back panel.
- Switch on the power again while holding down the display key on the front panel.
The display will show:
Confis
- Press Display until the display shows the current value of the option you want to change.
For example:
Fan Auto
- Press ◀ or ▶ to set the value you want.
When you have configured all the settings you want to change:
- Switch off the 586, using the power switch on the back panel.
To change the video output format
You can change the active video output using the Video toggle configuration option, enabling you to use the on-screen menus if you do not have the Composite video output connected.
This changes the active video output between S-Video and COMPONENT video.
• While in Config mode press Off.
The display will show:
Video tosale
To change the fan setting
- Press Display until the display shows the current fan setting.
For example:
Fan Auto
- Press ◀ or ▶ until the display shows the setting you want.
For example:
Fan Off
The following fan settings are provided:
Setting Description
Fan Auto The fan switches on when a disc is playing.
Fan Off The fan is off; only recommended in cool environments.
Fan Always The fan is permanently on; recommended if the 586 is used with limited ventilation, such as in a cabinet.
To configure another source to control the DVD player
By default the DVD player is selected by the DVD source, or the DVD key on the Meridian System Remote (labelled TEXT on earlier systems).
If you want to use another source, such as CD, to control the DVD player:
- Press the corresponding source key on the Meridian System Remote.
The display shows the source you have selected.
- Press ◀ or ▶ until the -C option is selected.
For example:
CD…C
To set other configuration options
The other configuration options are generally set to an appropriate value when you reset the 586 to one of the standard settings, and you should not normally need to alter them; see Choosing standard settings, page 48.
These options are summarised in the following table for advanced use:
Option Initial value
| Controller mode(Auto Setup, Controller, or Not Con.) | Auto Setup |
| System address (1-8) | Sys. Addr. =1 |
| Product address (1-8) | Prod. Addr. =1 |
| Start source (CD, RD, LP, TV,T1, T2, Cr, Cb, DV, V1, V2, Ld) | S.S. IV |
Setting up the DVD player
This chapter explains how to install the DVD player. It describes what you should find when you unpack the DVD player, how you should connect it to your other audio equipment, and the siting constraints.
Before you begin installation, you should ensure that your DVD player is the correct voltage for your local AC supply. If it is not, do not try to install the DVD player, and contact your dealer.
You should not make any connections to the DVD player or to any other component in your system whilst the AC power supply is connected and switched on.
Unpacking
The 586 DVD Player comes in a box containing the following components:
○ Meridian 586 DVD Player.
○ DVD remote.
○ Meridian comms lead.
○ Power cord.
○ This manual.
If any of these items are missing please contact your dealer. We suggest that you retain the packing in case you need to transport the unit.
To position the DVD player
Do not place the DVD player:
○ In direct sunlight.
○ Near heat sources, such as a radiator.
○ Directly on top of heat producing equipment, such as a power amplifier.
In common with all CD and DVD players, the 586 DVD Player emits some radio-frequency signals. You should therefore try to
keep all power cables and network leads away from signal cables, including audio, antenna, and loudspeaker cables.
Radio interference
FCC Warning: This equipment generates and can radiate radio frequency energy and if not installed and used correctly in accordance with our instructions may cause interference to radio communications or radio and television reception. It has been type-tested and complies with the limits set out in Subpart J, Part 15 of FCC rules for a Class B computing device. These limits are intended to provide reasonable protection against such interference in home installations.
EEC: This product has been designed to comply with the limits set out in EN55013 and EN55020C.

Back panel
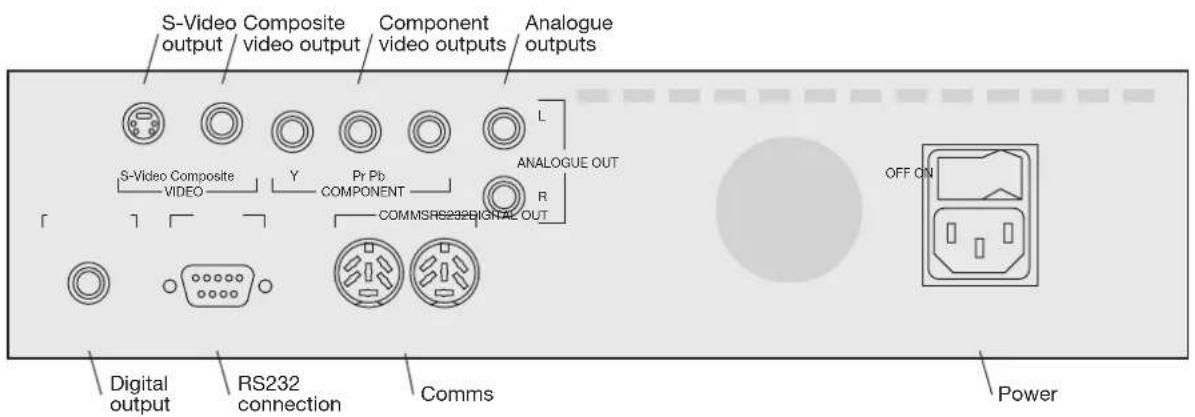
Video connections
The DVD player provides three alternative video outputs to provide flexibility in connecting it to other equipment.
If your other equipment provides component video outputs, use these to produce the highest possible video quality.
The video connections should be made using suitable video cables, which are available from your dealer.
Use this output To connect to this
COMPONENT A monitor or projection television with Y, Pr, Pb component video inputs.
S-Video A monitor or television with an S-Video input, or a Meridian 562V Multimedia Controller.
Composite A television or monitor with a composite video input, or the composite video input on a Meridian 562V or 501V.
Audio connections
The following table gives details of the two alternative audio outputs:
Use this output To connect to this
DIGITAL OUT A surround processor such as the Meridian 565 Digital Surround Processor, a digital preamplifier such as the Meridian 562V, or Meridian DSP loudspeakers.
ANALOGUE OUT A television, analogue preamplifier such as the Meridian 502, or an analogue surround processor such as the Meridian 541 Surround Controller.
The digital connections should be made with high quality 75Ω screened cable. Suitable cables are available from Meridian. We do not recommend using audio cables which do not have adequate shielding or the correct impedance, or cables intended for UHF applications, as these do not provide adequate shielding in the 1–30MHz region.
The analogue connections should be made using high-quality screened cable, taking care to connect the left and right channels correctly.
Communications connections
The following table gives details of the communications connections:
Use this connection To connect to this
COMMS Other Meridian 500 series
equipment, or Meridian DSP loudspeakers.
RS232 connection For future expansion, to allow
the 586 to be interfaced to a computer. Contact your dealer for more information.
Connecting using component video
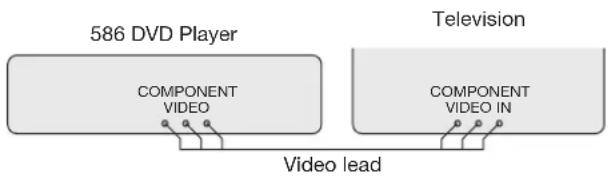
If your television, monitor, or projection system includes component video inputs, these will give the highest possible quality from DVD videos.
- Connect the component outputs from the 586 DVD Player to the COMPONENT video inputs, using suitable video cables.
- Set the VIDEO OUT SEL. menu option to COLOR STREAM; see To select the video output format, page 40, or To change the video output format, page 49.
Connecting using S-Video
- Connect the S-Video output to a corresponding input on a television, monitor, or video control unit, using a suitable S-Video cable.
The S-Video output is recommended if your other equipment provides a choice of both S-Video and composite inputs. - Leave the VIDEO OUT SEL. menu option set to S; see To select the video output format, page 40.
Connecting using composite video
- Connect the Composite video output to a corresponding input on a television, monitor, or video control unit using a suitable cable.
The Composite video output is always active, irrespective of the VIDEO OUT SEL. setting.
Connecting audio
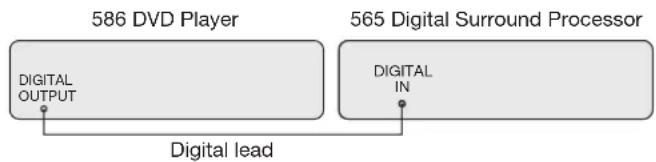
To connect to a Meridian 565 Digital Surround Processor
flowchart
graph LR
    A["586 DVD Player"] -->|DIGITAL OUTPUT| B["Digital lead"]
    C["565 Digital Surround Processor"] -->|DIGITAL IN| D["Digital lead"]
- Connect the DIGITAL OUT on the 586 to the DIGITAL IN on the 565.
- Set the AUDIO OUT SEL. menu option to AC-3; see To select the audio output format, page 37.
To connect to the Meridian 541 Surround Controller
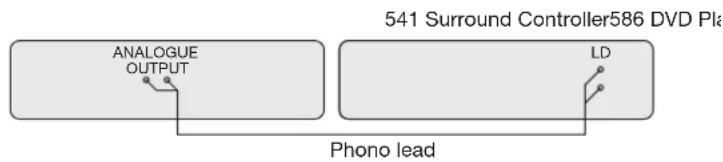
- Connect the ANALOGUE OUT connections from the 586 DVD Player to a suitable pair of audio inputs on the 541 Surround Controller, such as the CD or LD inputs.
- Leave the AUDIO OUT SEL. menu option set to PCM; see To select the audio output format, page 37.
To connect to Meridian DSP loudspeakers
flowchart
graph TD
    A["586 DVD Player"] --> B["DIGITAL OUTPUT COMMS"]
    B --> C["M5 lead"]
    C --> D["DSP5000 – Main R (slave) DSP5000 – Main L (master)"]
    D --> E["S5 lead"]
    E --> F["DIGITAL INPUTS 2 1 DIGITAL OUTPUT OUTPUT INPUT"]
    E --> G["DIGITAL INPUTS 2 1 DIGITAL OUTPUT OUTPUT INPUT"]
    E --> H["DIGITAL INPUTS 2 1 DIGITAL OUTPUT OUTPUT INPUT"]
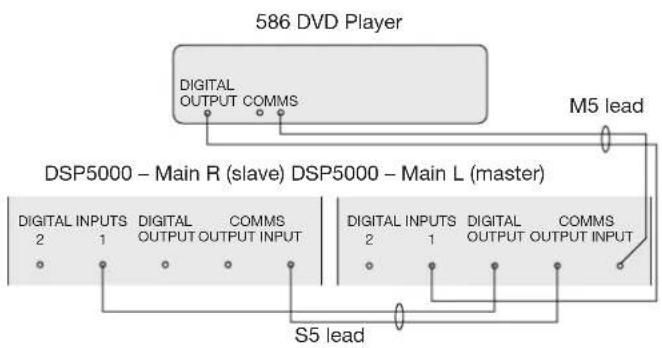
- Connect the DIGITAL OUT from the 586 DVD Player to DIGITAL INPUT 1 on the master DSP loudspeaker.
- Connect the DIGITAL and COMMS output from the left DSP loudspeaker to the DIGITAL and COMMS INPUTS on the slave DSP loudspeaker, using an M5 lead.
- Leave the AUDIO OUT SEL. menu option set to PCM; see To select the audio output format, page 37.
Connecting to other Meridian equipment
To connect to other Meridian 500 Series equipment
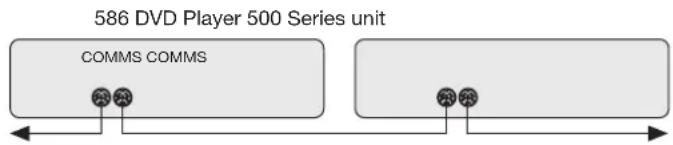
- Connect one of the COMMS sockets on the back panel of the DVD player to one of the COMMS sockets on another 500 Series unit, using the 500 comms lead provided with the 586 DVD Player.
The sequence in which you connect the units is not important.
Then configure the units with the following automatic setup procedure:
- Switch all the units to standby.
- Press CLEAR (remote).
Each unit will display:

One unit will then be designated as the controller, and display:
Controller
This is the unit that will respond to the remote.
All the other units will be configured as non-controllers, and display:
Not Con.
Your system is now set up and ready for use.
- If for any reason the automatic setup does not give the configuration you want, restore the default operation by selecting one of the standard types; see Choosing standard settings, page 48.
Note: Do not, under any circumstances, connect any equipment other than Meridian 500, 600, or 200 Series to the socket marked COMMS on the back of the DVD player.
Troubleshooting
This section describes problems you may encounter when using the DVD player, and includes suggested solutions.
If these suggestions fail to cure the problem, please contact your Meridian dealer for further assistance.
No lights are displayed when switching on
○ Check that your AC power supply is connected correctly.
○ Check that the ON/OFF switch on the back panel is in the ON position.
There is no sound when playing a disc
○ Check that your preamplifier is switched on, and the volume is at an appropriate level.
○ Check that the DVD player is connected correctly to the other components of your system; see Setting up the DVD player, page 53.
○ Check that the correct source has been selected on your preamplifier.
○ Check that the display does not show Pause.
☐ Try playing another disc. If this disc works, check the problem disc for signs of dirt or damage.
☐ If you are using the DVD player with a preamplifier or active loudspeakers check that the AUDIO OUT SEL. menu option is set to PCM; see To select the audio output format, page 37.
There is interference on the radio and/or television when the DVD player is switched on
Before following the steps below, ensure all units are switched off first.
If this equipment does cause or suffer from interference to/from radio or television reception then the following measures should be tried:
○ Reorient the receiving aerial (or antenna) or route the antenna cable of the receiver as far as possible from the 586 DVD Player and its cabling.
○ Ensure that the receiver uses well-screened antenna cable.
○ Relocate the receiver with respect to the DVD player.
○ Connect the receiver and this product to different AC outlets.
There are clicks when starting to play a disc
○ If you are using a source other than DVD to control the DVD player, check that it is configured as -C in Config. This ensures that the Meridian preamplifier or control unit mutes the sound when a disc is not playing.
○ If you are using a non-Meridian preamplifier the clicks are unavoidable.
For more information see To configure another source to control the DVD player, page 50.
There is no video output
Only one of the S-Video or COMPONENT video outputs is active at any time, depending on the option selected in the VIDEO OUT SEL. menu; see To select the video output format, page 40.
To change the menu option connect the COMPOSITE video output, which is active irrespective of this setting, or use the Video toggle configuration option; see To change the video output format, page 49.
The on-screen display shows PLEASE CHECK DISC when attempting to play a disc
○ Check that the disc is positioned correctly in the drawer; see To insert a disc, page 11.
○ If it is a single-sided disc check that the label is uppermost.
○ Check that it is not a recordable CD.
- Try playing another disc. If this disc works, check the problem disc for signs of dirt or damage.
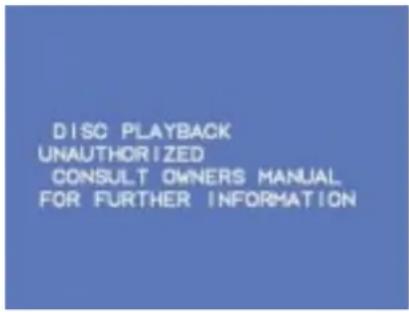
The on-screen display shows DISC PLAYBACK UNAUTHORIZED
This screen is displayed if you attempt to play a DVD video disc encoded for a region that is not supported by your DVD player:
A hand symbol is displayed on the on-screen display
This indicates that the function you have selected is not available on the disc you are playing.
Maintenance
Cleaning
When cleaning the DVD player bear in mind that the front of the DVD player is plastic, and the display panel and lid are glass.
Disconnect the power cord before cleaning the unit.
Note: Do not use abrasive cleaners on any part of the DVD player.
To clean the case, display panel, and keypad
- Use a slightly damp cloth.
Ensure that no water is allowed to get inside the case, and do not reconnect the power until you are certain that the DVD player is completely dry.
To clean the audio and video connections
The audio and video sockets on the back of the DVD player are gold-plated and need no cleaning if gold-plated phono plugs are used. Otherwise, it is recommended that you unplug and
reconnect the plugs at least once a year. A proprietary contact cleaner can be used to some advantage.
The electrical digital output should be treated in a similar way.
To change the mains fuse
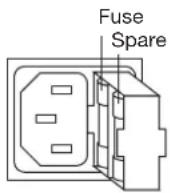
- Remove the mains connector, and pull out the drawer next to the power input to access the fuses.
Before replacing a blown fuse, it is best to ascertain the cause of the failure.
The fuse drawer includes a spare fuse. This should be replaced by a fuse of the same rating.
Service and guarantee
Service
The Meridian 500 Series of hi-fi components have been carefully designed to give years of untroubled service. There are no user-serviceable parts inside the case, nor do the units require any form of maintenance.
In the unlikely event that your DVD player fails to function correctly, it should be returned, in its original packaging, to your Meridian dealer.
In case of difficulty within the UK or USA please contact the appropriate sales and service address shown on page ii.
In case of difficulty outside the UK or USA, contact the importing agent for the territory. A list of Meridian agents outside the UK is available from Meridian Audio.
No responsibility can be accepted for the DVD player whilst in transit to the factory or an agent, and customers are therefore advised to insure the unit.
When seeking service under guarantee, proof of the date of purchase will be required.
Guarantee
The 586 DVD Player is guaranteed against defects in material and workmanship for 2 years from the date of purchase.
The guarantee is void if the 586 DVD Player has been subject to misuse, accident, or negligence, or has been tampered with or modified in any way without the written authorisation of Meridian Audio Limited. Note that connecting anything other than the correct network lead to the COMMS sockets may cause damage to the 586 DVD Player which will not be covered by this guarantee. Attempted servicing by unauthorised people may also invalidate this guarantee. Labour and carriage charges are not covered unless by local agreement.
Outside the UK, local warranty liability is restricted to equipment purchased within the territory. Our agents outside the UK are only under contractual obligation to service under-guarantee equipment sold through them. They are entitled to make a non-refundable charge for any service carried out on other equipment.
This guarantee does not limit your statutory rights within the United Kingdom.
Index
A A-B RPT (remote) 23
AC-3 option 37
Accessories 6
Advanced features 19
ANALOGUE OUT 56
ANGLE (remote) 28
Angle icon, displaying 44
ANGLE ICON option 44
AUDIO (remote) 26
Audio CDs 13
on-screen display 17
programming a selection 24
Audio connections 56, 58
AUDIO menu 36
AUDIO OUT SEL. option 37
audio output formats 37
AC-3 37
PCM 37
Audio setting
displaying 26
selecting 26
AUDIO SETTING menu 34, 36
Automatic setup 60
B Back panel 55
selecting by number 14
Choosing standard settings 48
Cleaning
the audio and video connections 64
the case 64
COLOR STREAM option 40
COMMS connection 56
Communications connections 56
COMPONENT outputs 55
Component video, connecting 57
Components 54
Composite output 55
Config mode 49
Config options
Controller mode 51
Product address 51
Start source 51
System address 51
Configuring the DVD player 47, 49
Connecting
audio 58
to Meridian 500 Series
equipment 60
video 57
Connections
audio 56
communications 56
video 55
Continuing after pausing 15
Controller mode Config option 51
Controller, setting 60
D D RANGE CONTROL option 37
Default options, setting 33
DESCRIPTIVE SERVICE option 36
DIGITAL OUT 56
Disc information 16
Disc menu 20
DISC MENU option 45
DISC PLAYBACK UNAUTHORIZED display 63
Display (front panel) 16
DISPLAY (remote) 16, 17
Display, flashing 11
Display function 16, 17
DISPLAY menu 34, 42
DISPLAY MODE menu 43
Displaying disc information 16
DVD remote 8
DVD video discs 13, 20
camera angle 28
on-screen display 16
programming a selection 24
Dynamic range control 37
E ENTER (remote) 35
EXTENDED FEATURES option 45
F Fast play 21
Flashing display 11
Front panel controls 10
Front panel display 16
blanking 16
FUNCTION menu 34, 39
Fuse, replacing 64
FWD (remote) 21
G Guarantee 65
| Inserting a disc 11
Installing 54
Introduction 1
L Language
disc menu 45
screen displays 42
subtitles 44
LAST PLAY (remote) 15
late-night listening 37
Letterbox format 43
Locating a specific title, chapter, or track 13
Low-power mode 12
M Maintenance 64
MEMORY (remote) 24
MENU (remote) 20
Meridian 500 Series 2
502 Analogue Controller 3
504 Stereo FM Tuner 5
508 Compact Disc Transport 5
562V Multimedia Controller 5
565 Digital Surround Processor 4 communications 2
Meridian 500 Series operation, setting 60
Meridian 541 Surround Controller, connecting to 58
Meridian 565 Digital Surround Processor, connecting to 58
Meridian Analogue Theatre 3
Meridian Digital Theatre™ 4
Meridian DSP loudspeakers, connecting to 59
Meridian System Remote 6, 7, 14
Moving to the next chapter or track 12
Multimedia system 5
N NO SUBTITLES option 45
NORMAL option 43
○ Off (front panel) 12
On-screen display 16, 17
turning on or off 41
Open (front panel) 11
OPEN/CLOSE (remote) 11
OSD option 41
P Pan-scan 43
Parental lock
cancelling 31
changing setting 31
setting 29
PAUSE/STEP (remote) 15
Pausing play 15
PCM option 37
Picture format 43
Playing 12
a selection 25
faster than normal 21
from a particular chapter or track 13
in slow motion 22
PLEASE CHECK DISC display 62
Positioning 54
POWER (remote) 12
Product address Config option 51
Programming a selection 24
R Radio interference 54
REMOTE CONFIRM option 39
Remote control 8
REPEAT (remote) 23
Repeating
a specific section of a disc 23
a title, chapter, or track 23
Restarting the current chapter or track 12
Resuming after stopping 15
REV (remote) 21
RS232 connection 56
S S option 40
S output 55
S-Video
changing 49
connecting 57
Sample configurations 3
Meridian Analogue Theatre 3
Meridian Digital Theatre™ 4
multimedia system 5
stereo music/video system 3
SCREEN DISPLAYS menu 42
Security code 29
changing 31
clearing 31
Selecting a title or chapter/track by number 14
Selecting titles or options from a menu 20
Service 65
SET UP (remote) 34, 35
SET UP MENU 33
displaying 34
SET UP menus
AUDIO SETTING 34, 36
DISPLAY 34, 42
FUNCTION 34, 39
Setting up the DVD player 53
SKIP (remote) 12
Slow-motion play 21
Soundtracks
extended features 44
language 36
selecting 26
Specification 6
Standard settings 48
choosing 48
Standby mode 11
Start source Config option 51
Stepping forward frame by frame 15
Stereo music/video system 3
STOP (remote) 11
Stopping play 15
SUBTITLE (remote) 27
SUBTITLE ON/OFF (remote) 27
SUBTITLE option 44
Subtitles
default language 44
descriptive service 36
displaying 27
Subtitles (continued)
displaying current setting 27
Switching on from standby 11
System address Config option 51
T TITLE (remote) 20
Title Menu 20
TITLE STOP option 40
Titles 13
repeating 23
selecting by number 14
selecting from the Title Menu 20
Tracks 13
playing from 13
repeating 23
Troubleshooting 61
TV SHAPE option 43
U Unpacking 54
Using the DVD player 7
V Video connections 55, 57
VIDEO OUT SEL. option 40
Video output formats 40, 49
COMPONENT 40
S-Video 40
VOCAL KARAOKE option 38
W Widescreen format 43
- Contents
- Introduction 1
- Using the DVD player 7
- Advanced features 19
- Setting default options 33
- Configuring the DVD player 47
- Setting up the DVD player 53
- Introduction
- The Meridian 500 Series
- Series communications
- Professional features
- Sample configurations
- Meridian Digital Theatre™
- Multimedia system
- Specification and accessories
- Specification
- Available accessories
- Using the DVD player
- DVD remote
- OPEN/CLOSE
- SUBTITLE ON/OFF
- SETUP
- TITLE
- RETURN
- ANGLE
- SKIP
- REV
- PLAY ▶
- PAUSE/STEP
- POWER
- DISPLAY
- MENU
- ◀▶ ▲▼
- ENTER
- SUBTITLE
- AUDIO
- SKIP ▶▶▶
- FWD ▶▶
- LAST PLAY
- STOP ■
- ZOOM
- DIMMER
- REPEAT
- MEMORY
- Number keys
- SLOW
- 3D
- A-B RPT
- CLEAR
- T
- Front panel
- Open
- ▶ (Play)
- ■ (Stop)
- II (Pause)
- Display
- ◀ (Previous)
- ▶ (Next)
- Off
- Playing a disc
- To switch on from standby
- To insert a disc
- To play the disc
- To restart the current chapter or track
- To move to the next chapter or track
- To switch to standby
- Locating a specific title, chapter, or track
- To play starting from a particular chapter or track
- To locate a title or chapter/track by number
- To locate a specific location within a title
- Stopping, pausing, and resuming play
- To stop play
- To resume after stopping
- To pause play
- To step forward frame by frame
- To continue after pausing
- Disc information
- To change the front panel display
- Display Example
- To display disc information on screen
- To display information about DVD video disc features
- To turn off the on-screen display
- Advanced features
- Selecting options from a menu
- To select an option from the disc menu
- To select a title using the Title Menu
- Fast and slow-motion play
- To play DVD video discs faster than normal
- To play DVD video discs in slow motion
- To play audio CDs faster than normal
- To resume normal speed
- Playing repeatedly
- To repeat a title, chapter, or track
- CHAPTER REPEAT
- Option Description
- To repeat a specific section of a disc
- To resume normal playback
- Programming a selection
- To program a selection
- To change the selection you have programmed
- To play the selection you have programmed
- Selecting a playback audio setting
- Information Examples
- To select the audio setting
- Displaying subtitles
- To select a subtitle language
- To display subtitles
- Selecting the camera angle and zooming the picture
- To change the camera angle
- To turn off the angle number indicator
- To zoom the picture
- Setting the parental lock
- To set the parental lock
- To change the parental lock setting
- To change the four-digit security code
- To cancel the parental lock function
- Language codes
- Setting default options
- Menu Description
- To display the SET UP MENU
- To select a set up menu
- To change a setting
- To return to the previous menu
- To exit from the set up menus
- Selecting the audio settings
- To select the default soundtrack language
- To select the audio output format
- To select dynamic range control
- To select vocal karaoke
- Selecting the function settings
- To select the black level
- To select title stop
- To select the video output format
- To select the on-screen display
- Selecting the display settings
- To select the language for screen displays
- To set the default picture format
- To display the angle icon
- To set the default subtitle language
- To set the default disc menu language
- Configuring the DVD player
- Choosing standard settings
- To restore the standard settings
- Configuring the 586 DVD Player
- To configure specific options
- To change the video output format
- To change the fan setting
- Setting Description
- To configure another source to control the DVD player
- To set other configuration options
- Setting up the DVD player
- Unpacking
- To position the DVD player
- Radio interference
- Back panel
- Video connections
- Use this output To connect to this
- Audio connections
- Communications connections
- Connecting using component video
- Connecting using S-Video
- Connecting using composite video
- Connecting audio
- To connect to a Meridian 565 Digital Surround Processor
- To connect to the Meridian 541 Surround Controller
- To connect to Meridian DSP loudspeakers
- Connecting to other Meridian equipment
- To connect to other Meridian 500 Series equipment
- Troubleshooting
- No lights are displayed when switching on
- There is no sound when playing a disc
- There is interference on the radio and/or television when the DVD player is switched on
- There are clicks when starting to play a disc
- There is no video output
- The on-screen display shows PLEASE CHECK DISC when attempting to play a disc
- The on-screen display shows DISC PLAYBACK UNAUTHORIZED
- A hand symbol is displayed on the on-screen display
- Maintenance
- Cleaning
- To clean the case, display panel, and keypad
- To clean the audio and video connections
- To change the mains fuse
- Service and guarantee
- Service
- Guarantee
- Index
Brand : MERIDIAN
Model : 586
Category : Hi-Fi System