
SC-CH717 - Hi-Fi System TECHNICS - Free user manual and instructions
Find the device manual for free SC-CH717 TECHNICS in PDF.


| Product Type | Hi-Fi System with CD changer, cassette deck, tuner, amplifier, and speakers |
| Model | SC-CH717 |
| Brand | Technics |
| Dimensions (Tuner/Sound Processor) | 270 x 89 x 274 mm (10 5/8 x 3 1/2 x 10 25/32 inches) |
| Dimensions (Amplifier) | 270 x 118.5 x 335 mm (10 4/8 x 4 21/32 x 13 1/6 inches) |
| Dimensions (CD Changer) | 270 x 89.5 x 320 mm (10 5/8 x 3 17/32 x 12 19/32 inches) |
| Dimensions (Cassette Deck) | 270 x 118.5 x 263 mm (10 5/8 x 4 21/32 x 10 11/32 inches) |
| Dimensions (Speaker, SC-CH717) | 239 x 414.5 x 326 mm (9 13/32 x 16 5/16 x 12 27/32 inches) |
| Weight (Tuner/Sound Processor) | 1.75 kg (3.86 lb) |
| Weight (Amplifier, SC-CH717) | 5.3 kg (11.7 lb) |
| Weight (CD Changer) | 2.9 kg (6.4 lb) |
| Weight (Cassette Deck) | 2.85 kg (6.3 lb) |
| Weight (Speaker, SC-CH717) | 6.2 kg (13.7 lb) |
| Power Consumption (Amplifier) | 195 W |
| Power Supply | 120 V, AC 60 Hz |
| Amplifier Output Power (FTC) | 2 x 60 W (6 Ω), 40 Hz - 20 kHz, THD 1% |
| CD Player Type | 3-disc carousel changer |
| Cassette Deck System | Stereo, 4-track, 2-channel, auto reverse |
| FM Tuner Frequency Range | 87.90 - 107.9 MHz (0.1 MHz steps) |
| AM Tuner Frequency Range | 520 - 1710 kHz (10 kHz steps) / 522 - 1611 kHz (9 kHz steps) |
| Speaker Type (SC-CH717) | 3-way main with built-in surround speakers |
| Speaker Impedance (Main/Surround) | 6 Ω / 8 Ω |
| Remote Control | Included (RAK-CH121WH) with full function |
| Special Features | One-touch CD editing, CCRT tape tuning, Karaoke mode, Timer operations |
| Safety | Laser product (Class 1), do not open covers; refer servicing to qualified personnel |
| Maintenance | Clean tape heads every 10 hours of use; clean cabinet with soft dry cloth |
Frequently Asked Questions - SC-CH717 TECHNICS
User questions about SC-CH717 TECHNICS
0 question about this device. Answer the ones you know or ask your own.
Ask a new question about this device
Download the instructions for your Hi-Fi System in PDF format for free! Find your manual SC-CH717 - TECHNICS and take your electronic device back in hand. On this page are published all the documents necessary for the use of your device. SC-CH717 by TECHNICS.
USER MANUAL SC-CH717 TECHNICS
Operating Instructions

natural_image
Black-and-white illustration of a person relaxing on a sofa with a lamp, a washing machine, and a speaker emitting sound waves (no text or symbols)The photograph shows the SC-CH717 model.
Before connecting, operating or adjusting this product, please read these instructions completely.
Dear customer
Thank you for purchasing this product.
For optimum performance and safety, please read these operating instructions carefully.
These operating instructions are applicable to models SC-CH717 and SC-CH515.
These operating instructions, however, fundamentally explain the operation of model SC-CH717.
The model number and serial number of this product can be found on either the back or the bottom of the unit.
Please note them in the space provided below and retain them for future reference.
MODEL NUMBER
SERIAL NUMBER
Tuner/Sound processor
Amplifier
CD changer
Cassette deck
Speaker system
CAUTION!
THIS PRODUCT UTILIZES A LASER.
USE OF CONTROLS OR ADJUSTMENTS OR PERFORMANCE OF PROCEDURES OTHER THAN THOSE SPECIFIED HEREIN MAY RESULT IN HAZARDOUS RADIATION EXPOSURE.
DO NOT OPEN COVERS AND DO NOT REPAIR YOURSELF. REFER SERVICING TO QUALIFIED PERSONNEL.
WARNING:
TO REDUCE THE RISK OF FIRE OR ELECTRIC SHOCK, DO NOT EXPOSE THIS APPLIANCE TO RAIN OR MOISTURE.

CAUTION
RISK OF ELECTRIC SHOCK DO NOT OPEN

CAUTION: TO REDUCE THE RISK OF ELECTRIC SHOCK, DO NOT REMOVE SCREWS.
NO USER-SERVICEABLE PARTS INSIDE.
REFER SERVICING TO QUALIFIED SERVICE PERSONNEL.

The lightning flash with arrowhead symbol, within an equilateral triangle, is intended to alert the user to the presence of uninsulated "dangerous voltage" within the product's enclosure that may be of sufficient magnitude to constitute a risk of electric shock to persons.

The exclamation point within an equilateral triangle is intended to alert the user to the presence of important operating and maintenance (servicing) instructions in the literature accompanying the appliance.
CAUTION:
TO PREVENT ELECTRIC SHOCK MATCH WIDE BLADE OF PLUG TO WIDE SLOT, FULLY INSERT.
CAUTION:
This equipment has been tested and found to comply with the limits for a Class B digital device, pursuant to Part 15 of the FCC Rules.
These limits are designed to provide reasonable protection against harmful interference in a residential installation. This equipment generates, uses and can radiate radio frequency energy and, if not installed and used in accordance with the instructions, may cause harmful interference to radio communications. However, there is no guarantee that interference will not occur in a particular installation. If this equipment does cause harmful interference to radio or television reception, which can be determined by turning the equipment off and on, the user is encouraged to try to correct the interference by one of the following measures:
●Reorient or relocate the receiving antenna.
- Increase the separation between the equipment and receiver.
- Connect the equipment into an outlet on a circuit different from that to which the receiver is connected.
- Consult the dealer or an experienced radio/TV technician for help.
FCC Notice: This system complies with new Part 15, except for the radio receiver, which complies with old Part 15, Subpart C of the FCC Rules. Operation is subject to the following two conditions: (1) This device may not cause harmful interference, and (2) this device must accept any interference received, including interference that may cause undesirable operation. The radio receiver is not subject to above item (2).
Any unauthorized changes or modifications to this equipment would void the user's authority to operate this device.
Table of contents
Before use
Precautions 4
Supplied accessories 6
Installation 7
Stacking the components 7
Connections 8
Optional antenna connections 10
External unit connection 11
Location of controls 12
Amplifier section 12
Tuner/sound processor section 12
Compact disc changer section 13
Cassette deck section 13
Preparations
Concerning the remote control ..... 14
Battery installation....14
Correct method of use 14
Concerning the multi-control section ..... 15
Setting the time 16
Memory presetting 17
Automatic memory presetting 17
Manual memory presetting 18
Compact disc operations
Listening to compact discs 19
Sequential play 19
Program play 22
Direct access play 24
Random play 24
Radio operations
Listening to radio broadcasts 25
Manual tuner operation 25
Memory tuner operation 25
Tape deck operations
Listening to tapes 26
Playback 26
Sequential playback between 2 tapes 28
Convenient functions
Convenient functions 29
Easy play 29
To mute the volume 29
To adjust the left-right volume balance 29
To use headphones 29
Recording operations
Making a recording from radio broadcasts .... 30
Recording from compact discs 33
One-touch editing preparation 34
To start one-touch editing 34
Program edit-recording (LAST FADE mode only) 36
Linking up several discs (LINK) 37
Synchro recording 38
Tape-to-tape recording 39
Volume level mode operations
Changing the volume level mode 40
Changing the output level display 40
Changing the output level scale 40
Tone quality operations
Changing the tone 41
About equalization curves (EQ) 41
About simulated listening environments (SPACE) 41
To retrieve the preprogrammed equalization curves (EQ mode) 42
To retrieve the preprogrammed simulated listening environments (SPACE mode) 43
To adjust EQ and SPACE ("USER" mode) 44
To listen with augmented bass (V.BASS) 44
Timer operations
Using the timer 45
About the types of timer operation 45
Setting the play timer 46
Setting the record timer 48
To use the sleep timer 50
To use each timer mode in conjunction 51
Microphone mixing
Enjoying microphone mixing 52
External unit operations
Using an external unit 53
Listening to an external source 53
Recording from an external source 53
Reference
Remote control operations —quick reference— .... 54
Concerning compact discs 56
Maintenance 57
Concerning cassette tapes 57
Troubleshooting guide 58
Product service 59
Technical specifications .... Back cover
Precautions
Before using this unit please read these operating instructions carefully. Take special care to follow the warnings indicated on the unit itself as well as the safety suggestions listed below.
Afterwards keep them handy for future reference.
Safety
- Power Source—The unit should be connected to power supply only of the type described in the operating instructions or as marked on the unit.
- Polarization—If the unit is equipped with a polarized AC power plug (a plug having one blade wider than the other), that plug will fit into the AC outlet only one way. This is a safety feature. If you are unable to insert the plug fully into the outlet, try reversing the plug. If the plug should still fail to fit, contact your electrician to replace your obsolete outlet. Do not defeat the safety purpose of the polarized plug.
- Power Cord Protection—AC power supply cords should be routed so that they are not likely to be walked on or pinched by items placed upon or against them. Never take hold of the plug or cord if your hand is wet, and always grasp the plug body when connecting or disconnecting it.
- Nonuse Periods—When the unit is not used, turn the power off. When left unused for a long period of time, the unit should be unplugged from the household AC outlet.
Installation
Environment
- Outdoor Antenna Grounding—If an outside antenna is connected to the receiver, be sure the antenna system is grounded so as to provide some protection against voltage surges and built-up static charges. Section 810 of the National Electrical Code, ANSI/NFPA No. 70-1990, provides information with respect to proper grounding of the mast and supporting structure, grounding of the lead-in wire to an antenna discharge unit, size of grounding conductors, location of antenna-discharge unit, connection to grounding electrodes, and requirements for the grounding electrode. See figure below.

NEC—NATIONAL ELECTRICAL CODE
-
Water and Moisture—Do not use this unit near water—for example, near a bathtub, washbowl, swimming pool, or the like. Damp basements should also be avoided.
-
Heat—The unit should be situated away from heat sources such as radiators and the like.
It also should not be placed in temperatures less than 5°C (41°F) or greater than 35°C (95°F). - Condensation—Moisture may form on the lens in the following cases...
- immediately after a heater has been turned on.
●in a steamy or very humid room. - when the unit is suddenly moved from a cold environment to a warm one.
If moisture forms inside this unit, it may not operate properly. To correct this problem, turn on the power and wait about one hour for the moisture to evaporate.
Placement
- Ventilation—The unit should be situated so that its location or position does not interfere with its proper ventilation. Allow 10 cm (4") clearance from the rear of the unit.
- Foreign Material—Care should be taken so that objects do not fall into and liquids are not spilled into the unit. Do not subject this unit to excessive smoke, dust, mechanical vibration, or shock.
- Magnetism—The unit should be situated away from equipment or devices that generate strong magnetism.
- Stacking—Do not place heavy objects, other than system components, on top of the unit.
- Surface—Place the unit on a flat, level surface.
- Carts and Stands—The unit should be used only with a cart or stand that is recommended by the manufacturer. The unit and
cart combination should be moved with care. Quick stops, excessive force, and uneven surfaces may cause the unit and cart combination to overturn. - Wall or Ceiling Mounting—The unit should not be mounted to a wall or ceiling, unless specified in this operating instructions.

Maintenance
(See page 57 for details.)
Clean the cabinet, panel and controls with a soft cloth lightly moistened with mild detergent solution.
Do not use any type of abrasive pad, scouring powder or solvent such as alcohol or benzine.
Service
- Damage Requiring Service—The unit should be serviced by qualified service personnel when:
(a) The AC power supply cord or the plug has been damaged; or
(b) Objects have fallen or liquid has been spilled into the unit; or
(c) The unit has been exposed to rain; or
(d) The unit does not appear to operate normally or exhibits a marked change in performance; or
(e) The unit has been dropped, or the enclosure damaged. - Servicing—The user should not attempt to service the unit beyond that described in the operating instructions. All other servicing should be referred to qualified service personnel.
Listening caution


Selecting fine audio equipment such as the unit you've just purchased is only the start of your musical enjoyment. Now it's time to consider how you can maximize the fun and excitement your equipment offers. This manufacturer and the Electronic Industries Association's Consumer Electronics Group want you to get the most out of your equipment by playing it at a safe level. One that lets the sound come through loud and clear without annoying blaring or distortion—and, most importantly, without affecting your sensitive hearing.
Sound can be deceiving. Over time your hearing "comfort level" adapts to higher volumes of sound. So what sounds "normal" can actually be loud and harmful to your hearing.
Guard against this by setting your equipment at a safe level BEFORE your hearing adapts.
To establish a safe level:
- Start your volume control at a low setting.
- Slowly increase the sound until you can hear it comfortably and clearly, and without distortion.
Once you have established a comfortable sound level:
- Set the dial and leave it there.
Taking a minute to do this now will help to prevent hearing damage or loss in the future. After all, we want you listening for a lifetime.
We Want You Listening For A Lifetime
Used wisely, your new sound equipment will provide a lifetime of fun and enjoyment. Since hearing damage from loud noise is often undetectable until it is too late, this manufacturer and the Electronic Industries Association's Consumer Electronics Group recommend you avoid prolonged exposure to excessive noise. This list of sound levels* is included for your protection.
•The level used here is different from that displayed on the system's display.
Decibel
Level Example
30 Quiet library, soft whispers
40 Living room, refrigerator, bedroom away from traffic
50 Light traffic, normal conversation, quiet office
60 Air conditioner at 20 feet, sewing machine
70 Vacuum cleaner, hair dryer, noisy restaurant
80 Average city traffic, garbage disposals, alarm clock at two feet.
THE FOLLOWING NOISES CAN BE DANGEROUS UNDER CON- STANT EXPOSURE
90 Subway, motorcycle, truck traffic, lawn mower
100 Garbage truck, chain saw, pneumatic drill
120 Rock band concert in front of speakers, thunderclap
140 Gunshot blast, jet plane
180 Rocket launching pad
Information courtesy of the Deafness Research Foundation.
Supplied accessories

Please check and identify the supplied accessories.
□ AC power supply cord 1 pc.
For U.S.A.: (SJA172-1)
For Canada: (SJA172)

□ Remote control transmitter 1 pc.
(RAK-CH121WH)

natural_image
Line drawing of a remote control with keypad and buttons (no text or symbols)Flat cable
□ (Long) 1 pc.
(REX0511)

□ (Short) 1 pc.
(REX0512)

□ FM indoor antenna 1 pc.
(RSA0006)

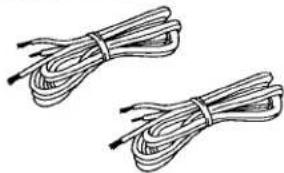
□ Speaker cords 2 pcs.
(For model SC-CH717: REE0393)
(For model SC-CH515: REE0499)
natural_image
Two bundles of bundled wires, no text or symbols visible□ Remote control batteries ....2 pcs.
(UM-4, AAA, R03)

□ AM loop antenna ....1 pc.
□ Antenna holder .... 1 pc.
□ Screw 1 pc.
(RSA0010)


(For SC-CH717 only)
Surround speaker cords .... 2 pcs.
(RJL1P001B25)

Stacking the components
Install the various components as shown below.
Horizontal stacking
SC-CH717

SC-CH515

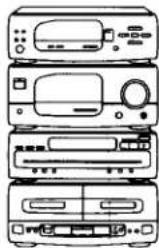
Vertical stacking
SC-CH717
natural_image
Line drawing of four different electronic devices with no visible text or symbolsTuner/sound processor (ST-CH505)
Amplifier (SE-CH717)
Compact disc changer (SL-CH515)
Cassette deck (RS-CH404)
SC-CH515

natural_image
Line drawing of four different electronic devices with no visible text or symbolsTuner/Sound processor (ST-CH505)
Amplifier (SE-CH515D)
Compact disc changer (SL-CH515)
Cassette deck (RS-CH404)
System layout example
① Left speaker
② Television set (not included)
③ This system
④ Right speaker


To produce a better stereo sound, install both speakers away from the system.
(For SB-CH717)
This speaker system has built-in surround speaker, so you can easily enjoy the surround sound effect when you select SPACE mode. (See page 43.)
Connections
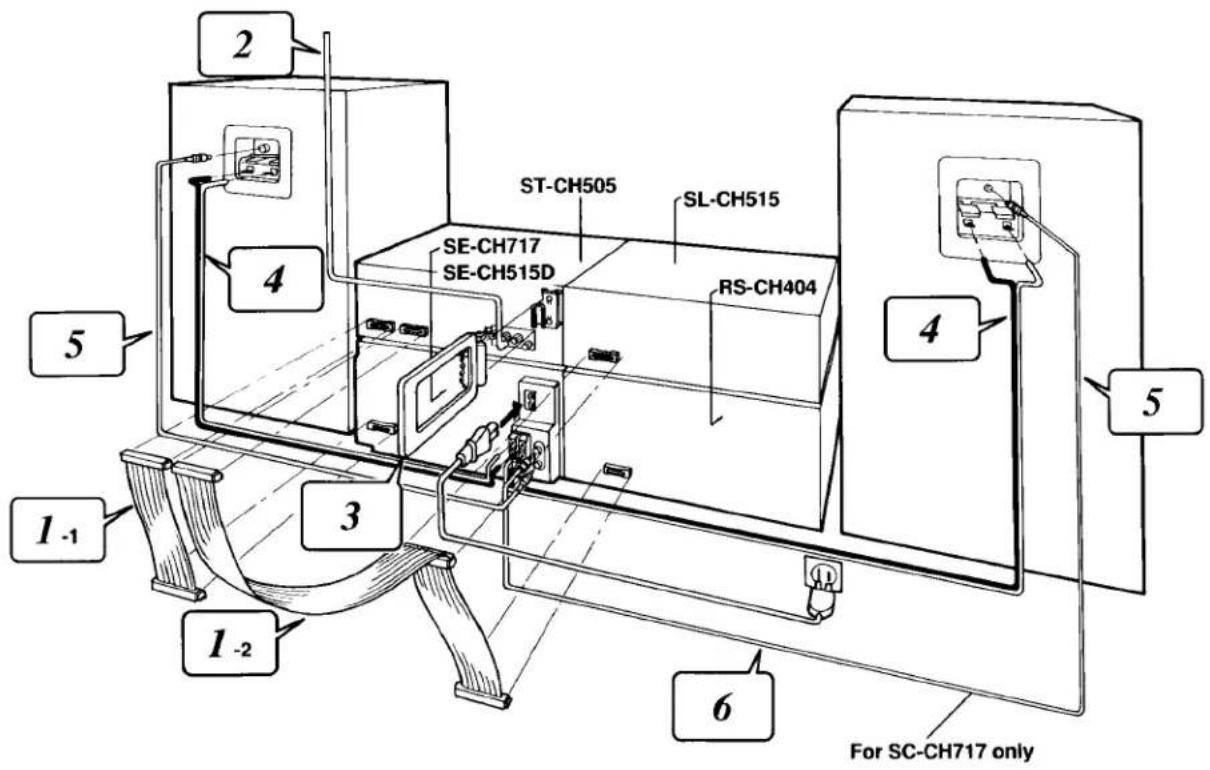
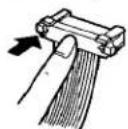
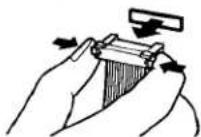
1 Connect the flat cable.
Connecting
Disconnecting
-
Connect the shorter flat cable to the terminal of the tuner/sound processor and amplifier.
-
Connect the longer flat cable to the terminal of the tuner/sound processor, compact disc changer, and cassette deck.
Route the cable horizontally (underneath the heat outlet grille) so that the side with the white-colored lead is positioned facing to you.
Be sure to connect the blue-colored connector to B1 (tuner/ sound processor).
After connection, fold and press the cable as flat to the back of the unit as possible.

Do not try connecting or disconnecting the flat cable while the power is switched to ON.
2 Connect the FM indoor antenna.
Install the antenna on a wall at a height, and in a direction, which results in the best reception.

The tip of the internal antenna wire should not come into contact with any metal objects.
When you cannot get a good reception with this FM indoor antenna, we recommend you install an FM outdoor antenna. (Not included. See page 10.)
3 Connect the AM loop antenna.
- Attach the antenna holder to the rear panel of the tuner/sound processor.
- Clamp the AM loop antenna to the antenna holder and connect the antenna terminal to the rear panel of the tuner/sound processor.
- Position the loop for the best reception.

You may attach the AM antenna holder with a screw (included) to a rack or other structure. In this case, attach as shown in the figure below.

Note
To minimize noise pickup, keep the AM loop antenna cord along the heat outlet grille, and away from the flat cables.
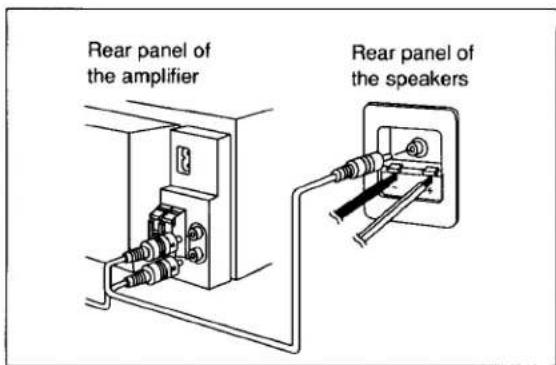
4 Connect the right (R) and left (L) speaker cables.
Notes
- Be sure to connect speaker cables before connecting the AC power supply cord.
- The load impedance of any speaker used with this unit must be 6–8Ω.
-
Match the two wires from the left and right speaker cables with the same colored levers of the speaker terminals, then insert the wires into the respective terminals.
-
Strip off the outer
covering, and twist the center conductor.

Make sure the bare ends of the wires are not unravelled. (If they are, twist them tight again.)
- (For SC-CH717)
Insert the wire to the rear panel of the speakers, and then pull down the lever.

(For SC-CH515)
① Tilt the lever back and insert the wire.
② Close the lever and pull the cord gently to be sure that it is secured.
- Insert the wire to the rear panel of the amplifier, and close the lever.

Notes
- To prevent damage to circuitry, never short-circuit positive (+) and negative (−) speaker wires.
- Be sure to connect only positive (red) wires to positive (+) terminals and negative (black) wires to negative (−) terminals.


(For SC-CH717 only)
5 Connect the surround speaker cord.
6 Connect the AC power supply cord after you have connected all other cables.
Optional antenna connections
FM outdoor antenna (not included)
If the FM indoor antenna does not provide satisfactory reception of FM broadcasts, use an outdoor antenna.
You may need an outdoor antenna if you use this system in a mountainous region or inside a reinforced-concrete building, etc. An outdoor antenna should be installed only by a competent technician.

Tuner/Sound processor
How to connect a 75Ω coaxial cable:
- Remove a piece of the outer vinyl sheath from the end of the cable.
- Bundle the shield braid, and remove a piece of the inner vinyl sheath covering the core wire.
- Connect the core wire and the shield braid.

How to connect a 300Ω parallel feeder cable:

AM outdoor antenna (not included)
This antenna is required in areas between mountains, inside reinforced concrete buildings or other locations where the broadcast signals are weak. Install the antenna along a window, etc.

Note
Do not remove the AM loop antenna.
External unit connection
DCC (digital compact cassette deck) or DAT (digital audio tape deck)

flowchart
graph TD
    A["REC (IN)"] --> B["(R) (L)"]
    C["PLAY (OUT)"] --> D["(R) (L)"]
    B --> E["Stereo connection cable (not included)"]
    D --> E
    E --> F["(R) (L)"]
    G["AUX"] --> H["DCC"]
    H --> I["RECA (IN)"]
    H --> J["PLAY (IN)"]
    H --> K["(L)="]
    H --> L["(R)="]
    M["Tuner/sound processor"] --> N["(R) (L)"]
Analog player
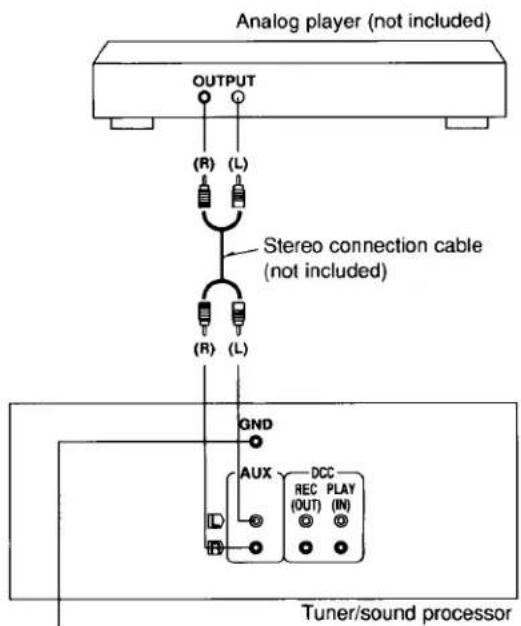
"GND" terminal
This terminal is for a ground wire use.
Use an analog player which has built-in phono equalizer.
Location of controls
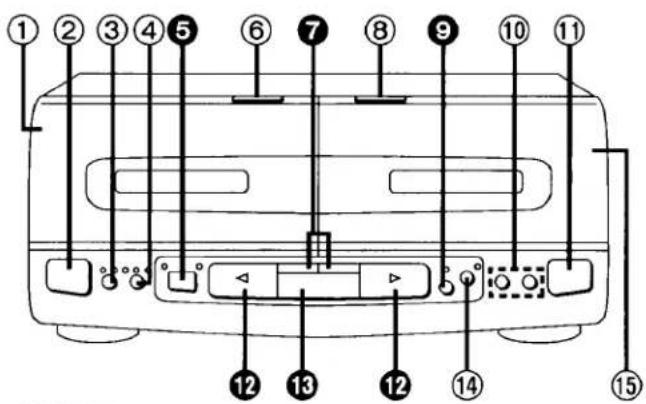
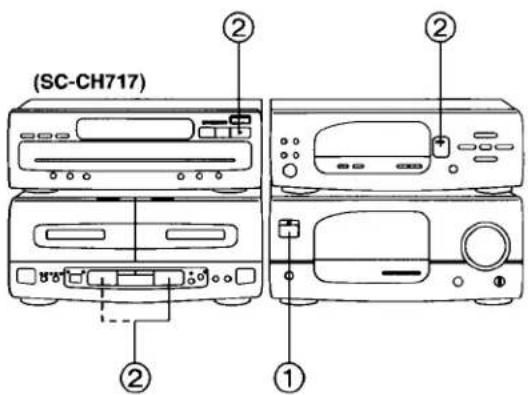
The functions indicated by the numbers with black background (for example ①) can also be activated from the remote control transmitter. (See pages 54–55.)


ST-CH505
Amplifier section
| No. | Name | Ref. page |
| 1 | Power “STANDBY ⏻/ON” switch(POWER, STANDBY ⏻/ON) | 16 |
| Press to switch the unit from on to standby mode or vice versa.In standby mode, the unit is still consuming a small amount of power. | ||
| 2 | Standby indicator (STANDBY)When the unit is connected to the AC mains supply, this indicator lights up in standby mode and goes out when the unit is turned on. | |
| 3 | Power indicator (POWER)(For SC-CH515 only) | |
| 4 | Display button (DISPLAY)(For SC-CH717 only) | 40 |
| 5 | Range select button (RANGE)(For SC-CH717 only) | 40 |
| 6 | Volume control (VOLUME) | 19 |
| 7 | Headphones jack (PHONES) | 29 |
| 8 | Microphone jack (MIC) | 52 |
| 9 | Microphone volume control(MIC VOLUME) | 52 |
Tuner/sound processor section
| No. | Name | Ref. page |
 | ||
 | ||
 | ||
 | ||
 | ||
 | ||
 | ||
 | ||
 | ||
 | ||
 | ||
 |

SL-CH515
RS-CH404
Compact disc changer section
| No. | Name | Ref. page |
| 1 | Disc buttons (DISC 1, DISC 2, DISC 3) | 20 |
| 2 | Stop button (☐) | 19 |
| 3 | Skip/search buttons( ▶/▶▶ , ◀◀/◀◀ , -SKIP/-SEARCH)Only the skip function is available using the remote control transmitter. | 21 |
| 4 | Loading drawer open/close button(▲ OPEN/CLOSE) | 19 |
| 5 | CD edit buttons(J.FIT, ALBUM, LAST FADE) | 34, 35, 36 |
| 6 | Display button (DISPLAY) | 20 |
| 7 | Random play button (RANDOM) | 24 |
| 8 | Repeat button (REPEAT) | 21 |
| 9 | Pause button (☐☐) | 19 |
| 10 | Play button and indicator (▷) | 19 |
Cassette deck section
| No. | Name | Ref. page |
| 1 | Deck 1 cassette holder | 26 |
| 2 | Deck 1 cassette holder open button (▲ OPEN) | 26 |
| 3 | Dolby noise reduction button and indicators (DOLBY NR) | 26 |
| 4 | Reverse mode button and indicators (REVERSE MODE) | 26 |
| 5 | Deck 1/deck 2 select button and indicators (DECK 1/2) | 26 |
| 6 | Deck 1 cassette holder close button (CLOSE) | 26 |
| 7 | Fast forward/rewind/tape program sensor buttons [◀◀ (TPS), (TPS) ▶▶] | 27 |
| 8 | Deck 2 cassette holder close button (CLOSE) | 28 |
| 9 | Record pause button and indicator (REC PAUSE) | 30 |
| 10 | One-touch tape edit buttons (NORMAL, HIGH) | 39 |
| 11 | Deck 2 cassette holder open button (▲ OPEN) | 30 |
| 12 | Playback buttons and indicators (<, ▷) | 26 |
| 13 | Stop button (□) | 26 |
| 14 | CCRT button and indicator (CCRT) | 30 |
| 15 | Deck 2 cassette holder | 30 |
Concerning the remote control
Battery installation
Insert the batteries with this unit as shown below.
Use two UM-4 "AAA", IEC R03 (1.5 V) or equivalent batteries.

To remove the batteries, pull out the ⊕ side.

natural_image
Diagram of a device interior with battery pack and directional arrow (no text or symbols)Use of batteries
- Do not mix old and new batteries, or batteries of different types (carbon and alkaline, etc.).
●Never subject batteries to excessive heat or flame; do not attempt to disassemble them; and be sure they are not short-circuited. - If the remote control is not to be used for a long period of time, remove the batteries and store them in a cool, dark place.
- Do not attempt to recharge alkaline or carbon batteries.
Battery life
The battery life is about one year.
- The batteries should be replaced if commands from the remote control transmitter do not operate the unit even when the transmitter is held close to the front panel.
Correct method of use

Operation notes

- Aim the remote control's transmission window toward the unit's sensor. Avoid any obstacles.

- Be sure the transmission window and the unit's sensor are free from dust. Excessive dust might affect its performance.
- The operation may not be correct if direct sunlight or other strong light source strikes the receiving sensor of this unit. If there is a problem, place the unit away from the light source.
- If this system is installed in a rack with glass doors, the glass doors' thickness or color might make it necessary to use the remote control a shorter distance from the system.
●Never place heavy items. - Do not disassemble or reconstruct.
- Do not spill water or other liquids.
Concerning the multi-control section
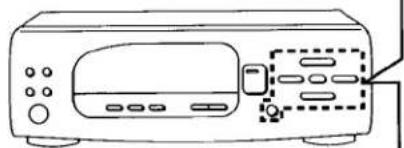
Using the multi-control buttons, the following operations can be performed.
- Clock/timer settings
●Tuning or presetting the radio station - Selecting or adjusting the EQ or SPACE mode
When operating, the display shows which buttons are available for the operation.
The chart below shows the display and the available buttons for each operation.
For your reference:
When you press and hold V.BASS, the display will change alternately showing the display example when the multi control buttons are used.
To cancel, press any button on the system.

| Operation | Display | Available buttons |
| ■ Clock/timer operation●Time setting (See page 16.)●Record timer setting (See pages 48–49.)●Play timer setting (See pages 46–47.)●Sleep timer setting (See page 50.) | MULTI CONTROL |  |
| ■ Radio operation●Automatic memory presetting (See page 17.)●Manual memory presetting (See page 18.)●Manual tuner operation (See page 25.)●Memory tuner operation (See page 25.) |  |  |
| ■ EQ/SPACE operation●The EQ/SPACE mode selection(See pages 42–43.) |  |  |
| ●The EQ/SPACE mode effect adjustment(See page 44.) |  |
About the illumination guide
Orange indicators on the buttons guide you to the easiest steps toward listening pleasure.
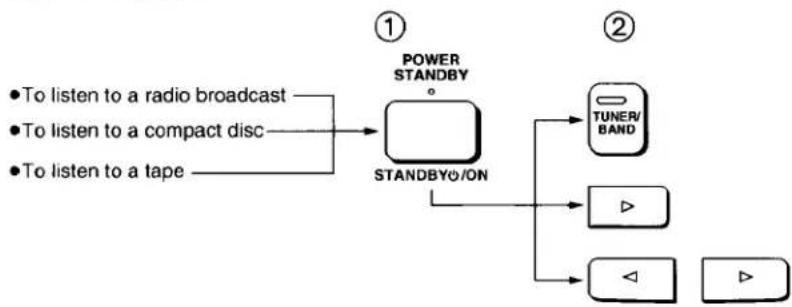
flowchart
graph LR
    A["To listen to a radio broadcast"] --> B["POWER STANDBY"]
    C["To listen to a compact disc"] --> B
    D["To listen to a tape"] --> B
    B --> E["TUNER/BAND"]
    B --> F["Play"]
    B --> G["Play"]
    B --> H["Play"]
Setting the time

This is a 12-hour display clock.
natural_image
Line drawing of a microwave oven with control panel and buttons (no text or symbols)
flowchart
graph TD
    A["2"] --> B["CLOCK/TIMER"]
    B --> C["3~5"]
    C --> D["SET"]
    C --> E["SET1"]
    C --> F["SET2"]
    C --> G["SET3"]
    C --> H["SET4"]
    C --> I["SET5"]
    style A fill:#f9f,stroke:#333
    style B fill:#ccf,stroke:#333
    style C fill:#cfc,stroke:#333
    style D fill:#fcc,stroke:#333
    style E fill:#cff,stroke:#333
    style F fill:#ffc,stroke:#333
    style G fill:#cfc,stroke:#333
    style H fill:#fcc,stroke:#333
    style I fill:#ffc,stroke:#333
These instructions explain how to set the time for 6:25 p.m. on Wednesday.
1

Switch on the power on the amplifier.
2
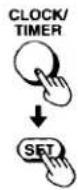
① Press CLOCK/TIMER to select "CLOCK".
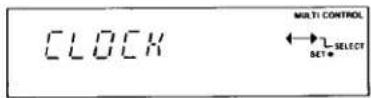
within 7 seconds:
② Press SET.
3

① Press ◀ or ▶ to select "WED".

② Press SET.
4

① Press ◀ or ▶ to select "PM 6".

② Press SET.
5
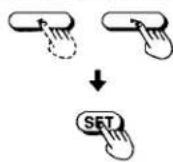
① Press ◀ or ▶ to select "25".
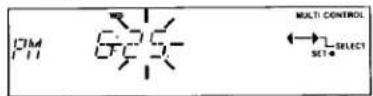
② Press SET to finish setting the time.
The display will return to the previous display after about 2 seconds.
When "E:" appears on the display:
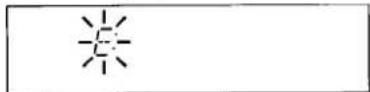
It appears when you connect the power supply cord for the first time or if there has been a power failure.
If this happens, reset the time.
If the minutes setting has gone wrong:
- Press CLOCK/TIMER.
- Press SET 3 times.
- Press one of ◀ or ▶ to set the minute, and then press SET.
For your reference:
To display the clock again:
Press CLOCK/TIMER.
The clock display will appear for about 5 seconds.
Memory presetting
This feature allows you to set broadcast frequencies into the memory. You can then easily retrieve any of those broadcast frequencies by pressing ◀ or ▶ on the tuner/sound processor.
Automatic memory presetting
The frequencies of the selected broadcast stations are automatically preset (in sequence from lower to higher frequencies) into the memory: "channels" 1 to 39 are available for the presetting of FM stations, "channels" 21 to 39 are available for AM stations.


flowchart
graph TD
    A["SET"] --> B["3"]
    A --> C["4"]
    A --> D["4"]
1

Switch ON the power on the amplifier.
2

Press TUNER/BAND to select FM.

Each time you press TUNER/BAND, "FM", "AM" will appear in order.
3

Press and hold ▲ or ▼ until the display shows the frequency from which you want to begin automatic memory presetting.
Press ▲ or ▼ momentarily to stop changing frequencies when the displayed frequency approaches the lowest frequency. Press ▲ or ▼ a few times until the lowest frequency is reached.
4

Press and hold SET and the automatic memory presetting will begin.
Keep SET depressed until MEMO indicator starts flashing, then release the button.
Stereo indicator Quartz lock indicator

STEREO indicator lights when an FM stereo broadcast is being received.
Quartz lock indicator lights when you precisely tune in a broadcast station.
After completing the memory presetting, MEMO indicator will go out and the display will show the last preset frequency.
To preset AM broadcast frequencies into the memory:
Select AM in step 2, then follow steps 3 and 4.
To confirm the preset stations:

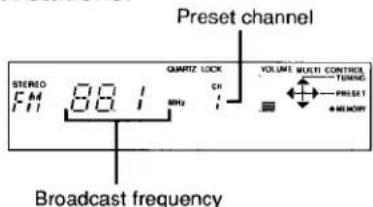
Note
When you preset a broadcast station to a channel that has already been preset, the previous presetting will be erased. So if, for example, FM frequencies are preset from channel 1 to 39 and then AM frequencies are preset, the first AM frequency will be preset to channel 21 (thus erasing the FM presetting of channel 21), the second AM frequency will be preset to 22 (erasing FM 22), and so on.
About the TUNER/BAND indicator:
While listening to radio broadcasts: Lights in green.
While listening to compact discs or tapes: Lights in orange.
Preset memory contents maintenance:
The contents of the memory will continue to be stored for approximately 2 weeks, even if the power supply cord is disconnected.
Correct presetting may not be possible in cases where the broadcast waves are too strong or too weak. In such cases, carry out presetting manually. (See next page.)
Manual memory presetting
This feature allows you to manually preset stations into any desired channel.

natural_image
Line drawings of four different electronic devices (no text or symbols visible)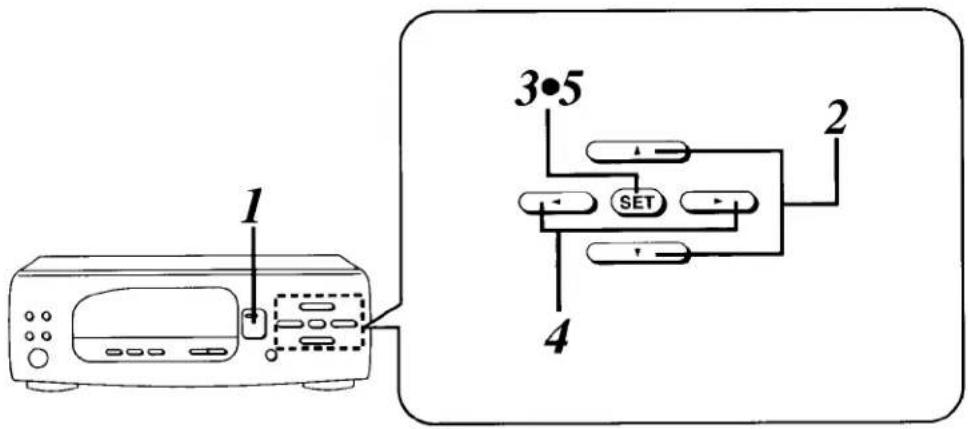
This example shows how to memorize FM 88.1 MHz into preset channel 1.
1

Press TUNER/BAND to select FM or AM.
Each time you press TUNER/BAND, "FM", "AM" will appear in order.
2

Press ▲ or ▼ to tune in to the desired broadcast.
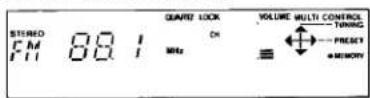
3

Press SET momentarily.
Illuminates. Flashes.
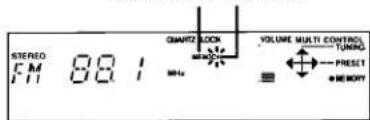
4


Press ◀ or ▶ to select the desired preset channel.
Flashes.

5

Press SET momentarily.
MEMO indicator will go out.
Automatic scanning:
Press and hold ▲ or ▼ until the displayed frequency begins to change.
- The changing of the displayed frequency will automatically stop if a broadcast station frequency is located during the tuning process.
- When there is excessive interference, the automatic scanning may not function.
To cancel the automatic scanning, press ▲ or ▼ once again.
To preset FM stations in monaural position:
- Select the desired frequency.
- Press FM MODE on the remote control to show "MONO".
- Follow the procedure 3-5 on the left.
About the frequency step:
Each time you press ▲ or ▼, the frequency display will change as follows:
FM: 0.1 MHz step
AM: 10 kHz or 9 kHz step
(To change the AM allocation, see page 25.)
Listening to compact discs
Sequential play
Sequential play refers to play all tracks on the loaded discs in sequence beginning with the first track of the first disc and continuing in order to the last track of the last disc.

1
Switch on the power on the amplifier.
2

Press ▲ OPEN/CLOSE to open the loading drawer.
3

Load the disc(s) on the disc tray(s).
Do not load 3" (8 cm) and 5" (12 cm) discs on the same disc tray.
4

Press OPEN/CLOSE to close the loading drawer.

5

Press ▷.
Disc play begins from the first track on the first disc.
Play stops automatically when the last track on the last disc finishes playing.
Currently playing track number

6
Adjust the volume level as you like on the amplifier.

To stop the disc play:
Press □.

To temporarily stop the disc play:
Press 00.
▷ flashes.
To play again, press ▷.
For your reference:
- If you press ▷ instead of ▲ OPEN/CLOSE after inserting disc(s), the loading drawer will close and play will start directly.
- The compact disc will automatically stop when a different sound mode is selected during its operation.
About ▷ indicator:
While halted: Lights in orange.
While playing: Lights in green.
When “▶” appears on the display:
It indicates there are 16 or more tracks on the disc at the playing position.
Concerning the total playing time on the display:
The total playing time displayed includes the silent sections between tracks. Hence, there will be a difference between the total playing time and the liner notes included with the disc.
Listening to compact discs
Notes
- Do not cover the hole or slits.
Otherwise the incorrect operation will take place.
- Do not insert another disc onto tray placed at ①, although the tray is partially showing, its disc is in the play position.

- Be sure to load the discs correctly in the center position as shown in the drawing.
3" (8 cm) CD
5" (12 cm) CD

natural_image
Four circular diagrams showing mechanical or optical components with arrows indicating motion or force direction (no text or symbols)- Do not touch the carousel or the loading drawer while it is moving.
- Do not turn the tray forcibly by hand because it may fail to operate normally.
- If the discs are not correctly loaded, playback may not start. In such a case, reinsert the disc as follows:
-
Switch the power to the standby mode on the amplifier, and then back on.
-
Press OPEN/CLOSE to open the loading drawer.
-
Load the disc(s) on the tray(s) correctly.
- If you press OPEN/CLOSE while the play indicator (▷) is lit in green, the drawer will open to half position.
To open fully, follow the procedure below.
-
Press □.
-
Press OPEN/CLOSE to close the loading drawer.
-
Press OPEN/CLOSE again to open the drawer.
- Do not move this changer with a compact disc inside the unit. If a disc comes off the disc tray, it might be scratched or the changer might become incapable of playing.
To select the desired discs

Press DISC 1, DISC 2 or DISC 3 to select the disc which you want to play.
The play will automatically start from the first track of the disc you select.
To confirm the total playing time of the disc currently playing
Press DISPLAY.
The display will change (as described below) each time you press the button.
In the stop mode:
① The display shows the total playing time of the disc currently playing.

② The display shows the disc number and the total track number of the disc currently playing.

In the play mode:
① The display shows the track number of the disc currently playing.

② The display shows the elapsed time of the track currently playing.

To exchange discs during play
While a disc is playing, you can exchange discs.
- Press OPEN/CLOSE during playing. The loading drawer will open at half position.
- Exchange the discs.
- Press OPEN/CLOSE again to close the loading drawer.
After the last track on the current disc finishes playing, the changer will play all the remaining disc(s) loaded, and then stop.
Note
If you play a disc with the loading drawer open, the changer will automatically stop when the last track on the current disc finishes playing.

natural_image
Line drawings of four different electronic devices (no text or symbols visible)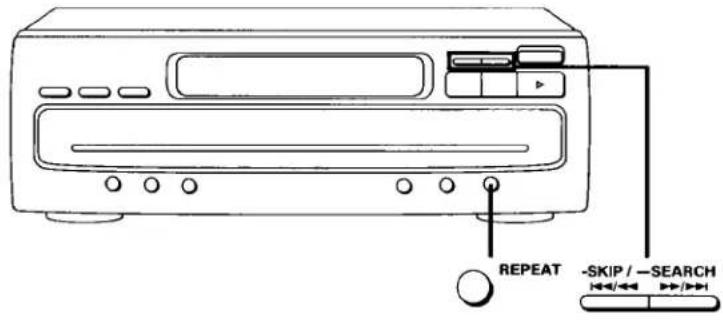
Repeat function
This function repeats the play of all tracks on the loaded discs.

Press REPEAT before or during play.
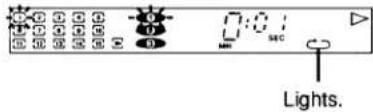
In sequential play mode: (See page 19.)
All tracks of all discs will be played repeatedly.
In program play mode: (See pages 22–23.)
The changer plays only the programmed selections in the programmed sequence continuously.
You can enjoy the same track over and over if you press REPEAT when only one track is programmed.
In random play mode: (See page 24.)
When the changer has played all tracks on all the loaded discs, it will select a new random sequence and play repeatedly. The sequence differs each time.
To cancel repeat play:
Press REPEAT once again.
indicator on the display will go out.
Skip function

Press either ▶/▶ or until you reach the desired track.
: To skip forward You can skip as many tracks as the number of times you press the button. : To skip backward
You can skip to the beginning of the track being played. If you press this button again quickly, you can skip to the beginning of the previous track.
Note that in a backward skip, the current track is included in the count.
For your reference:
In program play mode you can skip only the programmed tracks.
Note
In random play mode, you cannot skip to the previous track.
Search function
You can rapidly search forward or backward on the disc for specific sections.

While in play mode, press and hold either ▶/▶ or
. Release the button when you have reached the desired point.
: To search forward : To search backward
For your reference:
During program play and random play, search will take place within the track being played.
Program play
(Available only from the remote control)
This function allows you to program up to 24 tracks from the loaded disc(s) in any order you choose.
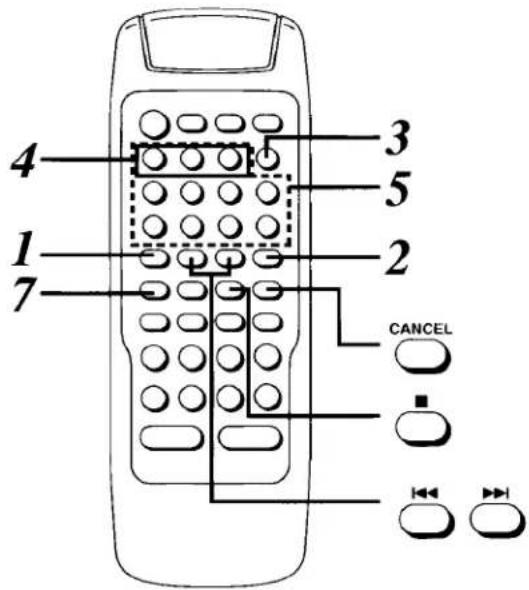
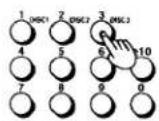
This example shows how to program track 3 of disc 2, track 5 of disc 3 and track 7 of disc 1.
1

Press CD.
2

Press PROGRAM.



3

Press DISC.

4

Press one of the numeric buttons (1–3) to select the disc.

5
Press the numeric button to select the track you want to play.
Programmed track number


Programmed order

6
Repeat steps 3–5 until you have completed the program.
7

Press ▷ to start play.
Play will automatically stop after playing the last track you programmed.

To cancel program play:
Press PROGRAM.
The compact disc changer resumes sequential play mode.
To select a two-digit track:
Press ≥10
For example:
Track 13: ≥10→1→3
Track 20: ≥10→2→0
To add an entry:
Repeat steps 3 to 5.
When "F" appears on the display:
The number of programmed tracks is limited to 24. No further tracks can be programmed.
When “--:--” appears on the display:
The total playing time of the programmed tracks has exceeded 99 minutes 59 seconds. However, programming and play are still possible.
To clear a programmed track one by one:
- Press CANCEL.
CANCEL indicator will light. - Press DISC.
- Press a numeric button (1-3) to specify the disc which contains the track you want to cancel.
- Press a numeric button corresponding to the track you want to cancel.
- Press CANCEL
CANCEL indicator will go out.
(Using or buttons on the remote control)
- Press CANCEL.
CANCEL indicator will light. - Press ▶▶▶▶ or ◀◀◀▶ repeatedly until the display shows the track number you want to cancel.
- (Within 10 seconds)
Press CANCEL. - Press CANCEL.
CANCEL indicator will go out.
To clear all tracks:
Press ■ once in the stop mode or twice in the play mode.
For you reference:
The unit's memory will retain the programmed sequence until you cancel it by opening the compact disc drawer or by pressing the stop button in the stop mode. The sequence will remain in the unit's memory for approximately 2 weeks.
Listening to compact discs
Direct access play
(Available only from the remote control)
Direct access allows you to start sequential play from a specific track on a specific disc and to play all discs loaded in sequence.

This example shows how to start the play from the 8th track of the disc 2.
1

Press CD.
2

Press DISC.
3

Press one of the numeric buttons (1–3) to specify which disc contains the track you wish to play.

If you don't proceed to step 4, play will automatically begin with the first track of the selected disc.
4
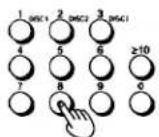
Press the numeric button to select the desired track number.
Play begins with the track selected and continues to the end of the last disc loaded, and then stops.
Flashes.

To select a two-digit track:
Press ≥10
For example:
Track 13: ≥10→1→3
Track 20: ≥10→2→0
Random play
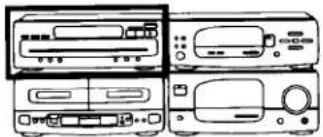
The changer will randomly choose a track from a randomly selected disc. Once the changer has played the selected track, it will make another selection at random, excluding the tracks already played. (No tracks will be repeated.)
natural_image
Line drawings of four electronic devices (no text or symbols visible)
Press RANDOM.

Random play will start.
The changer will stop automatically when all tracks on all the loaded discs have been played.

RANDOM
To cancel random play:
Press RANDOM once again.
RANDOM indicator will go out. The compact disc changer resumes the sequential play mode.
For your reference:
In the program play mode, the programmed tracks will be played randomly.
Listening to radio broadcasts
Manual tuner operation

1
Switch on the power on the amplifier.
2
Press TUNER/BAND to select FM or AM.
Each time you press TUNER/BAND, "FM", "AM" will be displayed in order.

3

Press ▲ or ▼ to tune into the desired broadcast.
The display will show the frequency which you selected.

4
Adjust the volume as you like on the amplifier.

If noise is excessive in the FM mode:
Press FM MODE on the remote control.

The sound will then be heard in monaural. If the broadcast signal is weak, or if there is a large amount of interference, you will get a clearer sound using FM MODE.
Memory tuner operation
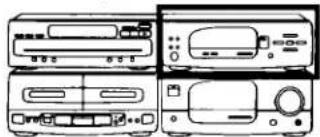
Switch on the power and be sure you've completed the steps of "Automatic memory presetting" on page 17 or "Manual memory presetting" on page 18.
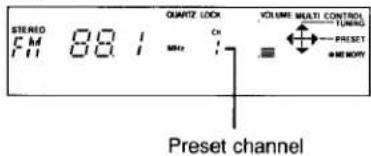
This example shows how to tune in to the preset channel 1.
natural_image
Line drawings of four different electronic devices (no text or symbols visible)
natural_image
Line drawing of a portable electronic device with buttons and a front panel (no text or symbols)
Press ◀ or ▶ to select the desired preset channel.
The selected preset channel will appear on the display.
AM allocation settings:
This unit comes equipped with an electronic digital tuner that divides the broadcast band into many small steps. These steps match the assignable broadcast frequencies and intervals in between.
Each country allocates (assigns) broadcast bands according to their particular needs.
By adjusting the allocation, you can enable this tuner to receive AM broadcasts allocated in 9 kHz steps.
-
Press TUNER/BAND to select AM.
-
Press and hold TUNER/BAND for approximately 4 seconds.
To return to the original frequency indication, repeat steps 1 and 2.
Listening to tapes
Playback
You can use either deck 1 or deck 2 for tape playback. You can use normal, chrome and metal tapes for playback.
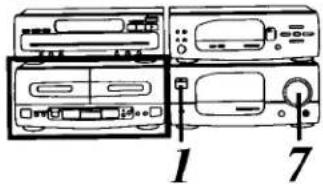

This page shows an example using deck 1.
1
Switch on the power on the amplifier.
2

Press ▲ OPEN, and then insert the cassette you wish to play.
Insert the cassette with the exposed tape facing down.
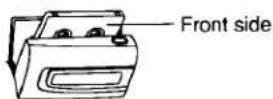
3

Press CLOSE on deck 1 to close the cassette holder.

4

Press DOLBY NR if the cassette you want to play was recorded using the Dolby NR.
The DOLBY NR IN indicator will light up. If the tape was not recorded using Dolby NR, press DOLBY NR and the DOLBY NR OUT indicator will light up.
5

Press REVERSE MODE to select the reverse mode you want to use.
Each time you press REVERSE MODE, one of the indicators will light up to show which mode you selected.
→: The player plays one side only, and then the tape automatically stops.
C: The player plays both sides 8 times, and then the tape automatically stops.
The player plays both sides of the tape, then automatically stops. When you load cassettes into both decks, the deck makes a sequential playback between 2 tapes. (See page 28.)
6
Press ◀ or ▷ to start play-back.
▷: The forward side (front side) will play.
◀: The reverse side will play.
7
Adjust the volume level as you like on the amplifier.
To stop tape playback: Press □.

To change the deck to be used:
Press DECK 1/2 to select the deck you want to use.
DECK 1 or DECK 2 indicator will illuminate to show which deck you can operate.
About ◀ and ▷ indicator:
While halted: Lights in orange.
While playing, recording or finding the beginning of a program:
Lights in green.
For your reference:
The tape will automatically stop when a different sound source is selected during its operation.

natural_image
Line drawing of three electronic devices with buttons and ports (no text or symbols)
To find the beginning of a program
(TPS: tape program sensor)
Press ◀◀ (TPS) or (TPS) ▶▶ while the tape is playing.
If the forward side (▷) is playing:
(TPS)→: The tape will play from the beginning of the next tune.
◀(TPS) : The tape will rewind to the beginning of the present tune. Then the tune will play again.
If the reverse side (◀) of the tape is playing:
The reverse operation should take place.
Note
TPS (Tape Program Sensor) is the function that searches for the silent passage in a tape program. So, it may sometimes fail to operate correctly in the following situations:
- When there is no blank space between tape programs (for example, when you are playing a tape recorded from a microphone)
- When the interval between programs (blank space) is less than 4 seconds
- When there is a particular low-level passage or silent passage in the middle of a program (For example, classical music)
- When the program is less than 10 seconds, or when it is less than 10 seconds from the beginning of the program to the beginning of the next program
- When a tape has been recorded with fade-ins (the function that increases the volume level gradually at the beginning of a program) and fade-outs (the function that decreases the volume level gradually at the end of a program)
For your reference:
Each decks' play direction is stored in the system's memory. So the play direction may change when you press DECK 1/2.
To fast forward or rewind the tape
Press ◀◀ (TPS) or (TPS) ▶▶ while the tape is in the stop mode.
If the forward side (▷) of the tape is playing:

If the reverse side (◀) of the tape is playing:
The reverse operation will take place.
High-speed rewind/fast-forward:
On this unit, if there is less tape on the take-up side than on the supply side (refer to the illustration below) at the time that ◀◀ or ▶▶ is pressed, the speed of the rewind/fast-forward operation will automatically be increased for approximately 1.5 times the normal speed. This function makes it possible to wind the tape faster when there is a large amount of tape to be wound.

Notes
- When there is more tape on the take up side than on the supply side, the tape will be wound at the normal speed.
- If high speed winding is begun from a state in which the tape is partly wound, such as that shown in the illustration above (for example, when the ratio of tape between the two sides is 1:3), high speed winding will continue until the ratio between the two sides reaches 3:1, and then the remaining winding will be done at the normal speed.
For your reference:
You can fast forward or rewind the tape while you are playing or recording a tape in another deck. Press DECK 1/2 to switch to the non playing deck, and then press ◀◀ or ▶▶.
After above operation, be sure to press DECK 1/2 to select the deck in which you are playing a tape.
Sequential playback between 2 tapes
You can listen to two tapes consecutively with the procedure below.

natural_image
Line drawings of electronic devices including a CD, front panel, and a speaker (no text or symbols visible)
1 Load cassettes in decks 1 and 2.
Load with the side that you wish to listen to first facing you in deck 1.
2 CLOSE Press CLOSE to close each deck's cassette holder.
3 DOLBY NR OUT IN Press DOLBY NR if the cassette you want to play was recorded using Dolby NR.
The DOLBY NR IN indicator will light up. If the tape was not recorded using Dolby NR, press DOLBY NR and the DOLBY NR OUT indicator will light up.
4 REVERSE MODE Press REVERSE MODE to set to the ○○ mode.

5 1-DECK-20 Press DECK 1/2 to select deck 1.
The DECK 1 indicator lights to show you can select deck 1.

flowchart
graph TD
    A["Forward side of tape in deck 1"] --> B["Reverse side of tape in deck 1"]
    B --> C["Forward side of tape in deck 2"]
    C --> D["Reverse side of tape in deck 2"]
    D --> E["Forward side of tape in deck 1"]
    E --> F["Forward side of tape in deck 2"]
    F --> G["Forward side of tape in deck 1"]
    G --> H["Forward side of tape in deck 2"]
    H --> I["Forward side of tape in deck 1"]
    I --> J["Forward side of tape in deck 2"]
    J --> K["Forward side of tape in deck 1"]
    K --> L["Forward side of tape in deck 2"]
    L --> M["Forward side of tape in deck 1"]
    M --> N["Forward side of tape in deck 2"]
    N --> O["Forward side of tape in deck 1"]
    O --> P["Forward side of tape in deck 2"]
    P --> Q["Forward side of tape in deck 1"]
    Q --> R["Forward side of tape in deck 2"]
    R --> S["Forward side of tape in deck 1"]
    S --> T["Forward side of tape in deck 2"]
    T --> U["Forward side of tape in deck 1"]
    U --> V["Forward side of tape in deck 2"]
    V --> W["Forward side of tape in deck 1"]
    W --> X["Forward side of tape in deck 2"]
    X --> Y["Forward side of tape in deck 1"]
    Y --> Z["Forward side of tape in deck 2"]
    Z --> AA["Forward side of tape in deck 1"]
    AA --> AB["Forward side of tape in deck 2"]
    AB --> AC["Forward side of tape in deck 1"]
    AC --> AD["Forward side of tape in deck 2"]
    AD --> AE["Forward side of tape in deck 1"]
    AE --> AF["Forward side of tape in deck 2"]
    AF --> AG["Forward side of tape in deck 1"]
    AG --> AH["Forward side of tape in deck 2"]
    AH --> AI["Forward side of tape in deck 1"]
    AI --> AJ["Forward side of tape in deck 2"]
    AJ --> AK["Forward side of tape in deck 1"]
    AK --> AL["Forward side of tape in deck 2"]
    AL --> AM["Forward side of tape in deck 1"]
    AM --> AN["Forward side of tape in deck 2"]
    AN --> AO["Forward side of tape in deck 1"]
    AO --> AP["Forward side of tape in deck 2"]
    AP --> AQ["Forward side of tape in deck 1"]
    AQ --> AR["Forward side of tape in deck 2"]
    AR --> AS["Forward side of tape in deck 1"]
    AS --> AT["Forward side of tape in deck 2"]
    AT --> AU["Forward side of tape in deck 1"]
    AU --> AV["Forward side of tape in deck 2"]
    AV --> AW["Forward side of tape in deck 1"]
    AW --> AX["Forward side of tape in deck 2"]
    AX --> AY["Forward side of tape in deck 1"]
After repeating above operation 8 times, the tape will automatically stop.

To stop sequential tape play: Press □.
For your reference:
- You cannot select Dolby NR for deck 1 and deck 2 respectively.
- We recommend that you use cassettes of the same type (Dolby noise reduction) in both decks.
- You can also start playback from a position other than the forward side of the tape in deck 1.
About priority of the deck:
When you load cassettes in both decks, DECK 1 or 2 indicator will light to show which deck you loaded last.
When you switch on the power, DECK 1 indicator will light.
Convenient functions

Easy play
(Available only from the remote control)
From the power standby condition, you can start play directly.
Listening to compact discs

Press ▶.
The play will start from the first track.
Listening to radio broadcasts

Press TUNER/BAND.
You can receive the station last tuned in when the power was switched to standby condition.
Listening to tapes

Press ◀ or ▶.
The playback will automatically start corresponding to the direction (◀ or ▶) you select.
When a tape has been loaded in both decks, the deck 1 will play.
- Playback will automatically start under the same condition (reverse mode, DOLBY NR) as last set when the power was switched to the standby mode.
- When tapes have been loaded in both decks, deck 1 has priority.
About fade-in start in direct play:
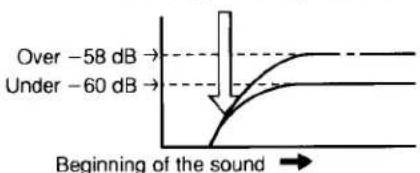
When you set the volume level under -60 dB last, the easy play will start with volume increasing to -60 dB gradually (fade-in). When you set the volume level over -58 dB last, the play will start with volume increasing gradually up to the volume level you set last.
Gradually increasing the volume level

natural_image
Line drawings of four different electronic devices (no text or symbols visible)

To mute the volume
(Available only from the remote control)

Press MUTING -20 dB.
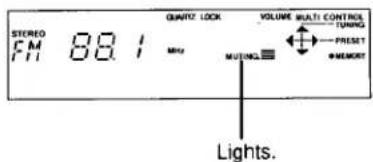
This feature is convenient when you have a telephone call, etc.
To cancel the muted state, press MUT-ING -20 dB once again.
To cancel from the pre-amplifier, reduce the volume level to the minimum position (— dB) and then reset to the desired volume.
To adjust the left-right volume balance
(Available only from the remote control)

Press one of BALANCE on the remote control.
Perform fine balance adjustments while playing a selected sound source. The balance display is only a rough quick.
Pressing L and R simultaneously will restore the balance to the center position.
To use headphones

Connect the headphones to the headphones jack.
Before connecting, reduce the volume level.
Making a recording from radio broadcasts
You can use normal, chrome and metal tapes for recording.

natural_image
Line drawings of four different electronic devices (no text or symbols visible)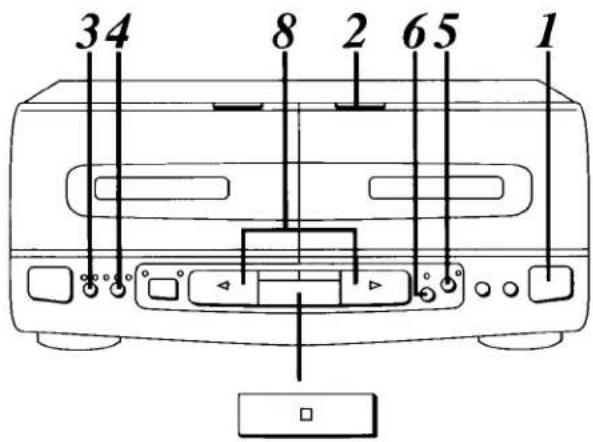
Check that the tape's erasure prevention tabs (see page 57) are intact, and then insert the cassette into deck 2. The leader tape must be wound on beforehand. (See page 31.)
1

Press ▲ OPEN on deck 2 to load a cassette.
2

Press CLOSE on deck 2 to close the cassette holder.
3
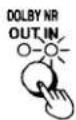
When making a recording using Dolby NR, press DOLBY NR so that the DOLBY NR IN indicator lights.
4

Press REVERSE MODE to select the reverse mode you want to use.
: One side will record, and then the tape will stop automatically at the tape end. : Both sides will record (forward side→reverse side), and then the tape will stop automatically at the tape end.
5

Press CCRT to activate the CCRT (Computer Control Record Tuning—see page 31) function.
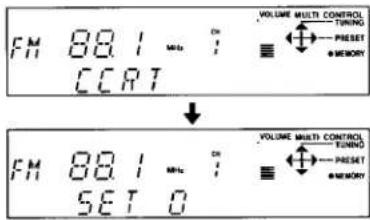
When the CCRT function is activated, the test signal for adjustment will be recorded on the tape, so the previous recording will be automatically erased. You can record without using the CCRT function.
6

Press REC PAUSE to put the cassette deck into the recording standby mode; then select the desired sound source. REC PAUSE indicator lights.
7
Press TUNER/BAND, and then ◀ or ▶ on the tuner/sound processor to tune in to the desired station.
8

Press ◀ or ▷ to start recording. ▷: When recording on either the forward side or both sides ◀: When recording only the reverse side
Making a recording from radio broadcasts

To stop recording:
Press □.
To cut an unnecessary part while recording:
- Press REC PAUSE.
The cassette deck will go into the recording standby state.
- To resume recording, press ◀ or ▷ corresponding to the direction in which recording is taking place.
CCRT recording function:
CCRT (Computer Control Record Tuning) is the function which identifies the quality of the tape (concerning bias, level, equalizer) automatically and sets the most desirable recording condition. While the CCRT setting is activated, the CCRT indicator flashes. After the setting has completed, CCRT indicator stops flashing.
The CCRT setting will remain in the system's memory even after the power is switched to the standby mode.
The display shows the CCRT setting conditions as follows:
- Bias setting

- Recording level setting

- Recording equalizer setting

CCRT setting has been completed: "SET OK"

- You can make recordings in constant tone quality with use of the CCRT function regardless of the different characteristics.
- When making an edit-recording from a CD, the CCRT function will be automatically activated.
Notes
- Do not press INT or EXT while the CCRT is setting.
- Do not insert or remove the cassette tape after the CCRT setting has been completed. It cancels the CCRT setting.
- The CCRT setting may not be possible with the old cassette tape or at around the end of the cassette tape. (The CCRT indicator starts to flash at a high speed.) In this case, press □ and record without using the CCRT function. (The CCRT indicator goes out.)
- Do not connect or disconnect the microphone while recording.

To cancel the CCRT setting on the way:
Press □.
To cancel the CCRT after the CCRT setting has completed:
Press CCRT.
To erase a recorded sound (Deck 2):
When you make a new recording on a previously recorded tape, the new recording will automatically erase what was previously recorded. To erase a recorded sound without making a new recording, perform the following steps:
1) Disconnect the microphone if it was connected.
2) Press INT to select the tape mode.
3) Insert the recorded tape into the cassette holder of deck 2.
4) Press DOLBY NR to light up Dolby NR OUT indicator.
5) Select the desired reverse mode.
6) Press REC PAUSE.
7) Press the playback button (◀ or ▷) corresponding to the side to be erased.
To take up the leader tape
The leader tape is the first few revolutions that you cannot record on.

Magnetic tape
(recordings can be made)
Leader tape
(no recordings can be made)
To record with desired tone quality
To record with the desired tone quality, follow the procedure below.
- Select the desired tone quality. (See pages 42–44.)
- Follow the procedure of "Making a recording from radio broadcasts" on page 30.
Note
When playing back such recordings, press ON/FLAT on the tuner/sound processor to set to "FLAT".
To record without any tonal effect
Press ON/FLAT on the tuner/sound processor to set to "FLAT".
(See pages 42 and 43.)
Making a recording from radio broadcasts
About Dolby Noise Reduction system
Using Dolby NR reduces tape hiss in the high-frequency range. It boosts the level of the high-frequency during recording, and lowers it by the same amount during playback, simultaneously reducing high-frequency interference incurred during the recording process.
This system has the Dolby B-type of noise-reduction system. With Dolby B NR, the noise is reduced by 10 dB at high frequencies. If you are playing a tape that was recorded with Dolby NR, use Dolby NR during playback for best results.
Dolby noise reduction manufactured under license from Dolby Laboratories Licensing Corporation.
"DOLBY" and the double-D symbol □□ are trademarks of Dolby Laboratories Licensing Corporation.
Recording from compact discs
There are 2 ways to record from compact discs, one-touch editing and synchro-recording. See below for the information.
| Use this procedure | Tape allotment | |
| One-touch editing | The system calculates the length of the tape used, and safeguards against a break in the continuity of sound when the recording changes from one side of the tape to the other. (except for LAST FADE mode) | |
| Editing of all tracks in their original sequence (ALBUM)If the system determines it is possible to record one more track on side A, the cassette deck rewinds the tape side A and the first track assigned on the tape side B will be recorded on the tape side A.Up to 24 tracks can be edited. | First arranged(Side A)  (Side B) (Side B)  Re-arranged Re-arranged  (Side A) 1st track 2 3 4 5 (Side A) 1st track 2 3 4 5  (Side B) 6 7 (Side B) 6 7  | |
| Allotting tracks to the tape without wasting tape space (J.FIT)If the amount of blank space is too great, the cassette deck rewinds to the tape end and the compact disc player selects a track which is the most appropriate fit for the end of tape side A.Up to 24 tracks can be edited. | First arranged(Side A)  (Side B) (Side B)  Re-arranged Re-arranged  (Side A) (Side A)  (Side B) (Side B)  | |
| Closing up the tape-end unrecorded sections (LAST FADE)At the end of side A of the tape, a track that cannot be recorded completely will be faded out, and then recorded from the beginning of side "B". During recording, silent gaps of approximately 4 seconds are automatically inserted between tracks (auto space function).You can edit as many tracks as you like using this mode.You can edit the desired tracks of the desired discs using the program play procedure. (See "Program edit-recording" on page 36.) | 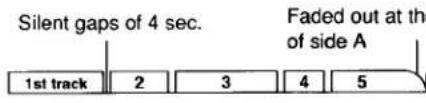 a end(Side A) a end(Side A)  The t The t  | |
| Linking up several discs (LINK)After the edit-recording of a loaded disc has finished, you can subsequently edit-record another disc on the remaining blank portion of the tape.This function is convenient when recording from 3" (8 cm) compact discs successively.You can use the link function (ALBUM, J.FIT, or LAST FADE) after the edit recording has finished. | This example shows when you use J.FIT edit.(Side A)  |(Side B) |(Side B)  | | | |
| Synchro-recording | The system records tracks in the original sequene without calculating the tape length. | |
| When you want to record on the remaining portion of the pre-recorded tape, use the synchro-recording. | [Side A)  |(Side B) |(Side B)  |Remaining of the 6th track |Remaining of the 6th track | |
One-touch editing preparation
You can use normal, chrome, and metal tapes for recording. Check that the tape's erasure prevention tabs (see page 57) are intact, and then insert the cassette into deck 2.

The cassette tape will automatically rewind the tape back to the beginning where the recording can be made. So you don't have to rewind the tape in advance.
1

Press ▲ OPEN to load a cassette in deck 2.
2

Press CLOSE on deck 2 to close the cassette holder.
3

When making a recording using Dolby NR, press DOLBY NR so that the DOLBY NR IN indicator lights.
4

Press REVERSE MODE to select "☐" for automatic two-sided recording.
5

Press ▲ OPEN/CLOSE on the compact disc changer to load a disc, and then press it again.
To start one-touch editing
There are 3 types of one-touch editing.
Be sure to finish the procedure of "One-touch editing preparation" on the left.

natural_image
Line drawings of four electronic devices (no text or symbols visible)
Editing of all tracks in their original sequence (ALBUM)

Press ALBUM.
The tracks assigned on tape side A

The tracks assigned on tape side B
The recording will start after the system completes the "One-touch editing operation" on page 35.
Notes
- Use a tape of under 99 minutes.
- You cannot edit-record tracks numbering higher than 24.
Allotting tracks to the tape without wasting tape space (J.FIT)

Press J.FIT.
The tracks assigned on tape side A

The recording will start after the system completes the "One-touch editing operation" on page 35.
Notes
- Use a tape of under 99 minutes.
- You cannot edit-record tracks numbering higher than 24.
Closing up the tape-end unrecorded sections (LAST FADE)

Press LAST FADE.

The recording will start after the system completes steps 2–3 of "One-touch operation" below.
Use this editing mode when you record the tracks numbering higher than 24.
You can edit the desired tracks of the desired disc(s) using this editing mode. (See "Program edit recording" on page 36.)

To cancel one-touch editing:
Press □ on the cassette deck.
The compact disc changer also stops.
One-touch editing operation:
- The cassette deck will fast-forward and rewind to measure its length. At the same time, CCRT function will be activated. (See page 31.)
- The cassette deck will automatically advance the tape beyond the leader tape, and then stop.
- The compact disc changer automatically scans for the peak (highest) level of the entire disc (Automatic Tape Level Setting—ATLS), then recording will start. ATLS is the function which scans (fast search) for the peak (highest) level of the disc, and sets the appropriate recording level. When ATLS is activated, no sound will be heard. It takes about 70 seconds to complete ATLS for a compact disc of 60 minutes.
When there are tracks allotted on tape side B:
The cassette deck will continue recording a blank portion on tape side A until the end of the side.
To record with desired tone quality:
Select the desired tone quality (see pages 42–44), and start editing. To play back such recordings, press ON/FLAT on the tuner/sound processor to set to FLAT.
To specify the tracks to be edited:
You can specify the tracks to be edited using the program play procedure. (See page 22.)
After completing step 5 on the previous page:
- Press PROGRAM on the remote control, and then specify the tracks to be recorded in the desired sequence.
- Press one of the one-touch editing buttons (ALBUM, J.FIT, LAST FADE) to start editing.
Note
You can program up to 24 tracks (and also tracks numbering lower than 24).
"FULL" appears on the display if you try to program more than 24 tracks.
After the edit recording has finished:
When one disc is loaded:
The deck automatically enters the recording standby mode. When "LINK" indicator flashes, it means you can edit tracks from the same or another disc in succession. (See page 37.)
When two or three discs are loaded:
When there is a blank portion on the tape, the deck will automatically start recording from the next compact disc.
When "LINK" indicator flashes after recording of all the loaded discs has finished, it means you can edit tracks from the same or another disc(s) in succession.
To finish recording:
Press □ on the compact disc changer and "LINK" indicator goes off.
Program edit-recording (LAST FADE mode only)
You can record the desired tracks of the desired disc(s) on the CD tray using LAST FADE mode.
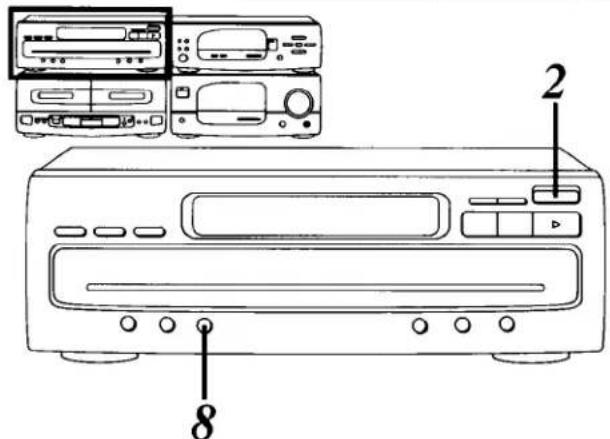
The cassette deck will automatically rewind the tape back to the beginning where the recording can be made. So you don't have to rewind the tape in advance.
1
Follow steps 1–4 on page 34.
2

Press OPEN/CLOSE to load disc(s) and then press it again.
3

Press PROGRAM.

4

Press DISC.
5
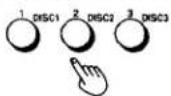
Press one of the disc buttons (DISC 1-3) to select disc number.
6

Press the numeric button to select the track you want to record.

7
Repeat steps 4–6 to complete the program.
8
Press LAST FADE.
The recording will start after the system completes steps 2–3 of "one-touch editing operation" on page 35.

To stop recording: Press □ on the cassette deck.
After the compact disc play finishes:
The cassette deck will create a non-recorded passage of about 4 seconds, and then go into the recording standby state.
When "F" appears on the display:
The number of programmed tracks is limited to 24. No further tracks can be programmed.
Linking up several discs (LINK)
When "LINK" indicator flashes after the edit-recording of loaded disc(s) has finished, you can subsequently edit-record the same or another disc(s) on the remaining blank portion of the tape.

natural_image
Line drawings of four different electronic devices (no text or symbols visible)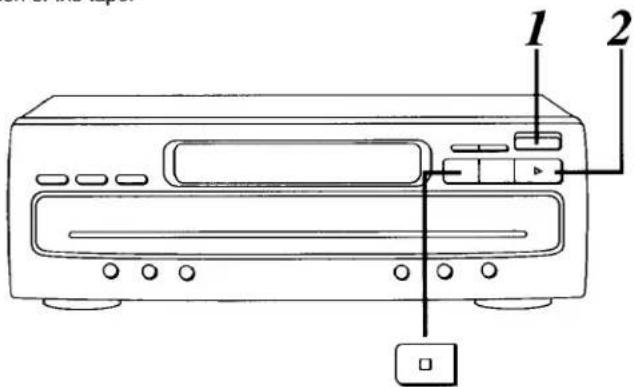
Finish the first edit-recording of the loaded disc(s).
1

Press OPEN/CLOSE to replace disc(s) and press it again.
The time remaining on tape

2

Press ▷.
The recording will start from the disc on the disc tray 1, with the same editing mode of the first disc.
The system will assign tracks to be recorded on the remainder of the tape and display the results.
Tracks to be recorded on tape side A
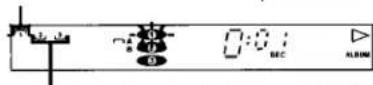
Tracks to be recorded on tape side B
The recording will start after the system completes the ATLS (see "One-touch editing operation" on page 35) setting.
3
Repeat steps 1–2 to record more discs.

To cancel the LINK function Press □.
To specify the tracks to be edited:
(Steps 2–5 are available only from the remote control.)
- Replace the CD.
- Press PROGRAM.
- Press DISC.
- Press one of the numeric buttons (1-3) to select disc number.
- Press numeric buttons to specify the tracks you want to record.
- Press ▷ to start recording.
To record from the same disc(s) in succession:
Follow steps 2–6 above.
Notes
- When you record the first compact disc using LAST FADE, tracks to be recorded will not be displayed. However, it is possible to record from another disc.
- When the display shows "0:00", you cannot record from another disc. Press □ to cancel the edit mode.
- If the time remaining on the tape is shorter than the length of the tracks to be recorded, you cannot record the tracks. Replace the disc with the tracks shorter than the time remaining on the tape or press □ to cancel the edit mode.
Synchro recording
You can use normal, chrome, and metal tapes for recording.

Check that the tape's erasure prevention tabs (see page 57) are intact, and then insert the cassette into deck 2.
The leader tape must be wound on beforehand. (See page 31.)

Press OPEN to load a cassette in deck 2.

Press CLOSE on deck 2 to close the cassette holder.
When making a recording using Dolby NR, press DOLBY NR so that the DOLBY NR IN indicator lights.

Press REVERSE MODE to select the reverse mode you want to use.
→: One side will record, and then the tape will stop automatically.
☐: Both sides will record (forward side/reverse side), and then the
Press CCRT to activate the CCRT function.
You can record without using the CCRT function.

Set the tape travel direction.
To change the tape travel direction, first press ◀ or ▷ on the cassette deck, then □.
▷: Recording from the forward side.
◀: Recording from the reverse side.
Press ▲ OPEN/CLOSE to load a disc and then press it again.
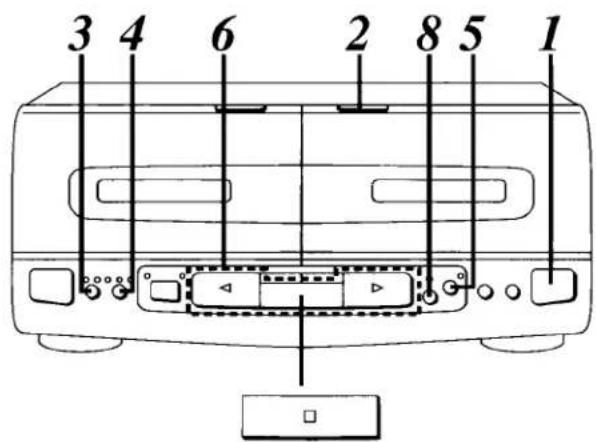

Press REC PAUSE. The cassette deck will enter the recording standby state.

Press ▷ on the CD changer to start recording.
The recording will automatically start corresponding to the tape travel direction indicator.
To stop recording: Press □ on the cassette deck.
After the compact disc play finishes:
When one disc is loaded:
The cassette deck will create a non-recorded passage of about 4 seconds, and then go into the recording standby state.
When two or three discs are loaded:
When there is a blank portion on the tape, the deck will automatically start recording from the next compact disc.
When you want to cut an unnecessary track while recording:
Before an unnecessary track play will start:
- Press III. The cassette deck will create a non-recorded passage of about 4 seconds, and then go into the recording standby state.
- Press ▶▶/▶▶ or ◀◀/◀◀ to skip to the desired track
- Press ▷ on the compact disc changer to resume recording.
To specify the tracks to be recorded:
- Follow steps 1 to 7.
- Specify the desired discs and tracks using the program play procedure. (See page 22.)
- Press REC PAUSE.
- Press ▷ on the CD changer to start recording.
The recording will automatically start.
Tape-to-tape recording
You can use normal, chrome and metal tapes for recording.
The recording level and the noise reduction effect of the original (playback) tape will be recorded on the new tape just as they were in the original recording.

natural_image
Line drawing of three electronic devices with ports and control panels (no text or symbols)
Press INT on the tuner/sound processor to select "TAPE".
Check that the tape's erasure prevention tabs (see page 57) are intact, and then insert the cassette into deck 2.
The leader tape must be wound on beforehand. (See page 31.)
1


Load cassettes.
For playback: Into deck 1
For recording: Into deck 2
Insert both cassettes with the starting side facing in front.
2
Press CLOSE to close each deck's cassette holder.
3

Select the desired reverse mode.
→: Single-sided recording
Two-sided recording (forward side→reverse side) In case the tape length loaded in deck 2 is longer than a tape in deck 1, deck 1 repeats the play-back until deck 2 completes the two-sided recording. (8 times max.)
XX: Two-sided recording (forward side→reverse side)
4

Press CCRT to activate the CCRT function.
(See page 31.)
You can record without using the CCRT function.
5

Set the tape direction to “▷” on deck 1 and deck 2.
Press DECK 1/2 and confirm both deck's tape direction are "D".
To change the tape direction, first press ▷, and then □.
To record on the reverse side, set deck 2 to “◀” tape direction. (In this case, be sure to rewind the tape to the beginning of the reverse side.)
6
ONE TOUCH TAPE EDIT NORMAL HIGH

Press one of ONE TOUCH TAPE EDIT (NORMAL or HIGH) to start recording with the desired editing speed.
NORMAL: When you wish to monitor the sound while recording
HIGH: When you wish to record at high speed (about 2 times normal speed)
While recording, both DECK 1 and DECK 2 indicators light. Tape direction indicator shows the tape direction of deck 2.
After recording has finished, both decks will stop.

To stop recording:
Press □.
Both decks will stop.
To record on the reverse side of the tape:
Set the deck 2 tape direction to ◀, and then press NORMAL or HIGH.
To enjoy another source while recording:
Press ▷ on the compact disc changer or TUNER/BAND on the tuner/sound processor, and start the sound source.
You can change the volume level and tone quality without affecting the recording.
For your reference:
For optimum results, use an editing tape of the same or higher quality than the playback tape.
Notes
- Some TV sets generate noise that could be recorded during tape-to-tape recording. To prevent the possibility of this, do not use this system close to a TV set.
- Do not press CD edit recording buttons (J.FIT, ALBUM, LAST FADE) while tape-to-tape recording is in progress. It changes the tape-to-tape recording to the CD edit recording mode.
- You cannot expect special tone quality and equalization effects for tape-to-tape recording.
Changing the volume level mode
(For SC-CH717 only)
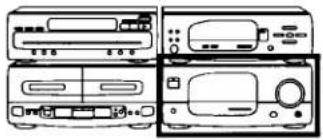
natural_image
Line drawings of four electronic devices (no text or symbols visible)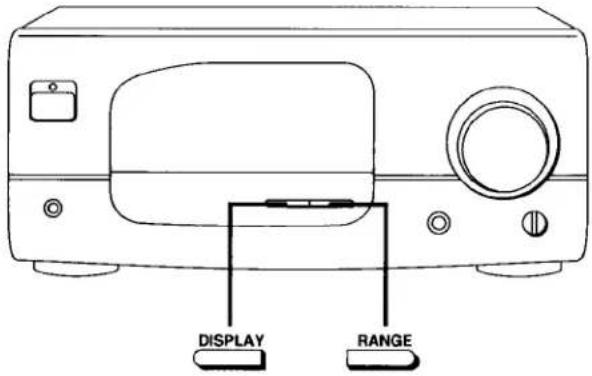
Changing the output level display
The display will change in 3 steps.
Select the desired display.

Press DISPLAY.
Each time you press DISPLAY, the display will change as shown in the illustration.
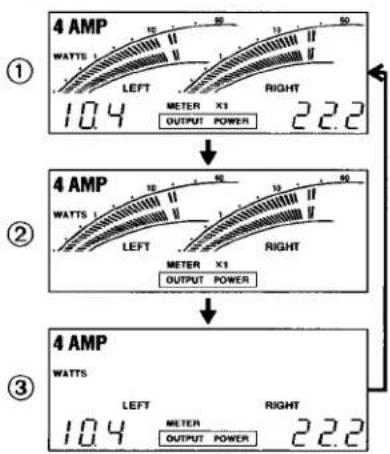
Note
You can change the output level scale only when the display shows same as ① and ②.
Changing the output level scale
Change the output level scale of the source you are listening to.

Press RANGE.
Each time you press RANGE, the display will change as follows:

① Shows the output level scale, up to 60 W max.
When the output level scale is more than 60 W, "OVER" lights.
② Shows the output level scale, up to 6 W max.
When the output level scale is more than 6 W, "OVER" lights.
Note
You can change the output level only when the display shows same as ① and ②.
Changing the tone
About equalization curves (EQ)
Use this sound mode when you want to change the tone according to the type of music.
There are 5 equalization curves preprogrammed to this system. (See page 42.)
About simulated listening environments (SPACE)
Use this sound mode when you want to create the "live" performance sound.
There are 3 simulated listening environments preprogrammed to this system. (See page 43.)
You can adjust equalization curves and simulated listening environment as you like, to store them as "USER" mode. (See page 44.)
To retrieve the preprogrammed equalization curves (EQ mode)
5 types of equalization curves are preprogrammed to this system.

natural_image
Line drawings of three electronic devices with ports and buttons (no text or symbols)
1

Press MODE to select EQ mode.
Each time you press MODE, EQ and SPACE mode will be alternately switched.

The display shows one of the EQ mode (HEAVY, CLEAR, SOFT, CAR, HP ST) which is previously retrieved.
2

Press and hold MODE to select PRESET mode.
Each time you press and hold MODE, PRESET and USER mode will be alternately switched.

3


Press ◀ or ▶ to select the desired equalization curves.
Each press ▶ advances the equalization curve setting as follows.

Pressing ◀ advances the equalization setting conversely.
About the pre-programmed equalization curves
1. HEAVY
Use to add "punch" to rock and other music.

2. CLEAR
Use to clarify the treble range of jazz, etc.

3. SOFT
Use to listen to background music, etc.
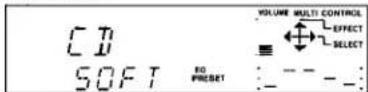
4. CAR (CAR STEREO)
Use to record a tape for playback using the car audio system (Car stereo).

5. HP ST (HEADPHONES STEREO)
Use to record a tape for playback using the stereo cassette player (Headphones Stereo).
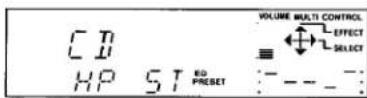

To cancel the EQ mode:
Press ON/FLAT to select FLAT.

For your reference:
You can record with desired equalization curves. To playback such recordings, press ON/FLAT to select FLAT.
When listening to the radio broadcast:
After pressing MODE (on steps 1 and 2), proceed to the next step within 10 seconds. If not, the display will return to the tuning/preset mode. In this case, press MODE twice, and proceed to the next step.
Note
During CD edit recording, you cannot alter the EQ mode.
To retrieve the preprogrammed simulated listening environments (SPACE mode)
3 types of simulated listening environments are preprogrammed to this system.

natural_image
Line drawings of four different electronic devices (no text or symbols visible)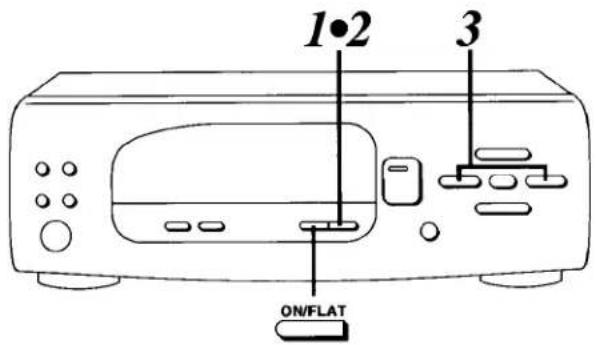
1 MODE
Press MODE to select SPACE mode.
Each time you press MODE, EQ and SPACE mode will be alternately switched.

The display shows one of the SPACE mode (DISCO, LIVE, HALL) which is previously retrieved.
2 MODE
Press and hold MODE to select PRESET mode.
Each time you press and hold MODE, PRESET and USER mode will be alternately switched.

3
Press ◀ or ▶ to select the desired simulated listening environments.
Each press of ▶ SELECT advances the simulated listening environment setting as follows.

Pressing ◀ advances the equalization setting conversely.
About the pre-programmed simulated listening environments
1. DISCO
Use to create powerful bass sounds found in discos.

2. LIVE
Use primarily for vocal pieces to add gloss to the vocals.
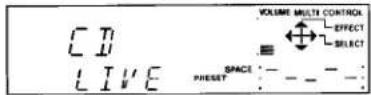
3. HALL
Use to impart a deep bass and spread which will make you feel as if you were in a large concert hall.


To cancel the SPACE mode: Press ON/FLAT to select FLAT.
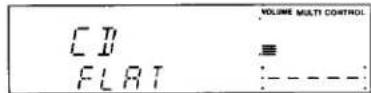
For your reference:
You can record with desired simulated listening environments. To playback such recordings, press ON/FLAT to select FLAT.
When listening to the radio broadcast:
After pressing MODE (on steps 1 and 2), proceed to the next step within 10 seconds. If not, the display will return to the tuning/preset mode. In this case, press MODE twice, and proceed to the next step.
Note
During CD edit recording, you cannot alter the SPACE mode.
Changing the tone
To adjust EQ and SPACE ("USER" mode)
You can adjust equalization curves and simulated listening environments as you like, and store them as the USER mode in its memory.

natural_image
Line drawings of four different electronic devices (no text or symbols visible)
natural_image
Line drawing of a portable electronic device with ports and buttons (no text or symbols)1
Select the equalization curve or simulated listening environment of which you want to adjust the tone.
(See pages 42–43.)
2

Press ▲ or ▼ to adjust the equalization curve or simulated listening environment.
: To increase the effect : To decrease the effect

Once you have made the adjustment, the system automatically stores the simulated listening environment or equalization curve as the USER mode in its memory.
To retrieve the USER mode:
- Press MODE to select EQ or SPACE mode.
- Press and hold MODE to select USER.
- Press ▶ or ◀ to select the desired equalization curve or simulated listening environment.
For your reference:
- Any adjustment will not affect the PRESET modes (equalization curves or simulated listening environments preprogrammed to this system).
- USER modes will continue to be stored for approximately 2 weeks, even if the power supply cord is disconnected.
To listen with augmented bass (V.BASS)

natural_image
Line drawings of three electronic devices (no text or symbols visible)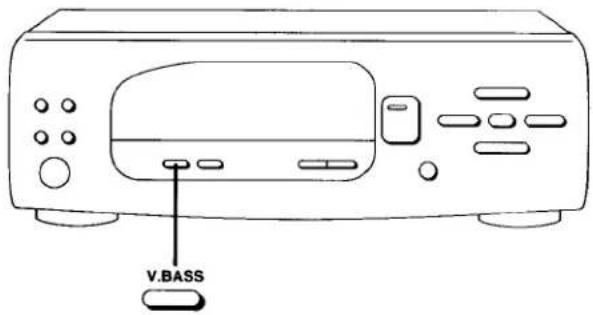

Press V.BASS to ON.


To cancel the V.BASS effect:
Press V.BASS once again.
Notes
- You cannot make a recording with the V.BASS effect. While recording, V.BASS mode cannot be activated.
- V.BASS indicator goes out while recording, and lights when recording finishes.
Using the timer
Make sure that you have completed "Setting the time" on page 16.
About the types of timer operation
There are 3 types of timer operation.
You can use below timer modes in conjunction.
See page 51 for details.
Play timer (see pages 46–47):
Select this timer when you want to use the timer as an alarm clock. You can wake up with listening to music (CD, tuner, tape) at a desired volume level and time.


Record timer (see pages 48–49):
Select this timer when you want to use the timer to record a midnight program or while you are out. The system will record a desired radio broadcast at a desired time.


The recording will be made while you are out.

Sleep timer (see page 50):
Select this timer when you want to use the timer to switch off the music automatically as you can fall asleep while listening. The system will go into power standby mode after the assigned time has passed.


Setting the play timer
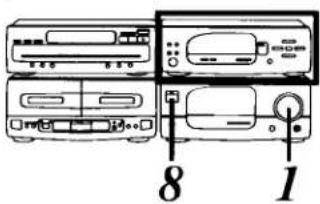

The following example shows how to set the play timer for; playing a CD at -46 dB everyday from Monday through Friday 6:30 a.m. to 7:40 a.m.
1
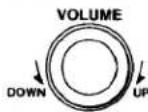
Adjust the volume level for the timer play on the amplifier.
2

① Press CLOCK/TIMER three times to select ☐ PLAY.

Within 10 seconds: ② Press SET.
3

① Press ◀ or ▶ to select the day.

② Press SET.
4

("ON" time setting) ① Press ◀ or ▶ to select the hour.

② Press SET.

③ Press ◀ or ▶ to select the minutes.

④ Press SET.
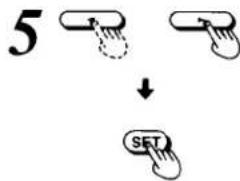
flowchart
graph TD
    A["Hand icon 5"] --> B["Arrow"]
    C["Hand icon 5"] --> D["Arrow"]
    E["Hand icon 5"] --> F["Arrow"]
("OFF" time setting) ① Press ◀ or ▶ to select the hour.
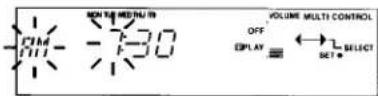
② Press SET. ③ Press ◀ or ▶ to select the minutes.


④ Press SET.

flowchart
graph TD
    A["Hand 1"] --> B["Hand 2"]
    B --> C["Hand 3"]
    C --> D["SET"]
① Press ◀ or ▶ to select the desired source.
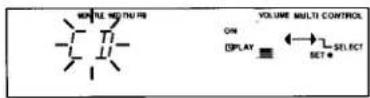
② Press SET.
When you select tuner, select a desired preset channel using ◀ or ▶, and then press SET.
7
Prepare for the play.
When you play a CD:
Load disc(s).
When you load two or three discs:
Press one of the disc buttons to select which disc you want to play, and then proceed to next step.
When you play a tape:
Load a tape.
8

Press POWER on the amplifier to switch the power to standby mode.
Please confirm ☐ PLAY appears on the display. The timer play will start at the preset time with volume increasing gradually up to the volume level you preset.
Note
When you play a CD in the program play mode, the timer play may start directly with the volume level you preset.

PLAY

To cancel the timer:
Press ☐ PLAY to go out ☐ PLAY on the display.
The play timer will not function, but the play timer setting will stay in the memory.
If you make an error:
Follow the procedure from the first step.
About the variation of the day setting:
One day from Sunday to Saturday: SUN...SAT
Everyday from Sunday to Saturday: SUN-SAT
Everyday from Monday to Saturday: MON-SAT
Everyday from Monday to Friday: MON-FRI
Saturday and Sunday only: SUN, SAT

To confirm the play timer:
Press CLOCK/TIMER to show ☐ PLAY on the display.

The display will show the ON time, OFF time, the source you select, and the volume level in 2 second steps.
To change the play timer setting:
Follow the procedure from the first step.
Using the timer at the same time setting continuously:
You can accomplish this even if the system is in the standby mode.
- Press ☐ PLAY to show ☐ PLAY on the display.
- Press POWER to switch the power to standby mode.
To enjoy the desired source after the timer setting is completed:
- Start playing the desired source.
Even if you change the volume level or sound source, the timer play will start in the preset mode. - Press POWER to standby mode after enjoying the play.
Notes
- This system retains the ON/OFF time settings until you make a new setting. In case you make a new ON time setting which is later than the previous OFF time setting, the system automatically advances to the day you set on step 3. When you reset the OFF time, the day setting will return to the original setting.
●The ON time and OFF time cannot be identical. - If the power is on, the timer will not function. The system must be in the standby mode.
●The play timer will function until you cancel the play timer mode. - If you switch the power to standby mode while play timer is functioning, the OFF time setting will be cancelled.
For your reference:
When you insert cassettes in both deck 1 and deck 2, deck 1 has priority for timer play on tape.
Setting the record timer


The following example shows how to set the record timer for; recording FM preset channel 1 on Saturday from 8:30 p.m. to 10:00 p.m.
1

① Press CLOCK/TIMER twice to select ☐ REC.
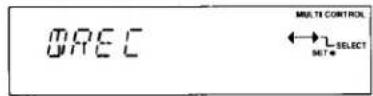
Within 8 seconds: ② Press SET.
2

① Press ◀ or ▶ to select the day.

② Press SET.
3

("ON" time setting)
① Press ◀ or ▶ to select the hour.


② Press SET.
③ Press ◀ or ▶ to select the minutes.

④ Press SET.


("OFF" time setting)
① Press ◀ or ▶ to select the hour.
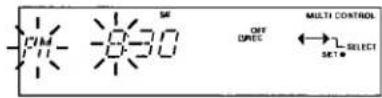


② Press SET.
③ Press ◀ or ▶ to select the minutes.
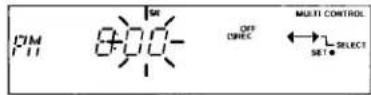
④ Press SET.
5 ① Press ◀ or ▶ to select the desired preset channel.


② Press SET.
6
Prepare for recording.
- Insert a cassette into deck 2.
- Select the Dolby NR.
- Select the reverse mode.
- Select the tape travel direction.
7
Press POWER on the amplifier to switch the power to standby mode.
Please confirm ☐ REC appears on the display.
The sound will be automatically muted during timer recording.

To cancel the timer:
Press ☐ REC to go out ☐ REC on the display.
The record timer will not function, but the record timer setting will stay in the memory.
If you make an error:
Follow the procedure from the first step.
About the variation of the day setting:
One day from Sunday to Saturday: SUN...SAT
Everyday from Sunday to Saturday: SUN-SAT
To confirm the record timer:
Press CLOCK/TIMER to show ☐ REC on the display.

The display will show the ON time, OFF time, the broadcast band you select, in 2 second steps.
To change the record timer setting:
Press CLOCK/TIMER to return to step 1.
Using the timer at the same time setting continuously:
You can accomplish this even if the system is in the standby mode.
- Press ☐ REC to show ☐ REC on the display.
- Press POWER to switch the power to standby mode.
To enjoy the desired source after the timer setting is completed:
-
Start playing the desired source.
When listening to a cassette tape, use deck 1.
Even if you change the sound source, the timer recording will start with the preset condition. -
After enjoying the source, prepare for recording, and then press POWER to standby mode.
Notes
- When the record timer is functioning, you cannot confirm the record timer.
- This system retains the ON/OFF time settings until you make a new setting. In case you make a new ON time setting which is later than the previous OFF time setting, the system automatically advances to the day you set on step 3. When you reset the OFF time, the day setting will return to the original setting.
●The ON time and OFF time cannot be identical. - If the power is on, the timer will not function.
- Once the record timer operation finishes, it clears the record timer mode (except for "everyday from Sunday to Saturday" mode).
- When you want to record a same program over several weeks, (except when you select "everyday from Sunday to Saturday" mode), press ☐ REC to show ☐ REC on the display after the timer recording has finished.
For your reference:
While timer recording is taking place, the volume level will be automatically muted.
To use the sleep timer
You can use this timer function to switch the power to the standby mode at a specified time (within a range of 1 minute to 120 minutes from the present time).

The following example shows how to set the system to standby mode after 30 minutes.
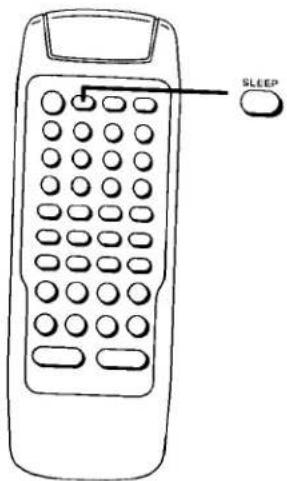
1
While enjoying the desired source:
① Press CLOCK/TIMER four times to select SLEEP.

Within 7 seconds:
② Press SET.

To confirm the time remaining on the sleep timer:
Press CLOCK/TIMER four times.
To change the time setting while sleep timer is functioning:
Follow procedure from the beginning.
If you want to operate the system again on the same sleep time:
Press SLEEP on the remote control to show "SLEEP" on the display.
2
① Press ◀ or ▶ to select the desired length of time.
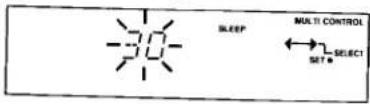
② Press SET.
Please confirm SLEEP appears on the display.

To cancel the sleep timer mode:
Press SLEEP to go out the SLEEP on the display.
The time setting will remain in the unit's memory.
To use each timer mode in conjunction
To go to sleep listening to a tape, and wake up the next morning listening to a compact disc, and record from a radio broadcast while going out
- Make a record timer setting. (See pages 48–49.)
- Make a play timer setting for a compact disc. (See pages 46–47.) Be sure to set the timer play to be off before the timer recording will start.
- Play back the tape in deck 1, and adjust the volume level. (Select "☐" of the reverse modes.)
- Press CLOCK/TIMER to select SLEEP timer, and set the sleep time. (See page 50.)
To go to sleep listening to a compact disc, and then to make a timer recording from a radio broadcast
- Make a record timer setting. (See pages 48–49.)
- Play a compact disc, and adjust the volume level.
- Press CLOCK/TIMER to select SLEEP timer, and set the sleep time. (See page 50.)
Be sure to set the sleep timer to off before the record timer will begin.
To make a timer recording from a radio broadcast while sleeping, and wake up the next morning listening to a cassette tape
- Make a record timer setting. (See pages 48–49.)
- Make a play timer setting for deck 1, and switch the power to standby mode. (See pages 46–47.) Be sure to set the record timer to off before the play timer will begin.
To go to sleep listening to an FM broadcast and wake up the next morning listening to a compact disc
- Make a play timer setting for compact disc. (See pages 46–47.)
- Tune in the desired band and station, and adjust the volume level.
- Press CLOCK/TIMER to select SLEEP timer, and set the sleep time. (See page 50.)
Timer sequence of priority:
Sleep timer, record timer, play timer is the timer operation of priority in order. Be sure not to make each timer setting overlap.
Example 1:

The sleep timer setting has priority, so the record timer will not function.
Example 2:
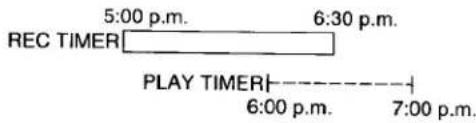
The record timer setting has priority, so the play timer will not function.
For your reference:
- When the OFF time of the record timer and the ON time of the play timer are the same, both timers will function.
- When the OFF time of the play timer and the ON timer of the record timer are the same, both timers will function.
Enjoying microphone mixing
This function mutes the vocal track but leaves the accompaniment allowing you to enjoy "KARAOKE" (singing with an accompaniment).
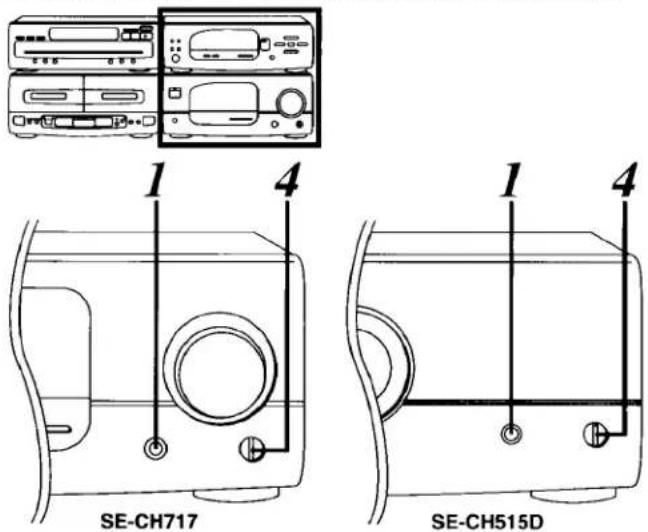
1

Connect the microphone to MIC after reducing the volume level.
Plug type: M6 monaural type
2

Start playing a compact disc.
3

Press KARAOKE to ON.
"VOICE MUTE", "L ONLY", "R ONLY" and light off (FLAT) will be displayed, in order, each time you press KARAOKE.
| VOICE MUTE | You can use a normal CD. |
| L ONLY or R ONLY | You can use a sound multiplex CD, or CD graphics. |
| Light off (FLAT) | You can use normal karaoke tape, a normal karaoke CD, or CD graphics. |

4
Start microphone mixing, and adjust the microphone level.


To cancel the "KARAOKE" mode:
Press KARAOKE to go out the indicator. When VOICE MUTE lights:
Press 3 times.
When L ONLY lights:
Press twice.
When R ONLY lights:
Press once.
To record your "KARAOKE" performance:
Start recording on deck 2, then start "KARAOKE". To playback the tape recorded in "KARAOKE" mode, press KARAOKE to go out the "KARAOKE" mode indicator (VOICE MUTE, L ONLY, R ONLY).
To record your voice:
- Connect the microphone to the MIC jack.
- Press REC PAUSE to put the cassette deck into the recording standby mode.
- Press ▷ or ◀ to start recording.
- Start "KARAOKE".
You cannot record in "KARAOKE" mode using:
A tone quality effect (equalization curve, simulated listening environment, and V.BASS effect)
A cassette tape originally made for KARAOKE use
You cannot use "KARAOKE" function with:
A tone quality effect (equalization curve, simulated listening environment effect)
A monaural source
Recording with "KARAOKE" mode on a DCC tape
Notes
●"KARAOKE" mode cannot be activated when you select "TUNER".
●During CD edit recording, you cannot alter the KARAOKE mode.
●This function may not be effective according to the type of music.
- If you hear strange noises (squealing or howling) during mixing, move the microphone farther away from the speakers or turn down the volume and microphone volume on the amplifier.
- When you are not using the microphone, disconnect it from the MIC jack, and turn down the microphone volume level to MIN.
- Do not press KARAOKE when recording on a DCC or DAT.
Using an external unit

natural_image
Line drawings of four different electronic devices (no text or symbols visible)
natural_image
Line drawing of a microwave oven with control panel and buttons (no text or symbols)Listening to an external source
You can connect DCC (or DAT) or analog turntable to this system.
The following example shows when you select DCC.
1

Press EXT to select the external source.
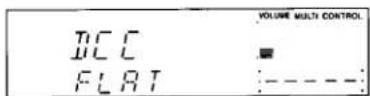
Each time you press EXT, "DCC" and "AUX" will be alternately displayed.
2
Operate the unit which is connected to the system.
See the instruction manual of the unit concerned for operating instructions.
Recording from an external source
The following example shows when you record from an analog player.
1

Press REC PAUSE on the cassette deck to put the cassette deck into the recording standby mode.
2

Press EXT to select an external source from which you want to record.
3

Press one of the playback buttons (◀ or ▷) on the cassette deck to start recording.
4
Start playing the source to be recorded.
See the instruction manual of the unit concerned for operating instructions.

To stop recording:
Press □ on the cassette deck.
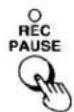
To briefly interrupt recording: Press REC PAUSE on the cassette deck
The cassette deck will go into the recording standby state.

To resume recording:
Press one of the playback buttons (◀ or ▷) corresponding to the direction in which recording is taking place.
To record on a DCC (or DAT) tape:
Start recording on a DCC (or DAT), and then start playing the source to be recorded.
You cannot record the sound with the equalization curve, simulated listening environment, and V.BASS effect on a DCC (or DAT) tape.
Note
Do not press KARAOKE when recording on a DCC or DAT.
Remote control operations —quick reference—
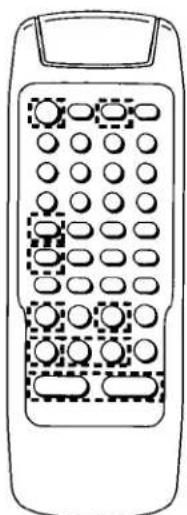
natural_image
Line drawing of a remote control device with keypad and buttons (no text or symbols)Common operation
| Switching the system on and power standby mode |  |
| Starting play directly from the power standby condition |     |
| Selecting the input source |   |
| Adjusting the volume | LUI  |
| Muting the volume temporarily |  |
| Adjusting the volume balance |  |

natural_image
Line drawing of a remote control device with buttons and dials (no text or symbols)CD section
| Starting play |  |
| Temporarily stopping play |  |
| Stopping play |  |
| Skipping tracks |  |
| Starting play from a particular track |  |
| Playing the particular track you programmed |  |
| Cancelling the particular track you programmed |  |
Remote control operations — quick reference—

natural_image
Line drawing of a remote control device with buttons and dials (no text or symbols)Tape section
| Switching between deck 1 and deck 2 |  |
| Starting playback |  |
| Finding the beginning of a track | During playback |
| Fast forwarding or rewinding the tape | In stop mode |
| Stopping playback |  |
| Recording |  |

natural_image
Line drawing of a remote control with keypad and buttons (no text or symbols)Tone control section
| Switching between equalization curve and simulated listening environment | [65cc] |
| Switching equalization curve or simulated listening environment on or off | [x3cz] |
| Switching between PRESET and USER mode | Press and hold.  |
Tuner/timer operation
| Listening to radio broadcasts | [8x2W] → 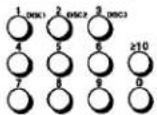 |
| Switching between FM stereo mode and monaural |  |
| Operating/releasing the sleep timer |  |
Concerning compact discs
Only compact discs having this mark can be used with this unit.

To remove a disc from its case
Press the center holder and lift the disc holding it by the edges.

natural_image
Illustration showing a hand holding a circular object next to another hand holding a ring (no text or symbols present)To hold the disc
Hold the disc by the edges so the surface is not soiled with fingerprints. Fingerprints, dirt and scratches can cause skipping and distortion.
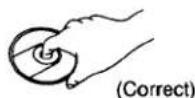

To store a disc in its case
Insert the disc with the label facing upwards and press downward at the center.
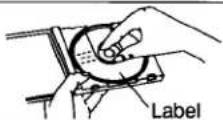
If the surface is soiled
Wipe gently with a soft, damp (water only) cloth.


If the disc is brought from a cold to a warm environment, moisture may form on the disc
Wipe this moisture off with a soft, dry, lint-free cloth before using the disc.
Improper disc storage:
You can damage discs if you store them in the following places:
●Areas exposed to direct sunlight
●Humid or dusty areas
- Areas directly exposed to a heat outlet or heating appliance
Handling precautions:
- Do not write on the label side with a ball-point pen or other writing utensils.
- Do not use record cleaning sprays, benzene, thinner, static electricity prevention liquids or any other solvent.
- Do not soil with fingerprints.
Maintenance
Maintenance of external surfaces
To clean this unit, use a soft, dry cloth.
If the surfaces are extremely dirty, use a soft cloth dipped in a soap-and-water solution or a weak detergent solution.
Wring the cloth well before wiping the unit.
Wipe once again with a soft, dry cloth.
Never use alcohol, paint thinner, benzene, or chemically treated cloths to clean this unit. Such chemicals may damage the finish of your system.
Tape head care
To assure sound quality for recording and playback, be sure to clean the tape heads after approximately every 10 hours of use.
- Press POWER on the amplifier to ON.
- Press ▲ OPEN to open the cassette holder.
-
Press POWER on the amplifier and CLOSE at the same time.
The system will go into power standby mode leaving the cassette holder open. -
Clean the tape heads, pinch rollers and the capstan shafts with a cotton swab (or a soft, lint-free cloth) slightly moistened with isopropyl alcohol.
Do not use any solution other than alcohol for head cleaning.
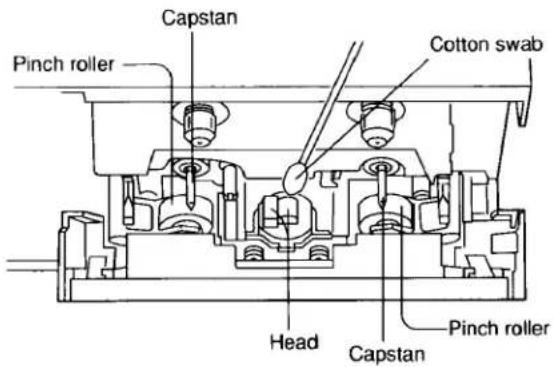
Concerning cassette tapes
Selection of cassette tapes
You can use normal, chrome, and metal tapes for recording:
- The deck automatically identifies the kind of tape loaded, and sets the bias (for recording) and equalization accordingly.
●The deck automatically sets the recording level.
Cassette tapes exceeding 90 minutes:
These tapes are handy for their long playback and recording time but be careful about repeatedly stopping and starting, rewinding and fast forwarding these tapes in short intervals as they are thin, tend to stretch and may become entangled in the deck mechanism.
Do not use the Fe-Cr tapes (TYPE III) in this system:
If you use this tape, it is impossible to obtain the required flat frequency response.
If the tape loosens, take up the slack
Tape slack may cause the tape to break.

To prevent erasure of recorded sounds
Remove the erase-prevention tabs with a screwdriver or a similar object.
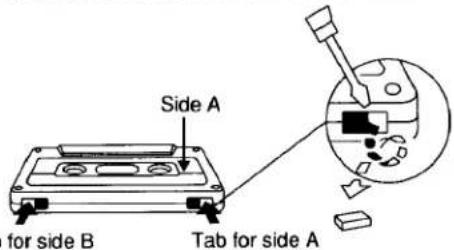
To re-record on a protected cassette, cover the slot with adhesive tape.
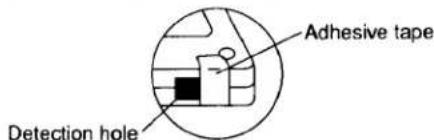
Do not cover the detection holes on chrome and metal tapes.
Improper tape storage:
You can damage tapes if you store them in the following places:
- In high temperature [35°C (95°F) or higher] or high humidity (80% or higher) areas
- In a strong magnetic field (near a speaker, on top of a TV, etc.) This can erase a recording.
●Areas exposed to direct sunlight
Troubleshooting guide
Before requesting service for this unit, check the chart below for a possible cause of the problem you are experiencing. Some simple checks or a minor adjustment on your part may eliminate the problem and restore proper operation.
If you are in doubt about some of the check points, or if the remedies indicated in the chart do not solve the problem, refer to the directory of Authorized Service Centers (enclosed with this unit) to locate a convenient service center, or consult your dealer for instructions.
| Problem | Probable cause(s) | Suggested remedy |
| Problems common to all systems | ||
| There is no sound when the power is ON. | Volume is set too low. | Adjust the volume level with the volume control on the amplifier. |
| The location of the various musical instruments is not well defined. | The (+) and (−) connections to one of the speakers are reversed. | Connect the speaker cords correctly. |
| The left and right sounds are reversed. | The left and right connections to the speaker are reversed. | Connect the speaker cords correctly. |
| When listening to the external unit, the left and right sounds are reversed. | The left and right connections to the external unit are reversed. | Connect the external unit's cord correctly. |
| Only one speaker is emitting sound. | One of the wires of the speaker cord is disconnected. | Connect the speaker cord correctly. |
| The balance control is set to left or right. | Set the balance to the center position. | |
| There is no sound when a source is being played. | The (+) and (−) wire of the speaker cords are shorted. | Switch the system to the standby mode, and reconnect the speaker cords so that they are not shorted. Then switch on the power. |
| “U70” display appears on the compact disc changer or tuner/sound processor display. | Flat cables are not connected steadily. | Connect the flat cables steadily. |
| While listening to FM broadcasts | ||
| There is a “rushing noise” during a stereo broadcast which is not audible during a monaural broadcast. | The transmitting station is a long distance away. | •If you are using an indoor antenna, change to an outdoor antenna.•If you are using a high-grade outdoor antenna, try changing the installation location, height and orientation. |
| You hear excessive noise during a stereo broadcast, and occasionally the sound disappears. | The installation location and orientation of the antenna are unsuitable. | |
| The stereo indicator flickers and does not light completely. | The transmitting station is a long distance away. | |
| The power of the TV set or VCR is ON. | Try switching off the TV set or VCR. | |
| The sound during a stereo broadcast is highly distorted. | There is a building or mountain nearby. [Distortion is caused by interference between the signal from the transmitting station (direct wave) and the signal reflected from the building or mountain (reflected wave).] | Use a high-grade outdoor antenna, and install it in a good location, height and orientation for reception. |
| While listening to AM broadcasts | ||
| You hear an unusual beat sound. | You are using the system at the same time you are playing a TV set. | Switch off the TV set, or use the system farther away from it. |
| You hear a low-frequency hum. | The antenna wire is near the power cord. | Separate the antenna wire from the power cord. |
| Problem | Probable cause(s) | Suggested remedy |
| When there is a television set nearby | ||
| The picture on the TV disappears or stripes appear on the screen. | The location and orientation of the antenna are incorrect. | If you are using an indoor antenna, change to an outdoor antenna. |
| The wiring at the back of the system is unsuitable. | Separate the antenna wire of the TV set from the system. | |
| While listening to tapes | ||
| Sound is low, intermittent, or poor quality, noisy, scratchy, or unsteady. | Heads are dirty. | Clean the heads. |
| The Dolby noise reduction is set in the wrong position. | Set it to match the Dolby NR recording mode. | |
| The deck does not enter the recording mode. | The erase-prevention tabs are removed from the cassette. | Attach tape to cover the space left by removal of the erase-prevention tabs. |
| While listening to compact discs | ||
| The display will not show the correct indication. Disc play does not start when you press the play button. | The disc is not positioned correctly in the disc tray. | Load the disc on the tray correctly. |
| The disc is loaded upside down. | Reload the disc. | |
| The disc is dirty. | Wipe the disc with a soft cloth. | |
| The disc is scratched. | Replace the disc with a new one. | |
| The disc is badly warped. | ||
| The disc is a nonstandard one. | Replace the disc with a different one. | |
| There is condensation inside the disc player. | Switch the power ON, and then wait for 60 minutes before using the disc player. | |
| While using the remote control | ||
| The system cannot be operated with the remote control. | The batteries are installed in the reverse polarity. | Re-insert the batteries in the correct polarity. |
| The batteries are worn. | Replace the batteries with new batteries. | |
Product Service
Do not attempt to remove the cover(s) or repair the unit yourself. Refer servicing to qualified personnel only. The servicer will require all components to service your system. Therefore, should service ever be necessary, be sure to bring the entire system.
Product information
For product service, product information or assistance with product operation, refer to the servicenter directory.
Technical specifications
TUNER/SOUND PROCESSOR
■ Pre-amplifier section
| Input sensitivity/impedance | |
| AUX, DCC | 250 mV/15 kΩ |
| Output level | |
| DCC RECOUT | 150 mV/1.5 kΩ |
| Frequency response | |
| AUX, DCC | 30 Hz-20 kHz |
■ EQ, SFP section
| Center frequency | 80, 250. 1 k, 4 k, 12.5 k(Hz) |
| Fixed mode | |
| SPACE | 3 modes (DISCO, LIVE, HALL) |
| GEQ | 5 modes (HEAVY, CLEAR, SOFT, CAR, HP ST) |
■ FM tuner section
| Frequency range | 87.90–107.9 MHz (0.1 MHz steps) |
| Sensitivity | 16.3 dBi (1.8 μV, IHF '58) |
| S/N | MONO 75 dB |
| Stereo separation at 1 kHz | 35 dB |
| Antenna terminal(s) | 300Ω (balanced) |
| 75Ω (unbalance) |
■ AM tuner section
| Frequency range | 520–1710 kHz (10 kHz steps) |
| 522–1611 kHz (9 kHz steps) | |
| Sensitivity (S/N 20 dB) | 500 μV/m |
■ Timer section
| Clock | Quartz-lock typeAM, PM 12-hour indication |
| Function | 24-hour programmable;Play timer (1 time), Rec timer (1 time),Sleep (120 min., 1 min. intervals) |
| Setting | 1 minute–23 hours 59 minutes(1 min. intervals) |
■ General
| Dimensions (W×H×D) | 270×89×274 mm(1058"×31⁄2"×1025/32") |
| Weight | 1.75 kg(3.86 lb.) |
AMPLIFIER
| Power output | |
| FTC 40 Hz-20 kHz THD 1% | |
| (SC-CH717) | 2×60 W (6Ω) |
| (SC-CH515) | 2×50 W (6Ω) |
| DIN 1 kHz, THD 1%, both channel driven | |
| (SC-CH717) | 2×65 W (6Ω) |
| (SC-CH515) | 2×57 W (6Ω) |
| Total harmonic distortion | |
| Half power at 1 kHz | 0.09% (6Ω) |
| Load impedance | 6-8Ω |
| S/N (rated power) | 84 dB |
■ General
| Power consumption | |
| (SC-CH717) | 195 W |
| (SC-CH515) | 175 W |
| Power supply | 120 V, AC 60 Hz |
| Dimensions (W×H×D) | |
| (SC-CH717) | 270 × 118.5 × 335 mm (10^48" × 42^1/32" × 13^1/6") |
| (SC-CH515) | 270 × 118.5 × 336 mm (10^48" × 42^1/32" × 13^7/32") |
| Weight(SC-CH717) | 5.3 kg(11.7 lb.) |
| (SC-CH515) | 5.1 kg(11.2 lb.) |
CD CHANGER
| ■ Audio | |
| DA converter | 1 bit 2 DAC MASH |
Pickup
| Wavelength | 780 nm |
| Laser power | No hazardous radiation is emitted(with safety protection). |
■ General
| Dimensions (W×H×D) | 270×89.5×320 mm(1058"×317/32"×1219/32") |
| Weight | 2.9 kg(6.4 lb.) |
CASSETTE DECK
| Deck system | Stereo cassette deck |
| Track system | 4-track, 2-channel |
| Recording system | AC bias |
| Bias frequency | 80 kHz |
| Erasing system | AC erase |
| Heads | |
| Deck 1(Playback head) | Permalloy head |
| Deck 2(Recording/Playback)(Erasure) | Permalloy headDouble gap ferrile head |
Motors
| Deck 1, 2(Capstan/reel table drive)(Reel table drive) | DC servo motorDC motor |
| Tape speed | 4.8 cm/s |
| Wow and flutter | 0.1% (WRMS) |
| Fast forward and rewind times | Approx. 45 secondswith C-60 cassette tape |
Frequency response
| (Dolby NR out, CCRT on) | |
| NORMAL | 20 Hz-17 kHz |
| 30 Hz-15 kHz (+3 dB, -3 dB) | |
| CrO2 | 20 Hz-18 kHz |
| 30 Hz-17 kHz (+3 dB, -3 dB) | |
| METAL | 20 Hz-20 kHz |
| 30 Hz-19 kHz (+3 dB, -3 dB) | |
| S/N (CrO2) | Signal level MOL |
| NR off | 56 dB (A weighted) |
| Dolby B NR on | 66 dB (CCIR) |
| Input sensitivity and impedance | |
| LINE IN | 126 mV/17.6 kΩ |
| Output voltage and impedance | |
| LINE OUT | 400 mV/220Ω |
General
| Dimensions (W×H×D) | 270×118.5×263 mm |
| (1058"×421/32"×1011/32") | |
| Weight | 2.85 kg |
| (6.3 lb.) |
SPEAKER SYSTEM
| Type(SC-CH717) | 3-way/surround speaker system |
| (SC-CH515) | 3-way, 3 speakers, bass-reflex |
Speaker(s)
| (SC-CH717) | |
| Woofer | 20 cm active air coupling woofer |
| Main unit | 8 cm cone type |
| Tweeter | Dome type |
| Full range | 8 cm cone type |
| (SC-CH515) | |
| Woofer | 14 cm cone type |
| Midrange | 6 cm cone type |
| Tweeter | Piezo type |
| Impedance(SC-CH717) | |
| MAIN | 6Ω |
| SURROUND | 8Ω |
| (SC-CH515) | 6Ω |
| Input power(SC-CH717) | |
| MAIN | 140 W (music), 70 W (DIN) |
| SURROUND | 24 W (music), 12 W (DIN) |
| (SC-CH515) | 120 W (music), 60 W (DIN) |
| Output sound pressure level | |
| (SC-CH717) | 81 dB/W (1.0 m) |
| (SC-CH515) | 84 dB/W (1.0 m) |
| Cross over frequency | |
| (SC-CH717) | 160 Hz, 10 kHz |
| (SC-CH515) | 3.5 kHz, 10 kHz |
| Frequency range | |
| (SC-CH717) | 28 Hz–22 kHz (-16 dB) |
| (SC-CH515) | 40 Hz–22 kHz (-16 dB) |
| 48 Hz–20 kHz (-10 dB) | |
General
| Dimensions (W×H×D) | |
| (SC-CH717) | 239×414.5×326 mm(913/32"×165/16"×1227/32") |
| (SC-CH515) | 230×414×258 mm(91/16"×165/16"×101/8") |
| Weight | |
| (SC-CH717) | 6.2 kg(13.7 lb.) |
| (SC-CH515) | 4.6 kg(10.1 lb.) |
Notes:
- Specifications are subject to change without notice.
Weight and dimensions are approximate. - Total harmonic distortion is measured by the digital spectrum analyzer.
MASH is a trademark of NTT.
Panasonic Company
Division of Matsushita Electric
Corporation of America
One Panasonic Way
Secaucus, New Jersey 07094
Panasonic Company (West) of America, Division of Matsushita Electric
Corporation of America
6550 Katella Ave.
Cypress, CA 90630
Panasonic Sales Company
Division of Matsushita Electric
of Puerto Rico, Inc.
San Gabriel Industrial Park
65th Infantry Ave. Km.9.5
Carolina, P.R. 00630

- Dear customer
- CAUTION!
- WARNING:
- CAUTION:
- Table of contents
- Before use
- Preparations
- Compact disc operations
- Radio operations
- Tape deck operations
- Convenient functions
- Recording operations
- Volume level mode operations
- Tone quality operations
- Timer operations
- Microphone mixing
- External unit operations
- Reference
- Precautions
- Safety
- Installation
- Environment
- Placement
- Maintenance
- Service
- Listening caution
- We Want You Listening For A Lifetime
- Decibel
- Level Example
- THE FOLLOWING NOISES CAN BE DANGEROUS UNDER CON- STANT EXPOSURE
- Supplied accessories
- Stacking the components
- Horizontal stacking
- Vertical stacking
- System layout example
- Connections
- Connect the flat cable.
- Connect the FM indoor antenna.
- Connect the AM loop antenna.
- Note
- Connect the right (R) and left (L) speaker cables.
- Notes
- (For SC-CH515)
- (For SC-CH717 only)
- Connect the surround speaker cord.
- Connect the AC power supply cord after you have connected all other cables.
- Optional antenna connections
- FM outdoor antenna (not included)
- How to connect a 75Ω coaxial cable:
- How to connect a 300Ω parallel feeder cable:
- AM outdoor antenna (not included)
- External unit connection
- Location of controls
- Concerning the remote control
- Battery installation
- Use of batteries
- Battery life
- Correct method of use
- Operation notes
- Concerning the multi-control section
- Using the multi-control buttons, the following operations can be performed.
- When operating, the display shows which buttons are available for the operation.
- For your reference:
- About the illumination guide
- Setting the time
- If the minutes setting has gone wrong:
- Memory presetting
- Automatic memory presetting
- 1
- 2
- 3
- 4
- Manual memory presetting
- Automatic scanning:
- To preset FM stations in monaural position:
- About the frequency step:
- Listening to compact discs
- Sequential play
- About ▷ indicator:
- When “▶” appears on the display:
- Concerning the total playing time on the display:
- To select the desired discs
- To confirm the total playing time of the disc currently playing
- Press DISPLAY.
- In the stop mode:
- In the play mode:
- To exchange discs during play
- Repeat function
- Skip function
- Search function
- Program play
- When "F" appears on the display:
- When “--:--” appears on the display:
- To clear a programmed track one by one:
- To clear all tracks:
- For you reference:
- Direct access play
- Random play
- To cancel random play:
- Listening to radio broadcasts
- Manual tuner operation
- Memory tuner operation
- AM allocation settings:
- Listening to tapes
- Playback
- To find the beginning of a program
- (TPS: tape program sensor)
- Press ◀◀ (TPS) or (TPS) ▶▶ while the tape is playing.
- To fast forward or rewind the tape
- Press ◀◀ (TPS) or (TPS) ▶▶ while the tape is in the stop mode.
- High-speed rewind/fast-forward:
- Sequential playback between 2 tapes
- About priority of the deck:
- Easy play
- Press ▶.
- Press TUNER/BAND.
- Press ◀ or ▶.
- About fade-in start in direct play:
- To mute the volume
- To adjust the left-right volume balance
- Press one of BALANCE on the remote control.
- To use headphones
- Connect the headphones to the headphones jack.
- Making a recording from radio broadcasts
- To stop recording:
- To cut an unnecessary part while recording:
- CCRT recording function:
- To erase a recorded sound (Deck 2):
- To take up the leader tape
- To record with desired tone quality
- To record without any tonal effect
- About Dolby Noise Reduction system
- Recording from compact discs
- One-touch editing preparation
- To start one-touch editing
- Allotting tracks to the tape without wasting tape space (J.FIT)
- Closing up the tape-end unrecorded sections (LAST FADE)
- To cancel one-touch editing:
- One-touch editing operation:
- When there are tracks allotted on tape side B:
- To record with desired tone quality:
- To specify the tracks to be edited:
- After the edit recording has finished:
- When one disc is loaded:
- When two or three discs are loaded:
- To finish recording:
- Program edit-recording (LAST FADE mode only)
- After the compact disc play finishes:
- Linking up several discs (LINK)
- To record from the same disc(s) in succession:
- Synchro recording
- When you want to cut an unnecessary track while recording:
- To specify the tracks to be recorded:
- Tape-to-tape recording
- To record on the reverse side of the tape:
- To enjoy another source while recording:
- Changing the volume level mode
- Changing the output level display
- Changing the output level scale
- Press RANGE.
- Changing the tone
- About equalization curves (EQ)
- About simulated listening environments (SPACE)
- To retrieve the preprogrammed equalization curves (EQ mode)
- About the pre-programmed equalization curves
- HEAVY
- CLEAR
- SOFT
- CAR (CAR STEREO)
- HP ST (HEADPHONES STEREO)
- When listening to the radio broadcast:
- To retrieve the preprogrammed simulated listening environments (SPACE mode)
- MODE
- Press MODE to select SPACE mode.
- MODE
- Press and hold MODE to select PRESET mode.
- Press ◀ or ▶ to select the desired simulated listening environments.
- About the pre-programmed simulated listening environments
- DISCO
- LIVE
- HALL
- To adjust EQ and SPACE ("USER" mode)
- To retrieve the USER mode:
- To listen with augmented bass (V.BASS)
- Using the timer
- About the types of timer operation
- Play timer (see pages 46–47):
- Record timer (see pages 48–49):
- Sleep timer (see page 50):
- Setting the play timer
- Prepare for the play.
- Press POWER on the amplifier to switch the power to standby mode.
- To cancel the timer:
- If you make an error:
- About the variation of the day setting:
- To confirm the play timer:
- To change the play timer setting:
- Using the timer at the same time setting continuously:
- To enjoy the desired source after the timer setting is completed:
- Setting the record timer
- ① Press ◀ or ▶ to select the desired preset channel.
- ② Press SET.
- 6
- Prepare for recording.
- 7
- To confirm the record timer:
- To change the record timer setting:
- To use the sleep timer
- To use each timer mode in conjunction
- Timer sequence of priority:
- Enjoying microphone mixing
- To record your "KARAOKE" performance:
- To record your voice:
- You cannot record in "KARAOKE" mode using:
- You cannot use "KARAOKE" function with:
- Using an external unit
- Listening to an external source
- Recording from an external source
- To record on a DCC (or DAT) tape:
- Remote control operations —quick reference—
- Remote control operations — quick reference—
- Concerning compact discs
- To remove a disc from its case
- To hold the disc
- To store a disc in its case
- If the surface is soiled
- If the disc is brought from a cold to a warm environment, moisture may form on the disc
- Improper disc storage:
- Handling precautions:
- Maintenance of external surfaces
- Tape head care
- Concerning cassette tapes
- Selection of cassette tapes
- If the tape loosens, take up the slack
- To prevent erasure of recorded sounds
- Improper tape storage:
- Troubleshooting guide
- Product Service
- Product information
- Technical specifications
- TUNER/SOUND PROCESSOR
- ■ Pre-amplifier section
- ■ EQ, SFP section
- ■ FM tuner section
- ■ AM tuner section
- ■ Timer section
- ■ General
- AMPLIFIER
- CD CHANGER
- Pickup
- CASSETTE DECK
- Motors
- Frequency response
- General
- SPEAKER SYSTEM
- Speaker(s)
- Notes:
Brand : TECHNICS
Model : SC-CH717
Category : Hi-Fi System