Jazz (2020) - Automotive Honda - Free user manual and instructions
Find the device manual for free Jazz (2020) Honda in PDF.


| Product Type | Automotive |
| Brand | Honda |
| Model | Jazz (2020) |
| Fuel Type | Unleaded premium petrol (95 RON or higher) |
| Fuel Tank Capacity | 40 L (8.8 Imp gal) |
| Transmission Options | Continuously Variable Transmission (CVT) or Manual Transmission (MT) |
| Safety Systems | Front, side, and side curtain airbags; ABS; Vehicle Stability Assist (VSA); Seat belt reminders; Child safety locks |
| Audio System | Colour audio system or display audio system with AM/FM/DAB, CD, USB, Bluetooth, HDMI port, auxiliary input jack |
| Climate Control | Manual heating and cooling system or automatic climate control system |
| Steering | Electric Power Steering (EPS) |
| Braking | Anti-lock Brake System (ABS) with Brake Assist |
| Exterior Mirrors | Power-adjustable door mirrors with folding option |
| Windows | Power windows with lock button |
| Lighting | Headlights with auto high-beam support system, fog lights, LED daytime running lights |
| Seating | Front seats adjustable, rear seats foldable |
| Tyre Pressure Monitoring | Deflation Warning System |
Frequently Asked Questions - Jazz (2020) Honda
User questions about Jazz (2020) Honda
0 question about this device. Answer the ones you know or ask your own.
Ask a new question about this device
Download the instructions for your Automotive in PDF format for free! Find your manual Jazz (2020) - Honda and take your electronic device back in hand. On this page are published all the documents necessary for the use of your device. Jazz (2020) by Honda.
USER MANUAL Jazz (2020) Honda
As you read this manual, you will find Information that is preceded by a NOTICE. This information is intended to help you avoid damage to your vehicle, other property, or the environment.
Symbols ▲ on labels attached to your vehicle are to remind you to read this owner's manual for proper and safe operation of your vehicle.
⚠️ Is colour-coded to indicate “danger” (red), “warning” (orange), or “caution” (amber).
Safety Labels P. 83
A Few Words About Safety
Your safety, and the safety of others, is very important. And operating this vehicle safely is an important responsibility.
To help you make informed decisions about safety, we have provided operating procedures and other information on labels and in this manual. This information alerts you to potential hazards that could hurt you or others.
Of course, it is not practical or possible to warn you about all the hazards associated with operating or maintaining your vehicle. You must use your own good judgement.
You will find this important safety information in a variety of forms, including:
●Safety Labels - on the vehicle.
● Safety Messages - preceded by a safety alert symbol ⚠ and one of three signal words: DANGER, WARNING, or CAUTION These signal words mean:
DANGER
You WILL be KILLED or SERIOUSLY HURT if you don't follow instructions.
WARNING
You CAN be KILLED or SERIOUSLY HURT if you don't follow instructions.
WARNING
You CAN be KILLED or SERIOUSLY HURT if you don't follow instructions.
CAUTION
You CAN be HURT if you don't follow instructions.
● Safety Headings - such as Important Safety Precautions.
●Safety Section - such as Safe Driving.
● Instructions - how to use this vehicle correctly and safely.
This entire book is filled with important safety information - please read it carefully.
Event Data Recorders
Your vehicle is equipped with several devices commonly referred to as Event Data Recorders. They record various types of real time vehicle data such as SRS airbag deployment and SRS system components failure.
This data belongs to the vehicle owner and may not be accessed by anyone else except as legally required or with the permission of the vehicle owner.
However this data may be accessed by Honda, its authorised dealers and authorised repairers, employees, representatives and contractors only for the purpose of the technical diagnosis, research and development of the vehicle.
Service Diagnostic Recorders
Your vehicle is equipped with service-related devices that record information about powertrain performance and driving conditions. The data can be used to help technicians diagnose, repair and maintain the vehicle. This data may not be accessed by anyone else except as legally required or with the permission of the vehicle owner.
However this data may be accessed by Honda, its authorised dealers and authorised repairers, employees, representatives and contractors only for the purpose of the technical diagnosis, research and development of the vehicle.
This owner's manual should be considered a permanent part of the vehicle and should remain with the vehicle when it is sold.
This owner's manual covers all models of your vehicle. You may find descriptions of equipment and features that are not on your particular model.
Images throughout this owner's manual represent features and equipment that are available on some, but not all, models. Your particular model may not have some of these features.
The information and specifications included in this publication were in effect at the time of approval for printing. Honda Motor Co., Ltd. reserves the right, however, to discontinue or change specifications or design at any time without notice and without incurring any obligation.
Although this manual is applicable to both right-hand and left-hand drive models, the illustrations contained in this manual mainly refer to the left-hand drive models.
→Safe Driving P. 31
For Safe Driving P. 32 Seat Belts P. 36 Airbags P. 49
→Instrument Panel P. 85
Indicators P. 86 Gauges and Multi-Information Display P. 123
→Controls P. 139
Clock P. 140 Locking and Unlocking the Doors P. 142
Opening and Closing the Windows P. 162
Adjusting the Seats P. 187
Climate Control System ^P. 213
→Features P. 219
Audio System P. 220 Audio System Basic Operation P. 227, 257
Customized Features P. 313 Hands-Free Telephone System P. 339, 362
→Driving P. 381
Before Driving P. 382 Towing a Trailer P. 386 When Driving P. 392
Multi-View Rear Camera* P. 469 Refueling P. 471
→Maintenance P. 475
Before Performing Maintenance P. 476 Service Reminder System P. 479
Checking and Maintaining Wiper Blades P. 513
Heating and Cooling System*/Climate Control System Maintenance P. 531
→Handling the Unexpected P. 541
Tools P. 542 If a Tyre Goes Flat P. 543
Overheating P. 568 Indicator, Coming On/Blinking P. 570
Information P. 591
Specifications P. 592 Identification Numbers P. 596
| Contents | |||
| Child Safety P. 62 | Exhaust Gas Hazard P. 82 | Safety Labels P. 83 | Quick Reference Guide P. 4 |
| Safe Driving P. 31 | |||
| Instrument Panel P. 85 | |||
| Opening and Closing the Tailgate P. 156 | Security System P. 159 | ||
| Operating the Switches Around the Steering Wheel P. 164 | Adjusting the Mirrors P. 185 | ||
| Interior Lights/Interior Convenience Items P. 199 Heating and Cooling System | *P. 209 | Controls P. 139 | |
| Audio Error Messages P. 305 General Information on the Audio System P. 308 | Features P. 219 | ||
| Driving P. 381 | |||
| Braking P. 453 Parking Your Vehicle P. 463 | Maintenance P. 475 | ||
| Fuel Economy and CO2 Emissions P. 473 | Handling the Unexpected P. 541 | ||
| Maintenance Schedule P. 484 | Maintenance Under the Bonnet P. 489 | Replacing Light Bulbs P. 501 | |
| Checking and Maintaining Tyres P. 517 | Battery P. 524 | Remote Transmitter Care P. 529 | |
| Cleaning P. 534 Accessories and Modifications P. 539 | Information P. 591 | ||
| Engine Does Not Start P. 561 | Jump Starting P. 564 | Shift Lever Does Not Move P. 567 | |
| Fuses P. 575 | Emergency Towing P. 586 | When You Cannot Open the Tailgate P. 589 | |
| Devices that Emit Radio Waves *P. 597 EC Declaration of Conformity Content Outline *P. 611 | Index P. 615 | ||
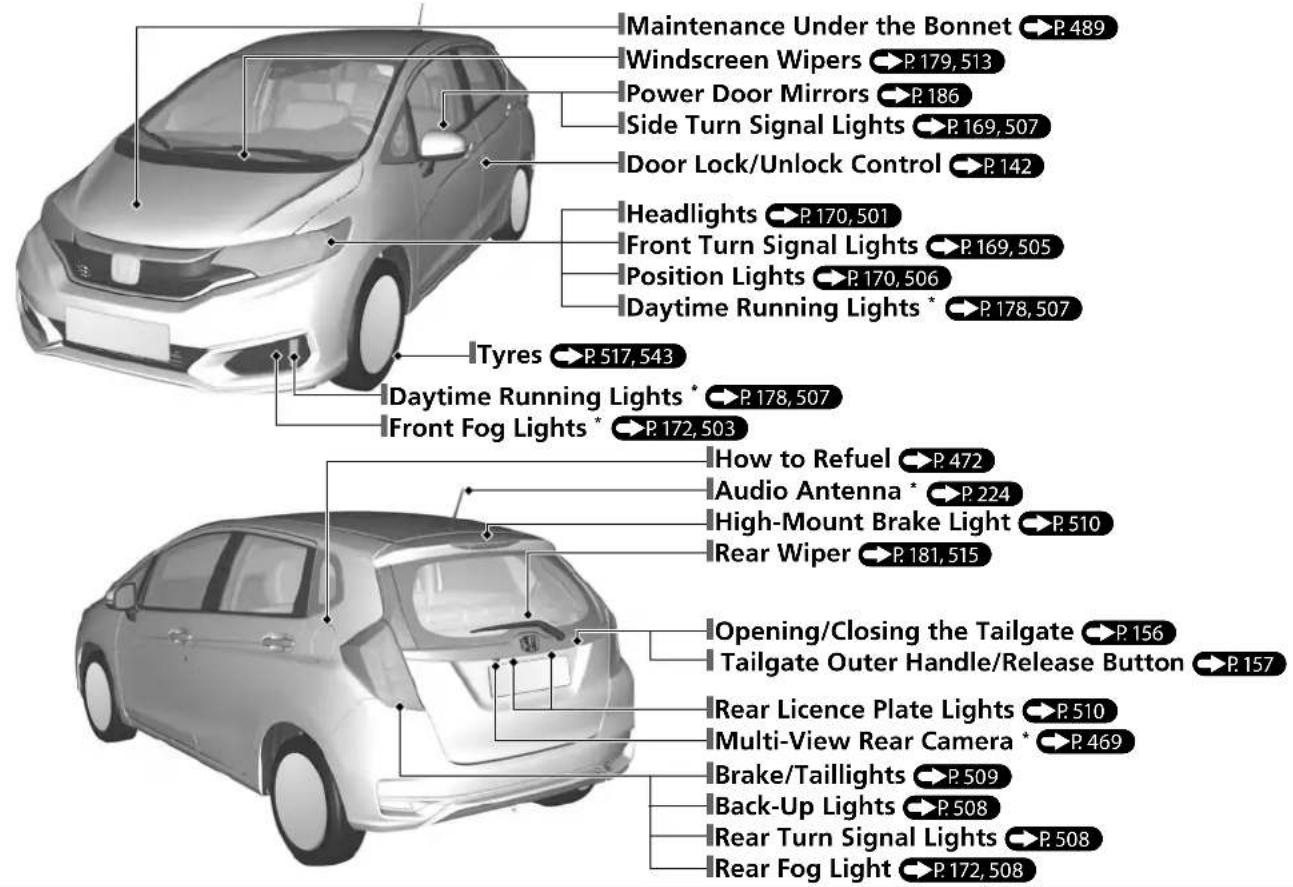
Visual Index
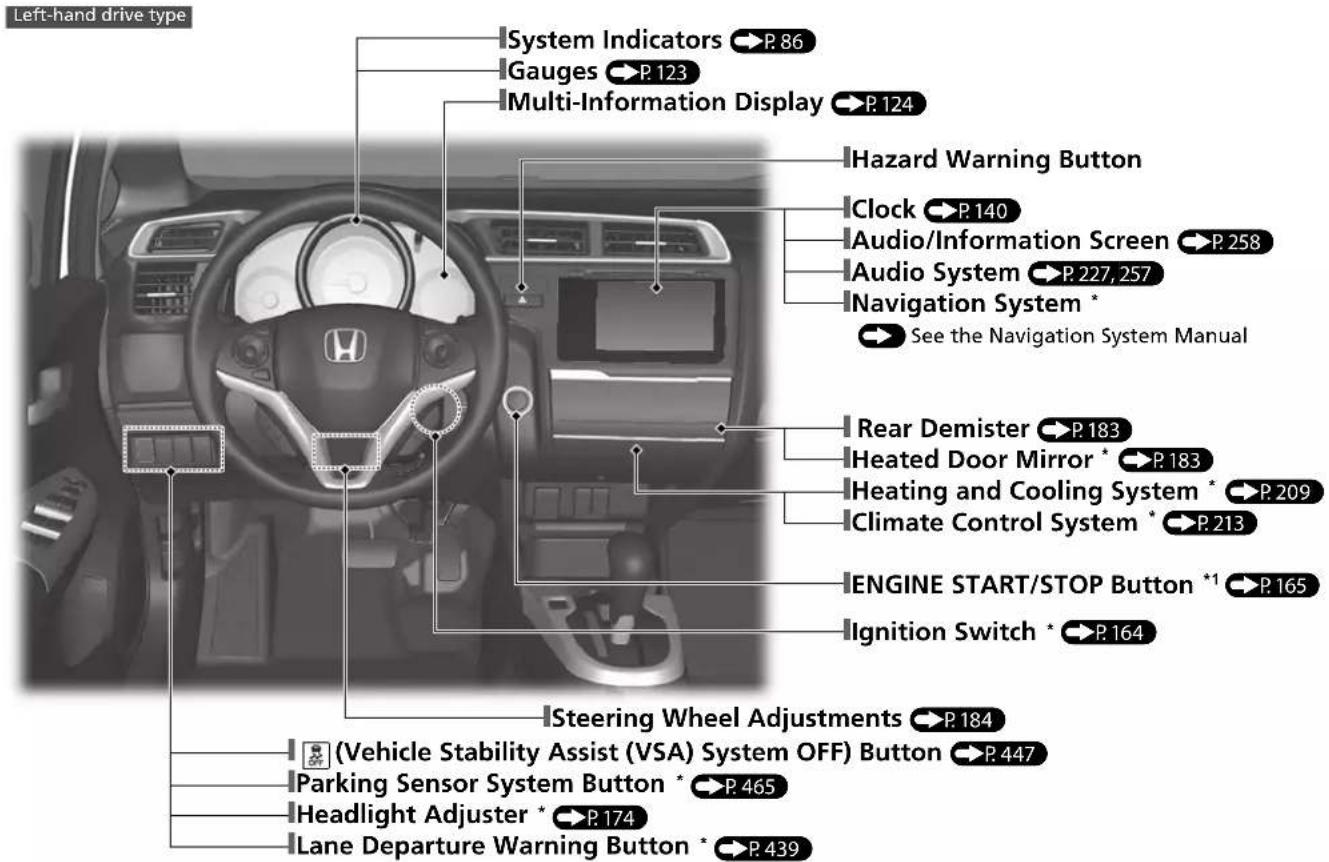
*1: Models with the keyless access system have an ENGINE START/STOP button instead of an ignition switch.
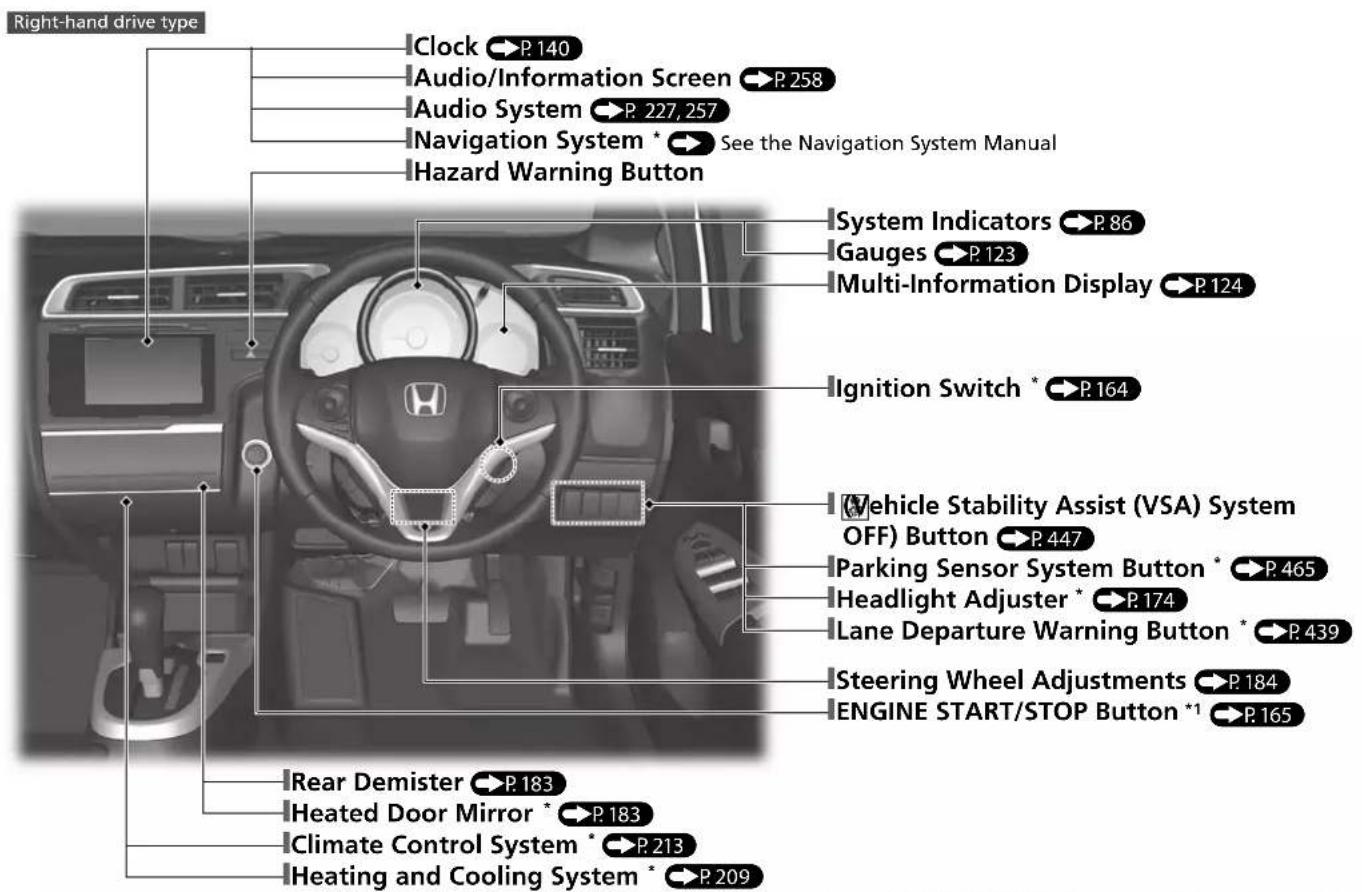
*1: Models with the keyless access system have an ENGINE START/STOP button instead of an ignition switch.
* Not available on all models
Visual Index
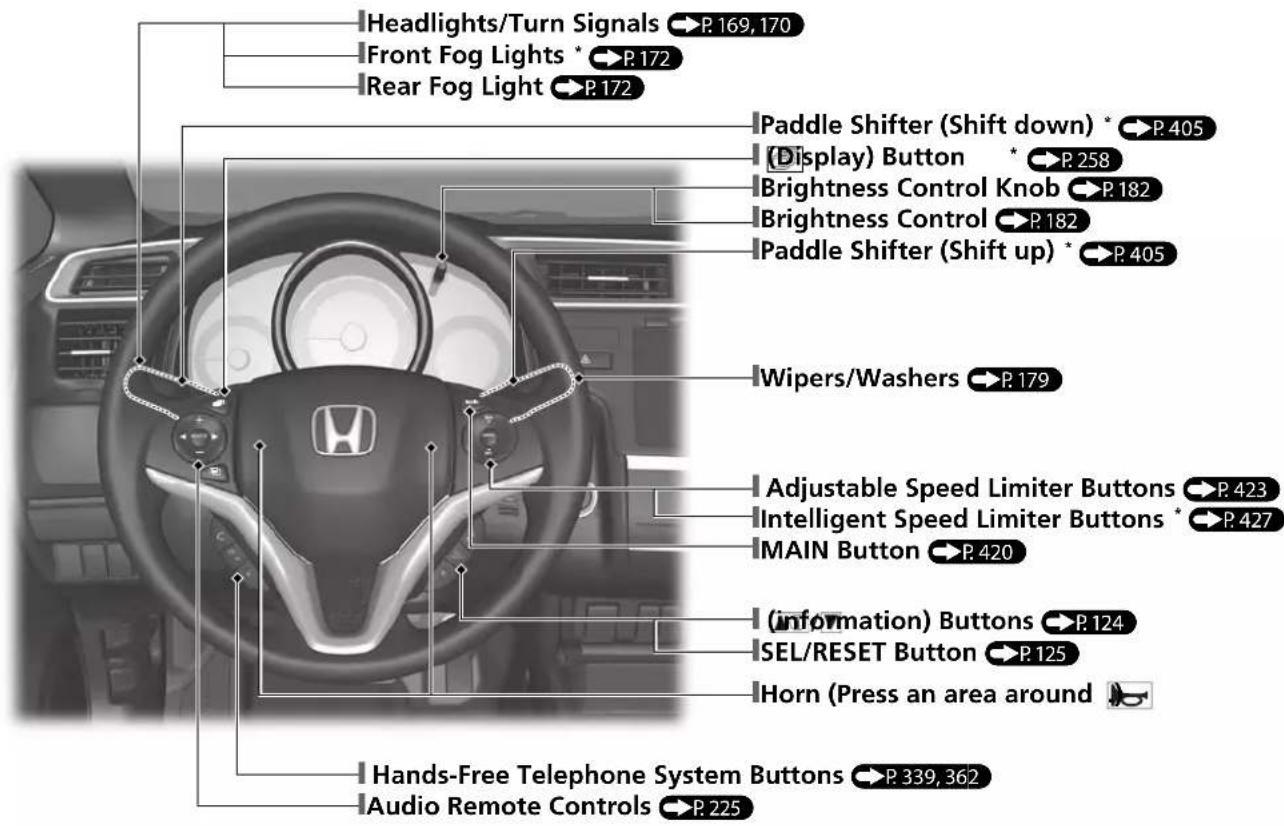
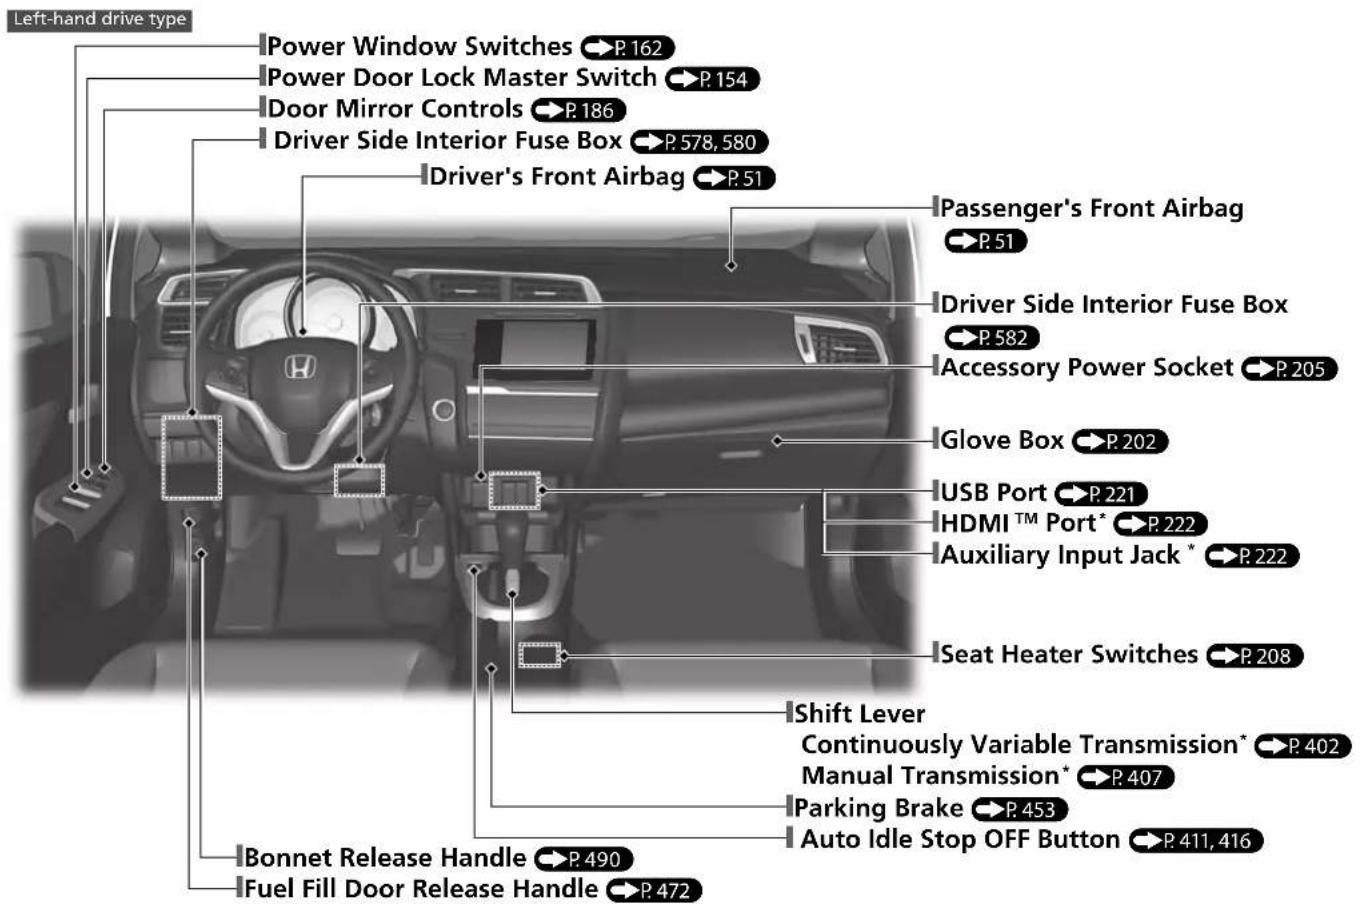
* Not available on all models
Visual Index
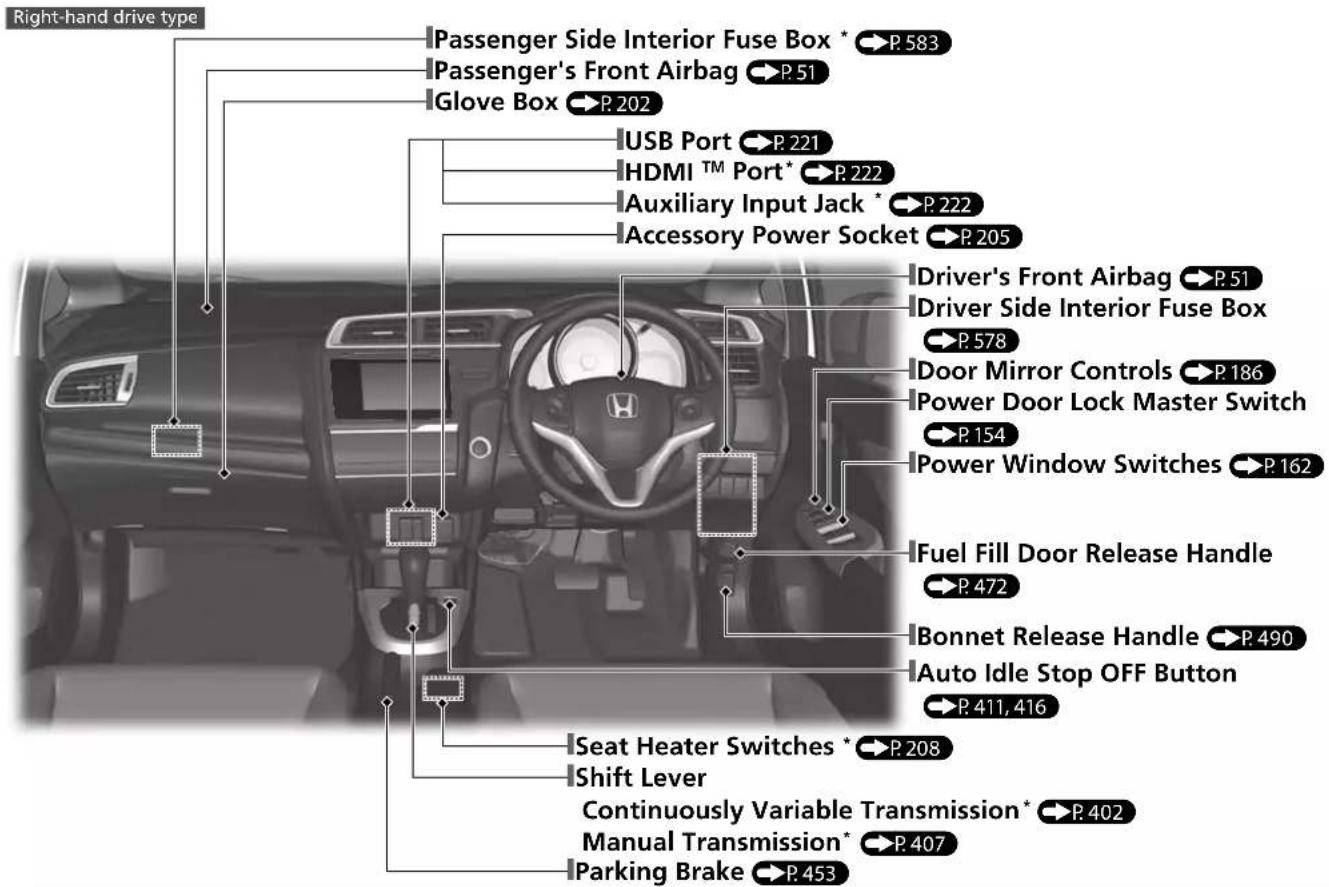
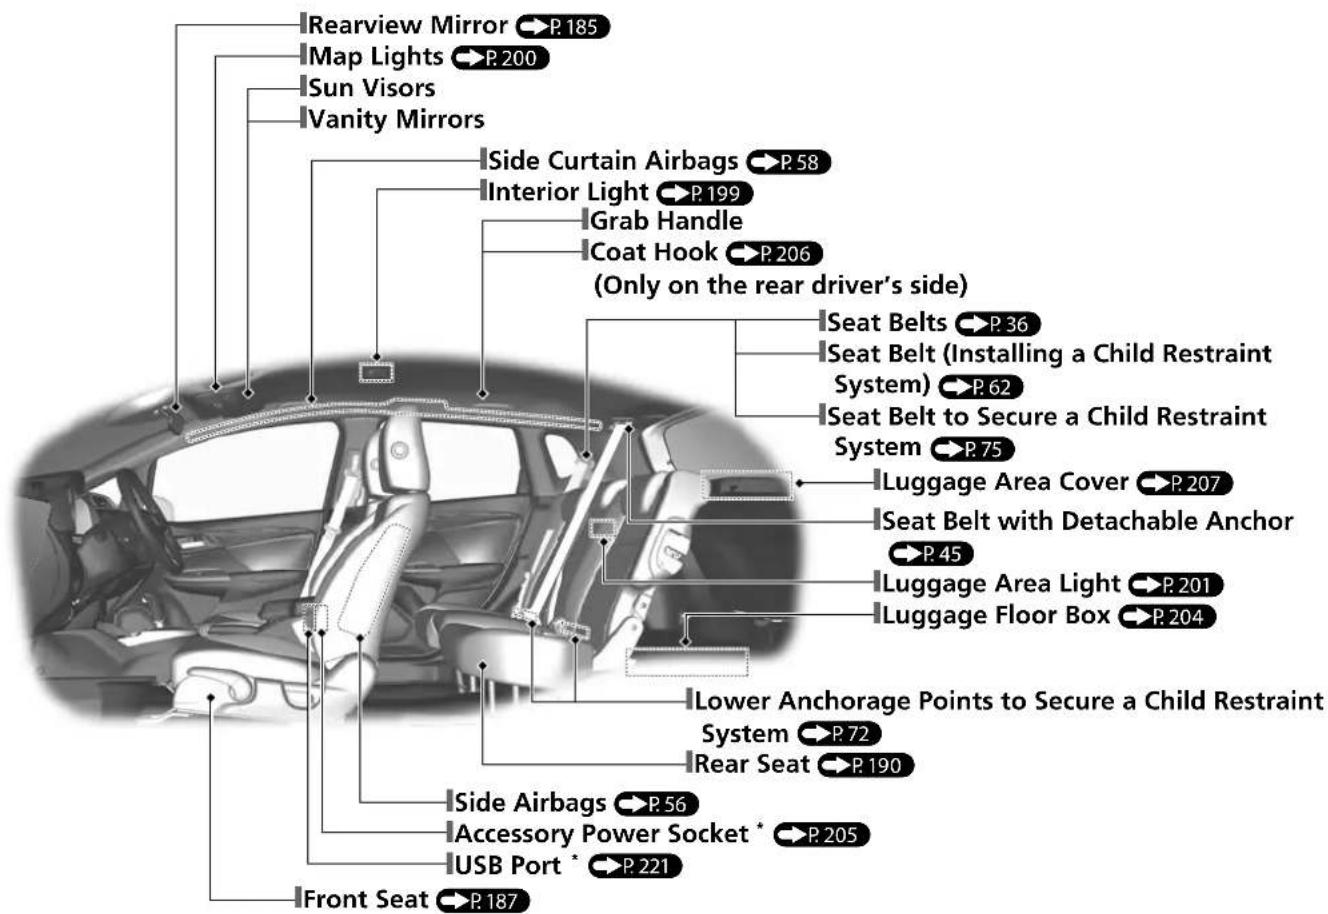
* Not available on all models
Visual Index
Auto Idle Stop Function
To improve fuel economy, the engine stops and then restarts as detailed below. When Auto Idle Stop is on, the Auto Idle Stop indicator (green) comes on. P. 410, 415
| At | Continuously variable transmission | Manual transmission Engine status | ||
Deceleration | Depress the brake pedal. | 1. Depress the brake pedal.2. Fully depress the clutch pedal. | 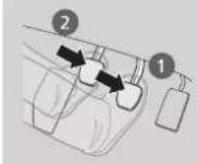 | 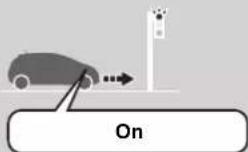 |
Stop | Keep the brake pedal depressed.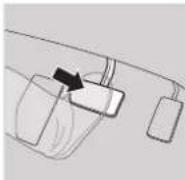 | Continue to depress the brake pedal.Move the shift lever toN.Release the clutch pedal. | 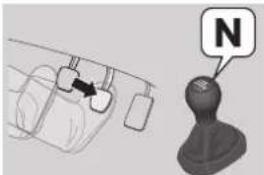 | 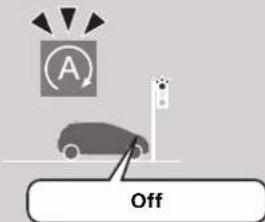 |
| Start-up | Release the brake pedal.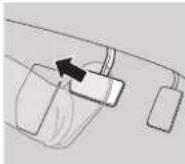 | 1. Depress the clutch pedal again.Move the shift lever to1.Depress the accelerator pedal to resume driving. | 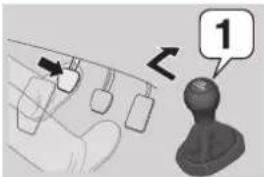 | 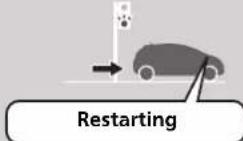 |
Safe Driving
P.31
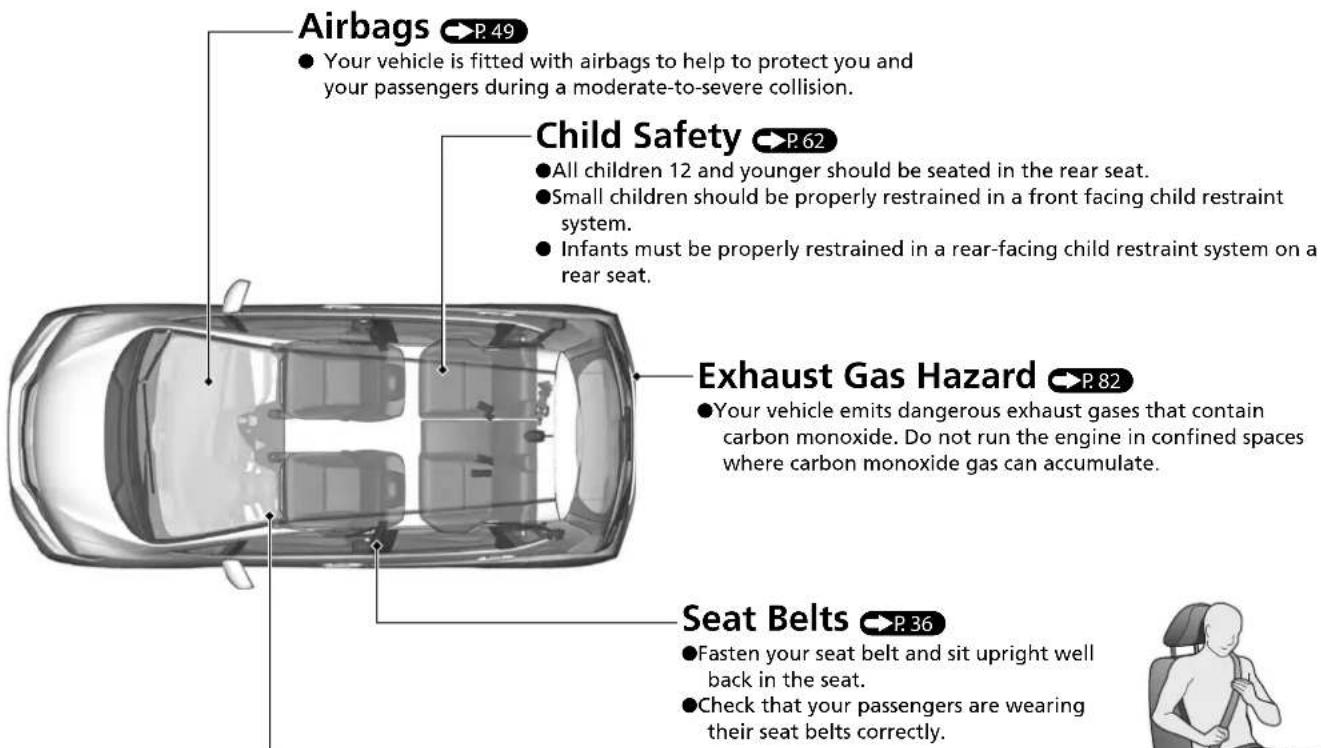
Before Driving Checklist P.35
● Before driving, check that the front seats, head restraints, steering wheel, and mirrors have been properly adjusted.


Instrument Panel
P.85
Gauges P.123/Multi-Information Display P.124/System Indicators P.86
System Indicators

Malfunction Indicator Lamp

Low Oil Pressure Indicator

Charging System Indicator

Vehicle Stability Assist (VSA) System Indicator

VSA OFF Indicator

Immobilizer System Indicator

Keyless Access System Indicator*

Electric Power Steering (EPS) System Indicator

High Temperature Indicator (Red) Low Temperature Indicator (Blue)

Auto Idle Stop Indicator (Green) Auto Idle Stop System Indicator (Amber)
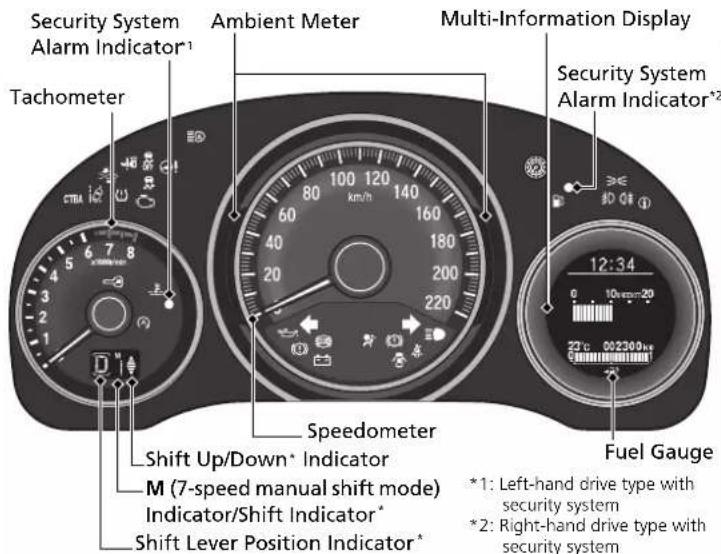
System Indicators

Forward Collision Warning Indicator*

Lane Departure Warning Indicator*

Low Tyre Pressure/Deflation Warning System Indicator
Lights Indicators

Lights On Indicator

High Beam Indicator

Front Fog Light Indicator*

Rear Fog Light Indicator
System Indicators

Turn Signal and Hazard Warning Indicators

Anti-lock Brake System (ABS) Indicator

Parking Brake and Brake System Indicator (Red)

Brake System Indicator (Amber)

Door and Tailgate Open Indicator

Low Fuel Indicator

Seat Belt Reminder Indicator

Supplemental Restraint System Indicator

High Beam Support System Indicator*

City-Brake Active System (CTBA) Indicator

System Message Indicator
Controls
P.139
Clock
P.140
The clock in the multi-information display is automatically updated along with the audio system's clock display.
Models with display audio system
The audio system receives signals from GPS satellites, updating the clock automatically.
Models with colour audio system
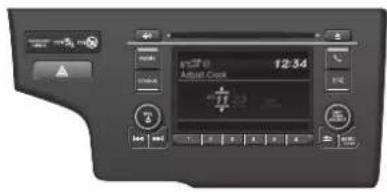
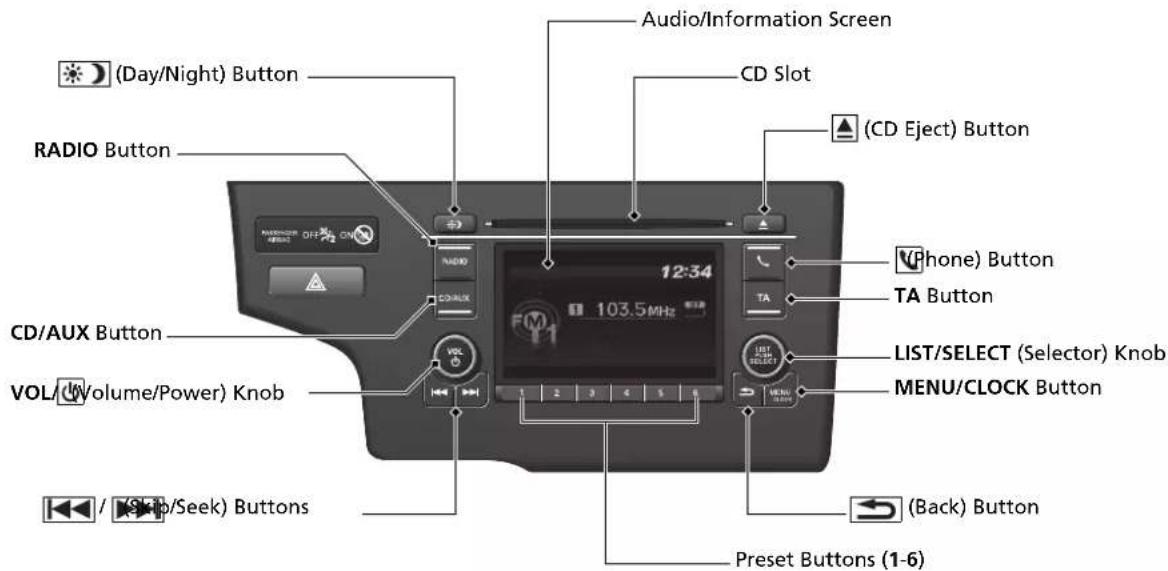
1 Press and hold the MENU/CLOCK button.
2 Rotate to change hour, then press 😊.
3 Rotate to change minute, then press 😊.
4 Select SET, then press.
These indications are used to show how to operate the LIST/SELECT (Selector) knob.
- Rotate to select.
- Press to enter.
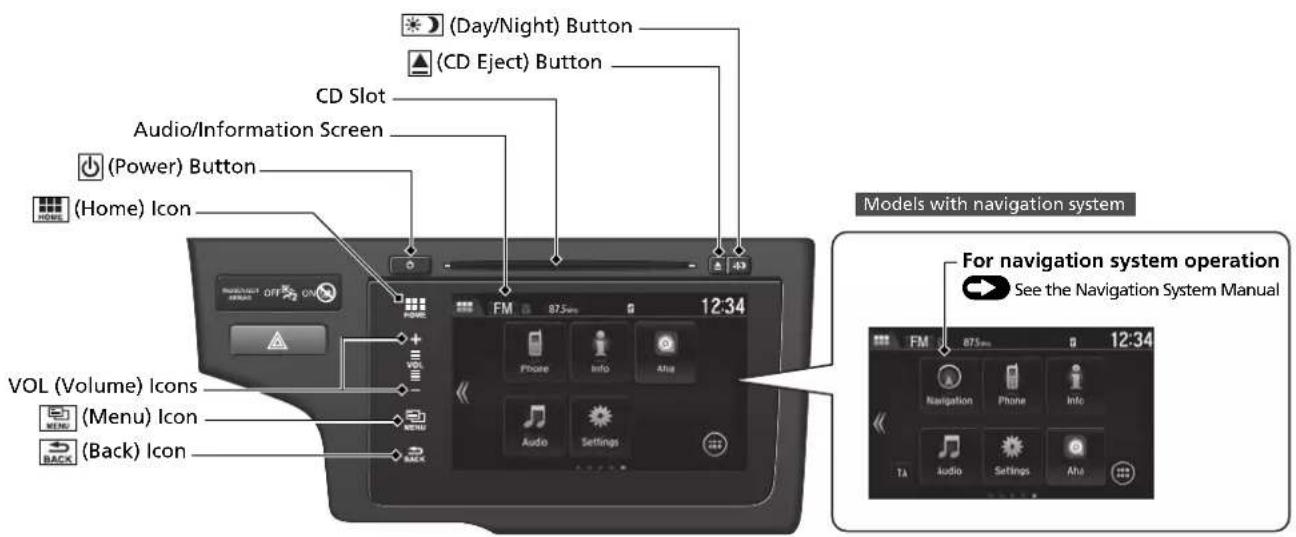
Models with display audio system
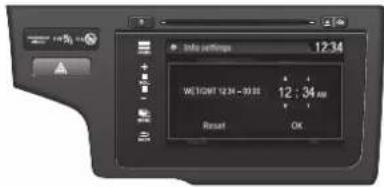
1 Select the HOME icon, then select Settings.
2 Select Info, Clock, then Clock Adjustment.
3 Touch the ▲ to adjust the numbers up or down.
4 Select OK.
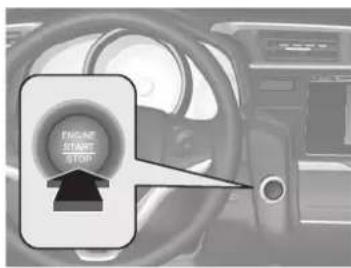
ENGINE START/STOP Button\* P.165
Press the button to change the vehicle's power mode.
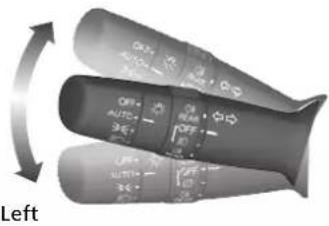
Turn Signals P.169
Turn Signal Control Lever
Right
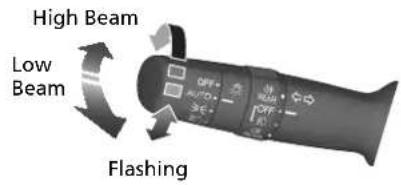
Lights → P.170
Light Control Switches
Wipers and Washers
Wiper/Washer Control Lever
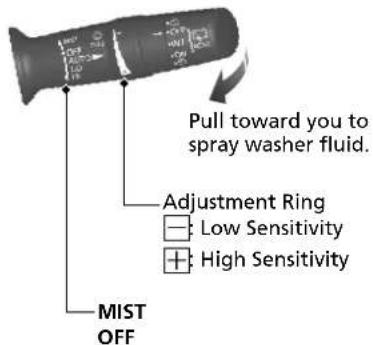
AUTO: Wiper speed varies automatically LO: Low speed wipe HI: High speed wipe
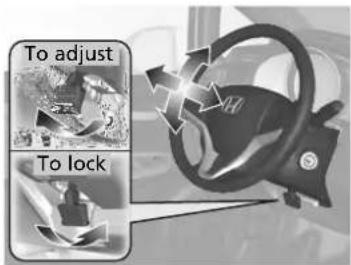
Steering Wheel

●To adjust, pull the adjustment lever towards you, adjust to the desired position, then lock the lever back in place.
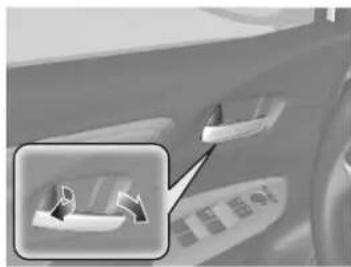
Unlocking the Front Doors from the Inside

●Pull either front door inner handle to unlock and open it in one motion.
natural_image
Close-up of a car's side panel showing a highlighted connector (no text or symbols visible)- Unlocking and opening the driver's door from the inner handle unlocks all the other doors.
The front passenger's door also unlocks and opens in one motion.
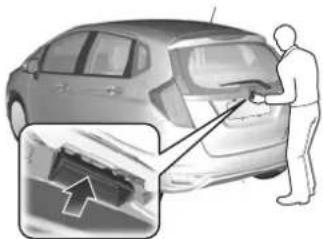
Tailgate P.156
natural_image
Illustration of a person cleaning a car with a tool, showing the engine compartment (no text or symbols present)Left-hand drive type without keyless access system
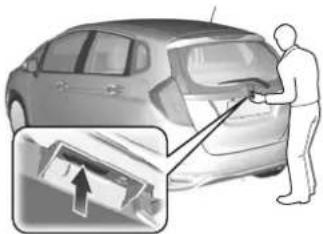
●With all the doors unlocked, pull the tailgate outer handle, and lift up to open it.
natural_image
Illustration of a person cleaning a car with a tool, showing the engine compartment (no text or symbols present)Left-hand drive type with keyless access system Right-hand drive type
●With all the doors unlocked, push the tailgate release button on the tailgate to open it.
Models with keyless access system
●Press the tailgate release button to unlock and open the tailgate when you carry the keyless access remote.
Power Door Mirrors
P.186
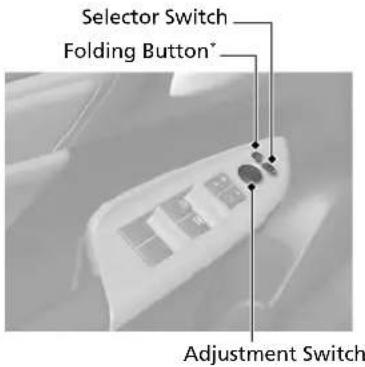
●With the ignition switch in ON ^*1 , move the selector switch to L or R.
●Push the appropriate edge of the adjustment switch to adjust the mirror.
- Press the folding button * to fold in and out the door mirrors.
Power Windows → P.162
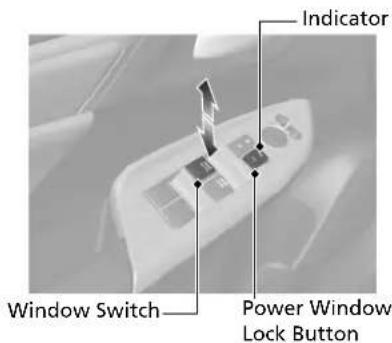
●With the ignition switch in ON ^*1 , open and close the power windows.
- If the power window lock button is in the off position, each passenger's window can be opened and closed with its own switch.
- If the power window lock button is in the on position (indicator on), each passenger's window switch is disabled.
*1: Models with the keyless access system have an ENGINE START/STOP button instead of an ignition switch.
Heating and Cooling System\*
P.209
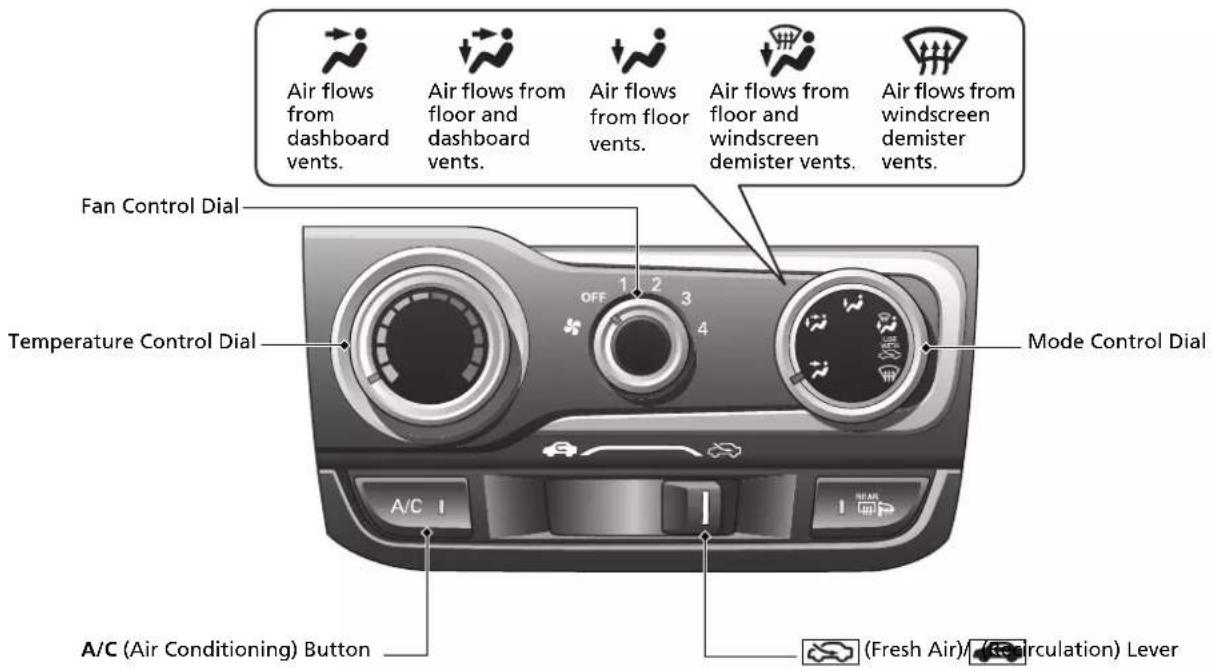
●Rotate the fan control dial to adjust the fan speed.
- Rotate the mode control dial (☐ / ☐ / ☐ / ☐) to select the vents air flows from.
●Rotate the temperature control dial to adjust the temperature.
- Rotate the fan control dial to OFF to turn the system off.
- Rotate the mode control dial to to defrost the windscreen.
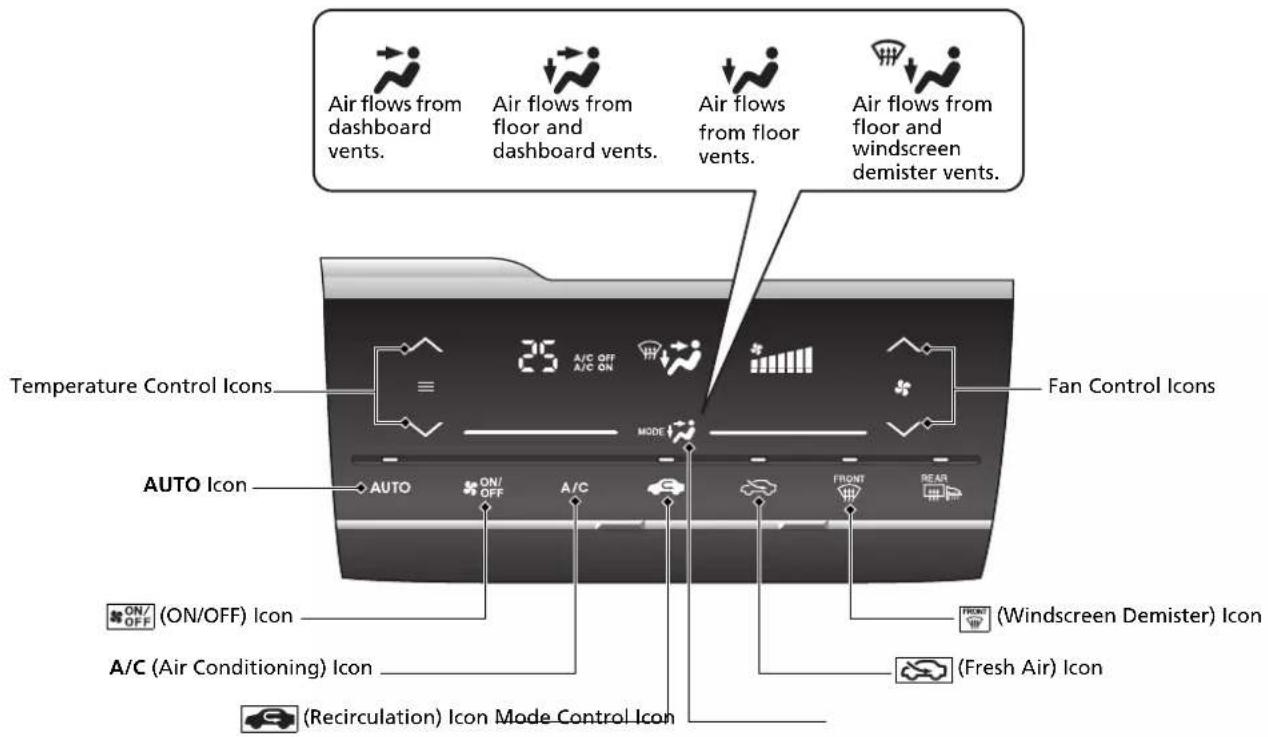
Climate Control System\*
P.213
- Select the AUTO icon to activate the climate control system.
●Select the ☐to turn the system on or off. - Select the icon to defrost the windscreen.
Features
P.219
Audio System
P.227,257
Models with colour audio system
P. 227
Models with display audio system

Models without navigation system
Audio Remote Controls
P.225
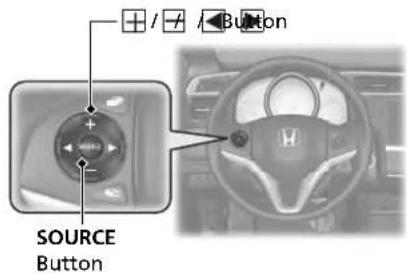
●/+Button
Press to adjust the volume up/down.
●SOURCE Button
Press to change the audio mode:
Models with colour audio system
FM1/FM2/DAB1*/DAB2*/LW/MW/CD/USB/
iPod/Bluetooth®Audio/AUX.
Models with display audio system
FM/LW/MW/DAB */CD/USB/iPod/Apps/
Bluetooth®Audio/AUX HDMI™.
● /Button
Radio:Press to change the preset station.
Press and hold to select the next or previous strong station.
CD/USB device:
Press to skip to the beginning of the next song or return to the beginning of the current song.
Press and hold to change a folder.
Driving
P.381
Manual Transmission\*
P.407
Continuously Variable Transmission\*
P.402
●Shift to ☐ and depress the brake pedal when starting the engine.
Shifting
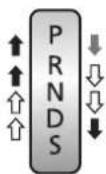

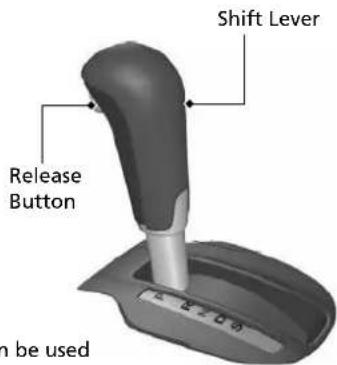
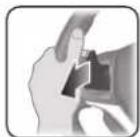
Depress the brake pedal and press the release button to move out of P.
Move the shift lever without pressing the release button.
Press the release button to move the shift lever.

Turn off or start the engine. Transmission is locked.

Reverse Used when reversing.

Neutral Transmission is not locked.

Drive • Normal driving.
- 7-speed manual shift mode can be used temporarily.

S Position
- Better acceleration. - Increased engine braking. - Going up or down hills. - 7-speed manual shift mod
7-Speed Manual Shift Mode P.404
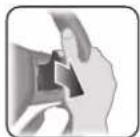
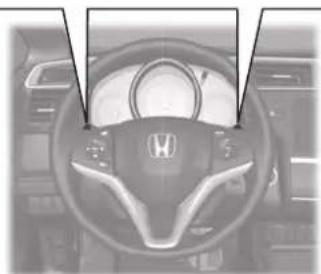
●Allows you to manually shift the transmission up or down without removing your hands from the steering wheel.
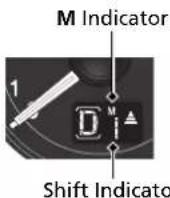
When the shift lever is in S
- Pulling a paddle shifter changes the mode from continuously variable transmission to 7-speed manual shift mode. - The M indicator and the selected speed number are displayed in the shift indicator.
When the shift lever is in D
●Pulling a paddle shifter temporarily changes the mode from continuously variable transmission to 7-speed manual shift mode. The selected speed number is displayed in the shift indicator.
Shift Down — Paddle Shifter
Shift Up ☐
Paddle Shifter
natural_image
Interior view of a car dashboard with Honda logo and steering wheel (no visible text or symbols)* Not available on all models
VSA On and OFF
P. 447
●The vehicle stability assist (VSA) system helps to stabilise the vehicle during cornering, and helps to maintain traction while accelerating on loose or slippery road surfaces.
●VSA comes on automatically every time you start the engine.
●To partially disable VSA functionality/features, press and hold the button until you hear a beep.
Cruise Control
P. 420
●Cruise control allows you to maintain a set speed without keeping your foot on the accelerator pedal.
- To use cruise control, press the MAIN button. Select cruise control by pressing the LIM button, then press the -/SET button once you have achieved the desired speed (above 30 km/h or 18 mph).
Adjustable Speed Limiter
P. 423
●This system enables you to set a maximum speed that cannot be exceeded even if you are depressing the accelerator pedal.
●To use the adjustable speed limiter, press the MAIN button. Select the adjustable speed limiter by pressing the LIM button, then press the -/SET when your vehicle reaches the desired speed.
●The vehicle speed limit can be set from 30 km/h (18 mph) to 250 km/h (156 mph).
Deflation Warning
System P.449
●Detects a change in tyre conditions and overall dimensions due to decrease in tyre pressures.
●The Deflation warning system is turned on automatically every time you start the engine.
●A calibration procedure must be performed when certain conditions arise.
Refueling → P.471
EN 228 standards petrol/gasohol fuel
Unleaded premium petrol/gasohol up to E10 (90% petrol and 10% ethanol), research octane number 95 or higher
Fuel tank capacity: 40 L (8.8 Imp gal)
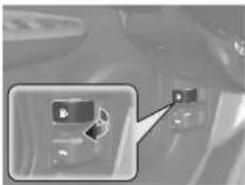
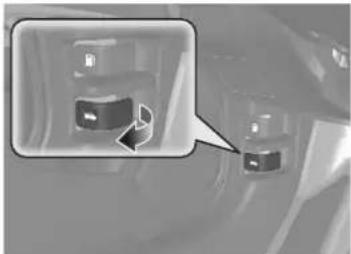
1 Pull the fuel fill door release handle.
natural_image
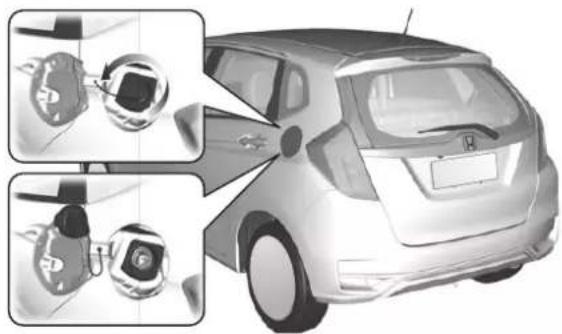
Close-up of a car interior with a highlighted camera module (no text or symbols visible)2 Turn the fuel fill cap slowly to remove the cap.
3 Place the cap in the holder on the fuel fill door.
4 After refueling, screw the cap back on until it clicks at least once.
natural_image
Side view of a car with two close-up insets showing internal components (no text or symbols visible)Maintenance
P.475
Under the Bonnet P.489
- Check engine oil, engine coolant, and windscreen washer fluid. Add when necessary.
- Check brake/clutch ^ fluid.
●Check the battery condition monthly.
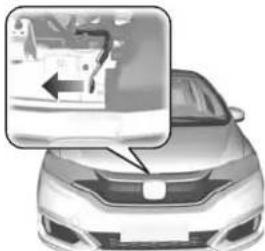
1 Pull the bonnet release handle under the corner of the dashboard.
natural_image
Close-up of a car's front camera module with a magnified inset showing the lens (no text or symbols visible)2 Locate the bonnet latch lever, push it to the side, and then raise the bonnet. Once you have raised the bonnet slightly, you can release the lever.
natural_image
Front view of a car with a highlighted internal component (no visible text or symbols)3 When finished, close the bonnet and make sure it is firmly locked in place.
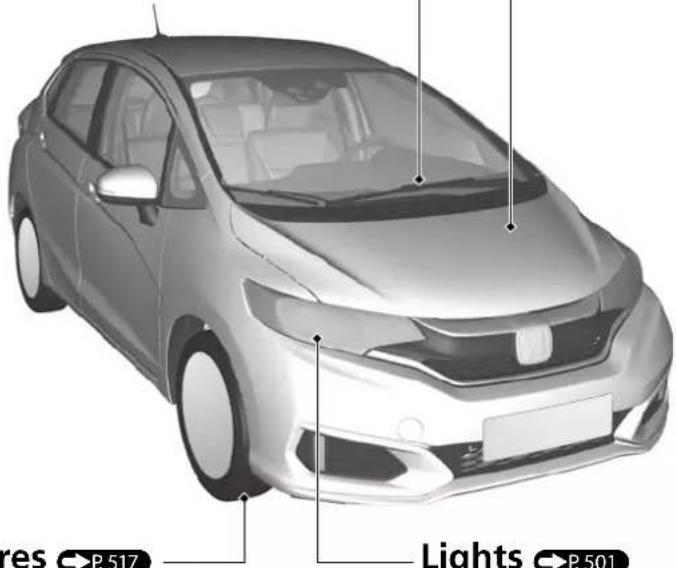
Wiper Blades P.513
●Replace blades if they leave streaks across the windscreen.
Tyres P.517
●Inspect tyres and wheels regularly.
●Check tyre pressures regularly.
●Install winter tyres for winter driving.
Lights → P.501
●Inspect all lights regularly.
Handling the Unexpected
P.541
Flat Tyre
P.543
Models with a spare tyre
●Park in a safe location and replace the flat tyre with the compact spare tyre in the luggage area.
Models with tyre repair kit
●Park in a safe location and repair the flat tyre using the tyre repair kit.
natural_image
Rear view of a silver minivan (no visible text or symbols)Indicators Come On
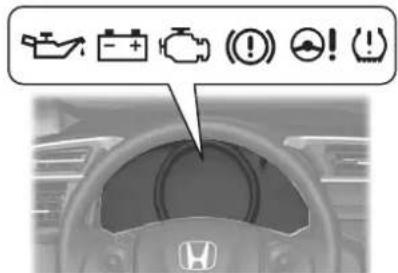
P.570
- Identify the indicator and consult the owner's manual.
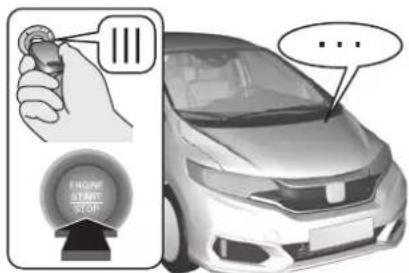
Engine Won't Start
P.561
- If the battery is dead, jump start using a booster battery.
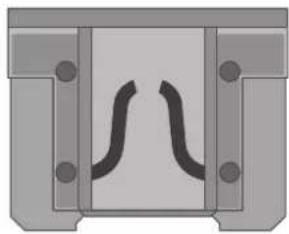
Blown Fuse
P.575
- Check for a blown fuse if an electrical device does not operate.
natural_image
Pure mechanical component diagram without any text, numbers, or symbolsOverheating
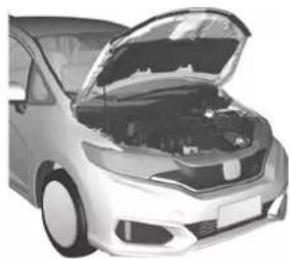
P.568
●Park in a safe location. If you do not see steam under the bonnet, open the bonnet, and let the engine cool down.
natural_image
Exterior view of a silver sedan with its hood open, showing engine compartment (no text or symbols visible)Emergency Towing
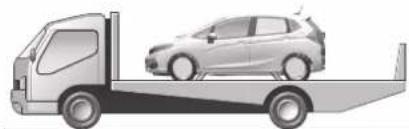
P.586
- Call a professional towing service if you need to tow your vehicle.
natural_image
Illustration of a silver car on a flatbed truck (no text or symbols)What to Do If

Models without keyless access system
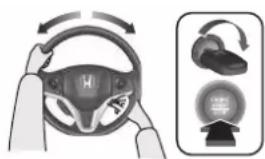
The ignition switch does not turn from 0 to 1. Why?
Models with keyless access system
The power mode does not change from VEHICLE OFF (LOCK) to ACCESSORY. Why?

- The steering wheel may be locked.
Models without keyless access system
- Try to turn the steering wheel left and right while turning the ignition key.
Models with keyless access system
- Move the steering wheel left and right after pressing the ENGINE START/STOP button.

Models without keyless access system
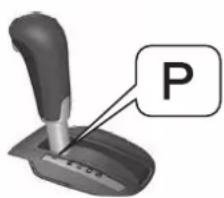
The ignition switch does not turn from 1 to 0 and I cannot remove the key. Why?
Models with keyless access system
The power mode does not change from ACCESSORY to VEHICLE OFF (LOCK). Why?

The shift lever should be moved to P.

Why does the brake pedal pulsate slightly when applying the brakes?

This can occur when the ABS activates and does not indicate a problem. Apply firm, steady pressure on the brake pedal. Never pump the brake pedal.
Anti-lock Brake System (ABS) P. 455

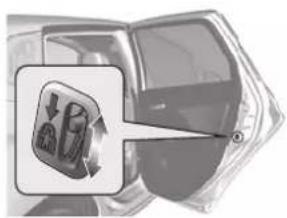
The rear door cannot be opened from inside the vehicle. Why?

Check if the childproof lock is in the lock position. If so, open the rear door with the outside door handle. To cancel this function, push the lever to the unlock position.
natural_image
Close-up of a car window with a logo and magnified view of the front wheel (no readable text or symbols)
Why do the doors lock after I unlocked the doors?

If you do not open the doors within 30 seconds, the doors are relocked automatically for security.

Why does the beeper sound when I open the driver's door?

The beeper sounds when:
• The exterior lights are left on.
• Auto Idle Stop is in operation.
Models without keyless access system
• The key is left in the ignition switch.
Models with keyless access system
• The power mode is in ACCESSORY.

Why does the beeper sound when I start driving?

The beeper sounds when:
- Driver and/or front passenger are not wearing their seat belts.
- The parking brake lever is not fully released.

I'm seeing an amber indicator of a tyre with an exclamation point. What is that?

The Deflation Warning System needs attention. If you recently inflated or changed a tyre, you have to recalibrate the system. ▶Deflation Warning System ➕P 449

Why do I hear a screeching sound when I apply the brake pedal?

The brake pads may need to be replaced. Have your vehicle inspected by a dealer.

Is it possible to use unleaded petrol with a Research Octane Number (RON) of 91 or higher on this vehicle?

Your vehicle is designed to operate on premium unleaded petrol with a research octane of 95 or higher. If this octane grade is unavailable, regular unleaded petrol with a research octane of 91 or higher may be used temporarily. The use of regular unleaded petrol can cause metallic knocking noises in the engine and will result in decreased engine performance. The long-term use of regular-grade petrol can lead to engine damage.
For Safe Driving
Important Safety Precautions ...... 32
Your Vehicle's Safety Features...... 34
Seat Belts
About Your Seat Belts.... 36
Fastening a Seat Belt 42
Seat Belt Inspection.... 47
Airbags
Airbag System Components...... 49
Types of Airbags 51
Front Airbags (SRS) 51
Side Airbags.... 56
Side Curtain Airbags 58
Airbag System Indicators.... 59
Airbag Care 61
Child Safety
Protecting Child Passengers 62
Safety of Infants and Small Children.... 66
Safety of Larger Children 79
Exhaust Gas Hazard
Carbon Monoxide Gas.... 82
Safety Labels
Label Locations 83
For Safe Driving
The following pages explain your vehicle's safety features and how to use them properly. The safety precautions below are ones that we consider to be among the most important.
Important Safety Precautions
■Always wear your seat belt
A seat belt is your best protection in all types of collisions. Airbags are designed to supplement seat belts, not replace them. So even though your vehicle is equipped with airbags, make sure you and your passengers always wear your seat belts, and wear them properly.
■Restrain all children
Children aged 12 and under should ride properly restrained in a back seat, not the front seat. Infants and small children should be restrained in a child restraint system. Larger children should use a booster seat and a lap/shoulder seat belt until they can use the belt properly without a booster seat.
■Be aware of airbag hazards
While airbags can save lives, they can cause serious or fatal injuries to occupants who sit too close to them, or are not properly restrained. Infants, young children, and short adults are at the greatest risk. Be sure to follow all instructions and warnings in this manual.
■Don't drink and drive
Alcohol and driving don't mix. Even one drink can reduce your ability to respond to changing conditions, and your reaction time gets worse with every additional drink. So don't drink and drive, and don't let your friends drink and drive, either.
Important Safety Precautions
Some countries prohibit the use of mobile phones other than hands-free devices by the driver while driving.
■Pay appropriate attention to the task of driving safely
Engaging in mobile phone conversation or other activities that keep you from paying close attention to the road, other vehicles, and pedestrians could lead to a crash. Remember, situations can change quickly, and only you can decide when it is safe to divert some attention away from driving.
■Control your speed
Excessive speed is a major factor in crash injuries and deaths. Generally, the higher the speed, the greater the risk, but serious injuries can also occur at lower speeds. Never drive faster than is safe for current conditions, regardless of the maximum speed posted.
■Keep your vehicle in safe condition
Having a tyre blowout or a mechanical failure can be extremely hazardous. To reduce the possibility of such problems, check your tyre pressures and condition frequently, and perform all regularly scheduled maintenance.
■Do not leave children unattended in the vehicle
Children, pets and people needing assistance left unattended in the vehicle may be injured if they activate one or more of the vehicle controls. They may also cause the vehicle to move, resulting in a crash in which they and/or another person(s) can be injured or killed. Also, depending on the ambient temperature, the temperature of the interior may reach extreme levels, which can result in harm or death. Even if the climate control system is on, never leave them in the vehicle unattended as the climate control system can shut off at any time.
Your Vehicle's Safety Features
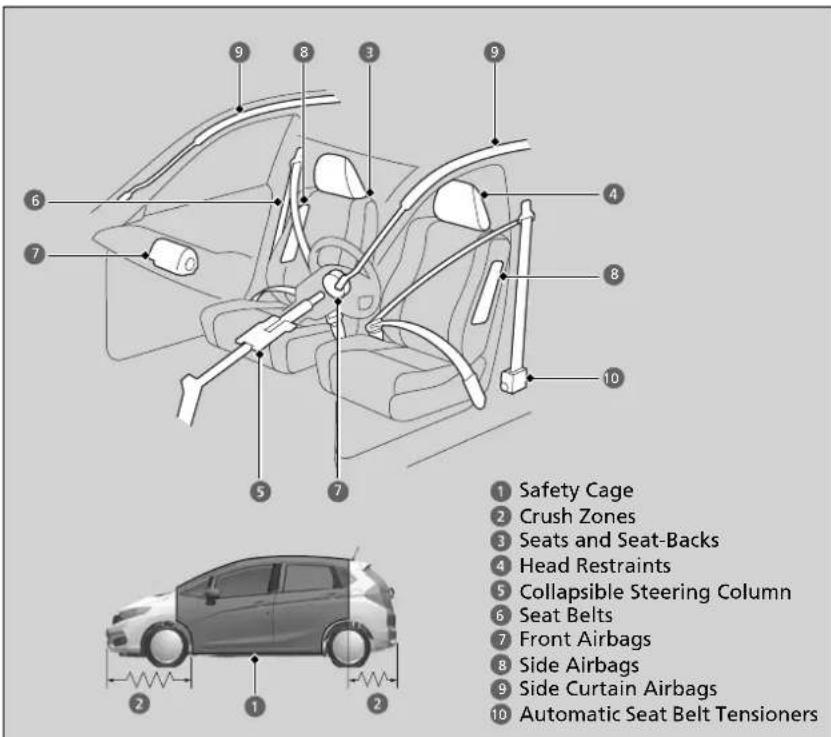
The following checklist will help you take an active role in protecting yourself and your passengers.
Your Vehicle's Safety Features
Your vehicle is equipped with many features that work together to help to protect you and your passengers during a crash.
Some features do not require any action on your part. These include a strong steel framework that forms a safety cage around the passenger compartment, front and rear crush zones, a collapsible steering column, and tensioners that tighten the front and rear outer seat belts in a sufficient crash.
However, you and your passengers cannot take full advantage of these features unless you remain seated in the correct position and always wear your seat belts. In fact, some safety features can contribute to injuries if they are not used properly.
Safety Checklist
For the safety of you and your passengers, make a habit of checking these items each time before you drive.
- Adjust your seat to a position suitable for driving. Be sure the front seats are adjusted as far to the rear as possible while allowing the driver to control the vehicle. Sitting too close to a front airbag can result in serious or fatal injury in a crash.
Adjusting the Seats P. 187
- Adjust head restraints to the proper position. Head restraints are most effective when the centre of the head restraint aligns with the centre of your head. Taller persons should adjust their head restraint to the highest position.
Head Restraints P. 193
- Always wear your seat belt, and make sure you wear it properly. Confirm that any passengers are properly belted as well.
Fastening a Seat Belt P. 42
- Protect children by using seat belts or child restraint systems according to a child's age, height and weight.
Child Safety P. 62
>>Safety Checklist
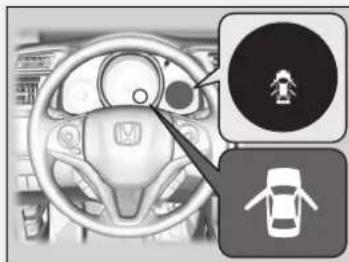
If the door/tailgate open indicator is on, a door and/or boot is not completely closed. Close all doors and the boot tightly until the indicator goes off.
Door and Tailgate Open Indicator P. 95
Seat Belts
About Your Seat Belts
Seat belts are the single most effective safety device because they keep you connected to the vehicle so that you can take advantage of many built-in safety features. They also help to keep you from being thrown against the inside of the vehicle, against any passengers, or out of the vehicle. When worn properly, seat belts also keep your body properly positioned in a crash so that you can take full advantage of the additional protection provided by the airbags.
In addition, seat belts help to protect you in almost every type of crash, including:
- frontal impacts
- side impacts
- rear impacts
- rollovers
About Your Seat Belts
WARNING
Not wearing a seat belt properly increases the chance of serious injury or death in a crash, even though your vehicle has airbags.
Be sure you and your passengers always wear seat belts and wear them properly.
WARNING: Seat belts are designed to bear upon the bony structure of the body, and should be worn low across the front of the pelvis or the pelvis, chest and shoulders, as applicable; wearing the lap section of the belt across the abdominal area must be avoided.
WARNING: Seat belts should be adjusted as firmly as possible, consistent with comfort, to provide the protection for which they have been designed. A slack belt will greatly reduce the protection afforded to the wearer.
WARNING: Belts should not be worn with straps twisted.
WARNING: Each belt assembly must only be used by one occupant; it is dangerous to put a belt around a child being carried on the occupant's lap.
Lap/shoulder seat belts
All five seating positions are equipped with lap/shoulder seat belts with emergency locking retractors. In normal driving the retractor lets you move freely while keeping some tension on the belt. During a collision or sudden stop the retractor locks to restrain your body.
About Your Seat Belts
Seat belts cannot completely protect you in every crash. But in most cases, seat belts can reduce your risk of serious injury.
Most countries require you to wear seat belts. Take time to familiarise with the legal requirements of the countries in which you will drive.
If you extend the seat belt too quickly, it will lock in place. If this happens, slightly retract the seat belt, then extend it slowly.
Continued
■Proper use of seat belts
Follow these guidelines for proper use:
- All occupants should sit upright, well back in the seat, and remain in that position for the duration of the trip. Slouching and leaning reduce the effectiveness of the belt and can increase the chance of serious injury in a crash.
- Never place the shoulder part of a lap/shoulder seat belt under your arm or behind your back. This could cause very serious injuries in a crash.
- Two people should never use the same seat belt. If they do, they could be very seriously injured in a crash.
- Do not put any accessories on the seat belts. Devices intended to improve comfort or reposition the shoulder part of a seat belt can reduce the protective capability and increase the chance of serious injury in a crash.
Seat Belt Reminder
Front seats
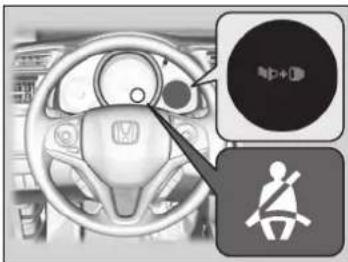
The seat belt system includes an indicator on the instrument panel to remind the driver or a front passenger or both to fasten their seat belts.
If the ignition switch is turned to ON [Ⅱ]^*1 and a seat belt is not fastened, a beeper will sound and the indicator will blink. After a few seconds, the beeper will stop and the indicator will come on and remain illuminated until the seat belt is fastened.
The beeper will also periodically sound and the indicator will blink while the vehicle is moving until the seat belt is fastened.
*1: Models with the keyless access system have an ENGINE START/STOP button instead of an ignition switch.
Continued
Seat Belt Reminder
The indicator will also come on if a front passenger does not fasten their seat belt within six seconds after the ignition switch is turned to ON ^*1 .
When no one is sitting in the front passenger's seat, the indicator will not come on and the beeper will not sound.
If the indicator comes on or the beeper sounds with no one sitting in the front passenger's seat. Check if:
- There is nothing heavy placed on the front passenger seat.
- The driver's seat belt is fastened.
If the indicator does not light when the passenger is seated and is not fastened, something may be interfering with the occupant detection sensor.
Check if:
• A cushion is placed on the seat.
- The front passenger is not sitting properly.
If none of these conditions exist, have your vehicle checked by a dealer.
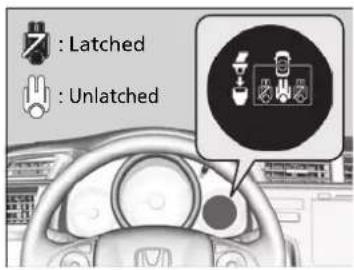
Rear seats
Your vehicle monitors rear seat belt use. A multi-information display notifies you if any of the rear seat belts are used.
The display appears when:
- A rear door is opened and closed.
- Any of the rear passengers latches or unlatches their seat belt.
The beeper sounds if any rear passenger's seat belt is unlatched while driving.
To see the display: press the button repeatedly.
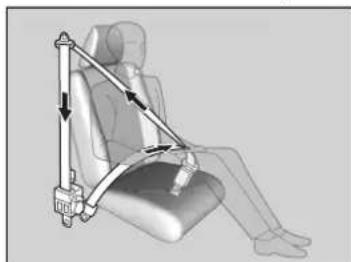
Automatic Seat Belt Tensioners
The front seats and the outer rear seats are equipped with automatic seat belt tensioners to enhance safety.
natural_image
Diagram of a car seatbelt with a belt and arm, showing no text or symbolsThe tensioners automatically tighten the front seat belts and the outer rear seat belts during a moderate-to-severe frontal collision, sometimes even if the collision is not severe enough to inflate the front airbags.
Automatic Seat Belt Tensioners
The seat belt tensioners can only operate once. If a tensioner is activated, the SRS indicator will come on. Have a dealer replace the tensioner and thoroughly inspect the seat belt system as it may not offer protection in a subsequent crash.
During a moderate-to-severe side impact, the tensioner on that side of the vehicle also activates.
Fastening a Seat Belt
After adjusting a front seat to the proper position, and while sitting upright and well back in the seat:
Adjusting the Seats P. 187
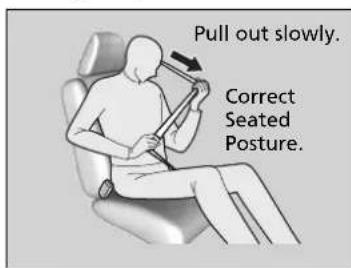
-
Pull the seat belt out slowly.
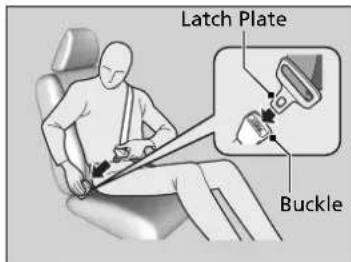
-
Insert the latch plate into the buckle, then tug on the belt to make sure the buckle is secure.
▶ Make sure that the belt is not twisted or caught on anything.
Fastening a Seat Belt
No one should sit in a seat with an inoperative seat belt or one that does not appear to be working correctly. Using a seat belt that is not working properly may not protect the occupant in a crash. Have a dealer check the belt as soon as possible.
WARNING
Improperly positioning the seat belts can cause serious injury or death in a crash.
Make sure all seat belts are properly positioned before driving.
To release the belt, push the red PRESS button and then guide the belt by hand until it has retracted completely.
When exiting the vehicle, be sure the belt is properly stowed so that it will not get caught in the closing door.
Never insert any foreign objects into the buckle or retractor mechanism.
-
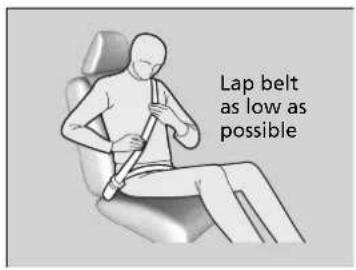
Position the lap part of the belt as low as possible across your hips, then pull up on the shoulder part of the belt so the lap part fits snugly. This lets your strong pelvic bones take the force of a crash and reduces the chance of internal injuries.
-
If necessary, pull up on the belt again to remove any slack, then check that the belt rests across the centre of your chest and over your shoulder. This spreads the forces of a crash over the strongest bones in your upper body.
Adjusting the Shoulder Anchor
The front seats have adjustable shoulder anchors to accommodate taller and shorter occupants.
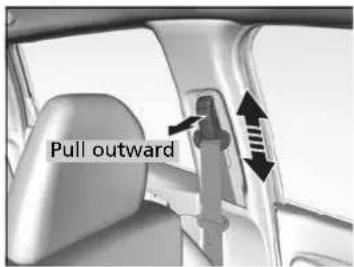
- Move the anchor up and down while pulling the release outward.
- Position the anchor so that the belt rests across the centre of your chest and over your shoulder.
Adjusting the Shoulder Anchor
The shoulder anchor height can be adjusted to four levels. If the belt contacts your neck, lower the height one level at a time.
After an adjustment, make sure that the shoulder anchor position is secure.
Seat Belt with Detachable Anchor
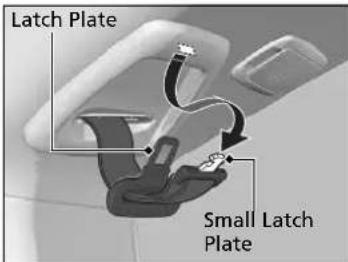
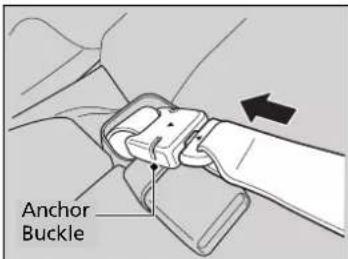
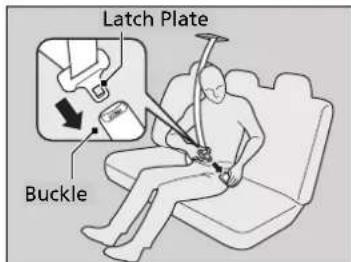
- Pull out the seat belt's small latch plate and the latch plate from each holding slot in the ceiling.
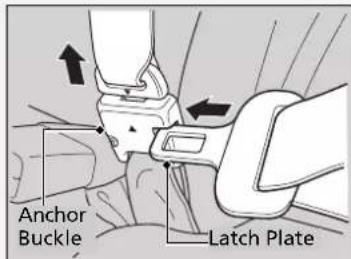
- Line up the triangle marks on the small latch plate and anchor buckle. Make sure the seat belt is not twisted. Attach the belt to the anchor buckle.
- Insert the latch plate into the buckle. Properly fasten the seat belt the same way you fasten the lap/shoulder seat belt.
Seat Belt with Detachable Anchor
WARNING
Using the seat belt with the detachable anchor unlatched increases the chance of serious injury or death in a crash.
Before using the seat belt, make sure the detachable anchor is correctly latched.
To unlatch the detachable anchor, insert the latch plate into the slot on the side of the anchor buckle.
Advice for Pregnant Women
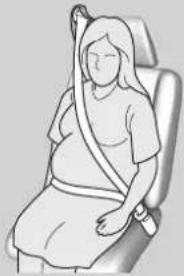
If you are pregnant, the best way to protect yourself and your unborn child when driving or riding in a vehicle is to always wear a seat belt and keep the lap part of the belt as low as possible across the hips.
Wear the shoulder belt across the chest avoiding the abdomen.
natural_image
Illustration of a pregnant woman wearing a seatbelt, no text or symbols presentWear the lap part of the belt as low as possible across the hips.
»Advice for Pregnant Women
Each time you have a checkup, ask your doctor if it is okay for you to drive.
To reduce the risk of injuries to both you and your unborn child that can be caused by an inflating front airbag:
- When driving, sit upright and adjust the seat as far back as possible while allowing full control of the vehicle.
- When sitting in the front passenger's seat, adjust the seat as far back as possible.
Seat Belt Inspection
Regularly check the condition of your seat belts as follows:
- Pull each belt out fully, and look for frays, cuts, burns, and wear.
- Check that the latch plates and buckles work smoothly and the belts retract easily.
If a belt does not retract easily, cleaning the belt may correct the problem. Only use a mild soap and warm water. Do not use bleach or cleaning solvents. Make sure the belt is completely dry before allowing it to retract.
Any belt that is not in good condition or working properly will not provide proper protection and should be replaced as soon as possible.
A belt that has been worn during a crash may not provide the same level of protection in a subsequent crash. Have your seat belts inspected by a dealer after any collision.
Seat Belt Inspection
WARNING
Not checking or maintaining seat belts can result in serious injury or death if the seat belts do not work properly when needed.
Check your seat belts regularly and have any problem corrected as soon as possible.
WARNING: No modifications or additions should be made by the user which will either prevent the seat belt adjusting devices from operating to remove slack, or prevent the seat belt assembly from being adjusted to remove slack.
WARNING: It is essential to replace the entire assembly after it has been worn in a severe impact even if damage to the assembly is not obvious.
WARNING: Care should be taken to avoid contamination of the webbing with polishes, oils and chemicals, and particularly battery acid. Cleaning may safely be carried out using mild soap and water. The belt should be replaced if webbing becomes frayed, contaminated or damaged.
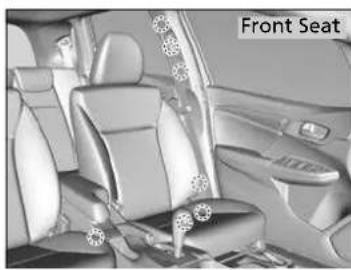
Anchorage points
natural_image
Interior view of a car showing the front seat and backrest (no text or symbols visible)When replacing the seat belts, use the anchorage points shown in the images. The front seat has a lap/shoulder belt.
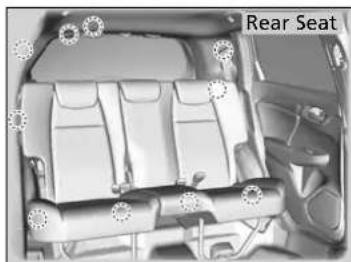
natural_image
Interior view of a car showing rear seat and dashboard seating (no text or symbols visible)The rear seat has three lap/shoulder belts.
Airbags
Airbag System Components
The front, front side, and side curtain airbags are deployed according to the direction and severity of impact. The airbag system includes:
- Two SRS (Supplemental Restraint System) front airbags. The driver's airbag is stored in the centre of the steering wheel; the front passenger's airbag is stored in the dashboard. Both are marked SRS AIRBAG.
- Two side airbags, one for the driver and one for a front passenger. The airbags are stored in the outer edges of the seat-backs. Both are marked SIDE AIRBAG.
-
Two side curtain airbags, one for each side of the vehicle. The airbags are stored in the ceiling, above the side windows. The front and rear pillars are marked SIDE CURTAIN AIRBAG.
-
An electronic control unit that, when the ignition switch is ON ^*1 , continually monitors information about the various impact sensors, seat and buckle sensors, airbag activators, seat belt tensioners, and other vehicle information. During a crash event the unit can record such information.
• Automatic front seat belt tensioners. - Impact sensors that can detect a moderate-to-severe front or side impact.
- An indicator on the instrument panel that alerts you to a possible problem with your airbag system or seat belt tensioners.
- An indicator on the dashboard that alerts you that the front passenger's front airbag has been turned off.
Important facts about your airbags
Airbags can pose serious hazards. To do their job, airbags must inflate with tremendous force. So, while airbags help to save lives, they can cause burns, bruises, and other minor injuries, sometimes even fatal ones if occupants are not wearing their seat belts properly and sitting correctly.
What you should do: Always wear your seat belt properly, and sit upright and as far back from the steering wheel as possible while allowing full control of the vehicle. A front passenger should move their seat as far back from the dashboard as possible.
Remember, however, that no safety system can prevent all injuries or deaths that can occur in a severe crash, even when seat belts are properly worn and the airbags deploy.
Do not place hard or sharp objects between yourself and a front airbag. Carrying hard or sharp objects on your lap, or driving with a pipe or other sharp object in your mouth, can result in injuries if your front airbag inflates.
Do not attach or place objects on the front airbag covers. Objects on the covers marked SRS AIRBAG could interfere with the proper operation of the airbags or be propelled inside the vehicle and hurt someone if the airbags inflate.
Important facts about your airbags
Do not attempt to deactivate your airbags. Together, airbags and seat belts provide the best protection.
When driving, keep hands and arms out of the deployment path of the front airbag by holding each side of the steering wheel. Do not cross an arm over the airbag cover.
Types of Airbags
Your vehicle is equipped with three types of airbags:
- Front airbags: Airbags in front of the driver's and front passenger's seats.
- Side airbags: Airbags in the driver's and front passenger's seat-backs.
- Side curtain airbags: Airbags above the side windows.
Each is discussed in the following pages.
Front Airbags (SRS)
The front SRS airbags inflate in a moderate-to-severe frontal collision to help to protect the head and chest of the driver and/or front passenger.
SRS (Supplemental Restraint System) indicates that the airbags are designed to supplement seat belts, not replace them. Seat belts are the occupant's primary restraint system.
Housing Locations
The front airbags are housed in the centre of the steering wheel for the driver, and in the dashboard for the front passenger. Both airbags are marked SRS AIRBAG.
*1: Models with the keyless access system have an ENGINE START/STOP button instead of an ignition switch.
Continued
Types of Airbags
The airbags can inflate whenever the ignition switch is in ON ^*1 .
After an airbag inflates in a crash, you may see a small amount of smoke. This is from the combustion process of the inflator material and is not harmful. People with respiratory problems may experience some temporary discomfort. If this occurs, get out of the vehicle as soon as it is safe to do so.
Operation
Front airbags are designed to inflate during moderate-to-severe frontal collisions. When the vehicle decelerates suddenly, the sensors send information to the control unit which signals one or both front airbags to inflate.
A frontal collision can be either head-on or angled between two vehicles, or when a vehicle crashes into a stationary object, such as a concrete wall.
How the Front Airbags Work
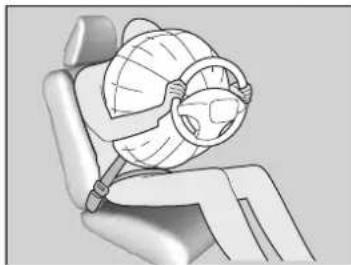
natural_image
Illustration of a person seated in a chair with a helmet partially visible, no text or symbols present.While your seat belt restrains your torso, the front airbag provides supplemental protection for your head and chest.
The front airbags deflate immediately so that they won't interfere with the driver's visibility or the ability to steer or operate other controls.
The total time for inflation and deflation is so fast that most occupants are not aware that the airbags deployed until they see them lying in front of them.
■When front airbags should not deploy
Minor frontal crashes: Front airbags were designed to supplement seat belts and help to save lives, not to prevent minor scrapes, or even broken bones that might occur during a less than moderate-to-severe frontal crash.
Side impacts: Front airbags can provide protection when a sudden deceleration causes a driver or front passenger to move towards the front of the vehicle. Side airbags and side curtain airbags have been specifically designed to help to reduce the severity of injuries that can occur during a moderate-to-severe side impact which can cause the driver or passenger to move towards the side of the vehicle.
Rear impacts: Head restraints and seat belts are your best protection during a rear impact. Front airbags cannot provide any significant protection and are not designed to deploy in such collisions.
Rollovers: Seat belts and side curtain airbags offer the best protection in a rollover. Because front airbags could provide little if any protection, they are not designed to deploy during a rollover.
■When front airbags deploy with little or no visible damage
Because the airbag system senses sudden deceleration, a strong impact to the vehicle framework or suspension might cause one or more of the airbags to deploy. Examples include running into a curb, the edge of a hole, or other low fixed object that causes a sudden deceleration in the vehicle chassis. Since the impact is underneath the vehicle, damage may not be readily apparent.
■ When front airbags may not deploy, even though exterior damage appears severe
Since crushable body parts absorb crash energy during an impact, the amount of visible damage does not always indicate proper airbag operation. In fact, some collisions can result in severe damage but no airbag deployment because the airbags would not have been needed or would not have provided protection even if they had deployed.
Passenger Front Airbag Off System
If it is unavoidable to install a rear-facing child restraint system in the front passenger seat, you must manually deactivate the passenger front airbag system, using the ignition key or the built-in key.
■Passenger front airbag ON/OFF switch
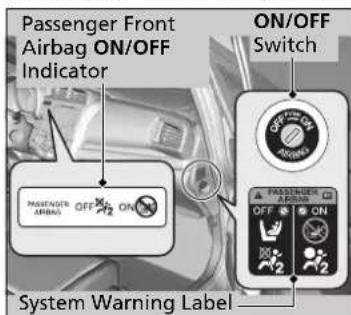
When the passenger front airbag ON/OFF switch is in:
OFF: The passenger front airbag is deactivated. The passenger front airbag does not inflate during a frontal crash that inflates driver's front airbag.
The passenger front airbag off indicator stays on as a reminder.
ON: The passenger front airbag is activated. The passenger front airbag on indicator comes on and remains on for about 60 seconds.
■To deactivate the passenger front airbag system
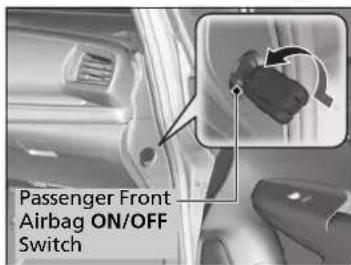
- Set the parking brake, and turn the ignition switch to LOCK 0 ^4 . Remove the key.
- Open the front passenger's door.
- Insert the key to the passenger front airbag ON/OFF switch.
The switch is located at the side panel of the front passenger side instrument panel.
- Turn the key to OFF, and remove it from the switch.
*1: Models with the keyless access system have an ENGINE START/STOP button instead of an ignition switch.
Passenger Front Airbag Off System
WARNING
The passenger front airbag system must be turned off, if it is not avoidable to put a rear-facing child restraint system in the front passenger seat.
If the front passenger airbag inflates, it can hit the rear-facing child restraint system with enough force to kill or cause a very serious injury to the infant.
WARNING
Make sure to turn on the passenger front airbag system when a rear-facing child restraint system is not used on the front passenger seat.
Leaving the passenger front airbag system deactivated can result in serious injury or death in a crash.
■Passenger front airbag off indicator
When the passenger front airbag system is activated, the indicator goes off after a few seconds when you turn the ignition switch to ON ^*1 .
When the passenger front airbag system is deactivated, the indicator stays on, or goes off momentarily and comes back on.
■Passenger front airbag off system label
The label is located at the side panel of the front passenger side instrument panel.
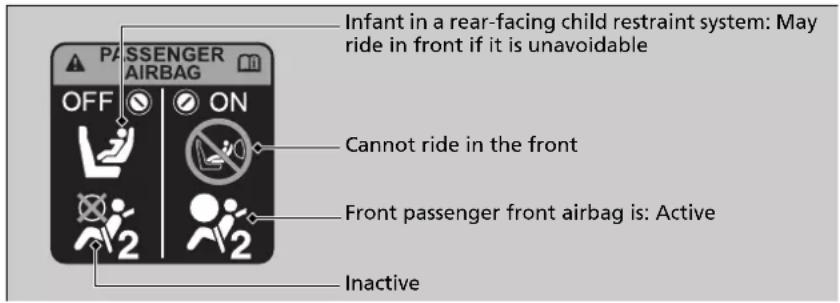
*1: Models with the keyless access system have an ENGINE START/STOP button instead of an ignition switch.
To deactivate the passenger front airbag system
NOTICE
- Use your vehicle's ignition key/built-in key to turn the passenger front airbag ON/OFF switch. If you use a different key, the switch can be damaged, or the passenger front airbag system may not work properly.
- Do not close the door or apply excessive load on the ignition key/built-in key while the key is in the passenger front airbag ON/OFF switch. The switch or the key can be damaged.
We strongly recommend that you do not install a rear-facing child restraint system in the front passenger seat.
Protecting Infants P. 66
It is your responsibility to change the setting of the passenger front airbag system to OFF when you put a rear-facing child restraint system on the front passenger seat.
When a rear-facing child restraint system is not in use in the front passenger seat, turn the system back on.
Side Airbags
The side airbags help to protect the upper torso and pelvis of the driver or a front passenger during a moderate-to-severe side impact.
Housing Locations
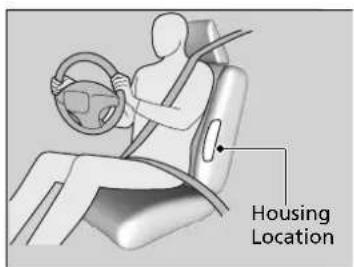
The side airbags are housed in the outside edge of the driver's and passenger's seat-backs.
Both are marked SRS AIRBAG.
Side Airbags
Do not attach accessories on or near the side airbags. They can interfere with the proper operation of the airbags, or hurt someone if an airbag inflates.
Operation
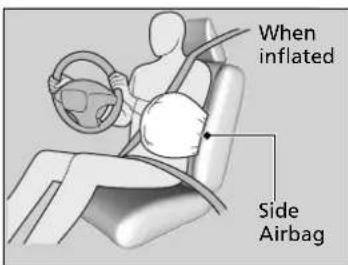
When the sensors detect a moderate-to-severe side impact, the control unit signals the side airbag on the impact side to immediately inflate.
■When a side airbag deploys with little or no visible damage
Because the airbag systems senses sudden acceleration, a strong impact to the side of the vehicle's framework can cause a side airbag to deploy. In such cases, there may be little or no damage, but the side impact sensors detected a severe enough impact to deploy the airbag.
■ When a side airbag may not deploy, even though visible damage appears severe
It is possible for a side airbag not to deploy during an impact that results in apparently severe damage. This can occur when the point of impact was towards the far front or rear of the vehicle, or when the vehicle's crushable body parts absorbed most of the crash energy. In either case, the side airbag would not have been needed nor provided protection even if it had deployed.
>>Side Airbags
Do not cover or replace the front seat-back covers without consulting a dealer. Improperly replacing or covering front seat-back covers can prevent your side airbags from properly deploying during a side impact.
Do not let the front passenger lean sideways with their head in the deployment path of the side airbag. An inflating side airbag can strike with strong force and seriously injure the passenger.
Side Curtain Airbags
The side curtain airbags help to protect the heads of the driver and passengers in outer seating positions during a moderate-to-severe side impact.
Housing Locations
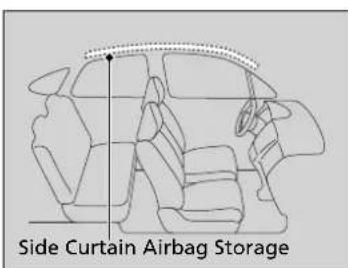
The side curtain airbags are located in the ceiling above the side windows on both sides of the vehicle.
Operation
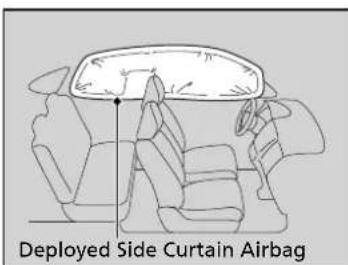
The side curtain airbag is designed to deploy in a moderate-to-severe side impact.
■When side curtain airbags deploy in a frontal collision
One or both side curtain airbags may inflate in a moderate-to-severe angled frontal collision.
>>Side Curtain Airbags
The side curtain airbags are most effective when an occupant is wearing their seat belt properly and sitting upright, well back in their seat.
Do not attach any objects to the side windows or roof pillars as they can interfere with the proper operation of the side curtain airbags.
Do not put a coat hanger or hard objects on a coat hook. This could result in injuries if your side curtain airbag inflates.
Airbag System Indicators
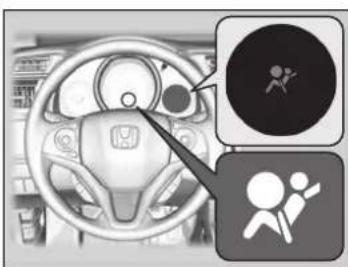
If a problem occurs in the airbag system, the SRS indicator comes on and a message appears on the multi-information display.
Supplemental Restraint System (SRS) Indicator
natural_image
Interior view of a car dashboard with a close-up of the steering wheel and two stick figures (no text or symbols visible)■When the ignition switch is turned to ON [II]\*1
The indicator comes on for a few seconds, then goes off. This tells you the system is working properly.
If the indicator comes on at any other time, or does not come on at all, have the system checked by a dealer as soon as possible. If you don't, your airbags and seat belt tensioners may not work properly when they are needed.
Supplemental Restraint System (SRS) Indicator
WARNING
Ignoring the SRS indicator can result in serious injury or death if the airbag systems or tensioners do not work properly.
Have your vehicle checked by a dealer as soon as possible if the SRS indicator alerts you to a possible problem.
Passenger Front Airbag Off Indicator
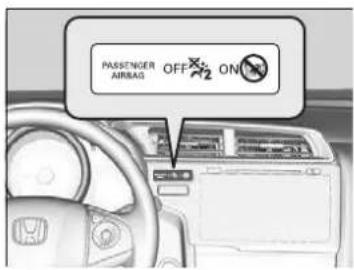
■When the passenger airbag off indicator comes on
The indicator stays on while the passenger's front airbag system is deactivated.
When a rear-facing child restraint system is not in use in the front passenger seat, manually turn the system back on. The indicator should go off.
Supplemental Restraint System (SRS) Indicator
WARNING
Remove the rear-facing child restraint system immediately from the front passenger seat if the SRS indicator comes on. Even if the passenger front airbag has been deactivated, do not ignore the SRS indicator.
The SRS system may have a fault which could cause the passenger front airbag to be activated, causing serious injury or death.
Airbag Care
You do not need to, and should not, perform any maintenance on or replace any airbag system components yourself. However, you should have your vehicle inspected by a dealer in the following situations:
■When the airbags have deployed
If an airbag has inflated, the control unit and other related parts must be replaced. Similarly, once an automatic seat belt tensioner has been activated, it must be replaced.
■When the vehicle has been in a moderate-to-severe collision
Even if the airbags did not inflate, have your dealer inspect the following: front seat belt tensioners, and each seat belt that was worn during the crash.
Airbag Care
The removal of airbag components from the vehicle is prohibited.
In case of malfunction, or shutdown, or after the airbag inflation/seat belt tensioner operation, ask a qualified personnel for handling.
We recommend against the use of salvaged airbag system components, including the airbag, tensioners, sensors, and control unit.
Child Safety
Protecting Child Passengers
Each year, many children are injured or killed in vehicle crashes because they are either unrestrained or not properly restrained. In fact, vehicle crashes are the number one cause of death of children aged 12 and under.
To reduce the number of child deaths and injuries, infants and children should be properly restrained when they ride in a vehicle.
Protecting Child Passengers
WARNING
Children who are unrestrained or improperly restrained can be seriously injured or killed in a crash.
Any child too small for a seat belt should be properly restrained in an approved child restraint system. A larger child should be properly restrained with a seat belt, using a booster seat if necessary.
In many countries, the law requires all children aged 12 and under, and whose height are shorter than 150 cm (60 inches) be properly restrained in a rear seat.
In many countries, it is required to use an officially approved and suitable child restraint system for transporting a child on any passenger seat. Check your local legal requirement.
European models
Child restraint systems must meet UN Regulation No. 44 or No. 129 or the regulations of the subject countries.
→ Selecting a Child Restraint System P. 69
Except European models
We recommend that child restraint systems meet UN Regulation No. 44 or No. 129, or the regulations of the subject countries.
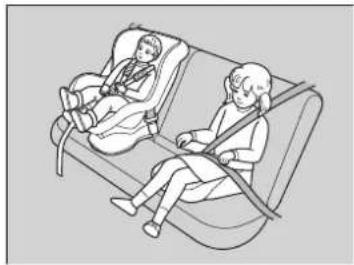
Children should sit properly restrained in a rear seat. This is because:
natural_image
Illustration of two people relaxing on a sofa, one seated and one standing (no text or symbols)- An inflating front or side airbag can injure or kill a child sitting in the front seat.
-
A child in the front seat is more likely to interfere with the driver's ability to safely control the vehicle.
• Statistics show that children of all sizes and ages are safer when they are properly restrained in a rear seat. -
Any child who is too small to wear a seat belt must be properly restrained in an approved child restraint system that is properly secured to the vehicle using the seat belt or the child restraint anchorage system.
- Never hold a child on your lap because it is impossible to protect them in the event of a collision.
- Never put a seat belt over yourself and a child. During a crash, the belt would likely press deep into the child and cause serious or fatal injuries.
- Never let two children use the same seat belt. Both children could be very seriously injured in a crash.
Protecting Child Passengers
Front Passenger's Sunvisor
WARNING
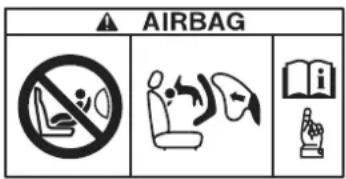
NEVER use a rearward facing child restraint on a seat protected by an ACTIVE AIRBAG in front of it, DEATH or SERIOUS INJURY to the CHILD can occur.
- Do not allow children to operate the doors, windows or seat adjustments.
- Do not leave children in the vehicle unattended, especially in hot weather when the inside of the vehicle can get hot enough to kill them. They could also activate vehicle controls causing it to move unexpectedly.
>>Protecting Child Passengers
WARNING: Use the power window lock button to prevent children from opening the windows. Using this feature will prevent children from playing with the windows, which could expose them to hazards or distract the driver.
Opening/Closing the Power Windows P. 162
WARNING: Always take the ignition key with you whenever you leave the vehicle alone or with other occupants.
To remind you of the passenger's front airbag hazards and child safety, your vehicle has the warning label on the sun visor. Please read and follow the instructions on the label.
→Safety Labels P. 83
Safety of Infants and Small Children
Protecting Infants
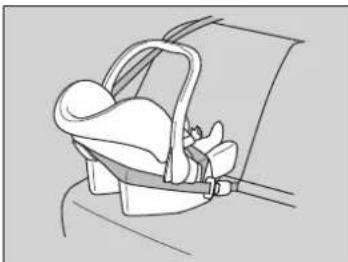
An infant must be properly restrained in a rear-facing, reclining child restraint system until the infant reaches the child restraint system manufacturer's weight or height limit for the seat, and the infant is at least one year old.
natural_image
Line drawing of a car seatbelt with hands adjusting the seat (no text or symbols)■Positioning a rear-facing child restraint system
Child restraint system must be placed and secured in a rear seating position.
If this occurs, we recommend that you install the child restraint system directly behind the front passenger's seat, move the seat as far forward as needed, and leave it unoccupied. Or, you may wish to get a smaller rear-facing child restraint system.
▶ Make sure that there is no contact between the child restraint system and the seat in front of it.
Protecting Infants
WARNING
Placing a rear-facing child restraint system in the front seat can result in serious injury or death if the passenger's front airbag inflates.
Always place a rear-facing child restraint system in the back seat, not the front.
As required by UN Regulation No. 94:
WARNING
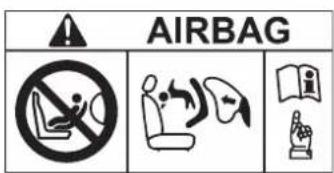
NEVER use a rearward facing child restraint on a seat protected by an ACTIVE AIRBAG in front of it, DEATH or SERIOUS INJURY to the CHILD can occur.
When properly installed, a rear-facing child restraint system may prevent the driver or a front passenger from moving their seat all the way back, or from locking their seat-back in the desired position.
>>Protecting Infants
Many experts recommend use of a rear-facing child restraint system for a child up to two years old if the child's height and weight are appropriate for a rear-facing child restraint system.
If the passenger's front airbag inflates, it can hit the rear-facing child restraint system with great force, which can dislodge or strike the system, and seriously injure the child.
Rear-facing child restraint systems should never be installed in a front facing position.
Always refer to the child restraint system manufacturer's instructions before installation.
If it is absolutely unavoidable to install a rear-facing child restraint system in the front passenger seat, manually turn off the passenger front airbag system.
→ Passenger Front Airbag Off System P. 54
Protecting Smaller Children
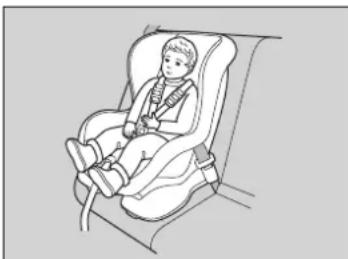
If a child is at least one year old and has exceeded the weight and height limitations of a rear-facing child restraint system, the child should be properly restrained in a firmly secured front-facing child restraint system until they exceed the weight and height limitations for the front-facing child restraint system.
natural_image
Line drawing of a child seated in a car seat (no text or symbols)■Front-facing child restraint system placement
We strongly recommend placing a front-facing child restraint system in a rear seating position.
Placing a front-facing child restraint system in the front seat can be hazardous. A rear seat is the safest place for a child.
Protecting Smaller Children
WARNING
Placing a front-facing child restraint system in the front seat can result in serious injury or death if the front airbag inflates.
If you must place a front-facing child restraint system in front, move the vehicle seat as far back as possible, and properly restrain the child.
Educate yourself about the laws and regulations regarding child restraint system use where you are driving, and follow the child restraint system manufacturer's instructions.
Selecting a Child Restraint System
Some child restraint systems are lower anchorage compatible. Some have a rigid-type connector, while others have a flexible-type connector. Both are equally easy to use. Some existing and previously owned child restraint systems can only be installed using the seat belt. Whichever type you choose, follow the child restraint system manufacturer's use and care instructions including recommended expiration dates as well as the instructions in this manual. Proper installation is key to maximising your child's safety.
The flexible type may not be available in your country.
In seating positions and vehicles not equipped with lower anchorages, install a child restraint system using the seat belt and a top tether for added security. This is because all child restraint systems must be secured with the seat belt when the lower anchorage system is not in use. In addition, the child restraint system manufacturer may advise that a seat belt be used to attach an ISO FIX restraint system once a child reaches a specified weight. Please read the child restraint system owner's manual for proper installation instructions.
■Important consideration when selecting a child restraint system
Make sure the child restraint system meets the following three requirements:
- The child restraint system is the correct type and size for the child.
- The child restraint system is the correct type for the seating position.
- The child restraint system is compliant with safety standards. We recommend a child restraint system compliant with UN Regulation No. 44 or No. 129, or the regulations of the subject countries. Look for the approval mark on the system and the manufacturer's statement of compliance on the box.
>>Selecting a Child Restraint System
Installation of a lower anchorage compatible child restraint system is simple.
Lower anchorage compatible child restraint systems have been developed to simplify the installation process and reduce the likelihood of injuries caused by incorrect installation.
We recommend a rear-facing or a front-facing Honda genuine ISOFIX child restraint system for infants or small children, respectively. Ask your dealer.
The Recommended Child Restraint Systems for EU Countries
Various types of child restraint systems are available. Not all types are suitable for your vehicle. Please refer to the table below to select which category of child restraint system can be used on each seating position.
| Mass group | Seating position | |||
| Front passenger Rear passenger | ||||
| Passenger front airbag ON/OFF switch position | centre | |||
| ON OFF Rear outboard Rear | ||||
| group 0 Up to 10 kg X U | *1,*2,*4,*5 | U^*3,*4 | U^*3,*4 | |
| group 0+ Up to 13 kg X U | *1,*2,*4,*5 | IL (Honda BABY-SAFE ISOFIX), or U^*3,*4 | U^*3,*4 | |
| group I 9 kg to 18 kg UF | *1,*2,*4,*5 | U^*1,*2,*4,*5 | IUF (Size class A, B1, B) or U^*3,*4 | U^*3,*4 |
| group II 15 kg to 25 kg UF | *1,*2,*4,*5 | U^*1,*2,*4,*5 | L (Honda KID FIX XP SICT) or U^*3,*4 | U^*3,*4 |
| group III 22 kg to 36 kg UF | *1,*2,*4,*5 | U^*1,*2,*4,*5 | L (Honda KID FIX XP SICT) or U^*3,*4 | U^*3,*4 |
IL: Suitable for particular ISOFIX child restraint systems (CRS) given in this list.
IUF: Suitable for front facing ISOFIX child restraints system of universal category approved for use in this mass group.
L: Suitable for particular child restraint systems given in this table. These restraints may be of the "specific vehicle," "restricted," or "semi-universal" category.
U: Suitable for "universal" category restraints approved for use in this mass group.
UF: Suitable for front facing "universal" category restraints approved for use in this mass group.
X: Seat position not suitable for children in this mass group.
Models with front seat height adjustment
*1: Move the front seat to its slide rail rearmost position.
*2: Adjust seat height to the most upper end position.
*3: Adjust seat-back angle to the upright position (Frontmost lock position).
*4: Adjust seat-back angle to the upright position (Frontmost lock position).
*5: Move the front seat to its slide rail rearmost position.
Models without front seat height adjustment
| Seating position in the vehicle | |||
| Front seat Rear outer seat | seat Rear centre seat | ||
| i-Size child restraint systems X i-U X | |||
i-U: Suitable for i-Size "universal" Child Restraint Systems for forward and rearward facing.
X: Seating position not suitable for i-Size "universal" Child Restraint Systems.
A size class is specified for some child restraint systems. Make sure to check the size class as indicated on the manufacturer's instructions, package, and labels of the child restraint.
The particular child restraints in the table are Honda Genuine Parts. They are available from your dealer.
For a correct installation, please refer to the Child Restraint Instruction Manual.
Installing a Lower Anchorage Compatible Child Restraint System
A lower anchorage compatible child restraint system can be installed in either of the two outer rear seats. A child restraint system is attached to the lower anchorages with either the rigid or flexible type of connectors.
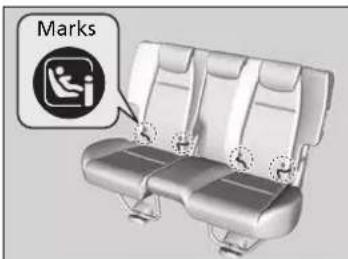
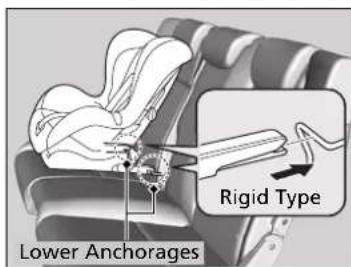
-
Locate the lower anchorages under the marks.
-
Make sure to lock the seat-back in the upright position.
-
Lower the head restraint to its lowest position.
-
Place the child restraint system on the vehicle seat then attach the child restraint system to the lower anchorages according to the instructions that came with the child restraint system.
When installing the child restraint system, make sure that the lower anchorages are not obstructed by the seat belt or any other object.
Installing a Lower Anchorage Compatible Child Restraint System
WARNING
Never attach two child restraint system to the same anchor. In a collision, one anchor may not be strong enough to hold two child restraint system attachments and may break, causing serious injury or death.
Some child restraint systems come with optional guide-cups, which avoid possible damage to the seat surface. Follow the manufacturer's instructions when using the guide-cups, and attach them to the lower anchorages as shown in the image.
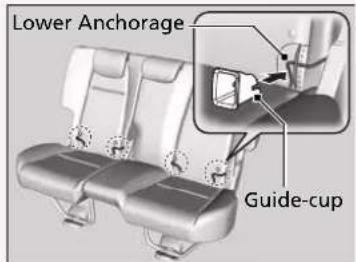
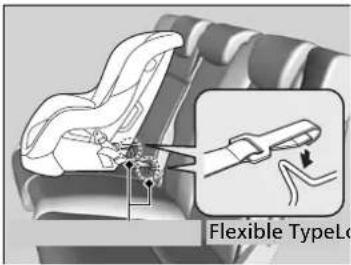
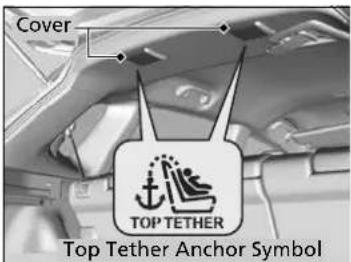
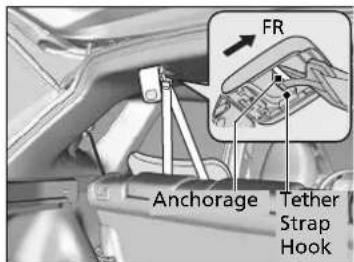
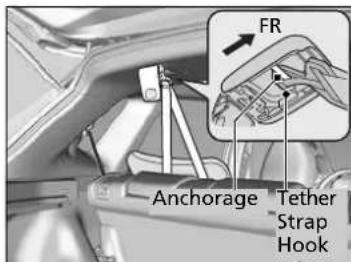
- Open the tether anchorage cover.
- Route the tether strap over the seat-back. Make sure the strap is not twisted.
- Secure the tether strap hook to the anchorage.
- Tighten the tether strap as instructed by the child restraint system manufacturer.
- Make sure the child restraint system is firmly secured by rocking it forward and back, and side to side; little movement should be felt.
- Make sure any unused seat belt that a child can reach is buckled.
Installing a Lower Anchorage Compatible Child Restraint System
For your child's safety, when using a child restraint system installed using the lower anchorage system, make sure that the child restraint system is properly secured to the vehicle. A child restraint system that is not properly secured will not adequately protect a child in a crash and may cause injury to the child or other vehicle occupants.
The flexible type may not be available in your country.
WARNING: Never use a hook that does not come with a Top Tether anchor symbol when securing an installed child restraint system.
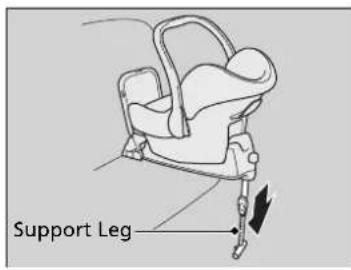
Child restraint system with support leg
- Stretch the support leg until it touches the floor as instructed by the child restraint system manufacturer.
▶ Confirm that the section of the floor on which the support leg rests is level. If the section is not level, the support leg will not provide adequate support.
▶ Make sure that there is no contact between the child restraint system and the seat in front of it.
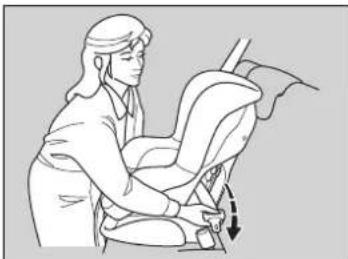
Installing a Child Restraint System with a Lap/Shoulder Seat Belt
natural_image
Illustration of a person seated in a chair, viewed from the side (no text or symbols present)- Make sure to lock the seat-back in the upright position.
- Lower the head restraint to its lowest position.
- Place the child restraint system on the vehicle seat.
- Route the seat belt through the child restraint system according to the child restraint system manufacturer's instructions, and insert the latch plate into the buckle.
▶ Insert the latch plate fully until it clicks.
Installing a Child Restraint System with a Lap/Shoulder Seat Belt
A child restraint system that is not properly secured will not adequately protect a child in a crash and may cause injury to the child or other vehicle occupants.
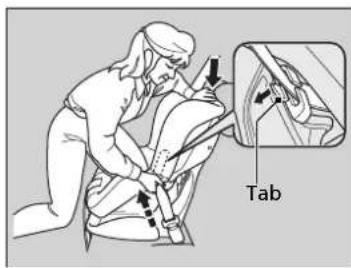
- Push down the tab. Route the shoulder part of the belt into the slit at the side of the restraint.
- Grab the shoulder part of the belt near the buckle, and pull up to remove any slack from the lap part of the belt.
When doing this, place your weight on the child restraint system and push it into the vehicle seat.
- Position the belt properly and push up the tab. Make sure the belt is not twisted.
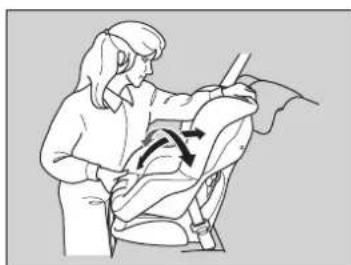
▶When pushing up the tab, pull up the upper shoulder part of the belt to remove any slack from the belt. - Make sure the child restraint system is firmly secured by rocking it forward and back, and side to side; little movement should be felt.
- Make sure any unused seat belt that a child can reach is buckled.
natural_image
Illustration of a person performing a seated exercise with directional arrows indicating motion (no text or symbols)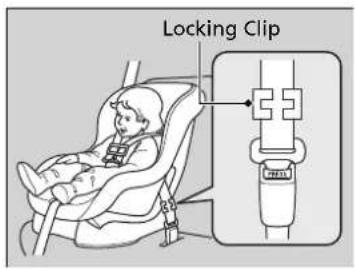
Except European models
If your child restraint system does not come with a mechanism that secures the belt, install a locking clip on the seat belt.
After going through the step 1 and 4, pull up the shoulder part of the belt and make sure there is no slack in the lap portion.
-
Tightly grasp the belt near the latch plate. Pinch both parts of the belt together so they do not slip through the latch plate. Unbuckle the seat belt.
-
Install the locking clip as shown in the image. Position the clip as close as possible to the latch plate.
-
Insert the latch plate into the buckle. Go to step 8 and 9.
Adding Security with a Tether
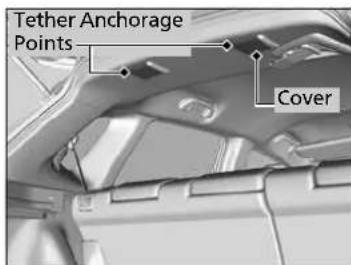
Two tether anchorage points are provided on the ceiling for rear outer seating positions. If you have a child restraint system that comes with a tether but can be installed with a seat belt, the tether may be used for additional security.
- Locate the appropriate tether anchorage point.
- Lower the head restraint to its lowest position.
- Open the anchorage cover.
- Route the tether strap over the seat-back. Make sure the strap is not twisted.
- Secure the tether strap hook onto the anchorage.
- Tighten the tether strap as instructed by the child restraint system manufacturer.
>>Adding Security with a Tether
WARNING: Child restraint anchorages are designed to withstand only those loads imposed by correctly fitted child restraints. Under no circumstances are they to be used for adult seat belts, harnesses or for attaching other items or equipment to the vehicle.
Always use a tether for front-facing child restraint system when using the seat belt or lower anchors.
Safety of Larger Children
Protecting Larger Children
The following pages give instructions on how to check proper seat belt fit, what kind of booster seat to use if one is needed, and important precautions for a child who must sit in front.
Checking Seat Belt Fit
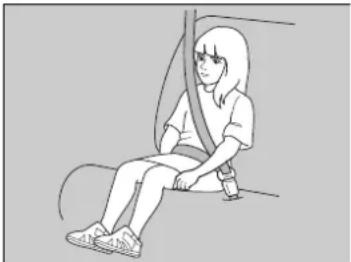
When a child is too big for a child restraint system, secure the child in a rear seat using the lap/shoulder seat belt. Have the child sit upright and all the way back, then answer the following questions.
natural_image
Illustration of a person sitting on a chair wearing a seatbelt (no text or symbols)Checklist
- Do the child's knees bend comfortably over the edge of the seat?
- Does the shoulder belt cross between the child's neck and arm?
- Is the lap part of the seat belt as low as possible, touching the child's thighs?
- Will the child be able to stay seated like this for the whole trip?
If you answer yes to all these questions, the child is ready to wear the lap/shoulder seat belt correctly. If you answer no to any question, the child needs to ride on a booster seat until the seat belt fits properly without a booster seat.
Safety of Larger Children
WARNING
Allowing a child aged 12 or under to sit in front can result in injury or death if the passenger's front airbag inflates.
If a larger child must ride in front, move the vehicle seat as far to the rear as possible, have the child sit up properly and wear the seat belt properly, using a booster seat if needed.
Booster Seats
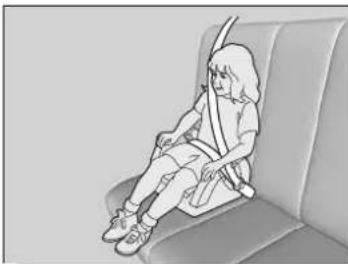
natural_image
Illustration of a person sitting on a chair wearing a seatbelt, no text or symbols presentIf a lap/shoulder seat belt cannot be used properly, position the child in a booster seat in the rear seat. For the child's safety, check that the child meets the booster seat manufacturer's recommendations.
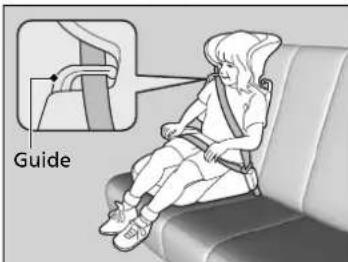
A backrest is available for a specific booster seat. Install the backrest to the booster seat and adjust it to the vehicle seat according to the booster seat manufacturer's instructions. Make sure the seat belt is properly routed through the guide at the shoulder of the backrest and the belt does not touch and cross the child's neck.
Booster Seats
When installing a booster seat, make sure to read the instructions that came with it, and install the seat accordingly.
There are high- and low-type booster seats. Choose a booster seat that allows the child to wear the seat belt correctly.
We recommend a booster seat with a backrest as it is easier to adjust the shoulder belt.
Protecting Larger Children - Final Checks
Your vehicle has a rear seat where children can be properly restrained. If you ever have to carry a group of children, and a child must ride in front:
- Make sure you read and fully understand the instructions and safety information in this manual.
- Move the front passenger seat as far back as possible.
- Have the child sit upright and well back in the seat.
- Check that the seat belt is properly positioned so that the child is secure in the seat.
■Monitoring child passengers
We strongly recommend that you keep an eye on child passengers. Even older, more mature children sometimes need to be reminded to fasten their seat belts and sit up properly.
Exhaust Gas Hazard
Carbon Monoxide Gas
The engine exhaust from this vehicle contains carbon monoxide, a colourless, odourless, and highly toxic gas. As long as you properly maintain your vehicle, carbon monoxide gas will not get into the interior.
■Have the exhaust system inspected for leaks whenever
- The exhaust system is making an unusual noise.
• The exhaust system may have been damaged. - The vehicle is raised for an oil change.
When you operate a vehicle with the tailgate open, airflow can pull exhaust gas into the interior and create a hazardous condition. If you must drive with the tailgate open, open all the windows and set the heating and cooling system */climate control system* as shown below.
- Select the fresh air mode.
- Select the mode.
- Set the fan speed to high.
- Set the temperature control to a comfortable setting.
Adjust the heating and cooling system*/climate control system* in the same manner if you sit in your parked vehicle with the engine running.
Carbon Monoxide Gas
WARNING
Carbon monoxide gas is toxic. Breathing it can cause unconsciousness and even kill you.
Avoid any enclosed areas or activities that expose you to carbon monoxide.
An enclosed area such as a garage can quickly fill up with carbon monoxide gas.
Do not run the engine with the garage door closed. Even when the garage door is open, drive out of the garage immediately after starting the engine.
Safety Labels
Label Locations
These labels are in the locations shown. They warn you of potential hazards that can cause serious injury or death. Read these labels carefully.
If a label comes off or becomes hard to read, contact a dealer for a replacement.
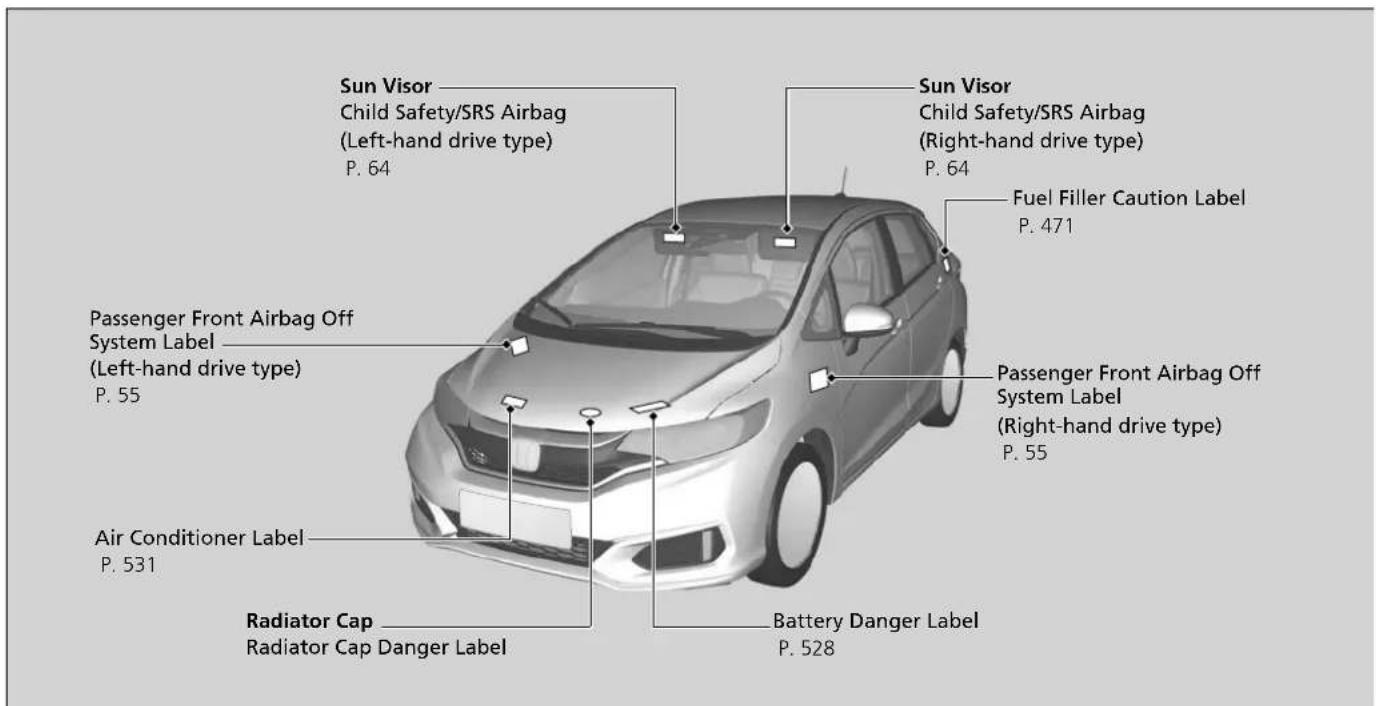
Instrument Panel
This chapter describes the buttons, indicators, and gauges that are used while driving.
Indicators 86
Multi-Information Display Warning and
Information Messages.... 108
Gauges and Multi-Information Display
Gauges.... 123
Multi-Information Display 124
Indicators
| Indicator | Name | On/Blinking | Explanation | Message |
 | Parking Brake and Brake System Indicator (Red) | Comes on for a few seconds when you turn the ignition switch to ON *1, then goes off if the parking brake has been released.Comes on when the parking brake is applied, and goes off when it is released.The beeper sounds and the indicator comes on if you drive with the parking brake not fully released.Comes on when the brake fluid level is low.Comes on if there is a problem with the brake system. | Comes on while driving- Make sure the parking brake is released. Check the brake fluid level.What to do when the indicator comes on while driving P. 571Comes on along with the ABS indicator - Have your vehicle checked by a dealer.If the Brake System Indicator (Red) Comes On P. 571 | 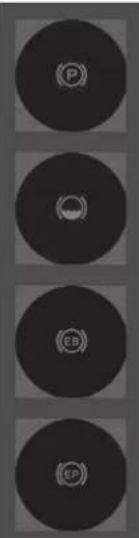 |
*1: Models with the keyless access system have an ENGINE START/STOP button instead of an ignition switch.
| Indicator | Name | On/Blinking | Explanation | Message |
 | Brake System Indicator (Amber) | Comes on for a few seconds when you turn the ignition switch to ON ^*1 , then goes off.Comes on if there is a problem with a system related to braking other than the conventional brake system. | Stays on constantly- Have your vehicle checked by a dealer. |  |
| Comes on if there is a problem with the City-Brake Active system. | Comes on along with the CTBA indicator- The City-Brake Active system does not activate. Have your vehicle checked by a dealer.City-Brake Active system P. 457 |  |
*1: Models with the keyless access system have an ENGINE START/STOP button instead of an ignition switch.
| Indicator | Name | On/Blinking | Explanation | Message |
 | Low Oil Pressure Indicator | Comes on when you turn the ignition switch to ON ^*1 , and goes off when the engine starts.Comes on when the engine oil pressure is low. | Comes on while driving - Immediately stop in a safe place.If the Low Oil Pressure Indicator Comes On P. 570 | 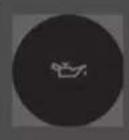 |
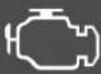 | Malfunction Indicator Lamp | Comes on when you turn the ignition switch to ON ^*1 , and goes off when the engine starts.Comes on if there is a problem with the emissions control system.Blinks when a misfire in the engine's cylinders is detected. | Comes on while driving - Have your vehicle checked by a dealer.Blinks while driving - Stop in a safe place where there are no flammable objects. Stop the engine for 10 minutes or more, and wait for it to cool down. Then, take your vehicle to a dealer.If the Malfunction Indicator Lamp Comes On or Blinks P. 571Shows the self-testing condition of the diagnostics of the emission control system. |  |
*1: Models with the keyless access system have an ENGINE START/STOP button instead of an ignition switch.
| Indicator | Name | On/Blinking | Explanation | Message |
 | Charging System Indicator | Comes on when you turn the ignition switch to ON II^*1 , and goes off when the engine starts.Comes on when the battery is not charging. | Comes on while driving- Turn off the heating and cooling system / climate control system * and rear demister in order to reduce electricity consumption.If the Charging System Indicator Comes On P. 570 |  |
 | Shift Lever Position Indicator * | Indicates the current shift lever position. | Shifting P. 402 |  |
 | Transmission Indicator * | Blinks if the transmission system has a problem. | Blinks while driving- Avoid sudden starts and acceleration and have your vehicle checked by a dealer immediately. | 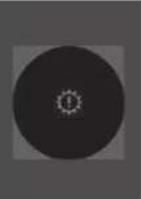 |
*1: Models with the keyless access system have an ENGINE START/STOP button instead of an ignition switch.
| Indicator | Name | On/Blinking | Explanation | Message |
 | M (7-speed manual shift mode)Indicator/Shift Indicator* | Comes on when 7-speed manual shift mode is applied. | 7-Speed Manual Shift ModeP. 404 |  |
| Seat Belt Reminder Indicator | Comes on if you are not wearing a seat belt when you turn the ignition switch to ON II*1.If the front passenger is not wearing a seat belt, the indicator comes on about a few seconds later.Blinks while driving if either you or the front passenger has not fastened a seat belt. The beeper sounds and the indicator blinks at regular intervals. | The beeper stops and the indicator goes off when you and the front passenger fasten their seat belts.Stays on after you or the front passenger has fastened the seat belt - A detection error may have occurred in the sensor. Have your vehicle checked by a dealer.Seat Belt Reminder P. 39 |  |
*1: Models with the keyless access system have an ENGINE START/STOP button instead of an ignition switch.
| Indicator | Name | On/Blinking | Explanation | Message |
 | Low Fuel Indicator | Comes on when the fuel reserve is running low (approximately 5.3 Litres/1.17 Imp gal left).Blinks if there is a problem with the fuel gauge. | Comes on - Refuel your vehicle as soon as possible. |  |
| Blinks - Have your vehicle checked by a dealer. |  | |||
 | Anti-lock Brake System (ABS) Indicator | Comes on for a few seconds when you turn the ignition switch to ON ^*1 , then goes off.If it comes on at any other time, there is a problem with the ABS. | Stays on constantly - Have your vehicle checked by a dealer. With this indicator on, your vehicle still has normal braking ability but no anti-lock function.Anti-lock Brake System (ABS)P. 455 |  |
 | Supplemental Restraint System Indicator | Comes on for a few seconds when you turn the ignition switch to ON ^*1 , then goes off.Comes on if a problem with any of the following is detected: Supplemental restraint systemSide airbag systemSide curtain airbag systemSeat belt tensioner | Stays on constantly or does not come on at all - Have your vehicle checked by a dealer. |  |
*1: Models with the keyless access system have an ENGINE START/STOP button instead of an ignition switch.
| Indicator | Name | On/Blinking | Explanation | Message |
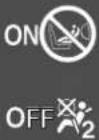 | Passenger Front Airbag On/Off Indicators | Both indicators come on for a few seconds when you turn the ignition switch to ON ^*1 , then goes off after a system check up.When the passenger front airbag is active: The on indicator comes back on and remains on for about 60 seconds. When the passenger front airbag is inactive: The off indicator comes back on and stays on. This is a reminder that the passenger front airbag is deactivated. | →Passenger Front Airbag Off System P. 54 | — |
*1: Models with the keyless access system have an ENGINE START/STOP button instead of an ignition switch.
| Indicator | Name | On/Blinking | Explanation | Message |
 | Vehicle Stability Assist (VSA) System Indicator | Comes on for a few seconds when you turn the ignition switch to ON ^*1 , then goes off.Blinks when VSA is active.Comes on if there is a problem with the VSA or hill start assist system. | Stays on constantly- Have your vehicle checked by a dealer.Vehicle Stability Assist (VSA) System P. 446Hill start assist system P. 394, 398 |   |
 | Vehicle Stability Assist (VSA) OFF Indicator | Comes on for a few seconds when you turn the ignition switch to ON ^*1 , then goes off.Comes on when you deactivate VSA. | VSA On and Off P. 447 |  |
*1: Models with the keyless access system have an ENGINE START/STOP button instead of an ignition switch.
| Indicator | Name | On/Blinking | Explanation | Message |
 | High Temperature Indicator (Red) | Comes on for a few seconds when you turn the ignition switch to ON *1, then goes off.Blinks when the engine coolant temperature goes up, and stays on if the temperature continues to rise. | Goes off, then comes on blue when the engine coolant temperature is low. | — |
| Blinks while driving- Drive slowly to prevent overheating. |  (White) (White) | |||
| Stays on while driving- Immediately stop in a safe place and allow the engine to cool.➤Overheating P. 568 |  (Amber) (Amber) | |||
 | Low Temperature Indicator (Blue) | Comes on when the engine coolant temperature is low. | If the indicator stays on after the engine has reached normal operating temperature, there may be a problem with the temperature sensors. Have your vehicle inspected by a dealer. | — |
*1: Models with the keyless access system have an ENGINE START/STOP button instead of an ignition switch.
| Indicator | Name | On/Blinking | Explanation | Message |
 | Door and Tailgate Open Indicator | Comes on for a few seconds when you turn the ignition switch to ON ^*1 , then goes off.Comes on if any door or the tailgate is not completely closed.The beeper sounds and the indicator comes on if any door or the tailgate is opened while driving. | Goes off when all doors and the tailgate are closed. |  |
*1: Models with the keyless access system have an ENGINE START/STOP button instead of an ignition switch.
| Indicator | Name | On/Blinking | Explanation | Message |
 | Low Tyre Pressure/ Deflation Warning System Indicator | Comes on for a few seconds when you turn the ignition switch to ON *1, then goes off.May come on briefly if the ignition switch is turned to ON *1and the vehicle is not moved within 45 seconds, to indicate the calibration process is not yet complete.Comes on and stays on when: - One or more tyres' pressures are determined to be significantly low. - The system has not been calibrated. | Comes on while driving- Stop in a safe place, check tyre pressures, and inflate the tyre(s) if necessary.Stays on after the tyres are inflated to the recommended pressures -The system needs to be calibrated.Deflation Warning System Calibration P. 449 |  |
| Blinks for about one minute, and then stays on if there is a problem with the deflation warning system, or when a compact spare tyre* is temporarily installed. | Blinks and remains on- Have your vehicle checked by a dealer. If the vehicle is fitted with a compact spare, get your regular tyre repaired or replaced and put back on your vehicle as soon as you can. |  |
*1: Models with the keyless access system have an ENGINE START/STOP button instead of an ignition switch.
| Indicator | Name | On/Blinking | Explanation | Message |
 | Electric Power Steering (EPS) System Indicator | Comes on when you turn the ignition switch to ON ^*1 , and goes off when the engine starts.Comes on if there is a problem with the EPS system. | Stays on constantly or does not come on at all - Have your vehicle checked by a dealer.If the Electric Power Steering (EPS) System Indicator Comes On P. 572 |  |
 | System Message Indicator | Comes on for a few seconds when you turn the ignition switch to ON ^*1 , then goes off.Comes on along with a beep when a problem is detected. A system message on the multi-information display appears at the same time. | While the indicator is on, press the ▲1/▼ (information) button to see the message again.Refer to the Indicators information in this chapter when a system message appears on the multi-information display. Take appropriate action for the message.The multi-information display does not return to the normal screen unless the warning is cancelled, or the button is pressed. |  |
*1: Models with the keyless access system have an ENGINE START/STOP button instead of an ignition switch.
| Indicator | Name | On/Blinking | Explanation | Message |
| Turn Signal and Hazard Warning Indicators | Blinks when you operate the turn signal lever.Blink along with all turn signals if you press the hazard warning button.Blinks along with all turn signals when you depress the brake pedal during high speed driving. | Does not blink or blinks rapidly - A turn signal light bulb has blown.Change the bulb immediately.Replacing Light Bulbs P. 505, 507Emergency Stop Signal P. 462 | — | |
| High Beam Indicator | Comes on when the high beam headlights are on. | — | ||
| Lights On Indicator | Comes on whenever the light switch is on, or in AUTO when the exterior lights are on. | If you remove the key from the ignition switch*, or set the power mode* to VEHICLE OFF (LOCK) while the exterior lights are on, a chime sounds when the driver's door is opened. | — | |
| Front Fog Light Indicator* | Comes on when the front fog lights are on. | — | ||
| Rear Fog Light Indicator | Comes on when the rear fog light is on. | — | ||
 | Immobilizer System Indicator | Comes on briefly when you turn the ignition switch to ON ^*1 , then goes off.Comes on if the immobilizer system cannot recognize the key information. | Blinks -Models without keyless access systemYou cannot start the engine. Turn the ignition switch to LOCK 0, pull the key out, and then insert the key and turn it to ON again.Models with keyless access systemYou cannot start the engine. Set the power mode to VEHICLE OFF (LOCK), then select the ON mode again.Repeatedly blinks- The system may be malfunctioning. Have your vehicle checked by a dealer.Do not try to alter this system or add other devices to it. Electrical problems can occur. | — |
*1: Models with the keyless access system have an ENGINE START/STOP button instead of an ignition switch.
| Indicator | Name | On/Blinking | Explanation | Message |
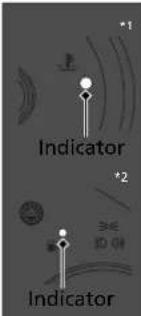 | Security System Alarm Indicator* | Blinks when the security system alarm has been set. | ➤ Security System Alarm * P. 159 |  |
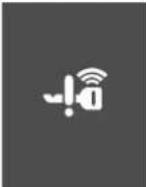 | Keyless Access System Indicator* | Comes on for a few seconds when you set the power mode to ON, then goes off.Comes on as soon as a problem is detected in the keyless access system or keyless starting system. | Stays on constantly or does not come on at all - Have your vehicle checked by a dealer. |  |
*1: Left-hand drive type
*2: Right-hand drive type
| Indicator | Name | On/Blinking | Explanation | Message | |
| *3UP | Shift Up Indicator | Comes on briefly when you turn the ignition switch to ON ^*1 , then goes off.Comes on when shifting up is recommended. | Shift Up IndicatorP. 406Shift Up/Down IndicatorsP. 408 | — | |
| *3 | Shift Down Indicator | Comes on briefly when you turn the ignition switch to ON ^*1 , then goes off.Comes on when shifting down is recommended. | Shift Up/Down IndicatorsP. 408 | — | |
| Cruise Main Indicator | Comes on when the cruise control is ready to use. | Cruise Control P. 420 | — | ||
| Adjustable Speed Limiter Indicator | Comes on when the adjustable speed limiter is ready to use. | Adjustable Speed Limiter P. 423 | — | ||
| Cruise Control and Adjustable Speed Limiter Set Speed Indicator* | Comes on when you have set a speed for cruise control or for adjustable speed limiter. | Cruise Control P. 420Adjustable Speed Limiter P. 423Intelligent Speed Limiter P. 427 | — | ||
*1: Models with the keyless access system have an ENGINE START/STOP button instead of an ignition switch.
*2: Continuously variable transmission models
*3: Manual transmission models
| Indicator | Name | On/Blinking | Explanation | Message |
 | High Beam Support System Indicator* | Comes on for a few seconds when you turn the ignition switch to ON *1, then goes off.Comes on when all the operating conditions of the high beam support system are met. | Auto High-Beam (High Beam Support System)* P. 175 |  |
 | Auto Idle Stop Indicator (Green) | Comes on when Auto Idle Stop is in operation. The engine automatically shuts off. | Auto Idle Stop P. 410, 415 |  |
| Manual transmission modelsModels with climate control systemBlinks when the ambient conditions may cause the windows to fog up.Blinks when the ambient conditions may become different from the climate control settings you have selected.(windscreen demister) is touched.Models with heating and cooling systemBlinks when the fan is turned on and the mode control dial is turned to | Depress the clutch pedal. The engine automatically restarts.Auto Idle Stop P. 415 |  |
*1: Models with the keyless access system have an ENGINE START/STOP button instead of an ignition switch.
| Indicator | Name | On/Blinking | Explanation | Message |
 | Auto Idle Stop System Indicator (Amber) | Comes on for a few seconds when you turn the ignition switch to ON ^*1 , then goes off. | — |  |
| Comes on when the Auto Idle Stop system has been turned off by the Auto Idle Stop systemOFFbutton. | Auto Idle Stop System ON/OFP. 411, 416 |  | ||
| Blinks if there is a problem with the Auto Idle Stop system. | Blinks- Have your vehicle checked by a dealer. |  |
*1: Models with the keyless access system have an ENGINE START/STOP button instead of an ignition switch.
| Indicator | Name | On/Blinking | Explanation | Message |
| Forward Collision Warning Indicator* | Comes on for a few seconds when you turn the ignition switch to ON *1, then goes off.Comes on when you have customized forward collision warning system to turn off.Comes on if there is a problem with the system. | Stays on constantly without the system off- Have your vehicle checked by a dealer. |  | |
| Comes on when the system shuts itself off. | Stays on- The temperature inside the camera is too high. The system activates when the temperature inside the system cools down.Automatic shutoff P. 436 |  | ||
| Stays on- The area around the camera is blocked by dirt, mud, etc. Stop your vehicle in a safe place, and wipe it off with a soft cloth.Have your vehicle checked by a dealer if the indicator and message come back on after you cleaned the area around the camera.Automatic shutoff P. 436 |  |
*1: Models with the keyless access system have an ENGINE START/STOP button instead of an ignition switch.
| Indicator | Name | On/Blinking | Explanation | Message |
| Comes on for a few seconds when you turn the ignition switch to ON *1, then goes off.Comes on if there is a problem with the lane departure warning system. | Stays on constantly- Have your vehicle checked by a dealer. |  | ||
| Lane Departure Warning Indicator* | Comes on when the system shuts itself off. | Stays on- The temperature inside the camera is too high.Use the heating and cooling system*/ climate control system * to cool down the camera.The system activates when the temperature inside the camera cools down.Lane Departure Warning Camera P. 439 |  | |
| Stays on- The area around the camera is blocked by dirt, mud, etc. Stop your vehicle in a safe place, and wipe it off with a soft cloth.Have your vehicle checked by a dealer if the indicator and message come back on after you cleaned the area around the camera.Lane Departure Warning Camera P. 439 |  |
*1: Models with the keyless access system have an ENGINE START/STOP button instead of an ignition switch.
* Not available on all models
Continued
| Indicator | Name | On/Blinking | Explanation | Message |
| CTBA | City-Brake Active System (CTBA) Indicator | Comes on for a few seconds when you turn the ignition switch to ON *1, then goes off. | — | |
| Goes off when you have customized the City-Brake Active system to turn on.Comes on when you have customized the City-Brake Active system to turn off. | City-Brake Active system P. 457Customized Features P. 131 | — | ||
| Comes on when the area around the laser sensor, which is located in the upper part of the windscreen, is covered with obstacles, such as dirt, ice and frost.May come on when driving in bad weather (rain, fog, snow). | Remove the dirt or any obstacles using the washer and wipers.Stop your vehicle in a safe place and wipe away dirt or any obstacles covering the area around the laser sensor on the windscreen.City-Brake Active system P. 457The system resumes when obstacles are removed. | [IMAGE] | ||
| Comes on when snow is accumulated on the bonnet. | Stop your vehicle in a safe place and remove snow from the bonnet. |
*1: Models with the keyless access system have an ENGINE START/STOP button instead of an ignition switch.
| Indicator | Name | On/Blinking | Explanation | Message |
| CTBA | City-Brake Active System (CTBA) Indicator | · May come on when the temperatures of the area around the laser sensor are high. | · Use the heating and cooling system */ climate control system * to cool down the area around the laser sensor.· The system resumes when the temperatures of the area around the laser sensor go down. |  |
| · Comes on along with the brake system indicator (amber) if there is a problem with the system. | · The system does not activate. Have your vehicle checked by a dealer. |  |
Multi-Information Display Warning and Information Messages
The following messages appear only on the multi-information display. Press the ▲①/▼ (information) button to see the message again with the system message indicator on.
| Message Condition Explanation | ||
 | Continuously variable transmission modelsAppears while you are customizing the settings and the shift lever is moved out ofP.Manual transmission modelsAppears while you are customizing the settings and the parking brake is released. | Customized Features P. 131 |
 | Appears once if the outside temperature is below 3°C while the ignition switch is in ON II*1. | There is a possibility that the road surface is icy and slippery. |
 | Appears when any of the rear seat belts are latched or unlatched, or either rear door is opened and closed. | Seat Belt Reminder P. 39 |
 | Appears when the vehicle speed reaches the set speed. You can set two different speeds for the alarm. | Speed Alarm Setting P. 129 |
*1: Models with the keyless access system have an ENGINE START/STOP button instead of an ignition switch.
| Message Condition Explanation | ||
 | Appears when the engine oil level is low while the engine is running. | Appears while driving - Immediately stop in a safe place.If the Low Oil Level Symbol Appears P. 574 |
 | Appears when the engine is running, there is a system problem in the engine oil level sensor. | Have your vehicle checked by a dealer. |
 | Appears if there is a problem with the automatic lighting control system. | Appears while driving - Manually turn the lights on, and have your vehicle checked by a dealer. |
| Models with LED headlightsAppears if there is a problem with the headlights with LED. | Have your vehicle checked by a dealer. | |
 | • Flashes when the City-Brake Active system senses a likely collision with a vehicle in front of you. The beeper sounds. | • Depress the brake pedal, and keep an appropriate distance from the vehicle ahead. The alert will disappear.• The system automatically applies the brake if a possible collision becomes likely unavoidable. ➞ City-Brake Active system P. 457 |
  | • Changes the display when your vehicle is stopped by the City-Brake Active system. The beeper stops.Appears when Auto Idle Stop does not activate for some reason.Appears when the engine restarts automatically. | |
| Auto Idle Stop Activates When: P. 412, 417 | ||
 | Appears when Auto Idle Stop does not activate because the engine coolant temperature is low or high. | Auto Idle Stop does not activate when: P. 412, 417 |
 | Appears when Auto Idle Stop does not activate because the climate control system is in use, and the difference between the set temperature and actual interior temperature becomes significant. | Auto Idle Stop P. 410, 415 |
| Continuously variable transmission modelsAppears when the system is under the following conditions while Auto Idle Stop activates:- The climate control system is in use, and the difference between the set temperature and actual interior temperature becomes significant.- The humidity in the interior is high. | The engine restarts automatically in a few seconds. | |
 | Appears when Auto Idle Stop does not activate because the battery charge level is low.Appears when the battery is low performance. | Auto Idle Stop P. 410, 415 |
| Appears when the system is under the following conditions while Auto Idle Stop activates:- The battery charge level is low. | The engine restarts automatically in a few seconds. | |
 | Appears when the bonnet is opened. | Close the bonnet. |
 | Appears when there is a problem with the sensor on the battery.Appears when the battery is not charging. | Have your vehicle checked by a dealer.Checking the Battery P. 524Appears along with the battery charging system indicator - Turn off the climate control system and rear defogger to reduce electricity consumption.If the Charging System Indicator Comes On P. 570 |
Continuously variable transmission models
| Message Condition Explanation | ||
 | Appears if you press the ENGINE START/STOP button to turn the engine off without the shift lever in P. | Press the ENGINE START/STOP button twice with your foot off the brake pedal, after moving the shift lever to P. |
| Appears when the engine stops without the shift lever in P, and does not restart automatically. | If you want to turn the ignition switch to ON II*1, move the shift lever to P. | |
| Appears if you open the bonnet with Auto Idle Stop activated. | If you want to start the engine, follow the normal procedure.Starting the Engine P. 392, 395 | |
 | Appears when Auto Idle Stop does not activate because the pressure to the brake pedal is not enough. | Depress the brake pedal firmly. |
*1: Models with the keyless access system have an ENGINE START/STOP button instead of an ignition switch.
| Manual transmission models | ||
| Message Condition Explanation | ||
 | Appears when the shift lever is in any position exceptN. | Shift to N.➢ Auto Idle Stop Activates When: P. 417 |
 | Appears in white when you turn the ignition switch to START [III]*1 before fully depressing the clutch pedal. | Depress the clutch pedal. |
| Models with climate control systemBlinks when the ambient conditions may cause the windows to fog up.Blinks when the ambient conditions may become different from the climate control settings you have selected.(windscreen demister) is touched.Models with heating and cooling systemBlinks when the fan is turned on and the mode control dial is turned to | Depress the clutch pedal. The engine automatically restarts.➢Auto Idle Stop P. 415 | |
| Appears in amber when the following conditions are kept while Auto Idle Stop is in operation:- You are not wearing a seat belt.- The shift lever is in any position except N. | Depress the clutch pedal. Wear the seat belt immediately, and continue to keep the shift lever in N next time Auto Idle Stop activates. | |
*1: Models with the keyless access system have an ENGINE START/STOP button instead of an ignition switch.
Models with high beam support system
Message Condition Explanation
natural_image
Simple black circular shape with a white symbol inside, no text or labels present.- Appears when there is a problem with the high beam support system.
-
Appears when the high beam support system camera lens gets dirty.
-
Manually operate the headlight switch.
- If you are driving with the high beam headlights when this happens, the headlights are changed to low beams.
- Stop in a safe place and clean the camera lens with a soft cloth.
- If the message does not disappear after cleaning the lens, have your vehicle checked by a dealer.
| Message Condition Explanation | ||
 | Appears when any of the service items is required in less than 30 days. The remaining days are estimated based on your driving conditions. | The remaining days will be counted down per day. ➤ Service Reminder System P. 479 |
 | Appears when any of the service items is required in less than 10 days. The remaining days are estimated based on your driving conditions. | Have the indicated service performed as soon as possible. ➤ Service Reminder System P. 479 |
 | Appears when the indicated maintenance service is still not done after the remaining days reach 0. | Your vehicle has passed the service required point. Immediately have the service performed and make sure to reset the service reminder. ➤ Service Reminder System P. 479 |
Models without keyless access system
| Message Condition Explanation | ||
| • Appears when the ignition key is turned to ACCESSORY I from ON II. (The driver's door is closed.) | — | |
| • Appears when you open the driver's door while the ignition key is in ACCESSORY I. | • Turn the ignition switch to LOCK 0, then remove the key. | |
| • Appears when you open the driver's door while the ignition key is in LOCK 0. | • Remove the key from the ignition switch. | |
| • Appears in white when you turn the ignition switch to START III before fully depressing the clutch pedal. | • Turn the ignition switch after fully depressing the clutch pedal. | |
| • Appears in amber when the engine does not restart automatically due to the following reasons:- The bonnet is open.- There is a problem in the system that disables Auto Idle Stop. | • Follow the normal procedure to start the engine. ➤ Starting the Engine P. 392 | |
*1: Manual transmission models
*2: Continuously variable transmission models
Models with keyless access system
| Message Condition Explanation | ||
 | Appears in white after you unlock and open the driver's door.Appears in white when you set the power mode to ACCESSORY or ON. | Starting the Engine P. 395 |
| Appears in amber when the engine does not restart automatically due to the following reasons:- The bonnet is open.- There is a problem in the system that disables Auto Idle Stop. | Follow the normal procedure to start the engine.Starting the Engine P. 395 | |
 | Appears when the power mode is in ACCESSORY. | — |
 | Appears after the driver's door is opened when the power mode is in ACCESSORY. | Press the ENGINE START/STOP button twice with your foot off the brake pedal*1 or the clutch pedal*2 to change the power mode to VEHICLE OFF (LOCK). |
*1: Continuously variable transmission models *2: Manual transmission models
| Message Condition Explanation | ||
 | • Appears when you close the door with the power mode in ON without the keyless remote inside the vehicle. | • Goes off when you bring the keyless remote back inside the vehicle and close the door. ➤ Keyless Remote Reminder P. 167 |
 | • Appears when the keyless remote battery becomes weak. | • Replace the battery as soon as possible. ➤ Replacing the Button Battery P. 529 |
 | • Appears if the keyless remote battery is too weak to start the engine or the key is not within operating range to start the engine. A beeper sounds six times. | ➤ If the Keyless Remote Battery is Weak P. 562 |
 | Appears if the starting system has a problem. | As a temporary measure, press and hold the ENGINE START/STOP button for 15 seconds while pressing the brake pedal and clutch pedal (manual transmission only), and manually start the engine. Have your vehicle checked by a dealer. |
 | Continuously variable transmission modelsAppears if you press the ENGINE START/STOP button to turn the engine off without the shift lever in P. | Press the ENGINE START/STOP button twice after moving the shift lever to P. |
 | Appears when the steering wheel is locked. | Move the steering wheel left and right while pressing the ENGINE START/STOP button. |
Models with forward collision warning
| Message Condition Explanation | ||
 | • Flashes when the system senses a likely collision with a vehicle in front of you. The beeper sounds. | • Take the appropriate means to prevent a collision (apply the brakes, change lanes, etc.) ➤Forward Collision Warning * P. 434 |
| Models with lane departure warning | ||
| Message Condition Explanation | ||
 | • Appears when your vehicle is too close to the traffic lane lines. The beeper sounds. | • Take appropriate action to keep your vehicle within the lane lines. ➤Lane Departure Warning * P. 438 |
Models with parking sensor system
| Message Condition Explanation | ||
 | • Appears if there is a problem with the parking sensor system. | • Check if the area around the sensor(s) is covered with mud, ice, snow, etc. If the indicator(s) stays on even after you clean the area, have the system checked by a dealer. |
 | • If there is a problem with any of the sensors, the appropriate sensor indicator(s) comes on. | |
Gauges and Multi-Information Display
Gauges
Gauges include the speedometer, tachometer, and related indicators. They are displayed when the ignition switch is in ON ^*1 .
Speedometer
Right-hand drive type
Displays your driving speed in km/h and mph.
Left-hand drive type
Displays your driving speed in km/h.
Tachometer
Shows the number of engine revolutions per minute.
Ambient Meter
Changes colour to reflect your driving style.
Green: Fuel efficient driving
Blue green: Moderate acceleration/deceleration
Blue: Aggressive acceleration/deceleration
The ambient meter colour changes in accordance with your brake or accelerator pedal operation.
Multi-Information Display
The multi-information display shows the odometer, trip meter, outside temperature, fuel gauge, and other gauges.
It also displays important messages such as warnings and other helpful information.
Switching the Display
■Main displays
Press the ▲(information) button to change the display.
Switching the Display
Right-hand drive type
Switch between km/h and mph by using the customized features on the multi-information display.
Customized Features P. 131
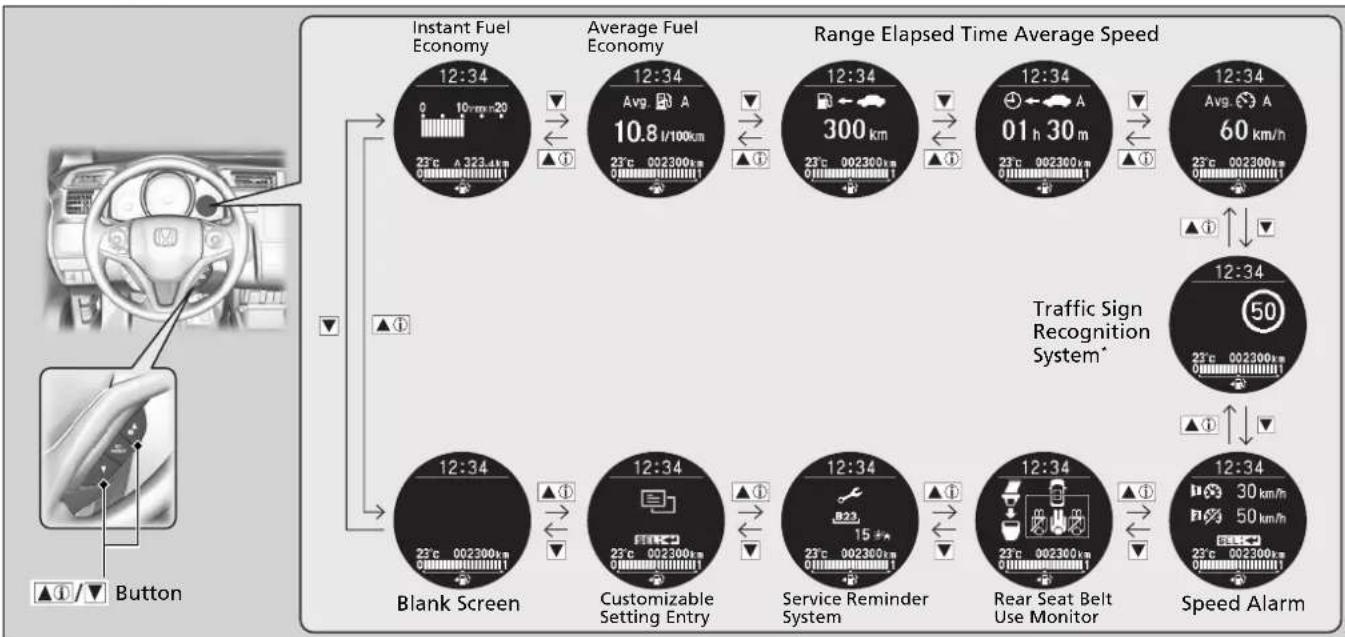
flowchart
graph TD
    A["Instant Fuel Economy"] --> B["12:34"]
    B --> C["23°C 0.02300km"]
    C --> D["10.8 l/100km"]
    D --> E["23°C 002300km"]
    E --> F["23°C Avg A"]
    F --> G["300 km"]
    G --> H["23°C Avg A"]
    H --> I["01 h 30 m"]
    I --> J["23°C Avg A"]
    J --> K["60 km/h"]
    K --> L["23°C Avg A"]
    L --> M["60 km/h"]
    M --> N["Traffic Sign Recognition System*"]
    N --> O["12:34"]
    O --> P["23°C Avg A"]
    P --> Q["50 km/h"]
    Q --> R["23°C Avg A"]
    R --> S["60 km/h"]
    S --> T["Speed Alarm"]
    T --> U["12:34"]
    U --> V["23°C Avg A"]
    V --> W["50 km/h"]
    W --> X["23°C Avg A"]
    X --> Y["60 km/h"]
    Y --> Z["Speed Alarm"]
    Z --> AA["12:34"]
    AA --> AB["23°C Avg A"]
    AB --> AC["50 km/h"]
    AC --> AD["23°C Avg A"]
    AD --> AE["60 km/h"]
    AE --> AF["Speed Alarm"]
■Lower displays
Press the SEL/RESET button to change the display.
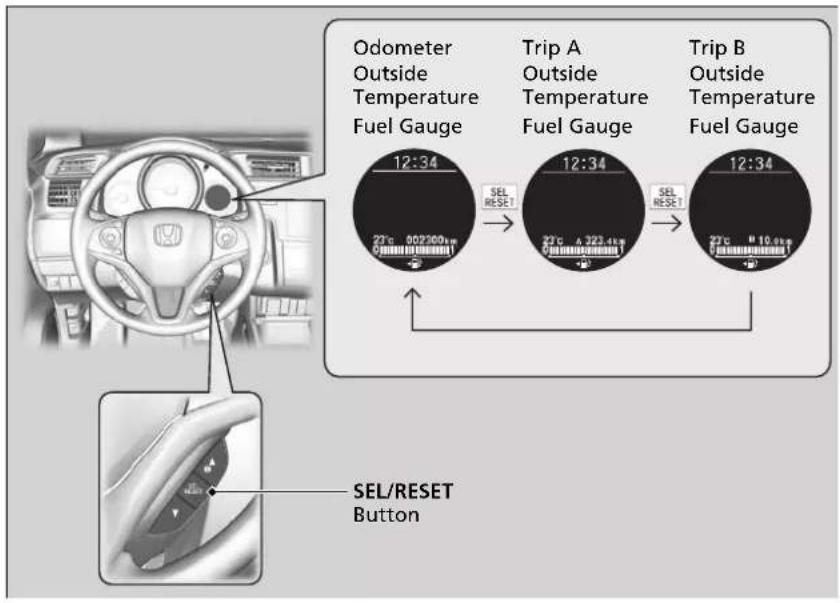
Switching the Display
Adjusting the Clock P. 140
Models with display audio system
Some of the items on the information display also appear on the audio/information screen. They also change along with the information display changes while the fuel consumption is shown.
Continued
Odometer
Shows the total number of kilometres or miles ^* that your vehicle has accumulated.
Trip Meter
Shows the total number of kilometres or miles* driven since the last reset. Trip A and B can be used to measure two separate trips.
■Resetting a trip meter
To reset a trip meter, display it, then press and hold the SEL/RESET button. The trip meter is reset to 0.0.
Average Fuel Economy
Shows the estimated average fuel economy of each trip meter in l/100 km or mpg ^4 . The display is updated at set intervals. When a trip meter is reset, the average fuel economy is also reset.
Range
Shows the estimated distance you can travel on the remaining fuel. This distance is estimated from the fuel economy of your previous trips.
Elapsed Time
Shows the time elapsed since the last time trip A or trip B was reset.
>>Trip Meter
Switch between trip A and B by pressing the SEL/RESET button.
Average Fuel Economy
You can change when to reset the average fuel economy.
Customized Features P. 131
Elapsed Time
You can change when to reset the elapsed time.
Customized Features P. 131
Average Speed
Shows the average speed in km/h or mph ^* since the last time trip A or trip B was reset.
Instant Fuel Economy
Shows the instant fuel economy as a bar graph in l/100 km or mpg*.
Outside Temperature
Shows the outside temperature in Celsius.
If the outside temperature has been below 3^ C at the time you turn the ignition switch to ON ^*1 , the outside temperature indicator blinks for 10 seconds.
■Adjusting the outside temperature display
Adjust the temperature reading up to ±3^ if the temperature reading seems incorrect.
Rear Seat Belt Use Monitor
Shows the rear seat belt use.
Seat Belt Reminder P. 39
*1: Models with the keyless access system have an ENGINE START/STOP button instead of an ignition switch.
* Not available on all models
Continued
>>Average Speed
You can change when to reset the average speed.
→Customized Features P. 131
Outside Temperature
The temperature sensor is in the front bumper. Road heat and exhaust from another vehicle can affect the temperature reading when your vehicle speed is less than 30 km/h (19 mph).
It may take several minutes for the display to be updated after the temperature reading has stabilized.
Use the multi-information display's customized features to correct the temperature.
Customized Features P. 131
Fuel Gauge
Displays the amount of fuel left in the fuel tank.
Traffic Sign Recognition System\*
Shows the traffic sign recognition system.
Traffic Sign Recognition System * P. 442
Service Reminder System
Shows the service reminder system.
→ Service Reminder System P. 479
Fuel Gauge
NOTICE
You should refuel when the reading approaches 0. Running out of fuel can cause the engine to misfire, damaging the catalytic converter.
The actual amount of remaining fuel may differ from the fuel gauge reading.
Speed Alarm Setting
Sets the speed alarm on and changes the speed alarm setting.
■To set the speed alarm
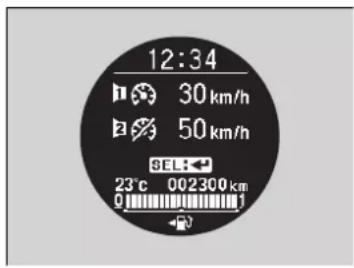
-
Press the button until the speed alarm setting screen appears on the display, then press the SEL/RESET button.
-
Press the button and select (speed alarm 1) or speed alarm 2), then press the SEL/RESET button. ▶ Off) switches to (on) then the display returns to the normal screen. ▶ If the speed alarm is (on), it switches to (off).
>>Speed Alarm Setting
The default settings for speed alarm 1) and (speed alarm 2) are off).
You can also return to the normal screen by selecting (exit).
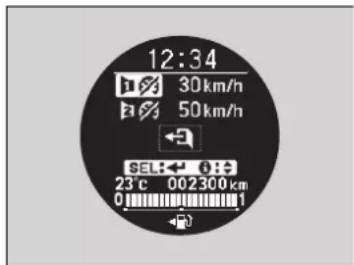
■To change the speed setting
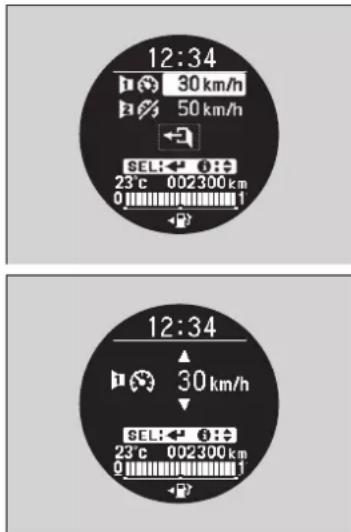
- Press the ▲ button until the speed alarm setting menu appears on the display, then press the SEL/RESET button.
- Press the button and select the speed alarm 1 speed setting or speed alarm 2 speed setting, then press the SEL/RESET button.
- Press the button and select the speed, then press the SEL/RESET button.
The speed setting is set, then the display returns to the normal screen.
▶You can set the speed setting over 5 km/h (mph) with 1 km/h (mph) steps.
>>Speed Alarm Setting
You cannot change the speed setting while driving.
Customized Features
Use the multi-information display to customize certain features.
How to customize
Select the E①customize Settings) screen by pressing the button/while the ignition switch is in ON Ⅲ*1, the vehicle is at a complete stop, and the shift lever is in P (continuously variable transmission), and the parking brake is set (manual transmission). Press the SEL/RESET button to enter the customizing mode.
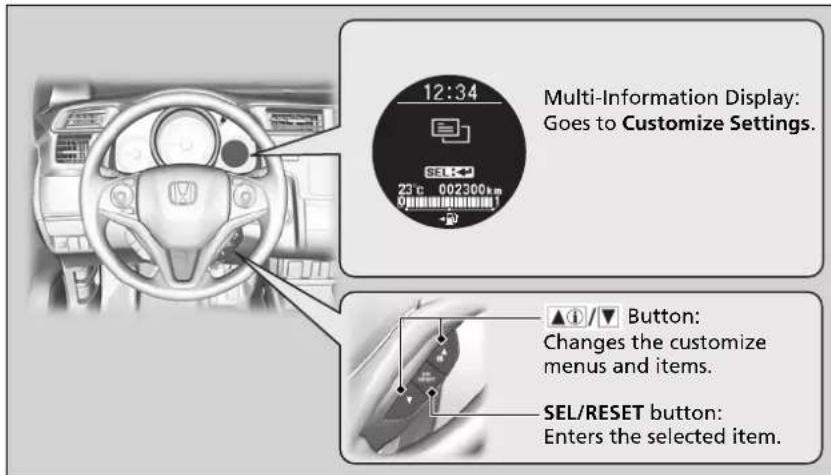
*1: Models with the keyless access system have an ENGINE START/STOP button instead of an ignition switch.
Continued
>>Customized Features
To customize other features, press the ▲/▼ button.
List of customizable options P. 134
Example of customization settings P. 137
When you customize settings:
Continuously variable transmission models Shift to P.
Manual transmission models
Set the parking brake.
■Customization flow
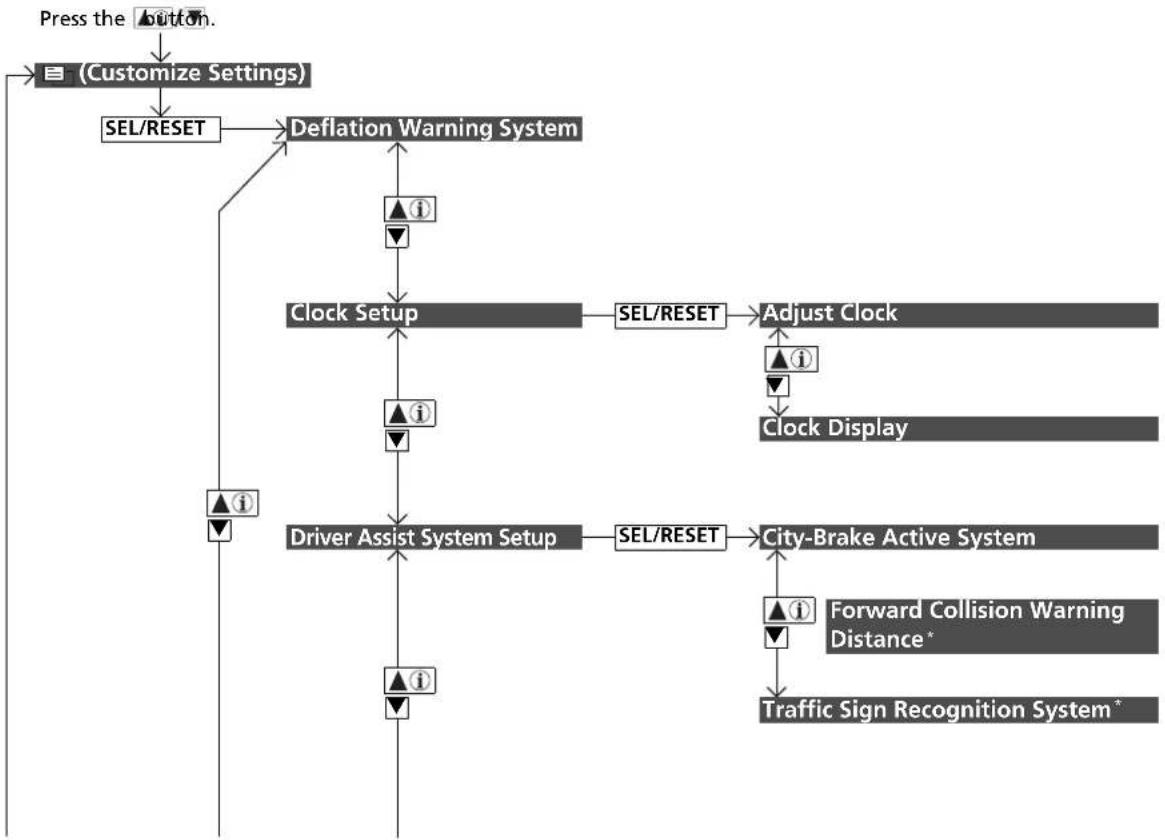
flowchart
graph TD
    A["Press the Button."] --> B["(Customize Settings)"]
    B --> C["SEL/RESET"]
    C --> D["Deflation Warning System"]
    D --> E["Clock Setup"]
    E --> F["Sel/RESET"]
    F --> G["Adjust Clock"]
    G --> H["Clock Display"]
    E --> I["Driver Assist System Setup"]
    I --> J["Sel/RESET"]
    J --> K["City-Brake Active System"]
    K --> L["Forward Collision Warning Distance*"]
    K --> M["Traffic Sign Recognition System*"]
    C --> N["▲i"]
    N --> O["▼"]
    O --> P["▲i"]
    P --> Q["▼"]
    Q --> R["▲i"]
    R --> S["▼"]
    S --> T["▲i"]
* Not available on all models
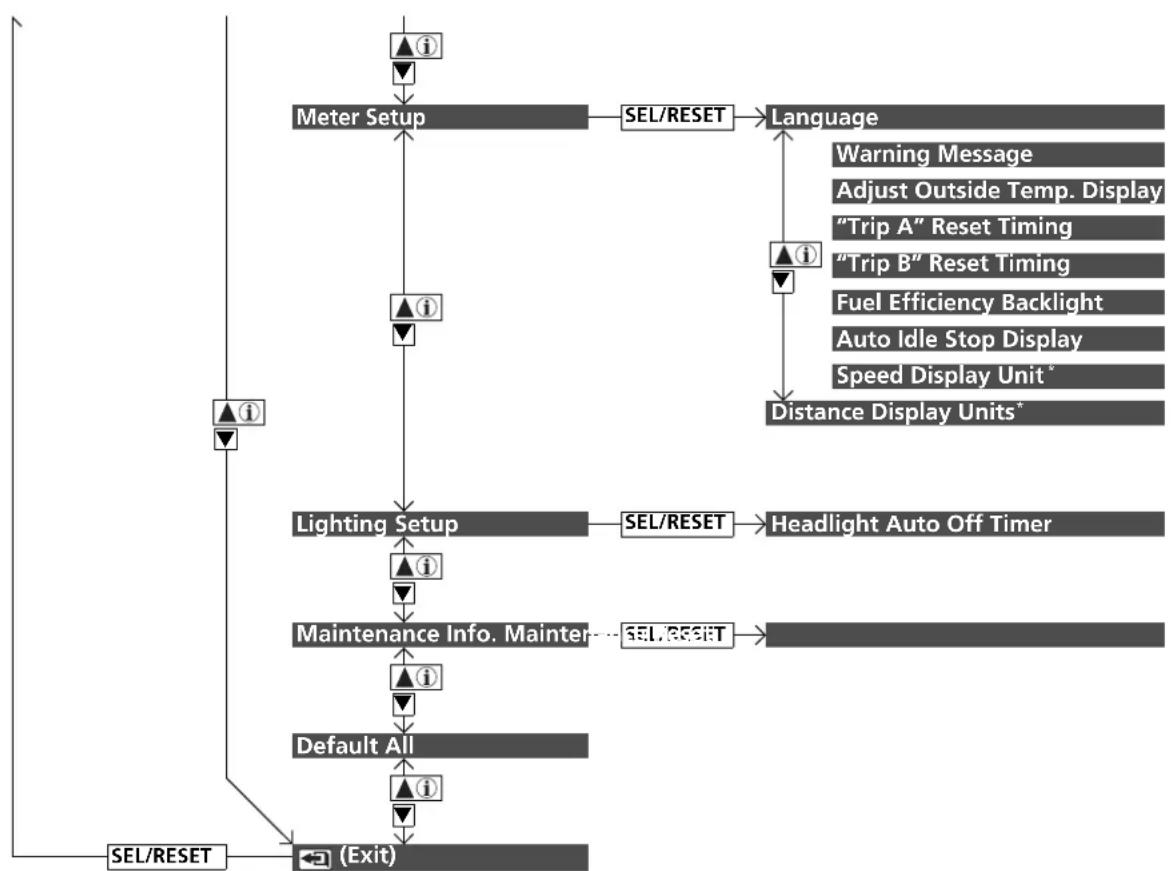
flowchart
graph TD
    A["▲i"] --> B["Meter Setup"]
    B --> C["SEL/RESET"]
    C --> D["Language"]
    D --> E["▲i"]
    E --> F["Distance Display Units*"]
    G["▲i"] --> H["Lighting Setup"]
    H --> I["SEL/RESET"]
    I --> J["Headlight Auto Off Timer"]
    K["▲i"] --> L["Maintenance Info. Mainter"]
    L --> M["SEL/RESET"]
    M --> N["Default All"]
    O["▲i"] --> P["(Exit)"]
    Q["SEL/RESET"] --> P
* Not available on all models
Continued
■List of customizable options
| Setup Group Customizable Features Description Selectable Settings | |||
| DeflationWarningSystem | Initialises the deflation warning system Cancel/Initialise | ||
| Clock Setup | Adjust Clock Adjusts the time. | ||
| Clock Display | Sets time display 12 hour, 24 hour, or OFF. | 12h^*1/24h/OFF | |
| Driver Assist System Setup | City-Brake Active System | Turns the City-Brake Active system feature on and off. | ON^*1/OFF |
| Forward Collision Warning Distance* | Changes at which distance FCW alerts, or turns FCW on and off. | Far/Normal*1/Near/OFF | |
| Traffic Sign Recognition System* | Selects whether the traffic sign small icons come on. | Small Icons ON^*1/Small Icons OFF | |
*1: Default Setting
| Setup Group | Customizable Features | Description | Selectable Settings |
| Meter Setup | Language Changes the displayed language. | English*1/German/Italian/French/Spanish/Polish/Portuguese/Dutch/Danish/Swedish/Norwegian/Finnish/Russian/Turkish | |
| Warning Message | Switches warning message to be displayed or not. | ON/OFF*1 | |
| Adjust Outside Temp. Display | Adjusts the temperature reading by a few degrees. | -3°C ~ ±0°C*1 ~ +3°C | |
| "Trip A" Reset Timing | Changes the setting of how to reset trip meter A, average fuel economy A, average speed A, and elapsed time A. | When Refueled/When Ignition Is Turned Off/Manual Reset*1 | |
| "Trip B" Reset Timing | Changes the setting of how to reset trip meter B, average fuel economy B, average speed B, and elapsed time B. | When Refueled/When Ignition Is Turned Off/Manual Reset*1 | |
| Fuel Efficiency Backlight | Turns the ambient meter feature on and off. | ON*1/OFF | |
*1: Default Setting
| Setup Group Customizable Features Description Selectable Settings | |||
| Meter Setup | Auto Idle Stop Display | Selects whether the Auto Idle Stop display comes on or not. | ON*1/OFF |
| Speed Display Unit* | Changes the displayed measurement of the vehicle speed on the multi-information display. | km/h/mph*1 | |
| Distance Display Units* | Changes the displayed measurement on the multi-information display. | km/miles*1 | |
| Lighting Setup | Headlight Auto Off Timer | Changes the length of time the exterior lights stay on after you close the driver's door. | 60sec/30sec/15sec*1/0sec |
| Maintenance Info. | Maintenance Reset Reset the service reminder item(s). | Cancel/All Due Items/Item A Only/Item B Only/Item 0 Only/Item 1 Only/Item 2 Only/Item 3 Only/Item 4 Only/Item 5 Only/Item 6 Only/Item 7 Only/Item 8 Only/Item 9 Only | |
| Default All — | Cancels/Resets all the customized settings as default. | Cancel/OK | |
*1: Default Setting
■Example of customization settings
The steps for changing the "Trip A" Reset Timing setting to When Refueled are shown below. The default setting for "Trip A" Reset Timing is Manual Reset.
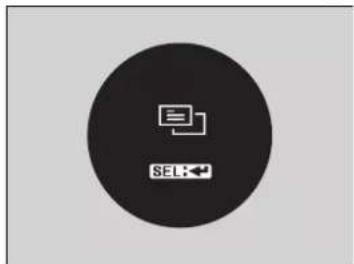
- Press the button until

(customize settings) appears on the display, then press the SEL/RESET button.
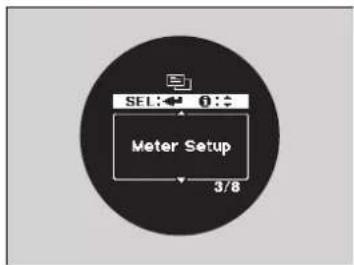
-
Press the button until Meter Setup appears on the display.
-
Press the SEL/RESET button.
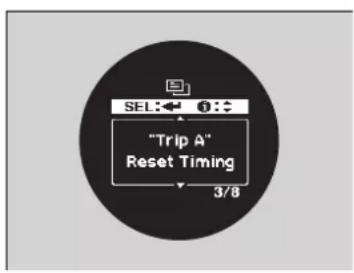
- Press the ▲/▼ button until "Trip A" Reset Timing appears on the display, then press the SEL/RESET button.
The display switches to the customization setup screen, where you can select When Refueled, When Ignition Is Turned Off, Manual Reset, or ← (Exit).
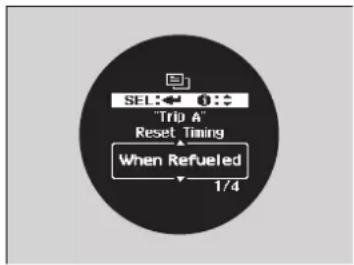
- Press the ▲i/▼ button and select When Refueled, then press the SEL/RESET button.
The When Refueled Setup screen appears, then the display returns to the customization menu screen.
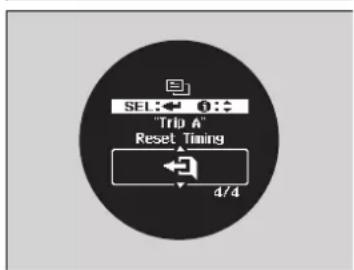
-
Press the button until (Exit) appears on the display, then press the SEL/RESET button.
-
Repeat Step 6 until you return to the normal screen.
Controls
This chapter explains how to operate the various controls necessary for driving.
Clock 140
Locking and Unlocking the Doors
Key Types and Functions 142
Low Keyless Remote Signal Strength* ..... 145
Locking/Unlocking the Doors from the
Outside 146
Locking/Unlocking the Doors from the
Inside 153
Childproof Door Locks 155
Opening and Closing the Tailgate ..... 156
Security System
Immobilizer System 159
Security System Alarm* 159
Super Locking* 161
Opening and Closing the Windows..... 162
Operating the Switches Around the
Steering Wheel
Models without keyless access system
Ignition Switch.... 164
Models with keyless access system
ENGINE START/STOP Button 165
Ignition Switch and Power Mode Comparison....168
Turn Signals.... 169
Light Switches 170
Fog Lights.... 172
Headlight Adjuster* 174
Auto High-Beam (High Beam Support System) ^4 ...175
Daytime Running Lights 178
Wipers and Washers.... 179
Brightness Control....182
Rear Demister/Heated Door Mirror * .....183
Adjusting the Steering Wheel ......184
Adjusting the Mirrors
Interior Rearview Mirror......185
Power Door Mirrors....186
Adjusting the Seats
Front Seats 187
Rear Seats 190
Interior Lights/Interior Convenience Items.... 199
Heating and Cooling System\*
Using Vents, Heating and A/C 209
Climate Control System
Using Automatic Climate Control .....213
Automatic Climate Control Sensors .....218
Clock
Adjusting the Clock
Models without navigation system
You can adjust the time in the clock display with the ignition switch in ON ^*1 .
Adjusting the Time
Models with display audio system
■ Using the settings menu on the audio/information screen
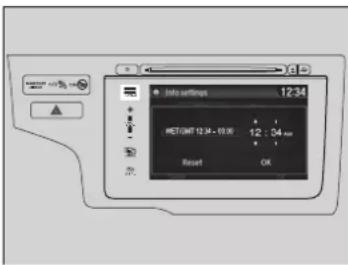
- Select the HOME (HOME) icon, then select Settings.
- Select Info, Clock, then Clock Adjustment.
- Adjust the hours and minutes by selecting

- Select OK to set the time.
Adjusting the Clock
Models with navigation system
The clock is automatically updated through the navigation system, so the time does not need to be adjusted.
Models with display audio system
The clock in the multi-information display is automatically adjusted along with the audio system's clock display.
You can customize the clock display to show the 12 hour clock or 24 hour clock.
Customized Features P. 313
You can turn the clock display on and off.
Customized Features P. 313
The clock is automatically updated when your smartphone is connected to the audio system.
The clock is automatically updated through the display audio system, so the time does not need to be adjusted.
Models with colour audio system
■Using the MENU/CLOCK button
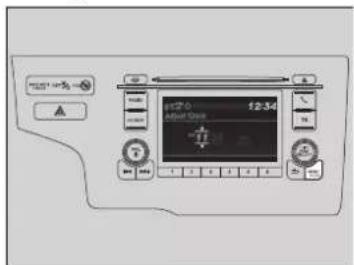
- Press and hold the MENU/CLOCK button.
▶Adjust clock is selected
-
Rotate to change hour, then press.
-
Rotate to change minute, then press
#
- To enter the selection, rotate and select
Set, then press 😊
Adjusting the Time
Models with colour audio system
These indications are used to show how to operate the LIST/SELECT (Selector) knob.
Rotate to select.
Press to enter.
You can customize the clock display to show the 12 hour clock or 24 hour clock.
→Customized Features P. 313
You can also select Adjust clock by pressing the MENU/CLOCK button.
Rotate to select Adjust clock, then press

The clock in the multi-information display is automatically adjusted along with the audio system's clock display.
Setting the Time Zone
Models with display audio system
■Using the settings menu on the audio/information screen
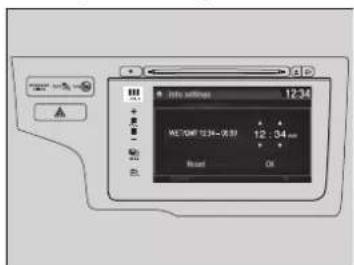
-
Select the HOME (HOME) icon, then select Settings.
-
Select Info, Clock, then Time Zone.
-
Select your time zone.
Locking and Unlocking the Doors
Key Types and Functions
This vehicle comes with the following keys:
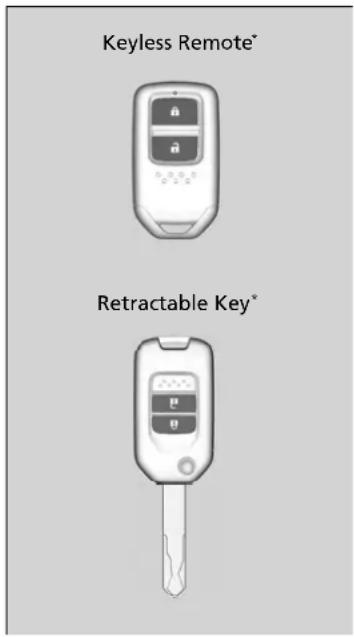
Use the key to start and stop the engine, and to lock and unlock* all the doors and tailgate. You can also use the remote transmitter or keyless access system* to lock and unlock all the doors and tailgate.
Key Types and Functions
All the keys have an immobilizer system. The immobilizer system helps to protect against vehicle theft.
Immobilizer System P. 159
Follow the advice below to prevent damage to the keys:
- Do not leave the keys in direct sunlight, or in locations with high temperature or high humidity.
- Do not drop the keys or set heavy objects on them.
- Keep the keys away from liquids, dust and sand.
- Do not take the keys apart except for replacing the battery.
If the circuits in the keys are damaged, the engine may not start, and the remote transmitter/keyless access system* may not work.
If the keys do not work properly, have them inspected by a dealer.
Built-in Key\*
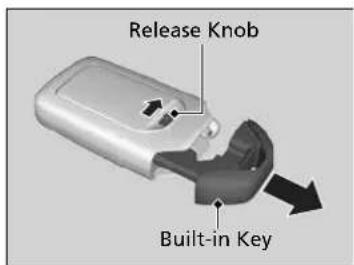
The built-in key can be used to lock/unlock the doors when the keyless remote battery becomes weak and the power door lock/unlock operation is disabled.
To remove the built-in key, slide the release knob and then pull out the key. To reinstall the built-in key, push the built-in key into the keyless remote until it clicks.
Retractable keys\*
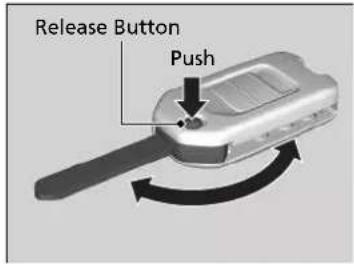
The key folds up inside the remote transmitter.
- Press the release button to release the key out from the transmitter.
▶ Make sure to fully extend the key.
- To close the key, press the release button then push the key inside the transmitter until you hear a click.
Retractable keys
If the key is not fully extended, the immobilizer system may not work properly, and the engine may not start.
Avoid contact with the key whenever it extends or retracts.
Key Number Tag
natural_image
Simple diagram of a rectangular object with a rounded top and internal structure, no text or symbols present.Contains a number that you will need if you purchase a replacement key.
Key Number Tag
Keep the key number tag separate from the key in a safe place outside of your vehicle. If you wish to purchase an additional key, contact a dealer.
If you lose your key and you cannot start the engine, contact a dealer.
Low Keyless Remote Signal Strength\*
The vehicle transmits radio waves to locate the keyless remote when locking/unlocking the doors and tailgate, or to start the engine.
In the following cases, locking/unlocking the doors and tailgate, or starting the engine may be inhibited or operation may be unstable:
• Strong radio waves are being transmitted by nearby equipment.
- You are carrying the keyless remote together with telecommunications equipment, laptop computers, mobile phones, or wireless devices.
- A metallic object is touching or covering the keyless remote.
Low Keyless Remote Signal Strength \*
Communication between the keyless remote and the vehicle consumes the keyless remote's battery. Battery life is about two years, but this varies depending on regularity of use.
The battery is consumed whenever the keyless remote is receiving strong radio waves. Avoid placing it near electrical appliances such as televisions and personal computers.
Locking/Unlocking the Doors from the Outside
Using the Keyless Access System\*
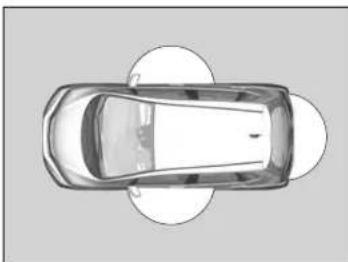
natural_image
Top-down view of a car viewed from the side, showing no text or symbols on the car itself.When you carry the keyless remote, you can lock/unlock the doors and tailgate. You can lock/unlock the doors and the tailgate within a radius of about 80 cm (32 inches) of the outside door handle. You can open the tailgate within about 80 cm (32 inches) radius from the tailgate release button.
Locking/Unlocking the Doors from the Outside
If the interior light switch is in the door activated position, the interior lights come on when you press the unlock button.
No doors opened: The lights fade out after 30 seconds.
Doors relocked with the remote transmitter: The lights go off immediately.
→Interior Lights P. 199
Using the Keyless Access System \*
If you do not open a door or the tailgate within 30 seconds of unlocking the vehicle with the keyless access system, the doors and tailgate will automatically relock.
You can lock or unlock doors using the keyless access system only when the power mode is in VEHICLE OFF.
- Do not leave the keyless remote in the vehicle when you get out. Carry it with you.
- Even if you are not carrying the keyless remote, you can lock/unlock the doors and the tailgate while someone else with the remote is within range.
- The door may be unlocked if the door handle is covered with water in heavy rain or in a car wash if the keyless remote is within range.
- If you grip a front door handle wearing gloves, the door sensor may be slow to respond or may not respond by unlocking the doors.
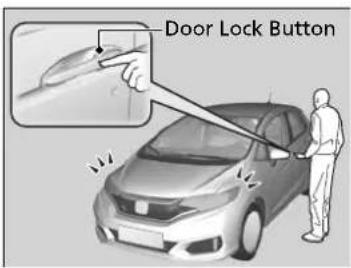
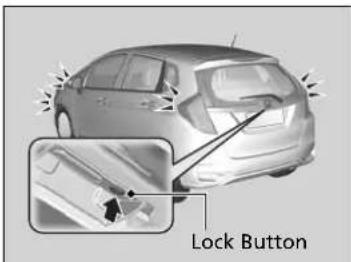
■Locking the doors and tailgate
Press the door lock button on the front door or the tailgate.
▶ Some exterior lights flash three times; all the doors and tailgate lock; and the security system sets.
Using the Keyless Access System \*
- You cannot unlock the door by gripping the handle after two seconds of locking it.
- The door may not open if you pull it immediately after gripping the door handle. Grip the handle again and confirm that the door is unlocked before pulling the handle.
- Even within the 80 cm (32 inches) radius, you may not be able to lock/unlock the doors and the tailgate with the keyless remote if it is above or below the outside handle.
- The keyless remote may not operate if it is too close to the door and door glass.
▶▶ Locking and Unlocking the Doors▶Locking/Unlocking the Doors from the Outside
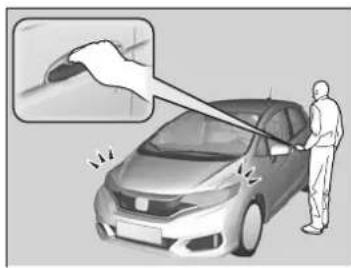
natural_image
Illustration of a person cleaning a car with a tool, showing the brush applying paint (no text or symbols present)■Unlocking the doors and the tailgate
▶ All the doors and tailgate unlock.
▶ Some exterior lights flash once.
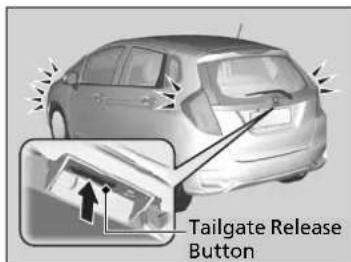
Press the tailgate release button:
▶ All the doors and tailgate unlock.
▶ Some exterior lights flash once.
Using the Tailgate Outer Handle/Release
Button P. 157
Using the Remote Transmitter
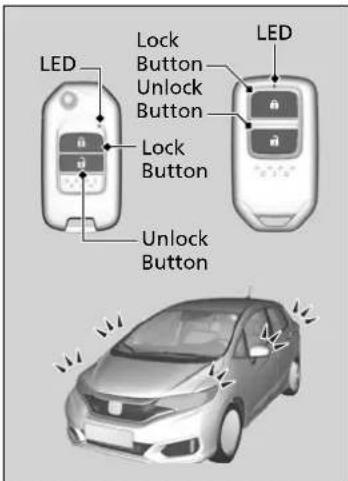
■Locking the doors and tailgate
Press the lock button.
▶ Some exterior lights flash three times, all the doors and tailgate lock, and the security system ^* sets.
Using the Remote Transmitter
If you do not open a door or the tailgate within 30 seconds of unlocking the vehicle with the remote transmitter, the doors and tailgate will automatically relock.
Right-hand drive models
You cannot lock any doors from the outside when the keyless remote is inside the vehicle, and the beeper sounds. If you want to lock a door while the remote is still in the vehicle, do any of the following four times:
- Press the lock button on the keyless remote.
- Turn the key in the cylinder to lock.
- Press the door lock button on the door handle or the tailgate.
■Unlocking the doors
Press the unlock button.
▶ Some exterior lights flash once, and all doors and the tailgate unlock.
Using the Remote Transmitter
The remote transmitter uses low-power signals, so the operating range may vary depending on the surroundings.
Models without keyless access system
The remote transmitter will not work when the key is in the ignition switch.
Models with keyless access system
You can lock or unlock doors using the remote transmitter only when the power mode is in VEHICLE OFF.
All models
The remote transmitter will not lock the vehicle when a door or the tailgate is open.
If the distance at which the remote transmitter works varies, the battery is probably low. Replace the button battery as soon as possible. If the LED does not come on when you press a button, the battery is dead.
→ Replacing the Button Battery P. 529
Locking/Unlocking the Doors Using a Key
If the lock or unlock button of the keyless remote does not work, use the key instead.
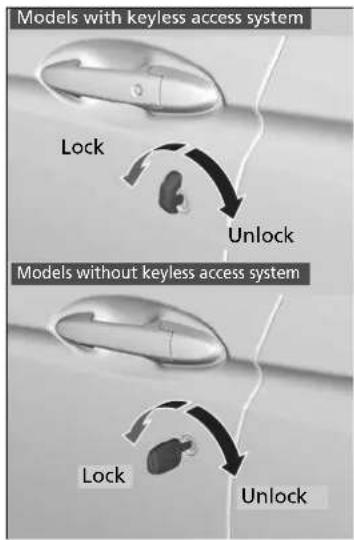
Fully insert the key and turn it.
* Not available on all models
Continued
Locking/Unlocking the Doors Using a Key
When you lock/unlock the driver's door with the key, all the other doors and the tailgate lock/unlock at the same time.
Unlocking the doors with the key will cause the security system* to alarm. Always unlock the doors with the remote transmitter or keyless access system*.
Models with retractable key
If you are using the retractable key, make sure it is fully extended.
Locking a Door Without Using a Key
If you do not have the key on you, or if for some reason you cannot lock a door using the key, you can lock the door without it.
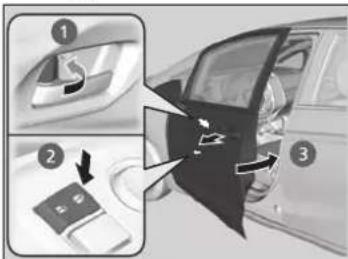
■Locking the driver's door
Push the lock tab forward ① or push the master door lock switch in the lock direction ②, then pull and hold the outside door handle ③. Close the door, then release the handle.
■Locking the passengers' doors
Push the lock tab forward and close the door.
■Lockout prevention system
Models without keyless access system
The doors and the tailgate cannot be locked when the key is in the ignition switch.
Models with keyless access system
The doors and the tailgate cannot be locked when the keyless remote is inside the vehicle.
>>Locking a Door Without Using a Key
When you lock the driver's door, all the other doors and tailgate lock at the same time.
Before locking a door, make sure that the key is not inside the vehicle.
Locking/Unlocking the Doors from the Inside
Using the Lock Tab
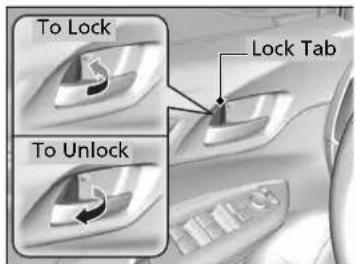
■Locking a door
Push the lock tab forward.
■Unlocking a door
Pull the lock tab rearward.
Using the Lock Tab
When you lock/unlock the door using the lock tab on the driver's door, all the other doors and the tailgate lock/unlock at the same time.
Continued
Unlocking Using the Front Door Inner Handle
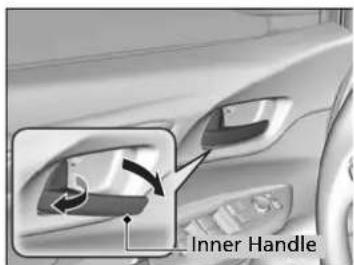
Pull the front door inner handle.
The door unlocks and opens in one motion.
Unlocking and opening the driver's door from the inner handle unlocks all the other doors.
Using the Master Door Lock Switch
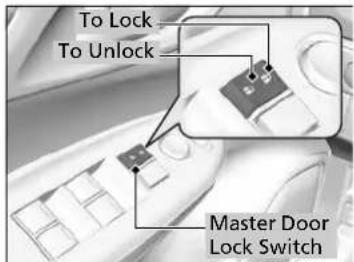
Press the master door lock switch in as shown to lock or unlock all the doors and the tailgate.
Unlocking Using the Front Door Inner Handle
The front door inner handles are designed to allow the front seat occupants to open the door in one motion.
However, this feature requires that front seat occupants never pull a front door inner handle while the vehicle is in motion.
Children should always ride in a rear seat where childproof door locks are provided.
→ Childproof Door Locks P. 155
Using the Master Door Lock Switch
When you lock/unlock the driver's door using the master lock switch, all the other doors and the tailgate lock/unlock at the same time.
Childproof Door Locks
The childproof door locks prevent the rear doors from being opened from the inside regardless of the position of the lock tab.
Setting the Childproof Door Locks
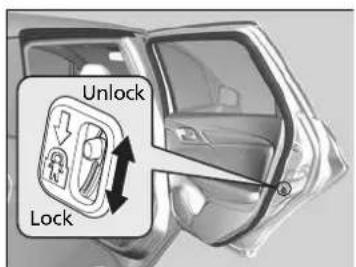
Slide the lever in the rear door to the lock position, and close the door.
■When opening the door
Open the door using the outside door handle.
>>Childproof Door Locks
To open the door from the inside when the childproof door lock is on, put the lock tab in the unlock position, lower the rear window, put your hand out of the window, and pull the outside door handle.
Opening and Closing the Tailgate
Precautions for Opening/Closing the Tailgate
Always make sure individuals and objects are clear of the tailgate before opening or closing it.
- Open the tailgate all the way.
▶If it is not fully opened, the tailgate may begin to close under its own weight. - Be careful when it is windy. The wind may cause the tailgate to close.
Keep the tailgate closed while driving to:
▶ Avoid possible damage.
▶Prevent exhaust gas from leaking into the vehicle.
Carbon Monoxide Gas P. 82
Precautions for Opening/Closing the Tailgate
WARNING
Anyone caught in the path of a tailgate that is being opened or closed can be seriously injured.
Make sure that all people are clear of the tailgate before opening or closing it.
Be careful not to hit your head on the tailgate or to put your hands between the tailgate and the luggage area when closing the tailgate.
When you are storing or picking up luggage from the luggage area while the engine is idling, do not stand in front of the exhaust pipe. You may get burned.
Do not allow any passenger in the luggage space. They may get hurt during hard braking, a sudden acceleration, or a crash.
Using the Tailgate Outer Handle/Release Button
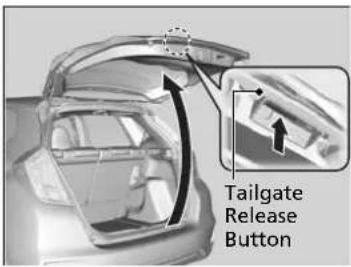
Left-hand drive type with keyless access system Right-hand drive type
When all the doors are unlocked, the tailgate is unlocked. Press the tailgate release button and lift open the tailgate.
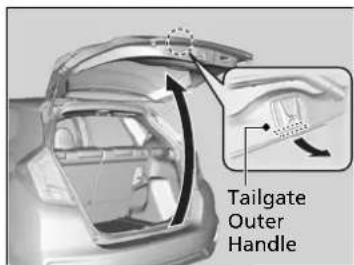
Left-hand drive type without keyless access system
When all the doors are unlocked, the tailgate is unlocked.
Pull up the tailgate outer handle and lift open the tailgate.
Using the Tailgate Outer Handle/Release Button
Models with keyless access system
- Do not leave the keyless remote in the vehicle when you get out. Carry it with you.
- Even if you are not carrying the remote, you can unlock the tailgate while someone else with the remote is within range.
If you are carrying the keyless remote, you do not have to unlock the tailgate before opening it.
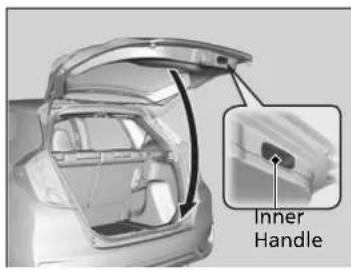
All models
To close the tailgate, grab the inner handle, pull the tailgate down, and push it closed from outside.
Security System
Immobilizer System
The immobilizer system prevents a key that has not been pre-registered from starting the engine. Each key contains electronic transmitters that use electronic signals to verify the key.
Pay attention to the following when inserting the key into the ignition switch or pressing the ENGINE START/STOP button:
- Do not allow objects that emit strong radio waves near the ignition switch or the ENGINE START/STOP button.
- Make sure the key is not covered by or touching a metal object.
- Do not bring a key from another vehicle's immobilizer system near the ignition switch or the ENGINE START/STOP button.
Do not put the key near magnetic items. Electronic device, such as televisions and audio systems emit strong magnetic fields. Note that even a key chain can become magnetic.
Security System Alarm\*
The security system alarm activates when the doors, tailgate, or bonnet are opened without the remote transmitter or keyless access system*.
■When the security system alarm activates
The horn sounds intermittently and some exterior lights flash.
■To deactivate the security system alarm
Unlock the vehicle using the remote transmitter or keyless access system, or turn the ignition switch to ON ^*1 . The system, along with the horn and flashing lights, is deactivated.
*1: Models with the keyless access system have an ENGINE START/STOP button instead of an ignition switch.
* Not available on all models
Continued
Immobilizer System
NOTICE
Leaving the key in the vehicle can result in theft or accidental movement of the vehicle. Always take the ignition key with you whenever you leave the vehicle unattended.
Do not alter the system or add other devices to it. Doing so may damage the system and make your vehicle inoperable.
If the system repeatedly does not recognise the coding of your key, contact your dealer. If you have lost your key and cannot start your engine, contact a dealer.
»Security System Alarm \*
Do not alter the system or add other devices to it. Doing so may damage the system and make your vehicle inoperable.
The security alarm will continue for approximately 5 minutes before the security system deactivates. The system will go through ten 30-second cycles, during which the horn will sound and an emergency indicator will flash.
Depending on circumstances, the security system may continue operating for more than 5 minutes.
■Setting the security system alarm
The security system alarm automatically sets when the following conditions have been met:
- The ignition switch is in LOCK 0^*1 .
- The bonnet is closed.
- All doors and the tailgate are locked from outside with the key, the remote transmitter, or keyless access system*.
Models without keyless access system
- The key has been removed from the ignition switch.
■When the security system alarm sets
The security system alarm indicator in the instrument panel blinks and the blinking interval changes after about 15 seconds.
■To cancel the security system alarm
The security system alarm is cancelled when the vehicle is unlocked using the remote transmitter, keyless access system* or when the ignition switch is turned to ON ^*1 . The security system alarm indicator goes off at the same time.
*1: Models with the keyless access system have an ENGINE START/STOP button instead of an ignition switch.
* Not available on all models
>>Security System Alarm \*
Do not set the security system alarm when someone is in the vehicle or a window is open. The system can accidentally activate when:
- Unlocking the door with the lock tab.
- Opening the bonnet with the bonnet release.
If the battery goes dead after you have set the security system alarm, the security alarm may go off once the battery is recharged or replaced. If this occurs, deactivate the security system alarm by unlocking a door using the remote transmitter or keyless access system*.
If you unlock a door with the key while the security system is activated, the alarm will go off.
Super Locking\*
The super locking function disables the lock tabs on all doors.
■To activate the super locking function
- Turn the key in the driver's door towards the vehicle front twice within five seconds.
- Press the lock button on the remote transmitter twice within five seconds.
Models with keyless access system
- Press the door lock button on the door handle or the tailgate twice within five seconds.
■To cancel the super locking function
Unlock the driver's door with the remote transmitter or keyless access system*.
Super Locking *
WARNING
No one must be inside the vehicle with the super locking set. Persons locked in can get seriously sick or die from the heat built inside the vehicle if left in the sun.
Make sure there is no one inside the vehicle before setting the super locking.
If you unlock a door with the key while the security system is activated, the alarm will go off.
Even if you have unlocked, opened, and then closed the tailgate, the super locking function continues to be in effect.
Opening and Closing the Windows
Opening/Closing the Power Windows
The power windows can be opened and closed when the ignition switch is in ON Ⅲ *1, using the switches on the doors.
The driver's side switches can be used to open and close all of the windows.
The power window lock button on the driver's side must be switched off (not pushed in, indicator off) to open and close the windows from anywhere other than the driver's seat.
When the power window lock button is pushed in, the indicator comes on and you can only operate the driver's window. Turn the power window lock button on if a child is in the vehicle.
Opening/Closing Windows with Auto-Open/Close Function
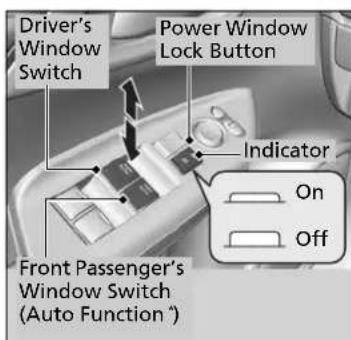
■Manual operation
To open: Push the switch down lightly, and hold it until the desired position is reached.
To close: Pull the switch up lightly, and hold it until the desired position is reached.
■Automatic operation
To open: Push the switch down firmly.
To close: Pull the switch up firmly.
The window opens or closes completely. To stop the window at any time, push or pull the switch briefly.
*1: Models with the keyless access system have an ENGINE START/STOP button instead of an ignition switch.
* Not available on all models
Opening/Closing the Power Windows
WARNING
Closing a power window on someone's hands or fingers can cause serious injury.
Make sure your passengers are away from the windows before closing them.
WARNING: Always take the ignition key with you whenever you leave the vehicle alone or with other occupants.
The power windows can be operated for up to 10 minutes after you turn the ignition switch to LOCK 0 ^1 .
Opening either front door cancels this function.
Auto Reverse
If a power window senses resistance when closing automatically, it will stop closing and reverse direction.
The driver's window auto reverse function is disabled when you continuously pull up the switch.
The auto reverse function stops sensing when the window is almost closed to ensure that it fully closes.
■ Opening/Closing Windows without Auto-Open/Close Function
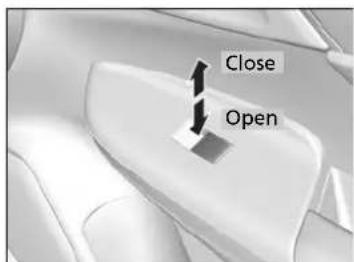
To open: Push the switch down.
To close: Pull the switch up.
Release the switch when the window reaches the desired position.
Operating the Switches Around the Steering Wheel
Models without keyless access system
Ignition Switch
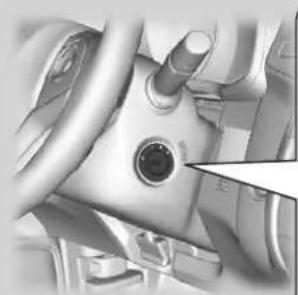
natural_image
Close-up of a car interior showing steering wheel and dashboard (no visible text or symbols)☐ LOCK: Insert and remove the key in this position.
☐ ACCESSORY: Operate the audio system and other accessories in this position.
☐ ON: This is the position when driving.
III START: This position is for starting the engine. The switch returns to ON II when you let go of the key.
Ignition Switch
Manual transmission models
WARNING
Removing the key from the ignition switch while driving locks the steering. This can cause you to lose control of the vehicle.
Remove the key from the ignition switch only when parked.
Continuously variable transmission models
You cannot take the key out unless the shift lever is in [P].
All models
If you open the driver's door when the key is in LOCK 0 or ACCESSORY 1, the following symbol appears on the multi-information display:
• In LOCK 0: symbol
• In ACCESSORY I: symbol
If the key won't turn from LOCK 0 to ACCESSORY 1, turn the key while moving the steering wheel left and right. The steering wheel will unlock, allowing the key to turn.
Models with keyless access system
ENGINE START/STOP Button
Changing the Power Mode
Continuously Variable Transmission Manual Transmission
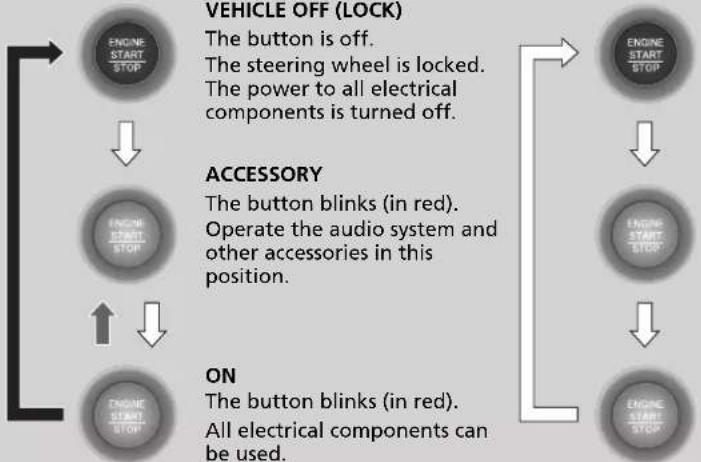
flowchart
graph TD
    A["ENGINE START STOP"] --> B["ENGINE START STOP"]
    B --> C["ENGINE START STOP"]
    C --> D["ENGINE START STOP"]
    D --> E["ENGINE START STOP"]
    E --> F["ENGINE START STOP"]
    F --> G["ENGINE START STOP"]
    G --> H["ENGINE START STOP"]
    H --> I["ENGINE START STOP"]
    I --> J["ENGINE START STOP"]
    J --> K["ENGINE START STOP"]
    K --> L["ENGINE START STOP"]
    L --> M["ENGINE START STOP"]
    M --> N["ENGINE START STOP"]
    N --> O["ENGINE START STOP"]
    O --> P["ENGINE START STOP"]
    P --> Q["ENGINE START STOP"]
    Q --> R["ENGINE START STOP"]
    R --> S["ENGINE START STOP"]
    S --> T["ENGINE START STOP"]
    T --> U["ENGINE START STOP"]
    U --> V["ENGINE START STOP"]
    V --> W["ENGINE START STOP"]
    W --> X["ENGINE START STOP"]
    X --> Y["ENGINE START STOP"]
    Y --> Z["ENGINE START STOP"]
    Z --> AA["ENGINE START STOP"]
    AA --> AB["ENGINE START STOP"]
    AB --> AC["ENGINE START STOP"]
    AC --> AD["ENGINE START STOP"]
    AD --> AE["ENGINE START STOP"]
    AE --> AF["ENGINE START STOP"]
    AF --> AG["ENGINE START STOP"]
    AG --> AH["ENGINE START STOP"]
    AH --> AI["ENGINE START STOP"]
    AI --> AJ["ENGINE START STOP"]
    AJ --> AK["ENGINE START STOP"]
    AK --> AL["ENGINE START STOP"]
    AL --> AM["ENGINE START STOP"]
    AM --> AN["ENGINE START STOP"]
    AN --> AO["ENGINE START STOP"]
    AO --> AP["ENGINE START STOP"]
    AP --> AQ["ENGINE START STOP"]
    AQ --> AR["ENGINE START STOP"]
    AR --> AS["ENGINE START STOP"]
    AS --> AT["ENGINE START STOP"]
    AT --> AU["ENGINE START STOP"]
    AU --> AV["ENGINE START STOP"]
    AV --> AW["ENGINE START STOP"]
    AW --> AX["ENGINE START STOP"]
    AX --> AY["ENGINE START STOP"]
Without depressing the brake pedal
Without depressing the clutch pedal
ENGINE START/STOP Button
ENGINE START/STOP Button Operating Range You can start the engine when the keyless remote is inside the vehicle.
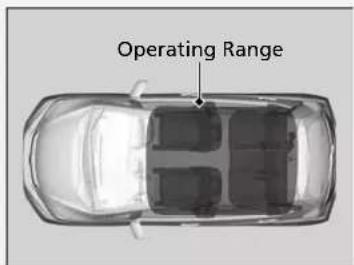
The engine may also run if the keyless remote is close to the door or window, even if it is outside the vehicle.
ON mode:
The ENGINE START/STOP button is on (in red), if the engine is running.
If the battery of the keyless remote is getting low, the engine may not start when you push the ENGINE START/STOP button. If the engine does not start, refer to the following link.
If the Keyless Remote Battery is Weak P. 562
Automatic Power Off
If you leave the vehicle for 30 to 60 minutes with the shift lever in [P]^*1 and the power mode in ACCESSORY, the vehicle automatically goes into the mode similar to VEHICLE OFF (LOCK) to avoid draining the battery.
When in this mode:
The steering wheel does not lock.
You cannot lock or unlock doors with the remote transmitter or the keyless access system.
Press the ENGINE START/STOP button twice to switch the mode to VEHICLE OFF (LOCK).
Changing the Power Mode P. 165
ENGINE START/STOP Button
If the power mode does not change from VEHICLE OFF to ACCESSORY, press the ENGINE START/STOP button while moving the steering wheel left and right. The steering wheel will unlock, allowing the mode to change.
Do not leave the power mode in ACCESSORY or ON when you get out.
Power Mode Reminder
If you open the driver's door when the power mode is set to ACCESSORY, a warning beep sounds.
Keyless Remote Reminder
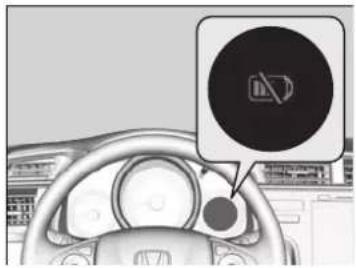
natural_image
Interior view of a car dashboard with a circular icon pointing to the right side (no text or symbols visible)Warning buzzers may sound from inside and/or outside the vehicle to remind you that the keyless remote is out of the vehicle. If the buzzer continues even after the remote is put back inside, place it to be within its operational range.
■When the power mode is in ON
If the keyless remote is taken out of the vehicle, and the driver's door is closed, a warning buzzer sound from both inside and outside the vehicle. A warning symbol on the multi-information display notifies the driver inside that the remote is outside of the vehicle.
■When the power mode is in ACCESSORY
If the keyless remote is taken out of the vehicle, and all the doors are closed, a warning buzzer sounds from outside the vehicle.
Keyless Remote Reminder
When the keyless remote is within the system's operational range, and the driver's door is closed, the warning function cancels.
If the keyless remote is taken out of the vehicle after the engine has been started, you can no longer change the ENGINE START/STOP button mode or restart the engine. Always make sure if the remote is in your vehicle when you operate the ENGINE START/STOP button.
Removing the keyless remote from the vehicle through a window does not activate the warning buzzer.
Do not put the keyless remote on the dashboard or in the glove box. It may cause the warning buzzer to go off. Under some other conditions that can prevent the vehicle from locating the remote, the warning buzzer may also go off even if the remote is within the system's operational range.
Ignition Switch and Power Mode Comparison
| Ignition Switch Position | LOCK 0(with/without the key)  | ACCESSORY I | ON II | START III |
| Without Keyless Access System | Engine is turned off and power is shut down.The steering wheel is locked.No electrical components can be used. | Engine is turned off.Some electrical components such as the audio system and the accessory power socket can be operated. | Normal key position while driving.All electrical components can be used. | Use this position to start the engine.The ignition switch returns to ON II position when you release the key. |
| Power Mode VEHICLE | OFF(LOCK)  | ACCESSORY ON S | XWWA Button is, blinking On |  |
| With Keyless Access System and ENGINE START/STOP Button | Button-OffEngine is turned off and power is shut down.The steering wheel is locked.No electrical components can be used. | Button-Blinking in redEngine is turned off.Some electrical components such as the audio system and the accessory power socket can be operated. | Button-Blinking in red (engine is turned off)On in red (engine is running)All electrical components can be used. | Button-On in redThe mode automatically returns to ON after the engine starts. |
Turn Signals
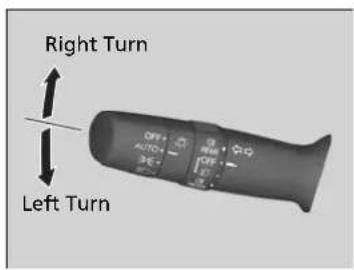
The turn signals can be used when the ignition switch is in ON *1.
■One touch turn signal
When you lightly push up or down and release the turn signal lever, the exterior turn signals and turn signal indicator blink three times.
This feature can be used when signalling for a lane change.
Light Switches
Manual Operation
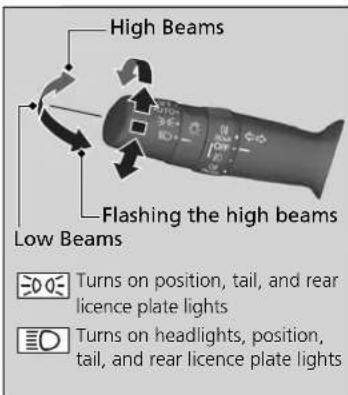
Rotating the light switch turns the lights on and off, regardless of the position of the ignition switch ^*1 .
■High beams
Push the lever forward until you hear a click.
■Low beams
When in high beams, pull the lever back to return to low beams.
■Flashing the high beams
Pull the lever back, and release it.
■Lights off
Turn the lever to OFF either when:
- The shift lever is in ^*2 .
• The parking brake is applied.
To turn the lights on again, turn the lever to
OFF to cancel the lights off mode. Even if you do not cancel the lights off mode, the lights come on automatically when:
• The shift lever is moved out of P ^2 .
• The parking brake is released.
• The vehicle starts to move.
>>Light Switches
Models without keyless access system
If you remove the key from the ignition switch while the lights are on, a chime sounds when the driver's door is opened.
Models with keyless access system
If you leave the power mode in VEHICLE OFF (LOCK) while the lights are on, a chime sounds when the driver's door is opened.
When the lights are on, the lights on indicator in the instrument panel will be on.
→Lights On Indicator P. 98
Do not leave the lights on when the engine is off because it will cause the battery to discharge.
If you sense that the level of the headlights is abnormal, have your vehicle inspected by a dealer.
*1: Models with the keyless access system have an ENGINE START/STOP button instead of an ignition switch.
*2: Continuously variable transmission models
Automatic Operation (automatic lighting control)
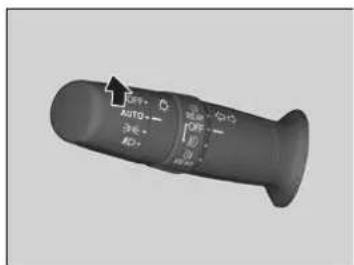
Automatic lighting control can be used when the ignition switch is in ON ^*1 .
When the light switch is in AUTO, the headlights and other exterior lights will switch on and off automatically depending on the ambient brightness.
The headlights comes on when you unlock a door in dark areas with the headlight switch in AUTO.
▶Once you lock the door, the headlights will go off.
Automatic Lighting Off Feature
The headlights, all other exterior lights, and the instrument panel lights turn off 15 seconds after you remove the key or set the power mode to VEHICLE OFF (LOCK), take the remote with you, and close the driver's door.
However, when the switch is in ☑the position lights remain on.
If you turn the ignition switch to LOCK 0*1 with the headlight switch on, but do not open the door, the lights turn off after 10 minutes (3 minutes, if the switch is in the AUTO position).
The lights turn on again when you unlock or open the driver's door. If you unlock the door, but do not open it within 15 seconds, the lights go off. If you open the driver's door, you will hear a lights on reminder chime.
*1: Models with the keyless access system have an ENGINE START/STOP button instead of an ignition switch.
>>Automatic Operation (automatic lighting control)
We recommend that you turn on the lights manually when driving at night, in a dense fog, or in dark areas such as long tunnels or parking facilities.
The light sensor is in the location shown below. Do not cover this light sensor with anything; otherwise, the automatic lighting system may not work properly.
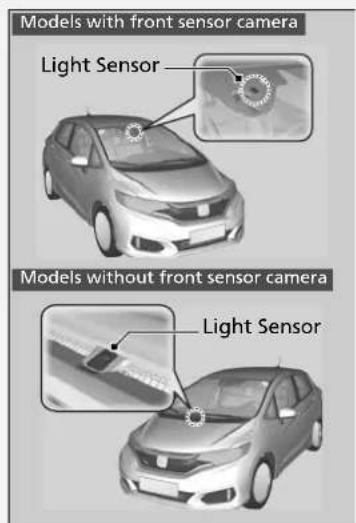
>>Automatic Lighting Off Feature
You can change the headlight auto off timer setting. →Customized Features P. 131
Fog Lights
Can be used when the position lights or the headlights are on.
■Rear fog light
Can be used when the headlights or the front fog lights are on.
Front and Rear Fog Lights Switch\*
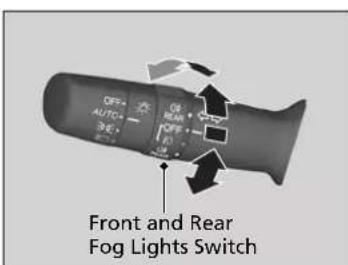
■To turn the front fog lights on
Rotate the switch up from the OFF position to the Position. The indicator comes on.
■To turn the front and rear fog lights on
Rotate the switch one position up from the 0 position. The hand indicator comes on.
■To turn the rear fog light on
Rotate the switch down from the OFF position. The Indicator comes on.
Rear Fog Lights\*
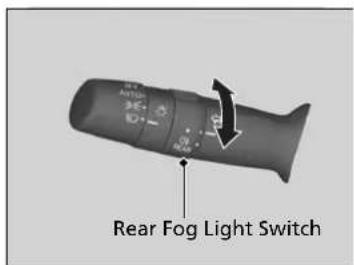
■To turn the rear fog light on
Rotate the switch to The indicator comes on.
Headlight Adjuster\*
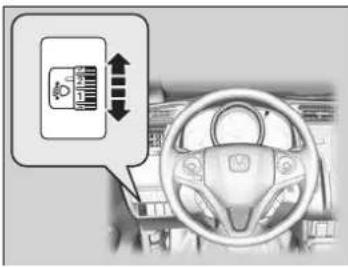
You can adjust the vertical angle of the low beam headlights when the ignition switch is in ON Ⅱ*1.
Turn the adjustment dial to select an appropriate angle for the headlights.
The larger dial number indicates the lower angle.
■To select the adjusting dial position
Refer to the below table for the appropriate dial position for your vehicle's riding and loading conditions.
| Condition Dial position | |
| A driver | 0 |
| A driver and a front passenger | |
| Five persons in the front and rear seats 1 | |
| Five persons in the front and rear seats and luggage in the luggage area, within the limit of maximum permissible axle weight and maximum permissible vehicle weight | 2 |
| A driver and luggage in the luggage area, within the limits of maximum permissible axle weight and maximum permissible vehicle weight | 3 |
*1: Models with the keyless access system have an ENGINE START/STOP button instead of an ignition switch.
* Not available on all models
Headlight Adjuster \*
Models with LED low beam headlights
Your vehicle is equipped with the automatic headlight adjusting system that automatically adjusts the vertical angle of the low beam headlights. If you find a significant change in the vertical angle of the headlights, there may be a problem with the system. Have your vehicle checked by a dealer.
You may need to alter the headlight beam distribution.
Adjusting Headlight Distribution P. 451
Auto High-Beam (High Beam Support System) \*
Using a camera mounted to the inside of the windshield, this system detects light sources ahead of the vehicle. Depending on the light source, the system automatically switches the headlights to high beam for optimal visibility at night.
The system operates when:
■The headlight switch is in AUTO.
■The lever is in the low beam position.
The low beams are on and the system recognizes that you are driving at night.
The vehicle speed is above 40 km/h (25 mph).
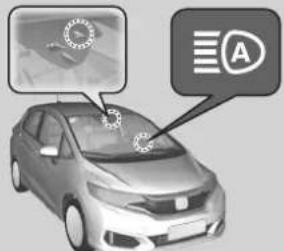
How it works
When the camera detects lights coming from a preceding or oncoming vehicle, the headlights remain in low beam.
When the camera detects no lights coming from a preceding or oncoming vehicle, the headlights change to high beam.
The view angle or distance that the camera can detect lights ahead differs depending on conditions, such as the brightness of the lights and the weather.
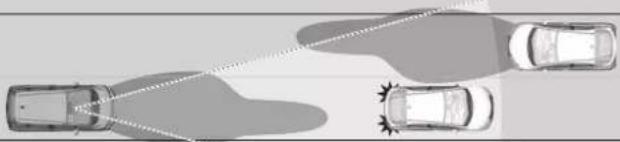
natural_image
Top-down diagram of three cars with a dotted line indicating a road or path, no text or symbols presentAuto High-Beam (High Beam Support System) \*
The auto high-beam determines when to change the headlight beams by responding to the brightness of the lights ahead of your vehicle. In the following cases, the system may not respond to the lights properly:
- The brightness of the lights from the preceding or oncoming vehicle is intense or poor.
- Visibility is poor due to the weather (rain, snow, fog, windscreen frost, etc.).
- Other light sources, such as streetlights and electric billboards are illuminating the road ahead.
- The brightness level of the road ahead constantly changes.
• The road is bumpy or with many curves. - A vehicle cuts in front of you, or a vehicle in front of you is not in the preceding or oncoming direction.
- Your vehicle is tilted with a heavy load in the rear.
If you find the timing of beam changes inconvenient for driving, change the headlight beams manually.
If you do not want the system to be activated at any time when the headlight switch is in AUTO, consult a dealer.
Operating the System
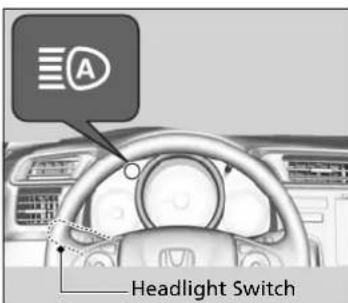
To activate the system, turn the headlight switch to AUTO and then set the headlights to low beam. The auto high-beam indicator will come on.
Light Switches P. 170
The high beams remain on unless:
- You have been driving below 24km/h (15mph) for an extended amount of time.
- The speed of the vehicle drops below 10km/h (6mph).
- The windshield wipers have been running at a high speed for more than a few seconds.
- You enter a well lit location.
The high beams come back on once the condition that caused them to turn off no longer exists.
Operating the System
For the auto high-beam to work properly:
- Do not place an object that reflects light on the dashboard.
- Keep the windscreen around the camera clean. When cleaning the windscreen, be careful not to apply the windscreen cleanser to the camera lens
- Do not attach an object, sticker or film to the area around the camera.
- Do not touch the camera lens.
If the camera receives a strong impact, or repairing of the area near the camera is required, consult a dealer.
To help reduce the likelihood that high interior temperatures will cause the camera system to shut off, when parking, find a shady area or face the front of the vehicle away from the sun.
If you use a reflective sun shade, do not allow it to cover the camera housing. Covering the camera can concentrate heat on the camera.
If the message appears:
- Use the heating and cooling system */climate control system* to cool down the interior and, if necessary, also use defroster mode with the air flow directed towards the camera.
- Start driving the vehicle to lower the windscreen temperature, which cools down the area around the camera.
If needed, you can temporarily turn the high beams off manually. Turn on the high beams by pushing the lever forward until you hear a click, or flash the high beams once by pulling the lever toward you. To turn the high beams back on, repeat one of the procedures. If you want the auto high-beam operation to resume at once, pull and hold the lever towards you for a few seconds.
Operating the System
If the message appears:
- Park your vehicle in a safe place, and clean the windscreen. If the message does not disappear after you have cleaned the windscreen and driven for a while, have your vehicle checked by a dealer.
Daytime Running Lights
The position */daytime running lights come on when the following conditions have been met:
- The ignition switch is in ON ^*1 .
• The headlight switch is in AUTO.
Turning off the ignition switch or setting the power mode to VEHICLE OFF will turn off the daytime running lights.
The daytime running lights are off once the headlight switch is turned on, or when the head light switch is in AUTO and it is getting darker outside.
*1: Models with the keyless access system have an ENGINE START/STOP button instead of an ignition switch.
* Not available on all models
Wipers and Washers
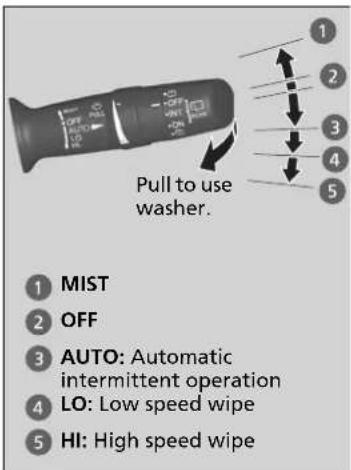
The windscreen wipers and washers can be used when the ignition switch is in ON ^*1 .
MIST
The wipers run at high speed until you release the lever.
■Wiper switch (OFF, AUTO, LO, HI)
Change the wiper switch setting according to the amount of rain.
Automatic Intermittent Wipers P. 180
Washer
Sprays while you pull the lever toward you. When you release the lever for more than one second, the spray stops, the wipers sweep two or three more times to clear the windscreen, then stop.
Wipers and Washers
NOTICE
Do not use the wipers when the windscreen is dry. The windscreen will get scratched, or the rubber blades will get damaged.
Turn the washers off if no washer fluid comes out. The pump may get damaged.
The wiper motor may stop motor operation temporarily to prevent an overload. Wiper operation will return to normal within a few minutes, once the circuit has returned to normal.
NOTICE
In cold weather, the blades may freeze to the windscreen, becoming stuck. Operating the wipers in this condition may damage the wipers. Use the demister to warm the windscreen, then turn the wipers on.
If the wipers stop operating due to any obstacle such as the build-up of snow, park the vehicle in a safe place.
Rotate the wiper switch to OFF, and turn the ignition switch to ACCESSORY 1 or LOCK 0*1, then remove the obstacle.
Automatic Intermittent Wipers
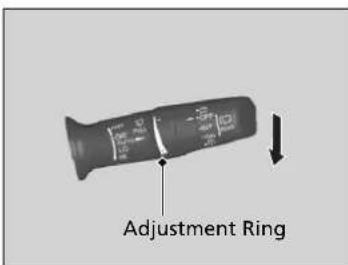
When you push the lever down to AUTO, the windscreen wipers sweep once, and go into the automatic mode.
The wipers operate intermittently, at low speed, or at high speed and stops in accordance with the amount of rainfall the rainfall sensor detects.
■AUTO sensitivity adjustment
When the wiper function is set to AUTO, you can adjust the sensitivity of the rain fall sensor (using the adjustment ring) so that wipers will operate in accordance with your preference.
Sensor sensitivity
Low sensitivity
High sensitivity
>>Automatic Intermittent Wipers
The rainfall sensor is in the location shown below.
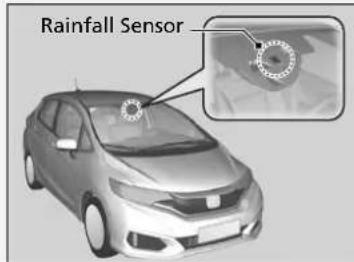
AUTO should always be turned OFF before the following situation in order to prevent severe damage to the wiper system:
- Cleaning the windshield
- Driving through a car wash
- No rain present
Rear Wiper/Washer
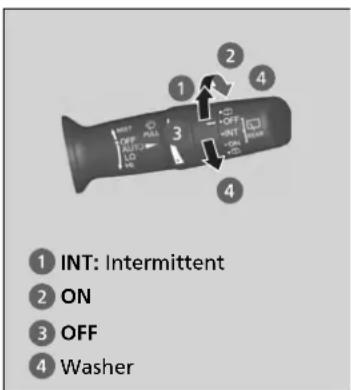
The rear wiper and washer can be used when the ignition switch is in ON ^*1 .
■Wiper switch (OFF, INT, ON)
Change the wiper switch setting according to the amount of rain.
■Washer ( )
Sprays while you rotate the switch to this position. Hold it to activate the wiper and to spray the washer. Once released, it stops operating after a few more sweeps.
■Operating in reverse
When you shift the transmission to R with the windscreen wipers activated, the rear wiper operates automatically as follows even if its switch is off.
Front Wiper Position Rear Wiper Operation
AUTO (Intermittent) Intermittent
LO (Low speed wipe)
HI (High speed wipe)
Continuous
Brightness Control
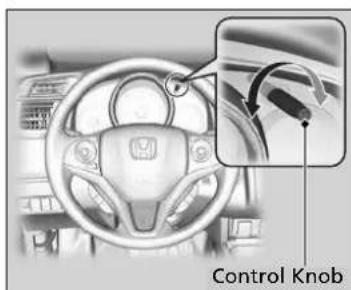
When the ignition switch is ON [Ⅱ]^*1 , you can use the brightness control knob to adjust instrument panel brightness.
Brighten: Turn the knob to the right.
Dim: Turn the knob to the left.
Several seconds after you have adjusted the brightness, you will be returned to the previous screen.
■Brightness level indicator
The brightness level is shown on the multi-information display while you are adjusting it.
Brightness Control
The brightness of the instrument panel will be reduced when the following conditions:
- The ignition switch is in ON [II] ^4 .
• The position lights are turned on.
To cancels the reduced instrument panel brightness when the exterior lights are on, turn the knob to the right until the brightness display is up to max.
The brightness can be set differently for when the exterior lights are on, and when they are off.
Rear Demister/Heated Door Mirror\*
Press the rear demister and heated door mirror* button or touch the icon to defog the rear window and mirrors * when the ignition switch is in ON □□*1.
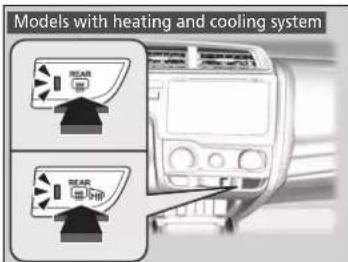
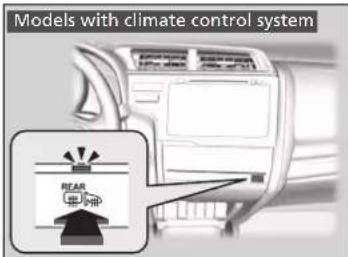
Models with climate control system
The rear demister and heated door mirrors automatically switch off after 10-30 minutes depending on the outside temperature. However, if the outside temperature is 0^ C or below, they do not automatically switch off.
*1: Models with the keyless access system have an ENGINE START/STOP button instead of an ignition switch.
* Not available on all models
Rear Demister/Heated Door Mirror *
NOTICE
When cleaning the inside of the rear window, be careful not to damage the heating wires. It is critical to wipe the window from side to side along the demister heating wires.
This system consumes a lot of power, so turn it off when the window has been demisted. Also, do not use the system for a long period when the engine is idling. This may weaken the battery, making it difficult to start the engine.
Adjusting the Steering Wheel
The steering wheel height and distance from your body can be adjusted so that you can comfortably grip the steering wheel in an appropriate driving posture.
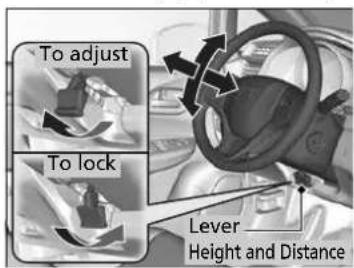
- Pull the steering wheel adjustment lever up.
The steering wheel adjustment lever is under the steering column.
- Move the steering wheel up or down, and in or out.
▶ Make sure you can see the instrument panel gauges and indicators.
- Push the steering wheel adjustment lever down to lock the steering wheel in position.
▶ After adjusting the position, make sure you have securely locked the steering wheel in place by trying to move it up, down, in, and out.
Adjusting the Steering Wheel
WARNING
Adjusting the steering wheel position while driving may cause you to lose control of the vehicle and be seriously injured in a crash.
Adjust the steering wheel only when the vehicle is stopped.
Adjusting the Mirrors
Interior Rearview Mirror
Adjust the angle of the rearview mirror when you are sitting in the correct driving position.
Rearview Mirror with Day and Night Positions
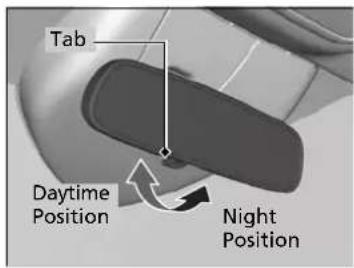
Flip the tab to switch the position. The night position will help to reduce the glare from headlights behind you when driving after dark.
Adjusting the Mirrors
Keep the inside and outside mirrors clean and adjusted for best visibility.
Adjust the mirrors before you start driving.
→Front Seats P. 187
Power Door Mirrors
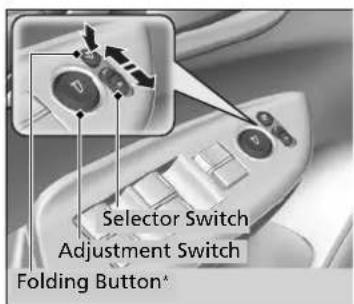
You can adjust the door mirrors when the ignition switch is in ON [II]^*1 .
■Mirror position adjustment
L/R selector switch: Select the left or right mirror. After adjusting the mirror, return the switch to the centre position.
Mirror position adjustment switch: Press the switch left, right, up, or down to move the mirror.
Press the folding button to fold in and out the door mirrors.
*1: Models with the keyless access system have an ENGINE START/STOP button instead of an ignition switch.
* Not available on all models
Adjusting the Seats
Front Seats
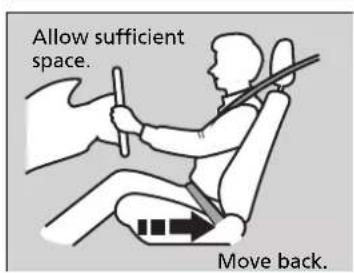
Adjust the driver's seat as far back as possible while allowing you to maintain full control of the vehicle. You should be able to sit upright, well back in the seat and be able to adequately press the pedals without leaning forward, and grip the steering wheel comfortably. The passenger's seat should be adjusted in a similar manner, so that it is as far back from the front airbag in the dashboard as possible.
■ Adjusting the Seat Position
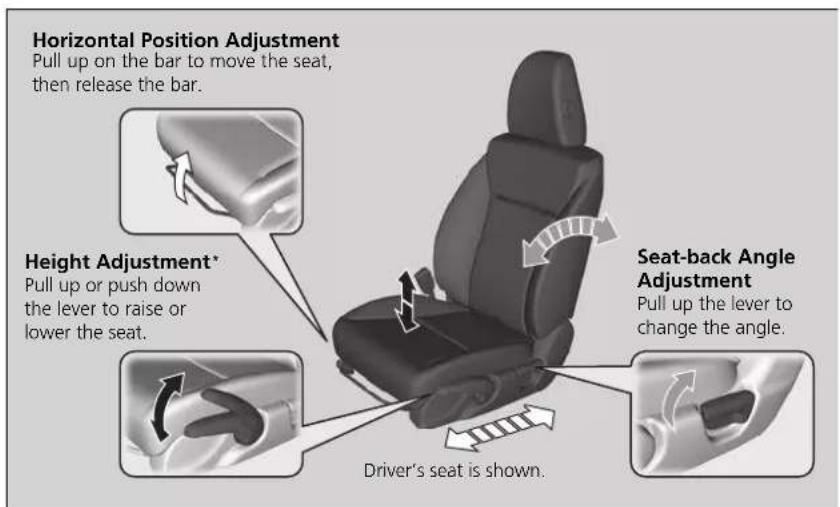
* Not available on all models
Continued
Adjusting the Seats
WARNING
Sitting too close to a front airbag can result in serious injury or death if the front airbags inflate.
Always sit as far back from the front airbags as possible while maintaining control of the vehicle.
In addition to the seat adjustment, you can adjust the steering wheel up and down, in and out. Allow at least 25 cm (10 inches) between the centre of the steering wheel and the chest.
Always make seat adjustments before driving.
Once a seat is adjusted correctly, rock it back and forth to make sure it is locked in position.
Adjusting the Seat-Backs
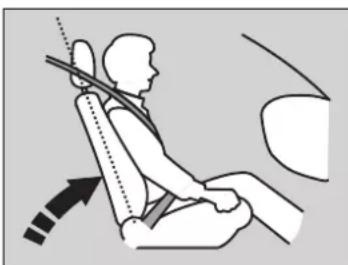
natural_image
Illustration of a person seated in a car seat using a horizontal barbell, with an arrow indicating direction (no text or symbols present)Adjust the driver's seat-back to a comfortable, upright position, leaving ample space between your chest and the airbag cover in the centre of the steering wheel.
The front seat passenger should also adjust their seat-back to a comfortable, upright position.
Reclining a seat-back so that the shoulder part of the belt no longer rests against the occupant's chest reduces the protective capability of the belt. It also increases the chance of sliding under the belt in a crash and being seriously injured. The farther a seat-back is reclined, the greater the risk of injury.
Adjusting the Seat-Backs
WARNING
Reclining the seat-back too far can result in serious injury or death in a crash.
Adjust the seat-back to an upright position, and sit well back in the seat.
Do not put a cushion, or other object, between the seat-back and your back.
Doing so may interfere with proper seat belt or airbag operation.
If you cannot get far enough away from the steering wheel and still reach the controls, we recommend that you investigate whether some type of adaptive equipment may help.
Reclining the Front Seats
Reclining the seat-backs on the front seats until they are level with the rear seat cushions provides a large cushioned area that can (and should only) be used when the vehicle is safely parked.
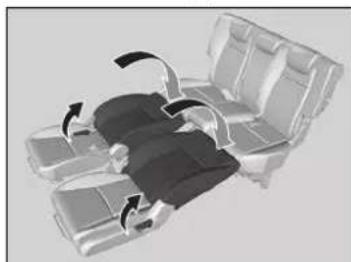
natural_image
3D rendering of a car seatbelt mechanism with directional arrows indicating movement (no text or symbols)- Remove the front head restraints while pushing the release button.
▶ Store the head restraints in the luggage area. - Adjust the front seats forward as far as possible.
- While pulling the seat-back angle adjustment lever, pivot the seat-back backward until it is level with the rear seat cushion.
- Move the front seat backward until it touches the rear seat.
- Unlatch the detachable anchor from the anchor buckle, and store the rear centre seat belt.
Seat Belt with Detachable Anchor P. 45 - Adjust the rear seat-back to the desired position.
To return the front seats and rear centre seat belt to their original positions, reverse this procedure.
When you return a seat-back to its upright position, hold the seat-back to keep it from going up too quickly.
Reclining the Front Seats
Both front seats must be returned to their normal upright position, and the head restraints reinstalled and properly adjusted before driving.
Removing and Reinstalling the Head Restraints P. 196
Rear Seats
Adjusting the Rear Seat-Backs
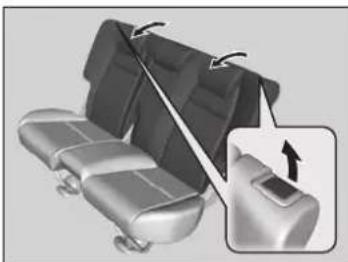
natural_image
3D illustration of a car seat assembly with directional arrows indicating movement (no text or symbols)Pull the lever on the right to change the angle of the right half of the seat-back, and left for the left half.
Adjusting the Rear Seat-Backs
WARNING
Make sure the seat-backs are latched securely before driving.
Folding Down the Rear Seats
The rear seats can be folded down separately to allow for additional storage space.
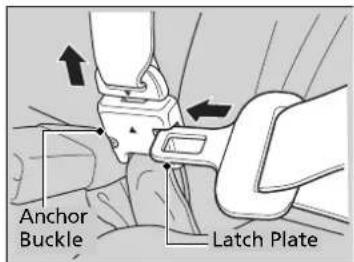
■To fold down the seat
- Store the centre seat belt first. Insert the latch plate into the slot on the side of the anchor buckle.
- Retract the seat belt into the holder on the ceiling.
Seat Belt with Detachable Anchor P. 45 - Lower the head restraint to its lowest position.
- Pull the release lever and fold down the seat-back.
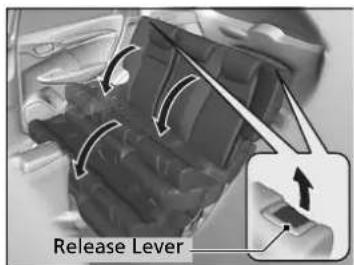
To return the seat to the original position, pull up the seat-back in the upright position.
Folding Down the Rear Seats
Make sure all items in the luggage area or items extending to the rear seats are properly secured. Loose items can fly forward if you have to brake hard.
Remove any items from the rear seat cushion and floor before you fold down the rear seat.
To lock the seat-back upright, push it backwards until it locks.
Make sure the seat-back, head restraints and seat cushion are securely latched back into place before driving. Also, make sure all rear shoulder belts are positioned in front of the seat-back, and the centre shoulder belt is re-positioned in the holding slot.
Folding the Rear Seat Up
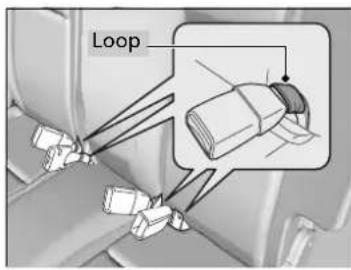
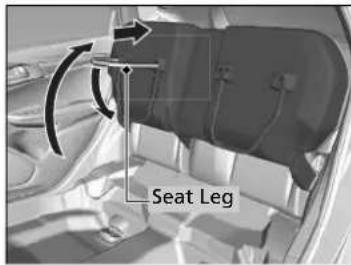
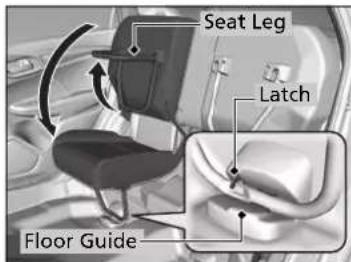
Separately lift up the left and right rear seat cushions to make room for luggage area.
■Lifting up the seat cushion
-
Make sure the seat belt buckles are in their loops on the seat.
-
Pull up the rear seat cushion.
-
Fold the seat leg down while pushing the seat cushion firmly against the seat-back to lock it.
■Putting the seat in the original position
- Hold the seat cushion in the upright position, and pull up the seat leg fully.
The seat cushion can abruptly fall down once you pull up the seat leg.
- Slowly put down the seat cushion and set the seat leg in the floor guide.
▶ A latch comes out when the leg is set properly.
Folding the Rear Seat Up
After you fold the seat up, or put it back in the original position, make sure the seat is firmly secured by rocking it forward and back.
Check if there are any items on the seat before you pull the seat cushion up. Check if there are any obstacles around the floor guide before you put the seat back in the original position.
Head Restraints
Your vehicle is equipped with head restraints in all seating positions.
Adjusting the front head restraint positions
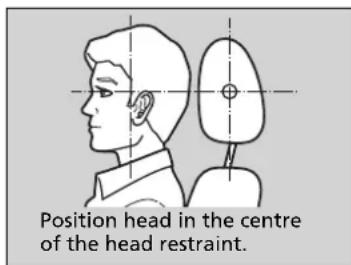
Head restraints are most effective for protection against whiplash and other rear-impact crash injuries when the centre of the back of the occupant's head rests against the centre of the restraint. The tops of the occupant's ears should be level with the centre height of the restraint.
The front head restraints can also be tilted to adjust its position properly.
Adjusting the front head restraint positions
WARNING
Improperly positioning head restraints reduces their effectiveness and increases the likelihood of serious injury in a crash.
Make sure head restraints are in place and positioned properly before driving.
In order for the head restraint system to work properly:
- Do not hang any items on the head restraints, or from the restraint legs.
- Do not place any object between an occupant and the seat-back.
• Install each restraint in its proper location.
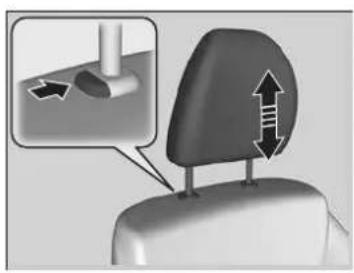
natural_image
3D diagram of a mechanical component with an inset showing a tool interacting with a surface (no text or symbols)To raise the head restraint:
Pull it upward.
To lower the head restraint:
Push it down while pressing the release button.
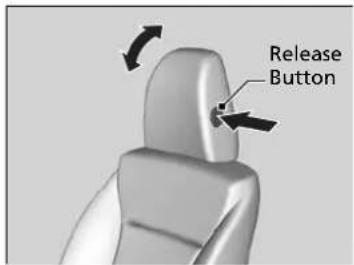
To tilt the head restraint: Pivot it while pressing the release button.
Changing the Rear Seat Head Restraint Positions
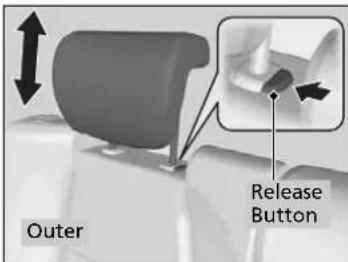
A passenger sitting in a back seating position should adjust the height of their head restraint to an appropriate position before the vehicle begins moving.
To raise the head restraint:
Pull it upward.
To lower the head restraint:
Push it down while pressing the release button.
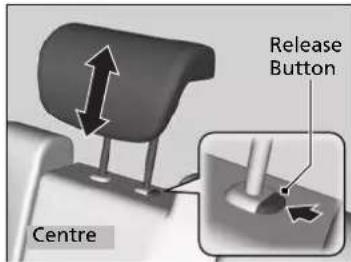
Continued
Changing the Rear Seat Head Restraint Positions
When you use the head restraint in a rear seating position, pull up the head restraint to its highest position. Do not use it in any lower position.
Removing and Reinstalling the Head Restraints
Head restraints can be removed for cleaning or repair.
To remove a head restraint:
Pull the restraint up as far as it will go. Then push the release button, and pull the restraint up and out.
To reinstall a head restraint:
Insert the legs back in place, then adjust the head restraint to an appropriate height while pressing the release button. Pull up on the restraint to make sure it is locked in position.
Removing and Reinstalling the Head Restraints
WARNING
Failure to reinstall, or correctly reinstall, the head restraints can result in severe injury during a crash.
Always replace the head restraints before driving.
Maintain a Proper Sitting Position
After all occupants have adjusted their seats and head restraints, and put on their seat belts, it is very important that they continue to sit upright, well back in their seats, with their feet on the floor, until the vehicle is safely parked and the engine is off.
Sitting improperly can increase the chance of injury during a crash. For example, if an occupant slouches, lies down, turns sideways, sits forward, leans forward or sideways, or puts one or both feet up, the chance of injury during a crash is greatly increased.
In addition, an occupant who is out of position in the front seat can be seriously or fatally injured in a crash by striking interior parts of the vehicle or being struck by an inflating front airbag.
Maintain a Proper Sitting Position
WARNING
Sitting improperly or out of position can result in serious injury or death in a crash.
Always sit upright, well back in the seat, with your feet on the floor.
▶▶Adjusting the Seats▶Armrest*
Armrest\*
Using the Front Seat Armrest
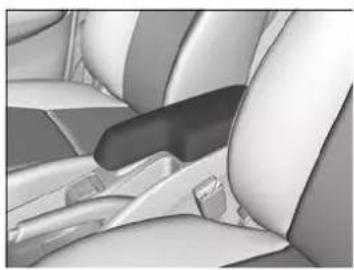
natural_image
Interior view of a car seatbelt and rear seats (no text or symbols visible)The console lid can be used as an armrest.
Interior Lights/Interior Convenience Items
Interior Lights
Interior Light Switch
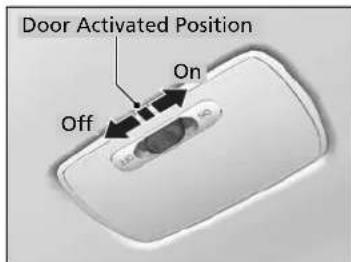
■ON
The interior light comes on regardless of whether the doors are open or closed.
■Door activated
The interior light comes on in the following situations:
- When any doors are opened.
- You unlock the driver's door.
Models without keyless access system
- You remove the key from the ignition switch.
Models with keyless access system
- When the power mode is set to VEHICLE OFF (LOCK).
OFF
The interior light remains off regardless of whether the doors are open or closed.
Interior Light Switch
In the door activated position, the interior light fades out and goes off about 30 seconds after the doors are closed.
The light goes off after 30 seconds in the following situations:
- When you unlock the driver's door but do not open it.
Models without keyless access system
- When you remove the key from the ignition switch but do not open a door.
Models with keyless access system
- When you set the power mode to VEHICLE OFF (LOCK) but do not open a door.
The interior light goes off immediately in the following situations:
- When you lock the driver's door.
- When you turn the ignition switch to ON II ^-1 .
Models without keyless access system
- When you close the driver's door with the key in the ignition switch.
Models with keyless access system
- When you close the driver's door in ACCESSORY mode.
If you leave any of the doors open in VEHICLE OFF (LOCK) mode, or without the key in the ignition switch, the interior light goes off after about 15 minutes.
*1: Models with the keyless access system have an ENGINE START/STOP button instead of an ignition switch.
▶▶ Interior Lights/Interior Convenience Items▶ Interior Lights
Map Lights
The map lights can be turned on and off by pressing the lenses.
Luggage Area Light
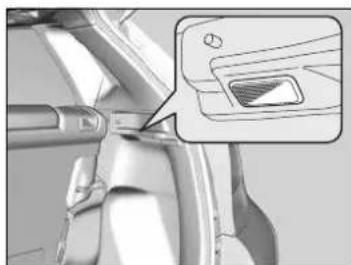
natural_image
Close-up of a car interior showing a hand holding a tool, with an inset close-up highlighting a textured surface (no text or symbols visible)The light comes on when you open the tailgate, and goes off when closed.
Interior Convenience Items
Glove Box
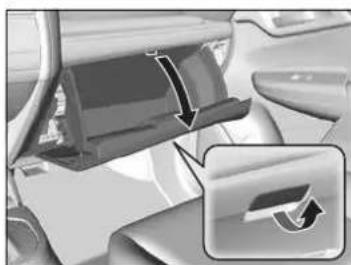
natural_image
Interior view of a car showing the dashboard and seat area with a directional arrow icon (no text or symbols)Pull the handle to open the glove box.
Console Compartment*
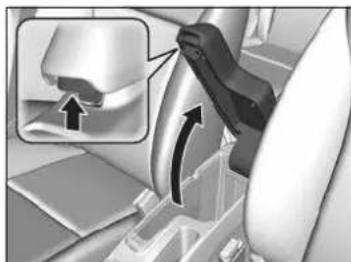
natural_image
Interior view of a car seatbelt mechanism with an inset showing a mechanical component (no text or symbols visible)Pull the handle to open the console compartment.
Glove Box
WARNING
An open glove box can cause serious injury to your passenger in a crash, even if the passenger is wearing the seat belt.
Always keep the glove box closed while driving.
Beverage Holders
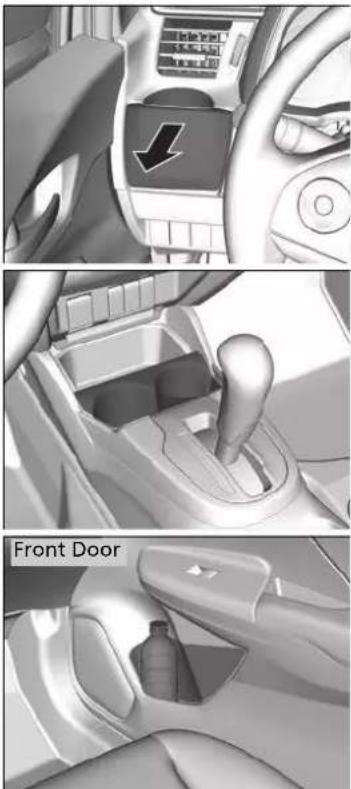
■Front seat beverage holders
Pull the lid backward to use the front panel beverage holder.
The beverage holder is at the front of each door.
Beverage Holders
NOTICE
Spilled liquids damage the upholstery, carpeting, and electrical components in the interior.
Be careful when you are using the beverage holders. Hot liquid can scald you.
Continued
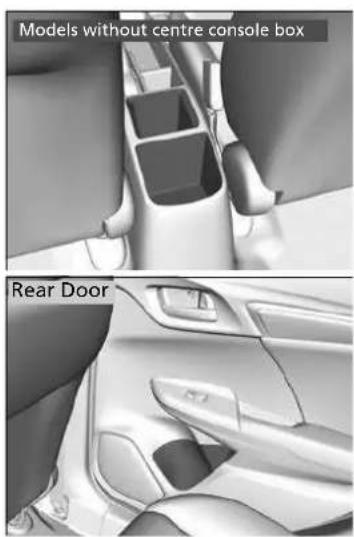
natural_image
Interior view of a car showing front and rear door compartments with no visible text or symbols■Rear seat beverage holders
The beverage holder is at the front of each door.
Luggage Floor Box
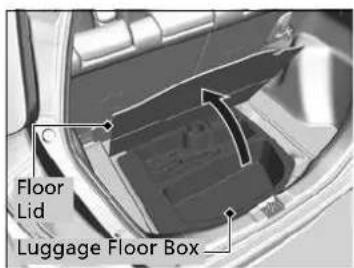
Pull up the luggage area floor lid.
Accessory Power Socket(s)
The accessory power socket can be used when the ignition switch must be in ACCESSORY I or ON II*1.
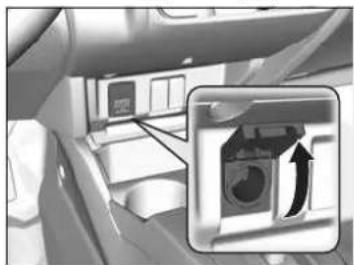
natural_image
Interior view of a car showing a washing machine with an arrow indicating clockwise motion (no text or symbols present)■Accessory power socket (console panel) Open the cover to use it.
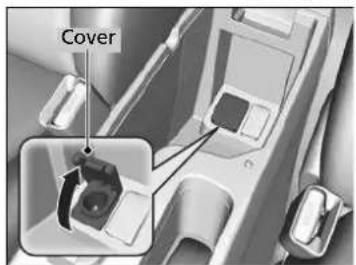
■Accessory power socket (console compartment)* Open the console lid and the cover to use it.
*1: Models with the keyless access system have an ENGINE START/STOP button instead of an ignition switch.
* Not available on all models
Continued
Accessory Power Socket(s)
NOTICE
Do not insert an automotive type cigarette lighter element. This can overheat the power socket.
The accessory power socket is designed to supply power for 12-volt DC accessories that are rated 180 watts (15 amps) or less.
To prevent battery drain, only use the power socket with the engine running.
Coat Hook
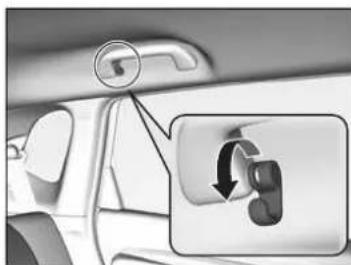
natural_image
Interior view of a car showing the rearview mirror and side door (no text or symbols visible)There is a coat hook on the rear driver's side grab handle. Pull it down to use it.
Tie-down Anchors
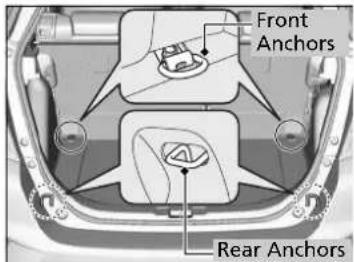
The tie-down anchors on the luggage area floor can be used to install a net for securing items.
Coat Hook
The coat hook is not designed for large or heavy items.
Luggage Area Cover
The luggage area cover may be removed to give you more luggage room.
■To remove the luggage area cover
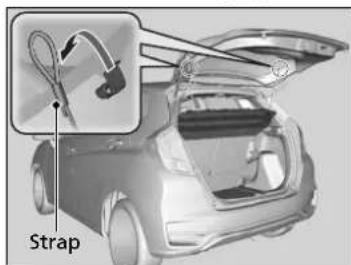
- Open the tailgate.
- Remove the strap on each side of the tailgate.
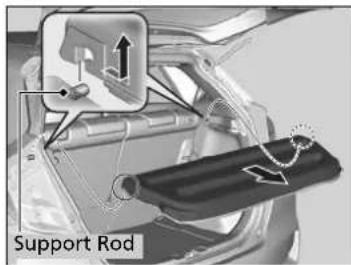
- Disengage the support rods, then remove the luggage area cover.
Reverse this procedure to install the luggage area cover.
After reinstalling the luggage area cover, make sure it is latched securely.
Luggage Area Cover
Do not place items on the luggage area cover, or stack objects higher than the top of the back seat. They could block your view and be thrown around the vehicle during a crush or sudden stop.
Do not apply excessive pressure to the cover, such as leaning on it to retrieve an item.
Seat Heaters\*
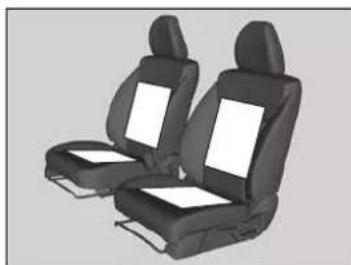
natural_image
Two black car seats with white panels, no visible text or symbolsThe ignition switch must be in ON ^II ^*1 to use the seat heaters. The HI setting heats the seats faster than the LO setting.
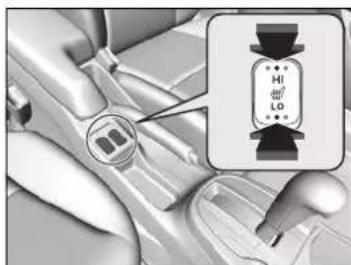
While in HI, the heater cycles on and off.
The appropriate indicator will be on while the seat heater is on. Briefly press the switch on the opposite side to turn the heater off. The indicator will be off. When a comfortable temperature is reached, select LO to keep the seat warm.
Seat Heaters*
WARNING
Heat induced burns are possible when using seat heaters.
Persons with a diminished ability to sense temperature (e.g., persons with diabetes, lower-limb nerve damage, or paralysis) or with sensitive skin should not use seat heaters.
Do not use the seat heaters even in LO when the engine is off. Under such conditions, the battery may be weakened, making the engine difficult to start.
In the LO setting, the heater runs continuously and does not automatically turn off.
*1: Models with the keyless access system have an ENGINE START/STOP button instead of an ignition switch.
* Not available on all models
Heating and Cooling System\*
Using Vents, Heating and A/C
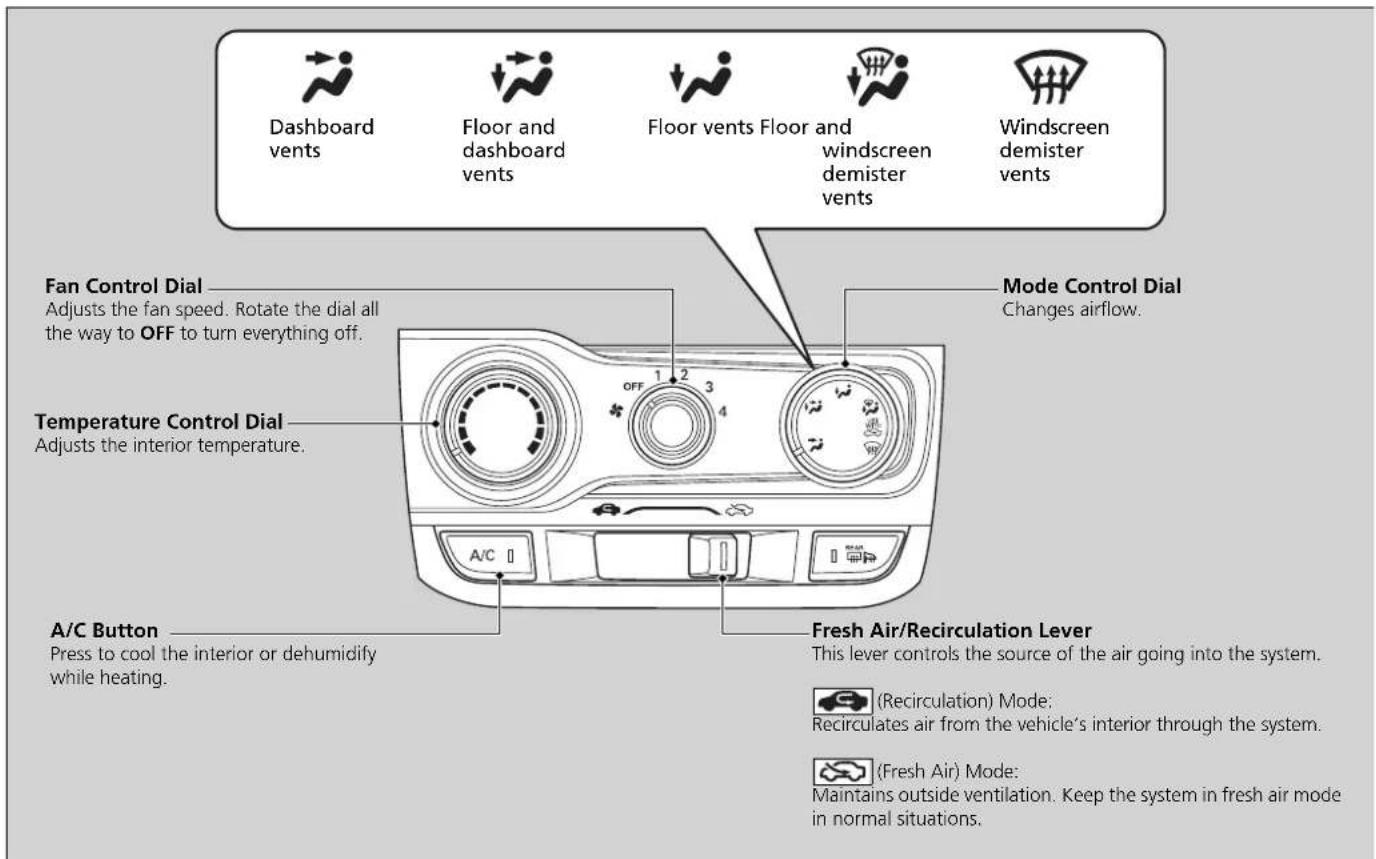
* Not available on all models
Continued
Heating
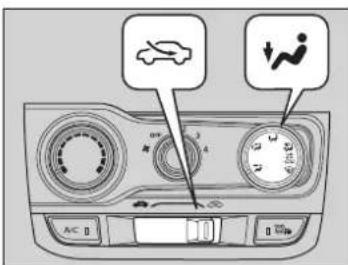
The heater uses heat from the engine coolant to warm the air.
- Adjust the fan speed using the fan control dial.
- Select and
- Adjust the temperature using the temperature control dial.
■To rapidly warm up the interior
- Set the fan to the maximum speed.
- Select ↓ ↓
- Set the temperature to maximum warm.
- Select
■To dehumidify the interior
When used in combination with the heater, the air conditioning system makes the interior warm and dry and can prevent the windows from fogging up.
- Turn the fan on.
- Press the A/C button to turn on the air conditioning.
- Select 📞 and 🐵. Adjust the temperature to your preference.
To rapidly warm up the interior
Change to fresh air mode as soon as the interior gets warm enough. The windows may fog up if kept in recirculation mode.
Cooling
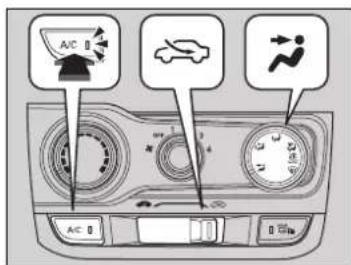
- Adjust the fan speed using the fan control dial.
- Select and
- Adjust the temperature using the temperature control dial.
- Press the A/C button (indicator on).
■To rapidly cool down the interior
- Set the fan to the maximum speed.
- Select
- Set the temperature to maximum cool.
- Press the A/C button (indicator on).
- Select
To rapidly cool down the interior
If the interior is very warm, you can cool it down more rapidly by partially opening the windows.
During the Auto Idle Stop, the air conditioning system will be turned off. To keep the air conditioning on, press the Auto Idle Stop OFF button to turn off the Auto Idle Stop system.
Auto Idle Stop System ON/OFF P. 411, 416
Defrosting the Windscreen and Windows
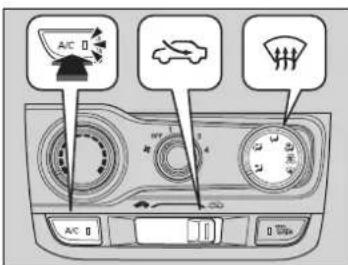
- Set the fan to the high speed.
- Select
- Select
- Press the A/C button (indicator on).

■To rapidly defrost the windows
- Set the fan to the maximum speed.
- Select
- Press the A/C button (indicator on).
- Select
- Set the temperature to maximum warm.


Defrosting the Windscreen and Windows
For your safety, make sure you have a clear view through all the windows before driving.
Do not set the temperature near the upper or lower limit.
When cold air hits the windscreen, the outside of the windscreen may fog up.
If the side windows fog up, adjust the vents so that the air hits the side windows.
Continuously variable transmission models
Selecting with the fan on restarts the engine during the Auto Idle Stop activated.
Manual transmission models
To defrost the windscreen during the Auto Idle Stop activated, restart the engine as follows:
-
Make sure the shift lever is in the [N].
-
Depress the clutch pedal fully.
-
Select
To rapidly defrost the windows
After defrosting the windows, switch over to fresh air mode. If you keep the system in recirculation mode, the windows may fog up from humidity. This impedes visibility.
Climate Control System\*
Using Automatic Climate Control
The automatic climate control system maintains the interior temperature you select. The system also selects the proper mix of heated or cooled air that raises or lowers the interior temperature to your preference as quickly as possible.
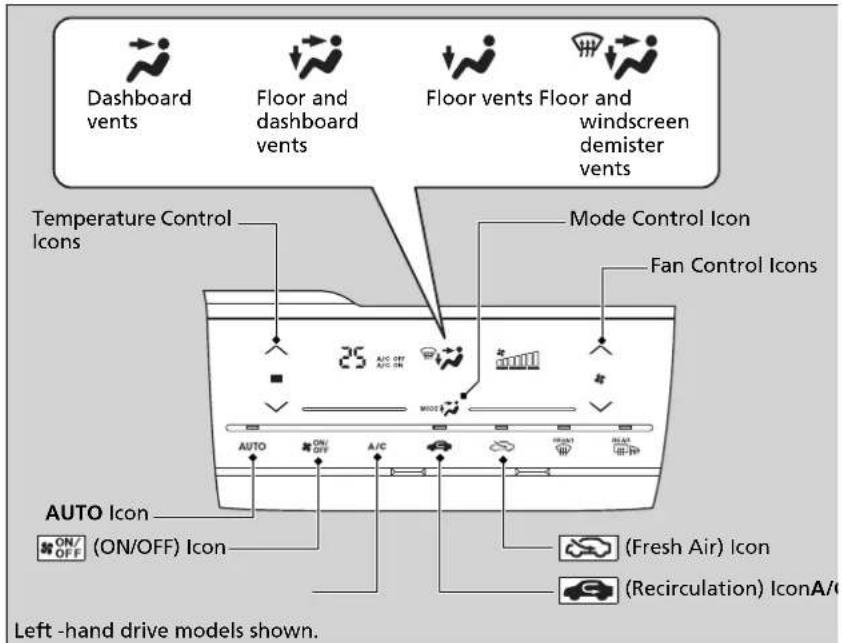
Use the system when the engine is running.
- Select the AUTO icon.
- Adjust the interior temperature using the temperature control icons.
- Select the ☑EN/SPN to cancel.
* Not available on all models
Continued
Using Automatic Climate Control
If any icons are selected while using the climate control system in auto, the function of the icon that was selected will take priority.
The AUTO indicator will go off, but functions unrelated to the icon that was selected will be controlled automatically.
To prevent cold air from blowing in from outside, the fan may not start immediately when the AUTO icon is selected.
If the interior is very warm, you can cool it down more rapidly by partially opening the windows, turning the system on auto, and setting the temperature to low. Change the fresh mode to recirculation mode until the temperature cools down.
When you set the temperature to the lower or upper limit, Lo or Hi is displayed.
You can raise or lower the temperature or fan speed setting flicking either control icon.
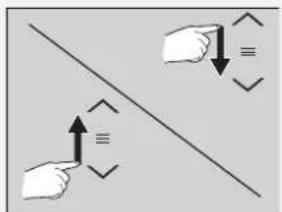
■Switching between the recirculation and fresh air modes
Select the icon to switch the mode depending on environmental conditions.
Recirculation mode (indicator on): Recirculates air from the vehicle's interior through the system.
Fresh air mode (indicator on): Maintains outside ventilation. Keep the system in fresh air mode in normal situations.
Using Automatic Climate Control
Selecting the ON/OFF switches the climate control system between on and off. When turned on, the system returns to your last selection.
During idle-stops, air-conditioning is suspended, and only the blower remains active.
If you do not want air-conditioning suspended, press the Auto Idle Stop system OFF button to cancel idle-stop.
The air conditioning system may also be turned off when driving uphill.
Defrosting the Windscreen and Windows
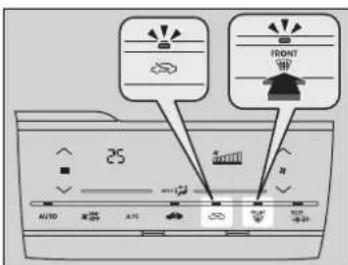
Select the ☐ on to turn the air conditioning system on and automatically switch the system to fresh air mode.
Select the ☐ on again to turn off, the system returns to the previous settings.
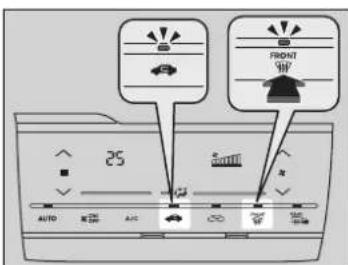
■To rapidly defrost the windows
- Select the 2. Select the

Defrosting the Windscreen and Windows
For your safety, make sure you have a clear view through all the windows before driving.
Do not set the temperature near the upper or lower limit.
When cold air hits the windscreen, the outside of the windscreen may fog up.
If the side windows fog up, adjust the vents so that the air hits the side windows.
Continuously variable transmission models
Selecting 📄 restarts the engine automatically during the Auto Idle Stop.
Manual transmission models
To defrost the windscreen during the Auto Idle Stop activated, restart the engine as follows:
-
Make sure the shift lever is in the N.
-
Depress the clutch pedal fully.
- Select the icon
To rapidly defrost the windows
After defrosting the windows, switch over to fresh air mode. If you keep the system in recirculation mode, the windows may fog up from humidity. This impedes visibility.
Turning On and Off the Touch Panel Beep
You hear the beep when operating the climate control system on the touch panel. This can be turned on and off.
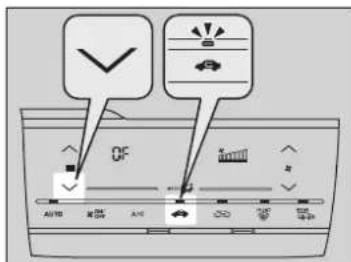
To turn off the beep:
- Set the power mode to ON.
- Touch the of the temperature control icon five times while pressing and holding the
- Release the 📄, after -- blinks five times and OF is displayed.
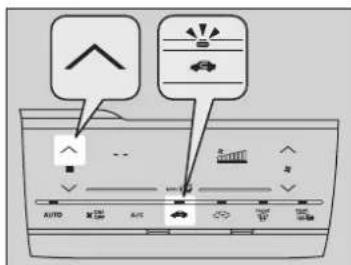
To turn on the beep:
- Set the power mode to ON.
- Touch the of the temperature control icon five times while pressing and holding the
- Release the 📄, after OF blinks five times and -- is displayed.
Turning On and Off the Touch Panel Beep
If you touch any other icons during this procedure, the setting may fail. In this case, once you set the power mode to VEHICLE OFF (LOCK), then follow this procedure again.
■ Touch Panel Sensitivity Setting
You can set the level of sensitivity of the touch panel to high, normal, or low.
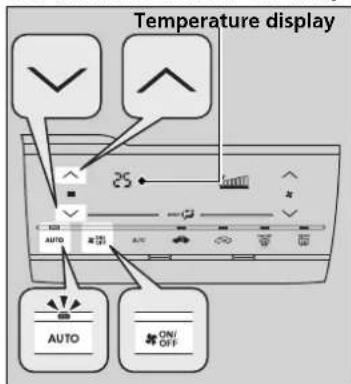
- Set the power mode to ON.
- Press and hold the AUTO icon, then press any of the following icons five times to set the level.
• : High (Hi) *1
▶ Previous setting blinks five times and Hi will be displayed in the temperature display area.
• : Normal (--)
▶ Previous setting blinks five times and -- will be displayed in the temperature display area.
• : Low (Lo)
▶ Previous setting blinks five times and Lo will be displayed in the temperature display area.
3. Release the AUTO icon.
>>Touch Panel Sensitivity Setting
If you touch any other icons during this procedure, the setting may fail. In this case, once you set the power mode to VEHICLE OFF (LOCK), then follow this procedure again.
Automatic Climate Control Sensors
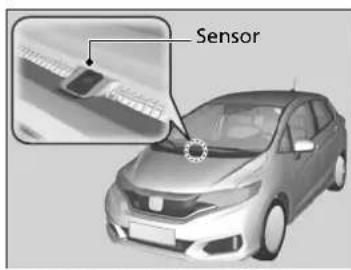
The automatic climate control system is equipped with sensors. Do not cover or spill any liquid on them.
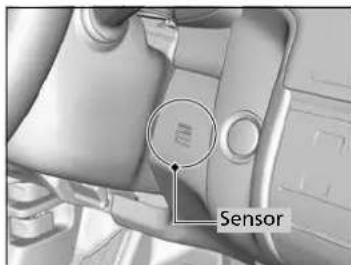
Features
This chapter describes how to operate technology features.
Audio System
About Your Audio System.... 220
USB Port(s).... 221
HDMI™ Port ^* 222
Auxiliary Input Jack ^* 222
Audio System Theft Protection 223
Audio Antenna ^* 224
Audio Remote Controls.... 225
Models with colour audio system
Audio System Basic Operation.... 227
Audio/Information Screen 228
Adjusting the Sound 232
Display Setup 233
Playing AM/FM Radio 234
Playing DAB (Digital Audio Broadcasting)* ....241
Playing a CD 245
Playing an iPod 248
Playing a USB Flash Drive 251
Playing Bluetooth® Audio.... 254
Models with display audio system
Audio System Basic Operation 257
Audio/Information Screen 258
Adjusting the Sound.... 274
Display Setup.... 275
Playing AM/FM Radio 277
Playing DAB (Digital Audio Broadcasting) * .... 282
Playing a CD 285
Playing an iPod 288
Playing a USB Flash Drive 291
Playing Bluetooth® Audio.... 294
Playing a Video Using the HDMI™ ......296
On Board Apps....298
Smartphone Connection....299
Wi-Fi Connection....302
Siri® Eyes Free....304
Audio Error Messages 305
General Information on the Audio
System 308
Customized Features....313
Models with colour audio system
Hands-Free Telephone System ....339
Models with display audio system
Hands-Free Telephone System ....362
Audio System
About Your Audio System
The audio system features AM/FM radio. It can also play audio CDs, WMA/MP3/AAC files, USB flash drives, and iPod, iPhone and Bluetooth ^® devices.
You can operate the audio system from the buttons and switches on the panel, the remote controls on the steering wheel, or the icons on the touchscreen interface*.
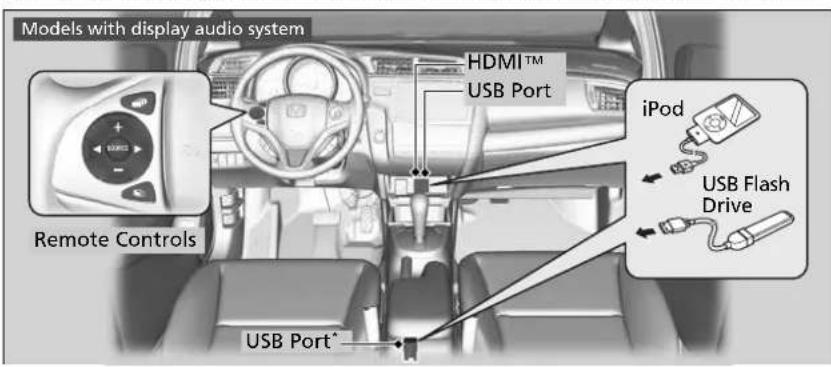
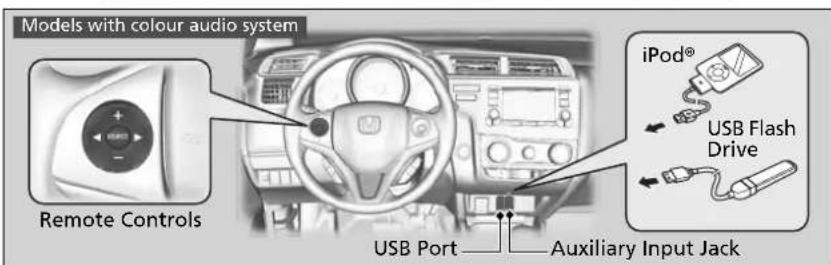
*1: Models with the keyless access system have an ENGINE START/STOP button instead of an ignition switch.
* Not available on all models
About Your Audio System
Video CDs, DVDs, and 8-cm mini CDs are not supported.
iPod, iPhone and iTunes are trademarks of Apple Inc.
Models with display audio system
Key Off Operation
After you turn the ignition switch to LOCK 0 ^1 , you can use the audio system for up to 30 minutes per driving cycle. However, whether you can continue using the audio system depends on the battery condition. Repeatedly using this feature may drain the battery.
USB Port(s)
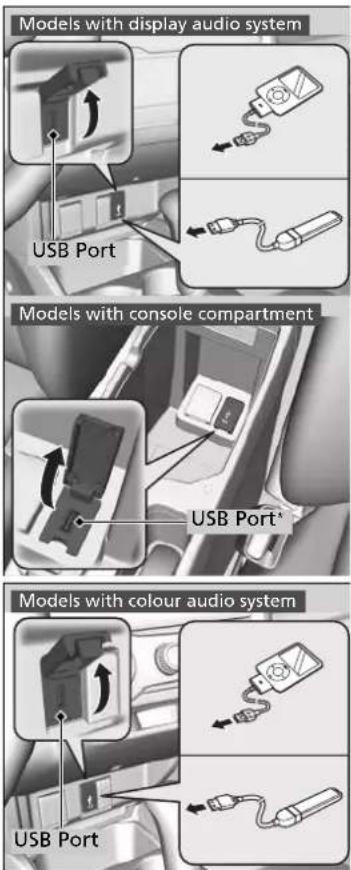
* Not available on all models
- Open the cover.
- Install the iPod USB connector or the USB flash drive to the USB port.
>>USB Port(s)
- Do not leave the iPod or USB flash drive in the vehicle. Direct sunlight and high temperatures may damage it.
- We recommend using an extension cable with the USB port.
- Do not connect the iPod or USB flash drive using a hub.
- Do not use a device such as a card reader or hard disk drive, as the device or your files may be damaged.
- We recommend backing up your data before using the device in your vehicle.
- Displayed messages may vary depending on the device model and software version.
If the audio system does not recognize the iPod, try reconnecting it a few times or reboot the device. To reboot, follow the manufacturer's instructions provided with the iPod or visit www.apple.com/ipod.
HDMI™ Port\*
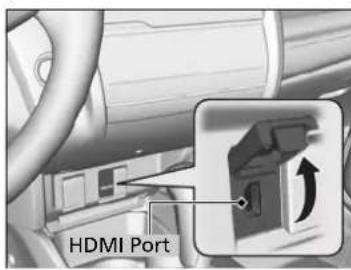
- Open the cover.
- Install the HDMI™ cable to the HDMI™ port.
Auxiliary Input Jack\*
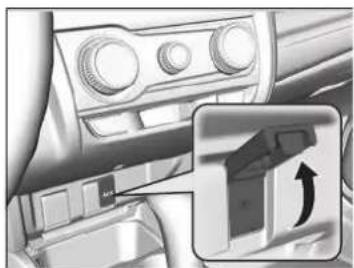
natural_image
Interior view of a car dashboard and air vent (no visible text or symbols)Use the jack to connect standard audio devices.
- Open the AUX cover.
- Connect a standard audio device to the input jack using a 3.5 mm (1/8 inch) stereo miniplug.
The audio system automatically switches to the AUX mode.
HDMI™ Port \*
- Do not leave the HDMI™ connected device in the vehicle. Direct sunlight and high temperatures may damage it.
• We recommend backing up your data before using the device in your vehicle. - Displayed messages may vary depending on the device model and software version.
The terms HDMI and HDMI High-Definition Multimedia Interface, and the HDMI Logo are trademarks or registered trademarks of HDMI Licensing LLC in the United States and other countries.
Auxiliary Input Jack \*
To switch the mode, press any of the audio mode buttons. You can return to AUX mode by pressing the CD/AUX button.
Audio System Theft Protection
The audio system is disabled when it is disconnected from the power source, such as when the battery is disconnected or goes dead. In certain conditions, the system may display a code entry screen. If this occurs, reactivate the audio system.
■Reactivating the audio system
- Turn the ignition switch to ON ^*1
- Turn on the audio system.
- Press and hold the audio system power button for more than two seconds.
The audio system is reactivated when the audio control unit establishes a connection with the vehicle control unit. If the control unit fails to recognise the audio unit, you must go to a dealer and have the audio unit checked.
Audio Antenna\*
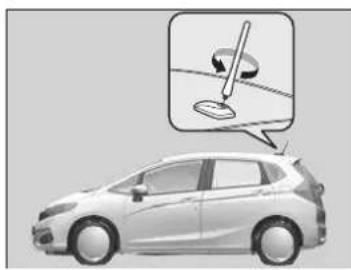
natural_image
Side view of a car with a magnified inset showing a small object on the roof (no text or symbols visible)Your vehicle is equipped with a removable antenna at the rear of the roof.
Audio Antenna
NOTICE
Before using a "drive-through" car wash, remove the antenna by unscrewing it by hand. This prevents the antenna from being damaged by the car wash brushes.
Audio Remote Controls
Allows you to operate the audio system while driving.
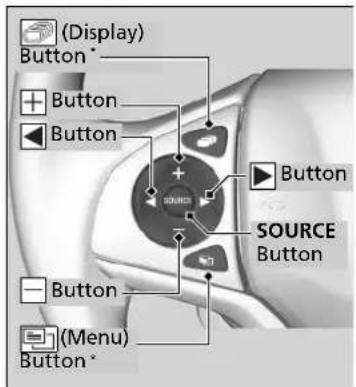
SOURCE Button
Cycles through the audio modes as follows:
Models with colour audio system
FM1→FM2→DAB1*→DAB2*→LW→MW→
CD→USB→iPod→Bluetooth® Audio→AUX
Models with display audio system
FM→LW→MW→DAB*→CD→USB→iPod→
Apps→Bluetooth® Audio→AUX HDMI™
+(Volume) Buttons
Press +: To increase the volume.
Press ☐: To decrease the volume.

Buttons
- When listening to the radio
Press ▶: To select the next preset radio station.
Press ▶: To select the previous preset radio station.
Press and hold ▶To select the next strong station.
To select the next service (DAB ^* ).
Press and hold ▶ to select the previous strong station.
To select the previous service (DAB ^* ).
- When listening to a CD, iPod, USB flash drive, or Bluetooth® Audio
Press ▶: To skip to the next song.
Press ▶: To go back to the beginning of the current or previous song.
- When listening to a CD or USB flash drive
Press and hold ▶To skip to the next folder.
Press and hold 📂 to go back to the previous folder.
* Not available on all models
Audio Remote Controls
Some mode appears only when an appropriate device or medium is used.
Depending on the Bluetooth ^® device you connect, some functions may not be operated.
Models with display audio system
Steering Wheel (Menu) Button
- When listening to the radio
Press 📄: To display the menu items. You can select Scan, Save Preset, or Seek. - When listening to a CD or USB flash drive
Press 📄: To display the menu items. You can select Scan, Repeat, or Random. - When listening to an iPod
Press 📄: To display the menu items. You can select Repeat or Shuffle. - When listening to a Bluetooth® Audio Press 📄: To display the menu items. You can select Pause or Play.
- When watching a video Press 📄: To display the menu items. You can select Scan, Repeat, Random or Play/Pause.
(Display) Button
Cycles through the displays as follows:
Navigation*→Phone→Audio
>>Audio Remote Controls
The button is available only when the audio mode is FM, DAB*, LW, MW, CD, USB, iPod, or Bluetooth® Audio.
Audio System Basic Operation
Models with colour audio system
To use the audio system function, the ignition switch must be in ACCESSORY [I] or ON [II].
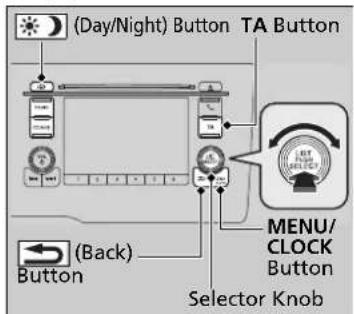
Use the selector knob or MENU/CLOCK button to access some audio functions.
Press &to switch between the normal and extended display for some functions.
Selector knob: Rotate left or right to scroll through the available choices. Press to set your selection.
MENU/CLOCK button: Press to select any mode.
The available modes include the wallpaper, display, clock, language setup, sound settings, RDS settings, and play modes. Play mode choices include scan, random, repeat, and so on.
(Back) button: Press to go back to the previous display.
TA button: Press to select the traffic announcement mode.
(Day/Night) button: Press to change the audio/information screen brightness.
Press 🙏 then adjust the brightness using .
▶ Each time you press ⚙️, the mode switches between the daytime mode, nighttime mode and OFF mode.
>>Audio System Basic Operation
These indications are used to show how to operate the selector knob.
Rotate to select.
Press 🔒 to enter.
Audio Menu Items
Adjust Clock P. 141
Wallpaper Setup P. 230
→Display Setup P. 233
Sound Settings P. 232
→Scan P. 247, 253
Play Mode P. 247, 250, 253
→RDS Settings P. 235
→DAB Settings P. 244
Bluetooth P. 254
Press the SOURCE, +, or button on the steering wheel to change any audio setting
Audio Remote Controls P. 225
One of the operating systems used in this unit is eCos.
For software license terms and condition, visit their website (eCos license URL:
http://ecos.sourceforge.org/license-overview.html)
For source code disclosure and other details regarding eCos, visit:
http://www.hondaopensource2.com
Audio/Information Screen
Displays the audio status and wallpaper. From this screen, you can go to various setup options.
Switching the Display
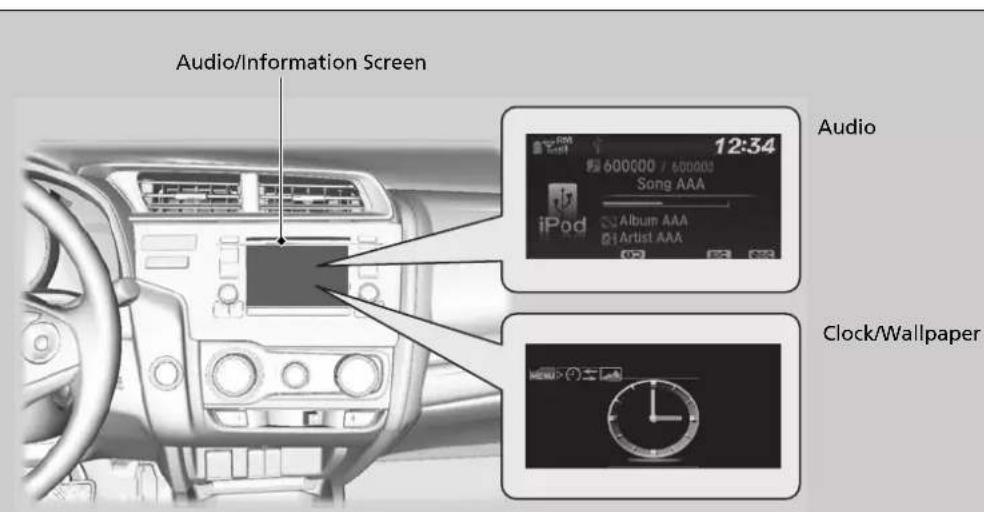
Audio
Shows the current audio information.
■Clock/Wallpaper
Shows a clock screen or an image you import.
■Change display
- Press the MENU/CLOCK button.
- Rotate 🔺 to select Settings, then press 🕒.
- Rotate 🔺 to select Display change, then press 🔺.
- Rotate 🔺 to select Wallpaper, then press 😊.
▶ If you want to return to the audio display, select Audio.
Wallpaper Setup
You can change, store, and delete the wallpaper on the audio/information screen.
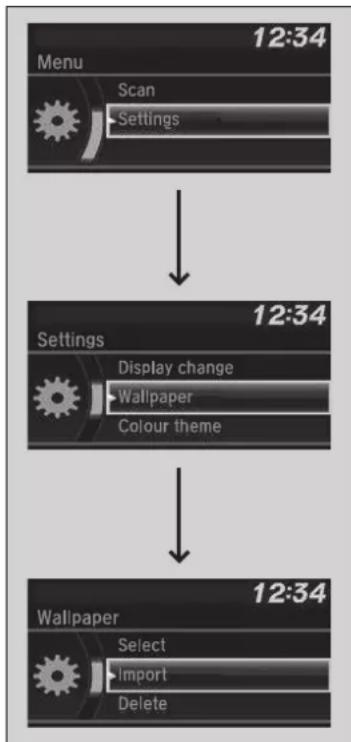
flowchart
graph TD
    A["Menu 12:34"] --> B["Scan"]
    B --> C["Settings"]
    C --> D["Settings"]
    D --> E["Display change"]
    E --> F["Wallpaper"]
    E --> G["Colour theme"]
    D --> H["Wallpaper"]
    H --> I["Select"]
    H --> J["Import"]
    H --> K["Delete"]
■Import wallpaper
You can import up to three images, one at a time, for wallpaper from a USB flash drive.
- Connect the USB flash drive to the USB port.
USB Port(s) P. 221
-
Press the MENU/CLOCK button.
-
Rotate 🔊 to select Settings, then press 🔕.
-
Rotate 🔒 to select Wallpaper, then press 🔒.
-
Rotate 🔒 to select Import, then press 🔒. ▶The picture name is displayed on the list.
-
Rotate to select a desired picture, then press 😊.
The selected picture is displayed.
-
Press to save the picture.
-
Press 🤔 to select OK.
-
Rotate to select a location to save the picture, then press 😊
The display will return to the wallpaper setting screen.
»Wallpaper Setup
- When importing wallpaper files, the image must be in the USB flash drive's root directory. Images in a folder cannot be imported.
- The file name must be fewer than 64 characters.
- The file format of the image that can be imported is BMP (bmp) or JPEG (jpg).
• The individual file size limit is 2 MB. - The maximum image size is 1,920 x 936 pixels. If the image size is less than 420 x 234 pixels, the image is displayed in the middle of the screen with the extra area appearing in black.
- Up to 255 files can be selected.
- If the USB flash drive does not have any pictures, the No files detected message appears.
■Select wallpaper
- Press the MENU/CLOCK button.
- Rotate 🔺 to select Settings, then press 😊.
- Rotate 🔺 to select Wallpaper, then press 😊.
-
Rotate 🔺 to select Select, then press 😊.
The screen changes to the wallpaper list. -
Rotate to select a desired wallpaper, then press.
■To view wallpaper once it is set
- Press the MENU/CLOCK button.
- Rotate 🔺 to select Settings, then press 😊.
- Rotate 🔗 to select Display change, then press 😊.
-
Rotate 🔊 to select Wallpaper, then press 😊.
The screen changes to the wallpaper list. -
Rotate 🔒 to select a wallpaper that you want to set, then press 😊.
■Delete wallpaper
- Press the MENU/CLOCK button.
- Rotate 🔺 to select Settings, then press 😊.
- Rotate 🔊 to select Wallpaper, then press 🔒.
- Rotate 🔺 to select Delete, then press 😊.
The screen changes to the wallpaper list. - Rotate 🔺 to select a wallpaper that you want to delete, then press 😊.
- Rotate 🔺 to select Yes, then press 🔕.
The display will return to the wallpaper setting screen.
Wallpaper Setup
To go back to the previous screen, press the (Back) button.
When the file size is large, it takes a while to be previewed.
Adjusting the Sound
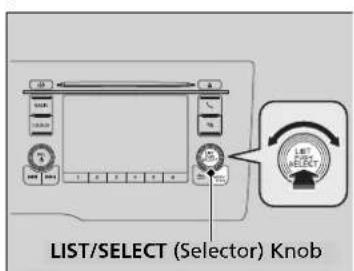
- Press the MENU/CLOCK button.
- Rotate 🔺 to select Sound, then press 🔺.
- Rotate to scroll through the following choices:
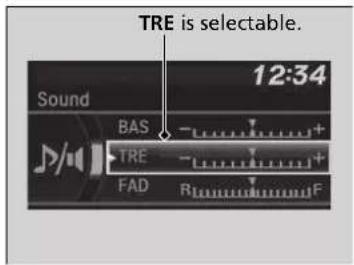
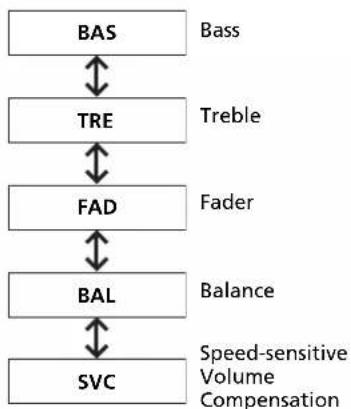
flowchart
graph TD
    A["BAS"] --> B["TRE"]
    B --> C["FAD"]
    C --> D["BAL"]
    D --> E["SVC"]
    style A fill:#f9f,stroke:#333
    style B fill:#f9f,stroke:#333
    style C fill:#f9f,stroke:#333
    style D fill:#f9f,stroke:#333
    style E fill:#f9f,stroke:#333
Rotate to adjust the sound setting, then press 😊.
Adjusting the Sound
The SVC has four modes: Off, Low, Mid, and High. SVC adjusts the volume level based on the vehicle speed. As you go faster, audio volume increases. As you slow down, audio volume decreases.
Display Setup
You can change the brightness or colour theme of the audio/information screen.
Changing the Screen Brightness
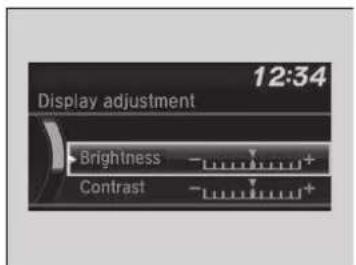
- Press the MENU/CLOCK button.
- Rotate 🔺 to select Settings, then press 🔺.
- Rotate 🔺 to select Display adjustment, then press 🔺
- Rotate 🔺 to select Brightness, then press 🔺.
- Rotate to adjust the setting, then press ⚙.
Changing the Screen's Colour Theme
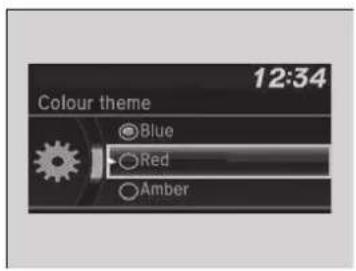
- Press the MENU/CLOCK button.
- Rotate 🔺 to select Settings, then press 🔺.
- Rotate 🔗 to select Colour theme, then press 😊.
- Rotate to select the setting you want, then press 😊
Changing the Screen Brightness
You can change the Contrast and Black level settings in the same manner.
Playing AM/FM Radio
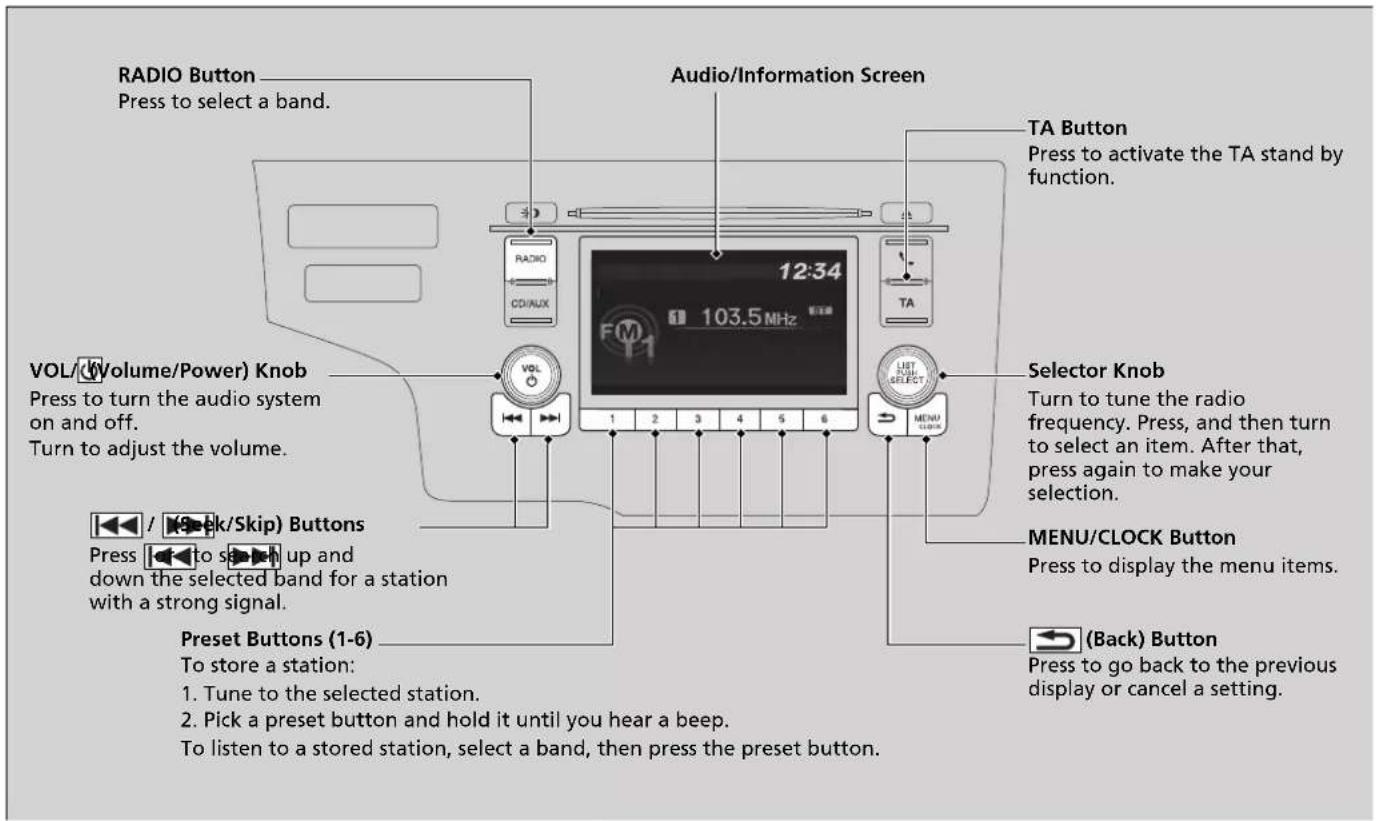
FM mode
Radio Data System (RDS) ^*
Provides convenient automated services related to your selected RDS-capable FM station.
■To find an RDS station from Station List
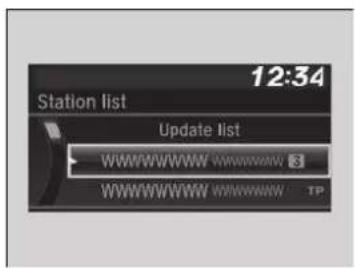
- Press ☑ while listening to an FM station.
- Rotate to select the station, then press ⚙.
■Manual Update
Updates your available station list at any time.
- Press ☑ while listening to an FM station.
- Rotate 🔺 to select Update list, then press 😊.
Playing AM/FM Radio
The ST indicator appears on the display indicating stereo FM broadcasts.
Stereo reproduction in AM is not available.
Switching the Audio Mode
Press the SOURCE button on the steering wheel.
Audio Remote Controls P. 225
You can store 12 AM stations and 12 FM stations into the preset button memory. AM has two types of frequencies LW and MW, and each lets you store six stations. FM1 and FM2 let you store six stations each.
>>Radio Data System (RDS)\*
When you select an RDS-capable FM station, the RDS automatically turns on, and the frequency display changes to the station name. However, when the signals of that station become weak, the display changes from the station name to the frequency.
■Available RDS functions
Alternative Frequency (AF):
Automatically changes the frequency of the same programme as you enter different regions.
Regional Programme (REG):
Keeps the same frequency of the stations within that region even if the signal gets weak.
News Programme (NEWS):
Automatically tunes to the news programme when AM/FM/DAB* mode is not selected.
>>Radio Data System (RDS) \*
While listening to an FM station on Station list, pressing [◀◀] (Seek/Skip) button change station.
■Selecting the RDS functions
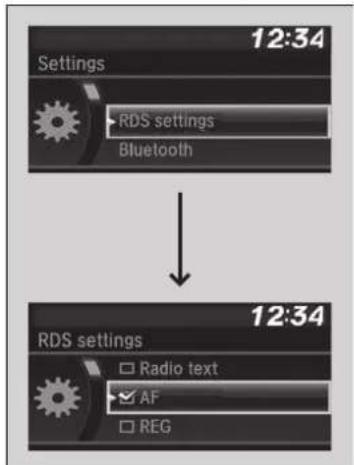
- Press the MENU/CLOCK button with the FM selected.
- Rotate 🔺 to select RDS settings and press 🔺.
- Each RDS function is displayed every time you rotate 🔒
- Press to select a function.
>>Radio Data System (RDS) \*
Turning the Alternative Frequency (AF) function on and off turns the RDS on and off.
Pressing switches the function between on and off.
■Traffic announcement (TA) button
TA standby function allows the system to stand by for traffic announcements in any mode. The last tuned station must be an RDS-capable traffic programme station.
To turn the function on: Press the TA button. When a traffic announcement begins on your last tuned station, the system automatically switches to the FM mode. TA-INFO appears on the display. The system returns to your last selected mode after the traffic announcement is finished.
If you want to go back to your last selected mode during the traffic announcement, press the TA button again.
To cancel the function: Press the TA button.
■Programme type (PTY)/News interrupt function
Allows the system to interrupt with a newscast when AM/FM/DAB ^* mode is not selected. The last tuned station must be the NEWS PTY coded station.
To activate the function: Select NEWS from RDS settings and display the NEWS PTY before changing to other modes. When a newscast begins on your last tuned station, the system automatically switches to the FM mode.
Selecting the RDS functions P. 237
The system returns to your last selected mode if changed to another programme, or signal gets weak.
>>Radio Data System (RDS) \*
TA
When you press the TA button, the TA indicator appears on the display.
If you select SCAN while the TA standby function is on, the system searches TP station only.
Pressing the TA button while the traffic announcement is on does not cancel the TA standby function.
■PTY alarm
When the PTY code for emergency announcements, such as natural disasters, is received, ALARM appears on the display and the system interrupts your audio operation.
■Radio Text
- Press the MENU/CLOCK button with the FM selected.
- Rotate 🔺 to select Radio text and press 🔺.
Radio Text
The TEXT indicator appears on the display indicating radio text information.
AM (MW/LW) mode
Station List
Lists the strongest stations on the selected band.
- Press the RADIO button to switch to a mode.
- Press to switch to the station list mode.
- Rotate to select the station, then press.
■Manual update
Updates your available station list at any time.
- Press the RADIO button to switch to a mode.
- Press & to switch to the station list mode.
- Rotate 🔊 to select Update list, then press ✅.
Scan
Samples each of the strongest stations on the selected band for 10 seconds.
- Press the MENU/CLOCK button.
- Rotate 🔺 to select Scan, then press 😊.
To turn off scan, press 😊
Station List
If the system cannot find any station on Station list, a confirmation message for updating the list appears. Rotate 📞 to select Yes, then press to update list.
Playing DAB (Digital Audio Broadcasting)*
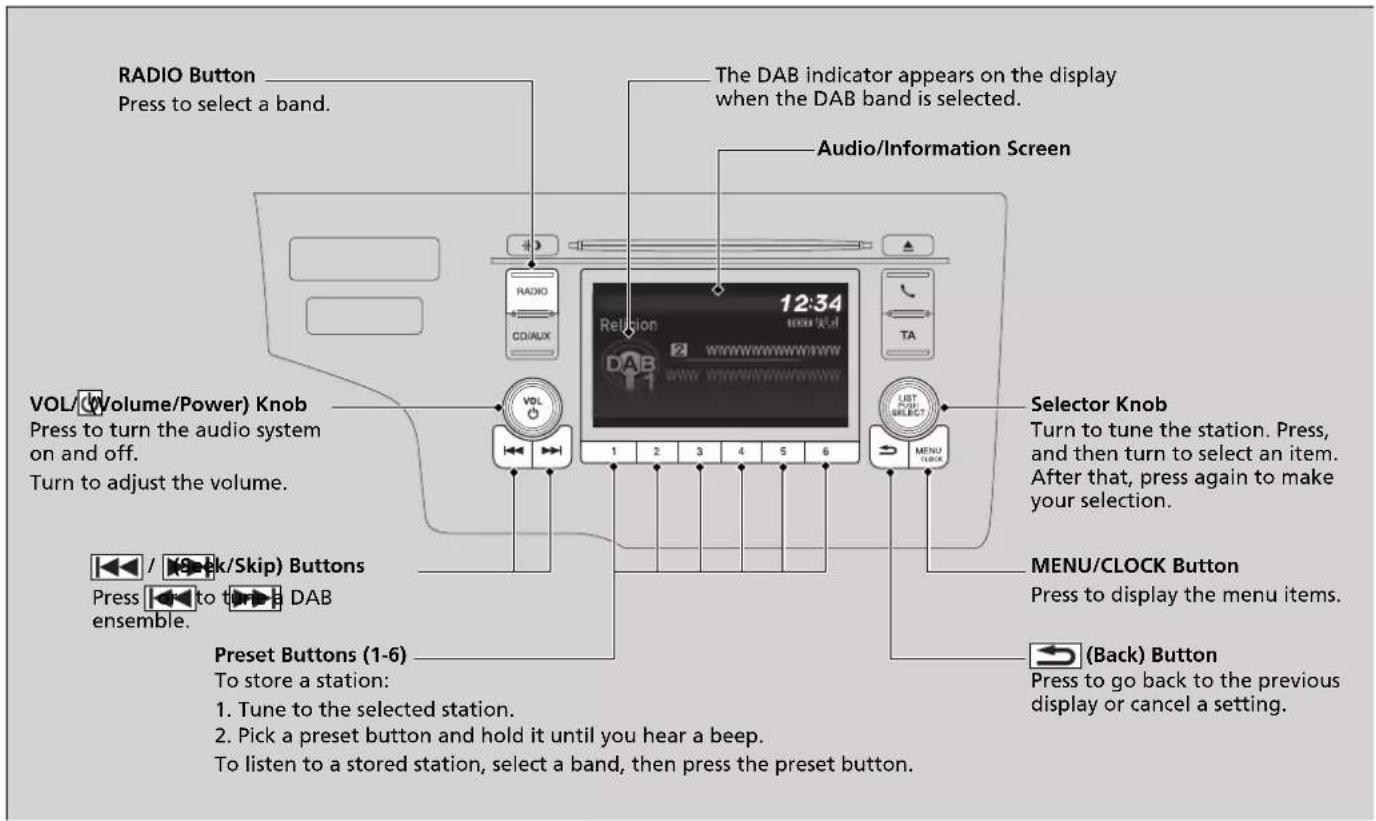
* Not available on all models
Continued
To find a DAB station from Service List or Ensemble List
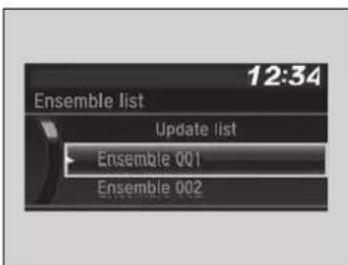
- Press & while selecting the DAB mode.
- Rotate to select the station, then press
▶ If you select Update list, the system updates the station list.

To find a DAB station from Service List or Ensemble List
If the system cannot find a station, a confirmation message for updating the list appears. Rotate to select Yes, then press to update the list.
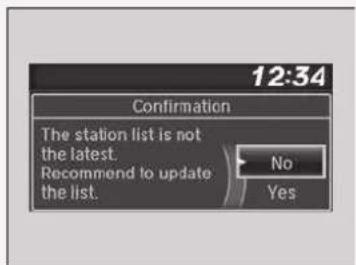
■Setting the DAB functions
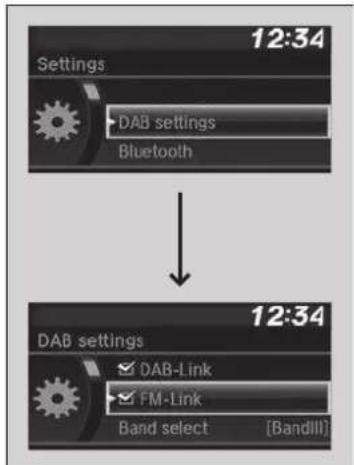
flowchart
graph TD
    A["Settings"] --> B["DAB settings"]
    B --> C["Bluetooth"]
    D["12:34"] --> E["12:34"]
    F["DAB settings"] --> G["DAB-Link"]
    F --> H["FM-Link"]
    F --> I["Band select [BandIII"]]
- Press the MENU/CLOCK button with the DAB selected.
-
Rotate 🔗 to select DAB settings and press 😊.
-
Each DAB function is displayed every time you rotate 📞
- Press to select a function.
- Rotate to select a setting, then press.
DAB Settings
DAB-Link:
Automatically searches for the same station from Ensembles, and switches to it.
■FM-Link:
If the system finds the same station from an FM band, it automatically switches the band.
■Band select:
You can select specific bands. This can reduce the time to update the lists, and search for a station.
Radio Text
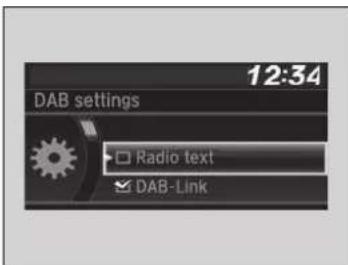
- Press the MENU/CLOCK button with the DAB selected.
- Rotate 🔒 to select Radio text and press 🔒.
>>Radio Text
The TEXT indicator appears on the display indicating radio text information.
Playing a CD
Your audio system supports audio CDs, CD-Rs and CD-RWs in either MP3, WMA, or AAC ^4 format. With the CD loaded, press the CD/AUX button.
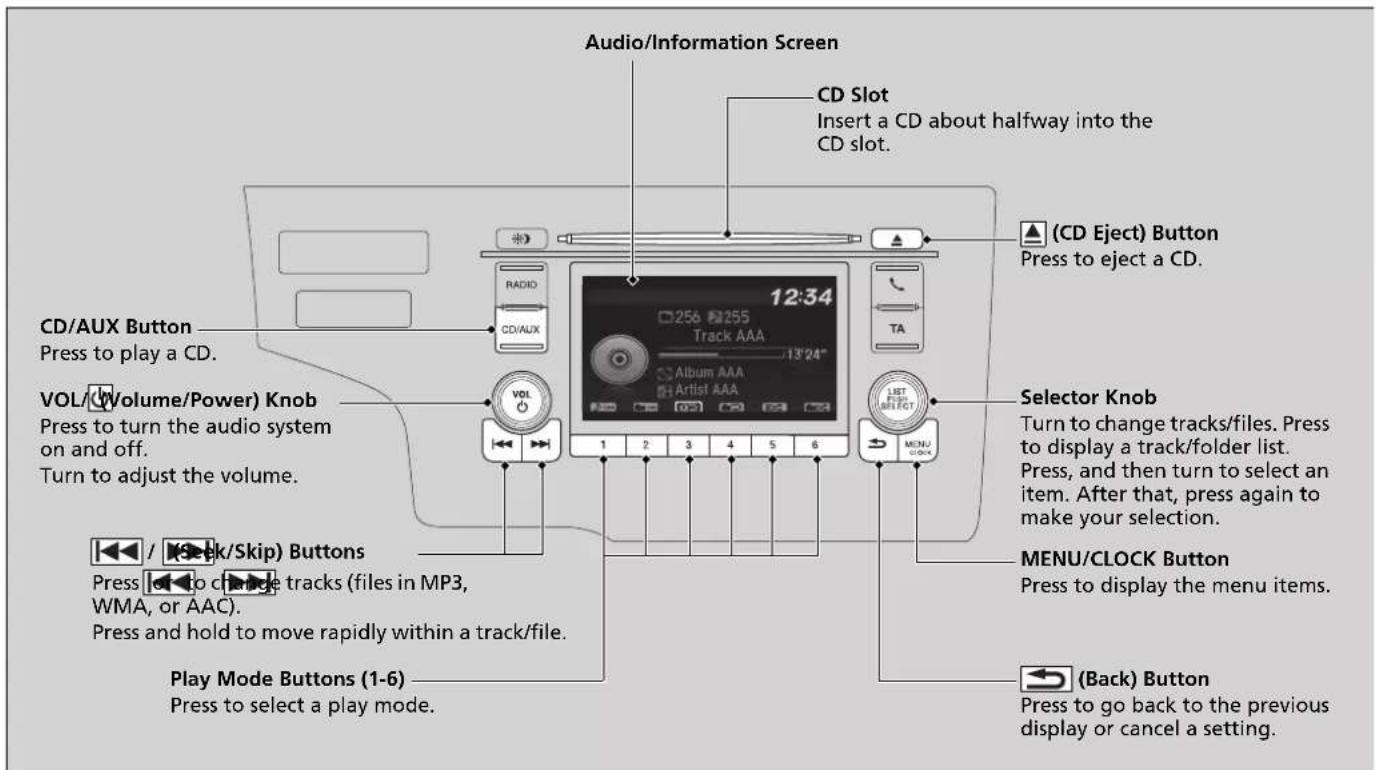
*1: Only AAC format files recorded with iTunes are playable on this unit.
How to Select a File from a Folder with the Selector Knob (MP3/WMA/AAC)
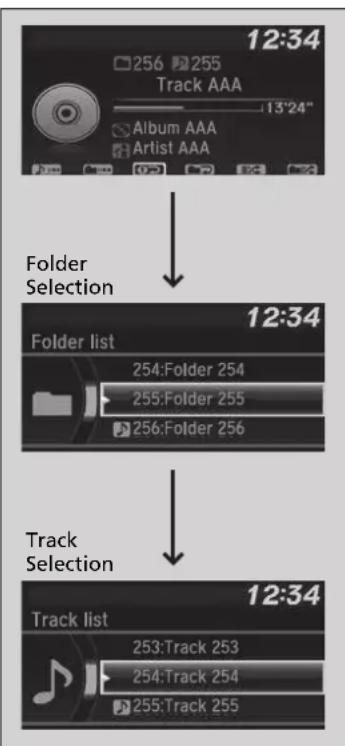
flowchart
graph TD
    A["12:34 Track AAA"] --> B["Folder Selection"]
    B --> C["12:34 Folder list"]
    C --> D["Track Selection"]
    D --> E["12:34 Track list"]
- Press to switch the display to a folder list.
- Rotate to select a folder.
- Press to display a list of files in that folder.
- Rotate to select a track, then press.
Playing a CD
NOTICE
Do not use CDs with adhesive labels. The label can cause the CD to jam in the unit.
WMA files protected by digital rights management (DRM) cannot be played.
The audio system displays Unplayable file, then skips to the next file.
Text data appears on the display under the following circumstances:
- When you select a new folder, file, or track.
- When you change the audio mode to CD.
- When you insert a CD.
If you eject the CD but do not remove it from the slot, the system reloads the CD automatically after several seconds.
How to Select a Play Mode
You can select repeat, random, and scan modes when playing a track or file.
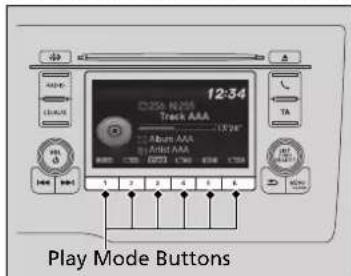
Available mode icons appear above the play mode buttons.
Press the button corresponding to the mode you want to select.
■To turn off a play mode
Press the selected button.
How to Select a Play Mode
Play Mode Menu Items
Repeat
Repeat one folder (MP3/WMA/AAC):
Repeats all files in the current folder.
Repeat one track: Repeats the current track/file.
Random
Random in folder (MP3/WMA/AAC): Plays all files in the current folder in random order.
Random all: Plays all tracks/files in random order.
Scan
Scan folders (MP3/WMA/AAC): Provides 10-second sampling of the first file in each of the main folders.
Scan tracks: Provides 10-second sampling of all tracks on the CD (all files in the current folder in MP3, WMA, or AAC).
You can also select a play mode by pressing the MENU/CLOCK button.
Rotate to select Play mode, then press. Rotate to select a mode, then press.
To turn it off, rotate to select Normal play, then press 😊.
Playing an iPod
Using your USB connector, connect the iPod to a USB port, then press the CD/AUX button.
USB Port(s) P. 221
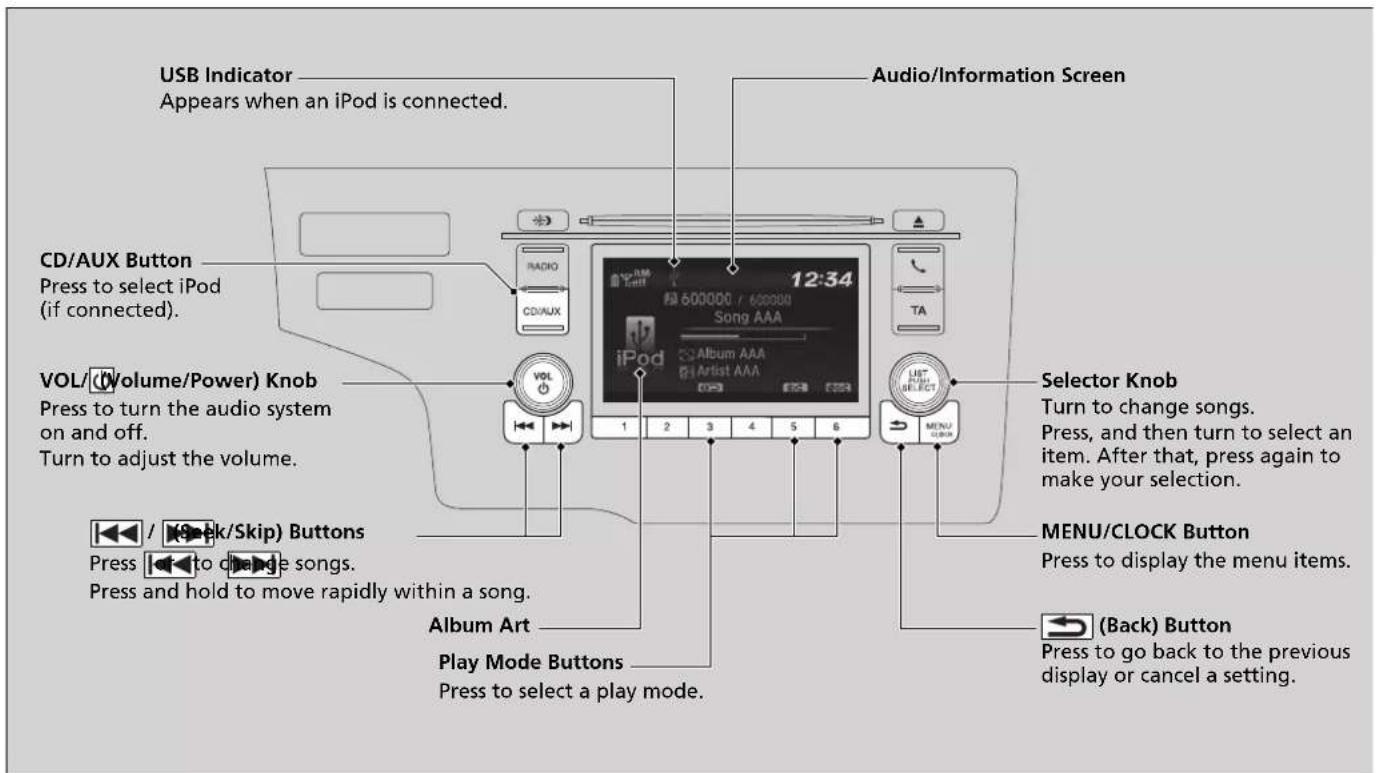
How to Select a Song from the iPod Music List with the Selector Knob
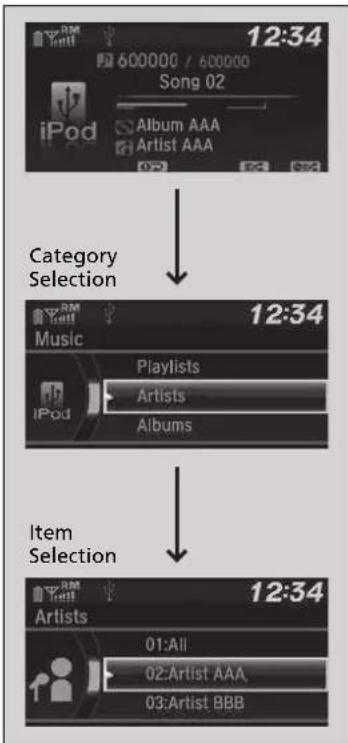
flowchart
graph TD
    A["12:34"] --> B["Category Selection"]
    B --> C["12:34"]
    C --> D["Item Selection"]
    D --> E["12:34"]
- Press & to display the iPod music list.
- Rotate to select a category.
- Press to display a list of items in the category.
- Rotate to select an item, then press.
▶Press and rotate repeatedly until a desired item you want to listen is displayed.
Playing an iPod
Available operating functions vary on models or versions. Some functions may not be available on the vehicle's audio system.
If there is a problem, you may see an error message on the audio/information screen.
→ iPod/USB Flash Drive P. 306
How to Select a Play Mode
You can select repeat and shuffle modes when playing a song.
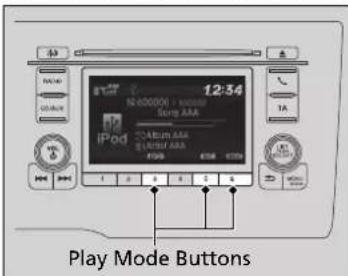
Available mode icons appear above the play mode buttons.
Press the button corresponding to the mode you want to select.
■To turn off a play mode
Press the selected button.
How to Select a Play Mode
Play Mode Menu Items
Shuffle albums: Plays all available albums in a selected category (playlists, artists, albums, songs, genres, or composers) in random order.
Shuffle all: Plays all available songs in a selected category (playlists, artists, albums, songs, genres, or composers) in random order.
Repeat one track: Repeats the current song.
You can also select a play mode by pressing the MENU/CLOCK button.
Rotate to select Play mode, then press. Rotate to select a mode, then press. To turn it off, rotate to select Normal play, then press.
Playing a USB Flash Drive
Your audio system reads and plays sound files on a USB flash drive in either MP3, WMA or AAC ^4 format.
Connect your USB flash drive to the USB port, then press the CD/AUX button.
USB Port(s) P. 221
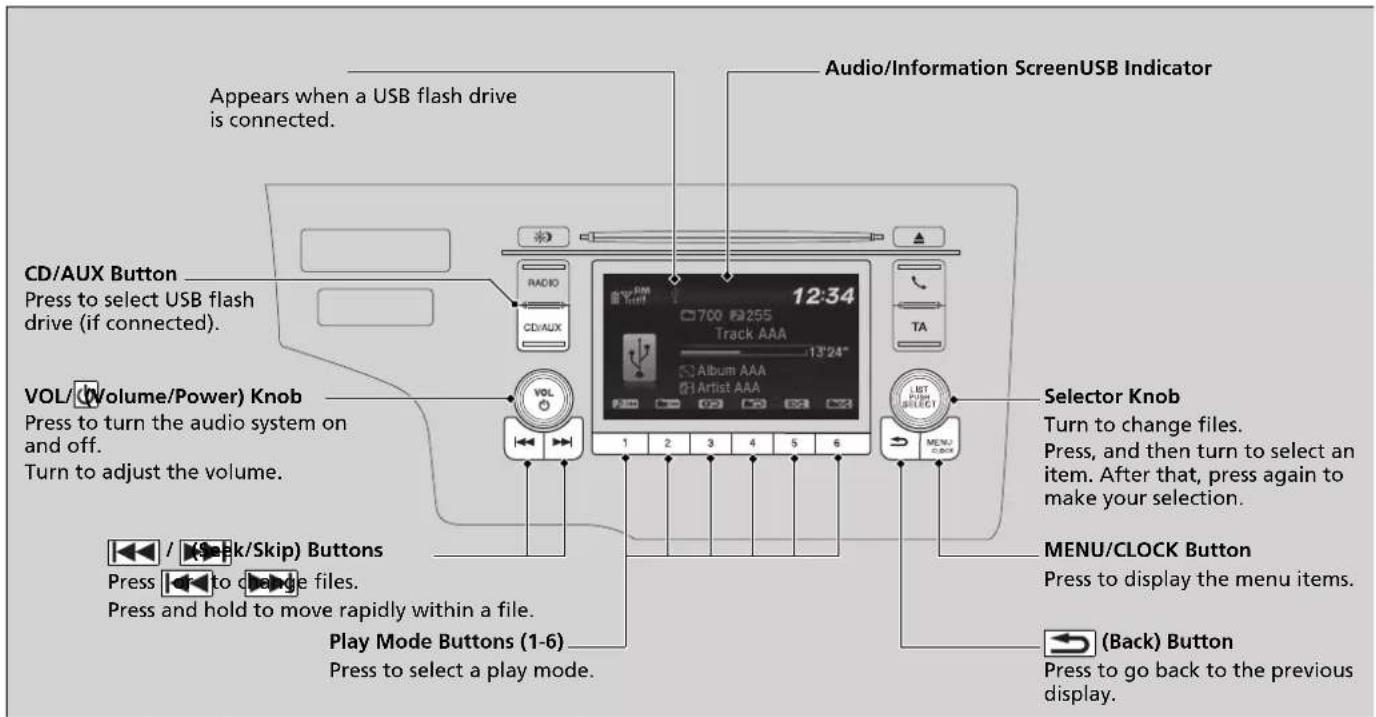
*1: Only AAC format files recorded with iTunes are playable on this unit.
Continued
How to Select a File from a Folder with the Selector Knob
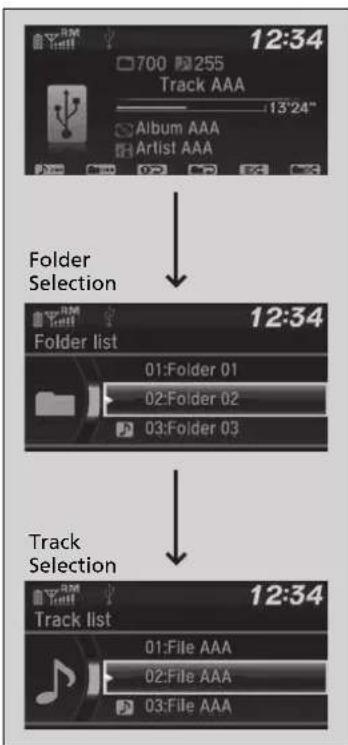
flowchart
graph TD
    A["12:34 Track AAA"] --> B["Folder Selection"]
    B --> C["12:34 Folder list"]
    C --> D["Track Selection"]
    D --> E["12:34 Track list"]
- Press to display a folder list.
- Rotate to select a folder.
- Press to display a list of files in that folder.
- Rotate to select a file, then press.
Playing a USB Flash Drive
Use the recommended USB flash drives.
General Information on the Audio System P. 308
Files in WMA format protected by digital rights management (DRM) cannot be played. The audio system displays Unplayable file, and then skips to the next file.
If there is a problem, you may see an error message on the audio/information screen.
iPod/USB Flash Drive P. 306
How to Select a Play Mode
You can select repeat, random, and scan modes when playing a file.
Available mode icons appear above the play mode buttons.
Press the button corresponding to the mode you want to select.
■To turn off a play mode
Press the selected button.
How to Select a Play Mode
Play Mode Menu Items
Repeat
Repeat one folder: Repeats all files in the current folder.
Repeat one track: Repeats the current file.
Random
Random in folder: Plays all files in the current folder in random order.
Random all: Plays all files in random order.
Scan
Scan folders: Provides 10-second sampling of the first file in each of the main folders.
Scan tracks: Provides 10-second sampling of all files in the current folder.
You can also select a play mode by pressing the MENU/CLOCK button.
Rotate to select Play mode, then press. Rotate to select a mode, then press.
To turn it off, rotate to select Normal play, then press 😊.
Playing Bluetooth® Audio
Your audio system allows you to listen to music from your Bluetooth-compatible phone.
This function is available when the phone is paired and connected to the vehicle's Bluetooth® Hands-Free Telephone (HFT) system.
Phone Setup P. 346
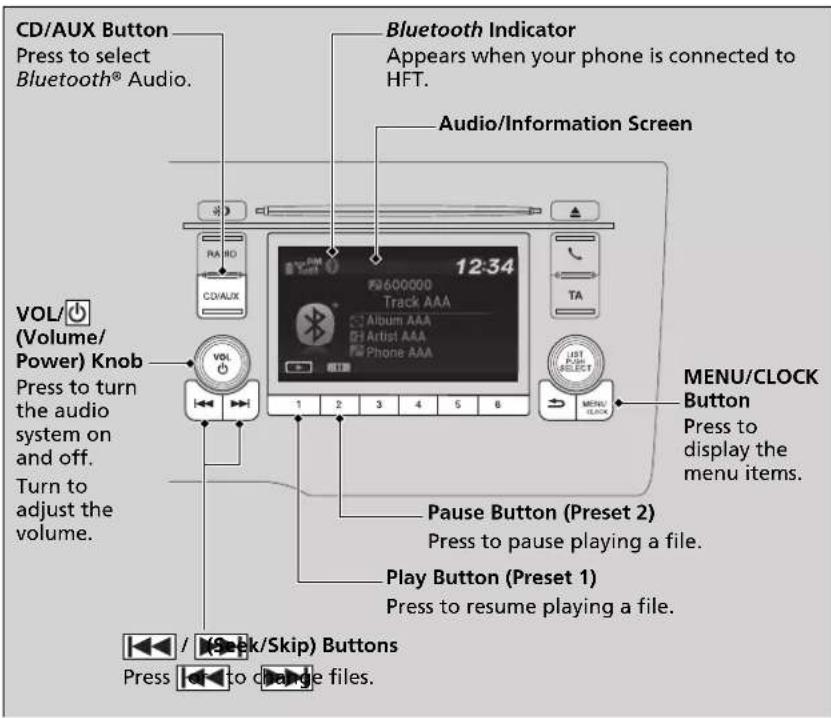
Playing Bluetooth® Audio
Not all Bluetooth-enabled phones with streaming audio capabilities are compatible with the system. To check if your phone is compatible, ask a dealer.
In some countries, it may be illegal to perform some data device functions while driving.
Only one phone can be used with HFT at a time. When there are more than two paired phones in the vehicle, the first paired phone the system finds is automatically connected.
If more than one phone is paired to the system, there will be a delay before the system begins to play.
In some cases, the name of the artist, album, or track may not appear correctly.
Some functions may not be available on some devices.
To Play Bluetooth® Audio Files
- Make sure that your phone is paired and connected to the system.
- Press the CD/AUX button.
If the phone is not recognized, another HFT-compatible phone, which is not compatible for Bluetooth® Audio, may already be connected.
■To pause or resume a file
Press a Play or Pause button to select a mode.
To Play Bluetooth® Audio Files
To play the audio files, you may need to operate your phone. If so, follow the phone maker's operating instructions.
The pause function may not be available on some phones.
If any audio device is connected to the auxiliary input jack or USB port, you may need to press the CD/AUX button repeatedly to select the Bluetooth® Audio system.
Switching to another mode pauses the music playing from your phone.
How to Select a Song from the Music Search List with the Selector Knob
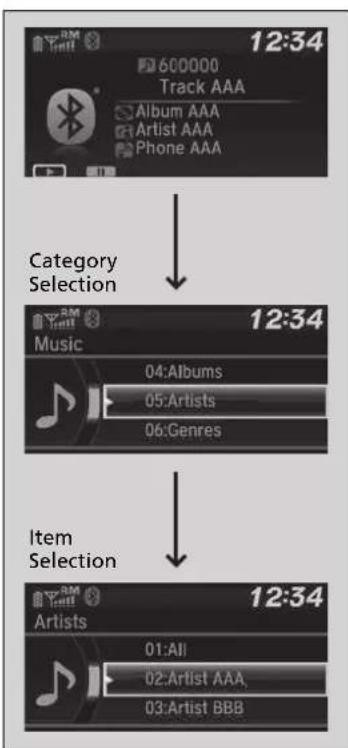
flowchart
graph TD
    A["12:34 Track AAA\n600000"] --> B["Category Selection"]
    B --> C["12:34 Music\n04:Albums\n05:Artists\n06:Genres"]
    C --> D["12:34 Item Selection\n01:All\n02:Artist AAA\n03:Artist BBB"]
- Press to display the music search list.
- Rotate to select a category.
- Press to display a list of items in the category.
- Rotate to select an item, then press.
▶Press and rotate repeatedly until a desired item you want to listen is displayed.
How to Select a Song from the Music Search List with the Selector Knob
Depending on the Bluetooth® device you connect, some or all of the categories may not be displayed.
Audio System Basic Operation
Models with display audio system
To use the audio system function, the ignition switch must be in ACCESSORY [I] or ON [II]*1.
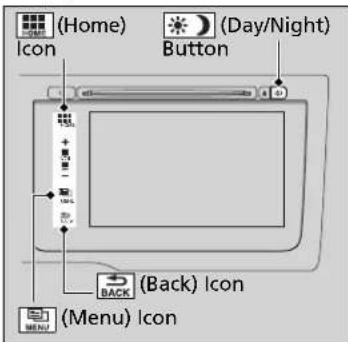
(Home): Select to go to the home screen.
Switching the Display P. 258
MENU (Menu): Touch to select any mode. The available mode includes Change Source, Station List, Save Preset, Radio Text, Music Search, and play modes. Play modes can be also selected from Scan, Random/Repeat, and so on.
(Back): Select to go back to the previous display when it is displayed.
(Day/Night) button:
Press to change the audio/information screen brightness.
Press ☐ once and select or to make an adjustment.
▶ Each time you press 📣the mode switches between the daytime mode, nighttime mode and OFF mode.
>>Audio System Basic Operation
Audio Menu Items
Station List P. 279
Music Search P. 286, 289, 292
Random/Repeat P. 287, 293
→Scan P. 279, 287, 293
When the battery has been reconnected or replaced, the next start-up may take a few minutes for the audio system to start. Wait a few moments while the system is starting up.
Press and hold the ☐Power) button for approximately 10 seconds to reset the system. When the system is reset and started up, you are required to input the password.
→ Audio System Theft Protection P. 223
Key Off Operation
Key Off Operation P. 220
Audio/Information Screen
Displays the audio status and wallpaper. From this screen, you can go to various setup options.
Switching the Display
■Using the button
Press the (display) button on the steering wheel to change the display.
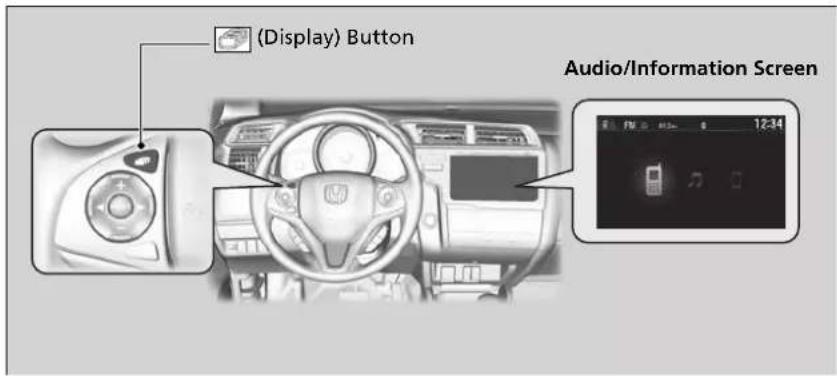
■Using the home screen
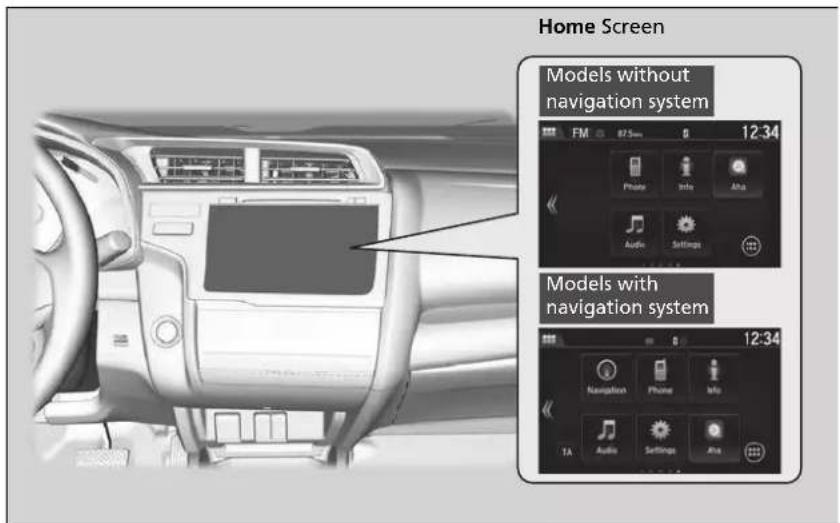
Select 📁 home go to the home screen.
Select Phone, Info, Audio, Settings, Navigation*, or TA.
Phone
Shows the HFT information.
→ Hands-Free Telephone System P. 362
Info
To see all available information, Trip Computer, Clock/Wallpaper, or System/
Device Information, select MENU
Trip Computer:
- Current Drive tab: Displays the current trip information.
- History of Trip A tab: Displays information for the three previous drives. The information is stored every time you reset Trip A.
Clock/Wallpaper: Displays the clock and wallpaper.
System/Device Information:
- Version Information: Displays the software version of the audio system.
• USB Device Information: Displays the memory usage of the USB device. - USB Device Change: Connects or disconnects USB device to this audio system.
Audio
Shows the current audio information.
Settings
Enters the customizing menu screen.
→ Customized Features P. 313
Navigation \*
Displays the navigation screen.
Refer to the Navigation System Manual
■ (App List)
Adds or removes App or Widget on the home screen.
Home Screen P. 264
TA
Turns on and off the traffic information.
* Not available on all models
>>Audio/Information Screen
Touchscreen operation
- Use simple gestures - including touching, swiping and scrolling - to operate certain audio functions.
- Some items may be greyed out during driving to reduce the potential for distraction.
- You can select them when the vehicle is stopped or use voice commands.
- Wearing gloves may limit or prevent touchscreen response.
Changing the Home Screen Icon Layout
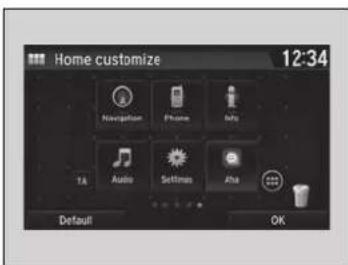
- Select HOME.
- Select Settings.
- Select System.
- Select the HOME tab.
- Select Home icon position.
- Select and hold the icon then, drag it to the desired position.
Wallpaper Setup
You can change, store, and delete the wallpaper on the audio/information screen.
■Import wallpaper
You can import up to five images, one at a time, for wallpaper from a USB flash drive.
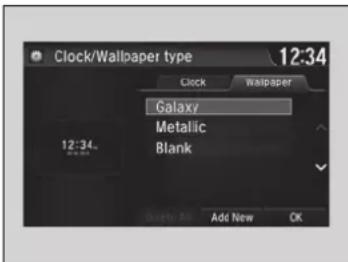
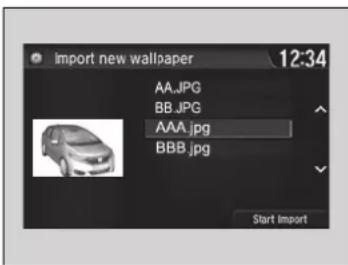
- Connect the USB flash drive to the USB port.
USB Port(s) P. 221 - Select Settings to go to the Settings screen.
- Select Info.
- Select Clock/Wallpaper Type, then the Wallpaper tab.
- Select Add New.
The picture name is displayed on the list.
- Select a desired picture.
The preview is displayed on the left side on the screen. - Select Start Import to save the data.
▶Then the display will return to the wallpaper list.
»Wallpaper Setup
- When importing wallpaper files, the image must be in the USB flash drive's root directory. Images in a folder cannot be imported.
- The file name must be fewer than 64 characters.
- The file format of the image that can be imported is BMP (bmp) or JPEG (jpg).
• The individual file size limit is 5 MB. - The maximum image size is 4,096 × 4,096 pixels. If the image size is less than 800 × 480 pixels, the image is displayed in the middle of the screen with the extra area appearing in black.
- Up to 5 files can be selected.
- If the USB flash drive does not have any pictures, the No files detected message appears.
■Select wallpaper
- Select Settings to go to the Settings screen.
- Select Info.
- Select Clock/Wallpaper Type, then the Wallpaper tab.
The screen changes to the wallpaper list. - Select a desired wallpaper.
The preview is displayed on the left side on the screen.
The pop-up menu appears on the screen. - Select Set.
The display will return to the wallpaper list.
■To view wallpaper once it is set
- Select HOME.
- Select Info.
- Select MENU.
- Select Clock/Wallpaper.
■Delete wallpaper
- Select Settings to go to the Settings screen.
- Select Info.
- Select Clock/Wallpaper Type, then the Wallpaper tab.
The screen changes to the wallpaper list. - Select a wallpaper that you want to delete.
The preview is displayed on the left side on the screen.
The pop-up menu appears on the screen. - Select Delete.
The confirmation message will appear. - Select Yes to delete completely.
The display will return to the wallpaper list.
Wallpaper Setup
From the pop-up menu, select Preview to see a preview at full-size screen.
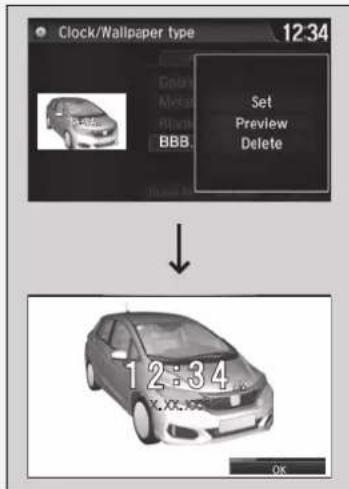
To go back to the previous screen, select OK, or BACK
When the file size is large, it takes a while to be previewed.
To delete all wallpapers you add, select Delete All, then Yes.
▶▶ Audio System Basic Operation▶ Audio/Information Screen
Home Screen
■To change to a next screen
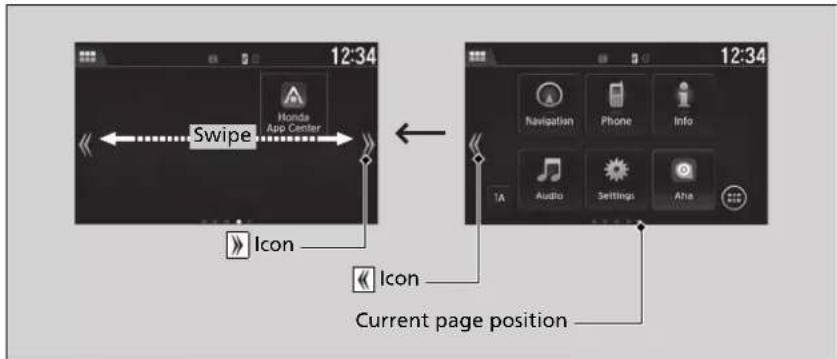
Selecting 📄 or , 🌈 or swiping the screen left or right changes to the next screen.
Home Screen
The home screen has 5 pages (fixed). You cannot add any more pages.
■To use apps or widgets
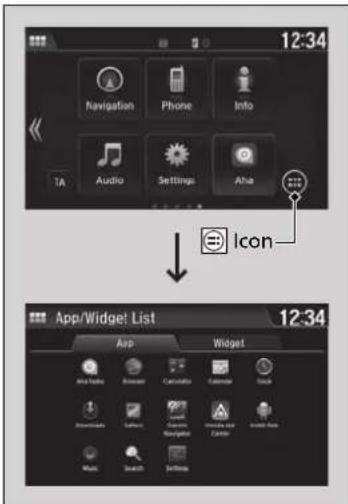
1. Select
The App/Widget List screen appears.
- Select the app or widget you want to use.
• Aha Radio: Starts up Aha Radio app.
- Browser: Displays the web browser utilized by smartphone and Wi-Fi connection.
• Calculator: Displays Calculator.
• Calendar: Displays Calender.
- Clock: Displays Clock.
- Downloads: Displays the data downloaded from the web browser and so on.
- Gallery: Displays the image list stored in the audio system.
• Germin Navigator: Starts up navigation app.
- Honda App Center: Displays Honda App Center.
• Install App: Installs and updates app stored in the USB flash drive. However, you can install and update app only through Honda App Center.
- Music: Displays the music list stored in the audio system.
- Search: Displays various retrieval screens.
- Settings: Displays the Android setting screen.
To use apps or widgets
Select and hold a selected app or widget to add that app's or widget's shortcut on the home screen.
Pre-installed apps may not start up normally. If this occurs, you need to reset the system.
→ Defaulting All the Settings P. 338
If you perform Factory Data Reset, it may reset all the settings to their factory default.
→ Defaulting All the Settings P. 338
In case those apps still do not startup normally even after Factory Data Reset, contact your dealer.
There is a possibility that a browser is shut down in the situation of the use. In that situation, the screen will return to before the browser startup.
You can delete user installed apps by the following procedure.
- Select HOME
- Select Settings
- Select System
- Select the Others tab.
- Select Detail Information.
- Select an App that you want to delete.
- Select Delete.
Pre-installed apps cannot be deleted.
▶▶ Audio System Basic Operation ▶ Audio/Information Screen
■To add app or widget icons on the home screen
App or widget icons can be added on the home screen.
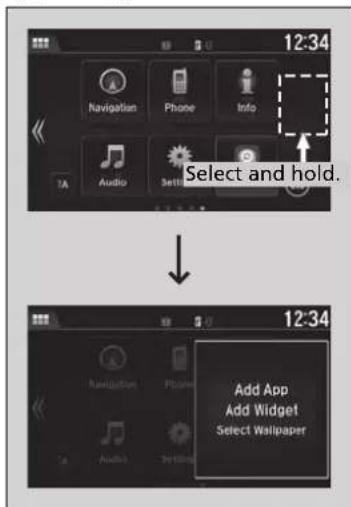
- Select and hold empty space on the home screen.
The pop-up menu appears on the screen.
- Select Add App or Add Widget.
The Add App/Widget screen appears.
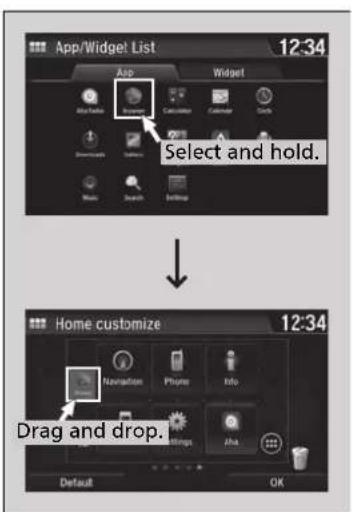
- Select and hold an app or widget icon you want to add.
The screen switches to the customization screen.
-
Drag and drop the icon to where you want it to be.
-
Select OK.
The screen will return to the home screen.
■To move icons on the home screen
You can change location on the home screen.
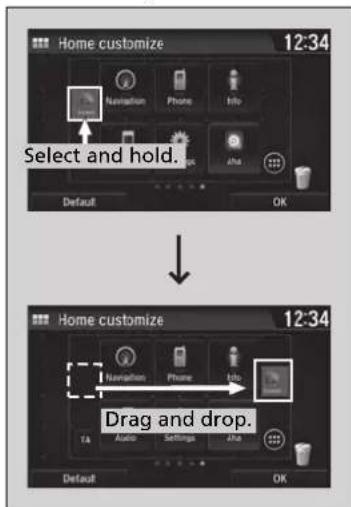
- Select and hold an icon.
The screen switches to the customization screen. - Drag and drop the icon to where you want it to be.
- Select OK.
The screen will return to the home screen.
To move icons on the home screen
You can also move the Phone, Info, Audio,
Settings, and Navigation* icons in the same manner.
■To remove icons on the home screen
You can delete the icons on the home screen.
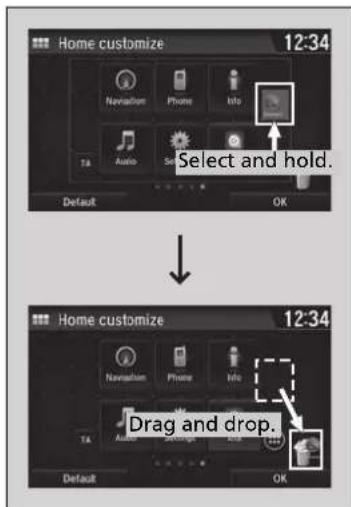
- Select and hold an icon.
The screen switches to the customization screen. - Drag and drop the icon you want to delete to the waste basket icon.
The icon is deleted. - Select OK
The screen will return to the home screen.
To remove icons on the home screen
You cannot delete the Phone, Info, Audio, Settings, and Navigation * icons.
Apps or widgets will not be deleted by deleting the icon on the home screen.
■To change the home screen wallpaper
You can change a wallpaper of the home screen.
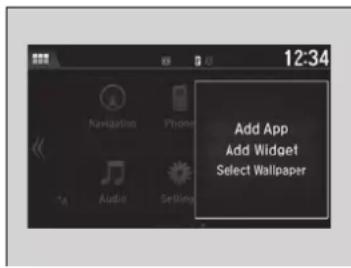
- Select and hold empty space on the home screen.
The pop-up menu appears on the screen. - Select Select Wallpaper.
The pop-up menu appears on the screen.
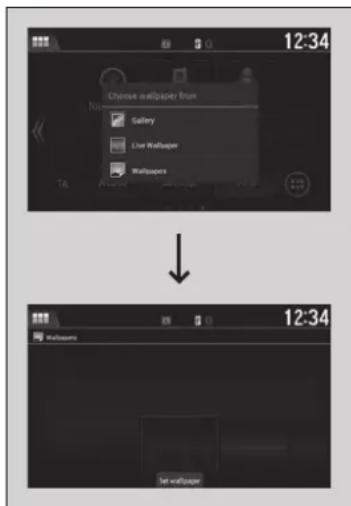
- Select an app for selecting wallpapers.
- Select the wallpaper you want to change.
- Select Set wallpaper.
The wallpaper is changed, then the screen will return to the home screen.
Status Area
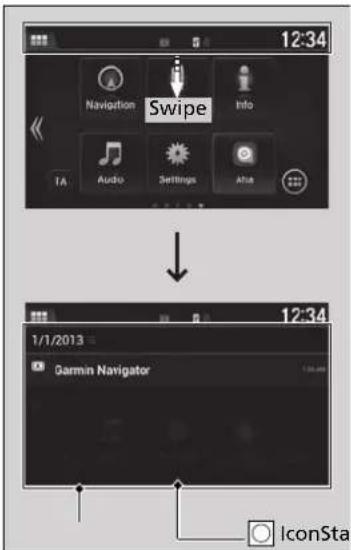
Swipe the upper area of the screen.
The status area appears.
Select an item to see the details.
Select 📄 swipe up the icon to close the area.
Changing the Screen Interface
You can change the screen interface design.
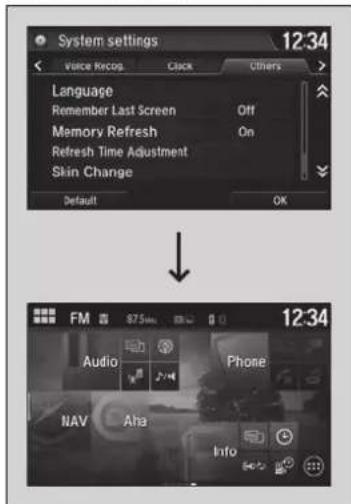
- Select HOME
- Select Settings.
- Select System.
- Select the Others tab.
- Select Skin Change
- A confirmation message appears on the screen. Select Yes.
Changing the Screen Interface
You need to reboot the system after changing the interface design. Wait a few moments while the system is starting up.
You can change the wallpaper on the audio/information screen.
Wallpaper Setup P. 262
If you change the screen interface, some of the setting items will change.
Customized Features P. 313
Closing Apps
You can close specific apps running in the background on the system.
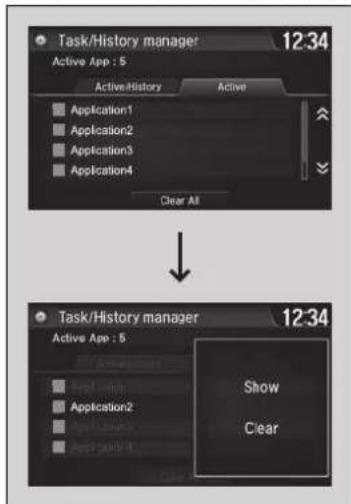
1. Select HOME
- Select the Active tab.
If you select the Active/History tab, you can close the apps that are currently running and delete the app activity history simultaneously.
-
Select an app you want to close.
-
Select Clear.
The display will return to the app list.
Closing Apps
If you leave the apps used open in the background, some apps may stop operating properly next time using them.
If this happens close unused apps.
To close all apps on the system, select Clear All, then Yes.
You cannot close the Garmin ^app.
Adjusting the Sound
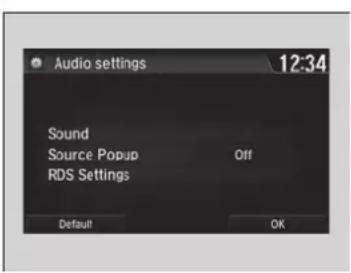
- Select HOME
- Select Settings
- Select Audio.
- Select Sound.
Select the tabs to adjust the following choices: BASS, TREBLE, FADER, BALANCE, Speed Volume Compensation (SVC)
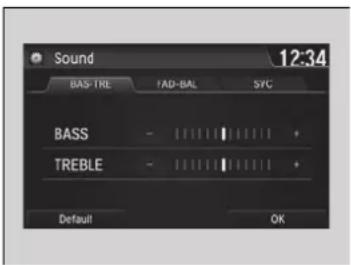
>>Adjusting the Sound
The SVC has four modes: Off, Low, Mid, and High. SVC adjusts the volume level based on the vehicle speed. As you go faster, audio volume increases. As you slow down, audio volume decreases.
Display Setup
You can change the brightness or colour theme of the audio/information screen.
Changing the Screen Brightness
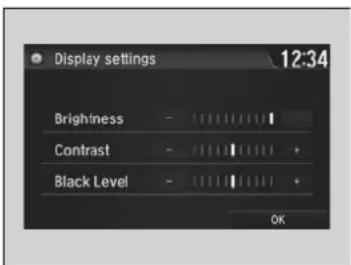
- Select HOME.
- Select Settings to go to the Settings screen.
- Select System.
- Select the Display tab.
- Select Display Settings.
- Select the setting you want.
- Select OK
Changing the Screen's Colour Theme
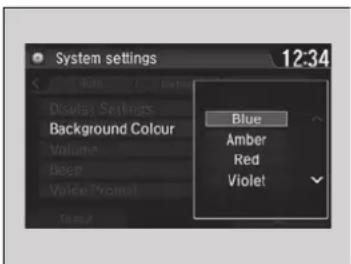
- Select HOME
- Select Settings to go to the Settings screen.
- Select System.
- Select the Display tab.
- Select Background Colour
- Select the setting you want.
- Select OK
▶A confirmation message appears on the screen. Select Yes to reboot the system.
Changing the Screen Brightness
You can change the Contrast and Black Level settings in the same manner.
Changing the Screen's Colour Theme
Reboot may take a few minutes. If you default the System settings when the colour theme is changed from its default colour, the system reboots.
Customized Features P. 313
Selecting an Audio Source
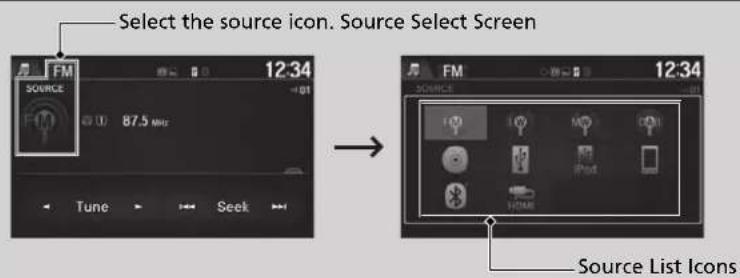
Select the current source icon, then select an icon on the source list to switch the audio source.
Limitations for Manual Operation
Certain manual functions are disabled or inoperable while the vehicle is in motion. You cannot select a grayed-out option until the vehicle is stopped.
>>Selecting an Audio Source
If you startup preinstalled audio apps, audio Apps displayed on the upper left of the screen. These preinstalled apps cannot be displayed on the source select screen.
You can startup those audio apps from App/Widget List.
Playing AM/FM Radio
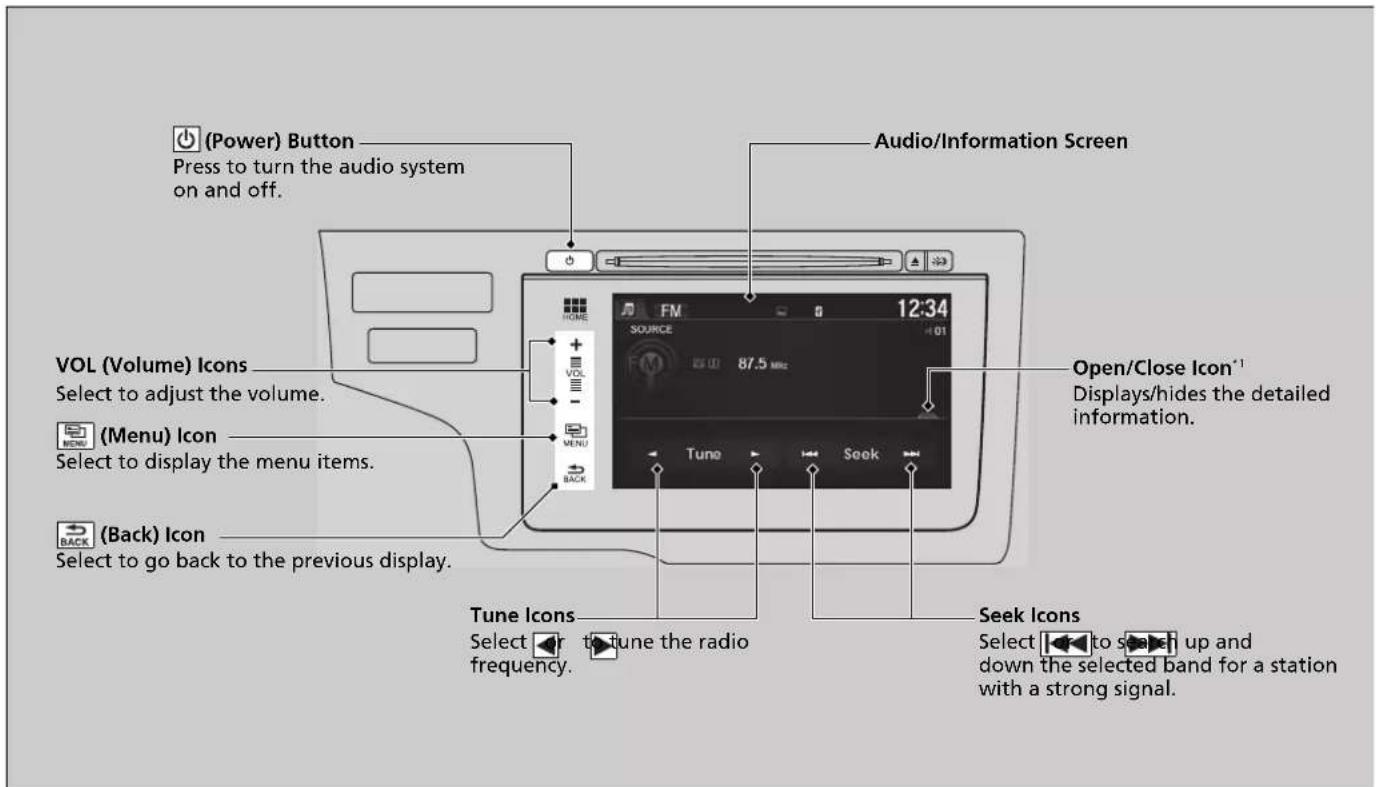
*1: Some or all of the lists may not be displayed.
Preset Memory
To store a station:
- Tune to the selected station.
- Select MENU.
- Select Save Preset.
- Select the preset number you want to store that station.
Playing AM/FM Radio
The ST indicator appears on the display indicating stereo FM broadcasts.
Stereo reproduction in AM is not available.
Switching the Audio Mode
Press the SOURCE button on the steering wheel or select SOURCE on the list.
Audio Remote Controls P. 225
You can also switch the mode by selecting Change Source on the Audio menu screen.
You can store 12 AM stations and 12 FM stations into the preset memory. AM has two types of frequencies LW and MW, and each lets you store six stations.
Station List
Lists the strongest stations on the selected band.
- Select MENU to switch to the Audio menu screen.
- Select Station List.
- Select the station.
■Manual update
Updates your available station list at any time.
- Select ☐ to switch to the Audio menu screen.
- Select Station List.
- Select Refresh.
Scan
Samples each of the strongest stations on the selected band for 10 seconds.
- Select MENU.
- Select Scan
To turn off scan, select Cancel.
Radio Data System (RDS)\*
Provides text data information related to your selected RDS-capable FM station.
■To find an RDS station from Station List
- Select ☐ while listening to an FM station.
- Select Station List.
- Select the station.
■Manual update
Updates your available station list at any time.
- Select ☐ while listening to an FM station.
- Select Station List.
- Select Update List.
>>Radio Data System (RDS) \*
When you select an RDS-capable FM station, the RDS automatically turns on, and the frequency display changes to the station name. However, when the signals of that station become weak, the display changes from the station name to the frequency.
■Radio text
Displays the radio text information of the selected RDS station.
-
Select MENU.
-
Select Radio Text.
Scan
Samples each of the strongest stations on the selected band for 10 seconds.
-
Select MENU
-
Select Scan.
To turn off scan, select Cancel Scan
Playing DAB (Digital Audio Broadcasting)\*
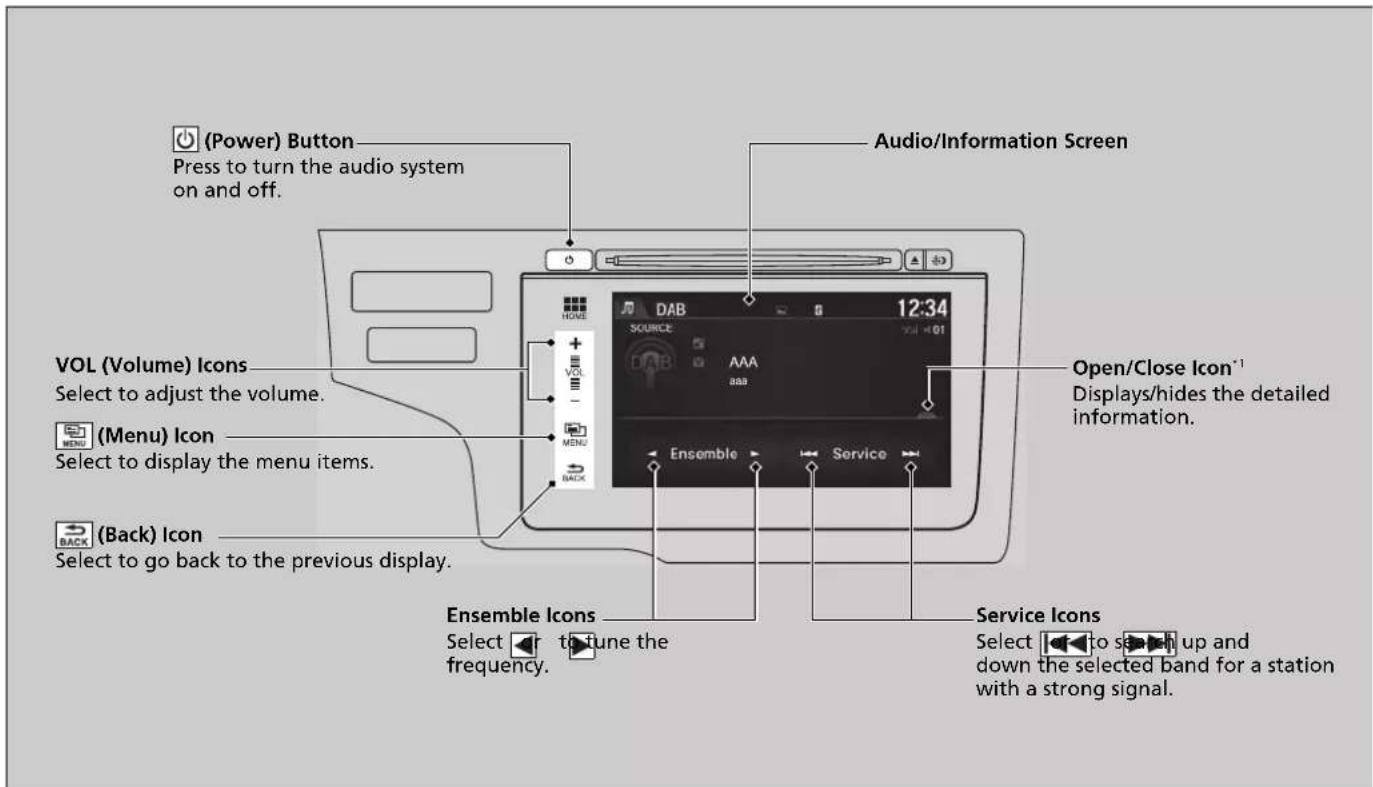
*1: Some or all of the lists may not be displayed.
Preset Memory
Stores a station:
- Tune to the selected station.
- Select MENU.
- Select Save Preset.
- Select the preset number for the station you want to store.
Ensemble List
Lists the strongest stations.
- Select MENU
- Select Ensemble List.
- Select the station.
■Manual update
Updates your available station list at any time.
- Select MENU
- Select Ensemble List.
- Select Update List.
Scan
Samples each of the strongest stations on the selected band for 10 seconds.
- Select MENU.
- Select Scan
- Select Scan Ensemble or Scan Service.
To turn off scan, select Cancel Scan.
* Not available on all models
Playing DAB (Digital Audio Broadcasting) *
Switching the Audio Mode
Press the SOURCE button on the steering wheel or select SOURCE on the screen.
Audio Remote Controls P. 225
You can also switch the mode by selecting Change Source on the Audio menu screen.
You can store 12 DAB stations into preset memory.
Continued
▶▶ Audio System Basic Operation ▶ Playing DAB (Digital Audio Broadcasting)*
Radio text
Displays the radio text information of the selected DAB station.
- Select MENU.
- Select Radio Text.
Playing a CD
Your audio system supports audio CDs, CD-Rs and CD-RWs in either MP3, WMA, or AAC ^4 format. With the CD loaded, select the CD mode.
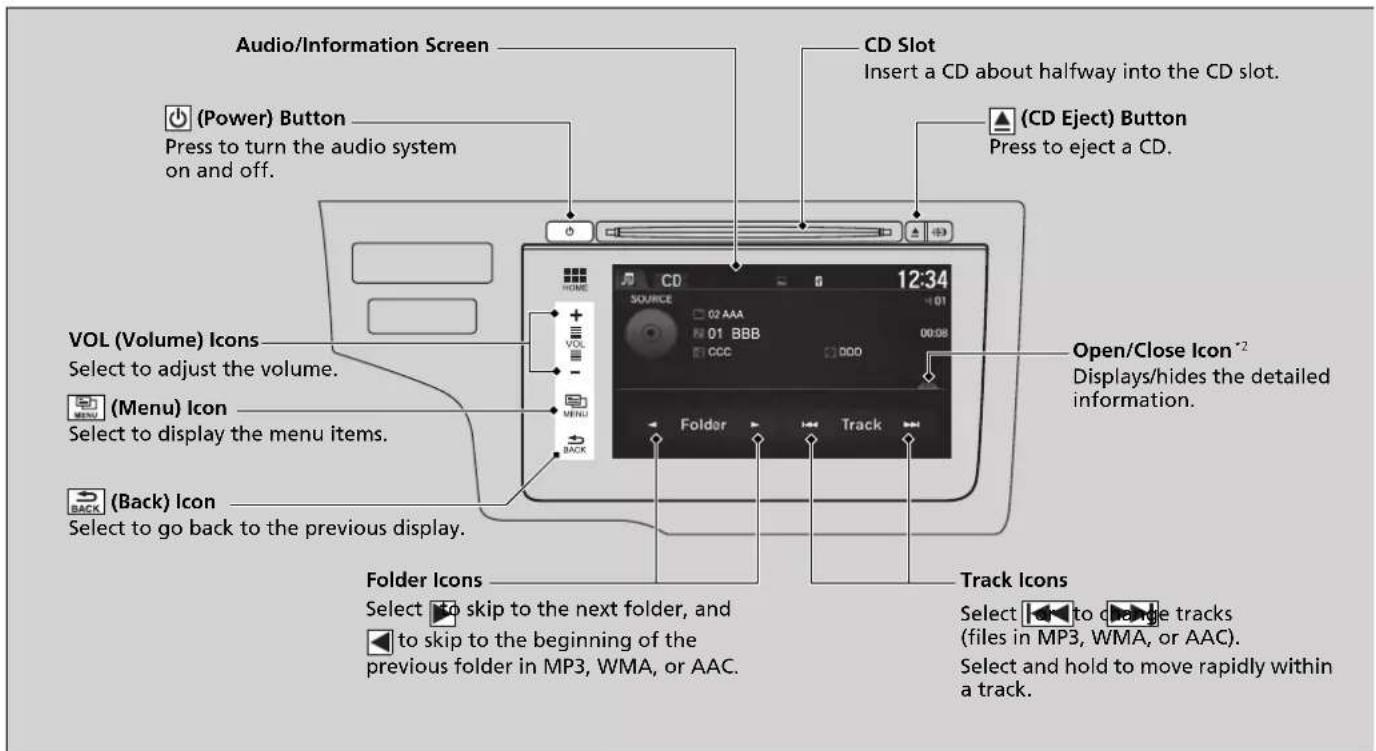
*1: Only AAC format files recorded with iTunes are playable on this unit.
*2: Some or all of the lists may not be displayed.
Continued
How to Select a File from the Music Search List (MP3/WMA/AAC)
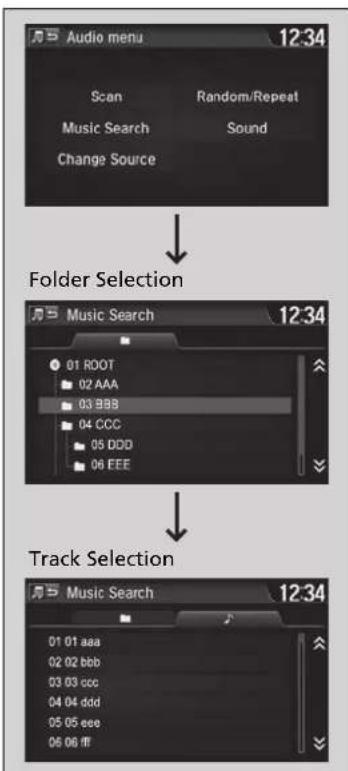
flowchart
graph TD
    A["Audio menu 12:34"] --> B["Folder Selection"]
    B --> C["Track Selection"]
- Select 📋 and select Music Search
- Select a folder.
- Select a track.
Playing a CD
NOTICE
Do not use CDs with adhesive labels. The label can cause the CD to jam in the unit.
WMA files protected by digital rights management (DRM) cannot be played.
The audio system displays Unplayable File, then skips to the next file.
Text data appears on the display under the following circumstances:
- When you select a new folder, file, or track.
- When you change the audio mode to CD.
- When you insert a CD
If you eject the CD but do not remove it from the slot, the system reloads the CD automatically after several seconds.
How to Select a Play Mode
You can select scan, repeat, and random modes when playing a track or file.
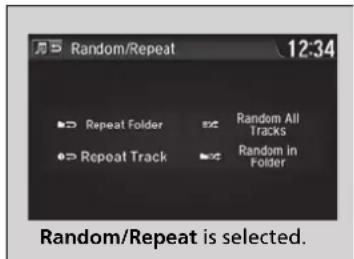
- Select MENU
- Select Scan or Random/Repeat.
- Select a mode.
■To turn off a play mode
- Select MENU.
- Select the mode you want to turn off.
How to Select a Play Mode
Play Mode Menu Items
Scan
Scan Folders (MP3/WMA/AAC): Provides 10-second sampling of the first file in each of the main folders.
Scan Tracks: Provides 10-second sampling of all tracks on the CD (all files in the current folder in MP3, WMA, or AAC).
Random/Repeat
Repeat Folder (MP3/WMA/AAC): Repeats all files in the current folder.
Repeat Track: Repeats the current track/file.
Random in Folder (MP3/WMA/AAC): Plays all files in the current folder in random order.
Random All Tracks: Plays all tracks/files in random order.
Playing an iPod
Connect the iPod using your USB connector to the USB port, then select the iPod mode.
USB Port(s) P. 221
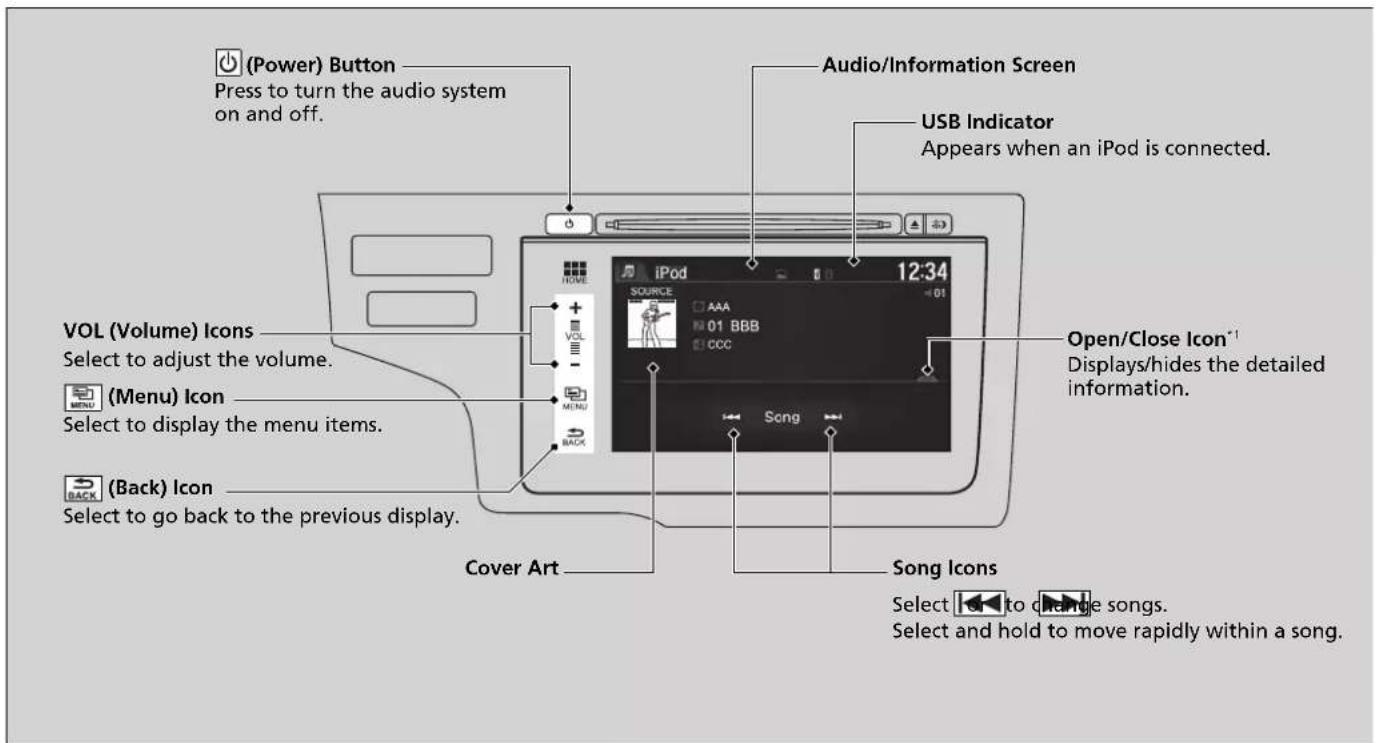
*1: Some or all of the lists may not be displayed.
How to Select a Song from the Music Search List
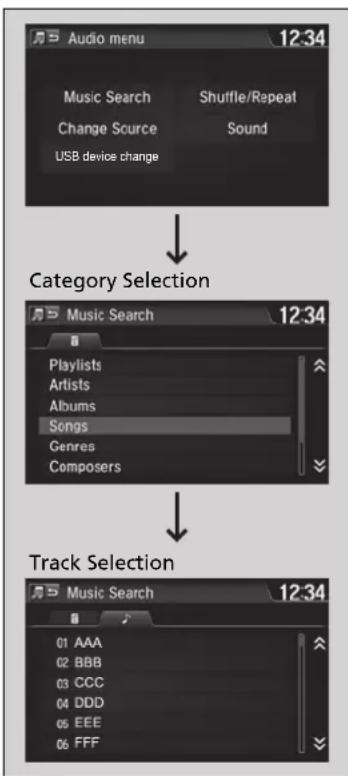
flowchart
graph TD
    A["Audio menu 12:34"] --> B["Category Selection"]
    B --> C["Track Selection"]
- Select MENU and select Music Search.
- Select the items on that menu.
How to Select a Song from the Music Search List
Available operating functions vary on models or versions. Some functions may not be available on the vehicle's audio system.
If there is a problem, you may see an error message on the audio/information screen.
iPod/USB Flash Drive P. 306
If you operate the music app on your iPhone/iPod while the phone is connected to the display audio system, you may no longer be able to operate the same app on the display audio. Reconnect the device if necessary.
Select USB device change in the Audio menu screen to switch to another USB device.
Continued
How to Select a Play Mode
You can select repeat and shuffle modes when playing a file.
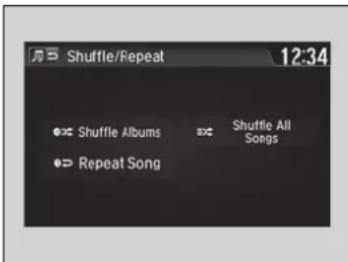
- Select MENU
- Select Shuffle/Repeat.
- Select a mode.
■To turn off a play mode
- Select MENU
- Select the mode you want to turn off.
>>How to Select a Play Mode
Play Mode Menu Items
Shuffle Albums: Plays all available albums in a selected list (playlists, artists, albums, songs, podcasts, genres, composers, or audiobooks) in random order.
Shuffle All Songs: Plays all available files in a selected list (playlists, artists, albums, songs, podcasts, genres, composers, or audiobooks) in random order.
Repeat Song: Repeats the current file.
Playing a USB Flash Drive
Your audio system reads and plays sound files on a USB flash drive in either MP3, WMA, AAC ^*1 , or WAV format.
Connect your USB flash drive to the USB port, then select the USB mode.
USB Port(s) P. 221
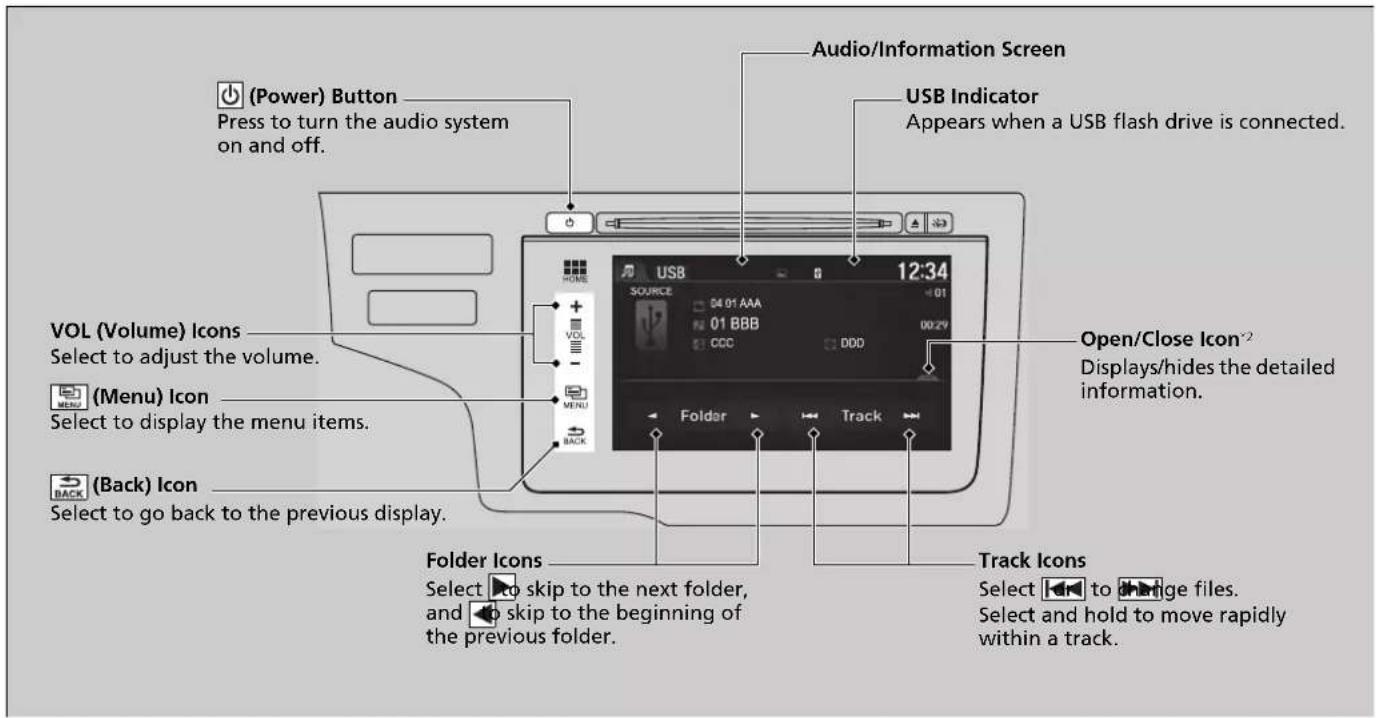
*1: Only AAC format files recorded with iTunes are playable on this unit.
*2: Some or all of the lists may not be displayed.
Continued
How to Select a File from the Music Search List
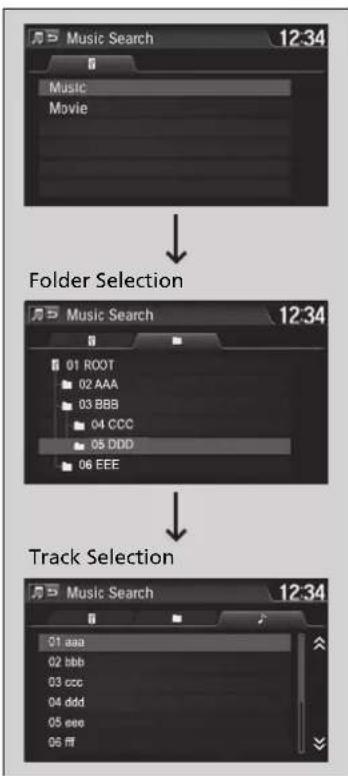
flowchart
graph TD
    A["Music Search 12:34"] --> B["Folder Selection"]
    B --> C["Track Selection"]
- Select MENU and select Music Search.
-
Select Music or Movie.
-
Select a folder.
-
Select a track.
Playing a USB Flash Drive
Use the recommended USB flash drives.
General Information on the Audio System P. 308
Files in WMA format protected by digital rights management (DRM) are not played. The audio system displays Unplayable File, and then skips to the next file.
If there is a problem, you may see an error message on the audio/information screen.
iPod/USB Flash Drive P. 306
Select USB device change in the Audio menu screen to switch to another USB device.
How to Select a Play Mode
You can select scan, repeat, and random modes when playing a file.
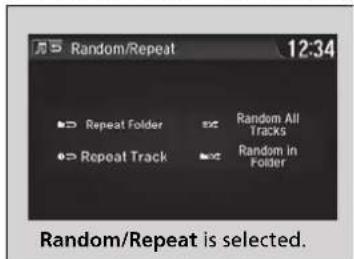
- Select MENU
- Select Scan or Random/Repeat.
- Select a mode.
■To turn off a play mode
- Select MENU.
- Select the mode you want to turn off.
How to Select a Play Mode
Play Mode Menu Items
Scan
Scan Folders: Provides 10-second sampling of the first file in each of the main folders.
Scan Tracks (Scan Movies ^*1 ): Provides 10-second sampling of all files in the current folder.
Random/Repeat
Repeat Folder: Repeats all files in the current folder.
Repeat Track (Repeat Movies ^*1 ): Repeats the current file.
Random in Folder: Plays all files in the current folder in random order.
Random All Tracks (Random All Movies ^1 ): Plays all files in random order.
When playing a video file:
Play/Pause: Select to resume or play a file.
Stop: Select to stop a file.
*1: When playing a video file
Playing Bluetooth® Audio
Your audio system allows you to listen to music from your Bluetooth-compatible phone.
This function is available when the phone is paired and connected to the vehicle's Hands-Free Telephone (HFT) system.
Phone Setup P. 368
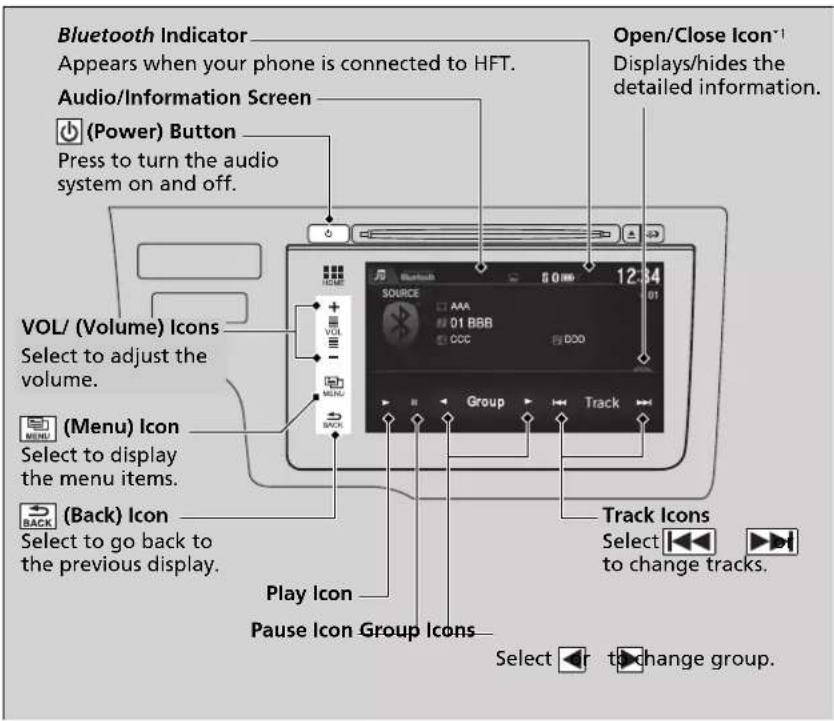
Playing Bluetooth® Audio
Not all Bluetooth-enabled phones with streaming audio capabilities are compatible with the system. To check if your phone is compatible, ask a dealer.
It may be illegal to perform some data device functions while driving.
Only one phone can be used with HFT at a time. When there are more than two paired phones in the vehicle, the first paired phone the system finds is automatically linked.
If more than one phone is paired to the HFT system, there may be a delay before the system begins to play.
In some cases, the name of the artist, album, or track may not appear correctly.
A No Device Connected message may be displayed if:
• The phone is not linked to HFT.
• The phone is not turned on.
• The phone is not in the vehicle.
- An incompatible phone is connected.
Some functions may not be available on some devices.
*1: Depending on the Bluetooth® device you connect, some or all of the lists may not be displayed.
To Play Bluetooth® Audio Files
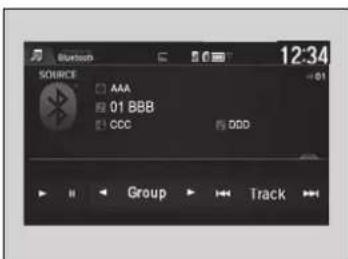
- Make sure that your phone is paired and connected to the system.
Phone Setup P. 368
- Select the Bluetooth® Audio mode.
If the phone is not recognized, another HFT-compatible phone, which is not compatible for Bluetooth® Audio, may already be connected.
■To pause or resume a file
Select the play icon or pause icon.
Searching for Music
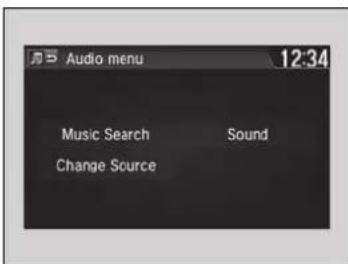
-
Select MENU
-
Select Music Search.
-
Select a search category (e.g., Albums).
-
Select an item.
▶The selection begins playing.
To Play Bluetooth® Audio Files
To play the audio files, you may need to operate your phone. If so, follow the phone maker's operating instructions.
Switching to another mode pauses the music playing from your phone.
Searching for Music
Depending on the Bluetooth® device you connect, some or all of the lists may not be displayed.
Playing a Video Using the HDMI™
Your audio system allows you to play videos from an HDMI™-compatible device. Connect the device, using an HDMI™ cable, then select the HDMI™ mode.
HDMI™ Port* P. 222
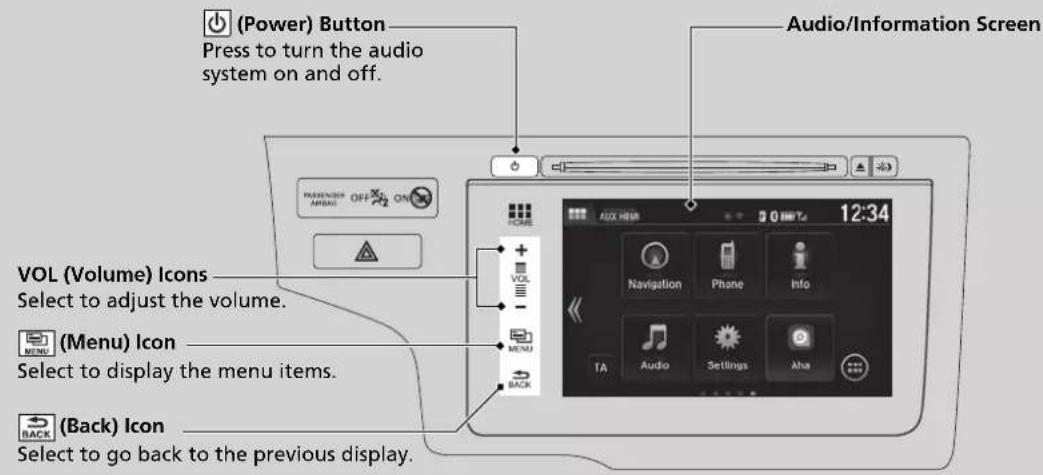
Changing the Screen Aspect
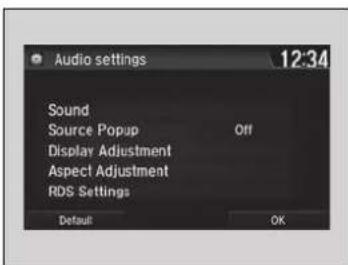
- Select HOME.
- Select Settings to go to the Settings screen.
- Select Audio.
- Select Aspect Adjustment.
- Select the setting you want.
- Select OK.
Playing a Video Using the HDMI™
This feature is limited while driving. To play videos, stop your vehicle and apply the parking brake.
On Board Apps
Honda Connect has the capability of On Board Apps which may be created by Honda or by 3rd parties. Apps may be already installed or can be downloaded through Honda App Center. Some Apps require internet access which can be established by Wi-Fi Connection.
Wi-Fi Connection P. 302
Please visit the below web address for further information: https://ivhs.os.ixonos.com/honda/help
On Board Apps
Make sure the GPS setting is turned on before using Honda App center.
Customized Features P. 313
Even if you change Background Colour on the System settings screen, it will not be reflected on the Honda App Center screen.
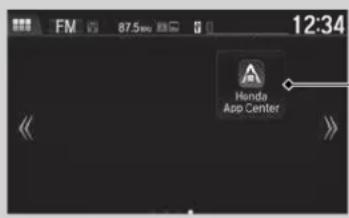
Honda App Center icon
Honda App Center provides access to a variety of App related services.
- Using the Display Audio system while driving can take your attention away from the road, causing a crash in which you could be seriously injured or killed. Only operate system controls when the conditions permit you to safely do so. Please always adhere to the laws of the territory when operating this device.
- Applications on the head unit are subject to change at anytime. This may mean that they are not available or operate differently. Honda shall not be liable to you in such instances.
- Applications available on the device may be provided by parties other than Honda to which 3rd party software licences and charges may apply.
- Data usage and roaming charges may result in using applications on the device in conjunction with your mobile phone and Honda is not liable for any costs you might incur from such use. Honda recommends you consult your mobile phone network provider in advance.
- Downloading applications from the Honda App Center will be subject to Terms and Conditions which can be found at: https://ivhs.os.ixonos.com/honda/help, and may also incur charges.
Smartphone Connection
Some of your smartphone apps can be displayed and operated on the audio/information screen when the phone is connected to the audio system. You can connect your phone using a cable, or wirelessly.
Connecting Your iPhone P. 301
Wi-Fi mode (setting for the first time) P. 302
Smartphone Connection
Park in a safe place before connecting your phone and while operating the displayed apps.
Not all phones are compatible with the system. The system does not display all the available apps on smartphone, and some apps need to be preinstalled. Ask a dealer for details.
You need to switch the Bluetooth® connection to your smartphone if another electronic device is connected.
To change the currently paired phone P. 369
The following may vary by phone type:
- Connection methods
• How to connect a smartphone to the system. - Apps that can be operated on the screen.
- Display response time/update time
We do not support every app operation on the display audio.
Ask the app provider for any questions on the app's features.
Do not get drawn into the display while operating a vehicle.
To use smartphone connection, you need to first pair your smartphone to the audio system via Bluetooth®.
Phone Setup P. 368
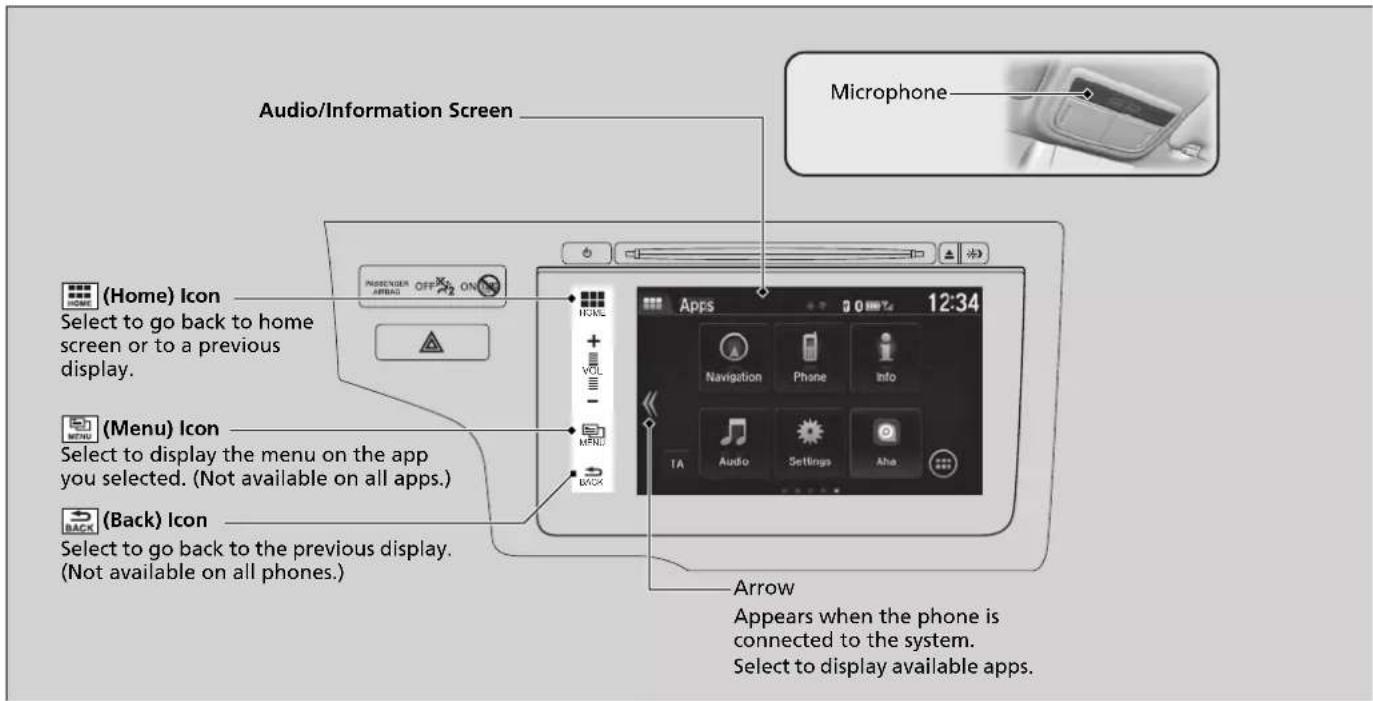
Connecting Your iPhone
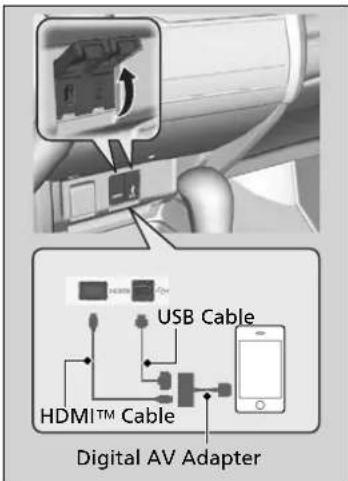
- Connect your phone to the display audio via Bluetooth®.
Phone Setup P. 368
-
Plug in the digital AV adapter to the HDMI™ jack.
-
Connect the digital AV adapter to your iPhone.
▶ Wait until an arrow appears on the home screen.
- Select the arrow to display the available smartphone apps on the audio/information screen.
▶You may need to operate from the phone.
- Select an app you want to operate from the audio/information screen.
▶ To go back to the previous screen, select
Connecting Your iPhone
Make sure to plug in the digital AV adapter to the HDMI™ jack first. If not, smartphone connection may not work properly.
To recharge your phone, connect it to the USB jack, too.
Contact a dealer for the digital AV adapter or HDMI™ cable purchasing information.
Wi-Fi Connection
You can connect the display audio system to the Internet using Wi-Fi and browse websites or use online services on the audio/information screen. If your phone has mobile hotspot capabilities, the system can be tethered to the phone. Go through the following steps for a setup.
Wi-Fi mode (setting for the first time)
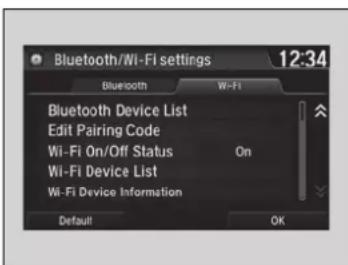
- Select HOME.
- Select Settings.
- Select Bluetooth / Wi-Fi.
- Select the Wi-Fi tab.
- Select Wi-Fi On/Off Status, then On.
- Select Wi-Fi Device List.
Make sure your phone's Wi-Fi setting is in access point (tethering) mode.
▶Select the phone you want to connect to the system.
▶If you do not find the phone you want to connect in the list, select Scan.
Wi-Fi mode (setting for the first time)
You cannot go through the setting procedure while a vehicle is moving. Park in a safe place to set the audio system in Wi-Fi mode.
Some cell phone carriers charge for tethering and smartphone data use. Check your phone's data subscription package.
Check your phone manual to find out if the phone has Wi-Fi connectivity.
You can confirm whether Wi-Fi connection is on or off with the icon on Wi-Fi Device list.
Transmission speed and others will not be displayed on this screen.
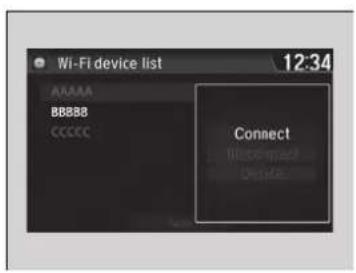
7. Select Connect.
▶ Enter a password for your phone, and select Done.
▶If you cannot enter the password on the displayed keyboard, change the keyboard to the one in which you can enter from the Android setting.
Customized Features P. 313
When the connection is successful, the icon is displayed on the list.
- Select 📄 go back to the home screen.
■ Wi-Fi mode (after the initial setting has been made)
Make sure your phone's Wi-Fi setting is in access point (tethering) mode.
Wi-Fi mode (setting for the first time)
If you cannot enter the password on the displayed keyboard, change the keyboard to the one in which you can enter from the following order:
Settings→Android→Language & input→select next to Android keyboard→Input
language→uncheck the box next to Use system language→select the keyboard languages that you can enter.
>>Wi-Fi mode (after the initial setting has been made)
iPhone users
You may need to go through an initial setup for Wi-Fi connection again after you boot your phone.
Siri® Eyes Free
You can talk to Siri using the □(Talk) button on the steering wheel when your iPhone is paired to the Hands-Free Telephone (HFT) System.
Phone Setup P. 368
Using Siri® Eyes Free
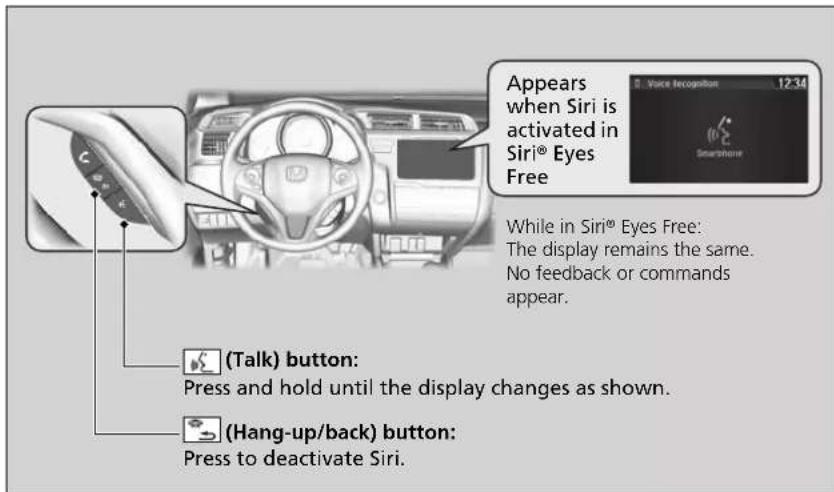
Siri® Eyes Free
Siri is a trademark of Apple Inc.
Check Apple Inc, website for features available for Siri.
We recommend against using Siri other than in Siri® Eyes Free while operating a vehicle.
Using Siri® Eyes Free
Some commands work only on specific phone features or apps.
Audio Error Messages
CD Player
If a disc error occurs, you may see the following error messages.
| Error Message Cause Solution | ||
| Unplayable file*1Unplayable File*2 | Track/file format not supported | Current track/file will be skipped. The next supported track/file plays automatically. |
| Bad discPlease check owners manualPush eject*1Bad DiscPlease Check Owner's ManualPush Eject*2 | Mechanical error | Press the ▲ject) button and remove the disc, and check that the error message is cleared.Check that the disc is not damaged or deformed, and insert the disc again. ➤Protecting CDs P. 309If the error message reappears, press the ▲button, and pull out the disc.Insert a different disc.If the new disc plays, there is a problem with the first disc.If the error message repeats, or the disc cannot be removed, contact a dealer.Do not try to force the disc out of the player. |
| Mechanical error*1Mecha Error*2 | ||
| Bad discPlease check owners manual*1Bad DiscPlease Check Owner's Manual*2 | Servo error | |
| Check disc*1Check Disc*2 | Disc error | Check that the disc is not damaged or deformed. ➤Protecting CDs P. 309 |
| Heat error*1Heat Error*2 | High temperature | Turn the audio system off and allow the player to cool down until the error message is cleared. |
*1: Colour audio system
*2: Display audio system
iPod/USB Flash Drive
If an error occurs while playing an iPod or USB flash drive, you may see the following error messages. If you cannot clear the error message, contact a dealer.
| Error Message Solution | |
| USB error*1USB Error*2 | Appears when there is a problem with the USB adapter unit. Check if the device is compatible with the USB adapter unit. |
| Incompatible USB devicePlease check owner's manual*1Bad USB DevicePlease Check Owners Manual*2 | Appears when an incompatible device is connected. Disconnect the device. Then turn the audio system off, and turn it on again. Do not reconnect the device that caused the error. |
| Unsupported ver*1Unsupported Version*2 | Appears when an unsupported iPod is connected. If it appears when a supported iPod is connected, update the iPod software to the newer version. |
| Retry connection*1Connect Retry*2 | Appears when the system does not acknowledge the iPod. Reconnect the iPod. |
| Unplayable file*1Unplayable File*2 | Appears when the files in the USB flash drive are DRM or an unsupported format. This error message appears for about three seconds, then plays the next song. |
| No data*1No song*1No Data*2 | iPodAppears when the iPod is empty.USB flash driveAppears when the USB flash drive is empty or there are no MP3, WMA, or AAC files in the USB flash drive.iPod and USB flash driveCheck that compatible files are stored on the device. |
| Unsupported | Appears when an unsupported device is connected. If it appears when a supported device is connected, reconnect the device. |
*1: Colour audio system
*2: Display audio system
Models with display audio system
Android/Apps
If an error occurs while using the audio system or apps, you may see the following error messages. If you cannot clear the error message, contact a dealer.
| Error Message*1 | Solution |
| Unfortunately, **** has stopped. | Error has occurred within app, select OK on the screen to close the app. Unless it is a fatal error, it would return to normal if you startup the app.If it does not return to normal even after starting up the app, press and hold the (power) button to perform the forced reset. If it still does not get back to normal, you need Factory Data Reset.➤ Defaulting All the Settings P. 338 |
| **** is not responding. Would you like to close it? | App is in a busy state.Select Wait if you can wait for a response from app a little longer. If it does not respond even if you keep waiting, select OK to close the app and start it up. When it does not return to normal, press and hold the (power) button to perform the forced reset. You also need Factory Data Reset.➤ Defaulting All the Settings P. 338 |
| Security warning | Occurs if you open the browser when the system date is older than the certificate date information. It also occurs when you are in the area where GPS reception is unavailable or GPS setting of the Android setting is turned off.Turn on GPS setting of the Android setting.Move to the area where GPS reception is available.➤ Customized Features P. 313 |
*1: **** part is variable characters, and will change depending upon where an error occurs.
General Information on the Audio System
Recommended CDs
- Use only high-quality CD-R or CD-RW discs labeled for audio use.
- Use only CD-R or CD-RW discs on which the recordings are closed.
- Play only standard round-shaped CDs.
The CD packages or jackets should have one of these marks.





CDs with MP3, WMA, or AAC files
- Some software files may not allow for audio play or text data display.
- Some versions of MP3, WMA, or AAC formats may be unsupported.
Recommended CDs
A Dual-disc cannot play on this audio unit. If recorded under certain conditions, a CD-R or CD-RW may not play either.
■Protecting CDs
Follow these precautions when handling or storing CDs:
- Store a CD in its case when it is not being played.
- When wiping a CD, use a soft clean cloth from the centre to the outside edge.
- Handle a CD by its edge. Never touch either surface.
- Never insert foreign objects into the CD player.
- Keep CDs out of direct sunlight and extreme heat.
- Do not place stabilizer rings or labels on the CD.
- Avoid fingerprints, liquids, and felt-tip pens on the CD.
>>Protecting CDs
NOTICE
Do not insert a damaged CD. It may be stuck inside and damage the audio unit.
Examples:
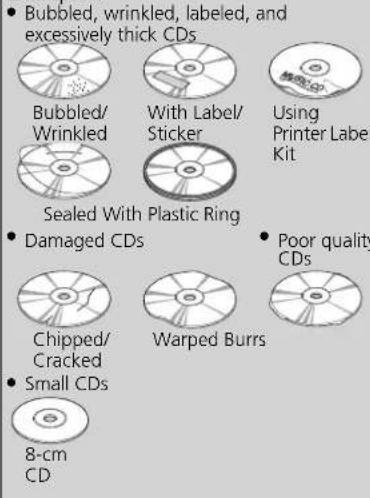





Compatible iPod, iPhone, and USB Flash Drives
iPod and iPhone Model Compatibility
Model
iPod (5th generation)
iPod classic 80GB/160GB (launch in 2007)
iPod classic 120GB (launch in 2008)
iPod classic 160GB (launch in 2009)
iPod nano (1st to 6th generation) launch in 2010
iPod nano (7th generation) launch in 2012
iPod touch (1st to 4th generation) launch in 2010
iPod touch (5th generation) launch in 2012
iPhone 3G/iPhone 3GS/iPhone 4/iPhone 4s/iPhone 5/iPhone 5c*1/iPhone 5s*1
*1: Display audio system
>>iPod and iPhone Model Compatibility
This system may not work with all software versions of these devices.
USB Flash Drives
- A USB flash drive of 256 MB or higher is recommended.
- Some digital audio players may not be compatible.
- Some USB flash drives (e.g., a device with security lockout) may not work.
- Some software files may not allow for audio play or text data display.
- Some versions of MP3, WMA, AAC or WAV * formats may be unsupported.
Models with display audio system
Recommended Devices
| Media CD-R/CD-RW/USB Flash Drive | |
| Profile (MP4 version) | Baseline Level 3 (MPEG4-AVC),Simple Level 5 (MPEG4) |
| File extension(MP4 version) | .mp4/.m4v |
| Compatible audio codec MPEG4-AVC (H.264) | MPEG4(ISO/IEC 14496 Part.2) |
| Bit rate 10 Mbps (MPEG4-AVC) 8 Mbps (MPEG4) | |
| Maximum image 720 X 576 pixels | |
USB Flash Drives
Files on the USB flash drive are played in their stored order. This order may be different from the order displayed on your PC or device.
Models with display audio system
About Open Source Licences
To see the open source licence information, follow these steps.
- Select HOME.
- Select Settings
- Select Android.
- Select About device.
- Select Legal information.
- Select Open source licences.
About Open Source Licences
You can also go to step 4 when you:
- Swipe down from the top.
▶Select Appears on the screen.
- Select Ⓞ, then select Settings on the App tab.
Customized Features
Use the audio/information screen to customize certain features.
Models with colour audio system
How to customize
While the vehicle is at a complete stop with the ignition switch in ON Ⅱ, press the MENU/CLOCK button, then select Settings. To customize the phone settings, press the button, then select Phone setup.
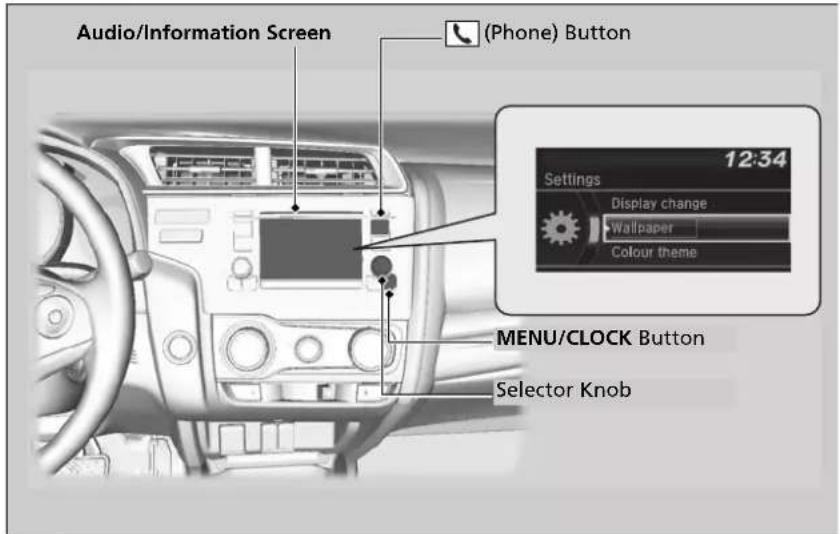
Continued
>>Customized Features
When you customize settings:
• Make sure that the vehicle is at a complete stop.
Continuously variable transmission models
- Shift to P.
Manual transmission models
- Set the parking brake.
>>How to customize
These indications are used to show how to operate the selector knob.
Rotate to select.
Press to enter.
To customize other features, select Settings, rotate
, and press
→ List of customizable options P. 318
■Customization flow
Press the MENU/CLOCK button.
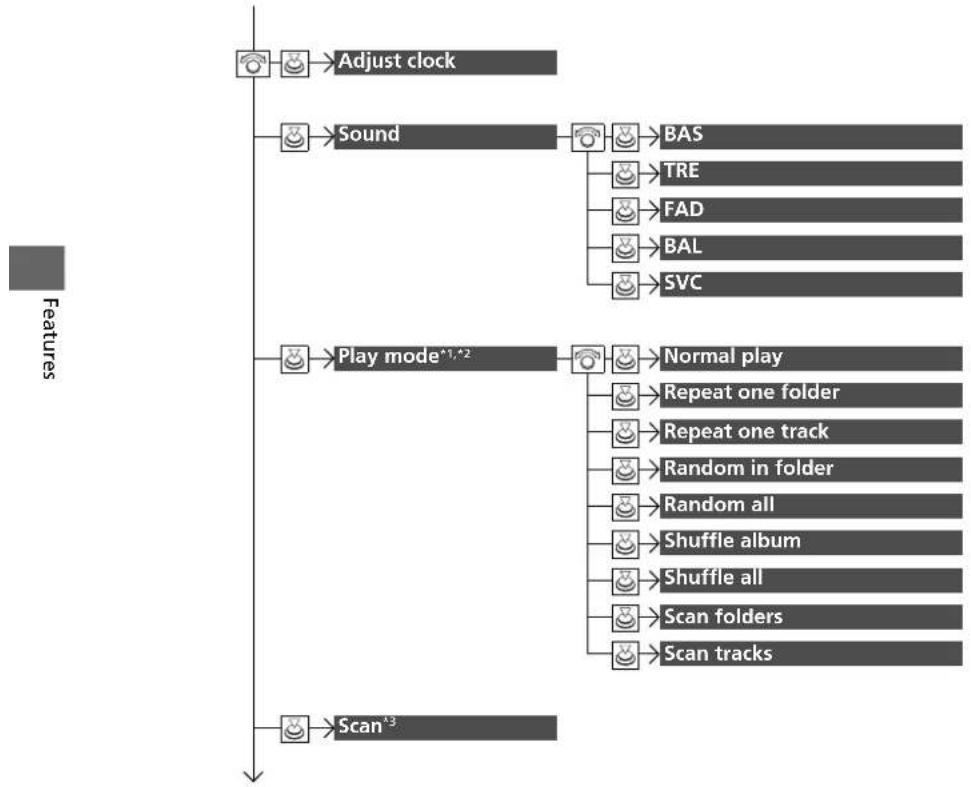
flowchart
graph TD
    A["Adjust clock"] --> B["Sound"]
    B --> C["BAS"]
    B --> D["TRE"]
    B --> E["FAD"]
    B --> F["BAL"]
    B --> G["SVC"]
    H["Play mode*1,*2"] --> I["Normal play"]
    I --> J["Repeat one folder"]
    I --> K["Repeat one track"]
    I --> L["Random in folder"]
    I --> M["Random all"]
    I --> N["Shuffle album"]
    I --> O["Shuffle all"]
    I --> P["Scan folders"]
    I --> Q["Scan tracks"]
    R["Scan*3"] --> S
*1: The items of play mode depend on audio modes.
*2: CD/iPod/USB mode
*3: AM/FM/DAB* mode
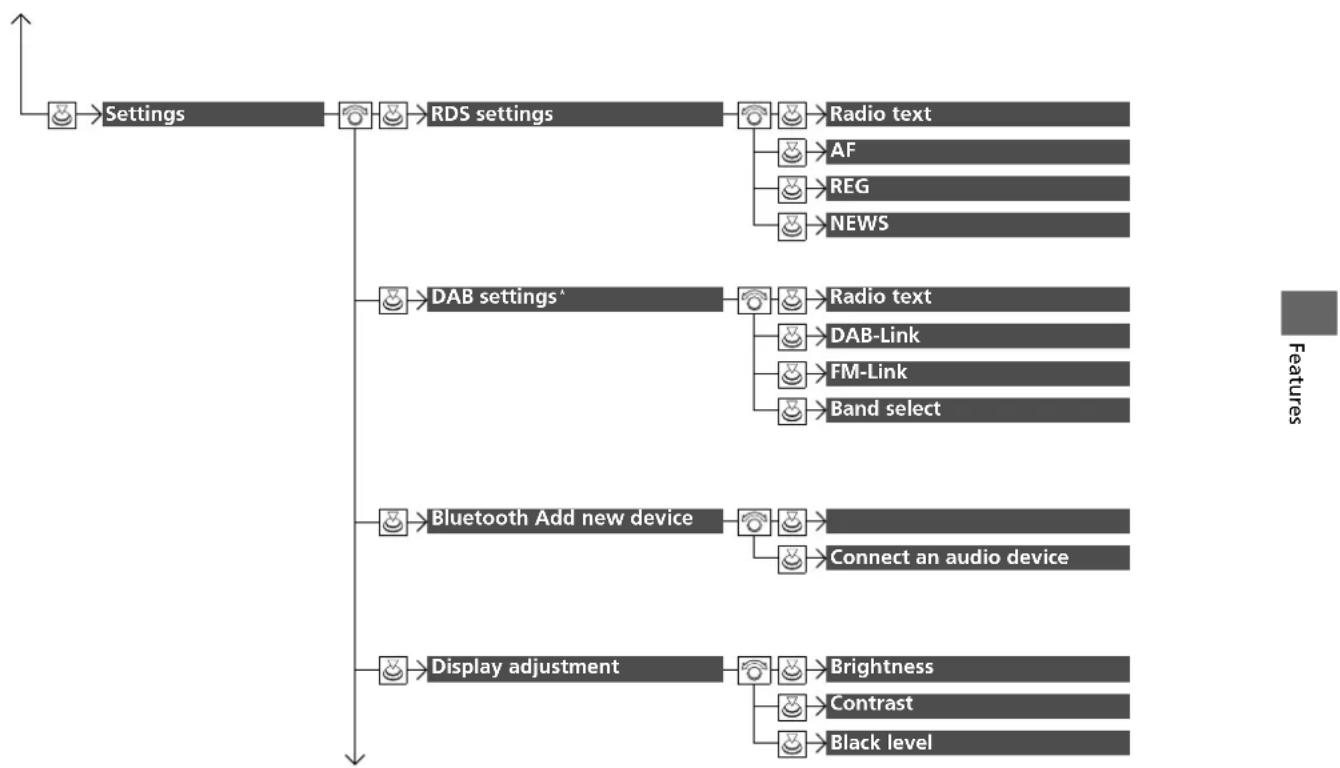
flowchart
graph TD
    A["Settings"] --> B["RDS settings"]
    B --> C["Radio text"]
    B --> D["AF"]
    B --> E["REG"]
    B --> F["NEWS"]
    B --> G["DAB settings^"]
    G --> H["Radio text"]
    G --> I["DAB-Link"]
    G --> J["FM-Link"]
    G --> K["Band select"]
    G --> L["Bluetooth Add new device"]
    L --> M["Connect an audio device"]
    L --> N["Display adjustment"]
    N --> O["Brightness"]
    N --> P["Contrast"]
    N --> Q["Black level"]
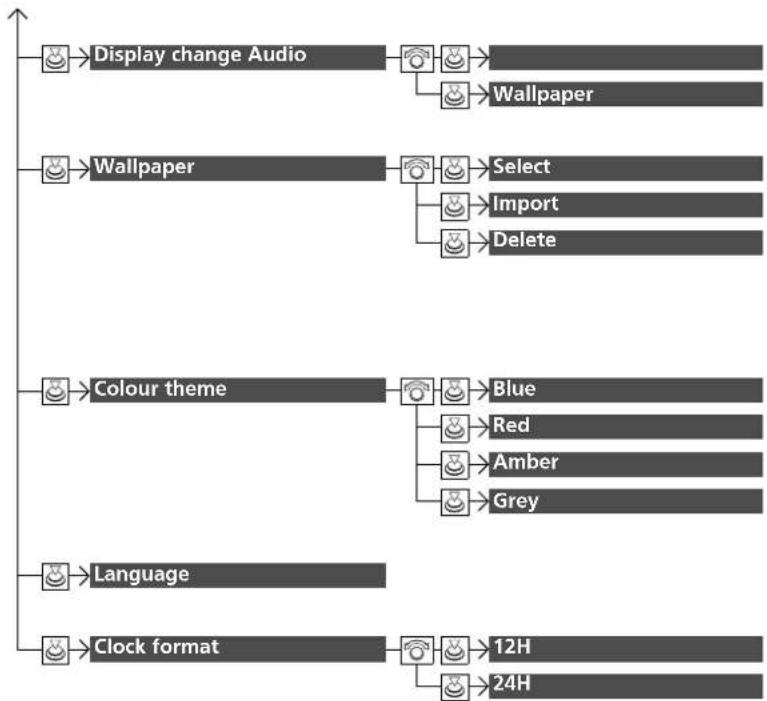
flowchart
graph TD
    A["Display change Audio"] --> B["Wallpaper"]
    C["Wallpaper"] --> D["Select"]
    C --> E["Import"]
    C --> F["Delete"]
    G["Colour theme"] --> H["Blue"]
    G --> I["Red"]
    G --> J["Amber"]
    G --> K["Grey"]
    L["Language"] --> M["Clock format"]
    M --> N["12H"]
    M --> O["24H"]
Press the 📊 button and rotate 🔺 to select Phone setup, then press 😊.
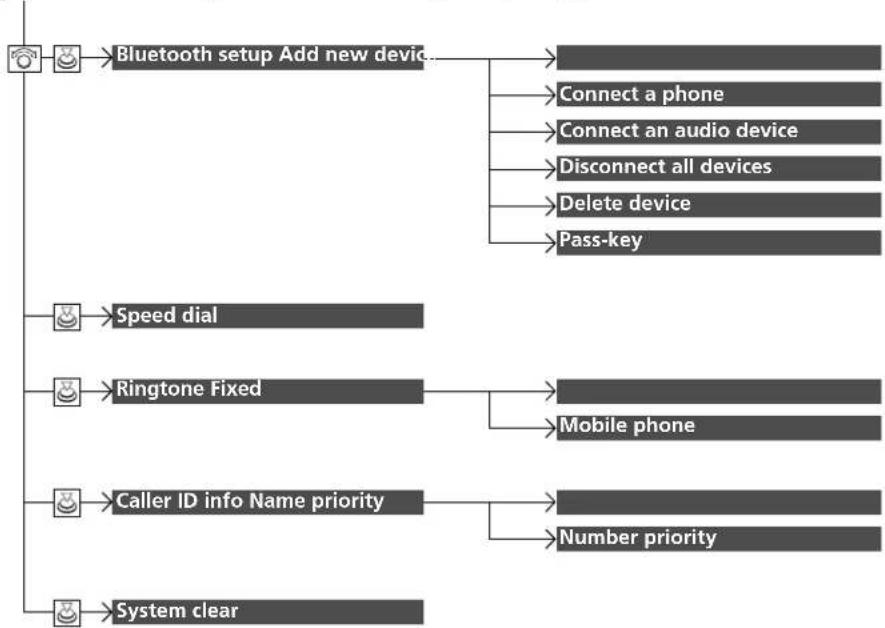
flowchart
graph TD
    A["Bluetooth setup Add new device"] --> B["Connect a phone"]
    A --> C["Connect an audio device"]
    A --> D["Disconnect all devices"]
    A --> E["Delete device"]
    A --> F["Pass-key"]
    G["Speed dial"] --> H["Mobile phone"]
    I["Ringtone Fixed"] --> J["Mobile phone"]
    K["Caller ID info Name priority"] --> L["Number priority"]
    M["System clear"] --> N["Mobile phone"]
■List of customizable options
| Setup Group | Customizable Features Description Selectable Settings | |
| Adjust clock | Adjust Clock. ➡Clock P. 140 — | |
| Sound | BAS | |
| TRE | Adjusts the settings of the audio speaker's sound. ➡Adjusting the Sound P. 232 — | |
| FAD | ||
| BAL | ||
| SVC | ||
| Play mode | Normal play | |
| CD/USB mode | ||
| Repeat one folder | ||
| CD/iPod/USB mode | ||
| Repeat one track | ||
| CD/USB mode | ||
| Random in folder | ||
| CD/USB mode | Selects a play mode. ➡How to Select a Play Mode P. 247, 250, 253 — | |
| Random all | ||
| iPod mode | ||
| Shuffle album | ||
| iPod mode | ||
| Shuffle all | ||
| CD/USB mode | ||
| Scan folders | ||
| CD/USB mode | ||
| Scan tracks | ||
*1: Default Setting
| Setup Group | Customizable Features Description Selectable Settings | |||
| AM/FM/DAB* mode Scan | Selects the scan mode. ➤Scan P. 247, 253 | — | ||
| Settings | RDS settings | Radio text | Turns on and off the radio text information. | On/Off*1 |
| AF Turns on and off Alternative Frequency (AF). On | */Off | |||
| REG Turns on and off Regional Programme (REG). On | */Off | |||
| NEWS | Turns on and off to automatically to tune to the news programme. | On/Off*1 | ||
| DAB settings* | Radio text | Turns on and off the radio text information. | On/Off*1 | |
| DAB-Link | Selects whether the system automatically searches for the same station from Ensembles, and switches to it. | On*/Off | ||
| FM-Link | Selects whether the system finds the same station from an FM band, and automatically switches the band. | On*/Off | ||
| Band select | Selects specific bands to reduce the time to update the lists, and search for a station. | Both*/BandIII/L-Band | ||
| Bluetooth | Add new device | Pairs a new phone to HFT, edits and deletes a paired phone, and create a code for a paired phone. ➤Phone Setup P. 346 | — | |
| Connect an audio device | Connects, disconnects or pairs a Bluetooth® Audio device to HFT. | — | ||
*1: Default Setting
| Setup Group | Customizable Features Description Selectable Settings | |||
| Settings | Display adjustment | Brightness | Changes the brightness of the audio/information screen. | — |
| Contrast | Changes the contrast of the audio/information screen. | — | ||
| Black level | Changes the black level of the audio/information screen. | — | ||
| Display change Changes the display type. Audio | ^*1 /Wallpaper | |||
| Wallpaper | Select Changes the display type. | Clock ^*1 /Image1/Image2/Image3 | ||
| Import | Imports an image file for a new wallpaper. →Wallpaper Setup P. 230 | — | ||
| Delete Deletes an image file for a wallpaper. Image1 | ^*1 /Image2/Image3 | |||
| Colour theme | Changes the background colour of the audio/information screen. | Blue ^*1 /Red/Amber/Grey | ||
| Language Changes the display language. | English ^*1 /Other selectable language is shown on the screen. | |||
| Clock format | Selects the digital clock display from 12H to 24H. | 12H ^*1 /24H | ||
*1: Default Setting
| Setup Group | Customizable Features Description Selectable Settings | |||
| Phone setup | Bluetooth setup | Add new device | Pairs a new phone to HFT. ➡Phone Setup P. 346 | — |
| Connect a phone | Pairs a new phone or connects a paired phone to HFT. ➡Phone Setup P. 346 | — | ||
| Connect an audio device | Connects a Bluetooth® Audio device to HFT. | — | ||
| Disconnect all devices Disconnects a paired phone from HFT. — | ||||
| Delete device Deletes a paired phone. — | ||||
| Pass-key Inputs and changes a code for a paired phone. — | ||||
| Speed dial | Edits, adds or deletes a speed dial entry. ➡Speed Dial P. 355 | — | ||
| Ringtone Selects the ring tone. Fixed | *1/Mobile phone | |||
| Caller ID info | Prioritizes the caller's name or phone number as the caller ID. | Name priority^1/Number priority | ||
| System clear | Cancels/Resets all customized items in the Phone setup group as default. | — | ||
*1: Default Setting
Models with display audio system
How to customize
While the vehicle is at a complete stop with the ignition switch in ON ^*1 , select Settings, then select a setting item.
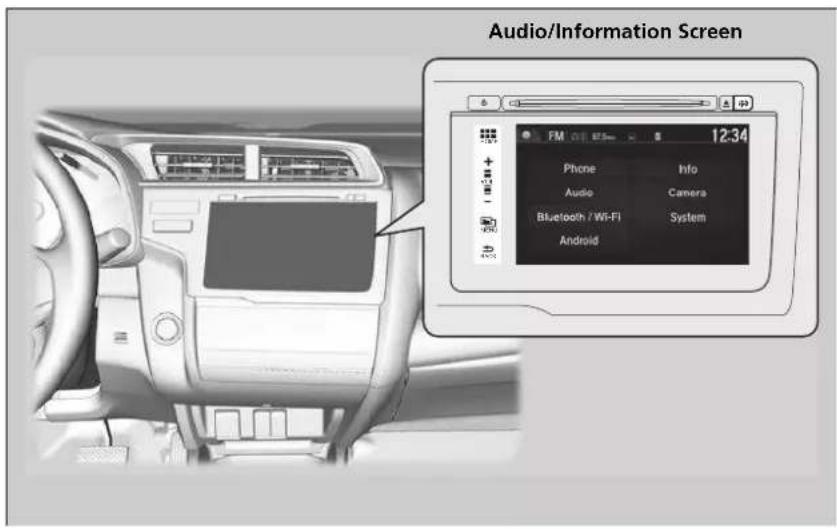
*1: Models with the keyless access system have an ENGINE START/STOP button instead of an ignition switch.
>>Customized Features
When you customize settings:
- Make sure that the vehicle is at a complete stop.
- Continuously variable transmission models Shift to P.
- Manual transmission models Set the parking brake.
>>How to customize
To customize other features, select Settings.
→ List of customizable options P. 328
If you press and hold the ☐(power) button when resetting the system, it may restore the customized value to its default value depending on the setting items.
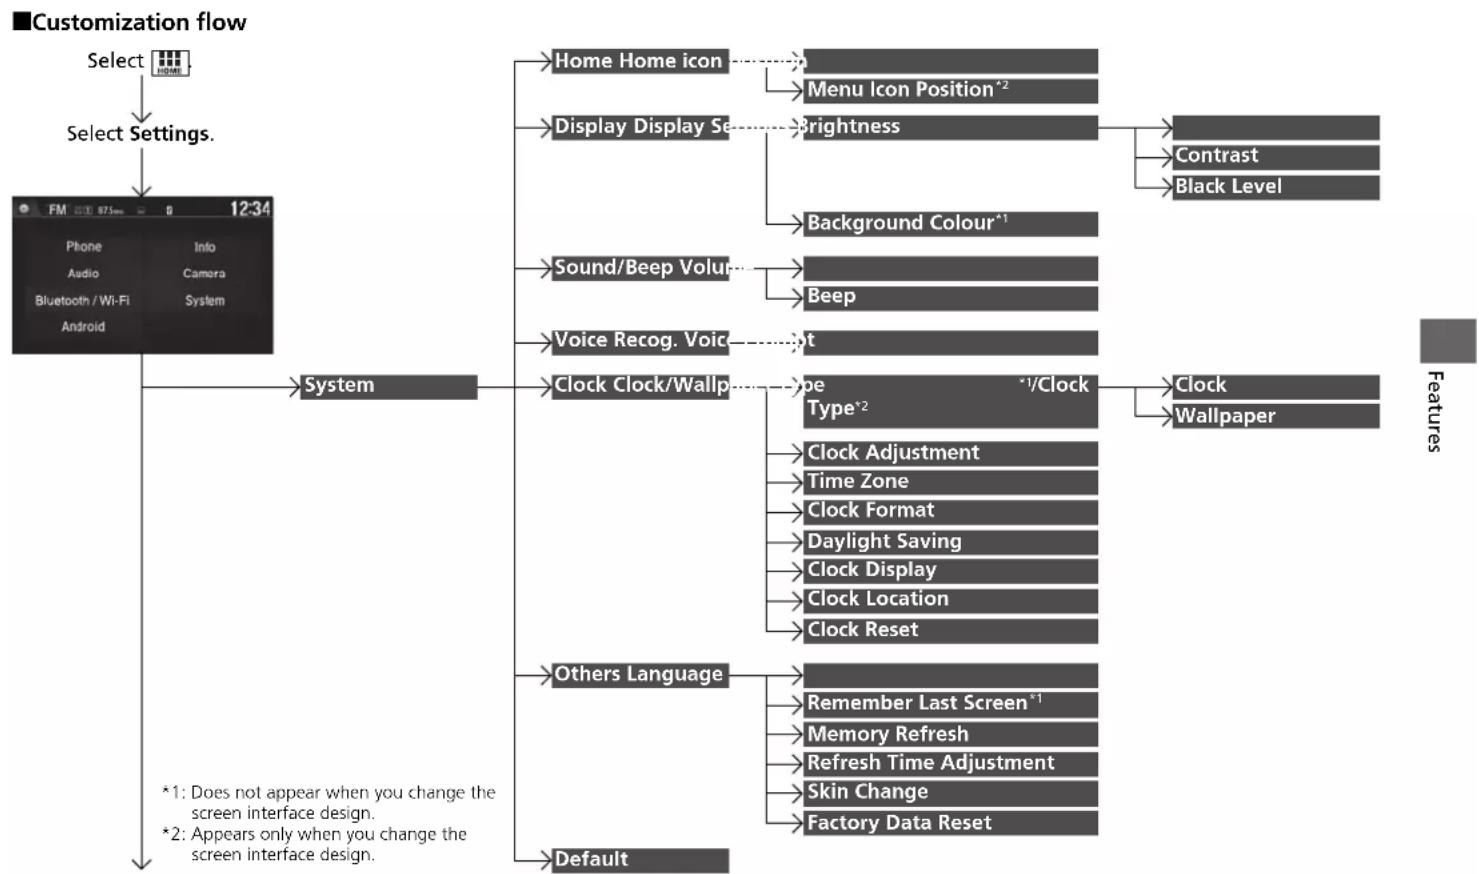
flowchart
graph TD
    A["Select"] --> B["Select Settings."]
    B --> C["FM 12:34"]
    C --> D["System"]
    D --> E["Home Home icon"]
    D --> F["Display Display Set"]
    D --> G["Sound/Beep Volur"]
    D --> H["Voice Recogn. Voice"]
    D --> I["Clock Clock/Wallp"]
    D --> J["Others Language"]
    D --> K["Default"]

    E --> L["Menu Icon Position*2"]
    F --> M["Brightness"]
    G --> N["Background Colour*1"]
    H --> O["Beep"]
    I --> P["Type*2"]
    P --> Q["Clock Adjustment"]
    P --> R["Time Zone"]
    P --> S["Clock Format"]
    P --> T["Daylight Saving"]
    P --> U["Clock Display"]
    P --> V["Clock Location"]
    P --> W["Clock Reset"]

    I --> X["Remember Last Screen*1"]
    I --> Y["Memory Refresh"]
    I --> Z["Refresh Time Adjustment"]
    I --> AA["Skin Change"]
    I --> AB["Factory Data Reset"]

    K --> AC["Features"]

    style A fill:#999,stroke:#333
    style B fill:#ccc,stroke:#333
    style C fill:#fff,stroke:#333
    style D fill:#fff,stroke:#333
    style E fill:#ccc,stroke:#333
    style F fill:#ccc,stroke:#333
    style G fill:#ccc,stroke:#333
    style H fill:#ccc,stroke:#333
    style I fill:#ccc,stroke:#333
    style J fill:#ccc,stroke:#333
    style K fill:#ccc,stroke:#333
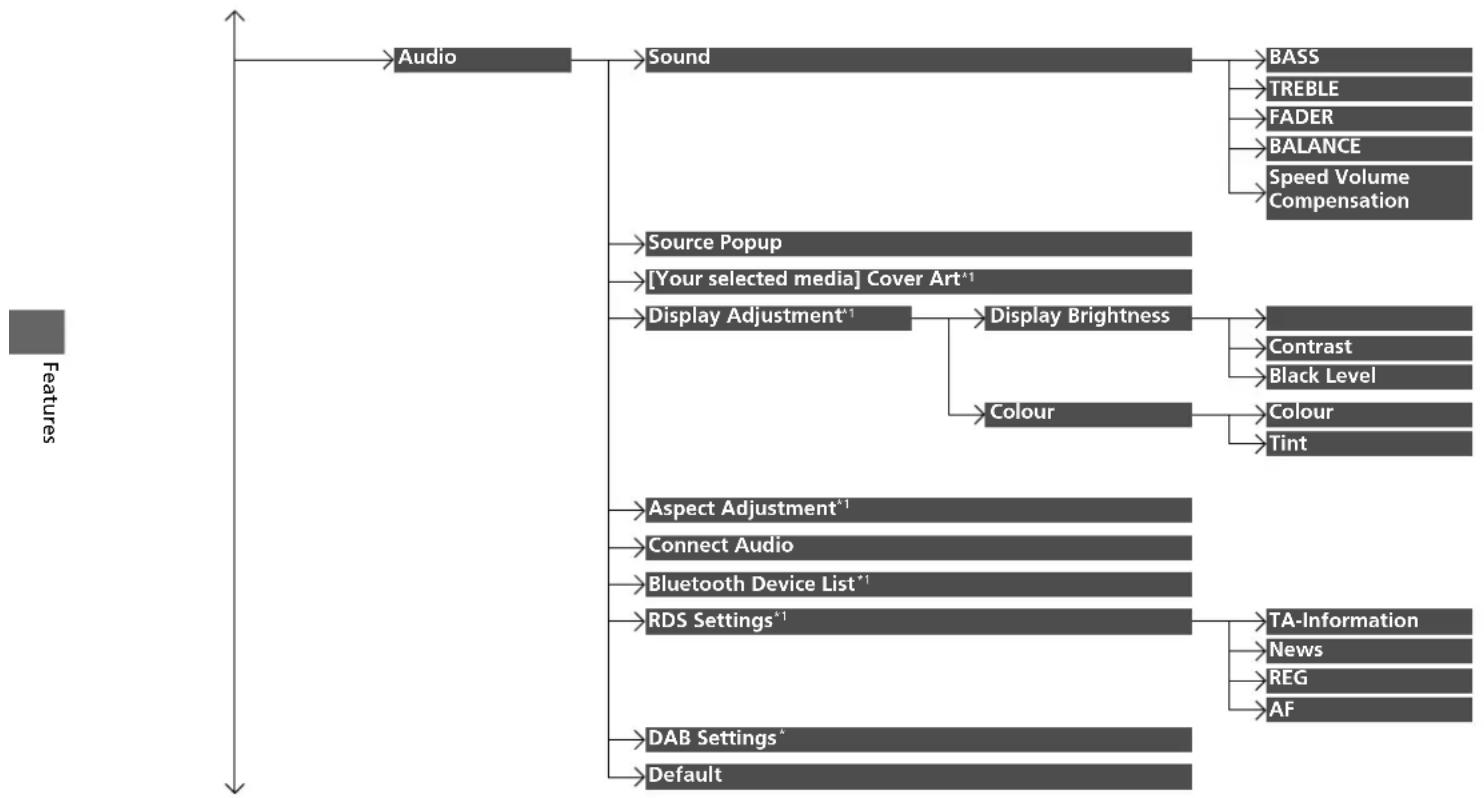
flowchart
graph TD
    A["Features"] --> B["Audio"]
    B --> C["Sound"]
    C --> D["BASS"]
    C --> E["TREBLE"]
    C --> F["FADER"]
    C --> G["BALANCE"]
    C --> H["Speed Volume Compensation"]
    B --> I["Source Popup"]
    I --> J["[Your selected media"] Cover Art*1]
    B --> K["Display Adjustment*1"]
    K --> L["Display Brightness"]
    L --> M["Contrast"]
    L --> N["Black Level"]
    K --> O["Colour"]
    O --> P["Colour"]
    O --> Q["Tint"]
    B --> R["Aspect Adjustment*1"]
    R --> S["Connect Audio"]
    R --> T["Bluetooth Device List*1"]
    B --> U["RDS Settings*1"]
    U --> V["TA-Information"]
    U --> W["News"]
    U --> X["REG"]
    U --> Y["AF"]
    B --> Z["DAB Settings*"]
    B --> AA["Default"]
*1: May change depending on your currently selected source.
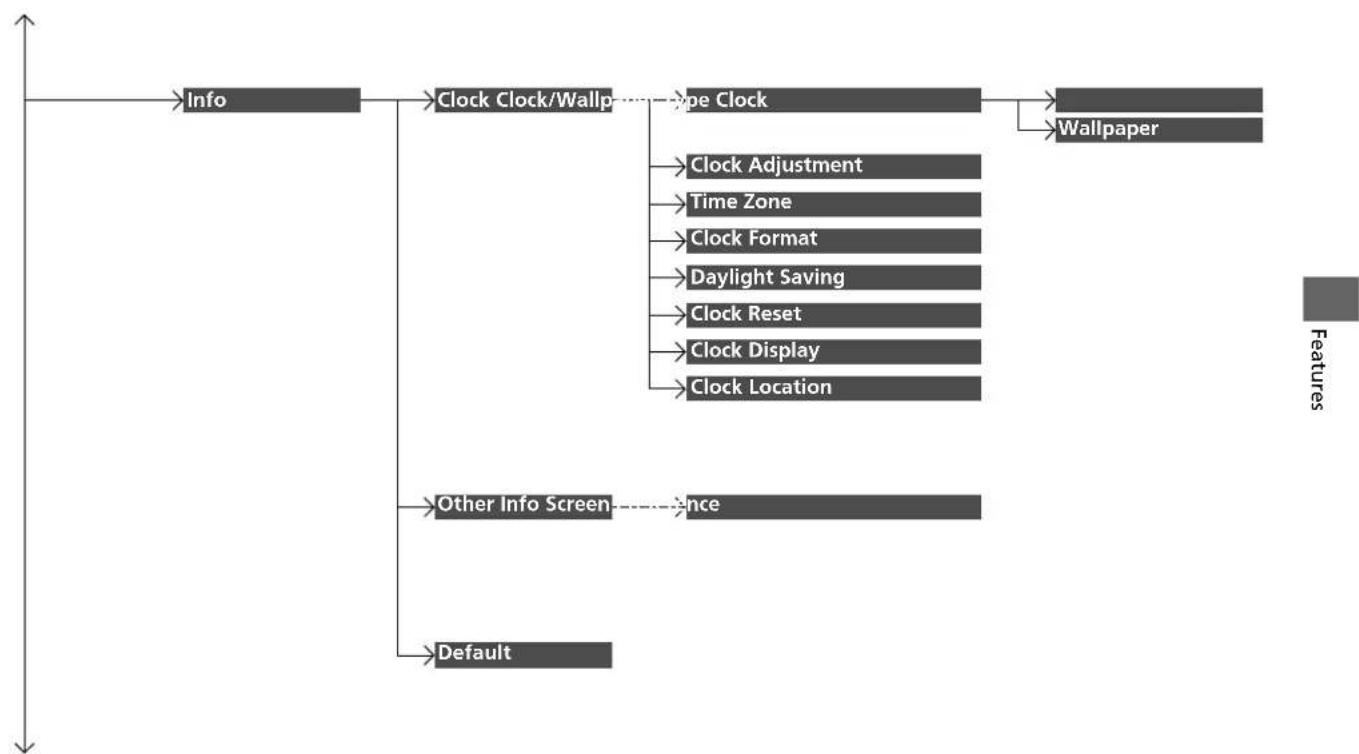
flowchart
graph TD
    A["Info"] --> B["Clock Clock/Wallp"]
    B --> C["Type Clock"]
    C --> D["Wallpaper"]
    B --> E["Clock Adjustment"]
    B --> F["Time Zone"]
    B --> G["Clock Format"]
    B --> H["Daylight Saving"]
    B --> I["Clock Reset"]
    B --> J["Clock Display"]
    B --> K["Clock Location"]
    E --> L["Other Info Screen"]
    L --> M["None"]
    N["Default"] --> L
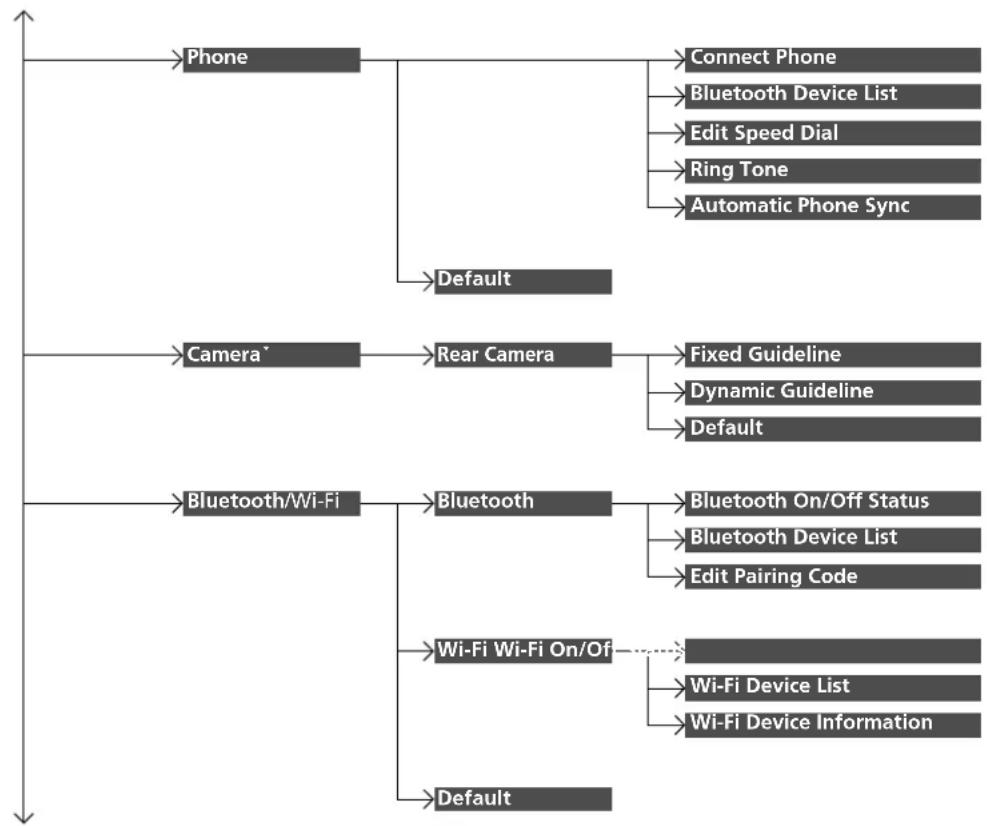
flowchart
graph TD
    A["Phone"] --> B["Default"]
    A --> C["Connect Phone"]
    C --> D["Bluetooth Device List"]
    C --> E["Edit Speed Dial"]
    C --> F["Ring Tone"]
    C --> G["Automatic Phone Sync"]
    H["Camera"] --> I["Rear Camera"]
    I --> J["Fixed Guideline"]
    I --> K["Dynamic Guideline"]
    I --> L["Default"]
    M["Bluetooth/Wi-Fi"] --> N["Bluetooth"]
    N --> O["Bluetooth On/Off Status"]
    N --> P["Bluetooth Device List"]
    N --> Q["Edit Pairing Code"]
    M --> R["Wi-Fi Wi-Fi On/Off"]
    R --> S["Wi-Fi Device List"]
    R --> T["Wi-Fi Device Information"]
    U["Default"] --> V["End"]
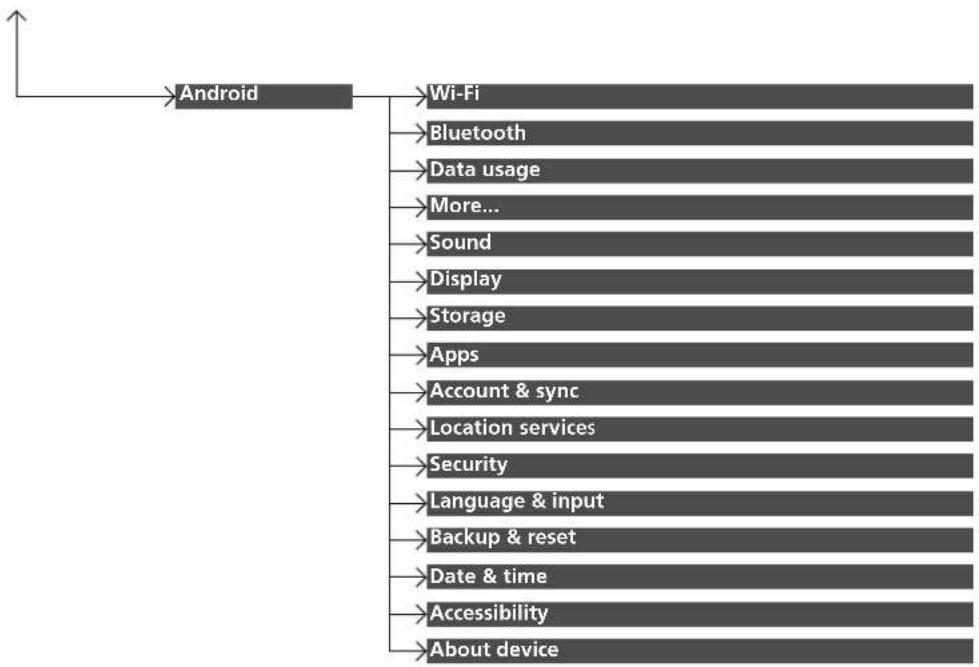
flowchart
graph TD
    A["Android"] --> B["Wi-Fi"]
    A --> C["Bluetooth"]
    A --> D["Data usage"]
    A --> E["More..."]
    A --> F["Sound"]
    A --> G["Display"]
    A --> H["Storage"]
    A --> I["Apps"]
    A --> J["Account & sync"]
    A --> K["Location services"]
    A --> L["Security"]
    A --> M["Language & input"]
    A --> N["Backup & reset"]
    A --> O["Date & time"]
    A --> P["Accessibility"]
    A --> Q["About device"]
■List of customizable options
| Setup Group | Customizable Features Description Selectable Settings | |||
| System | HOME | Home icon position Changes the home screen icon layout. — | ||
| Menu Icon Position*3 | Changes the home screen icon layout. | |||
| Display | Brightness | Changes the brightness of the audio/information screen. | — | |
| Contrast | Changes the contrast of the audio/information screen. | — | ||
| Black Level | Changes the black level of the audio/information screen. | — | ||
| Background Colour*2 | Changes the background colour of the audio/information screen | Blue *1/Amber/Red/Violet | ||
| Sound/Beep | Volume | Changes the sound volume.Adjusts the guidance volume of thenavigation system*. | 0~6 *1~11 | |
| Beep | Changes the beep volume. | OFF/1/2 *1/3 | ||
| Voice Recog. | Voice Prompt Turns the voice prompt on and off. On | *1/Off | ||
*1: Default Setting
*2: Does not appear when you change the screen interface design.
*3: Appears only when you change the screen interface design.
| Setup Group | Customizable Features Description Selectable Settings | ||
| System Clock | Clock/ Wallpaper Type*2/ Clock Type*3 | Clock Changes the clock display type. | Analog/Digital*1/Small Digital/Off |
| Wallpaper*2Changes the wallpaper type Imports an image file for a new wallpaper. Deletes an image file for a wallpaper.Wallpaper Setup P. 262 | Blank/Galaxy*1/Metallic | ||
| Clock Adjustment | Adjusts Clock.Clock P. 140 | — | |
| Time Zone | Changes the time zones. | WET/GMT*1 | |
| Clock Format | Selects the digital clock display from 12H to 24H. | 12H*1/24H | |
| Daylight Saving | Adjusts the clock automatically when a summer time change occurs. | On*1/Off | |
| Clock Display | Selects whether the clock display comes on. | On*1/Off | |
| Clock Location Changes the clock display layout. | Right upper*1/Left upper/Right lower/Left lower/Off | ||
| Clock Reset | Resets the clock settings to the factory default. | — | |
*1: Default Setting
*2: Does not appear when you change the screen interface design.
*3: Appears only when you change the screen interface design.
| Setup Group | Customizable Features Description Selectable Settings | ||
| System | Others | Language Changes the display language. | English (United Kingdom) *1: See other selectable languages on the screen. |
| Remember Last Screen | Selects whether the device remembers the last screen. | ||
| Memory Refresh | Turns on the audio system automatically and restores the fragmentation of a memory when the ignition switch is LOCK 0 *2. | ||
| Refresh Time Adjustment | Sets the time for Memory Fresh. | ||
| Skin Change Changes the screen interface design. — | |||
| Factory Data Reset | Resets all the settings to their factory default. ➤ Defaulting All the Settings P. 338 | ||
| Default | Cancels/Resets all customized items in the System group as default. | Yes/No | |
| Audio | Sound | Adjusts the settings of the audio speaker's sound ➤ Adjusting the Sound P. 274 | -6 ~ 0 *1 ~ +6 (BASS and TREBLE), RR9~0 *1~FR9 (FADER), L9~0 *1 ~R9 (BALANCE), Off/Low/Mid *1/ High (SVC) |
| Source Popup | Selects whether the list of selectable audio sources comes on or not when Audio is selected on the home screen. | On/Off *1 | |
*1: Default Setting
*2: Models with the keyless access system have an ENGINE START/STOP button instead of an ignition switch.
| Setup Group | Customizable Features Description Selectable Settings | |||
| Audio | CD, iPod, or USB mode[Your selected media]Cover Art | Turns on and off the cover art display. On | ^1 /Off | |
| USB, HDMITMmodeDisplay Adjustment | Brightness | System P. 328 | ||
| Contrast | ||||
| BlackLevel | ||||
| Colour | Changes the colour of the audio/information screen. | — | ||
| Tint | Changes the tint of the audio/information screen. | — | ||
| USB, HDMITMmodeAspect Adjustment | Changes the aspect ratio and zoom settings of the audio/information screen. | Original (only USB) ^* /Normal/Full ^** /Zoom | ||
| Bluetooth®Audio modeConnect Audio | Connects, disconnects or pairs a Bluetooth®Audio device to HFT. | — | ||
| Bluetooth®Audio modeBluetooth Device List | Pairs a new phone to HFT, edits or deletes a paired phone.Phone Setup P. 368 | — | ||
*1: Default Setting
| Setup Group | Customizable Features Description Selectable Settings | |||
| Audio | RDS Settings* | TA-Information | Turns on and off the traffic announcement function. | On/Off*1 |
| News | Turns on and off the interruption news function. | On/Off*1 | ||
| REG Turns on and off the regional function. On | *1/Off | |||
| AF | Turns on and off the alternative frequency function. | On*1/Off | ||
| DAB Settings* | DAB-DAB Link | Selects whether the system automatically searches for the same station from Ensembles, and switches to it. | On*1/Off | |
| DAB-FM Link | Selects whether the system finds the same station from an FM band, and automatically switches the band. | On*1/Off | ||
| Band select | Selects specific bands to reduce the time to update the lists, and search for a station. | BOTH*1/BAND III/L-BAND | ||
| Default | Cancels/Resets all customized items in the Audio group as default. | Yes/No | ||
*1: Default Setting
| Setup Group | Customizable Features Description Selectable Settings | |||
| Info | Clock | Clock/ Wallpaper type*2/ Clock Type*3 | Clock | System P. 328 |
| Clock Adjustment | ||||
| Time Zone | ||||
| Clock Format | ||||
| Daylight Saving | ||||
| Clock Reset | ||||
| Clock Display | ||||
| Clock Location | ||||
| Other | Info Screen Preference | Changes the Info screen type. | Info Top/Info Menu/Off*1 | |
| Default | Cancels/Resets all customized items in the Info group as default. | Yes/No | ||
*1: Default Setting
*2: Does not appear when you change the screen interface design.
*3: Appears only when you change the screen interface design.
| Setup Group | Customizable Features Description Selectable Settings | ||
| Phone | Connect Phone | Pairs a new phone to HFT, connects or disconnects a paired phone. ➕Phone Setup P. 368 | — |
| Bluetooth Device List | Pairs a new phone to HFT, edits or deletes a paired phone. ➕Phone Setup P. 368 | — | |
| Edit Speed Dial | Edits, adds or deletes a speed dial entry. ➕Speed Dial P. 374 | — | |
| Ring Tone | Selects the ring tone. | Fixed/Mobile Phone^^1 | |
| Automatic Phone Sync | Sets a phonebook and call history data to be automatically imported when a phone is paired to HFT. | On/Off | |
| Default | Cancels/Resets all customized items in the Phone group as default. | Yes/No | |
*1: Default Setting
| Setup Group | Customizable Features Description Selectable Settings | |||
| Camera* | Rear Camera | Fixed Guideline | Selects whether the fixed guidelines come on on the rear camera monitor. ➕Multi-View Rear Camera * P. 469 | On*1/Off |
| Dynamic Guideline | Selects whether the dynamic guidelines come on on the rear camera monitor. ➕Multi-View Rear Camera * P. 469 | On*1/Off | ||
| Default | Cancels/Resets all customized items in the Rear Camera group as default. | Yes/No | ||
| Bluetooth /Wi-Fi | Bluetooth | Bluetooth On/Off Status | Changes the Bluetooth® status. | On*1/Off |
| Bluetooth Device List | Pairs a new phone to HFT, edits or deletes a paired phone, or creates a security PIN. ➕Phone Setup P. 368 | — | ||
| Edit Pairing Code | Edits Pairing Code. ➕To change the pairing code setting P. 369 | Random/Fixed*1 | ||
*1: Default Setting
| Setup Group | Customizable Features Description Selectable Settings | ||
| Bluetooth /Wi-Fi | Wi-Fi On/Off Status Changes the Wi-Fi mode. On | *1/Off | |
| Wi-Fi Device List | Connects, disconnects, or deletes the Wi-Fi device. | — | |
| Wi-Fi Device Information | Shows the Wi-Fi information of the device. — | ||
| Default | Cancels/Resets all customized items in the Bluetooth/Wi-Fi group as default. | Yes/No | |
| Android | Wi-Fi | Shows the status of the Wi-Fi connection (On/Off) and adds new Wi-Fi networks. | On *1/Off |
| Bluetooth | Shows the status of the Bluetooth® connection (On/Off) and adds new Bluetooth® devices. | On *1/Off | |
| Data usage Shows the data usage of the system. — | |||
| More... Adds VPN (Virtual Private Network). — | |||
| Sound | Adjusts the alarm volume and selects the favorite sound. | — | |
| Display | Sets up the wallpaper and changes the font size. | — | |
*1: Default Setting
| Setup Group | Customizable Features Description Selectable Settings | ||
| Android | Storage | Shows the storage capacity of the system and the USB capacity. | — |
| Apps Shows the status of the installed apps. — | |||
| Account & sync | Adds the additional account information. | — | |
| Location services | Turn on/off the GPS setting before using apps. | — | |
| Security Shows the security status of the system. — | |||
| Language & input | Changes the display language of the system and the input keyboard. | — | |
| Backup & reset Resets the system. — | |||
| Date & time | Changes the date, the time zones, and the clock format. | — | |
| Accessibility | Changes the display font of the system and the voice guidance of the password. | — | |
| About device | Shows the status of the system, the Android version, the legal information, and so on. | — | |
*1: Default Setting
Defaulting All the Settings
Reset all the menu and customized settings as the factory defaults.
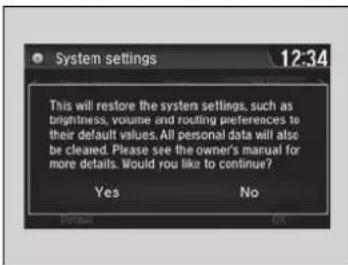
- Select HOME
- Select Settings.
- Select System.
- Select the Others tab.
- Select Factory Data Reset.
The confirmation message will appear. - Select Yes to reset the settings.
- Select Yes again to reset the settings.
The confirmation message will appear. Select OK.
▶ After selecting OK, the system will reboot. - The confirmation message will appear. Select OK.
- After selecting OK, the system will reboot.
Defaulting All the Settings
When you transfer the vehicle to a third party, reset all settings to default and delete all personal data.
The following settings will be reset:
• Audio preset settings
- Phonebook entries
- Other display and personal settings.
- Audio preset settings - Phonebook entries - Other display and personal settings.
Hands-Free Telephone System
Models with colour audio system
The Hands-Free Telephone (HFT) System allows you to place and receive phone calls using your vehicle's audio system, without handling your mobile phone.
Using HFT
HFT Buttons
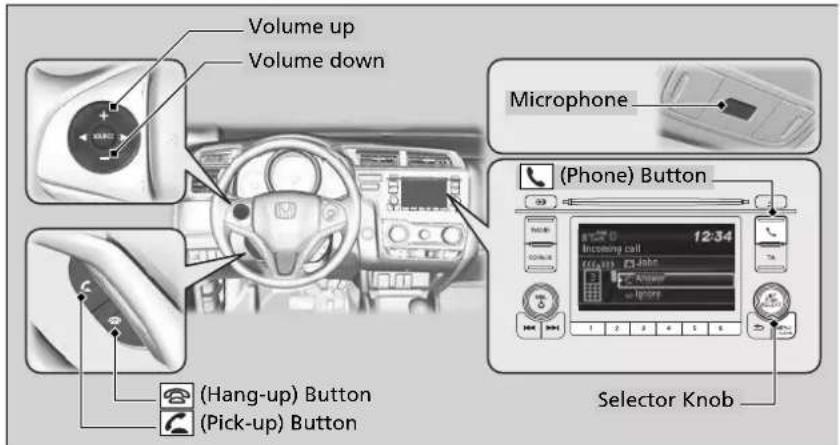
Hands-Free Telephone System
Place your phone where you can get good reception. To use HFT, you need a Bluetooth-compatible mobile phone. For a list of compatible phones, pairing procedures, and special feature capabilities, ask a dealer or your local Honda.
Voice control tips
- Aim the vents away from the ceiling and close the windows, as noise coming from them may interfere with the microphone.
- To change the volume level, use the audio system's volume knob or the remote audio controls on the steering wheel.
If you receive a call while using the audio system, the system resumes its operation after ending the call.
Up to 20 speed dial entries can be stored. If there is no entry in the system, Speed dial is disabled.
Speed Dial P. 355
Up to 20 call histories can be stored. If there is no call history, Call history is disabled.
☐ (Phone) button: Press to go directly to the Phone screen.
Selector knob: Rotate to select an item on the screen, then press.
(Pick-up) button: Press to go directly to the Phone screen or to answer an incoming call.
(Hang-up) button: Press to end a call.
HFT Status Display
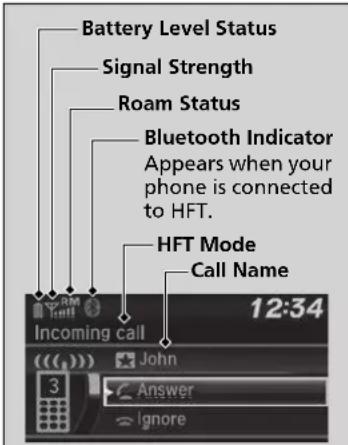
The audio/information screen notifies you when there is an incoming call.
Limitations for Manual Operation
Certain manual functions are disabled or inoperable while the vehicle is in motion. You cannot select a greyed-out option until the vehicle is stopped.
Hands-Free Telephone System
Bluetooth® Wireless Technology
The Bluetooth ^® word mark and logos are registered trademarks owned by Bluetooth SIG, Inc., and any use of such marks by Honda Motor Co., Ltd., is under licence. Other trademarks and trade names are those of their respective owners.
HFT Limitations
An incoming call on HFT will interrupt the audio system when it is playing. It will resume when the call is ended.
See the following URLs for Declaration of conformity (DoC) of Hands Free Telephone: http://www.ptc.panasonic.eu/
HFT Status Display
The information that appears on the audio/information screen varies between phone models.
You can change the system language.
Customized Features P. 313
HFT Menus
The ignition switch must be in ACCESSORY I or ON II to use the system.
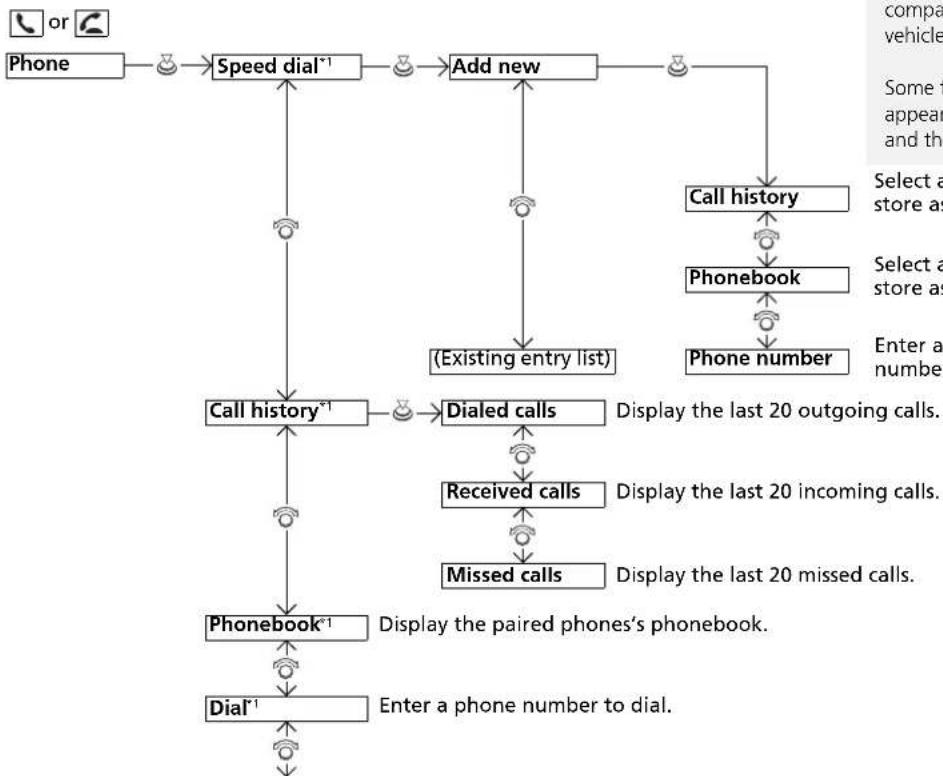
flowchart
graph TD
    A["Phone"] --> B["Speed dial*1"]
    B --> C["Add new"]
    C --> D["Call history"]
    D --> E["Phonebook"]
    E --> F["Phone number"]
    C --> G["(Existing entry list)"]
    G --> H["Call history*1"]
    H --> I["Dialed calls"]
    I --> J["Received calls"]
    J --> K["Missed calls"]
    K --> L["Phonebook*1"]
    L --> M["Dial*1"]
    M --> N["Enter a phone number to dial."]
HFT Menus
To use HFT, you must first pair your Bluetooth-compatible mobile phone to the system while the vehicle is parked.
Some functions are limited while driving. A message appears on the screen when the vehicle is moving and the operation is canceled.
Select a phone number from the call history to store as a speed dial number.
Select a phone number from the phonebook to store as a speed dial number.
Enter a phone number to store as a speed dial number.
*1: Appears only when a phone is connected to the system.
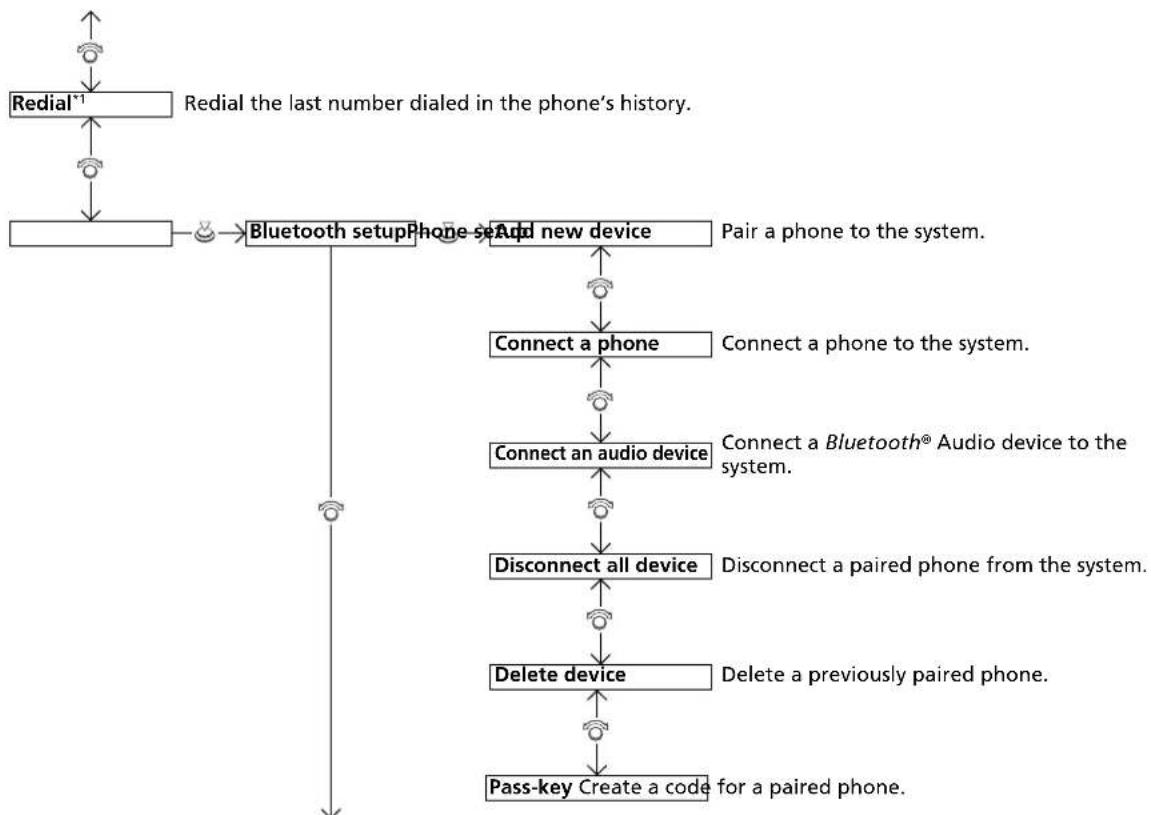
flowchart
graph TD
    A["Redial*1"] --> B["Redial the last number dialed in the phone's history."]
    B --> C["Bluetooth setup"]
    C --> D["Phone set"]
    D --> E["Add new device"]
    E --> F["Connect a phone"]
    F --> G["Connect an audio device"]
    G --> H["Disconnect all device"]
    H --> I["Delete device"]
    I --> J["Pass-key Create a code for a paired phone."]
    E --> K["Pair a phone to the system."]
    K --> L["Connect a phone to the system."]
    L --> M["Connect a Bluetooth® Audio device to the system."]
    M --> N["Disconnect a paired phone from the system."]
    N --> O["Delete a previously paired phone."]
*1: Appears only when a phone is connected to the system.
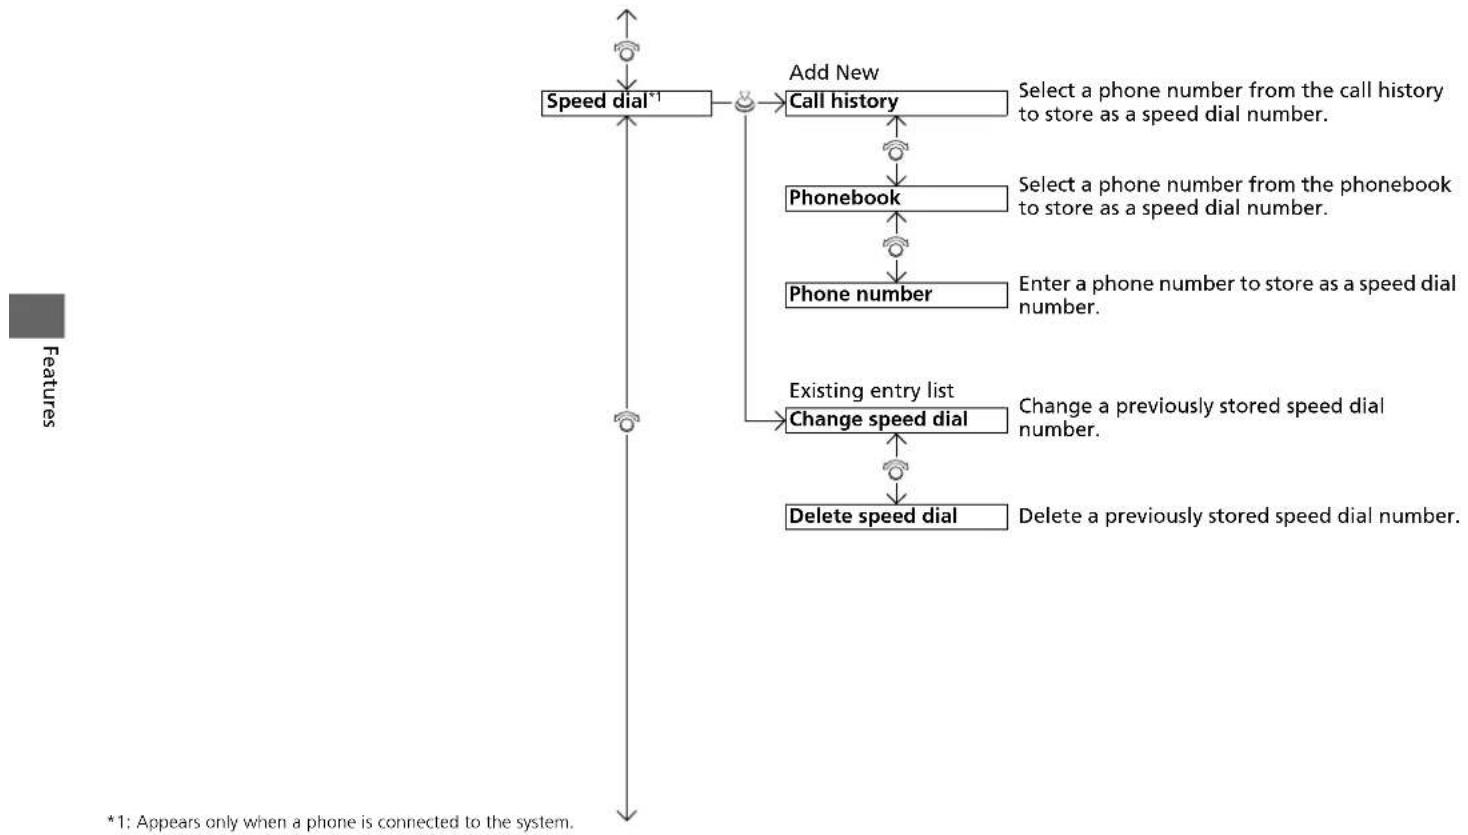
flowchart
graph TD
    A["Speed dial*1"] --> B["Call history"]
    B --> C{Add New}
    C -->|Yes| D["Select a phone number from the call history to store as a speed dial number."]
    C -->|No| E["Phonebook"]
    E --> F{Select a phone number from the phonebook to store as a speed dial number.}
    F -->|Yes| G["Phone number"]
    G --> H{Enter a phone number to store as a speed dial number.}
    H -->|No| I["Change speed dial"]
    I --> J{Existing entry list}
    J -->|Yes| K["Change a previously stored speed dial number."]
    J -->|No| L["Delete speed dial"]
    L --> M["Delete a previously stored speed dial number."]
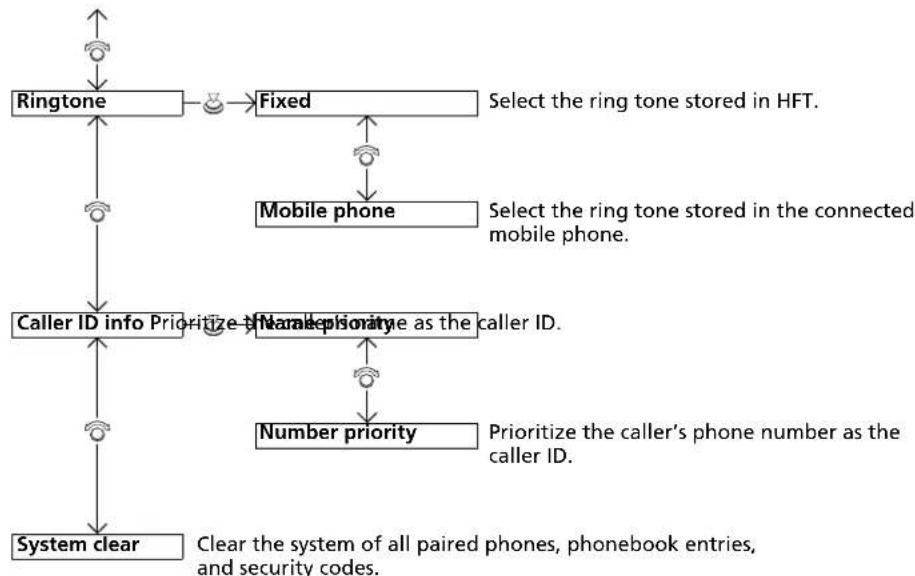
flowchart
graph TD
    A["Ringtone"] --> B["Fixed"]
    B --> C["Mobile phone"]
    C --> D["Caller ID info"]
    D --> E["Number priority"]
    E --> F["Prioritize the caller's phone number as the caller ID."]
    F --> G["System clear"]
    style A fill:#f9f,stroke:#333
    style B fill:#ccf,stroke:#333
    style C fill:#cfc,stroke:#333
    style D fill:#fcc,stroke:#333
    style E fill:#cff,stroke:#333
    style F fill:#ffc,stroke:#333
    style G fill:#cfc,stroke:#333
Phone Setup
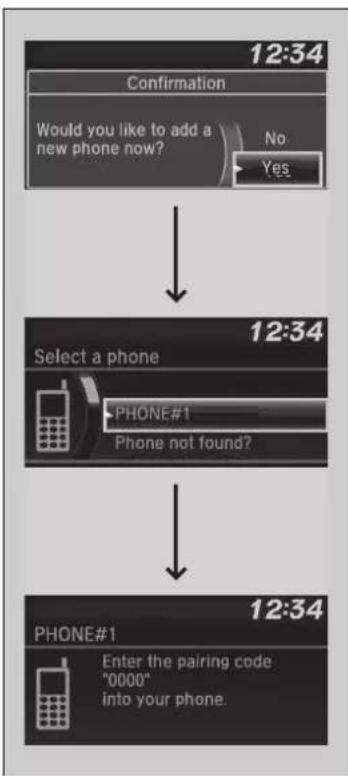
flowchart
graph TD
    A["Confirmation\nWould you like to add a new phone now?"] --> B["12:34\nNo\nYes"]
    B --> C["Select a phone\nPHONE#1\nPhone not found?"]
    C --> D["12:34\nPHONE#1\nEnter the pairing code "0000" into your phone."]
■To pair a mobile phone (No phone has been paired to the system)
- Press the button or the button.
- Rotate 🔒 to select Yes, then press 😊.
-
Make sure your phone is in search or discoverable mode, then press 😊
HFT automatically searches for a Bluetooth® device. -
When your phone appears on the list, select it by pressing 😊
If your phone doesn't appear, select Phone not found? and search for Bluetooth® devices using your phone. From your phone, select Honda HFT.
- The system gives you a pairing code on the audio/information screen.
▶ Confirm if the pairing code on the screen and your phone match. This may vary by phone.
- A notification appears on the screen if pairing is successful.
Phone Setup
Your Bluetooth-compatible phone must be paired to the system before you can make and receive hands-free calls.
Phone Pairing Tips:
- You cannot pair your phone while the vehicle is moving.
- Up to six phones can be paired.
- Your phone's battery may drain faster when it is connected to the system.
- If your phone is not ready for pairing or not found by the system within three minutes, the system will time out and returns to idle.
Once you have paired a phone, you can see it displayed on the screen with one or two icons on the right side.
These icons indicate the following:
: The phone can be used with HFT.
: The phone is compatible with Bluetooth® Audio.
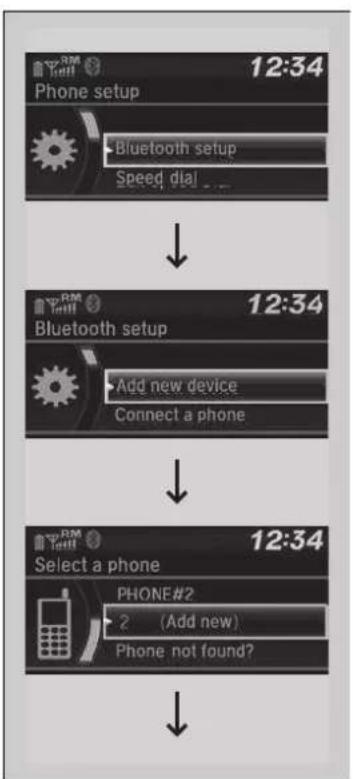
flowchart
graph TD
    A["Phone setup 12:34"] --> B["Bluetooth setup"]
    B --> C["Add new device"]
    C --> D["Connect a phone"]
    D --> E["Select a phone 12:34"]
    E --> F["PHONE#2"]
    F --> G["2 (Add new)"]
    G --> H["Phone not found?"]
■To pair a mobile phone (when a phone has already been paired to the system)
- Press the button or the button.
▶ If a prompt appears asking to connect to a phone, select No and proceed with step 2. - Rotate 🔺 to select Phone setup, then press 🔺.
- Rotate 🔺 to select Bluetooth setup, then press 🔺.
-
Rotate 🔒 to select Add New device, then press 🔒.
The screen changes to device list. -
Rotate 🔒 to select Add new, then press 🔒.
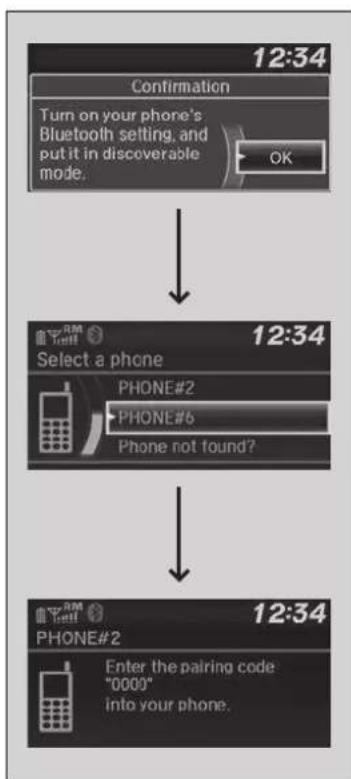
flowchart
graph TD
    A["Confirmation"] --> B["Turn on your phone's Bluetooth setting, and put it in discoverable mode."]
    B --> C{OK}
    C --> D["12:34 Select a phone"]
    D --> E["PHONE#2"]
    E --> F["PHONE#6"]
    F --> G["Phone not found?"]
    G --> H["12:34"]
    H --> I["PHONE#2"]
    I --> J["Enter the pairing code "0000" into your phone."]
- Make sure your phone is in search or discoverable mode, then press 😊
HFT automatically searches for a Bluetooth® device.
- When your phone appears on the list, select it by pressing 🌿
If your phone does not appear, select Phone not found? and search for Bluetooth® devices using your phone. From your phone, select Honda HFT.
- The system gives you a pairing code on the audio display.
▶ Confirm if the pairing code on the screen and your phone match. This may vary by phone.
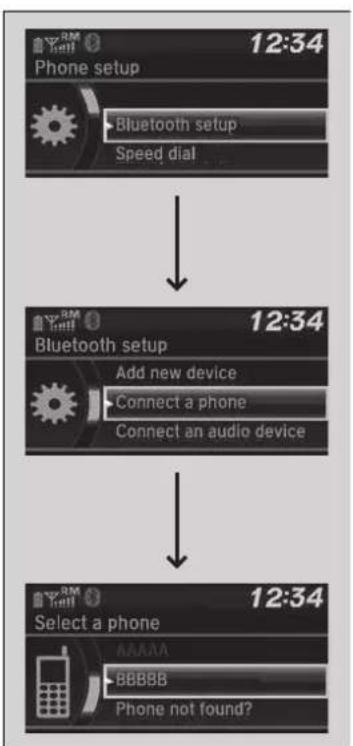
flowchart
graph TD
    A["Phone setup 12:34"] --> B["Bluetooth setup"]
    B --> C["Speed dial"]
    D["Bluetooth setup 12:34"] --> E["Add new device"]
    E --> F["Connect a phone"]
    F --> G["Connect an audio device"]
    H["Select a phone 12:34"] --> I["AAAAA"]
    I --> J["BBBBB"]
    J --> K["Phone not found?"]
■To Change the currently paired phone
- Press the button or the button.
- Rotate 🔺 to select Phone setup, then press 🔺.
-
Rotate 🔒 to select Bluetooth setup, then press 🔒.
-
Rotate 🔺 to select Connect a phone, then press 🔺
The screen changes to a device list.
- Rotate to select a desired device name, then press
The system disconnects the connected phone and starts searching for another paired phone.
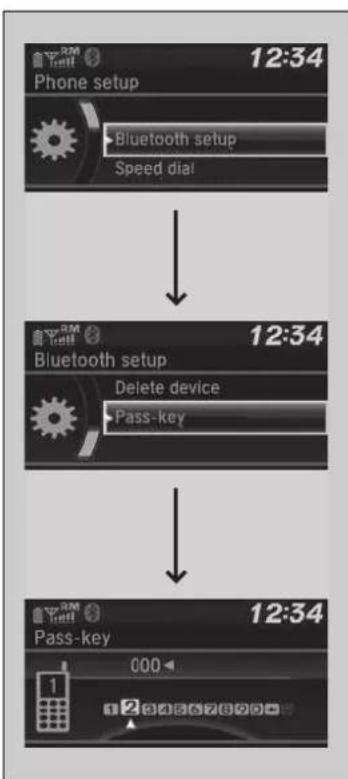
flowchart
graph TD
    A["Phone setup 12:34"] --> B["Bluetooth setup"]
    B --> C["Speed dial"]
    D["Bluetooth setup 12:34"] --> E["Delete device"]
    E --> F["Pass-key"]
    G["Pass-key 12:34"] --> H["000"]
■To change the pairing code setting
- Press the button or the button.
- Rotate 🔺 to select Phone setup, then press 🔺.
- Rotate 🔒 to select Bluetooth setup, then press 🔒.
- Rotate 🔺 to select Pass-key, then press 😊.
- Input a new pairing code, then press 🌿
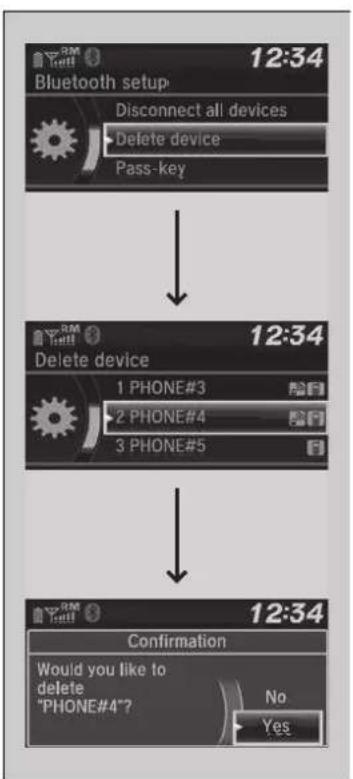
flowchart
graph TD
    A["Bluetooth setup"] --> B["Disconnect all devices"]
    B --> C["Delete device"]
    C --> D["Pass-key"]
    A --> E["12:34"]
    E --> F["12:34"]
    F --> G["1 PHONE#3"]
    F --> H["2 PHONE#4"]
    F --> I["3 PHONE#5"]
    G --> J["Confirmation"]
    H --> J
    I --> J
    J --> K["Would you like to delete "PHONE#4"?"]
    K --> L["No"]
    K --> M["Yes"]
■To delete a paired phone
- Press the button or the button.
- Rotate 🔒 to select Phone setup, then press 🔒.
-
Rotate 🔒 to select Bluetooth setup, then press 🔒.
-
Rotate 🔗 to select Delete device, then press 😊. ▶The screen changes to a device list.
-
Rotate to select a phone you want to delete, then press 😊
-
A confirmation message appears on the screen. Rotate to select Yes, then press 😊.
Ring Tone
You can change the ring tone setting.
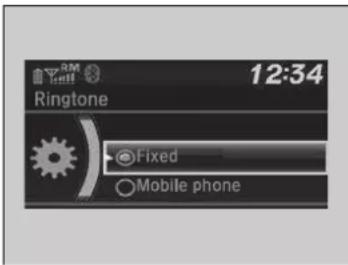
- Press the button or the button.
- Rotate 🔒 to select Phone setup, then press 🔒.
- Rotate 🔺 to select Ringtone, then press ✉.
- Rotate 🔺 to select Fixed or Mobile phone, then press 😊
Caller's ID Information
You can select a caller's information to be displayed when you have an incoming call.
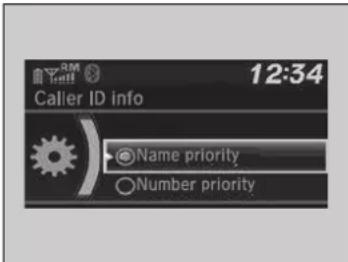
- Press the button or the button.
- Rotate 🔺 to select Phone setup, then press 🔺.
- Rotate 🔺 to select Caller ID info, then press 🔺.
- Rotate to select a mode you want, then press 😊.
>>Ring Tone
Fixed: The fixed ring tone sounds from the speakers.
Mobile phone: For certain connected phones, the ring tone stored in the phone sounds from the speakers.
»Caller's ID Information
Name priority: A caller's name is displayed if it is stored in the phonebook.
Number priority: A caller's phone number is displayed.
To Clear the System
Pairing codes, paired phones, all speed dial entries, all call history data, and all imported phonebook data are erased.
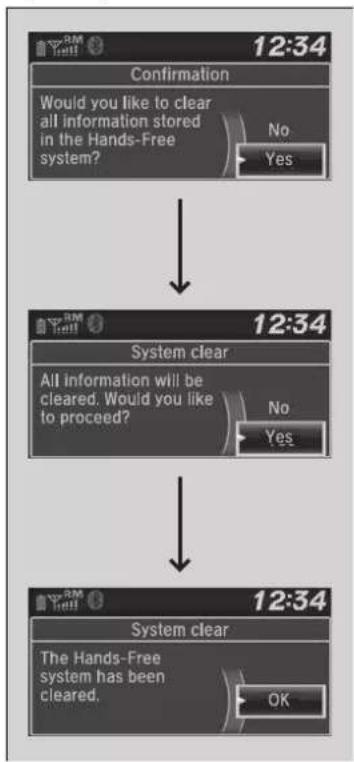
flowchart
graph TD
    A["Confirmation\nWould you like to clear all information stored in the Hands-Free system?"] --> B["System clear\nAll information will be cleared. Would you like to proceed?"]
    B --> C["System clear\nThe Hands-Free system has been cleared."]
- Press the button or the button.
- Rotate 🔒 to select Phone setup, then press ⚙.
- Rotate 🔒 to select System clear, then press 🔒.
-
Rotate 🔒 to select Yes, then press 😊.
-
A confirmation message appears on the screen. Rotate to select Yes, then press 😊.
-
A confirmation appears on the screen. Press 😊.
Automatic Import of Mobile Phonebook and Call History
When your phone is paired, the contents of its phonebook and call history are automatically imported to the system.
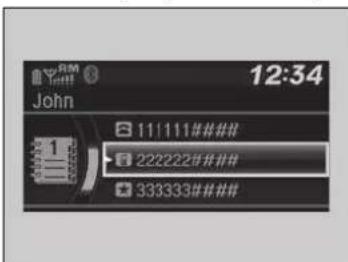
Automatic Import of Mobile Phonebook and Call History
When you select a person from the list in the mobile phonebook, you can see up to three category icons. The icons indicate what types of numbers are stored for that name.
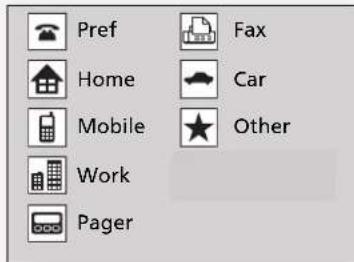
If a name has four or more numbers, ... appears instead of category icons.
On some phones, it may not be possible to import the category icons to the system.
The phonebook is updated after every connection. Call history is updated after every connection or call.
Speed Dial
Up to 20 speed dial numbers can be stored per phone.
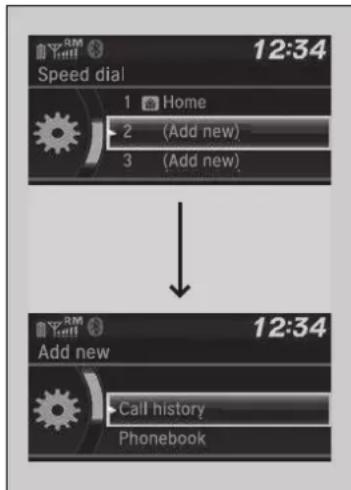
To store a speed dial number:
- Press the button or the button.
- Rotate 🔺 to select Speed dial, then press 🔺.
- Rotate 🔒 to select Add new, then press 🔒.
- Rotate to select a place to choose a number from, then press From Call history:
▶Select a number from the call history.
From Phonebook:
Select a number from the connected cell phone's imported phonebook.
From Phone number:
▶ Input the number manually.
>>Speed Dial
You can use the audio preset buttons during a call to store a speed dial number:
- Press and hold the desired audio preset button during a call.
- The contact information for the active call will be stored for the corresponding speed dial.
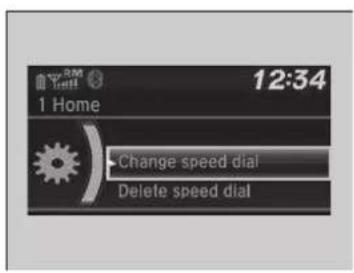
■To edit a speed dial
- Press the button or the button.
- Rotate 🔺 to select Phone setup, then press 🔺.
- Rotate 🔺 to select Speed dial, then press 🔺.
- Select an existing speed dial entry.
- Rotate 🔒 to select Change speed dial, then press 🔒
- Select a new speed dial number, then press ⚙.
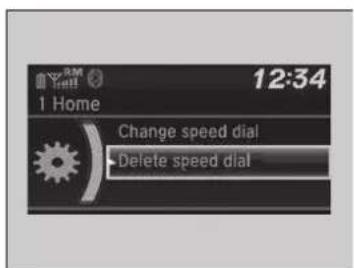
■To delete a speed dial number
- Press the button or the button.
- Rotate 🔒 to select Phone setup, then press 🔒.
- Rotate 🔺 to select Speed dial, then press 🔺.
- Select an existing speed dial entry.
- Rotate 🔺 to select Delete speed dial, then press 😊
▶ A confirmation message appears on the screen. Rotate to select Yes, then press 🔒.
Making a Call
You can make calls by inputting any phone number, or by using the imported phonebook, call history, speed dial entries, or redial.
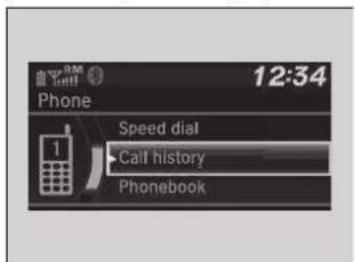
Making a Call
The maximum range between your phone and vehicles is 10 metres (30 feet).
Once a call is connected, you can hear the voice of the person you are calling through the audio speakers.
Continued
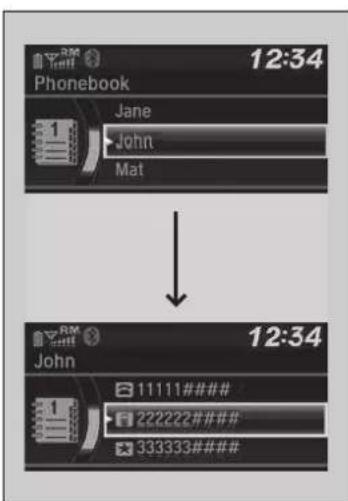
■To make a call using the imported phonebook
When your phone is paired, the contents of its phonebook are automatically imported to the system.
- Press the button or the button.
- Rotate 🔺 to select Phonebook, then press 😊.
- The phonebook is stored alphabetically. Rotate to select the initial, then press 🤔.
- Rotate to select a name, then press.
- Rotate to select a number, then press 🎨.
▶Dialing starts automatically.
To make a call using the imported phonebook
This function is disabled while the vehicle is moving.
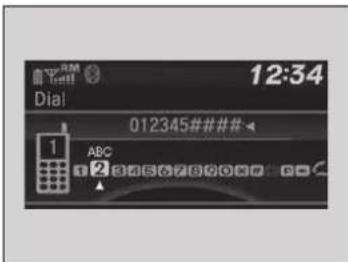
■To make a call using a phone number
- Press the button or the button.
- Rotate 🔺 to select Dial, then press 😊.
- Rotate to select a number, then press
- Rotate to select, then press. ▶Dialing starts automatically.
To make a call using a phone number
This function is disabled while the vehicle is moving.
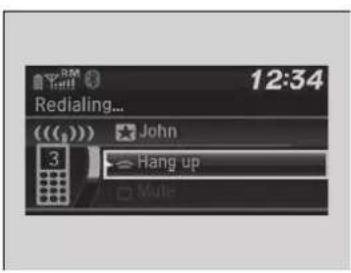
■To make a call using redial
- Press the button or the button.
- Rotate 🔒 to select Redial, then press 😊.
▶Dialing starts automatically.
To make a call using redial
Press and hold the button to redial the last number dialed in your phone's call history.
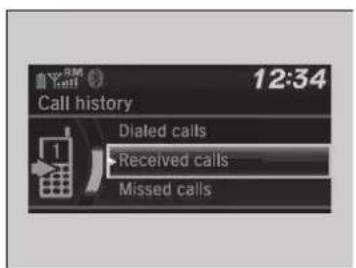
■To make a call using the call history
Call history is stored by Dialed calls, Received calls, and Missed calls.
- Press the button or the button.
- Rotate 🔒 to select Call history, then press 🔒.
- Rotate 🔺 to select Dialed calls, Received calls, or Missed calls, then press 🔺.
- Rotate to select a number, then press
▶Dialing starts automatically.
To make a call using the call history
The call history appears only when a phone is connected to the system, and displays the last 20 dialed, received, or missed calls.
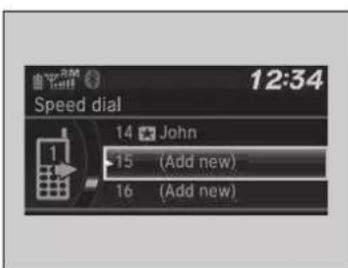
■To make a call using a speed dial entry
- Press the button or the button.
- Rotate 🔒 to select Speed dial, then press

- Rotate to select a number, then press

▶Dialing starts automatically.
To make a call using a speed dial entry
On the Phone screen, the first six speed dials on the list can be directly selected by pressing the corresponding audio preset buttons (1-6).
Receiving a Call
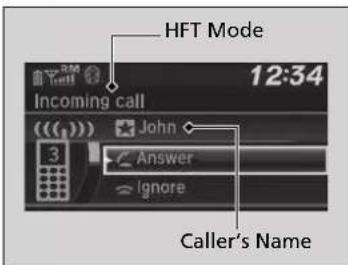
When there is an incoming call, an audible notification sounds and the Incoming call screen appears.
Press the button to answer the call. Press the button to decline or end the call.
>>Receiving a Call
Call Waiting
Press the ☐ button to put the current call on hold to answer the incoming call.
Press the button again to return to the current call.
Select Ignore to ignore the incoming call if you do not want to answer it.
Press the 📄 button if you want to hang up the current call.
You can select the icons on the audio/information screen instead of the 📐 and buttons. Rotate 🔗 to select the icon, then press 😊
Options During a Call
The following options are available during a call.
Swap call: Put the current call on hold to answer the incoming call.
Mute: Mute your voice.
Transfer call: Transfer a call from the system to your phone.
Dial tones: Send numbers during a call. This is useful when you call a menu-driven phone system.
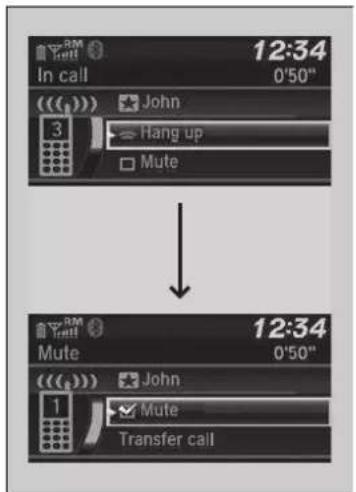
-
To view the available options, press the button.
-
Rotate to select the option, then press ⚙.
The check box is checked when Mute is selected. Select Mute again to turn it off.
Options During a Call
Dial tones: Available on some phones.
Hands-Free Telephone System
Models with display audio system
The Hands-Free Telephone (HFT) System allows you to place and receive phone calls using your vehicle's audio system, without handling your mobile phone.
Using HFT
HFT Buttons
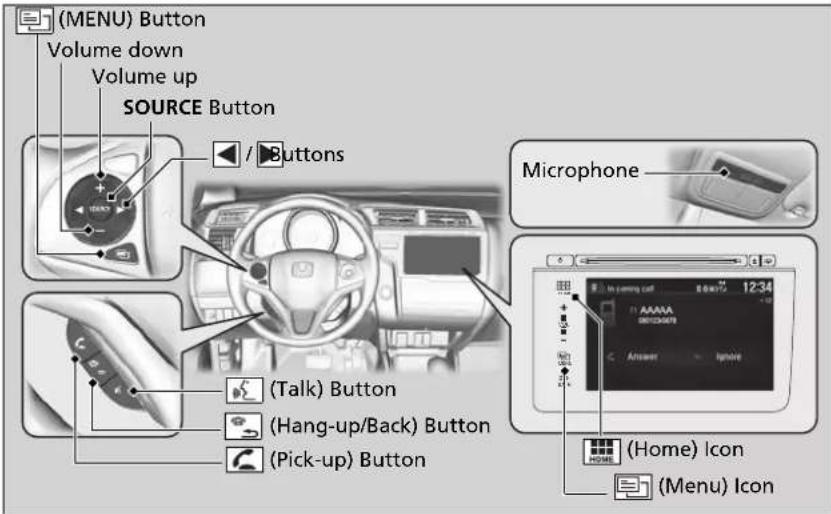
(Pick-up) button: Press to go directly to the Phone screen, or to answer an incoming call.
(Hang-up/Back) button: Press to end a call, go back to the previous command, or cancel a command.
Hands-Free Telephone System
Place your phone where you can get good reception. To use HFT, you need a Bluetooth-compatible mobile phone. For a list of compatible phones, pairing procedures, and special feature capabilities, ask a dealer or your local Honda.
To use the system, the Bluetooth On/Off Status setting must be On.
→Customized Features P. 313
Voice control tips
- Aim the vents away from the ceiling and close the windows, as noise coming from them may interfere with the microphone.
- Press and release the button when you want to call a number using a stored voice tag. Speak clearly and naturally after a beep.
- If the microphone picks up voices other than yours, the command may be misinterpreted.
- To change the volume level, select the audio system's VOL (Volume) or use the remote audio controls on the steering wheel.
Up to six speed dial entries can be displayed among a total of 20 that can be entered. If there is no entries in the system, Speed Dial is disabled.
→Speed Dial P. 374
Up to six call histories can be displayed. If there is no call histories, Call History is disabled.
(£) (Talk) button: Press to call a number with a stored voice tag.
(Menu) button: Press to display Speed Dial, Call History, or Redial on the Phone screen.
/ ▶ button: Press to select an item displayed on the Phone screen.
SOURCE button: Press to call a number listed in the selected item on the Phone screen.
To go to the Phone Menu screen:
- Select HOME.
- Select Phone to switch the display to the Phone screen.
- Select MENU.
HFT Status Display
The audio/information screen notifies you when there is an incoming call.
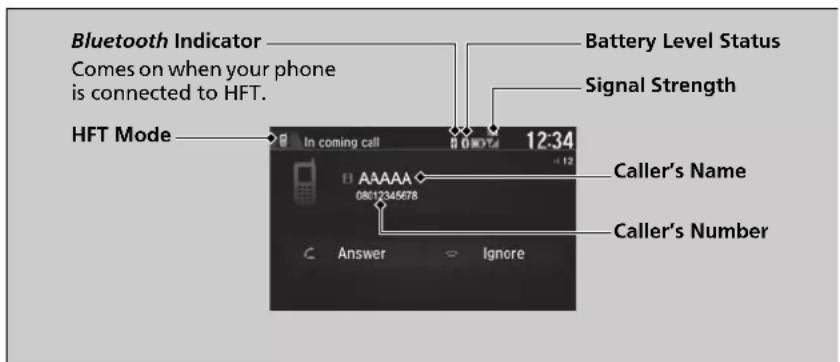
Continued
Hands-Free Telephone System
Bluetooth® Wireless Technology
The Bluetooth ^® word mark and logos are registered trademarks owned by Bluetooth SIG, Inc., and any use of such marks by Honda Motor Co., Ltd., is under licence. Other trademarks and trade names are those of their respective owners.
HFT Limitations
An incoming call on HFT will interrupt the audio system when it is playing. It will resume when the call is ended.
HFT Status Display
The information that appears on the audio/information screen varies between phone models.
You can change the system language.
Customized Features P. 313
Limitations for Manual Operation
Certain manual functions are disabled or inoperable while the vehicle is in motion. You cannot select a greyed-out option until the vehicle is stopped.
Only previously stored speed dial entries with voice tags, phonebook names, or numbers can be called using voice commands while the vehicle is in motion.
→Speed Dial P. 374
HFT Menus
The ignition switch must be in ACCESSORY Ⅰ or ON Ⅱ*1 to use the system.
■Phone settings screen
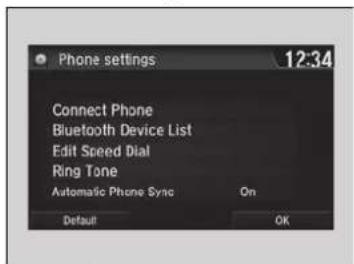
- Select HOME
- Select Settings.
- Select Phone.
HFT Menus
To use HFT, you must first pair your Bluetooth-compatible mobile phone to the system while the vehicle is parked.
Some functions are limited while driving.
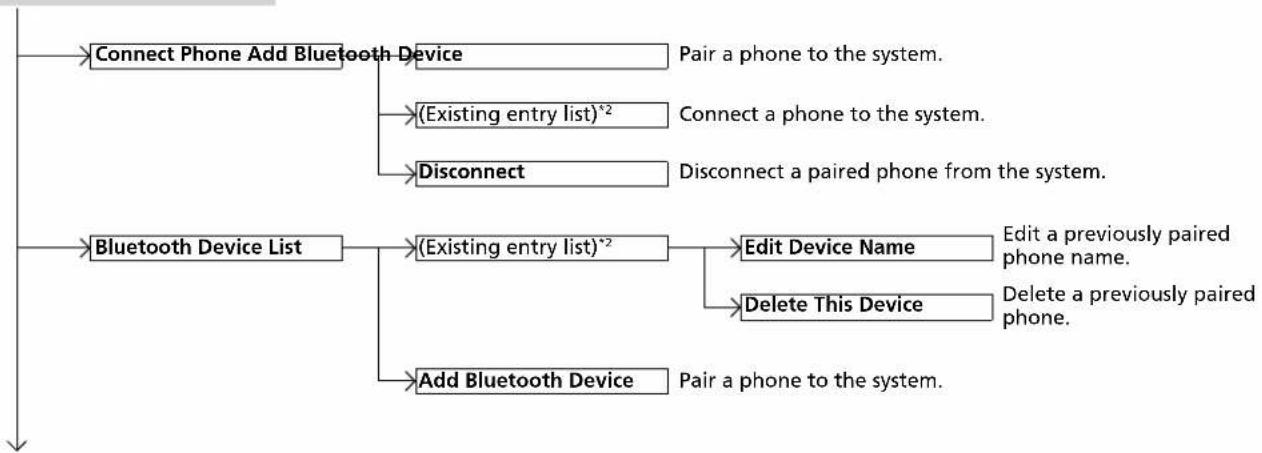
flowchart
graph TD
    A["Connect Phone Add Bluetooth Device"] --> B["(Existing entry list)*2"]
    A --> C["Disconnect"]
    B --> D["Edit Device Name"]
    B --> E["Delete This Device"]
    F["Bluetooth Device List"] --> G["(Existing entry list)*2"]
    F --> H["Add Bluetooth Device"]
    G --> I["Edit a previously paired phone name."]
    G --> J["Delete a previously paired phone."]
    H --> K["Pair a phone to the system."]
    style A fill:#f9f,stroke:#333
    style F fill:#f9f,stroke:#333
    style G fill:#f9f,stroke:#333
    style H fill:#f9f,stroke:#333
*1: Models with the keyless access system have an ENGINE START/STOP button instead of an ignition switch.
*2: Appears only when a phone is connected to the system.
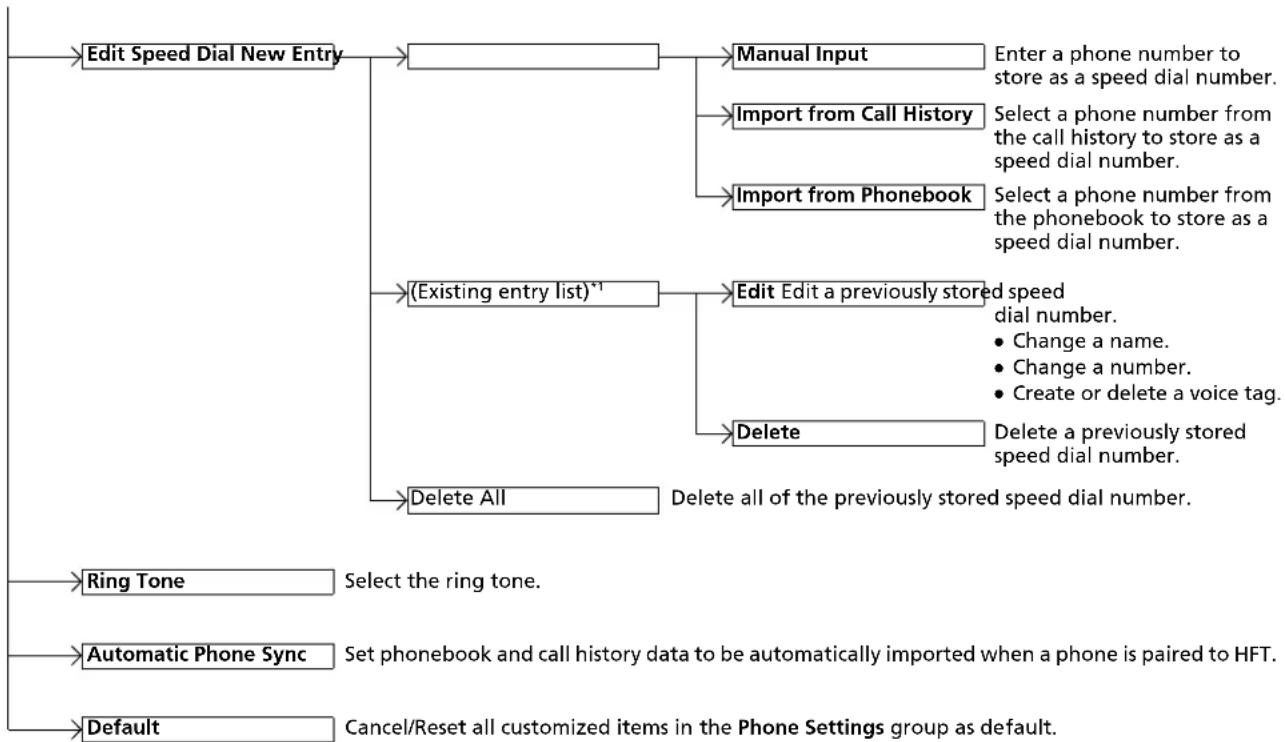
flowchart
graph TD
    A["Edit Speed Dial New Entry"] --> B["Manual Input"]
    B --> C["Enter a phone number to store as a speed dial number."]
    B --> D["Import from Call History"]
    D --> E["Select a phone number from the call history to store as a speed dial number."]
    D --> F["Import from Phonebook"]
    F --> G["Select a phone number from the phonebook to store as a speed dial number."]
    A --> H["(Existing entry list)*"]
    H --> I["Edit Edit a previously stored speed dial number."]
    I --> J["Change a name."]
    I --> K["Change a number."]
    I --> L["Create or delete a voice tag."]
    H --> M["Delete"]
    M --> N["Delete all of the previously stored speed dial number."]
    A --> O["Delete All"]
    O --> P["Delete all of the previously stored speed dial number."]
    A --> Q["Ring Tone"]
    Q --> R["Select the ring tone."]
    A --> S["Automatic Phone Sync"]
    S --> T["Set phonebook and call history data to be automatically imported when a phone is paired to HFT."]
    A --> U["Default"]
    U --> V["Cancel/Reset all customized items in the Phone Settings group as default."]
*1: Appears only when a phone is connected to the system.
■Phone menu screen
- Press 📄, or select 📋, then select Phone.
- Press (MENU) on the steering wheel, or select .
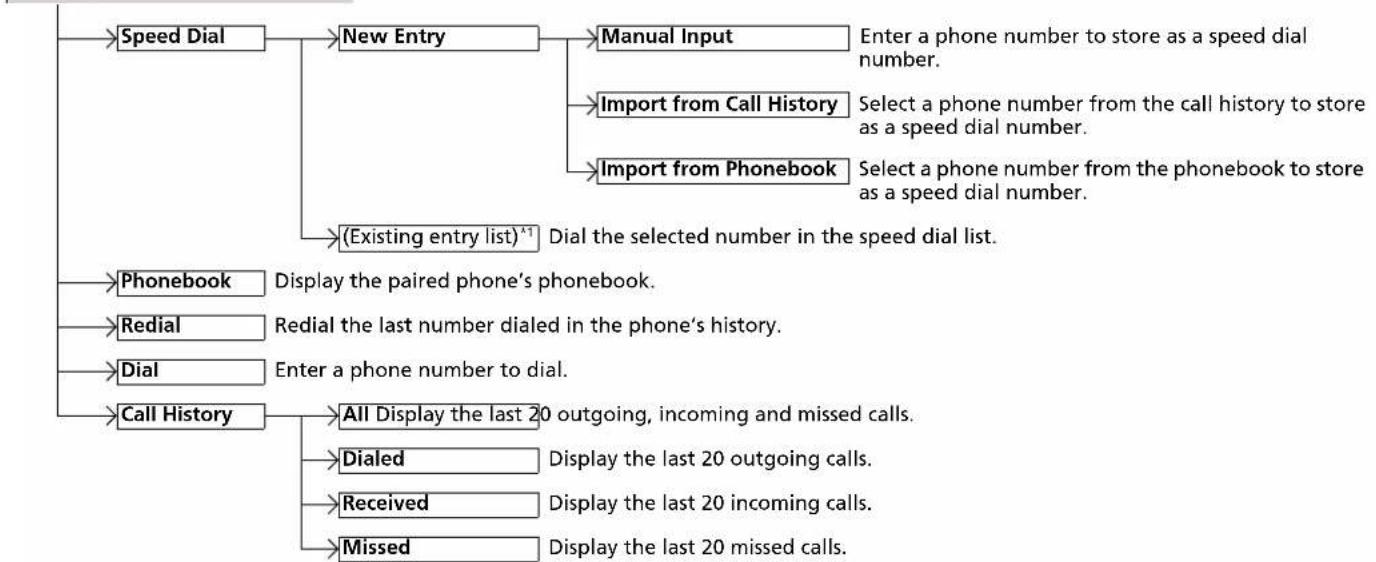
flowchart
graph TD
    A["Speed Dial"] --> B["New Entry"]
    B --> C["Manual Input"]
    C --> D["Enter a phone number to store as a speed dial number."]
    B --> E["(Existing entry list)*1"]
    E --> F["Dial the selected number in the speed dial list."]
    G["Phonebook"] --> H["Display the paired phone's phonebook."]
    I["Redial"] --> J["Redial the last number dialed in the phone's history."]
    K["Dial"] --> L["Enter a phone number to dial."]
    M["Call History"] --> N["All Display the last 20 outgoing, incoming and missed calls."]
    M --> O["Dialed"] --> P["Display the last 20 outgoing calls."]
    M --> Q["Received"] --> R["Display the last 20 incoming calls."]
    M --> S["Missed"] --> T["Display the last 20 missed calls."]
*1: Appears only when a phone is connected to the system.
Phone Setup
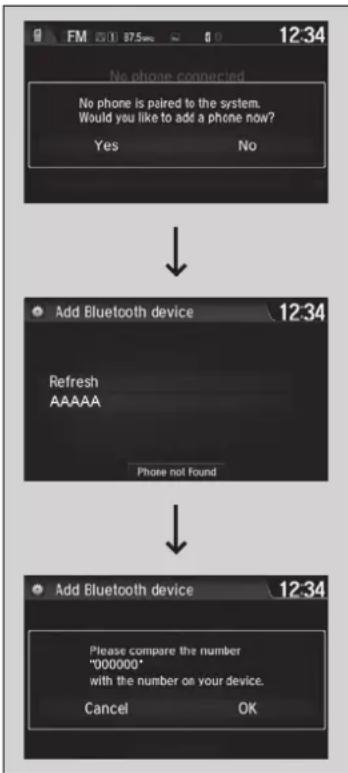
■To pair a mobile phone (when there is no phone paired to the system)
- Select Phone.
- Select Yes.
- Make sure your phone is in search or discoverable mode, then select Continue.
▶HFT automatically searches for a Bluetooth device.
- Select your phone when it appears on the list.
▶If your phone does not appear, you can select Refresh to search again.
If your phone still does not appear, select Phone not found and search for Bluetooth devices using your phone. From your phone, search for Honda HFT.
- The system gives you a pairing code on the audio/information screen.
▶ Confirm if the pairing code on the screen and your phone match. This may vary by phone.
Phone Setup
Your Bluetooth-compatible phone must be paired to the system before you can make and receive hands-free calls.
Phone Pairing Tips:
- You cannot pair your phone while the vehicle is moving.
- Up to six phones can be paired.
- Your phone's battery may drain faster when it is paired to the system.
- If your phone is not ready for pairing or not found by the system, the system will return to the previous screen.
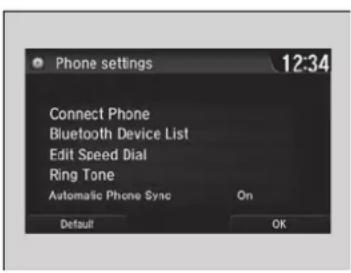
■To change the currently paired phone
- Go to the phone settings screen.
Phone settings screen P. 365 - Select Connect Phone.
- Select a phone to connect.
▶HFT disconnects the current phone and starts searching for another paired phone.
To change the currently paired phone
If no other phones are found or paired when trying to switch to another phone, HFT will inform you that the original phone is connected again.
To pair other phones, select Add Bluetooth Device from the Connect Phone screen.
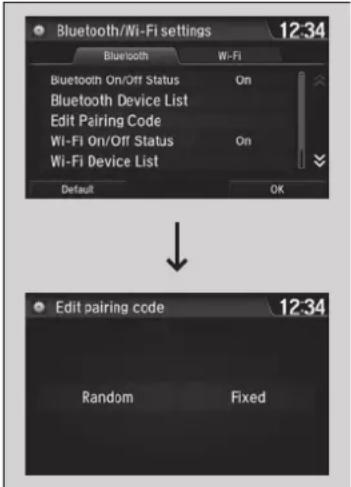
■To change the pairing code setting
- Select HOME.
- Select Settings.
- Select Bluetooth/Wi-Fi.
- Select Bluetooth tab.
- Select Edit Pairing Code.
- Select Fixed or Random.
To change the pairing code setting
The default pairing code is 0000 until you change the setting. To create your own, select Fixed, and delete the current code, then enter a new one.
For a randomly generated pairing code each time you pair a phone, select Random.
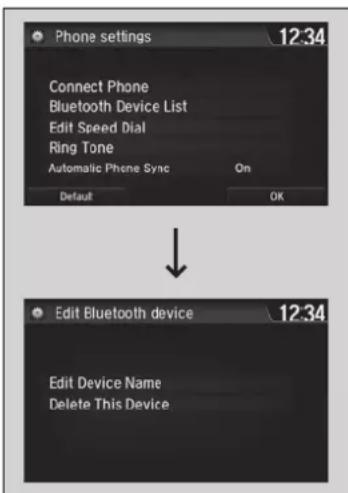
■To edit an already-paired phone name
- Go to the phone settings screen.
Phone settings screen P. 365 - Select Bluetooth Device List
-
Select a paired phone you want to edit.
-
Select Edit Device Name.
- Edit the name and select OK.
- A notification appears if the change is successful.
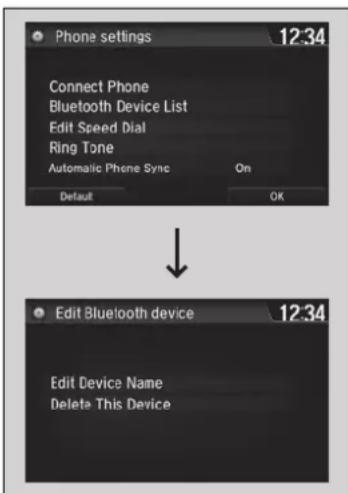
■To delete a paired phone
- Go to the phone settings screen.
Phone settings screen P. 365
- Select Bluetooth Device List.
-
Select a phone you want to delete.
-
Select Delete This Device.
-
You will receive a confirmation message on the screen. Select Yes.
- A notification appears if the deletion is successful.
Ring Tone
You can change the ring tone setting.
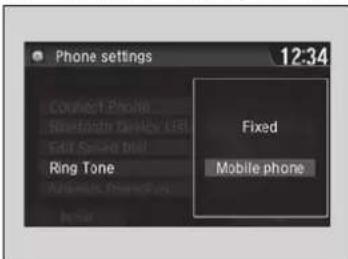
- Go to the phone settings screen.
Phone settings screen P. 365 - Select Ring Tone.
- Select Fixed or Mobile Phone.
>>Ring Tone
Fixed: The fixed ring tone sounds from the speaker.
Mobile Phone: For certain connected phones, the ring tone stored in the phone sounds from the speakers.
Automatic Import of Cellular Phonebook and Call History
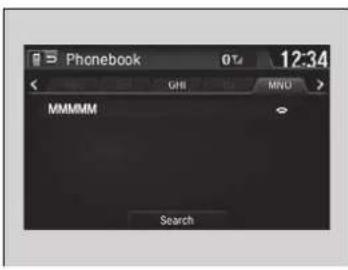
■When Automatic Phone Sync is set to On:
When your phone is paired, the contents of its phonebook and call history are automatically imported to the system.
■Changing the Automatic Phone Sync setting
-
Go to the phone settings screen. Phone settings screen P. 365
-
Select Automatic Phone Sync.
-
Select On or Off.
Automatic Import of Cellular Phonebook and Call History
When you select a person from the list in the cellular phonebook, you can see up to three category icons. The icons indicate what types of numbers are stored for that name.
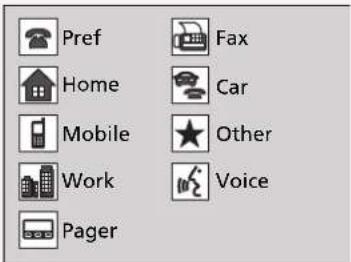
On some phones, it may not be possible to import the category icons to the system.
The phonebook is updated after every connection. Call history is updated after every connection or call.
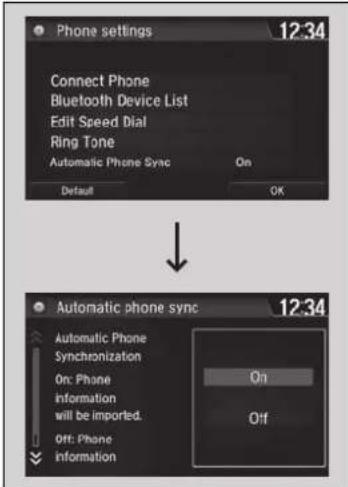
Speed Dial
Up to 20 speed dial numbers can be stored per phone.
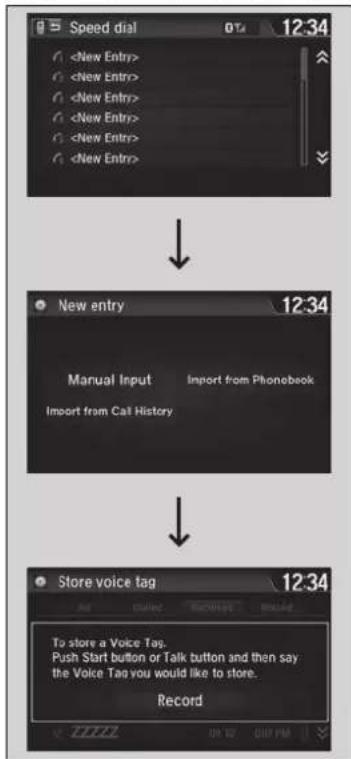
flowchart
graph TD
    A["Speed dial"] --> B["New entry"]
    B --> C["Manual Input Import from Phonebook"]
    C --> D["Store voice tag"]
To store a speed dial number:
- Go to the phone menu screen. Phone menu screen P. 367
- Select Speed Dial.
- Select New Entry
- Select a place to choose a number. From Import from Call History:
▶Select a number from the call history.
From Manual Input:
▶ Input the number manually.
From Import from Phonebook:
Select a number from the connected mobile phone's imported phonebook.
-
When the speed dial is successfully stored, you are asked to create a voice tag for the number. Select Yes or No.
-
Select Record to store a voice tag for the speed dial entry.
▶ Using the button, follow the prompts to store a voice tag for the speed dial entry.
>>Speed Dial
When a voice tag is stored, press the button to call the number using the voice tag. Say the voice tag name.
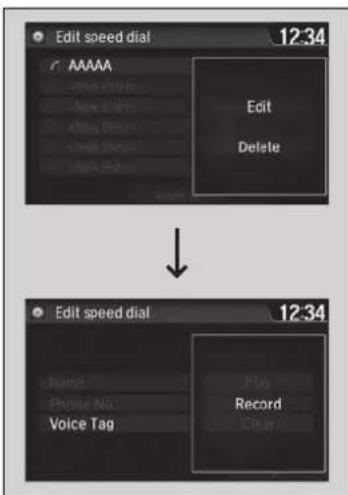
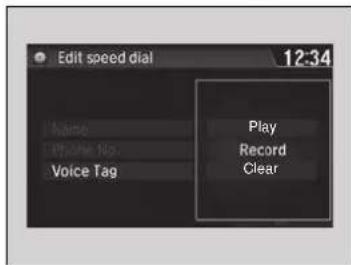
■To add a voice tag to a stored speed dial number
- Go to the phone settings screen.
Phone settings screen P. 365 - Select Edit Speed Dial.
- Select an existing speed dial entry.
▶ From the pop-up menu, select Edit. - Select Voice Tag
▶ From the pop-up menu, select Record. - Select Record to store the voice tag.
- Using the button, follow the prompts to complete the voice tag.
■To delete a voice tag
- Go to the phone settings screen.
Phone settings screen P. 365 - Select Edit Speed Dial.
- Select an existing speed dial entry.
▶ From the pop-up menu, select Edit. - Select Voice Tag
▶ From the pop-up menu, select Clear. - A confirmation message appears on the screen. Select Yes.
>>Speed Dial
Avoid using duplicate voice tags.
Avoid using "home" as a voice tag.
It is easier for the system to recognize a longer name.
For example, use "John Smith" instead of "John."
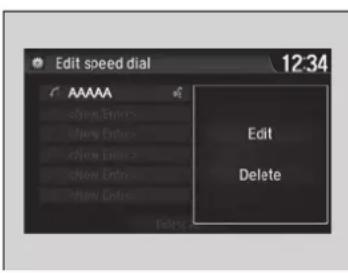
■To edit a speed dial
- Go to the phone settings screen.
Phone settings screen P. 365 - Select Edit Speed Dial.
- Select an existing speed dial entry.
▶ From the pop-up menu, select Edit - Select a setting you want.
■To delete a speed dial
- Go to the phone settings screen.
Phone settings screen P. 365 - Select Edit Speed Dial.
- Select an existing speed dial entry.
▶ From the pop-up menu, select Delete. - A confirmation message appears on the screen. Select Yes.
Making a Call
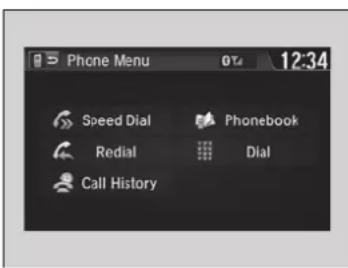
You can make calls by inputting any phone number, or by using the imported phonebook, call history, speed dial entries, or redial.
Making a Call
Any voice-tagged speed dial entry can be dialed by voice from most screens.
Press the button and say the voice tag name.
Once a call is connected, you can hear the voice of the person you are calling through the audio speakers.
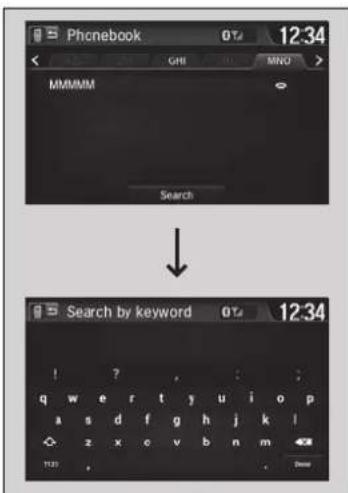
■To make a call using the imported phonebook
- Go to the phone menu screen.
Phone menu screen P. 367
- Select PhoneBook.
- Select a name.
▶You can also search by letter. Select
Search
▶ Use the keyboard on the touch screen for entering letters.
- Select a number.
▶Dialing starts automatically.
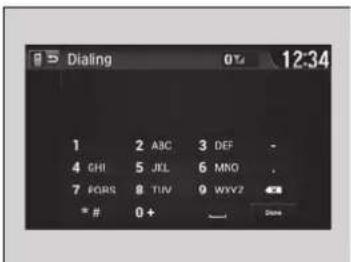
■To make a call using a phone number
- Go to the phone menu screen.
Phone menu screen P. 367
- Select Dial.
- Select a number.
▶ Use the keyboard on the touch screen for entering numbers.
- Select Done.
▶Dialing starts automatically.
To make a call using the imported phonebook
This function is disabled while the vehicle is moving. However, you can call a stored voice-tagged speed dial number using voice commands.
Limitations for Manual Operation P. 364
Speed Dial P. 374
To make a call using a phone number
This function is disabled while the vehicle is moving. However, you can call a stored voice-tagged speed dial number using voice commands.
Limitations for Manual Operation P. 364
→Speed Dial P. 374
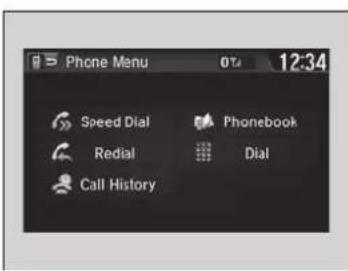
■To make a call using redial
- Go to the phone menu screen. Phone menu screen P. 367
- Select Redial. ▶Dialing starts automatically.
To make a call using redial
Press and hold the 📄 button to redial the last number dialed in your phone's history.
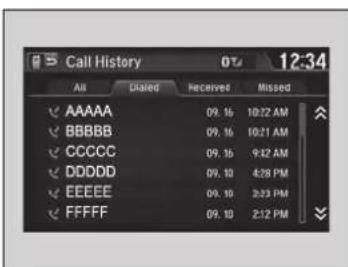
■To make a call using the call history Call history is stored by All, Dialed, Received, and Missed.
- Go to the phone menu screen. Phone menu screen P. 367
- Select Call History.
- Select All, Dialed, Received, or Missed.
- Select a number.
▶Dialing starts automatically.
To make a call using the call history
The call history displays the last 20 dialed, received, or missed calls. (Appears only when a phone is connected to the system.)
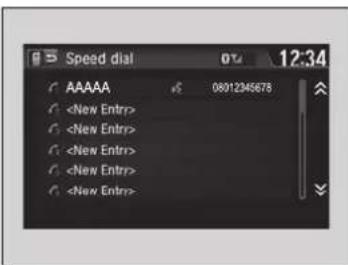
■To make a call using a speed dial entry
- Go to the phone menu screen. Phone menu screen P. 367
- Select Speed Dial.
- Select a number. ▶Dialing starts automatically.
To make a call using a speed dial entry
When a voice tag is stored, press the 📄 button to call the number using the voice tag. ▶Speed Dial P. 374
Any voice-tagged speed dial entry can be dialed by voice from any screen. Press the button and follow the prompts.
Receiving a Call
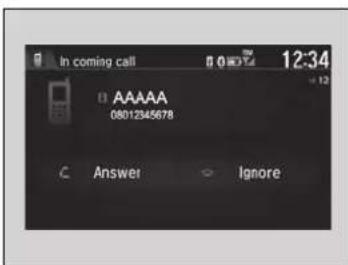
When there is an incoming call, an audible notification sounds and the Incoming call screen appears.
Press the button to answer the call. Press the button to decline or end the call.
Options During a Call
The following options are available during a call.
Mute: Mute your voice.
The mute icon appears when Mute is selected. Select Mute again to turn it off.
Transfer: Transfer a call from the system to your phone.
Touch Tones: Send numbers during a call. This is useful when you call a menu-driven phone system.
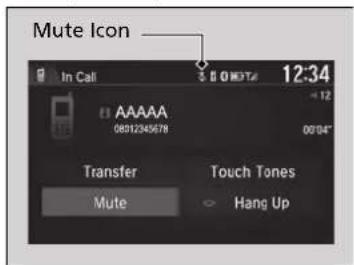
The available options are shown on the lower half of the screen.
Select the option.
The mute icon appears when Mute is selected. Select Mute again to turn it off.
>>Receiving a Call
Call Waiting
Press the button to put the current call on hold to answer the incoming call.
Press the 📄 button again to return to the current call.
Select Ignore to ignore the incoming call if you do not want to answer it.
Press the button if you want to hang up the current call.
You can select the icons on the touch screen instead of the and buttons.
>>Options During a Call
Touch Tones: Available on some phones.
You can select the icons on the touch screen.
Driving
This chapter discusses driving and refueling.
Before Driving 382
Towing a Trailer 386
When Driving
Models without keyless access system
Starting the Engine 392
Models with keyless access system
Starting the Engine 395
Precautions While Driving.... 399
Continuously Variable Transmission * ..... 401
Continuously variable transmission models
Shifting 402
Manual transmission models
Shifting 407
Continuously variable transmission models
Auto Idle Stop 410
Manual transmission models
Auto Idle Stop 415
Cruise Control 420
Adjustable Speed Limiter 423
Intelligent Speed Limiter 427
Forward Collision Warning* 434
Lane Departure Warning 438
Traffic Sign Recognition System* ...... 442
Vehicle Stability Assist (VSA) System...... 446
Agile Handling Assist 448
Deflation Warning System 449
Adjusting Headlight Distribution ..... 451
Braking
Brake System.... 453
Anti-lock Brake System (ABS) 455
Brake Assist System 456
City-Brake Active system....457
Emergency Stop Signal 462
Parking Your Vehicle
When Stopped 463
Parking Sensor System ^* 464
Multi-View Rear Camera
About Your Multi-View Rear Camera...469
Refueling
Fuel Information....471
How to Refuel 472
Fuel Economy and CO₂ Emissions
Improving Fuel Economy and Reducing CO_2
Emissions....473
Before Driving
Driving Preparation
Check the following items before you start driving.
Exterior Checks
- Make sure there are no obstructions on the windows, door mirrors, exterior lights, or other parts of the vehicle.
▶Remove any frost, snow, or ice.
Remove any snow on the roof, as this can slip down and obstruct your field of vision while driving. If frozen solid, remove ice once it has softened.
When removing ice from around the wheels, be sure not to damage the wheel or wheel components. - Make sure the bonnet is securely closed.
▶If the bonnet opens while driving, your front view will be blocked. - Make sure the tyres are in good condition.
▶ Check air pressures and check for damage and excessive wear.
→ Checking and Maintaining Tyres P. 517
• Make sure there are no people or objects behind or around the vehicle.
There are blind spots from the inside.
Exterior Checks
NOTICE
When doors are frozen shut, use warm water around the door edges to melt any ice. Do not try to force them open, as this can damage the rubber trim around the doors. When done, wipe dry to avoid further freezing.
Do not pour warm water into the key cylinder. You will be unable to insert the key if the water freezes in the hole.
Heat from the engine and exhaust can ignite flammable materials left under the bonnet, causing a fire. If you've parked your vehicle for an extended period, inspect and remove any debris that may have collected, such as dried grass and leaves that have fallen or have been carried in for use as a nest by a small animal. Also check under the bonnet for leftover flammable materials after you or someone else has performed maintenance on your vehicle.
Interior Checks
- Store or secure all items on board properly.
Carrying too much luggage, or improperly storing it, can affect your vehicle's handling, stability, stopping distance, and tyres, and make it unsafe.
Load Limit P. 385 - Do not pile items higher than the seat height.
▶They can block your view and may be thrown forward in the event of sudden braking. - Do not place anything in the front seat footwells. Make sure to secure the floor mat ^* .
An object or unsecured floor mat can interfere with your brake and accelerator pedal operation while driving. - If you have any animals on board, do not let them move around in the vehicle.
▶They may interfere with driving and a crash could occur. - Securely close all doors and the tailgate.
- Adjust your seating position properly.
▶Adjust the head restraint, too.
Adjusting the Seats P. 187
Adjusting the front head restraint positions P. 193 - Adjust the mirrors and steering wheel properly for your driving.
▶Adjust them while sitting in the proper driving position.
Adjusting the Mirrors P. 185
Adjusting the Steering Wheel P. 184
»Interior Checks
The headlight aim is set by the factory, and does not need to be adjusted. However, if you regularly carry heavy items in the luggage area or tow a trailer, have the aiming readjusted at a dealer or by a qualified technician.
Models with halogen type headlights
You can adjust the low beam headlight angle by your self.
Headlight Adjuster * P. 174
Models with LED type headlights
Your vehicle is equipped with the automatic headlight adjusting system that automatically adjusts the vertical angle of the low beam headlights.
- Be sure items placed on the floor behind the front seats cannot roll under the seats.
They can interfere with the driver's ability to operate the pedals, or the operation of the seats. - Everyone in the vehicle must fasten their seat belts.
Fastening a Seat Belt P. 42 - Make sure that the indicators in the instrument panel come on when you start the vehicle, and go off soon after.
▶ Always have a dealer check the vehicle if a problem is indicated.
Indicators P. 86
Load Limit
When you load luggage, the total weight of the vehicle, all passengers, and luggage must not exceed the maximum permissible weight.
Specifications P. 592
The load for the front and rear axles also must not exceed the maximum permissible axle weight.
Specifications P. 592
Load Limit
WARNING
Overloading or improper loading can affect handling and stability and cause a crash in which you can be hurt or killed.
Follow all load limits and other loading guidelines in this manual.
Towing a Trailer
Towing Preparation
Towing Load Limits
Your vehicle can tow a trailer if you carefully observe the load limits, use the proper equipment, and follow the towing guidelines. Check the load limits before driving.
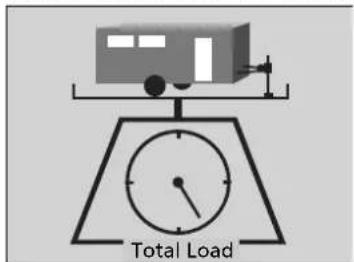
■Total trailer weight
Do not exceed the maximum towing weight of the trailer and towbar (with/without brakes), luggage and everything in or on it.
Towing loads in excess of the maximum towing weight can seriously affect vehicle handling and performance and can damage the engine and drivetrain.
Each weight limit is calculated based on the following conditions:
- Occupants fill seats from the front of the vehicle to the back Any additional weight, luggage or accessories reduce the maximum trailer weight and maximum tongue load.
Towing Load Limits
WARNING
Exceeding any load limit or improperly loading your vehicle and trailer can cause a crash in which you can be seriously hurt or killed.
Check the loading of your vehicle and trailer carefully before starting to drive.
Check if all loads are within limits at a public scale. If a public scale is not available, add the estimated weight of your luggage load to the weight of your trailer (as quoted by the manufacturer), and the trailer nose load.
Break-in Period
Avoid towing a trailer during your vehicle's first 1,000 km (625 miles).
Never exceed the maximum towing weight and any specified load limit.
Specifications P. 595
If you tow a trailer in mountainous conditions, remember to reduce 10% of the combined vehicle and trailer weights from the maximum towing weight for every 1,000 metres of elevation.
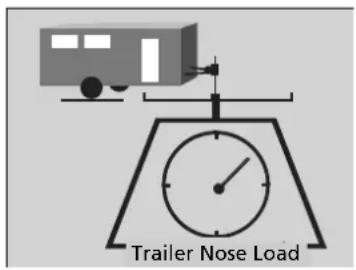
■Trailer nose load
The trailer nose load should never exceed 95 kg (209 lbs). This is the amount of weight the trailer puts on the towbar when it is fully-loaded. As a rule of thumb for trailer weights of less than 950 kg (2,094 lbs), the trailer nose load should be 10 percent of the total trailer package.
- Excessive trailer nose load reduces front tyre traction and steering control. Too little trailer nose load can make the trailer unstable and cause it to sway.
- To achieve a proper trailer nose load, start by loading 60% of the load toward the front of the trailer and 40% toward the rear. Readjust the load as needed.
Towing Equipment and Accessories
Towing equipment varies by the size of your trailer, how much load you are towing, and where you are towing.
Towbars
The towbar must be of an approved type and properly bolted to the underbody.
■Safety chains
Always use safety chains when you tow a trailer. Leave enough slack to allow the trailer to turn corners easily, but do not allow the chains to drag on the ground.
■Trailer brakes
If you are thinking of getting a trailer that has brakes, be sure they are electronically actuated. Do not attempt to tap into your vehicle's hydraulic system. No matter how successful it may seem, any attempt to attach trailer brakes to your vehicle's hydraulic system will lower braking effectiveness and create a potential hazard.
■Additional towing equipment
There may be laws requiring special outside mirrors when towing a trailer. Even if mirrors are not required in your locale, you should install special mirrors if visibility is restricted in any way.
■Trailer light
Trailer lights and equipment must comply with the regulations of the country where you are driving. Check with your local trailer sales or rental agency for the requirements in the area where you plan to tow.
Towing Equipment and Accessories
Make sure that all equipment is properly installed and maintained, and that it meets the regulations of the country where you are driving.
Consult your trailer maker for proper installation and setup of the equipment. Improper installation and setup can affect the handling, stability, and braking performance of your vehicle.
Consult your trailer sales or rental agency if any other items are recommended or required for your towing situation.
The lighting and wiring of trailers can vary by type and brand. If a connector is required, it should only be installed by a qualified technician.
Driving Safely with a Trailer
Things You Need To Know Before Towing a Trailer
- Have the trailer properly serviced and keep it in good condition.
- Make sure that all the weights and load in the vehicle and trailer are within limits. ▶Towing Load Limits P. 386
- Securely attach the towbar, safety chains, and other necessary parts to the trailer.
- Securely store all the items in and on the trailer so that they do not shift while driving.
- Check if the lights and brakes on the trailer are working properly.
- Check the pressure of the trailer tyres, including the spare.
- Check regulations concerning the maximum speed or driving restrictions for vehicles towing trailers. If you are driving across several countries, check each country's requirements before leaving home, because regulations may vary.
- Turn off the Auto Idle Stop system using the Auto Idle Stop OFF button. The trailer weight can affect your vehicle's brake effectiveness if Auto Idle Stop is activated on a hill while towing a trailer.
>>Driving Safely with a Trailer
Operating speed when towing a trailer must not exceed 100 km/h (62 mph).
Parking
In addition to the normal precautions, place wheel chocks at each of the trailer's tyres.
We recommend you drive uphill or less than 12% slope. Follow the trailer association's recommendations for suitable roads.
Winds caused by passing large vehicles can sway your trailer, keep a constant speed and steer straight ahead.
Always drive slowly and have someone guide you when reversing.
Continued
Towing Speeds and Gears
- Drive slower than normal.
- Obey posted speed limits for vehicles with trailers.
- Use the D position when towing a trailer on level roads.
Continuously variable transmission models
Manual transmission models
- Either shift up or shift down indicator will come on at the best time to shift to a higher or lower gear for the better fuel economy.
Towing Speeds and Gears
When towing a fixed-sided trailer (e.g., camper), do not exceed 88 km/h (55 mph). At higher speeds, the trailer may sway or affect vehicle handling.
Manual transmission models
The shift down indicator will not prompt to downshift to 1st gear. It is up to you to downshift to 1st gear to increase engine braking. Avoid sudden engine braking.
Road and traffic conditions may require you to shift at times other than those indicated.
Turning and Braking
- Turn more slowly and with a wider turning arc than normal.
- Allow more time and distance for braking.
- Do not brake or turn suddenly.
Driving in Hilly Terrain
- Closely watch your high temperature indicator. If the indicator remains on, turn off the heating and cooling system*/climate control system* and reduce speed. Pull to the side of the road safely to cool down the engine if necessary.
Continuously variable transmission models
- Shift to the [S] position and use the paddle shifter to shift down when driving down hills. This helps to increase engine braking efficiently and prevent the brake system from overheating.
When Driving
Models without keyless access system
Starting the Engine
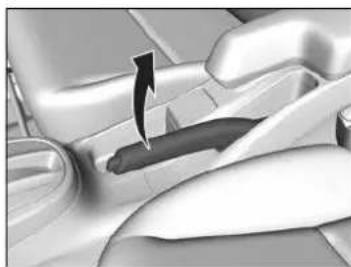
natural_image
Interior view of a car seatbelt with a black seatbelt being lifted by an arrow (no text or symbols visible)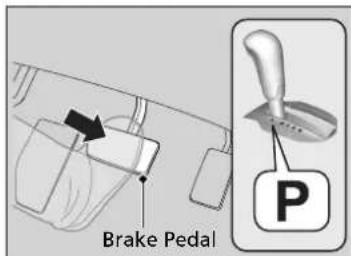
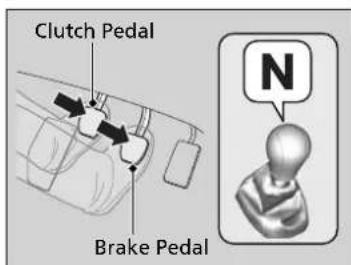
- Make sure the parking brake is applied.
Continuously variable transmission models
- Check that the transmission is in P, then depress the brake pedal.
Although it is possible to start the vehicle in N, it is safer to start it in P.
Manual transmission models
- Check that the transmission is in N. Then depress the brake pedal with your right foot, and the clutch pedal with your left foot.
The clutch pedal must be fully depressed to start the engine.
Starting the Engine
Keep your foot firmly on the brake pedal when starting the engine.
The engine is harder to start in cold weather and in thinner air found at altitudes above 2,400 metres (8,000 feet).
When starting the engine in cold weather, turn off all electrical accessories such as the lights, heating and cooling system */climate control system*, and rear demister in order to reduce battery drain.
If the exhaust system sounds abnormal or you can smell exhaust gas inside the vehicle, have your vehicle checked by a dealer. There may be a problem with the engine or exhaust system.
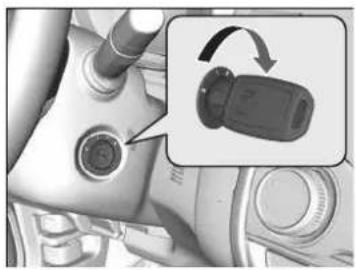
natural_image
Close-up of a mechanical component with a close-up inset showing a device's internal structure (no visible text or symbols)All models
- Turn the ignition switch to START III without depressing the accelerator pedal.
■Stopping the Engine
You can turn the engine off when the vehicle is completely stopped.
Starting to Drive
Continuously variable transmission models
- Keeping your right foot on the brake pedal, release the parking brake. Check that the parking brake and brake system indicator has gone off.
→Parking Brake P. 453 - Put the transmission into D. Select R when reversing.
- Gradually release the brake pedal and gently depress the accelerator pedal to pull away.
Starting the Engine
Do not hold the key in START [III] for more than 10 seconds.
- If the engine does not start right away, wait for at least 30 seconds before trying again.
- If the engine starts, but then immediately stops, wait at least 30 seconds before repeating step 3 while gently depressing the accelerator pedal. Release the accelerator pedal once the engine starts.
The immobilizer system protects your vehicle from theft. If an improperly coded device is used, the engine's fuel system is disabled.
Immobilizer System P. 159
Starting to Drive
Manual transmission models
If the engine stalls, fully depress the clutch pedal within three seconds.
The engine may automatically restart under certain conditions.
Otherwise, follow the standard procedure.
■Hill start assist system
Hill start assist keeps the brake engaged briefly to help to prevent the vehicle from rolling on inclines as you move your foot from the brake pedal to the accelerator.
Manual transmission models
Depress the clutch pedal, and shift to one of the forward gears when facing uphill, or R when facing downhill, then release the brake pedal.
Continuously variable transmission models
Move the shift lever to D or S when facing uphill, or R when facing downhill, then release the brake pedal.
Hill start assist system
Hill start assist may not prevent the vehicle from rolling downhill on a very steep or slippery slope, and does not operate on small inclines.
Hill start assist is not a replacement for the parking brake.
Hill start assist will operate even when VSA is switched off.
Models with keyless access system
Starting the Engine
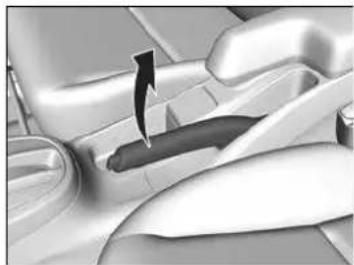
natural_image
Interior view of a car showing a car's side arm and dashboard (no text or symbols visible)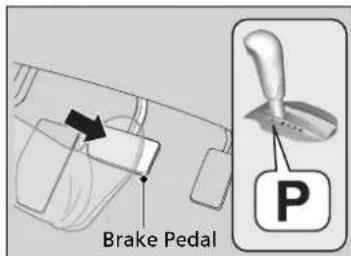
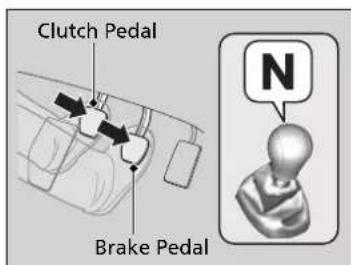
- Make sure the parking brake is applied.
Continuously variable transmission models
- Check that the transmission is in P, then depress the brake pedal.
Although it is possible to start the vehicle in N, it is safer to start it in P.
Manual transmission models
- Check that the transmission is in N. Then depress the brake pedal with your right foot, and the clutch pedal with your left foot.
The clutch pedal must be fully depressed to start the engine.
Starting the Engine
Keep your foot firmly on the brake pedal when starting the engine.
The engine is harder to start in cold weather and in thinner air found at altitudes above 2,400 metres (8,000 feet).
When starting the engine in cold weather, turn off all electrical accessories such as the lights, climate control system, and rear demister in order to reduce battery drain.
If the exhaust system sounds abnormal or you can smell exhaust gas inside the vehicle, have your vehicle checked by a dealer. There may be a problem with the engine or exhaust system.
The immobilizer system protects your vehicle from theft. If an improperly coded device is used, the engine's fuel system is disabled.
Immobilizer System P. 159
Continued
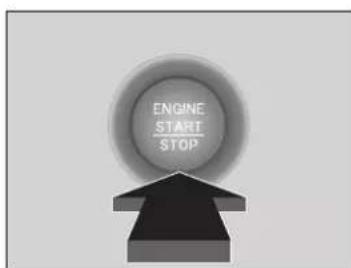
All models
- Press the ENGINE START/STOP button without depressing the accelerator pedal.
Starting the Engine
Bring the keyless remote close to the ENGINE START/STOP button if the battery in the keyless remote is weak.
If the Keyless Remote Battery is Weak P. 562
The engine may not start if the keyless remote is subjected to strong radio waves.
Do not hold the ENGINE START/STOP button to start the engine.
If the engine does not start, wait at least 30 seconds before starting the engine again.
Stopping the Engine
You can turn the engine off when the vehicle is completely stopped.
Continuously variable transmission models
- Put the transmission into P.
- Press the ENGINE START/STOP button.
Manual transmission models
- If the transmission is in N, press the ENGINE START/STOP button.
- If the transmission is in any gear other than , depress the clutch pedal, then press the ENGINE START/STOP button.
Starting to Drive
Continuously variable transmission models
- Keeping your right foot on the brake pedal, release the parking brake. Check that the parking brake and brake system indicator has gone off.
Parking Brake P. 453 - Put the transmission into D. Select R when reversing.
- Gradually release the brake pedal and gently depress the accelerator pedal to pull away.
Starting to Drive
Manual transmission models
If the engine stalls, fully depress the clutch pedal within three seconds.
The engine may automatically restart under certain conditions.
Otherwise, follow the standard procedure.
■Hill start assist system
Hill start assist keeps the brake engaged briefly to help to prevent the vehicle from rolling on inclines as you move your foot from the brake pedal to the accelerator.
Continuously variable transmission models
Move the shift lever to D or S when facing uphill, or R when facing downhill, then release the brake pedal.
Manual transmission models
Depress the clutch pedal, and shift to one of the forward gears when facing uphill, or R when facing downhill, then release the brake pedal.
Hill start assist system
Hill start assist may not prevent the vehicle from rolling downhill on a very steep or slippery slope, and does not operate on small inclines.
Hill start assist is not a replacement for the parking brake.
Hill start assist will operate even when VSA is switched off.
Precautions While Driving
In Rain
Avoid driving in deep water and on flooded roads. This can damage the engine or driveline, or cause electrical component failure.
*1: Models with the keyless access system have an ENGINE START/STOP button instead of an ignition switch.
Continued
>>Precautions While Driving
CAUTION: Do not drive on the road where water is deep. Driving through deep water will cause damage to the engine and electrical equipment and the vehicle will break down.
NOTICE
Do not operate the shift lever while pressing the accelerator pedal. You could damage the transmission.
NOTICE
If you repeatedly turn the steering wheel at an extremely low speed, or hold the steering wheel in the full left or right position for a while, the electric power steering (EPS) system heats up. The system goes into a protective mode, and limits its performance. The steering wheel becomes harder and harder to operate. Once the system cools down, the EPS system is restored. Repeated operation under these conditions can eventually damage the system.
If the ignition switch is turned to ACCESSORY 1 while driving, the engine will shut down and all steering and brake power assist functions will stop, making it difficult to control the vehicle.
Do not put the transmission into N, as you will lose engine braking (and acceleration) performance.
Other Precautions
If there is a strong impact with something under the vehicle, stop in a safe location. Check the underside of the vehicle for damage or any fluid leaks.
Precautions While Driving
During the first 1,000 km (625 miles) of operation, avoid sudden acceleration or full throttle operation so as not to damage the engine or powertrain.
Avoid hard braking for the first 300 km (200 miles). You should also follow this when the brake pads are replaced.
NOTICE
The following can damage the under spoiler:
- Parking the vehicle by a parking block
• Parallel parking along the road shoulder - Driving towards the bottom of a hill
- Driving up or down to a different surface level (such as a road shoulder)
- Driving on a rutted or bumpy road
- Driving on a road with potholes.
Continuously Variable Transmission\*
Creeping
The engine runs at a higher idle speed and creeping increases. Keep the brake pedal firmly depressed when stopped.
Kickdown
Quickly depressing the accelerator pedal while driving uphill may cause the transmission to drop to a lower ratio, unexpectedly increasing vehicle speed. Depress the accelerator pedal carefully, especially on slippery roads and curves.
Continuously variable transmission models
Shifting
Change the shift position in accordance with your driving needs.
Shift lever positions
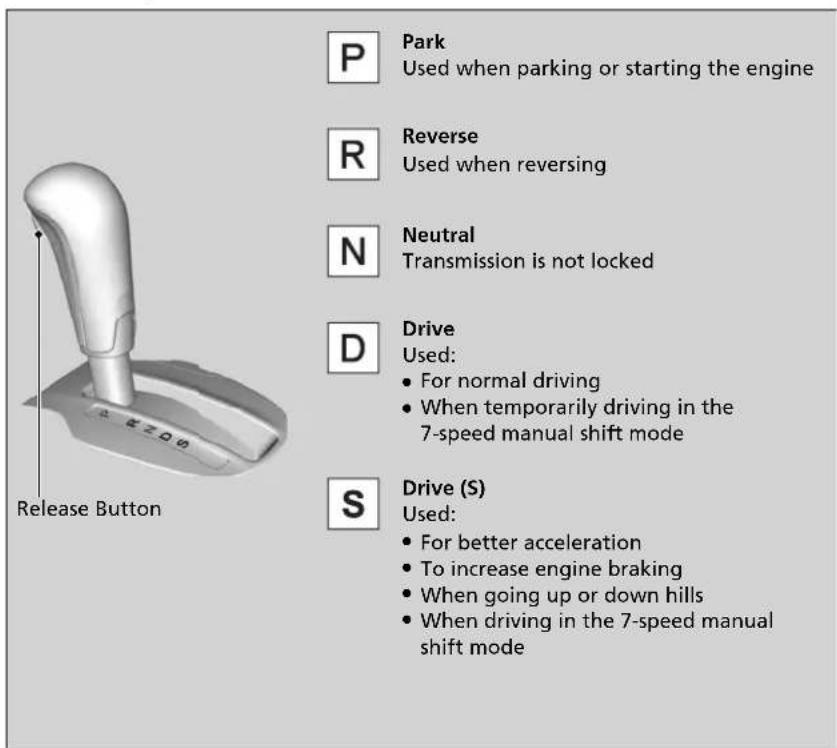
>>Shift lever positions
Models without keyless access system
You cannot turn the ignition switch to LOCK 0 and remove the key unless the shift lever is in [P].
Models with keyless access system
You cannot change the power mode from ON to VEHICLE OFF (LOCK) unless the shift lever is in [P].
The vehicle may move forward very slightly even in N while the engine is cold.
Depress the brake pedal firmly and, when necessary, apply the parking brake.
When shifting positions in extremely low temperatures ( -30^ ), there may be a short delay before the shift position is displayed. Always confirm you are in the correct shift position before driving.
Shift Lever Operation
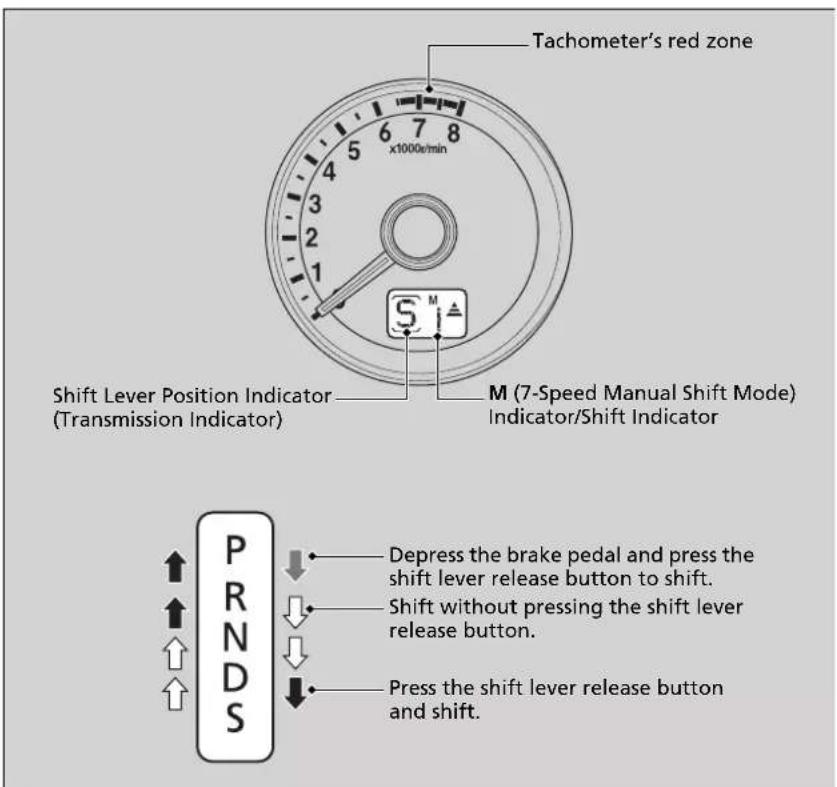
Shift Lever Operation
NOTICE
When you change the shift lever from D to R and vice versa, come to a complete stop and keep the brake pedal depressed.
Operating the shift lever before the vehicle has come to a complete standstill can damage the transmission.
Use the shift lever position indicator to check the lever position before pulling away.
If the transmission indicator blinks when driving, in any shift position, there is a problem with the transmission.
Avoid sudden acceleration and have the transmission checked by a dealer as soon as possible.
The fuel supply may be cut off if you drive at engine speeds in or over the tachometer's red zone (engine speed limit). If this happens, you may experience a slight jolt.
It may not be possible to operate the shift lever if the brake pedal is applied while the shift lever release button is held down.
Depress the brake pedal first.
7-Speed Manual Shift Mode
Use the paddle shifters to change between 1st and 7th speeds without releasing your hands from the steering wheel. The transmission switches to the 7-speed manual shift mode when you pull a paddle shifter while driving. This mode is useful when engine braking is needed.
■ When the shift lever is in D:
The shift mode goes into the 7-speed manual shift mode temporarily, and the number is displayed in the shift indicator.
The 7-speed manual shift mode is cancelled automatically if you drive at constant speed or accelerate, and the number in the shift indicator goes off.
You can cancel this mode by pulling the pladdle shifter for a few seconds.
The 7-speed manual shift mode is especially useful when reducing the vehicle speed temporarily before making a turn.
■ When the shift lever is in S:
The shift mode goes into the 7-speed manual shift mode. The M indicator and the speed number are displayed in the shift indicator. As the vehicle speed slows down, the transmission automatically shifts down accordingly. When the vehicle comes to a stop, it automatically shifts down into 1st.
You can cancel this mode by pulling the pladdle shifter for a few seconds.
If the vehicle speed increases and the engine speed reaches near the tachometer's red zone, the transmission automatically shifts up.
7-Speed Manual Shift Mode
In the 7-speed manual shift mode, the transmission shifts up or down by operating either paddle shifter under the following conditions:
Shift Up: The engine speed reaches the lowest threshold of the higher speed position.
Shift Down: The engine speed reaches the highest threshold of the lower speed position.
When the engine speed reaches near the tachometer's red zone, the transmission shifts up automatically.
When the engine speed reaches the lowest threshold of the selected speed position, the transmission shifts down automatically.
Operating the paddle shifters on slippery surfaces may cause the tyres to lock up. In this case, the 7-speed manual shift mode is cancelled and goes back to the normal driving mode.
7-Speed Manual Shift Mode Operation
You can only pull away in 1st gear.
When cancelling the 7-speed manual shift mode, move the shift lever from S to D. When the 7-speed manual shift mode is cancelled, the M indicator and shift indicator will turn off.
You can cancel this mode by pulling the + paddle shifter for a few seconds.
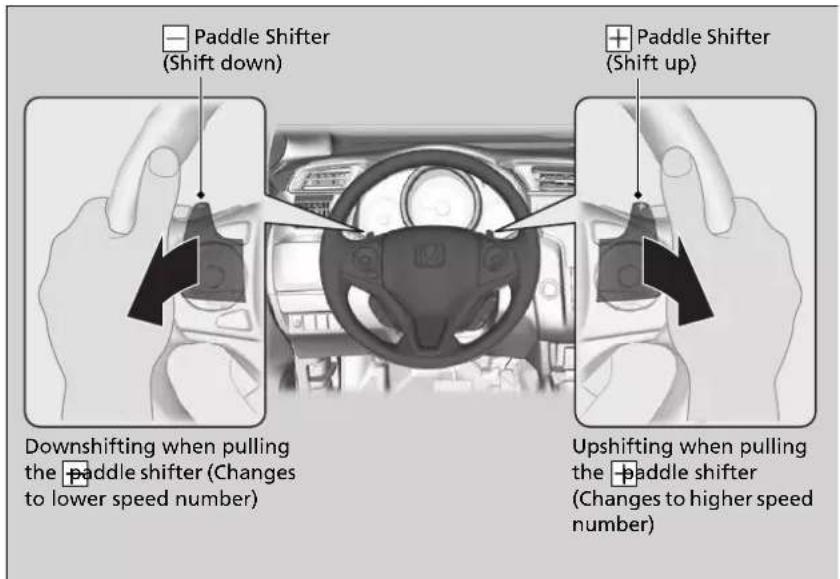
7-Speed Manual Shift Mode Operation
Each paddle shift operation makes a single gear change.
To change continuously, release the paddle shifter before pulling it again for the next speed.
The shift indicator blinks when you cannot shift up or down. It indicates that your vehicle speed is not in its allowable shifting range.
Slightly accelerate to shift up and decelerate to shift down while the indicator is blinking.
Shift Up Indicator
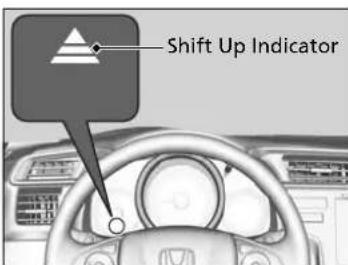
Comes on while the vehicle is in the 7-speed manual shift mode to indicate when a shift change is appropriate to maintain the most fuel efficient driving style.
The shift up indicator: Comes on when shifting up is recommended.
Shift Up Indicator
WARNING
The shift indicator is only a guide to help you achieve better fuel economy. Never refer to the Shift Indicators when road and traffic conditions are unsuitable or when it may distract you.
Ambient meter colour may change if you do not change transmission when a shift indicator illuminates. This can result in a change in fuel economy.
Road and traffic conditions may require you to shift at times other than those indicated.
Manual transmission models
Shifting
Shift Lever Operation
Fully depress the clutch pedal to operate the shift lever and change gears, then slowly release the pedal.
Depress the clutch pedal, and pause for a few seconds before shifting into R, or shift into one of the forward gears for a moment. This stops the gears so they do not "grind."
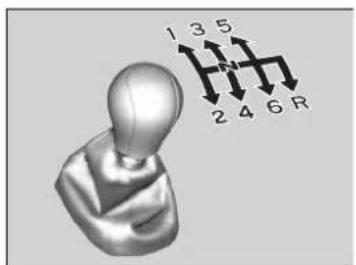
When you are not shifting, do not rest your foot on the clutch pedal. This can cause your clutch to wear out faster.
Continued
>>Shifting
NOTICE
Do not shift to before the vehicle comes to a complete stop. Shifting to before stopping can damage the transmission.
NOTICE
Before downshifting, make sure the engine will not go into the tachometer's red zone. Should this occur, it can severely damage your engine.
There is a metallic part on the shift lever. If you leave the vehicle parked outside for a long time on a hot day, be careful before moving the shift lever. Because of heat, the shift lever may be extremely hot. If the outside temperature is low, the shift lever may feel cold.
If you exceed the maximum speed for the gear you are in, the engine speed will enter into the tachometer's red zone. When this happens, you may experience a slight jolt.
Shift Up/Down Indicators
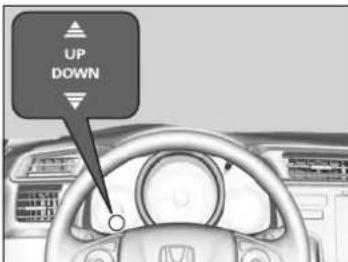
Come on to indicate when a gear change is appropriate to maintain the most fuel efficient driving style.
The shift up indicator: Comes on when shifting up is recommended.
The shift down indicator: Comes on when shifting down is recommended.
Shift Up/Down Indicators
WARNING
The shift indicator is only a guide to help you achieve better fuel economy. Never refer to the Shift Indicators when road and traffic conditions are unsuitable or when it may distract you.
This indicator will not prompt you to downshift to increase engine braking. It is up to you to downshift to increase engine braking when driving downhill.
Always shift down at the appropriate vehicle speed.
The shift down indicator does not come on when downshifting from 2 to 1.
Ambient meter colour may change if you do not change gears when a shift indicator illuminates. This can result in a change in fuel economy.
Road and traffic conditions may require you to shift at times other than those indicated.
Reverse Lockout
The manual transmission has a lockout mechanism that stops you from accidentally shifting into R from a forward gear while the vehicle is moving above a certain speed.
If you cannot shift to R when the vehicle is stopped, do the following:
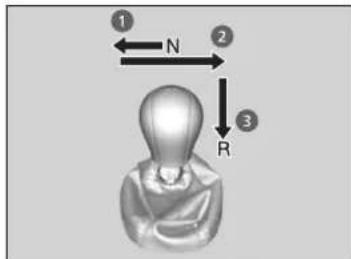
- Depress the clutch pedal, move the shift lever all the way to the left, and shift to R.
- If you still cannot shift into R, apply the parking brake, and turn the ignition switch to ACCESSORY I or LOCK 0*1.
- Depress the clutch pedal and shift into R.
- Keep depressing the clutch pedal and start the engine.
Have your vehicle checked by a dealer if you have to go through this procedure repeatedly.
Continuously variable transmission models
Auto Idle Stop
To help to maximise fuel economy, the engine automatically stops when the vehicle comes to a stop, depending on environmental and vehicle operating conditions. The indicator (green) comes on at this time.
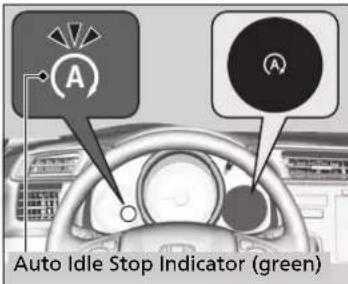
The engine then restarts once the vehicle is about to move again, or depending on environmental and vehicle conditions, and the indicator (green) goes off.
The Engine Automatically Restarts When: P. 414
The environmental and vehicle conditions that impact Auto Idle Stop system operation are varied.
Auto Idle Stop Activates When: P. 412, 417
If the driver's door is opened while the indicator (green) is on, a buzzer sounds to notify you that the Auto Idle Stop function is in operation.
A message associated with Auto Idle Stop appears on the multi-information display.
Indicators P. 102, 103
Multi-Information Display Warning and Information Messages P. 111
→ Customized Features P. 131
Auto Idle Stop
The 12-volt battery installed in this vehicle is specifically designed for a model with Auto Idle Stop. Using a battery other than this specified type may shorten the battery life, and prevent Auto Idle Stop from activating. If you need to replace the battery, make sure to select the specified type. Ask a dealer for more details.
Specifications P. 592
Auto Idle Stop System ON/OFF
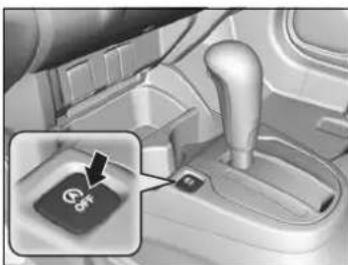
natural_image
Interior view of a car gear shift lever with a highlighted key (no text or symbols visible)To turn the Auto Idle Stop system off, press this button. The Auto Idle Stop system stops.
▶ Auto Idle Stop system will stop and the indicator (amber) will come on.
The Auto Idle Stop system is turned on every time you start the engine, even if you turned it off the last time you drove the vehicle.
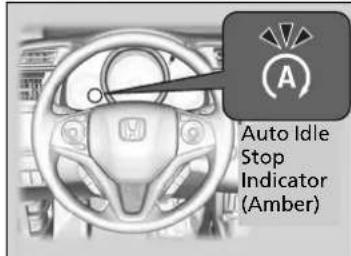
Continued
Auto Idle Stop System ON/OFF
Pressing the Auto Idle Stop OFF button restarts the engine from the idling stop.
Auto Idle Stop Activates When:
The vehicle stops with the shift lever in and the brake pedal depressed.
■Auto Idle Stop does not activate when:
- The Auto Idle Stop OFF button is pressed.
- The driver's seat belt is not fastened.
- The engine coolant temperature is low or high.
• The transmission fluid temperature is low or high. - The vehicle comes to a stop again before the vehicle speed reaches 5 km/h (3 mph) after the engine starts.
- Stopped on a steep incline.
- The transmission is in a position other than D.
- The engine is started with the bonnet open.
▶ Turn off the engine. Close the bonnet before you restart the engine to activate Auto Idle Stop.
• The battery charge is low. - The internal temperature of the battery is 5^ or less.
Models without parking sensor system
- The capacitor unit condition is not good.
The capacitor unit is used for a condenser to charge or discharge in a short time.
Models with climate control system
- The climate control system is in use, and the outside temperature is below -20°C or over 40°C.
- The climate control system is in use, and the temperature is set to Hi or Lo.
• IS on (indicator on).
Models with heating and cooling system
- The fan is turned on and the mode control dial is turned to 📄.
Auto Idle Stop Activates When:
Do not open a bonnet while the Auto Idle Stop function is activated. If the bonnet is opened, the engine will not restart automatically.
In this case, restart the engine with the ignition switch or the ENGINE START/STOP button.
Starting the Engine P. 392, 395
Models with keyless access system
Pressing the ENGINE START/STOP button changes the power mode to ACCESSORY even while Auto Idle Stop is in operation. Once in ACCESSORY, the engine no longer restarts automatically. Follow the standard procedure to start the engine.
Starting the Engine P. 395
Models without keyless access system
Even if you turn the ignition switch to START III during the Auto Idle Stop activated, the engine does not start.
■Auto Idle Stop may not activate when:
• The steering wheel is operated.
- Altitude is high.
• The vehicle is stopped by braking suddenly.
- The vehicle is repeatedly accelerated and decelerated at a low speed.
Models with climate control system
- The climate control system is in use, and there is a significant difference between the set temperature and the actual interior temperature.
- The climate control system is in use, and humidity in the interior is high.
• The fan speed is high.
■ The Engine Automatically Restarts When:
The brake pedal is released.
■ The engine restarts even if the brake pedal is depressed when:
• The Auto Idle Stop OFF button is pressed.
• A steering wheel is operated.
- The transmission is put into R or S, or taken out of N and put into D.
- The pressure to the brake pedal is reduced and the vehicle starts moving while stopped on an incline.
- The pressure on the brake pedal is repeatedly applied and released slightly during a stop.
• The battery charge becomes low.
• The accelerator pedal is depressed.
- The driver's seat belt is unlatched.
Models with climate control system
- isON (indicator on).
- The climate control system is in use, and the difference between the set temperature and actual interior temperature becomes significant.
- The climate control system is being used to dehumidify the interior.
Models with heating and cooling system
- The fan is turned on and the mode control dial is turned to

■ Starting Assist Brake Function
Briefly keeps the brake applied after releasing the brake pedal to restart the engine. This can keep your vehicle from unexpectedly moving while on an incline.
The Engine Automatically Restarts When:
If you are using an electronic device during Auto Idle Stop, the device may temporarily be turned off when the engine restarts.
Manual transmission models
Auto Idle Stop
To help to maximise fuel economy, the engine automatically stops when the vehicle comes to a stop, depending on environmental and vehicle operating conditions. The indicator (green) comes on at this time.
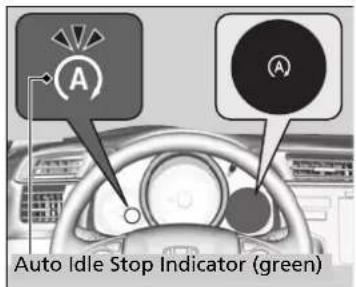
The engine then restarts once the vehicle is about to move again, or depending on environmental and vehicle conditions, and the indicator (green) goes off.
The Engine Automatically Restarts When: P. 414
The environmental and vehicle conditions that impact Auto Idle Stop system operation are varied.
Auto Idle Stop Activates When: P. 412, 417
If the driver's door is opened while the indicator (green) is on, a buzzer sounds to notify you that the Auto Idle Stop function is in operation.
A message associated with Auto Idle Stop appears on the multi-information display.
Indicators P. 102, 103
Multi-Information Display Warning and Information Messages P. 111
→ Customized Features P. 131
Continued
Auto Idle Stop
The 12-volt battery installed in this vehicle is specifically designed for a model with Auto Idle Stop. Using a battery other than this specified type may shorten the battery life, and prevent Auto Idle Stop from activating. If you need to replace the battery, make sure to select the specified type. Ask a dealer for more details.
Specifications P. 592
Auto Idle Stop System ON/OFF
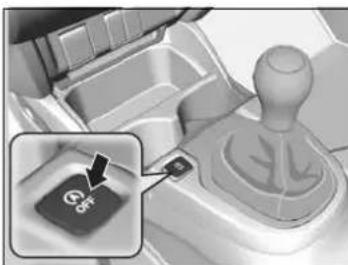
natural_image
Interior view of a car gear shift lever with a highlighted G5 component (no text or symbols visible)To turn the Auto Idle Stop system off, press this button. The Auto Idle Stop system stops.
▶ Auto Idle Stop system will stop and the indicator (amber) will come on.
The Auto Idle Stop system is turned on every time you start the engine, even if you turned it off the last time you drove the vehicle.
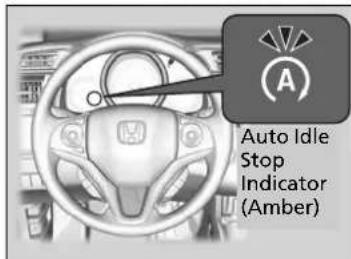
Auto Idle Stop System ON/OFF
Pressing the Auto Idle Stop OFF button restarts the engine during the Auto Idle Stop activated.
Auto Idle Stop Activates When:
After the vehicle moves forward, stopping with the brake, the clutch pedal fully depressed, the shift lever in , and then the clutch pedal is released.
▶ To restart the engine automatically, keep the shift lever in N.
■Auto Idle Stop does not activate when:
- The Auto Idle Stop OFF button is pressed.
- The driver's seat belt is not fastened.
- The engine coolant temperature is low or high.
- The vehicle comes to a stop again before the vehicle speed reaches 3 km/h (2 mph) after the engine starts.
- The shift lever is in any position except .
- The engine is started with the bonnet open.
▶ Turn off the engine. Close the bonnet before you restart the engine to activate Auto Idle Stop.
• The battery charge is low.
- The internal temperature of the battery is 5^ C or less.
Models with climate control system
- The climate control system is in use, and the outside temperature is below -20^ or over 40^ .
- The climate control system is in use, and the temperature is set to Hi or Lo.
• SOn (indicator on).
Models with heating and cooling system
- The fan is turned on and the mode control dial is turned to 📄.
Auto Idle Stop Activates When:
Do not open a bonnet while the Auto Idle Stop function is activated. If the bonnet is opened, the engine will not restart automatically.
In this case, restart the engine with the ignition switch or the ENGINE START/STOP button.
Starting the Engine P. 392, 395
Models with keyless access system
Pressing the ENGINE START/STOP button changes the power mode to OFF even while Auto Idle Stop is in operation. The engine no longer restarts automatically. Follow the standard procedure to start the engine.
Starting the Engine P. 395
Models without keyless access system
Even if you turn the ignition switch to START [III] during the Auto Idle Stop activated, the engine does not start.
■Auto Idle Stop may not activate when:
• The steering wheel is operated.
- Altitude is high.
Models with climate control system
- The climate control system is in use, and there is a significant difference between the set temperature and the actual interior temperature.
• The climate control system is in use, and humidity in the interior is high.
• The fan speed is high.
Engine Automatically Restarts When:
The clutch pedal is depressed.
■ The engine automatically restarts even if the clutch pedal is not depressed with the transmission in N when:
- The Auto Idle Stop OFF button is pressed.
- The pressure on the brake pedal is reduced and the vehicle starts moving while stopped on an incline.
- The pressure on the brake pedal is repeatedly applied and released slightly during a stop.
• The battery charge becomes low.
• The steering wheel is operated.
Engine Automatically Restarts When:
The engine does not restart automatically when there is a problem in the system. Follow the normal procedure to start the engine.
Starting the Engine P. 392, 395
If you are using an electronic device during Auto Idle Stop, the device may temporarily be turned off when the engine restarts.
During Auto Idle Stop, the engine does not restart automatically if:
• The driver's seat belt is unlatched.
To keep Auto Idle Stop activated, fasten your seat belt immediately.
- The transmission is put into a position other than . Put the transmission into .
Multi-Information Display Warning and Information Messages P. 114
When the system stops operating, follow the normal procedure to start the engine.
Starting the Engine P. 392, 395
When indicator light (Green) blinks in Auto Idle Stop
Fully depress the clutch pedal.
▶The engine automatically restarts.
When indicator light (Green) blinks in Auto Idle Stop
The indicator starts blinking rapidly under the following conditions:
Models with climate control system
• (Windscreen demister) is touched.
- When the climate control system is in use and moisture builds up inside the vehicle.
- When the climate control system is in use and the difference between the set temperature and the actual temperature inside the vehicle becomes significant.
Models with heating and cooling system
- is on with the fan operating.
Cruise Control
Maintains a constant vehicle speed without having to keep your foot on the accelerator. Use cruise control on motorways or open roads where you can travel at a constant speed with little acceleration or deceleration.
When to use
■ Vehicle speed for cruise control: Desired speed in a range from about 30 km/h (18 mph) to about 200 km/h (125 mph)
Always keep sufficient distance between you and the vehicle in front of you.
Continuously variable transmission models
Shift positions for cruise control: In D or S

Cruise Control
WARNING
Improper use of the cruise control can lead to a crash.
Use the cruise control only when travelling on open motorways in good weather.
It may not be possible to maintain a constant speed when driving uphill or downhill.
When not using cruise control: Turn off cruise control by pressing the MAIN button.
Manual transmission models
When the engine speed slows down, try to downshift.
You can maintain the set speed if you change gear within five seconds.
Setting the power mode to ACCESSORY or VEHICLE OFF (LOCK) turns off cruise control automatically.
You cannot use cruise control and the adjustable speed limiter at the same time.
To Set the Vehicle Speed
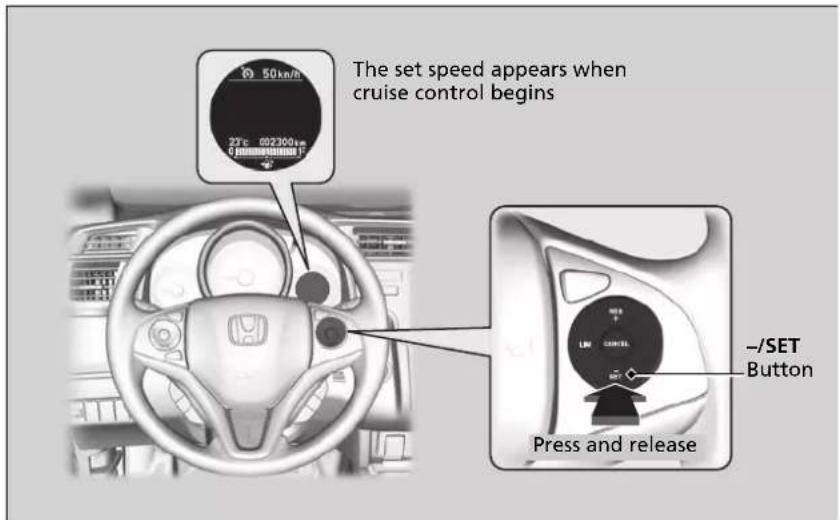
Take your foot off the pedal and press the -/SET button when you reach the desired speed.
The moment you release the -/SET button, the set speed is fixed, and cruise control begins. The set speed is displayed.
To Adjust the Vehicle Speed
Increase or decrease the vehicle speed using the RES/+ or -/SET buttons on the steering wheel.
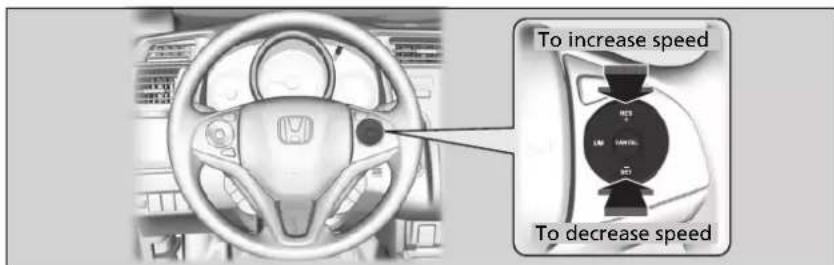
• Each time you press the button, the vehicle speed is increased or decreased by about 1 km/h or 1 mph accordingly.
- If you keep the button pressed, the vehicle speed increases or decreases by about 10 km/h or 10 mph accordingly.
To Cancel
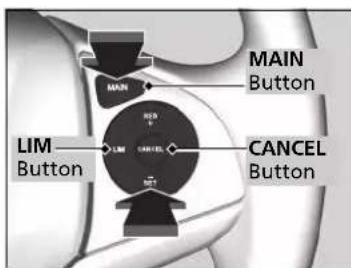
To cancel cruise control, do any of the following:
- Press the CANCEL button.
- Press the MAIN button.
- Press the LIM button.
- Depress the brake pedal.
Manual transmission models
- Depress the clutch pedal for five seconds or more.
The cruise control indicator and displayed set speed go off.
To Adjust the Vehicle Speed
You can set the vehicle speed using the -/SET button on the steering wheel when adjusting the speed with the accelerator and brake pedals.
To Cancel
Resuming the prior set speed:
After cruise control has been cancelled, you can still resume the prior set speed by pressing the RES/+ button while driving at a speed of at least 30 km/h (18 mph) or more.
You cannot set or resume in the following situations:
- When vehicle speed is less than 30 km/h (18 mph)
- When the MAIN button is turned off
At vehicle speeds of 25 km/h (16 mph) or less, cruise control is cancelled automatically.
Adjustable Speed Limiter
This system enables you to set a maximum speed that cannot be exceeded even if you are depressing the accelerator pedal.
The vehicle speed limit can be set from about 30 km/h (18 mph) to about 250 km/h (156 mph).
How to use
The indicator is on in the instrument panel.
Adjustable speed limiter is ready to use.
■Press the MAIN button on the steering wheel
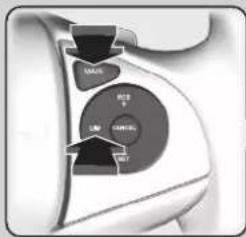
If a different indicator comes on, press the LIM button to switch to the adjustable speed limiter.
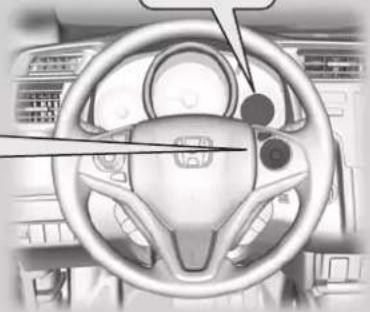
natural_image
Interior view of a car dashboard and steering wheel (no visible text or symbols)Adjustable Speed Limiter
WARNING
Adjustable Speed Limiter has limitations.
It is always your responsibility to adjust the vehicle speed to obey the actual speed limit, and safely operate the vehicle.
WARNING
Do not depress the accelerator pedal more than necessary.
Maintain an appropriate accelerator pedal position depending on the vehicle speed.
The adjustable speed limiter may not hold the set speed limit when driving downhill. If this occurs, slow down by depressing the brake pedal.
When not using the adjustable speed limiter: Turn off the adjustable speed limiter by pressing the MAIN button.
You cannot use the adjustable speed limiter and cruise control or intelligent speed limiter* at the same time.
Manual transmission models
When the engine speed slows down, try to downshift.
To Set the Speed Limit
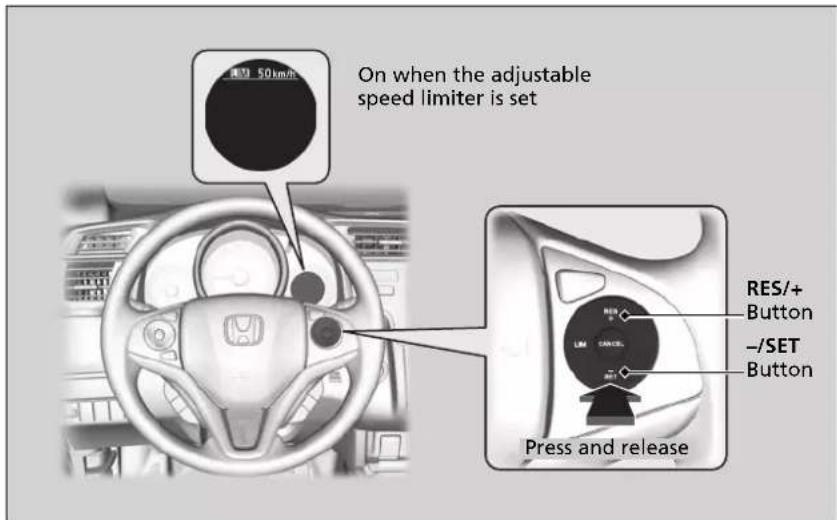
- Take your foot off the pedal and press the -/SET button when you reach the desired speed.
The moment you release the -/SET button, the speed limit is fixed, and the adjustable speed limiter is set. The speed limit is displayed. - You can set the previously set speed limit by pressing the RES/+ button.
To Set the Speed Limit
If you set the speed limit while travelling at less than 30 km/h (18 mph), the speed limit is set to 30 km/h (18 mph).
The beeper sounds and the displayed speed limit blinks if the vehicle speed exceeds the limit by 3 km/h (2 mph) or more on a steep descent.
The adjustable speed limiter is set to the current speed if it is higher than the previously set speed limit when you press the RES/+ button.
To Adjust the Speed Limit
Increase or decrease the speed limit by using the RES/+ or -/SET buttons on the steering wheel.
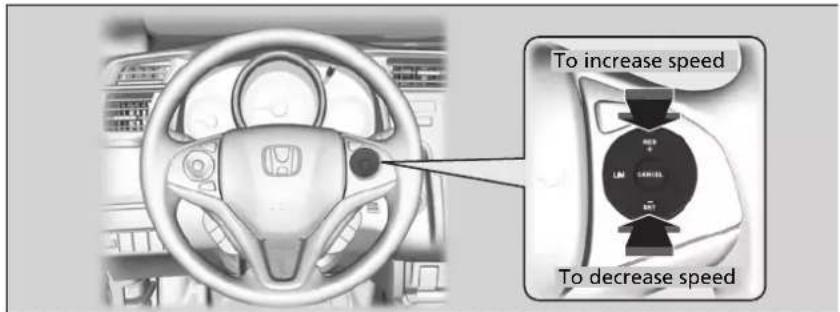
• Each time you press the button, the speed limit increases or decreases by about 1 km/h or 1 mph accordingly.
- If you keep the button pressed, the speed limit increases or decreases in increments of 10 km/h or 10 mph every 0.5 second until system limit is reached.
- The vehicle may accelerate or decelerate until the set speed is reached.
Exceeding the Speed Limit Temporarily
The speed limit can be exceeded by depressing the accelerator pedal completely.
The displayed speed limit blinks. The beeper sounds once the speed limit has been exceeded.
Exceeding the Speed Limit Temporarily
The beeper sounds when the vehicle speed goes higher than the set speed limit with the acceleration pedal depressed completely.
The adjustable speed limiter resumes working once the vehicle speed goes lower than the set speed limit.
To Cancel
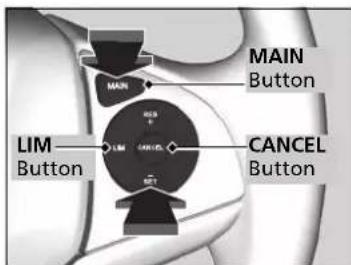
To cancel the adjustable speed limiter, do any of the following:
- Press the CANCEL button.
- Press the MAIN button.
- Press the LIM button.
To Cancel
The adjustable speed limiter changes into cruise control if the LIM button is pressed.
Models with intelligent speed limiter
The adjustable speed limiter changes into intelligent speed limiter if the LIM button is pressed.
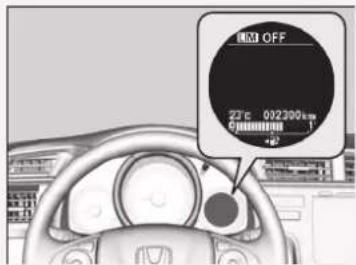
If there is a problem with the system when you are using the adjustable speed limiter, the beeper sounds and OFF comes on. The adjustable speed limiter will be turned off.
Models with traffic sign recognition system
Intelligent Speed Limiter
Automatically sets the speed limit that the traffic sign recognition system detects. And the speed limit cannot be exceeded even if you are depressing the accelerator pedal. If you fully depress the accelerator the speed limit can be exceeded.
Traffic Sign Recognition System * P. 442
Intelligent Speed Limiter
WARNING
Intelligent Speed Limiter has limitations. The Intelligent Speed Limiter may set itself to a speed above or below the actual speed limit, or may not work, particularly where the traffic sign recognition system does not operate correctly or where a road has no speed limit signs. It is always your responsibility to adjust the speed to obey the actual speed limit and to safely operate the vehicle.
Depending on the amount of depression of the accelerator pedal, the vehicle will accelerate until it reaches the speed identified by the traffic sign recognition system.
* Not available on all models
Continued
How to use
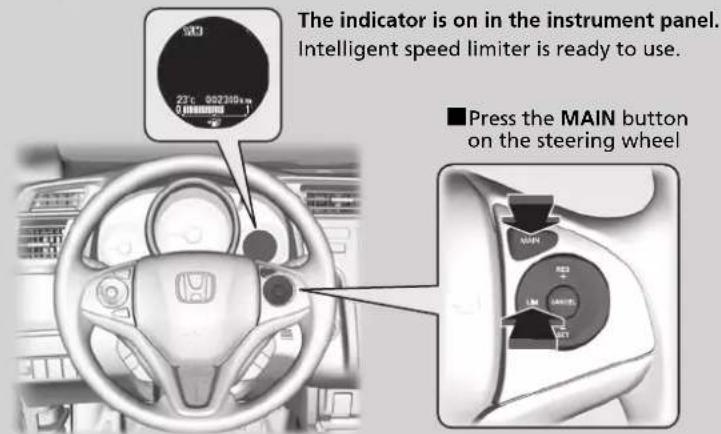
If a different indicator comes on, press the LIM button to change it to the intelligent speed limiter.
Intelligent Speed Limiter
The system is designed to detect signs that follow the Vienna Convention standards. Not all signs may be detected, but any signs posted on roadsides should not be ignored. The system does not work on the designated traffic signs of all the countries you travel, nor in all situations.
Traffic Sign Recognition System \* P. 442
If the intelligent speed limiter is set to the wrong speed limit, try one of the following:
To cancel
- Press the CANCEL button.
- Press the MAIN button.
- Press the LIM button.
To exceed the speed limit temporarily
• Depressing the accelerator pedal fully.
The intelligent speed limiter may not hold the set speed limit when driving downhill. If this occurs, slow down by depressing the brake pedal.
When not using the intelligent speed limiter, turn off the intelligent speed limiter by pressing the MAIN button.
You cannot use the intelligent speed limiter and cruise control or adjustable speed limiter at the same time.
To Set the Speed Limit
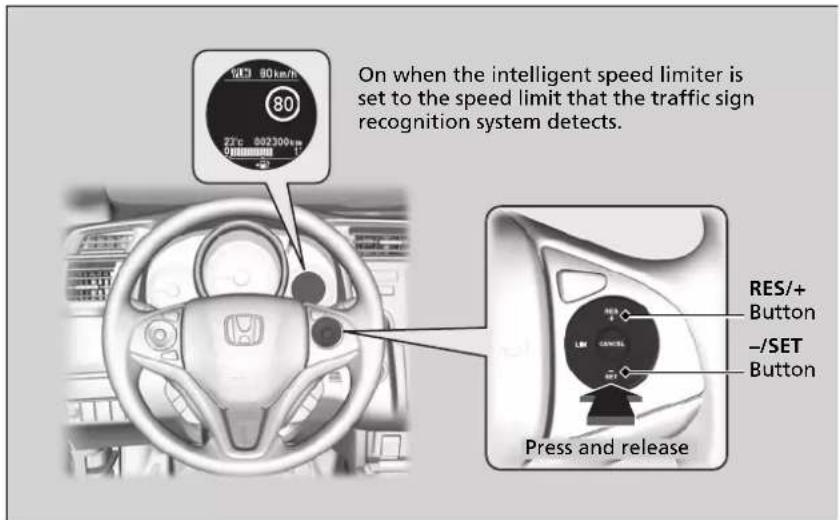
- The moment you release the -/SET button or RES/+ button, the intelligent speed limiter is set to the speed limit that the traffic sign recognition system detects. The speed limit is displayed.
Intelligent Speed Limiter
Manual transmission models
When the engine speed slows down, try to downshift.
Do not use the intelligent speed limiter in areas of different units from the display unit of the intelligent speed limiter.
Right-hand drive type
Change the displayed measurement of the set vehicle speed to the same units as the driving areas.
Customized Features P. 131
To Set the Speed Limit
If you set the intelligent speed limiter when the speed limit that the traffic sign recognition system detects is less than 30 km/h (20 mph), the speed limitation function and warning function may switch to pause.
If your vehicle speed is higher than the speed limit that the traffic sign recognition system detects, your vehicle decelerates slowly to the speed limit or less. If necessary, slow down by depressing the brake pedal. And the beeper sounds and the displayed speed limit blinks if the vehicle speed exceeds the limit by 3 km/h (2 mph) or more.
■ When the traffic sign recognition system detects the new speed limit sign The intelligent speed limiter is set to the new speed limit that the traffic sign recognition system detects.
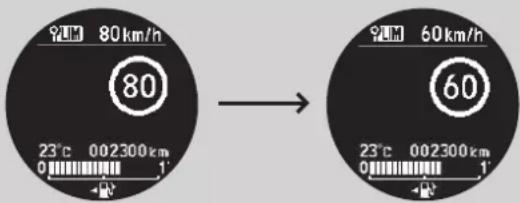
■ The speed limitation function and warning function may switch to pause if there is no speed limit sign in the screen of the traffic sign recognition system when:
- The end of speed limit or other designated limit is detected.
- Your vehicle enters/exits motorway or highway.
- You make a turn with a turn signal to change direction at an intersection.
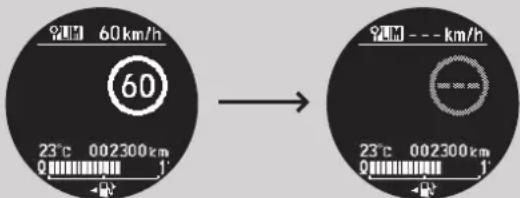
To Set the Speed Limit
The intelligent speed limiter may also switch to pause when the traffic sign recognition system detects only additional speed limit signs.
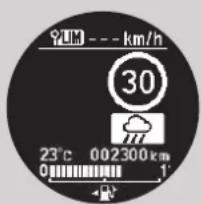
■ When the traffic sign recognition system detects the speed limit sign while the intelligent speed limiter is paused
The speed limitation function and warning function will be resumed automatically.
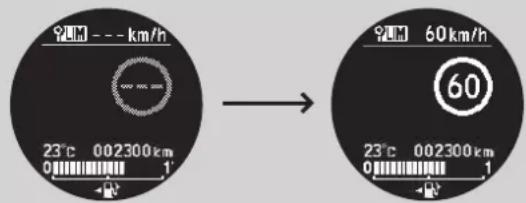
■ When the traffic sign recognition system does not detect the speed limit sign for a time while the intelligent speed limiter is activated
While driving, in addition to when the traffic sign recognition system detects no speed limit sign, the traffic sign recognition system may display no speed limit. But, intelligent speed limiter functions continue.
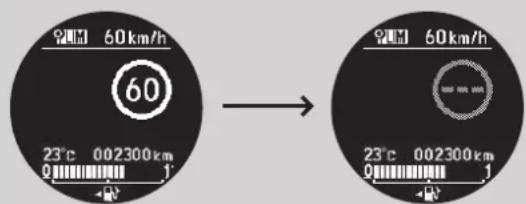
To Adjust the Speed Limit
Increase or decrease the speed limit by using the RES/+ or -/SET buttons on the steering wheel.
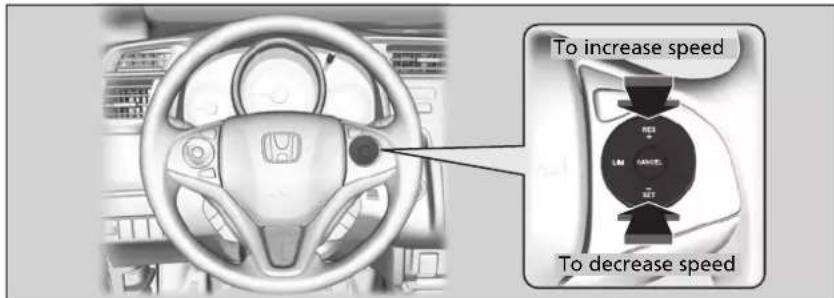
- Each time you press the button, the speed limit is increased or decreased by about 1 km/h or 1 mph accordingly.
- You can increase the speed limit until +10 km/h or +5 mph on the basis of the speed limit that the traffic sign recognition system detects.
- You can decrease the speed limit until -10 km/h or -5 mph on the basis of the speed limit that the traffic sign recognition system detects.
- You can accelerate until the set speed is reached. If your vehicle speed is higher than the speed limit that the traffic sign recognition system detects, your vehicle decelerates slowly to the speed limit.
Exceeding the Speed Limit Temporarily
The speed limit can be exceeded by depressing the accelerator pedal fully.
▶The displayed speed limit blinks.
The beeper sounds once the speed limit has been exceeded.
To Adjust the Speed Limit
A negative or positive offset with respect to the speed limit will be reset automatically when the traffic sign recognition system detects the new speed limit sign.
You cannot decrease the speed limit less than 30 km/h (18 mph).
Exceeding the Speed Limit Temporarily
The beeper sounds when the vehicle speed goes higher than the set speed limit with the acceleration pedal depressed completely.
The intelligent speed limiter resumes working once the vehicle speed goes lower than the set speed limit.
To Cancel
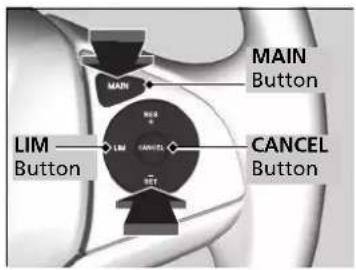
To cancel the intelligent speed limiter, do any of the following:
- Press the CANCEL button.
- Press the MAIN button.
- Press the LIM button.
To Cancel
The intelligent speed limiter changes into cruise control if the LIM button is pressed.
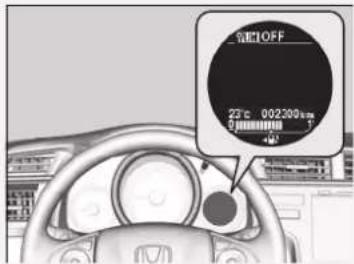
If there is a problem with the system or traffic sign recognition system when you are using the intelligent speed limiter, the beeper sounds and OFF comes on. The intelligent speed limiter will be turned off.
Traffic Sign Recognition System * P. 442
▶▶ When Driving▶ Forward Collision Warning *
Forward Collision Warning\*
Alerts you when it determines that there is a possibility that your vehicle may collide with a vehicle detected in front of yours.
If the system determines a collision is possible, it gives both visual and audible alerts.
▶ Take appropriate action to prevent a collision (apply the brakes, change lanes, etc.).
■How the system works
The system may give warnings of potential collisions when your vehicle speed is above 15 km/h (9 mph).
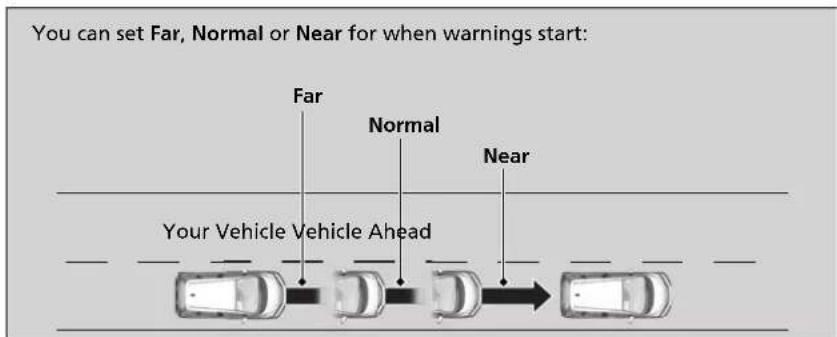
Forward Collision Warning *
Important Safety Reminder
Forward Collision Warning cannot detect all objects ahead and may not detect a given object; accuracy of the system will vary based on weather, speed and other factors. Forward Collision Warning does not include a braking function. It is always your responsibility to safely operate the vehicle and avoid collisions.
You can change the Forward Collision Warning Distance setting or turn the system on and off.
Customized Features P. 131
The camera is shared with Lane Departure Warning, Traffic Sign Recognition System and High beam Support System.
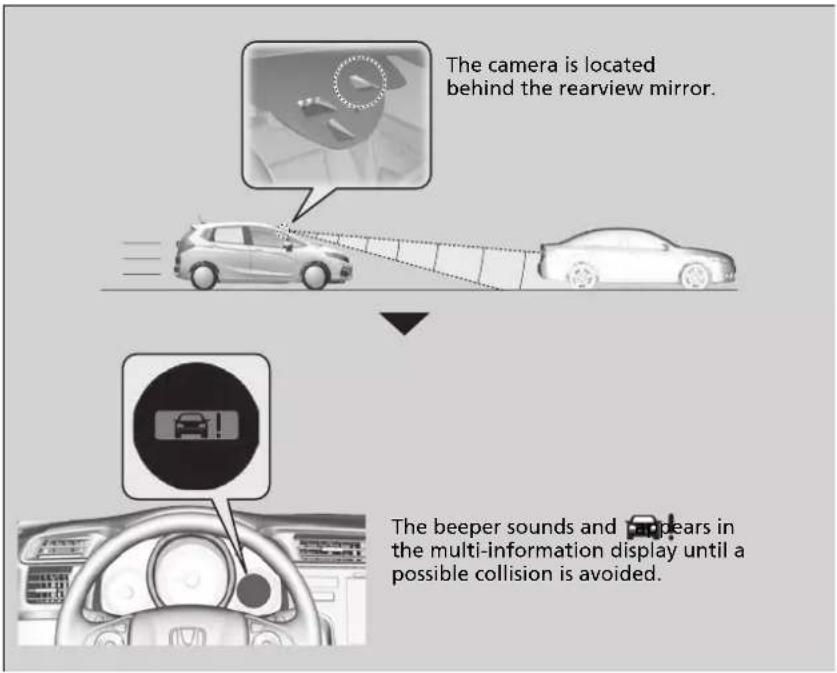
* Not available on all models
Continued
Forward Collision Warning \*
Never apply a film or attach any objects to the windscreen that could obstruct the Forward Collision Warning camera's field of vision.
Scratches, nicks, and other damage to the windscreen within the Forward Collision Warning camera's field of vision can cause the system to operate abnormally. If this occurs, we recommend that you replace the windscreen with a genuine Honda replacement windscreen. Making even minor repairs within the camera's field of vision or installing an aftermarket replacement windscreen may also cause the system to operate abnormally.
After replacing the windscreen, have a dealer recalibrate the camera. Proper calibration of the Forward Collision Warning camera is necessary for the system to operate properly.
For the system's proper operation:
- Do not impact the camera or the area around the camera when you clean the windscreen.
- Keep the upper windscreen clean. Wipe away any debris including ice and frost.
Consult a dealer in the following cases.
- The camera or the area around the camera is severely impacted.
- The area around the windscreen needs repair.
■Automatic shutoff
Forward Collision Warning may automatically shut itself off and the indicator comes and stays on when:
- The temperature inside the system is high.
- The windscreen is blocked by dirt, mud, leaves, wet snow, etc.
Once the conditions that caused Forward Collision Warning to shut off improve or are addressed (e.g., cleaning), the system comes back on.
>>Automatic shutoff
To help to reduce the likelihood that high interior temperatures will cause the camera system to shut off, when parking, find a shady area or face the front of the vehicle away from the sun.
If you use a reflective sun shade, do not allow it to cover the camera housing. Covering the camera can concentrate heat on the camera.
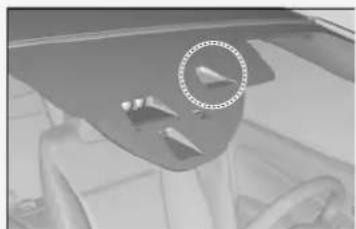
natural_image
Interior view of a car dashboard and steering wheel (no visible text or symbols)If the system cannot operate: 📄 appears:
- Use the heating and cooling system*/climate control system* to cool down the interior and, if necessary, the demister mode when windows are fogged.
- Start driving the vehicle to lower the windscreen temperature, which cools down the area around the Forward Collision Warning camera.
If the system cannot operate: 📄 appears: Park your vehicle in a safe place. Wipe away debris blocking the windscreen, then start driving again. If the symbol remains on even after driving for a while with the clean windscreen, have your vehicle checked by a dealer.
Forward Collision Warning Limitations
Forward Collision Warning may not activate or may not detect a vehicle in front of your vehicle, and may activate even when you are aware of a vehicle ahead of you, or when there is no vehicle ahead, under the following conditions.
Condition
- The distance between your vehicle and the vehicle ahead of you is too short.
- A vehicle cuts in front of you at a slow speed, and it brakes suddenly.
- A vehicle suddenly crosses in front of you.
- When either your vehicle or the vehicle ahead of you accelerates rapidly.
- The vehicle ahead of you is a motorcycle, a small vehicle, or a unique vehicle such as a tractor.
- When you drive off-road or on a mountain road, or curved and winding road for an extended period that makes it difficult for the camera to properly detect a vehicle in front of you.
- When there are pedestrians or animals in front of your vehicle.
- When you drive in bad weather (rain, fog, etc.).
- A heavy load in the rear or modifications to the suspension tilts your vehicle.
- An abnormal tyre condition is detected (wrong tyre size, flat tyre, etc.).
- When the windscreen is blocked by dirt, mud, leaves, wet snow, etc.
- When the temperature inside the system is high.
- A sudden change between light and dark such as an entrance or exit of a tunnel.
- You drive into the sunlight (e.g. at dawn or dusk).
- When the windscreen is dirty or cloudy.
- When streetlights are perceived as the taillight of a vehicle in front of yours.
- When driving at night, the vehicle ahead of you is running with either taillight bulb burned out.
- When you drive in the shadows of trees, buildings, etc.
- When your vehicle is towing a trailer.
Lane Departure Warning\*
Alerts you when the system determines a possibility of your vehicle unintentionally crossing over detected lane markings.
How the System Works
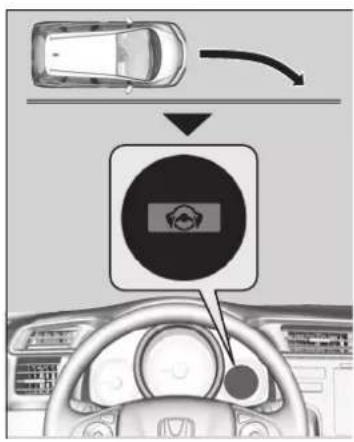
If your vehicle is getting too close to detected left or right side lane markings without a turn signal activated, Lane Departure Warning will give audible and visual alerts.
The beeper sounds and 📋 appears on the multi-information display, letting you know that you need to take appropriate action.
How the System Activates
The system begins to search for lane markings when all the following conditions are met:
• The vehicle is travelling above 72 km/h (45 mph).
- The vehicle is on a straight or slightly curved road.
• The turn signals are off.
• The brake pedal is not depressed.
Lane Departure Warning \*
Important Safety Reminder
Like all assistance systems, Lane Departure Warning has limitations.
Over-reliance on Lane Departure Warning may result in a collision. It is always your responsibility to keep the vehicle within your driving lane.
Lane Departure Warning only alerts you when lane drift is detected without a turn signal in use. Lane Departure Warning may not detect all lane markings or lane departures; accuracy will vary based on weather, speed and lane marker condition. It is always your responsibility to safely operate the vehicle and avoid collisions.
The Lane Departure Warning may not work properly or may work improperly under the certain conditions:
Lane Departure Warning Conditions and Limitations P. 440
How the System Activates
Lane Departure Warning may automatically shut off and the indicator comes and stays on.
Indicators P. 105
Lane Departure Warning Camera
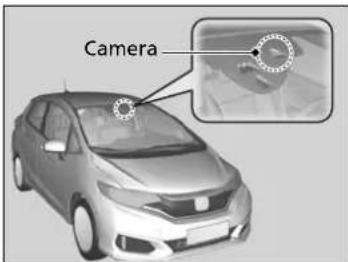
The camera is located behind the rearview mirror.
Lane Departure Warning On and Off
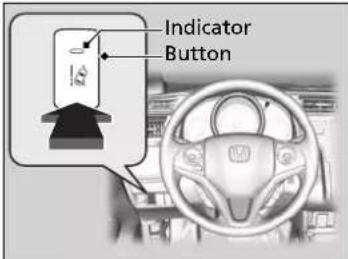
Press the Lane Departure Warning button to turn the system on and off.
The indicator in the button comes on when the system is on.
Lane Departure Warning Camera
Never apply a film or attach any objects to the windscreen that could obstruct the Lane Departure Warning camera's field of vision.
Scratches, nicks, and other damage to the windscreen within the Lane Departure Warning camera's field of vision can cause the system to operate abnormally. If this occurs, we recommend that you replace the windscreen with a genuine Honda replacement windscreen. Making even minor repairs within the camera's field of vision or installing an aftermarket replacement windscreen may also cause the system to operate abnormally.
After replacing the windscreen, have a dealer recalibrate the camera. Proper calibration of the Lane Departure Warning camera is necessary for the system to operate properly.
Do not place an object on the top of the instrument panel. It may reflect onto the windscreen and prevent the system from detecting lane lines properly.
To help to reduce the likelihood that high interior temperatures will cause the camera system to shut off, when parking, find a shady area or face the front of the vehicle away from the sun.
If you use a reflective sun shade, do not allow it to cover the camera housing. Covering the camera can concentrate heat on the camera.
Lane Departure Warning Conditions and Limitations
Lane Departure Warning may not activate or may not recognize lanes, and may activate even when keeping in the middle of a lane, under certain conditions. Some examples of these conditions are listed below.
■Environmental conditions
- Driving in bad weather (rain, fog, snow, etc.).
- Sudden changes between light and dark, such as an entrance or exit of a tunnel.
- There is little contrast between lane lines and the roadway surface.
- Driving into low sunlight (e.g., at dawn or dusk).
• Strong light is reflected onto the roadway. - Driving in the shadows of trees, buildings, etc.
- Shadows of adjacent objects are parallel to lane markings.
- Roadway objects or structures are misinterpreted as lane markers.
• Reflections on the interior of the front windscreen.
Lane Departure Warning Camera
If the message appears:
- Use the heating and cooling system */climate control system* to cool down the interior and, if necessary, the demister mode when windows are fogged.
- Start driving the vehicle to lower the windscreen temperature, which cools down the area around the Lane Departure Warning camera.
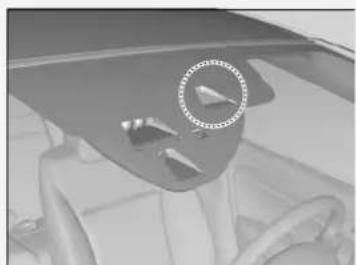
natural_image
Interior view of a car dashboard with a circular annotation highlighting a component (no text or symbols present)If the message appears:
Park your vehicle in a safe place. Wipe away debris blocking the windscreen, then start driving again. If the message remains on even after driving for a while with the clean windscreen, have your vehicle checked by a dealer.
Roadway conditions
- Driving on a snowy or wet roadway (obscured lane marking, vehicle tracks, reflected lights, road spray, high contrast).
- Driving on a road with temporary lane markings.
- Faint, multiple, or varied lane markings are visible on the roadway due to road repairs or old lane markings.
- The roadway has merging, split, or crossing lines (e.g., such as at an intersection or crosswalk).
- The lane markings are extremely narrow, wide, or changing.
- The vehicle in front of you is driving near the lane lines.
- The road is hilly or the vehicle is approaching the crest of a hill.
- Driving on rough or unpaved roads, or over bumpy surfaces.
- When objects on the road (curb, guard rail, pylons, etc.) are recognised as white lines (or yellow lines).
- When driving on roads with double lines.
■Vehicle conditions
- Headlight lenses are dirty or the headlights are not properly adjusted.
- The outside of the windscreen is blocked by dirt, mud, leaves, wet snow, etc.
- The inside of the windscreen is fogged.
- The camera temperature gets too hot.
- An abnormal tyre or wheel condition (wrong sized, varied size or construction, improperly inflated, compact spare tyre ^^ , etc.).
- The vehicle is tilted due to a heavy load or suspension modifications.
- When tyre chains are installed.
Traffic Sign Recognition System\*
Reminds you of road sign information, such as the current speed limit and that overtaking is prohibited, your vehicle has just passed through, showing it on the multi-information display.
How the System Works
When the camera located behind the rearview mirror captures traffic signs while driving, the system displays the ones that are recognised as designated for your vehicle. The sign icon will be displayed for a while until the vehicle reaches a predetermined time and distance.
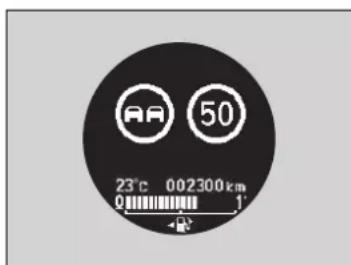
The sign icon also may switch to another one or disappear when:
- The end of speed limit or other designated limit is detected.
- Your vehicle enters/exists motorway or highway.
- You make a turn with a turn signal to change direction at an intersection.
Traffic Sign Recognition System \*
The system is designed to detect signs that follow the Vienna Convention standards. Not all signs may be displayed, but any signs posted on roadsides should not be ignored.
The Traffic Sign Recognition System is designed to merely provide driving assistance. The driver must still be aware of the road conditions and comply with all road regulations. Certain conditions, such as below, may disrupt the system's proper operations.
- The upper part of the windscreen is fogged or frosted, or is blocked by dirt, mud, leaves, wet snow, etc.
- Dew condensation is formed on the windscreen.
If the system does not detect any traffic signs while you are driving, the image below may appear.
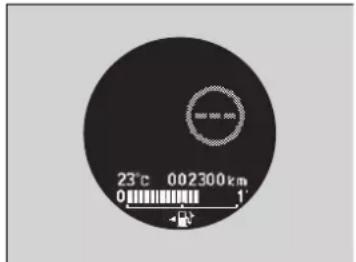
Condition
- The sign is covered with dirt, snow, or frost.
• The ambient brightness is too dark.
• In bad weather (heavy rain, fog, snow, etc.) - Faded signs
• Signs positioned on bends - Rotated or damaged signs
- Concealed or poorly positioned signs
- When the temperature inside the system is high.
- You drive into the sunlight (e.g. at dawn or dusk).
- When the windscreen is dirty or cloudy.
- When you drive in the shadows of trees, buildings, etc.
- When the windscreen is blocked by dirt, mud, leaves, wet snow, etc.
- A sudden change between light and dark such as an entrance or exit of a tunnel.
Traffic Sign Recognition System \*
If the system cannot operate: 📄 appears:
- Use the heating and cooling system * /climate control system* to cool down the interior and, if necessary, the demister mode when windows are fogged.
- Start driving the vehicle to lower the windscreen temperature, which cools down the area around the system camera.
If the system cannot operate: Park your vehicle in a safe place. Wipe away debris blocking the windscreen, then start driving again. If the symbol remains on even after driving for a while with the clean windscreen, have your vehicle checked by a dealer.
If ☐ appears in amber on the multi-information display while driving, the system may have malfunctioned.
Have your vehicle checked by a dealer.
In a situation above, you may also see this icon. The system is temporarily cancelled.
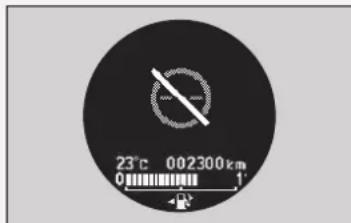
Signs Displayed on the Multi-Information Display
Two traffic signs can be simultaneously displayed next to each other when detected. The speed limit sign icon is displayed on the right half of the screen. The overtaking prohibition sign icon appears on the left. Any additional sign that indicates speed limit based on weather (rain, snow, etc.) or specific period of time can appear on either side.
■When main mode is selected
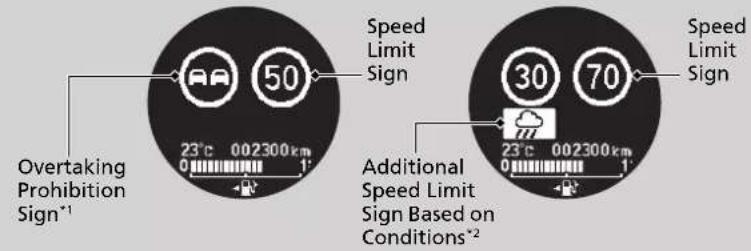
■When main mode is not selected
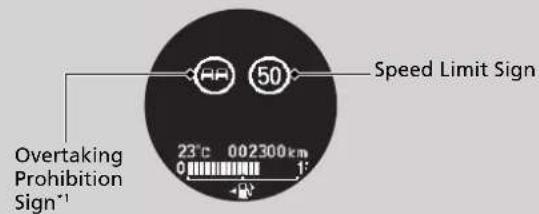
Depending on situation, *1 can be replaced with *2, or *2 can appear on the right side.
■Selecting to display traffic signs when main mode is off
You can continue displaying reduced-size traffic sign icon on the multi-information display even while the main mode is not selected.
Customized Features P. 131
Vehicle Stability Assist (VSA) System
VSA helps to stabilise the vehicle during cornering if the vehicle turns more or less than what was intended. It also assists in maintaining traction on slippery surfaces. It does so by regulating engine output and selectively applying the brakes.
VSA Operation
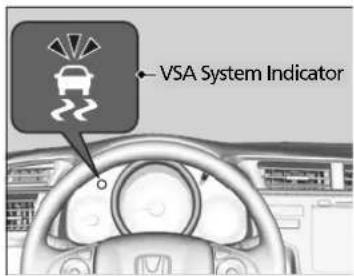
When VSA activates, you may notice that the engine does not respond to the accelerator. You may also notice some noise from the hydraulic system. You will also see the indicator blink.
Vehicle Stability Assist (VSA) System
The VSA may not function properly if tyre type and size are mixed. Make sure to use the same size and type of tyre, and the air pressures as specified.
When the VSA system indicator comes on and stays on while driving, there may be a problem with the system. While this may not interfere with normal driving, have your vehicle checked by a dealer immediately.
VSA cannot enhance stability in all driving situations and does not control the entire braking system. You still need to drive and corner at speeds appropriate for the conditions and always leave a sufficient margin of safety.
The Main function of the VSA system is generally known as Electronic Stability Control (ESC). The system also includes a traction control function.
VSA On and Off
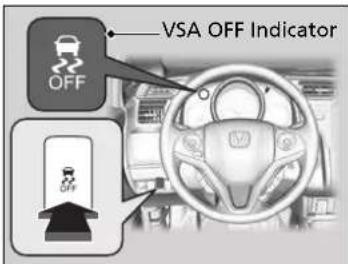
This button is on the driver side control panel. To partially disable VSA functionality/features, press and hold it until you hear a beep.
Your vehicle will have normal braking and cornering ability, but traction control function will be less effective.
To restore VSA functionality/features, press the (VSA OFF) button until you hear a beep.
VSA is turned on every time you start the engine, even if you turned it off the last time you drove the vehicle.
Vehicle Stability Assist (VSA) System
In certain unusual conditions when your vehicle gets stuck in shallow mud or fresh snow, it may be easier to free it with the VSA temporarily switched off.
When the button is pressed, the traction control function becomes less effective. This allows for the wheels to spin more freely at low speed. You should only attempt to free your vehicle with the VSA off if you are not able to free it when the VSA is on.
Immediately after freeing your vehicle, be sure to switch VSA on again. We do not recommend driving your vehicle with the VSA system switched off.
You may hear a motor sound coming from the engine compartment while system checks are being performed immediately after starting the engine or while driving. This is normal.
Agile Handling Assist
Lightly brakes each of the front and rear wheels, as needed, when you turn the steering wheel, and helps support the vehicle's stability and performance during cornering.
Agile Handling Assist
The agile handling assist cannot enhance stability in all driving situations. You still need to drive and corner at speeds appropriate for the conditions and always leave a sufficient margin of safety.
When the VSA system indicator comes on and stays on while driving, the agile handling assist does not activate.
You may hear a sound coming from the engine compartment while the agile handling assist is activated. This is normal.
Deflation Warning System
Instead of directly measuring the pressure in each tyre, the deflation warning system on this vehicle monitors and compares the rolling radius and rotational characteristics of each wheel and tyre while you are driving to determine if one or more tyres are significantly under-inflated. This will cause the low tyre pressure/deflation warning system indicator to come on and a message to appear on the multi-information display.
Deflation Warning System Calibration
You must start deflation warning system calibration every time you:
- Adjust the pressure in one or more tyres.
- Rotate the tyres.
- Replace one or more tyres.
Before calibrating the deflation warning system:
- Set the cold tyre pressure in all four tyres.
Make sure:
- The vehicle is at a complete stop.
Manual transmission models
• The parking brake is applied.
Continuously variable transmission models
- The shift lever is in .
All models
- The ignition switch is in ON ^*1 .
*1: Models with the keyless access system have an ENGINE START/STOP button instead of an ignition switch.
* Not available on all models
Continued
Deflation Warning System
The system does not monitor the tyres when driving at low speed.
Conditions such as low ambient temperature and altitude change directly affect tyre pressure and can trigger the low tyre pressure/deflation warning system indicator to come on.
Tyre pressure checked and inflated in:
- Warm weather can become under-inflated in colder weather.
- Cold weather can become over-inflated in warmer weather.
The low tyre pressure indicator will not come on as a result of over inflation.
The deflation warning system may not function properly if tyre type and size are mixed.
Make sure to use the same size and type of tyre.
→ Checking and Maintaining Tyres P. 517
The low tyre pressure/deflation warning system indicator may come on with a delay or may not come on at all when:
- You rapidly accelerate, decelerate, or turn the steering wheel.
- You drive on snowy or slippery roads.
- Snow chains are used.
The low tyre pressure/deflation warning system indicator may come on under the following conditions:
- A compact spare tyre ^ is used.
- There is a heavier and uneven load on the tyres, such as when towing a trailer, than the condition at calibration.
- Snow chains are used.
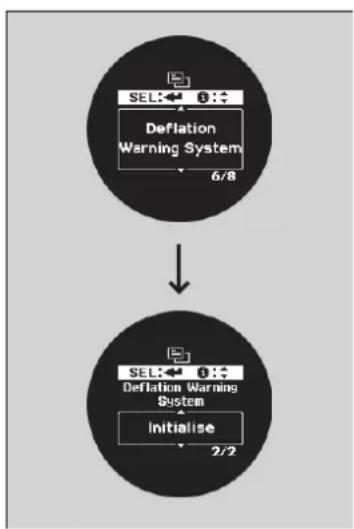
flowchart
graph TD
    A["DEL: 1"] --> B["Deflation Warning System"]
    B --> C["6/8"]
    C --> D["↓"]
    D --> E["2/2"]
    E --> F["DEL: 1"] --> G["Deflation Warning System"]
    G --> H["Initialise"]
You can calibrate the system from the customized features on the multi-information display.
- Press the button until (customize settings) appears on the display, then press the SEL/RESET button.
- Press the button until Deflation Warning System appears on the display, then press the SEL/RESET button.
The display switches to the customization setup screen, where you can select Cancel or Initialise.
- Press the button and select Initialise, then press the SEL/RESET button.
▶Completed screen appears, then the display returns to the customization menu screen.
-
Press the button until (Exit) appears on the display, then press the SEL/RESET button.
-
The display returns to the normal screen.
- The calibration process finishes automatically.
Deflation Warning System Calibration
- Deflation Warning System cannot be calibrated if a compact spare tyre * is installed.
- The calibration process requires approximately 30 minutes of cumulative driving at speeds between 40–100 km/h (25–62 mph).
- During this period, if the ignition switch ^1 is turned on and the vehicle is not moved within 45 seconds, you may notice the low tyre pressure indicator comes on briefly. This is normal and indicates that the calibration process is not yet complete.
If the snow chains are installed, remove them before calibrating the deflation warning system.
If the low tyre pressure/deflation warning system indicator comes on even when the properly inflated specified regular tyres are installed, have the vehicle checked by a dealer.
We recommend that the tyres be replaced with the same brand, model, and size as the originals. Ask a dealer for details.
Adjusting Headlight Distribution
Driving the right-hand type vehicle in right-hand traffic, or the left-hand type vehicle in left-hand traffic causes headlight glare to oncoming vehicles. You need to alter the headlight beam distribution using masking tape.
Models with halogen headlights
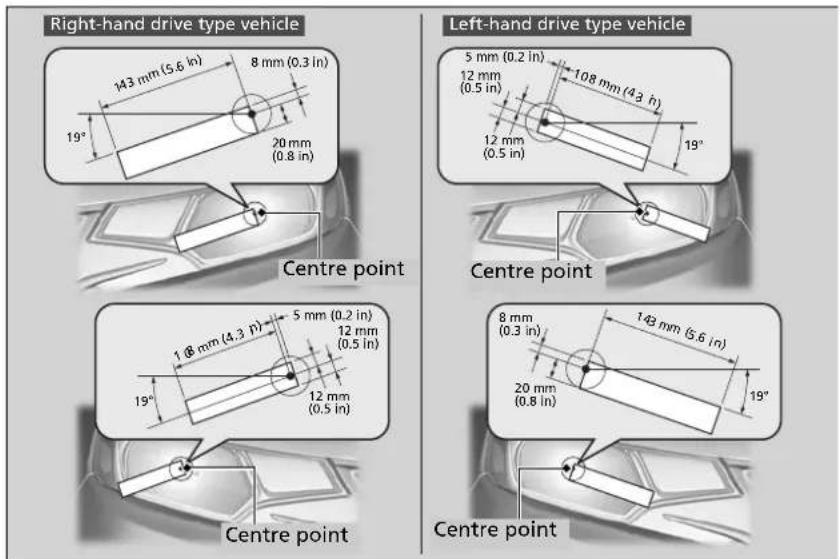
- Prepare for two rectangular pieces of masking tape, measuring 24 mm (0.9 in) wide and 113 mm (4.4 in) long, and 28 mm (1.1 in) wide and 143 mm (5.6 in) long.
▶ Use masking tape that can shut out light, such as seal type waterproof vinyl. - Affix the tape to the lens as shown.
The label is inclined downward at 19°.
Continued
Adjusting Headlight Distribution
Be careful not to adhere the tape to an incorrect location. If the headlight beam is distributed incorrectly, it may not comply with your country's legal requirements. Ask your dealer for details.
Models with LED headlights
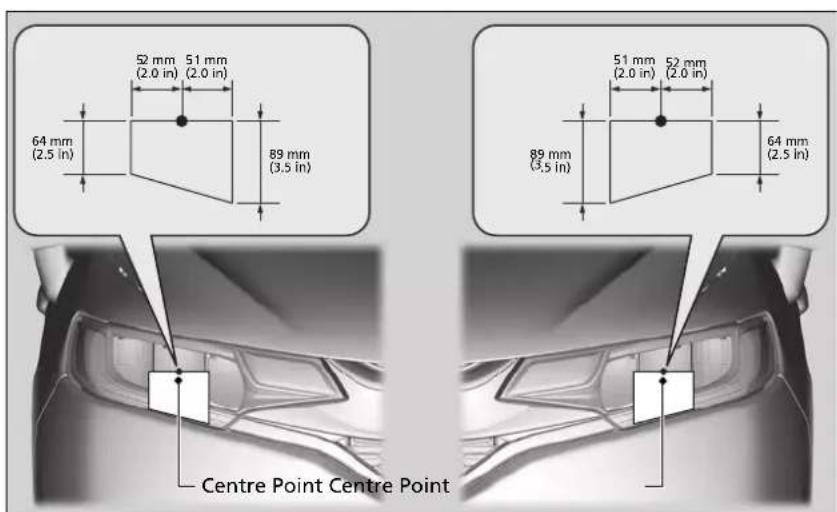
-
Prepare for two rectangular pieces of masking tape, measuring 89 mm (3.5 in) wide and 103 mm (4.1 in) long.
▶ Use masking tape that can shut out light, such as seal type waterproof vinyl. -
Affix the tape to the lens as shown.
Braking
Brake System
Parking Brake
Use the parking brake to keep the vehicle stationary when parking.
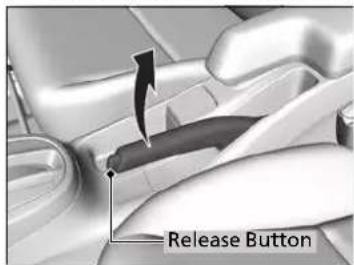
To apply:
Pull the lever fully up without pressing the release button.
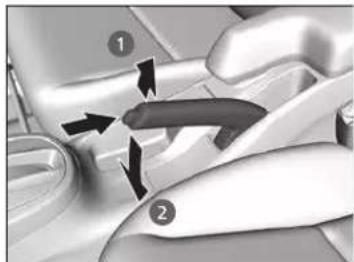
natural_image
Interior view of a car dashboard with labeled parts (1 and 2), showing directional arrows indicating movement or flow (no text or symbols beyond labels)To release:
- Pull the lever slightly, and press and hold the release button.
- Lower the lever down all the way, then release the button.
Parking Brake
NOTICE
Release the parking brake fully before driving. The rear brakes and axle can be damaged if you drive with the parking brake applied.
If you start driving without fully releasing the parking brake, a buzzer sounds as a warning, and 📄 appears on the multi-information display.
Always apply the parking brake when parking.
Continued
Foot Brake
Your vehicle is equipped with disc brakes at all four wheels. A vacuum power assist helps to reduce the effort needed on the brake pedal. The brake assist system increases the stopping force when you depress the brake pedal hard in an emergency situation. The anti-lock brake system (ABS) helps you to retain steering control when braking very hard.
Brake Assist System P. 456
Anti-lock Brake System (ABS) P. 455
Foot Brake
Check the brakes after driving through deep water, or if there is a buildup of road surface water. If necessary, dry the brakes by lightly depressing the pedal several times.
If you hear a continuous metallic friction sound when applying the brakes, the brake pads need to be replaced. Have the vehicle checked by a dealer.
Constantly using the brake pedal while going down a long hill builds up heat, which reduces the brake effectiveness. Apply engine braking by taking your foot off the accelerator pedal and downshifting to a lower gear/speed position. With manual transmission use a lower gear for greater engine braking.
Do not rest your foot on the brake pedal while driving, as it will lightly apply the brakes and cause them to lose effectiveness over time and reduce pad life. It will also confuse drivers behind you.
Anti-lock Brake System (ABS)
ABS
Helps to prevent the wheels from locking up, and helps you to retain steering control by pumping the brakes rapidly, much faster than you.
The electronic brake distribution (EBD) system, which is part of the ABS, also balances the front-to-rear braking distribution according to vehicle loading.
You should never pump the brake pedal. Let the ABS work for you by always keeping firm, steady pressure on the brake pedal. This is sometimes referred to as "stomp and steer."
■ABS operation
The brake pedal may pulsate slightly when the ABS is working. Depress the brake pedal and keep holding the pedal firmly down. On dry pavement, you will need to press on the brake pedal very hard before the ABS activates. However, you may feel the ABS activate immediately if you are trying to stop on snow or ice.
ABS may activate when you depress the brake pedal when driving on:
- Wet or snow covered roads.
- Roads paved with stone.
- Roads with uneven surfaces, such as potholes, cracks, manholes, etc.
When the vehicle speed goes under 10 km/h, the ABS stops.
Anti-lock Brake System (ABS)
NOTICE
The ABS may not function if you use a tyre of the wrong size or type.
If the ABS indicator comes on while driving, there may be a problem with the system. While normal braking will not be affected, there is a possibility that the ABS will not be operating. Have your vehicle checked by a dealer immediately.
The ABS is not designed for the purpose of reducing the time or distance it takes for a vehicle to stop: It is designed to limit brake lockup which can lead to skidding and loss of steering control.
In the following cases, your vehicle may need more distance to stop than a vehicle without the ABS:
- You are driving on rough or uneven road surfaces, such as gravel or snow.
- The tyres are equipped with tyre chains.
The following may be observed with the ABS system:
- Motor sounds coming from the engine compartment when the brakes are applied, or when system checks are being performed after the engine has been started and while the vehicle accelerates.
- Brake pedal and/or the vehicle body vibration when ABS activates.
These vibrations and sounds are normal to ABS systems and are no cause for concern.
Brake Assist System
Is designed to assist the driver by generating greater braking force when you depress the brake pedal hard during emergency braking.
■Brake assist system operation
Press the brake pedal firmly for more powerful braking.
When brake assist operates, the pedal may wiggle slightly and an operating noise may be heard. This is normal. Keep holding the brake pedal firmly down.
City-Brake Active system
Can assist you when driving at a low speed, and there is a possibility of your vehicle colliding with a vehicle detected right in front of yours. The City-Brake Active system is designed to alert you when a potential collision is determined, as well as to reduce your vehicle speed when a collision is deemed unavoidable to help to minimise collision severity.
How the System Works
A laser sensor starts to monitor if there is a vehicle in front of you when your vehicle speed is between about 5 km/h (3 mph) and about 32 km/h (20 mph).
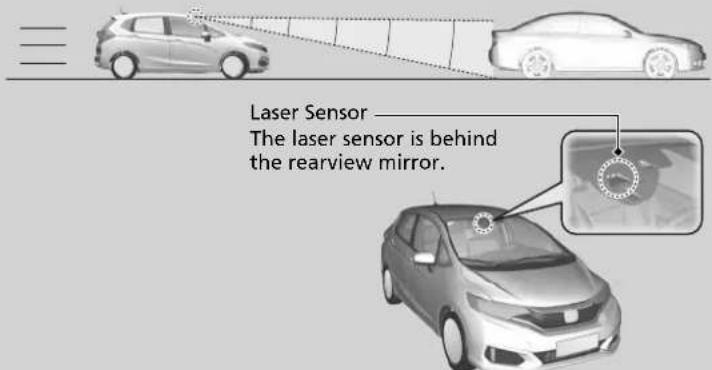
The system activates when the speed difference between your vehicle and a vehicle detected in front of you is about 5 km/h (3 mph) to 32 km/h (20 mph) with a high chance of collision.
The system don't activate when shift position is R.
City-Brake Active system
WARNING
Do not rely on the city-brake active system to avoid every possible frontal collision.
Failure to pay close attention to a vehicle ahead of you, and to operate the brake pedal appropriately according to the situation can cause serious injury or death.
For the system to work properly:
• Always keep the upper part of the windscreen clean. Wipe away any dirt, ice, frost, etc.
- Do not impact the area around the laser sensor when cleaning the windscreen.
- Do not remove the laser sensor form the unit.
Manual transmission models
When the vehicle comes to a stop with the system's automatic braking, the engine may stop. To start the engine again, follow the standard procedure.
Starting the Engine P. 392, 395
Collision Alert Stages
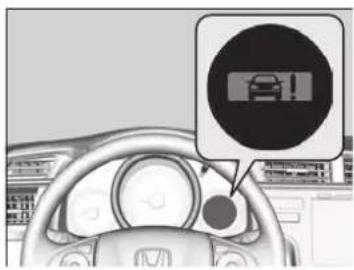
The beeper sounds, and a CTBA warning blinks on the multi-information display, and hard braking is applied when a possible collision becomes likely unavoidable.
This automatic braking with the system activated is cancelled after the vehicle comes to a complete stop.
Apply the brakes accordingly.
A symbol indicating that the system has activated appears on the multi-information display after the vehicle is stopped.
Multi-Information Display Warning and Information Messages P. 110
The system may be cancelled if you operate the brake pedal, the accelerator pedal, or the steering wheel to avoid the collision.
City-Brake Active system
The system may not activate or may not detect a vehicle in front of your vehicle under the following conditions:
- A vehicle in front of you is diagonally, horizontally, or frontally positioned.
- The distance between your vehicle and the vehicle ahead of you is too short.
- The speed difference between your vehicle and a vehicle ahead of you is large.
- A vehicle cuts in front of you, and brakes suddenly.
- You rapidly accelerate your vehicle, getting closer to a vehicle ahead.
- An oncoming vehicle suddenly drifts in front of you.
- Your vehicle suddenly drifts into the oncoming lane.
- A vehicle suddenly crosses in front of you at intersections.
- When driving in bad weather (heavy rain, fog, snow, etc.).
- When driving on a curved or winding road.
- A vehicle in front of you is extremely dirty, making it difficult to reflect radio waves well.
- You depress the brake pedal or turn the steering wheel to avoid a collision.
- A vehicle ahead of you is a motorcycle or other small vehicle the sensor cannot detect properly.
- The upper part of the windscreen around the laser sensor is covered with dirt, ice frost, etc.
The system may not activate while you are fully depressing the accelerator pedal.
The System On and Off
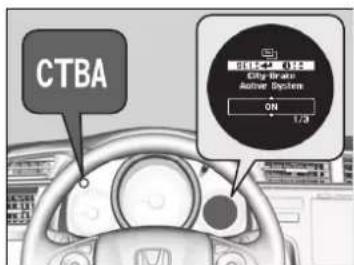
You can turn the system on and off using the multi-information display.
→Customized Features P. 131
When the system is off, the CTBA indicator in the instrument panel comes on.
The City-Brake Active system is turned on every time you start the engine, even if you turned it off the last time you drove the vehicle.
*1: Models with the keyless access system have an ENGINE START/STOP button instead of an ignition switch.
Continued
City-Brake Active system
The system may automatically shut off, and the CTBA indicator can come on and the message can appear on the multi-information display when:
- The temperature around the laser sensor on the upper part of the windscreen becomes high.
- The area around the laser sensor, which is located in the upper part of the windscreen, is covered with obstacles, such as dirt, ice and frost.
- The bonnet is covered with obstacles such as snow.
Stop your vehicle in a safe place, and
- Use the air conditioning system to cool down the interior if the laser sensor temperature is high.
- Remove any obstacles such as dirt and snow from the windscreen and bonnet.
Indicators P. 106
Once the conditions that caused the system to shut off improve, the system comes back on.
Turn off the system when:
- You use a dynamometer or put the wheels on a roller.
- Driving off road or on a mountainous road obstructed with branches and leaves.
With Little Chance of a Collision
The system may activate even when you are aware of a vehicle ahead of you, or when there is no vehicle ahead. Some examples of this are:
■When passing
Your vehicle approaches another vehicle ahead of you and you change lanes to pass.
■At an intersection
Your vehicle approaches or passes another vehicle that is making a left or right turn.
■Through a low bridge
You drive under a low or narrow bridge.
■ Speed bumps, road work sites, train tracks, roadside objects, etc.
You drive over speed bumps, steel road plates, etc., or your vehicle approaches train tracks or roadside objects, such as a traffic sign and guard rail, on a curve.
■When parking
Your vehicle approaches a stationary vehicle or wall.
City-Brake Active system
Take your vehicle to a dealer if you need the laser sensor or area around it to be repaired, or removed, or the area around the laser sensor is strongly impacted.
Do not alter your vehicle's suspension. Changing the vehicle height prevents the system to work properly.
Make sure to use the same size and type of tyre for all four wheels. Use the tyres that are all in about the same condition with adequate tread. If not, the system may operate abnormally.
The system may not work properly if:
- Your vehicle has heavy load in the rear.
- Tyres are over- or underinflated.
About the Laser Equipped in the System
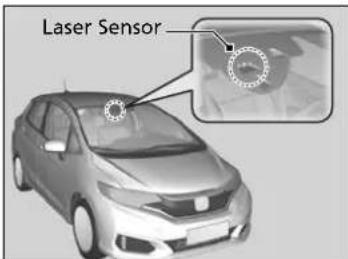
The City-Brake Active system unit, including the laser sensor, is located behind the rearview mirror.
Following lists the classified specifications of the laser used in this system according to the IEC requirements. The same information can be found in the IEC60825-1 standard labels.
Laser classification
Max average power: 45 mW
Pulse duration: 33 ns
Wavelength: 905 nm
Average power angle 28 × 12
(horizontal × vertical)
Laser Classification Label Laser Explanation Label
INVISIBLE LASER RADIATION
DO NOT VIEW DIRECTLY WITH
OPTICAL INSTRUMENTS (MAGNIFIERS)
CLASS 1M LASER PRODUCT
Max average power: 45 mW
Pulse duration: 33 ns
Wavelength: 905 nm
IEC 60825-1:2007
Complies with FDA performance standards for laser products
except for deviations pursuant to Laser Notice No. 50, dated
July 26 ^th , 2001
About the Laser Equipped in the System
WARNING
Handling the laser sensor improperly can lead to eye injury.
To avoid eye injury, Keep the following:
- Do not take the sensor apart from the unit.
- Never look at the sensor within a 100 mm distance using an optical device, such as a magnified glass, microscopes, and an object lens.
Emergency Stop Signal
Activates when you brake hard while driving at 60 km/h (37 mph) or above to alert drivers behind you about sudden braking by rapidly flashing hazard warning lights. This may help to alert drivers behind you to take appropriate means to avoid a possible collision with your vehicle.
■When the system activates:
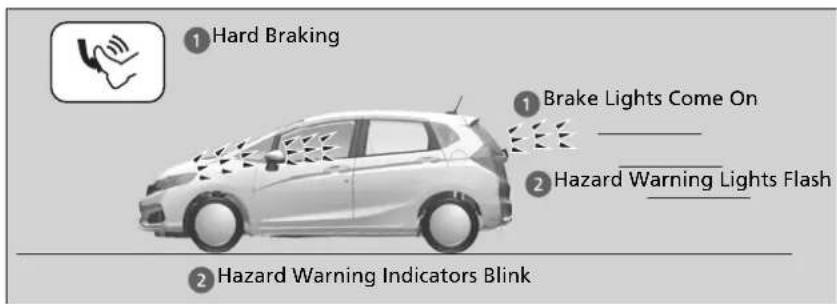
The hazard warning lights stop flashing when:
- You release the brake pedal.
• The ABS is deactivated. - Your vehicle's decelerating speed becomes moderate.
- You press the hazard warning button.
Emergency Stop Signal
The emergency stop signal is not a system that can prevent a possible rear-end collision caused by your hard braking. It flashes the hazard warning lights at the time you are braking hard. It is always recommended to avoid hard braking unless it is absolutely necessary.
The emergency stop signal does not activate with the hazard warning button pressed in.
If the ABS stops working for a certain period during braking, the emergency stop signal may not activate at all.
Parking Your Vehicle
When Stopped
- Depress the brake pedal firmly.
- Firmly apply the parking brake.
Continuously variable transmission models
- Change the shift position to P.
Manual transmission models
- Move the shift lever to R or 1.
- Turn off the engine.
Always set the parking brake firmly, in particular if you are parked on an incline.
Parking Your Vehicle
Do not park your vehicle near flammable objects, such as dry grass, oil, or timber. Heat from the exhaust can cause a fire.
When Stopped
Continuously variable transmission models
WARNING
The vehicle can roll away if left unattended without confirming that Park is engaged. A vehicle that rolls away could cause a crash resulting in serious injury or death. Always keep your foot on the brake pedal until you have confirmed that P is shown on the gear position indicator.
NOTICE
The following can damage the transmission:
- Depressing the accelerator and brake pedals simultaneously.
- Holding the vehicle in place when facing uphill by depressing the accelerator pedal.
- Moving the shift lever into before the vehicle stops completely.
Raise the wiper arms when snow is expected. In extremely cold temperatures, the parking brake may freeze up if applied. If such temperatures are expected, do not apply the parking brake but, if parking on a slope, either turn the front wheels so they will contact the curb if the vehicle rolls down the slope or block the wheels to keep the vehicle from moving. If you do not take either precaution, the vehicle may roll unexpectedly, leading to a crash.
Parking Sensor System\*
The corner and centre sensors monitor obstacles around your vehicle, and the beeper and multi-information display and audio/information screen * let you know the approximate distance between your vehicle and the obstacle.
■The sensor location and range
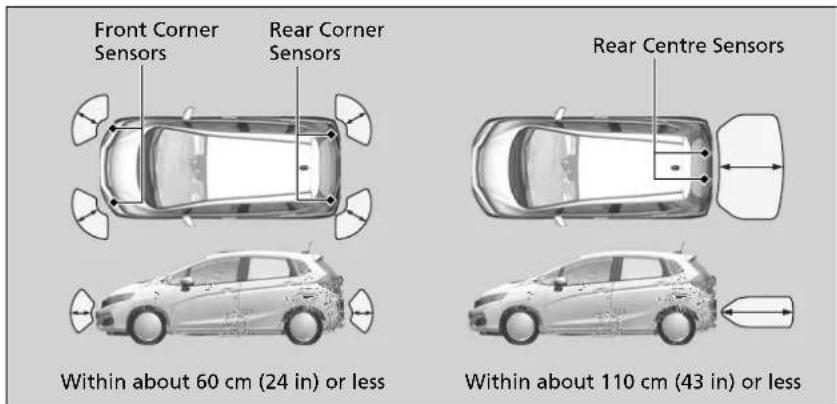
Parking Sensor System \*
Even when the system is on, always confirm if there is no obstacle near your vehicle before parking.
The system may not work properly when:
- The sensors are covered with snow, ice mud or dirt.
- The vehicle is on uneven surface, such as grass, bumps, or a hill.
• The vehicle has been out in hot or cold weather. - The system is affected by devices that emit ultrasonic waves.
- Driving in bad weather.
The system may not sense:
- Thin or low objects.
- Sonic-absorptive materials, such as snow, cotton, or sponge.
- Objects directly under the bumper.
Do not put any accessories on or around the sensors.
■Parking sensor system on and off
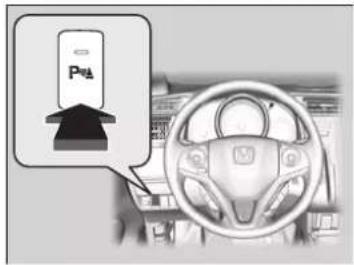
With the ignition switch in ON [Ⅱ]^*1 , press the parking sensor system button to turn on or off the system. The indicator in the button comes on when the system is on.
The front corner sensors start to detect an obstacle when the shift lever is in any position other than P or R, and the vehicle speed is less than 8 km/h (5 mph).
The front corner, rear corner and rear centre sensors start to detect an obstacle when the shift lever is in [R], and the vehicle speed is less than less than 8 km/h (5 mph).
Manual transmission models
You also need to release the parking brake.
Parking sensor system on and off
The parking sensor system is in the previously selected on or off setting each time you start the engine.
■ When the distance between your vehicle and obstacles becomes shorter
Models with multi-view rear camera
| Length of the intermittent beep | Distance between the Bumper and Obstacle | Indicator Audio/information screen | ||
| Corner Sensors Centre Sensors | ||||
| Moderate — | About 110-60 cm (43-24 inches) | Blinks in Yellow*1 | 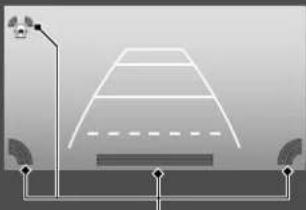 | |
| Short | About 60-45 cm (24-18 inches) | About 60-45 cm (24-18 inches) | Blinks in Amber | |
| Very short | About 45-35 cm (18-14 inches) | About 45-35 cm (18-14 inches) | 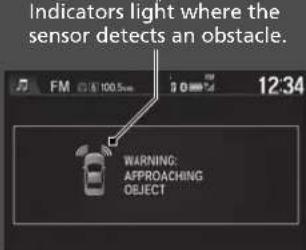 | |
| Continuous | About 35 cm (14 inches) or less | About 35 cm (14 inches) or less | Blinks in Red | |
*1: At this stage, only the centre sensors detect obstacles.
Models without multi-view rear camera
| Length of the intermittent beep | Distance between the Bumper and Obstacle | Indicator Multi-information display | |
| Corner Sensors Centre Sensors | |||
| Moderate*1 | — | About 110-60 cm (43-24 inches) | — |
| Short | About 60-45 cm (24-18 inches) | About 60-45 cm (24-18 inches) | — |
| Very short | About 45-35 cm (18-14 inches) | About 45-35 cm (18-14 inches) | |
| Continuous | About 35 cm (14 inches) or less | About 35 cm (14 inches) or less | — |
Indicators: Where the sensor detects an obstacle lights.
*1: At this stage, only the centre sensors detect obstacles.
■Rearview screen with parking sensor
When the distance between your vehicle and obstacle behind becomes shorter, the audio/information screen, and display audio screen ^* displays the parking sensor indicators.
Turning off All Rear Sensors
- Make sure that the parking sensor system is not activated. Turn the ignition switch to LOCK 0^*1 .
- Press and hold the parking sensor system button, and turn the ignition switch to ON ^*1 .
- Keep pressing the button for 10 seconds. Release the button when the indicator in the button flashes.
- Press the button again. The indicator in the button goes off. ▶ The beeper sounds twice. The rear sensors are now turned off.
To turn the rear sensors on again, follow the above procedure. The beeper sounds three times when the rear sensors come back on.
>>Turning off All Rear Sensors
When you shift to R, the indicator in the parking sensor system button blinks as a reminder that the rear sensors have been turned off.
Multi-View Rear Camera\*
About Your Multi-View Rear Camera
The audio/information screen can display your vehicle's rear view. The display automatically changes to the rear view when the transmission is put into R.
Multi-View Rear Camera Display Area
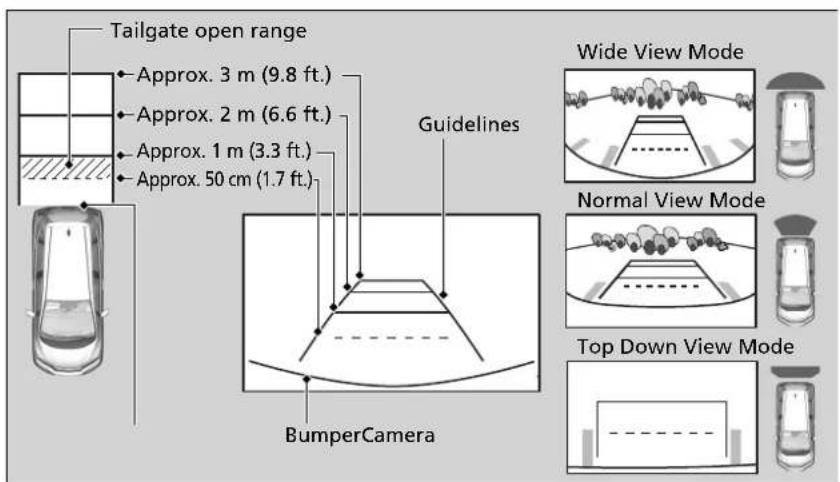
»About Your Multi-View Rear Camera
The rear camera view is restricted. You cannot see the corner ends of the bumper or what is underneath the bumper. Its unique lens also makes objects appear closer or farther than they actually are.
Visually confirm that it is safe to drive before backing up. Certain conditions (such as weather, lighting, and high temperatures) may also restrict the rear view. Do not rely on the rearview display which does not give you all information about conditions at the back of your vehicle.
If the camera lens is covered with dirt or moisture, use a soft, moist cloth to keep the lens clean and free of debris.
You can change the Fixed Guideline and Dynamic Guideline settings.
Customized Features P. 313
Fixed Guideline
On: Guidelines appear when you put the transmission into [R].
Off: Guidelines do not appear.
Dynamic Guideline
On: Guidelines move according to the steering wheel direction.
Off: Guidelines do not move.
You can view three different camera angles on the audio/information screen. Touch the appropriate icon to switch the angle.

Wide view
Normal view
: Top down view
- If the last used viewing mode was Wide or Normal, the same mode is selected the next time you put the transmission into .
- If Top down view was last used before you turned off the engine, Wide View mode is selected next time you set the power mode to ON and put the transmission into R.
You can also change the rear camera setting by selecting [Menu] when your vehicle's rear view is displayed. When you select [Menu] (Menu) and select Display, the following items are available in additional:
- Display tab: Adjusts Brightness, Contrast, and Black Level of the rear camera screen.
- Colour tab: Adjusts Colour and Tint of the rear camera screen.
Refueling
Fuel Information
■Fuel recommendation
EN 228 standards petrol/gasohol fuel
Unleaded premium petrol/gasohol up to E10 (90% petrol and 10% ethanol), research octane number 95 or higher
Your vehicle is designed to operate on premium unleaded petrol with a research octane of 95 or higher. If this octane grade is unavailable, regular unleaded petrol with a research octane of 91 or higher may be used temporarily.
The use of regular unleaded petrol can cause metallic knocking noises in the engine and will result in decreased engine performance. The long-term use of regular-grade petrol can lead to engine damage.
■Fuel tank capacity: 40 L (8.8 Imp gal)
»Fuel Information
NOTICE
Use of petrol that contains lead presents the following risks:
- Damage to the exhaust system including the catalytic converter
- Damage to the engine and fuel system
- Detrimental effects on the engine and other systems
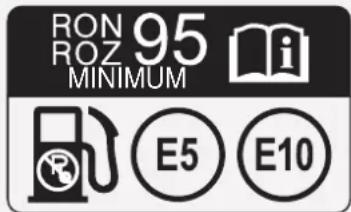
Oxygenated Fuels
Oxygenated fuels are blended with petrol and ethanol or other compounds. Your vehicle is also designed to operate on oxygenated fuels containing up to 10% ethanol by volume and up to 22% ETBE by volume, based on the EN 228 standards. For more information, ask your dealer.
How to Refuel
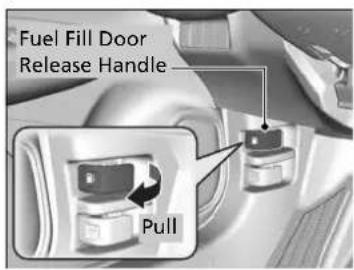
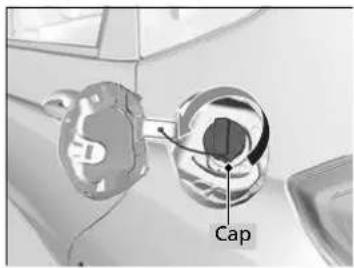
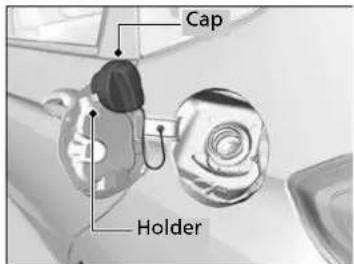
- Stop your vehicle with the service station pump on the left side of the vehicle in the rear.
- Turn off the engine.
- Pull on the fuel fill door release handle under the dashboard at the driver's side.
The fuel fill door opens.
-
Remove the fuel fill cap slowly. If you hear a release of air, wait until this stops, then turn the knob slowly to open the fuel fill cap.
-
Place the fuel fill cap in the holder.
- Insert the fuel filler nozzle fully.
When the tank is full, the filler nozzle will click off automatically. This leaves space in the fuel tank in case the fuel expands with a change in the temperature.
- After filling, replace the fuel fill cap, tightening it until you hear it click at least once.
▶Shut the fuel fill door by hand.
How to Refuel
WARNING
Petrol is highly flammable and explosive. You can be burned or seriously injured when handling fuel.
- Stop the engine, and keep heat, sparks, and flame away.
- Handle fuel only outdoors.
- Wipe up spills immediately.
Do not continue to add fuel after the filler nozzle has automatically stopped. Additional fuel can exceed the full tank capacity.
The filler nozzle automatically stops to leave space in the fuel tank so that fuel does not overflow as a result of changes in air temperature.
Fuel Economy and CO _2 Emissions
Improving Fuel Economy and Reducing CO₂ Emissions
Achieving fuel economy and reducing CO_2 emissions is dependent on several factors, including driving conditions, load weight, idling time, driving habits, and vehicle condition. Depending on these and other factors, you may not achieve the rated fuel economy of this vehicle.
Maintenance and Fuel Economy
You can optimize your fuel economy with proper maintenance of your vehicle. Follow the maintenance schedule and, if necessary, consult your warranty booklet. On vehicles without service reminder system, follow the Maintenance schedule.
→Maintenance Schedule P. 484
- Use engine oil with the viscosity recommended.
Recommended Engine Oil P. 491 - Maintain the specified tyre pressure.
- Do not load the vehicle with excess luggage.
- Keep your vehicle clean. A buildup of snow or mud on your vehicle's underside adds weight and increases wind resistance.
Improving Fuel Economy and Reducing CO₂ Emissions
Direct calculation is the recommended method to determine actual fuel consumed while driving.
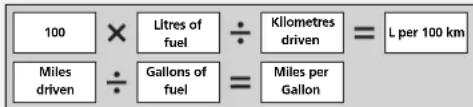
Maintenance
This chapter discusses basic maintenance.
Before Performing Maintenance
Inspection and Maintenance 476
Safety When Performing Maintenance..... 477
Parts and Fluids Used in Maintenance
Service 478
Service Reminder System 479
Maintenance Schedule 484
Maintenance Record (On vehicles without
Service Book)....488
Maintenance Under the Bonnet
Maintenance Items Under the Bonnet ....489
Opening the Bonnet 490
Recommended Engine Oil ....491
Oil Check 494
Adding Engine Oil 495
Engine Coolant.... 496
Transmission Fluid 498
Brake/Clutch * Fluid 499
Refilling Window Washer Fluid...... 500
Fuel Filter 500
Replacing Light Bulbs 501
Checking and Maintaining Wiper Blades
513
Checking and Maintaining Tyres
Checking Tyres 517
Wear Indicators.... 519
Tyre Service Life 519
Tyre and Wheel Replacement..... 520
Tyre Rotation 521
Snow Traction Devices 522
Battery 524
Remote Transmitter Care
Replacing the Button Battery ..... 529
Heating and Cooling System\*/Climate Control
System* Maintenance....531
Cleaning
Interior Care 534
Exterior Care.... 536
Accessories and Modifications ..... 539
Accessories 539
Modifications.... 539
Before Performing Maintenance
Inspection and Maintenance
For your safety, perform all listed inspections and maintenance to keep your vehicle in good condition. If you become aware of any abnormality (noise, smell, insufficient brake fluid, oil residue on the ground, etc.), have your vehicle inspected by a dealer. Refer to the Service Book ^4 that came with your vehicle/maintenance schedule in this owner's manual for detailed maintenance and inspection information.
→Maintenance Schedule P. 484
Types of Inspection and Maintenance
■Daily inspections
Perform inspections before long distance trips, when washing the vehicle, or when refueling.
■Periodic inspections
- Check the brake fluid level monthly.
Brake/Clutch * Fluid P. 499 - Check the tyre pressure monthly. Examine the tread for wear and foreign objects.
→ Checking and Maintaining Tyres P. 517 - Check the operation of the exterior lights monthly.
→ Replacing Light Bulbs P. 501 - Check the condition of the wiper blades at least every six months.
▶ Checking and Maintaining Wiper Blades P. 513
Safety When Performing Maintenance
Some of the most important safety precautions are given here. However, we cannot warn you of every conceivable hazard that can arise in performing maintenance. Only you can decide whether you should perform a given task.
Maintenance Safety
- To reduce the possibility of fire or explosion, keep cigarettes, sparks, and flames away from the battery and all fuel related parts.
- Never leave rags, towels, or other flammable objects under the bonnet.
▶ Heat from the engine and exhaust can ignite them, causing a fire.
• To clean parts, use a commercially available degreaser or parts cleaner, not petrol. - Wear eye protection and protective clothing when working with the battery or compressed air.
• Engine exhaust contains carbon monoxide, which is poisonous and can kill you.
▶ Only operate the engine if there is sufficient ventilation.
Vehicle Safety
- The vehicle must be in a stationary condition.
▶ Make sure your vehicle is parked on level ground, the parking brake is set, and the engine is off. - Be aware that hot parts can burn you.
▶ Make sure to let the engine and exhaust system cool thoroughly before touching vehicle parts. - Be aware that moving parts can injure you.
▶ Do not start the engine unless instructed, and keep your hands and limbs away from moving parts.
▶ Do not open the bonnet while the Auto Idle Stop function is activated.
Safety When Performing Maintenance
WARNING
Improperly maintaining this vehicle or failing to correct a problem before driving can cause a crash in which you can be seriously hurt or killed.
Always follow the inspection and maintenance recommendations and schedules in this owner's manual/Service Book*.
WARNING
Failure to properly follow maintenance instructions and precautions can cause you to be seriously hurt or killed.
Always follow the procedures and precautions in this owner's manual.
Parts and Fluids Used in Maintenance Service
The use of Honda genuine parts and fluids is recommended when maintaining and servicing your vehicle. Honda genuine parts are manufactured according to the same high quality standards used in Honda vehicles.
About Your Maintenance Service
If the service reminder system is available in your vehicle, you are informed by the multi-information display when your vehicle's maintenance services are due. Refer to Service Book that came with your vehicle for an explanation of the service item codes that appear on the display.
Service Reminder System P. 479
If the service reminder system is not available, follow the maintenance schedules in the Service Book that came with your vehicle.
If your vehicle is without the Service Book, follow the maintenance schedule in this owner's manual.
→ Maintenance Schedule P. 484
»About Your Maintenance Service
If you are planning to take your vehicle outside the service reminder system applied countries, consult a dealer for how to record your service reminder information and schedule your maintenance service under the conditions of that country.
Service Reminder System
Provides information of which service items are to be performed. Service items are represented by a code and icon. The system tells you when to take your vehicle to a dealer by days remaining.
When the next maintenance service timing is near, coming or passed, a warning icon will also appear on the multi-information display every time you turn the ignition switch to ON [Ⅲ]^*1 .
Service Reminder System
You can choose to have a corresponding warning message displayed with the warning icon on the multi-information display.
The maintenance schedule may not display correct information if you disconnect the battery for an extended period. If this occurs, see a dealer.
Displaying the Service Reminder Information
- Turn the ignition switch to ON ^*1 .
- Press the ▲i/▼ (information) button repeatedly until the maintenance item(s) appears on the multi-information display.
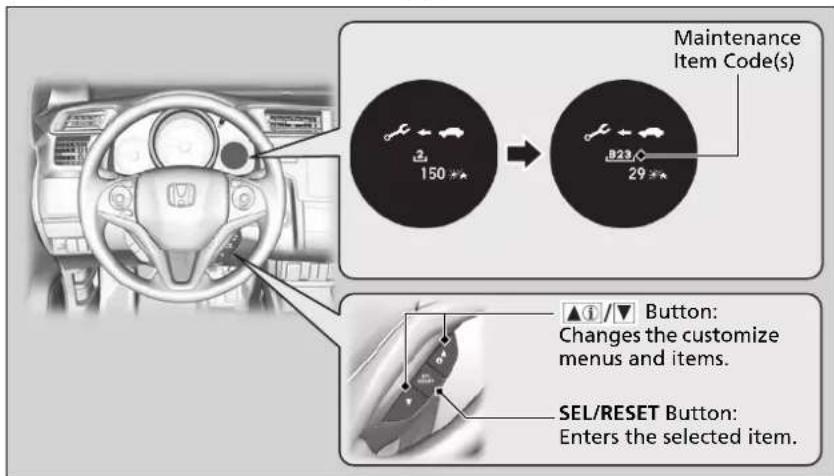
The system message indicator (① comes on along with the service reminder Information.
*1: Models with the keyless access system have an ENGINE START/STOP button instead of an ignition switch.
▶ Displaying the Service Reminder Information
Based on engine operating conditions and engine oil conditions, the system calculates the remaining days before the next service is to be performed.
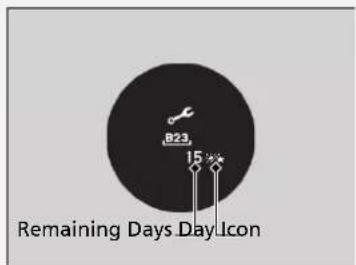
Warning Icons and Service Reminder Information on the Multi-Information Display
| Warning Icon (Amber) | Service Reminder Information | Explanation | Information |
SERVICE DUE SOON  | One or more of the service items | are required in less than 30 days. The remaining days are estimated based on your driving conditions. | The remaining days will be counted down per day. |
SERVICE DUE NOW  | One or more of the service items | are required in less than 10 days. The remaining days are estimated based on your driving conditions. | Have the indicated service performed as soon as possible. |
SERVICE OVER DUE  | The indicated maintenance | service is still not done after the remaining days reach 0. | Your vehicle has passed the service required point. Immediately have the service performed and make sure to reset the service reminder system. |
Service Reminder Items
Service items displayed on the multi-information display are in code and icon. For an explanation of the service reminder codes and icons, refer to the Service Book that came with your vehicle.
■Availability of the Service Reminder System
Even if the service reminder information appears on the multi-information display while pressing the Information) button, this system is not available in some countries. Refer to Service Book that came with your vehicle, or ask a dealer if you can use the service reminder system.
Availability of the Service Reminder System
If you are planning to take your vehicle outside the service reminder system applied countries, consult a dealer on how to record your service reminder information and schedule your maintenance service under the conditions of that country.
Resetting the Display
Reset the service reminder information display if you have performed the maintenance service.
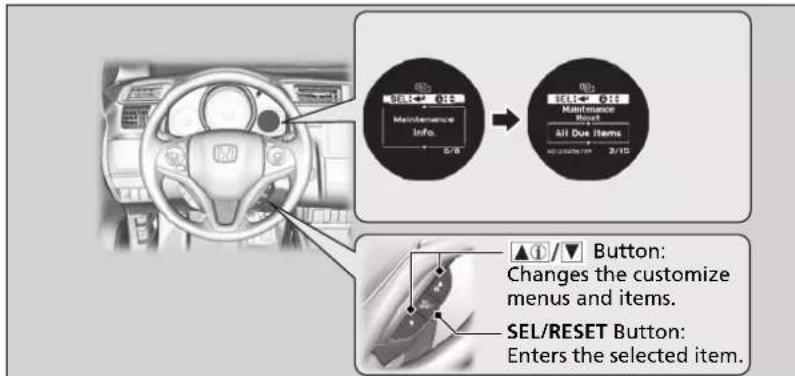
- Turn the ignition switch to ON ^*1
- Press the ▲/▼ button until □ (customize settings) appears on the display, then press the SEL/RESET button.
- Press the ▲/▼ button until Maintenance Info. appears on the display, then press the SEL/RESET button.
- Press the ▲①/▼ button and select the reset information on the display, then press the SEL/RESET button.
The service code will disappear.
To cancel the service reminder information reset mode, select Cancel, then press the SEL/RESET button.
*1: Models with the keyless access system have an ENGINE START/STOP button instead of an ignition switch.
>>Resetting the Display
NOTICE
Failure to reset the service reminder information after a maintenance service results in the system showing incorrect maintenance intervals, which can lead to serious mechanical problems.
The dealer will reset the service reminder information display after completing the required maintenance service. If someone other than a dealer performs maintenance service, reset the service reminder information display yourself.
Maintenance Schedule
If your vehicle comes with the Service Book, the maintenance schedule for your vehicle is available in the book. For vehicles without the Service Book, refer to the following maintenance schedule.
The maintenance schedule outlines the minimum required maintenance that you should perform to ensure the troublefree operation of your vehicle. Due to regional and climatic differences, some additional servicing may be required. Please consult your warranty booklet for a more detailed description.
Maintenance work should be performed by properly trained and equipped technicians. Your authorised dealer meets all of these requirements.
Models without Service Book
| Service at the indicated distance or time - whichever comes first. | km x 1,000 | 20 | 40 | 60 | 80 | 100 | 120 | 140 | 160 | 180 | 200 |
| miles x 1,000 | 12.5 | 25.0 | 37.5 | 50.0 | 62.5 | 75.0 | 87.5 | 100.0 | 112.5 | 125.0 | |
| months 12 24 36 48 | 60 | 72 | 84 | 96 | 108 | 120 | |||||
| Replace engine oil*1 | Normal Every 10,000 km (6,000 miles) or 1 year | ||||||||||
| Severe*2 | Every 5,000 km (3,000 miles) or 6 months | ||||||||||
| Replace engine oil filter*1 | Normal Every 20,000 km (12,500 miles) or 2 years | ||||||||||
| Severe*2 | Every 10,000 km (6,000 miles) or 1 year | ||||||||||
| Add genuine injector cleaner agent*5 | Direct injection models | Every 10,000 km (6,000 miles) or 1 year | |||||||||
| Replace air cleaner element | Every 30,000 km (18,500 miles) | ||||||||||
| Inspect valve clearance*3 | Every 120,000 km (75,000 miles) | ||||||||||
| Replace fuel filter | Normal | ●● | |||||||||
| Severe Every 40,000 km (25,000 miles) or 2 years | |||||||||||
| Replace spark plugs | Every 100,000 km (62,500 miles) | ||||||||||
| Inspect drive belts | ● | ● | ● | ● | ● | ||||||
*1: Only severe schedule is required in some countries: refer to the local warranty booklet that came with your vehicle.
*2:Refer to page 487 for replacement information under severe conditions.
*3:Sensory Method. Adjust the valves during services 120,000 km if there are noisy.
*4: It is recommended replace the fuel filter if the fuel you are using is suspected to be contaminated with dust, etc because the filter may be clogged sooner.
*5: Regular use of injector cleaner may be required for models designated for the following countries, it will depend on the quality of the fuel used. Consult your dealer for details : Reunion, Melilla, Ceuta, Canary Islands
| Service at the indicated distance or time - whichever comes first. | km x 1,000 | 20 | 40 | 60 | 80 | 100 | 120 | 140 | 160 | 180 | 200 |
| miles x 1,000 | 12.5 | 25.0 | 37.5 | 50.0 | 62.5 | 75.0 | 87.5 | 100.0 | 112.5 | 125.0 | |
| months 12 24 36 48 | 60 72 | 84 96 | 108 120 | ||||||||
| Replace engine coolant At 200,000 km (125,000 miles) or 10 years,thereafter every 100,000 km (62,500 miles) or 5 years | |||||||||||
| Replace transmission fluid | MT Normal | Every 120,000 km (75,000 miles) or 6 years | |||||||||
| Severe*1 | ● | ● | ● | ||||||||
| CVT | ● | ● | ● | ● | ● | ||||||
| Inspect front and rear brakes | Every 10,000 km (6,000 miles) or 6 months | ||||||||||
| Replace brake fluid | Every 3 years | ||||||||||
| Check parking brake adjustment | ● | ● | ● | ● | ● | ● | |||||
| Replace dust and pollen filter | ● | ● | ● | ● | ● | ● | ● | ● | ● | ● | |
| Check expiry date for TRK bottle* | Every year | ||||||||||
| Rotate tyres (Check tyre inflation and condition at least once per month) | Every 10,000 km (6,000 miles) | ||||||||||
| Visually inspect the following items: | |||||||||||
| Tie rod ends, steering gear box, and bootsSuspension componentsDriveshaft boots | Every 10,000 km (6,000 miles) or 6 months | ||||||||||
| Brake hoses and lines (including ABS)All fluid levels and condition of fluidExhaust systemFuel lines and connections | ● | ● | ● | ● | ● | ● | ● | ● | ● | ● | |
*1: Refer to page 487 for replacement information under severe conditions.
If you drive your vehicle under severe conditions, you must have the following items served to the maintenance schedule indicated as Severe.
Items Condition
Engine oil and filter A, B, C, D and E
Transmission fluid B and D
Maintenance Schedule
The condition is considered as severe when you drive:
A. Less than 8 km (5 miles), or less than 16 km (10 miles) in freezing temperatures per trip.
B. In extremely hot temperature above 35°C.
C. With extensive idling or long periods of stop-and-go.
D. With a trailer towing, loaded roof rack, or in mountains.
E. On muddy, dusty or de-iced roads.
Maintenance Record (On vehicles without Service Book)
Have your servicing dealer record all required maintenance below. Keep receipts for all work done on your vehicle.
| Km (Mi.) or Month Date Sign or Stamp |
| 20,000 km12,500 Mi. (or 12 Mo.) |
| 40,000 km25,000 Mi. (or 24 Mo.) |
| 60,000 km37,500 Mi. (or 36 Mo.) |
| 80,000 km50,000 Mi. (or 48 Mo.) |
| 100,000 km62,500 Mi. (or 60 Mo.) |
| 120,000 km75,000 Mi. (or 72 Mo.) |
| 140,000 km87,500 Mi. (or 84 Mo.) |
| 160,000 km100,000 Mi. (or 96 Mo.) |
| 180,000 km112,500 Mi. (or 108 Mo.) |
| 200,000 km125,000 Mi. (or 120 Mo.) |
Maintenance Under the Bonnet
Maintenance Items Under the Bonnet
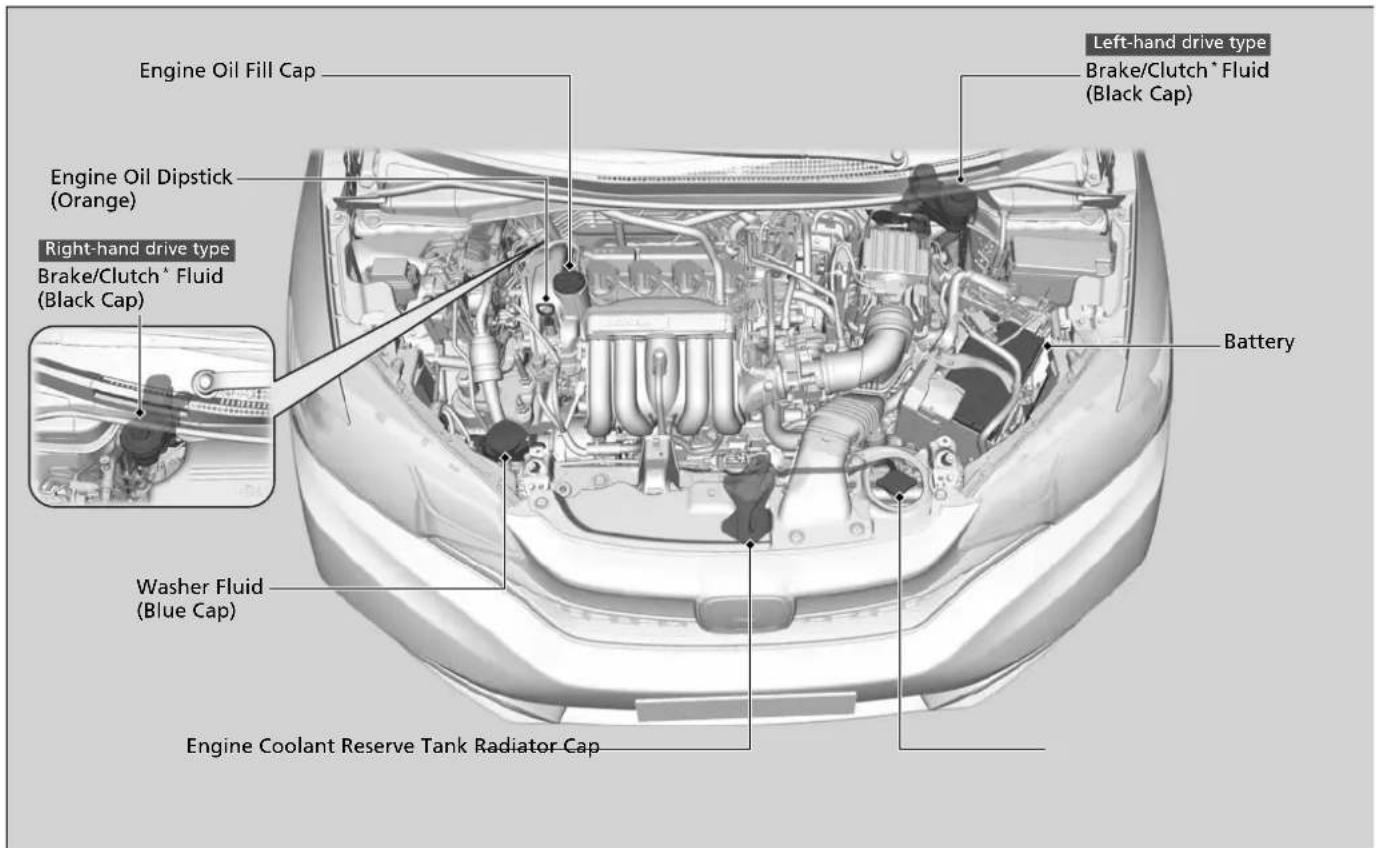
* Not available on all models
Opening the Bonnet
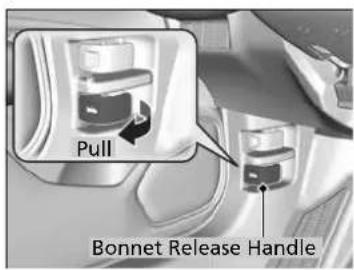
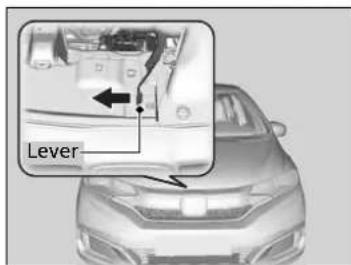
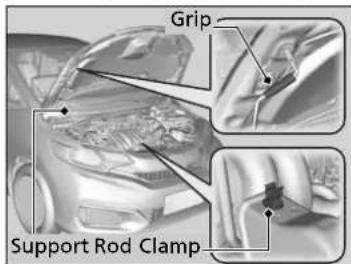
- Park the vehicle on a level surface, and set the parking brake.
- Pull the bonnet release handle under the driver's side lower outside corner of the dashboard.
The bonnet will pop up slightly.
- Push the bonnet latch lever (located under the front edge of the bonnet to the centre) to the side and raise the bonnet. Once you have raised the bonnet slightly, you can release the lever.
- Remove the support rod from the clamp using the grip. Mount the support rod in the bonnet.
When closing, remove the support rod, and stow it in the clamp, then gently lower the bonnet. Remove your hand at a height of approximately 30 cm (12 inches) and let the bonnet close.
Opening the Bonnet
NOTICE
Do not open the bonnet when the wiper arms are raised.
The bonnet will strike the wipers, resulting in damage to the bonnet and/or the wipers.
When closing the bonnet, check that the bonnet is securely latched.
If the bonnet latch lever moves stiffly, or if you can open the bonnet without lifting the lever, the latch mechanism should be cleaned and lubricated.
Do not open the bonnet while the Auto Idle Stop function is activated.
Recommended Engine Oil
Use a genuine engine oil or another commercial engine oil of suitable type and viscosity (for the ambient temperature) as shown in the image that follows.
Oil is a major contributor to your engine's performance and longevity. If you drive the vehicle with insufficient or deteriorated oil, the engine may fail or be damaged.
See the engine oil fill cap markings in the image that follows and on the actual cap to check if the vehicle is equipped with a gasoline particulate filter*.
→Adding Engine Oil P. 495
Recommended Engine Oil
Engine Oil Additives
Models with gasoline particulate filter
You cannot use Engine Oil Additives.
Models without gasoline particulate filter
Your vehicle does not require oil additives. In fact, they may adversely affect the engine performance and durability.
European models
Genuine Engine Oil Commercial Engine Oil
- Honda Engine OIL #1.0*1
- Honda Green OIL
• Honda Engine Oil Type 2.0
• Honda Genuine Motor Oil
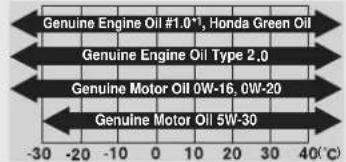
Ambient Temperature
- API service SM or higher grade fuel-efficient oil
- ACEA A5/B5
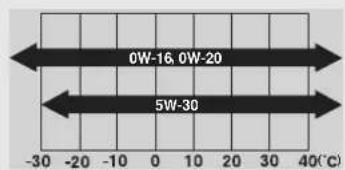
Ambient Temperature
*1: Formulated to improve fuel economy.
Except European models
Genuine Engine Oil Commercial Engine Oil
- Honda Engine OIL #1.0*1
- Honda Green OIL
• Honda Genuine Motor Oil
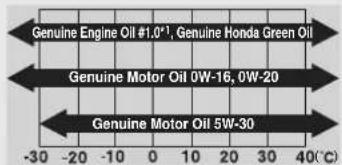
Ambient Temperature
- API service SM or higher grade fuel-efficient oil
- ACEA A5/B5
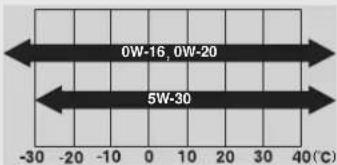
Ambient Temperature
*1: Formulated to improve fuel economy.
Oil Check
We recommend that you check the engine oil level every time you refuel. Park the vehicle on level ground.
Wait approximately three minutes after turning the engine off before you check the oil.
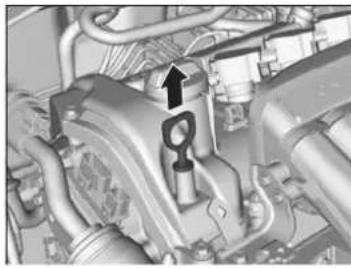
natural_image
Close-up mechanical assembly showing internal components and a highlighted part (no visible text or symbols)- Remove the dipstick (orange).
- Wipe the dipstick with a clean cloth or paper towel.
- Insert the dipstick back all the way into its hole.
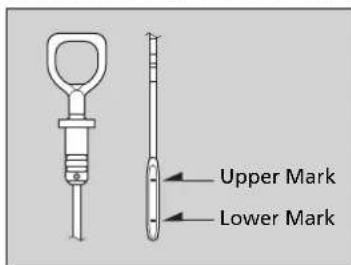
- Remove the dipstick again, and check the level. It should be between the upper and lower marks. Add oil if necessary.
Oil Check
If the oil level is near or below the lower mark, slowly add oil, being careful not to overfill.
The amount of oil consumed depends on how the vehicle is driven and the climatic and road conditions encountered. The rate of oil consumption can be up to 1 litre per 1,000 km/625 miles.
Consumption is likely to be higher when the engine is new.
Adding Engine Oil
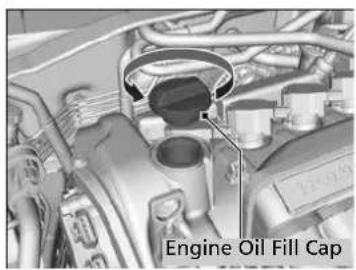
- Unscrew and remove the engine oil fill cap.
- Add oil slowly.
- Reinstall the engine oil fill cap, and tighten it securely.
- Wait for three minutes and recheck the engine oil dipstick.
>>Adding Engine Oil
NOTICE
Do not fill the engine oil above the upper mark. Overfilling the engine oil may result in leaks and engine damage.
If any oil spills, wipe it up immediately. Spilled oil may damage the engine compartment components.
Engine Coolant
Specified coolant: Honda All Season Antifreeze/Coolant Type 2
This coolant is premixed with 50% antifreeze and 50% water. Do not add any straight antifreeze or water.
We recommend you check the engine coolant level every time you refuel. Check the reserve tank first. If it is completely empty, also check the coolant level in the radiator. Add the engine coolant accordingly.
Reserve Tank
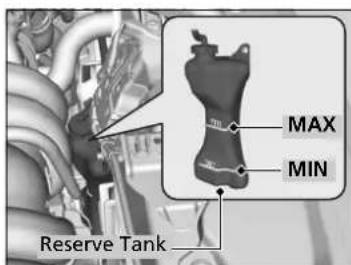
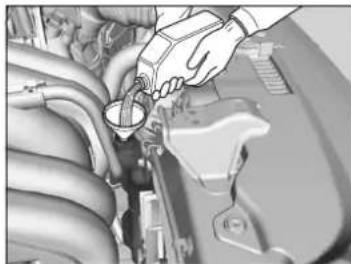
natural_image
Close-up of hands inspecting the engine compartment with a tool, no visible text or symbols-
Make sure the engine and radiator are cool.
-
Check the amount of coolant in the reserve tank.
▶ If the coolant level is below the MIN mark, add the specified coolant until it reaches the MAX mark.
- Inspect the cooling system for leaks.
Engine Coolant
WARNING
Removing the radiator cap while the engine is hot can cause the coolant to spray out, seriously scalding you.
Always let the engine and radiator cool down before removing the radiator cap.
If temperatures consistently below -30°C are expected, the coolant mixture should be changed to a higher concentration. Consult your Honda dealer for details about a suitable coolant mixture.
If Honda antifreeze/coolant is not available, you may use another major brand non-silicate coolant as a temporary replacement. Check that it is a high quality coolant recommended for aluminium engines. Continued use of any non-Honda coolant can result in corrosion, causing the cooling system to malfunction or fail. Have the cooling system flushed and refilled with Honda antifreeze/coolant as soon as possible.
Do not add rust inhibitors or other additives to your vehicle's cooling system. They may not be compatible with the coolant or with the engine components.
Radiator
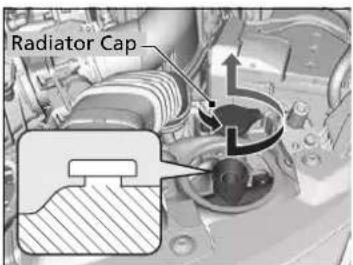
- Make sure the engine and radiator are cool.
- Turn the radiator cap 1/8 turn anticlockwise and allow any pressure in the cooling system.
- Push down and turn the radiator cap anticlockwise to remove it.
- The coolant level should be up to the base of the filler neck. Add coolant if it is low.
- Put the radiator cap back on, and tighten it fully.
>>Radiator
NOTICE
Pour the fluid slowly and carefully so you do not spill any. Clean up any spills immediately; they can damage components in the engine compartment.
Transmission Fluid
Continuously variable transmission models
Continuously Variable Transmission (CVT) Fluid
Specified fluid: Honda HCF-2
Have a dealer check the fluid level and replace if necessary.
Follow your vehicle's maintenance service timing of when to change continuously variable transmission (CVT) fluid.
Service Reminder System P. 479
→Maintenance Schedule P. 484
Do not attempt to check or change the continuously variable transmission (CVT) fluid yourself.
Manual transmission models
Manual Transmission Fluid
Specified fluid: Honda MTF
Have a dealer check the fluid level and replace if necessary.
Follow your vehicle's maintenance service timing of when to change manual transmission fluid.
Service Reminder System P. 479
→Maintenance Schedule P. 484
Do not attempt to check or change the manual transmission fluid yourself.
Continuously Variable Transmission (CVT) Fluid
NOTICE
Do not mix Honda HCF-2 with other transmission fluids.
Using a transmission fluid other than Honda HCF-2 may adversely affect the operation and durability of your vehicle's transmission, and damage the transmission.
Any damage caused by using a transmission fluid that is not equivalent to Honda HCF-2 is not covered by Honda's new vehicle limited warranty.
Manual Transmission Fluid
If Honda MTF is not available, you may use the API certificated SAE 0W-20 or 5W-20 viscosity motor oil as a temporary measure.
Replace with MTF as soon as possible. Motor oil does not contain the proper additives for the transmission and continued use can cause decreased shifting performance and lead to transmission damage.
Brake/Clutch\* Fluid
Specified fluid: Brake Fluid with DOT 3 or DOT 4
Use the same fluid for both the brakes and clutch.
Checking the Brake Fluid
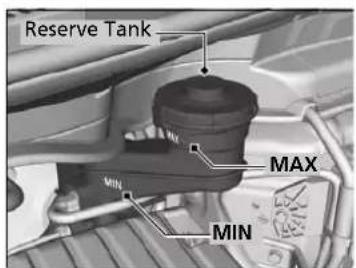
The fluid level should be between the MIN and MAX marks on the side of the reserve tank.
Manual transmission models
The brake fluid reserve tank is also used for your vehicle's clutch fluid. As long as you keep the brake fluid level as instructed above, there is no need for checking the clutch fluid level.
Brake/Clutch \* Fluid
NOTICE
Brake fluid marked DOT 5 is not compatible with your vehicle's braking system and can cause extensive damage.
We recommend using a genuine product.
If the brake fluid level is at or below the MIN mark, have a dealer inspect the vehicle for leaks or worn brake pads as soon as possible.
Refilling Window Washer Fluid
Check the amount of window washer fluid by looking at the reservoir. If the level is low, fill the washer reservoir.
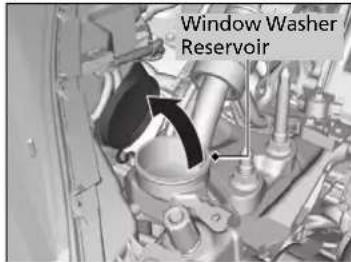
Pour the washer fluid carefully. Do not overflow the reservoir.
Fuel Filter
Replace fuel filter according to the time and distance recommendations in the maintenance schedule.
Have a qualified technician change the fuel filter. Fuel in the system can spray out and create a hazard if all fuel line connections are not handled correctly.
Refilling Window Washer Fluid
NOTICE
Do not use engine antifreeze or a vinegar/water solution in the windscreen washer reservoir. Antifreeze can damage your vehicle's paint. A vinegar/water solution can damage the windscreen washer pump.
Use only commercially available windscreen washer fluid. Avoid prolonged use of hard water to prevent lime scale build up.
Replacing Light Bulbs
Headlight Bulbs
When replacing, use the following bulbs.
Models with halogen type headlights
High/Low beam headlight: 60/55 W (H4LL/HB2LL*, H4 LL, H4 for halogen bulb type)
Models with LED type headlights
High beam headlight: LED type Low beam headlight: LED type
High/Low Beam Headlight
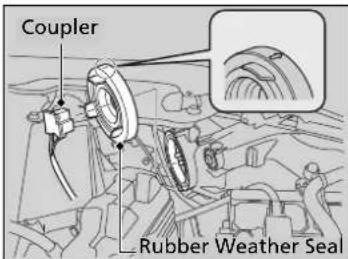
Models with halogen type headlights
- Remove the coupler.
- Remove the rubber weather seal.
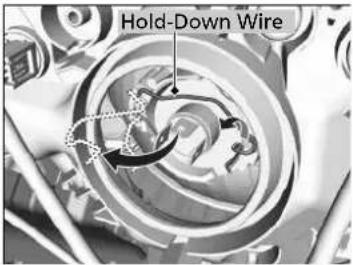
- Remove the hold-down wire, then remove the bulb.
- Insert a new bulb.
* Not available on all models
Continued
Headlight Bulbs
NOTICE
Halogen bulbs get very hot when lit. Oil, perspiration, or a scratch on the glass can cause the bulb to overheat and shatter.
The headlight aim is set by the factory, and does not need to be adjusted. However, if you regularly carry heavy items in the luggage area or tow a trailer, have the aiming readjusted at a dealer or by a qualified technician.
When replacing a halogen bulb, handle it by its base, and protect the glass from contact with your skin or hard objects. If you touch the glass, clean it with denatured alcohol and a clean cloth.
Models with LED type headlights
High beam and low beam headlights are LED type. Have an authorized Honda dealer inspect and replace the light assembly.
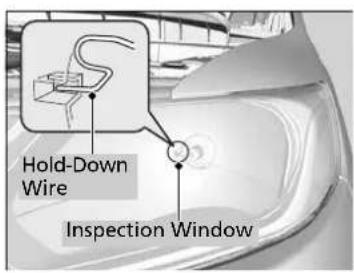
- Reinstall the hold-down wire. Hook the end of the wire on the knob in the slot.
▶You can see if the hold-down wire is in the right place from the inspection window.
-
Reinstall the rubber weather seal.
-
Insert the coupler into the connector of the bulb.
Front Fog Light Bulbs\*
When replacing, use the following bulbs.
Front Fog Light: 35 W (H8 for halogen bulb type)
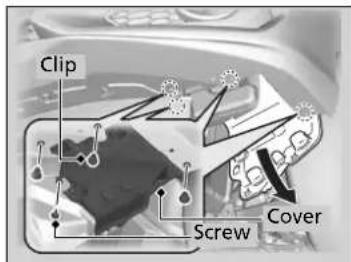
- Remove the screws using a Phillips-head screwdriver and remove the holding clips using a flat-tip screwdriver.
- Pull the under part of the inner fender cover down.
Front Fog Light Bulbs \*
NOTICE
Halogen bulbs get very hot when lit. Oil, perspiration, or a scratch on the glass can cause the bulb to overheat and shatter.
When replacing a halogen bulb, handle it by its plastic case, and protect the glass from contact with your skin or hard objects. If you touch the glass, clean it with denatured alcohol and a clean cloth.
Holding clip
Insert a flat-tip screwdriver, lift and remove the central pin to remove the clip.
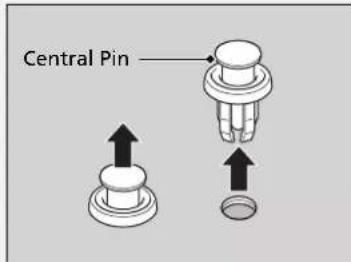
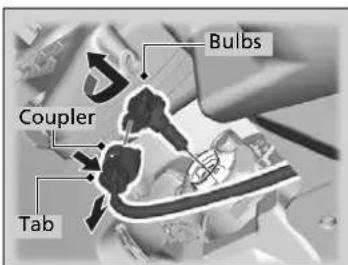
- Push the tab to remove the coupler.
- Rotate the old bulb to the left to remove.
- Insert a new bulb into the fog light assembly and turn it to the right.
- Insert the coupler into the connector of the bulb.
Front Fog Light Bulbs \*
Insert the clip with the central pin raised, and push until it is flat.
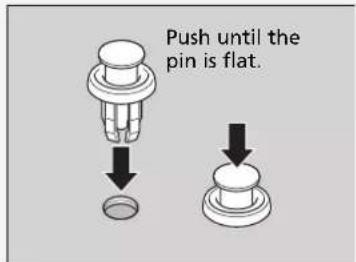
Front Turn Signal Light Bulbs
When replacing, use the following bulbs.
Front Turn Signal Light: 21 W (Amber)
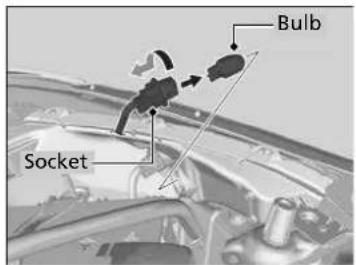
- Turn the socket to the left and remove it.
- Pull the bulb straight out of its holder.
- Insert a new bulb.
Models with bulb type position lights
Position Light Bulbs
When replacing, use the following bulbs.
Position Light: 5 W
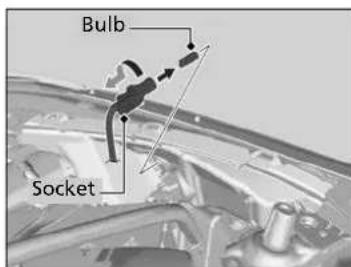
- Turn the socket to the left and remove it, then remove the old bulb.
- Insert a new bulb.
Models with LED type position lights
Position Lights
Position lights are LED type. Have an authorised Honda dealer inspect and replace the light assembly.
Side Turn Signal/Emergency Indicator Lights
Door mirrors have side turn signal lights. Have an authorized Honda dealer inspect and replace the light bulbs.
Daytime Running Lights\*
Daytime running lights are the LED type. Have an authorized Honda dealer inspect and replace the light assembly.
Position/Daytime Running Lights\*
Position/daytime running lights are the LED type. Have an authorized Honda dealer inspect and replace the light assembly.
Back-Up Light, Rear Turn Signal Light and Rear Fog Light Bulbs
When replacing, use the following bulbs.
Back-Up Light: 16 W Rear Turn Signal Light: 21 W (Amber) Rear Fog Light: 21 W
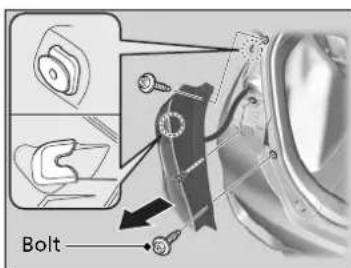
- Use a Phillips-head screwdriver to remove the bolts.
- Pull the light assembly out of the rear pillar.
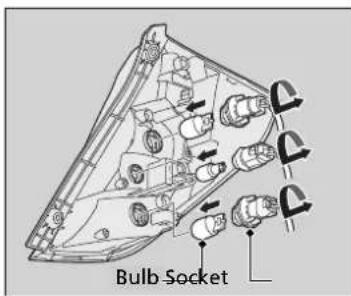
- Turn the socket to the left and remove it. Remove the old bulb.
- Insert a new bulb.
- Slide the light assembly onto the guide on the body.
Brake/Taillights
Brake/taillights are the LED type. Have an authorized Honda dealer inspect and replace the light assembly.
Rear Licence Plate Light Bulbs
When replacing, use the following bulbs.
Rear Licence Plate Light: 5 W
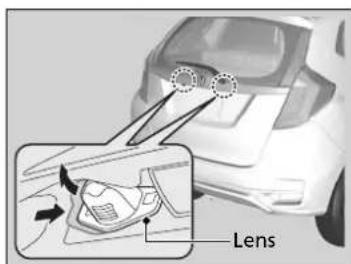
- Push the lens on the left and pull out the lens and the socket attached to it.
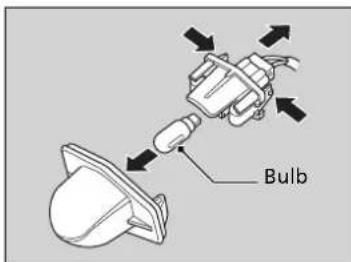
- Remove the licence plate light assembly by squeezing the tabs on both sides of the socket.
- Remove the old bulb and insert a new bulb.
High-Mount Brake Light
High-mount brake light is LED type. Have an authorized Honda dealer inspect and replace the light assembly.
Other Light Bulbs
Ceiling Light Bulb
When replacing, use the following bulb.
Ceiling Light: 8 W
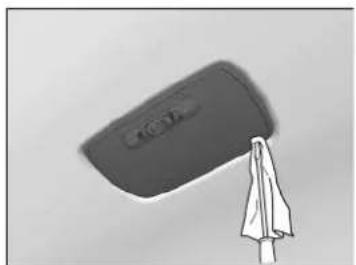
natural_image
Simple line drawing of a tool with a handle and base, no text or symbols present- Pry on the edge of the cover using a flat-tip screwdriver to remove the cover.
▶ Wrap the flat-tip screwdriver with a cloth to prevent scratches.
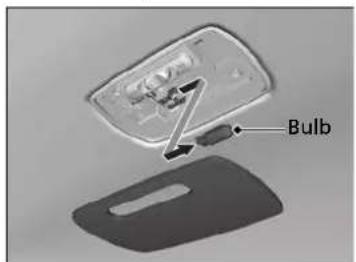
- Remove the old bulb and insert a new bulb.
Map Light Bulbs
Models with display audio system
When replacing, use the following bulbs.
Map Light: 8 W
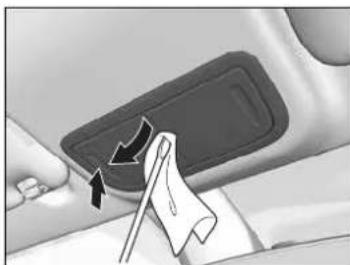
natural_image
Interior view of a car showing a door panel and a flag marker (no text or symbols visible)- Pry on the edge of the cover using a flat-tip screwdriver to remove the cover.
▶ Wrap the flat-tip screwdriver with a cloth to prevent scratches.
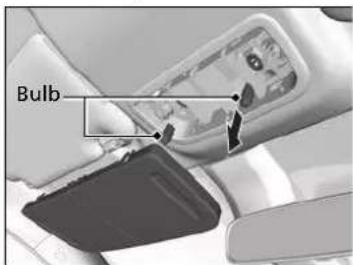
- Remove the old bulb and insert a new bulb.
Models with colour audio system
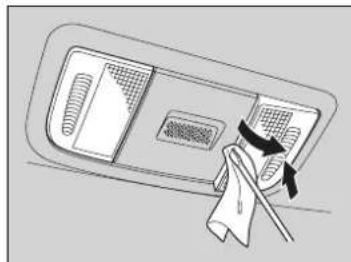
natural_image
Simple line drawing of a car frontview with a cloth and handle, no text or symbols present- Pry on the edge of the cover using a flat-tip screwdriver to remove the cover.
▶ Wrap the flat-tip screwdriver with a cloth to prevent scratches.
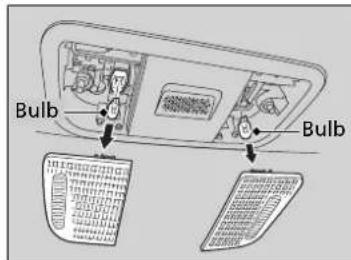
- Remove the old bulb and insert a new bulb.
Luggage Area Light Bulb
When replacing, use the following bulbs.
Luggage Area Light: 5 W
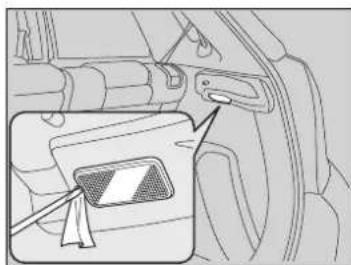
natural_image
Diagram of a car interior showing a door panel and a close-up of a device with a mesh grille (no text or symbols)- Pry on the edge of the cover using a flat-tip screwdriver to remove the cover.
▶ Wrap the flat-tip screwdriver with a cloth to prevent scratches.
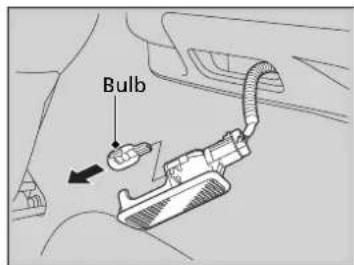
- Remove the old bulb and insert a new bulb.
Checking and Maintaining Wiper Blades
Checking Wiper Blades
If the wiper blade rubber has deteriorated, it will leave streaks and the hard surfaces of the blade may scratch the window glass.
Changing the Front Wiper Blade Rubber
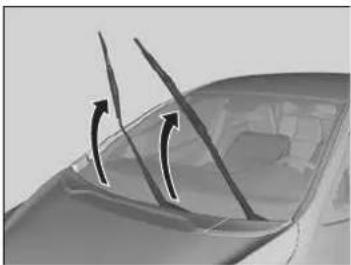
natural_image
Close-up of a car's side profile showing two curved arrows pointing to the blade (no text or symbols visible)- Lift the driver side wiper arm first, then the passenger side.
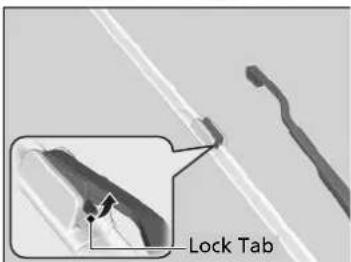
- Press up on and hold the tab, then slide the holder off the wiper arm.
Changing the Front Wiper Blade Rubber
NOTICE
Avoid dropping the wiper arm onto the windscreen, it may damage the wiper arm and/or the windscreen.
Continued
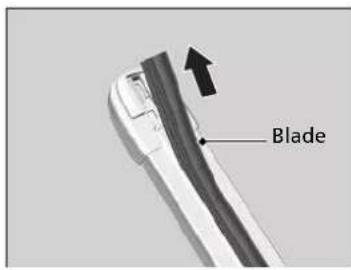
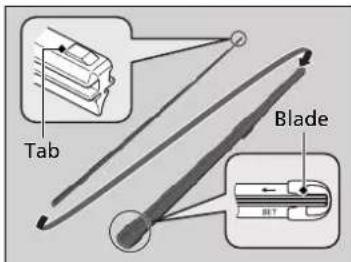
-
Slide the wiper blade out of the holder by pulling the tabbed end out.
-
Slide the new wiper blade onto the holder from the bottom end.
The tab on the blade should fit in the indent of the top of the wiper holder.
-
Slide the holder onto the wiper arm securely.
-
Lower the passenger side wiper arm first, then the driver side.
Changing the Rear Wiper Blade Rubber
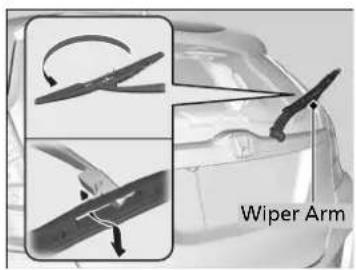
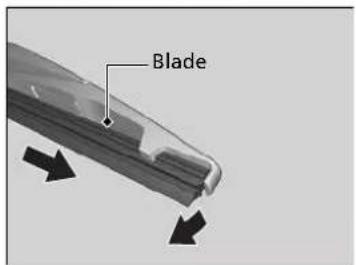
- Raise the wiper arm off.
- Pivot the bottom end of the wiper blade up until it comes off from the wiper arm.
- Slide the wiper blade out from the end with the indent.
Changing the Rear Wiper Blade Rubber
NOTICE
Avoid dropping the wiper arm; it may damage the rear window.
Continued
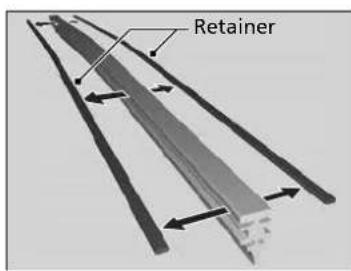
- Remove the retainers from the wiper blade that has been removed, and mount to a new rubber blade.
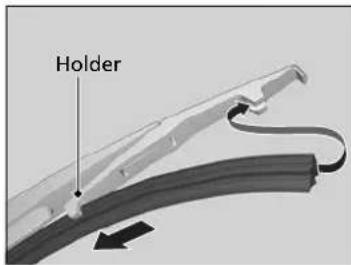
- Slide the wiper blade onto the holder. ▶ Make sure it is engaged correctly, then install the wiper blade assembly onto the wiper arm.
Checking and Maintaining Tyres
Checking Tyres
To safely operate your vehicle, your tyres must be of the proper type and size, in good condition with adequate tread, and properly inflated.
■Inflation guidelines
Properly inflated tyres provide the best combination of handling, tread life, and comfort. Refer to the driver's doorjamb label for the specified pressure.
Underinflated tyres wear unevenly, adversely affect handling and fuel economy, and are more likely to fail from overheating.
Overinflated tyres make your vehicle ride harshly, are more prone to road hazards, and wear unevenly.
Every day before you drive, look at each of the tyres. If one looks lower than the others, check the pressure with a tyre gauge.
At least once a month or before long trips, use a gauge to measure the pressure in all tyres, including the spare ^5 . Even tyres in good condition can lose 10-20 kPa (0.1-0.2 kgf/cm ^2 , 1-2 psi) per month.
Checking Tyres
WARNING
Using tyres that are excessively worn or improperly inflated can cause a crash in which you can be seriously hurt or killed.
Follow all instructions in this owner's manual regarding tyre inflation and maintenance.
Measure the air pressure when tyres are cold. This means the vehicle has been parked for at least three hours, or driven less than 1.6 km (1 mile). If necessary, add or release air until the specified pressure is reached.
If checked when hot, tyre pressure can be as much as 30–40 kPa (0.3–0.4 kgf/cm ^2 , 4–6 psi) higher than if checked when cold.
Have a dealer check the tyres if you feel a consistent vibration while driving. New tyres and any that have been removed and reinstalled should be properly balanced.
Whenever tyre pressure is adjusted, you must calibrate the Deflation Warning System.
Deflation Warning System Calibration P. 449
■Inspection guidelines
Every time you check inflation, also examine the tyres and valve stems. Look for:
- Bumps or bulges on the side or in the tread. Replace the tyre if you find any cuts, splits, or cracks in the side of the tyre. Replace it if you see fabric or cord.
- Remove any foreign objects and inspect for air leaks.
- Uneven tread wear. Have a dealer check the wheel alignment.
- Excessive tread wear.
Wear Indicators P. 519 - Cracks or other damage around valve stem.
Wear Indicators
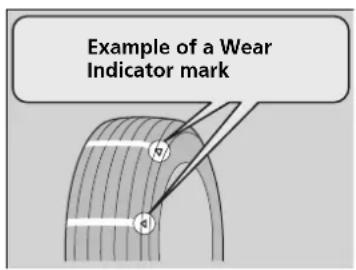
The groove where the wear indicator is located is 1.6 mm (1/16 inch) shallower than elsewhere on the tyre. If the tread has worn so that the indicator is exposed, replace the tyre. Worn out tyres have poor traction on wet roads.
Tyre Service Life
The life of your tyres is dependent on many factors, including driving habits, road conditions, vehicle loading, inflation pressure, maintenance history, speed, and environmental conditions (even when the tyres are not in use).
In addition to regular inspections and inflation pressure maintenance, it is recommended that you have annual inspections performed once the tyres reach five years old. All tyres, including the spare*, should be removed from service after 10 years from the date of manufacture, regardless of their condition or state of wear.
Tyre and Wheel Replacement
Replace your tyres with radials of the same size, load range, speed rating, and maximum cold tyre pressure rating (as shown on the tyre's sidewall). Using tyres of a different size or construction can cause certain vehicle systems such as the ABS and Vehicle Stability Assist (VSA) ^* system to work incorrectly.
It is best to replace all four tyres at the same time. If that isn't possible, replace the front or rear tyres in pairs.
Make sure that the wheel's specifications match those of the original wheels.
▶Tyre and Wheel Replacement
WARNING
Installing improper tyres on your vehicle can affect handling and stability. This can cause a crash in which you can be seriously hurt or killed.
Always use the size and type of tyres recommended in the tyre information label on your vehicle.
Tyre Rotation
Rotating tyres according to the maintenance schedule helps to distribute wear more evenly and increase tyre life.
■Tyres without rotation mark
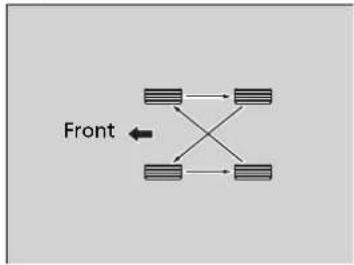
flowchart
graph TD
    A["Top Line"] --> B["Left"]
    C["Bottom Line"] --> D["Right"]
    E["Left"] <--> F["Cross"]
    G["Right"] --> H["Cross"]
    I["Left"] --> J["Right"]
Rotate the tyres as shown here.
■Tyres with rotation mark
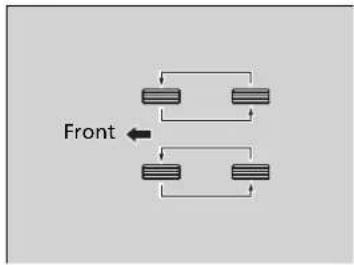
flowchart
graph TD
    A["Component 1"] --> B["Component 2"]
    B --> C["Component 3"]
    C --> D["Component 4"]
    D --> E["Component 5"]
    E --> F["Component 6"]
    F --> G["Component 7"]
    G --> H["Component 8"]
    H --> I["Component 9"]
    I --> J["Component 10"]
    J --> K["Front"]
    style A fill:#f9f,stroke:#333
    style B fill:#f9f,stroke:#333
    style C fill:#f9f,stroke:#333
    style D fill:#f9f,stroke:#333
    style E fill:#f9f,stroke:#333
    style F fill:#f9f,stroke:#333
    style G fill:#f9f,stroke:#333
    style H fill:#f9f,stroke:#333
    style I fill:#f9f,stroke:#333
    style J fill:#f9f,stroke:#333
    style K fill:#f9f,stroke:#333
Rotate the tyres as shown here.
»Tyre Rotation
Tyres with directional tread patterns should only be rotated front to back (not from one side to the other). Directional tyres should be mounted with the rotation indication mark facing forward, as shown below.
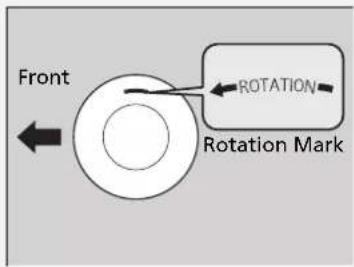
When the tyres are rotated, make sure the air pressures are checked.
Whenever tyre pressure is adjusted, you must calibrate the Deflation Warning System.
Deflation Warning System Calibration P. 449
Snow Traction Devices
If driving on snowy or frozen roads, mount winter tyres, or tyre chains; reduce speed; and maintain sufficient distance between vehicles when driving.
Be particularly careful when operating the steering wheel or brakes to prevent skidding.
Use tyre chains, winter tyres, or all season tyres when necessary or according to the law.
When mounting, refer to the following points.
For winter tyres:
- Select the size and load ranges that are the same as the original tyres.
- Mount the tyres to all four wheels.
Snow Traction Devices
WARNING
Using the wrong chains, or not properly installing chains, can damage the brake lines and cause a crash in which you can be seriously injured or killed.
Follow all instructions in this owner's manual regarding the selection and use of tyre chains.
NOTICE
Traction devices that are the wrong size or improperly installed can damage your vehicle's brake lines, suspension, body, and wheels. Stop driving if they are hitting any part of the vehicle.
According to the EEC Directive for tyres, when winter tyres are used, it is necessary to affix a sticker with the allowable max. speed of the winter tyres clearly in the field of view of the driver, if the designed max. speed of vehicle is higher than the allowed max. speed of winter tyre. A sticker is obtainable from your tyre dealer. If you have any question, consult a dealer.
When tyre chains are mounted, follow the chain manufacturer's instructions regarding vehicle operational limits.
Use tyre chains only in an emergency or when they are legally required for driving through a certain area.
Use greater caution when driving with tyre chains on snow or ice. They may have less-predictable handling than good winter tyres without chains.
If your vehicle is equipped with summer tyres, be aware that these tyres are not designed for winter driving conditions. For more information, contact a dealer.
For tyre chains:
- Consult a dealer before purchasing any type of chains for your vehicle.
• Install them on the front tyres only. - Because your vehicle has limited tyre clearance, we strongly recommend using the chains listed below:
Original Tyre Size*1
Chain Type
185/60R15 84H RUD-matic classic 48478
185/55R16 83H RUD-matic classic 48479
*1: Original tyre size is mentioned on the tyre information label on the driver's doorjamb.
- Follow the chain manufacturer's instruction when installing. Mount them as tightly as you can.
- Check that the chains do not touch the brake lines or suspension.
- Drive slowly.
Battery
Checking the Battery
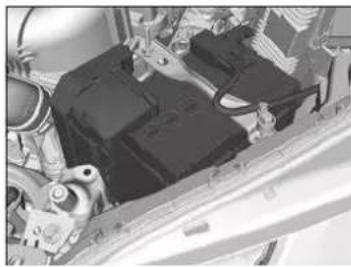
natural_image
Close-up of a car's engine compartment showing internal components like motors and suspension parts (no visible text or symbols)The condition of the battery is monitored by a sensor located on the negative terminal of the battery. If there is a problem with the sensor, the warning message on multi-information display will let you know. Have your vehicle checked by a dealer.
Check the battery terminals for corrosion monthly.
If your vehicle's battery is disconnected or goes dead:
- The clock resets.
Clock P. 140
• The audio system is disabled.
→ Reactivating the audio system P. 223
- The navigation system is disabled. A PIN code will be required.
Refer to the navigation system manual
Battery
WARNING
The battery gives off explosive hydrogen gas during normal operation.
A spark or open flame can cause the battery to explode with enough force to kill or seriously hurt you.
Keep all sparks, open flames, and smoking materials away from the battery.
Wear protective clothing and a face shield, or have a skilled technician do any battery maintenance.
WARNING
The battery contains sulfuric acid (electrolyte) which is highly corrosive and poisonous.
Getting electrolyte in your eyes or on your skin can cause serious burns. Wear protective clothing and eye protection when working on or near the battery.
Swallowing electrolyte can cause fatal poisoning if immediate action is not taken.
KEEP OUT OF THE REACH OF CHILDREN
Charging the Battery
Disconnect both battery cables to prevent damaging your vehicle's electrical system. Always disconnect the negative (-) cable first, and reconnect it last.
>>Battery
Emergency Procedures
Eyes: Flush with water from a cup or other container for at least 15 minutes. (Water under pressure can damage the eye.) Call a physician immediately. Skin: Remove contaminated clothing. Flush the skin with large quantities of water. Call a physician immediately. Swallowing: Drink water or milk. Call a physician immediately.
When you find corrosion, clean the battery terminals by applying a baking powder and water solution. Clean the terminals with a damp towel. Cloth/towel dry the battery. Coat the terminals with grease to help prevent future corrosion.
When replacing the battery, the replacement must be of the same specifications. Consult a dealer for more information.
The battery installed in this vehicle is specifically designed for a model with Auto Idle Stop. Using a battery other than this specified type may shorten the battery life, and prevent Auto Idle Stop from activating. If you need to replace the battery, make sure to select the specified type. Ask a dealer for more details.
Replacing Battery
When you remove and replace the battery, always follow the maintenance safety and the warnings for when checking the battery to prevent potential hazards.
Maintenance Safety P. 477
→Checking the Battery P. 524
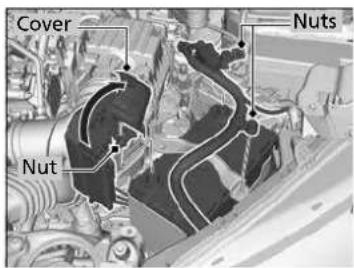
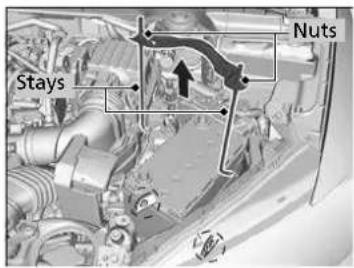
- Turn the ignition switch to LOCK 0*1. Open the bonnet.
- Loosen the nut on the negative battery cable, then disconnect the cable from the negative (-) terminal.
- Open the positive battery terminal cover. Loosen the nut on the positive battery cable, then disconnect the cable from the positive (+) terminal.
- Loosen the nut on each side of the battery bracket with a wrench.
- Pull the bottom end of each battery stay out of the hole on the battery base, and remove the combination of the battery bracket and the stays.
>>Replacing Battery
NOTICE
An improperly disposed of battery can be harmful to the environment and human health. Always confirm local regulations for battery disposal.
This symbol on the battery means that this product must not be treated as household waste.

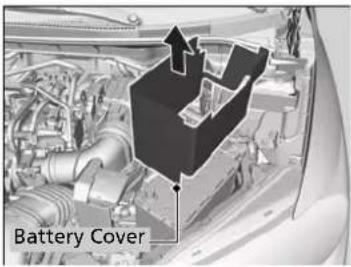
- Remove the battery cover.
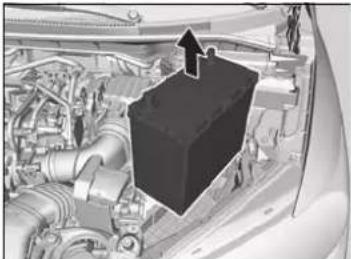
natural_image
Interior view of a car engine bay with visible structural components and a highlighted 3D block (no text or symbols)- Take out the battery carefully.
>>Replacing Battery
Always disconnect the negative (-) cable first, and reconnect it last.
To install a new battery, reverse this procedure.
Battery Label
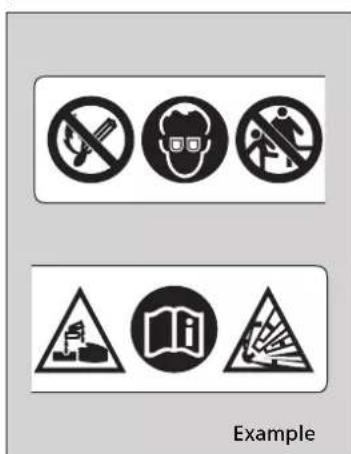
Battery Label
DANGER
- Keep flames and sparks away from the battery. The battery produces explosive gas that can cause an explosion.
- Wear eye protection and rubber gloves when handling the battery to avoid risk of burns or loss of eyesight if exposed to battery electrolyte.
- Do not allow children to handle the battery, under any circumstance. Ensure that anyone handling the battery has a proper understanding of the hazards and correct handling procedures involved.
- Handle battery electrolyte with extreme care, as it contains dilute sulfuric acid. Exposure to eyes or skin can cause burns or loss of eyesight.
- Read this manual carefully, and understand it before handling the battery. Failure to do so can cause personal injury and damage to the vehicle.
- Do not use the battery if the level of electrolyte is at or below the recommended level. Using the battery with low electrolyte can cause it to explode, causing serious injury.
Remote Transmitter Care
Replacing the Button Battery
If the indicator does not come on when the button is pressed, replace the battery.
Retractable Key*
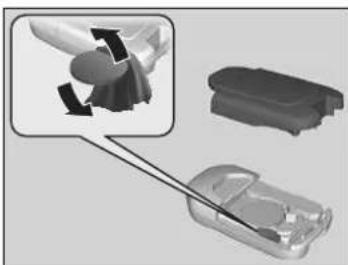
natural_image
3D illustration of a mechanical component with a highlighted section showing internal structure (no text or symbols)Battery type: CR2032
- Remove the upper half of the cover by carefully prying on the edge with a coin.
▶ Wrap a coin with a cloth to prevent scratching the retractable key.
-
Remove the button battery with the small flat-tip screwdriver.
-
Make sure to replace the battery with the correct polarity.
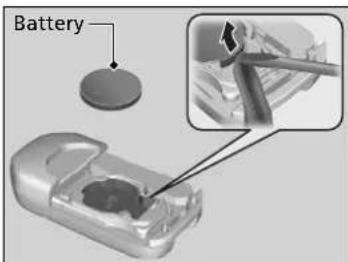
Replacing the Button Battery
WARNING
CHEMICAL BURN HAZARD
The battery that powers the remote transmitter can cause severe internal burns and can even lead to death if swallowed. Keep new and used batteries away from children.
If you suspect that a child has swallowed the battery, seek medical attention immediately.
A warning mark is located adjacent to the button battery ^* .
NOTICE
An improperly disposed of battery can damage the environment. Always confirm local regulations for battery disposal.
Replacement batteries are commercially available or at a dealer.
This symbol on the battery means that this product must not be treated as household waste.

Keyless Remote\*
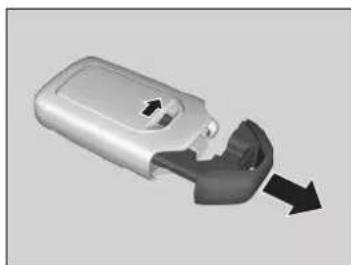
natural_image
3D rendering of a car door handle with black arrows indicating direction (no text or symbols)Battery type: CR2032
- Remove the built-in key.
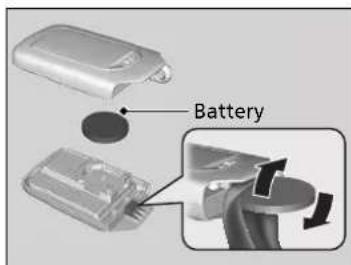
- Remove the upper half by carefully prying on the edge with a coin.
▶ Wrap a coin with a cloth to prevent scratching the keyless remote.
- Make sure to replace the battery with the correct polarity.
Heating and Cooling System\*/Climate Control System\* Maintenance
Air Conditioning
For proper and safe operation of the heating and cooling system /climate control system, the refrigerant system should only be served by a qualified technician.
Never repair or replace the air conditioning evaporator (cooling coil) with one removed from a used or salvaged vehicle.
Air Conditioning
NOTICE
Vented refrigerant is harmful to the environment. To avoid refrigerant from venting, never replace the evaporator with one removed from a used or salvaged vehicle.
Refrigerant in your vehicle's air conditioning system is flammable and can be ignited during servicing if proper procedures are not followed.
The air conditioner label is found under the bonnet:
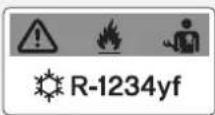
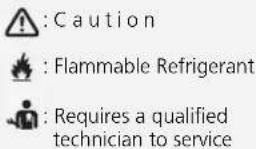
: Air Conditioning System
Dust and Pollen Filter
When to Replace the Dust and Pollen Filter
Replace the dust and pollen filter according to your vehicle's recommended maintenance schedule. It is recommended to replace the filter even sooner if the vehicle has been driven in a dusty environment.
→Maintenance Schedule P. 484
Service Reminder System P. 479
How to Replace the Dust and Pollen Filter
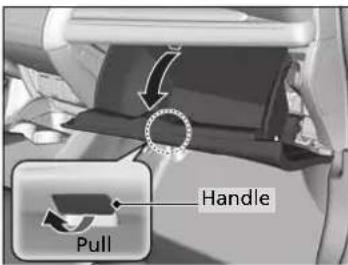
- Open the glove box.
Dust and Pollen Filter
If the airflow from the heating and cooling system ^ /climate control system ^ deteriorates noticeably, and the windows fog up easily, the filter may need to be replaced.
The dust and pollen filter collects pollen, dust, and other debris in the air.
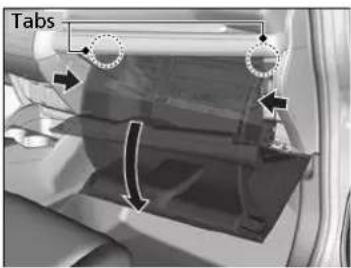
- Disengage the two tabs by pushing on each side panel.
- Pivot the glove box out of the way.
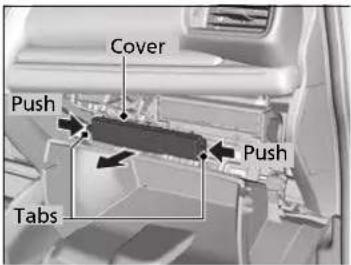
- Push in the tabs on the corners of the filter case cover, and remove it.
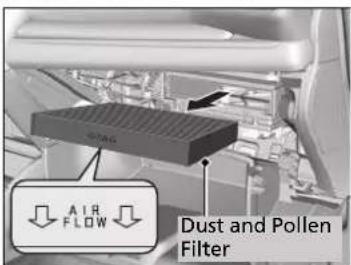
- Remove the filter from the case.
- Install a new filter in the case.
▶ Put the AIR FLOW arrow directed side down.
Dust and Pollen Filter
If you are not sure how to replace the dust and pollen filter, have it replaced by a dealer.
Cleaning
Interior Care
Use a vacuum cleaner to remove dust before using a cloth.
Use a damp cloth with a mixture of mild detergent and warm water to remove dirt. Use a clean cloth to remove detergent residue.
Cleaning Seat Belts
Use a soft brush with a mixture of mild soap and warm water to clean the seat belts. Let the belts air dry. Wipe the loops of the seat belt anchors using a clean cloth.
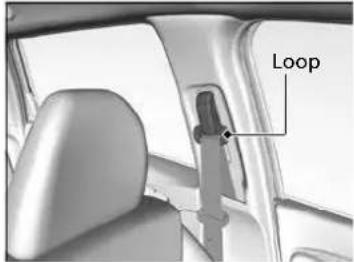
Cleaning the Window
Wipe using a glass cleaner.
»Interior Care
Do not spill liquids inside the vehicle. Electrical devices and systems may malfunction if liquids are splashed on them.
Do not use silicone based sprays on electrical devices such as audio devices and switches.
Doing so may cause the items to malfunction or cause a fire inside the vehicle. If a silicone based spray is inadvertently used on electrical devices, consult a dealer.
Depending on their composition, chemicals and liquid aromatics may cause discolouration, wrinkles, and cracking to resin-based parts and textiles.
Do not use alkali solvents or organic solvents such as benzene or petrol.
After using chemicals, make sure to gently wipe them away using a dry cloth.
Do not place used cloths on top of resin based parts or textiles for long periods of time without washing.
Be careful not to spill a liquid type air freshener.
>>Cleaning the Window
Wires are mounted to the inside of the rear window. Wipe along the same direction as the wires with a soft cloth so as not to damage them.
Floor Mats
The driver's floor mat hooks over the floor anchors, which keep the mat from sliding forward. To remove a mat for cleaning, turn the anchor knobs to the unlock position. When reinstalling the mat after cleaning, turn the knobs to the lock position.
Do not put additional floor mats on top of the anchored mat.
Maintaining Genuine Leather\*
To properly clean leather:
- Use a vacuum or soft dry cloth first to remove any dirt or dust.
- Clean the leather with a soft cloth dampened with a solution comprised of 90% water and 10% neutral soap.
- Wipe away any soap residue with a clean damp cloth.
- Wipe away residual water and allow leather to air dry in the shade.
>>Floor Mats
If you use any floor mats that were not originally provided with your vehicle, make sure they are designed for your specific vehicle, fit correctly, and are securely anchored by the floor anchors. Position the rear seat floor mats properly. If they are not properly positioned, the floor mats can interfere with the front seat functions.
Maintaining Genuine Leather \*
It is important to clean or wipe away dirt or dust as soon as possible. Spills can soak into leather resulting in stains. Dirt or dust can cause abrasions in the leather. In addition, please note that some dark coloured clothing can rub onto the leather seats resulting in discolouration or stains.
Exterior Care
Dust off the vehicle body after you drive.
Regularly inspect your vehicle for scratches on painted surfaces. A scratch on a painted surface can result in body rust. If you find a scratch, promptly repair it.
Washing the Vehicle
Wash the vehicle regularly. Wash more frequently when driving in the following conditions:
- If driving on roads with road salt.
- If driving in coastal areas.
- If tar, soot, bird droppings, insects, or tree sap are stuck to painted surfaces.
Using an Automated Car Wash
- Make sure to follow the instructions indicated on the automated car wash.
- Remove or store the audio antenna
Audio Antenna * P. 224 - Fold in the door mirrors.
- Turn off the automatic intermittent wipers.
Using High Pressure Cleaners
- Keep sufficient distance between the cleaning nozzle and the vehicle body.
• Take particular care around the windows. Standing too close may cause water to enter the vehicle interior. - Do not spray high pressure water directly into the engine compartment. Instead, use low pressure water and a mild detergent.
Washing the Vehicle
Do not spray water into the air intake vents. It can cause a malfunction.
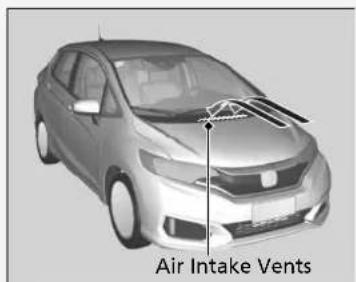
Applying Wax
A good coat of automotive body wax helps to protect your vehicle's paint from the elements. Wax will wear off over time and expose your vehicle's paint to the elements, so reapply as necessary.
Maintaining the Bumpers and Other Resin Coated Parts
If you get petrol, oil, engine coolant, or battery fluid on resin coated parts, they may be stained or the coating may peel. Promptly wipe it away using a soft cloth and clean water.
Cleaning the Window
Wipe using a glass cleaner.
Maintaining Aluminium Wheels\*
Aluminium is susceptible to deterioration caused by salt and other road contaminants. When necessary, as early as possible use a sponge and mild detergent to wipe away these contaminants. Do not use a stiff brush or harsh chemicals (including some commercial wheel cleaners). These can damage the protective finish on aluminium alloy wheels, resulting in corrosion. Depending on the type of finish, the wheels also may lose their luster or appear burnished. To avoid water stains, wipe the wheels dry with a cloth while they are still wet.
>> Applying Wax
NOTICE
Chemical solvents and strong cleaners can damage the paint, metal, and plastic on your vehicle. Wipe away spills immediately.
Maintaining the Bumpers and Other Resin Coated Parts
Ask a dealer about the correct coating material when you want to repair the painted surface of the parts made of resin.
Fogged Exterior Light Lenses
The inside lenses of exterior lights (headlights, brake lights, etc.) may fog temporarily if you have driven in the rain, or after the vehicle has been run through a car wash. Dew condensation also may build up inside the lenses when there is a significant enough difference between the ambient and inside lens temperatures (similar to vehicle windows fogging up in rainy conditions). These conditions are natural processes, not structural design problems in the exterior lights.
Lens design characteristics may result in moisture developing on the light lens frame surfaces. This also is not a malfunction.
However, if you see large amounts of water accumulation, or large water drops building up inside the lenses, have your vehicle inspected by a dealer.
Accessories and Modifications
Accessories
When installing accessories, check the following:
- Do not install accessories on the windscreen. They can obstruct your view and delay your reaction to driving conditions.
- Do not install any accessories over areas marked SRS Airbag, on the sides or backs of the front seats, on front or side pillars, or near the side windows. Accessories installed in these areas may interfere with proper operation of the vehicle's airbags or may be propelled into you or another occupant if the airbags deploy.
- Be sure electronic accessories do not overload electrical circuits or interfere with proper operation of your vehicle.
Fuses P. 575 - Before installing any electronic accessory, have the installer contact a dealer for assistance. If possible, have a dealer inspect the final installation.
Modifications
Do not modify your vehicle in a manner that may affect its handling, stability, or reliability, or install non-genuine Honda parts or accessories that may have a similar effect.
Even minor modifications to vehicle systems can affect overall vehicle performance. Always make sure all equipment is properly installed and maintained, and do not make any modification to your vehicle or its systems that might cause your vehicle to no longer meet your country's and local regulations.
The on-board diagnostic port (OBD-II/SAE J1962 connector) installed on this vehicle is intended to be used with automobile system diagnostic devices or with other devices that Honda has approved. Use of any other type of device may adversely affect the vehicle's electronic systems or allow them to be compromised, possibly resulting in a system malfunction, drained battery, or other unexpected problems.
Do not modify or attempt to repair any of the electrical components.
Accessories and Modifications
WARNING
Improper accessories or modifications can affect your vehicle's handling, stability, and performance, and cause a crash in which you can be seriously hurt or killed.
Follow all instructions in this owner's manual regarding accessories and modifications.
When properly installed, mobile phones, alarms, two-way radios, radio antennas, and low-powered audio systems should not interfere with your vehicle's computer controlled systems, such as your airbags and anti-lock brakes.
Honda Genuine accessories are recommended to ensure proper operation on your vehicle.
Handling the Unexpected
This chapter explains how to handle unexpected troubles.
Tools
Types of Tools.... 542
If a Tyre Goes Flat
Changing a Flat Tyre ^* 543
Temporarily Repairing a Flat Tyre * .... 551
Engine Does Not Start
Checking the Engine.... 561
If the Keyless Remote Battery is Weak ....562
Emergency Engine Stop 563
Jump Starting 564
Shift Lever Does Not Move.... 567
Overheating
How to Handle Overheating...... 568
Indicator, Coming On/Blinking
If the Low Oil Pressure Indicator Comes On.... 570
If the Charging System Indicator Comes On 570
If the Malfunction Indicator Lamp Comes On or Blinks.... 571
If the Brake System Indicator (Red) Comes On.... 571
If the Electric Power Steering (EPS) System Indicator Comes On....57
If the Low Tyre Pressure/Deflation Warning System Indicator Comes On or Blinks... 573
If the Low Oil Level Symbol Appears .....574
Fuses
Fuse Locations 575
Inspecting and Changing Fuses...... 585
Emergency Towing.... 586
When You Cannot Open the Tailgate ....589
Tools
Types of Tools
Models with a compact spare tyre
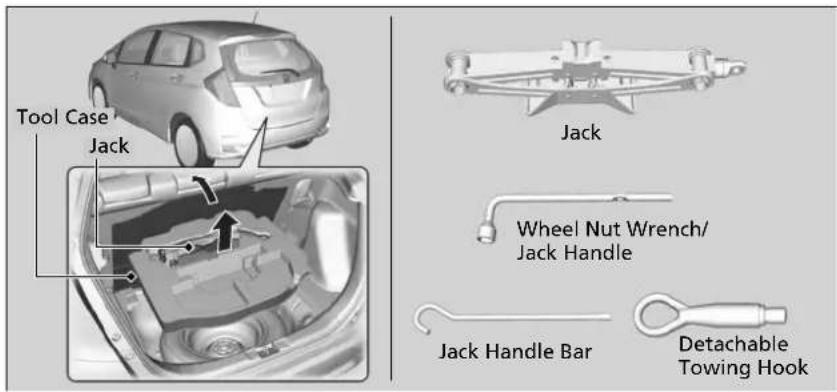
Models with temporary tyre repair kit
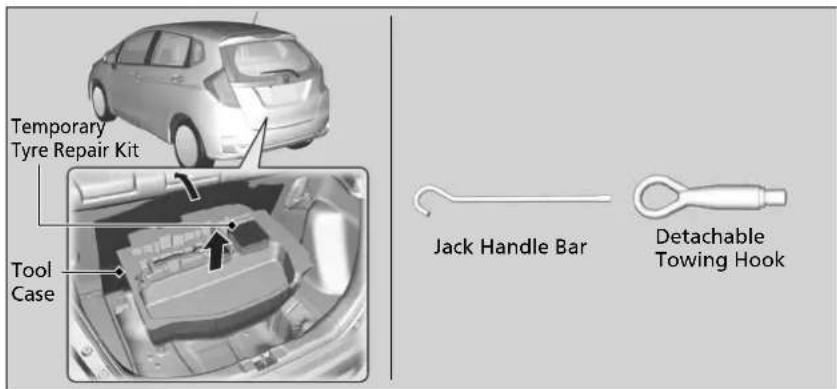
Types of Tools
The tools are stored in the luggage area.
If a Tyre Goes Flat
Changing a Flat Tyre\*
If a tyre goes flat while driving, grasp the steering wheel firmly, and brake gradually to reduce speed. Then, stop in a safe place. Replace the flat tyre with a compact spare tyre. Go to a dealer as soon as possible to have the full-size tyre repaired or replaced.
- Park the vehicle on firm, level, and non-slippery surface and apply the parking brake.
Continuously variable transmission models
- Move the shift lever to P.
Manual transmission models
- Move the shift lever to R.
All models
- Turn on the hazard warning lights and turn the ignition switch to LOCK 0*1.
*1: Models with the keyless access system have an ENGINE START/STOP button instead of an ignition switch.
* Not available on all models
Continued
Changing a Flat Tyre \*
Follow compact spare precautions: Periodically check the tyre pressure of the compact spare. It should be set to the specified pressure. Specified Pressure: 420 kPa (4.2 kgf/cm ^2 , 60 psi)
When driving with the compact spare tyre, keep the vehicle speed under 80 km/h (50 mph). Replace with a full-size tyre as soon as possible.
The compact spare tyre and wheel in your vehicle are specifically for this model. Do not use them with another vehicle. Do not use another type of compact spare tyre or wheel with your vehicle.
Do not mount tyre chains on a compact spare tyre. If a chain-mounted front tyre goes flat, remove one of the full-size rear tyres and replace it with the compact spare tyre. Remove the flat front tyre and replace it with the full-size tyre that was removed from the rear. Mount the tyre chains on the front tyre.
A compact spare tyre gives a harsher ride and less traction on some road surfaces. Use greater caution while driving.
Do not use more than one compact spare tyre at the same time.
The compact spare tyre is smaller than the regular tyre. Your vehicle's ground clearance reduces when the compact spare tyre is installed. Driving over road debris or bumps could possibly damage the underside of your vehicle.
Getting Ready to Replace the Flat Tyre
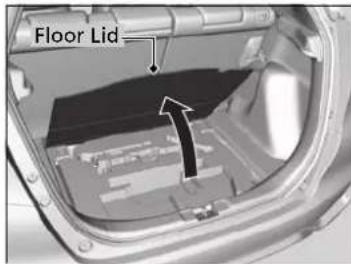
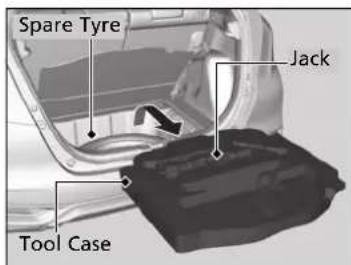
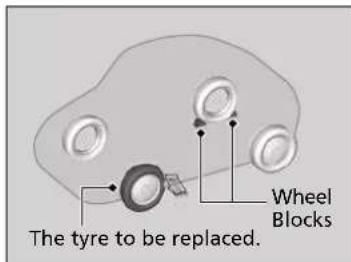
-
Open the luggage area floor lid.
-
Take the tool case out of the luggage area.
- Take the wheel nut wrench, jack handle bar and jack out of the tool case.
- Unscrew the wing bolt, and remove the spacer cone. Then, remove the spare tyre.
- Place a wheel block or rock in front and rear of the wheel diagonal to the flat tyre.
Changing a Flat Tyre \*
WARNING: The jack can only be used for helping an emergency vehicle breakdown, not for changing the regular seasonal tyre or any other normal maintenance or repair operation.
NOTICE
Do not use the jack if it doesn't work properly. Call your dealer or a professional towing service.
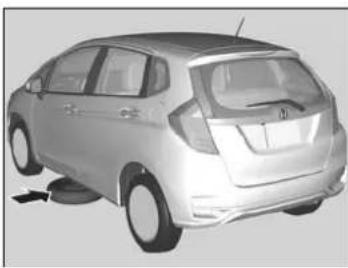
natural_image
Side view of a silver minivan with visible rear suspension and side-mounted sensors (no text or symbols)- Place the compact spare tyre (wheel side up) under the vehicle body, near the tyre that needs to be replaced.
Getting Ready to Replace the Flat Tyre
Be careful not to hurt yourself when removing or storing the spare tyre.
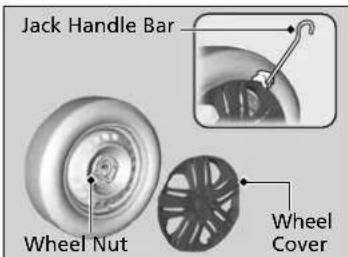
Models with wheel cover
- Put the flat tip of the jack handle bar into the edge of the wheel cover. Carefully pry the edge and remove the cover.
▶ Wrap a cloth around the flat tip of the jack handle bar to prevent scratches on the cover.
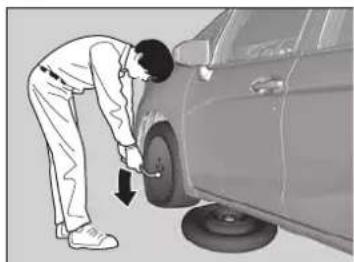
natural_image
Person inspecting or adjusting a car tire, showing the wheel and tire (no text or symbols visible)All models
- Loosen each wheel nut about one turn using the wheel nut wrench.
How to Set Up the Jack
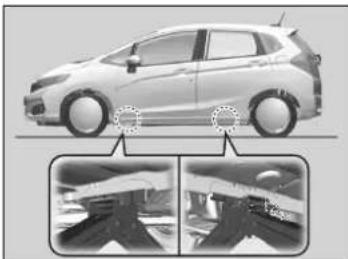
natural_image
Side view of a white car with two close-up insets showing interior lighting and exterior view (no text or symbols)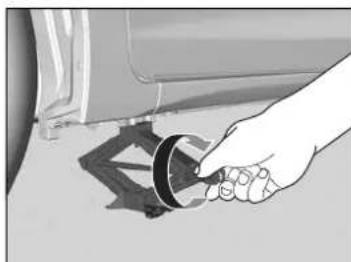
natural_image
Hand holding a circular object near a vehicle (no visible text or symbols)-
Place the jack under the jacking point closest to the tyre to be changed.
-
Turn the end bracket clockwise as shown in the image until the top of the jack contacts the jacking point.
▶ Make sure that the jacking point tab is resting in the jack notch.
How to Set Up the Jack
WARNING
The vehicle can easily roll off the jack, seriously injuring anyone underneath.
Follow the directions for changing a tyre exactly, and no person should place any portion of their body under a vehicle that is supported by a jack.
WARNING: The jack shall be placed on a flat and stable surface on the same level as the vehicle is parked.
The jack that came with your vehicle has the following label.
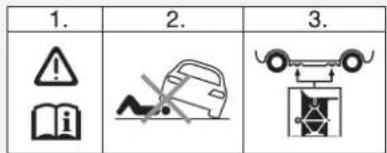
- See Owner's Manual.
- Never get under vehicle when supported by jack.
- Place jack underneath reinforced area.
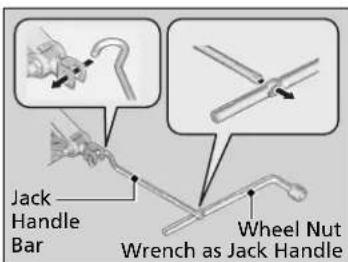
- Raise the vehicle, using the jack handle bar and the jack handle, until the tyre is off the ground.
>>How to Set Up the Jack
Do not use the jack with people or luggage in the vehicle.
Use the jack provided in your vehicle.
Other jacks may not support the weight ("load") or may not fit the jacking point.
The following instructions must be followed to use the jack safely:
- Do not use while the engine is running.
- Use only where the ground is firm and level.
- Use only at the jacking points.
- Do not get in the vehicle while using the jack.
- Do not put anything on top of or underneath the jack.
Loose items can fly around the interior in a crash and can seriously injure the occupants.
Store the wheel, jack, and tools securely before driving.
Replacing the Flat Tyre
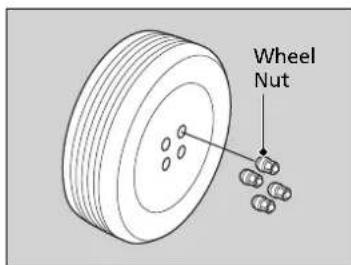
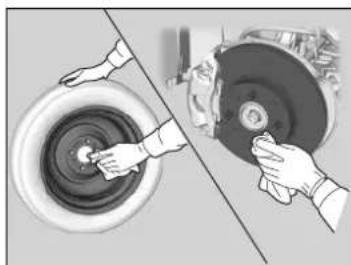
natural_image
Two hands working on a car tire and disc assembly (no text or symbols visible)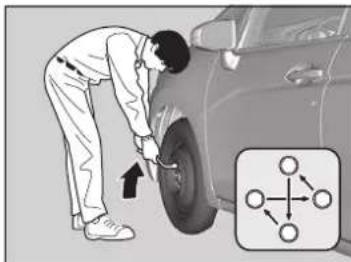
natural_image
Mechanic inspecting a tire on a car, with an inset diagram showing a mechanical linkage (no text or symbols)-
Remove the wheel nuts and flat tyre.
-
Wipe the mounting surfaces of the wheel with a clean cloth.
-
Mount the compact spare tyre.
-
Screw the wheel nuts until they touch the lips around the mounting holes, and stop rotating.
-
Lower the vehicle and remove the jack. Tighten the wheel nuts in the order indicated in the image. Go around, tightening the nuts, two to three times in this order.
Wheel nut torque:
108 N·m (11 kgf·m, 80 lbf·ft)
>>Replacing the Flat Tyre
Do not over tighten the wheel nuts by applying extra torque using your foot or a pipe.
Models with wheel cover
Make sure the wire support ring is hooked into the clips around the edge of the wheel cover.
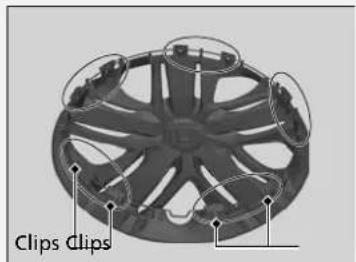
Align the valve mark on the wheel cover to the tyre valve on the wheel, then install the wheel cover.
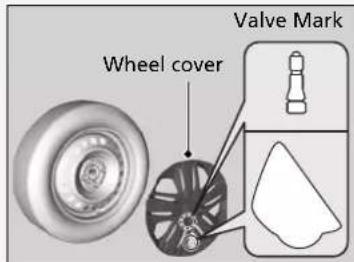
Storing the Flat Tyre
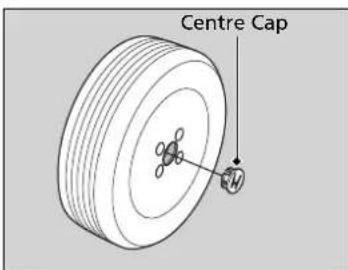
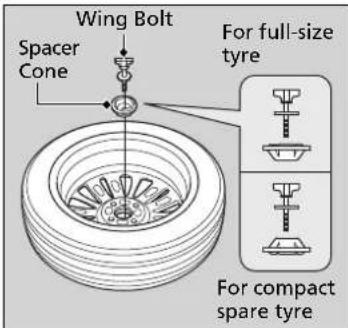
Models with aluminium wheels
- Remove the centre cap.
Models with a compact spare tyre
- Remove the spacer cone from the wing bolt, flip it over, and insert it back on the bolt.
All models
- Place the flat tyre face down in the spare tyre well.
- Secure the flat tyre with the wing bolt.
- Securely put the jack and wheel nut wrench back in the tool case.
- Store the case in the luggage area.
Storing the Flat Tyre
WARNING
Loose items can fly around the interior in a crash and can seriously injure the occupants.
Store the wheel, jack, and tools securely before driving.
Models with wheel cover
Make sure the wire support ring is on the outer side of the tyre valve as shown.
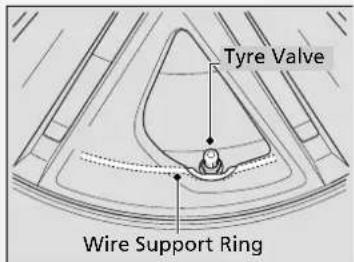
Continued
Deflation Warning System and the Compact Spare Tyre
If you replace a flat tyre with the spare tyre, indicator comes on while you are driving. After driving for a few kilometres (miles), the indicator will start blinking for a short time and then stay on, but this is normal and is no cause for concern.
Calibrate the deflation warning system when you replace the tyre with a specified regular tyre.
→ Deflation Warning System Calibration P. 449
Temporarily Repairing a Flat Tyre\*
If the tyre has a large cut or is otherwise severely damaged, you will need to have the vehicle towed. If the tyre only has a small puncture, from a nail for instance, you can use the temporary tyre repair kit so that you can drive to the nearest service station for a permanent repair.
If a tyre goes flat while driving, grasp the steering wheel firmly, and brake gradually to reduce speed. Then stop in a safe place.
- Park the vehicle on firm, level, and non-slippery ground and apply the parking brake.
Continuously variable transmission models
- Move the shift lever to P.
Manual transmission models
- Move the shift lever to R.
All models
- Turn on the hazard warning lights and turn the ignition switch to LOCK 0*1.
▶When towing a trailer, unhitch the trailer.
*1: Models with the keyless access system have an ENGINE START/STOP button instead of an ignition switch.
* Not available on all models
▶ Temporarily Repairing a Flat Tyre \*
The kit should not be used in the following situations. Instead, contact a dealer or a roadside assistant to have the vehicle towed.
• The tyre sealant has expired.
- More than one tyre is punctured.
- The puncture or cut is greater than 4 mm (3/16 inch).
- The tyre side wall is damaged or the puncture is outside the tyre area.
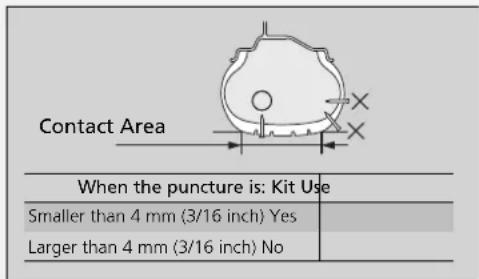
- Damage has been caused by driving with the tyres extremely under inflated.
- The tyre bead is no longer seated.
- The rim is damaged.
Do not remove a nail or screw that punctured the tyre. If you remove it from the tyre, you may not be able to repair the puncture using the kit.
Getting Ready to Temporarily Repair the Flat Tyre
Air Compressor
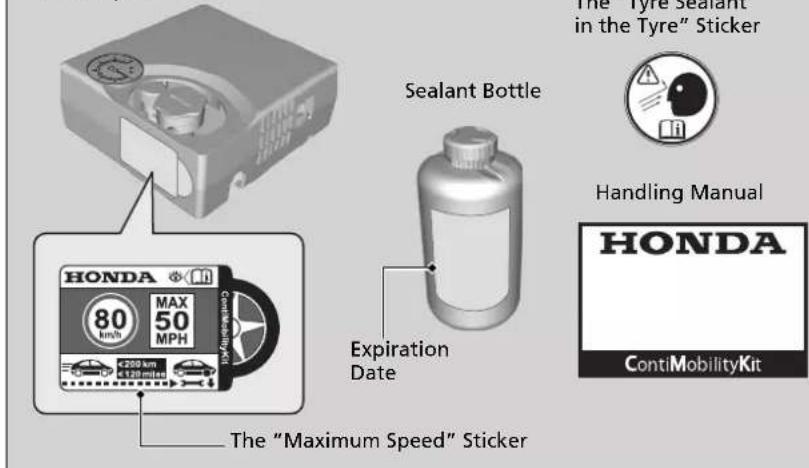
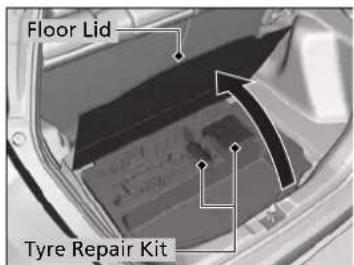
The "Tyre Sealant in the Tyre" Sticker

Handling Manual

- Open the luggage area floor lid, then take the kit out of the tool box.
- Place the kit, face up, on flat ground near the flat tyre, away from traffic. Do not place the kit on its side.
>>Getting Ready to Temporarily Repair the Flat Tyre
When making a temporary repair, carefully read the instruction manual provided with the kit.
Injecting the Sealant and Air in the Tyre
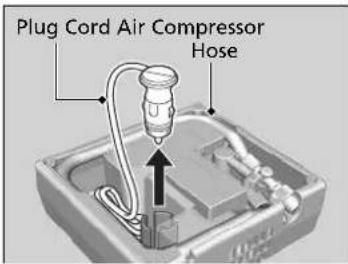
- Take the air compressor hose and plug cord out of the back of the air compressor.
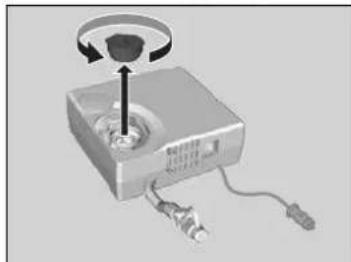
natural_image
3D rendering of a mechanical device with a central knob and wiring (no visible text or symbols)- Remove the cap from the air compressor.
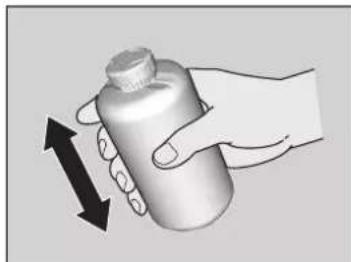
natural_image
Illustration of a hand holding a bottle with an upward arrow indicating motion (no text or symbols)- Shake the bottle well.
Injecting the Sealant and Air in the Tyre
WARNING
Tyre sealant contains substances that are harmful and can be fatal if swallowed.
If accidentally swallowed, do not induce vomiting. Drink plenty of water and get medical attention immediately.
For skin or eye contact, flush with cool water and get medical attention if necessary.
Keep the sealant bottle out of the reach of children.
In cold temperatures, the sealant may not flow easily. In this situation, warm it by keeping the bottle in the passenger compartment before using.
The sealant can permanently stain clothing and other materials. Be careful during handling and wipe away any spills immediately.
▶▶ If a Tyre Goes Flat▶ Temporarily Repairing a Flat Tyre*
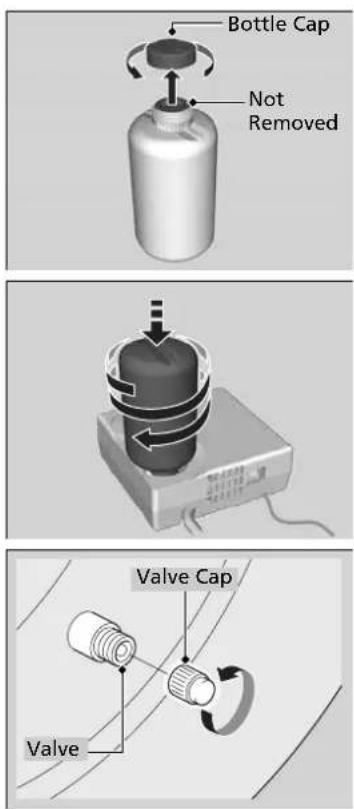
- Remove the bottle cap.
▶ Do not remove the sealed cover.
- Screw the sealed bottle onto the air compressor.
▶Screw the bottle tightly so that it does not become loose.
- Unscrew the valve cap.
Injecting the Sealant and Air in the Tyre
Do not remove the empty bottle after injecting the sealant.
See a Honda dealer for a replacement of sealant bottle and proper disposal of the empty bottle.
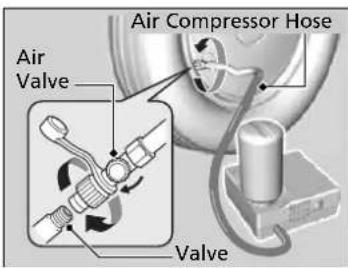
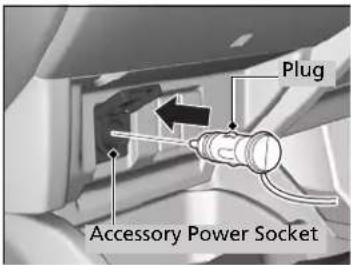
- Screw the air compressor hose onto the tyre valve.
▶ Make sure the air valve is closed and the air compressor is turned off.
- Plug in the compressor to the accessory power socket.
→ Accessory Power Socket(s) P. 205
- Start the engine.
Carbon Monoxide Gas P. 82
Injecting the Sealant and Air in the Tyre
WARNING
Running the engine with the vehicle in an enclosed or even partly enclosed area can cause a rapid build-up of toxic carbon monoxide.
Breathing this colourless, odourless gas can cause unconsciousness and even death. Only run the engine to power the air compressor with the vehicle outdoors.
Turn the air compressor off when connecting the air compressor hose.
You hear a motor sound coming from the activated air compressor. This is normal.
If the specified air pressure is not reached within 10 minutes, the tyre may be too severely damaged for the kit to provide the necessary seal and your vehicle will need to be towed.
If you want to measure the air pressure using a gauge, turn the air compressor off first.
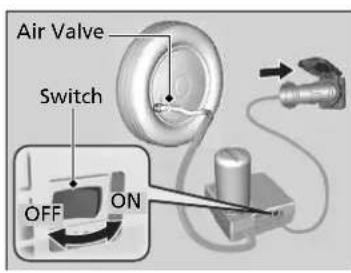
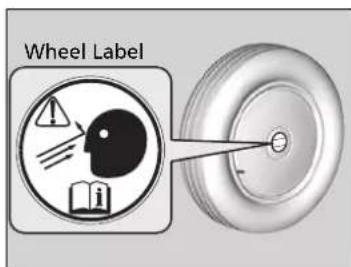
- Turn on the air compressor and inflate the tyre to the specified air pressure.
The compressor starts injecting sealant and air into the tyre.
▶Refer to the driver's doorjamb label for the specified pressure.
- After the air pressure reaches to specified pressure, turn off the compressor.
▶ Check the air pressure gauge on the air compressor.
▶ If overinflated, release the air by turning the air valve. Be careful not to spill any sealant.
-
Unplug the plug from the accessory power socket.
-
Unscrew the air compressor hose from the tyre valve. Install the hose cap.
▶ Be careful not to spill any sealant when the hose is disconnected. Wipe away any spills.
- Apply the wheel label to the flat surface of the wheel.
The wheel surface must be clean to ensure the label adheres properly. - Store the tyre repair kit in the luggage area.
▶ Do not remove the sealant bottle from the air compressor.
Injecting the Sealant and Air in the Tyre
Inform the use of tyre sealant when you ask a Honda dealer or the road assistant service for replacing or repairing the flat tyre.
This air compressor is designed for the automotive tyre. Check the following:
- The power supply of the air compressor is limited to your vehicle's 12-volt DC accessory power socket.
- Do not operate the temporary tyre repair kit compressor for more than 15 minutes. The compressor can overheat and become permanently damaged.
Make it cool down when using the compressor continuously.
Distributing the Sealant in the Tyre
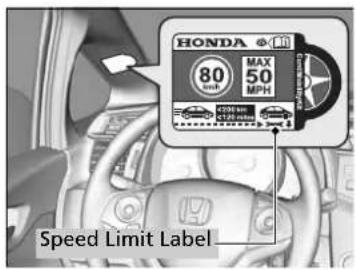
- Apply the speed limit label to the location as shown.
- Drive the vehicle for about 10 minutes or three to ten kilometres (two to six miles).
▶Do not exceed 80 km/h (50 mph). - Stop the vehicle in a safe place.
- Recheck the air pressure using the gauge on the air compressor.
▶ Do not turn the air compressor on to check the pressure.
Distributing the Sealant in the Tyre
WARNING
Running the engine with the vehicle in an enclosed or even partly enclosed area can cause a rapid build-up of toxic carbon monoxide.
Breathing this colourless, odourless gas can cause unconsciousness and even death. Only run the engine to power the air compressor with the vehicle outdoors.
Refer to the driver's doorjamb label for the specified pressure.
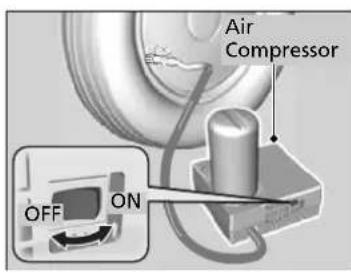
- If the air pressure is
- Less than 130 kPa (19 psi): Do not add air and continue driving. The leak is too severe. Call for help and have your vehicle towed.
Emergency Towing P. 586
- Specified air pressure (See the label on driver's doorjamb.) or more: Continue driving until you reach the nearest service station. Do not exceed 80 km/h (50 mph).
- Greater than 130 kPa (19 psi), but less than specified air pressure (See the label on driver's doorjamb.): Inflate the tyre to the specified air pressure.
Inflating an Under-inflated Tyre P. 559
And repeat steps 2 to 4 until you reach the nearest service station. Do not exceed 80 km/h (50 mph).
The distance to the nearest service station has to be within about 200 kilometres (120 miles).
- Repackage and properly stow the kit.
Distributing the Sealant in the Tyre
Make sure to store the air compressor with the empty bottle in the luggage area.
Inflating an Under-inflated Tyre
You can use the kit to inflate a non-punctured under-inflated tyre.
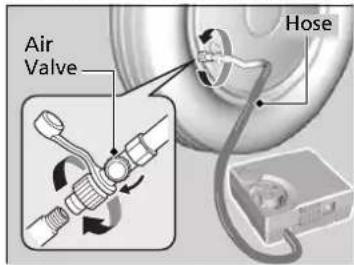
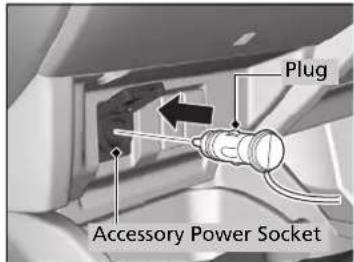
- Take the air compressor out of the luggage area.
- Place the kit, face up, on flat ground near the tyre to inflate, away from traffic. Do not place the kit on its side.
- Remove the valve cap.
- Attach the hose onto the tyre valve. Screw it until it is tight.
▶ Make sure the air valve is closed. - Plug in the compressor to the accessory power socket.
▶ Be careful not to pinch the cord in a door or window.
→ Accessory Power Socket(s) P. 205 - Start the engine.
Carbon Monoxide Gas P. 82
Inflating an Under-inflated Tyre
WARNING
Running the engine with the vehicle in an enclosed or even partly enclosed area can cause a rapid build-up of toxic carbon monoxide.
Breathing this colourless, odourless gas can cause unconsciousness and even death. Only run the engine to power the air compressor with the vehicle outdoors.
You hear a motor sound coming from the activated air compressor. This is normal.
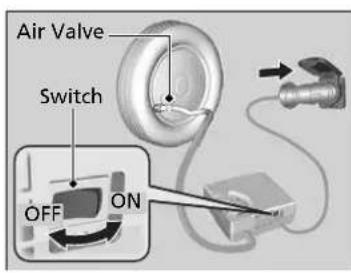
- Turn on the air compressor and inflate the tyre to the specified air pressure (See the label on driver's doorjamb.)
- Turn off the air compressor.
▶ Check the air pressure gauge on the air compressor.
▶If overinflated, turn the air valve to deflate.
- Turn off the engine, then unplug the air compressor from the accessory power socket.
- Unscrew the air compressor hose from the tyre valve. Reinstall the valve cap.
- Store the air compressor in the luggage area.
Inflating an Under-inflated Tyre
This air compressor is designed for the automotive tyre. Check the following:
- The power supply of the air compressor is limited to your vehicle's 12-volt DC accessory power socket.
- Do not operate the temporary tyre repair kit compressor for more than 15 minutes. The compressor can overheat and become permanently damaged.
Make it cool down when using the compressor continuously.
If you want to measure the air pressure using a gauge, turn the air compressor off first.
Engine Does Not Start
Checking the Engine
If the engine does not start, check the starter.
Checking the Engine
If you must start the vehicle immediately, use an assisting vehicle or booster battery to jump start it. ▶ Jump Starting P. 564
Models with keyless access system
Do not hold the ENGINE START/STOP button for more than 15 seconds.
Starter condition Checklist
| Starter doesn’t turn or turns over slowly.The battery may be dead. Check each of the items on the right and respond accordingly. | Models with keyless access systemCheck for an indication on the multi-information display.Ifappears.If the Keyless Remote Battery is Weak P. 562Make sure the keyless remote is in its operating range.ENGINE START/STOP Button Operating Range P. 165 |
| Check the brightness of the interior lights.Turn on the interior lights and check the brightness.If the interior lights are dim or do not come on at allBatteryP. 524If the interior lights come on normallyFusesP. 575 | |
| The starter turns over normally but the engine doesn’t start.There may be a problem with the fuse. Check each of the items on the right and respond accordingly. | Review the engine start procedure.Follow its instructions, and try to start the engine again.Starting the Engine P. 392, 395 |
| Check the immobilizer system indicator.When the immobilizer system indicator is blinking, the engine cannot be started.Immobilizer System P. 159 | |
| Check the fuel level.There should be enough fuel in the tank.Fuel Gauge P. 128 | |
| Check the fuses.Check all fuses, or have your vehicle checked by a dealer.Inspecting and Changing Fuses P. 585 | |
| If the problem continues:Emergency Towing P. 586 |
▶▶ Engine Does Not Start▶ If the Keyless Remote Battery is Weak
Models with keyless access system
If the Keyless Remote Battery is Weak
If the beeper sounds, bears on the multi-information display, and the ENGINE START/STOP button flashes, and the engine does not start.
Start the engine as follows.
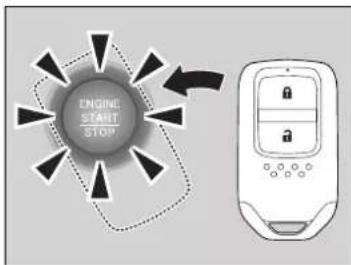
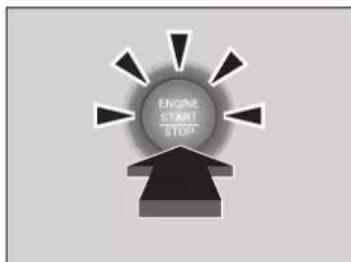
- Touch the centre of the ENGINE START/STOP button with the H logo on the keyless remote while the ENGINE START/STOP button is flashing. The buttons on the keyless remote should be facing you.
The ENGINE START/STOP button flashes for about 30 seconds.
- Depress the brake pedal and the clutch pedal (manual transmission) and press the ENGINE START/STOP button within 10 seconds after the beeper sounds and the ENGINE START/STOP button changes from flashing to on.
▶If you do not depress the pedal, the mode will change to ACCESSORY.
Models with keyless access system
Emergency Engine Stop
The ENGINE START/STOP button may be used to stop the engine due to an emergency situation even while driving. If you must stop the engine, do either of the following operations:
- Press and hold the ENGINE START/STOP button about for two seconds.
- Firmly press the ENGINE START/STOP button three times.
The steering wheel will not lock.
Continuously variable transmission models
The power mode is in ACCESSORY when the engine is stopped.
To change the mode to VEHICLE OFF, move the shift lever to P after the vehicle comes to a complete stop. Then press the ENGINE START/STOP button twice without depressing the brake pedal.
Manual transmission models
The power mode changes to VEHICLE OFF.
Emergency Engine Stop
Do not press the ENGINE START/STOP button while driving unless it is absolutely necessary for the engine to be turned off.
If you press the ENGINE START/STOP button while driving, the beeper sounds.
Jump Starting
Jump Starting Procedure
Turn off the power to electric devices, such as audio and lights. Turn off the engine, then open the bonnet.
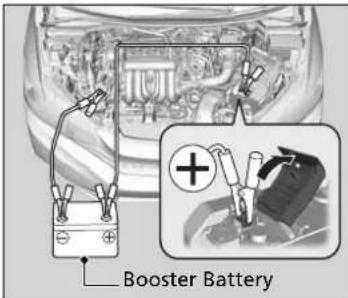
- Connect the first jumper cable to the position shown in a Illustration.
Remove the cover from the under-bonnet fuse box.
Engine Compartment Fuse Box P. 575
- Connect the other end of the first jumper cable to the booster battery ⊕ terminal.
▶ Use a 12-volt booster battery only.
▶Connect when using the automotive battery charger to boost your 12-volt battery, select a lower charging voltage than 15-volt. Check the charger manual for the proper setting.
- Connect the second jumper cable to the booster battery ⊖ terminal.
Jump Starting
WARNING
A battery can explode if you do not follow the correct procedure, seriously injuring anyone nearby.
Keep all sparks, open flames, and smoking materials away from the battery.
NOTICE
If a battery sits in extreme cold, the electrolyte inside can freeze. Attempting to jump start with a frozen battery can cause it to rupture.
Securely attach the jumper cables clips so that they do not come off when the engine vibrates. Also be careful not to tangle the jumper cables or allow the cable ends to touch each other while attaching or detaching the jumper cables.
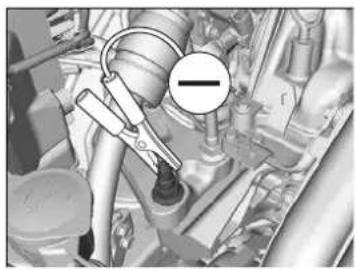
natural_image
Mechanical assembly diagram showing engine components and a circular warning symbol (no readable text or labels)- Connect the other end of the second jumper cable to the stud bolt as shown. Do not connect this jumper cable to any other part.
- If your vehicle is connected to another vehicle, start the assisting vehicle's engine and increase its rpm slightly.
- Attempt to start your vehicle's engine. If it turns over slowly, check that the jumper cables have good metal-to-metal contact.
Jump Starting
Battery performance degrades in cold conditions and may prevent the engine from starting.
What to Do After the Engine Starts
Once your vehicle's engine has started, remove the jumper cables in the following order.
- Disconnect the jumper cable from your vehicle's stud bolt.
- Disconnect the other end of the jumper cable from the booster battery ⊖ terminal.
- Disconnect the jumper cable from your vehicle's battery ⊕ terminal.
- Disconnect the other end of the jumper cable from the booster battery terminal.
Have your vehicle inspected by a nearby service station or a dealer.
Shift Lever Does Not Move
Continuously variable transmission models
Follow the procedure below if you cannot move the shift lever out of the P position.
Releasing the Lock
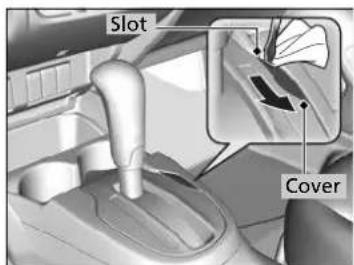
- Set the parking brake.
Models without keyless access system
- Remove the key from the ignition switch.
Models with keyless access system
- Remove the built-in key from the keyless remote.
All models
-
Wrap a cloth around the tip of a small flat-tip screwdriver. Put it into the shift lock release slot as shown in the image, and remove the cover.
-
Insert the key into the shift lock release slot.
-
While pushing the key down, press the shift lever release button, and place the shift lever into N.
The lock is now released. Have the shift lever checked by a dealer as soon as possible.
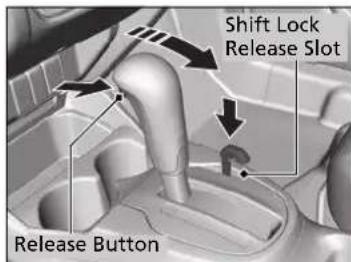
Overheating
How to Handle Overheating
Overheating symptoms are as follows:
- The high temperature indicator comes on or the engine suddenly loses power.
- The message appears on the multi-information display.
- Steam or spray comes out of the engine compartment.
■First thing to do
- Immediately park the vehicle in a safe place.
- Turn off all accessories and turn on the hazard warning lights.
▶ No steam or spray present: Keep the engine running and open the bonnet.
▶ Steam or spray is present: Turn off the engine and wait until it subsides.
Then open the bonnet.
How to Handle Overheating
WARNING
Steam and spray from an overheated engine can seriously scald you.
Do not open the bonnet if steam is coming out.
NOTICE
Continuing to drive with the high temperature indicator on may damage the engine.
■Next thing to do
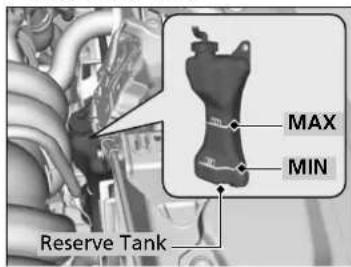
- Check that the cooling fan is operating and stop the engine once the high temperature indicator goes off.
▶If the cooling fan is not operating, immediately stop the engine.
- Once the engine has cooled down, inspect the coolant level and check the cooling system components for leaks.
▶If the coolant level in the reserve tank is low, add coolant until it reaches the MAX mark.
If there is no coolant in the reserve tank, check that the radiator is cool. Cover the radiator cap with a heavy cloth and open the cap. If necessary, add coolant up to the base of the filler neck, and put the cap back on.
■Last thing to do
Once the engine has cooled sufficiently, restart it and check the high temperature indicator. If the high temperature indicator is off, resume driving. If it stays on, contact a dealer for repairs.
How to Handle Overheating
WARNING
Removing the radiator cap while the engine is hot can cause the coolant to spray out, seriously scalding you.
Always let the engine and radiator cool down before removing the radiator cap.
If the coolant is leaking, contact a dealer for repairs.
Use water as an emergency/temporary measure only. Have a dealer flush the system with proper antifreeze as soon as possible.
Indicator, Coming On/Blinking
If the Low Oil Pressure Indicator Comes On

■Reasons for the indicator to come on
Comes on when the engine oil pressure is low.
■What to do as soon as the indicator comes on
-
Immediately park the vehicle on level ground in a safe place.
-
If necessary, turn the hazard warning lights on.
■What to do after parking the vehicle
-
Stop the engine and let it sit for approximately three minutes.
-
Open the bonnet and check the oil level.
→Oil Check P. 494
- Start the engine and check the low oil pressure indicator.
The indicator goes off: Start driving again.
The indicator does not go off within 10 seconds: Immediately stop the engine and contact a dealer for repairs.
If the Charging System Indicator Comes On

■Reasons for the indicator to come on
Comes on when the battery is not being charged.
■What to do when the indicator comes on
Turn off the heating and cooling system*/climate control system*, rear demister, and other electrical systems, and immediately contact a dealer for repairs.
If the Low Oil Pressure Indicator Comes On
NOTICE
Running the engine with low oil pressure can cause serious mechanical damage almost immediately.
If the Charging System Indicator Comes On
If you need to stop temporarily, do not turn off the engine. Restarting the engine may rapidly discharge the battery.
If the Malfunction Indicator Lamp Comes On or Blinks

■Reasons for the indicator lamp to come on or blink
- Comes on when there is a problem with the engine emissions control system.
- Blinks when engine misfiring is detected.
■What to do when the indicator lamp comes on
Avoid high speeds and immediately get your vehicle inspected at a dealer.
■What to do when the indicator lamp blinks
Park the vehicle in a safe place with no flammable items and wait at least 10 minutes or more with the engine stopped until it cools.
If the Brake System Indicator (Red) Comes On

■Reasons for the indicator to come on
• The brake fluid is low.
- There is a malfunction in the brake system.
■ What to do when the indicator comes on while driving
Depress the brake pedal lightly to check pedal pressure.
- If normal, check the brake fluid level the next time you stop.
- If abnormal, take immediate action. If necessary, downshift the transmission to slow the vehicle using engine braking.
If the Malfunction Indicator Lamp Comes On or Blinks
NOTICE
If you drive with the malfunction indicator lamp on, the emissions control system and the engine could be damaged.
If the malfunction indicator lamp blinks again when restarting the engine, drive to the nearest dealer at 50 km/h (30 mph) or less. Have your vehicle inspected.
If the Brake System Indicator (Red) Comes On
Have your vehicle repaired immediately. It is dangerous to drive with low brake fluid. If there is no resistance from the brake pedal, stop immediately in a safe place. If necessary, downshift the gears.
If the brake system indicator and ABS indicator come on simultaneously, the electronic brake distribution system is not working. This can result in vehicle instability under sudden braking.
Have your vehicle inspected by a dealer immediately.
If the Electric Power Steering (EPS) System Indicator Comes On

■Reasons for the indicator to come on
- Comes on when there is a problem with the EPS system.
- If you depress the accelerator pedal repeatedly to increase the engine speed while the engine is idling, the indicator comes on, and sometimes the steering wheel becomes harder to operate.
■What to do when the indicator comes on
Stop the vehicle in a safe place and restart the engine. If the indicator comes on and stays on, immediately have your vehicle inspected by a dealer.
If the Low Tyre Pressure/Deflation Warning System Indicator Comes On or Blinks

■Reasons for the indicator to come on or blink
A tyre pressure is significantly low, or the deflation warning system has not been calibrated. If there is a problem with the deflation warning system, the indicator blinks for about one minute, and then stays on. If the compact spare tyre* is installed, the indicator will either come on or it will first blink for about one minute, then stay on.
■What to do when the indicator comes on
Drive carefully and avoid abrupt cornering and hard braking. Stop your vehicle in a safe place. Check the tyre pressure and adjust the pressure to the specified level. The specified tyre pressure is on a label on the driver side doorjamb.
▶ Calibrate the deflation warning system after the tyre pressure is adjusted.
▶ Deflation Warning System Calibration P. 449
If the compact spare tyre* causes the indicator to come on, change the tyre to a full-size tyre. The indicator goes off after driving for a few kilometers (miles).
▶ Calibrate the deflation warning system after a full-size tyre is reinstalled.
→ Deflation Warning System Calibration P. 449
■ What to do when the indicator blinks, then remains on
Have the tyre inspected by a dealer as soon as possible. If the compact spare tyre ^* causes the indicator to first blink, and then stay on, change the tyre to a full-size tyre.
The indicator goes off after driving for a few kilometres (miles).
▶ Calibrate the deflation warning system after a full-size tyre is reinstalled.
Deflation Warning System Calibration P. 449
* Not available on all models
If the Low Tyre Pressure/Deflation Warning System Indicator Comes On or Blinks
NOTICE
Driving on an extremely underinflated tyre can cause it to overheat. An overheated tyre can fail. Always inflate your tyres to the prescribed level.
If the Low Oil Level Symbol Appears

■Reasons for the symbol to appear
Appears when the engine oil level is low.
■What to do as soon as the symbol appears
-
Immediately park the vehicle on level ground in a safe place.
-
If necessary, turn the hazard warning lights on.
■What to do after parking the vehicle
-
Stop the engine and let it sit for about three minutes.
-
Open the bonnet and check the oil level.
Oil Check P. 494
If the Low Oil Level Symbol Appears
NOTICE
Running the engine with low oil level can cause serious mechanical damage almost immediately.
This system activates after the engine warms up. If the outside temperature is extremely low, you may have to drive for a long time until the system senses the engine oil level.
If the symbol appears again, stop the engine and contact a dealer for repairs immediately.
Fuses
Fuse Locations
If any electrical devices are not working, turn the ignition switch to LOCK 0 *1 and check to see if any applicable fuse is blown.
Engine Compartment Fuse Box
Fuse Box A
Located near the brake fluid reserve tank. Push the tabs to open the box. Locate the fuse in question by the following image and table.
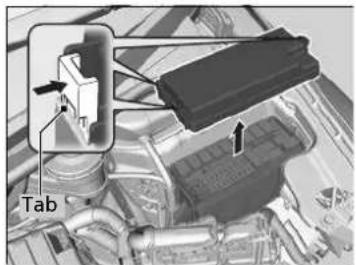
*1: Models with the keyless access system have an ENGINE START/STOP button instead of an ignition switch.
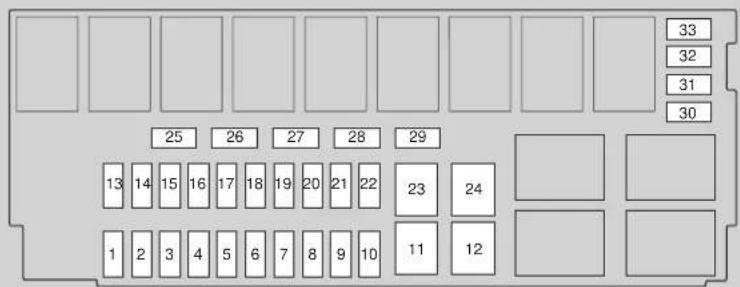

Front
■Circuit protected and fuse rating
| Circuit Protected Amps | ||
| 1 Headlight Low Beam Main 20 A | ||
| 2 | - | - |
| 3 Hazard 10 A | ||
| 4 DBW 15 A | ||
| 5 Wiper | * | (30 A) |
| 6 Stop 10 A | ||
| 7 IGP 15 A | ||
| 8 IG Coil 15 A | ||
| 9 | - | - |
| 10 EVTC | (20 A) | |
| 11 | DC/DC2* | (30 A) |
| 12 | Main Fan | 30 A |
| 13 | Starter SW* | (30 A) |
| 14 | MG Clutch | 7.5 A |
| 15 | Battery Sensor | 7.5 A |
| 16 | - | - |
| 17 | DRL 7.5 A | |
| 18 Horn | 10 A | |
| 19 | Front Fog Lights* | (15 A) |
| 20 | - | - |
| Circuit Protected Amps | ||
| 21 | Back Up1 | 10 A |
| 22 | Interior Light | 7.5 A |
| 23 | Sub Fan* | (30 A) |
| 24 | DC/DC 1* | 30 A |
| 25 | Starter Diag* | (7.5 A) |
| 26 | CAM SNSR | (7.5 A) |
| 27 | - | - |
| 28 | - | - |
| 29 | Back Up2 Main | 30 A |
| 30 | IGP LAF | 10 A |
| 31 | IGP2 Sub | 7.5 A |
| 32 | Right Headlight Low Beam | 10 A |
| 33 | Left Headlight Low Beam | 10 A |
Fuse Box B
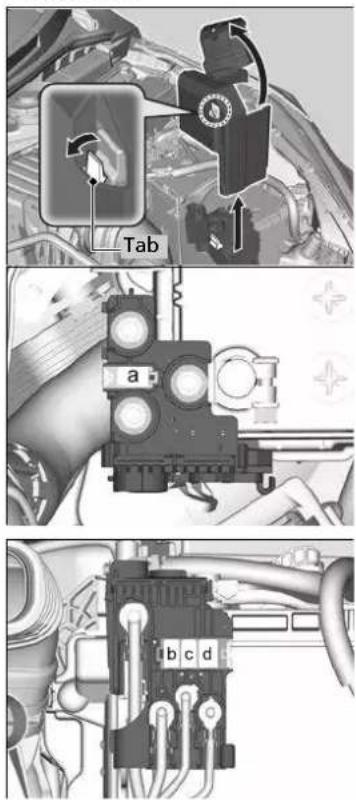
Pull up the cover on the ⊕ terminal, then remove it while pulling out the tab as shown.
Replacement of engine compartment fuses should be done by a dealer.
■Circuit protected and fuse rating
| Circuit Protected Amps | |
| a Batter Main 100 A | |
| b RB Main 1 70 A | |
| c RB Main 2 80 A | |
| d CAP Main 80 A |
Driver Side Interior Fuse Box
■Type A
Located behind the instrument panel.
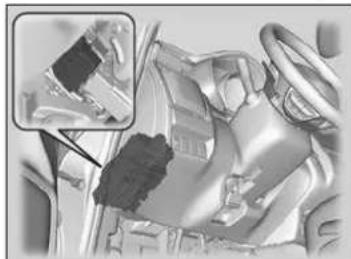
natural_image
Interior view of a car showing steering wheel, dashboard, and gear assembly (no visible text or symbols)Locate the fuse in question by the following image and table.
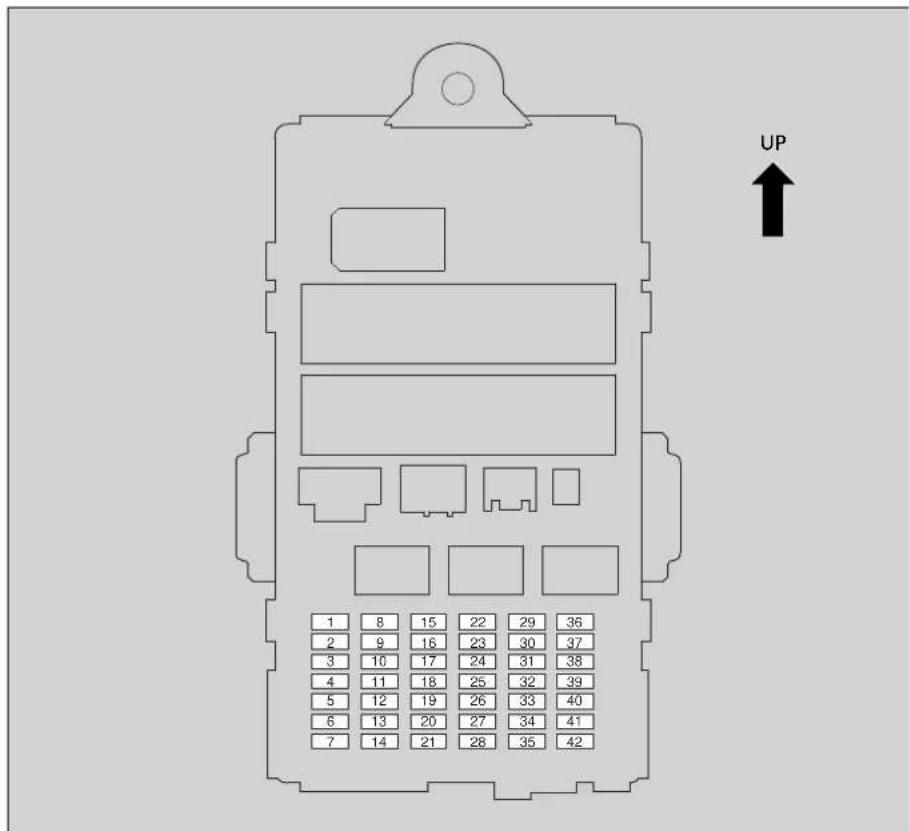
■Circuit protected and fuse rating
| Circuit Protected Amps | ||
| 1 Door Lock 20 A | ||
| 2 -- | ||
| 3 Keyless Access System * (10 A) | ||
| 4 Left Side Door Unlock 15 A | ||
| 5 Right Side Door Unlock 15 A | ||
| 6 -- | ||
| 7 -- | ||
| 8 Driver's Power Window 20 A | ||
| 9 Passenger's Power Window 20 A | ||
| 10 | Rear Left Power Window | 20 A |
| 11 | Rear Right Power Window | 20 A |
| 12 | Left Side Door Lock | 15 A |
| 13 | Right Side Door Lock | 15 A |
| 14 | Rear Fog Light | 10 A |
| 15 | Right Headlight High Beam | 10 A |
| 16 | STS* | (7.5 A) |
| 17 | -- | |
| 18 | -- | |
| 19 | Heated Seat* | (20 A) |
| 20 | -- | |
| Circuit Protected Amps | ||
| 21 | -- | |
| 22 | Washer | 15 A |
| 23 | Rear Wiper Main* | (10 A) |
| 24 | A/C | 7.5 A |
| 25 | Daytime Running Lights | 7.5 A |
| 26 | Starter* | 7.5 A |
| 27 | ABS/VSA | 7.5 A |
| 28 | SRS1 | 10 A |
| 29 | Left Headlight High Beam | 10 A |
| 30 | ACG | 10 A |
| 31 | Power Window | 10 A |
| 32 | Fuel Pump | 15 A |
| 33 | SRS2 | 7.5 A |
| 34 | Meter | 7.5 A |
| 35 | Mission SOL* | (7.5 A) |
| 36 | Front ACC Socket | 20 A |
| 37 | ACC | 7.5 A |
| 38 | -- | |
| 39 | Option | 10 A |
| 40 | Rear Wiper | 10 A |
| Circuit Protected Amps | |
| 41 | -- |
| 42 | -- |
■Type B
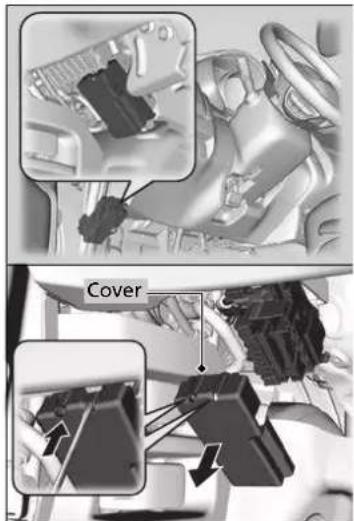
Remove the cover by putting the flat-tip screwdriver into the side slot as shown. Locate the fuse in question by the following image and table.
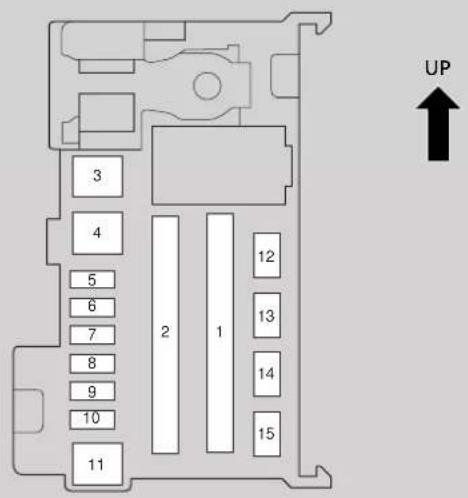
■Circuit protected and fuse rating
| Circuit Protected Amps | ||
| EPS | 70 A | |
| IG Main | 50 A*1 | |
| 30 A*2 | ||
| 1 | Fuse Box Main 2 50 A | |
| ABS/VSA Motor 40 A | ||
| Fuse Box Main 1 30 A | ||
| Fuse Box Main 3 40 A | ||
| 2 | - | - |
| - | - | |
| - | - | |
| - | - | |
| - | - | |
| - | - | |
| Circuit Protected Amps | ||
| 3 Heater Motor 30 A | ||
| 4*2 | IG Main 2 (30 A) | |
| 5 ABS/VSA FSR 30 A | ||
| 6 ISA | * | (15 A) |
| 7 -- | ||
| 8 Super Lock | * | (20 A) |
| 9 | Small Light | 10 A |
| 10 | Centre Accessory Socket * | (20 A) |
| 11 | Rear Demister | 30 A |
| 12*1 | Key ACC Lock | (7.5 A) |
| 13 | Heated Door Mirror * | (10 A) |
| 14 | A/C Blower SW*3 | (7.5 A) |
| 15*1 | Front Wiper (30 A) | |
*1: Models without the keyless access system
*2: Models with the keyless access system
*3: Models with heating and cooling system
Left-hand drive type
■Type C \*
Located near the steering column.
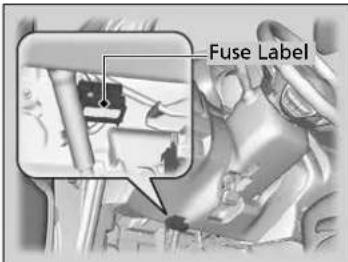
Fuse locations are shown on the label. Locate the fuse in question by the fuse number and label number.
■Circuit protected and fuse rating
| Circuit Protected Amps | |||
| 1 | --- | ||
| 2 | IG 1-2i7.5 A | ||
| 3 | Power Oil Pump (10 A) | ||
| 4 | - | - | - |
| 5 | Accessory 7.5 A | ||
| 6 | IG 1-1i7.5 A | ||
| 7 | i | Back Up2 Main | 15 A |
Right-hand drive type
Passenger Side Interior Fuse Box \*
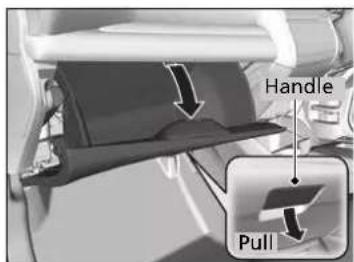
Located behind the glove box.
- Open the glove box.
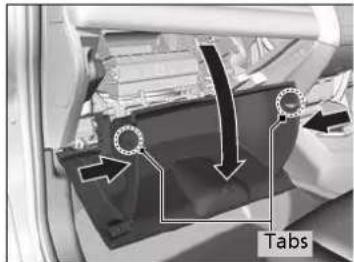
-
Disengage the two tabs by pushing on each side panel.
-
Pivot the glove box out of the way.
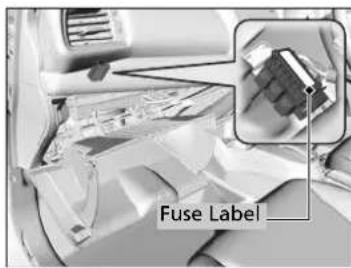
Fuse locations are shown on the label. Locate the fuse in question by the fuse number and label number.
■Circuit protected and fuse rating
| Circuit Protected Amps | |||
| 1 | --- | ||
| 2 | IG 1-2i7.5 A | ||
| 3 | Power Oil Pump (10 A) | ||
| 4 | - | - | - |
| 5 | Accessory 7.5 A | ||
| 6 | IG 1-1i7.5 A | ||
| 7 | BackUp2 Main | 15 A | |
Inspecting and Changing Fuses
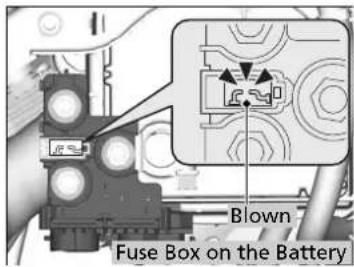
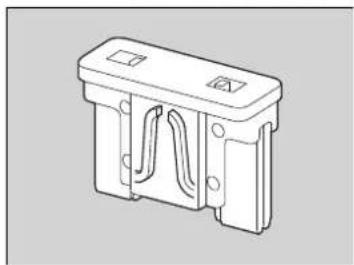
natural_image
Technical line drawing of a mechanical component with internal channels and mounting holes (no text or symbols)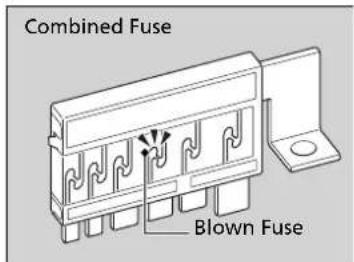
- Turn the ignition switch to LOCK 0 ^*1 . Turn headlights and all accessories off.
- Remove the fuse box cover.
- Check the large fuses on the battery in the engine compartment.
▶If the fuse is blown, have it replaced by a dealer.
- Inspect the small fuses in the engine compartment and the vehicle interior.
▶If there is a blown fuse, remove it and replace it with a new one. - Check the large fuse in the vehicle interior.
▶If the fuse is blown, use a phillips-head screwdriver to remove the screw and replace it with a new one.
Inspecting and Changing Fuses
NOTICE
Replacing a fuse with one that has a higher rating greatly increases the chances of damaging the electrical system.
Replace fuse with a spare fuse of the same specified amperage.
Use the charts to locate the fuse in question and confirm the specified amperage.
→Fuse Locations P. 575
Emergency Towing
Call a professional towing service if you need to tow your vehicle.
■Flat bed equipment
The operator loads your vehicle on the back of a truck. This is the best way to transport your vehicle.
■Wheel lift equipment
The tow truck uses two pivoting arms that go under the front tyres and lift them off the ground. The rear tyres remain on the ground. This is an acceptable way to tow your vehicle.
Emergency Towing
NOTICE
Trying to lift or tow your vehicle by the bumpers will cause serious damage. The bumpers are not designed to support the vehicle's weight.
Improper towing such as towing behind a motorhome or other motor vehicle can damage the transmission.
Never tow your vehicle with just a rope or chain. It is very dangerous since ropes or chains may shift from side to side or break.
■ If your vehicle must be towed with the front wheels on the ground:
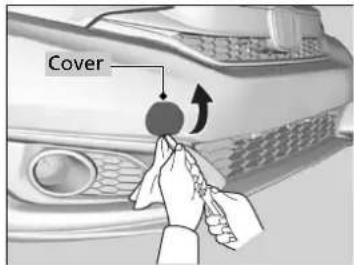
- Check the ground underneath the vehicle around where the transmission housing is for a fluid leak.
▶If you find a leak, call a professional towing service and have your vehicle inspected by a dealer.
- Put cloth on the edge of the cover. Carefully pry with a small flat-tip screwdriver or a metal fingernail file to remove the cover.
The detachable towing hook mounts on the anchor in the front bumper.
If your vehicle must be towed with the front wheels on the ground:
Towing a vehicle is prohibited by law in some countries.
Check and follow the legal requirements of the country in which you are driving before towing your vehicle.
If you cannot follow the exact procedure, do not tow your vehicle with the front wheels on the ground.
If you cannot turn on the engine, you may experience the following while your vehicle is being towed.
- Braking may become difficult since the brake system's power assist is disabled.
- Steering wheel becomes heavy as the power steering system is disabled.
Manual transmission models
- Turning the ignition switch to LOCK 0 ^-1 locks the steering wheel.
With the front wheels on the ground, it is best to tow the vehicle no farther than 80 km (50 miles), and keep the speed below 55 km/h (34 mph).
Going down a long slope heats up the brakes. This may prevent the brakes from working properly. If your vehicle needs to be towed on an incline, call a professional towing service.
Make sure to use the properly-designed and attached towing equipment.
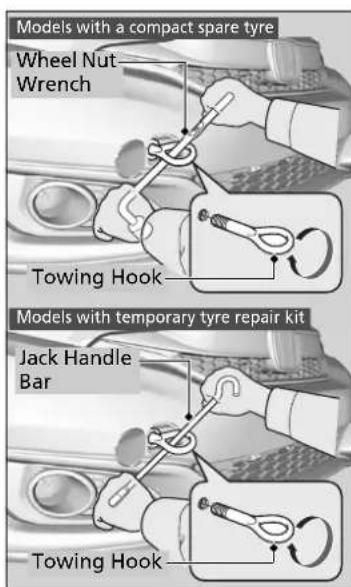
Models with a compact spare tyre
- Take the towing hook and the wheel nut wrench out of the luggage area.
Models with temporary tyre repair kit
- Take the towing hook and the jack handle bar out of the luggage area.
All models
- Screw the towing hook into the hole, and tighten it with the wheel nut wrench* or the jack handle bar* securely.
- Hook the towing device to the towing hook.
- Start the engine.
If it is difficult to turn on the engine, put the ignition switch in ACCESSORY I or ON II *1.
Manual transmission models
- Shift to N.
Continuously variable transmission models
- Depress the brake pedal.
- Shift to D and hold for five seconds, then to N.
All models
- Release the parking brake.
If your vehicle must be towed with the front wheels on the ground:
NOTICE
Continuously variable transmission models
If you cannot shift the transmission or turn on the engine, will damage the transmission. Your vehicle must be transported with the front wheels off the ground.
*1: Models with the keyless access system have an ENGINE START/STOP button instead of an ignition switch.
* Not available on all models
When You Cannot Open the Tailgate
What to Do When Unable to Open the Tailgate
If you cannot open the tailgate, use the following procedure.
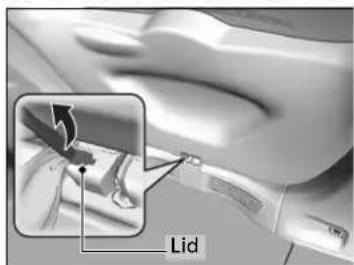
- Wrap a cloth around the flat-tip screwdriver. Put it into the lid as shown in the image, and open the lid.
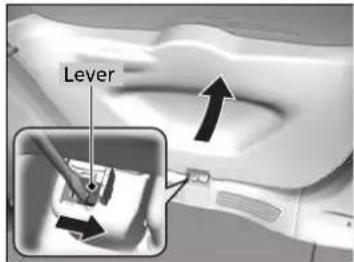
Models with keyless access system
- To open the tailgate, push the tailgate while sliding the lever to the right.
What to Do When Unable to Open the Tailgate
Following up: After taking these steps, contact a dealer to have the vehicle checked.
When you open the tailgate from inside, make sure there is enough space around the tailgate, and it does not hit anyone or any object.
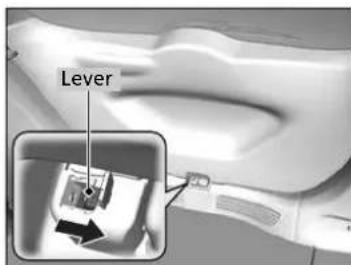
Models without keyless access system
- Slide the lever to unlock the tailgate.
- Open the tailgate.
Information
This chapter includes your vehicle's specifications, locations of identification numbers, and other information required by regulation.
Specifications.... 592
Identification Numbers
Vehicle Identification Number (VIN),
Engine Number and Transmission
Number 596
Devices that Emit Radio Waves* ..... 597
EC Declaration of Conformity Content
Outline ^* 611
Specifications
Vehicle Specifications
| Model Jazz | |
| Curb Weight ^1 | 1,074 – 1,110 kg (2,367 – 2,447 lbs) |
| Curb Weight ^2 | 1,094 – 1,130 kg (2,411 – 2,491 lbs) |
| Maximum permissible weight | See the certification label on the driver's doorjamb ^3 See the certification label on the passenger's doorjamb ^2 |
| Maximum permissible axle weight | See the certification label on the driver's doorjamb ^3 See the certification label on the passenger's doorjamb ^2 |
*1: Manual transmission models
*2: Continuously variable transmission models
*3: Left-hand drive models
*4: Right-hand drive models
■Engine Specifications
| Type Water-cooled in-line 4-cylinder DOHC | |
| Bore x Stroke 73.0 x 78.7 mm (2.87 x 3.10 in) | |
| Displacement 1,318 cm ^3 (80.4 cu-in) | |
| Compression ratio 13.5 : 1 | |
| Spark Plugs | NGK DILZKAR7C11S |
| DENSO DXE22HCR11S | |
Fuel
| Fuel: Type | Unleaded premium petrol, Research octane number of 95 (E10) or higher |
| Fuel Tank Capacity 40 L (8.8 Imp gal) | |
Battery
| Capacity 40AH(5)/50AH(20) |
The battery installed in this vehicle is specifically designed. If you need to replace the battery, make sure to select the specified type (N-65 S). Ask a dealer for more details.
Washer Fluid
| Tank Capacity 2.5 L (2.2 Imp qt) |
Light Bulbs
| Headlights (High/Low Beam)*1 | 60/55W (H4LL/HB2LL*, H4 LL, H4) |
| Headlights (Low Beam)*2 | LED |
| Headlights (High Beam)*2 | LED |
| Position Lights*1 | 5W |
| Position Lights*2 | LED |
| Front Turn Signal Lights 21W (Amber) | |
| Daytime Running Lights LED | |
| Front Fog Lights * | 35W (H8) |
| Side Turn Signal Lights(on Door Mirrors) | LED |
| Brake/Taillights LED | |
| Rear Turn Signal Lights 21W (Amber) | |
| Back-Up Lights 16W | |
| Rear Fog Light 21W | |
| Rear Licence Plate Lights 5W | |
| High-Mount Brake Light LED | |
| Interior Lights | |
| Map lights 8W | |
| Ceiling Light 8W | |
| Luggage Area Light 5W | |
*1: Models without keyless access system
*2: Models with keyless access system
Brake Fluid
| Specified Brake Fluid with DOT 3 or DOT 4 |
Air Conditioning
| Refrigerant Type R-1234yf |
| Charge Quantity 375 - 425 g |
■Continuously Variable Transmission Fluid
| Specified Honda HCF-2 Transmission Fluid | |
| Capacity Change | 3.4 L (3.0 Imp qt) |
■Manual Transmission Fluid
| Specified Honda Manual Transmission Fluid | |
| Capacity Change | 1.4 L (1.2 Imp qt) |
Engine Oil
| Recommended** | Honda Engine OIL #1.0Honda Green OILHonda Engine Oil Type 2.0Honda Genuine Motor Oil 0W-16, 0W-20, 5W-30API service SM or higher grade fuel-efficient oilACEA A5/B50W-16, 0W-20, 5W-30 |
| Recommended** | Honda Engine OIL #1.0Honda Green OILHonda Genuine Motor Oil 0W-16, 0W-20, 5W-30API service SM or higher grade fuel-efficient oilACEA A5/B50W-16, 0W-20, 5W-30 |
| Capacity | Change 3.4 L (3.0 Imp qt) |
| Change 3.6 L (3.2 Imp qt)including filter |
*1: European models
*2: Except European models
Engine Coolant
| Specified Honda All Season Antifreeze/Coolant Type2 | |
| Ratio | 50/50 with distilled water |
| Capacity ^+3 | 3.48 L (0.766 Imp gal) ^*1 3.35 L (0.737 Imp gal) ^-2 (change including the remaining 0.4 L(0.09 Imp gal) in the reserve tank) |
| Capacity ^*4 | 3.78 L (0.832 Imp gal)(change including the remaining 0.42 L(0.092 Imp gal) in the reserve tank) |
*1: Continuously variable transmission models
*2: Manual transmission models
*3: With single fan
*4: With twin fans
Tyre
| Regular | Size | 185/60R15 84H185/55R16 83H |
| Pressure | See the label on driver's doorjamb. | |
| Compact Spare* | Size | T135/80D15 99MT135/80D15 100M |
| Pressure | See the label on driver's doorjamb. | |
| Wheel Size | Regular | 15 × 6J^*1 16 × 6J^*2 |
| Compact Spare* | 15 x 4T |
For the tyre size and pressure information, see the label on driver's doorjamb.
*1: Modes with 185/60 R15 tyres
*2: Modes with 185/55 R16 tyres
Honda TRK Air Compressor
| A weighted emission sound pressure level 81 dB (A) |
| A weighted sound power level 89 dB (A) |
Brake
| Type Power assisted |
| Front Ventilated disc |
| Rear Solid Disc |
| Parking Hand brake |
Vehicle Dimensions
| Length 4,028 mm (158.5 in) | |
| Width 1,694 mm (66.7 in) | |
| Height | 1,515 mm( 59.6 in) ^*3 1,541 mm( 60.7 in) ^*4 |
| Wheelbase 2,530 mm (99.6 in) | |
| Track | Front 1,483 mm( 58.4 in) ^*1 1,477 mm( 58.1 in) ^*2 Rear 1,472 mm( 58.0 in) ^*1 1,466 mm( 57.7 in) ^*2 |
*1: Modes with 185/60 R15 tyres
*2: Modes with 185/55 R16 tyres
^3 : Body
*4: With shark fin antenna
■The mounting point/rear over hang of coupling device
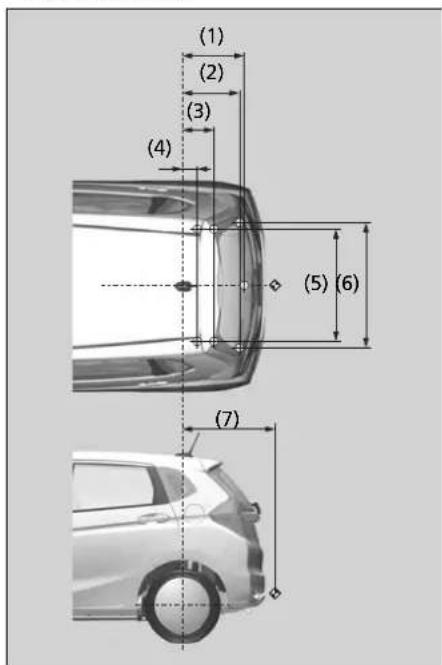
No. Dimensions
(1) 525 mm (20.6 in)
(2) 485 mm (19.0 in)
(3) 269 mm (10.5 in)
(4) 128 mm (5.0 in)
(5) 950 mm (37.4 in)
(6) 1,061 mm (41.7 in)
(7) 786 mm (30.9 in)
Max. Towing Weight
| Trailer with brakes 1,000 kg (2,205 lbs) | |
| Trailer without brakes | 450 kg (992 lbs) |
| The maximum permissible vertical load on the coupling device | 95 kg (209 lbs) |
NOTE:
- marks show towbar fixing points.
- mark shows towbar coupling point.
Identification Numbers
Vehicle Identification Number (VIN), Engine Number and Transmission Number
Your vehicle has a 17-digit vehicle identification number (VIN) used to register your vehicle for warranty purposes, and for licensing and insuring your vehicle. The locations of your vehicle's VIN, engine number and transmission number are shown as follows.
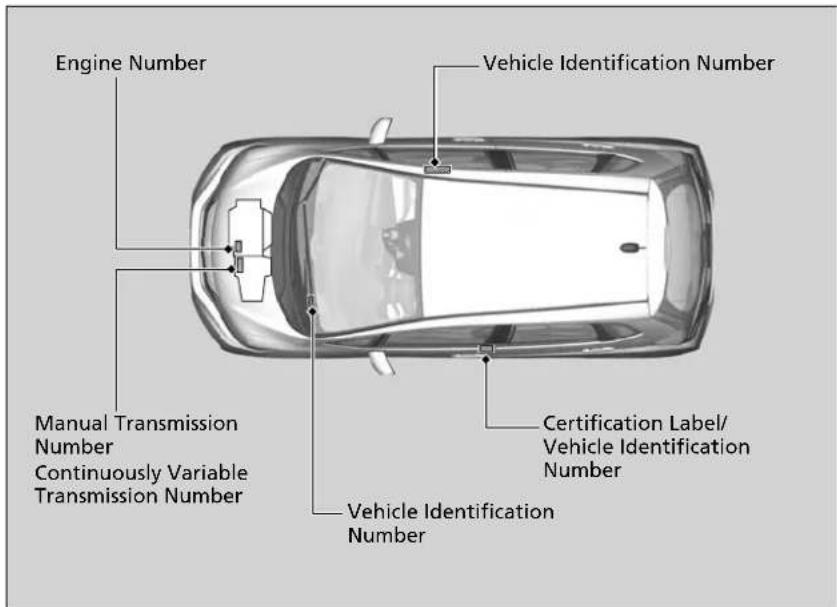
Vehicle Identification Number (VIN), Engine Number and Transmission Number
The interior vehicle identification number (VIN) is located under the cover.
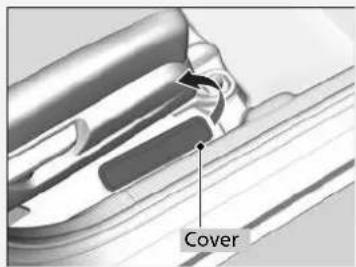
Devices that Emit Radio Waves\*
The following products and systems on your vehicle emit radio waves when in operation.
Israeli models
Immobilizer system Remote Transmitter
* Not available on all models
Continued
Keyless Access System\*
Moldova models
Immobilizer system
ERC/REC 70-03 Annex 9
Echopositional artificial porous Si metal in hand of the moment 119-135 dB
The following mentioned herein is documented
Sofia A. Nr.09059)

Remote Transmitter\*
ERC/REC 70-03 Annex 1
DECLARATION of CONFORMITY
For

Product: Immobiliser base station Model: TWK1A0028
Supplied by
ALPS ELECTRIC CO., LTD. 4-3-36, Nakamoto, Furakawa, Osaki-city, Miyagi-prof., JAPAN 989-6181
Technical Construction File held by ALPS ELECTRIC CO., LTD. 6-1-36, Nakazato, Furukawa, Osaka-city, Miyagi-prof., JAPAN 989-6181
Standard used for comply
R&TTE Directive EN 60065: 2002 + Amd.1: 2006 + Amd.11: 2008 + Amd.2: 2010 + Amd.12: 2011 (Article 3.1(a) Safety)
R&TTE Directive EN 301489-1 V1.9.2 2011 (Article 3.1(b) EMC) EN 301489-3 V1.6.1 2013
RATTE Dissection EN 206 330-LV1-7-2010
(Article 3.2 Spectrum) EN 300 330-2 V1.5.1 2010
Means of Conformity
We declare under our sole responsibility that the Product (x) is conformity with the essential requirements and other relevant requirements of the Radio and Telecommunication Terminal Equipment (RATTE) Directive (1999/5/EC).
Date of issue: July 11, 2014
Signature of Responsible Person:
Zoshiya Icaoshi
Toshiya Ikanishi Group Leader GROUP1 ENGINEERING DEPT M5
Hands-Free Telephone System\*
This device is designed to be used in Republic of Moldova.
2-28, Gosho-dori 1-chome, Hyogo-tku, Kobe, 652-8510, Japan

Declaratie de conformitate
No. 85E-328213-0017
Director General de Proiect
Departamentul de management engineering
NURAF ANRITOTEC (MAUS/ADJAB1001)
25 AVR 2013
CERTIFICAT D'AGRÉMENT
- VISUALIS N° 24-96 RELUTIVE À LA POATE ET AUX TÉLÉCOMMUNICATIONS SELLE O UBLIE ATE MOBILE ET COMPLETED
VU 12 INCISION ANRIT/DIGN'12/04 DU 29/12/2004 FINANT LE RÉGAME D'AGRESENT DES EQUIPMENTS TERMINNEL ET DES INSTALLATIONS PARMOUSTINUED 2012 EN COMPUTER PAR LA INCISION ANRIT/DIGN'28/08 DU 28 AUGES 2006 - VU LA DECISION ANRTO/DUN°07/06 DU 28 JULIET 2006 MAINT LES SPECIFICATIONS TECHNIQUES ETÀREMANT DES EQUIPEMENTS THINMAUX ET DES INSTALLATIONS PARDOÉLECTRAIQUES D'ILLE OYÈLLE A RÉD NOUIRES ET COMPLETÉS YAN LA DECISION ANRTO/DUN°15/09 DU 22 JULIET 2009;
- VI LA DÉCISION ANRITIDIGN 2017/10 ou 13 OCTOIRE 2018 ÉVAINT LES CONDITIONS TECHNIQUES ÉVITISATION DES INSTALLATIONS, RÉCHO DE TROU DE COMÉDISE (Contrôle) DE CHA LE VIGENCE AU JACADE 2016, 2019).
- VU L'ENGAGEMENT DE CONFORMATE AUX SPECIFICATIONS TECHNIQUES E DECLARÉEL DEPISSE LORS DE LA DEMAISE.
L'ANET SÉCIC (ACCIONNEL GOURNÉT À L'ENHEMNT DÉSINÉ O LESSON)
| DÉSIGRATION | ÉMETTEUR/RÉCEPPIEUR A2FP | N° O'ACGEMENT | MR 8091 ANRT 2013 |
| MARQUE | HONDA LOCK | ||
| TYPE | HLJKS-1R | DELIVRELE | 25/04/2013 |
| FABRICANT | HONDA LOCK Mtg. Co., LTD | EXPRIE LE | 24/04/2023 |
| CARACTERIQUES TECHNIQUES |
| BAJOS DE FRÉQUENCES | ÉMISSION | RICEPTION |
| 125 kHz | 413,92 MHz | |
| NIVEAU DE CHAMP MONETIQUE : 24,3 dIUAm@3m | ||
SPECIFICATIONS TECHNIQUES APPLICABLES
| INTERFACES SOURCES A L'AGEMENT | ARBIT TELECOMMUNICATIONS | COMPATIBLE ELECTRONOMETRICS | SECURITIES ELECTRICAL | EXPOSITIONAL AIR ENVIRONMENTAL ELECTRONOMETRICS |
| RADIOLECTRIDGE 433.92 MHz | ANRT.STAIR.A2FP(100000) | EN 201 489-10 | EN 60005 | EN 62479 |
| RADIOLECTRIDGE 125 kHz | ANRT.STAIR.A2FP(100000) |
CONDITIONS DE COMMERCIALIZATION
- LES PERSONNES, PHYSIQUES OU JORALEL, QUI SOUHAITENT COMMERCIALISER LE MATÉRIEL OIRET DU PRESENT
- DEPOSER, AU PREALABLE, UNE DIMANDE AUPRES DE L'ARRT, ACCOMPONÉS D'UN ENGAGEMENT DOMENT REMPLI COMFORMÉMENT LA DÉCISION ARRT/DG/III°07/10USMENTIONNES.
- TENSIR A JOUR UN REQUISTRE COMPORTANT LES INFORMATIONS DEMANDES PAR LA DITE DECISION
CONDITIONS D'USAGE
- L'UTILISATION OU MATÉRIEL OBUIET DU PRESENT CERTIFICAT EST LIME SOUR RÉSERVE DU RESPECT DES CONDITIONS D'EXPLOITATIONS PÉCISES DANS LES DÉCISIONS SUSMENTIONNÉES RÉGIDANT L'USAGE DES APPARELIS DE FAIBLE PORTÉE ET FAIBLE RUSSANCE (A2FP) :
- TOUTE MODIFICATION QUE LIMIT CE MATERIEL, POSTENHÉJÉMENT À GON AGNEMENT, NOTÉAMMENT AU NOUS DE BRT. CANDÉTÉRIOUÉ TECHNOUES, CE MATERIEL, DURA ETRE JOURS L'UN HOUI, AGNEMENT.
- ENÇAS DE CHANGEMENT À LA RÉGLEMENTATION ENVIGUEUR, RENDANT NÉCESSAIRE D'APPORTER DES MODIFICATIONS AU PRESENT ÉQUIPEMENT OU A LA PROCEDURE APPLICABLE POUR SON USAGE OU SON ADJÉMENT, VOINE SOCIETE SERATENUE DE S'Y CONFORMER.
- EN CAS D'INFRACTION À LA RÉGLEMENTATION EN VIGUEUR, CET AGREMENT REUT ÉTRE SUSRENDU OU RETIRE. VOTRE
CERTIFICAT D'AGRÉNEMENT ACCORDÉA
CERTIFICATE AGREEMENT AS
RASSON SOCIAL
ADASIE
REALTIME TELECOMMUNICATION
ПО КИЕ МЕЛОГНА АРТ 2, АЗДАЛ, ПОВАТ
AGGENCATION LE DE PUGLEMENTATION
DES TELECOMMUNICATIONS
ANRT

Centre (d)olluen, 34, Al-Hod, mig Bld, 90 2016, 80/01-100 Tangguline (07/02-57) 91-01-02 Tungssien (2/25-10) 26-36-62 www.a.n.r.tn.o
Remote Transmitter\*
AGRÉE PAR L'ANRT MAROC MR 8359 ANRT 2013 19/07/2013
Keyless Access System\*
AGREE PAR L'ANRT MAROC
MR 8477 ANRT 2013
MR 7815 ANRT 2013
MR 9492 ANRT 2014
24/09/2013
28/01/2013
23/07/2014
Keyless Access System\*
Serbian models
Immobilizer system Remote Transmitter

Akconarsko društvo za spltivanje kvaliteta "KVALITET" № Акционарко другово за испитиванье квалитета "KVALITET" № Joint-stock company for quality testing "KVALITET" №

POTVRDA O USAGLASENOSTI - RITTO CONFIRMATION OF CONFORMITY - R&TTE Broj: P1614118200 No.
Podnoallac zahtava: Applicant:
DELTA AUTOMOTO D.O.D. 11670 NOVI BEOGRAD OMLADINSKIH BRIGADA 33A
Vrsta oprima: Equipment category
UREDAJ 2A BLOKADU KONTAKT BRAVE VOZILA
Ознака тра/модеа: Equipment type/model
HLKB-1R
Robna marka: Equipment trademark Proizvočaj: Manufacturer
Honda Lock Honda Lock Mtg. Co., Ltd. Japan
Laboratoria lapini (lveda): Laboratory Test report
Vrednovana dokumentacija Evaluated documentation: Bezednost/Safety: UL Japan, Inc. Head Office EMC Lab : 32EE0044-HO-02-B, 28.03.2013. / EMK/EMC: UL Japan, Inc. SHONAN EMC Lab : 32EE0044-SH-02-D, 15.01.2013. / AUTU/RATTE: UL Japan, Inc. SHONAN EMC Lab : 32EE0044-SH-02-C, 15.01.2013. / 32EE0044-SH-02-B, 15.01.2013. /
No casku gore navedene dokumentacija utvrdjemo je da gore navelena oprema zadvojava rahtave Pravimika o radio opremi i telekomunikationej terminalnej opremi (S. glasnik RS, 11/0012). On the basis of tie above cessioned documentation it is found that above mentioned equipment fulle the requirements of the Rukstock on Radio Equipment and Telecommunications Terminal Equipment (Official Gazette RS, 11/0012).
Nostas promens u specifikači, tijalmoditu, komponenta, elektrim bekterotikama sprime kaj dňu ne magišenitel na nasodenim Pravinskum moraju se prjavši "Kvalite" u a.d. NIL. Any changes occur in the specification, typrodele, components of the design, electrical construction which may influence (on conformity) to the above mention rulebook, that be forwarded is "Kvalite".
Mesto i datum izdavanja: Place and date N6. 05.11.2014.
Važi do: Vazid uni 06.11.2017.
[Non-Text]

Aksionarsko društro za ispitivanja kvaliteta "KVALITET" NII Акционароко другио за испливање квалитета "KVALITET" ниш Joint-stock company for quality testing "KVALITET" NII

POTVRDA O USAGLASENOSTI - RITTo CONFIRMATION OF CONFORMITY - R&TTE Broj. P1614118300 No.
Podnoasilac zahteva: Applicant
DELTA AUTOMOTO D.O.D. 11070 NOVI BEOGRAD ONLADINSKIN BRICADA 33A
Vista corneal: Equipment category:
KLJUČ ZADALJINSKI PRISTUP VOZILU
Ourska tips/moderate Equipment type/mouse
HLKB-ST
Rotna mana: Equipment trademark: Proizvodjač: Manufacturer:
Honda Lock
Proizvodjač Manufacturer:
Honda Lock Mfg. Co., Ltd. Japan
Laboratorial inspiril (zveda): Laboratory Test report
Vrednovara dokumentacija Evaluated documentation Bebednost/Safety: UL Japan, Inc. Head Office EMC Lab. 1000831BH, 01.07.2013. / 100082365/C, 24.06.2013. / EMK/EMC: UL Japan, Inc. SHONAN EMC Lab. 100082365R, 21.06.2013. / RITTo/R&TTE: UL Japan, Inc. SHONAN EMC Lab. 100082365A, 21.06.2013. /
Na osnovu gum navedene dokumentacija udvjerdo je da gava navedena opima začivoljava zahleve Pravilnika o radio opremi i tekekomunikacijo terminalni opremi (5: glasnik RS. 11/012). On the basis of the above mentioned documents it is found at the above mentioned equipment. Sutilo the requirements of the Pulsator on Radio Equipment and Telecommunications Terminal Equipment (Official Gazette RS. 11/02). Nastle promenie u specifikaciji, iplnoditlu, komponentama, elektrónim karakteristikama opreme koji izbu na usklsteknosi na naslademih Pravilnikom moraju se prigisi "Kvalite" is a 4.708. Any changes occur in the specification, typiskluti, components of the design, electrical construction which may influence on conformity by the above mention radiobus, that be forwarded in "Kvalite".
Mesto i datum izdavanja: Place and date: N18, 06.11.2014.
Važi do: Valid until 06.11.2017
Bul. Svetog Cao Konstantina 82-88, N4 16000, Snja, Tel: (018)550-766, 551-824. Fax: (018)550-636, 550-068 e-mail: office@kvalitet.co.rs, http://www.kvalitet.co.rs
Keyless Access System\*

Acionarsko drušivno za rečivanje kvalitela "KVALITET" NA Анционарско друштво за иолитиване залитета "KVALITET" Ниш Jaint-stock company for quality testing "KVALITET" No8

POTVRDA O USAGLAŠENOSTI - RiTTo Brosj: P1617074400 CONFIRMATION OF CONFORMITY - RATTE No.
Podnosilac zahtava: RTTE CONSULTING DOO Applicant: 11000 BEDGRAD MARIČKA 28/29
Vrsta oprene: SISTEM ZA DALJINSKI FRISTUP VOZILU Equipment category
Ocnaka tipa/modela: 40527612 Equipment type/model:
Ročna marka: Continental Equipment trademark Proizvodajč: Continental Automotive GmbH Manufacturer: Germany
Vrednovana dokumentacja Evaluated documentation: Laboratorija/ Bettednost/Safety: M. Dudle Hochfrequenz Technik. ispni izvela: 12006153, 14.12.2012 / Laboratry/ Trial report ENKEMC: M. Dudle Hochfrequenz Technik. 12006151, 14.12.2012 / R/To/R&TE: M. Dudle Hochfrequenz Technik. 12006150, 14.12.2012 / R/To/R&TE: M. Dudle Hochfrequenz Technik.
Na osnovu gore navedente dokumentasje uvtivjemo je da gore navedente operna zadovoljava zaštbeve Pravitnika i radio oprem i telekomunikacionoj terminalnoj oprem' (SI. glašně RŠ, 11/0512). On the basis of the above mentioned documentation it is found that above mentioned equipment fulits the requirements of the Russian on Radio Equipment and Telecommunications Terminal Equipment (Official Guide RŠ, 11/0512).
Nastale promere u specifikaciji, tipu/modulu, komponentana, elektrčim kavakltemstkama opreme kojučiće na usaglasenost sa navedenim Pravitnikem moraju se prijiviti "Kvalitel" u a.d. Nis Any chelange isusir in tre specifikaciji, typeinuktor, componento of the disaje, electronic control issuer whom may influence un controly to the above margin. Pdebook, shall be kivantelet is "Kvalitel".
Pnvo izdavanje Potvrde za navedanu opinmu: 16.05.2014, broj Potuter: P1614053700 Mesto i datum izdavanja: Place and date Nia.: 16.05.2017. Važi do: Yaid unit: 15.05.2020. M.P. Dovni Vladimir Vukašnović, diplinž
Ovaj dokument valzi samo za proizvođe koji su istovetri sa proizvodna koji su bili predmet vrednovanja. Bul: Ovelog Cari Konstantina 82-95, Nr 10000, Sroja, Tel (018)051-766, 553-624, Fax: (018)050-636, 550-066 e-mail: office@kvalite.co.rs, http://www.kvalite.co.rs

Akcionarsko društvo za izpšivanje kvisteta "KVALITET" No5 Акциезнарско друштво за испlicitавне квалитета "KVALITET" Низ Joint-stock company for quality testing "KVALITET" No5

POTVRDA O USAGLAŠENOSTI - RIITTo CONFIRMATION OF CONFORMITY - R&TTE Broj: P1617072200 No.
Podnosiac zahleva: RTTE CONSULTING DOO Applicant: 11000 BEOGRAD MARIČKA 28/29
Vrsta oprame: KLJUČ ZA DALJINSKI PRISTUP VOZILU Equipment category
Oznaka tpa/modela: V2xV4i Equipment type/model
Robna marka: Continental Equipment trademark: Proizvodjač: Continental Automotive GmbH Manufacturer: Germany
Vrednorana dokumentacija (Evaluated documentation) Laboratorija/ Ispitni izveša): Laboratory Test report: Bezbedness/Safety: M.Dudde Hochfrequenz-Technik. 2008045, 02.11.2012./ 2008040, 02.11.2012./ EMK/ENC: M.Dudde Hochfrequenz-Technik. 2008041, 02.11.2012./ RTToRATTTE: M.Dudde Hochfrequenz-Technik. 2008042, 02.11.2012./ 2008043, 02.11.2012./
Na ončenou gore navelene dokumentuje iztrbnog je da gore ravedens oproma zadovljava zatlave: "Pravinskau radio opremi i telekumenkazionoj (seminato) opremi (SI. glanja RS, 11/2012). On the basis ofte immunođedocumentatel je in front that ušte immunođednaj odgovod za file the reștenutenje de la "Nustrova os na nevelenjeni" te vakwidne (Etskumimovskogomj Opojinu KFJRA RS, 11/2012). Nastde promere u specifikacij, tipurodoru, komponentama, elektrdnik karakternikstaks opreme koju uču na usgledačenost na nevelenjeni "Nustrova isomni se građeni" "klative" in a pre-erad. Any changes occur in the specifizioni, typologii, componente of the design, electrical construction which may influence on proximity to the above mention kafobek, shall be forwarded to "klative". Provo izdavanja Palvrda za navelendu zoromu (6.05.2014, Brs. Palvrda P1541403809) Generals direktor Mesto i datum izdavanja: Važil do: Place and date: Nis. 12.05.2017. Vakl. M.P. Bark Vladimir Vuklačenivić, dipl.inž. Oraj dokument vaši samo za prozlođe koji su izstevni sa prozvodnje koji su bil predmet izvodnarja. Bul. Sielog Kara Koneintana I2-86, N4 13000, Sroja, http://i16/050-760, 550-624, Fax: (i16/050-636, 550-668) e-mail: office@klvatet.co.rs. http://www.kreitet.co.rs.
Keyless Access System\*

ALPS ELECTRIC CO., LTD. Engineering Headquarters 6-3-JA, Nakamura, Furukawa, Ouliatry, Aliyagi-prof, 09-4181, Japan Phone +81 228-25-5121 Fax +81 228-25-5120
DECLARATION of CONFORMITY For

Product: Immobiliser base station Model: TWK1A0028
Supplied by ALPS ELECTRIC CO., LTD. 6-3-36, Nakazato, Farukawa, Osaki-city. Miyagi-pref., JAPAN 989-6151
Technical Construction File held by ALPS ELECTRIC CO., LTD. 6-3-36, Nakazato, Furukawa, Osiki-city, Miyagi-pref., JAPAN 989-6181
R&TTE Directive (Article 3.1(a) Safety)
R&TTE Directive (Article 3.1(b) EMC)
RATTE Directive (Article 3.2 Spectrum)
Standard used for comply
EN 60065:2002 + Amd.1:2006 + Amd.11:2008 + Amd.2:2010 + Amd.12:2011
EN 101 489-1 V19.2: 2011 EN 101 489-3 V16.1: 2013
EN 300 330-1 V1.7.1: 2010 EN 300 330-2 V1.5.1: 2010
Means of Conformity
We declare under our sole responsibility that the Product (s) is conformity with the essential requirements and other relevant requirements of the Radio and Telecommunication Terminal Equipment (R&TTE) Directive (1999/3/EC).
Date of issue: July 11, 2014
Signature of Responsible Person:
Joshiya I###
Toshiya Ikarashi Group Leader GROUP ENGINEERING DEPT.M5
Hands-Free Telephone System\*

Aktionarsko društvo za ispitivanje kvališena "KVALITET" Niš Акционароко društvo za испitiвање калитета "KVALITET" Ниš Joint-stock company for quality testing "KVALITET" Niš

POTVRDA O USAGLAŠENOSTI - RI'To CONFIRMATION OF CONFORMITY - R&TTE Broj: P1617174400 No.
Podnosilac zahteva:
Applicant:
The Ground Truth image displays a single, solid horizontal line. According to Rule 2 (UNDERSCORE & LINE RULES), this is a stylistic or background line, not a placeholder underscore. Therefore, the OCR result must ignore it and output nothing or only meaningful text. The provided OCR content is "____", which consists of four underscores. This is an incorrect interpretation of the line as a placeholder, violating the rule that stylistic lines must be ignored. The OCR has hallucinated placeholder underscores where none should exist in the GT. Hence, the OCR result is inconsistent with the Ground Truth.
Vrita opreme:
Oznaka tpa/modela:
Equipment type/model
RITTE CONSULTING DOO
11090 BEOGRAD-RAKOVICA
KNEZA VIŠESLAVA 63/2.7
AUDIO UREDJA/ZA AUTOMOBIL SA BLUETOOTH, WLAN GPS
FT0056A
(1) 本说明仅供参考。
Robna marka: FUJITSUTEN
Equipment trademark
Prolzvođač:
Manufacturer
FUJITSUTEN LIMITED
Japan
Vrednovina dokumentacija. Evaluated documentation
Laboratorija/
ispitni levelaj:
Laboratory
Test report
EMC/EMC, U. Japan, Inc. Head Office EMC Lab
107500HKD, 08.11.2013.
103742356.W. 02/10/2014 /
10374235H-V, 02.10.2014
10075507H-C, 08.11.2013
Na osnovu gole navedine dokumentacije utvrstjeno je da jone navedena oprema zastovoljava zaštene 'Pravilnika e radio opremi i selekumurivkaconoj terminatnoj opremi' (SI, obisnja RS, 11/2012).
On the basis of the above-mentioned documentation it is found that above-mentioned equipment fulfils the requirements of the Yulmbouk (or Radix Equipment and Zaramanscriptions, Detrimal Equipment Official Gavette RS 11/02/12):
Any charges occur in the specification, typomodel components of the deal
above mention: Sablebook, after be forwarded to "Aviste".
Pto: 2014. Forma 29 havedamo opemiz. 2011. Age 3.0q Pto: F: 14.2000
Meso i datum izdavanja
Place and date:
168, 22.11.2017
Važilo do
Valid unit:
21.11.2020

Oraj dokument važr samo za proizvoće koji su izlovetni sa proizvodima koji su bil predmet vrednovanja. Btu: Sretog Cava Konstantina 02-06, Nib (1000), Otrije, Tel (018)329-700, 500-024, Fax: (018)500-026, 500-069 e-mail: offices@kvalitet.co.rs. http://www.kvalitet.co.rs
EC Declaration of Conformity Content Outline\*
EC Declaration of Conformity

-
The undersigned, Mt. Ryoidi Hiraki, representing the manufacturers, herewith declares that the machinery described below fulfils all the relevant provisions of:
• The EC-directive 2006/42/EC on machinery -
Description of the machinery
| a) Generic denomination: | Pantograph jack |
| b) Function: | lifting motor vehicle |
| c) Model | d) Type |
| SNB | Honda Type-A |
| SJD | Honda Type-B |
| S2A | Honda Type-C |
| SAH | Honda Type-D |
| TP6 | Honda Type-G |
| T5A | Honda Type-I |
| T2V | Honda Type-J |
-
Manufacturer (1): Honda Type-A/B/C/G/1
RIKENKAKI CO., LTD.
5-6-12 Chiyoda Sakado-shi
JAPAN -
Manufacturer (2): Honda Type-D/J
CHANGZHOU RIKENSEIKO MACHINERY CO., LTD
No. 1903 Zhongwu Ave. Zhongiou Changzhou, Jiangsu CHINA
- Legal person authorised to compile the technical file
Honda Motor Europe Ltd Belgian Branch
pra Honda Motor Europe Ltd – Aalst Officer Wingershold 4 (Nord) 6
B-9300 Aalst (Belgium)
| 6. References to harmonized standards | 7. Other standards or specifications |
| EN1494:2300+A1:2008 | - |
-
Done at
-
Date
Saitama, Japan
1 December,2009

Ryoichi Hiraki
President of RIKENKAKI CO.,LTD
President of CHANGZHOL RIKENSEIKO
MACHINERY CO., LTD.
Note: This declaration becomes invalid, if technical or operational modifications are introduced without the manufactures consent.
Deutsch (German)
About Open Source Licences.... 312
ABS (Anti-lock Brake System).... 455
Accessories and Modifications 539
Accessory Power Socket.... 205
Adding
Coolant 496
Engine Oil 495
Washer 500
Additives, Engine Oil 491
Adjustable Speed Limiter 423
Adjusting
Clock 140
Front Seats.... 187
Headlight Distribution 451
Headlights 174
Mirrors.... 185
Rear Seats.... 190
Steering Wheel 184
Temperature 127
Adjusting Headlight Distribution ..... 451
Agile Handling Assist System 448
Air Conditioning System
(Climate Control System) 213
Changing the Mode.... 213, 214
Defrosting the Windscreen and
Windows 215
Dust and Pollen Filter.... 532
Maintenance 531
Recirculation/Fresh Air Mode 213, 214
Sensors.... 218
Using Automatic Climate Control 213
Air Conditioning System
(Heating and Cooling System) 209
Cooling 211
Defrosting the Windscreen and
Windows 212
Heating 210
Maintenance 531
Recirculation/Fresh Air Mode 209
Air Pressure 517, 594
Airbags 49
After a Collision.... 51
Airbag Care....61
Event Data Recorder 1
Front Airbags (SRS) 51
Indicator....59, 91
Sensors 49
Side Airbags 56
Side Curtain Airbags 58
AM/FM Radio 234, 277
Ambient Meter 123
Anti-lock Brake System (ABS) 455
Indicator....91
Armrest 198
Audio Antenna 224
Audio Remote Controls.... 225
Audio System 220
Adjusting the Sound.... 232, 274
Auxiliary Input Jack 222
Error Messages.... 305
General Information 308
HDMI™ Port 222
iPod 248, 288
MP3/WMA/AAC 251, 285, 291
Recommended CDs.... 308
Recommended Devices.... 310
Remote Controls 225
USB Flash Drives.... 311
USB Port 221
Audio System Theft Protection 223
Auto High-Beam (High Beam Support
System).... 175
Auto Idle Stop 410, 415
Auto Idle Stop Function.... 11
Auxiliary Input Jack 222
Average Fuel Economy 126
Average Speed 127
B
Battery 524
Charging System Indicator...... 89, 570
Jump Starting 564
Maintenance (Checking the Battery)...... 524
Maintenance (Replacing) 526
Belts (Seat) 36
Beverage Holders 203
Bluetooth® Audio 254, 294
Booster Seats (For Children)....80
Brake System...... 453
Anti-lock Brake System (ABS) 455
Brake Assist System 456
Fluid 499
Foot Brake 454
Indicator 86, 87, 571
Parking Brake 453
Brake System Indicator (Amber) 87
Brake System Indicator (Red) 86
Brightness Control (Instrument Panel) .... 182
Bulb Replacement.... 501
Back-Up Light 508
Brake/Taillight....509
Daytime Running Lights.... 507
Fog Lights....503
Front Turn Signal Lights 505
Headlights 501
High-Mount Brake Light 510
Interior Lights 511
Luggage Area Light 512
Position Light Bulbs.... 506
Rear Fog Light 508
Rear Licence Plate Light 510
Rear Turn Signal Light.... 508
Side Turn Signal Lights.... 507
Bulb Specifications.... 593
C
Carbon Monoxide Gas 82
Carrying Luggage.... 383, 385
CD Player 245, 285
Changing Bulbs 501
Charging System Indicator.... 89, 570
Child Restraint System 62
Booster Seats 80
Child Restraint System for Infants 66
Child Restraint System for Small Children 68
Installing a Child Restraint System with a Lap/Shoulder Seat Belt 75
Larger Children 79
Rearward Facing Child Restraint System .... 66
Selecting a Child Restraint System 69
Using a Tether.... 78
Child Safety 62
Childproof Door Locks.... 155
Childproof Door Locks 155
City-Brake Active system.... 457
Cleaning the Exterior 536
Cleaning the Interior 534
Climate Control System.... 213
Changing the Mode 213
Defrosting the Windscreen and Windows.... 215
Dust and Pollen Filter.... 532
Recirculation and Fresh Air Mode .... 214
Sensors 218
Using Automatic Climate Control 213
Clock 140
Coat Hook 206
Compact Spare Tyre.... 543, 594
Console Compartment.... 202
Continuously Variable Transmission..... 401
7-Speed Manual Shift Mode 404
Creeping.... 401
Fluid 498
Kickdown 401
Operating the Shift Lever 403
Shift Lever Does Not Move.... 567
Shifting.... 402
Controls 139
Coolant (Engine) 496
Adding to the Radiator 497
Adding to the Reserve Tank 496
Overheating.... 568
Creeping
(Continuously Variable Transmission)... 401
Cruise Control 420
Cup Holders.... 203
Customized Features 131, 313
D
DAB
(Digital Audio Broadcasting) ..... 241, 282
Daytime Running Lights.... 178
Dead Battery 564
Deflation Warning System 449
Indicator 96,573
Defrosting the Windscreen and Windows.... 212, 215
Devices that Emit Radio Waves.... 597
Digital Audio Broadcasting (DAB) 241, 282
Dimming
Headlights 170
Dipstick (Engine Oil) 494
Directional Signals (Turn Signals) 169
Display Button 258
Door Mirrors.... 186
Doors 142
Door and Tailgate Open Indicator 35, 95
Keys.... 142
Locking/Unlocking the Doors from the Inside 153
Locking/Unlocking the Doors from the Outside 146
Lockout Prevention System 152
Driving 381
Braking 453
Continuously Variable Transmission ..... 401
Cruise Control 420
Shifting Gear 402, 407
Starting the Engine 392, 395
Dust and Pollen Filter 532
E
EC Declaration of Conformity Content Outline 611
Elapsed Time.... 126
Electric Power Steering (EPS) System
Indicator....97, 572
Emergency Stop Signal 462
Emergency Towing 586
Engine Coolant 496 Jump Starting 564 Oil 491 Starting 392, 395 Switch Buzzer 29
Engine Coolant .... 496
Adding to the Radiator .... 497
Adding to the Reserve Tank.... 496
Overheating .... 568
Engine Oil 491
Adding 495
Checking 494
Low Oil Pressure Indicator 88, 570
Recommended Engine Oil 491
Engine Start/Stop Button 165
EPS (Electric Power Steering)
System 97, 572
Exhaust Gas Hazard
(Carbon Monoxide) 82
Exterior Care (Cleaning) 536
Exterior Mirrors 186
F
Features 219
Filter
Dust and Pollen.... 532
Flat Tyre 543
Floor Mats 535
Fluids
Brake 499
Continuously Variable Transmission (CVT).... 498
Engine Coolant 496
Manual Transmission.... 498
Windscreen Washer 500
Folding Down the Rear Seats 191
Foot Brake 454
Forward Collision Warning.... 434
Front Airbags (SRS).... 51
Front Fog Light Indicator 98
Front Seats.... 187
Adjusting .... 187
Fuel....471
Economy....473
Gauge.... 128
Instant Fuel Economy 127
Low Fuel Indicator.... 91
Range 126
Recommendation.... 471
Refueling.... 471
Fuel Economy 473
Fuel Fill Cap 25,472
Fuel Fill Door 25,472
Fuses 575
Inspecting and Changing.... 585
Locations.... 575, 577, 578, 580
G
Gasoline (Fuel)
Instant Fuel Economy.... 127
Low Fuel Indicator 91
Gauges.... 123
Gear Shift Lever Positions
Continuously Variable
Transmission....402
Manual Transmission 407
Glass (care) 534, 537
Glove Box 202
H
Halogen Bulbs.... 501
Hands-Free Telephone (HFT)
System.... 339, 362
Automatic Import of Cellular Phonebook and Call History 373
Automatic Import of Mobile Phonebook and Call History 354
Caller's ID Information.... 352
HFT Buttons.... 339, 362
HFT Menus 342, 365
HFT Status Display 341, 363
Limitations for Manual Operation .... 341, 364
Making a Call.... 357, 376
Options During a Call 361, 379
Phone Setup.... 346, 368
Receiving a Call 360, 379
Ring Tone.... 352, 372
Speed Dial.... 355, 374
To Clear the System 353
Hazard Warning Button 4,5
HDMI™ Port 222
Headlights.... 170
Adjuster 174
Aiming.... 501
Dimming.... 170
Operating.... 170
Heaters (Seat) 208
Heating and Cooling System 209
HFT (Hands-Free Telephone) 339, 362
High Beam Indicator 98
High Beam Support System
Indicator.... 102
Hill Start Assist System 394, 398
|
Identification Numbers 596
Vehicle Identification 596
Ignition Switch 164
Illumination Control.... 182
Knob.... 182
Immobilizer System 159
Indicator.... 99
Indicators 86
Adjustable Speed Limiter.... 101
Anti-lock Brake System (ABS) 91
Auto Idle Stop.... 102
Auto Idle Stop System.... 103
Brake System (Amber) 87
Brake System (Red) 86
Charging System.... 89
City-Brake Active System (CTBA) 106
Cruise Control and Adjustable Speed Limiter Set Speed.... 101
Cruise Main 101
Door and Tailgate Open.... 35, 95
Electric Power Steering (EPS) System ..... 97
Forward Collision Warning.... 104
Front Fog Light 98
High Beam.... 98
High Beam Support System.... 102
High Temperature.... 94
Immobilizer System 99
Keyless Access System.... 100
Lane Departure Warning.... 105
Lights On 98
Low Fuel 91
Low Oil Pressure 88
Low Temperature.... 94
Low Tyre Pressure/Deflation Warning System 96
M (7-speed manual shift mode) /Shift ..... 90
Malfunction Indicator Lamp 88
Parking Brake and Brake System 86
Passenger Front Airbag On/Off.... 92
Rear Fog Light.... 98
Seat Belt Reminder.... 90
Security System Alarm.... 100
Shift Down 101
Shift Lever Position.... 89
Shift Up 101
Supplemental Restraint System 91
System Message 97
Transmission 89
Turn Signal 98
Vehicle Stability Assist (VSA) System...... 93
VSA OFF 93
Instant Fuel Economy 127
Instrument Panel 85
Brightness Control 182
Intelligent Speed Limiter 427
Interior Lights.... 199
Interior Rearview Mirror 185
iPod.... 248, 288
J
Jack (Wheel Nut Wrench).... 546
Jump Starting 564
K
Key Number Tag 144
Keyless Access System 146
Keyless Lockout Prevention.... 152
Keys 142
Lockout Prevention.... 152
Number Tag 144
Rear Door Won't Open.... 155
Remote Transmitter 149
Types and Functions 142
Won't Turn 28
Kickdown
(Continuously Variable Transmission) ... 401
L
Lane Departure Warning 438
Language (HFT) 320, 330
Light Switches.... 170
Lights.... 170, 501
Bulb Replacement.... 501
Fog Lights.... 172
High Beam Indicator 98
Interior 199
Lights On Indicator 98
Turn Signals.... 169
Load Limit 385
Locking/Unlocking 142
Childproof Door Locks.... 155
From Inside.... 153
From Outside.... 146
Keys 142
Using a Key 151
Lockout Prevention System.... 152
Low Battery Charge.... 570
Low Fuel Indicator.... 91
Low Keyless Remote Signal Strength..... 145
Low Oil Level Symbol.... 574
Low Oil Pressure Indicator 88,570
Low Tyre Pressure/Deflation Warning
System Indicator 96,573
Lower Anchorages 72
Lubricant Specifications Chart.... 593
Luggage (Load Limit) 385
Luggage Area Cover 207
M
Maintenance 475
Air Conditioning.... 531
Battery 524
Brake Fluid 499
Cleaning 534
Climate Control.... 531
Coolant 496
Oil 494
Precautions 476
Radiator 497
Remote Transmitter.... 529
Replacing Light Bulbs 501
Safety.... 477
Transmission Fluid 498
Tyres 517
Under the Bonnet 489
Malfunction Indicator Lamp.... 88, 571
Manual Transmission 407
Map Lights 200
Maximum Loaded Vehicle Weight ..... 385
Maximum Permissible Weight 385
Meters, Gauges.... 123
Mirrors.... 185
Adjusting.... 185
Door....186
Exterior.... 186
Interior Rearview.... 185
Modifications (and Accessories).... 539
MP3....245, 251, 285, 291
Multi-Information Display.... 124
Multi-View Rear Camera 469
N
Numbers (Identification) 596
0
Odometer 126
Oil (Engine) 491
Adding 495
Checking.... 494
Low Oil Pressure Indicator...... 88, 570
Recommended Engine Oil.... 491
Viscosity 491
On Board Apps.... 298
Opening/Closing
Bonnet 490
Power Windows 162
Tailgate 156
Outside Temperature Display.... 127
Overheating.... 568
P
Paddle Shifters
(7-Speed Manual Shift Mode).... 404
Parking Brake 453
Parking Brake and Brake System
Indicator.... 86, 571
Parking Sensor System 464
Passenger Front Airbag Off System 54
Passing Indicators 170
Petrol 25,471
Economy 473
Gauge 128
Information 471
Refueling 471
Power Windows 162
Precautions While Driving 399
Rain 399
Pregnant Women 46
Preset Memory 234, 241
Puncture (Tyre) 543
R
Radiator 497
Radio (AM/FM) 234, 277
Radio Data System (RDS) 235, 280
Range.... 126
RDS (Radio Data System) 235, 280
Rear Demister Button 183
Rear Fog Light Indicator.... 98
Rear Seats (Folding Down) 191
Rear Wiper 181
Rearview Mirror 185
Refueling 471
Fuel Gauge 128
Low Fuel Indicator.... 91
Petrol 471,592
Regulations 597,611
Remote Transmitter.... 149
Replacement
Battery.... 526, 529
Bulbs 501
Fuses 575, 578
Tyres 520
Wiper Blade Rubber 513
Resetting a Trip Meter.... 126
S
Safe Driving.... 31
Safety Labels 83
Safety Message 0
Seat Belts 36
Adjusting the Shoulder Anchor 44
Automatic Seat Belt Tensioners 41
Checking 47
Fastening 42
Installing a Child Restraint System with a Lap/Shoulder Seat Belt.... 75
Pregnant Women.... 46
Reminder 39
Warning Indicator 39, 90
Seat Heaters 208
Seats...... 187
Adjusting 187
Front Seats.... 187
Rear Seats.... 190
Seat Heaters 208
Security System 159
Immobilizer System Indicator.... 99
Security System Alarm Indicator 100
SEL/RESET Button 125
Select Lever 23,402,407
Selecting a Child Restraint System.... 69
Selector Knob (Audio) 227
Setting the Clock.... 140
Shift Down Indicator 101,408
Shift Lever 23,402,407
Operation 23,403,407
Releasing 567
Won't Move 567
Shift Lever Position Indicator 89,403
Shift Up Indicator.... 101, 406, 408
Shifting
Continuously Variable Transmission ..... 402
Manual Transmission 407
Shoulder Anchor 44
Side Airbags 56
Side Curtain Airbags.... 58
Spare Tyre 543, 594
Spark Plugs.... 592
Specifications 592
Specified Fuel 471, 592
Speed Alarm Setting 129
Speedometer 123
SRS Airbags (Airbags) 51
Start/Stop Button.... 165
Starting the Engine 392, 395
Does Not Start.... 561
Engine Switch Buzzer 29
Jump Starting 564
Steering Wheel 184
Adjusting.... 184
Stopping 463
Supplemental Restraint System (SRS).... 51
Switches
(Around the Steering Wheel) ..... 4, 6, 164
System Message Indicator....97
T
Tachometer.... 123
Tailgate 156
Temperature Outside Temperature Display .... 127
Temperature Sensor 127, 218
Temporarily Repairing a Flat Tyre ..... 551
Tie-down Anchors 206
Time (Setting) 140
Tools 542
Towing a Trailer 386
Equipment and Accessories 388
Load Limits.... 386
Towing Your Vehicle Emergency 586
Traffic Sign Recognition System...... 442
Transmission 402, 407
7-Speed Manual Shift Mode.... 404
Continuously Variable 402
Fluid 498
Manual 407
Shift Lever Position Indicator.... 89, 403
Trip Meter 126
Troubleshooting.... 541
Blown Fuse.... 575, 578
Brake Pedal Vibrates.... 28
Buzzer Sounds When Opening Door...... 29
Emergency Towing.... 586
Engine Won't Start.... 561
Noise When Braking.... 30
Overheating 568
Puncture/Flat Tyre 543
Rear Door Won't Open.... 29
Shift Lever Won't Move.... 567
Warning Indicators 86
Turn Signals 169
Indicators (Instrument Panel) 98
Tyres.... 517
Air Pressure.... 517, 594
Checking and Maintaining 517
Inspection.... 517
Puncture (Flat Tyre) 543
Rotation 521
Spare Tyre 543, 594
Tyre Chains.... 522
Wear Indicators 519
Winter....522
U
Unlocking the Doors.... 146
Unlocking the Front Doors from the Inside....153
USB Flash Drives.... 311
USB Port 221
Using the Keyless Access System...... 146
V
Vanity Mirrors....9
Vehicle Identification Numbers 596
Vehicle Stability Assist (VSA).... 446
Off Button 447
Off Indicator....93
System Indicator 93
Ventilation 209, 213, 214
Viscosity (Oil) 491, 593
VSA (Vehicle Stability Assist).... 446
W
Warning and Information
Messages 108
Warning Indicator On/Blinking 570
Warning Labels.... 83
Watts 593
Wear Indicators (Tyre).... 519
Wheel Nut Wrench (Jack Handle) 547
When You Cannot Open the Tailgate .... 589
Wi-Fi Connection.... 302
Window Washers 179
Adding/Refilling Fluid 500
Switch.... 179
Windows (Opening and Closing) ..... 162
Windscreen 179
Cleaning 534, 537
Defrosting/Defogging.... 212, 215
Washer Fluid 500
Wiper Blades 513
Wipers and Washers.... 179
Winter Tyres 522
Tyre Chains 522
Wipers and Washers.... 179
Checking and Replacing Wiper Blades ..... 513
WMA 245, 251, 285, 291
Worn Tyres 517
- A Few Words About Safety
- DANGER
- WARNING
- CAUTION
- Event Data Recorders
- Service Diagnostic Recorders
- Auto Idle Stop Function
- Safe Driving
- Before Driving Checklist P.35
- Instrument Panel
- Gauges P.123/Multi-Information Display P.124/System Indicators P.86
- System Indicators
- Lights Indicators
- Controls
- Clock
- Models with display audio system
- Models with colour audio system
- ENGINE START/STOP Button\* P.165
- Turn Signals P.169
- Lights → P.170
- Wipers and Washers
- Steering Wheel
- Unlocking the Front Doors from the Inside
- Tailgate P.156
- Left-hand drive type with keyless access system Right-hand drive type
- Models with keyless access system
- Power Door Mirrors
- P.186
- Power Windows → P.162
- Heating and Cooling System\*
- Climate Control System\*
- Features
- Audio System
- Audio Remote Controls
- Driving
- Manual Transmission\*
- Continuously Variable Transmission\*
- Shifting
- 7-Speed Manual Shift Mode P.404
- When the shift lever is in S
- When the shift lever is in D
- VSA On and OFF
- Cruise Control
- Adjustable Speed Limiter
- Deflation Warning
- Refueling → P.471
- Maintenance
- Under the Bonnet P.489
- Wiper Blades P.513
- Tyres P.517
- Lights → P.501
- Handling the Unexpected
- Flat Tyre
- Models with a spare tyre
- Models with tyre repair kit
- Indicators Come On
- Engine Won't Start
- Blown Fuse
- Overheating
- Emergency Towing
- What to Do If
- Models without keyless access system
- For Safe Driving
- Seat Belts
- Airbags
- Child Safety
- Exhaust Gas Hazard
- Safety Labels
- Important Safety Precautions
- ■Always wear your seat belt
- ■Restrain all children
- ■Be aware of airbag hazards
- ■Don't drink and drive
- ■Pay appropriate attention to the task of driving safely
- ■Control your speed
- ■Keep your vehicle in safe condition
- ■Do not leave children unattended in the vehicle
- Your Vehicle's Safety Features
- Safety Checklist
- >>Safety Checklist
- About Your Seat Belts
- Lap/shoulder seat belts
- ■Proper use of seat belts
- Seat Belt Reminder
- Front seats
- Rear seats
- Automatic Seat Belt Tensioners
- Fastening a Seat Belt
- Adjusting the Shoulder Anchor
- Seat Belt with Detachable Anchor
- Advice for Pregnant Women
- »Advice for Pregnant Women
- Seat Belt Inspection
- Anchorage points
- Airbag System Components
- Important facts about your airbags
- Types of Airbags
- Front Airbags (SRS)
- Housing Locations
- Operation
- How the Front Airbags Work
- ■When front airbags should not deploy
- ■When front airbags deploy with little or no visible damage
- ■ When front airbags may not deploy, even though exterior damage appears severe
- Passenger Front Airbag Off System
- ■Passenger front airbag ON/OFF switch
- ■To deactivate the passenger front airbag system
- ■Passenger front airbag off indicator
- ■Passenger front airbag off system label
- To deactivate the passenger front airbag system
- NOTICE
- Side Airbags
- ■When a side airbag deploys with little or no visible damage
- ■ When a side airbag may not deploy, even though visible damage appears severe
- >>Side Airbags
- Side Curtain Airbags
- ■When side curtain airbags deploy in a frontal collision
- >>Side Curtain Airbags
- Airbag System Indicators
- Supplemental Restraint System (SRS) Indicator
- ■When the ignition switch is turned to ON [II]\*1
- Passenger Front Airbag Off Indicator
- ■When the passenger airbag off indicator comes on
- Airbag Care
- ■When the airbags have deployed
- ■When the vehicle has been in a moderate-to-severe collision
- Protecting Child Passengers
- European models
- Except European models
- Children should sit properly restrained in a rear seat. This is because:
- >>Protecting Child Passengers
- Safety of Infants and Small Children
- Protecting Infants
- ■Positioning a rear-facing child restraint system
- >>Protecting Infants
- Protecting Smaller Children
- ■Front-facing child restraint system placement
- Selecting a Child Restraint System
- ■Important consideration when selecting a child restraint system
- >>Selecting a Child Restraint System
- The Recommended Child Restraint Systems for EU Countries
- Models with front seat height adjustment
- Models without front seat height adjustment
- Installing a Lower Anchorage Compatible Child Restraint System
- Child restraint system with support leg
- Installing a Child Restraint System with a Lap/Shoulder Seat Belt
- Adding Security with a Tether
- >>Adding Security with a Tether
- Safety of Larger Children
- Protecting Larger Children
- Checking Seat Belt Fit
- Checklist
- Booster Seats
- Protecting Larger Children - Final Checks
- ■Monitoring child passengers
- Carbon Monoxide Gas
- ■Have the exhaust system inspected for leaks whenever
- Label Locations
- Indicators
- Multi-Information Display Warning and Information Messages
- Models with high beam support system
- Message Condition Explanation
- Gauges and Multi-Information Display
- Gauges
- Speedometer
- Right-hand drive type
- Left-hand drive type
- Tachometer
- Ambient Meter
- Multi-Information Display
- Switching the Display
- ■Main displays
- ■Lower displays
- Adjusting the Clock P. 140
- Odometer
- Trip Meter
- ■Resetting a trip meter
- Average Fuel Economy
- Range
- Elapsed Time
- >>Trip Meter
- Average Speed
- Instant Fuel Economy
- Outside Temperature
- ■Adjusting the outside temperature display
- Rear Seat Belt Use Monitor
- >>Average Speed
- Fuel Gauge
- Traffic Sign Recognition System\*
- Service Reminder System
- Speed Alarm Setting
- >>Speed Alarm Setting
- Customized Features
- How to customize
- >>Customized Features
- ■Customization flow
- ■Example of customization settings
- Locking and Unlocking the Doors
- Opening and Closing the Tailgate ..... 156
- Security System
- Operating the Switches Around the
- Adjusting the Mirrors
- Adjusting the Seats
- Climate Control System
- Adjusting the Clock
- Models without navigation system
- Adjusting the Time
- ■ Using the settings menu on the audio/information screen
- Models with navigation system
- ■Using the MENU/CLOCK button
- Setting the Time Zone
- ■Using the settings menu on the audio/information screen
- Key Types and Functions
- Immobilizer System P. 159
- Built-in Key\*
- Retractable keys\*
- Retractable keys
- Key Number Tag
- Low Keyless Remote Signal Strength\*
- Low Keyless Remote Signal Strength \*
- Locking/Unlocking the Doors from the Outside
- Using the Keyless Access System\*
- Using the Keyless Access System \*
- ■Locking the doors and tailgate
- ■Unlocking the doors and the tailgate
- Using the Remote Transmitter
- Right-hand drive models
- ■Unlocking the doors
- All models
- Locking/Unlocking the Doors Using a Key
- Models with retractable key
- Locking a Door Without Using a Key
- ■Locking the driver's door
- ■Locking the passengers' doors
- ■Lockout prevention system
- >>Locking a Door Without Using a Key
- Locking/Unlocking the Doors from the Inside
- Using the Lock Tab
- ■Locking a door
- ■Unlocking a door
- Unlocking Using the Front Door Inner Handle
- Using the Master Door Lock Switch
- Childproof Door Locks
- Setting the Childproof Door Locks
- ■When opening the door
- >>Childproof Door Locks
- Opening and Closing the Tailgate
- Precautions for Opening/Closing the Tailgate
- Using the Tailgate Outer Handle/Release Button
- Left-hand drive type without keyless access system
- Immobilizer System
- Security System Alarm\*
- ■When the security system alarm activates
- ■To deactivate the security system alarm
- »Security System Alarm \*
- ■Setting the security system alarm
- ■When the security system alarm sets
- ■To cancel the security system alarm
- >>Security System Alarm \*
- Super Locking\*
- ■To activate the super locking function
- ■To cancel the super locking function
- Opening and Closing the Windows
- Opening/Closing the Power Windows
- Opening/Closing Windows with Auto-Open/Close Function
- ■Manual operation
- ■Automatic operation
- Auto Reverse
- ■ Opening/Closing Windows without Auto-Open/Close Function
- Operating the Switches Around the Steering Wheel
- Ignition Switch
- Continuously variable transmission models
- ENGINE START/STOP Button
- Changing the Power Mode
- Automatic Power Off
- Power Mode Reminder
- Keyless Remote Reminder
- ■When the power mode is in ON
- ■When the power mode is in ACCESSORY
- Turn Signals
- ■One touch turn signal
- Light Switches
- Manual Operation
- ■High beams
- ■Low beams
- ■Flashing the high beams
- ■Lights off
- >>Light Switches
- →Lights On Indicator P. 98
- Automatic Operation (automatic lighting control)
- Automatic Lighting Off Feature
- >>Automatic Operation (automatic lighting control)
- >>Automatic Lighting Off Feature
- Fog Lights
- ■Rear fog light
- Front and Rear Fog Lights Switch\*
- ■To turn the front fog lights on
- ■To turn the front and rear fog lights on
- ■To turn the rear fog light on
- Rear Fog Lights\*
- Headlight Adjuster\*
- ■To select the adjusting dial position
- Headlight Adjuster \*
- Models with LED low beam headlights
- Auto High-Beam (High Beam Support System) \*
- The system operates when:
- How it works
- Operating the System
- Daytime Running Lights
- MIST
- ■Wiper switch (OFF, AUTO, LO, HI)
- Washer
- Automatic Intermittent Wipers
- ■AUTO sensitivity adjustment
- Sensor sensitivity
- >>Automatic Intermittent Wipers
- Rear Wiper/Washer
- ■Wiper switch (OFF, INT, ON)
- ■Washer ( )
- ■Operating in reverse
- Front Wiper Position Rear Wiper Operation
- Brightness Control
- ■Brightness level indicator
- Rear Demister/Heated Door Mirror\*
- Models with climate control system
- Adjusting the Steering Wheel
- Interior Rearview Mirror
- Rearview Mirror with Day and Night Positions
- ■Mirror position adjustment
- ■ Adjusting the Seat Position
- Adjusting the Seat-Backs
- Reclining the Front Seats
- Adjusting the Rear Seat-Backs
- Folding Down the Rear Seats
- ■To fold down the seat
- Folding the Rear Seat Up
- ■Lifting up the seat cushion
- ■Putting the seat in the original position
- Head Restraints
- Adjusting the front head restraint positions
- To raise the head restraint:
- To lower the head restraint:
- Changing the Rear Seat Head Restraint Positions
- Removing and Reinstalling the Head Restraints
- To remove a head restraint:
- To reinstall a head restraint:
- Maintain a Proper Sitting Position
- Armrest\*
- Using the Front Seat Armrest
- Interior Lights/Interior Convenience Items
- Interior Lights
- Interior Light Switch
- ■ON
- ■Door activated
- OFF
- Map Lights
- Luggage Area Light
- Interior Convenience Items
- Beverage Holders
- ■Front seat beverage holders
- ■Rear seat beverage holders
- Luggage Floor Box
- Accessory Power Socket(s)
- Coat Hook
- Tie-down Anchors
- Luggage Area Cover
- ■To remove the luggage area cover
- Seat Heaters\*
- Heating
- ■To rapidly warm up the interior
- ■To dehumidify the interior
- To rapidly warm up the interior
- Cooling
- ■To rapidly cool down the interior
- To rapidly cool down the interior
- Defrosting the Windscreen and Windows
- ■To rapidly defrost the windows
- For your safety, make sure you have a clear view through all the windows before driving.
- Manual transmission models
- To rapidly defrost the windows
- Using Automatic Climate Control
- ■Switching between the recirculation and fresh air modes
- Turning On and Off the Touch Panel Beep
- To turn off the beep:
- To turn on the beep:
- ■ Touch Panel Sensitivity Setting
- >>Touch Panel Sensitivity Setting
- Automatic Climate Control Sensors
- About Your Audio System
- Key Off Operation
- USB Port(s)
- >>USB Port(s)
- HDMI™ Port\*
- Auxiliary Input Jack\*
- HDMI™ Port \*
- Auxiliary Input Jack \*
- Audio System Theft Protection
- ■Reactivating the audio system
- Audio Antenna\*
- Audio Antenna
- SOURCE Button
- Buttons
- Steering Wheel (Menu) Button
- (Display) Button
- >>Audio Remote Controls
- Audio System Basic Operation
- >>Audio System Basic Operation
- Audio/Information Screen
- Audio
- ■Clock/Wallpaper
- ■Change display
- Wallpaper Setup
- ■Import wallpaper
- »Wallpaper Setup
- ■Select wallpaper
- ■To view wallpaper once it is set
- ■Delete wallpaper
- Adjusting the Sound
- Display Setup
- Changing the Screen Brightness
- Changing the Screen's Colour Theme
- Playing AM/FM Radio
- FM mode
- Radio Data System (RDS) *
- ■To find an RDS station from Station List
- ■Manual Update
- >>Radio Data System (RDS)\*
- ■Available RDS functions
- Alternative Frequency (AF):
- Regional Programme (REG):
- News Programme (NEWS):
- >>Radio Data System (RDS) \*
- ■Traffic announcement (TA) button
- ■Programme type (PTY)/News interrupt function
- TA
- ■PTY alarm
- Radio Text
- AM (MW/LW) mode
- Station List
- Scan
- To find a DAB station from Service List or Ensemble List
- ■Setting the DAB functions
- DAB Settings
- DAB-Link:
- ■FM-Link:
- ■Band select:
- >>Radio Text
- Playing a CD
- How to Select a File from a Folder with the Selector Knob (MP3/WMA/AAC)
- How to Select a Play Mode
- ■To turn off a play mode
- Repeat
- Random
- Playing an iPod
- How to Select a Song from the iPod Music List with the Selector Knob
- Playing a USB Flash Drive
- How to Select a File from a Folder with the Selector Knob
- Playing Bluetooth® Audio
- To Play Bluetooth® Audio Files
- ■To pause or resume a file
- How to Select a Song from the Music Search List with the Selector Knob
- (Day/Night) button:
- ■Using the button
- ■Using the home screen
- Phone
- Info
- Trip Computer:
- System/Device Information:
- Settings
- Navigation \*
- ■ (App List)
- >>Audio/Information Screen
- Touchscreen operation
- Changing the Home Screen Icon Layout
- Home Screen
- ■To change to a next screen
- Select
- To use apps or widgets
- ■To add app or widget icons on the home screen
- ■To move icons on the home screen
- To move icons on the home screen
- ■To remove icons on the home screen
- To remove icons on the home screen
- ■To change the home screen wallpaper
- Status Area
- Changing the Screen Interface
- Closing Apps
- Select HOME
- >>Adjusting the Sound
- Selecting an Audio Source
- Limitations for Manual Operation
- >>Selecting an Audio Source
- Preset Memory
- Radio Data System (RDS)\*
- ■Radio text
- Playing DAB (Digital Audio Broadcasting)\*
- Ensemble List
- How to Select a File from the Music Search List (MP3/WMA/AAC)
- Random/Repeat
- How to Select a Song from the Music Search List
- >>How to Select a Play Mode
- How to Select a File from the Music Search List
- Searching for Music
- Playing a Video Using the HDMI™
- Changing the Screen Aspect
- On Board Apps
- Smartphone Connection
- To change the currently paired phone P. 369
- Connecting Your iPhone
- Wi-Fi Connection
- Wi-Fi mode (setting for the first time)
- Select Connect.
- ■ Wi-Fi mode (after the initial setting has been made)
- >>Wi-Fi mode (after the initial setting has been made)
- iPhone users
- Siri® Eyes Free
- Using Siri® Eyes Free
- Audio Error Messages
- iPod/USB Flash Drive
- Android/Apps
- General Information on the Audio System
- Recommended CDs
- CDs with MP3, WMA, or AAC files
- ■Protecting CDs
- >>Protecting CDs
- Examples:
- Compatible iPod, iPhone, and USB Flash Drives
- iPod and iPhone Model Compatibility
- Model
- >>iPod and iPhone Model Compatibility
- USB Flash Drives
- About Open Source Licences
- >>How to customize
- Defaulting All the Settings
- Hands-Free Telephone System
- Using HFT
- Voice control tips
- HFT Status Display
- HFT Menus
- Phone Setup
- ■To pair a mobile phone (No phone has been paired to the system)
- Phone Pairing Tips:
- ■To pair a mobile phone (when a phone has already been paired to the system)
- ■To Change the currently paired phone
- ■To change the pairing code setting
- ■To delete a paired phone
- Ring Tone
- Caller's ID Information
- >>Ring Tone
- »Caller's ID Information
- To Clear the System
- Automatic Import of Mobile Phonebook and Call History
- Speed Dial
- >>Speed Dial
- ■To edit a speed dial
- ■To delete a speed dial number
- Making a Call
- ■To make a call using the imported phonebook
- To make a call using the imported phonebook
- ■To make a call using a phone number
- To make a call using a phone number
- ■To make a call using redial
- To make a call using redial
- ■To make a call using the call history
- To make a call using the call history
- ■To make a call using a speed dial entry
- To make a call using a speed dial entry
- >>Receiving a Call
- Options During a Call
- HFT Buttons
- ■Phone menu screen
- ■To pair a mobile phone (when there is no phone paired to the system)
- To change the currently paired phone
- To change the pairing code setting
- ■To edit an already-paired phone name
- Automatic Import of Cellular Phonebook and Call History
- ■When Automatic Phone Sync is set to On:
- ■Changing the Automatic Phone Sync setting
- ■To add a voice tag to a stored speed dial number
- ■To delete a voice tag
- ■To delete a speed dial
- ■To make a call using the call history Call history is stored by All, Dialed, Received, and Missed.
- Receiving a Call
- >>Options During a Call
- Before Driving
- Driving Preparation
- Exterior Checks
- Interior Checks
- »Interior Checks
- Models with halogen type headlights
- Models with LED type headlights
- Load Limit
- Towing a Trailer
- Towing Preparation
- Towing Load Limits
- ■Total trailer weight
- ■Trailer nose load
- Towing Equipment and Accessories
- Towbars
- ■Safety chains
- ■Trailer brakes
- ■Additional towing equipment
- ■Trailer light
- Driving Safely with a Trailer
- Things You Need To Know Before Towing a Trailer
- >>Driving Safely with a Trailer
- Parking
- Towing Speeds and Gears
- Turning and Braking
- Driving in Hilly Terrain
- When Driving
- Starting the Engine
- ■Stopping the Engine
- Starting to Drive
- ■Hill start assist system
- Hill start assist system
- Stopping the Engine
- Precautions While Driving
- In Rain
- >>Precautions While Driving
- Other Precautions
- Creeping
- Kickdown
- >>Shift lever positions
- 7-Speed Manual Shift Mode
- ■ When the shift lever is in D:
- ■ When the shift lever is in S:
- 7-Speed Manual Shift Mode Operation
- Shift Up Indicator
- Shift Lever Operation
- >>Shifting
- Shift Up/Down Indicators
- Reverse Lockout
- Auto Idle Stop
- Auto Idle Stop System ON/OFF
- Auto Idle Stop Activates When:
- ■Auto Idle Stop does not activate when:
- Models without parking sensor system
- Models with heating and cooling system
- ■Auto Idle Stop may not activate when:
- ■ The Engine Automatically Restarts When:
- ■ Starting Assist Brake Function
- The Engine Automatically Restarts When:
- Engine Automatically Restarts When:
- ■ The engine automatically restarts even if the clutch pedal is not depressed with the transmission in N when:
- When indicator light (Green) blinks in Auto Idle Stop
- When to use
- To Set the Vehicle Speed
- To Adjust the Vehicle Speed
- To Cancel
- How to use
- To Set the Speed Limit
- To Adjust the Speed Limit
- Exceeding the Speed Limit Temporarily
- Models with intelligent speed limiter
- Models with traffic sign recognition system
- Intelligent Speed Limiter
- Traffic Sign Recognition System \* P. 442
- ■ When the traffic sign recognition system detects the speed limit sign while the intelligent speed limiter is paused
- ■ When the traffic sign recognition system does not detect the speed limit sign for a time while the intelligent speed limiter is activated
- Forward Collision Warning\*
- ■How the system works
- Important Safety Reminder
- Customized Features P. 131
- Forward Collision Warning \*
- ■Automatic shutoff
- >>Automatic shutoff
- Forward Collision Warning Limitations
- Condition
- Lane Departure Warning\*
- How the System Activates
- Lane Departure Warning \*
- Lane Departure Warning Camera
- Lane Departure Warning On and Off
- Lane Departure Warning Conditions and Limitations
- ■Environmental conditions
- Roadway conditions
- ■Vehicle conditions
- How the System Works
- Traffic Sign Recognition System \*
- Signs Displayed on the Multi-Information Display
- ■Selecting to display traffic signs when main mode is off
- Vehicle Stability Assist (VSA) System
- VSA Operation
- Agile Handling Assist
- Deflation Warning System
- Deflation Warning System Calibration
- → Checking and Maintaining Tyres P. 517
- Adjusting Headlight Distribution
- Models with LED headlights
- Braking
- Brake System
- Parking Brake
- To apply:
- To release:
- Foot Brake
- Anti-lock Brake System (ABS)
- ABS
- ■ABS operation
- Brake Assist System
- ■Brake assist system operation
- City-Brake Active system
- For the system to work properly:
- Collision Alert Stages
- Multi-Information Display Warning and Information Messages P. 110
- The System On and Off
- With Little Chance of a Collision
- ■When passing
- ■At an intersection
- ■Through a low bridge
- ■ Speed bumps, road work sites, train tracks, roadside objects, etc.
- ■When parking
- About the Laser Equipped in the System
- Laser classification
- Laser Classification Label Laser Explanation Label
- Emergency Stop Signal
- Parking Your Vehicle
- When Stopped
- Parking Sensor System\*
- Parking Sensor System \*
- ■Parking sensor system on and off
- Parking sensor system on and off
- ■ When the distance between your vehicle and obstacles becomes shorter
- ■Rearview screen with parking sensor
- Turning off All Rear Sensors
- >>Turning off All Rear Sensors
- Multi-View Rear Camera\*
- About Your Multi-View Rear Camera
- »About Your Multi-View Rear Camera
- Fixed Guideline
- Dynamic Guideline
- Refueling
- Fuel Information
- ■Fuel recommendation
- Oxygenated Fuels
- How to Refuel
- Fuel Economy and CO _2 Emissions
- Improving Fuel Economy and Reducing CO₂ Emissions
- Maintenance and Fuel Economy
- →Maintenance Schedule P. 484
- Before Performing Maintenance
- Service Reminder System 479
- Maintenance Schedule 484
- Maintenance Under the Bonnet
- Replacing Light Bulbs 501
- Checking and Maintaining Wiper Blades
- Checking and Maintaining Tyres
- Battery 524
- Remote Transmitter Care
- Heating and Cooling System\*/Climate Control
- Cleaning
- Accessories and Modifications ..... 539
- Inspection and Maintenance
- Types of Inspection and Maintenance
- ■Daily inspections
- ■Periodic inspections
- Safety When Performing Maintenance
- Maintenance Safety
- Vehicle Safety
- Parts and Fluids Used in Maintenance Service
- About Your Maintenance Service
- Displaying the Service Reminder Information
- ▶ Displaying the Service Reminder Information
- Service Reminder Items
- ■Availability of the Service Reminder System
- Availability of the Service Reminder System
- Resetting the Display
- >>Resetting the Display
- Maintenance Schedule
- Items Condition
- Maintenance Items Under the Bonnet
- Opening the Bonnet
- Recommended Engine Oil
- Genuine Engine Oil Commercial Engine Oil
- Oil Check
- Adding Engine Oil
- >>Adding Engine Oil
- Engine Coolant
- Specified coolant: Honda All Season Antifreeze/Coolant Type 2
- Radiator
- >>Radiator
- Transmission Fluid
- Continuously Variable Transmission (CVT) Fluid
- Manual Transmission Fluid
- Do not mix Honda HCF-2 with other transmission fluids.
- Brake/Clutch\* Fluid
- Checking the Brake Fluid
- Brake/Clutch \* Fluid
- Refilling Window Washer Fluid
- Fuel Filter
- Replacing Light Bulbs
- Headlight Bulbs
- High/Low Beam Headlight
- Front Fog Light Bulbs\*
- Front Fog Light: 35 W (H8 for halogen bulb type)
- Front Fog Light Bulbs \*
- Holding clip
- Front Turn Signal Light Bulbs
- Models with bulb type position lights
- Position Light Bulbs
- Position Light: 5 W
- Models with LED type position lights
- Position Lights
- Side Turn Signal/Emergency Indicator Lights
- Daytime Running Lights\*
- Position/Daytime Running Lights\*
- Back-Up Light, Rear Turn Signal Light and Rear Fog Light Bulbs
- Brake/Taillights
- Rear Licence Plate Light Bulbs
- High-Mount Brake Light
- Other Light Bulbs
- Ceiling Light Bulb
- Map Light Bulbs
- Luggage Area Light Bulb
- Checking Wiper Blades
- Changing the Front Wiper Blade Rubber
- Changing the Rear Wiper Blade Rubber
- Checking Tyres
- ■Inflation guidelines
- ■Inspection guidelines
- Wear Indicators
- Tyre Service Life
- Tyre and Wheel Replacement
- Tyre Rotation
- »Tyre Rotation
- Snow Traction Devices
- Battery
- Checking the Battery
- Charging the Battery
- >>Battery
- Emergency Procedures
- Replacing Battery
- >>Replacing Battery
- Battery Label
- Replacing the Button Battery
- Battery type: CR2032
- CHEMICAL BURN HAZARD
- Keyless Remote\*
- Heating and Cooling System\*/Climate Control System\* Maintenance
- Air Conditioning
- Dust and Pollen Filter
- When to Replace the Dust and Pollen Filter
- How to Replace the Dust and Pollen Filter
- Interior Care
- Cleaning Seat Belts
- Cleaning the Window
- »Interior Care
- >>Cleaning the Window
- Floor Mats
- Maintaining Genuine Leather\*
- >>Floor Mats
- Maintaining Genuine Leather \*
- Exterior Care
- Washing the Vehicle
- Using an Automated Car Wash
- Using High Pressure Cleaners
- Applying Wax
- Maintaining the Bumpers and Other Resin Coated Parts
- Maintaining Aluminium Wheels\*
- >> Applying Wax
- Fogged Exterior Light Lenses
- Accessories and Modifications
- Accessories
- Modifications
- Tools
- If a Tyre Goes Flat
- Engine Does Not Start
- Indicator, Coming On/Blinking
- Fuses
- Types of Tools
- Changing a Flat Tyre\*
- Changing a Flat Tyre \*
- Getting Ready to Replace the Flat Tyre
- Models with wheel cover
- How to Set Up the Jack
- >>How to Set Up the Jack
- Replacing the Flat Tyre
- Wheel nut torque:
- >>Replacing the Flat Tyre
- Storing the Flat Tyre
- Models with aluminium wheels
- Models with a compact spare tyre
- Deflation Warning System and the Compact Spare Tyre
- Temporarily Repairing a Flat Tyre\*
- ▶ Temporarily Repairing a Flat Tyre \*
- Getting Ready to Temporarily Repair the Flat Tyre
- >>Getting Ready to Temporarily Repair the Flat Tyre
- Injecting the Sealant and Air in the Tyre
- Distributing the Sealant in the Tyre
- Inflating an Under-inflated Tyre
- Checking the Engine
- If the Keyless Remote Battery is Weak
- Emergency Engine Stop
- Jump Starting
- Jump Starting Procedure
- What to Do After the Engine Starts
- Shift Lever Does Not Move
- Releasing the Lock
- How to Handle Overheating
- ■First thing to do
- ■Last thing to do
- If the Low Oil Pressure Indicator Comes On
- If the Charging System Indicator Comes On
- If the Malfunction Indicator Lamp Comes On or Blinks
- ■Reasons for the indicator lamp to come on or blink
- ■What to do when the indicator lamp comes on
- ■What to do when the indicator lamp blinks
- If the Brake System Indicator (Red) Comes On
- ■Reasons for the indicator to come on
- ■ What to do when the indicator comes on while driving
- If the Electric Power Steering (EPS) System Indicator Comes On
- ■What to do when the indicator comes on
- If the Low Tyre Pressure/Deflation Warning System Indicator Comes On or Blinks
- ■Reasons for the indicator to come on or blink
- ■ What to do when the indicator blinks, then remains on
- If the Low Oil Level Symbol Appears
- Fuse Locations
- Engine Compartment Fuse Box
- Fuse Box A
- Driver Side Interior Fuse Box
- ■Type A
- ■Type C \*
- Passenger Side Interior Fuse Box \*
- Inspecting and Changing Fuses
- ■Flat bed equipment
- ■Wheel lift equipment
- ■ If your vehicle must be towed with the front wheels on the ground:
- If your vehicle must be towed with the front wheels on the ground:
- Models with temporary tyre repair kit
- When You Cannot Open the Tailgate
- What to Do When Unable to Open the Tailgate
- Information
- Identification Numbers
- Specifications
- Vehicle Identification Number (VIN), Engine Number and Transmission Number
- Devices that Emit Radio Waves\*
- Israeli models
- Immobilizer system Remote Transmitter
- Keyless Access System\*
- Moldova models
- Remote Transmitter\*
- DECLARATION of CONFORMITY
- For
- Supplied by
- Standard used for comply
- Means of Conformity
- Hands-Free Telephone System\*
- Declaratie de conformitate
- CERTIFICAT D'AGRÉMENT
- Serbian models
- POTVRDA O USAGLASENOSTI - RITTO CONFIRMATION OF CONFORMITY - R&TTE Broj: P1614118200 No.
- POTVRDA O USAGLASENOSTI - RITTo CONFIRMATION OF CONFORMITY - R&TTE Broj. P1614118300 No.
- DECLARATION of CONFORMITY For
- EC Declaration of Conformity Content Outline\*
- EC Declaration of Conformity
- Deutsch (German)
- Adding
- Adjusting
- Air Conditioning System
- Auto High-Beam (High Beam Support
- B
- C
- D
- G
- H
- |
- J
- K
- L
- M
- N
- 0
- P
- R
- S
- T
- U
- V
- W
Brand : Honda
Model : Jazz (2020)
Category : Automotive