
DigiWalker P350 - Digital Personal Assistant MIO - Free user manual and instructions
Find the device manual for free DigiWalker P350 MIO in PDF.


| Product Type | Digital Personal Assistant / Portable GPS Navigator |
| Model | Mio DigiWalker P350 |
| Brand | Mio |
| Navigation Software | MioMap v3.2 with door-to-door navigation, multi-point routing, and TMC support |
| Display | Touchscreen, operable by fingertips, supports both portrait and landscape orientation |
| GPS Receiver | Built-in, supports NMEA and SiRF protocols |
| Power Source | Rechargeable internal battery (estimated 3-5 hours operation) |
| Dimensions (Approx.) | 120 x 70 x 20 mm (4.7 x 2.8 x 0.8 inches) |
| Weight (Approx.) | 150 g (5.3 oz) |
| Key Features | 2D/3D map views, Smart Zoom, speed camera warnings, track log recording, POI management, voice guidance, automatic day/night colors |
| Memory Card Support | SD/MMC card for map storage (map pre-installed) |
| Safety Features | Safety Mode to disable screen while driving, speed warning, lock-on-road for accurate positioning |
| Maintenance & Cleaning | Clean the device with a soft, dry cloth; avoid liquids and abrasive materials |
| Spare Parts & Repairability | No user-serviceable parts; contact Mio support for repairs |
| General Information | August 2006, English US version; includes MioMap v3.2 navigation software with comprehensive map data from Tele Atlas and Whereis |
Frequently Asked Questions - DigiWalker P350 MIO
User questions about DigiWalker P350 MIO
0 question about this device. Answer the ones you know or ask your own.
Ask a new question about this device
Download the instructions for your Digital Personal Assistant in PDF format for free! Find your manual DigiWalker P350 - MIO and take your electronic device back in hand. On this page are published all the documents necessary for the use of your device. DigiWalker P350 by MIO.
USER MANUAL DigiWalker P350 MIO
natural_image
Illustration of two stylized orange flowers with yellow petals and decorative elements (no text or symbols)
Digi Walker
User Manual
MioMap™ v3.2
Navigation software for Mio DigiWalker P350/P550
US English
August, 2006 (v1.00)

natural_image
Illustration of a stylized orange flower with petal outlines (no text or symbols)Copyright note
The product and the information contained herein may be changed at any time without prior notification.
This manual nor any parts thereof may not be reproduced or transmitted in any form either electronically or mechanically, including photocopying and recording, without the express written consent of Mio Technology Limited.
© 2006 Mio Technology Limited
© 2006 Nav N Go Kft.
Whereis® map data is © 2006 Telstra Corporation Limited and its licensors
Data Source © 2006 Tele Atlas N.V.
Austria: © BEV, GZ 1368/2003
Denmark: © DAV
France: © IGN France
Great Britain: Ordnance Survey data with permission of Her Majesty's
Stationery Office © Crown Copyright
Italy: © Geonext/DeAgostini
Northern Ireland: © Ordnance Survey of Northern Ireland
Norway: © Norwegian Mapping Authority, Public Roads Administration /
Mapsolutions
Switzerland: © Swisstopo
The Netherlands: Topografische ondergrond
All rights reserved.
Thank you for choosing MioMap as your door-to-door in-car navigator. Read the Quick Start Guide first and start using MioMap right away. This document is the detailed description of the software. Although MioMap can easily be discovered by experience, it is still recommended that you read through this manual to clearly understand the exact function of each button and icon.
Table of Contents
1 Warnings and safety information....8
2 General information....9
3 Operating MioMap (Controls)....10
3.1.1 Power on/off....10
3.1.2 Tilt up and down 10
3.1.3 Zoom in and out.... 10
3.1.4 Rotate left and right 11
3.1.5 Voice instruction announcement.... 11
3.1.6 The Route Information screen 11
3.2 Screen buttons and controls 12
3.2.1 Direct selectors 12
3.2.2 List selectors....12
3.2.3 Sliders....12
3.2.4 Switches 13
3.2.5 Switches in the Quick menu....13
3.2.6 Virtual keyboards....13
3.2.6.1 QWERTY-type keyboards 14
3.2.6.2 The numeric keyboard....14
4 Discovering the program through the screens 15
4.1 The map....15
4.1.1 2D and 3D map views....15
4.1.2 Zoom levels 16
4.1.3 Daylight and night color schemes 16
4.1.4 Streets and roads 18
4.1.5 Other objects 18
4.1.6 Speed cameras....19
4.1.7 Contacts....19
4.1.8 Elements of the Active Route.... 19
4.1.8.1 The start point, via points and the destination.... 19
4.1.8.2 Animated turn guidance 20
4.1.8.3 The route line 20
4.1.8.4 Roads in the route excluded by your preferences 20
4.2 Screens with map 21
4.2.1 Turn preview (No. 1) 23
4.2.2 Zoom in and out (No. 2 & 3)....23
4.2.3 Tilt up and down (No. 4 & 5) 24
4.2.4 Lock to GPS position and heading (No. 6)....24
4.2.5 Cursor (No. 7) 25
4.2.6 Map scale (No. 8) 25
4.2.7 Menu (No. 9)....25
4.2.8 Map orientation and Overview (No. 10) 26
4.2.9 GPS position quality (No. 11)......26
4.2.10 Battery status (No. 12)....27
4.2.11 Sound muting (No. 13)....27
4.2.12 Track Log recording/playback indicator (No. 14) 28
4.2.13 Cursor menu (No. 15) 28
4.2.14 Current street (No. 16)....30
4.2.15 Travel and Route data (No. 17) 31
4.2.16 Distance to next turn (No. 18)....31
4.2.17 Next street / Next settlement (No. 19)....31
4.2.18 Approaching next turn (No. 20)....32
4.2.19 Current speed limit (No. 21)....32
4.3 GPS Data screen 32
4.3.1 GPS data displayed 33
4.3.2 GPS connection indicator 33
4.3.3 GPS data quality indicator 33
4.3.4 Time synchronization....34
4.3.5 GPS configuration (Detect and Config.) 34
4.4 Route Information screen....34
4.4.1 Route data displayed (for destination and via points) 35
4.4.1.1 Route line 35
4.4.1.2 Distance Left 36
4.4.1.3 Method 36
4.4.1.4 Time Left 36
4.4.1.5 Estimated Arrival 36
4.4.1.6 Destination / Via point 36
4.4.2 Warning icons 37
4.4.3 Fit to screen....38
4.4.4 Parameters 38
4.5 Menu....38
4.5.1 Find tab....38
4.5.2 Quick tab....38
4.5.2.1 Zoom & Tilt (switch)....39
4.5.2.2 Daylight & Night Modes (switch) 39
4.5.2.3 Manage POI (Points of Interest) 40
4.5.2.4 Popup Information (switch)......43
4.5.2.5 Manage Track Logs....44
4.5.3 Route tab 46
4.5.3.1 Recalculate 46
4.5.3.2 Delete 48
4.5.3.3 Itinerary 48
4.5.3.4 Fly Over....49
4.5.3.5 Edit....50
4.5.3.6 Info 51
4.5.4 Main button....51
4.6 Speed cameras....51
4.6.1 Camera types 52
4.6.1.1 Fixed cameras....52
4.6.1.2 Mobile cameras....52
4.6.1.3 Built-in cameras 52
4.6.1.4 Section control cameras....53
4.6.2 Controlled traffic direction 53
4.6.3 Speed limit checked....54
4.6.4 Add a new camera or edit an existing one 54
4.6.5 Change the settings of the camera warning....54
4.7 TMC (Traffic Message Channel) 54
4.7.1 List of TMC messages 55
4.7.2 TMC control center 55
4.7.2.1 Selected FM radio station....56
4.7.2.2 Exclude selected station....56
4.7.2.3 Show excluded stations....56
4.7.2.4 Sorts events by distance / type 56
4.7.2.5 Use traffic information 57
4.7.2.6 Recalculate to avoid traffic 57
5 Find....58
5.1 Main menu Find buttons (Address, Favorites, POI, History) 58
5.2 Selection by tapping the map....58
5.3 Using the Find menu....59
5.3.1 Find an Address, Street, Intersection or City 59
5.3.1.1 Selecting the city, state and country to search in 60
5.3.1.2 Selecting a house number or the midpoint of the street 63
5.3.1.3 How to select an intersection instead of a house number 64
5.3.1.4 An example for a full address search 64
5.3.2 Find in History 65
5.3.3 Find Coordinates 65
5.3.4 Find a POI....66
5.3.5 Find one of the Favorites (Home/Work) 68
6 Settings....69
6.1 General settings....69
6.1.1 Safety Mode....69
6.1.2 Automatic Night Colors 70
6.1.3 Speed Warning Options....70
6.1.3.1 Speeding tolerance 70
6.1.3.2 Alternative speed limit 70
6.1.3.3 Alternative speeding tolerance 70
6.1.4 Enable Speed Camera Warning 71
6.1.5 Speed Camera Options 71
6.1.5.1 Audible Warning....71
6.1.5.2 Visible Warning 72
6.1.6 Set Favorite Destinations....73
6.1.7 Route Recalculation....73
6.1.7.1 Automatic 74
6.1.7.2 Disabled 74
6.1.8 Display Orientation 74
6.2 Sound settings 74
6.2.1 Master sound volume/switch....74
6.2.2 Voice guidance volume/switch....75
6.2.3 Key sound volume/switch 75
6.2.4 Dynamic Volume....75
6.2.5 Attention Tone 75
6.3 Route parameter settings....76
6.3.1 Route 76
6.3.1.1 Shortest....76
6.3.1.2 Fastest 76
6.3.1.3 Economical....76
6.3.2 Vehicle 76
6.3.3 Road types to include/exclude 77
6.3.3.1 Unpaved Roads 77
6.3.3.2 Motorways 77
6.3.3.3 Ferries....77
6.3.3.4 U-turns 77
6.3.3.5 Permit needed....78
6.3.3.6 Toll Roads 78
6.3.3.7 Cross-border Planning 78
6.4 Language & Units 78
6.4.1 Program language 78
6.4.2 Voice language 79
6.4.3 Units 79
6.4.4 Set Date & Time Format 79
6.5 Advanced settings....79
6.5.1 Cockpit settings 80
6.5.1.1 3D in Cockpit mode (and track-up orientation) 80
6.5.1.2 Cockpit screen layout....80
6.5.2 Backlight settings....80
6.5.2.1 Power management 81
6.5.2.2 Brightness 81
6.5.3 User data management 81
6.5.3.1 Backup Data....82
6.5.3.2 Restore Data 82
6.5.3.3 Clear Data 82
6.5.3.4 Reset Advanced Settings 82
6.5.4 Map options 83
6.5.4.1 Daylight / Night color profile 83
6.5.4.2 Show Street Labels 83
6.5.4.3 Textured Polygons 83
6.5.5 Smart Zoom 83
6.5.5.1 Enable Smart Zoom 84
6.5.5.2 Enable Overview mode 84
6.5.5.3 Keep position on road (Lock-on-Road)....85
6.6 About screen....85
6.7 Manual GPS configuration 85
6.7.1 Protocol....86
6.7.2 Port 86
6.7.3 Baud rate 86
7 Troubleshooting guide....87
8 Glossary 89
1 Warnings and safety information
MioMap is a navigation system that helps you find your way to your selected destination. It will determine your exact location with the help of an attached GPS device. The position information obtained from the GPS receiver will not be transmitted anywhere, so others will not be able to track you by the help of this program.
If you are the driver of the vehicle, we recommend that you operate MioMap before beginning your journey. The driver's attention should be on the road. Plan your route before departure and pull over if you need to change route parameters. MioMap has a built-in (optional) Safety Mode that will prevent you from using the screen functions if your car is in motion. Unless a passenger will be the only one to operate MioMap, we strongly encourage you to turn on the Safety Mode.
It is also important that you look at the display only if it is absolutely safe to do so.
You should always observe traffic signs and road geometry before you obey any instruction from MioMap. If you need to deviate from the recommended direction, MioMap will suggest a modified route according to the new situation.
Never place the PDA where it can obstruct the view of the driver, is within the deployment zone of airbags, or where it can cause injuries in case of an accident.
2 General information
MioMap is a navigation system optimized for in-car use. It provides door-to-door navigation for both single and multi-point routes using adaptable route parameters. MioMap is capable of planning routes throughout the whole map region installed on the memory card. Unlike some other products, MioMap does not require that you change maps or switch to a poorly detailed general map to navigate between map segments or countries. You always have complete freedom to go wherever you wish. Just select your destination and go.
You do not need a stylus to use MioMap. All screen buttons and controls are designed so that you can operate them with your fingertips.
You can access all functions of the program by using hardware and screen buttons. With the help of these buttons you can travel through all the screens of the program. Most of the screens (especially menu functions and settings) can be accessed from several other screens, minimizing the number of actions needed to reach the desired function.
When using MioMap, you do not need to 'double tap' or 'tap & hold' the touch screen as these functions cannot be used reliably in a moving vehicle. A single tap triggers most of the screen controls. The only exceptions are 'drag & drop' for moving the map, or scaling it in Map mode (Page 25).
Most of the screens have a Return button in the top left corner. This arrow returns to the previous screen or directly to one of the map screens.
Settings screens also have a Help button 📋 in the top right corner. This will show a detailed description of the current settings screen.
3 Operating MioMap (Controls)
MioMap is designed for easy operation. All controls are operable by fingertips. Wherever possible, pushbuttons and lists are provided to make accessing functions or changing settings as easy as possible.
3.1.1 Power on/off
Use this button to turn the power of the Mio DigiWalker P350/P550 on or off any time.
If the device power is turned off while MioMap is running, when you turn the device back on, MioMap will continue the navigation as soon as the built-in GPS determines the location again.
While the device is switched off, the GPS will not work, no position will be calculated, track log will not be saved, and navigation will stop.
3.1.2 Tilt up and down
Map tilting modifies the vertical view angle of the map in 3D mode. This function is explained in detail here: Page 24.
Note: The Tilt down button has a special function when starting Fly Over (Page 49), the route simulation. If started while keeping this button depressed, the simulation will be fast to give you a rough overview of the route events.
3.1.3 Zoom in and out
Tilt the joystick up to zoom in, or tilt it down to zoom out.
Zoom will change the scale of the map in both 2D and 3D map modes. This function is explained in detail here: Page 23.
Note: When applied on list and menu screens, this action will move the highlight up and down.
3.1.4 Rotate left and right
Tilt the joystick left or right to rotate the map.
Track-up map orientation (Page 26) will always rotate the map so its top faces your direction of travel when your GPS position is available. Use this function if you need to check something on your left or right.
If you rotate the map during navigation, Smart Zoom will still zoom and tilt the map but the automatic rotation (Track-up) will be deactivated, so the map orientation will remain as you set it. You need to press Enter, or tap the Lock button (Page 24) to reactivate the automatic map rotation.
Note: When applied on list and menu screens, this action will move the highlight left and right.
3.1.5 Voice instruction announcement
Press the joystick for this function.
When using either the Map or the Cockpit screen, you can repeat the latest voice instruction by pushing this button.
Tip: Use this button any time during your journey if you need the distance and type of the next route event.
Note: In order to receive voice instructions, sound should not be muted (Page 74), voice guidance must be enabled (Page 75), and a route must be active.
Note: If you have disabled Smart Zoom by tilting, rotating or moving the map during navigation (i.e. the Lock button appears on the screen), this button will first re-enable normal navigation, and will say the instruction only after being pushed again.
Note: When applied on list and menu screens, this button will select the highlighted item.
3.1.6 The Route Information screen
To give easy access to the most important data screen during navigation, a hardware button is reserved for opening the Route Information screen. Alternatively, tap the travel data fields of the Cockpit screen (Page 21) or the Info button (Page 51) in the Route menu to display this screen.
3.2 Screen buttons and controls
The primary input channel of MioMap is the touch screen. If you read on, you will realize that most parts of the screen are not only used to display information but also to initiate functions by tapping. Below you will find a list of the most frequently used controls in the program.
3.2.1 Direct selectors
Some of the settings can be chosen from a short list of possible values. If the values can be described graphically, all values are available on the screen.
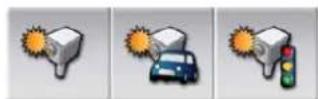
Tap one of the icons to set/change the value.
3.2.2 List selectors
When the values in the list need to be named, only the current value is shown (sometimes together with a short description) in a horizontal stripe with arrows at both ends.

The arrows are buttons. Tap 🔒 to move left in the list or tap 🔒 to move right. You need not confirm your selection. As soon as you leave the screen, the selected value becomes effective.
Note: The only exception for this is the Manual GPS Configuration screen (Page 85) where you can confirm your new set of selections by tapping the OK button, or leave the previous settings untouched by exiting with the 🔒 button in the top left corner.
3.2.3 Sliders
When a feature has several different unnamed (numeric) values, MioMap will show sliders that look like analogue potentiometers to set the desired value.

If the value limits are not displayed at the ends of the slider, the leftmost position means the minimum value, while the rightmost position represents the maximum value.
With most sliders you can check the current value on the left.
This control can be operated in two ways. Either drag the handle to move the slider to its new position, or tap the slider where you want the handle to appear (the thumb jumps there immediately). As with the list selectors, there is no need to confirm your selection. As soon as you leave the screen, the selected value becomes effective.
3.2.4 Switches
When a function can only have two values (mainly Enabled and Disabled), a switch is used. Unlike with list selectors, the horizontal line contains the name of the function and not the actual status. There is a lamp on the left to show whether the function is active or not.
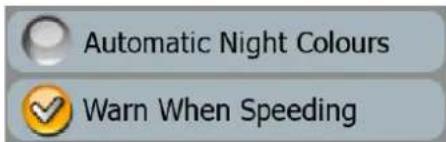
When the tick mark is missing ⏻, the function is not selected. When it is displayed ⚙, the function is enabled. The whole strip works as a button. Tap anywhere to toggle between the enabled and disabled status.
3.2.5 Switches in the Quick menu
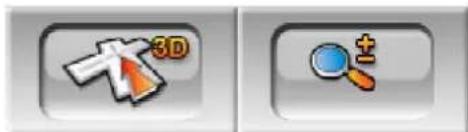
The switches of the Quick menu (Page 38) behave as normal switches but they look different in order to fit in with the other menu buttons.
natural_image
Two gray rounded rectangles with icons: one with a white cross and '3D' label, the other with a magnifying glass (no text or symbols)Tap the button to toggle between the two states. Remember that the sign on the button will not indicate the current state but the state you can switch it to.
3.2.6 Virtual keyboards
MioMap is designed in a way that you only need to enter letters or numbers when it is inevitable. In these cases a full screen keyboard pops up that can easily be operated with your fingertips. You can choose between a separate ABC and numeric keypad, or a set of QWERTY-type keyboards that contain both letters and numbers. MioMap will remember your last choice and offer it the next time you need to enter data.
The alphabetic keyboards in MioMap do not contain special characters, because you do not need to enter accents when searching for a destination. Type only the base letters (the letter most similar to the accented one) and MioMap will search for all
their combinations in the database (e.g. for the French street ‘Cité Bergère ’ you only need to type ‘Cite Bergere’, and the rest is done by the program).
When you type in POI or track log names, MioMap will automatically turn all initials into capitals to create names that look pleasant.
3.2.6.1 QWERTY-type keyboards
QWERTY-type keyboards have both letters and numbers on them. Their layout is the same as of the standard QWERTY and AZERTY (French) keyboards. To switch to your desired QWERTY-type keyboard, press the Keys button.
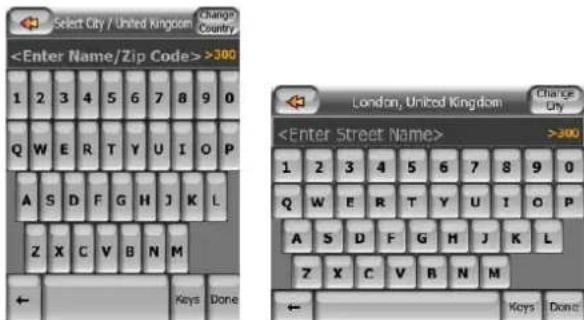
The special keys described in the previous section are also available here.
3.2.6.2 The numeric keyboard
The numeric keyboard only contains numbers, on huge buttons. The special keys you find on the other keyboards (except Space) are available here as well.
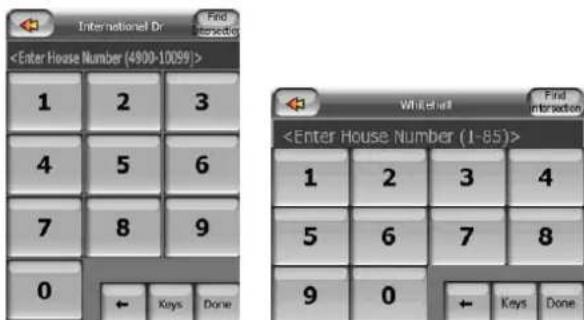
Although QWERTY-type keyboards also contain number keys, when entering a house number, the program offers the more convenient numeric keypad.
4 Discovering the program through the screens
The best way to discover MioMap is to explore each screen in detail, and to find out how to move from one to another. Read this chapter for a guided tour.
4.1 The map
The most important and most frequently used screens of MioMap are the two screens with the map (Map screen and Cockpit screen). They are similar in look and in possible controls but are optimized for different uses. The map they display is common. The elements of the map are described here. For the controls and special functions of the two map screens see Page 21.
The current version of MioMap is primarily intended for land navigation. That is why maps in MioMap look similar to paper roadmaps (when using daytime colors and 2D map mode). However, MioMap provides much more than regular paper maps can. The look and the contents can be changed.
4.1.1 2D and 3D map views
Besides the classical top down view of the map (called 2D mode), you have the possibility to tilt the map to have a perspective view (3D mode) that gives a view similar to that seen through the windscreen with the possibility to see far ahead.
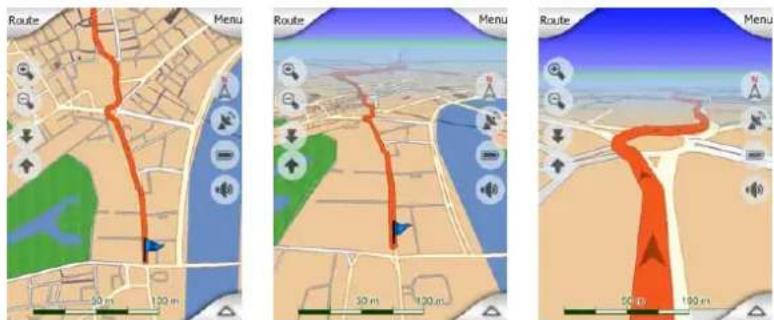
It is easy to change between 2D and 3D modes. You have two options. You can use the Tilt up and down buttons (Page 24) to tilt the map seamlessly between 2D and all 3D angles, or you can use the switch in the Quick menu (3D Map) to quickly switch between the two modes.
Note: You may find that 2D mode is more useful in North-up Map mode when looking for a certain part of the map or an object to select as destination. On the other hand, 3D mode in Track-up Cockpit mode with Smart Zoom makes navigation very comfortable. The description of these modes will come later in this manual.
Note: Using the Advanced settings, you can force Cockpit mode to always start in 3D Track-up view (Page 80). You can still rotate and tilt the maps in either mode, but the next time you enter this screen, the preset look will reappear.
4.1.2 Zoom levels
MioMap uses high quality vector maps that let you see the map at various zoom levels, always with optimized content. Street names and other text objects are always displayed with the same font size, never upside down, and you only see as many streets and objects as needed to find your way around the map. Zoom in and out to see how the map changes in either the 2D or 3D view.
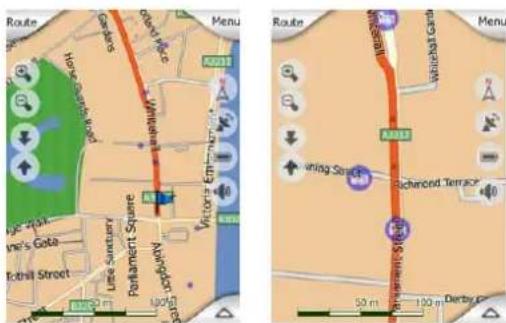
Changing the scale of the map is very easy. You can drag and stretch the scale (Page 25) at the bottom of the Map screen, or use the zoom icons (Page 23) on both Map and Cockpit screens.
Note: If you need to zoom out briefly to locate your position on the map, use the Overview mode instead of zooming out and back in. The Overview mode is a 2D North-up view that can be started by tapping the compass button on the right (Page 26).
Note: MioMap has a special Smart Zoom function for navigation that automatically rotates, scales and tilts the map in 3D map mode to always give you the optimal view in your current situation. When approaching a turn, it will zoom in and raise the view angle to let you easily recognize your maneuver at the next junction. If the next turn is at a distance, it will zoom out and lower the view angle to flat in order to let you see the road in front of you.
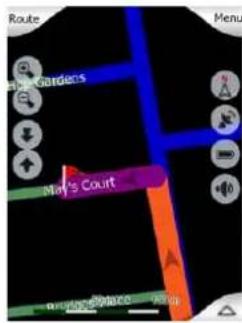
4.1.3 Daylight and night color schemes
The different color schemes let you adjust MioMap to the brightness of the environment. Use the daylight and night color schemes accordingly. Daylight colors are similar to paper roadmaps, while the night color schemes use dark tints for large
objects to keep the average brightness of the screen low, with carefully selected colors to still keep you informed about all the necessary information on the screen.
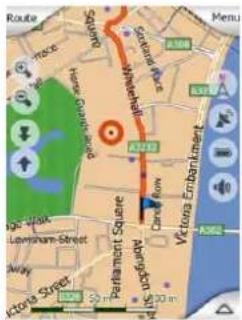
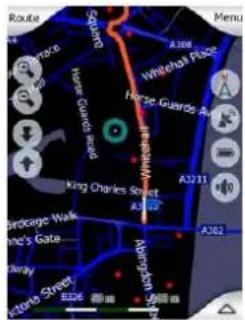
You can change between day and night views manually in the Quick Menu (Page 39) or let MioMap do it automatically (Page 70) for you.
Note: The automatic day/night mode is based upon the current date and GPS position by which MioMap calculates the exact sunrise and sunset times on the particular day at the particular location. Using that information MioMap can automatically switch between the color schemes a few minutes before sunrise, when the sky has already turned bright, and a few minutes after sunset before it gets dark.
Tip: There are several daytime and night color schemes included with MioMap. To select the one that suits your needs the best, make your selection in Settings (Page 83).
Tip: To further enhance the effect of the night color scheme, you can instruct MioMap to decrease the display backlight when the night colors are used. Set the desired backlight levels for both daylight and night modes. Page 80.
Note: The colors mentioned and screenshots included in this manual refer to the default daytime and night color schemes. They may not look the same in the schemes you have chosen.
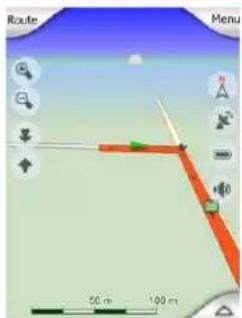
Tip: If you use MioMap after sunrise or before sunset, look for the sun in the sky in the map background using a flat 3D view. It is displayed at its actual position to give you another way to orientate, and also to provide some eye candy.
4.1.4 Streets and roads
The similarity of MioMap to paper roadmaps is also convenient when it comes to streets, the most important elements of the map concerning navigation. MioMap uses similar color codes to those you are accustomed to, and the width of the streets also refers to their importance, so it will not be difficult to tell a highway from a small street.
Streets and roads have names or numbers for identification. Of course, this information can be displayed on the map. MioMap uses two different ways to show street labels. The conventional way is the same as a roadmap – it displays the name of the street aligned with the street. The alternative is a kind of virtual signpost stuck into the street itself.
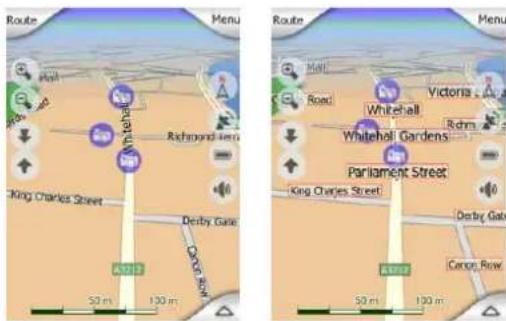
You need not choose between the two modes. MioMap will use the one best for the current tilt and zoom level. Zoom in to have only a few streets on the map, and start tilting up and down to see how MioMap switches between the two modes in an instant.
Note: The automatic switching is on even when using Smart Zoom. At first you may find it odd, but later you will discover how it adjusts the displayed information to the current view of the map. It is important, as the driver must be able to read the map at a glance.
Tip: If you do not want to be bothered by street names during navigation, turn them off in Map Options (Page 83).
4.1.5 Other objects
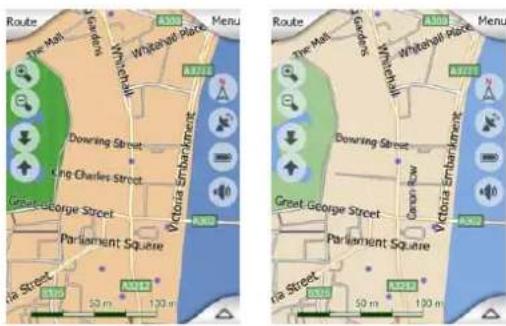
To help orientate you, the map also contains objects that have no other navigating function than to help you recognize your location on the map. These are surface-waters, large buildings, forests, etc.
Tip: These objects are normally displayed using textured polygons that look natural to the eye. You may wish to switch the textured display off (Page 83) to free some of the resources of your PDA by replacing textures with plain colored surfaces.
4.1.6 Speed cameras
There are special POI types in MioMap. There is a built-in database of fixed and mobile speed cameras. It is also possible to add new cameras to enhance this database. They are not shown in POI lists, but they are shown on the map with special icons. Speed cameras are described in detail here: Page 51
4.1.7 Contacts
A different type of special POIs are Contacts. When MioMap is started, it will attempt to recognize the addresses in your Mio DigiWalker P350/P550's Contact database. All contacts with the address recognized will be shown as My POIs in a group named Contacts.
If they exist, both the home and work addresses of a contact will be imported. For example if you have the home and office addresses of John Smith, you will have two POIs, one called 'John Smith (Home)', and another one as 'John Smith (Work)'.
4.1.8 Elements of the Active Route
MioMap uses a multi-destination routing system in which you have a start point (your current location if GPS position is available), a destination, the line of the active leg of the route, and optionally via points and inactive legs. They are all shown on the map.
4.1.8.1 The start point, via points and the destination
These points are represented by flags.
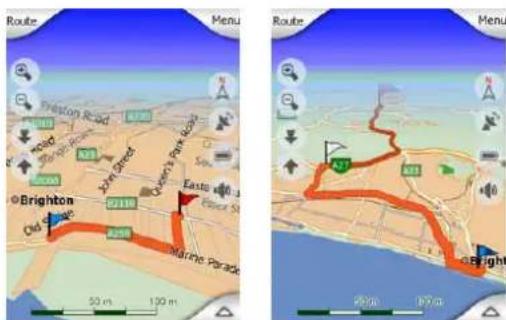
4.1.8.2 Animated turn guidance
Animated arrows represent all route events other than the above-mentioned special points. These arrows show the direction in which you need to continue your journey.
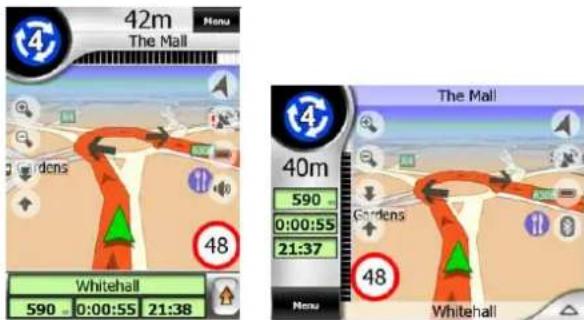
4.1.8.3 The route line
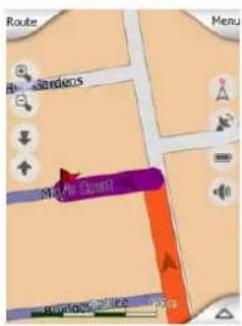
The line representing the planned route is displayed in orange with both daylight and night colors. In both cases it is the most conspicuous part of the map even when in the background of a 3D map view.
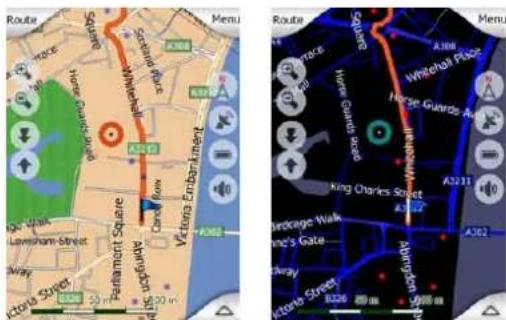
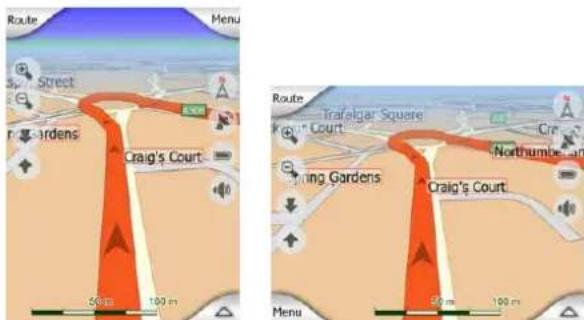
The line of the route is displayed on the driving side of the road for two-way and on the axis in case of one-way streets. When the map is zoomed in and the line is wide enough, small arrows show the direction of the route. This can be useful if you preview the route before starting the journey or when entering a complex junction.
4.1.8.4 Roads in the route excluded by your preferences
Although you can choose whether to include or avoid some road types in Route parameter settings (Page 77), sometimes they are impossible to avoid near the starting point, via points or the destination.
If so, MioMap will display those segments of the route with an alternate color.
4.2 Screens with map
Having explained the contents of the map, the description of the other parts of the map screens follows. There are two map screens: the Map screen and the Cockpit screen. The way they show the map is the same but their look and controls are optimized for different purposes.
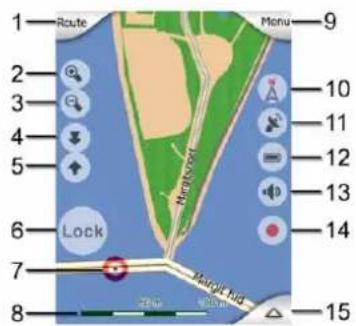
The Map screen is to be used mainly without a GPS, to browse the map, create user POI items, or to plan your route based on map points. The Map screen is designed to give you the maximum map area. This screen is usually used in 2D North-up mode.
The Cockpit screen is for driving purposes. Besides showing the map, it contains some additional travel information if you are just cruising (speed, current street your are driving in, speed limit for the current street), and some more route data if you are navigating (e.g. next street in your route, distance to travel, type of the next route event). This screen is typically used in 3D Track-up mode (you can make MioMap always open the Cockpit screen like that.
There are several controls that function in a similar fashion on the two screens. They are described on the following pages.
Map screen contents:
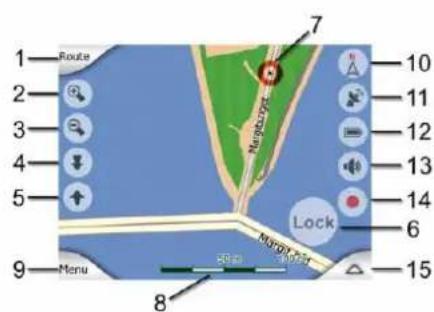
Cockpit screen contents:
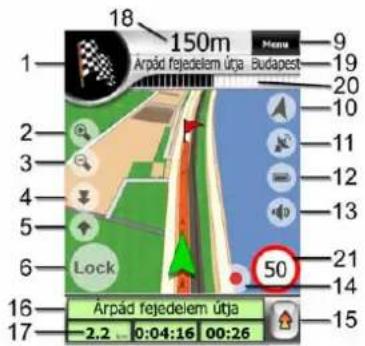
1 (Cockpit only) Turn preview* Opens Route menu*
2 n/a Zooms in (optional)
3 n/a Zooms out (optional)
4 n/a Tilts down (optional)
5 n/a Tilts up (optional)
6 Indicates that Lock to GPS position and heading is inactive Re-enables Lock-to-Position / Smart Zoom
7 Selected map point (Cursor) Opens Popup Info and Cursor menu
8 (Map only) Map scale Zooms in/out by dragging
9 n/a Menu (Find, Quick, Route, Main)
10 Map orientation and Overview Switches North-up, Track-up and Overview
11 GPS position quality Opens GPS Data screen
12 Battery status Opens settings
13 Sound on or muted Enables/disables muting
14 Track Log recording or playback Opens Track Logs screen
15 n/a Opens Cursor menu
16 (Cockpit only) Current street Opens Route Information screen
17 (Cockpit only) Travel and Route data** Opens Route Information screen
18 (Cockpit only) Distance to next turn*** n/a
19 (Cockpit only) Next street*** n/a
20 (Cockpit only) Approaching next n/a
No. Display Control
turn****
21 Current speed limit***** n/a
* On Map screen only when a route is active
** Contents differ when a route is active
*** Appears only when a route is active
**** Appears only when a route is active and the next turn is near
***** Appears only if speed limit is known for the current road
4.2.1 Turn preview (No. 1)
On the Cockpit screen this field shows a graphic illustration of the next maneuver. For example when you approach a turn, an arrow will show whether it is a slight, normal or sharp turn. When showing a roundabout, the number of the exit is also given in the picture.
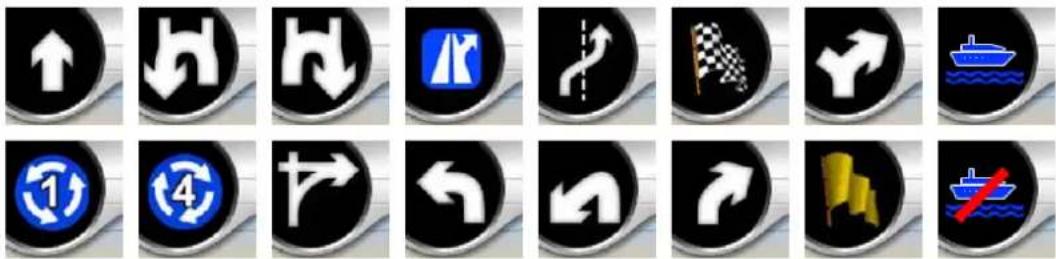
This field also serves as a button. Tap it to get to the Route menu (Page 46). The Map screen will show a button called Route here if there is an active route. This also leads to the Route menu.
4.2.2 Zoom in and out (No. 2 & 3)
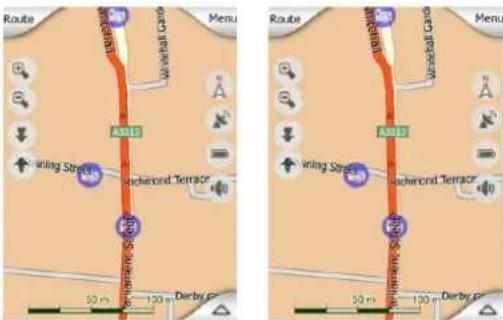
These semi-transparent buttons are only displayed if "Zoom & Tilt" is enabled in the Quick menu (Page 39).

Zoom will change the scale of the map. Zoom out shows a larger part of the map, while Zoom in shows a smaller part of the map in more detail.
The automatic Smart Zoom function will do the necessary zooming for you when navigating (zooms out if the next turn is at a distance to let you see far ahead and zooms in when approaching a turn to give you a better view of the upcoming
maneuver). If you manually change the zoom level, Smart Zoom will no longer scale the map by itself (automatic tilting and rotating remains active).
You need to tap the Lock button (Page 24) to return the zoom control to Smart Zoom. If you are on the Cockpit screen, MioMap will do this automatically if you leave the display untouched for 30 seconds.
4.2.3 Tilt up and down (No. 4 & 5)
These semi-transparent buttons are only displayed if "Zoom & Tilt" is enabled in the Quick menu (Page 39).
This function modifies the vertical viewing angle of the map in 3D mode. You can change the angle in a wide range starting from a top down view (2D view is seamlessly integrated) all the way to a flat view that lets you see far ahead.
The automatic Smart Zoom function will do the necessary tilting for you when navigating (gives a flat view if the next turn is at a distance to let you see far ahead and raises the angle when approaching a turn to give you a better view of the upcoming maneuver). If you manually change the view angle, Smart Zoom will no longer tilt the map by itself (automatic zooming and rotating remains active).
You need to tap the Lock (Page 24) to return the tilt control to Smart Zoom. If you are on the Cockpit screen, MioMap will do this automatically if you leave the display untouched for 30 seconds.
4.2.4 Lock to GPS position and heading (No. 6)
This semi-transparent icon is displayed if GPS position is available, and the map has been moved or rotated. It also appears when you scale or tilt the map while Smart Zoom is enabled.
Lock
Normally MioMap positions the map to keep the GPS position visible somewhere on the map (when North-up orientation is selected), or always at the bottom center of the map (when Track-up orientation is selected).
If you manually move the map, it will freeze the map in the new position. To return to the GPS position, use this Lock button.
Rotating the map in any direction will only freeze the orientation of the map, but it keeps on moving to keep the GPS position visible. Use Lock to return to North-up or Track-up orientation (the one previously selected).
When Smart Zoom is enabled, scaling or tilting the map also stops the automatic zooming or automatic tilting respectively. To reactivate Smart Zoom, tap this button.
This button has a hardware button equivalent: Hardware buttons.
Note: When the Cockpit screen is open, you do not need to tap the Lock button. Just wait for 30 seconds without tapping the screen, and MioMap will automatically re-enable Lock-to-Position and/or Smart Zoom. If you tap the screen during this period, the 30 seconds countdown will restart.
4.2.5 Cursor (No. 7)
As described earlier (Selected map point, also known as the Cursor), if you tap the map somewhere or select one specific item in Find, it will become the selected point on the map, marked with a small red dot and radiating red circles to make it conspicuous. You can use this point as starting point, via point or destination for your route, you can search for a POI near it, mark it with a pin, or save it as a POI.
Note: When GPS position is available, the Lock button will appear indicating that you have disabled Lock-to-Position. Tapping the Lock button will re-enable the position lock and move the cursor back to the current GPS position. The same happens when MioMap restores Lock-to-Position automatically on the Cockpit screen after 30 seconds of inactivity.
4.2.6 Map scale (No. 8)
The scale indicator is only available on the Map screen. In 2D map view it represents the scale of the map. In 3D view it is the scale of the nearest part of the map only.
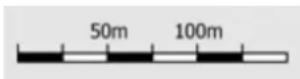
You can use it in both 2D and 3D modes to scale the map. Drag and pull it right to zoom in, or left to zoom out.
4.2.7 Menu (No. 9)
This button opens the Menu with the Find engine, the Quick menu, the Route menu and the exit button that takes you to the Main menu screen. The Menu will be described in detail later: Page 38.
4.2.8 Map orientation and Overview (No. 10)
You can view the map screens in three different presentation modes. This switch will cycle through them in the following order.
The usual map orientation for navigation is Track-up. It means MioMap rotates the map during navigation to always face the direction of your travel. In this mode an arrow (compass) points towards North.

Tap this icon to switch to North-up mode. Now the map is fixed to keep facing North. The icon changes to show the new rotation mode.

Tap the icon again to enter Overview mode. This mode looks similar to the North-up mode with one difference: the zoom level in this mode has a fixed default to give you a better look of where you are on the map. You can change the zoom level at any time, this will not cause the Lock button to appear, but when entering Overview mode later, the default zoom level will be restored.
The arrow representing your position will be fixed in the middle of the screen. When you move the map in Overview mode, the Lock button will appear, and when pushed, it will move the map to have your current position in the middle of the map again.
You cannot rotate the map in Overview mode. This mode is strictly north-up.
You can set up MioMap so that it will switch to Overview mode during navigation when the next turn is far away. You can specify this distance and the fixed zoom level of Overview in Advanced settings (Page 84).
An airplane icon indicates Overview mode.

Tap the icon again to return to Track-up (automatic rotation) mode.
4.2.9 GPS position quality (No. 11)
Similarly to the icon found on the GPS Data screen (Page 33), the map screens also inform you about the GPS signal:

- The black satellite dish with the red exclamation mark shows there is no connection with the GPS receiver. GPS navigation is not possible. Devices with a
built-in GPS receiver are permanently connected, so this icon may not appear under normal circumstances.

- Red shows there is a connection, but the signal is too weak to give a position. GPS navigation is not possible.

- Black shows there is a GPS position, and navigation is possible. When only one arc is shown, the position is 2D (no altitude available), and position error may be significant, yet MioMap is ready to navigate.

- A black dish and two arcs represent a 3D GPS position. MioMap is ready to navigate.

- When small car symbols are displayed under the dish, TMC information is available.
4.2.10 Battery status (No. 12)
The status of the battery is also shown by MioMap. You can estimate the available power reserve from the length of the bar inside. Some examples:

• The thunderbolt in the battery shows the battery is being charged.

- Battery is not charging, but it is at full capacity.

- Battery in not full, but there is sufficient reserve capacity.

- When the inside of the battery turns red, the battery needs recharging.
4.2.11 Sound muting (No. 13)
By tapping this button you can quickly mute all sounds of the PDA. This will not modify the volume level and the enabled or disabled status of the voice guidance or the key sounds (all to be set on the Sound Settings screen: Page 74), just mutes the sound output. When muting is enabled, the speaker icon is crossed out.

Tap again to re-enable sounds.
Note: Sound can be muted in Sound settings (Page 74), too. There you have a Master switch that works together with the switch described above. There is also a Master slider on that screen. That you can use to fully turn down the volume of the device. Setting the volume low is different from muting, therefore it will not show up on the mute indicator.
4.2.12 Track Log recording/playback indicator (No. 14)
When a track log is being recorded, a red icon is displayed on the map screens. This icon also functions as a button leading to the Track Log screen (Page 44) where you can stop the recording or make the track log visible on the map.

During track log playback a green icon will blink. Tapping this icon (in fact, tapping the screen anywhere) stops the simulation.

4.2.13 Cursor menu (No. 15)
The Cursor is the selected point on the map (marked by a red dot and radiating red circles around it), or the current GPS position when it is available and Lock-to-Position is enabled. When you tap the screen to place the Cursor, the Cursor menu pops up automatically to give you the list of possible functions you can use the Cursor for. At the same time Popup Info (street name, house number and the list of POIs nearby) appears near the selected map point if Popup Info is enabled in the Quick menu (Page 40).
If you do not use the Cursor menu in a few seconds, it will automatically vanish back to the bottom of the screen, and Popup Info disappears, too. You can have them reappear by reopening the Cursor menu using the arrow in the bottom right corner. When you open the menu manually, it will stay on until you close it or switch to another screen.
Tip: If you want to see the map around the Cursor, close the Cursor menu and reopen it. When this menu is opened manually, the map is always moved to have the cursor in the center.
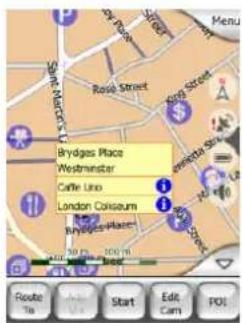
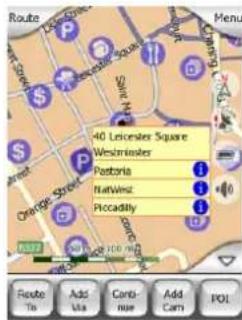
The content of the Cursor menu depends on the screen (Map or Cockpit) and it is slightly different if there is an active route already planned. You have the following options:
- Start: use the Cursor as the departure point for your route. This menu point is available only in Map mode and when there is no active route. In Cockpit mode the departure point of the route is always the GPS position or if it is not available, the last known GPS position.
- Route To: use the Cursor as the destination of your route. This button is to start a new route. The previous route (if it exists) will be deleted and replaced. If a multi-point route is active, MioMap will ask you whether you really want to delete it together with all its via points.
- Add Via: by inserting the selected map point as a via, you instruct MioMap to cross this location before the destination of the route. This is the way to build a multi-point route in reverse order (when you wish to insert a stopover 'go to A but first get some fuel at B' or want to influence the direction of the route). This menu point works only if a route is already active.
- Remove Via: removes the 'via point' near or at the Cursor. The route will be recalculated immediately excluding the deleted point. This menu point replaces Add Via and is available only if the Cursor is near or at a via point.
- Continue: add a new destination to be reached after the previous destination. The new destination replaces the old one, which is now demoted to a via point. This is the way to build your multi-point route in straight order (when you wish to visit several destinations 'go to A then to B'). This menu point is available only if a route is already active.
- Add Cam: this button will place a speed camera at the position of the Cursor. A new window opens where you can set the type of the camera (fixed, mobile, built-in, or section control camera), the direction of the monitored traffic (your direction, the opposite direction, both directions or all directions), and the speed limit. If the map contains speed limit information, this will be the default value for Camera Speed.
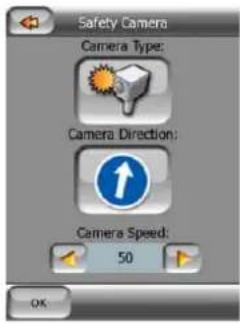
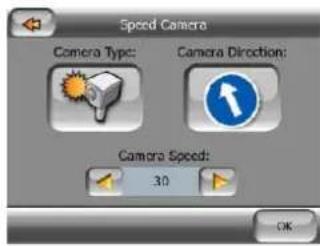
- Edit Cam: you can edit the parameters of the camera near or at the Cursor, or delete it. This menu point replaces Add Cam and is available only if the selected point is near or at a speed camera. A window will open up that contains the same settings as in Add Cam. In addition, it will have a Delete button that removes the camera from the map.
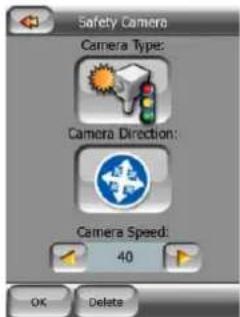
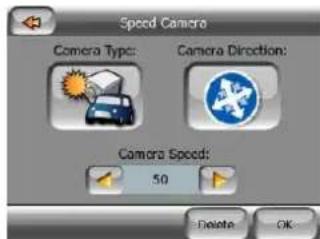
- Add POI: opens the new POI capture window to let you add the selected map point to the list of your user points. This menu point is only available on the Map screen and if there are no POIs near the cursor (i.e. only the address is shown in the Popup Info window).
- POI: opens the list of POIs near the selected point. These are the POIs shown in the Popup Info window. If you want to add a new POI at the cursor, you can do so by tapping New in the bottom left corner. This menu point replaces Add POI and it is only available in the Map screen and if there is at least one POI item near the Cursor.
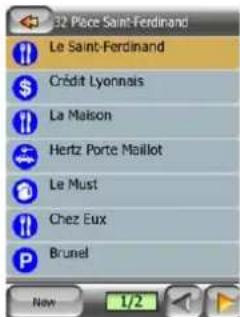
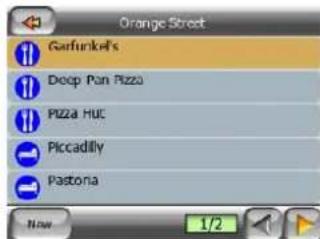
4.2.14 Current street (No. 16)
This field of the Cockpit screen shows the name or number (as available) of the current street or road you are driving on.
4.2.15 Travel and Route data (No. 17)
The contents of these three fields are different when cruising (without an active route) or navigating (following an active route).
While cruising, the fields show the present speed, and the time of day.
While navigating a route, these fields show the estimated time needed to reach the destination (ETE), the distance to destination, and the estimated arrival time at the destination (ETA) by default.
You can choose what to display in these three fields during navigation, by going to Advanced settings / Display Options (Page 80). See the following list for your options. The only restriction is that you cannot select a value that already appears in another field. The possible field contents are:
• Distance to destination (default value for the left field)
• Time to destination (estimated time en route, default value for the middle field)
• Distance to next via point
• Time to next via point
• Time to next maneuver (next route event)
- Speed
- Speed limit
- Arrival at next via point
• Arrival at destination (default value for the right field)
4.2.16 Distance to next turn (No. 18)
This field shows the distance to go before reaching the next route event (turn, roundabout, exit, etc.)
This field is only displayed when navigating a route.
4.2.17 Next street / Next settlement (No. 19)
This field shows the road or street that comes next in the route itinerary.
If you are not yet in the settlement where this next street is, MioMap will display the name of the settlement instead of the name of the road or street. A bullet symbol will appear next to the name of settlements to help you tell them apart from street names.
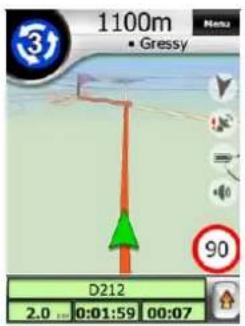
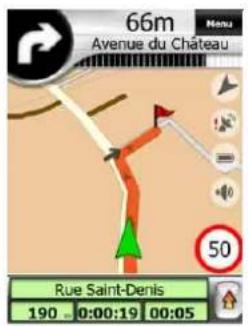
This field is only displayed when navigating a route.
4.2.18 Approaching next turn (No. 20)
This bar is only visible when approaching the next route event. It appears on the screen to visualize the distance when you get closer than 300 meters (1000 feet) to the next turn, and it remains visible till you reach the turn.
This field is displayed only when navigating a route.
4.2.19 Current speed limit (No. 21)
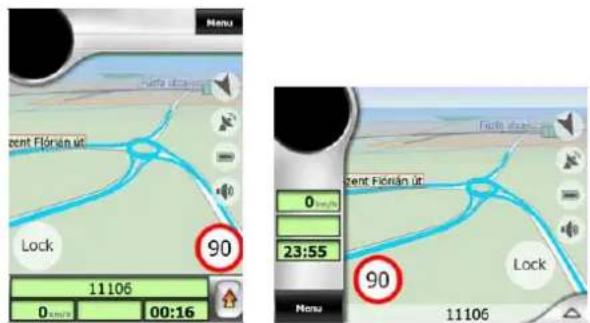
To help you drive safely, MioMap shows the speed limit of the current road while you are cruising or navigating a route. This information is displayed only if it is available for the given road.
4.3 GPS Data screen
Tap the small satellite dish icon on the Map or Cockpit screen to open this window.
The GPS Data screen is a collection of information received from the GPS device and it also serves as the entry point to the GPS Setup, Time Sync and TMC screens. TMC is explained in detail here: Page 54.
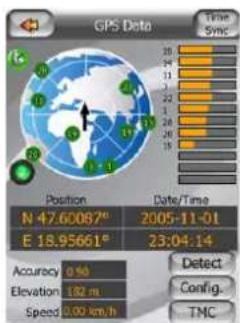
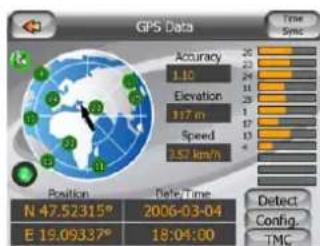
4.3.1 GPS data displayed
The virtual sky on the left represents the currently visible part of the sky above you, with your position as the center. The satellites are shown at their current positions. The GPS receives data from both the green and gray satellites. Signals from the gray satellites are only received, while green ones are used by the GPS to calculate your current location. On the right you can see the satellite signal strength bars. Dark bars are for the gray and orange bars are for the green satellites. To identify satellites use their numbers also shown in the virtual sky. The more satellites your GPS tracks (the green ones), the better your calculated position will be.
Additional pieces of information on this screen are: current position in latitude/longitude format, elevation, speed, date, time and calculated accuracy.
Note: Accuracy can be affected by several factors the GPS cannot take into account. Use this accuracy information only as estimation.
There are two icons on the left to show the status of the GPS connection and the quality of reception.
4.3.2 GPS connection indicator
In the middle to the left there is a lamp similar to the ones used for switches. This one has more colors and represents more values:

- a fast blinking green lamp means that there is communication with the GPS and data is being received,

- other colors may not appear with a built-in GPS. Should any of these appear, this means a faulty operation of your device.
4.3.3 GPS data quality indicator
In the top left corner there is a satellite dish to show the quality of the GPS position. Different colors represent different signal quality:

- black with a red cross means there is no connection with the GPS device. This should never be the case if your device has a built-in GPS.

• red means the GPS is connected but no GPS position is available,

- yellow means 2D reception. A GPS position has been acquired, MioMap is ready for navigation, but the GPS is using enough satellites for calculating the horizontal position only. Elevation data is not provided, and the position error may be significant.

- green means 3D reception. The GPS receiver has enough satellites to calculate altitude. Position is generally correct (yet it can still be inaccurate due to different environmental factors). MioMap is ready for navigation.
4.3.4 Time synchronization
In the top right corner of the screen you have another button that leads to a new screen where you can synchronize the clock of your PDA to the very accurate time provided by the connected GPS.
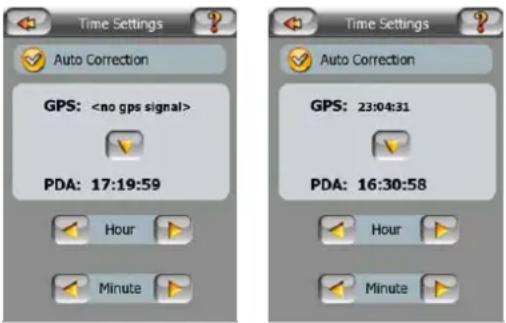
Turn on the Auto Correction switch to let MioMap frequently check and correct the PDA time with the GPS time.
Below that button you will see the current values of the GPS and the PDA clocks. You can check here whether any correction is needed. Tap the 📋 button to manually synchronize the time.
Below the PDA time you have hour and minute controls to manually correct the time with or without a valid GPS time. It also gives you the chance to correct the time after synchronization if your PDA does not support time zones or daylight saving time.
4.3.5 GPS configuration (Detect and Config.)
Two buttons on this screen open the automatic (Detect) and the manual (Config.) GPS Setup screens. For information on how to set up the GPS connection refer to Page 85.
4.4 Route Information screen
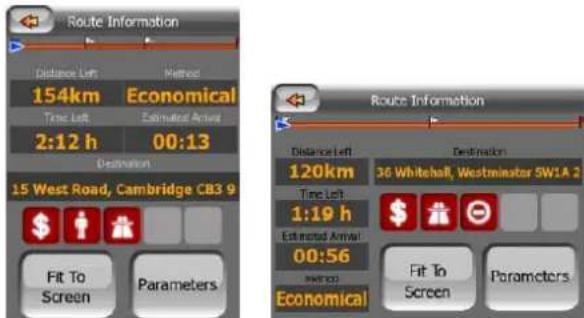
The Route Information screen has all the data and some of the functions you need while you navigate. Some additional functions can be found in the Route menu (Page 46). Without an active route one of the buttons is inactive and route data cannot be displayed.
As a reminder, you can open this screen three ways: tapping the Info button in the Route menu (Page 51), tapping one of the Route Data fields on the Cockpit screen, or pressing the Route Information hardware button.
4.4.1 Route data displayed (for destination and via points)
In the top section of the screen you see information about the current route. These fields are continuously updated while you keep this screen open.
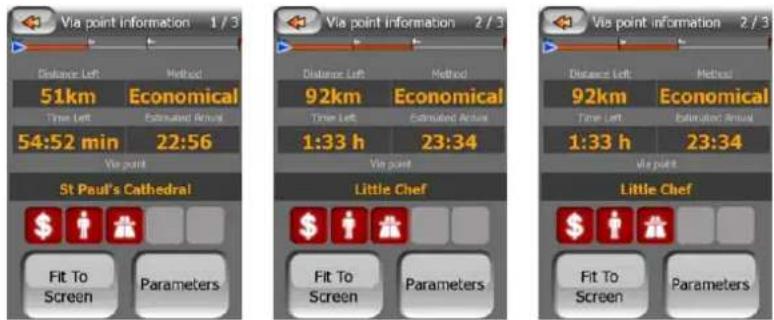
When you open the screen, all fields contain information on reaching your final destination. Tap any of the fields to see data on the via points starting from the first one through the final destination again.
4.4.1.1 Route line
The upper part of this screen shows your planned route as a horizontal line. Its leftmost point is the start of the route, the rightmost one is the final destination, and you can see your via point flags along the line, spaced in proportion to their distance.
The blue (yellow at night) arrow representing your position will travel from the left to the right, giving you visual feedback of your journey.
When you reach a via point, it becomes the starting point of the route, the past will be deleted, the line with all the other via points will be modified instantly, and the arrow jumps back to the left.
When MioMap needs to recalculate the route, the arrow will not jump back to the left as when reaching a via point, but it may drift a bit as the length of the new route may be different from the previous one.
When the data corresponding to the entire route is displayed in the fields below, the line is colored the same way as the route line shown on the map. When you see data that belongs to a via point, the route is colored only up to that via point. The rest of the line remains gray.
4.4.1.2 Distance Left
This value can also be displayed in one of the Route data fields on the Cockpit screen as ‘Distance to destination’. This is the distance you need to travel on the route before reaching your final destination.
If via points exist, tap and tap again any of the fields to see the distance to reach the first, second, etc. via point.
4.4.1.3 Method
This field shows how the route was calculated. It either displays the 'Route' or the 'Vehicle' field from the Route parameter settings. If you have chosen Car, Taxi, Bus or Truck, the type of the route (Fastest, Shortest or Economical) will be displayed here; if you have selected Emergency, Bicycle or Pedestrian, this information will be displayed here.
4.4.1.4 Time Left
This is an estimated value that can also be displayed in one of the Route data fields on the Cockpit screen as 'Time to destination'. It shows the time needed to reach the final destination of the route based on information available for the remaining segments of the route. The calculation cannot take into account traffic jams and other possible delays.
If via points exist, tap and tap again any of the fields to see the time needed to reach the first, second, etc. via point.
4.4.1.5 Estimated Arrival
This is an estimated value that can also be displayed in one of the Route data fields on the Cockpit screen as 'ETA to destination'. It shows the estimated arrival time at the final destination of the route based on information available for the remaining segments of the route. The calculation cannot take into account traffic jams and other possible delays.
If via points exist, tap and tap again any of the fields to see the estimated arrival at the first, second, etc. via point.
4.4.1.6 Destination / Via point
This field shows the exact address (or its coordinates if the address is not available) of the final destination.
If via points exist, tap and tap again any of the fields to see the address or coordinates of the first, second, etc. via point.
4.4.2 Warning icons
The following 5 squares are normally gray. Some of them turn red and show a graphical symbol in case warning(s) are attached to the planned route. These are warnings, so icons always show information for the whole route, even if the data fields display values from your current position to a via point only.
Click on any of the icons to show its description.
A few samples of the available icons:
This icon shows that you need to pay toll on the recommended route.
This icon shows that the route contains motorways. Tap the icon to see the length of the motorways in the recommended route.
This icon shows that toll roads are included in the recommended route.
This icon shows that you need to board a ferry along the recommended
- This icon shows that you need to pay for the ferry.
This icon is displayed when MioMap could not plan a route with all your road preferences respected. Sometimes it is impossible to find a suitable route the start or the destination.
This icon warns you that MioMap had to recommend a route that does not all your preferences given at the Route Parameters settings.
The recommended route contains areas only accessible to pedestrians.
commended route contains unpaved roads.
The recommended route contains roads that require a permit or permission er.
Information – any other piece of relevant but not categorized information. The icon to see the content.
Next page – displayed when more than 5 warnings apply for the amended route.


4.4.3 Fit to screen
Tap this button to display an overview of the whole recommended route. You will jump to the Map screen with a 2D North-up view so that you can check where the route takes you.
4.4.4 Parameters
This button opens the Route parameter settings screen (Page 76) otherwise opened from the Route menu (Page 46).
4.5 Menu
The Menu button can be found in the top right corner of the portrait map screens and in the bottom left corner of the landscape map screens.
Tapping this button brings up a menu that allows you to access some of the most frequently used functions of MioMap.
4.5.1 Find tab
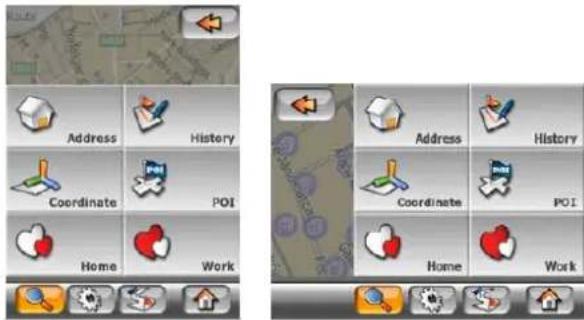
The first page of the Menu is Find. It lets you select a destination without first having to locate it on the map. The Find menu will be described in detail later here: Page 59.
4.5.2 Quick tab
This provides quick access to some configurable options.
Remember that symbols on the buttons show the state of the function they are switching to, and not the one the program is currently in. For example with daylight colors you see the moon, while with night colors the sun is depicted on the button that switches between the two color modes.
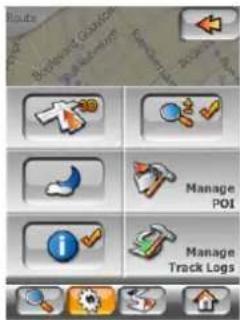
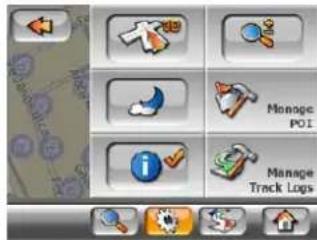
4.5.2.1 Zoom & Tilt (switch)
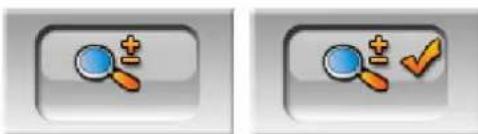
This button makes additional map controls available. The states of this button are:
natural_image
Two identical button icons with magnifying glass and checkmark symbols, no text or labels present.When this feature is turned on, additional transparent buttons (Page 23 and Page 24) appear on the left side of the map screens for zooming and tilting the map.
4.5.2.2 Daylight & Night Modes (switch)
This button switches between the daylight and night color schemes of MioMap. The states of this button are:
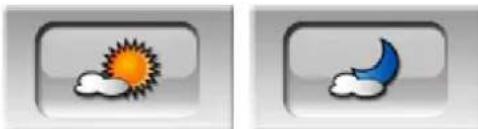
natural_image
Two weather icons: one sunny with sun and cloud, the other crescent moon (no text or symbols)Turn on or off the night colors manually to override the automatic color scheme switching.
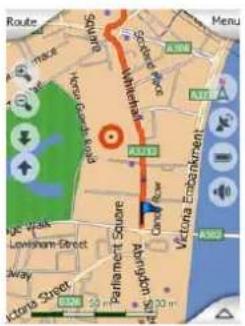
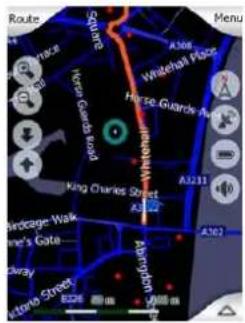
Note: Using this option turns off the Automatic Night Colors feature. You need to re-enable it at the General settings screen (Page 69) to have the colors change automatically again.
4.5.2.3 Manage POI (Points of Interest)
Here you can set all the parameters of POIs that you have created and the visibility of the built-in POIs that come with the map.
Manage built-in POI visibility
The maps in MioMap come with a huge number of POIs. Displaying all of them would make the maps too crowded (to see how POI items are shown on the map see Visible POIs (Points of Interest)). In order to avoid that, you can decide which POI groups to show and which ones to hide on the map. MioMap has a multi-level POI category system. You can set the visibility of the top two levels. All levels below that will be shown or hidden according to their respective category (i.e. you can set the visibility of Petrol Stations in the Services category, but all brands listed under that will either be shown or suppressed together).
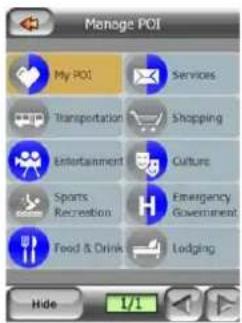
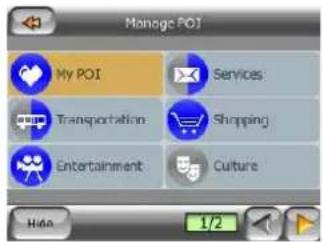
Groups shown with a gray icon are hidden; blue icons are visible on the map, while the ones shown in two colors have some of their subcategories shown and some others hidden.
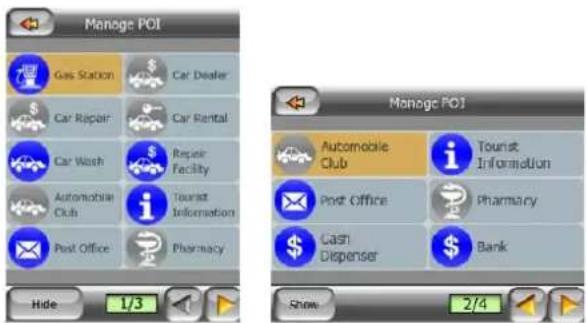
If you highlight any of the POI groups by tapping them, the button in the bottom left corner will become Show if the POI group is hidden, or Hide if the group is shown or partly shown.
Tip: To make a partly shown group fully shown, tap this button twice. First you will hide the whole group, and then you will have it displayed with all its subgroups.
Tapping again the highlighted POI group (except for My POI – described later) opens the list of subcategories of that group. Here you cannot see bicolor subgroups, as visibility can only be set for the top two levels of categories. Showing and hiding a subgroup is done the same way as for the main groups.
Manage My POI
By highlighting then tapping again the My POI switch on the Manage POI main screen you can manage the POI groups and items that you have created.
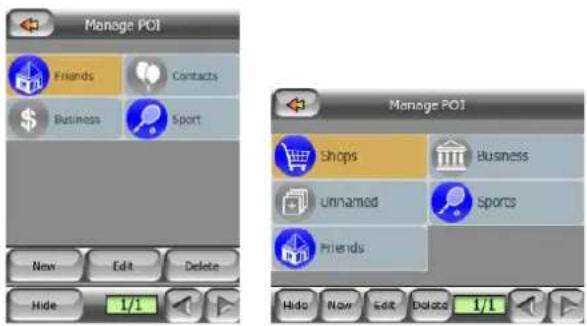
Note: The group Unnamed only appears if you have previously saved a POI item without creating a new POI group for it.
Note: If there are valid entries in the Contacts application of your Mio DigiWalker P350/P550, the ones MioMap can recognize the address in will be imported as My POIs, added to a new group named Contacts. Each time MioMap starts, it reloads the points from the Contacts application database. With the help of these points you can plan a route to any of your contacts by only a few screen taps.
Tapping any of the group names will open a list of POIs saved in that group. This list is similar to the list of POI results in Find. The POIs are ordered based on their distance from your current position. If GPS position is not available or you have disabled Lock-to-Position by tapping the map, the POIs will be ordered by their distance from the Cursor.
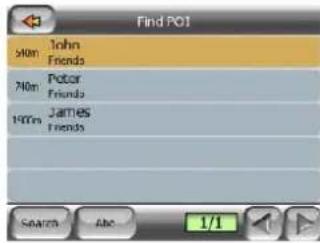
When the My POI Groups are displayed, you have the following options:
- Show/Hide: similarly to built-in POIs, you have the possibility to show or hide all POIs of the selected category on the map. Groups with a blue icon are displayed; groups with a gray icon are hidden.
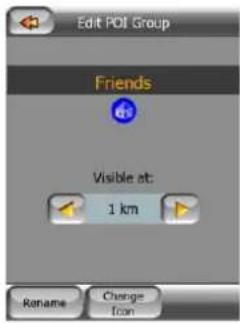
- New: you can create a new My POI group by tapping this button. You need to select an icon, a name, and the maximum zoom level at which the POI is still visible on the map (provided you let the POI group be displayed at all). You do not necessarily need to create POI groups in advance. You can do it while saving a new POI.
- Delete: you can delete any of your previously saved My POI groups. This will delete all POIs in that group. MioMap will ask you to confirm this action.
- Edit: you can edit the attributes (name, icon, visibility level) of a previously created My POI group.
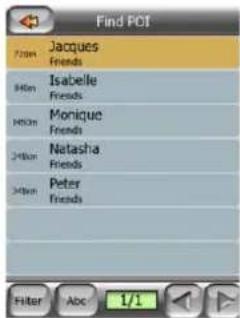
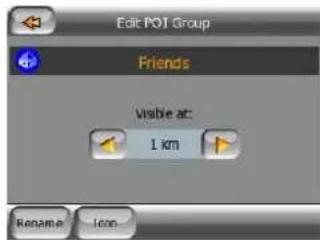
- Left/right arrows: if your groups fill several pages, these buttons will let you browse through them. The green field left of these buttons shows the current page number and the number of pages.
When the list of My POIs is displayed, you have the following options:
- Filter: you can shorten the list of matching POI items by filtering. Just like in Find, enter a few letters of the desired POI name. When the number of matching items can fit in one page, MioMap will automatically display the list. If you tap Done any time before this happens, you receive the list of matches on multiple pages.
- ABC/Distance: by tapping this button you can have the POIs sorted in an alphabetical order. Tapping again will return to the distance-based order.
When you tap on any of your POIs in the list, you will open a new window with the details of the selected POI.
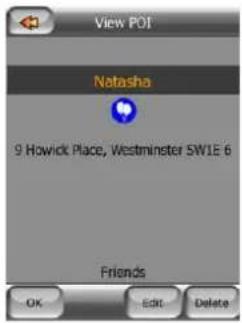
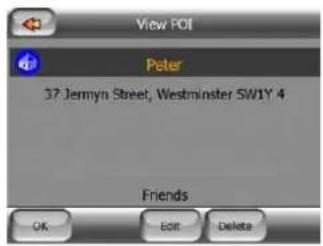
Here you have the following options:
- OK: if you tap this button, the map screen returns with the selected POI in the middle.
• Edit: you can edit the attributes (name, icon and group) of the selected POI.
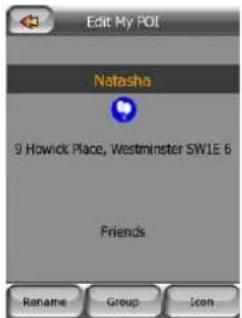
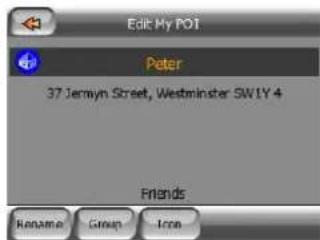
- Delete: you can delete any of your previously saved POIs. MioMap will ask you to confirm this action.
4.5.2.4 Popup Information (switch)
This button enables or disables the popup information of the Cursor on the map screens. The states of this button are:

When this feature is enabled, tapping the screen (activating the Cursor, a radiating red dot) on either of the map screens also opens a pop-up box with the selected street name, house number and the name of the nearby POIs, if any.
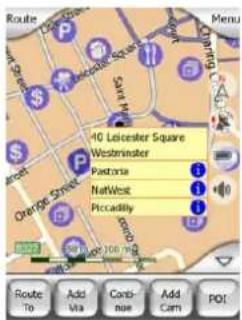
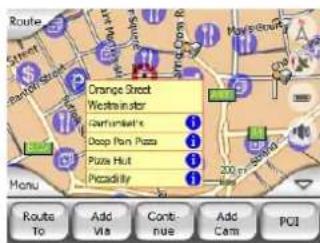
Tip: Tapping one of the blue Information icons behind the POI names shows the details of the appropriate POI item.
4.5.2.5 Manage Track Logs
Using MioMap it is also possible to save the track logs of your journeys. This screen lets you manage all your track logs. When it comes up, it shows a list of all track logs already saved.
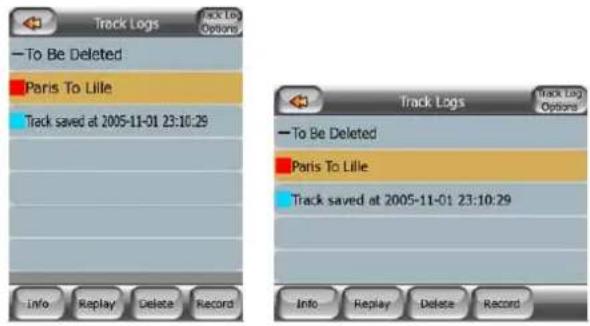
The original name of a track log is the date and time when it was recorded. You can change their name to something more meaningful if you wish.
Each track log has a color, shown to the left of its name when the track log is visible on the map. If the track is not visible, an underscore character is shown here. Tapping the line of the highlighted track log will toggle between showing and hiding that log. The track log will be drawn on the map using the color next to its name.
When a track log is being recorded, a new line appears in this list with an underscore, as newly recorded track logs are not shown in the map normally.
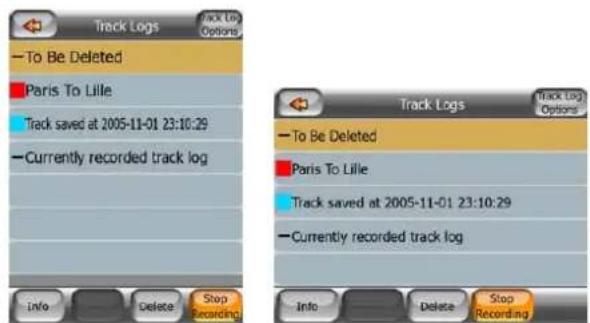
Tip: If you wish to see the track log currently being recorded, tap on it twice to make it visible.
In this screen you have the following options:
- Record: this will initiate track log recording. A new line appears in the list, and GPS position data will be saved until you stop the recording or exit MioMap. A red icon (Page 28) is shown on the map screens to let you know that a recording is in progress. Tapping that icon opens this Track Log screen.
- Stop recording: if recording is in progress, this buttons stops it.
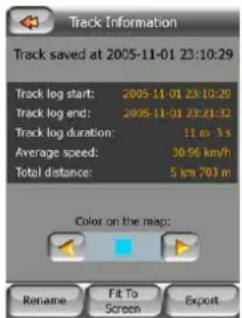
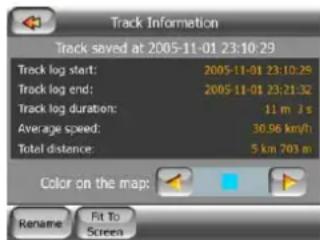
- Info: this button opens a screen that shows the track log details, and lets you:
- change the name of the track log (Rename button),
- change the color of the track log (Color on the map selector),
• have it displayed on the map (Fit to screen button),
- Replay: push this button to see a simulation of the saved track log on the map. A green icon (Page 28) will appear on the map screens to let you know it is not a fly over but a simulation based on a real saved log.
- Delete: you can delete a track log if it is not needed any more. MioMap will ask you to confirm this action.
-
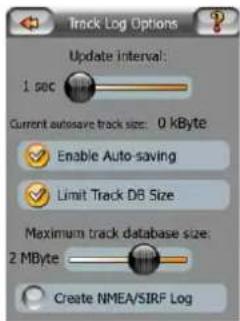
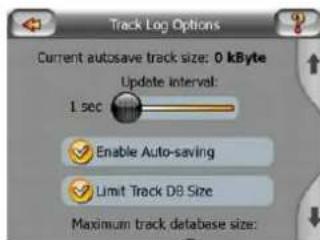
Track log options: this button in the upper right corner leads to a settings screen where you can set up the track logging parameters:
-
Update interval is how often track points will be saved. Position information is normally received once a second from the GPS. If you do not need such a detailed log, you can increase this number to save track log space.
- Current autosave track size: this figure shows how much memory is used by the automatically saved track logs.
- Enable auto-saving: when auto-saving is enabled, you do not need to turn track log saving on and off manually. MioMap will automatically start recording the track log as soon as GPS position is available.
-
Limit track DB size: here you can set whether or not to maximize the size of the database where the automatically saved track logs are kept.
-
Maximum track database size: here you can set the maximum database size if the track database size limit is enabled using the previous switch.
- Create NMEA/SIRF log: independently of the normal track log, you can instruct MioMap to record the native GPS data received from the GPS device. MioMap is capable of working with GPS devices using either the NMEA or the SiRF protocol, so the saved data will be in one of these formats. These logs are saved as separate text files on the SD card, and they cannot be shown or replayed in MioMap. They are for post-processing needs, should you have any. Be careful when saving native GPS data, as it can soon eat up available memory.
4.5.3 Route tab
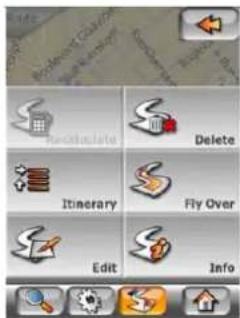
This menu contains options to manage different settings in the program.
4.5.3.1 Recalculate
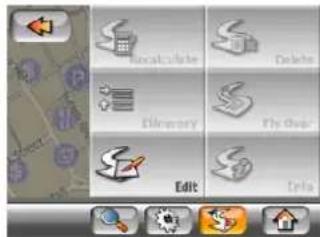
This menu point is only available if an active route exists and GPS position is present.
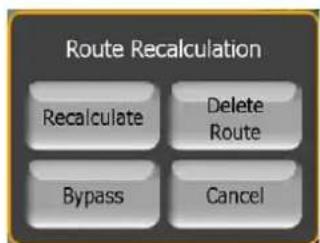
It brings up a menu with four options. Using one of these functions you can modify the current route.
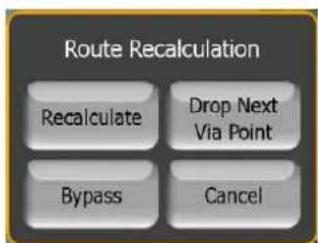
Recalculate
This function repeats the route calculation based on the same settings as used to calculate previously. This possibility is typically used when automatic off-route recalculation is disabled. However you may consider using it when you travel on a road parallel to that recommended by the route. In this case MioMap may not recalculate the route for some time, but you can force recalculation here. This is also the button you will most frequently use when the window appears automatically, provided that the manual route recalculation is set (Ask First).
Drop Next Via Point / Delete Route
You can modify the route to skip the next via point if you decide it is no longer needed. For example, you may have added the via point only to influence the route but you do not want to actually reach it; or you have already almost reached it, and MioMap still keeps on navigating towards that point. When there are no via points left (only the destination), the name of this button turns to Delete Route, and it cancels the navigation.
Bypass
When you run into a traffic jam or roadblock, you may want to have MioMap calculate a route that departs the original route as soon as it can. You will need to select the minimum distance along the original route where your new route is allowed to rejoin the original route. Select the one you feel appropriate for the traffic difficulty you face.
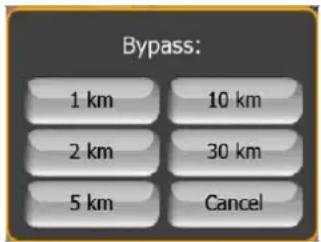
Note: This function is to give you an alternative for the next section of the recommended route. To change later parts of the route or to avoid specific streets or turns, use the Avoid function in Itinerary instead (Page 48).
Note: When you use this feature, MioMap will keep on excluding the same part of the map from later routes until you manually delete the route (Page 48), or restart MioMap.
Cancel
This option returns directly to the map screen without recalculating the active route. If you choose this option when manual route recalculation is configured (Ask First), navigation stops and will be activated again when you are back on your original route.
4.5.3.2 Delete
Tap Delete to erase the active route along with all its route points (start, via points and destination). If you later decide that you need the same route again, you will have to rebuild it from scratch. MioMap will warn you before deleting route data.
This function has a special role if you have used the Avoid feature during your journey. When you arrive at your destination, the route line disappears on the map and navigation stops. The route is now practically deleted, but if you plan a new route, the roads, maneuvers and areas excluded from your route will also be avoided when planning the new route. Tap Delete to completely delete your previous route together with its Avoid restrictions.
Note: When a POI item is used as a route waypoint, deleting the route will not delete the POI item itself, just its role in the route.
4.5.3.3 Itinerary
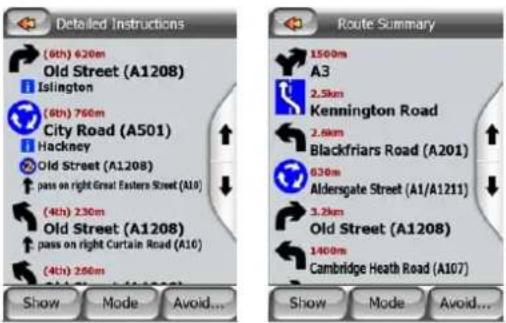
This function opens the itinerary (route event list) of the active route. The Itinerary has three different display modes and two functions.
Display modes
Display modes are different only in the number of events displayed in the list. List items are always shown with all information available including pictograms of the needed action and distance of the event from the previous list item.
The Itinerary is live and constantly updated when navigating a route. The list item coming next in navigation is the highlighted one until you highlight another one by tapping. After that, the highlight remains on the item you have selected.
- Detailed Instructions: this is the list displayed when Itinerary is opened. It is the list of events in full detail. All significant junctions are shown in the list, even ones to be passed.
- Instructions: by tapping the Mode button once you will see the list of events that need your attention, i.e. the list of maneuvers during the route. These are the events shown in the Turn preview field and announced by the voice instructions.
- Route summary: tapping the Mode button again will show an overview of the route that contains only the significant roads and intersections.
Show
Tap this button to see the highlighted list item on the map. This will help you identify route events in the list.
Avoid
Tap this button to show a list of possibilities for modifying the route. They let you recalculate the route avoiding the highlighted event and sometimes also some of the subsequent ones.
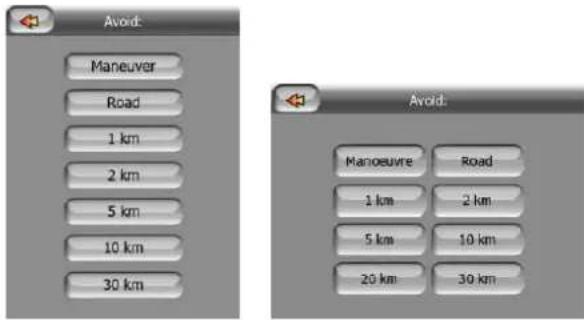
- Maneuver: this option avoids the highlighted action. For example if you find a turn too difficult during rush hour traffic, MioMap will recalculate the route excluding that turn. If the next street is important in the route, it is likely that MioMap will replace the turn with several easier ones to get to the same street.
- Road: when you exclude a road, MioMap will calculate a route that does not use that road. It is useful when you anticipate a traffic jam in a street used in your route, or a roadblock is announced on the radio, and you find that road in your itinerary.
- Distances: you can also find some distance buttons in this list. They are similar to the ones in the Bypass list of the Recalculate menu (Page 46), but these can also be used for distant parts of the route.
Note: You need not open itinerary if you run into a roadblock or traffic jam. To get an immediate alternative route use the Bypass function of Recalculate (Page 46).
Note: When you use this feature, MioMap will keep on excluding the same part of the map from later routes until you manually delete the route (Page 48), or restart MioMap.
4.5.3.4 Fly Over
This feature has no navigation function, it merely provides a quick view of the route. It will present a simulation of the route showing what you will see later when navigating.
There are two possibilities for running the simulation.
Fast Fly Over
Tap Fly Over to quickly run through the route. MioMap will fly the route in Cockpit mode at high speed to give you a rough overview of the route events. MioMap is tweaked to give you a smooth and easy-to-follow playback even at this speed.
Press and hold the Tilt down button (Page 10) then tap Fly Over to quickly run through the route. MioMap will fly the route in Cockpit mode at high speed to give you a rough overview of the route events. MioMap is tweaked to give you a smooth and easy-to-follow playback even at this speed.
This mode is useful if you want to have a look at the route before you start your journey. Tap anywhere on the screen to stop the simulation.
Lifelike simulation
Tap the Fly Over button without pushing any hardware buttons.
In this mode the simulation is run at normal speed (using the speed limit of the streets and roads in the route), and voice instructions are also played.
This mode is mainly useful for demonstrating MioMap, or to learn the way it works before your start your first journey.
4.5.3.5 Edit
Tap Edit to see the list of all points used in the route. The first item in the list is the departure point of the route without a valid GPS position, the last reached via point if you open the list during navigation, or the point where MioMap most recently recalculated the route. This means the list is permanently updated, and via points drop out during the journey. The last item in the list is your final destination.
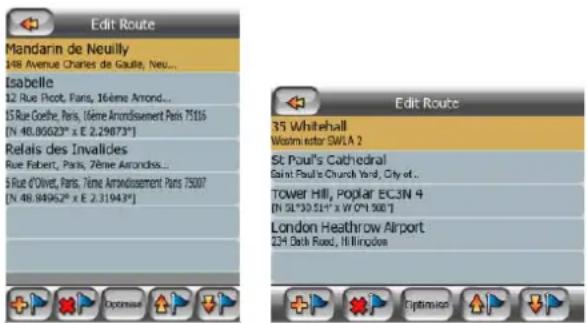
Use the arrows on the right to browse through the list and tap any line to highlight it. You can perform the following operations:
- Add: you can add a new route point (or a new final destination if the highlighted item is the last one in the list) after the selected point. The Find menu opens automatically to let you search for an address, POI, coordinates, one of your favorite destinations, or select a point from the History list. As soon as you select any of these, MioMap returns to the Edit screen and your selection appears right under the highlighted line.
- Delete: you can delete the selected point from the list. If the highlighted item is the last one in the list, the previous via point will be promoted to be the final destination.
- Optimize: you can optimize the order in which you will drive through the via points, if there is no specific order you would like to keep. When tapping this button, MioMap reorders the list instantly to save you time and fuel. Optimization is for via points only. Your starting point and destination remain in their positions, of course.
- Up and Down: using these buttons you can reorder the list by moving the highlighted item up or down in the list.
4.5.3.6 Info
This button opens the Route Information screen described here: Page 34. This screen shows information about the current route and has a few additional options to check and modify your active route.
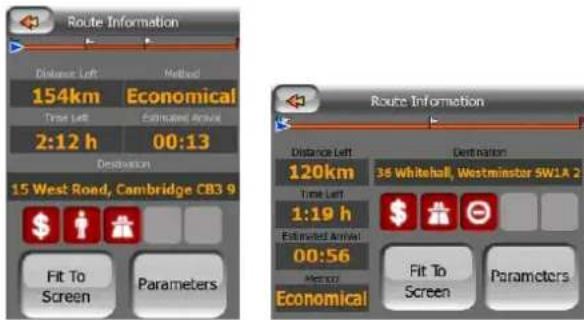
4.5.4 Main button
The Main button at the bottom right corner leads to the Main menu screen described here: Main menu.
4.6 Speed cameras
There is a built-in database of fixed and mobile speed cameras. It is also possible to add new cameras to enhance this database. MioMap can warn you when you approach one of these cameras. You can fine-tune this warning in General settings (Page 69).
Speed cameras are displayed with small camera symbols on the map.
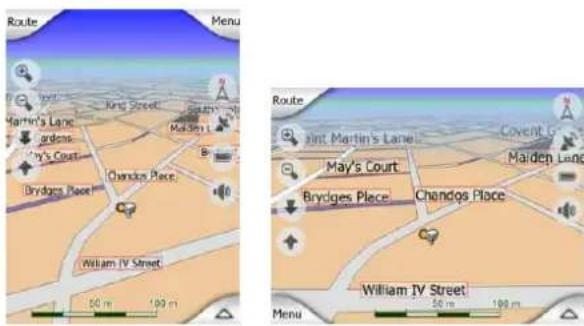
4.6.1 Camera types
There are four types of speed cameras:
4.6.1.1 Fixed cameras
Some cameras stand by the roadside, looking in one direction, measuring one or both directions of the traffic. They measure your current speed. For these cameras you can specify the controlled traffic direction and the speed limit. MioMap will warn you when you approach these cameras in the measured direction. If your speed exceeds the speed limit near the camera, a special warning sound will be played.
These cameras are displayed with the following symbol:

natural_image
Simple icon of a megaphone emitting a yellow-orange burst (no text or symbols)4.6.1.2 Mobile cameras
Some cameras are operated from vehicles. The database contains some typical places of these mobile cameras. They are not always operational at the given location, and the speed limit is not specified for them. The warning is similar to fixed cameras, but as there is no speed limit given, only the proximity is announced.
These cameras are displayed with the following symbol:

natural_image
Illustration of a blue car with a sunburst effect next to a white box (no text or symbols)4.6.1.3 Built-in cameras
Some cameras are built in traffic lights. They work like fixed cameras, but they are difficult to spot. The warning for proximity and speeding is the same as for the fixed cameras.
These cameras are displayed with the following symbol:
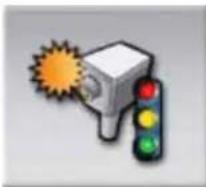
natural_image
Illustration of a camera with a sunburst effect and a traffic light (no text or symbols)4.6.1.4 Section control cameras
These cameras work in pairs, and do not measure your current speed but your average speed between the two cameras. Both will identify your car, and record the exact time you pass them. The difference between the two points of time will be used to calculate your average speed.
MioMap will warn you when you approach one of these cameras, but as you pass by, the warning stays on, and your average speed is measured until you reach another camera of this type. If your average speed exceeds the speed limit between the two cameras, you will receive the same special warning sound as with the other camera types.
Note: In the rare case MioMap cannot register the moment you pass the second camera (e.g. it is placed at the exit of a tunnel where GPS position is not yet available) the warning will continue. Just tap the camera symbol displayed on the left to stop the warning.
These cameras are displayed with the following symbol:
natural_image
Illustration of a mechanical device with a yellow explosion effect and a speedometer (no text or symbols)4.6.2 Controlled traffic direction
The different cameras can measure the speed of one direction of the traffic, both directions, or even several directions in an intersection, when they are mounted on a rotating base. MioMap warns you only if you drive in a measured or possibly measured direction.
The measured direction of the cameras are displayed with the following symbols:

natural_image
Four gray rounded squares with blue road signs: one upward-right, one down-left, one up-right, one cross symbol (no text or numbers)4.6.3 Speed limit checked
As additional information, the speed limit checked by the camera is given for fixed, built-in and section control cameras. When you save a camera location using the Add Cam button in the Cursor menu (Page 28), the speed limit of the road is used by default, but you can change the value from 30 km/h to 130 km/h with the given control:

4.6.4 Add a new camera or edit an existing one
You can add new cameras, delete or modify the parameters of existing ones using the Add Cam or Edit Cam buttons of the Cursor menu (Page 28). To delete an existing camera first tap Edit Cam, then Delete.
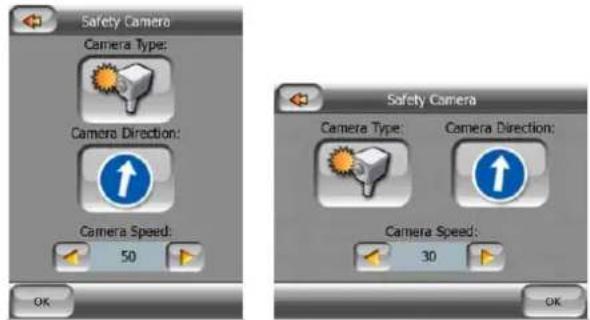
4.6.5 Change the settings of the camera warning
You can turn on and off the camera warning, and fine-tune its settings in General settings (Page 71 and Page 71).
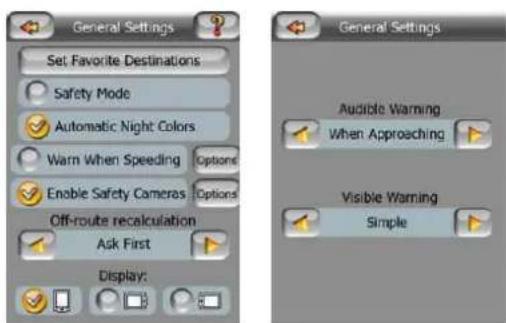
4.7 TMC (Traffic Message Channel)
MioMap can provide you with even better routes if Traffic Message Channel (TMC) information is available. The TMC is a specific application of the FM Radio Data System (RDS) used for broadcasting real-time traffic and weather information.
Note: TMC is not a global service. It may not be available in your country or region. Ask your local dealer for coverage details.
You need a TMC receiver attached to your PDA to receive TMC information.
MioMap automatically takes into account the TMC information received. You do not need to set anything in the program. The receiver will automatically search the FM radio stations for TMC data, and the decoded information will immediately be used in route planning. The moment MioMap receives traffic information that may affect your route, the program will warn you that it is recalculating the route, and navigation will continue with a new route that is optimal considering the most up-to-date traffic conditions.
The TMC subsystem can be started from the GPS Data screen (Page 32) by tapping the TMC button.
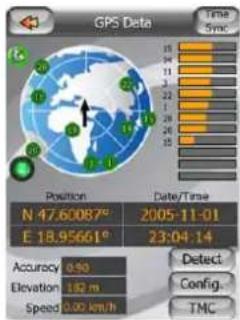
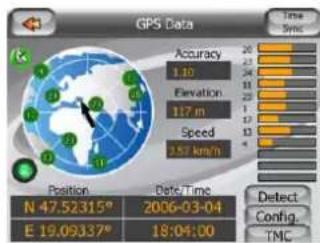
4.7.1 List of TMC messages
The main screen of the TMC section is the list of valid TMC messages ordered by their distance from your current location.
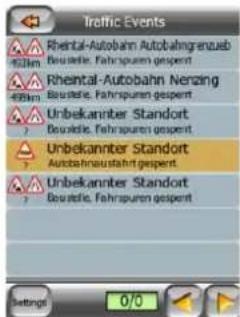
Tap the arrows to turn the page, and see traffic difficulties farther away from your current position, or press Settings to configure the TMC subsystem. This opens a new window.
4.7.2 TMC control center
This screen shows the selected TMC source and allows you to change the TMC settings.
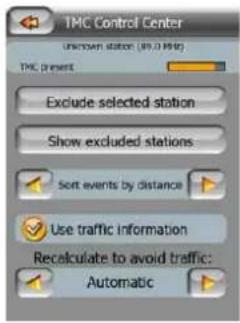
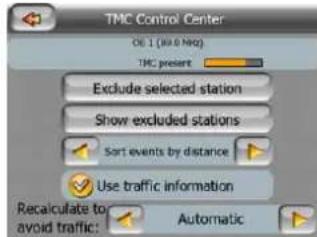
4.7.2.1 Selected FM radio station
The name and frequency of the selected radio station will appear at the top of this window, together with signal strength information indicated by a bar similar to the GPS satellite signal strength bars on the GPS Data screen.
If there aren't any radio stations broadcasting TMC data in your area, the receiver keeps on searching. You will see the frequency continuously sweeping across the FM CCIR radio band (87.5-108 MHz). When you move to an area with TMC information, the indicator will show the frequency, and detailed information for the TMC station.
4.7.2.2 Exclude selected station
If you wish to receive TMC data from another radio station, push this button. The radio station will be added to the list of excluded stations, MioMap will start searching for another TMC station, and will always skip the excluded station in the future.
4.7.2.3 Show excluded stations
This button opens the list of excluded radio stations. Tap any of the stations in the list, then tap Enable to allow MioMap to accept TMC information from this station.
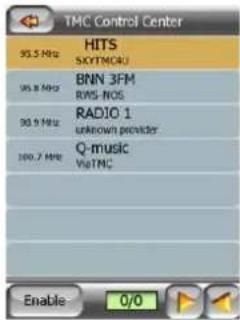
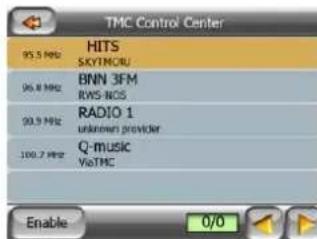
4.7.2.4 Sorts events by distance / type
The list of traffic events can be ordered by their distance from the current position, or by their type. Tap this button to toggle between the two possibilities.
4.7.2.5 Use traffic information
This button is enabled by default, which means that TMC messages are used in route planning. Tap this button to have MioMap ignore real-time traffic information when planning routes.
Tip: If you make a route planning for a future journey, it may be better to turn off TMC corrected route planning.
4.7.2.6 Recalculate to avoid traffic
This setting is similar to the previous one. Disabling it will not prevent the system from using TMC data for route planning, but will not trigger an automatic recalculation when the traffic conditions change during your journey.
5 Find
One of the most frequently used functions of MioMap is selecting the destination. Once you have the destination, you can start navigating. Getting to this point should be as fast as possible. MioMap provides you with a versatile search engine designed to find your chosen destination after only a few taps on the screen.
Note: If you select a location in any part of the Find system, you will normally drop back to the map screen, where you will have several possible actions (set as start, set as destination, add as via, continue route with, mark with a pin, or add as a POI item). However, if you enter the Find system from the Main Menu, MioMap will immediately put you into Cockpit mode and start navigation.
5.1 Main menu Find buttons (Address, Favorites, POI, History)
As just mentioned, the fastest way to find your destination and start navigating is to start from the Main Menu (Main menu) with one of the Address, Favorites, POI or History buttons. These will put you on the respective Find screen, and as soon as you pick a destination, MioMap will immediately show the Cockpit screen and start navigation. This means that if you plan your route to one of your Favorite destinations, you only need two taps (e.g. Favorites then Home) to start navigating.
You will find similar buttons in the Find menu (Page 59) accessible from the map screens. Activated from the map screens, they will only move the cursor to the desired location, but will not directly initiate navigation.
5.2 Selection by tapping the map
It is also very easy to set your destination using the map. Just browse to your desired destination on the map, tap it, and the Cursor menu with the possible actions will then open automatically.
Note: When appearing automatically, the Cursor menu remains open for a few seconds only. If you decide not to choose any of the actions listed, the menu closes
automatically. When you open it manually, it will remain until you close it or switch to another screen.
Tip: If you want the selected point shown in the center of the map, close and reopen the menu or wait until it closes and open it again. By opening the Cursor menu manually, the map will be moved to have the selected location in the center.
5.3 Using the Find menu
The Find menu is accessible by the Menu buttons of the map screens (Main menu). The Find menu gives you various possibilities for selecting a location.
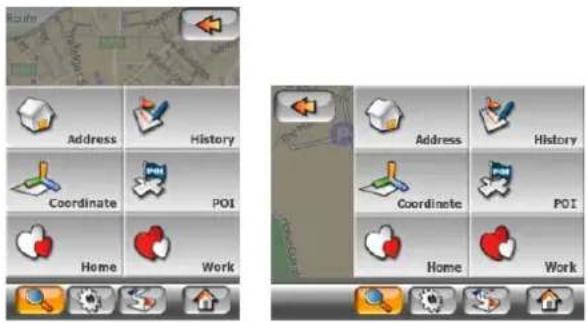
5.3.1 Find an Address, Street, Intersection or City
Searching for a city, a street, an intersection, or an exact address can all be done in the Find Address module. If you know at least a part of the address, this is the quickest way to find the location.
The following figure shows the structure of the address-search module. There are five levels (Country, State, City, Street and Address). The state level only appears for Australia and the United States of America. This level is not used in all other countries that MioMap currently supports. The list of recent cities and states is the entry point of the module. The green rectangles are the exits. You can complete your search by selecting the center of a settlement, the midpoint of a street, an intersection of two roads, or an exact address.
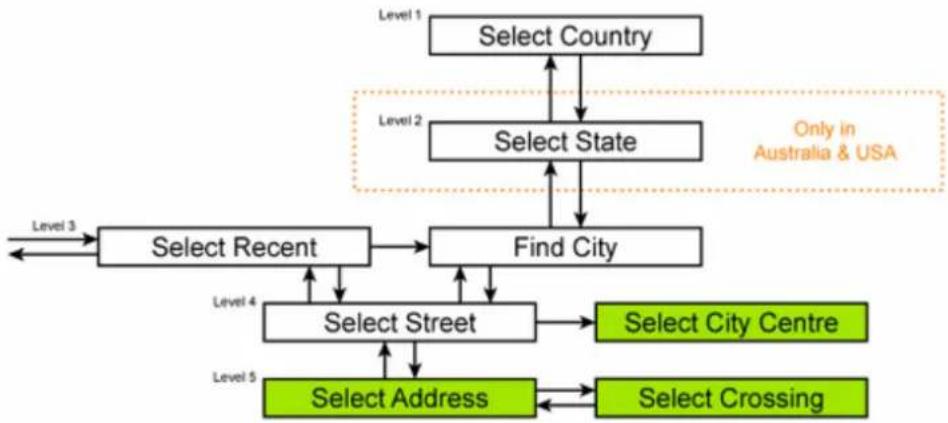
flowchart
graph TD
    A["Select Country"] --> B["Select State"]
    B --> C["Find City"]
    C --> D["Select Street"]
    D --> E["Select Address"]
    E --> F["Select Crossing"]
    D --> G["Select Recent"]
    G --> H["Level 3"]
    H --> I["Level 4"]
    I --> D
    style A fill:#f9f,stroke:#333
    style B fill:#ccf,stroke:#333
    style C fill:#cfc,stroke:#333
    style D fill:#fcc,stroke:#333
    style E fill:#cff,stroke:#333
    style F fill:#ffc,stroke:#333
    style G fill:#cfc,stroke:#333
    style H fill:#fcc,stroke:#333
    subgraph "Only in Australia & USA"
        B
        C
        D
        E
        F
        G
    end
You enter the module at Level 3. From this point you can go forward (down) to give the name of the street, then the house number or intersection, or backward (up) to change the city, state or country to search.
5.3.1.1 Selecting the city, state and country to search in
The first screen of the address-search module is the list of recently used cities (and states in Australia). The first line of the list is always the city you are in or near to (Europe, Asia and USA), or state you are in (Australia).
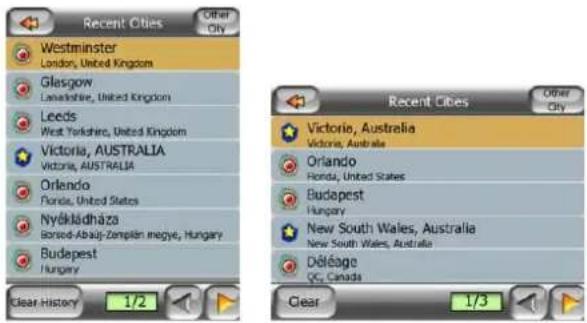
Should the settlement you are looking for appear on the list, just tap it and you will immediately jump to the Street Name Input screen with the selected city name or postcode shown at the top of the screen. If the desired settlement is not displayed, use the arrows in the bottom right corner to see more of this list.
Tip: If during navigation you need to know the name of the city, the state or the country you are currently in, just start Find/Address and read the first line of the list. This function leads to a reliable result only if GPS position is available, and you have not disabled Lock-to-Position by moving the map.
If you find that the list of recently used cities contains settlements you will not visit in the near future, you can choose to empty the list by the Clear button in the bottom left corner.
Selecting a new settlement to search in
If you are looking for a city or town (or state) you cannot find on the list, tap Other City in the top right corner. This will take you to the city name or postcode input screen, where you can select the desired city by entering a few letters of its name or some digits of its postcode, then select from the list of results automatically given by the program if the matching items can be displayed on one page, or displayed on more pages if you tap Done after entering some letters.
Note: Postcodes may not be available for the selected country. In this case you need to enter the name of the settlement.
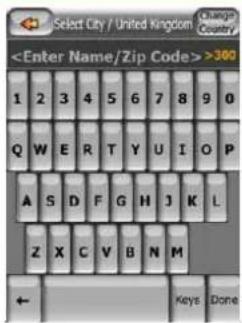
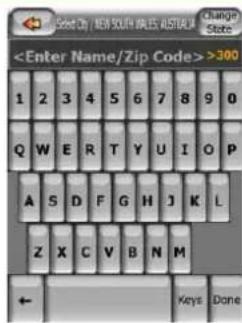
You can accomplish this by using an alphabetic input screen (either an ABC- or a QWERTY-type). You only need to enter the first few letters, as the program only searches among the settlements that exist in the given state or country. If the name of the settlement is of more than one word, the searched pattern can be any or the combination of those. You can search for multiple partial words by inserting space characters in the pattern. For example Key West in Florida will be found if you enter 'Ke W' or even 'We K' (any word order will do).
You do not need to enter accents when searching for a destination. Type only the base letters (the letter most similar to the accented one) and MioMap will search for all their combinations in the database (e.g. for the Canadian town ‘Déléage’ you only need to type ‘Deleage’, and the rest is done by the program).
As you start typing, MioMap will calculate the number of settlements matching your pattern(s). This number is shown at the right end of the input line. If all the matching city names can fit on one screen, the sound played when hitting the key will be different, and MioMap will show you all the results in a list. You can select the one you are looking for by tapping the appropriate list item.
Note: When more than 300 matching items (a list of more than 60 pages) exist for the entered pattern(s), MioMap stops searching, and displays ‘>300’ at the right end of the input line. Enter more letters to narrow the list.
Note: When the name of the settlement contains a character that is not available on the keyboard (e.g. apostrophe or dash), MioMap considers it a space that splits the word. That is why you can search for 'Alleyn-Et-Cawood' with all the following search criteria: 'A E C', 'Et A', or 'Al Ca'.
Tip: If you have finished entering the street name and the matching names are still on more than one page, just tap Done, and select your desired settlement from the list. Turn the pages with the arrow buttons in the bottom right corner.
Tip: In case you are looking for a city name that has more than one word, you can reduce the list of matches faster if you enter a few letters from each word.
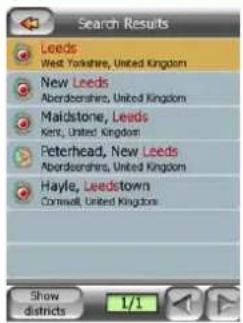
Note: If any of the settlements listed has named suburbs or numbered districts that also appear separately in the map, a Show districts button will appear in the bottom left corner. Tap this button to list the suburbs together with the main settlements. Now the button turns to Hide districts, and tapping it will return to the original, shorter result list.
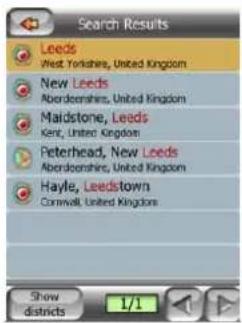
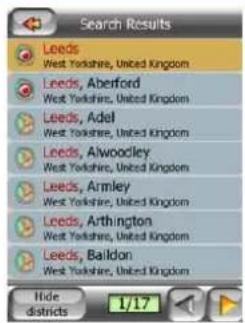
Once you have selected the city, you can continue by entering the street name as described here: Selecting a street or the center of the settlement.
Changing the state (Australia and USA only)
The maps of Australia and the USA contain state information. If the settlement you are looking for is in a different state, tap Other City then Change State from the list of recently used cities, then select the appropriate state. Should you wish to search for an address in the whole country, just tap "All states" at the beginning of the list.
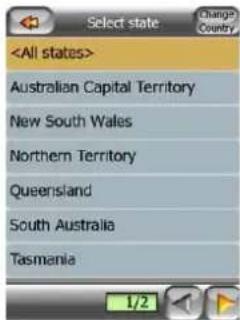
When the state is selected, you need to select a settlement by entering a part of its name or postcode, then selecting from the list of available matching items as described before.
Note: In Australia you can skip this part by tapping Done before entering any letters. This way you can search for a street name in the whole state. In the USA this step is compulsory. If you press Done before entering any letters, the list of settlements will appear in a list in alphabetical order.
Changing the country
If your destination is in another country, tap the Change Country button in the top right corner of the state selection screen (Australia and USA), or the city selection screen (Europe and Asia), and select the country from the list.
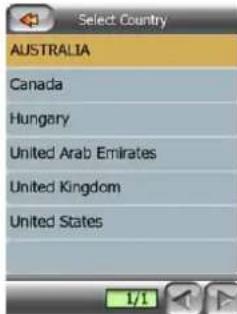
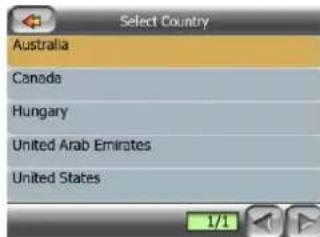
5.3.1.2 Selecting a house number or the midpoint of the street
Once the country, the city and the street name are selected, you are asked to give the house number using the numeric keypad. The range of available house numbers for the chosen street is shown in the input field before you begin entering the figures.
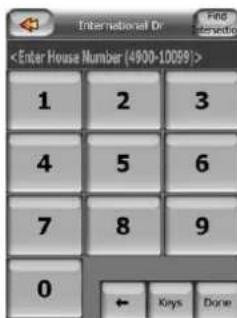
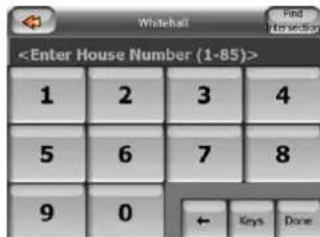
Enter the number, tap Done, and MioMap will show you the selected location on the map (or will start navigating immediately if you have selected Find Address at the Main menu screen).
Note: House numbers may not be available on the map of your region. Ask your local dealer for details.
Tip: If you do not know the house number, just press Done, and the midpoint of the street will be used as the selected location.
5.3.1.3 How to select an intersection instead of a house number
If you do not know the house number or it is easier to pinpoint the location with an intersection, press the Find intersection button in the top right corner and select the desired street name from the list of available intersections of the previously selected street (displayed in the top center of the screen). The crossing of the two streets will be the selected point.
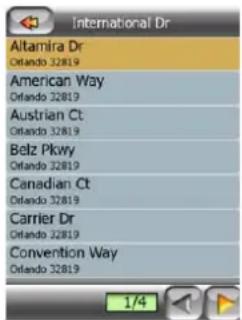
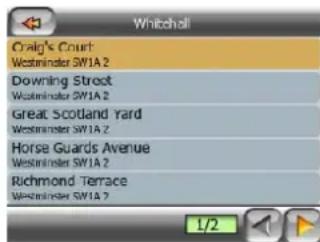
5.3.1.4 An example for a full address search
This is an example for the most complex address search, finding an address from abroad. In this example your current position is not in France, and you are looking for an address in Paris, France, the address '17 rue d'Uzès'. The following steps shall be taken after entering the Find Address section:
- You see the list of recently used cities. Paris does not appear in the list.
- Tap Other City in the top right corner.
- Since you are in Europe, there is no state level between cities and countries, so tap Change Country in the top right corner to change the country.
- Tap France in the list.
- Now select the city in France. Enter ‘Paris’ using the virtual keyboard.
- As several settlements have Paris in their name, the list of cities is not shown automatically. Tap Done to get the list of settlements containing ‘Paris’.
- The first settlement in the list is Paris, as it is the exact match. Tap it.
-
Now you need to enter the name of the street.
-
You need not enter accents, the apostrophe, and you can enter more of the words in any order separated by spaces. Enter 'R D Uz', 'D Uz', 'Uz', and 'rue d'Uzès' automatically appears; or enter 'R D U', 'U R D', 'Ru U', and tap Done to get the list of matching street names.
- Either way you get the list, tap 'rue d'Uzès' to select the street.
- Now you see the numeric keypad, where you need to enter '17' and tap Done to finish the process: '17 rue d'Uzès, Paris, France' is selected.
5.3.2 Find in History
If you have used Find before, or saved map points as POIs or picked and used points of the map before, they all appear in the History list.
This list is ordered by the time the points were last used. The most recently used locations are always at the beginning of the list.
![History 36 Whitehall Westminster SW1A 2 Parliament Street, Westminster SW1A 2 [N 51:50135" x W 0 12625"] London Heathrow Airport 234 Bath Road, Hillington International Dr X Convention Way Orlando 32819/32921 5 Gainburn Crescent Condorsat/Glasgow, Cumbenskeld 687.4 Chelsea Chelsea,VIC, Australia Leeds Leeds,Nest Yorkshire, United King... Clear History 1/3 History London Heathrow Airport 234 Bath Road, Hillington Trumpington Road, Cambridge CB2 2 [N 52°11.662 x E 0°2.361"] 15 Whitehall Westminster SW1A 2 Trafalgar Square, Westminster SW1Y 5 [N 51°10.452" x W 0°7660"] Regent Street X Glasshouse Street Westminster/Peddington/All ... SW1Y 4/W1R SW Clear 1/11](/content/2026/05/761341/images/65e4f4c004b31500bf05fc24e74e7748e4b1d892be8fa5d58a01485c4b7c136f.jpg)
Just pick any of the recent locations as your destination. Here you have no possibility to reorder the list or filter it by name, but the Next and Previous buttons let you browse through the complete list to find your preferred point.
5.3.3 Find Coordinates
MioMap also lets you enter your destination by map coordinates. The coordinates need to be in latitude/longitude format and, based on the WGS84 earth model (the one used by most GPS devices).
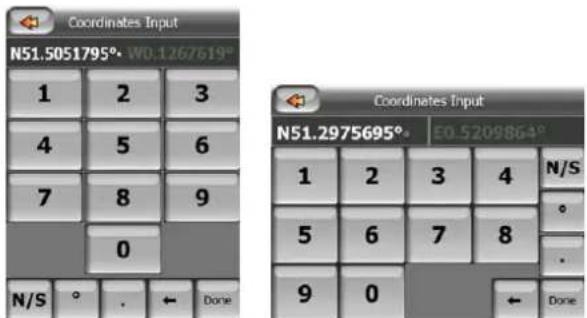
When you enter this page, the coordinates of the current GPS position (or the selected map point, the Cursor, if Lock-to-Position is inactive) are shown at the top of the display.
The coordinates are always shown in ‘broken degrees’ format, but you can enter the coordinates in any of the three latitude/longitude formats (broken degrees; degrees and broken minutes; or degrees, minutes and broken seconds). You can even enter the latitude and longitude in different formats.
Entering a latitude/longitude pair is easy. The left field contains the latitude. It starts with an 'N' (North) or 'S' (South) letter. This tells MioMap whether the point is in the Northern or the Southern hemisphere. Use the N/S button to change the hemisphere. Enter numbers for the latitude. Use the decimal point if the degrees, minutes or seconds are not integers. Use the / / / button (the label depends on the current cursor position inside the latitude) to start entering minutes after degrees or seconds after minutes.
When finished, tap the longitude on the right, and enter it as you did latitude. This time the hemisphere-changing button E/W tells MioMap whether the point is located East or West from the meridian crossing Greenwich, UK.
Once you have entered both numbers, press Done to make the selection.
Tip: The quickest way to tell the coordinates of a point is to select it by tapping on the map or by using Find, and then come to this page and read the coordinates.
Tip: If you need to reformat coordinates to the format selected in MioMap, enter the coordinates in the format you have, press Done to show it in the map, then come back here to see the same location in dd.dddddded format.
5.3.4 Find a POI
You can select your destination from the thousands of POIs included with MioMap or from the ones you have previously created. This screen helps you find the one you are looking for. POI items are categorized to let you locate them more easily. On this screen you can see the first page of the top level POI categories. There are three levels altogether.
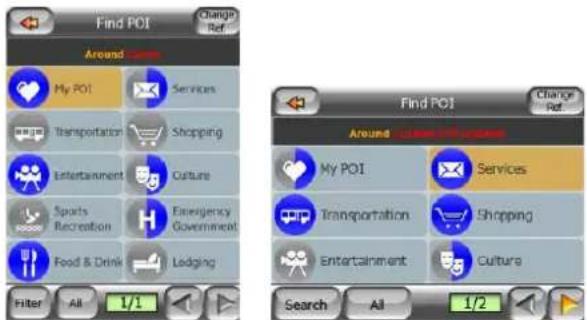
The search will be carried out around a certain reference point. Always look at the current reference point shown in the green field above the POI category buttons and confirm that it matches what you want. To change the reference, tap the Change ref. button in the top right corner.
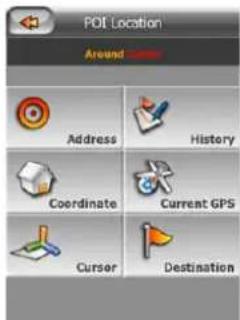
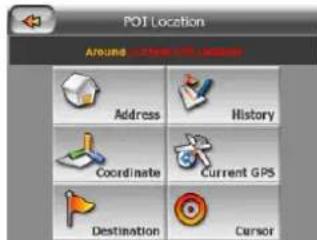
Once you tap the Change ref. button, you are presented with these choices:
- Address: you can specify an address to be searched around, or a settlement to search in. The center of this settlement will be used as the reference point.
• History: the reference for the search can be selected from the History list. - Coordinates: you can specify a latitude/longitude pair to be the center of the search.
- GPS Position: the search will be carried out around the current location given by the GPS if it is available. If no GPS position is available, the last known GPS position (gray arrow on the map) will be used.
- Cursor: the search will be carried out around the previously selected map point.
- Destination: the search will be carried out around the destination of your current route.
The current selection is always shown in the green field at the top of the page.
Note: The default reference point for POI search is the current GPS position, if it is available, or the Cursor, when there is no reliable GPS position.
Once you have set the reference point, you have the following options on the Find POI screen:
- Search in POI subgroups: highlight one of the POI groups by tapping or using the direction buttons, then press Enter or tap it again to see the list of subgroups. Using the same action you can move deeper into subgroups.
- Filter from all the POIs of that level: tapping the Filter button will bring up a text input screen to let you narrow the list of POIs. If you tap Filter in the list of subgroups, you will only search in the group you are already in.
- See all POIs of the current group in a list: tapping the All button opens the list of all points in the group or subgroup you are already in. Use the Next and Previous buttons to browse through the list.
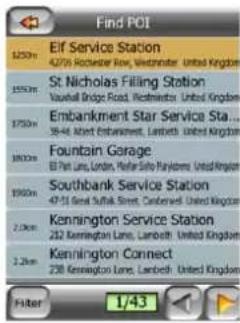
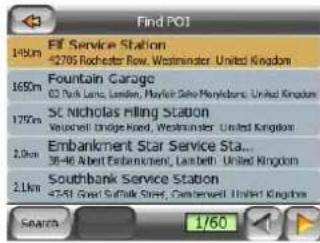
Search results are ordered by their distance from the given reference point (nearest first).
Note: In the case of POI items that you have created, you can also see the results in alphabetical order. Push the button with the label ABC that appears between Filter and the page number.
Once the desired POI item is selected, MioMap will show its details.
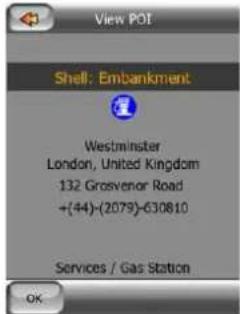
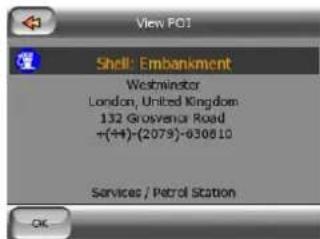
Tapping OK will return to the map with the selected POI in the center (or starts navigating to it if Find & GO was selected). Tapping the arrow in the top left corner returns to the search results.
Tip: If you want to find the nearest POIs, or if you are close to one of them but do not know exactly where it is or what its name is, tap the All button on the very first screen of POI search, and get a list of the nearest POIs. Use the Next button in the bottom right corner to turn the page if you cannot see the desired place on the first page of the list.
5.3.5 Find one of the Favorites (Home/Work)
If you have already set up your favorite destinations in General settings (Page 73), you can select either of them by simply tapping the button with the name on it.
Using the Favorites function at the Main menu it is only two taps to start navigating.
Note: If you try to access a favorite destination that you have not yet set up, MioMap will lead you to the setup page.
6 Settings
MioMap provides several settings in order to let you customize the functions of the program. The Settings screen can be accessed directly from the Main menu screen (Main menu) and from the map screens by using the battery icon (Page 27), while some of its sub-screens are accessible from other parts of the program.
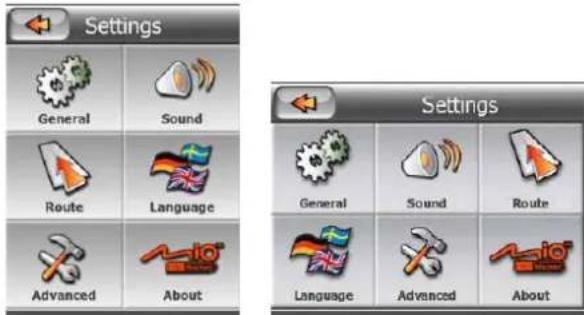
6.1 General settings
These are the basic settings of MioMap.
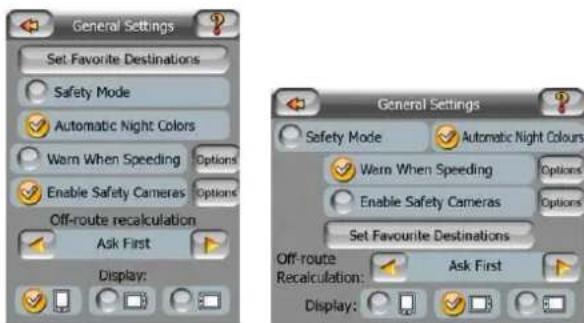
6.1.1 Safety Mode
Safety mode will disable the touch-screen above 10 km/h (6 mph) to keep your attention on the road.
You are still able to use the hardware buttons, but you cannot set a new destination or change the settings.
When you disable Safety Mode, MioMap will warn you.
6.1.2 Automatic Night Colors
Using the automatic night mode, MioMap will change between the daylight and night color schemes a few minutes before sunrise and a few minutes after sunset based on the time and location information provided by your GPS. Once you set a permanent color scheme in the Quick menu (Page 39), this automatic mode turns off. If you need MioMap to switch between colors for you again, you need to re-enable this feature.
6.1.3 Speed Warning Options
When speed warning is turned on, the values of these controls determine when the warning will be triggered.
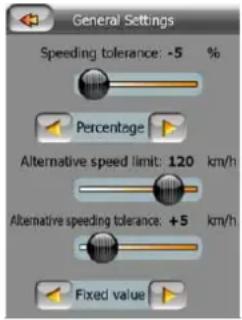
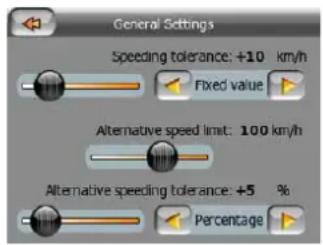
You can set two different kinds of behavior for the warning: one is applied up to a certain speed limit and the other one is used above that.
6.1.3.1 Speeding tolerance
MioMap will warn you when you exceed the speed limit by the amount specified here. Select whether you want to specify the tolerance as a Fixed value (offset to the speed limit) or as a Percentage.
The slider will change depending on which mode you have chosen.
Both positive and negative values can be given in either offset or percentage mode.
6.1.3.2 Alternative speed limit
If the speed limit of the current road segment equals or is above this limit, the speed warning will use the alternative tolerance instead of the previous one.
Move the slider to its rightmost position to turn off the alternative speed warning. Then the settings of the upper slider will determine the warning for all roads.
6.1.3.3 Alternative speeding tolerance
If the speed limit of the current road reaches the value set at Alternative speed limit, this setting will replace the basic one set at the top of this screen. The slider and the selector work exactly as the basic ones described here: Page 70.
Example: to let you better understand how this feature works, here is an example. If you use the setting on the left (portrait) screen example (+10 km/h - 100 km/h - +5%), MioMap will warn you when driving at the following speeds:
| Speed limit | Warning at | |
| 40 km/h | 50 km/h | (=40 km/h + 10 km/h) |
| 60 km/h | 70 km/h | (=60 km/h + 10 km/h) |
| 90 km/h | 100 km/h | (=90 km/h + 10 km/h) |
| 100 km/h | 105 km/h | (=100 km/h + 5%) |
| 120 km/h | 126 km/h | (=120 km/h + 5%) |
| 160 km/h | 168 km/h | (=160 km/h + 5%) |
6.1.4 Enable Speed Camera Warning
MioMap contains a built-in database of known speed and red light cameras, and you can also add further cameras you discover using the Add Cam button in the Cursor menu (Page 28). The types and parameters of speed cameras are explained here: Page 51.
In this section you can enable or disable the warning for known cameras, and you can also fine-tune the way MioMap warns you when you approach one of these cameras.
6.1.5 Speed Camera Options
When speed camera warning is turned on, the values of these controls determine how the user will be notified when approaching a speed camera.
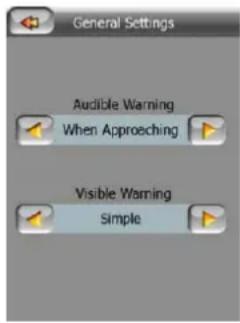
6.1.5.1 Audible Warning
You can disable the audible warning; have a simple warning (when you are warned only if you exceed the speed limit when approaching a camera); or a complex sound with repeated beeps as you approach the camera. In case of section control
cameras, you will also hear these beeps while you are between the two cameras (these cameras work in pairs).
You are warned well in advance. The distance MioMap starts warning you before reaching the camera depends on your speed. The higher the speed, the earlier the warning starts.
6.1.5.2 Visible Warning
Besides this, MioMap can pop up a visual warning with only the symbol of the camera above the speed limit sign on the Cockpit screen, or you can ask for details as described below.
Approaching a fixed or built-in camera you will see the speed limit checked by the camera, and the remaining distance to reach the area monitored by the camera.
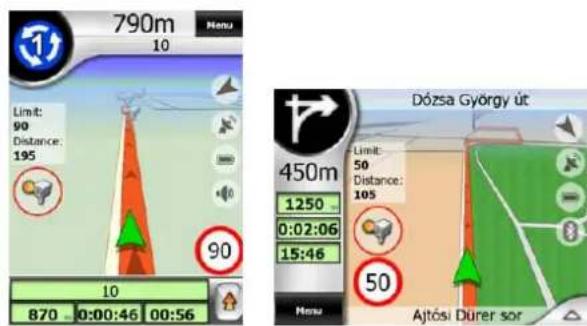
With mobile cameras you can only see the distance from the measured area, as there is no speed limit set.
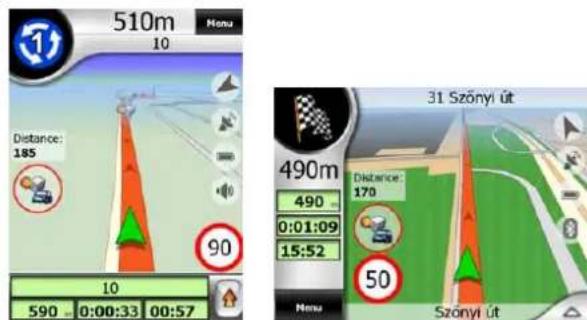
When approaching the first of section control camera pairs you will see the same data as with a fixed camera (speed limit and distance). Then while being between the two cameras, your frequently updated average speed is displayed below the speed limit.
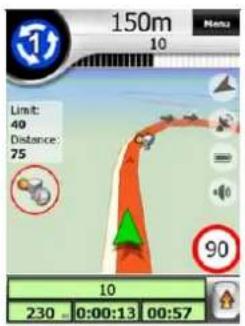
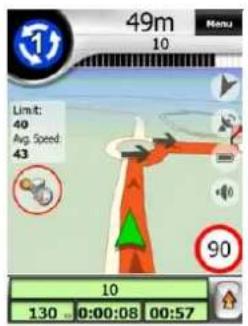
6.1.6 Set Favorite Destinations
You can select two of your most frequent destinations to be your favorites (Page 68). You can start navigating to either of them by only two taps on the screen. The original names of these points are Home and Work.
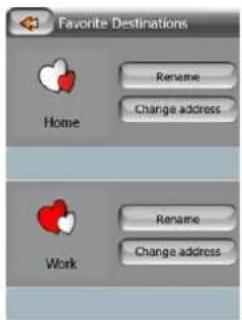
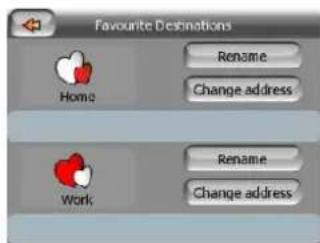
You can rename them and specify their locations. To determine the location you can use the same Find menu options (Page 59) as for a route destination, and depending on that choice and the information available, the location will be shown here as a street address, a latitude/longitude position, or both.
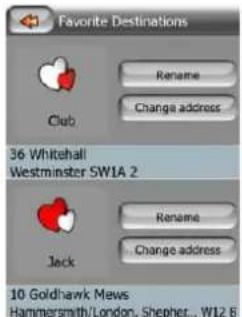
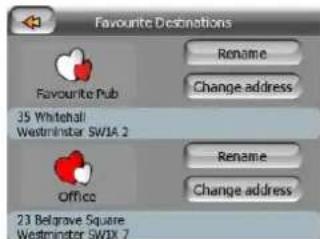
Note: If you tap either of your favorite destinations in the Find menu (Page 68) before defining it, MioMap will offer to take you to this screen to set it up.
6.1.7 Route Recalculation
Once a route is planned, this setting will tell MioMap what to do when you deviate from that route.
6.1.7.1 Automatic
The route will be recalculated automatically a few seconds after you go astray.
6.1.7.2 Disabled
If you stick to the original route, and you wish to get back to it on your own, you can disable recalculation. This way guidance will stop until you return to the recommended route on your own.
6.1.8 Display Orientation
You can set whether you intend to use MioMap with a portrait orientation or either of the two landscape modes. This setting is totally independent from the similar Pocket PC setting, so you do not need any extra action later e.g. if you use your PDA always in portrait mode but MioMap in landscape mode, or vice versa, or you want MioMap to look the same no matter how your PDA is currently oriented.
6.2 Sound settings
Settings on this page determine the way MioMap sounds.
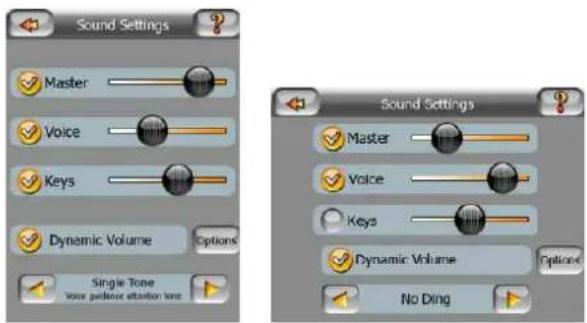
6.2.1 Master sound volume/switch
The loudness of MioMap is independent of your PDA settings. When you run MioMap, the position of this fader determines the device volume level. When you exit the program, the device settings return.
The left part of this control works as a mute button. Tap to mute all MioMap sounds.
This works in tandem with the Mute button (Page 27) on the map screens. Switching one of them will change the status of the other.
6.2.2 Voice guidance volume/switch
The switch on the left can turn on or mute MioMap's audible guidance (voice instructions and speed camera warning). When turned on, the slider on the right will adjust the loudness of voice prompts. In its leftmost position the voice guidance is suppressed, in its rightmost position the master volume applies.
6.2.3 Key sound volume/switch
The switch on the left can turn the key sounds on or off. Key sounds are audible confirmations of either pressing hardware buttons or tapping the touch screen. When key sounds are turned on, the slider on the right will adjust their loudness. In its leftmost position the key sounds are suppressed, in its rightmost position they are played at the master volume level.
Note: The sound effects of MioMap are context sensitive. They will be different if, for example you open or close a window, or you enable or disable a setting. They will even let you know if you have entered enough letters of a street name to have a short list of matching streets on the screen.
6.2.4 Dynamic Volume
When driving at high speed, the noise in the car may be too loud to clearly understand the voice guidance messages and to perceive the key sounds. Using Dynamic Volume you can instruct MioMap to increase the volume when your speed exceeds a certain minimum, and reach its highest volume (determined by the Master volume slider in Sound settings) at the given maximum speed.
Tap the Dynamic Volume button to turn on the feature. This will also open the screen where you can set the minimum and maximum speeds.
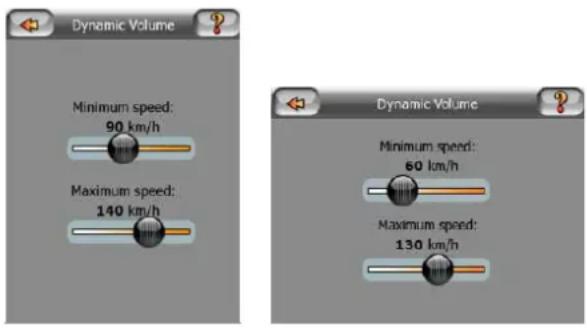
6.2.5 Attention Tone
If this is set to Disabled, the voice guidance will sound without a preceding attention tone. Setting it to Single Tone will initiate a single attention tone before the instructions, while Double Tone will use a double tone.
Note: The Mute function (Page 27) accessible from the map screens overrides the settings on this screen. When MioMap is muted, all sounds disappear. These settings will not be changed; only the output will be muted temporarily.
6.3 Route parameter settings
This is a very important page. Settings here determine how routes will be calculated. This screen is directly accessible from the Route Information screen (Page 34).
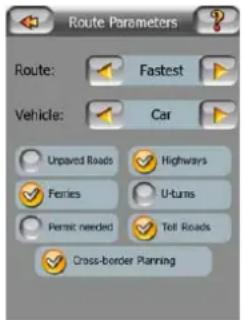
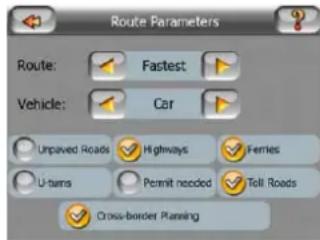
6.3.1 Route
Here you can choose from three different route types.
6.3.1.1 Shortest
Choosing Shortest will result in a route that has the smallest total distance of all possible routes between the given points. This is usually preferred by pedestrians, cyclists or slow vehicles.
6.3.1.2 Fastest
Choosing Fastest will result in the quickest possible route, given that you can travel at or near the speed limits on all included roads. This is usually preferred for fast and normal cars.
6.3.1.3 Economical
This setting is a wise combination of the previous two. Although basically going for the fastest solution, if there is another route taking a bit more time but a lot less distance compared to the fastest one, MioMap will choose this one instead to save fuel.
6.3.2 Vehicle
You can set the type of the vehicle that you will use to navigate the route. Based upon this setting, some of the road types will be excluded from the route (e.g.
motorways for pedestrians), or some of the restrictions may not be taken into account (e.g. emergency vehicles have no restrictions). Available values:
- Car
- Taxi
- Bus
- Truck
- Emergency
- Bicycle
- Pedestrian
6.3.3 Road types to include/exclude
To let the route fit your needs you can also set which road types are to be considered for or to be excluded from the route if possible.
Note: Excluding a route is a preference. It does not necessarily mean total prohibition. If your destination can only be accessed using some of the excluded road types, MioMap will use them but only as much as necessary. In this case a warning icon will be shown on the Route Information screen (Page 34), and the road not matching your preference will be displayed in alternate color on the map.
6.3.3.1 Unpaved Roads
Unpaved roads are excluded by default, as they can be in a bad condition and you usually cannot reach the speed limit on them.
6.3.3.2 Motorways
When driving a slow car or towing another vehicle, you may prefer not to take motorways.
6.3.3.3 Ferries
The accessibility of temporary ferries is not necessarily included in the map data. Furthermore you may need to pay fare, so you may consider disabling them from the preset enabled status.
6.3.3.4 U-turns
Although displayed amongst road types, this is a type of action. Most drivers prefer to replace them with a few normal left and/or right turns in the next few junctions, so it is disabled by default.
Turning back on dual carriageways is not considered as a u-turn.
Note: Via points are handled as stopovers with regards to u-turns. It means disabling u-turns on this page will avoid u-turns during the entire route if possible, but when reaching a via point, the following part of the route may be planned starting in the opposite direction.
6.3.3.5 Permit needed
To use some roads or enter some areas you may need special permit or permission from the owners. These roads are excluded from your routes by default. Use this switch if your vehicle is authorized to enter.
6.3.3.6 Toll Roads
Toll roads are included in your routes by default. If you wish to travel more to avoid paying a toll, disabling them will make MioMap plan the best toll-free route for you.
6.3.3.7 Cross-border Planning
By default MioMap plans routes using the border crossing points. However if you live near the border, you can disable border crossing with this switch to remain within one country.
6.4 Language & Units
Here you can set the languages, measurement units, and date and time formats used by MioMap.
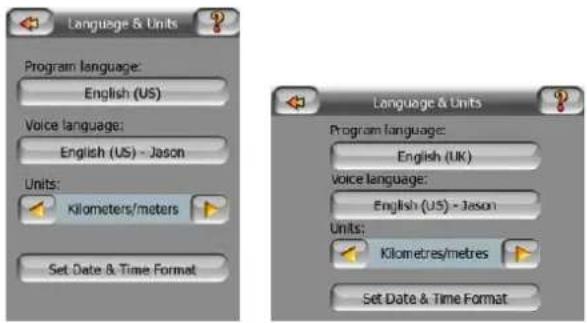
6.4.1 Program language
This button displays the current written language of the program. By tapping the button you can select from a list of available languages. MioMap will have to be restarted if you change this setting. MioMap will ask for confirmation before it restarts.
6.4.2 Voice language
This button shows the current language of the voice guidance. By tapping the button you can select from a list of available languages and speakers. Tap any of these to hear a sample voice prompt. Just tap OK when you have selected the new spoken language.
6.4.3 Units
You can set the distance units to be used by the program. MioMap may not support all of the listed units in some voice guidance languages. If you select a measurement unit that is not supported by the chosen voice guidance language, you will see a red warning message under the selector.
6.4.4 Set Date & Time Format
You can set the date and time format displayed by MioMap. Various international formats are available.
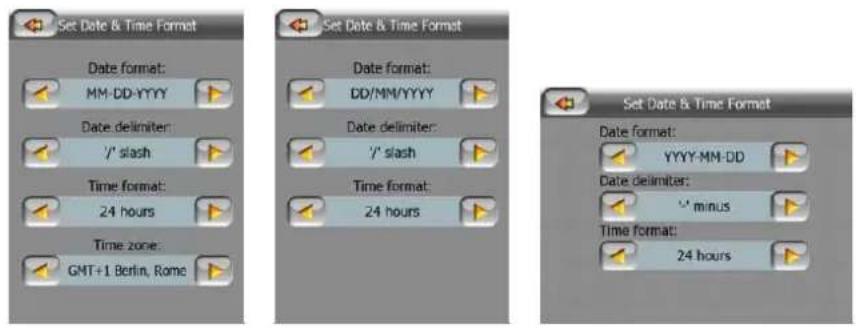
6.5 Advanced settings
These screens let you set a large number of different advanced settings and initiate some special functions. These settings and functions are divided into groups.
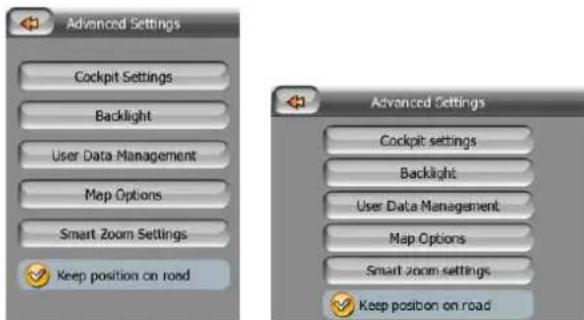
Tap on any button to set the corresponding parameters. .All but the last one will open new windows where you can make your desired changes.
6.5.1 Cockpit settings
These settings determine how MioMap displays different content elements of the Cockpit screen.
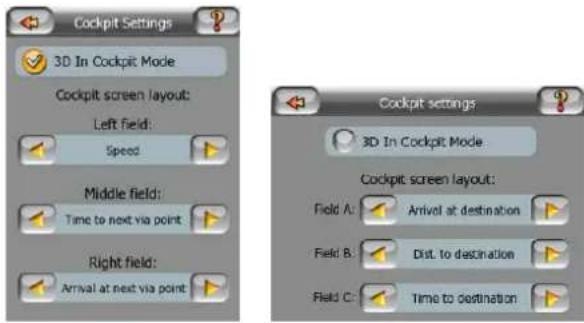
6.5.1.1 3D in Cockpit mode (and track-up orientation)
The normal use of the Cockpit mode is cruising or navigating, when the road lying in front of the driver is the most important part of the map. It is usually done in a 3D view with the current direction towards the top of the map. By default MioMap uses the same look of the map in both Map and Cockpit modes.
Use this switch to instruct MioMap to always open the Cockpit mode in 3D with Track-up orientation (automatic map rotation) for driving purposes.
Note: You will still have the possibility to switch the map to 2D view or north-up orientation, but the map will return to 3D mode with map rotation whenever Cockpit mode is started.
6.5.1.2 Cockpit screen layout
There are three route data fields on the left of the Cockpit screen.
Their content is fixed in Cruise mode (when there is no active route), but for Navigation mode you can change their content here. The available values are listed here: Page 31.
6.5.2 Backlight settings
Here you can set how the display backlight behaves when using MioMap. These settings are independent of the settings of the other applications of Mio DigiWalker P350/P550.
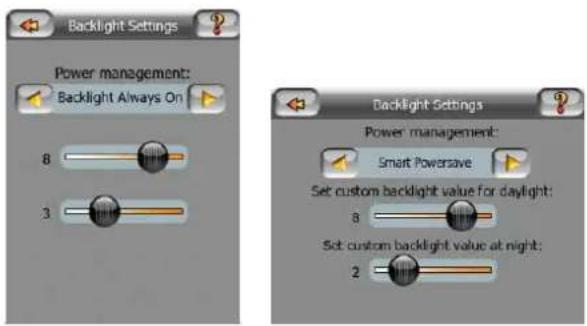
6.5.2.1 Power management
At the top of the screen you can set how the backlight will behave when the screen has not been touched for a while.
Backlight always on
You can choose to have the lights always on.
Use device settings
You can preserve the PDA device settings (previously set in the operating system at Start/Settings/Backlight).
Smart powersave
You can also initiate this special feature of MioMap. When running on battery Smart Powersave will light up the screen only when you press or tap a button, or if MioMap has something to show you. After a few seconds the light level decreases, and after another few seconds the backlight turns off. This helps you achieve a longer battery life.
6.5.2.2 Brightness
You can set the backlight level separately for both daylight and night modes, thus enhancing the effect of the night color scheme. The values are between 0 and 10, where zero means there is no backlight at all, and 10 represents the maximum backlight value.
6.5.3 User data management
Everything that was saved (pins, My POIs, Favorites, track logs etc.) or modified (Settings, History lists) since MioMap was installed is stored in a user database located in the internal memory of the Mio DigiWalker P350/P550. Here you have options to save, restore or reset the database or parts of it.
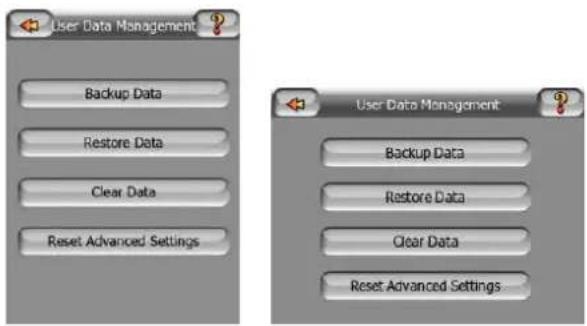
6.5.3.1 Backup Data
You can make a safe copy of the whole user database on an SD card.
Tap this button to copy all user data and settings on the SD card. The backup is always created with the same file name; so backing up data will always overwrite previous backups.
Tip: If you wish to keep more versions of the user database, or you wish to save one particular state (e.g. saved POIs and track logs of your holiday), look for the backup file on the SD card, rename it, or save it to your PC.
Tip: If you move to another PDA, and you wish to keep your data and settings, make a backup, remove the card, insert it into the other PDA, then return to this Settings page, and push the Restore Data button as described in the next section. MioMap will then restart, and all your previous POIs, track logs, settings, city and find history lists will also appear on the new PDA.
6.5.3.2 Restore Data
If you have accidentally deleted things, or you have created a number of temporary items and you do not wish to delete them one by one, you can tap this button to restore the state of MioMap to the latest backup.
By tapping this button you will lose all of the changes made since the time of the latest backup. MioMap will warn you about this before overwriting the current database with the backup.
6.5.3.3 Clear Data
This button will delete all user data. It is a reset to factory settings. Tapping this button means you lose all your saved data and customized settings. MioMap will warn you about this.
6.5.3.4 Reset Advanced Settings
There are a multitude of Advanced settings in MioMap. Some changes may cause MioMap to behave in an unsatisfying manner. Tap this button to restore the default settings.
6.5.4 Map options
You can set a few parameters determining the appearance of the maps in MioMap.
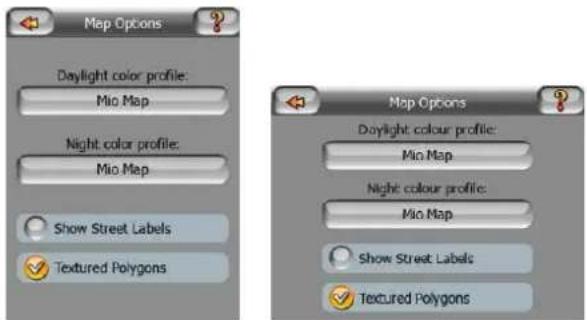
6.5.4.1 Daylight / Night color profile
MioMap comes with different color schemes for both daylight and night use. There is always one selected daytime scheme and one selected night-time scheme. MioMap uses these when switching from day to night and back.
Tap the appropriate button and select a new scheme from the list.
6.5.4.2 Show Street Labels
You can set whether or not to see the names of the streets and the POI icons on the map when driving. Based on the current zoom and tilt levels, street names are displayed either aligned with the street or on signposts stuck into the streets (Page 18). If you switch these signs on, it will be easier to recognize your location on the map, if you turn them off, it will be easier to see the road geometry.
Note: You can only disable street names and POI icons if MioMap follows your position. As soon as you move the map and Lock-to-Position (Page 24) is disabled, street names and icons become visible again. Tap Lock to re-enable Lock-to-Position and have the labels and icons disappear again.
6.5.4.3 Textured Polygons
Enable textured polygons, and have rivers, lakes, forests and other large objects displayed in a more realistic and attractive way on the map.
Disabling it will lead to uniform areas but better performance. See Page 18.
6.5.5 Smart Zoom
Smart zoom is a lot more than just a usual automatic zoom.
While navigating a route: when approaching a turn, it will zoom in and raise the view angle to let you easily recognize your maneuver at the next junction. If the next turn is at a distance, it will zoom out and lower the view angle to be flat in order to let
you see the road in front of you, or it can even switch to an Overview mode to let you follow your position on the map.
While cruising: if there is no active route and you are just driving, Smart Zoom will zoom in if you drive slowly and zoom out when you drive at high speed.
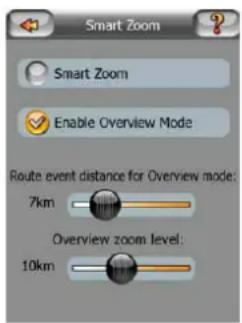
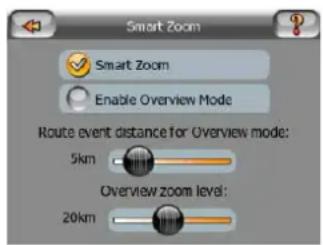
6.5.5.1 Enable Smart Zoom
Use this switch to enable or disable Smart Zoom. When disabled, the zoom and tilt levels on map screens during navigation are fixed, and you can set them manually using screen buttons (Page 23 and Page 24). Turn this feature on to let MioMap zoom and tilt the map automatically to always show you the best view for your navigation needs.
6.5.5.2 Enable Overview mode
You can configure how the Overview mode is triggered when the next turn is at a distance.
The Route event distance will determine when MioMap switches to the Overview or back to the Navigation view.
The Overview zoom level will determine the fixed zoom level of the map in both automatic and manually selected (by the Map orientation icon – see here: Page 26) Overview modes. You can change the zoom level manually at any time (the Lock button will not be displayed), but when you enter the Overview mode again, the zoom level will be reset to this value.
You can also move the map in Overview mode. Then the Lock button will appear, and when pushed, it will move the map to have your current position in the middle again.
On the other hand you are not allowed to rotate the map in Overview mode. This mode is a strictly north-up orientated mode.
Note: when this automatic feature is disabled, you can still enable the Overview mode manually as described here: Page 26.
6.5.5.3 Keep position on road (Lock-on-Road)
MioMap is normally used for vehicle navigation, therefore Lock-on-Road will display the position arrow precisely over roads, seamlessly correcting small GPS errors. For pedestrian use you may consider disabling Lock-on-Road to make MioMap always show your exact position.
Note: By turning off Lock-on-Road you also turn off the GPS position error filtering. The position shown on the map will be subject to all position errors and position fluctuations.
6.6 About screen
Tap About on the Main menu screen to open this screen. The About screen is not used in normal navigation. It is there to inform you about the map licenses you have, the creators of MioMap and the legal aspects of using the program.
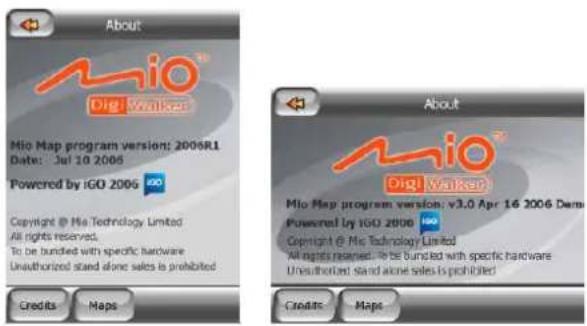
6.7 Manual GPS configuration
This screen is separated from the other settings as it is normally used only once, when you set up MioMap for the first time. It can be accessed from the GPS Data screen (Page 34) by pushing the Config. button. There are three values to set on this screen.
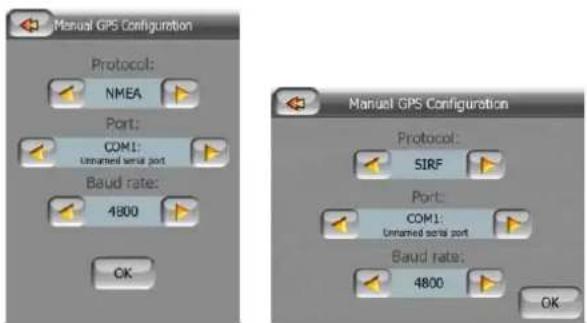
6.7.1 Protocol
This is the ‘language’ the GPS and MioMap communicate in. The default NMEA is the worldwide standard that practically all GPS devices are able to use.
Note: If you use SiRF protocol in MioMap, you need to change the protocol of your GPS to SiRF as well. This cannot be done in MioMap. You need to quit MioMap and use the application provided with your GPS.
6.7.2 Port
There are different wired and virtual serial ports on your PDA. You need to know which of them your GPS is connected to, and set it here.
6.7.3 Baud rate
You also need to set the speed your GPS is communicating at. The higher the speed, the smaller the position delay there will be (there is always a small delay between the real position and the position shown in navigation systems due to the time consuming processing and communication).
Tip: Unless you are comfortable with these settings, or you have a special configuration that demands manual set-up, you should use the automatic GPS detection feature of MioMap to configure your GPS.
7 Troubleshooting guide
Thank you again for purchasing our product. We hope you will enjoy every minute of using it. However you may face difficulties before you get really accustomed to MioMap. In such cases, please, refer to this table of frequently encountered problematic situations.
I cannot find the Greenarrow that would show my location. Navigation does not start.
Check the GPS status icon on any of the map screens (Page 26) or the GPS Data screen (Page 32). It is likely that the GPS cannot determine your position. Move the GPS out of cover to get a position fix.
The GPS is connected, sending valid position data, yet I cannot see the Greenarrow that would show my position.
You should see a large semi-transparent 'Lock' icon (Page 24) on the screen. Tap this to re-enable the Lock-to-Position feature that moves the map back to your actual location.
The Green arrow shows my location, but I cannot see the route (Orange or red line), and no voice instructions are announced.
It is likely that you have no active route. Check the upper left corner of the Cockpit screen (Page 23) if you can see the indication for the next turn or not. If this field is blank, you have no route planned, so you need to create one first. It is a common mistake to find a destination, show it on the map, but forget to tap the 'Route To' button in the Cursor menu (Page 28) to create the route. Be sure to follow these steps, or always plan your routes by using one of the buttons on the Main menu screen. This will ensure your route is calculated automatically as soon as the destination has been selected.
I cannot see the Lock button on the screen, yet the map is not rotated during driving.
Look for a small, red 'N' letter on the compass icon (Page 26) or an airplane icon instead of it. It is likely that you had initiated the North-up map orientation or the Overview mode unintentionally. Tap this icon to revert to Track-up mode with automatic map rotation.
Creating a multi-point route I have tapped the 'Route To' button once for each destination but only the last one appears in the list, all previous points have disappeared.
The ‘Route To’ button is for starting a new route only. For a single route you tap this when the destination is selected. Multi-point routes can be created after you have established a single route. Add points to the single route by using the ‘Add Via’ and ‘Continue’ buttons. Applying ‘Route To’ again will delete the whole route. In your case only single routes existed before, so they were deleted without a warning message. If you already have a multi-point route, MioMap warns you before deleting the whole route.
The speaker icon shows MioMap is not muted yet I hear no voice guidance.
The muting available from both map screens is just a quick silencer that cancels the sound output. Voice guidance and key sounds need to be enabled and volume must be set at the Sound Settings screen (Page 74).
I enabled the speed warning as soon as I bought the product but I have just been fined for speeding because MioMap failed to warn me.
For an accurate speed warning the actual speed limits of each street and road must be present correctly on the map. This is a relatively new feature of digital maps, so it may not be available in some countries, and its accuracy still has much room for improvement (ask your local dealer for the details in your region). This feature can help you in several cases but it cannot be considered as serious speed control. That is why it can be turned on and off separately from the reliable voice guidance (Warn When Speeding).
I would like to create a new POI during navigation (Cockpit screen) but there is no Add POI button in the Cursor menu.
For driving safety reasons the Add POI function is only available on the Map screen. If you are the driver, save it as a POI later, when you reach your destination. If you are not driving, switch to Map mode, where the Add POI button is available.
I would like to create a new POI but there are others near its location, and the new menu point (POI) opens the list of POI instead of creating a new one.
Look for the New button in the bottom left corner of the newly opened list. Using that button you can add your new POI as if it was opened from the Cursor menu.
8 Glossary
The manual may contain many technical terms. Please look below for an explanation if you are unfamiliar with some of them.
2D/3D GPS reception: The GPS receiver uses satellite signals to calculate its (your) position. Depending on the current positions of the ever moving satellites in the sky, and the objects in your environment, the signal that your GPS device receives may be weaker or stronger. Your GPS needs strong signal from at least four satellites to give a three dimensional position including elevation. If fewer satellites are available, it may still be possible to calculate the position but the accuracy will be lower and the GPS device will not calculate elevation. This is called 2D reception. MioMap shows the quality of reception on the GPS Data screen (Page 33) and both map screens (Page 26). Note that 2D and 3D GPS receptions have nothing to do with the 2D and 3D display modes of the map. That is a way of representing the map on the screen independently from the GPS reception.
Accuracy: The difference between your real position and the one given by the GPS device is affected by several different factors. The GPS is capable of providing a guess of its current error based on the number of satellites it can receive a signal from, and their position in the sky. This information is shown in MioMap on the GPS Data screen (Page 32). Lower numbers indicate better accuracy, where 1.0 is near-perfection. Use it as a general reference only. Note that several other factors affect the real accuracy, some of which the GPS is incapable of estimating (e.g. signal delay in the ionosphere, reflecting objects near the GPS device, etc.).
Active route: A route is an itinerary planned to reach your chosen destinations. A route is active when it is used for navigation. MioMap has only one route at a time, and it is always active until you delete it, reach the final destination or exit MioMap. When there is more than one destination to reach, the route is cut into different legs (from one via point to another). Only one of these legs can be active at one particular time. The rest of them are unused and shown in a different color on the map.
Automatic route planning (Autorouting): You only need to set up your destination, and based on its map, the software will automatically figure out which roads you need to take, and the turns you need to make to get there. MioMap will let you select multiple destinations, and customize some important routing parameters (Page 76).
Automatic route recalculation: If this function is enabled (Page 74), MioMap recalculates your route if you deviate from it. When you miss a turn or avoid a roadblock, MioMap waits for a few seconds to be sure you do not follow the route any more (you can fine-tune it in Advanced settings), then recalculates the route based upon your new position and heading.
Automatic day/night colors: Based on the time and position given by the GPS device, MioMap is able to calculate when the sun rises and sets at your current location on this particular day. Using that information MioMap can change between the day and the night color schemes a few minutes before sunrise and a few minutes after sunset (Page 70). As additional information to help your orientation, the sun is shown in the sky when you display the map in 3D mode with a low viewing angle, and the sun is near the horizon.
Elevation: When the GPS receiver can see at least four GPS satellites, it can determine its current position in three dimensions. In this case the elevation is calculated together with the latitude/longitude position. Note that some older GPS units may provide incorrect elevation data because they use a simple ellipsoidal earth model rather than a database that contains local sea levels. You should also be aware that the elevation value is generally less accurate (by at least a factor of 2) than the horizontal position. See also 2D/3D GPS Reception.
ETA (Estimated Time of Arrival): A frequently used expression in navigation. It represents the time when you will reach your destination based upon calculations using the remaining part of the route and available information of the roads used. This estimation can only be used as a general reference. It will not be able to take into account your future speed or the traffic delays. In MioMap this value is shown as 'Estimated Arrival' on the Route Information screen (Page 36).
ETE (Estimated Time Enroute): Another frequently used expression in navigation. It represents the time needed to reach your destination based upon calculations using the remaining part of the route and available information of the roads used. This estimation can be used only as a general reference. It will not be able to take into account your future speed or the traffic delays. In MioMap this value is shown as 'Time left' on the Route Information screen (Page 36).
GPS: Abbreviation of Global Positioning System. This system is operated by the DoD (the Department of Defense of the United States Government). It consists of 24 satellites orbiting Earth, and several ground stations to keep the satellites in sync. To calculate your position, your GPS device uses the signals received from those GPS satellites that are currently visible at your location. You can use this service free of charge.
Lock-on-Road: This function of MioMap will always keep the blue (yellow at night) arrow representing your actual position on the nearest road. This automatic feature is necessary as the position given by the GPS receiver is not perfectly accurate. Under normal circumstances Lock-on-Road will eliminate the occasional position error. If the corridor of error is too large, your position may be shown over a different street on the map. You can only avoid that by using good quality GPS equipment positioned so that it has a direct view to as large a portion of the sky as possible. Normally Lock-on-Road is always active in MioMap when GPS position is available. See also in Current position and Lock-on-Road. However for pedestrian use it can be permanently turned off in Advanced settings (Page 85).
Lock-to-Position: When GPS position is available, MioMap will automatically keep moving the map to always have the blue (yellow at night) arrow, representing your actual position, on the screen. You can move the map to lose this position. Then the
Lock button appears on the screen. Tapping it will re-enable Lock-to-Position. See also Page 24.
Map Orientation: MioMap is able to rotate the map for your convenience. If you choose Track-up mode, the map will be rotated to look in the direction of your heading. Selecting North-up, the map remains oriented to have North toward the top. Use the left and right hardware buttons to turn your map in the direction you wish. This will immediately turn off the automatic rotation. A small compass in the top right section of the map screens (Page 26) will always show the current direction of the map. Map orientation should not be mixed up with Screen orientation.
NMEA (National Marine Electronics Association): This is the name of a communication protocol format. This association issues standards for interfacing marine electronic devices. One of their standards is NMEA-0183 that defines electrical signal requirements and a data transmission protocol for time and position data. This is today's standard for not only marine but also all other GPS devices. MioMap, as well as most GPS devices, will default to using this protocol out of the box.
North-up: A kind of map orientation having the map rotated to have North toward the top of the screen. See also Track-up and Map Orientation.
POI: Points Of Interest, exact map locations of important points saved in a database together with their name, category and subcategories (e.g. Service/Fuel/Autogas), address, phone and fax number, and other important information. Use the versatile search system in MioMap to find the appropriate POI near you, your destination or any other given location on the map (Page 66). You can also have your favorite places saved as 'My POI' in MioMap.
Track log: In MioMap you have the possibility to record your journeys using the position data your GPS provides in every second or every few seconds (depending on your GPS settings). When you start the recording, position data are saved in the database until you stop recording it. This set of sequential GPS positions is called track log. Each set of consecutive positions has a name (originally it is the time of recording but you can change it to any name you like) and a color in which it can be displayed on the map. Later you can replay the journey on the screen of MioMap as if it were happening again. This is good for demonstration purposes or for analyzing your maneuvers during the trip. See also Page 44.
Track-up: A kind of map orientation when the map is rotated to look always in the direction of your heading. See also North-up and Map Orientation.
Via point: Routes in MioMap can have several (as many as you want) different destinations to reach in a specific order. All these points except the final destination are called via points, as the route goes ‘via’ (through) them. The destinations can be seen in the Route Information screen on the Route line (Page 35), and each via point is announced by the voice instructions as you approach and when you reach it. Should your via point serve as a stopover, navigation continues automatically as you depart. Navigation will resume even if you turn off and on your PDA or restart MioMap.
Zoom In and Out: The Zoom function is used to change the scale of the map. Use Zoom In to scale down the map to see less of it but in more detail, and use Zoom Out to scale the map up to have a broader view of that part of the map with fewer details. See also Page 16 and Page 23.
- User Manual
- MioMap™ v3.2
- Copyright note
- Table of Contents
- Route parameter settings....76
- Language & Units 78
- Advanced settings....79
- About screen....85
- Manual GPS configuration 85
- Troubleshooting guide....87
- Glossary 89
- Warnings and safety information
- General information
- Operating MioMap (Controls)
- Power on/off
- Tilt up and down
- Zoom in and out
- Rotate left and right
- Voice instruction announcement
- The Route Information screen
- Screen buttons and controls
- Direct selectors
- List selectors
- Sliders
- Switches
- Switches in the Quick menu
- Virtual keyboards
- QWERTY-type keyboards
- The numeric keyboard
- Discovering the program through the screens
- The map
- 2D and 3D map views
- Zoom levels
- Daylight and night color schemes
- Streets and roads
- Other objects
- Speed cameras
- Contacts
- Elements of the Active Route
- The start point, via points and the destination
- Animated turn guidance
- The route line
- Roads in the route excluded by your preferences
- Screens with map
- No. Display Control
- Turn preview (No. 1)
- Zoom in and out (No. 2 & 3)
- Tilt up and down (No. 4 & 5)
- Lock to GPS position and heading (No. 6)
- Lock
- Cursor (No. 7)
- Map scale (No. 8)
- Menu (No. 9)
- Map orientation and Overview (No. 10)
- GPS position quality (No. 11)
- Battery status (No. 12)
- Sound muting (No. 13)
- Track Log recording/playback indicator (No. 14)
- Cursor menu (No. 15)
- Current street (No. 16)
- Travel and Route data (No. 17)
- Distance to next turn (No. 18)
- Next street / Next settlement (No. 19)
- Approaching next turn (No. 20)
- Current speed limit (No. 21)
- GPS Data screen
- GPS data displayed
- GPS connection indicator
- GPS data quality indicator
- Time synchronization
- GPS configuration (Detect and Config.)
- Route Information screen
- Route data displayed (for destination and via points)
- Route line
- Distance Left
- Method
- Time Left
- Estimated Arrival
- Destination / Via point
- Warning icons
- Fit to screen
- Parameters
- Menu
- Find tab
- Quick tab
- Zoom & Tilt (switch)
- Daylight & Night Modes (switch)
- Manage POI (Points of Interest)
- Manage built-in POI visibility
- Manage My POI
- Popup Information (switch)
- Manage Track Logs
- Route tab
- Recalculate
- Recalculate
- Drop Next Via Point / Delete Route
- Bypass
- Cancel
- Delete
- Itinerary
- Display modes
- Show
- Avoid
- Fly Over
- Fast Fly Over
- Lifelike simulation
- Edit
- Info
- Main button
- Speed cameras
- Camera types
- Fixed cameras
- Mobile cameras
- Built-in cameras
- Section control cameras
- Controlled traffic direction
- Speed limit checked
- Add a new camera or edit an existing one
- Change the settings of the camera warning
- TMC (Traffic Message Channel)
- List of TMC messages
- TMC control center
- Selected FM radio station
- Exclude selected station
- Show excluded stations
- Sorts events by distance / type
- Use traffic information
- Recalculate to avoid traffic
- Find
- Main menu Find buttons (Address, Favorites, POI, History)
- Selection by tapping the map
- Using the Find menu
- Find an Address, Street, Intersection or City
- Selecting the city, state and country to search in
- Selecting a new settlement to search in
- Changing the state (Australia and USA only)
- Changing the country
- Selecting a house number or the midpoint of the street
- How to select an intersection instead of a house number
- An example for a full address search
- Find in History
- Find Coordinates
- Find a POI
- Find one of the Favorites (Home/Work)
- Settings
- General settings
- Safety Mode
- Automatic Night Colors
- Speed Warning Options
- Speeding tolerance
- Alternative speed limit
- Alternative speeding tolerance
- Enable Speed Camera Warning
- Speed Camera Options
- Audible Warning
- Visible Warning
- Set Favorite Destinations
- Route Recalculation
- Automatic
- Disabled
- Display Orientation
- Sound settings
- Master sound volume/switch
- Voice guidance volume/switch
- Key sound volume/switch
- Dynamic Volume
- Attention Tone
- Route parameter settings
- Route
- Shortest
- Fastest
- Economical
- Vehicle
- Road types to include/exclude
- Unpaved Roads
- Motorways
- Ferries
- U-turns
- Permit needed
- Toll Roads
- Cross-border Planning
- Language & Units
- Program language
- Voice language
- Units
- Set Date & Time Format
- Advanced settings
- Cockpit settings
- 3D in Cockpit mode (and track-up orientation)
- Cockpit screen layout
- Backlight settings
- Power management
- Backlight always on
- Use device settings
- Smart powersave
- Brightness
- User data management
- Backup Data
- Restore Data
- Clear Data
- Reset Advanced Settings
- Map options
- Daylight / Night color profile
- Show Street Labels
- Textured Polygons
- Smart Zoom
- Enable Smart Zoom
- Enable Overview mode
- Keep position on road (Lock-on-Road)
- About screen
- Manual GPS configuration
- Protocol
- Port
- Baud rate
- Troubleshooting guide
- I cannot find the Greenarrow that would show my location. Navigation does not start.
- The GPS is connected, sending valid position data, yet I cannot see the Greenarrow that would show my position.
- The Green arrow shows my location, but I cannot see the route (Orange or red line), and no voice instructions are announced.
- I cannot see the Lock button on the screen, yet the map is not rotated during driving.
- Creating a multi-point route I have tapped the 'Route To' button once for each destination but only the last one appears in the list, all previous points have disappeared.
- The speaker icon shows MioMap is not muted yet I hear no voice guidance.
- I enabled the speed warning as soon as I bought the product but I have just been fined for speeding because MioMap failed to warn me.
- I would like to create a new POI during navigation (Cockpit screen) but there is no Add POI button in the Cursor menu.
- I would like to create a new POI but there are others near its location, and the new menu point (POI) opens the list of POI instead of creating a new one.
- Glossary
Brand : MIO
Model : DigiWalker P350
Category : Digital Personal Assistant