
Komplete Kontrol S61 - Keyboard NATIVE INSTRUMENTS - Free user manual and instructions
Find the device manual for free Komplete Kontrol S61 NATIVE INSTRUMENTS in PDF.


| Product Type | Keyboard Controller |
| Brand | Native Instruments |
| Model | Komplete Kontrol S61 |
| Number of Keys | 61 |
| Connectivity | USB 2.0, MIDI In/Out (5-pin), Sustain and Expression pedal inputs (1/4") |
| Power Supply | Included external power adapter |
| Display | 8 LCD displays above knobs, 2 touch strips (Pitch and Modulation) |
| Key Features | Browser, Perform Panel (scales, chords, arpeggiator), Light Guide, Control Section with 8 knobs, Transport Section, Host Control, MIDI Mode, Native Map |
| Software | Komplete Kontrol software (standalone and VST/AU/AAX plug-in), Controller Editor |
| System Requirements | Windows 7/8, Mac OS X 10.8/10.9, USB 2.0 port, Komplete 9 or higher recommended |
| Maintenance | Clean with a dry, soft cloth; avoid moisture and liquids |
| Safety | Use only the included power adapter; do not expose to water or extreme temperatures |
| General Information | Integrated music production studio with automatic parameter mapping via Native Map; supports all Komplete instruments |
Frequently Asked Questions - Komplete Kontrol S61 NATIVE INSTRUMENTS
User questions about Komplete Kontrol S61 NATIVE INSTRUMENTS
0 question about this device. Answer the ones you know or ask your own.
Ask a new question about this device
Download the instructions for your Keyboard in PDF format for free! Find your manual Komplete Kontrol S61 - NATIVE INSTRUMENTS and take your electronic device back in hand. On this page are published all the documents necessary for the use of your device. Komplete Kontrol S61 by NATIVE INSTRUMENTS.
USER MANUAL Komplete Kontrol S61 NATIVE INSTRUMENTS
natural_image
3D rendering of a modern piano keyboard with control knobs and keyboard shortcuts (no readable text or symbols)Manual

The information in this document is subject to change without notice and does not represent a commitment on the part of Native Instruments GmbH. The software described by this document is subject to a License Agreement and may not be copied to other media. No part of this publication may be copied, reproduced or otherwise transmitted or recorded, for any purpose, without prior written permission by Native Instruments GmbH, hereinafter referred to as Native Instruments.
“Native Instruments”, “NI” and associated logos are (registered) trademarks of Native Instruments GmbH.
Ableton is a trademark of Ableton AG.
Mac, Mac OS, GarageBand, Logic, iTunes and iPod are registered trademarks of Apple Inc., registered in the U.S. and other countries.
Windows, Windows Vista and DirectSound are registered trademarks of Microsoft Corporation in the United States and/or other countries.
All other trade marks are the property of their respective owners and use of them does not imply any affiliation with or endorsement by them.
Document authored by: Gustav Sto. Tomas, Nicolas Sidi
Software version: 1.0 (01/2011)
Special thanks to the Beta Test Team, who were invaluable not just in tracking down bugs, but in making this a better product.
NATIVE INSTRUMENTS GmbH
© NATIVE INSTRUMENTS GmbH, 2014. All rights reserved.
Table of Contents
1 Welcome to KOMPLETE KONTROL ....11
1.1 Where to Start? 11
1.2 Manual Conventions 13
1.3 System Requirements 15
2 Basic Concepts ....17
2.1 KOMPLETE KONTROL and KOMPLETE KONTROL S-SERIES 17
2.1.1 The Browser and the Navigate Section 18
2.1.2 The Perform Panel and the Perform Section 19
2.1.3 The Light Guide 20
2.1.4 The Control Section and KOMPLETE Instrument Parameters 22
2.1.5 The Transport Section and Your Host Application 23
2.2 Adjusting the KOMPLETE KONTROL Software Interface 24
2.2.1 Showing/Hiding the Browser 24
2.2.2 Showing/Hiding the Perform Panel 24
2.2.3 Selecting Instrument Views 25
2.3 Stand-Alone and Plug-in Mode 29
2.3.1 Differences between Stand-Alone and Plug-in Mode 30
2.3.2 Switching Instances 31
2.3.3 Configuring Your Host Application 32
2.4 MIDI Mode 34
2.5 Preferences 34
2.5.1 Preferences – Library Page 35
2.5.2 Preferences – Hardware Page 39
2.6 Audio and MIDI Settings 43
2.6.1 Audio and MIDI Settings – Audio Page 43
2.6.2 Audio and MIDI Settings – Routing Page 45
2.6.3 Audio and MIDI Settings – MIDI Page 46
2.7 Connecting External MIDI Equipment to KOMPLETE KONTROL S-SERIES 47
2.8 Incoming and Outgoing MIDI 48
2.8.1 Incoming MIDI and Host Automation 48
2.8.2 Outgoing MIDI and Host Control 49
2.8.3 MIDI Mode 49
2.9 Native Map 50
2.9.1 Automatically Assigning Controls via Native Map 50
2.10 Controlling Parameters via MIDI and Host Automation 50
2.10.1 Recording Automation 51
2.11 Using Pedals with KOMPLETE KONTROL S-SERIES 54
3 Quick Start 56
3.1 First Steps 57
3.1.1 Opening the Browser 57
3.1.2 Finding and Loading an Instrument Preset 59
3.2 Controlling KOMPLETE Instruments 68
3.2.1 Controlling Instrument Parameters 68
3.2.2 More than Eight Parameters: Switching Parameter Pages 68
3.3 Using the Perform Features: Scale, Arp, and the Light Guide 69
3.3.1 Selecting a Scale 69
3.3.2 Playing Chords 70
3.3.3 Playing Arpeggiated Chords 71
3.4 What's Next? 72
4 KOMPLETE KONTROL Software Overview 74
4.1 Software Interface Overview 75
4.2 Header 76
4.3 Browser 78
4.4 Instrument Area 79
4.4.1 Default View 81
4.4.2 Additional View 81
4.4.3 Edit View 83
5 KOMPLETE KONTROL Software Browser 85
5.1.2 Browsing the Library vs. Browsing Your Hard Disks 87
5.2 Searching and Loading Files from the Library 88
5.2.1 Overview of the Library Pane 88
5.2.2 Choosing Between Factory and User Content 91
5.2.3 Selecting a Product Category, a Product, and a Bank 91
5.2.4 Selecting Type and Mode Tags 97
5.2.5 Performing a Text Search 102
5.2.6 Using the Result List 102
5.3 Additional Browsing Tools 104
5.3.1 Displaying File Information 106
5.4 Editing the Files' Tags and Properties 106
5.4.1 Attribute Editor Basics 107
5.4.2 The BANK Page 108
5.4.3 The TYPES and MODES Pages 109
5.4.4 The PROPERTIES Page 111
5.5 Loading and Importing Files from Your File System 112
5.5.1 Overview of the Files Pane 112
5.5.2 Using Favorites 114
5.5.3 Using the Location Bar 115
5.5.4 Navigating to Recent Locations 116
5.5.5 Using the Result List 117
5.5.6 Importing Files to the KOMPLETE Library 119
6 KOMPLETE KONTROL Software Perform Panel 121
6.1 Perform Panel Overview 122
6.2 A Note about Music Theory 127
6.2.1 Scales 127
6.2.2 Chords 127
6.2.3 Arpeggios 128
6.3 Scale Engine 128
6.4 Scale Parameters 129
6.4.1 Root Note 130
6.4.2 Scale Type 131
6.4.3 Key Mode 134
6.4.4 Chord Mode 138
6.4.5 Chord Type 140
6.5 Arpeggiator 143
6.6 Arp Parameters....144
6.6.1 Mode 144
6.6.2 Type 146
6.6.3 Rate 146
6.6.4 Sequence 148
6.6.5 Swing 149
6.6.6 Octaves 150
6.6.7 Dynamic 151
6.6.8 Gate 151
7 KOMPLETE KONTROL S-SERIES Keyboard 152
7.1 Keyboard Overview 152
7.2 MIDI Mode 155
7.2.1 Switching Controller Modes 155
7.2.2 Host Control in MIDI Mode 156
7.3 Host Control and the Transport Section 156
7.3.1 Transport Controls 158
7.3.2 Automatic Track Focus and the Navigate Section 160
7.3.3 Switching between KOMPLETE KONTROL Instances 162
7.4 Browsing and the Navigate Section 164
7.4.1 The BROWSE Button and the Browser 166
7.4.2 Selecting a Product and a Bank 171
7.4.3 Selecting Type and Mode Tags 176
7.4.4 Using the Result List 184
7.5 Control Section 185
7.5.1 Control Section Controls 186
7.5.2 Native Map 187
7.5.3 Controlling Instrument Parameters with the Control Section 188
7.5.4 Controlling the Perform Features with the Control Section 193
7.6 Touch Strips 194
7.6.1 Pitch Strip 195
7.6.2 Modulation Strip 199
7.7 The Light Guide 202
7.7.1 KOMPLETE Instrument Mapping 202
7.7.2 Perform Feature Mapping 204
8 KOMPLETE KONTROL S-SERIES Perform Functions 205
8.1 PERFORM Section Overview 206
8.1.1 SCALE Button Functions 206
8.1.2 ARP Button Functions 207
8.2 SCALE 207
8.3 SCALE Parameters 208
8.3.1 SCALE and Root Note 208
8.3.2 Scale Type 210
8.3.3 KEY MODE 213
8.3.4 CHORD 217
8.3.5 Chord Type 218
8.4 ARP 221
8.5 Using ARP with a Sustain Pedal 222
8.6 ARP Parameters 222
8.6.1 MAIN 223
8.6.2 Type 225
8.6.3 RHYTHM 225
8.6.4 SEQUENCE 227
8.6.5 SWING 228
8.6.6 OCTAVES / OTHER 229
8.6.7 DYNAMIC 230
8.6.8 GATE 230
9.1 Troubleshooting 232
9.1.1 The KOMPLETE KONTROL Software Won't Start 232
9.1.2 No Output from Your KOMPLETE Instrument 232
9.1.3 Latency Issues 233
9.1.4 The KOMPLETE KONTROL Software Crashes 233
9.1.5 Updates 234
9.2 Getting Help 234
9.3 Support Channel Videos 234
9.3.1 Knowledge Base 235
9.3.2 Technical Support 235
9.3.3 Registration Support 236
9 Troubleshooting – Getting Help 232
9.3.4 User Forum 236
Index 237
1 Welcome to KOMPLETE KONTROL
Thank you for choosing KOMPLETE KONTROL!
KOMPLETE KONTROL and its dedicated keyboard—the KOMPLETE KONTROL S-SERIES—is a tightly integrated music production studio that gives you absolute control over the instruments in your KOMPLETE library.
KOMPLETE KONTROL lets you browse your KOMPLETE instruments in an intuitive way and play them according to a vast amount of selectable scales and chords. You can also control your host software with the KOMPLETE KONTROL S-SERIES keyboard, and customize the functions of the touch strips, knobs and buttons according to your needs utilizing the included Controller Editor application. We hope you enjoy this fantastic instrument as much as we do. Now let's get going!
—The team at Native Instruments
1.1 Where to Start?
KOMPLETE KONTROL provides you with many information sources. The main documents are meant to be read in the following sequence:
1. Komplete Kontrol Setup Guide
- Komplete Kontrol Manual (this document)

The whole documentation set is available in PDF format and located within the KOMPLETE KONTROL installation folder on your hard disk. You can also access these documents from the Help menu in the Application Menu Bar or from the Help submenu in the KOMPLETE KONTROL menu.

Please check the Service Center or the Native Instruments website regularly for up-to-date and localized versions of these documents. You can start the Service Center by selecting Launch Service Center from the Help menu in the Application Menu Bar or from the Help submenu in the KOMPLETE KONTROL menu.

Please check the Service Center or the Native Instruments website regularly for up-to-date and localized versions of these documents. You can start the Service Center by selecting Launch Service Center from the Help menu in the Application Menu Bar or from the Help submenu in the KOMPLETE KONTROL S-SERIES menu.
Additional documentation sources provide you with details on more specific topics:
- KOMPLETE KONTROL S-SERIES Ableton Live Setup document
- Controller Editor Manual
Hereafter is a quick description of each of these documentation sources.
Your First Stop: the Setup Guide
The Setup Guide will guide you through the software and hardware installation of KOMPLETE KONTROL and KOMPLETE KONTROL S-SERIES, from the very beginning to the first sound coming through your speakers.
First read the Setup Guide. After reading the Setup Guide and following its instructions, KOMPLETE KONTROL and your KOMPLETE KONTROL S-SERIES keyboard should be up and running. Then proceed with this Komplete Kontrol Manual to get more familiar with KOMPLETE KONTROL.
Komplete Kontrol Manual
This Komplete Kontrol Manual provides you with a comprehensive description of all KOMPLETE KONTROL software and KOMPLETE KONTROL S-SERIES hardware features.
KOMPLETE KONTROL S-SERIES Ableton Live Setup
To get the most of your KOMPLETE KONTROL S-SERIES when using it to control your host software, ensure you are running a compatible version of the host. To enable combined use of Ableton Live and KOMPLETE KONTROL S-SERIES, Ableton Live 9.1.4 is required. In addition to this, further configuration is necessary. A detailed guide for setting up Ableton Live for use with KOMPLETE KONTROL S-SERIES is available as a PDF file in the Host Integration Files subfolder of the Komplete Kontrol installation folder on your hard disk. It can also be found here: http://www.native-instruments.com/en/support/knowledge-base/show/2643/
Controller Editor Manual
Besides using your KOMPLETE KONTROL S-SERIES keyboard together with its dedicated KOMPLETE KONTROL software, you can also use it as a powerful and highly versatile MIDI controller to pilot any other MIDI-capable application or device. This is made possible by the Controller Editor software, a little application that allows you to precisely define all MIDI assignments for your KOMPLETE KONTROL S-SERIES keyboard. The Controller Editor should have been installed during the KOMPLETE KONTROL installation procedure. For more information on this, please refer to the Controller Editor Manual available as a PDF file in the Documentation subfolder of the Controller Editor installation folder on your hard disk.
Other Online Resources
If you are experiencing problems related to your Native Instruments product that the supplied documentation does not cover, there are several ways of getting help:
- Knowledge Base
- User Forum
- Technical Support
- Registration Support
You will find more information on these in chapter 9 , Troubleshooting – Getting Help.
1.2 Manual Conventions
This section introduces you to the signage and text highlighting used in this manual. This manual uses particular formatting to point out special facts and to warn you of potential issues. The icons introducing these notes let you see what kind of information is to be expected:

Whenever this exclamation mark icon appears, you should read the corresponding note carefully and follow the instructions and hints given there if applicable.

This light bulb icon indicates that a note contains useful extra information. This information may often help you to solve a task more efficiently, but does not necessarily apply to the setup or operating system you are using; however, it's always worth a look.
Furthermore, the following formatting is used:
- Text appearing in (drop-down) menus (such as Open..., Save as... etc.) and paths to locations on your hard disk or other storage devices is printed in italics.
- Text appearing elsewhere (labels of buttons, controls, text next to checkboxes etc.) is printed in blue. Whenever you see this formatting applied, you will find the same text appearing somewhere on the screen.
- Text appearing on displays of the keyboard is printed in light grey. Whenever you see this formatting applied, you will find the same text on a controller display.
- Text appearing on labels of the keyboard is printed in orange. Whenever you see this formatting applied, you will find the same text on the controller.
- Important names and concepts are printed in bold.
- References to keys on your computer's keyboard you'll find put in square brackets (e.g., "Press [Shift] + [Enter]").
▶ Single instructions are introduced by this play button type arrow.
→ Results of actions are introduced by this smaller arrow.
Naming Convention
Throughout the documentation we will refer to KOMPLETE KONTROL S-SERIES as the keyboard and KOMPLETE KONTROL as the software installed on your computer.
Button Combinations and Shortcuts on Your Keyboard
Most instructions will use the “+” sign to indicate buttons that must be pressed simultaneously, starting with the button indicated first. E.g., an instruction such as:
"Press SHIFT + PLAY" means:
- Press and hold SHIFT.
- While holding SHIFT, press PLAY and release it.
- Release SHIFT.
Unlabeled Knobs on the KOMPLETE KONTROL S-SERIES Keyboard
The knobs above the displays on your KOMPLETE KONTROL S-SERIES keyboard do not have labels.

The unlabeled knobs on the KOMPLETE KONTROL S-SERIES keyboard
For better reference, we applied a special formatting here: throughout the document, the elements are capitalized and numbered, so the knobs above the displays are written Knob 1 to Knob 8. E.g., whenever you see an instruction such as “Turn Knob 2 to increase the value,” you’ll know it’s the second knob from the left above the displays.
1.3 System Requirements
For KOMPLETE KONTROL and KOMPLETE KONTROL S-SERIES to fully function as indented, your system needs to meet the following requirements.
- Windows 7 or Windows 8
- Mac OS X 10.8 or 10.9
- USB 2.0 or higher for KOMPLETE KONTROL S-SERIES (cable included)
- Power supply for KOMPLETE KONTROL S-SERIES (adapter included)
KOMPLETE
KOMPLETE KONTROL is optimized for use with KOMPLETE 10 and KOMPLETE 10 ULTIMATE. For full features set, KOMPLETE 9 or higher is required. System requirements for KOMPLETE 10 and KOMPLETE 10 ULTIMATE:
- Windows 7 or Windows 8, Intel Core 2 Duo or AMD Athlon 64 X2
- Mac OS X 10.7, 10.8 or 10.9, Intel Core 2 Duo
- 4 GB RAM (6 GB recommended for large KONTAKT instruments)
Supported Host Applications
For some of the advanced host integration features of KOMPLETE KONTROL to function as intended, your host application must be compatible. The following Knowledge Base article gives you an overview of the features that are available in each of the most commonly used DAWs:
http://www.native-instruments.com/en/support/knowledge-base/show/2765/
For the latest information on KOMPLETE KONTROL compatibility with third-party software, visit: www.native-instruments.com/komplete-kontrol-system-requirements
2 Basic Concepts
This chapter will introduce you to KOMPLETE KONTROL's main elements and explain how they relate to one another. You will also learn how to set up your audio interface and how to connect MIDI devices.

Before reading this chapter it is strongly recommended that you read the KOMPLETE KON-TROL Setup Guide.
2.1 KOMPLETE KONTROL and KOMPLETE KONTROL S-SERIES
KOMPLETE KONTROL is the combination of the KOMPLETE KONTROL software with its quick browsing experience and powerful performance abilities, and the versatile KOMPLETE KONTROL S-SERIES keyboard's tactility—both fully integrated with the instruments of Native Instruments KOMPLETE.
KOMPLETE KONTROL and each area of its software interface correspond directly to the hardware sections of your KOMPLETE KONTROL S-SERIES keyboard. Adjusting instrument parameters from the knobs on your keyboard also adjusts the corresponding controls in the software. You can see the software controls move in real-time whenever you turn your hardware knobs, swipe the touch strips, or switch button states on and off.
Via KOMPLETE KONTROLS's browser you can load any KOMPLETE instrument and even search for specific types of sounds and presets, e.g. "soundscapes" or "percussion."
When you load a KOMPLETE instrument inside KOMPLETE KONTROL, you instantly get access to the instrument's controls from the KOMPLETE KONTROL S-SERIES keyboard. The knobs, displays, and touch strips on the keyboard are automatically mapped to the parameters of the loaded KOMPLETE instrument via Native Instruments' own unique Native Map protocol.
KOMPLETE KONTROL's Perform Panel lets you generate and play back a multitude of scales, chords, and arpeggios simply by pressing a key on your KOMPLETE KONTROL S-SERIES keyboard. By mapping the keyboard's keys to a scale, you can ensure that you'll always stay in key as well as learn to play new and interesting types of music.
The LEDs in the Light Guide give you visual feedback in real time, letting you know what keys are active and which notes are being played back. You can even follow the Light Guide when you are playing back a MIDI note pattern from a host application.
- For an overview of how KOMPLETE KONTROL and KOMPLETE KONTROL S-SERIES integrate with each other, continue reading below.
- For a quick start to get you going with KOMPLETE KONTROL S-SERIES, see chapter ↑3, Quick Start.
- For a detailed description of the KOMPLETE KONTROL software, see chapter ↑4, KOMPLETE KONTROL Software Overview and onward.
- For a detailed description of the KOMPLETE KONTROL S-SERIES keyboard, see chapter ↑7, KOMPLETE KONTROL S-SERIES Keyboard and onward.
Corresponding Features
In the following sections we outline the KOMPLETE KONTROL software and the KOMPLETE KONTROL S-SERIES keyboard and give you an overview of how they relate to each other and to the instruments in your KOMPLETE library.
2.1.1 The Browser and the Navigate Section
The browser is where you access your KOMPLETE library with all its instruments. You can search, edit, tag, arrange, and load your files from the KOMPLETE KONTROL software, but also use the NAVIGATE section on your KOMPLETE KONTROL S-SERIES keyboard to call up an on-screen overlay displaying the browser. This way you can also search, filter, and load your KOMPLETE instruments using only the hardware controls, which is great e.g. for live performance situations.
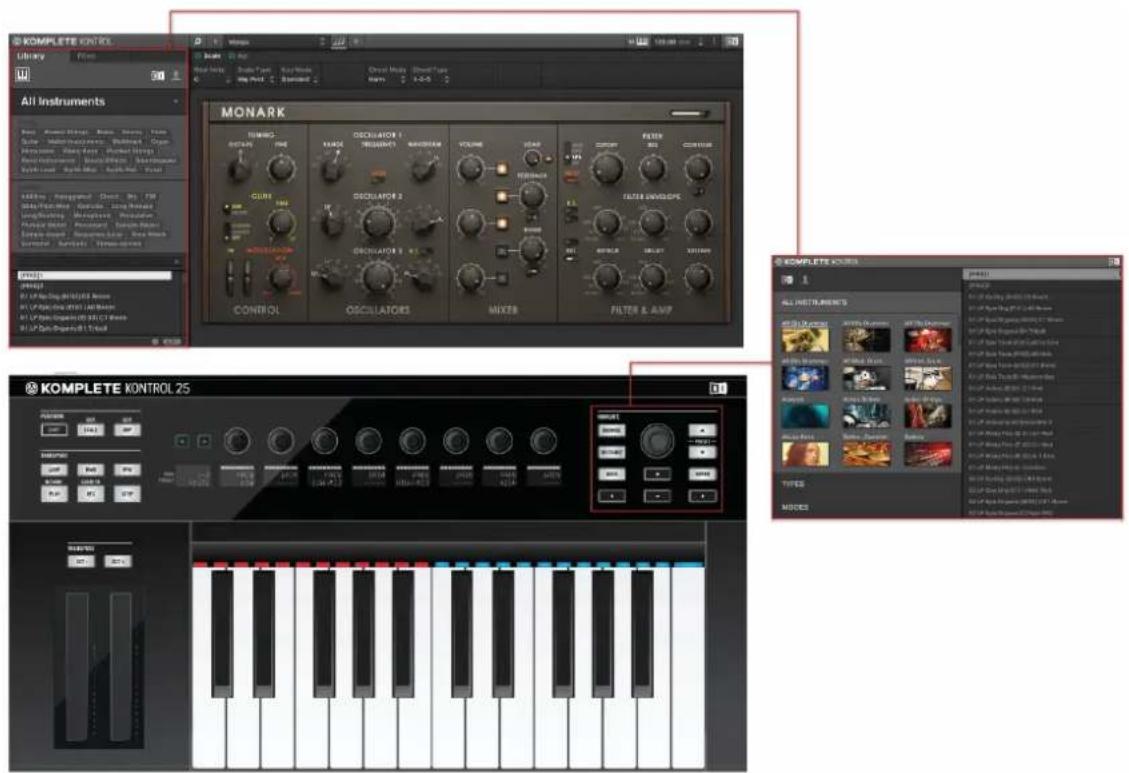
The browser at the left side of the KOMPLETE KONTROL software interface and the browser displayed by the on-screen overlay, called up from the NAVIGATE section of the KOMPLETE KONTROL S-SERIES keyboard (S25 depicted).
2.1.2 The Perform Panel and the Perform Section
The Perform Panel near the top of the KOMPLETE KONTROL software interface gives you controls for generating scales and chords, and playing arpeggios using your KOMPLETE instruments as sound source. The same parameters can also be accessed from the PERFORM section in the upper left corner of your KOMPLETE KONTROL S-SERIES keyboard. The perform parameters are then mapped to the knobs and the displays on the keyboard, letting you edit the scales and arps using the hardware controls.
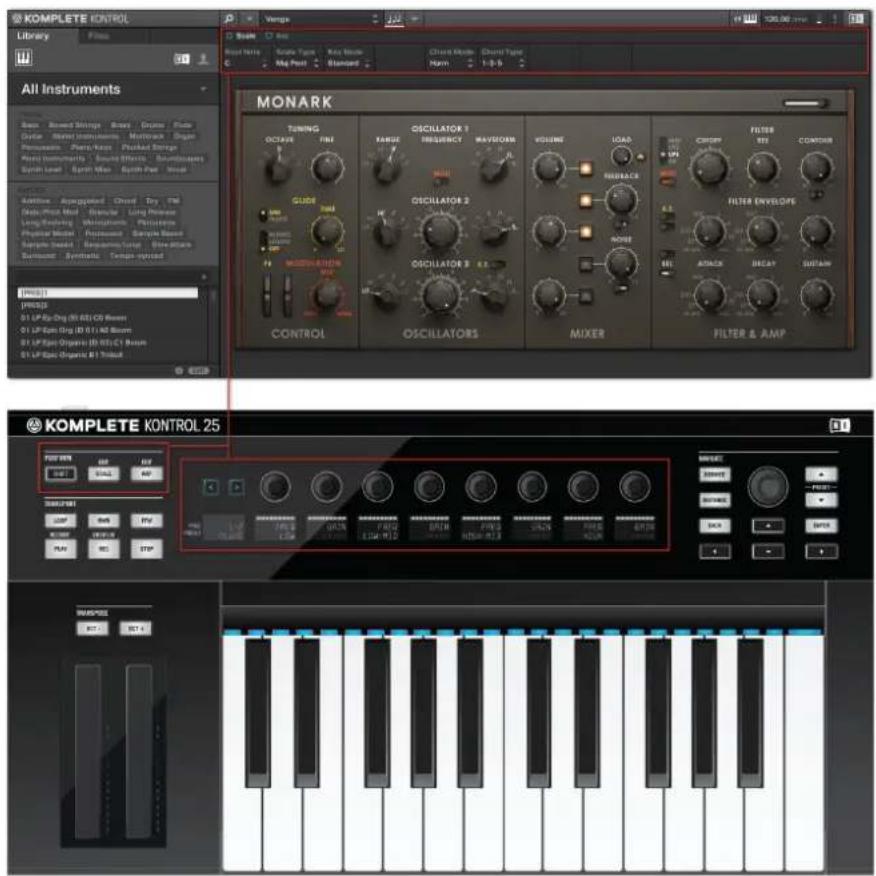
The Perform Panel in the KOMPLETE KONTROL software with the corresponding controls of KOMPLETE KONTROL S-SERIES' PERFORM section mapped to the knobs and displays
2.1.3 The Light Guide
The settings of the perform parameters are instantly reflected by the LEDs of the Light Guide—located just above the keypad—effectively letting you know what keys belong to the scale selected in the Perform Panel (software) or PERFORM section (keyboard) by switching the LEDs on and off. When you press an unlit key, KOMPLETE KONTROL will instead play back the
nearest lit key, ensuring you are always in key and within the scale. The Light Guide also gives you visual feedback when you play back incoming MIDI note patterns from your host sequencer.
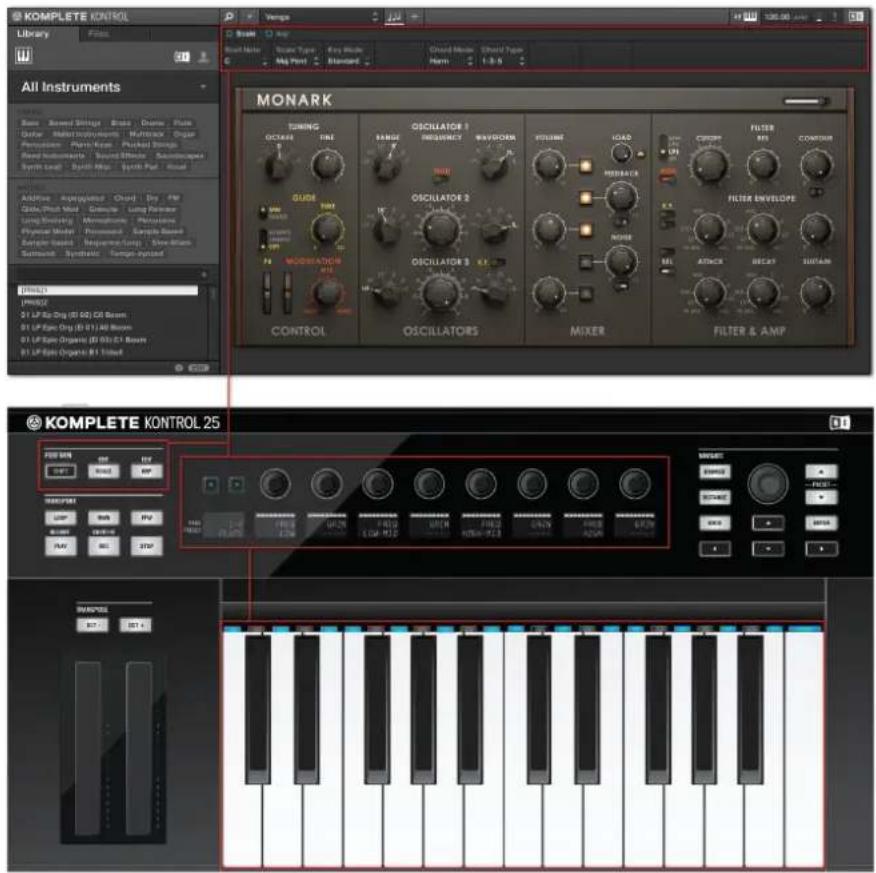
The Light Guide reflects the settings of the perform parameters by switching the LEDs on or off to display the selected scale (C major).
2.1.4 The Control Section and KOMPLETE Instrument Parameters
The touch strips, knobs, and displays on the KOMPLETE KONTROL S-SERIES keyboard are automatically mapped to the controls and parameters of any loaded KOMPLETE instrument via Native Instruments' unique integration mapping protocol Native Map. No further MIDI assignments are necessary: Just load an instrument from the browser and start playing!
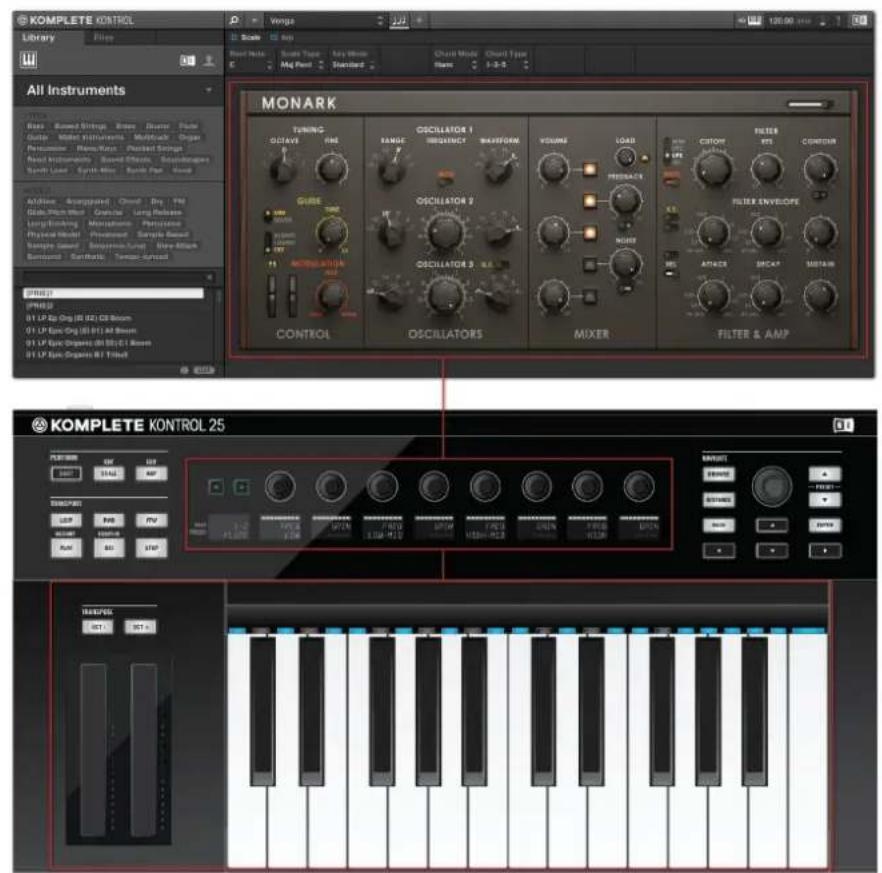
MONARK loaded in KOMPLETE KONTROL—the touch strips, knobs, and displays on KOMPLETE KONTROL S-SERIES are automatically assigned to control the instrument.
2.1.5 The Transport Section and Your Host Application
Controlling your host application from the KOMPLETE KONTROL S-SERIES keyboard is a great way to keep your workflow going without needing to grab for the computer mouse and can be very helpful in live performance situations. The TRANSPORT section on the far left and the arrow buttons in the NAVIGATE section on the right are both used to select and record arm tracks in your DAW, so you can play and record notes from your keyboard. For detailed information on how controlling your host from the KOMPLETE KONTROL S-SERIES, see section ↑7.3, Host Control and the Transport Section.
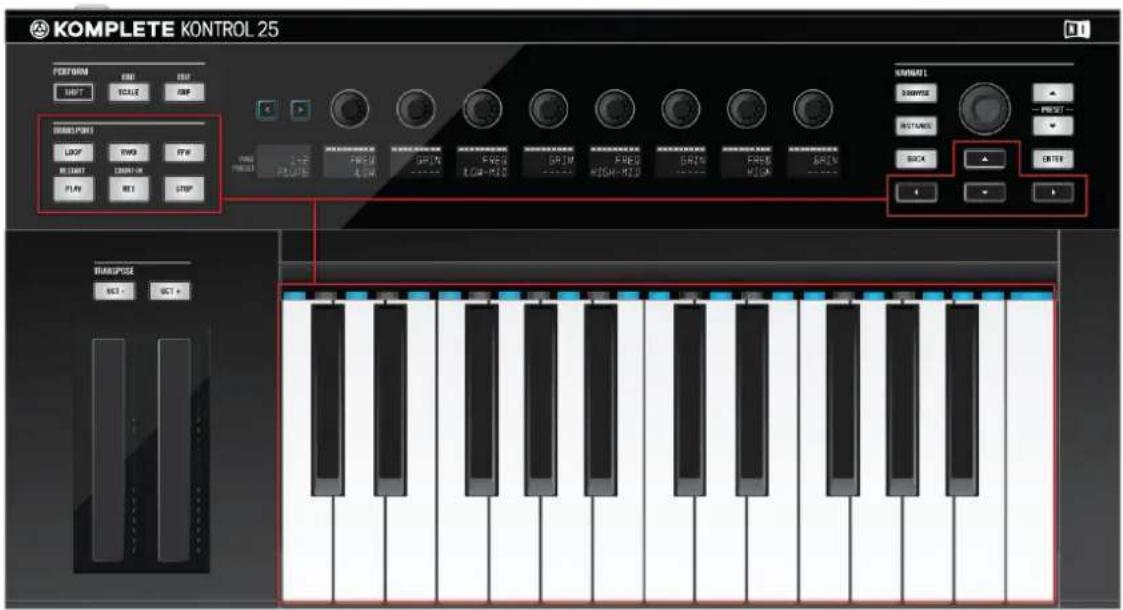
The TRANSPORT section and the NAVIGATE buttons let you control your host application from the KOMPLETE KON-TROL S-SERIES.

For information on how to configure your host application for use with external MIDI hardware, refer to the documentation of your DAW.
2.2 Adjusting the KOMPLETE KONTROL Software Interface
The KOMPLETE KONTROL software user interface is very flexible. You can choose what to display and what not, allowing you to focus on your workflow. This section shows you how to adjust the KOMPLETE KONTROL GUI to suit your needs.
2.2.1 Showing/Hiding the Browser
▶ Click the browser button (with the magnifier symbol) in the header to show and hide the browser. You can also select Browser from the View menu in the application menu bar or from the View submenu in the KOMPLETE KONTROL menu.
The browser button in the header

In stand-alone mode, you can also show/hide the browser from your computer keyboard via the [B] key.
2.2.2 Showing/Hiding the Perform Panel
▶ Click the Perform Panel button (with the three-notes symbol) in the header to show and hide the Perform Panel. You can also select Perform Panel from the View menu in the application menu bar or from the View submenu in the KOMPLETE KONTROL menu.
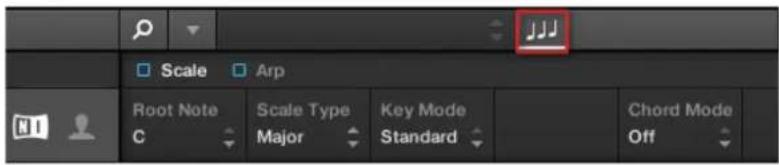
The Perform Panel button in the header

In stand-alone mode, you can also show/hide the Perform Panel from your computer keyboard via the [P] key.
2.2.3 Selecting Instrument Views
Once you have loaded a KOMPLETE instrument from the browser, it appears in the instrument area of the KOMPLETE KONTROL software. Most instruments come equipped with more than one view, giving you access to another set of controls or letting you edit certain features in finer detail. The three possible instrument views are described below.
To switch between the instrument views, click View in the application menu bar or the View submenu of the KOMPLETE KONTROL menu and select Default View, Additional View, or Edit View.
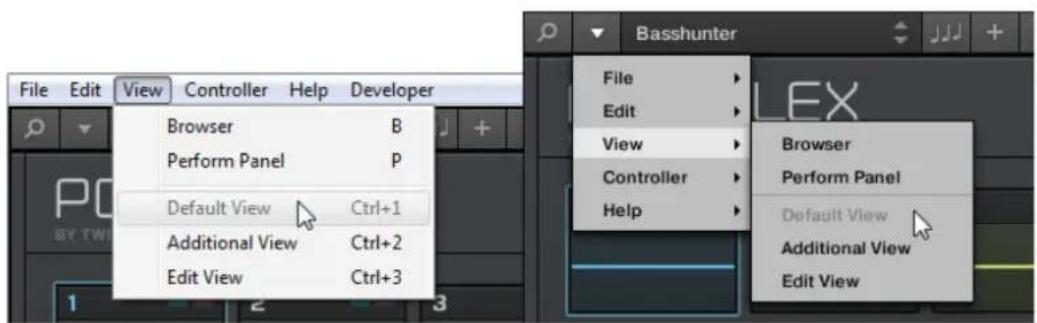
Instrument views in the View menu of the application menu bar (Windows depicted), and in the View submenu of the KOM- PLETE KONTROL menu.

The available views may vary with the loaded instrument.

All instrument parameters can be controlled at all time from the KOMPLETE KONTROL S-SERIES keyboard, regardless of the selected instrument view in the KOMPLETE KONTROL software.
Default View
The default view is the view that first appears when you load an instrument from the browser. It gives you access to some of the most important features of each KOMPLETE instrument with an easy-to-use interface.
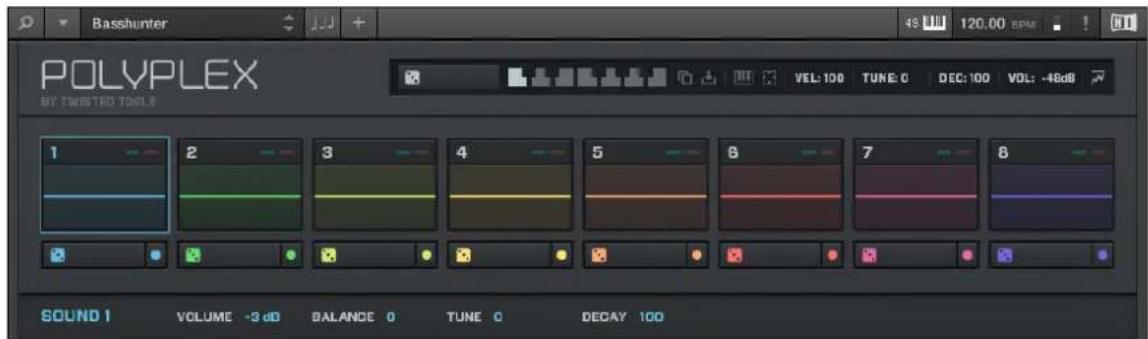
POLYPLEX in default view
Additional View
Most KOMPLETE instruments have more parameters than can be displayed at once in small surface and therefore come with a second, additional view. The additional view can give you access to detailed edit controls or to a completely different set of controls altogether depending on the loaded instrument.
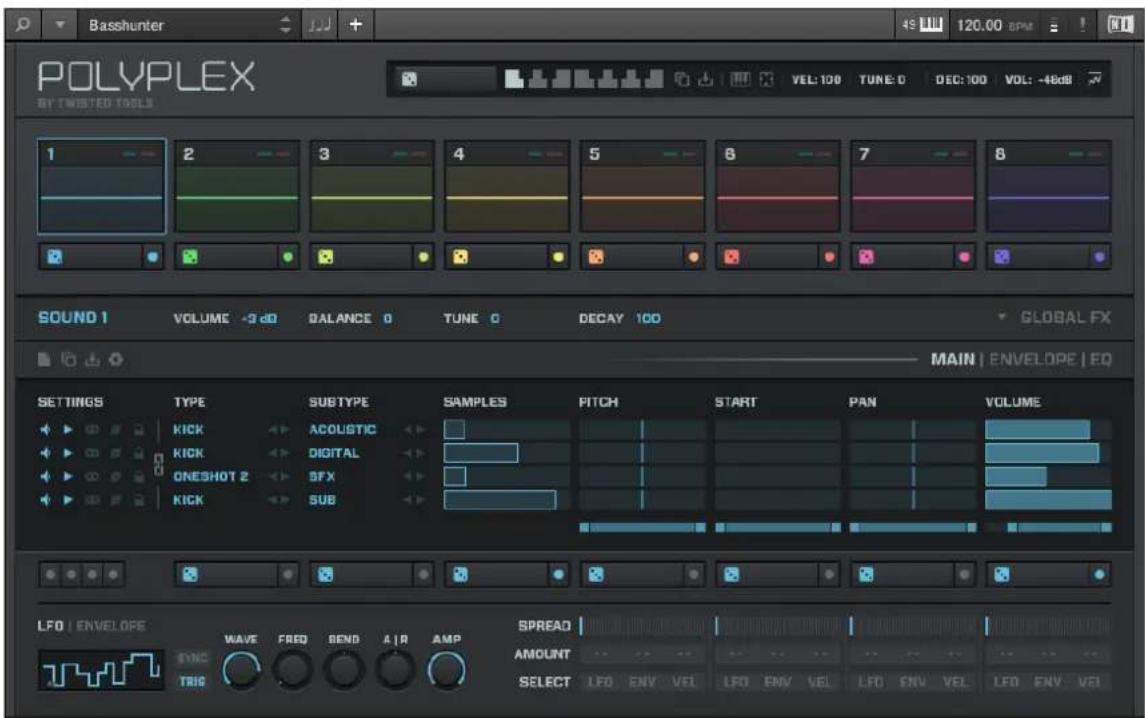
POLYPLEX in additional view
▶ To switch to the additional view, click the + button in the KOMPLETE KONTROL header.
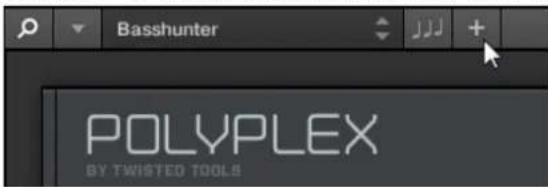
Clicking it again will return the KOMPLETE instrument to default view.
Edit View
You also have the possibility to open any KOMPLETE instrument that can be loaded and played by either the KONTAKT or REAKTOR players in edit view. Use the edit view to access all the flexible controls and features you would normally have when using KONTAKT or REAKTOR in stand-alone mode.
To switch to the edit view, click Edit View in the View submenu of the KOMPLETE KONTROL menu.
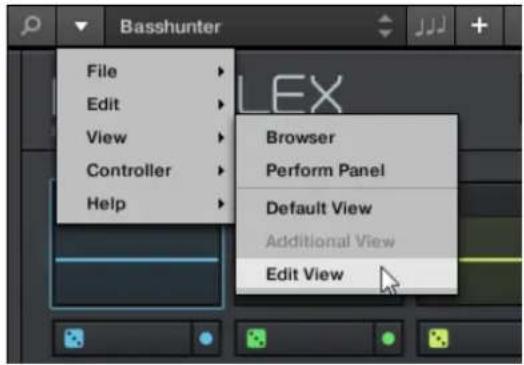

Edit view is only available for instruments powered by KONTAKT or REAKTOR.

Edit view enables you to access files that cannot be loaded from the KOMPLETE KONTROL browser, e.g. KONTAKT Multis which can be loaded from the KONTAKT browser in edit view.
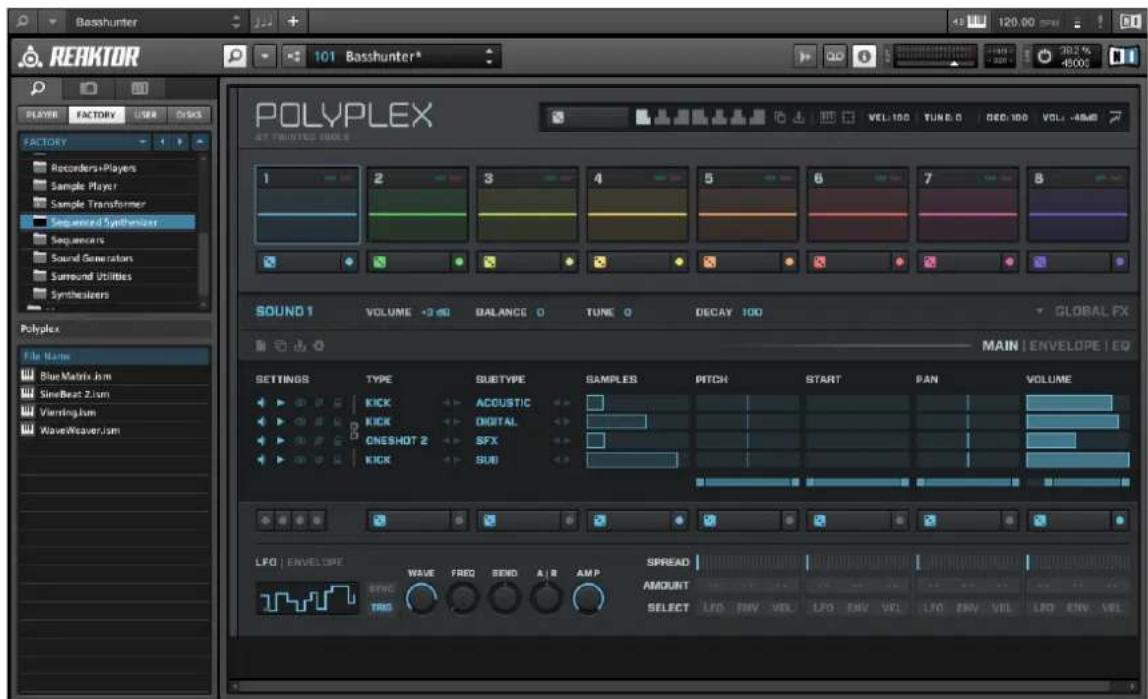
POLYPLEX in edit view
2.3 Stand-Alone and Plug-in Mode
You can run the KOMPLETE KONTROL software as a stand-alone application or integrate it into your favorite Digital Audio Workstation (or DAW, in short) by loading it as a plug-in. The KOMPLETE KONTROL software is available in the VST, Audio Unit, and AAX plug-in formats. For further information on plug-in compatibility and for a detailed description of how to use plug-ins in your host, please refer to the documentation included with your host software. If you did not install the plug-ins when installing the KOMPLETE KONTROL software, please refer to the Setup Guide available from the documentation folder in the KOMPLETE KONTROL software installation folder.

You cannot record MIDI in stand-alone mode. For information on audio and MIDI routing, see section 2.6, Audio and MIDI Settings.

For information on how to load KOMPLETE KONTROL as a VST, AAX or AU plug-in, refer to the documentation of your host application.
2.3.1 Differences between Stand-Alone and Plug-in Mode
Transport Functions and Navigate Controls
When KOMPLETE KONTROL is used as a plug-in within a host sequencer software (e.g., Cu-base or Pro Tools), the transport functions and the navigate controls on the KOMPLETE KONTROL S-SERIES keyboard can be used to control your host application. For example, you can switch tracks in your DAW, record arm them, and play back your recordings, all from your keyboard. For more information, see section ↑7.3, Host Control and the Transport Section.

When using KOMPLETE KONTROL S-SERIES in MIDI mode, you can do this even when no instance of KOMPLETE KONTROL is running.
When KOMPLETE KONTROL is used as a plug-in within a host sequencer software (e.g., Cu-base or Logic), KOMPLETE KONTROL receives its MIDI clock exclusively from the host application: you cannot modify the tempo of your host project within the KOMPLETE KONTROL plug-in itself—it is synchronized to your host's transport functions and tempo settings. As a direct consequence, when KOMPLETE KONTROL is used as a plug-in the tempo field is grayed out and inactive in the KOMPLETE KONTROL header.
Audio and MIDI Handling
When KOMPLETE KONTROL is used in stand-alone mode, it directly communicates with your audio and MIDI interface. You can select which physical audio/MIDI ports have to be used on your interface, and configure crucial audio settings like the sample rate. All this is done via the Audio and MIDI Settings panel (for more information on this, please refer to ↑2.6, Audio and MIDI Settings).
- On the contrary, when KOMPLETE KONTROL is used as a plug-in within a host application, the communication with your audio and MIDI interfaces is managed by the host—the KOMPLETE KONTROL plug-in only communicates with the host.

For all details on the audio and MIDI configuration of your host application, please refer to its documentation.
Multiple Plug-in Instances
When you are using KOMPLETE KONTROL as a plug-in within a host application, you can open multiple KOMPLETE KONTROL instances. Actually, you can load as many instances of KOMPLETE KONTROL as your computer and your host application can handle CPU-wise. In contrast to the stand-alone application, they are always tempo synced to the host. In plug-in mode you can also record automation for KOMPLETE KONTROL or KOMPLETE instrument parameters from your host. To learn more, have a look at chapter ↑2.10, Controlling Parameters via MIDI and Host Automation and ↑7.3.3, Switching between KOMPLETE KONTROL Instances.
2.3.2 Switching Instances
When two or more instances of the KOMPLETE KONTROL software are running (e.g., as plugins on different tracks of your DAW), you must choose which instance you want to control from your KOMPLETE KONTROL S-SERIES keyboard. You can do this both from your keyboard and in the software.
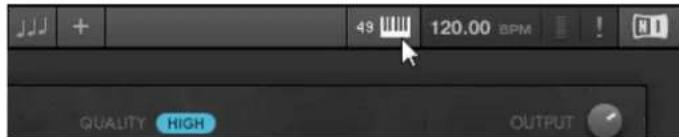
Click the Connect button to connect the keyboard to that instance.
Switching Instance from the Software
To select your keyboard from a particular KOMPLETE KONTROL instance, click the Connect button (keyboard icon) in the KOMPLETE KONTROL header of that instance.
Switching Instance from the Keyboard
To select a particular KOMPLETE KONTROL instance from your keyboard:

Depending on the compatibility and version number of your host application, switching between instances of KOMPLETE KONTROL may not function as described.

For use of KOMPLETE KONTROL S-SERIES with Ableton Live, refer to the KOMPLETE KONTROL S-SERIES Ableton Live Setup document available as a PDF file in the Host Integration Files subfolder of the Komplete Kontrol installation folder on your hard disk.
To select a KOMPLETE KONTROL instance from your keyboard, use the NAVIGATE up and down buttons on your KOMPLETE KONTROL S-SERIES to select the track containing the instance in your DAW. The KOMPLETE KONTROL instance loaded on that track is automatically selected.
For detailed information about selecting tracks and KOMPLETE KONTROL instances from your keyboard, see section 7.3 , Host Control and the Transport Section.
2.3.3 Configuring Your Host Application
Though KOMPLETE KONTROL can be used stand-alone, most of the time you will want to load it as a plug-in in a host application. Before using the KOMPLETE KONTROL S-SERIES keyboard to control your host application, there are a few things to be aware of. To learn more about the necessary configuration steps, continue reading below.

For detailed information on how to set up your DAW for fully integrated use with KOMPLETE KONTROL and KOMPLETE KONTROL S-SERIES, refer to the documentation of your host application.
Configuring Your Host for Use with KOMPLETE KONTROL S-SERIES
For some of KOMPLETE KONTROL's most advanced host integration features to function as intended, your host application must support these features. For an overview of which host integration features that are supported by which host applications, refer to the following Knowledge Base article: http://www.native-instruments.com/support/knowledge-base/show/2765/.
At the time of writing this manual, the following DAWs support full functionality of KOM- PLETE KONTROL S-SERIES:
- Ableton Live 9.1.4 (further configuration required, see Knowledge Base article below)
- Apple Logic X 10.0.7
- Steinberg Cubase 7.5.1
- Steinberg Nuendo 6.0.7

For information on how to configure your host application for use with external MIDI hardware, refer to the documentation of your DAW.
For detailed guides to help to you set up and configure your host application for use with KOM- PLETE KONTROL S-SERIES, refer to these Knowledge Base articles:
- Setting up Ableton Live for KOMPLETE KONTROL: http://www.native-instruments.com/support/knowledge-base/show/2643/
- Setting up Apple Logic for KOMPLETE KONTROL: http://www.native-instruments.com/support/knowledge-base/show/2787/
- Setting up Steinberg Cubase / Nuendo for KOMPLETE KONTROL: http://www.native-instruments.com/support/knowledge-base/show/2785/
Compatibility with Other Connected MCU Devices

If you have other MIDI devices using the MCU (Mackie Control Universal) protocol in your setup, then connecting and configuring the KOMPLETE KONTROL S-SERIES in your host can cause interference between the devices.
Depending on the host application of your choice, the following measures can be taken to avoid interference with other connected MCU devices. If you are using one of the supported hosts (as listed above):
To keep all KOMPLETE KONTROL S-SERIES' features intact except host integration features (i.e. host transport controls and automatic track focus) ensure you do not set up KOMPLETE KONTROL S-SERIES as an MCU control surface when configuring your host application. Doing so will allow you to use other MCU devices simultaneously.
To keep all KOMPLETE KONTROL S-SERIES' features intact—including host integration features (i.e. host transport controls and automatic track focus)—set up KOMPLETE KONTROL S-SERIES as an MCU control surface when configuring your host application. Doing so will however not allow you to use other MCU devices simultaneously.

For a detailed guide on using KOMPLETE KONTROL S-SERIES with other MCU devices, refer to the following Knowledge Base article: http://www.native-instruments.com/support/knowledge-base/show/2895/
2.4 MIDI Mode
Besides using your KOMPLETE KONTROL S-SERIES keyboard together with its dedicated KOMPLETE KONTROL software, you can also use it as a powerful and highly versatile MIDI controller to pilot any other MIDI-capable software application running on the computer it is connected to via USB as well as any other MIDI-compatible hardware.

The MIDI ports on KOMPLETE KONTROL S-SERIES' rear panel are only active when the keyboard is connected to your computer via USB.
Switching to MIDI Mode
To switch your keyboard between KOMPLETE KONTROL mode and MIDI mode:

Switching to MIDI mode via the INSTANCE button is only possible in stand-alone mode.
Controller Editor
The versatility of the MIDI mode is made possible by the Controller Editor software, an application that allows you to precisely define all MIDI assignments for your KOMPLETE KONTROL S-SERIES keyboard. The Controller Editor is installed during the KOMPLETE KONTROL installation procedure. For more information on this, please refer to the Controller Editor Manual available as a PDF file in the Documentation subfolder of the Controller Editor installation folder on your hard disk.
2.5 Preferences
The Preferences panel lets you specify various settings for KOMPLETE KONTROL.
To open the Preferences panel, click Preferences... in the Komplete Kontrol menu (Mac OS X) or Edit menu (Windows) of the application menu bar, or in the Edit submenu of the KOMPLETE KONTROL menu:
The following pages are available in the Preferences panel:
- Library: see ↑2.5.1, Preferences – Library Page.
- Hardware: see ↑2.5.2, Preferences – Hardware Page.
2.5.1 Preferences – Library Page
The Library page allows you to edit the locations of all KOMPLETE KONTROL library files (both factory and user) that appear in the Library pane of the Browser.

The Library pane of the Browser is described in section 5.2 , Searching and Loading Files from the Library.
▶ To display the Library page click the Library tab on the left of the Preferences panel.
At the top of the page, the Factory and User buttons allow you to switch between the Factory pane and the User pane.
Factory Pane
▶ To display the Factory pane, click the Factory button at the top of the Library page.
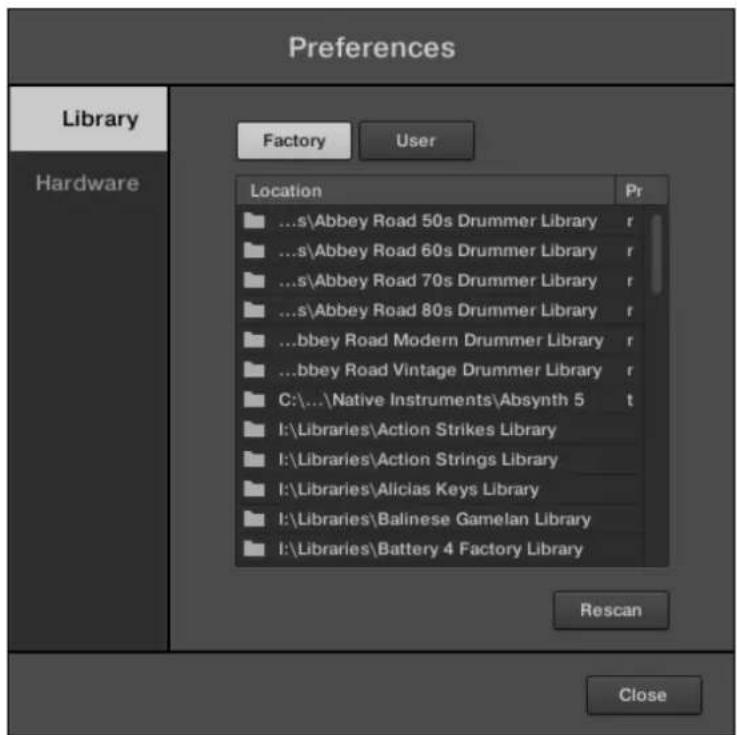
The Preferences panel – the Library page's Factory pane.
The Factory pane shows all factory libraries available. These libraries will appear in the Factory view of the Browser's Library pane.
| Element | Description |
| Location column | Shows the path of each library. If you have moved any library to another location on your computer, click the folder icon on the left of that library and select its new path. |
| Product column Shows the | name of each product. These names cannot be edited. |
| Rescan button | If you have made any change to a library (e.g., changed its location), select it in the list and click the Rescan button to rescan that library. |
User Pane
▶ To display the User pane, click the User button at the top of the Library page.
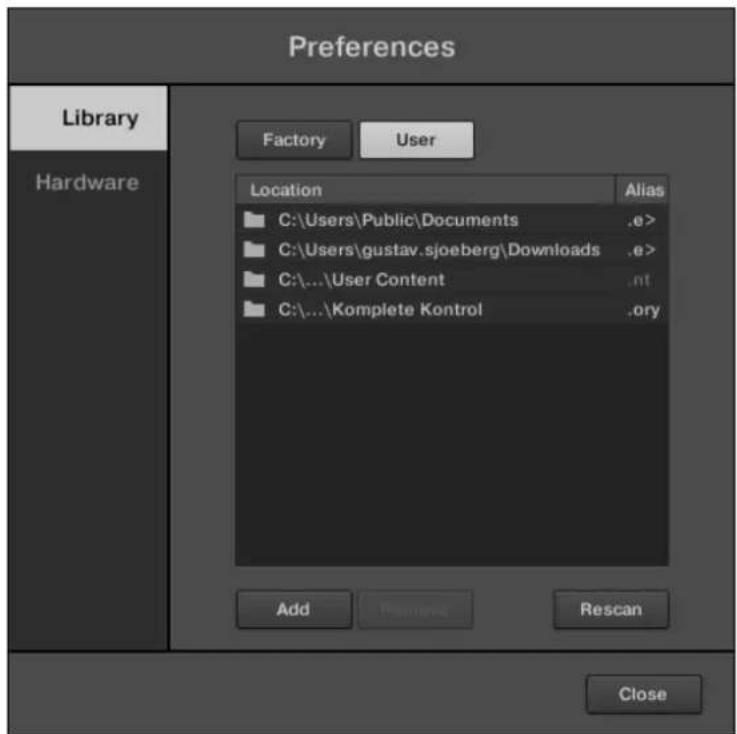
The Preferences panel – the Library page's User pane.
The User pane shows all user libraries currently used. These include KOMPLETE KONTROL's standard user directory as well as any other user directory you might have defined. These libraries will appear in the User view of the Browser's Library pane.
| Element Description | |
| Location column | Shows the path of each library. If you have moved any library to another location on your computer, click the folder icon on the left of that library and select its new path. |
| Alias column | Shows the alias stored for each library. Click an alias to edit it. Defining aliases for your user folders is not mandatory, but it can be of great help when working on different computers (see description below). After adding a location (see Add below), click the field in the new row and in the Alias column to set the alias for that new location. The alias of the default user folder, Native Instruments User Directory, cannot be edited — this is the location where all your user files will be stored by default. |
| Add button | Click Add to manually add directories to the user library. See below for more details. |
| Remove button | Click Remove to remove the selected user library. Files will only be removed from the KOMPLETE KONTROL Browser, not from your hard disk. |
| Rescan button | If you have made any change to a library (e.g., added/removed files), select it in the list and click the Rescan button to rescan that library. |

You can resize the Preferences panel at your convenience using the usual method on your operating system. You can also resize each column by clicking and dragging the limit between both column headers.
Adding Folders to the User Library
In the User pane of the Library page, you can add other folders to the user content of your KOMPLETE KONTROL library. To do this:
- Click Add at the bottom of the pane.
A folder selection dialog opens up.
- In the dialog, navigate to the desired folder on your computer and click OK (Choose on Mac OS X).
→ All KOMPLETE KONTROL-compatible files found in the selected folder are added to your user content in KOMPLETE KONTROL.

KOMPLETE KONTROL-compatible files include ens, rkplr, nrkt, nfm8, nabs, nki, nmsv, and nbkt.
Furthermore, the attributes (product/bank/sub-bank, type/subtype/mode tags, as well as properties) of all imported files will be retained.
By adding a folder to the user content of your KOMPLETE Library, you make their files available in the Browser's Library pane for quick searching and loading! For more information on how to use the Library pane of the Browser, please refer to section ↑5.2, Searching and Loading Files from the Library.

Paths to folders added via the IMPORT button in the Browser's Files pane will also show up here. The only difference between adding folders via the Add button in Preferences panel, described here, and via the IMPORT button in the Files pane of the Browser is that the latter allows you to directly tag the files as they are imported. See section ↑5.5.5, Using the Result List for more information on how to import folders via the Files pane.
Please note that the selected folder cannot contain, or be contained within, a folder already listed in the User or Factory pane. If KOMPLETE KONTROL detects such a folder as you press OK (Choose on Mac OS X) in the folder selection dialog, a Duplicate Location message appears: Click OK to return to the folder selection dialog and select another folder on your computer.
Removing Folders from the User Library
You can also remove any user folder from your library—except the default user content directory Native Instruments User Content.
2.5.2 Preferences – Hardware Page
The Hardware page enables you to customize how the keys react to your playing and to adjust the behavior of the touch strips, as well as switch the Light Guide on or off.
▶ To display the Hardware page click the Hardware tab on the left of the Preferences panel.
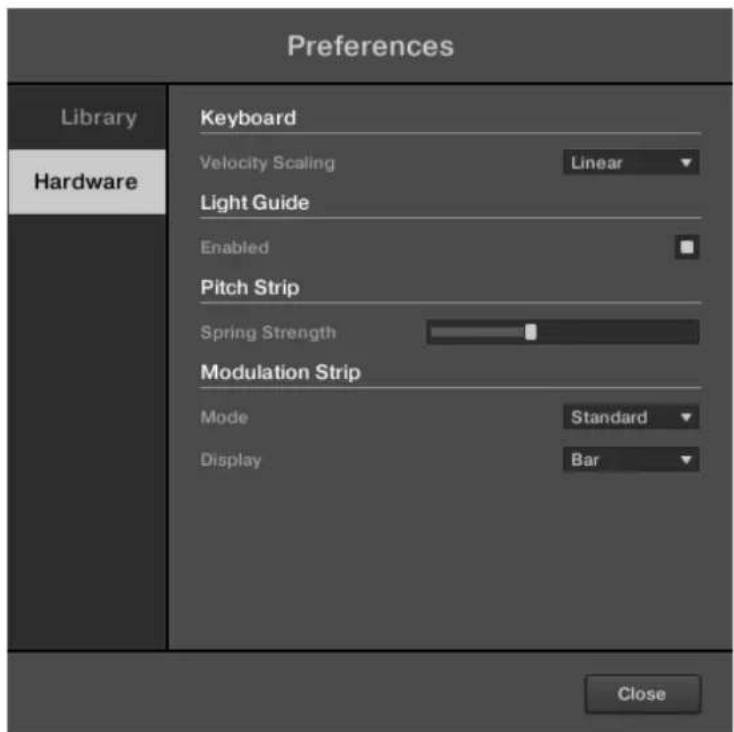
The Preferences panel – Hardware page, Standard mode.
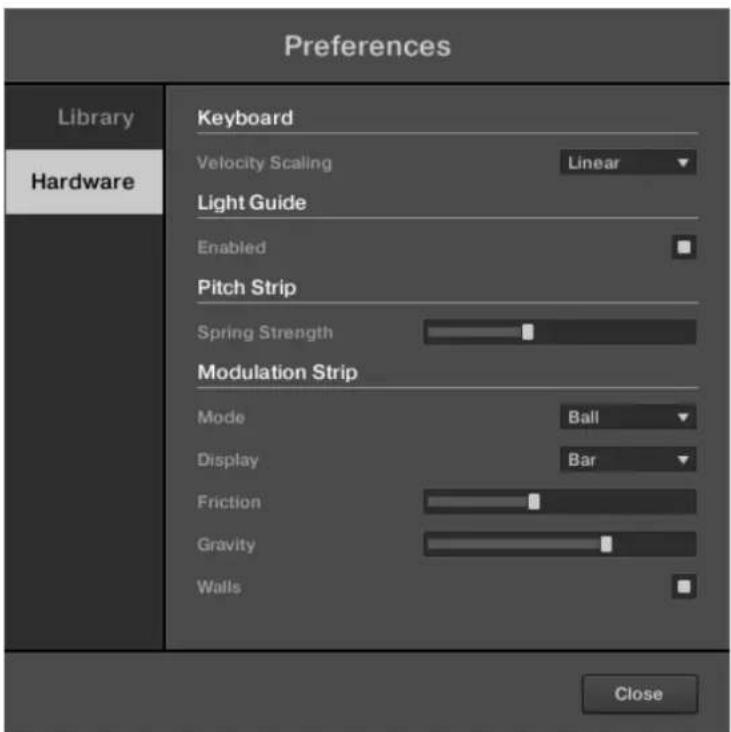
The Preference panel – Hardware page, Ball mode.
| Setting | Description |
| Keyboard | |
| Velocity Scaling Velocity Scaling | determines how your playing is translated into velocity values: starting from Soft 3 (a soft touch is enough to get a big velocity value) through Linear (default) to Hard 3 (you really have to press the key hard to get a big velocity value). |
| Light Guide | |
| Enabled Light Guide allows you to | switch the colored LEDs above the keypad on or off. The Light Guide visualizes MIDI patterns being played back from your host application as well as shows you the active keys in any scale from the Perform Panel. |
| Setting Description | |
| Pitch Strip | |
| Spring Strength Spring Strength affects how fast the pitch strip snaps back to its default value upon release: from very slow (fully left) to instantly (fully right). | |
| Modulation Strip | |
| Mode | Mode lets you select one of two behaviors for the modulation strip: Standard or Ball. In Standard mode, the value of modulation strip only changes when you touch it. In Ball mode, the modulation strip behaves like a physical object in space (e.g. a ball) and you can further define the behavior using the three extra parameters Friction, Gravity, and Walls. |
| Display Display lets you select one of two ways to display the current state of the modulation strip: Bar or Dot. Bar displays a bar of LEDs from the bottom of the strip to the current value (similar to a level meter); whereas Dot displays only the current value. | |
| Friction (Ball mode only) | Friction determines how fast the virtual ball decelerates and stops once you release the strip: from never stops (fully left) to stops instantly (fully right). |
| Gravity (Ball mode only) | Gravity determines how fast the virtual ball gravitates toward your finger, if you touch the strip again while the ball is still “bouncing.” |
| Walls (Ball mode only) | Walls determines whether the virtual ball bounces off the edges of the strip or wraps around it. |

For more information on the Light Guide, see section 7.7 , The Light Guide.

For more information on the touch strips, see section 7.6 , Touch Strips.

For information on the MIDI mode, please refer to the Controller Editor Manual.
2.6 Audio and MIDI Settings
When KOMPLETE KONTROL is running as a stand-alone application, the Audio and MIDI Settings panel allows you to configure the audio and MIDI hardware device(s) to use with KOMPLETE KONTROL along with the audio routing between your audio device and KOMPLETE KONTROL.
To open the Audio and MIDI Settings panel, select the Audio and MIDI Settings... entry from the Edit menu in the application menu bar (or from the Edit submenu in the KOMPLETE KONTROL menu).

When KOMPLETE KONTROL is running as a plug-in in a host application, its audio and MIDI configuration is managed by the host, and the Audio and MIDI Settings panel is not available. See section ↑2.3, Stand-Alone and Plug-in Mode for more information on using KOMPLETE KONTROL in a host environment.
The Audio and MIDI Settings panel contains three pages: Audio, Routing, and MIDI. Each page can be displayed by clicking the corresponding tab at the top.
2.6.1 Audio and MIDI Settings – Audio Page
The Audio page holds settings related to your audio interface.
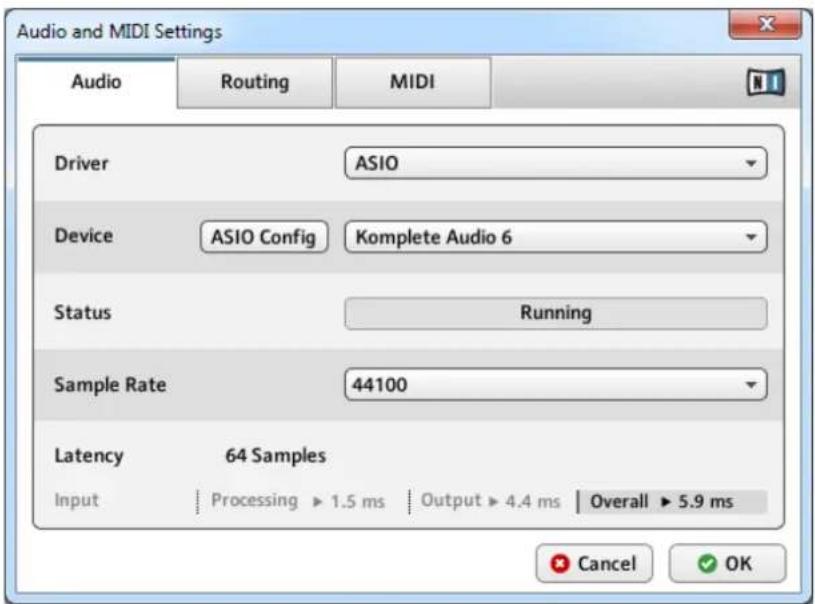
The Audio page of the Audio and MIDI Settings panel.
| Setting Description | |
| Driver Select your audio driver here. | |
| Device This allows you to choose from the available devices if you have connected more than one audio interface. | |
| Status This shows you whether your audio interface is currently running. | |
| Sample Rate This displays the selected sample rate of your audio interface. Please re-start KOMPLETE KONTROL after changing the sample rate. | |
| Latency | Mac OS X: This slider allows you to adjust the latency of your audio interface in samples. Lower values result in a more immediate playing response but are heavier on both the CPU and the audio driver, and may result in audible clicks and pops. Larger values are easier on the CPU, but introduce a larger latency (i.e., there may be a very small delay between when you hit a pad and when you actually hear it). You should therefore experiment with this setting so that it is as low as possible without overloading your CPU or introducing any audio artifacts.Windows: When using an ASIO driver, the Audio and MIDI Settings panel shows an ASIO Config button instead of the Latency slider. Click this button to open the settings window of the selected ASIO driver. |
2.6.2 Audio and MIDI Settings – Routing Page
The Routing page allows you to configure the connections between the virtual outputs of KOMPLETE KONTROL and the physical outputs of your audio interface.
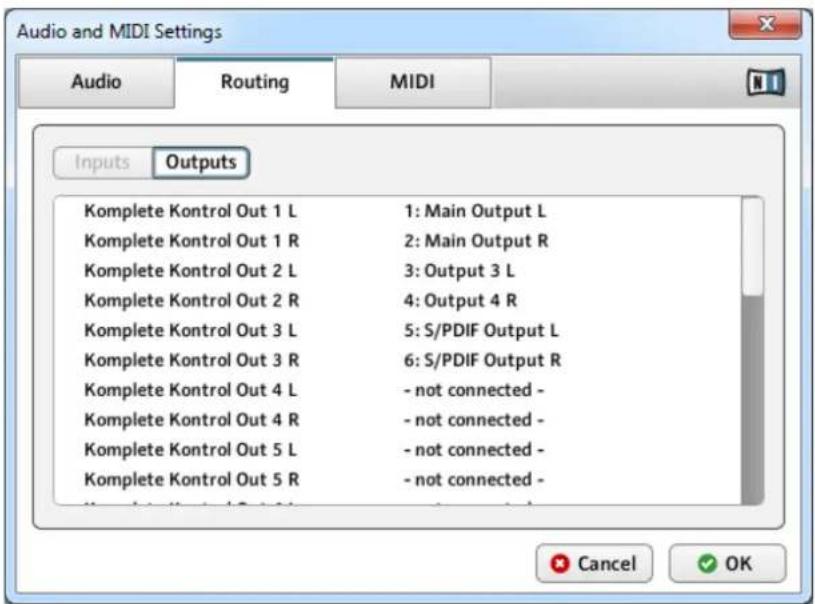
The Routing page of the Audio and MIDI Settings panel (entries may vary on your computer).
| Element Description | |
| Outputs | In Outputs, you will be presented with a list of the 16 stereo outputs from KOMPLETE KONTROL: In the right column, you can assign them to the outputs of your audio interface. Click the fields in the right column to select the desired outputs via a drop-down menu. |
2.6.3 Audio and MIDI Settings – MIDI Page
The MIDI page allows you to set up the MIDI input ports that you want to use with KOMPLETE KONTROL.
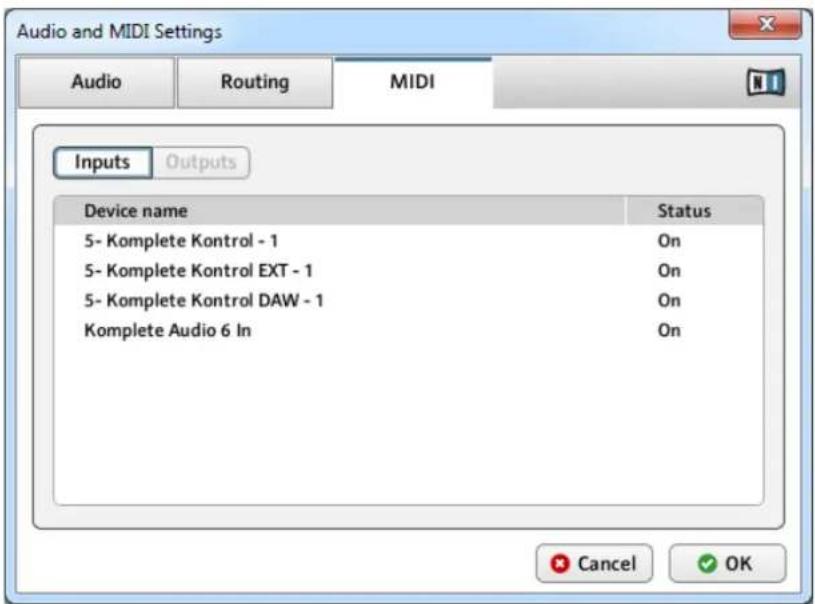
The MIDI page of the Audio and MIDI Settings panel (entries may vary on your computer).
| Element Description | |
| Inputs | Clicking Inputs displays a list of all the available MIDI inputs of your system. You can activate/deactivate each input by clicking the fields in the Status column, which displays the current status of the corresponding port. |
2.7 Connecting External MIDI Equipment to KOMPLETE KONTROL S-SERIES
You can integrate KOMPLETE KONTROL S-SERIES into your MIDI setup.

The MIDI sockets on the rear panel of the KOMPLETE KONTROL S-SERIES
To connect your external MIDI equipment:
- Hook it up to the KOMPLETE KONTROL S-SERIES keyboard's MIDI IN or MIDI OUT socket on the rear panel.
- If KOMPLETE KONTROL is running as a stand-alone application, activate the corresponding MIDI input and/or output(s) of your KOMPLETE KONTROL S-SERIES keyboard in the MIDI page of the Audio and MIDI Settings panel (see ↑2.6.2, Audio and MIDI Settings – Routing Page).
- If KOMPLETE KONTROL is running as a plug-in in a host application, the MIDI configuration is managed by the host (see sections ↑2.3, Stand-Alone and Plug-in Mode and ↑2.3.3, Configuring Your Host Application). Please refer to your host documentation to know how to configure MIDI in your host.

The 5-pin MIDI ports on KOMPLETE KONTROL S-SERIES' rear panel are only active when the keyboard is connected via USB to a computer that is running.
2.8 Incoming and Outgoing MIDI
KOMPLETE KONTROL provides you with flexible MIDI remote control and host automation abilities that can be used in many situations.
2.8.1 Incoming MIDI and Host Automation
KOMPLETE KONTROL and the KOMPLETE instruments you load inside it can be controlled via MIDI and the host (when KOMPLETE KONTROL is running as a plug-in):
- Triggering KOMPLETE instruments via MIDI notes: By default, incoming MIDI notes will trigger the loaded KOMPLETE instrument and will also be visually reflected by the Light Guide. For information on the MIDI settings, see section ↑2.6.2, Audio and MIDI Settings – Routing Page.
- Controlling parameters via host automation: You can control both KOMPLETE KONTROL and your loaded KOMPLETE instruments' parameters via host automation (when KOMPLETE KONTROL is running as a plug-in). This is described in section ↑2.10, Controlling Parameters via MIDI and Host Automation.
Receiving MIDI Clock
When you load KOMPLETE KONTROL as a plug-in in a host application, the tempo is automatically synced to host tempo. The tempo display in KOMPLETE KONTROL's header is grayed out and tempo is adjusted in the host.
2.8.2 Outgoing MIDI and Host Control
You can also send MIDI data from KOMPLETE KONTROL S-SERIES:
- Recording MIDI notes: When KOMPLETE KONTROL is running as a plug-in in a host environment, you can record your performance playing the keys of your KOMPLETE KONTROL S-SERIES as a MIDI pattern in your host application.
- Controlling the host application: You can control your host application from your KOMPLETE KONTROL S-SERIES keyboard by using the TRANSPORT and NAVIGATE sections. This is described in section ↑7.3, Host Control and the Transport Section.
2.8.3 MIDI Mode
Beyond controlling KOMPLETE KONTROL you can also use your KOMPLETE KONTROL S-SERIES keyboard in MIDI mode to assign and control any parameters you want via MIDI CC (see section ↑7.2, MIDI Mode).

For more information about assigning controls via MIDI, please refer to the Controller Editor Manual available as a PDF file in the Documentation subfolder of the Controller Editor installation folder on your hard disk
2.9 Native Map
You do not have to assign KOMPLETE KONTROL's parameters to MIDI messages in order to control and automate them via MIDI. Instead, KOMPLETE KONTROL has its own proprietary mapping system called Native Map that allows you to switch your keyboard on, load a KOMPLETE instrument in KOMPLETE KONTROL, and get instant access to its parameters via the knobs, displays, and touch strips on the KOMPLETE KONTROL S-SERIES keyboard.
2.9.1 Automatically Assigning Controls via Native Map
Immediately after you load a KOMPLETE instrument from the Browser, the instrument's parameters are automatically mapped to the eight knobs at the center of your KOMPLETE KON-TROL S-SERIES keyboard and to the two touch strips on the left-hand side. You do not need to step through any complicated configurations to map software and hardware controls to each other.
The mapping of each knob is reflected by its corresponding display. The two arrow shaped page buttons to the left of the knobs let you skip through all parameters of the loaded KOM-PLETE instrument while automatically mapping them to the eight knobs on your keyboard. The change in mapping is reflected by the displays, always informing you of the current mapping. For detailed information, see section ↑7.5, Control Section.
2.10 Controlling Parameters via MIDI and Host Automation
When you load KOMPLETE KONTROL as a plug-in into your host application, the parameters of the loaded KOMPLETE instrument that are currently mapped to the knobs and displays on KOMPLETE KONTROL S-SERIES also become available for automation from your host.
Which KOMPLETE KONTROL Parameters Can Be Automated?
All the parameters available for automation are found in the Perform Panel or in the loaded KOMPLETE instrument. You cannot automate the controls located in the Browser as they do not send MIDI and therefore cannot be found by your host application. This means that only parameters that are assigned to the knobs and displays on your KOMPLETE KONTROL S-SER-IES via either Native Map or MIDI CC can be automated.

For more information about assigning controls via MIDI, please refer to the Controller Editor documentation in the software installation folder on your hard disk
In turn, you can also use your KOMPLETE KONTROL S-SERIES to control your host application. This is described in section 7.3 , Host Control and the Transport Section.
2.10.1 Recording Automation
Many DAWs require that you have set transport record to on (see section ↑7.3.1, Transport Controls) in order to record automation, while others make use of dedicated automation controls.

For detailed information regarding automation recording in your DAW, refer to the documentation of your host software.
To record automation data in your host using KOMPLETE KONTROL, you can take the following measures:
On/Off Switches
To change the state of an on/off switch:
▶ Click the corresponding button with your computer mouse.
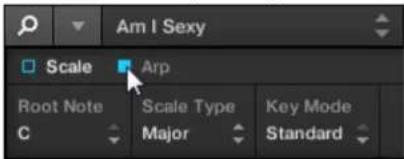
or:
▶ Turn the knob on your KOMPLETE KONTROL S-SERIES keyboard currently assigned to the corresponding parameter.
Drop-Down Menus
To select another entry from a drop-down menu:
▶ Click the corresponding menu with your computer mouse and select an entry.
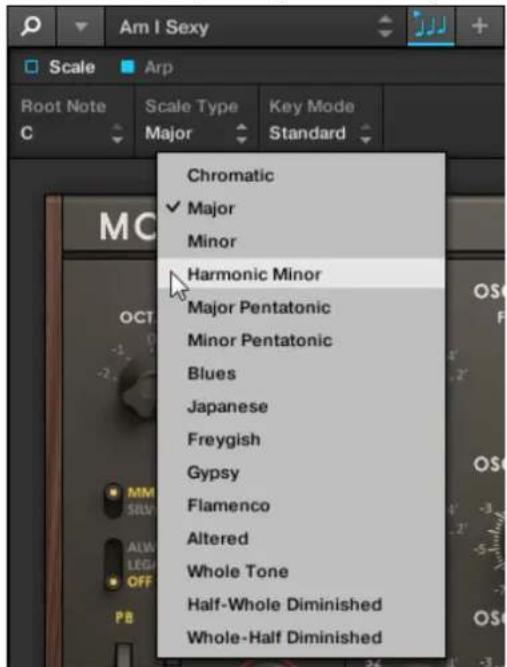
or:
▶ Turn the knob on your KOMPLETE KONTROL S-SERIES keyboard currently assigned to the corresponding parameter.
Drag Controls
To change the value of a drag control:
▶ Click and drag the corresponding drag control with your computer mouse.
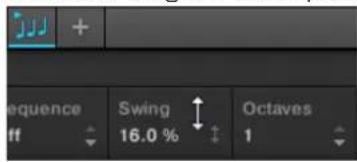
or:
▶ Turn the knob on your KOMPLETE KONTROL S-SERIES keyboard currently assigned to the corresponding parameter.
Some DAWs let you handle automation by using automation IDs that are mapped to specific parameters of the plug-in. KOMPLETE KONTROL comes with a predefined list of automation IDs that lets your host application find them automatically.

For detailed information regarding automation recording in your DAW, refer to the documentation of your host software.
Automation IDs for the Perform Panel
The following automation IDs are reserved for KOMPLETE KONTROL's perform parameters:
| Automation ID Parameter | |
| 000 Reserved for | Instance Recognition and Automatic Focus Follow |
| 001 Scale On / Off | |
| 002 Scale Root Note | |
| 003 Scale Type | |
| 004 Scale Key Mode | |
| 006 Chord Mode | |
| 007 Chord Type | |
| 008 Chord Position | |
| 009 Chord Voicing | |
| 026 Arp On / Off | |
| 027 Arp Mode | |
| 028 Arp Type | |
| 029 Arp Rate | |
| 030 Arp Sequence | |
| 031 Arp Swing | |
| 032 Arp Octaves | |
| 033 Arp Dynamic | |
| 034 Arp Gate | |

When configuring your own automation IDs, it is important you do not overwrite the NIKB00 ID, as this is used to recognize the KOMPLETE KONTROL S-SERIES keyboard in you host.
Automation IDs for KOMPLETE Instruments
The automation IDs 101-1194 are reserved for KOMPLETE instruments' automation parameters. This way, automation IDs previously used by e.g. KONTAKT or REAKTOR are remapped thus:
- KONTAKT or REAKTOR automation ID 000 is moved to KOMPLETE KONTROL automation ID 100.
- KONTAKT or REAKTOR automation ID 100 is moved to KOMPLETE KONTROL automation ID 200.
2.11 Using Pedals with KOMPLETE KONTROL S-SERIES
Your KOMPLETE KONTROL S-SERIES provides you two pedal inputs in the form of 1/4" sockets on its rear panel: SUSTAIN and EXPRESSION.

The pedal inputs on the rear panel of your keyboard
These sockets allow you to connect sustain and expression pedals in order to further refine your performance.
- SUSTAIN: Lets you connect a stereo footswitch to control the sustain of the notes you play. This is an on/off switch.
- EXPRESSION: Lets you connect an expression pedal to control e.g. velocity. This is a continuous control.
For information on how to assign the pedals via MIDI, refer to the Controller Editor Manual.
3 Quick Start
After you have followed the steps in the Setup Guide: finished the installation, connected your KOMPLETE KONTROL S-SERIES keyboard to your computer and to the power supply, and finally made the required configurations in your DAW and the KOMPLETE KONTROL preferences, you are ready to start playing music with KOMPLETE KONTROL. In this section we will show you some basic workflows and use cases to get you started.

This section describes the fine-tuned integration and use of KOMPLETE KONTROL and the KOMPLETE KONTROL S-SERIES keyboard. If you do not yet own a KOMPLETE KONTROL S-SERIES keyboard, continue reading in section 4 , KOMPLETE KONTROL Software Overview.
KOMPLETE KONTROL S-SERIES and MIDI Mode
When you switch on your KOMPLETE KONTROL S-SERIES keyboard, you will either notice a message on the displays reading PRESS BROWSE or be presented with various MIDI CC numbers, depending on whether you have entered KOMPLETE KONTROL mode or MIDI mode:
- If you first started the KOMPLETE KONTROL software on your computer and then switched on your KOMPLETE KONTROL S-SERIES, your keyboard will launch into KOMPLETE KONTROL mode. For information on KOMPLETE KONTROL mode, continue reading in section ↑3.1, First Steps. If instead you want to launch MIDI mode, press the INSTANCE button on your keyboard and select MIDI MODE from the appearing on-screen overlay.
- If you switched on your KOMPLETE KONTROL S-SERIES without first starting the KOMPLETE KONTROL software, your keyboard will launch into MIDI mode. To switch to KOMPLETE KONTROL mode, start the software from your computer. For information on switching between modes, see section ↑2.4, MIDI Mode.
- If you are using your KOMPLETE KONTROL S-SERIES as a MIDI controller to control your DAW without using the KOMPLETE KONTROL software, your keyboard is set to MIDI mode. For information on MIDI mode, see section ↑2.4, MIDI Mode.
3.1 First Steps
Once both the KOMPLETE KONTROL software and the KOMPLETE KONTROL S-SERIES keyboard are up and running, your first stop is the browser. For detailed information about the browser in the KOMPLETE KONTROL software, see section 5 , KOMPLETE KONTROL Software Browser.

This section assumes that you are running KOMPLETE KONTROL either in stand-alone mode or as a plug-in in a host application.
3.1.1 Opening the Browser
To open the browser and access your KOMPLETE library, press the BROWSE button on your KOMPLETE KONTROL S-SERIES keyboard. You find it to the right of the displays in the NAVIGATE section.
![KOMPLETE KONTROL ALL INSTRUMENTS [PRIS]1 [PRIS]2 01 LP Ep Org (El 02) C0 Boom 01 LP Epic Org (El 01) A0 Boom 01 LP Epic Organic (El 03) C1 Boom 01 LP Epic Organic B1 Tribull 01 LP Epic Tech (El 01) A0 LoTom 01 LP Epic Tech (El 02) A0 Kick 01 LP Epic Tech (El 03) C1 Boom 01 LP Epic Tech B1 Modern Ops 01 LP Indust (El 01) C1 Kick 01 LP Indust (El 02) C0 Kick 01 LP Indust (El 03) C1 Kick 01 LP Industrial A1 Indusdirty 3 01 LP Mang Pop (El 01) C1 Kick 01 LP Mang Pop (El 02) C1 Kick 01 LP Mang Pop (El 03) A-1 Kick 01 LP Mang Pop G1 ConSoul 02 LP Ep Org (El 02) C#0 Boom 02 LP Epic Org (El 01) A#0 Kick 02 LP Epic Organic (El 03) C#1 Boom 02 LP Epic Organic C2 Epic TKO TYPES MODES](/content/2026/05/761321/images/e67dac14d84f3a93a93ad62d099a734cf5ed224f9989468782dbf3cbf2c48c35.jpg)
The on-screen overlay displaying the browser

The appearance of the browser will vary with the installed content of your KOMPLETE library.
If you set up the correct plug-in folder during installation, all instruments in your KOMPLETE library should appear on your computer screen via the on-screen overlay. If you cannot find your KOMPLETE instruments, see section ↑2.5.1, Preferences – Library Page.
3.1.2 Finding and Loading an Instrument Preset
As browsing through your entire KOMPLETE KONTROL library can be time consuming—especially in a live performance situation—the browser comes equipped with some handy features to enhance your browsing experience, such as the TYPES and MODES filters. In this tutorial you will learn how to:
- Navigate the browser from your keyboard
- Filter the library using the TYPES and MODES filters
-
Select and load an instrument preset from the result list
-
To open the browser, press the BROWSE button.
![KOMPLETE KONTROL ALL INSTRUMENTS [PRIS]1 [PRIS]2 01 LP Ep Org (El 02) C0 Boom 01 LP Epic Org (El 01) A0 Boom 01 LP Epic Organic (El 03) C1 Boom 01 LP Epic Organic B1 Tribull 01 LP Epic Tech (El 01) A0 LoTom 01 LP Epic Tech (El 02) A0 Kick 01 LP Epic Tech (El 03) C1 Boom 01 LP Epic Tech B1 Modern Ops 01 LP Indust (El 01) C1 Kick 01 LP Indust (El 02) C0 Kick 01 LP Indust (El 03) C1 Kick 01 LP Industrial A1 Indusdirty 3 01 LP Mang Pop (El 01) C1 Kick 01 LP Mang Pop (El 02) C1 Kick 01 LP Mang Pop (El 03) A-1 Kick 01 LP Mang Pop G1 ConSoul 02 LP Ep Org (El 02) C#0 Boom 02 LP Epic Org (El 01) A#0 Kick 02 LP Epic Organic (El 03) C#1 Boom 02 LP Epic Organic C2 Epic TKO TYPES MODES](/content/2026/05/761321/images/091de609decf9053c8bc8b8df534e7118a28c61bd2d282a16aadcdbb0efb3100.jpg)
By default the factory content is selected. For detailed information on the user content, see section ↑5.2.2, Choosing Between Factory and User Content.

If you already know what instrument you want to load, you can scroll through the product icons using the Control encoder.
- To set focus to the TYPES filter, press the NAVIGATE down button.
![@ KOMPLETE KONTROL ALL INSTRUMENTS TYPES Bass Bowed Strings Brass Drums Flute Guitar Mallet Instruments Multitrack Organ Percussion Piano/Keys Plucked Strings Reed Instruments Sound Effects Soundscapes Synth Lead Synth Misc Synth Pad Vocal MODES [PRIS]1 [PRIS]2 01 LP Ep Org (El 02) C0 Boom 01 LP Epic Org (El 01) A0 Boom 01 LP Epic Organic (El 03) C1 Boom 01 LP Epic Organic B1 Tribull 01 LP Epic Tech (El 01) A0 LoTom 01 LP Epic Tech (El 02) A0 Kick 01 LP Epic Tech (El 03) C1 Boom 01 LP Epic Tech B1 Modern Ops 01 LP Indust (El 01) C1 Kick 01 LP Indust (El 02) C0 Kick 01 LP Indust (El 03) C1 Kick 01 LP Industrial A1 Indusdirty 3 01 LP Mang Pop (El 01) C1 Kick 01 LP Mang Pop (El 02) C1 Kick 01 LP Mang Pop (El 03) A-1 Kick 01 LP Mang Pop G1 ConSoul 02 LP Ep Org (El 02) C#0 Boom 02 LP Epic Org (El 01) A#0 Kick 02 LP Epic Organic (El 03) C#1 Boom 02 LP Epic Organic C2 Epic TKO](/content/2026/05/761321/images/da6e47f641bbcd7f69744b490a74fd5cb5d6b7b7b3aa13710b5cb25ca2a11f3a.jpg)
- To scroll to a type you want to use, turn the Control encoder.
![@ KOMPLETE KONTROL N1 ALL INSTRUMENTS TYPES Bass Bowed Strings Brass Drums Flute Guitar Mallet Instruments Multitrack Organ Percussion Piano/Keys Plucked Strings Reed Instruments Sound Effects Soundscapes Synth Lead Synth Misc Synth Pad Vocal MODES [PRIS]1 [PRIS]2 01 LP Ep Org (El 02) C0 Boom 01 LP Epic Org (El 01) A0 Boom 01 LP Epic Organic (El 03) C1 Boom 01 LP Epic Organic B1 Tribull 01 LP Epic Tech (El 01) A0 LoTom 01 LP Epic Tech (El 02) A0 Kick 01 LP Epic Tech (El 03) C1 Boom 01 LP Epic Tech B1 Modern Ops 01 LP Indust (El 01) C1 Kick 01 LP Indust (El 02) C0 Kick 01 LP Indust (El 03) C1 Kick 01 LP Industrial A1 Indusdirty 3 01 LP Mang Pop (El 01) C1 Kick 01 LP Mang Pop (El 02) C1 Kick 01 LP Mang Pop (El 03) A-1 Kick 01 LP Mang Pop G1 ConSoul 02 LP Ep Org (El 02) C#0 Boom 02 LP Epic Org (El 01) A#0 Kick 02 LP Epic Organic (El 03) C#1 Boom 02 LP Epic Organic C2 Epic TKO](/content/2026/05/761321/images/9ae2bc5d7469d70997d1613a23c995f1dc11c1941bcebad279ca0439ba411c25.jpg)
- To select that type, either press the Control encoder or the ENTER button.
![KOMPLETE KONTROL ALL INSTRUMENTS TYPES Bass Bowed Strings Brass Drums Flute Guitar Mallet Instruments Multitrack Organ Percussion Piano/Keys Plucked Strings Reed Instruments Sound Effects Soundscapes Synth Lead Synth Misc Synth Pad Vocal Airy Pad Basic Pad Bright Pad Chime Pad Chord Pad Deep Pad Dirty Pad Evolving Pad Layered Pad Other Pad MODES [PRIS]2 5th Bell 08-15 25 Lovely Nurses 80s Pad 1868 Recorded Sine 1999B 1999C 12047 A Peddie A Scanner Darkly A&D Pad Abandoned Future Abandoned Planet Abandoned Toyfactory Across The Pacific Ad Parnassum 2 Ad Parnassum Addictive Synth Adding It Up Additiv Pad Additivum](/content/2026/05/761321/images/87bbee5afff68ea62dc81a6da3ac88d8944b65858b4893d7c76269b8495b22c2.jpg)
The result list on the right side is filtered accordingly and the subtypes appear beneath the types. You can select a subtype to further filter the result list.
- To set focus to the MODES filter, press the NAVIGATE down button.
![@ KOMPLETE KONTROL ALL INSTRUMENTS TYPES Synth Pad MODES Additive Chord Dry FM Glide/Pitch Mod Granular Long Release Long/Evolving Monophonic Percussive Physical Model Processed Sample Based Sample-based Sequence/Loop Slow Attack Surround Synthetic Tempo-synced [PRIS]2 5th Bell 08-15 25 Lovely Nurses 80s Pad 1868 Recorded Sine 1999B 1999C 12047 A Peddie A Scanner Darkly A&D Pad Abandoned Future Abandoned Planet Abandoned Toyfactory Across The Pacific Ad Parnassum 2 Ad Parnassum Addictive Synth Adding It Up Additiv Pad Additivum](/content/2026/05/761321/images/2e34bd935b45f8a0cc31d44d64077056884d9bbbdfaa1d6dd7a6c01406482e39.jpg)
- To scroll to a mode you want to use, turn the Control encoder and then press it to select the mode.
![KOMPLETE KONTROL ALL INSTRUMENTS TYPES Synth Pad MODES Additive Chord Dry FM Glide/Pitch Mod Granular Long Release Long/Evolving Monophonic Percussive Physical Model Processed Sample Based Sample-based Sequence/Loop Slow Attack Surround Synthetic Tempo-synced [PRIS]2 80s Pad 12047 A Scanner Darkly A&D Pad Abandoned Future Abandoned Planet Abandoned Toyfactory Ad Parnassum 2 Ad Parnassum Addictive Synth Additivum Afx After Showdown Aftermath Afternoon Daydream Airborn Memories Airtight Container Ako Padz Alien Drone Alien Intimity Alien Nature](/content/2026/05/761321/images/85d37f63017a29945046fe253ff905242f2ad3e1d43615f793a6c74afb8a934c.jpg)
The result list on the right side is filtered accordingly.
- To set focus to the result list on the right side, press the NAVIGATE right button.
![[PRIS]2 80s Pad 12047 A Scanner Darkly A&D Pad Abandoned Future Abandoned Planet Abandoned Toyfactory Ad Parnassum 2 Ad Parnassum Addictive Synth Additivum Afex After Showdown Aftermath Afternoon Daydream Airborn Memories Airtight Container Ako Padz Alien Drone Alien Intimity Alien Nature](/content/2026/05/761321/images/71591fb14752c9b4a2133383b3f5da7e44c073781a2ab81b60cdca57a942b7df.jpg)
-
To scroll to an instrument preset you want to load, turn the Control encoder.
-
To load the instrument preset, press either the Control encoder or the ENTER button.
![KOMPLETE KONTROL Library Files 80s Pad 4s 120.00 RPM FM8 ALL Instruments LFO Timble Output Effects Rate Vibrate Harmonic Deluxe Valuey Volume Amount Overdrive Tube Amp Cabinet Shelving EU Peak 60 Talk Wah Reset Flanger Tremelo Reverb Psycho Delay/ Chorus/Delay Apply Reset [PRIS]2 80s Pad 12047 A Scanner Darky A&D Pad Timble Envelope Amplitude Envelope](/content/2026/05/761321/images/8bf97b4160c45f7103cf0f8d8cf33384d011d8565e866b9d68f25e3d763fdef6.jpg)
The KOMPLETE instrument with the selected preset is loaded into the KOMPLETE KONTROL software and its parameters are automatically mapped to the knobs, displays, and touch strips on your KOMPLETE KONTROL S-SERIES keyboard, giving you direct hands-on access to the controls on the instrument panel.

For more information about automatically assigning controls, see section 2.9, Native Map.
→ You are ready to play the loaded KOMPLETE instrument with the keys and knobs on your KOMPLETE KONTROL S-SERIES or via MIDI notes from your host application of choice. Have fun!
3.2 Controlling KOMPLETE Instruments
This section introduces you to controlling KOMPLETE instruments using your keyboard.
3.2.1 Controlling Instrument Parameters
Once you have loaded a KOMPLETE instrument, you can control its parameters from your KOMPLETE KONTROL S-SERIES keyboard, without the need to first map them via MIDI learn. The eight knobs on your keyboard and their corresponding displays are automatically assigned to eight instrument parameters. Whenever you turn a knob on your keyboard, the mapped parameter visually reflects the movement in the KOMPLETE KONTROL software.
To adjust an instrument parameter, turn the corresponding knob on your KOMPLETE KONTROL S-SERIES keyboard. The mapping of each knob is indicated by its corresponding display.

The displays on KOMPLETE KONROL S-SERIES mapped to MONARK's controls (preset At The Parade (ATTHPRD) selected)
3.2.2 More than Eight Parameters: Switching Parameter Pages
Many KOMPLETE instruments are equipped with much more than eight parameters. KOMPLETE KONTROL has an easy solution for this in the PAGE buttons (left and right arrows). They let you quickly skip through parameter pages, all the while remapping the knobs to a different set of instrument parameters. The current parameter page is always indicated by the PAGE display at the far left. The displayed value will depend on the loaded instrument and its amount of controls.

The PAGE display at the left indicates the current mapping (1/8)
To skip to another parameter page and remap the eight knobs to a new set of controls, press the arrow-shaped PAGE buttons left or right. The PAGE display indicates the changed parameter page and the eight knobs and their corresponding displays reflect their new parameter mappings.

To see all instrument parameters in the software, use Additional View and Edit View as described in section 2.2.3, Selecting Instrument Views.
3.3 Using the Perform Features: Scale, Arp, and the Light Guide
Once you have learned to call up the browser via the on-screen overlay and to use it to load an instrument, it is time to find out more about some of the features that make KOMPLETE KON-TROL so unique: SCALE, ARP, and the Light Guide.
The PERFORM Section and the Perform Panel
Rather than just being a browser for your KOMPLETE instruments, KOMPLETE KONTROL is also equipped with a versatile and powerful PERFORM section. You can select, play and combine a huge variety of scales, chords, and sequences and even have them played back visually to you by the LEDs in the Light Guide on your KOMPLETE KONTROL S-SERIES. For detailed information about the Perform Panel and its parameters, see sections ↑6, KOMPLETE KONTROL Software Perform Panel and ↑8, KOMPLETE KONTROL S-SERIES Perform Functions. In the tutorials below you will learn how to:
- Edit the scale and arp parameters
- Map the keys to a scale and play it
- Understand the information given by the Light Guide
- Automatically play notes as harmonized chords
- Automatically play back chords as arpeggiated note sequences
3.3.1 Selecting a Scale
To open and edit the scale parameters via the displays and knobs on your keyboard, follow these instructions:
- To map the knobs and displays to the scale parameters, press SHIFT + SCALE.

The PAGE display at the far left reads SCALE and the others display the scale parameters.
- To select a scale, turn Knob 2 (by default set to MAJOR) until you find a scale you like.
- To switch on the scale you selected, press the SCALE button so it lights up.
The keys on your KOMPLETE KONTROL S-SERIES are mapped to the notes in the selected scale. The mapping is reflected visually by the Light Guide.
→ Pressing any unlit key automatically activates the nearest lit key so that only notes belonging to the selected scales are being played back!
To map the knobs and displays to instrument parameters again, press SHIFT + SCALE once more. You can also press the BACK button in the NAVIGATE section. The scale engine will still be switched on.

If you selected CHROM, all keys will be lit. For more information on the chromatic scale, see section 6.4.2, Scale Type.

If the Light Guide is not reflecting the settings of the SCALE parameters, ensure that SCALE is switched on.
3.3.2 Playing Chords
You can play chords in the usual way by pressing any number of keys simultaneously (or send multiple MIDI notes simultaneously from your host application), but KOMPLETE KONTROL also lets you create and play chords by using the PERFORM section.

To play multiple notes in a chord simultaneously, the loaded KOMPLETE instrument must be able to handle polyphony.
To play multiple notes in a chord simultaneously, follow these instructions:
-
To map the knobs and displays to the scale parameters, press SHIFT + SCALE so the PAGE display at the far left reads SCALE.
-
To activate Chord Mode, set CHORD to HARM by turning Knob 5 (by default set to OFF).

The Chord Type parameter appears on the display below Knob 6 (by default set to 1-3-5).
- To enable playing full chords, ensure that the SCALE button is lit.
→ Chord Mode is activated and set to Harmonizer. Pressing any key automatically activates and plays back the nearest lit key according to the mapping by selected scale. It also plays back the third and the fifth note above the pressed key in the selected scale, in accordance with the interval value set by Knob 6 (1-3-5, meaning the first, third, and fifth note of a chord). All played back notes are indicated by the Light Guide.

For detailed information on Chord Mode and Chord Type, see sections 6.4.3, Key Mode and 6.4.5, Chord Type.
To map the knobs and displays to instrument parameters again, press SHIFT + SCALE once more. You can also press the BACK button in the NAVIGATE section. The scale engine will still be switched on.

If the Light Guide does not reflect the settings of the SCALE parameters, ensure that SCALE is switched on.
3.3.3 Playing Arpeggiated Chords
In the tutorials above you learned to select a scale and to play full chords that follow the selected scale. To play back a chord as an arpeggiated note sequence, follow these instructions:
- To switch on the arpeggiator, press the ARP button so it lights up.
→ Pressing a key (or receiving a MIDI note) starts the arpeggiator, which automatically plays back the notes in the chord that you generated in the SCALE settings as a sequence, rather than simultaneously.
To edit some of the ARP parameters to tweak your arpeggio:
- To map the knobs and displays to the arp parameters, press SHIFT + ARP.

The PAGE display at the far left reads ARP and the others display the arp parameters.
- To change the direction of the sequence to e.g. UP-DOWN, turn Knob 2 (by default set to UP).
- To adjust the OCTAVES reach of the arpeggiator, turn Knob 6 (by default set to 1) to e.g. 4.
→ Your chord plays back as a sequence of notes being played up and then down again over four octaves.
To map the knobs and displays to instrument parameters again, press SHIFT + ARP once more. You can also press the BACK button in the NAVIGATE section. The arp engine will still be switched on.

If no change is audible, ensure that ARP is switched on.

Depending on the settings of the KOMPLETE instrument you have loaded, you may need to adjust ADSR envelope or gate settings. For information, refer to the document of the loaded instrument.

For more information on the many parameters of the arpeggiator, see section 16.4.5, Chord Type.
3.4 What's Next?
You have already learned to use some of the most important features of KOMPLETE KON-TROL. Do not be afraid to test other controls not described in the above tutorials or to load an instrument and try out to figure out the settings by yourself. To learn more in detail about KOMPLETE KONTROL, continue reading the following sections:
- For an overview of the KOMPLETE KONTROL software, see section ↑4, KOMPLETE KONTROL Software Overview.
- For a thorough description of the software browser and how to edit and add files to the KOMPLETE library, see section ↑5, KOMPLETE KONTROL Software Browser.
- For detailed information on the perform features and all parameters and settings of the scales and the arpeggiator, see sections ↑6, KOMPLETE KONTROL Software Perform Panel and ↑8, KOMPLETE KONTROL S-SERIES Perform Functions.
- For an overview of the KOMPLETE KONTROL S-SERIES keyboard, see section ↑7, KOMPLETE KONTROL S-SERIES Keyboard.
- For information about controlling your host application, see section ↑7.3, Host Control and the Transport Section.
- For information about using the touch strips, see section ↑7.6, Touch Strips.
- For information about the multicolored LEDs in the Light Guide, see section ↑7.7, The Light Guide.
- For information about MIDI mode, see section ↑7.2, MIDI Mode.
- For help and troubleshooting, see section ↑9, Troubleshooting – Getting Help.
4 KOMPLETE KONTROL Software Overview
Though the integration of the KOMPLETE KONTROL S-SERIES keyboard and the KOMPLETE KONTROL software is what makes KOMPLETE KONTROL so powerful and at the same time so easy to use, you can also use the software alone. In this section we will give you an overview of the software interface and in the following sections ↑5, KOMPLETE KONTROL Software Browser and ↑6, KOMPLETE KONTROL Software Perform Panel we will take detailed looks at the features of the KOMPLETE KONTROL software.
![KOMPLETE KONTROL Library Files All Instruments TYPES Bass Bowed Strings Brass Drums Flute Guitar Mallet Instruments Melt/track Organ Percussion Piano/Keys Plucked Strings Reed Instruments Sound Effects Soundscapes Synth Lead Synth Misc Synth Pad Vocal NODES Additive Arpeggiated Chord Dry FM Glide/Pitch Mod Granular Long Release Long/Evolving Monophonic Percussive Physical Model Processed Sample Based Sample-based Squence/Loop Slow Attack Surround Synthetic Tempo-synced [PRIS]1 [PRIS]2 01 LP Ep Org (El 02) C0 Boom 01 LP Epic Org (El 01) A0 Boom 01 LP Epic Organic (El 03) C1 Boom 01 LP Epic Organic B1 Tribull KOMPLETE KONTROL Use the browser to load an instrument.](/content/2026/05/761321/images/9951f3cdcbe6f3f5e3bdd0a1f8be24edf93c3d300a3b91982ddf420a8e5a5c2c.jpg)
The KOMPLETE KONTROL software interface
4.1 Software Interface Overview
Most of KOMPLETE KONTROL's parameters can be accessed both from the controls on your KOMPLETE KONTROL S-SERIES keyboard and by using your computer mouse to adjust the KOMPLETE KONTROL software. This section gives you an overview of the areas and controls of the KOMPLETE KONTROL software.
![1 2 3 KOMPLETE KONTROL Library Files All Instruments TYPES Boss Bowed Strings Brace Drume Flute Guitar Market Instruments Multitrack Organ Percussion Pado/Keys Plucked Strings Read Instruments Sound Effects Soundscapes Synth Lead Synth Misc Synth Pad Vocal MOMES Additive Aspeqolated Chord Dry FM Glide/Pitch Mod Granular Long Release Long/Evolving Monoghanic Percussive Physical Model Processed Sample Based Sample-based Sequence/Loop Slow Attack Surround Synthetic Tempo-synced [PBS]1 [PBS]2 01 LP Ep Org (E1 02) C0 Boom 01 LP Epic Org (E1 01) A0 Boom 01 LP Epic Organic (E1 00) C1 Boom 01 LP Epic Organic B1 Tribut](/content/2026/05/761321/images/e9e6e71c1e4d3dc6e895b53b0155140509986ea5cb3293553464e2f8dfc78403.jpg)
Overview of the KOMPLETE KONTROL software
(1) Header: Gives you access to general controls like the KOMPLETE KONTROL menu as well as possibilities to show and hide areas of the GUI, e.g. the Browser and the Perform Panel. For details, see section ↑4.2, Header.
(2) Browser: Lets you search, edit, and load all your KOMPLETE instrument files. For details, see section ↑5, KOMPLETE KONTROL Software Browser.
(3) Instrument area: Displays your loaded KOMPLETE instrument and gives you visual feedback as you control it with your KOMPLETE KONTROL S-SERIES keyboard. For information, see sections ↑2.2.3, Selecting Instrument Views and ↑4.4, Instrument Area.
4.2 Header
The header is where you find general settings that affect KOMPLETE KONTROL globally and controls to customize the appearance of the KOMPLETE KONTROL software (see section 2.2 , Adjusting the KOMPLETE KONTROL Software Interface).

The header
(1) KOMPLETE logo: The NI logo and KOMPLETE logo open the About screen which displays the version number and edition of your KOMPLETE KONTROL software.
(2) Browser button: Shows or hides the browser. For detailed information on the browser, see section ↑5, KOMPLETE KONTROL Software Browser.
(3) KOMPLETE KONTROL menu: Opens the KOMPLETE KONTROL menu and lets you select general settings, e.g. instrument view or access the preferences panel (see section ↑2.5, Preferences).
(4) Preset display: Displays the name of the loaded preset at all time. The arrow buttons on the right skip to the next preset in the browser's result list. The presets of all KOMPLETE instruments can be browsed via the browser as well as via the BROWSE button on your KOMPLETE KONTROL S-SERIES keyboard (see sections ↑5, KOMPLETE KONTROL Software Browser and ↑7.4, Browsing and the Navigate Section).
(5) Perform Panel button: Shows or hides the Perform Panel, which gives you access to the Scale and Arp parameters. The Perform Panel button lights blue when Scale and/or Arp is active. For detailed information on the Perform Panel and how to generate scales and chords, see section 16, KOMPLETE KONTROL Software Perform Panel.
(6) + button: Switches the loaded KOMPLETE instrument between default view and additional view. To open edit view, use the KOMPLETE KONTROL menu (3). For details, see section ↑2.2.3, Selecting Instrument Views.
(7) Tempo: Displays the tempo in BPM (beats per minute). Click and drag this up or down with your mouse to change tempo, or double-click and then type in a value with your computer keyboard. When KOMPLETE KONTROL is loaded as a plug-in in a host application, the tempo is automatically synchronized to the host tempo and this feature is grayed out.
(8) CPU meter: Represents the current load on your computer's processor and is constantly measured; it should not go above 70 % to avoid clicks and interruptions.
(9) ! button: Click the ! button to disable the entire sound processing of KOMPLETE KON-TROL.
(10) NI logo: The NI logo and KOMPLETE logo open the About screen which displays the version number and edition of your KOMPLETE KONTROL software.
Opening the Perform Panel
As described above, clicking the Perform Panel button (5) in the header opens the Perform Panel: One of the most important and creative features of KOMPLETE KONTROL. It lets you tailor your performance by selecting scales and harmonies in order to automatically play back chords and arpeggiated note sequences. For detailed information, see section ↑6, KOMPLETE KONTROL Software Perform Panel.

The Perform Panel displays the Scale and Arp parameters (Arp depicted)
4.3 Browser
The browser lets you search, edit, and organize your KOMPLETE library and all its files. For all you need to know about the browser, continue reading in section 5 , KOMPLETE KONTROL Software Browser. You can also call up the browser via the on-screen overlay by pressing the BROWSE button on your KOMPLETE KONTROL S-SERIES keyboard (see section 7.4 , Browsing and the Navigate Section). However, many of the advanced browser functions can only be accessed in the KOMPLETE KONTROL software.
![KOMPLETE KONTROL Library Files All Instruments TYPES Bass Bowed Strings Brass Drums Flute Guitar Mallet Instruments Multitrack Organ Percussion Piano/Keys Plucked Strings Reed Instruments Sound Effects Soundscapes Synth Lead Synth Misc Synth Pad Vocal MODES Additive Arpeggiated Chord Dry FM Glide/Pitch Mod Granular Long Release Long/Evolving Monophonic Percussive Physical Model Processed Sample Based Sample-based Sequence/Loop Slow Attack Surround Synthetic Tempo-synced [PRIS]1 [PRIS]2 01 LP Ep Org (El 02) C0 Boom 01 LP Epic Org (El 01) A0 Boom 01 LP Epic Organic (El 03) C1 Boom 01 LP Epic Organic B1 Tribull](/content/2026/05/761321/images/08458b8348ec6752331824375d79d92b3f32a539966a2c6de5bd75b13072c9b5.jpg)
The browser in the software
4.4 Instrument Area
The instrument area of the KOMPLETE KONTROL software is where your KOMPLETE instruments are displayed once you have loaded them from the browser. Each KOMPLETE instrument offers a different set of controls and parameters, but they are all easily controlled both with your computer mouse and from the KOMPLETE KONTROL S-SERIES keyboard. The key-
board has some clear advantages here, such as the keys, which let you play chords and melodies, and the hands-on tactility of the knobs and touch strips. Either way you choose to control them, the parameters of the loaded KOMPLETE instrument are mutually reflected by both the displays on the KOMPLETE KONTROL S-SERIES and the software interfaces in the instrument area.
Selecting Instrument Views
Once you have loaded a KOMPLETE instrument from the browser, it appears in the instrument area of the KOMPLETE KONTROL software. Most instruments come equipped with more than one view, giving you access to another set of controls or letting you edit certain features in finer detail. The three possible instrument views are described below.
To switch between the instrument views, click View in the application menu bar or the View submenu of the KOMPLETE KONTROL menu and select Default View, Additional View, or Edit View.
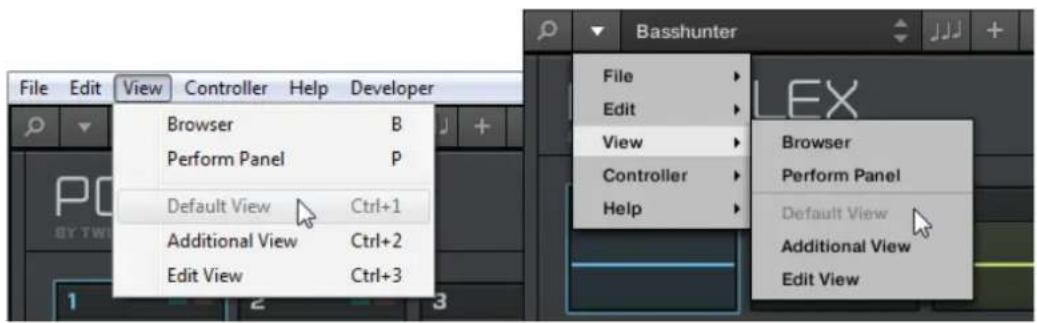
Instrument views in the View menu of the application menu bar (Windows depicted), and in the View submenu of the KOMPLETE KONTROL menu.

The available views may vary with the loaded instrument.

All instrument parameters can be controlled at all time from the KOMPLETE KONTROL S-SERIES keyboard, regardless of the selected instrument view in the KOMPLETE KONTROL software.
4.4.1 Default View
The default view is the view that first appears when you load an instrument from the browser. It gives you access to some of the most important features of each KOMPLETE instrument with an easy-to-use interface.
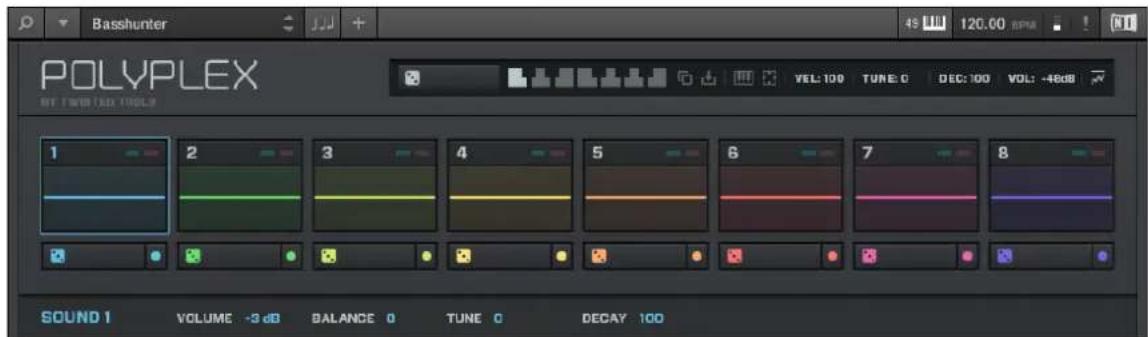
POLYPLEX in default view
4.4.2 Additional View
Most KOMPLETE instruments have more parameters than can be displayed at once in small surface and therefore come with a second, additional view. The additional view can give you access to detailed edit controls or to a completely different set of controls altogether depending on the loaded instrument.
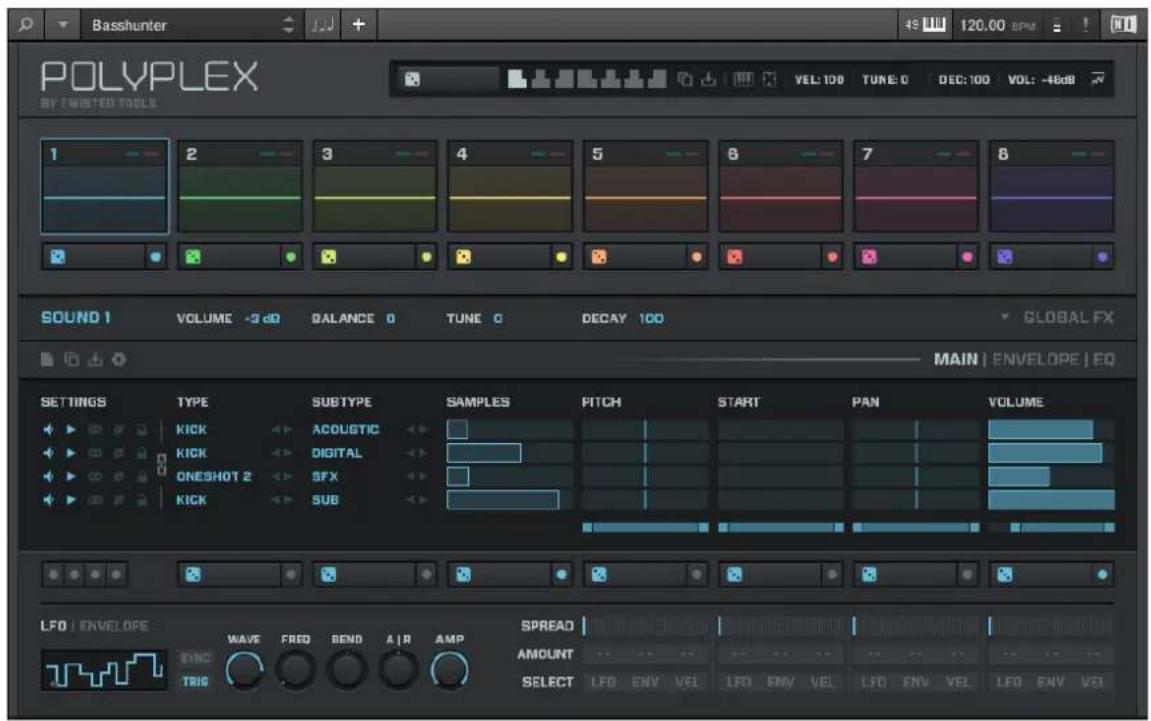
POLYPLEX in additional view
▶ To switch to the additional view, click the + button in the KOMPLETE KONTROL header.
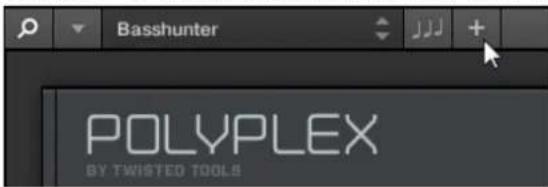
Clicking it again will return the KOMPLETE instrument to default view.
4.4.3 Edit View
You also have the possibility to open any KOMPLETE instrument that can be loaded and played by either the KONTAKT or REAKTOR players in edit view. Use the edit view to access all the flexible controls and features you would normally have when using KONTAKT or REAKTOR in stand-alone mode.
To switch to the edit view, click Edit View in the View submenu of the KOMPLETE KONTROL menu.
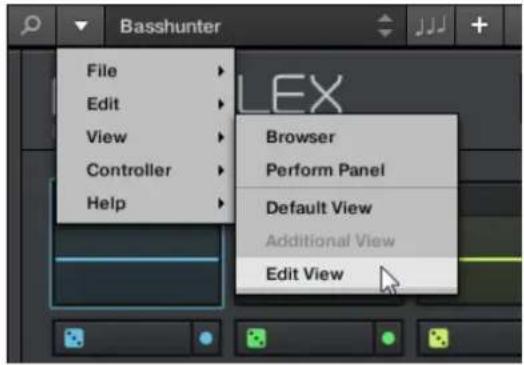

Edit view is only available for instruments powered by KONTAKT or REAKTOR.

Edit view enables you to access files that cannot be loaded from the KOMPLETE KONTROL browser, e.g. KONTAKT Multis which can be loaded from the KONTAKT browser in edit view.
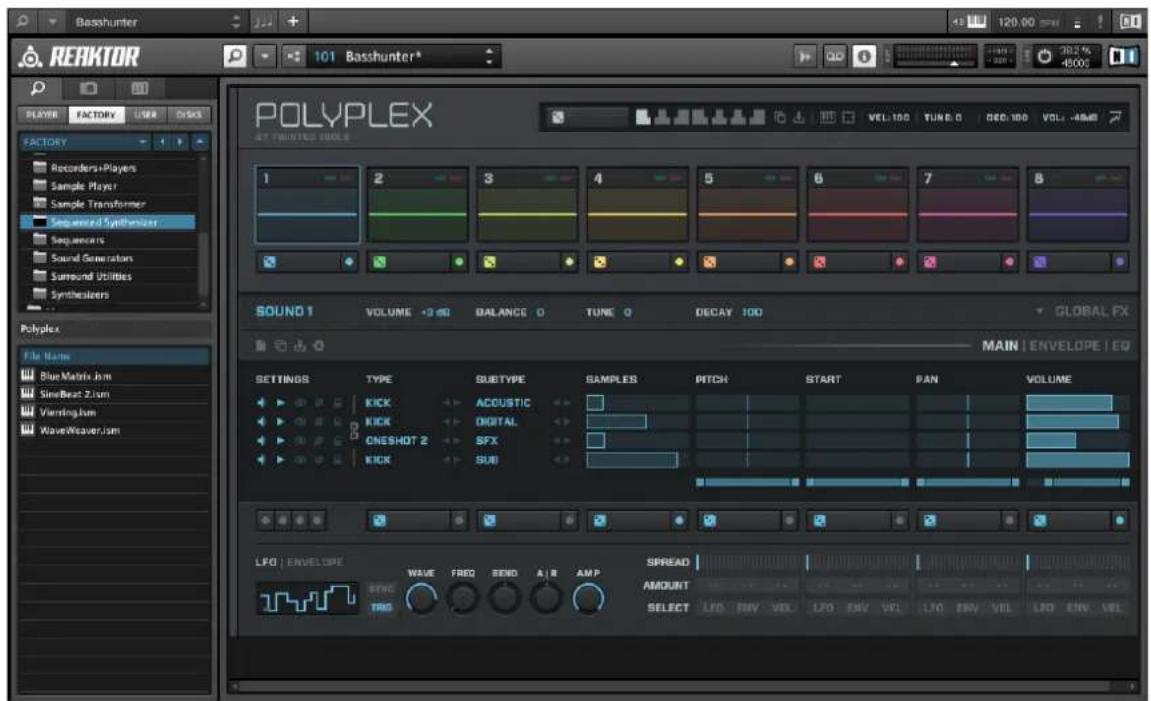
POLYPLEX in edit view
5 KOMPLETE KONTROL Software Browser
The browser is the place where you can organize and categorize all of your instruments and plug-in presets. This is done by tagging them, which means categorizing them by using keywords. When it comes to the browser, the KOMPLETE KONTROL software has some advantages over the keyboard, such as a very big screen and a QWERTY-keyboard. Thus, adding and editing tags can only be done using the software.
![KOMPLETE KONTROL Library Files 01 All Instruments TYPES Bass Bowed Strings Brass Drunes Flute Guitar Malet Instruments Multitrack Organ Percussion Piano/Keys Plucked Strings Roed Instruments Sound Effects Soundscapes Synth Lead Synth Misc Synth Pad Vocal MODES: Additive Arpeggiated Chord Dry FM Glide/Pitch Med Granular Long Release Long/Evolving Monophonic Percoustic Physical Model Processed Sample Based Sample-based Sequence/Loop Slow Attack Surround Synthetic Tampa-synced [PRIS]1 [PRIS]2 01 LP Ep Org (El 02) C0 Boom 01 LP Epic Org (El 01) A0 Boom 01 LP Epic Organic (El 03) C1 Boom 01 LP Epic Organic B1 Tribull](/content/2026/05/761321/images/cbfa403f236ce777387a94700c9a7037c105858d5bcf8f7e5905b5f77bbe0966.jpg)
The Browser
5.1 Browser Basics
This section of the manual describes some general concepts about the Browser.
5.1.1 The Library
To organize, find, keep track of, and provide you thousands of files at any time ready for loading, KOMPLETE KONTROL makes use of a Library. The Library contains the factory content of instruments included with KOMPLETE and KOMPLETE ULTIMATE as well as your own user content.

To be able to make the most out of your KOMPLETE instruments together with KOMPLETE KONTROL, ensure they are up to date. To download the latest versions of your KOMPLETE instruments, start the Service Center application from your desktop.
To help you find the right file quickly and efficiently, the Library implements various techniques that go far beyond the classic folder structure of your operating system. For example, each file included in the Library can be described according to following aspects:
- The content type of the file, i.e. whether it originates from a product's factory library or if it was created by a user.
- The product which the files comes from—this can include, e.g., a hierarchical structure with a product category, a particular product, and possibly a bank of this product.
- A variable amount of tags used to describe various characteristics of the file, for example, the type of effect, the sonic character, the context in which it is used—in a word, anything that might help you find the file.

Note that the Library is the only other way to display and access your files: You could also navigate to the same files in your file system. The (substantial) difference lies in the fact that the Library organizes your files in a musically relevant way.
Which Files Are Included in the Library?
The files included in the Library are all KOMPLETE KONTROL-relevant files found in the folders whose paths are listed in the Library page of the Preferences panel. For more information on how to manage these library folders, please refer to ↑2.5.1, Preferences – Library Page.
5.1.2 Browsing the Library vs. Browsing Your Hard Disks
The Browser is your interface to the KOMPLETE Library. It provides all necessary tools to search for the files you require—and suggest other files you might not have thought of. Beside this, the Browser also allows you to navigate your file system in a classic way. Both are described in the next section.
The Browser provides two operation modes, each of them providing its own tools:
- The Library pane allows you to browse the KOMPLETE Library. This is the preferred way to search for files meeting particular musical requirements. This pane also allows you to tag your own files to your liking.
- The Files pane allows you to browse your hard disks by using the hierarchical folder structure of your operating system. For example you can use it to navigate KOMPLETE KON-TROL-relevant files that have not been imported into the KOMPLETE Library—and you can import them from there!

In contrast to the software, the Browser called up from your KOMPLETE KONTROL S-SER-IES keyboard can only load files that have already been added to the Library. You cannot directly access specific directories on your hard disks with the on-screen overlay Browser using the keyboard. This is why you should always import all your files to the Library and tag them using the software Browser beforehand.
Switching Between Library and Files Pane
To show the Library pane or the Files pane of the Browser, click the corresponding tab at the top of the Browser.
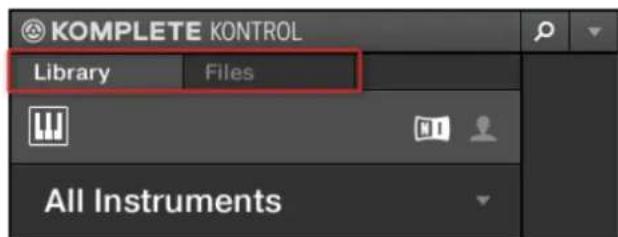
Click the desired tab to show the corresponding pane of the Browser.
The Library pane is described in section 5.2 , Searching and Loading Files from the Library, and the Files tab is described in section 5.5 , Loading and Importing Files from Your File System.
5.2 Searching and Loading Files from the Library
The Browser's Library pane allows you to search for any file in the KONTROL Library.
▶ To display the Library pane, click the Library tab in the top left corner of the Browser.
5.2.1 Overview of the Library Pane
The Library pane contains following elements:
![KOMPLETE KONTROL Library Files All Instruments TYPES Bass Bowed Strings Brass Drums Flute Guitar Mallet Instruments Multitrack Organ Percussion Piano/Keys Plucked Strings Reed Instruments Sound Effects Soundscapes Synth Lead Synth Misc Synth Pad Vocal MODES Additive Arpeggiated Chord Dry FM Glide/Pitch Mod Granular Long Release Long/Evolving Monophonic Percussive Physical Model Processed Sample Based Sample-based Sequence/Loop Slow Attack Surround Synthetic Tempo-synced [PRIS]1 [PRIS]2 01 LP Ep Org (El 02) C0 Boom 01 LP Epic Org (El 01) A0 Boom 01 LP Epic Organic (El 03) C1 Boom 01 LP Epic Organic B1 Tribull](/content/2026/05/761321/images/01e604a970b02efa36632e265a3218ab5d9734076fe51fabff078610124d9273.jpg)
The elements of the Library pane.
(1) Library tab: Click the Library tab to open the Library pane described here.
(2) Content selector: Click the NI icon (on the left) to select factory content or the User icon (on the right) to select user content instead. Only the files of the content selected here will be displayed in the result list (7). See section ↑5.2.2, Choosing Between Factory and User Content.
(3) Product selector: Click to open a drop-down menu where you can select a particular product, product category, and sometimes the bank of the selected product. Again, only the files matching your selection will be displayed in the result list (7). See section ↑5.2.3, Selecting a Product Category, a Product, and a Bank.
(4) TYPES filter: allows you to search for files based on Type and Subtype tags that have been applied to them. See section ↑5.2.4, Selecting Type and Mode Tags.
(5) MODES filter (Instrument/Effect presets only): allows you to search for files based on Mode tags that have been applied to them. See section ↑5.2.4, Selecting Type and Mode Tags.
(6) Search field: Enter any character string into the search field to limit the search results to the files containing this string. See section ↑5.2.5, Performing a Text Search.
(7) Result list: The result list displays all files that match your query, as specified via the various tools above. See section 15.2.6, Using the Result List.
(8) Control bar: At the bottom of the Browser, the control bar provides a few useful tools when browsing and editing the KOMPLETE Library:
- Click the Information button (showing a little "i") near the EDIT button to display more information on the selected file(s). See section ↑5.3.1, Displaying File Information.
- Click the EDIT button at the far right of the bar to open the Attribute Editor and modify the tags and properties assigned to the selected file(s). See section ↑5.4, Editing the Files' Tags and Properties.
Overview of the Search Workflow in the Library Pane
When searching for files via the Library pane, you can progressively refine your search by following this typical top-to-bottom workflow.
The first step is mandatory:
- Select between factory content and user content in the Content selector (2).
The next steps are optional. They can be useful to further refine your search and limit the number of search results to a reasonable amount: - Choose a product category or a product in the Product selector (3). If you have selected a product you can further choose a particular bank and sub-bank of this product, if any.
- Select tags in the TYPES filter (4) and the MODES filter (5) describing what you are looking for.
At any time in the procedure described above, you can use the search field (6) to quickly perform a text search among the entries in the result list (7).
The above steps are described in detail in the following sections.
5.2.2 Choosing Between Factory and User Content
The Content selector shows two icons, one representing the factory content on the left, and one representing the user content on the right:
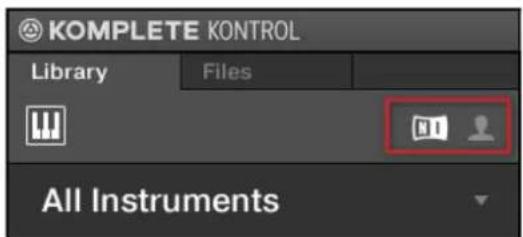
The Content selector.
▶ Click the NI icon to search the factory content, or click the User icon to search the user content.
5.2.3 Selecting a Product Category, a Product, and a Bank
The Product selector allows you to limit your search to a certain product category, a particular product, or a specific bank of the product.
By default there is no particular selection in the Product selector; it reads All Instruments:
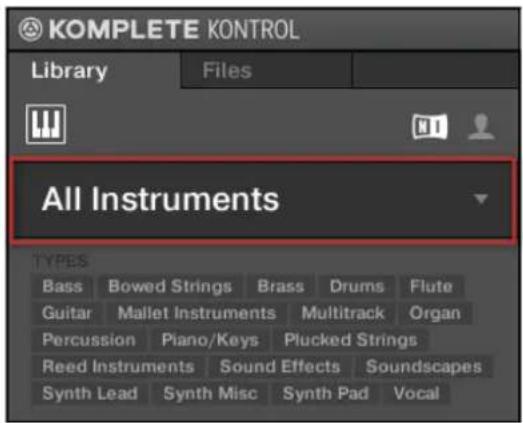
The closed Product selector without any instrument selected.
Selecting a Product or a Product Category
▶ Click the Product selector to open it.
→ The Product selector opens up and shows you the following:
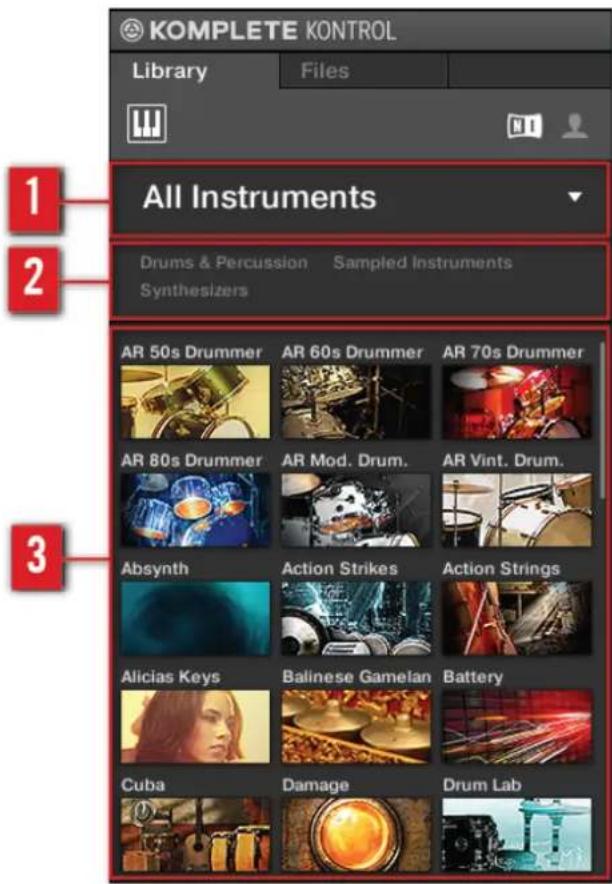
The opened Product selector displaying your KOMPLETE instruments
(1) Product selector header: The header shows the product or the selected product category—if there is no selection it shows a generic label (All Instruments in the picture above). Click the header to close the Product selector.
(2) Product category filter: Shows the categories of the products that have files available in the KOMPLETE Library. Click a category of a product to select/deselect it. Selecting a category limits the number of products shown in the Product list below (3). Only one category can be
selected at a time. You can also select a category and close the Product selector by clicking its header (1) again: The header (1) will display the category that you have just selected, and the TYPES and MODES filters along with the result list will be filtered by that category.
(3) Product list: Shows the products for which files are available in the KOMPLETE Library. Click the desired product in the list. Upon your selection the Product selector automatically closes, the product name and icon appear in the header, and the tag filter and result list below will be filtered accordingly.
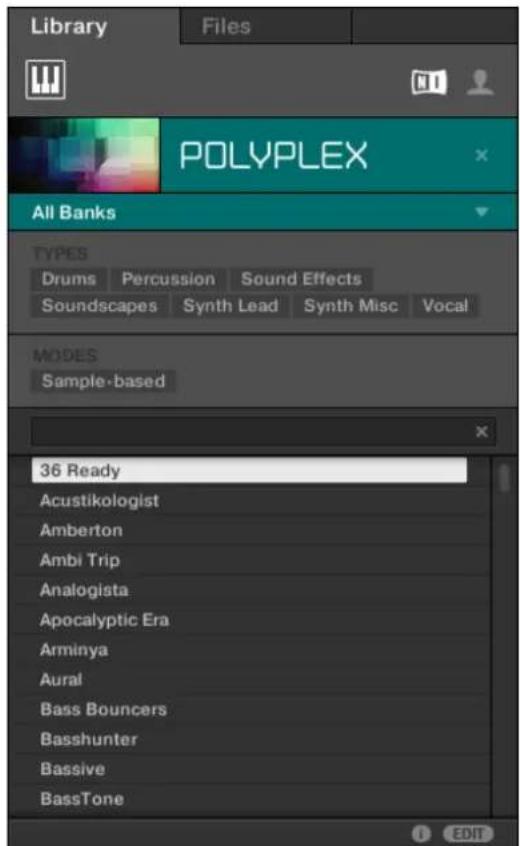
The closed Product selector with an instrument selected.

Product categories and products are shown in the Product selector only if the KOMPLETE Library contains files for them. If you haven't updated a particular Native Instruments instrument, the icon for that product might not be available in the Product selector when the factory content is selected in the Content selector—to prevent this, make sure that all your Native Instruments products are up to date.
Resetting the Product Selection
▶ To reset the selection made in the Product selector, click the little cross at the right of the product name:
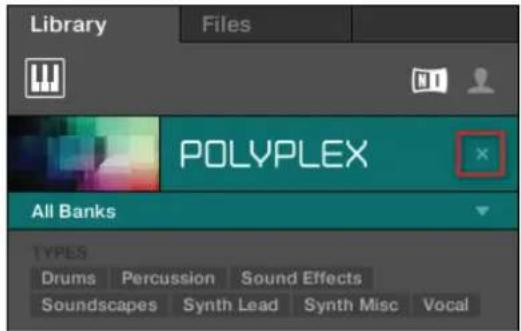
→ The product selection is cancelled. The Product selector displays the generic label All Instruments. The tag filter and the result list under the Product selector now include files for all products.
Selecting a Bank
When you select specific products in the Product list (see description above), an additional Bank menu appears under the closed Product selector:
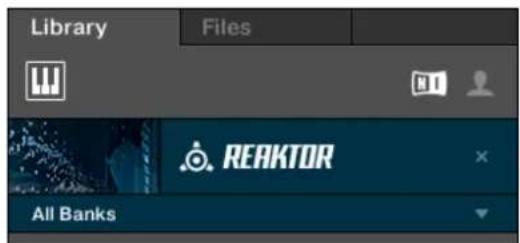
The Bank menu showing All Banks for REAKTOR instruments
This Bank menu allows you to select a particular bank of files for the selected product (REAKTOR in the picture above).
▶ To select a particular bank for the selected product, click the Bank menu under the product icon and choose a bank from the available entries.
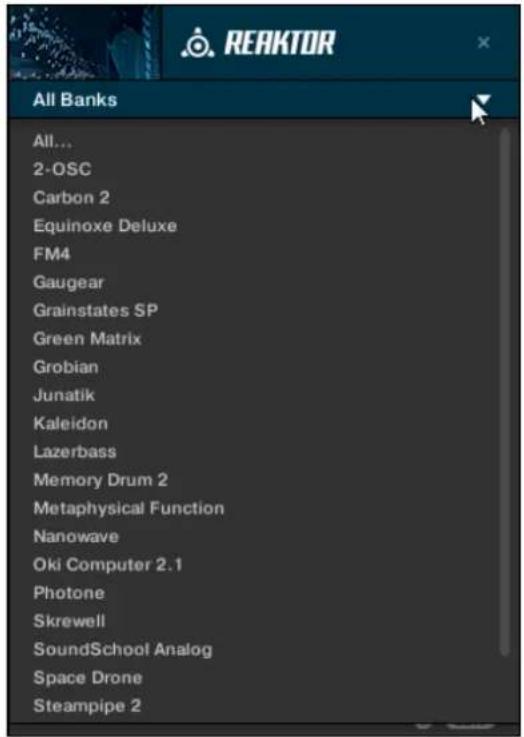
→ Upon your selection the Bank menu closes and displays the selected bank. The tag filter and result list underneath further narrow their content accordingly.

Banks can be, e.g., additional libraries (e.g., MASSIVE EXPANSIONS), different versions of the original Factory Library (e.g., FM7 Legacy and FM8 Factory Library), or any other content categorization specific to a particular product.
As with the product above, you can remove the selected bank by clicking the little cross at the right of the bank name in the closed menu.
Products and Banks for User Content
When you save your own KONTAKT or REAKTOR snapshots, they are automatically assigned to products and banks depending on the KOMPLETE instrument you are using.

Any KOMPLETE instrument presets you save can be found in the location alias Native Instruments User Content as specified in the User page of the Preferences panel's Library page. For detailed information, see section ↑2.5.1, Preferences – Library Page.

Saved monolith files in BATTERY 4 do not show up in the KOMPLETE KONTROL Browser. To access these, open BATTERY 4 in edit view and open the BATTERY Browser.

Saved multi files in KONTAKT 5 do not show up in the KOMPLETE KONTROL Browser. To access these, open KONTAKT 5 in edit view and open the BATTERY Browser.
5.2.4 Selecting Type and Mode Tags
The tag filter that appears under the Product selector allows you to search for files according to particular characteristics, effect type, sonic character, etc. Tags can be of two kinds: type or mode. You can select them via the TYPES and MODES filter, respectively.
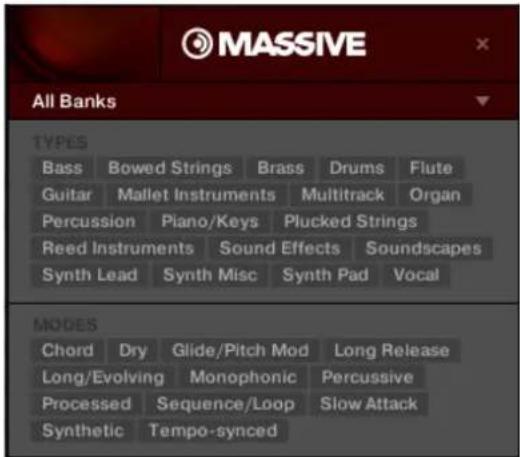
TYPES and MODES filters for MASSIVE
▶ Click the desired tags in the tag filter to select them and limit the search to the files marked with them. Click the selected tags again to deselect them and broaden the search.
Types
The Type tags are structured into two hierarchical levels. You can select them via the TYPES filter:
- At first the TYPES filter displays the available top-level tags only.
- As soon as you select a tag at the top level, the second level appears underneath with subtags of the selected tag.
- The hierarchical structure means that the sets of subtags are specific to each tag of the level above.
Example: Imagine that you are looking for a bass line from the MONARK instrument:
- You have already selected the Monark product in the Product selector (for more information on this, see section ↑5.2.3, Selecting a Product Category, a Product, and a Bank). For now the TYPES filter shows only top-level tags:
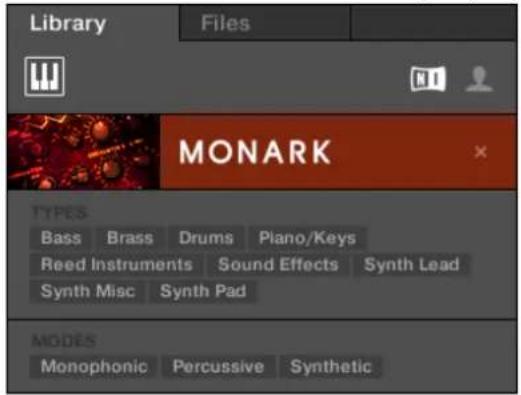
- In order to find a bass sound, you first select the Bass tag from the TYPES filter. Upon your selection the second level of tags appears underneath with subtypes like Analog Bass, Fingered Bass, etc.:
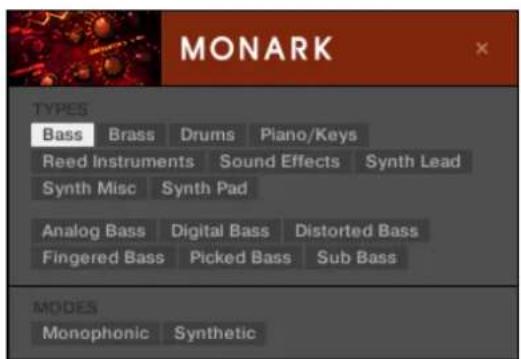
In this second level, you select the subtype you want for your bass line.
By selecting any of these tags, say, Picked Bass, you will narrow your search to this particular subtype of bass sounds:
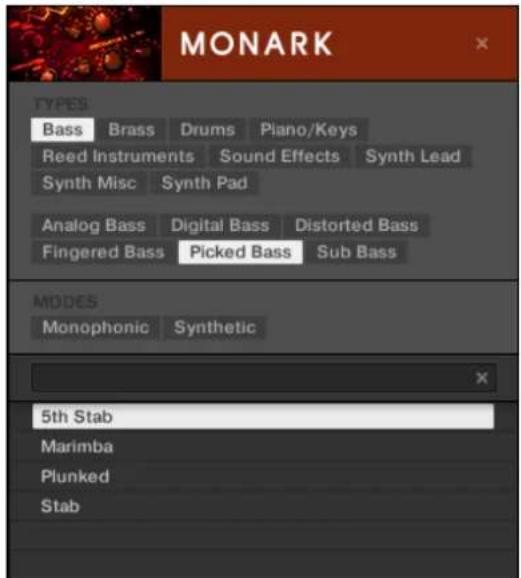
- Now imagine that you have loaded a picked bass preset but you decided you want something that sounds a bit rougher: You leave the Bass tag selected at the top level of the TYPES filter and go directly to the second level, where you select Distorted Bass instead of Picked Bass. As you select Distorted Bass, the result list is filtered accordingly.
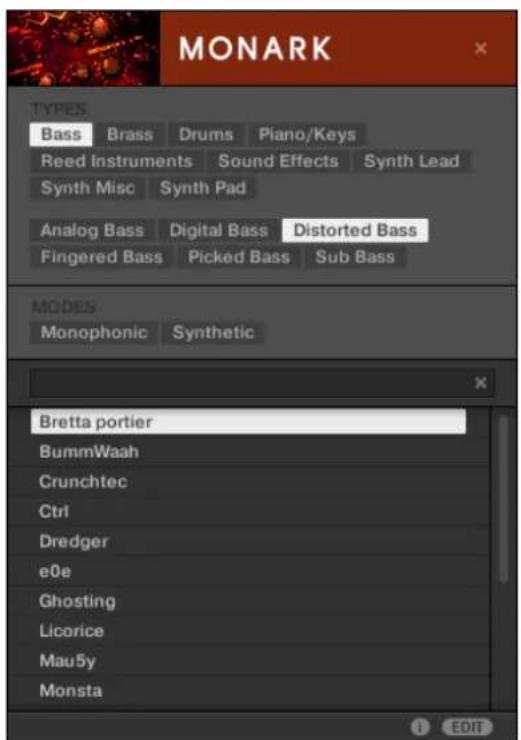
This allows you to quickly find various presets (even for different instruments) with similar characteristics—here, a distorted bass sound.
- If you decided you like the type of sounds you found by using the Distorted Bass subtype and want to see what other KOMPLETE instruments have presets tagged with the same tag, reset the Product selector by clicking the cross.
→ The Product selector is reset and the TYPES and MODES filters are now filtering all KOMPLETE instrument presets according to the tags Bass and Distorted Bass.
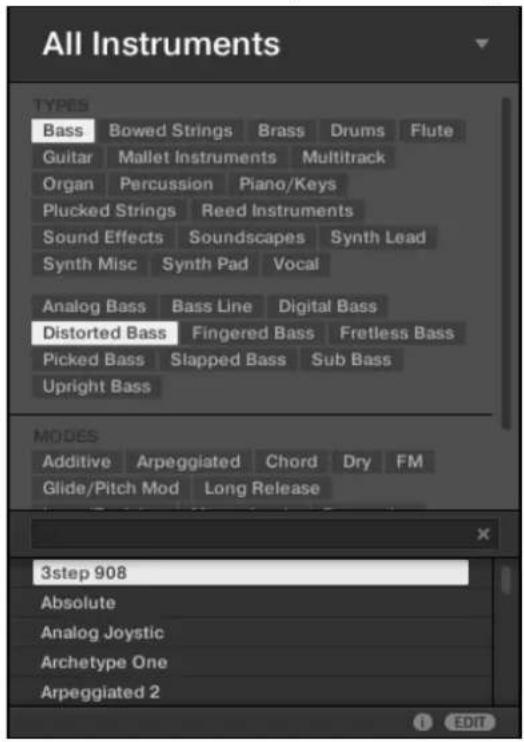
Modes
- The MODES filter provides an additional level that is independent from the type levels:
- In general, Mode tags will rather refer to technical terms (e.g., Arpeggiated, Percussive, Synthetic, etc.).
- The MODES filter is always displayed. You can start your search with the MODES filter before (or even without) using the TYPES filter.
- However, the list of tags available in the MODES filter will vary depending on the tags selected in the TYPES filter. If no file contains both the type and mode tags that you have selected, the type tags will prevail and the mode tags will be deselected.

If you don't select any tag in the TYPES or the MODES filter, the result list will include all files satisfying any of their tags.
Selecting Multiple Tags from the Same Level
In both TYPES and MODES filter you can select multiple tags from the same level:
▶ Hold [Shift] on your computer keyboard and click two tags at a particular level to select these tags and all tags in-between.
▶ Hold [Ctrl] ([Cmd] on Mac OS X) on your computer keyboard and click any number of tags at a particular level to select these particular tags.
→ The result list will include all files satisfying at least one of the selected tags.
5.2.5 Performing a Text Search
In the search field you can enter your search query.

The search field.
▶ Click in the search field and type the desired text to limit the results to files containing this text.
The search will be performed on the file paths, the file names, the products/banks/sub-banks, the tags, and the properties directly as you type. As you start typing, the list of matches will start narrowing in the result list below.
On the right of the search field, click the Reset button (showing a little cross) to reset both text search and tag search. The Product selection is not affected.
5.2.6 Using the Result List
The Result list shows all the files that match your query:
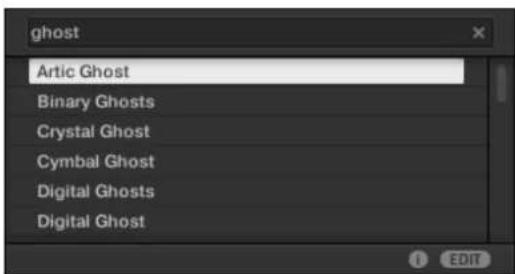
The result list showing instrument presets matching the search query "ghost."
If the list is too long to fit in the display, use your mouse wheel or drag the scroll bar on the right to show the remaining items.
The result list allows you to:
- Select the desired file(s).
- Load the selected file.
- Delete the selected file(s) from your hard disk and from the Library.
- Navigate to the selected file in your operating system.
- See, and possibly edit, the attributes of the selected file(s) by clicking the EDIT button at the bottom right of the Browser. For more information on this, please refer to section ↑5.4, Editing the Files' Tags and Properties.
Selecting Files in the Result List
▶ To select a single file in the Result list, click its entry.
You can also select multiple files in the Result list in order to process them all at once.
To select adjacent files in the list, do the following:
▶ Hold [Shift] on your computer keyboard and click two files in the Result list to select these files and all files in-between.
To select distant files in the list, do the following:
▶ Hold [Ctrl] ([Cmd] on Mac OS X) and click all the files you want to select.
Loading Files
Double-clicking one of the matches will load the respective file.

The instrument preset loaded will replace the one previously loaded, if any!
Deleting Files in the Result List
You can delete user files directly from the Result list:
-
Right-click ([Ctrl]-click on Mac OS X) the desired user file and select Delete from the context menu. If you want to delete several files at once, first select them as described above, and right-click ([Ctrl]-click on Mac OS X) ([Ctrl]-click on Mac OS X) any of them. A warning dialog opens to inform you that the file will be not only removed from the KOM-PLETE Library but also deleted from your hard disk.
-
Click OK to confirm the deletion (or Cancel to keep the file).
→ The file is deleted from the KOMPLETE Library and from your hard disk.

When browsing factory content, the Delete entry is not available in the context menu.
Navigating to the Files in Your Operating System
If you want to find out the location of a particular file shown in the Result list, do the following:
Right-click ([Ctrl]-click on Mac OS X) any file shown in the Result list and select Find in Explorer (Find in Finder on Mac OS X) from the context menu to open an Explorer/Finder window pointing to the folder containing that file on your operating system.
5.3 Additional Browsing Tools
At the bottom of the Browser, the Control bar provides a couple of useful tools that will help you quickly find and check the files you need.
![KOMPLETE KONTROL Library Files All Instruments TYPES Bass Bowed Strings Brass Drums Flute Guitar Mallet Instruments Multitrack Organ Percussion Piano/Keys Plucked Strings Reed Instruments Sound Effects Soundscapes Synth Lead Synth Misc Synth Pad Vocal MODES Additive Arpeggiated Chord Dry FM Glide/Pitch Mod Granular Long Release Long/Evolving Monophonic Percussive Physical Model Processed Sample Based Sample-based Sequence/Loop Slow Attack Surround Synthetic Tempo-synced [PRIS]1 [PRIS]2 01 LP Ep Org (El 02) C0 Boom 01 LP Epic Org (El 01) A0 Boom 01 LP Epic Organic (El 03) C1 Boom 01 LP Epic Organic B1 Tribull EDIT](/content/2026/05/761321/images/c2a87b562c4a2fa8541ca7b6e60cd3c60898f69467f5143938365ca5168102ce.jpg)
The Control bar at the bottom of the Browser.

The EDIT button (Library pane) or IMPORT button (Files pane) at the far right of the Control bar allows you to edit the attributes of the files selected in the result list above (in the Files pane, these are the files being imported to the Library, whereas in the Library pane these are files already in the Library). Please refer to section ↑5.4, Editing the Files' Tags and Properties for more information!
5.3.1 Displaying File Information

The Information button
▶ Click the Information button (showing a little "i") next to the EDIT button in the right part of the Control bar to display information on the file(s) selected in the result list.
→ A box appears above with various information on the selected file(s): File Format, Date modified, File Size, Type, as well as the Author and Vendor properties, if any (see section ↑5.4, Editing the Files' Tags and Properties).
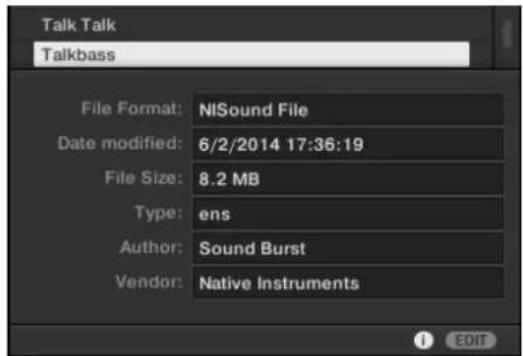
The Information box provides various information on the selected file(s).
If the selected files have different characteristics, the corresponding fields in the Information box will read multi.
5.4 Editing the Files' Tags and Properties
The Attribute Editor allows you to assign or edit tags and properties to your files to make it easier to find them later when browsing the KOMPLETE Library in the Library pane (see section ↑5.2, Searching and Loading Files from the Library).
5.4.1 Attribute Editor Basics
The Attribute Editor is used in the following situations:
- At any time you can edit the tags and properties of user files already in the Library by selecting them in the result list of the Library pane and clicking the EDIT button at the bottom right of the Browser. After you have finished editing click APPLY to apply your changes to the selected files, or click the lit EDIT button again to cancel you changes and close the Attribute Editor. See section ↑5.2, Searching and Loading Files from the Library for more information on the Library pane.
- When importing folders to the KOMPLETE Library from the Browser's Files pane, clicking IMPORT at the bottom right of the Browser automatically opens the Attribute Editor so you can tag the files being imported. After you have finished tagging click OK to import the files to the Library and apply the selected tags, or click CANCEL to cancel the import. See section ↑5.5, Loading and Importing Files from Your File System for more information on the Files pane.
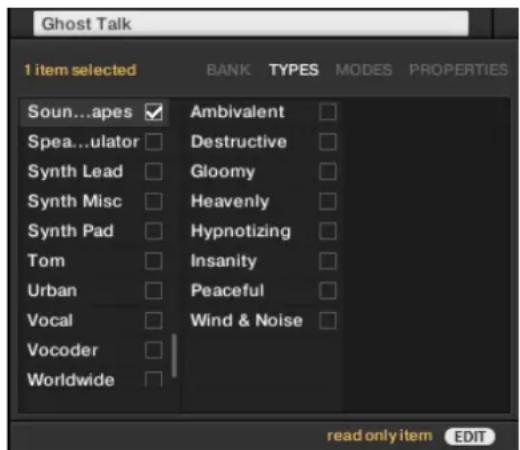
The Attribute Editor (here showing the TYPES page).
The Attribute Editor affects the files selected in the Result list of the Library pane (see section 5.2.6, Using the Result List) or the files within the folders selected for import in the Files pane (see section 5.5.5, Using the Result List).
The Attribute Editor is organized into various pages:
- In the Library pane of the Browser, all pages are available: BANK, TYPES, MODES, and PROPERTIES.
- In the Files pane of the Browser, only the TYPES and MODES pages are available.
▶ Click the desired tab at the top right of the Attribute Editor to show the corresponding page.

You can adjust the overall height of the Attribute Editor by dragging its upper border.
The number of items selected appears in yellow in the upper left corner of the Attribute Editor.
Displaying Attributes of Factory Files
When browsing in the Library pane, if the files selected in the result list are factory files (i.e. files from any factory content) this will be indicated by a yellow read only item label next to the EDIT button at the bottom of the Browser:
Factory files are loaded in the Attribute Editor.
The Attribute Editor will display the various attributes for these files, but you won't be able to modify them.
5.4.2 The BANK Page
The BANK page is only available when opening the Attribute Editor from the Library pane.
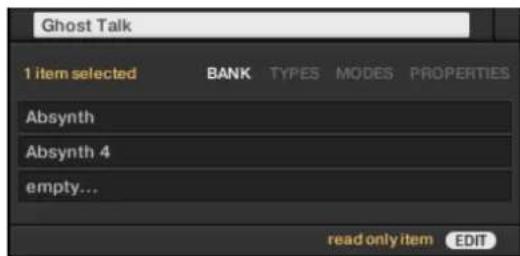
The BANK page of the Attribute Editor
The BANK page shows you (from top to bottom) the product, bank, and sub-bank of the selected file(s). If any of these attributes are not set the corresponding fields read empty....
You cannot modify the attributes shown in the BANK page—they are automatically assigned by KOMPLETE KONTROL.
5.4.3 The TYPES and MODES Pages
The TYPES and MODES pages display and let you modify the tags assigned to the file(s) selected in the result list above.

As with the other pages of the Attribute Editor, the fields in the TYPES and MODES pages can be modified only if you have selected user files in the result list (or set the Content selector to user content). The tags of factory files cannot be edited.
- The TYPES page shows two columns according to the hierarchical levels of the Type tags (see section ↑5.2.4, Selecting Type and Mode Tags):
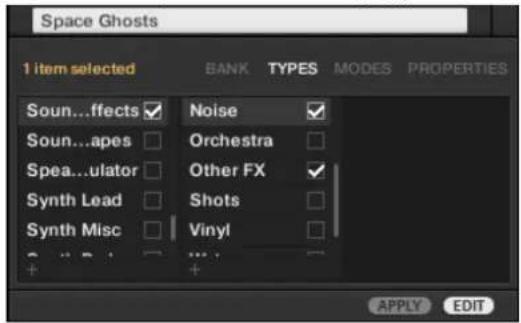
- The MODES page shows only one column:
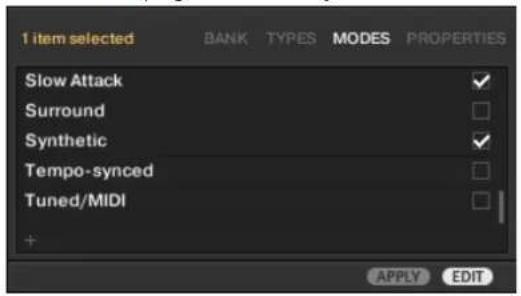
Displaying Tags
- In both TYPES and MODES pages, tags assigned to the selected files are marked with a check mark right of their name:
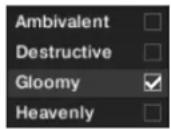
- In the TYPES page, click the name of a tag to select it and display its subtypes in the next column to the right. Only one tag's subtypes can be displayed at a time. The selected tag is highlighted:
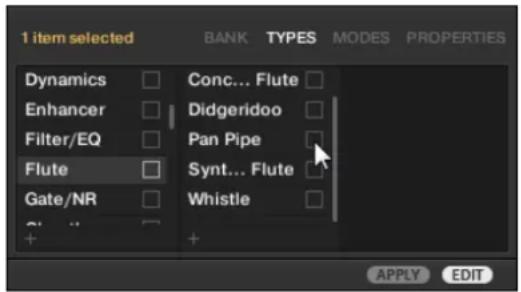
Assigning Tags
- Click the empty check box right of the desired tag name to assign this tag to the selected files.
A check mark appears in the check box.
- Click the APPLY button in the control bar to assign the selected tag.
→ The tag is assigned and saved.
Additionally, when you check a tag on the TYPES page:
- If another column is available on the right the tag you check is automatically selected and its Subtypes appear in the next column (if any), allowing you to directly refine your description by checking the desired Subtypes in this next column.
- If you check a Subtype tag whose parent tag was not checked in the previous column on the left, this parent tag will be automatically checked as well.

Be as precise as possible when tagging your files in order to be able to find what you are looking for later.
Unassigning Tags
▶ Click the check mark right of the desired tag to unassign this tag from the selected files.
→ The check mark disappears.

In the TYPES page, if you uncheck a tag for which some subtype tags were selected in the columns on the right, these will automatically be unassigned as you unassign their parent tag.
Creating New Tags
You can also create your own tags both in the TYPES and MODES pages:
To create a new tag in any column, click the “+” symbol at the bottom of the column, enter the desired tag name with your computer keyboard and press [Enter] to confirm.

Adding a new subtype
Deleting Tags
Tags in the TYPES and MODES pages cannot be deleted manually. However, if a tag is not assigned to any file anymore, it will be automatically removed from its column.
5.4.4 The PROPERTIES Page
The PROPERTIES page is only available when opening the Attribute Editor from the Library pane.
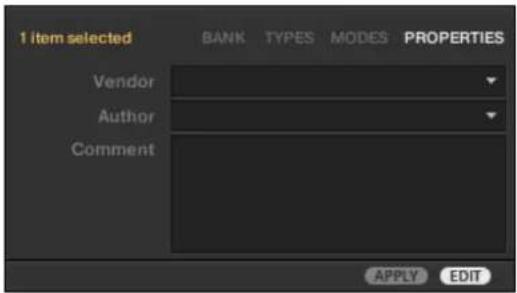
The PROPERTIES page of the Attribute Editor.
The PROPERTIES page displays three additional attributes of the selected files:
- Vendor: Use this field to indicate the manufacturer of the selected files. Click the down-pointing arrow on the right to quickly select any Vendor attribute already in use in other files of the Library.
- Author: Use this field to indicate the author of the selected files. Click the down-pointing arrow on the right to quickly select any Author attribute already in use in other files of the Library.
- Comment: Use this field to add any other information about the selected files.

As with the other pages of the Attribute Editor, the fields in the PROPERTIES page can be modified only if you have selected user files in the Result list. The attributes of factory files cannot be edited.
5.5 Loading and Importing Files from Your File System
The Browser's Files pane allows you to browse your file system and import the desired folders to your KOMPLETE Library.
▶ To display the Files pane, click the Files tab at the top of the Browser.
5.5.1 Overview of the Files Pane
The Files pane contains following elements:
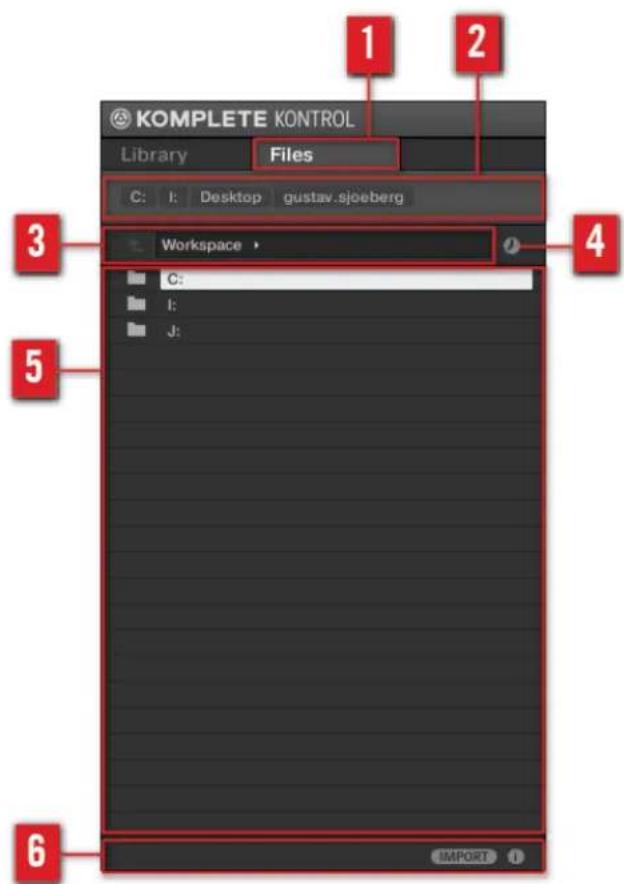
The elements of the Files pane.
(1) Files tab: Click the Files tab to open the Files pane described here.
(2) Favorite bar: Displays all your Favorites. Click any Favorite to directly jump to that particular path and display its content in the Result list (5). See section ↑5.5.2, Using Favorites.
(3) Location bar: Displays the selected path. The Location bar provides various tools to quickly navigate your file system. See section ↑5.5.3, Using the Location Bar.
(4) Recent Locations button: Click this button to see a list of the last visited locations and quickly jump any of them. See section 15.5.4. Navigating to Recent Locations.
(5) Result list: The result list displays the content (files and folders) of the folder loaded in the Location bar (3). Only KOMPLETE KONTROL-compatible files are displayed. See section 15.5.5. Using the Result List.
(6) Control bar: At the bottom of the Browser, the Control bar provides a couple of useful tools when browsing your file system, some of them depending on the type of the files selected in the result list:
- Click the Information button (showing a little "i") in the bottom right corner to display more information on the selected file(s). See section ↑5.3.1, Displaying File Information.
- When a folder is selected, click the IMPORT button at the right side of the bar to import the selected folder to the KOMPLETE Library. Clicking the IMPORT button will open the Attribute Editor so you can assign tags to the selected files about to be imported. See section ↑5.4, Editing the Files' Tags and Properties.
5.5.2 Using Favorites
Located at the top of the Files pane, the Favorite bar displays all your Favorites.
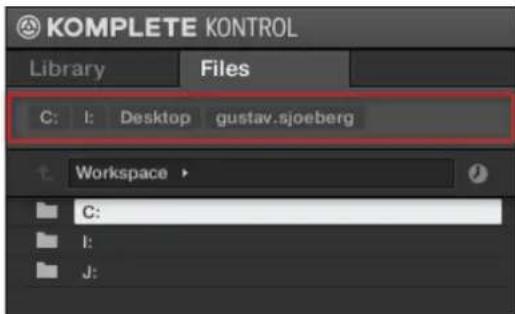
The Favorite bar, at the top of the Files pane.
Favorites are shortcuts to specific locations in your file system.
▶ Click any Favorite in the Favorite bar to jump to that location.
→ The selected location is loaded in the Location bar and its content appears in the Result list.
Favorites can be useful if you often return to the same location while browsing your file system in the Files pane: Save this location as a Favorite, and at any time you will be only one click away from that location!
The default Favorites are the roots of each of your hard disks, your desktop folder, and your user folder.
Adding and Removing Favorites
You can add your own Favorites to the Favorite bar. This is done in the Result list:
- Navigate to the parent folder containing the folder you want to use as Favorite, so that this folder appears in the Result list.
- In the Result list, right-click ([Ctrl]-click on Mac OS X) the desired folder and select Add to Favorites from the context menu.
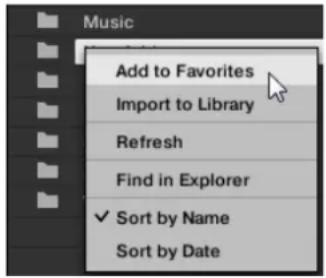
You can also remove any Favorite from the Favorite bar:
▶ To remove a Favorite, right-click it ([Ctrl]-click it on Mac OS X) in the Favorite bar and select Remove from Favorites.
5.5.3 Using the Location Bar
The Location bar shows and lets you modify the selected path. At any time the Result list will display the content of the path shown here.
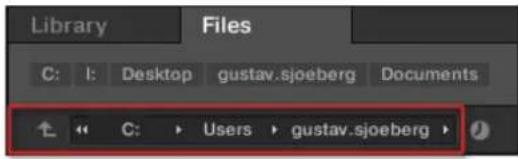
The Location bar
The Location bar provides following tools:
- Up arrow: Click the Up arrow on the left to go one level up in your file system.
- Selected path: Within the path displayed, you can:
- Click any folder name to jump to that folder:

- Click any right-pointing arrow after a folder name to open a list of its subfolders, and select any entry in the list to jump to that folder:

- If all the levels cannot be displayed in the path, click the double left-pointing arrow left of the path to display the remaining upper levels (up to the Workspace, representing the highest level in your file system), and select any entry in the list to jump to that location:

5.5.4 Navigating to Recent Locations
The Recent Locations button shows a clock icon at the right of the Location bar:
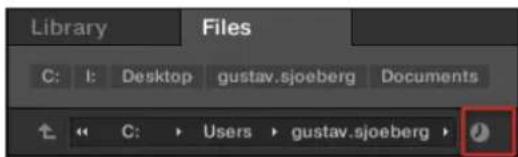
The Recent Location button.
The last 10 locations you have visited are stored by KOMPLETE KONTROL and available here:
▶ Click the Recent Location button and select any recently visited location from the list.
→ This location is loaded in the Location bar and its content displayed in the result list.
5.5.5 Using the Result List
The result list of the Files pane shows the files and folders found in the path loaded in the Location bar above (see section ↑5.5.3, Using the Location Bar).

Only KOMPLETE KONTROL-compatible files are shown in the result list.
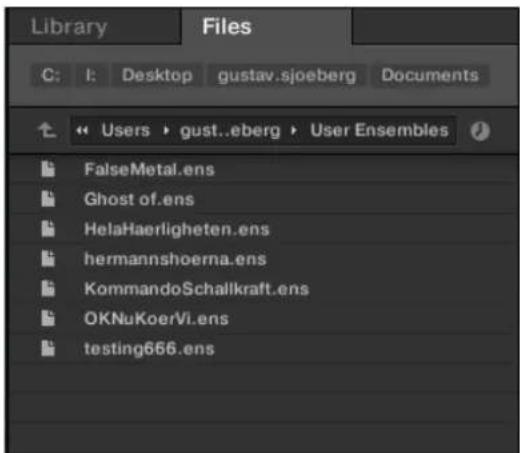
The Result list of the Files pane.
If the list is too long to fit in the display, use your mouse wheel or drag the scroll bar on the right to show the remaining items.
Navigating Your File System in the Result List
You can further browse your file system in the result list by opening any of the displayed folders:
▶ Double-click a folder to display its content.
To return to the previous folder or to select any folder outside the folder currently displayed, use the various tools located above the Result list:
- Favorites: ↑5.5.2, Using Favorites.
- Location bar: ↑5.5.3, Using the Location Bar.
- Recent Locations button: ↑5.5.4, Navigating to Recent Locations.
Selecting Files and Folders in the Result List
▶ To select a single file or folder in the result list, click its entry.
You can also select multiple files and folders in the Result list in order to process them all at once.
To select adjacent files in the list, do the following:
▶ Hold [Shift] on your computer keyboard and click two files in the Result list to select these files and all files in-between.
To select distant files in the list, do the following:
▶ Hold [Ctrl] ([Cmd] on Mac OS X) and click all the files you want to select.
Loading Files from the Result List
You can load files from the result list using the same method as in the result list of the Library pane: by double-clicking them. For all details, please refer to section ↑5.2.6, Using the Result List.
Additional Features in the Result List
▶ Right-click ([Ctrl]-click on Mac OS X) any entry in the result list to open a context menu with additional commands.
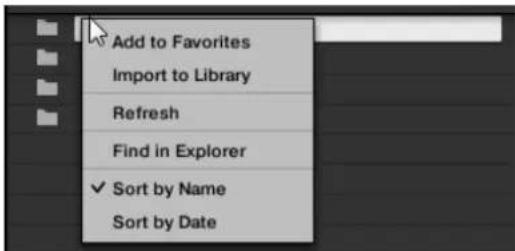
The context menu in the result list of the Files pane (Windows depicted).
Following commands are available:
| Command Description | |
| Add to Favorites (folders only) | Adds the selected folder to your Favorites. See section ↑5.5.2, Using Favorites for more information. |
| Import to Library (folders only) | Imports the selected folder(s) into the Library. See section ↑5.5.5, Using the Result List for more information. |
| Refresh Refreshes the display of the list, in case items have been modified in that folder. | |
| Find in Explorer / Find in Finder | Opens an Explorer/Finder window pointing to the selected folder. |
| Sort by Name Sorts the Result list according to the item names. | |
| Sort by Date Sorts the Result list according to the item dates. | |
5.5.6 Importing Files to the KOMPLETE Library
Apart from the huge KOMPLETE factory library, you might want to use, e.g., your own REAKTOR ensembles or KONTAKT instrument files you received from other users. As described previously, you can load them directly from the Files pane, but you won't be able to find and load them from your keyboard's on-screen browser nor from the Library pane (see section ↑5.2, Searching and Loading Files from the Library).
For this you will have to import the files into the Library first. Importing files does not mean they will be moved from the directory they currently reside in, they will only be referenced by the Browser. That's why whenever you move files, make sure to update the paths to their respective directories in the Library page of the Preferences panel, as described in section 2.5.1, Preferences – Library Page.
The Files pane allows you to import whole folders. All KOMPLETE KONTROL-compatible files found in the selected folder(s) will be imported.
To import a folder, do the following:
- Click the Files tab at the top of the Browser to open the Files pane.
- In the Files pane, navigate to the folder containing the folder you want to import. To do this, use the various tools described in the previous sections.
- Select the desired folder as described above.
- Click the IMPORT button at the bottom right of the Browser. You will be presented with the Attribute Editor.
- In the Attribute Editor, tag the files you are about to import to the Library as described in section 5.4, Editing the Files' Tags and Properties.
- When you are done, click OK at the bottom right of the Browser to import the files to the Library.
→ All KOMPLETE KONTROL-compatible files found in the selected folder(s) are imported to your Library. They are added as user content (User icon selected in the Content selector of the Library pane, see section ↑5.2.2, Choosing Between Factory and User Content). Furthermore, the paths of the imported folders are added to the list of user libraries in the User pane of the Library page in the Preferences panel—see section ↑2.5.1, Preferences – Library Page for more information on this.

You can also apply/remove tags at any time after they are imported. However, it may be best to tag files on import, since it will make it easier to find them later.
6 KOMPLETE KONTROL Software Perform Panel
One of the most powerful and creative features of KOMPLETE KONTROL is the dedicated Perform Panel. It allows you to play chords and arpeggiated note sequences according to a vast amount of selectable scales and other parameters. You can even generate chords by selecting sets of harmonizers to add onto the notes you play, effectively making chords out of single notes. On the KOMPLETE KONTROL S-SERIES keyboard, the features of the Perform Panel are reflected by the LEDs in the Light Guide directly above the keypad (for details, see section 7.7 , The Light Guide) and can be accessed and edited via the PERFORM section on the far left (see section 8 , KOMPLETE KONTROL S-SERIES Perform Functions).
6.1 Perform Panel Overview
![KOMPLETE KONTROL Library Files Scale App 3 4 Key Mode Chord Mode Standard All Instruments TYPE: Base Bowed Strings Brass Drums Flute Guitar Mallet Instruments Multitrack Organ Percussion Piano/Keys Plucked Strings Feed Instruments Sound Effects Soundscapes Synth Lead Synth Misc Synth Pad Vocal MODES: Additive Arpeggiated Chord Dry FM Glide/Pitch Mod Granular Long Release Long/Evolving Monophonic Percussive Physical Model Processed Sample Based Sample-based Sequence/Loop Slow Attack Surround Synthetic Tempo-synced [PRIS]1 [PRIS]2 01 LP Ep Org (El 02) C0 Boom 01 LP Epic Org (El 01) A0 Boom 01 LP Epic Organic (El 03) C1 Boom 01 LP Epic Organic B1 Tribull KOMPLETE KONTROL Use the browser to load an instrument.](/content/2026/05/761321/images/8682663559fd3d7a8b45de90a561935c9eba8dc0aae2ffdcc8bb62692c28b22b.jpg)
The default view of the Perform Panel: showing Scale parameters
(1) Perform Panel button: Shows and hides the Perform Panel with all its parameters. The Perform Panel button lights blue when Scale or Arp is active.
(2) Perform Panel: Contains all performance features and parameters. The Perform Panel lets you access and edit all available menus for Scale and Arp. Clicking Scale displays all the scale parameters; clicking Arp displays all the arp parameters.
(3) Scale: Clicking the check box left of Scale switches the scale engine on or off. Clicking the Scale label displays the scale parameters. For detailed information on Scale and its parameters, see section ↑6.3, Scale Engine and ↑6.4, Scale Parameters.
(4) Arp: Clicking the check box left of Arp switches the arpeggiator on or off. Clicking the Arp label displays the arp parameters. For detailed information on Arp and its parameters, see section ↑6.4.5, Chord Type and ↑6.6, Arp Parameters.
Showing/Hiding the Perform Panel
To open the Perform Panel and view the Scale and Arp parameters, click the Perform Panel button in the header.

Click it once more to hide the Perform Panel.
To open or close the Perform Panel from the KOMPLETE KONTROL menu, click the downward pointing arrow and select Perform Panel from the View submenu of the appearing drop-down menu.
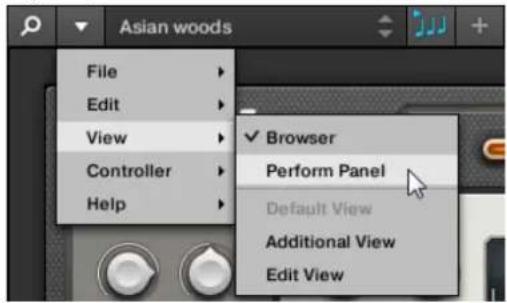
To open or close the Perform Panel from the application menu bar, click View and select Perform Panel from the appearing drop-down menu.
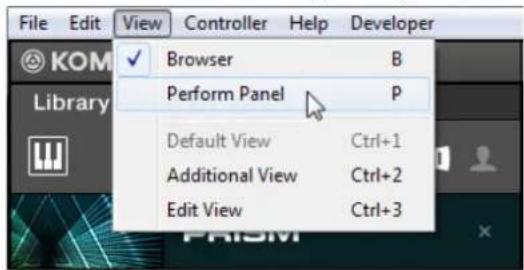

In stand-alone mode, you can also show/hide the Perform Panel from your computer keyboard via the [P] key.
Perform Panel Button States
The four states of the Perform Panel button indicate whether the engines are active or inactive and also whether the Perform Panel is open or not.
- When the Perform Panel is hidden and inactive, the Perform Panel button is grayed out.
Perform Panel hidden, engines inactive
- When the Perform Panel is open but engines are inactive, the Perform Panel button lights up white and displays a white panel at the bottom of the button.
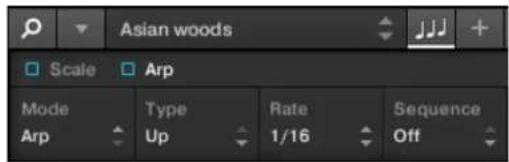
Perform Panel open, engines inactive
- When the Perform Panel is open and one or both engines are active, the Perform Panel button lights up blue and displays a play symbol as well as a blue panel at the bottom of the button.
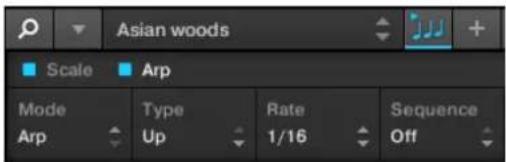
Perform Panel open, Scale and Arp active
- When the Perform Panel is hidden but active, the Perform Panel button lights up blue. No panel is displayed.
Perform Panel hidden, one or both engines active

The default view of the Perform Panel: showing Scale parameters
The performance features are editable parameters that come in the form of drop-down menus or click-and-drag controls.
Switching Pages
▶ To view the Scale page, click the Scale label.

▶ To view the Arp page, click the Arp label.

Setting a Parameter Value
To set a value for a drop-down menu parameter, click it and select the value from the appearing menu.
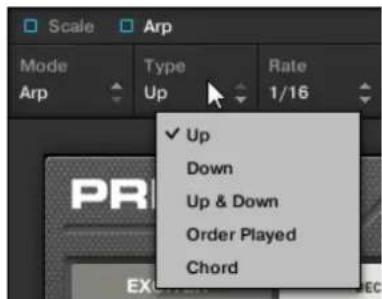
Selecting a Type from the Arp parameters
To set a value for drag-control parameters, either click and drag the value with your mouse or double-click it and then enter a value with your computer keyboard.
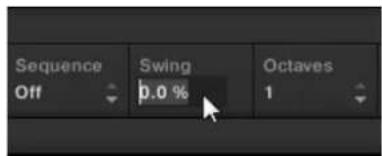
Setting a Swing value from the Arp parameters

The engine for which you are editing parameters must be switched on (check box filled blue) for the settings to become active.
6.2 A Note about Music Theory
KOMPLETE KONTROL has built-in scales and harmonies that you can select to play your KOMPLETE instruments with chords and arpeggios. To learn more about what that really means, continue reading below. To skip directly to detailed information about the Perform Panel's parameters, proceed to ↑6.3, Scale Engine and ↑6.4.5, Chord Type.
6.2.1 Scales
Traditionally music is built by combining elements of rhythm and harmony. There are many exceptions to this, but to understand the concepts of scales, chords and arpeggios let's start from there.
All notes and keys correspond to a pitch—or tone frequency. On a keyboard, each key typically represents a semitone, meaning that it is a “half step” higher or lower in pitch than the next key (though other tunings exist as well). To play melodies or chords that sound good together, notes are usually grouped together in scales. In the Western music tradition, a scale typically covers seven white keys and five black keys on a keyboard or piano: an octave. It is called so because the eighth key that follows the seventh contiguous white key plays the same note as the first of the seven. That key is called the root note. A scale then, is a certain combination of white and black keys (each representing a semitone) within an octave. By playing only the keys belonging to some scale, you are certain to stay “in key” within that scale. Important to note though, is that scales are not made up by absolute note values, but rather consist of relative changes in pitch—or steps along the scale. For example, the major scale consists of “whole step—whole step—half step—whole step—whole step—half step,” which means that you can transpose the scale up and down a keyboard; choose any root note you want and play the scale from there.
6.2.2 Chords
Polyphonic instruments let you play multiple notes simultaneously—in other words chords. As an example, let's see how to build up a chord by selecting individual notes from a scale and playing them simultaneously. In this case, we'll use the C major scale. As we saw above in section 16.2.1, Scales, the major scale starts with two whole steps, followed by a half step, and then three more whole steps until it ends with another half step. We can use this knowledge to
play a C major chord by pressing the root note C, then pressing another key two whole steps above C (the E note) and then yet another key a half step and a whole step further up the keyboard (the G note) all simultaneously. This C major chord corresponds to a root note (C), a third (E) and a fifth (G), which is the note interval of a major triad. By playing a triad chord you have just learned the concept of musical harmony, where notes are stacked together into chords and played simultaneously.
6.2.3 Arpeggios
In section 6.2.2, Chords above you read about the combination of notes and playing them together as chords. You can also play them like diachronic note sequences, quite like playing the harp—or arpeggio. If chords have to do with adding harmony to a note, then arpeggios add time and rhythm. Instead of playing a chord consisting of three notes simultaneously, you can play the same three notes as a sequence in a given order (e.g. top-down) and at a certain rate (e.g. 1/16 notes). This is also a way for monophonic instruments to play “chords.”
6.3 Scale Engine
KOMPLETE KONTROL comes equipped with a vast amount of scales that you can select and use to play your KOMPLETE instruments. This opens up possibilities to play an instrument such as a piano according to, e.g., the minor pentatonic scale without hitting a “false” note. In Chord Mode you can use the provided scales to combine individual note harmonies into chords. Combined with the arpeggiator (see ↑6.4.5, Chord Type), you can even play scales automatically simply by pressing down a key on your KOMPLETE KONTROL S-SERIES keyboard or receiving an incoming MIDI note.

The Perform Panel showing Scale parameters
▶ To switch on the Scale engine, click the blue check box so it is filled.

When you select a scale in the Perform Panel and switch the Scale engine on, the scale gets mapped onto your KOMPLETE KONTROL S-SERIES keyboard and is reflected by the Light Guide. This means that regardless of what keys you actually press down on your keyboard—or what MIDI notes you send from your host application—the notes that are being played back are always mapped onto the closest notes contained in the scale that you selected.
▶ Use Scale and Arp together simultaneously to play arpeggiated chords or note sequences.
To learn more about each of the Scale parameters, continue reading below.
6.4 Scale Parameters
You have the possibility to tailor your scales and chords to your liking using the Scale parameters. They are a set of menus located on the Scale page of the Perform Panel.
Available Scale Parameters
- For information about Root Note and how to select the first key in a scale, see section ↑6.4.1, Root Note.
- For information about Scale Type and mapping musical scales onto the keys of your keyboard, see section ↑6.4.2, Scale Type.
- For information about Key Mode and playing white keys only in Easy mode, see section ↑6.4.2, Scale Type.
- For information about generating chords with Chord Mode and Chord Type, see sections 16.4.3. Key Mode and 16.4.5. Chord Type.

For information on Arp parameters, see section 6.6 , Arp Parameters.
6.4.1 Root Note

The Scale parameter Root Note, default value C
The leftmost Scale parameter is Root Note. Setting the root note of a scale means deciding what key the scale will begin with. The following notes of the scale depend on which scale pattern you select with the Scale Type parameter (see ↑6.4.2, Scale Type). For example, using the default Root Note value C combined with the default Scale Type value Major, you get the scale C major, which spans over one octave and contains the notes C, D, E, F, G, A, and B (followed by C again). If instead you select G as your Root Note, the G major scale contains the notes G, A, B, C, D, E, and F# (followed by G again). You will notice that the distance between each note follows the same pattern of “whole step-whole step-half step-whole step-whole step-half step,” which is the pattern of the Major scale. You can transpose this pattern up or down along the keyboard by selecting the Root Note.
- The KOMPLETE KONTROL S-SERIES keyboard indicates the selected Root Note via fully lit LEDs, while other active keys are half-lit.

The Scale engine must be switched on for the settings to become active.
The Root Note menu contains the following values:
·C
· C#
·D
·D#
·E
·F
- F#
·G
· G#
·A
- A#
·B
6.4.2 Scale Type

The Scale parameter Scale Type, default value Major
The second parameter from the left is Scale Type. Use it to decide the scale pattern (see section ↑6.4.1, Root Note) according to which the notes will be mapped onto the keys of your KOMPLETE KONTROL S-SERIES keyboard. If you are triggering a KOMPLETE instrument via an incoming MIDI pattern from your host software, the notes of the MIDI pattern will be mapped onto the closest keys belonging to the selected Scale Type. This means that, for example (with Root Note set to C) a MIDI pattern consisting of the notes C-D-D# will be played back as such if Scale Type is set to Chromatic, but instead as C-D-E if Scale Type is set to Major. For a fully detailed list of the key mappings of each scale, see the table below.
- The KOMPLETE KONTROL S-SERIES keyboard indicates the active keys in the selected Scale Type via lit LEDs, while inactive keys are unlit.

The Scale engine must be switched on for the settings to become active.
The Scale Type menu contains the following values:
| Scale Type Keys per Octave | ||||||||||||
| All Keys 1 2 3 4 5 6 7 8 9 | 10 11 | 12 | ||||||||||
| Chromatic | ||||||||||||
| Corresponding Mapping R | 2 3 4 | 5 6 7 8 | 9 10 | 11 12 | ||||||||
| Example with Root Note: C | C C# | D D# | E F F# | G G# | A A B | |||||||
| Major | ||||||||||||
| Corresponding Mapping R | 2 2 3 | 3 4 5 5 | 6 6 7 | 7 | ||||||||
| Example with Root Note: C | C D D | E E F | G G A | A A B | B | |||||||
| Minor | ||||||||||||
| Corresponding Mapping R | R 2 b3 | b3 4 5 | 5 b6 | b6 b7 | b7 | |||||||
| Example with Root Note: C | C C D | Eb Eb | F G | G Ab | Ab Bb | Bb | ||||||
| Harmonic Minor | ||||||||||||
| Corresponding Mapping R | R 2 b3 | b3 4 5 | 5 b6 | b6 7 7 | ||||||||
| Example with Root Note: C | C C D | Eb Eb | F G | G Ab | Ab B B | |||||||
| Major Pentatonic | ||||||||||||
| Corresponding Mapping R | R 2 2 | 3 3 5 5 | 5 6 6 | R | ||||||||
| Example with Root Note: C | C C D | D E E | G G | G A A | C | |||||||
| Minor Pentatonic | ||||||||||||
| Scale Type Keys per Octave | ||||||||||||
| Corresponding Mapping R | R b3 b | 3 4 4 | 4 5 5 | b7 b7 R | ||||||||
| Example with Root Note: C | C C E | b Eb F | F F G | G Bb | Bb C | |||||||
| Blues | ||||||||||||
| Corresponding Mapping R | R R b3 | b3 4 #4 5 5 | b7 b7 R | |||||||||
| Example with Root Note: C | C C C | Eb Eb F F# | G G Bb Bb C | |||||||||
| Japanese | ||||||||||||
| Corresponding Mapping R | 2 2 b3 | b3 5 5 b6 | b6 R R | |||||||||
| Example with Root Note: C | C D D | Eb E b G G | G Ab Ab C C | |||||||||
| Freygish | ||||||||||||
| Corresponding Mapping R | b2 b2 | 3 3 4 5 b6 | b6 b7 b7 | |||||||||
| Example with Root Note: C | C Db | Db E E F G | G Ab Ab Bb Bb | |||||||||
| Gypsy | ||||||||||||
| Corresponding Mapping R | 2 2 b3 | b3 #4 #4 5 | b6 b6 7 7 | |||||||||
| Example with Root Note: C | C D D | Eb E b F# F | # G A b Ab B | B | ||||||||
| Flamenco | ||||||||||||
| Corresponding Mapping R | b2 b2 | 3 3 4 5 b6 | b6 7 7 | |||||||||
| Example with Root Note: C | C Db | Db E E F G | G Ab Ab B B | |||||||||
| Altered | ||||||||||||
| Corresponding Mapping R | b2 b2 | b3 b4 | b5 b5 | b6 b6 | b7 b7 | R | ||||||
| Example with Root Note: C | C Db | Db Eb | Fb Gb | Gb A | b Ab | Bb Bb | C | |||||
| Whole Tone | ||||||||||||
| Corresponding Mapping R | R 2 3 | 3 #4 #4 | #5 #5 | #6 #6 | R | |||||||
| Example with Root Note: C | C C D | E E F | # F# | G# G# | A# A# | C | ||||||
| Half-Whole Diminished | ||||||||||||
| Corresponding Mapping R | b2 b2 | #2 3 #4 | #4 5 | 6 6 b | 7 b7 | |||||||
| Example with Root Note: C | C Db | Db D# | E F# | F# G | A A Bb | Bb | ||||||
| Whole-Half Diminished | ||||||||||||
| Corresponding Mapping R | R 2 b3 | b3 #3 | #4 #4 | #5 6 | 7 7 | |||||||
| Example with Root Note: C | C C D | Eb Eb | E# F | # F# | G# A B | B | ||||||
6.4.3 Key Mode

The Scale parameter Key Mode, default value Standard
Both sections ↑6.4.1, Root Note and ↑6.4.2, Scale Type describe the use of Scale on the assumption that Key Mode—the third Scale parameter—is set to its default value Standard. In Standard mode, the keys are mapped to the notes of the selected scale exactly as depicted in the table in section ↑6.4.2, Scale Type. That is to say, playing your KOMPLETE KONTROL S-SERIES keyboard, the selected scale is mapped onto an octave of the keyboard so that the octave is equally represented by seven white keys and five black ones. The mapping is reflected by the Light Guide, giving you valuable information on what keys are mapped onto which notes.
If instead, Key Mode is set to Easy, the notes are mapped onto the keys so that any scale (except the 12-step Chromatic scale) can be played using each consecutive white key of an octave. This means that a scale consisting of seven notes—or whole steps—will be mapped onto seven contiguous white keys. Black keys are inactive and pressing them will not play back any other notes.
When using Key Mode Easy, the set Root Note (see section 6.4.1 , Root Note) is always mapped onto the middle C key (commonly called C3). If the selected scale covers seven steps (and the 12-step chromatic), then the C1 key will also be mapped to the selected Root Note. If instead the selected scale has more or less than seven notes, then—depending on the amount of notes in the selected scale and counting down from C3—the C1 key will instead be mapped to any note contained in the selected scale corresponding to the amount of steps down from C3.
For a fully detailed list of the Easy mode mappings for each scale, see below.

Selecting the 12-step Chromatic scale in Key Mode Easy maps the keys in the same way as in the Standard mode. This is because the Chromatic scale contains twelve notes, rather than seven, as is common for other scales.
- The KOMPLETE KONTROL S-SERIES keyboard indicates the active keys in the selected Key Mode via lit LEDs, while inactive keys are unlit.

The Scale engine must be switched on for the settings to become active.
The Key Mode menu contains the following values:
- Standard
- Easy
In Easy mode, the Scale Types are mapped onto the white keys only according to this table:
| Scale Type Mapping in Key Mode: Easy | ||||||||
| White Keys C3 D3 E3 F3 G3 | A3 B3 | |||||||
| Major | ||||||||
| Corresponding Mapping R 2 3 4 5 6 | 7 | |||||||
| Example with Root Note: C | C D E F | G A B | ||||||
| Minor | ||||||||
| Corresponding Mapping R 2 b3 4 5 b6 b7 | ||||||||
| Example with Root Note: C | C D Eb | F G Ab Bb | ||||||
| Harmonic Minor | ||||||||
| Corresponding Mapping R 2 b3 4 5 b6 7 | ||||||||
| Example with Root Note: C | C D Eb | F G Ab B | ||||||
| Major Pentatonic | ||||||||
| Corresponding Mapping R 2 3 5 6 | ||||||||
| Example with Root Note: C | C D E G | A | ||||||
| Minor Pentatonic | ||||||||
| Corresponding Mapping R b3 4 5 b7 | ||||||||
| Example with Root Note: C | C Eb F G Bb | |||||||
| Blues | ||||||||
| Corresponding Mapping R | b3 4 #4 5 | b7 | ||||||
| Example with Root Note: C | C Eb F F | # G Bb | ||||||
| Japanese | ||||||||
| Corresponding Mapping R | 2 b3 5 b6 | |||||||
| Example with Root Note: C | C D Eb G Ab | |||||||
| Freygish | ||||||||
| Corresponding Mapping R | b2 3 4 5 b6 b7 | |||||||
| Example with Root Note: C | C Db E F G Ab Bb | |||||||
| Gypsy | ||||||||
| Corresponding Mapping R | 2 b3 #4 5 b6 7 | |||||||
| Example with Root Note: C | C D Eb F# G Ab B | |||||||
| Flamenco | ||||||||
| Corresponding Mapping R | b2 3 4 5 b6 7 | |||||||
| Example with Root Note: C | C Db E F G Ab B | |||||||
| Altered | ||||||||
| Corresponding Mapping R | b2 b3 b4 b5 b6 b7 | |||||||
| Example with Root Note: C | C Db Eb Fb Gb Ab Bb | |||||||
| Whole Tone | ||||||||
| Corresponding Mapping R | 2 3 #4 #5 | #6 | ||||||
| Example with Root Note: C | C D E F# | G# A# | ||||||
| Half-Whole Diminished | ||||||||
| Corresponding Mapping R | b2 #2 3 # | 4 5 6 b7 | ||||||
| Example with Root Note: C | C Db D# | E F# G A Bb | ||||||
| Whole-Half Diminished | ||||||||
| Corresponding Mapping R | 2 b3 #3 # | 4 #5 6 7 | ||||||
| Example with Root Note: C | C D Eb | E# F# G# | A B | |||||
6.4.4 Chord Mode

The Scale parameter Chord Mode, default value Off
A very useful and creative Scale parameter is Chord Mode. Use it to generate chords from single notes, either from your KOMPLETE KONTROL S-SERIES or from incoming MIDI notes from your host software. Chord Mode has one inactive (Off) and two active states: Harmonizer and Chord Set.
- In the Harmonizer state, you specify the interval of notes in the selected Scale Type (see ↑6.4.2, Scale Type) that will constitute the chord from the Chord Type menu (see ↑6.4.5, Chord Type): E.g. a triad in the form of the root note, the third note, and the fifth note (Chord Type value 1-3-5).
- In the Chord Set state, Chord Types (see ↑6.4.5, Chord Type) are selected from a list of major and minor chords depending on the selected Root Note (see ↑6.4.1, Root Note).
Depending on whether you select Chord Mode Off, Harmonizer, or Chord Set, other Scale parameters will be either displayed or hidden:
- Selecting Harmonizer sets the Chord Type menu to display a series of note intervals, letting you decide what keys should be used to generate a chord.

The Scale parameter Chord Mode, set value Harmonizer
- Selecting Chord Set sets the Chord Type menu to display a list of major and minor chords. Scale Type and Key Mode are hidden.

The Scale parameter Chord Mode, set value Chord Set
- The KOMPLETE KONTROL S-SERIES keyboard indicates the keys being played back in a chord generated by the selected Chord Mode and Chord Type settings via fully lit LEDs, while active keys are half-lit and inactive keys are unlit.

The Scale engine must be switched on for the settings to become active.
The following items are selectable from the Chord Mode menu:
- Off
- Harmonizer
- Chord Set
6.4.5 Chord Type

The Scale parameter Chord Type, set value 1-3-5 (Chord Mode set to Harmonizer)

The Scale parameter Chord Type, set value Major 1 (Chord Mode set to Chord Set)
The Chord Type parameter lets you define a chord that will be generated from a single note used as input. If, for example, Root Note (see ↑6.4.1, Root Note) is set to C and Chord Mode (see ↑6.4.3, Key Mode) to Chord Set, then the Chord Type menu presents you with a list of selectable chords. Values are, e.g., Major 4 and Minor 7, which would generate a major and minor chord, respectively—both using C as the chord's root note.
If Chord Mode is instead set to Harmonizer, then Chord Type will offer you a selection of individual notes present in the selected Scale Type (see ↑6.4.2, Scale Type). This means that for all scales except the 12-tone Chromatic scale (see further below), you can select the interval of notes that will make up your chord. The note interval is added onto the key of an incoming MIDI note, either from your KOMPLETE KONTROL S-SERIES keyboard or from your host software. For example, you can select to play a C minor triad by setting Root Note to C, Scale Type to Minor, Chord Mode to Harmonizer, and Chord Type to 1-3-5. If all of this seems complex, try setting a random value and use the KOMPLETE KONTROL S-SERIES' Light Guide to see what keys are active, inactive, and played back.
- The KOMPLETE KONTROL S-SERIES keyboard indicates the keys being played back in a chord generated by the selected Chord Mode and Chord Type settings via fully lit LEDs, while active keys are half-lit and inactive keys are unlit.

The Scale engine must be switched on for the settings to become active.
The Chord Type menu contains the following values:
- When Chord Mode is set to Harmonizer:
- When Chord Mode is set to Chord Set:
• Major 1
• Major 2
• Major 3
• Major 4
• Major 5
• Major 6
• Major 7
• Major 8
- Minor 1
Minor 2
Minor 3
- Minor 4
Minor 5
- Minor 6
Minor 7
• Minor 8
| Chord Type | Interval Added to Played Note |
| Octave Octave | |
| 1-3 3rd | |
| 1-5 5th |
| Chord Type Interval Added to Played Note |
| 1-3-5 3rd and 5th |
| 1-4-5 4th and 5th |
| 1-3-5-7 3rd, 5th and 7th |
| 1-4-7 4th and 7th |
Chord Type and the Chromatic Scale
The Chromatic scale consists of every semitone in an octave. That means that when you play every white key and every black key of an octave up or down, you are playing the 12-step Chromatic scale. Since all semitones of an octave are present in the scale, you can use all keys to form chords. In turn, selecting Chromatic as Scale Type (see ↑6.4.2, Scale Type) means that you can select virtually any Chord Type. The following chords are available and can be generated:
| Chord Type Semitones Added above Played Note | |
| Octave 12 | |
| Perfect 4 5 | |
| Perfect 5 7 | |
| Major 4 and 7 | |
| Minor 3 and 7 | |
| Suspended 4 5 and 7 | |
| Major 7 4, 7 and 11 | |
| Minor 7 3, 7 and 10 | |
| Dominant 7 4, | 7 and 10 |
| Dominant 9 4, | 7, 10 and 14 |
| Minor 7 b5 3, | 6 and 10 |
| Diminished 7 | 3, 6 and 9 |
| Augmented | 4 and 8 |
| Chord Type Semitones Added above Played Note |
| Quartal 5, 10 and 15 |
| Trichord 5 and 11 |
6.5 Arpeggiator
The Perform Panel has a flexible and versatile arpeggiator that effectively lets you play your KOMPLETE instruments in note sequences according to the scales and chords created with the Scale parameters (see section ↑6.4, Scale Parameters). You can use the arpeggiator by itself as well, for example to keep retriggering the keys you press or to play a note over multiple octaves. To play an arpeggiated note sequence you only need to press any key on your KOMPLETE KONTROL S-SERIES keyboard or receive an incoming MIDI note from your host software.

The Perform Panel showing Arp parameters
▶ To switch on the Arp engine, click the blue check box on the left so it fills.

▶ Use Scale and Arp together simultaneously to play arpeggiated chords or note sequences.
To learn more about each of the Arp parameters, continue reading below.
6.6 Arp Parameters
The arpeggiator has eight different parameters, giving you many possibilities to configure and shape the sound of your own note sequences. For example, you can set values for rate, swing, and range in order to add both rhythm and melody.
Available Arp Parameters
- For information about Mode and note repeat, see section ↑6.6.1, Mode.
- For information about Type and the direction of the playback, see section ↑6.6.2, Type.
- For information about Rate and the available note values of the arpeggiator, see section ↑6.6.3, Rate.
- For information about Sequence and creating rhythmic variation, see section ↑6.6.4, Sequence.
- For information about Swing and the adding groove, see section ↑6.6.5, Swing.
- For information about Octaves and the range of the arpeggiator, see section ↑6.6.6, Octaves.
- For information about Dynamic and creating velocity variations, see section ↑6.6.7, Dynamic.
- For information about Gate and setting note length, see section ↑6.6.8, Gate.

For information on Scale parameters, see section ↑6.4, Scale Parameters.
6.6.1 Mode

The Arp parameter Mode, default value Arp
The first and most basic Arp parameter is Mode, which lets you select either Arp or Note Repeat. Depending on your selection, many of the remaining Arp parameters will either be visible or hidden.
Arp mode lets you play the output of the Scale engine as a sequence of notes. For example, this means that you can set Scale Type (see ↑6.4.2, Scale Type) to, e.g., Japanese and Chord Mode (see ↑6.4.3, Key Mode) to Harmonizer in order to play a chord according to the Japanese scale. With Arp switched on and Mode set to Arp, the chord you created using the Scale engine will play as an arpeggiated note sequence instead of simultaneously. You only need to press one key on your KOMPLETE KONTROL S-SERIES to hear the arpeggiated notes play out according to the selected scale. Likewise, if you are triggering the chord from your host software, no more than a single MIDI event is necessary to play the arpeggiated note sequence, which among other things is useful for monophonic instruments.
- Selecting Arp gives you access to all Arp parameters.
- Selecting Note Repeat gives you access to the Arp parameters Rate, Swing, and Gate (see image below). Other parameters are hidden.

The Arp parameter Mode, set value Note Repeat

The Arp engine must be switched on for the settings to become active.
The Mode menu contains the following values:
- Arp
- Note Repeat
Note Repeat Mode
Setting Mode to Note Repeat deactivates the arpeggiator and instead sets KOMPLETE KON-TROL to Note Repeat mode, where whichever note is input is repeated until KOMPLETE KON-TROL receives a MIDI note-off message. Use parameters Rate, Swing, and Gate (see ↑6.6.3, Rate, ↑6.6.4, Sequence, and ↑6.6.5, Swing) to design Note Repeat mode to fit your needs.
6.6.2 Type

The Arp parameter Type, default value Up
The Type parameter is only available in Arp mode and sets the sequential order of the arpeggiated notes. Choose whether your arpeggiated chord should be played from the root note and up, the other way around, or even simultaneously. Selecting Order Played will play back the notes in the order you pressed down the corresponding keys on your KOMPLETE KONTROL S-SERIES keyboard. Automating the Type parameter in your host software can create interesting variations and textures.

The Arp engine must be switched on for the settings to become active.
The Type menu contains the following values:
- Up
- Down
- Up & Down
- Order Played
- Chord
6.6.3 Rate

The Arp parameter Rate, default value 1/16
The Rate parameter—available in both Arp and Note Repeat mode—sets the tempo of the Arp engine in relation to global tempo in musical values, ranging from 1/1 to 1/128. All note values (except 1/1 and 1/128) are available as basic notes, dotted notes, and triplets. Dotted notes are 1.5 times longer than the corresponding basic notes. Triplets are 2/3 the duration of their corresponding basic notes, so that e.g. three 1/4 notes are equal in duration to two basic 1/4 notes.

The Arp engine must be switched on for the settings to become active.
The Rate menu contains the following values:
· 1/1
- 1/2 Dotted
- 1/1 Triplet
■ 1/2
- 1/4 Dotted
- 1/2 Triplet
· 1/4
- 1/8 Dotted
- 1/4 Triplet
■ 1/8
- 1/16 Dotted
- 1/8 Triplet
■ 1/16
- 1/32 Dotted
- 1/16 Triplet
• 1/32
- 1/64 Dotted
- 1/32 Triplet
· 1/64
- 1/128 Dotted
- 1/64 Triplet
· 1/128
6.6.4 Sequence

The Arp parameter Sequence, default value Off
The Sequence parameter gives you a way of adding interesting rhythms to your arpeggiated notes. Select one of eight different sequences and apply it to the arpeggio you are playing. Combine Sequence with the Rate parameter (see ↑6.6.3, Rate) to create a huge variety of rhythms at different tempos. If Rate is set to a basic or dotted value, then Sequence applies a 16-step sequencer to the notes. If Rate is instead set to a triplet value, then Sequence applies a 12-step sequencer to the notes.
You can switch sequences in real time during playback. For example, if sequence 1 is running and you instead select sequence 2 after the fourth MIDI note in a pattern has been played back, then sequence 2 starts when the fifth MIDI note in the pattern is played back.

The Arp engine must be switched on for the settings to become active.
The Sequence menu contains the following values:
- Off
· 1
·2
·3
· 4
·5
·6
·7
·8
6.6.5 Swing

The Arp parameter Swing, default value 0.0%
Adding Swing to your note sequence can make it feel less quantized and sound more natural. Swing works by introducing a delay to every second note in a sequence. Doing so often adds a certain groove to the music.
Swing is a drag control that lets you select a value between 0% and 100%:
▶ Set the value to 0% to play back the notes without delay.
▶ Set the value to 50% to delay playing back the notes with half a step in the grid of your host sequencer.
▶ Set the value to 100% to delay playing back the notes with a full step in the grid of your host sequencer.
Using Swing in combination with the Gate parameter (see ↑6.6.8, Gate) adds further variations in note duration. For example, if Gate is set to 100%, KOMPLETE KONTROL sends a MIDI note-off message before each note and plays back the sequence legato. If Gate is set to values larger or smaller than 100%, then notes will be scaled after the value of the Swing parameter has been applied, leaving the groove intact.

The Arp engine must be switched on for the settings to become active.
6.6.6 Octaves

The Arp parameter Octaves, default value 1
The Octaves parameter lets you decide the range of the arp sequence. You can choose to play back your sequence within the octave of the keys you pressed on your KOMPLETE KON-TROL S-SERIES keyboard only, or you can select up to eight octaves and let the corresponding notes of your chord or scale be played back in as many octaves.
Depending on the settings you have made to the Type parameter (see ↑6.6.2, Type), the octaves played back can be above (e.g. Up) or below (e.g. Down) the pressed keys.

The Arp engine must be switched on for the settings to become active.
The Octaves menu contains the following values:
The Dynamic function reads the velocity of the input—e.g. a key you pressed on your KOMPLETE KONTROL S-SERIES keyboard or an incoming MIDI note from your host software—and scales it by the factor you set with the Dynamic parameter. The scaling is applied per note. The velocity of each played note is taken and multiplied by the value set with the Dynamic parameter.

The Arp engine must be switched on for the settings to become active.
Dynamic is a drag control that lets you set a value between 1.0% and 200.0%.
6.6.8 Gate

The Arp parameter Gate, default value 100.0%
The Gate parameter lets you decide the length of the notes in your sequence. Setting a value between 1% and 99% makes the duration of the notes shorter than they otherwise would be. Setting a value between 101% and 200% instead elongates the duration of the notes by the selected value.

The Arp engine must be switched on for the settings to become active.
7 KOMPLETE KONTROL S-SERIES Keyboard
The KOMPLETE KONTROL S-SERIES keyboard is the dedicated hardware side of KOMPLETE KONTROL. It is tightly integrated in the software and can be used to browse, control and play your KOMPLETE instruments as well as to control your host application.
The KOMPLETE KONTROL S-SERIES contains three different keyboards: S25, S49, and S61: All created with the same top-quality semi-weighted Fatar keyed with aftertouch. Beyond the amount of keys, all KOMPLETE KONTROL S-SERIES keyboards come with identical features.

The following sections of this document are focused on the use of the KOMPLETE KON-TROL S-SERIES keyboard. For information about the KOMPLETE KONTROL software, see sections ↑4, KOMPLETE KONTROL Software Overview, ↑5, KOMPLETE KONTROL Software Browser, and ↑6, KOMPLETE KONTROL Software Perform Panel.
7.1 Keyboard Overview
The keyboard is equipped with the following sections:
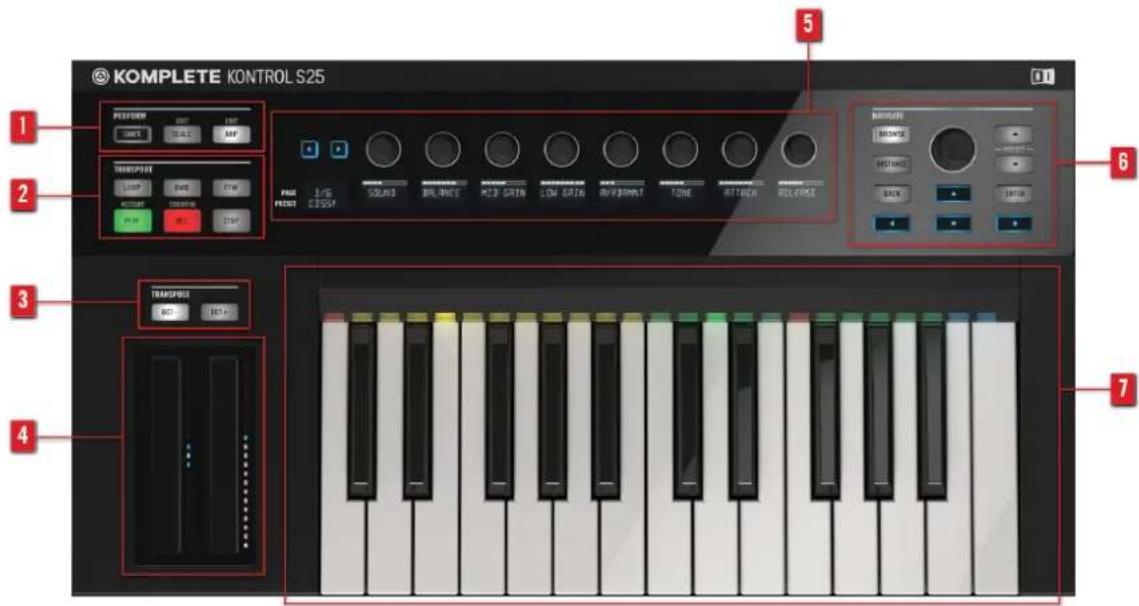
KOMPLETE KONTROL S-SERIES, S25 depicted
(1) PERFORM section: Lets you edit and control the powerful performance features, i.e. playing scales, chords, and arpeggios. The settings made in the PERFORM section are displayed in the Control section (5) and are reflected by the Light Guide and keybed (7). For details, see section 18, KOMPLETE KONTROL S-SERIES Perform Functions.
(2) TRANSPORT section: Controls the transport controls of your host application when KOM-PLETE KONTROL is used as a plug-in. For more information about the well-integrated host control features, see section ↑7.3, Host Control and the Transport Section.
(3) TRANSPOSE buttons: The OCT- and OCT+ buttons let you transpose the entire keypad one octave down or up, respectively. This can be especially useful if you are using the KOM-PLETE KONTROL S25.
(4) Touch strips: The pitch strip and the modulation strip are automatically assigned to corresponding controls of the loaded KOMPLETE instrument. For information about the touch strips, see section ↑7.6, Touch Strips.
(5) Control section: The page buttons, knobs, and displays at the center of the KOMPLETE KONTROL S-SERIES are automatically assigned to corresponding controls of the loaded KOMPLETE instrument. Use the page buttons to skip to another set of knob assignments, so that all instrument parameters can be controlled from the keyboard. The knobs and displays can also be used to control the parameters of the PERFORM section: SCALE and ARP. For information about the Control section and automatic parameter assignment (i.e. Native Map), see section ↑7.5, Control Section. For information about the PERFORM section, see ↑8, KOMPLETE KONTROL S-SERIES Perform Functions.
(6) NAVIGATE section: Calls up an on-screen overlay that lets you browse and load your KOMPLETE instruments. You can filter and scroll through instrument presets via the BROWSE button and keep track of your host session and switch between modes using the INSTANCE button. For information about how to browse the KOMPLETE library using the on-screen overlay, see section ↑7.4, Browsing and the Navigate Section. For information on how to use the NAVIGATE arrows for host control, see section ↑7.3.2, Automatic Track Focus and the Navigate Section.
(7) Light Guide and keyed: Reflect the settings of the PERFORM section by switching LEDs on or off to indicate active and inactive keys. The Light Guide also reflects the settings of the loaded KOMPLETE instruments and can be very helpful to illustrate e.g. BATTERY or KON-TAKT mappings.
Further Reading
- For information about how to connect your KOMPLETE KONTROL S-SERIES keyboard, refer to the Setup Guide located in the software installation folder on your hard disk.
- To learn more about the integration of KOMPLETE KONTROL S-SERIES and the KOMPLETE KONTROL software, see section 2 , Basic Concepts.
- For information about audio and MIDI settings, see section ↑2.6, Audio and MIDI Settings.
- For a run-down of how to use the most common features of KOMPLETE KONTROL and KOMPLETE KONTROL S-SERIES, see section ↑3, Quick Start.
- To learn more about MIDI mode and KOMPLETE KONTROL S-SERIES host control features, see section ↑7.2, MIDI Mode and ↑7.3, Host Control and the Transport Section.
7.2 MIDI Mode
Switching on your KOMPLETE KONTROL S-SERIES keyboard without first launching the KOMPLETE KONTROL software sets the keyboard to MIDI mode. When set to MIDI mode, your keyboard functions as a versatile, high-quality MIDI controller and can be used to, e.g., control your host application or to play external MIDI-compatible equipment.

The KOMPLETE KONTROL S-SERIES' displays in MIDI mode
7.2.1 Switching Controller Modes
The INSTANCE button in KOMPLETE KONTROL S-SERIES' NAVIGATE section can be used to switch between controller modes.
Plug-in Use
To switch your keyboard between KOMPLETE KONTROL mode and MIDI mode when KOMPLETE KONTROL is used as a plug-in:
▶ Press SHIFT + INSTANCE on your KOMPLETE KONTROL S-SERIES keyboard.
Stand-Alone Use
To switch your keyboard between stand-alone KOMPLETE KONTROL mode and MIDI mode:

Switching to MIDI mode via the on-screen overlay is only possible in stand-alone mode.
7.2.2 Host Control in MIDI Mode
Largely depending on the host application you use, you will use MIDI mode for host control more or less. KOMPLETE KONTROL S-SERIES switches automatically between KOMPLETE KONTROL mode and MIDI mode when you focus on tracks in your host that either contains or does not contain a KOMPLETE KONTROL instance, respectively. For detailed information on host control, continue reading below ( 7.3 , Host Control and the Transport Section). To skip straight to information about automatic track focus, proceed to 7.3.2 , Automatic Track Focus and the Navigate Section.
7.3 Host Control and the Transport Section
With KOMPLETE KONTROL S-SERIES as the centerpiece of your studio setup, you will want to use it to control not only the KOMPLETE instruments running inside KOMPLETE KONTROL, but also the host application running KOMPLETE KONTROL as a plug-in. This gives you direct hands-on control of your host application and allows you to select and record arm tracks as well as record and play back clips in your host project.
If you have loaded KOMPLETE KONTROL as a plug-in into one or more tracks of your host application, while also having one or more tracks running e.g. audio or other MIDI equipment, your KOMPLETE KONTROL S-SERIES will automatically switch between MIDI mode and KOMPLETE KONTROL mode, depending on the focused track. In the following sections we will take a look at how this works.

For information on how to load KOMPLETE KONTROL as a VST, AAX or AU plug-in, refer to the documentation of your host application.

Saving and loading a host project containing one or more instance of KOMPLETE KONTROL will recall the settings of both KOMPLETE KONTROL and any loaded KOMPLETE instrument.
A Note about Host Control
Depending on your choice of host application and the appearance of its GUI, the exact behavior of the TRANSPORT and NAVIGATE controls may vary when controlling your host. To find out which of KOMPLETE KONTROL's advanced host integration features are available for your host application, refer to the following Knowledge base article:
http://www.native-instruments.com/support/knowledge-base/show/2765/
For detailed guides explaining use together with your host application, please refer to the relevant Knowledge Base article:
- Setting up Ableton Live for KOMPLETE KONTROL:
http://www.native-instruments.com/support/knowledge-base/show/2643/ - Setting up Apple Logic for KOMPLETE KONTROL:
http://www.native-instruments.com/support/knowledge-base/show/2787/ - Setting up Steinberg Cubase / Nuendo for KOMPLETE KONTROL:
http://www.native-instruments.com/support/knowledge-base/show/2785/
7.3.1 Transport Controls
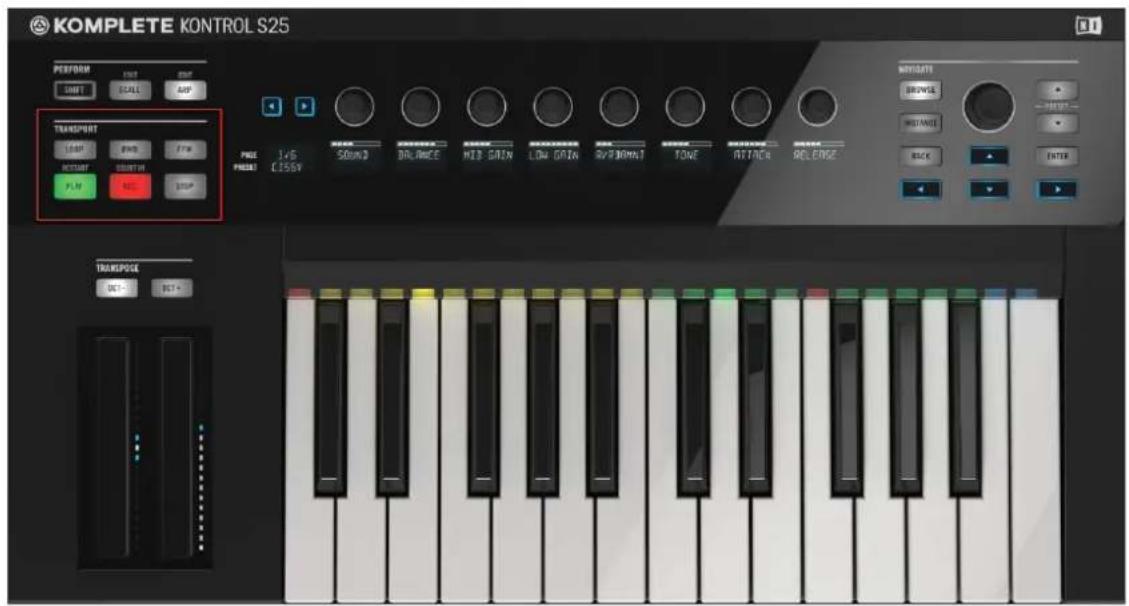
The TRANSPORT section
The TRANSPORT section at the far left on your keyboard gives you quick and easy access to playing, recording, looping, etc your host project while running KOMPLETE KONTROL as a plug-in.

The TRANSPORT controls of your KOMPLETE KONTROL S-SERIES are fully functional and can be used even if no instance of KOMPLETE KONTROL is loaded.

The functionality of the TRANSPORT controls may differ from DAW to DAW. Therefore we recommend you refer to the Knowledge Base article covering your host application (see section 7.3 , Host Control and the Transport Section)
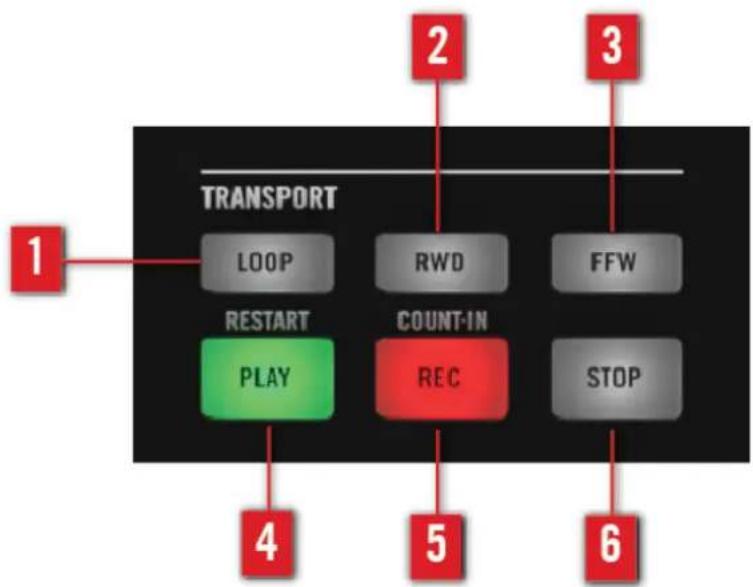
flowchart
graph TD
    1["1"] --> LOOP["LOOP"]
    1 --> RESTART["RESTART"]
    1 --> PLAY["PLAY"]
    2["2"] --> RWD["RWD"]
    3["3"] --> FFW["FFW"]
    4["4"] --> COUNTIN["COUNT-IN"]
    5["5"] --> REC["REC"]
    6["6"] --> STOP["STOP"]
    1 --> Transport["TRANSPORT"]
The TRANSPORT section
(1) LOOP: Switches the playback mode of your host application between standard and loop.
(2) RWD: Moves the playhead of your host application backward.
(3) FFW: Moves the playhead of your host application fast forward.
(4) PLAY: Plays back your host project.
(5) REC: Switches record on or off in your host application.
(6) STOP: Stops playback of your host project.

For information on how to load KOMPLETE KONTROL as a VST, AAX or AU plug-in, refer to the documentation of your host application.
7.3.2 Automatic Track Focus and the Navigate Section
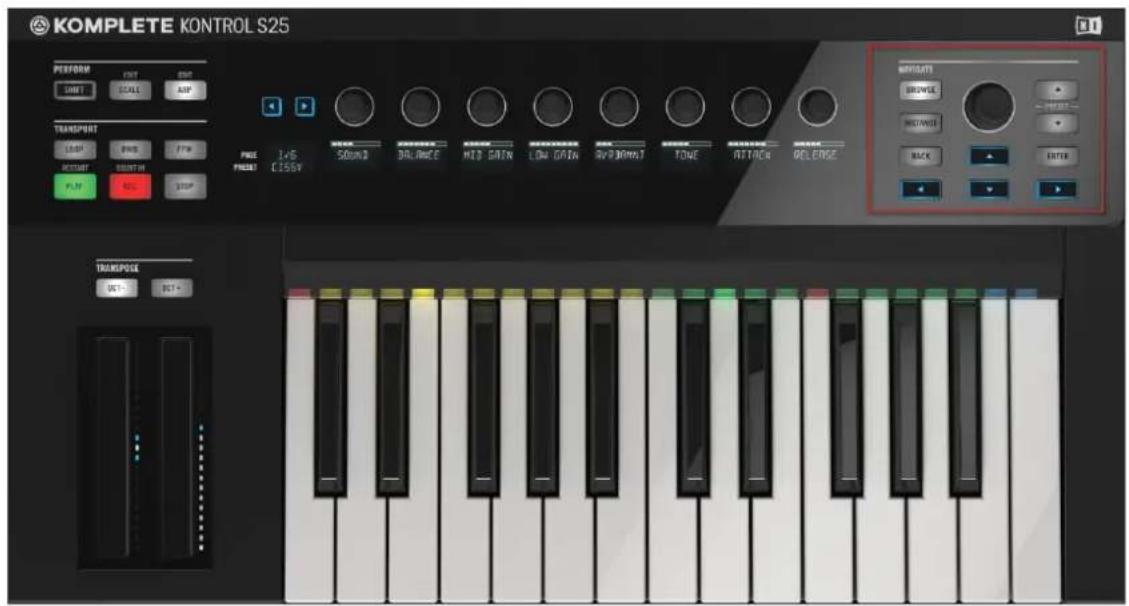
The NAVIGATE section
The NAVIGATE section at the far right on your keyboard allows you to navigate your host project and switch between tracks as well as to record arm them. Use the four Navigate arrow buttons to navigate between tracks, depending on the layout of your host application's GUI.
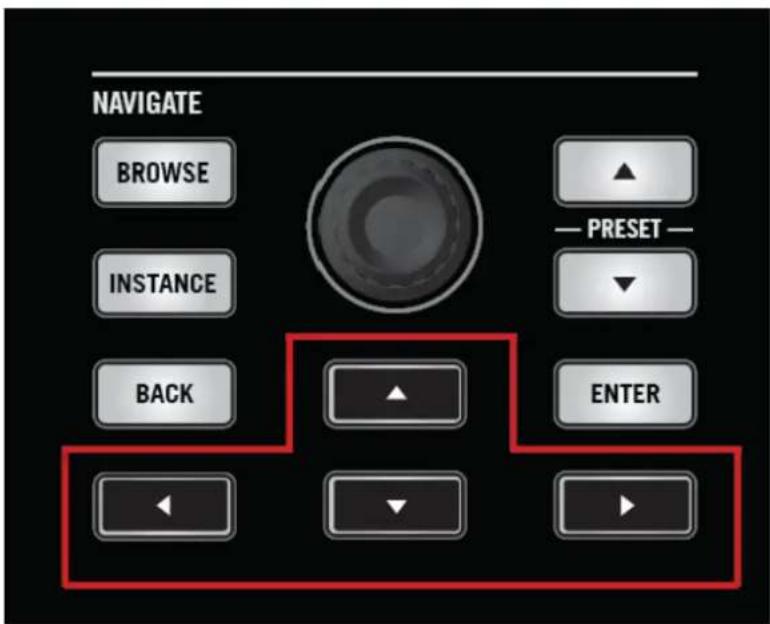
The NAVIGATE section of the KOMPLETE KONTROL S-SERIES, arrow buttons highlighted

For information on how to load KOMPLETE KONTROL as a VST, AAX or AU plug-in, refer to the documentation of your host application.

Using KOMPLETE KONTROL in multiple plug-in formats simultaneously can interfere with automatic track focus. Therefore we recommend you use only one plug-in format pro host project or session.

Automatic track focus is not supported in multiple hosts simultaneously.
Selecting a Track
As you can and most often will have multiple tracks running simultaneously in your host application, it is important to be able to switch between them. It is easy to use your keyboard to set focus on different tracks without the need to reach for your computer mouse. To focus your KOMPLETE KONTROL S-SERIES keyboard on a certain track you must first select it. To do so, use the arrow buttons in the NAVIGATE section located at the far right on your keyboard.
To select a track in your host application and set your keyboard's focus on it, press the NAVIGATE up or down button repeatedly until the track you want is selected.
→ Your KOMPLETE KONTROL S-SERIES keyboard if now focused on the selected track.
Focusing on a Track
KOMPLETE KONTROL S-SERIES automatically switches between MIDI mode and KOMPLETE KONTROL mode depending on the content of the selected track(s) in your host application.
If you have loaded KOMPLETE KONTROL as a plug-in into one or more of your host application's software instrument tracks, then selecting these tracks will automatically set your KOMPLETE KONTROL S-SERIES keyboard to KOMPLETE KONTROL mode: The knobs, displays, and touch strips will be mapped accordingly and the LEDs of the Light Guide light up to reflect the instrument's settings.

Using KOMPLETE KONTROL in multiple plug-in formats simultaneously can interfere with automatic track focus. Therefore we recommend you use only one plug-in format pro host project.
Selecting any other track—e.g. an audio track or a track dedicated to external MIDI equipment—will set KOMPLETE KONTROL to MIDI mode and you will be able to use the keyboard for host control. The displays will give you information regarding MIDI CC numbers and you will be able to assign the knobs and touch strips on your KOMPLETE KONTROL S-SERIES to any available destination(s) via MIDI learn or using the Controller Editor software.

For more information about assigning controls via MIDI, please refer to the Controller Editor documentation in the software installation folder on your hard disk
7.3.3 Switching between KOMPLETE KONTROL Instances

Selecting instances of KOMPLETE KONTROL with the INSTANCE button is only possible in host applications that support this feature (see http://www.native-instruments.com/support/knowledge-base/show/2765/ for reference).
The NAVIGATE section does not only let you switch between tracks using the Navigate arrow buttons, you can also press the INSTANCE button on your KOMPLETE KONTROL S-SERIES to call up an on-screen overlay. Doing so gives you an overview of all loaded instances of KOMPLETE KONTROL in your session. Use the Control encoder at the center of the NAVIGATE section to select the instance you want to focus on.
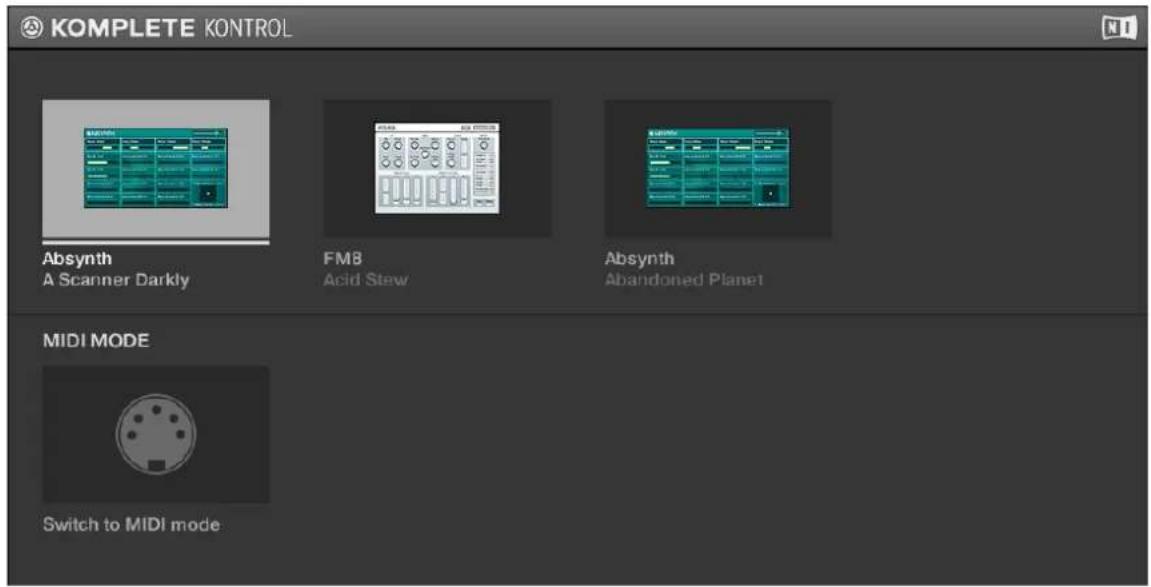
The on-screen overlay
Selecting an Instance in the Host
To display and select loaded KOMPLETE KONTROL instances using the on-screen overlay, follow the instructions below:
- To call up the on-screen overlay and display the loaded instances of KOMPLETE KON-TROL in your host application, press the INSTANCE button.
- The on-screen overlay appears on your computer screen. To scroll between the displayed instances, turn the Control encoder at the center of the NAVIGATE section.
- Press the Control encoder to select the instance and close the on-screen overlay.
→ Your KOMPLETE KONTROL S-SERIES keyboard focuses the selected instance and automatically assigns its knobs and displays to the KOMPLETE instrument loaded in the selected instance.

Using the INSTANCE button and the on-screen overlay to switch between KOMPLETE KONTROL instances is only available in hosts that do not support automatic track focus. Therefore, these hosts do not automatically reroute their incoming MIDI signals to the selected KOMPLETE KONTROL instance. In order to play the KOMPLETE instrument with the keys on your KOMPLETE KONTROL S-SERIES keyboard, you must manually record arm the track containing the selected KOMPLETE KONTROL instance in your host application.
7.4 Browsing and the Navigate Section
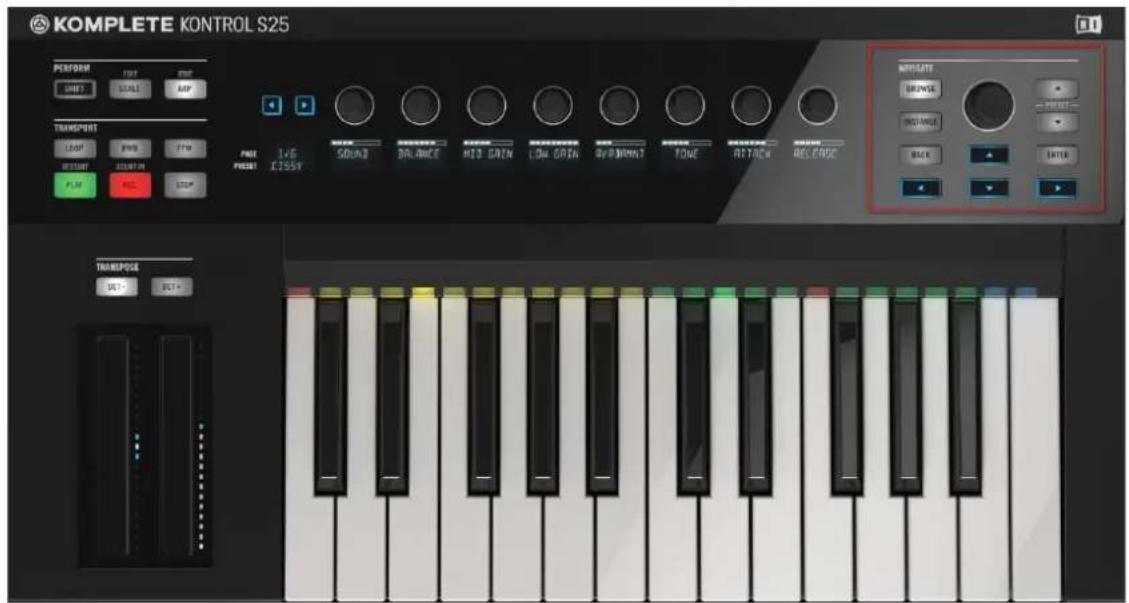
The NAVIGATE section
You can use and control the advanced Browser directly from the KOMPLETE KONTROL S-SERIES keyboard. To the very right of the control panel you will find the NAVIGATE section, which contains all the controls you need to browse, select and load presets from your installed KOMPLETE libraries. Pressing the BROWSE button brings up a large and easy-to-see on-screen overlay on your computer screen so that you can use the browser in stressful live performance situations. Learn more about the on-screen overlay below.
Navigate Section Controls
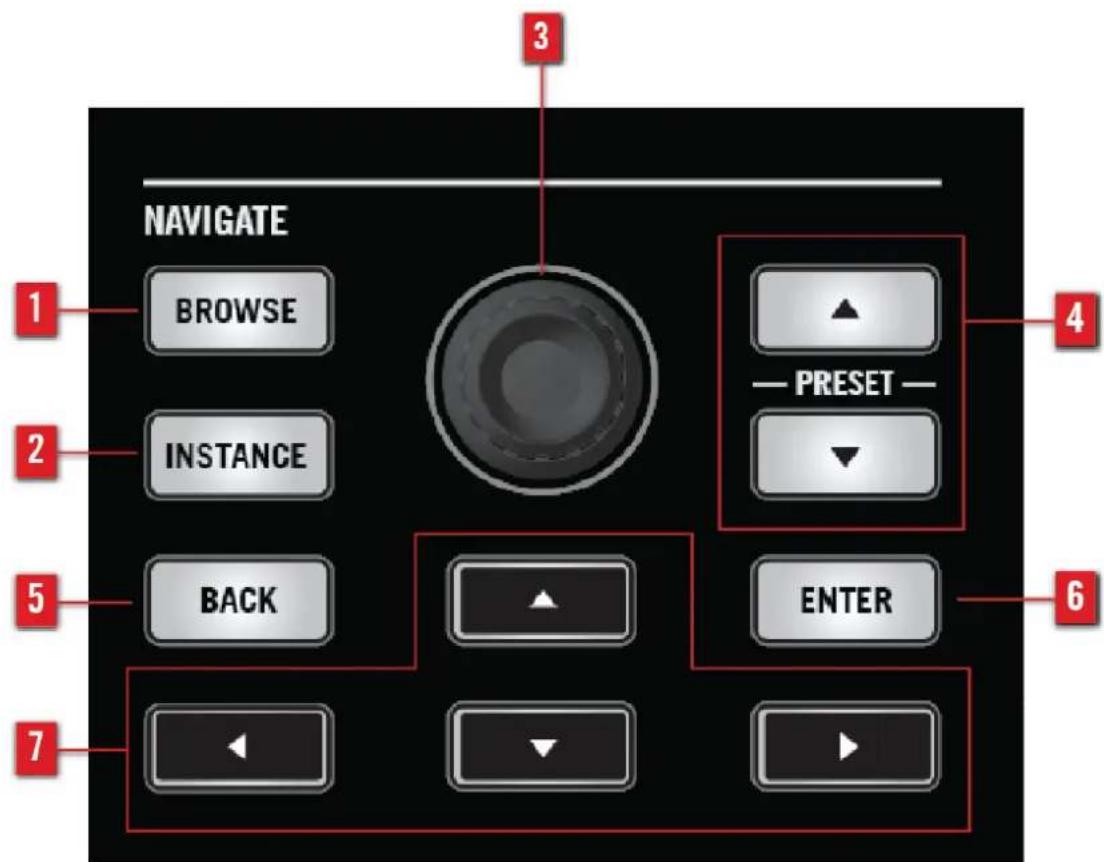
The NAVIGATE section
(1) BROWSE button: Calls up the on-screen overlay Browser and that lets you search, filter and load presets from the KOMPLETE Library. For detailed information, see section ↑7.4.1, The BROWSE Button and the Browser.
(2) INSTANCE button: Calls up the on-screen overlay to let you switch between KOMPLETE KONTROL instances and controller modes. For details, see sections ↑7.2.1, Switching Controller Modes and ↑7.3.3, Switching between KOMPLETE KONTROL Instances.
(3) Control encoder: Lets you scroll through the instrument presets in the on-screen overlay Browser's result list as well as through the TYPES and MODES filters.
(4) PRESET buttons: Skips to the next instrument preset in the result list.
(5) BACK button: Lets you move one step back in the hierarchy of the Browser.
(6) ENTER button: Lets you select the focused item on the on-screen overlay or enter the next level in the hierarchy of the Browser.
(7) Navigate arrows: Navigates the on-screen overlay Browser by setting the focus on its separate sections. You can also use the arrow buttons for host control as described in section 7.3.2 , Automatic Track Focus and the Navigate Section.
7.4.1 The BROWSE Button and the Browser
When you press the BROWSE button to call up the on-screen overlay to display the Browser on your computer screen, you instantly get access to many features common to the KOMPLETE KONTROL software's Browser. For detailed information about the software Browser, see section ↑5, KOMPLETE KONTROL Software Browser. This section describes the use of the NAVIGATE section on the KOMPLETE KONTROL S-SERIES keyboard and how to browse for instrument presets from the vast KOMPLETE Library.

To be able to make the most out of your KOMPLETE instruments together with KOMPLETE KONTROL, ensure they are up to date. To download the latest versions of your KOMPLETE instruments, start the Service Center application from your desktop.
To help you find the right file quickly and efficiently, the Browser implements various techniques that go far beyond the classic folder structure of your operating system. For example, each file included in the KOMPLETE Library can be described according to following aspects:
- The content type of the file, i.e. whether it originates from a product's factory library or if it was created by a user.
- The product which the files comes from—this can include, e.g., a hierarchical structure with a particular product and possibly a bank of this product.
- A variable amount of tags used to describe various characteristics of the file, for example, the type of effect, the sonic character, the context in which it is used—in a word, anything that might help you find the file.
Which Files Are Included in the Browser?
The files included in the Browser are all KOMPLETE KONTROL-relevant files found in the folders whose paths are listed in the Library page of the Preferences panel. For more information on how to manage these library folders, please refer to ↑2.5.1, Preferences – Library Page.
Browser Overview
![@ KOMPLETE KONTROL 1 ALL INSTRUMENTS AR 50s Drummer AR 60s Drummer AR 70s Drummer AR 80s Drummer AR Mod. Drum. AR Vint. Drum. Absynth Action Strikes Action Strings Alicias Keys Baline.. Gamelan Battery TYPES MODES [PRIS]1 [PRIS]2 01 LP Ep Org (El 02) C0 Boom 01 LP Epic Org (El 01) A0 Boom 01 LP Epic Organic (El 03) C1 Boom 01 LP Epic Organic B1 Tribull 01 LP Epic Tech (El 01) A0 LoTom 01 LP Epic Tech (El 02) A0 Kick 01 LP Epic Tech (El 03) C1 Boom 01 LP Epic Tech B1 Modern Ops 01 LP Indust (El 01) C1 Kick 01 LP Indust (El 02) C0 Kick 01 LP Indust (El 03) C1 Kick 01 LP Industrial A1 Indusdirty 3 01 LP Mang Pop (El 01) C1 Kick 01 LP Mang Pop (El 02) C1 Kick 01 LP Mang Pop (El 03) A-1 Kick 01 LP Mang Pop G1 ConSoul 02 LP Ep Org (El 02) C#0 Boom 02 LP Epic Org (El 01) A#0 Kick 02 LP Epic Organic (El 03) C#1 Boom 02 LP Epic Organic C2 Epic TKO](/content/2026/05/761321/images/f6ca089ff5de58f6c444915805079862a7933f06f26498124dd9cb80b114f346.jpg)
Overview of the Browser
(1) Content selector: Selects the files that are browsed. Select the NI icon to search the factory content, or select the User icon to search the user content.
(2) Product selector: Select to open a drop-down menu where you can select a particular product and sometimes the bank of the selected product. Only the files matching your selection will be displayed in the result list (5).
(3) TYPES filter: Allows you to search for files based on type and subtype tags that have been applied to them.
(4) MODES filter: Allows you to search for files based on mode tags that have been applied to them.
(5) Result list: The result list displays all files that match your query, as specified via the various tools above.
Overview of the Search Workflow in the Browser
When searching for files via the on-screen overlay's Browser, you can progressively refine your search by following this typical top-to-bottom workflow.
The first step is mandatory:
- Select between factory content and user content in the Content selector (1).
The next steps are optional. They can be useful to further refine your search and limit the number of search results to a reasonable amount:
-
Choose a product category or a product in the Product selector (2). If you have selected a product you can further choose a particular bank, if any.
-
Select tags in the TYPES filter (3) and the MODES filter (4) describing what you are looking for.
The above steps are described in detail in the following sections.
Opening the Browser
To call up the on-screen overlay and display the Browser, press the BROWSE button in the NAVIGATE section on your KOMPLETE KONTROL S-SERIES keyboard.
The first time in a session that you call up the Browser the focus will be on the Product selector. This is the default position of the Browser and is shown in the image below.
![KOMPLETE KONTROL ALL INSTRUMENTS AR 50s Drummer AR 60s Drummer AR 70s Drummer AR 80s Drummer AR Mod. Drum. AR Vint. Drum. Absynth Action Strikes Action Strings Alicias Keys Baline . Gamelan Battery TYPES MODES [PRIS]1 [PRIS]2 01 LP Ep Org (El 02) C0 Boom 01 LP Epic Org (El 01) A0 Boom 01 LP Epic Organic (El 03) C1 Boom 01 LP Epic Organic B1 Tribull 01 LP Epic Tech (El 01) A0 LoTom 01 LP Epic Tech (El 02) A0 Kick 01 LP Epic Tech (El 03) C1 Boom 01 LP Epic Tech B1 Modern Ops 01 LP Indust (El 01) C1 Kick 01 LP Indust (El 02) C0 Kick 01 LP Indust (El 03) C1 Kick 01 LP Industrial A1 Indusdirty 3 01 LP Mang Pop (El 01) C1 Kick 01 LP Mang Pop (El 02) C1 Kick 01 LP Mang Pop (El 03) A-1 Kick 01 LP Mang Pop G1 ConSoul 02 LP Ep Org (El 02) C#0 Boom 02 LP Epic Org (El 01) A#0 Kick 02 LP Epic Organic (El 03) C#1 Boom 02 LP Epic Organic C2 Epic TKO](/content/2026/05/761321/images/35050d0fecefa848d31cc07e0d80f670d392201dffc97518c995b74e37c73d5c.jpg)
On-screen overlay depicting the default position of the Browser
At first you will see all your installed KOMPLETE instruments on the left side and a list of their presets on the right side: the result list. As the comprehensive result list can contain a very large amount of presets, it might take some time to scroll through to find the preset you are looking for. The Browser you see on the on-screen overlay is using the same tag-based filter system as the Browser in the regular KOMPLETE KONTROL software (described in detail section ↑5.2.4, Selecting Type and Mode Tags) to filter presets after your needs. Continue reading to find out how easy it is to find and load a preset that perfectly fits what you are looking for.
To scroll through your KOMPLETE instruments, presets, or filters, turn the Control encoder. Pressing the Control encoder selects the focused item.
▶ To switch focus to another section of the Browser, press the Navigate arrows.
Choosing Between Factory and User Content
The Content selector shows two icons, one representing the factory content on the left, and one representing the user content on the right:
The Content selector.
▶ Press the Control encoder to select the NI icon and search the factory content, or turn and then press the Control encoder to select the User icon and search the user content.
7.4.2 Selecting a Product and a Bank
The Product selector allows you to limit your search to a particular product or a specific bank of the product.
By default there is no particular selection in the Product selector; it reads All Instruments:
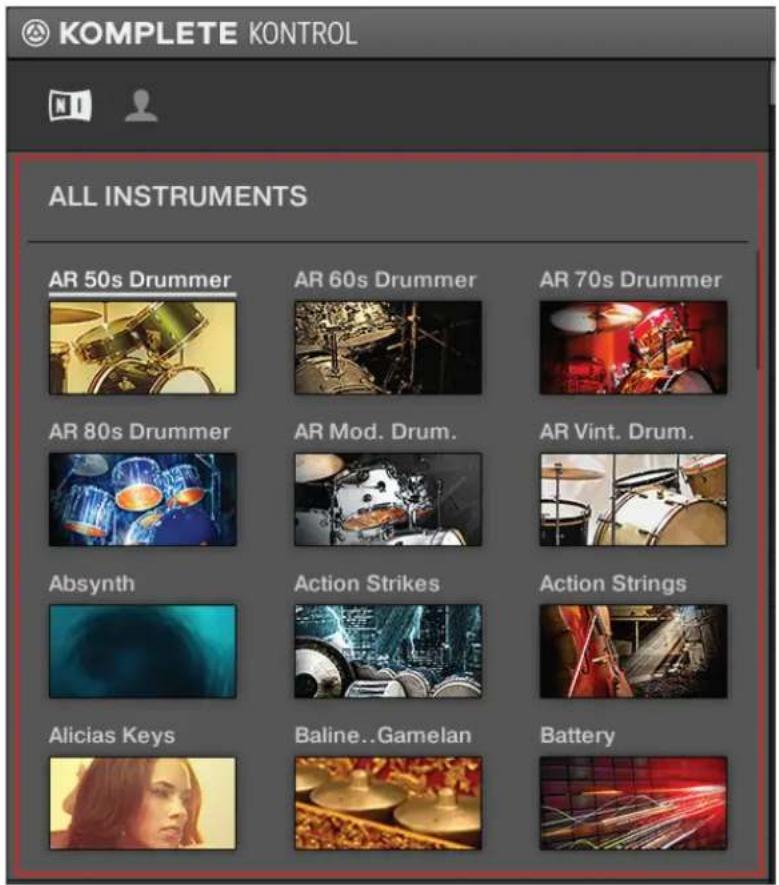
The open Product selector without any instrument selected.
Selecting a Product
To open the Product selector and display the KOMPLETE instruments, press the Navigate arrows until the Product list is focused.
→ The Product selector opens up and displays the KOMPLETE Library.

Products are shown in the Product selector only if the KOMPLETE Library contains files for them. If you haven't updated a particular Native Instruments instrument, the icon for that product might not be available in the Product selector when the factory content is selected in the Content selector—to prevent this, make sure that all your Native Instruments products are up to date.
To select a KOMPLETE instrument from the Product selector, turn the Control encoder and then press it when the instrument you want is focused.
![KOMPLETE KONTROL ALL INSTRUMENTS Monark Polyplex Prism Razor Reaktor Retro Machines Rise and Hit Funk Guitarist Jay-Bass MM-Bass MM-Bass Amped Pre-Bass TYPES MODES Callisto [PRIS]1 [PRIS]2 01 LP Ep Org (El 02) C0 Boom 01 LP Epic Org (El 01) A0 Boom 01 LP Epic Organic (El 03) C1 Boom 01 LP Epic Organic B1 Tribull 01 LP Epic Tech (El 01) A0 LoTom 01 LP Epic Tech (El 02) A0 Kick 01 LP Epic Tech (El 03) C1 Boom 01 LP Epic Tech B1 Modern Ops 01 LP Indust (El 01) C1 Kick 01 LP Indust (El 02) C0 Kick 01 LP Indust (El 03) C1 Kick 01 LP Industrial A1 Indusdirty 3 01 LP Mang Pop (El 01) C1 Kick 01 LP Mang Pop (El 02) C1 Kick 01 LP Mang Pop (El 03) A-1 Kick 01 LP Mang Pop G1 ConSoul 02 LP Ep Org (El 02) C#0 Boom 02 LP Epic Org (El 01) A#0 Kick 02 LP Epic Organic (El 03) C#1 Boom 02 LP Epic Organic C2 Epic TKO](/content/2026/05/761321/images/f7b74d8d4903f92089dbc45282411008ce126920dff55e68737d9f81df898dbc.jpg)
→ The selected instrument is displayed in the Product selector header. The result list on the right side of the Browser is filtered accordingly and displays only presets belonging to the instrument you selected.
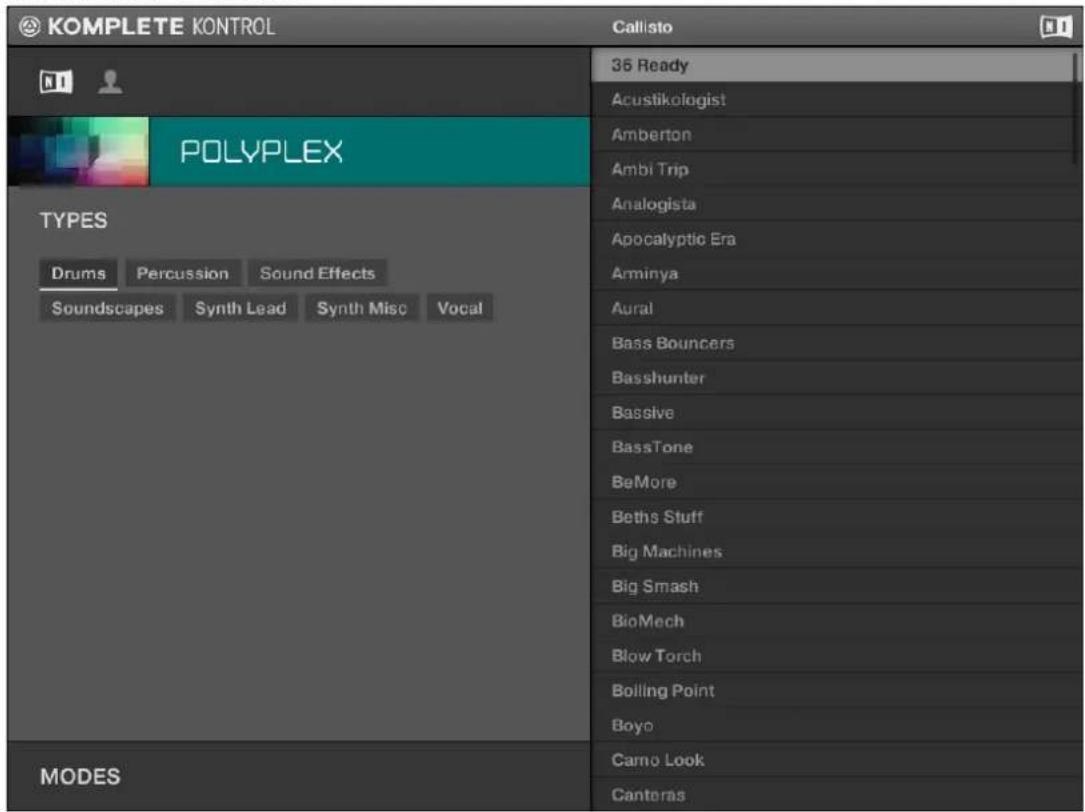
Resetting the Product Selection
To reset the selection made in the Product selector, press SHIFT + BACK button on your KOMPLETE KONTROL S-SERIES keyboard.
→ The product selection is cancelled. The Product selector displays the generic label All Instruments. The tag filter and the result list now include files for all products.
Selecting a Bank
When you select specific products in the Product list (see description above), an additional Bank menu appears under the closed Product selector:
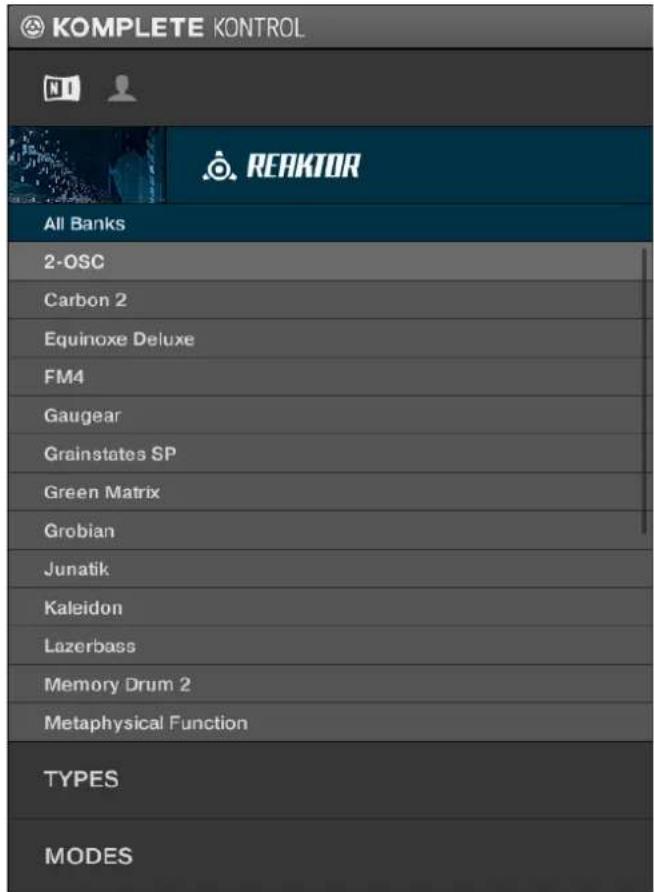
The Bank menu showing All Banks for REAKTOR instruments
This Bank menu allows you to select a particular bank of files for the selected product (REAKTOR in the picture above).
▶ To select a particular bank for the selected product, turn and then press the Control encoder to choose a bank from the available entries.
→ Upon your selection the Bank menu closes and the result list displays the presets from the selected bank. The tag filter and result list underneath further narrow their content accordingly.

Banks can be, e.g., additional libraries (e.g., MASSIVE EXPANSIONS), different versions of the original Factory Library (e.g., FM7 Legacy and FM8 Factory Library), or any other content categorization specific to a particular product.
7.4.3 Selecting Type and Mode Tags
The tag filter that appears under the Product selector allows you to search for files according to particular characteristics, effect type, sonic character, etc. Tags can be of two kinds: type or mode. You can select them via the TYPES and MODES filter, respectively.
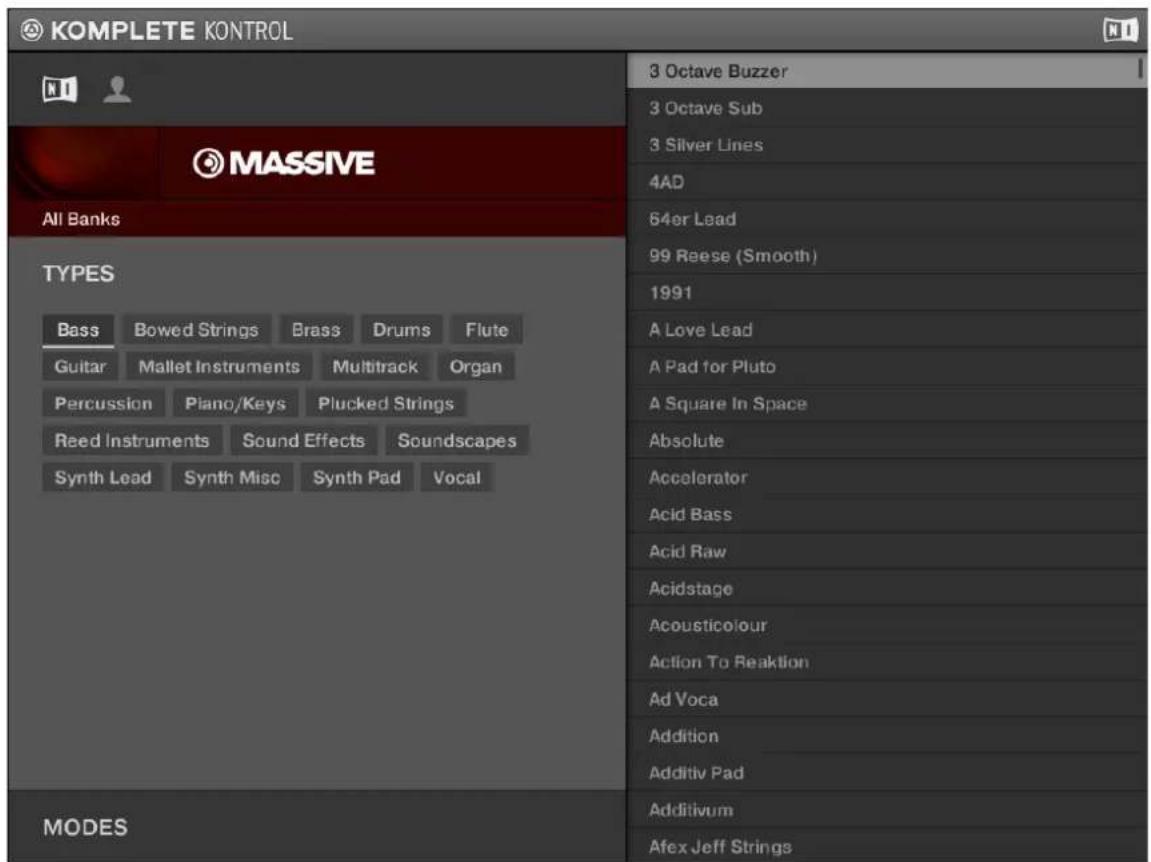
TYPES filter for MASSIVE
To display the available tags, move focus to the TYPES or MODES level by pressing the Navigate arrows on your KOMPLETE KONTROL S-SERIES keyboard.
To select the desired tags in the tag filter and limit the search to the files marked with them:
- Turn the Control encoder to scroll to the tag you want.
- When the tag you want is focused, press the Control encoder to select it.

You can also press the ENTER button to select any focused item in the Browser.
▶ Focus the selected tags and press the Control encoder again to deselect them and broaden the search.
Types
The type tags are structured into two hierarchical levels. You can select them via the TYPES filter:
- At first the TYPES filter displays the available top-level tags only.
- As soon as you select a tag at the top level, the second level appears underneath with subtags of the selected tag.
- The hierarchical structure means that the sets of subtags are specific to each tag of the level above.
Example: Imagine that you are looking for a bass line from the MONARK instrument:
- You have already selected the Monark product in the Product selector (for more information on this, see section ↑7.4.2, Selecting a Product and a Bank). For now the TYPES filter shows only top-level tags:
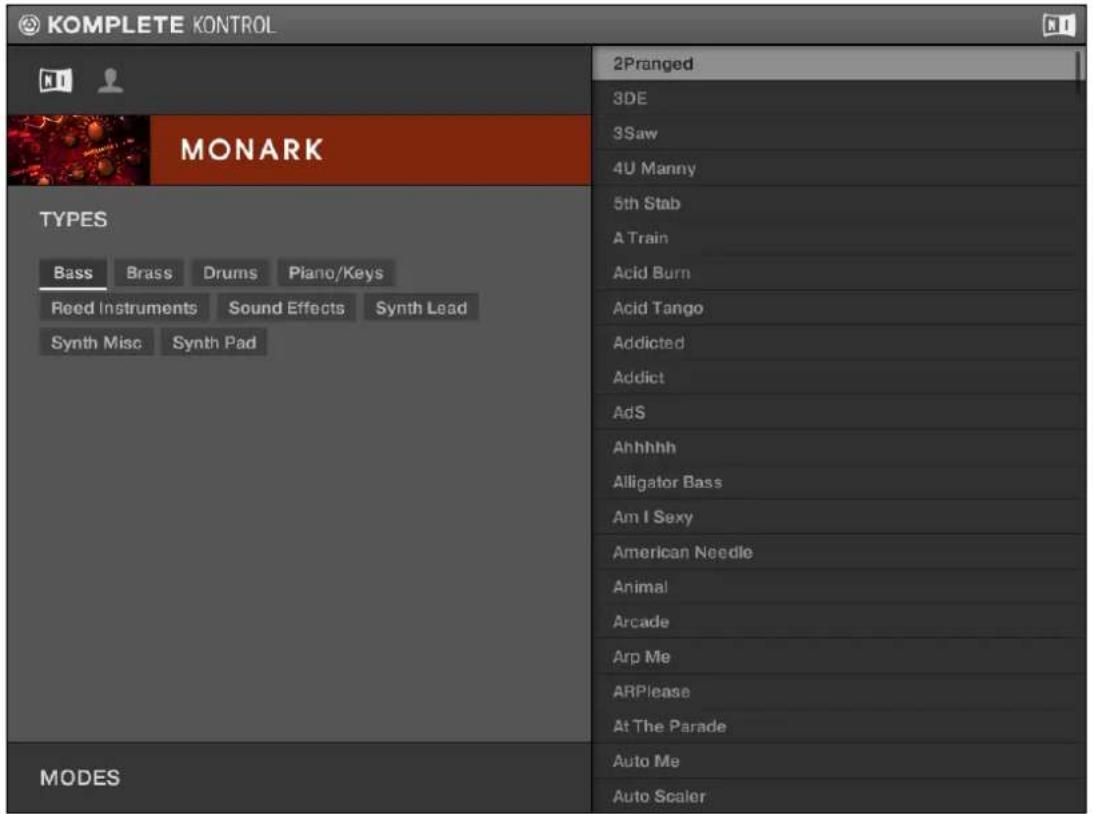
- In order to find a bass sound, you first select the Bass tag from the TYPES filter. Upon your selection the second level of tags appears underneath with subtypes like Analog Bass, Fingered Bass, etc.:
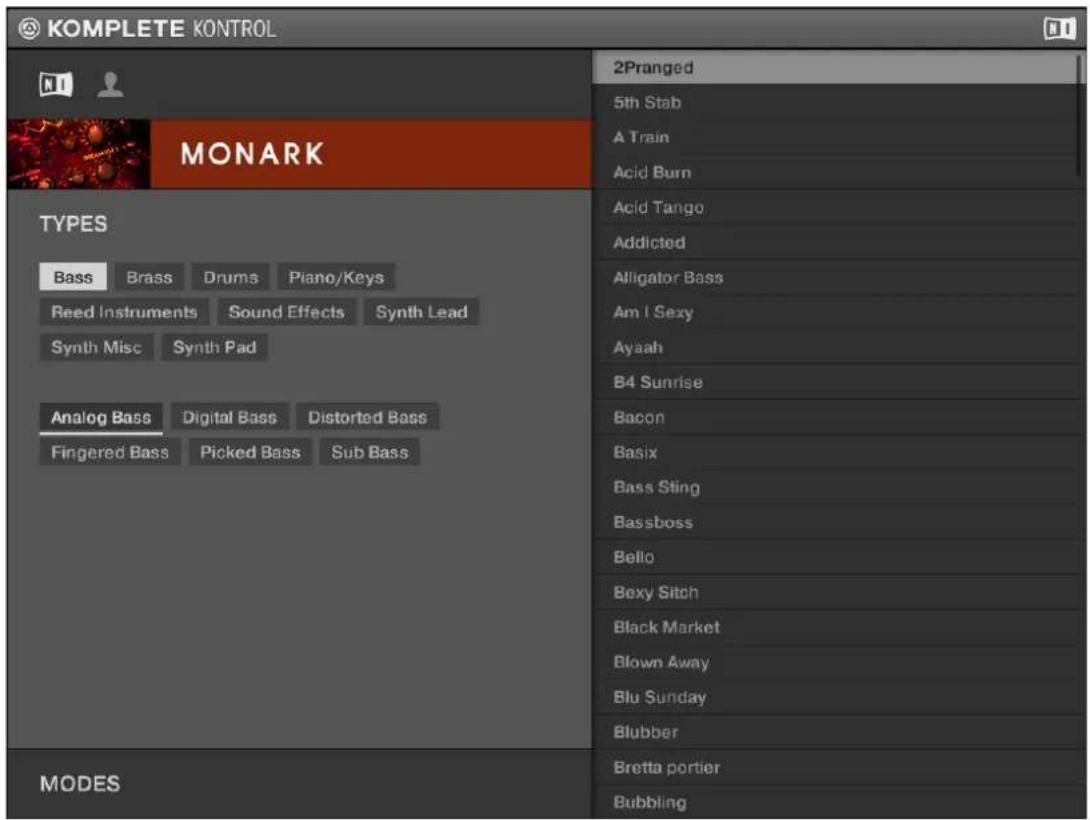
Press the Navigate down arrow to focus the second level of tags. In this second level, you select the subtype you want for your bass line.
By selecting any of these tags, say, Picked Bass, you will narrow your search to this particular subtype of bass sounds:
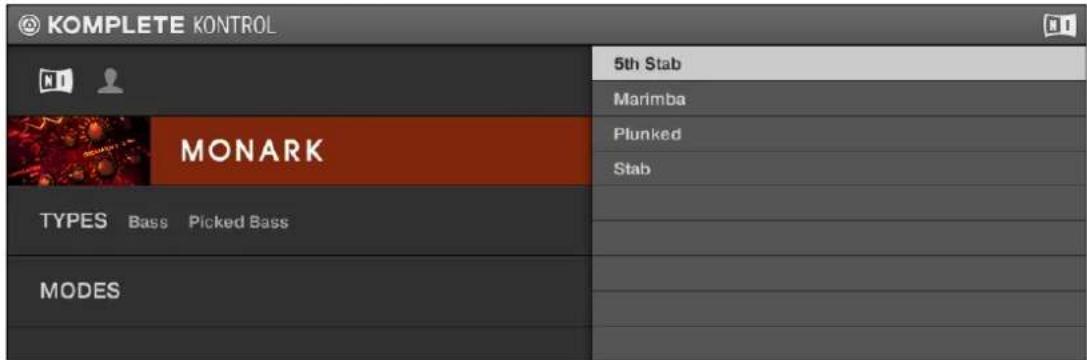
- Now imagine that you have loaded a picked bass preset but you decided you want something that sounds a bit rougher: You leave the Bass tag selected at the top level of the TYPES filter and go directly to the second level, where you select Distorted Bass instead of Picked Bass. As you select Distorted Bass, the result list is filtered accordingly.
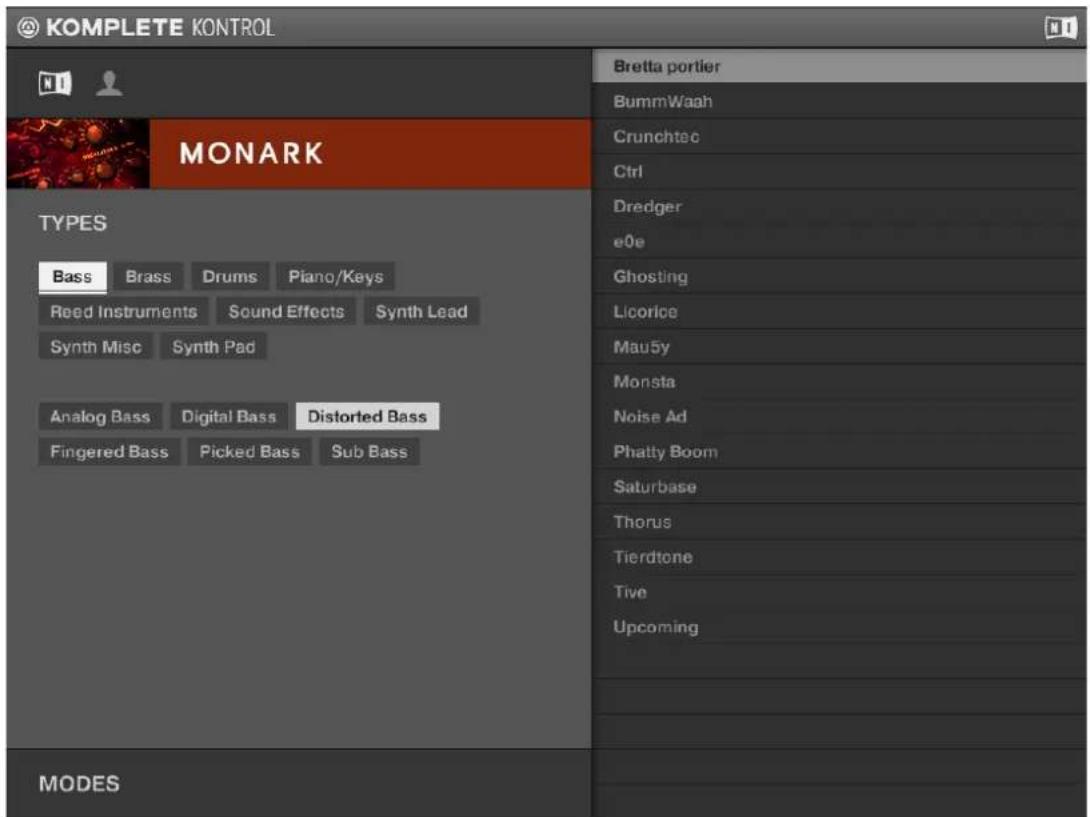
This allows you to quickly find various presets with similar characteristics—here, a distorted bass sound.

You can also search for presets from all instruments ion the KOMPLETE library by not selecting an instrument in the Product selector. Instead you then search using only the TYPES and MODES filters.
Modes
![KOMPLETE KONTROL ALL INSTRUMENTS TYPES MODES Additive Arpegglated Chord Dry FM Glide/Pitch Mod Granular Long Release Long/Evolving Monophonic Percussive Physical Model Processed Sample Based Sample-based Sequence/Loop Slow Attack Surround Synthetic Tempo-synced [PRIS]1 [PRIS]2 01 LP Ep Org (El 02) C0 Boom 01 LP Epic Org (El 01) A0 Boom 01 LP Epic Organic (El 03) C1 Boom 01 LP Epic Organic B1 Tribull 01 LP Epic Tech (El 01) A0 LoTom 01 LP Epic Tech (El 02) A0 Kick 01 LP Epic Tech (El 03) C1 Boom 01 LP Epic Tech B1 Modern Ops 01 LP Indust (El 01) C1 Kick 01 LP Indust (El 02) C0 Kick 01 LP Indust (El 03) C1 Kick 01 LP Industrial A1 Indusdirty 3 01 LP Mang Pop (El 01) C1 Kick 01 LP Mang Pop (El 02) C1 Kick 01 LP Mang Pop (El 03) A-1 Kick 01 LP Mang Pop G1 ConSoul 02 LP Ep Org (El 02) C#0 Boom 02 LP Epic Org (El 01) A#0 Kick 02 LP Epic Organic (El 03) C#1 Boom 02 LP Epic Organic C2 Epic TKO](/content/2026/05/761321/images/ec410c33fa539ff807caf043ee0fee2d9c06beda7bcd20235bf34e08a52e610f.jpg)
The MODES filter
To display the MODES filter of the tag-based Browser, press the Navigate buttons until it is focused.
- The MODES filter provides an additional level that is independent from the type levels:
- In general, Mode tags will rather refer to technical terms (e.g., Arpeggiated, Percussive, Synthetic, etc.).
- The MODES filter is always available. You can start your search with the MODES filter before (or even without) using the TYPES filter.
- However, the list of tags available in the MODES filter will vary depending on the tags selected in the TYPES filter. If no file contains both the type and mode tags that you have selected, the type tags will prevail and the mode tags will be deselected.

If you don't select any tag in the TYPES or the MODES filter, the result list will include all files satisfying any of their tags.
Selecting Multiple Tags from the Same Level
In both TYPES and MODES filter you can select multiple tags from the same level:
▶ Press and hold the SHIFT button and scroll and then press the Control encoder to focus and select any number of tags at a particular level to select these particular tags.
→ The result list will include all files satisfying at least one of the selected tags.
7.4.4 Using the Result List
The Result list shows all the files that match your query:
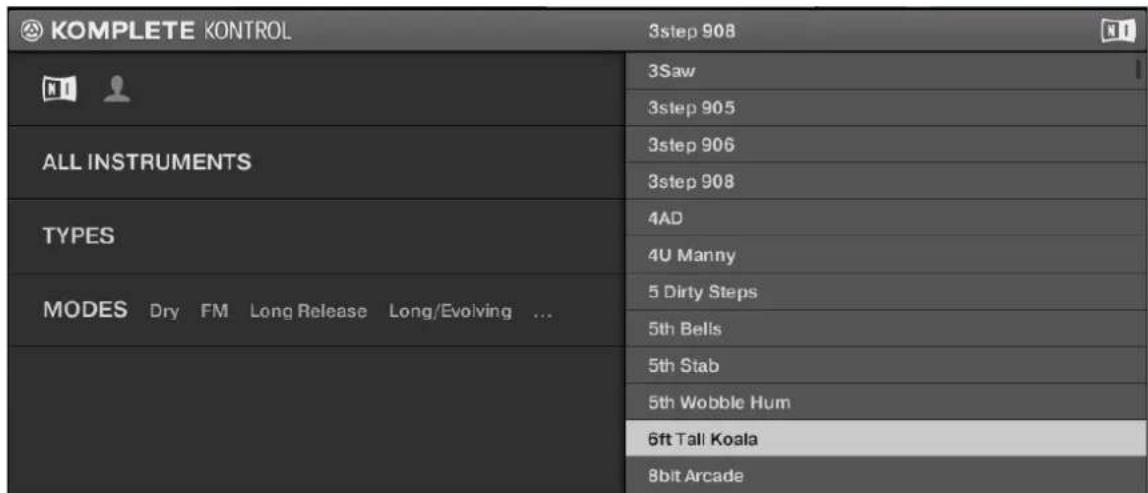
The result list
▶ If the list is too long to fit in the display, use the Control encoder to show the remaining items.
Scrolling and Selecting Files in the Result List
▶ To select a preset in the result list, use the Control encoder to scroll to it and then load it by pressing the ENTER button.

The instrument preset loaded will replace the one previously loaded, if any!
Loading Files with the PRESET Buttons
Pressing the PRESET up and down buttons in the upper right corner of the NAVIGATE section on your KOMPLETE KONTROL S-SERIES keyboard will automatically load whichever instrument preset is currently above or beneath the focused file in the result list.

The instrument preset loaded will replace the one previously loaded, if any!
7.5 Control Section
The controls located at the center of the KOMPLETE KONTROL S-SERIES keyboard are used to pilot the instruments loaded in KOMPLETE KONTROL. They give you the ability to tap, twist and turn hardware controls to edit sound design and perform features.
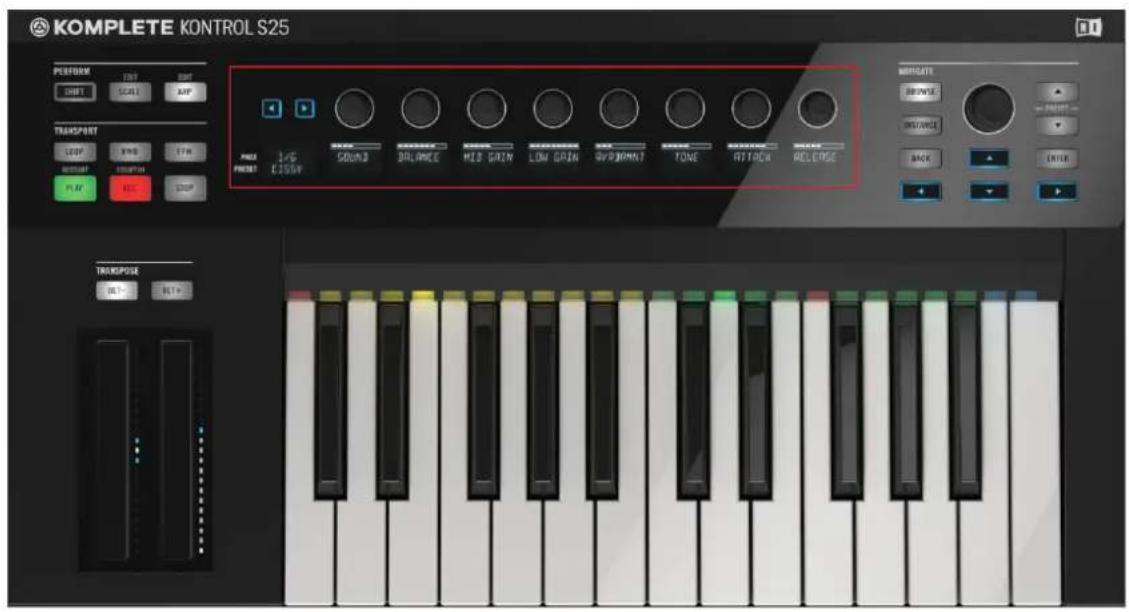
The Control section at the center of the KOMPLETE KONTROL S-SERIES (S25 depicted)
7.5.1 Control Section Controls
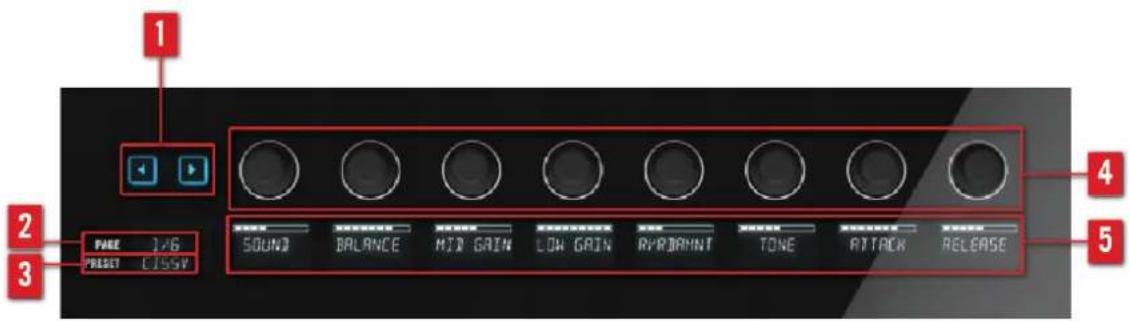
The controls of the Control section
(1) Page buttons: Lets you skip to the next instrument page (2) and thus remaps the knobs (4) and displays (5) to another set of controls.
(2) PAGE display: Tells you the current control mapping. The PAGE display reflects the mapping by displaying e.g. 1/6 or ARP.
(3) PRESET display: Tells you the loaded instrument preset.
(4) Knobs: Give you hands-on control over KOMPLETE instrument parameters as well as the PERFORM features. The knobs are automatically mapped to the controls of the loaded instrument via the proprietary Native Map protocol (see 7.5.2). As the knobs are touch-sensitive, you can tap them to see their value displayed by their corresponding display.
(5) Displays: Constantly give you information about the mapping between the knobs and the loaded instrument or perform parameters.

For more information about controlling instrument or perform parameters, continue reading in section 7.5.3 , Controlling Instrument Parameters with the Control Section.
7.5.2 Native Map
The controls in the Control section are automatically mapped to any KOMPLETE instrument loaded in KOMPLETE KONTROL. You do not have to assign them via MIDI learn or step through any extra configuration. This is all made possible by Native Instruments own mapping protocol Native Map.
As most instruments have more controllable parameters than there are knobs in KOM-PLETE KONTROL S-SERIES keyboard's Control section, the parameters are split into pages that can be accessed by pressing the Page buttons on the left side of the Control section. When you skip to another page, the knobs are mapped to another set of parameters and the displays reflect the new mapping. At any point, you can tap a knob to see the set value of the mapped parameter.
Not only the knobs and displays are mapped to instrument parameters via Native Map: also KOMPLETE KONTROL S-SERIES' touch strips are mapped automatically. For information about the touch strips, see section ↑7.6, Touch Strips. For information on how to control instrument parameters, continue reading below.
7.5.3 Controlling Instrument Parameters with the Control Section
Once you have loaded a KOMPLETE instrument into KOMPLETE KONTROL you can control its parameters with the KOMPLETE KONTROL S-SERIES keyboard (for information on how to browse and load instruments, see section ↑7.4, Browsing and the Navigate Section). The section below describes how to control instruments and their parameters with the Control section.
- In the following example, we have loaded the preset 3Saw from the KOMPLETE instrument MONARK.
- This is reflected by the PRESET display at the far left of the Control section, which reads 3SAW:

PRESET 3SAW
- In the KOMPLETE KONTROL software, this is reflected by the preset display in the header:
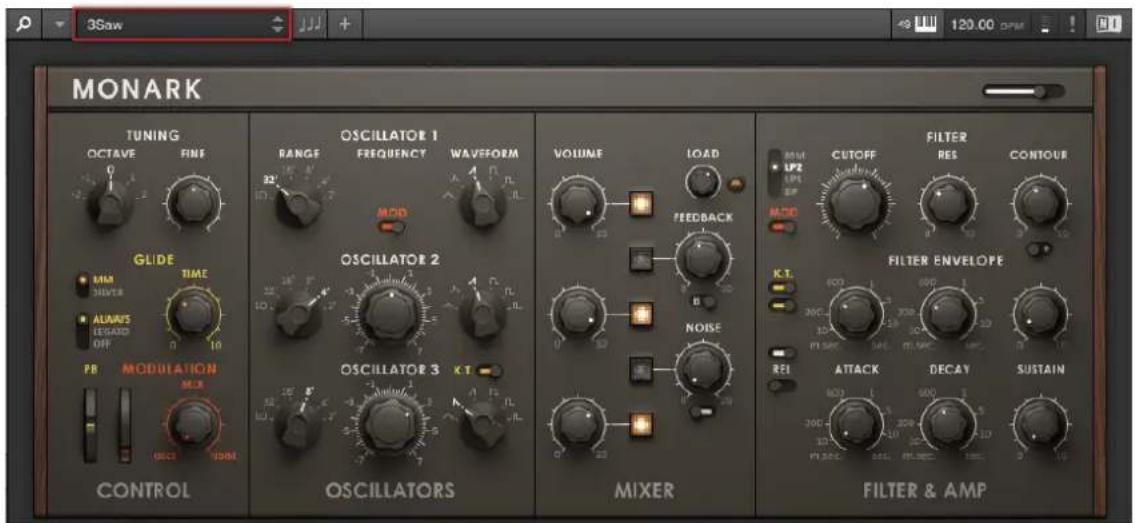
Preset 3Saw
- To test the integrated parameter control of KOMPLETE KONTROL and the KOMPLETE KONTROL S-SERIES keyboard, i.e. Native Map, let's have a look at how editing a parameter is mutually reflected by software and keyboard. In this example, we will set a new value for the filter resolution parameter:
- The second display reads RESO, which indicates that Knob 2 is mapped to the resolution parameter:

Display 2 RESO
- In the KOMPLETE KONTROL software, you find the resolution parameter in the FILTER section, labeled as RES:
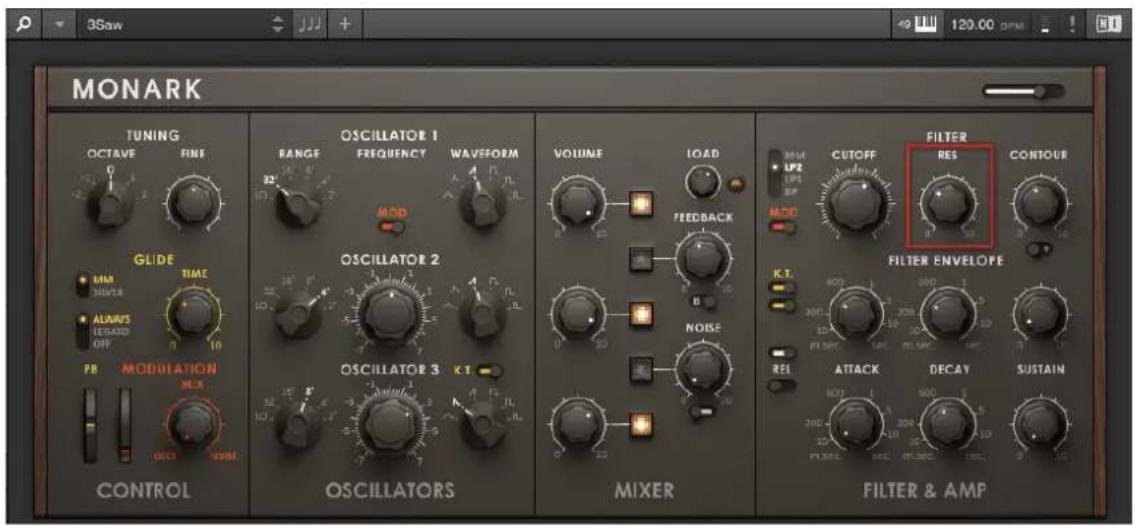
The RES parameter
▶ To adjust the resolution parameter, turn Knob 2 on your KOMPLETE KONTROL S-SERIES keyboard.

→ The RES parameter in MONARK's FILTER section reflects the change by moving in real time.
Switching Parameter Page
▶ To skip to the next set of instrument parameters and remap the knobs and displays, press the arrow shaped Page buttons on the left side of the Control section.
→ The PAGE display reflects the parameter page and each knob and display is mapped to a new parameter.

- The second display reads FLT DEC, which indicates that Knob 2 is mapped to MONARK's filter decay parameter, labeled as DECAY in the FILTER ENVELOPE section.

Display 2 FLT DEC
The DECAY parameter
▶ To skip back to PAGE 1/8, press the left Page button.
Switching KOMPLETE Instruments

To learn how to load a KOMPLETE instrument from the KOMPLETE KONTROL S-SERIES keyboard, see section ↑7.4.2, Selecting a Product and a Bank.
- Loading a new KOMPLETE instrument from the Browser automatically remaps the Control section to the parameters of the new instrument.
• In the example below, we have loaded the instrument preset Bahnhof Zoo from the Browser, which is indicated by the PAGE display (BHNFZ). Knob 2 is mapped to FM8's Stereo Width parameter.

7.5.4 Controlling the Perform Features with the Control Section
KOMPLETE KONTROL comes equipped with powerful perform features that you can use to generate chords and play scales. The PERFORM section lets you access the SCALE and ARP parameters, which are displayed and edited via the Control section. For information about controlling the PERFORM section and how to edit its parameters using the Control section's knobs and displays, see section 8 , KOMPLETE KONTROL S-SERIES Perform Functions.
7.6 Touch Strips
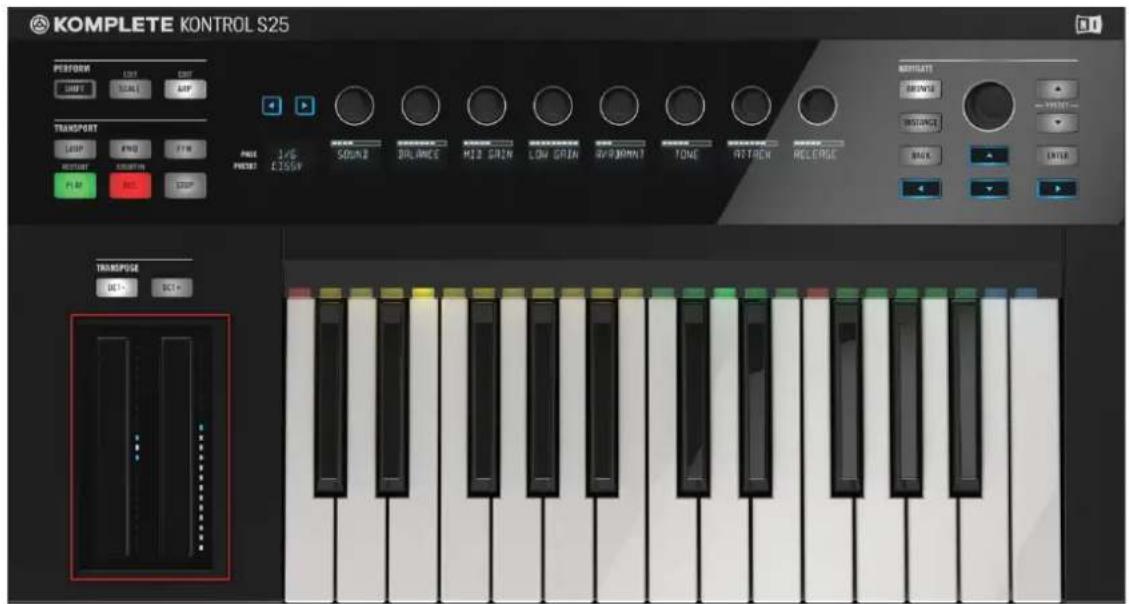
The touch strips on the KOMPLETE KONTROL S-SERIES keyboard (S25 depicted)
The two touch strips to the left of the keypad let you control any mapped parameter of the loaded KOMPLETE instrument. The left touch strip is automatically assigned to its corresponding instrument parameters via Native Instruments' unique mapping protocol Native Map (see ↑7.5.2, Native Map and ↑7.5.3, Controlling Instrument Parameters with the Control Section) and does not need to be assigned via MIDI learn. Depending on the loaded instrument preset, the right touch strip is either automatically assigned in the same way as the left one, or it must be assigned to an instrument parameter via MIDI learn.
- The left touch strip reflects the behavior of traditional pitch wheels—or pitch bend wheels, but gives you the possibility to decide for yourself how fast the strip will spring back to default state. For details, see section ↑7.6.1, Pitch Strip.
- The right touch strip can be used like a traditional modulation wheel—or mod wheel—but you can also configure it to apply modulation in intricate ways not possible with traditional mod wheels. For details, see section ↑7.6.2, Modulation Strip.
To configure the behavior of the touch strips, open the Preferences panel in the KOM- PLETE KONTROL software:
To open the Preferences panel, click Preferences... in the Komplete Kontrol menu (Mac OS X) or Edit menu (Windows) of the application menu bar, or in the Edit submenu of the KOMPLETE KONTROL menu:
7.6.1 Pitch Strip
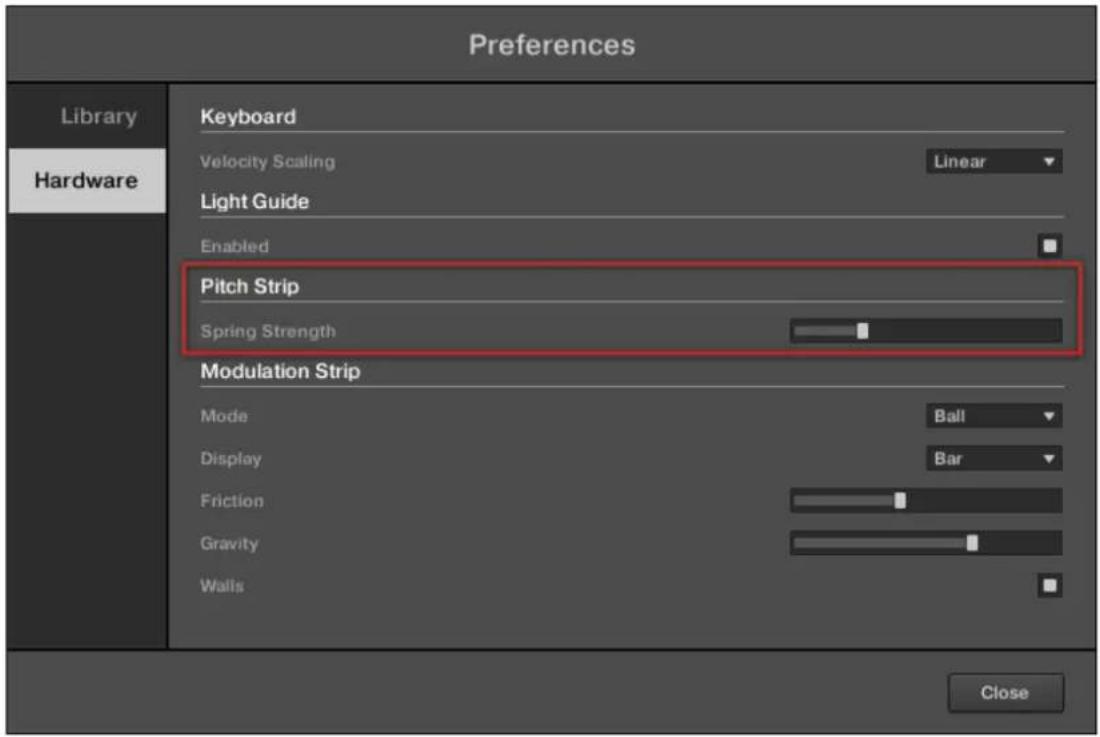
The Preferences panel displaying the Pitch Strip settings
- The left touch strip on your KOMPLETE KONTROL S-SERIES keyboard corresponds to the usual behavior for a pitch bend control. This pitch strip simulates a simple spring holding back the current value of the assigned instrument parameter when it moves away from its default position, which is in the middle of the strip. When you put your finger somewhere on the strip, the value instantly jumps to the corresponding position and stays there as long as you keep your finger on the strip. When you remove your finger, the value moves back to the default position. The speed of this return trip can be adjusted via the Spring Strength slider on the Hardware page of the Preferences panel in the KOMPLETE KONTROL software: Using the analogy of the spring holding back the instrument parameter value, the higher the Spring Strength setting, the quicker the parameter value will return to its default position.
Controlling Instrument Parameters with the Pitch Strip
- Loading the KOMPLETE instrument MONARK's preset 3Saw as an example, you can see in real time how the automatically assigned pitch bend parameter PB moves to reflect the value of the pitch strip:
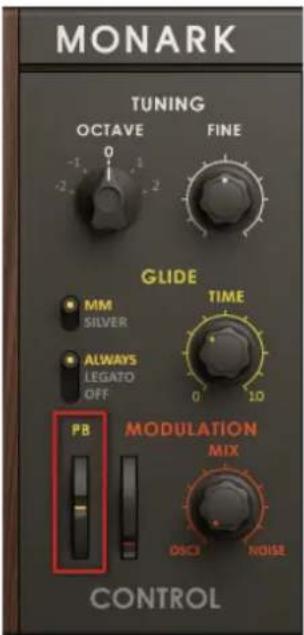
The default state of MONARK's PB parameter
▶ To adjust the value of the assigned parameter, put down your finger on the pitch strip and swipe your finger up and down.
→ The assigned parameter moves according to the movements of your finger and bends the pitch accordingly.
→ A bar of white and blue LEDs next to the pitch strip follows the movement of your finger.
To return the pitch strip to its default state, remove your finger. The LED bar on your KOMPLETE KONTROL S-SERIES keyboard and the assigned parameter in KOMPLETE KONTROL both snap back to their default values.
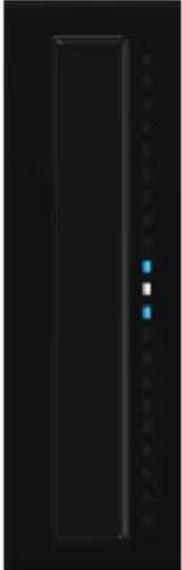
natural_image
Pure electrical circuit lines without any symbols7.6.2 Modulation Strip
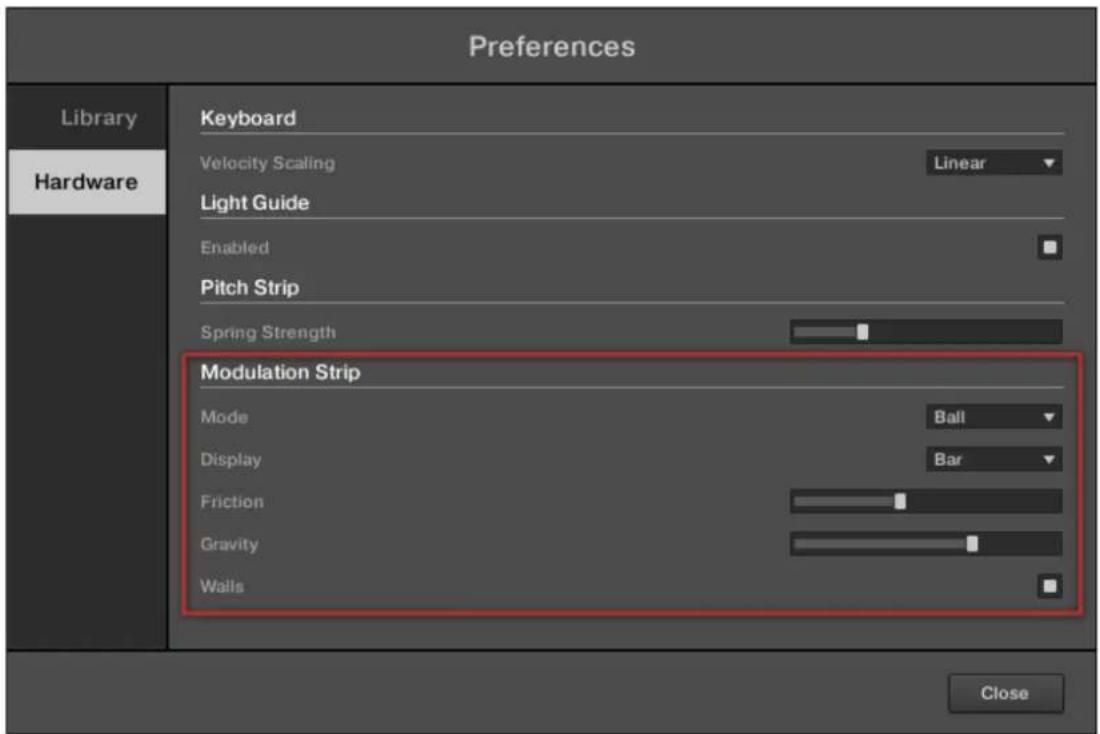
The Preferences panel displaying the Modulation Strip settings
- The right touch strip on your KOMPLETE KONTROL S-SERIES keyboard corresponds to a highly versatile modulation control. It has two distinct modes that can be set with the Mode menu found on the Hardware page of the Preferences panel in the KOMPLETE KONTROL software:
- Standard: This is the default mode for the modulation strip on your KOMPLETE KON-TROL S-SERIES keyboard and corresponds to the usual behavior for a modulation control. In this mode the touch strip reads the position of your finger and applies the value to the assigned instrument parameter. When you put your finger somewhere on the strip, the val-
ue instantly jumps to the corresponding position and stays there. The Display menu allows you to define how the value should be indicated on the strip's LED chain—see section ↑2.5.2, Preferences – Hardware Page for more details.
- Ball: This mode simulates a ball (the current parameter value) that would be attracted by the gravity of your finger. If you put your finger at a particular location on the strip, the ball will move from its current position towards your finger. If you keep your finger in place until the ball reaches it, the ball stops there. If you remove your finger before, the ball sustains its momentum and continues on its way beyond your finger. Note that the longer you keep your finger on the strip, the faster the ball will get.
Alternatively, you can “throw” the ball by putting your finger on the ball’s current position (blue LED), dragging it in any direction, and removing your finger. The faster you drag your finger, the faster the ball will get.
The movement of the ball is also affected by following parameters:
- Friction slider: Adjusts the air friction that slows down the ball once you have removed your finger. The higher the Friction value, the quicker the ball will decelerate and stop. When fully left, the ball never stops. When fully right, the ball stops instantly.
- Gravity slider: Adjusts the attraction of your finger on the ball: The higher the Gravity value, the faster the ball will move. This parameter doesn't affect the ball movement if you throw the ball with your finger (see above).
- Walls button: Adjusts the behavior of the ball when it reaches the range limits. If Walls is set to on, the ball bounces off the range limit and continues its trip in the opposite direction. If Walls is set to off, the ball jumps to the opposite range limit and continues from there in the same direction.
Controlling Instrument Parameters with the Modulation Strip
Depending on the loaded instrument preset, the modulation strip is either assigned automatically or must be assigned manually via MIDI learn. If you loaded an instrument preset and touching the modulation strip does not affect the sound, follow these instructions to assign it to an instrument parameter:

For simplicity, we will use the same instrument preset as in the pitch strip example above (see 7.6.1 , Pitch Strip): MONARK's 3Saw.
→ The modulation strip is assigned to an instrument parameter in the KOMPLETE KON-TROL software. The assigned parameter moves according to the movements of your finger and is modulated accordingly.
→ A bar of white and blue LEDs next to the modulation strip follows the movement of your finger.
To return the pitch strip to its default state, remove your finger. Depending on the settings you have selected in the KOMPLETE KONTROL software's Preferences panel, the LED bar on your KOMPLETE KONTROL S-SERIES keyboard and the assigned parameter in KOMPLETE KONTROL will keep on going, stay at their current position, or fall back to their default state.
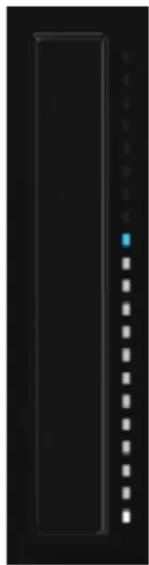
natural_image
Pure electrical circuit lines without any symbols7.7 The Light Guide
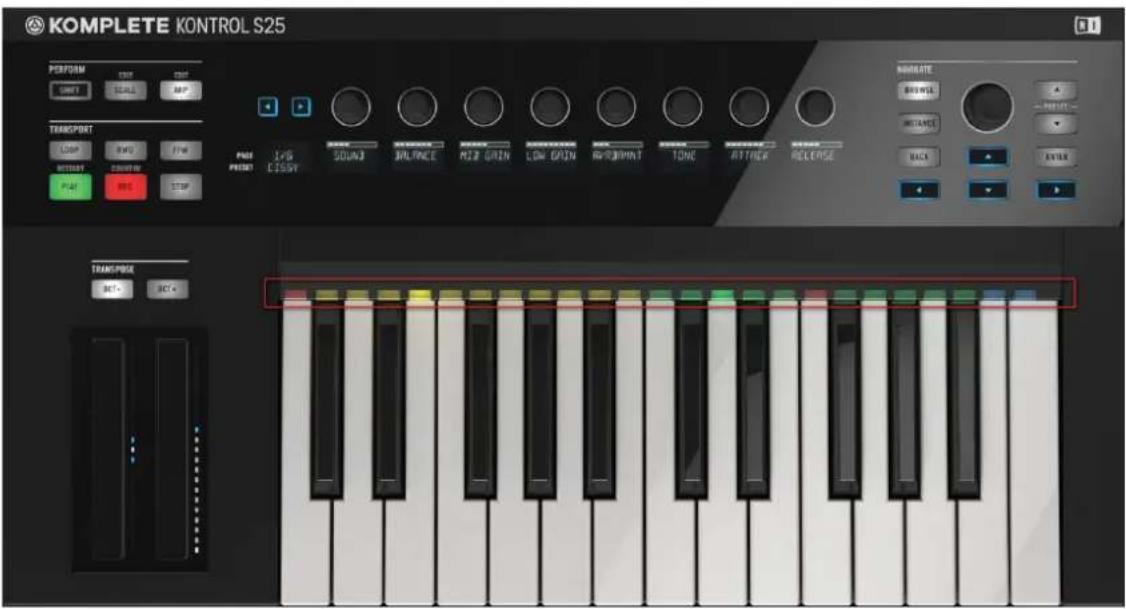
The multicolored Light Guide above the keyed
The Light Guide is one of KOMPLETE KONTROL S-SERIES' most prominent features and helps you keep track of key mapping both from loaded KOMPLETE instruments and from the PERFORM section. By color coding sample based instruments and indicating active and inactive keys in scales using the LEDs above the keyed, the Light Guide always presents you important information in a clearly visible way, even during live performance situations.
7.7.1 KOMPLETE Instrument Mapping
- For an example of how helpful the Light Guide can be, let's load a preset from the KOM- PLETE instrument BATTERY:
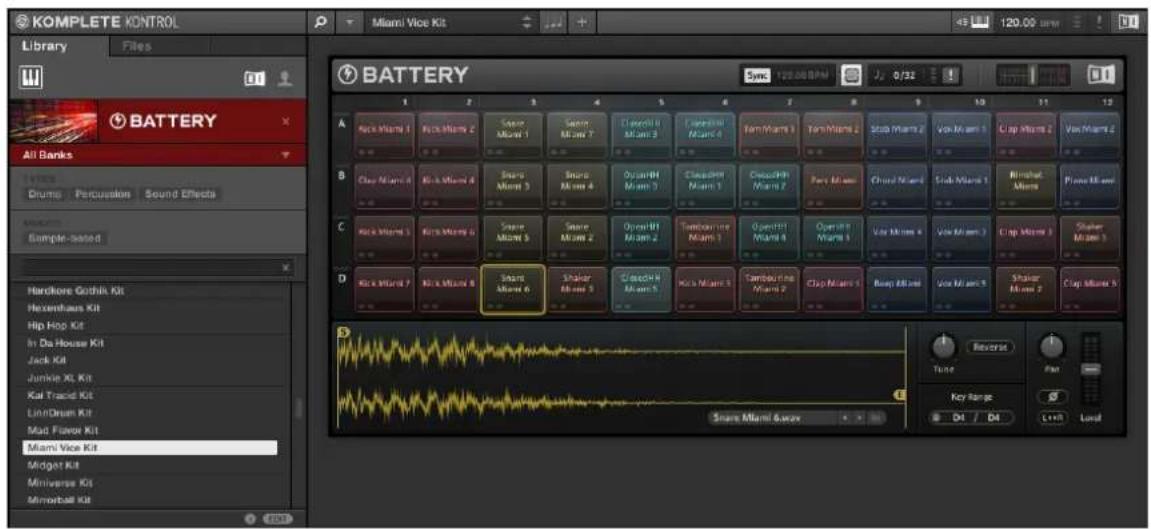
The cell matrix in BATTERY containing drum samples
BATTERY's cell matrix depicts and color codes the contained samples according to the type of sound, e.g. Kick or Snare. When mapping out 48 drum samples over a keyboard, it can be hard to keep track of what key that represents which cell in the cell matrix. The KOM-PLETE KONTROL S-SERIES keyboard's Light Guide reflects the mapping of cell matrix to keyboard and indicates in detail the color coding of the samples with its multicolored LEDs:
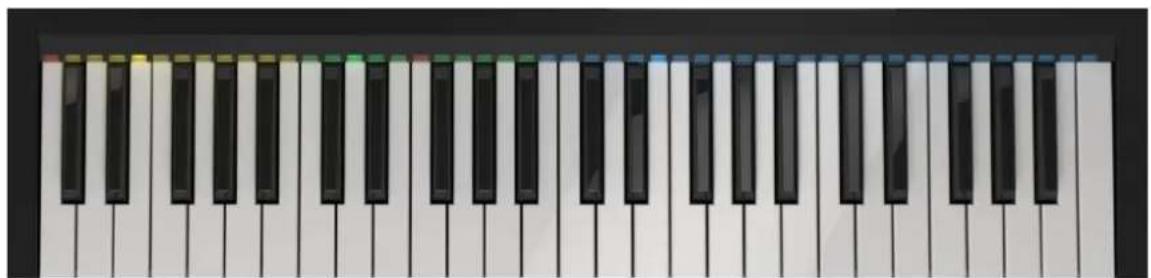
natural_image
Close-up of a standard piano keyboard with black, white, and blue keys (no text or symbols visible)The Light Guide (KOMPLETE KONTROL S49 depicted)
- As you press down any key on the keyboard, the LED representing that key lights up fully, while other keys remain half-lit. This is also true for incoming MIDI notes.
7.7.2 Perform Feature Mapping
KOMPLETE KONTROL has built-in scales and harmonies that you can select to play your KOMPLETE instruments with chords and arpeggios. To learn more about what that really means, see section 6.2 , A Note about Music Theory. Settings made with the perform parameters using the PERFORM and Control sections (or the Perform Panel in the KOMPLETE KONTROL software, see section 6 , KOMPLETE KONTROL Software Perform Panel) are reflected by the Light Guide. This means that when you select e.g. a scale or chord, the LEDs corresponding to the keys contained in that scale or chord will light up, whereas inactive keys remain unlit. For more information about SCALE, ARP, and each of their parameters, see sections 8 , KOMPLETE KONTROL S-SERIES Perform Functions, 8.2 , SCALE, and 8.3.5 , Chord Type.
8 KOMPLETE KONTROL S-SERIES Perform Functions
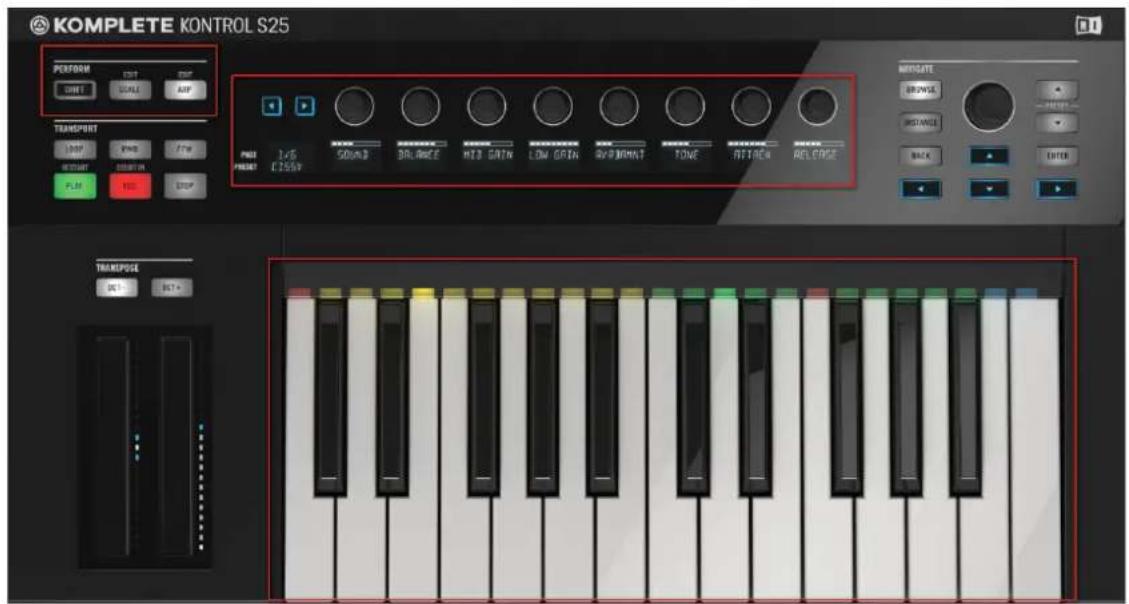
The PERFORM section, the Control section, and the keybed with the Light Guide
One of the most powerful and creative features of KOMPLETE KONTROL is the dedicated PERFORM section. It allows you to play chords and arpeggiated note sequences according to a vast amount of selectable scales and other parameters. You can even generate chords by selecting sets of harmonizers to add onto the notes you play, effectively making chords out of single notes. On the KOMPLETE KONTROL S-SERIES keyboard, the settings of the PERFORM section are reflected by the LEDs in the Light Guide directly above the keyed. The Light Guide indicates what keys are active or inactive in a selected scale or chord mode. The settings of the PERFORM section can also be accessed in the KOMPLETE KONTROL software's Perform Panel (see section ↑6, KOMPLETE KONTROL Software Perform Panel).
8.1 PERFORM Section Overview
The buttons of the PERFORM section let you access and switch the scale and arp parameters on or off. The parameters will be visible and editable via the displays and knobs in the Control section (see 7.5 , Control Section for information).
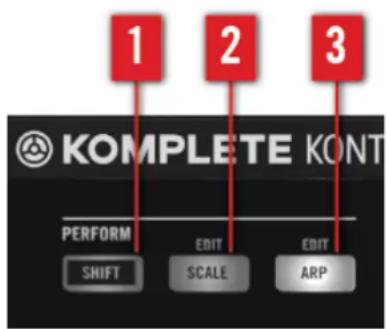
The PERFORM section
(1) SHIFT: Pressing and holding the SHIFT button lets you access the secondary function of controls labeled as such, for example the EDIT functions of the SCALE (2) and ARP (3) buttons. Pressing SHIFT while turning the knobs in the Control section changes their values in finer increments.
(2) SCALE: Pressing the SCALE button switches the scale engine on or off. Holding SHIFT while pressing SCALE lets you edit the scale parameters via the Control section's knobs and displays.
(3) ARP: Pressing the ARP button switches the arpeggiator on or off. Holding SHIFT while pressing ARP lets you edit the arp parameters via the Control section's knobs and displays.
8.1.1 SCALE Button Functions
▶ To access the scale parameters for editing, press SHIFT + SCALE.
→ The SCALE parameters are displayed and can be edited via the knobs in the Control section.

▶ To switch the scale engine on or off, press the SCALE button so it lights up.
→ The settings of the SCALE parameters are reflected by the Light Guide.
To map the knobs and displays to instrument parameters again, press SHIFT + SCALE once more. You can also press the BACK button in the NAVIGATE section. The scale engine will still be switched on.
8.1.2 ARP Button Functions
▶ To access the scale parameters for editing, press SHIFT + SCALE.
→ The ARP parameters are displayed and can be edited via the knobs in the Control section.

▶ To switch the arpeggiator on or off, press the ARP button so it lights up.
→ The settings of the ARP parameters are reflected by the Light Guide.
To map the knobs and displays to instrument parameters again, press SHIFT + ARP once more. You can also press the BACK button in the NAVIGATE section. The arpeggiator will still be switched on.
8.2 SCALE
KOMPLETE KONTROL comes equipped with a vast amount of scales that you can select and use to play your KOMPLETE instruments. This opens up possibilities to play an instrument such as a piano according to, e.g., the minor pentatonic scale without hitting a “false” note. In
CHORD mode you can use the provided scales to combine individual note harmonies into chords. Combined with the arpeggiator (see ↑8.3.5, Chord Type), you can even play scales automatically simply by pressing down a key on your KOMPLETE KONTROL S-SERIES keyboard or receiving an incoming MIDI note.

The PAGE display reads SCALE
When you select a scale using the SCALE parameters and switch the SCALE engine on, the scale gets mapped onto your KOMPLETE KONTROL S-SERIES keyboard and is reflected by the Light Guide. This means that regardless of what keys you actually press down on your keyboard—or what MIDI notes you send from your host application—the notes that are being played back are always mapped onto the closest notes contained in the scale that you selected.
8.3 SCALE Parameters
This section describes the settings of KOMPLETE KONTROL S-SERIES' SCALE function.

For information about the ARP parameters, see section 18.6, ARP Parameters.
8.3.1 SCALE and Root Note

The SCALE parameter corresponds to the Root Note parameter in the KOMPLETE KONTROL software
The leftmost scale parameter is SCALE, which corresponds to Root Note in the KOMPLETE KONTROL software. Setting the root note of a scale means deciding what key the scale will begin with. The following notes of the scale depend on which scale pattern you select with the second scale parameter (see ↑8.3.2, Scale Type). For example, using the default SCALE val-
ue C combined with the default Scale Type value MAJOR, you get the scale C major, which spans over one octave and contains the notes C, D, E, F, G, A, and B (followed by C again). If instead you select G as your root note, the G major scale contains the notes G, A, B, C, D, E, and F# (followed by G again). You will notice that the distance between each note follows the same pattern of “whole step-whole step-half step-whole step-whole step-half step,” which is the pattern of the MAJOR scale. You can transpose this pattern up or down along the keyboard by selecting the root note.
- The KOMPLETE KONTROL S-SERIES keyboard indicates the selected SCALE via fully lit LEDs, while other active keys are half-lit.

The SCALE engine must be switched on for the settings to become active.
▶ With SCALE selected, the SCALE parameter can be set to the following values by turning Knob 1 in the Control section:
■ C
C#
• D
D#
• E
■ F
■ F#
■ G
G#
■ A
A#
■ B
8.3.2 Scale Type

The scale type selects the scale pattern
The second parameter from the left is Scale Type. Use it to decide the scale pattern (see section 8.3.1 , SCALE and Root Note) according to which the notes will be mapped onto the keys of your KOMPLETE KONTROL S-SERIES keyboard. If you are triggering a KOMPLETE instrument via an incoming MIDI pattern from your host software, the notes of the MIDI pattern will be mapped onto the closest keys belonging to the selected Scale Type. This means that, for example (with root note set to C) a MIDI pattern consisting of the notes C-D-D# will be played back as such if Scale Type is set to CHROM, but instead as C-D-E if Scale Type is set to MAJOR. For a fully detailed list of the key mappings of each scale, see the table below.
- The KOMPLETE KONTROL S-SERIES keyboard indicates the active keys in the selected Scale Type via lit LEDs, while inactive keys are unlit.

The SCALE engine must be switched on for the settings to become active.
▶ With SCALE selected, the Scale Type parameter can be set to the following values by turning Knob 2 in the Control section:
| Scale Type Keys per Octave | |||||||||||
| All Keys 1 2 3 4 5 6 7 8 9 | 10 11 | 12 | |||||||||
| Chromatic | |||||||||||
| Corresponding Mapping R | 2 3 4 | 5 6 7 8 | 9 10 | 11 12 | |||||||
| Example with SCALE: C | C C# | D D# | E F F# | G G# | A A B | ||||||
| Major | |||||||||||
| Scale Type Keys per Octave | ||||||||||||
| Corresponding Mapping R | 2 2 3 | 3 4 5 | 5 6 6 7 | 7 | ||||||||
| Example with SCALE: C | C D D | E E F | G G A | A B B | ||||||||
| Minor | ||||||||||||
| Corresponding Mapping R | R 2 b3 | b3 4 | 5 5 b6 | b6 b7 | b7 | |||||||
| Example with SCALE: C | C C D | Eb Eb | F G | G Ab | Ab Bb | Bb | ||||||
| Harmonic Minor | ||||||||||||
| Corresponding Mapping R | R 2 b3 | b3 4 | 5 5 b6 | b6 7 7 | ||||||||
| Example with SCALE: C | C C D | Eb Eb | F G | G Ab | Ab B B | |||||||
| Major Pentatonic | ||||||||||||
| Corresponding Mapping R | R 2 2 | 3 3 5 | 5 6 6 | R | ||||||||
| Example with SCALE: C | C C D | D E E | G G | G A A | C | |||||||
| Minor Pentatonic | ||||||||||||
| Corresponding Mapping R | R b3 b | 3 4 4 | 4 5 5 | b7 b7 R | ||||||||
| Example with SCALE: C | C C E | b Eb | F F F G | G G Bb | Bb C | |||||||
| Blues | ||||||||||||
| Corresponding Mapping R | R R b3 | b3 4 | #4 5 5 | b7 b7 | R | |||||||
| Example with SCALE: C | C C C | Eb Eb | F F # | G G Bb | Bb C | |||||||
| Japanese | ||||||||||||
| Corresponding Mapping R | 2 2 b3 | b3 5 | 5 5 b6 | b6 R R | ||||||||
| Example with SCALE: C | C D D | Eb Eb | G G | G Ab | Ab C C | |||||||
| Scale Type Keys per Octave | ||||||||||||
| Freygish | ||||||||||||
| Corresponding Mapping R | b2 b2 | 3 3 4 | 5 5 b6 | b6 b7 | b7 | |||||||
| Example with SCALE: C | C Db | Db E | E F G | G Ab | Ab Bb | Bb | ||||||
| Gypsy | ||||||||||||
| Corresponding Mapping R | 2 2 b3 | b3 #4 | #4 5 | b6 b6 | 7 7 | |||||||
| Example with SCALE: C | C D D | Eb E | F# F | # G A | Ab B | B | ||||||
| Flamenco | ||||||||||||
| Corresponding Mapping R | b2 b2 | 3 3 4 | 5 5 b6 | b6 7 7 | ||||||||
| Example with SCALE: C | C Db | Db E | E F G | G Ab | Ab B B | |||||||
| Altered | ||||||||||||
| Corresponding Mapping R | b2 b2 | b3 b4 | b5 b5 | b6 b6 | b7 b7 | R | ||||||
| Example with SCALE: C | C Db | Db Eb | Fb Gb | Gb A | b Ab | Bb Bb | C | |||||
| Whole Tone | ||||||||||||
| Corresponding Mapping R | R 2 3 | 3 #4 #4 | #5 #5 | #6 #6 R | ||||||||
| Example with SCALE: C | C C D | E E F | # F# | G# G# | A# A# | C | ||||||
| Half-Whole Diminished | ||||||||||||
| Corresponding Mapping R | b2 b2 | #2 3 #4 | #4 5 | 6 6 b7 | b7 | |||||||
| Example with SCALE: C | C Db | Db D# | E F# | F# G | A A Bb | Bb | ||||||
| Whole-Half Diminished | ||||||||||||
| Scale Type Keys per Octave | ||||||||||||
| Corresponding Mapping R | R 2 b3 | b3 #3 | #4 #4 | #5 6 | 7 7 | |||||||
| Example with SCALE: C | C C D | Eb Eb | E# F | # F# | G# A B | B | ||||||
8.3.3 KEY MODE

KEY MODE sets the key mapping
Both sections ↑8.3.1, SCALE and Root Note and ↑8.3.2, Scale Type describe the use of SCALE on the assumption that KEY MODE—the third scale parameter—is set to its default value STANDARD. In STANDARD mode, the keys are mapped to the notes of the selected scale exactly as depicted in the table in section ↑8.3.2, Scale Type. That is to say, playing your KOMPLETE KONTROL S-SERIES keyboard, the selected scale is mapped onto an octave of the keyboard so that the octave is equally represented by seven white keys and five black ones. The mapping is reflected by the Light Guide, giving you valuable information on what keys are mapped onto which notes.
If instead, KEY MODE is set to EASY, the notes are mapped onto the keys so that any scale (except the 12-step CHROM scale) can be played using each consecutive white key of an octave. This means that a scale consisting of seven notes—or whole steps—will be mapped onto seven contiguous white keys. Black keys are inactive and pressing them will not play back any other notes.
When using EASY KEY MODE, the set root note (see section 8.3.1 , SCALE and Root Note) is always mapped onto the middle C key (commonly called C3). If the selected scale covers seven steps (and the 12-step chromatic), then the C1 key will also be mapped to the selected root note. If instead the selected scale has more or less than seven notes, then—depending on the amount of notes in the selected scale and counting down from C3—the C1 key will instead be mapped to any note contained in the selected scale corresponding to the amount of steps down from C3.
For a fully detailed list of the EASY mode mappings for each scale, see below.

Selecting the 12-step CHROM scale in EASY KEY MODE maps the keys in the same way as in the STANDARD mode. This is because the CHROM scale contains twelve notes, rather than seven, as is common for other scales.
- The KOMPLETE KONTROL S-SERIES keyboard indicates the active keys in the selected KEY MODE via lit LEDs, while inactive keys are unlit.

The SCALE engine must be switched on for the settings to become active.
▶ With SCALE selected, the KEY MODE parameter can be set to the following values by turning Knob 3 in the Control section:
■ STANDARD
■ EASY
EASY KEY MODE

In EASY KEY MODE, the Scale Types are mapped onto the white keys only according to this table:
| Scale Type Mapping in Easy Key Mode | ||||||||
| White Keys C3 D3 E3 F3 G3 | A3 B3 | |||||||
| Major | ||||||||
| Corresponding Mapping R 2 3 4 5 6 | 7 | |||||||
| Example with SCALE: C | C D E F | G A B | ||||||
| Minor | ||||||||
| Corresponding Mapping R 2 b3 4 5 b6 b7 | ||||||||
| Example with SCALE: C | C D Eb | F G Ab Bb | ||||||
| Harmonic Minor | ||||||||
| Corresponding Mapping R 2 b3 4 5 b6 7 | ||||||||
| Example with SCALE: C | C D Eb F G Ab B | |||||||
| Major Pentatonic | ||||||||
| Corresponding Mapping R 2 3 5 6 | ||||||||
| Example with SCALE: C | C D E G A | |||||||
| Minor Pentatonic | ||||||||
| Corresponding Mapping R b3 4 5 b7 | ||||||||
| Example with SCALE: C | C Eb F G Bb | |||||||
| Blues | ||||||||
| Corresponding Mapping R b3 4 #4 5 b7 | ||||||||
| Example with SCALE: C | C Eb F F# G Bb | |||||||
| Japanese | ||||||||
| Corresponding Mapping R 2 b3 5 b6 | ||||||||
| Example with SCALE: C | C D Eb G Ab | |||||||
| Freygish | ||||||||
| Corresponding Mapping R b2 3 4 5 b6 b7 | ||||||||
| Example with SCALE: C | C Db E F G Ab Bb | |||||||
| Gypsy | ||||||||
| Corresponding Mapping R 2 b3 #4 5 b6 7 | ||||||||
| Example with SCALE: C | C D Eb F# G Ab B | |||||||
| Flamenco | ||||||||
| Corresponding Mapping R b2 3 4 5 b6 7 | ||||||||
| Example with SCALE: C | C Db E F G Ab B | |||||||
| Altered | ||||||||
| Corresponding Mapping R b2 b3 b4 b5 b6 b7 | ||||||||
| Example with SCALE: C | C Db Eb Fb Gb Ab Bb | |||||||
| Whole Tone | ||||||||
| Corresponding Mapping R 2 3 #4 #5 #6 | ||||||||
| Example with SCALE: C | C D E F# G# A# | |||||||
| Half-Whole Diminished | ||||||||
| Corresponding Mapping R b2 #2 3 #4 5 6 b7 | ||||||||
| Example with SCALE: C | C Db D# E F# GA Bb | |||||||
| Whole-Half Diminished | ||||||||
| Corresponding Mapping R 2 b3 #3 #4 #5 6 7 | ||||||||
| Example with SCALE: C | C D Eb E# F# G# A B | |||||||
8.3.4 CHORD

CHORD selects chord mode
A very useful and creative scale parameter is CHORD. Use it to generate chords from single notes, either from your KOMPLETE KONTROL S-SERIES or from incoming MIDI notes from your host software. CHORD has one inactive (OFF) and two active states: HARM and CHD SET.
- In the HARM state, you specify the interval of notes in the selected Scale Type (see ↑8.3.2, Scale Type) that will constitute the chord using the Chord Type parameter (see ↑8.3.5, Chord Type): E.g. a triad in the form of the root note, the third note, and the fifth note (Chord Type value 1-3-5).
- In the CHD SET state, Chord Types (see ↑8.3.5, Chord Type) are selected from a list of major and minor chords depending on the selected root note (see ↑8.3.1, SCALE and Root Note).
Depending on whether you select CHORD mode OFF, HARM, or CHD SET, other scale parameters will be either displayed or hidden:
- Selecting HARM sets the Chord Type parameter to display a series of note intervals, letting you decide what keys should be used to generate a chord.

The Scale parameter CHORD, set value HARM
- Selecting CHD SET sets the Chord Type parameter to display a series of major and minor chords. Scale Type and KEY MODE are hidden.

The Scale parameter CHORD, set value CHD SET
- The KOMPLETE KONTROL S-SERIES keyboard indicates the keys being played back in a chord generated by the selected CHORD and Chord Type settings via fully lit LEDs, while active keys are half-lit and inactive keys are unlit.

The SCALE engine must be switched on for the settings to become active.
With SCALE selected, the CHORD parameter can be set to the following values by turning Knob 5 in the Control section:
- OFF
■ HARM - CHD SET
8.3.5 Chord Type

Chord Type displaying available parameters with HARM selected

Chord Type displaying available parameters with CHD SET selected
The Chord Type parameter lets you define a chord that will be generated from a single note used as input. If, for example, the root note (see ↑8.3.1, SCALE and Root Note) is set to C, and CHORD (see ↑8.3.3, KEY MODE) to CHD SET, then the Chord Type parameter presents you with a series of selectable chords. Values are, e.g., MAJ 4 and MIN 7, which would generate a major and minor chord, respectively—both using C as the chord's root note.
If CHORD is instead set to HARM, then Chord Type will offer you a selection of individual notes present in the selected Scale Type (see ↑8.3.2, Scale Type). This means that for all scales except the 12-tone CHROM scale (see further below), you can select the interval of notes that will make up your chord. The note interval is added onto the key of an incoming MIDI note, either from your KOMPLETE KONTROL S-SERIES keyboard or from your host software. For example, you can select to play a C minor triad by setting SCALE to C, Scale Type to MINOR, CHORD to HARM, and Chord Type to 1-3-5. If all of this seems complex, try setting a random value and use the KOMPLETE KONTROL S-SERIES' Light Guide to see what keys are active, inactive, and played back.
- The KOMPLETE KONTROL S-SERIES keyboard indicates the keys being played back in a chord generated by the selected CHORD and Chord Type settings via fully lit LEDs, while active keys are half-lit and inactive keys are unlit.

The SCALE engine must be switched on for the settings to become active.
▶ With SCALE selected, the Chord Type parameter can be set to the following values by turning Knob 6 in the Control section:
- When CHORD is set to HARM:
-
When CHORD is set to CHD SET:
-
MAJ 1
- MAJ 2
。 MAJ 3 - MAJ 4
• MAJ 5 - MAJ 6
-
MAJ 7
-
MAJ 8
。MIN 1
• MIN 2
• MIN 3
。MIN 4
• MIN 5
• MIN 6
• MIN 7
。MIN 8
| Chord Type Interval Added to Played Note | |
| OCTAVE | Octave |
| 1-3 | 3rd |
| 1-5 | 5th |
| 1-3-5 | 3rd and 5th |
| 1-4-5 | 4th and 5th |
| 1-3-5-7 | 3rd, 5th and 7th |
| 1-4-7 | 4th and 7th |
Chord Type and the Chromatic Scale
The CHROM scale consists of every semitone in an octave. That means that when you play every white key and every black key of an octave up or down, you are playing the 12-step CHROM scale. Since all semitones of an octave are present in the scale, you can use all keys to form chords. In turn, selecting CHROM as Scale Type (see ↑8.3.2, Scale Type) means that you can select virtually any Chord Type. The following chords are available and can be generated:
| Chord Type | Semitones Added above Played Note |
| OCTAVE | 12 |
| PERF 4 | 5 |
| Chord Type Semitones Added above Played Note | |
| PERF 5 | 7 |
| MAJOR | 4 and 7 |
| MINOR | 3 and 7 |
| SUS 4 | 5 and 7 |
| MAJ 7 | 4, 7 and 11 |
| MIN 7 | 3, 7 and 10 |
| DOM 7 | 4, 7 and 10 |
| DOM 9 | 4, 7, 10 and 14 |
| MIN 7b5 | 3, 6 and 10 |
| DIM 7 | 3, 6 and 9 |
| AUG | 4 and 8 |
| QUARTAL | 5, 10 and 15 |
| TRICHD | 5 and 11 |
8.4 ARP

The PAGE display reads ARP
KOMPLETE KONTROL S-SERIES' PERFORM section has a flexible and versatile arpeggiator that effectively lets you play your KOMPLETE instruments in note sequences according to the scales and chords created with the scale parameters (see section ↑8.2, SCALE). You can use the arpeggiator by itself as well, for example to keep retriggering the keys you press or to play a note over multiple octaves. To play an arpeggiated note sequence you only need to press any key on your KOMPLETE KONTROL S-SERIES keyboard or receive an incoming MIDI note from your host software.
8.5 Using ARP with a Sustain Pedal
You can use a sustain pedal to alter the behavior of the arpeggiator. A sustain pedal can be connected in the rear panel of your KOMPLETE KONTROL S-SERIES keyboard via 1/4" sockets.

The pedal inputs on the rear panel of your keyboard
Pressing Sustain Pedal when ARP is On
- Pressing the sustain pedal while keys are held and then releasing those keys continues the arpeggiated sequence. This way the footswitch behaves as an arp trig function.
- When a new key is pressed, the new note is added to the current sequence.
Releasing Sustain Pedal when ARP is On
- Releasing the sustain pedal with no keys pressed stops the sequence and all playing notes.
- Releasing the sustain pedal with keys still pressed removes all notes from the sequence except those corresponding to the pressed keys—the sequence continues with the pressed keys only
8.6 ARP Parameters
The arpeggiator has eight different parameters, giving you many possibilities to configure and shape the sound of your own note sequences. For example, you can set values for rate, swing, and range in order to add both rhythm and melody.
Available Arp Parameters
- For information about MAIN and note repeat, see section ↑6.6.1, Mode.
- For information about Type and the direction of the playback, see section ↑6.6.2, Type.
- For information about RHYTHM and the available note values of the arpeggiator, see section ↑6.6.3, Rate.
- For information about SEQUENCE and creating rhythmic variation, see section ↑6.6.4, Sequence.
- For information about SWING and the adding groove, see section ↑6.6.5, Swing.
- For information about OCTAVES / OTHER and the range of the arpeggiator, see section ↑6.6.6, Octaves.
- For information about DYNAMIC and creating velocity variations, see section ↑6.6.7, Dynamic.
- For information about GATE and setting note length, see section ↑6.6.8, Gate.

For information on SCALE parameters, see section 8.3 , SCALE Parameters.
8.6.1 MAIN

The first and most basic ARP parameter is MAIN, which lets you select either ARP or NOTE RPT. Depending on your selection, many of the remaining ARP parameters will either be visible or hidden.
ARP mode lets you play the output of the scale engine as a sequence of notes. For example, this means that you can set Scale Type (see ↑8.3.2, Scale Type) to, e.g., JAPANESE and CHORD (see ↑8.3.3, KEY MODE) to HARM in order to play a chord according to the JAPANESE scale. With ARP switched on and MAIN set to ARP, the chord you created using the scale engine will play as an arpeggiated note sequence instead of simultaneously. You only need to press a single key on your KOMPLETE KONTROL S-SERIES to hear the arpeggiated notes play out according to
the selected scale. Likewise, if you are triggering the chord from your host software, no more than a single MIDI event is necessary to play the arpeggiated note sequence, which among other things is useful for monophonic instruments.
- Selecting ARP gives you access to all arp parameters.
- Selecting NOTE RPT gives you access to the arp parameters RHYTHM, SWING, and GATE (see image below). Other parameters are hidden.
- The KOMPLETE KONTROL S-SERIES keyboard indicates the keys being played back in an arpeggiated sequence via fully lit LEDs, while active keys are half-lit and inactive keys are unlit.

The ARP engine must be switched on for the settings to become active.
▶ With ARP selected, the MAIN parameter can be set to the following values by turning Knob 1 in the Control section:
■ ARP
NOTE RPT
NOTE RPT Mode

MAIN set to NOTE RPT: RHYTHM, SWING, and GATE are visible
Setting MAIN to NOTE RPT deactivates the arpeggiator and instead sets KOMPLETE KONTROL S-SERIES to NOTE RPT mode, where whichever note is input is repeated until KOMPLETE KONTROL receives a MIDI note-off message. Use parameters RATE, SWING, and GATE (see 8.6.3 , RHYTHM, 8.6.5 , SWING, and 8.6.7 , DYNAMIC) to design NOTE RPT mode to fit your needs.
8.6.2 Type

Type sets the direction of the playback
The Type parameter is only available in ARP mode and sets the sequential order of the arpeggiated notes. Choose whether your arpeggiated chord should be played from the root note and up, the other way around, or even simultaneously. Selecting PLAYED will play back the notes in the order you pressed down the corresponding keys on your KOMPLETE KONTROL S-SERIES keyboard. Automating the Type parameter in your host software can create interesting variations and textures.

The ARP engine must be switched on for the settings to become active.
With ARP selected, the Type parameter can be set to the following values by turning Knob 2 in the Control section:
■ UP
- DOWN
■ UP-DOWN
■ PLAYED
- CHORD
8.6.3 RHYTHM

The RHYTHM parameter sets the rate of the arpeggiator
The RHYTHM parameter—available in both ARP and NOTE RPT mode (see 8.6.1 , MAIN)—sets the tempo of the ARP engine in relation to global tempo in musical values, ranging from 1/1 to 1/128. All note values (except 1/1 and 1/128) are available as basic notes, dotted notes, and triplets. Dotted notes are 1.5 times longer than the corresponding basic notes. Triplets are 2/3 the duration of their corresponding basic notes, so that e.g. three 1/4 notes are equal in duration to two basic 1/4 notes.

The ARP engine must be switched on for the settings to become active.
▶ With ARP selected, the RHYTHM parameter can be set to the following values by turning Knob 3 in the Control section:
■ 1/1
■ 1/2 D
■ 1/1 T
■ 1/2
■ 1/4 D
■ 1/2 T
■ 1/4
■ 1/8 D
■ 1/4 T
■ 1/8
■ 1/16
■ 1/8 T
■ 1/16
■ 1/32 D
■ 1/16 T
■ 1/32
■ 1/64 D
■ 1/32 T
■ 1/64
■ 1/128 D
■ 1/64 T
■ 1/128
8.6.4 SEQUENCE

The SEQUENCE parameter selects rhythms
The SEQUENCE parameter gives you a way of adding interesting rhythms to your arpeggiated notes. Select one of eight different sequences and apply it to the arpeggio you are playing. Combine SEQUENCE with the RHYTHM parameter (see ↑8.6.3, RHYTHM) to create a huge variety of rhythms at different tempos. If RHYTHM is set to a basic or dotted value, then SEQUENCE applies a 16-step sequencer to the notes. If RHYTHM is instead set to a triplet value, then SEQUENCE applies a 12-step sequencer to the notes.
You can switch sequences in real time during playback. For example, if sequence 1 is running and you instead select sequence 2 after the fourth MIDI note in a pattern has been played back, then sequence 2 starts when the fifth MIDI note in the pattern is played back.

The ARP engine must be switched on for the settings to become active.
With ARP selected, the SEQUENCE parameter can be set to the following values by turning Knob 4 in the Control section:
■ OFF
■ 1
· 2
■ 3
4
■ 5
6
7
■ 8
▶ To display the set value of the SEQUENCE parameter, tap Knob 4.
8.6.5 SWING

The SWING parameter adds groove to your sequence
Adding SWING to your note sequence can make it feel less quantized and sound more natural. SWING works by introducing a delay to every second note in a sequence. Doing so often adds a certain groove to the music.
SWING lets you select a value between 0.0 % and 100.0 %:
▶ Set the value to 0.0 % to play back the notes without delay.
▶ Set the value to 50.0 % to delay playing back the notes with half a step in the grid of your host sequencer.
▶ Set the value to 100.0 % to delay playing back the notes with a full step in the grid of your host sequencer.
Using SWING in combination with the GATE parameter (see ↑8.6.7, DYNAMIC) adds further variations in note duration. For example, if GATE is set to 100.0 %, KOMPLETE KONTROL sends a MIDI note-off message before each note and plays back the sequence legato. If GATE is set to values larger or smaller than 100.0 %, then notes will be scaled after the value of the SWING parameter has been applied, leaving the groove intact.

The ARP engine must be switched on for the settings to become active.
With ARP selected, the SWING parameter can be set to values between 0.0 % and 100.0 % by turning Knob 5 in the Control section.
▶ To display the set value of the SWING parameter, tap Knob 5.
8.6.6 OCTAVES / OTHER

The OCTAVES / OTHER parameter sets the range of the arpeggiator
The OCTAVES / OTHER parameter lets you decide the range of the arp sequence. You can choose to play back your sequence within the octave of the keys you pressed on your KOMPLETE KONTROL S-SERIES keyboard only, or you can select up to eight octaves and let the corresponding notes of your chord or scale be played back in as many octaves.
Depending on the settings you have made to the Type parameter (see ↑6.6.2, Type), the octaves played back can be above (e.g. Up) or below (e.g. Down) the pressed keys.
- The KOMPLETE KONTROL S-SERIES keyboard indicates the played back keys depending on the octave range via fully lit LEDs, while other keys are half-lit.

The ARP engine must be switched on for the settings to become active.
▶ With ARP selected, the OCTAVES / OTHER parameter can be set to the following values by turning Knob 6 in the Control section:
• 1
·2
■ 3
4
■ 5
6
7
■ 8
▶ To display the set value of the OCTAVES / OTHER parameter, tap Knob 6.
8.6.7 DYNAMIC

The DYNAMIC parameter set the velocity for the arp
The DYNAMIC function reads the velocity of the input—e.g. a key you pressed on your KOMPLETE KONTROL S-SERIES keyboard or an incoming MIDI note from your host software—and scales it by the factor you set with the DYNAMIC parameter. The scaling is applied per note. The velocity of each played note is taken and multiplied by the value set with the DYNAMIC parameter.

The ARP engine must be switched on for the settings to become active.
With ARP selected, the DYNAMIC parameter can be set to values between 1.0 % and 200.0 % by turning Knob 7 in the Control section:
▶ To display the set value of the DYNAMIC parameter, tap Knob 7.
8.6.8 GATE

The GATE parameter sets the length of the arp notes
The GATE parameter lets you decide the length of the notes in your sequence. Setting a value between 1.0 % and 99.9 % makes the duration of the notes shorter than they otherwise would be. Setting a value between 100.1 % and 200.0 % instead elongates the duration of the notes by the selected value.

The ARP engine must be switched on for the settings to become active.
With ARP selected, the GATE parameter can be set to values between 1.0 % and 200.0 % by turning Knob 8 in the Control section:
▶ To display the set value of the GATE parameter, tap Knob 8.
9 Troubleshooting – Getting Help
This chapter assists you in solving common issues with KOMPLETE KONTROL and provides you with the necessary information for getting further assistance. Before getting help please make sure you have downloaded the latest KOMPLETE KONTROL software and documentation and all KOMPLETE 10 or KOMPLETE 9 updates from Service Center!
9.1 Troubleshooting
A few common issues and possible solutions when working with KOMPLETE KONTROL are listed in this section.
9.1.1 The KOMPLETE KONTROL Software Won't Start
- Check the system requirements for KOMPLETE KONTROL. The minimum requirements are the very least you can get by with and are often not enough for advanced use. Increasing the RAM in your computer may help significantly.
- Make sure you have the most recent version of the KOMPLETE KONTROL software installed. You can find the latest available version following this link: http://www.native-instruments.com/updates
- Make sure that you have not clicked an outdated application alias/shortcut.
- Try to restart your computer. Disconnect any other audio interfaces and computer peripherals like printers, scanners, and the like.
9.1.2 No Output from Your KOMPLETE Instrument
If you have loaded e.g. KONTAKT, BATTERY, or REAKTOR into KOMPLETE KONTROL and cannot hear any audio output from Output 3 and higher, ensure that you have instantiated the Multi Output (16 x Stereo) version of KOMPLETE KONTROL in your host. If instead the stereo version of KOMPLETE KONTROL is instantiated, only audio routed to Outputs 1 and 2 is audible.
9.1.3 Latency Issues
- Please check if your computer is suited for handling real-time audio processing without dropouts. In general, it is not recommended to use laptops with shared-memory graphic cards. You will need all the memory and processing power available for your audio software.
- It is not recommended to run the laptop on battery, as built-in power management systems might slow the clock rate of the CPU in an effort to extend battery life.
- Disconnect all unused hardware (e.g., printer, scanner). This will increase the amount of processing power available for your music software.
- Laptops are often equipped with built-in devices that disturb audio processing, most commonly Bluetooth transceivers, an Ethernet network adapter, or a wireless LAN card. You might need to disable these devices while working with KOMPLETE KONTROL.
Windows users: The Online Knowledge Base contains additional tuning tips for your operating system. See following articles:
- Windows 7 tuning tips for audio processing: http://www.native-instruments.com/knowledge/questions/847/
- Windows 8 tuning tips for audio processing: http://www.native-instruments.com/knowledge/questions/1395/
9.1.4 The KOMPLETE KONTROL Software Crashes
In case of a crash during runtime, please contact the Native Instruments technical support team as described in section 9.3.2 , Technical Support and send them your crashlog and a detailed description of what you were doing with the software just before the crash happened. You will find the crashlog in the following folders:
- Windows: My Documents\Native Instruments\Komplete Konrol\Crashlogs
- Mac OS X: Users/\~/Library/Logs/CrashReporter
9.1.5 Updates
Whenever you encounter problems, it is recommended that you first download and install any available software updates. Updates are released regularly to fix known problems, maintain compatibility with operating system updates, and to continuously improve the software. The version number of your software is displayed in the About dialog for all Native Instruments applications. This dialog can be opened by clicking the NI logo in the upper right corner of the user interface, by clicking the KOMPLETE KONTROL logo in its upper left corner, or by selecting About Komplete Kontrol from the Help menu in the application menu bar or from the Help submenu in the KOMPLETE KONTROL menu. Alternatively, you can find the version numbers of all installed Native Instruments applications when showing the details for an application within the Overview page of the Service Center. Updates are available on the Update page in Service Center or on our website under:
http://www.native-instruments.com/updates
9.2 Getting Help
If you are experiencing problems related to your Native Instruments product that the supplied documentation does not cover, there are several ways of getting help!

The links in the following sections can also be reached from the Service Center application: Open the Service Center application and click on the Support button in the upper-right corner.
9.3 Support Channel Videos
You can find a number of support videos on The Official Native Instruments Support Channel under the following url: https://www.youtube.com/NIsupportEN
We recommend that you follow along with these instructions while the respective application is running on your computer.
9.3.1 Knowledge Base
The Online Knowledge Base gathers useful information about your Native Instruments product and can be of great help to solve possible issues you may encounter. You can reach the Knowledge Base via:
www.native-instruments.com/knowledge
You can also access the Knowledge Base directly from KOMPLETE KONTROL by selecting Visit Online Knowledge Base from the Help menu in the application menu bar or from the Help submenu in the KOMPLETE KONTROL menu.
9.3.2 Technical Support
If no Knowledge Base entry matches your problem, or if the matching entry does not solve the problem, you can use the Online Support Form to contact the Technical Support team of Native Instruments. The Online Support Form will ask you to enter information about your hardware and software setup. This information is essential for our Support team to be able to provide you with quality assistance. You can reach the Online Support via:
www.native-instruments.com/suppform
When communicating with the Native Instruments Support team, keep in mind that the more details you can provide about your hardware, your operating system, the version of the software you are running, and the problem you are experiencing, the better they will be able to help you.
In your description, you should mention:
- How to reproduce the problem
- How you have already tried to fix the problem
- A description of your setup, including all hardware and the version of your software
- The brand and specifications of your computer
When installing new software or software updates, a Readme file is included that contains late breaking news and new information that was not yet included in the documentation. Please open and read this Readme file before contacting Technical Support.
9.3.3 Registration Support
If problems occur during the product activation procedure, please contact our Registration Support team:
www.native-instruments.com/regsuppfrm
9.3.4 User Forum
In the Native Instruments User Forum, you can discuss product features directly with other users and with experts moderating the forum. Please be aware that the Technical Support team does not participate in the forum. If you're encountering an issue that can't be solved by other users, contact Native Instruments' Technical Support team via the online support as described above. You can reach the User Forum via:
www.native-instruments.com/forum
Index
A
ARP [144] [222]
Dynamic [151] [230]
GATE [151] [231]
Groove [149] [228]
Mode [145]
Note Value [147] [226]
OCTAVES [150] [229]
OCTAVES / OTHER [229]
OTHER [229]
Range [150] [229]
Rate [147] [226]
RHYTHM [148] [226]
Rhythms [227]
Sequence [148] [227]
Swing [149] [228]
Tempo [147] [226]
Type [146] [225]
Velocity [151] [230]
ARP button [206]
Arp Mode
Note Repeat [145]
NOTE RPT [224]
ARP Page [187]
Audio and MIDI Settings [43]
Audio page [43]
MIDI page [46]
Routing page [45]
Audio driver (selecting) [44]
Audio interface
selecting and outputs [45]
settings [43]
Automatic Track Focus [160]
Automatically Assigned Controls [187]
B
BACK button [166]
BROWSE button [165] [166]
Browser
in-depth [85]
Keyboard [165]
On-Screen Overlay [165] [166]
showing and hiding [24]
C
CHORD
CHD SET [217]
HARM [217]
Chord Mode [138] [217]
Chord Type [140] [219]
CHROM Scale [220]
Chromatic Scale [142]
Chords [127]
Chord Set [138]
Generating [138] [140] [217] [219]
Harmonizer [138]
CHROM Scale [220]
Chromatic Scale [142]
Configuration
Host Application [32]
Content selector
On-Screen Overlay [168]
Control encoder [166]
NAVIGATE section [166]
Control section [188]
Page buttons [187]
Controller settings [39]
D
Displays
Control section [187]
Driver
selecting an audio driver [44]
Dynamic [151] [230]
E
EASY
KEY MODE [213]
ENTER button [166]
F
FILES pane [112]
G
GATE [151] [231]
H
Help [232]
Host
Record Arming [160]
Host Application
Configuration [32]
Host automation [50]
Host Configuration [32]
Host Control [158] [160]
Configuration [157]
Host Navigation [160]
Host Transport Control [158]
|
IMPORT button [120]
Importing your files into the Library [119]
INSTANCE
button [34]
INSTANCE button [155] [166]
Host Control [163]
Instance Selection [163]
Instances
Switching [31]
K
KEY MODE [135] [213]
EASY [135] [213]
Key velocity [39]
Keyboard
Controls [152]
Overview [152]
Keyboard LEDs [202]
Knobs
Control section [187]
KOMPLETE KONTROL
Keyboard Overview [152]
KOMPLETE KONTROL S-SERIES
Keyboard Overview [152]
KOMPLETE KONTROL software
stand-alone or plug-in [29]
L
Latency [45]
LEDs
Keybed [202]
Light Guide [202]
Library [86]
importing your own files [119]
LIBRARY pane [88]
Light Guide [202]
LEDs [202]
M
MIDI
automation [50]
configuring [46]
connecting external equipment [48]
controlling parameters via [50]
Mode [34]
Native Map [50]
MIDI Mode [34]
Mode [145]
MODES Filter [90]
On-Screen Overlay [168]
Music Theory
Arpeggio [128]
Chords [127]
Scales [127]
N
Native Map [50]
assigning controls [50]
Navigate arrows [166]
Navigate Controls [30]
NAVIGATE section [160] [165] [166]
Overview [166]
Note Repeat [145]
Mode [145]
NOTE RPT [224]
MAIN [224]
0
OCT- button [153]
OCT+ button [153]
OCTAVES [150] [229]
OCTAVES OTHER [229]
On-Screen Overlay [163]
Browser [165] [166]
Browser Workflow [169]
MODES [176]
TAGS [176]
Overview
Keyboard [152]
P
Page buttons [187]
Skipping Pages [187]
PAGE display [187]
Parameter Pages [187]
Perform Panel
Scale [128]
showing and hiding [24]
PERFORM section
ARP button [206]
SCALE [207]
SCALE button [206]
SHIFT button [206]
Plug-in [29]
Preferences [34] [195]
Hardware page [39]
Library page [35]
PRESET buttons [166] [185]
PRESET display [187]
PRESET down [185]
PRESET up [185]
PRESS BROWSE [56]
Product selector
On-Screen Overlay [168]
R
Rate [147]
Record Arming [160]
Result list
in Files pane [114] [117]
in Library pane [90] [102]
On-Screen Overlay [169] [184]
RHYTHM [226]
Root Note [130]
SCALE [208]
S
Sample rate
selecting [45]
SCALE [128] [207]
CHORD [217]
Chord Mode [138]
Chord Type [140] [219]
KEY MODE [135] [213]
Root Note [130] [208]
Scale Type [131] [210]
SCALE button [206]
Scale Engine [128] [207]
SCALE Page [187]
Scale Type [131] [210]
CHROM [220]
Chromatic [142]
Scales [127]
Search field [90]
Search results [102] [184]
Selecting Host Tracks [160]
Sequence [148] [227]
Setup
Host Application Configuration [32]
SHIFT button [206]
Soundcard
output routing [45]
settings [43]
Stand-alone application [29]
STANDARD
KEY MODE [213]
SWING [149] [228]
Switching Instances [31]
T
Tag Filter
using [97] [176]
Tags
assigning Types and Subtypes [110]
creating [111]
Text search
Track Selection [160]
Transport Functions [30]
TRANSPORT section [158]
TRANSPOSE buttons [153]
Troubleshooting [232]
Type [146] [225]
TYPES filter [90]
On-Screen Overlay [168]
V
Velocity scaling [39]
- NATIVE INSTRUMENTS GmbH
- Table of Contents
- Welcome to KOMPLETE KONTROL ....11
- Basic Concepts ....17
- Instrument Area 79
- KOMPLETE KONTROL Software Browser 85
- Searching and Loading Files from the Library 88
- Additional Browsing Tools 104
- Editing the Files' Tags and Properties 106
- Loading and Importing Files from Your File System 112
- KOMPLETE KONTROL Software Perform Panel 121
- KOMPLETE KONTROL S-SERIES Keyboard 152
- Troubleshooting – Getting Help 232
- Welcome to KOMPLETE KONTROL
- Where to Start?
- Komplete Kontrol Setup Guide
- Your First Stop: the Setup Guide
- Komplete Kontrol Manual
- KOMPLETE KONTROL S-SERIES Ableton Live Setup
- Controller Editor Manual
- Other Online Resources
- Manual Conventions
- Naming Convention
- Button Combinations and Shortcuts on Your Keyboard
- Unlabeled Knobs on the KOMPLETE KONTROL S-SERIES Keyboard
- System Requirements
- KOMPLETE
- Supported Host Applications
- Basic Concepts
- KOMPLETE KONTROL and KOMPLETE KONTROL S-SERIES
- Corresponding Features
- The Browser and the Navigate Section
- The Perform Panel and the Perform Section
- The Light Guide
- The Control Section and KOMPLETE Instrument Parameters
- The Transport Section and Your Host Application
- Adjusting the KOMPLETE KONTROL Software Interface
- Showing/Hiding the Browser
- Showing/Hiding the Perform Panel
- Selecting Instrument Views
- Default View
- Additional View
- Edit View
- Stand-Alone and Plug-in Mode
- Differences between Stand-Alone and Plug-in Mode
- Transport Functions and Navigate Controls
- Audio and MIDI Handling
- Multiple Plug-in Instances
- Switching Instances
- Switching Instance from the Software
- Switching Instance from the Keyboard
- Configuring Your Host Application
- Configuring Your Host for Use with KOMPLETE KONTROL S-SERIES
- Compatibility with Other Connected MCU Devices
- MIDI Mode
- Switching to MIDI Mode
- Controller Editor
- Preferences
- Preferences – Library Page
- Factory Pane
- User Pane
- Adding Folders to the User Library
- Removing Folders from the User Library
- Preferences – Hardware Page
- Audio and MIDI Settings
- Audio and MIDI Settings – Audio Page
- Audio and MIDI Settings – Routing Page
- Audio and MIDI Settings – MIDI Page
- Connecting External MIDI Equipment to KOMPLETE KONTROL S-SERIES
- Incoming and Outgoing MIDI
- Incoming MIDI and Host Automation
- Receiving MIDI Clock
- Outgoing MIDI and Host Control
- MIDI Mode
- Native Map
- Automatically Assigning Controls via Native Map
- Controlling Parameters via MIDI and Host Automation
- Which KOMPLETE KONTROL Parameters Can Be Automated?
- Recording Automation
- On/Off Switches
- Drop-Down Menus
- Drag Controls
- Automation IDs for the Perform Panel
- Automation IDs for KOMPLETE Instruments
- Using Pedals with KOMPLETE KONTROL S-SERIES
- Quick Start
- KOMPLETE KONTROL S-SERIES and MIDI Mode
- First Steps
- Opening the Browser
- Finding and Loading an Instrument Preset
- Controlling KOMPLETE Instruments
- Controlling Instrument Parameters
- More than Eight Parameters: Switching Parameter Pages
- Using the Perform Features: Scale, Arp, and the Light Guide
- The PERFORM Section and the Perform Panel
- Selecting a Scale
- Playing Chords
- Playing Arpeggiated Chords
- What's Next?
- KOMPLETE KONTROL Software Overview
- Software Interface Overview
- Header
- Opening the Perform Panel
- Browser
- Instrument Area
- Selecting Instrument Views
- Default View
- Additional View
- Edit View
- KOMPLETE KONTROL Software Browser
- Browser Basics
- The Library
- Which Files Are Included in the Library?
- Browsing the Library vs. Browsing Your Hard Disks
- Switching Between Library and Files Pane
- Searching and Loading Files from the Library
- Overview of the Library Pane
- Overview of the Search Workflow in the Library Pane
- Choosing Between Factory and User Content
- Selecting a Product Category, a Product, and a Bank
- Selecting a Product or a Product Category
- Resetting the Product Selection
- Selecting a Bank
- Products and Banks for User Content
- Selecting Type and Mode Tags
- Types
- Modes
- Selecting Multiple Tags from the Same Level
- Performing a Text Search
- Using the Result List
- Selecting Files in the Result List
- Loading Files
- Deleting Files in the Result List
- Navigating to the Files in Your Operating System
- Additional Browsing Tools
- Displaying File Information
- Editing the Files' Tags and Properties
- Attribute Editor Basics
- Displaying Attributes of Factory Files
- The BANK Page
- The TYPES and MODES Pages
- Displaying Tags
- Assigning Tags
- Unassigning Tags
- Creating New Tags
- Deleting Tags
- The PROPERTIES Page
- Loading and Importing Files from Your File System
- Overview of the Files Pane
- Using Favorites
- Adding and Removing Favorites
- Using the Location Bar
- Navigating to Recent Locations
- Using the Result List
- Navigating Your File System in the Result List
- Selecting Files and Folders in the Result List
- Loading Files from the Result List
- Additional Features in the Result List
- Importing Files to the KOMPLETE Library
- KOMPLETE KONTROL Software Perform Panel
- Perform Panel Overview
- Showing/Hiding the Perform Panel
- Perform Panel Button States
- Switching Pages
- Setting a Parameter Value
- A Note about Music Theory
- Scales
- Chords
- Arpeggios
- Scale Engine
- Scale Parameters
- Available Scale Parameters
- Root Note
- Scale Type
- Key Mode
- Chord Mode
- Chord Type
- Chord Type and the Chromatic Scale
- Arpeggiator
- Arp Parameters
- Available Arp Parameters
- Mode
- Note Repeat Mode
- Type
- Rate
- Sequence
- Swing
- Octaves
- Gate
- KOMPLETE KONTROL S-SERIES Keyboard
- Keyboard Overview
- Further Reading
- MIDI Mode
- Switching Controller Modes
- Plug-in Use
- Stand-Alone Use
- Host Control in MIDI Mode
- Host Control and the Transport Section
- A Note about Host Control
- Transport Controls
- Automatic Track Focus and the Navigate Section
- Selecting a Track
- Focusing on a Track
- Switching between KOMPLETE KONTROL Instances
- Selecting an Instance in the Host
- Browsing and the Navigate Section
- The BROWSE Button and the Browser
- Which Files Are Included in the Browser?
- Browser Overview
- Overview of the Search Workflow in the Browser
- Opening the Browser
- Choosing Between Factory and User Content
- Selecting a Product and a Bank
- Selecting a Product
- Selecting Type and Mode Tags
- Using the Result List
- Scrolling and Selecting Files in the Result List
- Loading Files with the PRESET Buttons
- Control Section
- Control Section Controls
- Native Map
- Controlling Instrument Parameters with the Control Section
- PRESET 3SAW
- Switching Parameter Page
- Switching KOMPLETE Instruments
- Controlling the Perform Features with the Control Section
- Touch Strips
- Pitch Strip
- Controlling Instrument Parameters with the Pitch Strip
- Modulation Strip
- Controlling Instrument Parameters with the Modulation Strip
- The Light Guide
- KOMPLETE Instrument Mapping
- Perform Feature Mapping
- KOMPLETE KONTROL S-SERIES Perform Functions
- PERFORM Section Overview
- SCALE Button Functions
- ARP Button Functions
- SCALE
- SCALE Parameters
- SCALE and Root Note
- Scale Type
- KEY MODE
- EASY KEY MODE
- CHORD
- Chord Type
- ARP
- Using ARP with a Sustain Pedal
- Pressing Sustain Pedal when ARP is On
- Releasing Sustain Pedal when ARP is On
- ARP Parameters
- MAIN
- NOTE RPT Mode
- Type
- RHYTHM
- SEQUENCE
- SWING
- OCTAVES / OTHER
- DYNAMIC
- GATE
- Troubleshooting – Getting Help
- Troubleshooting
- The KOMPLETE KONTROL Software Won't Start
- No Output from Your KOMPLETE Instrument
- Latency Issues
- The KOMPLETE KONTROL Software Crashes
- Updates
- Getting Help
- Support Channel Videos
- Knowledge Base
- Technical Support
- Registration Support
- User Forum
- Index
- A
- Arp Mode
- B
- C
- D
- Displays
- Driver
- E
- EASY
- F
- G
- H
- Help [232]
- Host
- Host Application
- Host automation [50]
- Host Configuration [32]
- Host Control [158] [160]
- Host Navigation [160]
- Host Transport Control [158]
- |
- IMPORT button [120]
- Importing your files into the Library [119]
- INSTANCE
- INSTANCE button [155] [166]
- Instances
- K
- L
- M
- MIDI
- MIDI Mode [34]
- Mode [145]
- MODES Filter [90]
- Music Theory
- N
- Native Map [50]
- Navigate arrows [166]
- Navigate Controls [30]
- NAVIGATE section [160] [165] [166]
- Note Repeat [145]
- NOTE RPT [224]
- 0
- OCT- button [153]
- OCT+ button [153]
- OCTAVES [150] [229]
- OCTAVES OTHER [229]
- On-Screen Overlay [163]
- Overview
- P
- R
- S
- Sample rate
- SCALE [128] [207]
- SCALE button [206]
- Scale Engine [128] [207]
- SCALE Page [187]
- Scale Type [131] [210]
- Scales [127]
- Search field [90]
- Search results [102] [184]
- Selecting Host Tracks [160]
- Sequence [148] [227]
- Setup
- SHIFT button [206]
- Soundcard
- Stand-alone application [29]
- STANDARD
- SWING [149] [228]
- Switching Instances [31]
- T
- Tag Filter
- Tags
- Text search
- Track Selection [160]
- Transport Functions [30]
- TRANSPORT section [158]
- TRANSPOSE buttons [153]
- Troubleshooting [232]
- Type [146] [225]
- TYPES filter [90]
Brand : NATIVE INSTRUMENTS
Model : Komplete Kontrol S61
Category : Keyboard