
Indianapolis Pro 7951 - Car radio BECKER - Free user manual and instructions
Find the device manual for free Indianapolis Pro 7951 BECKER in PDF.


| Product Type | Car Stereo with Navigation |
| Brand | Becker |
| Model | Indianapolis Pro 7951 |
| Dimensions (approx.) | 1 DIN (approx. 180 x 50 x 160 mm) |
| Weight (approx.) | 1.5 kg |
| Power Supply | 12 V DC (negative ground) |
| Display Type | LCD with backlight |
| Radio Bands | FM, AM (MW, LW, SW) |
| RDS Features | PTY, Radio Text, Traffic Programme (TP), TMC |
| Navigation System | GPS with digital maps on CDs (4 CDs for Europe) |
| Audio Playback | CD, CD-R/RW, MP3, WMA |
| Additional Audio Sources | AUX input, optional CD changer, optional iPod via adapter |
| Bluetooth | Yes (for hands-free telephone) |
| Anti-theft | Detachable front panel with code card |
| Output Power | 4 x 20 W RMS (typical) |
| Preamp Outputs | Front, rear, subwoofer (line out) |
| User Interface | Multifunction buttons, rotary controls, on-screen menus |
| Languages | Multiple (including English, German, French, etc.) |
| Safety | Speed limit display, traffic regulations priority |
Frequently Asked Questions - Indianapolis Pro 7951 BECKER
User questions about Indianapolis Pro 7951 BECKER
0 question about this device. Answer the ones you know or ask your own.
Ask a new question about this device
Download the instructions for your Car radio in PDF format for free! Find your manual Indianapolis Pro 7951 - BECKER and take your electronic device back in hand. On this page are published all the documents necessary for the use of your device. Indianapolis Pro 7951 by BECKER.
USER MANUAL Indianapolis Pro 7951 BECKER
Safety instructions 5
Information regarding
general road safety 6
Arrangement of controls 7
Anti-theft device 8
Entering the code number 8
Removing the portable panel 9
Attaching the portable panel 9
General Operation 10
Switching on/off 10
Setting the volume 10
Activating the tone menu 10
Setting the bass 10
Setting the treble 10
Fader 11
Setting the balance 11
Linear adjustment 11
Adjusting the volume of the
subwoofer or centre speaker 11
Switching loudness on / off 11
Navigation mode 12
What is navigation? 12
Navigation CDs 13
Navigation with four
European CDs 14
General instructions 15
Selecting navigation 16
Main navigation menu 17
Destination entry 17
Selecting a country 17
Entering a destination 18
Selecting destination via post code 19
Entering the destination town 20
Entering the destination
town centre 21
Destination input via coordinates 22
Route menu
Entering house number for destination road 23
Selecting intersection for
destination road 24
Selecting route settings 24
Storing a destination in the
destination memory 25
Deleting a destination from the destination memory 26
Destination memory full 26
Route guidance calculation 26
Recalculating route. 26
Stopover
Entering a stopover 26
Starting route guidance to a stopover 27
Deleting a stopover 27
Stopover reached 27
Detour function
Entering length of traffic jam 27
Deleting traffic jam 28
Cancelling route guidance 28
Explanation of navigation 28
Dynamic route guidance
with TMC 30
What is dynamic route guidance? 30
Dynamic route guidance 31
Displaying traffic information 31
Information during
route guidance 33
Requesting journey duration and kilometres travelled 33
Displaying/changing settings
during route guidance 33
Requesting current time 36
Calling up current position 36
Calling up road list 37
Destination memory 38
P.O.I. 38
Points of interest (P.O.I.) CD 40
Terms of licence 42
System settings 42
Setting time 43
Saving position 43
Selecting a game 44
Setting the language 44
Animation 45
Switching announcement of arrival time on /off 45
Selecting the units of measurement 45
Influencing the calculation of ETA 46
Switching the speed limits
display on/off 46
Setting the time display 47
Contents
Radio mode 48
Switching on radio mode 48
Switching on Radio Menu Mode 48
Selecting the FM waveband 48
Selecting the AM waveband 48
Settings for station selection 48
Dynamic autostore (FM-DAS) 49
Station search FM-DAS 49
Station search MW, LW, SW 49
Scan search 50
Programme filtering for FM DAS 50
Programme type selection (PTY) 50
Turning PTY display on / off 51
Calling up / storing FM stations 51
Calling up/storing MW, LW, SW stations 51
Autostore MW, LW 52
Manual FM tuning 52
Manual Tuning MW, LW, KW 52
Regionalisation 53
Switching regionalisation on / off 53
Turning frequency
display on or off 53
Switching radio text on / off 54
Traffic programme (TP) 54
Activating / quitting the TP menu 55
Switching TP on / off 55
Selecting automatic tracking 56
Selecting / cancelling direct
programming 56
Switching mute on/off 56
Interrupting TP announcements 57
TP Announcement volume 57
Display for receivable TMC stations 57
Telephone muting 57
CD mode 58
Notes on compact discs (CD) 58
Inserting / ejecting CDs 58
Forward / backward track
skipping 59
Scan search 59
Fast forward / reverse 59
Track repeat 59
Random play 60
CD settings menu 60
Displaying number of tracks 60
Switching between Track/
CD Text display 60
Temperature protection circuit 61
Notes on CD-R and CD-RWs 61
Notes on copy-protected CDs 61
MP3 mode 62
General notes on MP3 62
Creating an MP3/WMA storage
medium 62
Creating a playlist 63
Inserting /ejecting MP3 CDs 64
Switching between folder/
playlist 65
Forward / backward track s
kipping 65
Changing folder/playlist 65
Scan search 65
Fast forward / reverse 66
Random Play 66
Track repeat 66
MP3 settings menu 66
Number of folders/playlists/tracks 66
Displaying name of folder/playlist 67
Switching between track/ ID3 tag display 67
Audio playback via an optional
Apple TM iPod 67
CD changer mode 69
Operational readiness of
CD changer 69
Loading / ejecting the CD magazine 69
Selecting CD changer mode 69
Changing/selecting CDs 69
CDC settings menu 70
Displaying track information 70
Displaying number of tracks and
total playing time 70
Naming a CD 71
CD filter function 72
Contents
Telephone mode 73
Requesting telephone mode 74
Mobile phone already connected 74
Mobile phone has just been
connected 74
Mobile phone not yet connected 74
Connecting mobile phone 75
Connecting automatically 76
Dialling numbers 76
Number is busy 77
Call lists 77
Calling a number from a call list 78
Deleting call lists 78
Accepting a call 79
Rejecting a call 79
Terminating a call 79
User settings 80
Opening / quitting User
Settings menu 80
Setting the GAL (Gal) 80
Telephone mute function (Tel) 81
Display brightness (Lum) 81
LED setting 81
Setting reception
optimisation (M/S) 82
Setting navigation
announcements (Nav) 82
AUX input (Aux) 83
Display compass (Cmp) 83
Signal tone volume (BeV) 83
Service menu
Calling up / exiting service menu 84
CD Changer reset 84
Bluetooth module reset 84
Unit reset 84
Explanation
RDS SYSTEM 85
DAS Seek Qual. level 85
DAS Seek Name level 85
RDS Stations level 85
Stations Fix level 85
PTY (programme type) 85
Technical terminology glossary
Index 89
Technical data
NOTICE
Correct disposal of this product
(waste for electrical and
electronic equipment) 95
Installation Guide 96
Prior to installation 96
Symbols used in the
installation guide 96
Safety instructions 97
Installation instructions 98
Connection diagram for the
navigation system 99
Installation of the GPS antenna 100
Installation of the microphone 103
Connection of the reverse signal 105
Connection of the speed signal
(GAL) from the speedometer/
speedometer cable 106
Installation/Removal of the unit 109
Using GPS for the first time,
and sensors 110
Installation of the Navigation
Software 112
Calibration 113
Service Mode 115
Connections 123

Safety instructions
Operation of the unit is permitted only if the traffic conditions are suitable and you are absolutely sure that you, your passengers or other motorists are not endangered, obstructed or inconvenienced.
In all cases, all applicable road traffic regulations must be obeyed. Destinations may only be entered when the vehicle is stationary.
The country-specific regulations for telephone operation apply.
The navigation system is only an aid. Errors may occur in individual data items/entries. At all times, the driver must decide whether or not to heed the information provided. We do not accept liability for erroneous data provided by the navigation system.
Due to continual changes in traffic routing or deviations in the data, it may occur that imprecise or erroneous information is given. Therefore, actual road signs and traffic regulations must always be observed. In particular, the navigation system cannot be used as an orientation aid at times of poor visibility.
The unit may only be used for its intended purpose. The volume of the radio/navigation system should be adjusted so that external noise is still audible.
Do not activate the telephone near petrol stations, fuel depots, chemical plants or blasting areas.
In the case of a malfunction (i.e. smoke or other noticeable odours) the unit is to be turned off immediately.
For safety reasons, the unit may only be opened by a trained technician. Please refer to your dealer for repair.
Information regarding general road safety
This car radio device is intended and approved for installation and operation in passenger cars, commercial vehicles and buses (vehicle classes M, N and O) whose electric system has a rated voltage of 12V.
Installation and maintenance should only be carried out by specialists. Faulty installation or maintenance can result in the malfunctioning of the motor vehicle's electronic systems. The vehicle manufacturer's safety instructions must be observed.
The vehicle's electronics (e.g. speedometer signal) may only be worked on by an authorised service garage. We assume no liability for any impairment of the vehicle's electronics.
This device is only intended for installation in the area provided for this purpose by the vehicle manufacturer.
The method of attachment used must ensure that the device will remain properly attached, should the vehicle be involved in a crash.
The power supply must be properly fused.
Using mobile phones without an external antenna in the proximity of the radio unit may cause interference.
Familiarise yourself with the device and how it works before embarking on your journey. Whilst on the move, only operate the device in appropriate traffic conditions. The volume of the device should be set at a level that enables external noises (e.g. police sirens) to be easily heard.
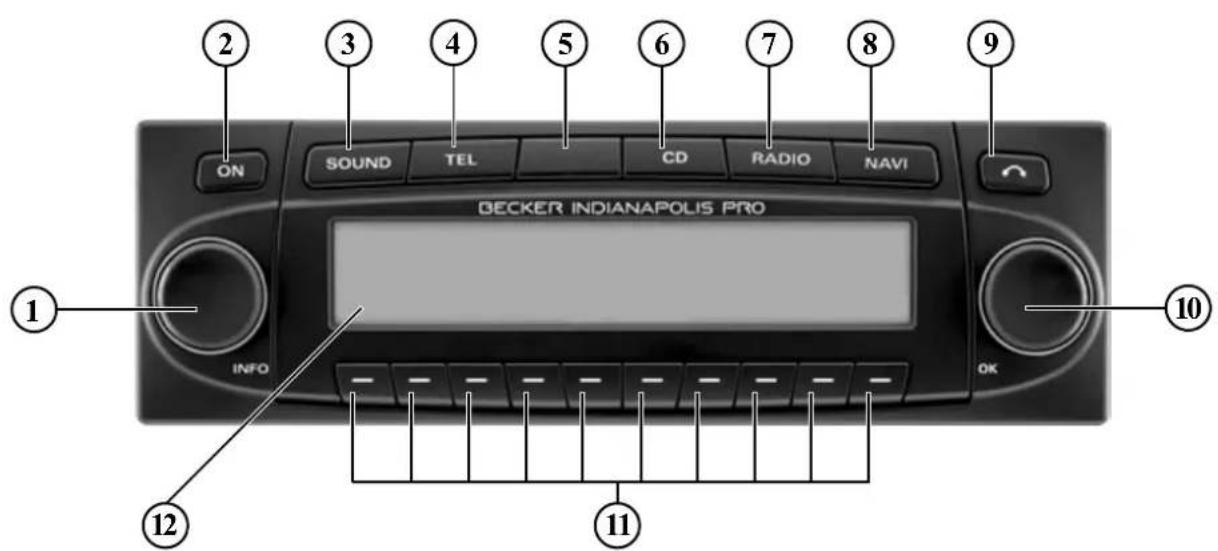
1 Left rotary control (INFO)
2 On / off switch ( ) ON
3 Tone button () SOUND
4 Switching between telephone/traffic programme (TEL)
5 LED
6 Select CD mode () CD
7 Select radio mode ( ) RADIO
8 Select navigation () NAVI
9 CD eject button ()
10 Right rotary control (OK)
11 Multifunction buttons
12 Display
Anti-theft device
Entering the code number
If the car radio is disconnected from the electrical supply source, the anti-theft device prevents it from being reconnected. After turning on the unit via the ON button, the prompt Enter Code Number is displayed.

▶Use the multifunction keys 4 7 to enter the five-digit code number.
Example:
Code number 15372 (the code number can be found on the enclosed CODE CARD).
The unit automatically switches on when the fifth digit is entered and all other digits were entered correctly.
Note
It is important to store the CODE CARD in a safe place outside of the vehicle. This will prevent unauthorised use. The window stickers provided should be attached to the windscreen/windows inside your vehicle.
In an incorrect code number is entered, the prompt Enter Code Number will be displayed once again. If an incorrect code number is entered three times in a row, the unit will displayWait, and it will be blocked for approximately 60 minutes.

Three further incorrect entries block the unit for another 60 minutes.
Attention:
The waiting time elapses only when the ignition and unit are switched on.
Removing the portable panel
As an effective anti-theft device, the portable panel (A) may be removed from the unit.
▶Press button 📂fly (storage medium remains in the unit).
The display folds forwards.
▶ Detach the portable panel.
The volume is limited to a maximum level after the display has been folded down. After 20 seconds, an audible signal indicates that the control component is folded down. The unit then switches itself off.

Warning Accident hazard
For safety reasons, the portable panel may not be left open while driving.
Attention:
Please insert the portable panel in the accompanying protective cover after removal.
Do not touch the metal contacts on the portable panel or on the radio.
Attaching the portable panel
▶Insert the portable panel into the lower left catch and then engage it in the lower right catch. Then fold up the portable panel and engage it in the upper catches.
The portable panel can also be placed flat against the unit and pushed into place.
To ensure correct function, be sure that the portable panel is completely seated in all four catches.
General operation
Switching on/off
▶Press ON
The unit can also be switched on/off via the vehicle ignition.
To switch the unit on via the ignition, the unit must have previously been turned off via the ignition.
After switching off the ignition, the unit can be prevented from switching off by pressing the ON button within 3 seconds.
Note:
The unit can also be switched on with the ignition switched off via the ON button, but it will switch off automatically after 1 hour.
Setting the volume
Turn the left-hand rotary control ● The volume increases or decreases.
Activating the tone menu
Press SOUND tone menu is activated. The following functions can be called up: Bas (Bass), Trb (Treble), Fad (Fader), Bal (Balance), FLT (Linear adjustment), Sub (Subwoofer) and Ldn (Loudness).

Settings for bass and treble, for the FM, AM (MW, LW, SW) wavebands, for road traffic announcements, navigation announcements, telephone mode, CD, MP3/WMA and CDC/AUX mode are stored separately.
Setting the bass
▶Press the soundon and then the Bas multifunction button.
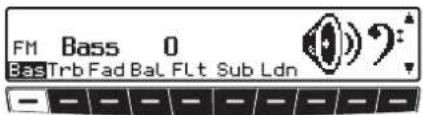
▶Set the desired bass level using the right-hand rotary control ●
Setting the treble
▶Press the solution and then the Trb multifunction button.
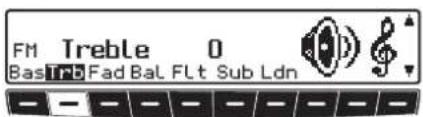
▶Set the desired treble level using the right-hand rotary control ●
General operation
Fader
▶Press the SOUN on and then the Fad multifunction button.

▶Use the right-hand rotary control ● to achieve the desired fader setting.
Setting the balance
▶Press the solution and then the Bal multifunction button.

▶ Set the desired balance level using the right-hand rotary control ●
Linear adjustment
The tone adjustments for the current signal source (i.e. FM) can be reset to a mid-level.
▶Briefly press the button. Then press multifunction button FLT briefly - Tone reset will appear.

▶Press the Findifunction button again.
Adjusting the volume of the subwoofer or centre speaker
▶Press the SOUNC on and then the Sub multifunction button.

▶Use the right-hand rotary control to achieve the desired subwoofer volume setting.
Switching loudness on / off
▶Press the SOUN on and then the Ldn multifunction button.

▶With multifunction button Lydn can select either Loudness on (ON) or Loudness off (OFF).
Note:
Loudness is switched off in MW, LW and SW wavebands.
Navigation mode
What is navigation?
The term “navigation” (lat. navigare = to travel by sea) is generally understood to mean the location of a vehicle, the determination of the direction and distance from the desired destination and the required route. As navigation aids, stars, prominent landmarks, compass and satellites are used.
With the Becker Indianapolis Pro, the location is determined via the GPS receiver (GPS = Global Positioning System). The direction and distance from the destination are determined using a digital road map, a navigation computer and sensors. A speedometer signal and a reverse signal are additionally used to calculate the route.
For safety reasons, navigation is predominantly in spoken form supported by a direction indicator on the display.

Safety instructions
- Road traffic regulations always take priority. The navigation system is only an aid. Errors may occur in individual data items/entries. At all times, the driver must decide whether or not to heed the information provided.
We do not accept liability for erroneous data provided by the navigation system. - Observation of traffic signs and local traffic regulations must always take priority.
- Traffic guidance is restricted to passenger vehicles only. Special driving recommendations and regulations for other vehicles (e.g. commercial vehicles) are not included.
- Destinations may only be entered when the vehicle is stationary.
Navigation CDs
You will be supplied with four navigation CDs.
These CDs contain a digitised road map.
- CD 1 contains the data covering: Denmark, Great Britain, Finland, Ireland, Norway and Sweden.
- CD 2 contains the data covering: Austria, Belgium, Denmark, Germany, Liechtenstein, Luxembourg, the Netherlands and Switzerland.
- CD 3 contains the data covering: Andorra, Belgium, France, Luxembourg, Portugal and Spain.
- CD 4 contains the data covering: Austria, the Czech Republic, Italy, Liechtenstein, Monaco, San Marino, Slovakia, Switzerland and the Vatican City.
In addition to the countries listed above, all the CDs also contain the complete trunk road network of the digitised area of Europe.
Motorways, federal and regional roads, as well as district roads are stored for the countries included on the individual CDs. Larger cities and communities are comprehensively covered. For smaller towns and communities, the regional and unclassified roads or access roads and the town centres are included.
One-way streets, pedestrian zones, turn bans and other traffic regulations are taken into account as far as possible.
Note:
There may be discrepancies between the data on the navigation CD and the actual local situation, due to continual changes to road systems and their traffic regulations.
Note:
For Norway, Sweden, Finland, the Czech Republic and Denmark, non-verified data has been used to achieve a high depth of digitisation; i.e. with this data, the navigation system cannot refer to information such as motorway, trunk road, 30 zone, one-way street or other traffic regulations, as this is not recorded. All roads can be used, but optimum route guidance cannot be guaranteed.
Navigation mode
Navigation with four European CDs
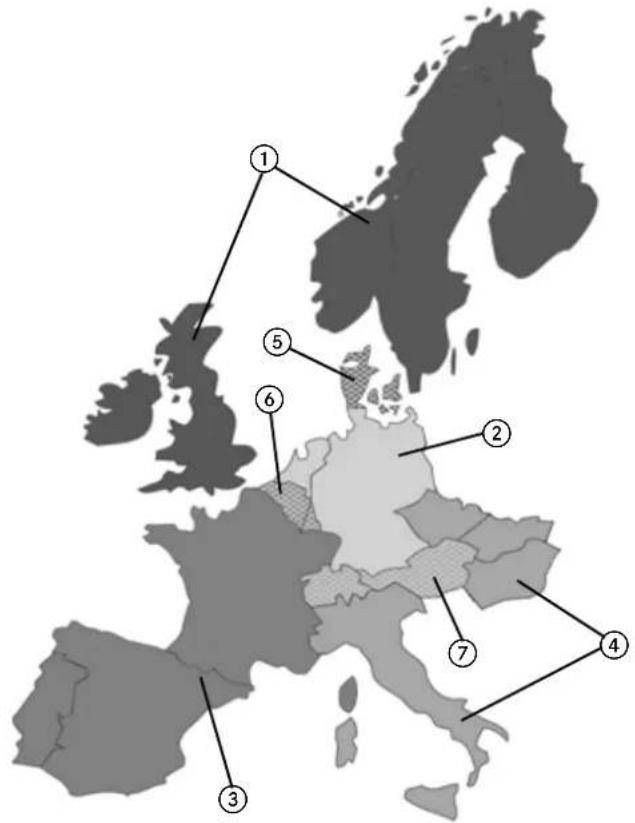
①Area covered by CD 1.
②Area covered by CD 2.
③Area covered by CD 3.
④Area covered by CD 4.
⑤ Overlapping area covered by CD 1 and CD 2.
⑥ Overlapping area covered by CD 2 and CD 3.
⑦ Overlapping area covered by CD 2 and CD 4.
For example, you want navigation guidance from a town which is only covered by CD 2 to a town which is only covered by CD 3. Select the country of destination. Then enter the town required. You can now select the town centre and start route guidance. You will then be guided to the centre of the town required. As soon as you have left the last trunk road before your destination, OFFROAD and a direction arrow will be displayed. In this case, the direction arrow indicates the linear direction to the selected town centre. If you would like to be directed to a particular road at the destination you can, as soon as you are on a trunk road (or in the area completely covered by CD 3), insert CD 3, enter the exact address of the destination and begin guidance to this road.
Notes:
- If you know your way around the town you are starting out from well you could insert CD 3 from the beginning and enter the exact destination address. The system will then show OFFROAD and a direction arrow until you reach a trunk road. In this case, the direction arrow always indicates the linear direction to the nearest trunk road.
- When the different CDs are changed you will be shown the message CHANGE MAP DATA?. Confirm this message by pressing the right rotary control ● A progress indicator is displayed while the map data is being loaded. You can enter the required destination once the progress indicator has disappeared.
General instructions
- During navigation mode, radio or CD can still be heard.
The distance to the next announcement and, depending on the setting made in “Setting the time display” on page 47, also the estimated time of arrival, the current time or the remaining travel time are displayed on the right of the display. - The unit can be switched to radio mode when route guidance is in operation by pressing the RADIO.
You can switch to CD/MP3 mode by pressing the button.
The Navigation menu is automatically displayed when navigation announcements are given. - When entering the destination, only those letters, digits and symbols which are relevant for the destination are displayed.
The entries are automatically completed.
A space (i.e. in Bad Abbach) is entered as an underscore.
Letter, numbers and symbols can be selected using the multifunction buttons to . The9individual
characters can be selected by pressing the relevant multifunction buttons repeatedly.
Selection can also be made using the right rotary control which will be used in the remainder of this guide.
• NAVI's the current menu and switches to the previous menu.
- The system recalculates the navigation if a deviation is made from the route.
- Briefly press the left rotary control to hear the current navigation announcement.
- During a navigation announcement, the volume can be adjusted using the left rotary control and the tone by pressing S 500 (also page 10).
Navigation mode
- By briefly pressing the left rotary control additional information can be requested during route guidance or the current position can be requested when route guidance is not active. See "Information during route guidance" on page 33.
- The current navigation announcement is interrupted by pressing the left rotary control ●
- If the left rotary control is pressed for more than 2 seconds during a navigation announcement, the navigation announcements are switched off and navigation is performed via displays only.
Quickly pressing the left rotary control switches the navigation announcements back on. - The scroll marks and indicate a selection list which can be scrolled through using the right rotary control
Each entry in the list shown in capital letters can be selected by pressing the right rotary control ●
Selecting navigation
▶Press NAVI
NAVIGATION IS BEING ACTIVATED! PLEASE OBSERVE RTR
The main navigation menu appears after this display.
Note:
The navigation CD must be loaded when starting navigation mode for the first time.
If calibration of the navigation system has not yet been completed, the system will prompt you to take a drive for calibration. See “Calibration” on page 113.
A navigation CD containing the data for the target country is required for navigation mode.
The navigation CD must be inserted to start the calculation of a route. During calculation, the prompt CD will flash in the display. Once calculation is completed, the prompt CD will disappear, the navigation CD can be removed and an audio CD may be inserted.
When entering destinations, driving off should be delayed until the prompt CD disappears.
Main navigation menu
| DEST. MEMORY |
| DESTINATION |
| P.O.I. |
Select from
DESTINATION,
DEST. MEMORY,
P.O.I..
LAST DESTINATIONS.
by turning the right rotary control ● and confirm your choice by pressing it.
- DESTINATION
Accesses the entry menu for the destination.
See "Destination entry" on page 17.
- DEST. MEMORY
Contains previously stored destinations.
See “Destination memory” on page 38.
• P.O.I.
Menu for selecting regional and inter-regional destinations of special interest and local points of interest. Points of interest include petrol stations, airports or hospitals, for example. See "P.O.I." on page 38.
- LAST DESTINATIONS
A list of the last 50 destinations is displayed. With the right rotary control, the desired destination can be selected. By pressing the left rotary control, information on the destination can be called up before confirming by pressing the right rotary control, stopovers are not stored as last destinations.
Destination entry
▶In the Main Navigation Menu, select DESTINATION with the right rotary control and press the control to confirm.
Selecting a country
| GERMANY |
| STUTTGART |
| ROAD |
▶If your destination is in a country other than the one currently shown, select the country (in the example GERMA-NY) with the right rotary control ● and press the control to confirm.
| GERMANY | ▲ | |
| GREAT BRITAIN | ▼ | GB |
| IRELAND |
▶Select the desired country with the right rotary control ● and press to confirm.
Note:
When selecting a distant destination, we recommend selecting a stopover (Page 26) halfway.
Navigation mode
Entering a destination

The last location entered is displayed. If you wish to select a destination within the displayed location, immediately select ROAD or CENTRE.
▶If your destination is located elsewhere, select the place using the right rotary control and press to confirm.

▶Select the letters one after another by turning the right rotary control and press to confirm. The selected letter appears enlarged at the right of the display.
Use multifunction button to delete the last confirmed letter.
The complete entry can be deleted by pressing multifunction button for more than 2 seconds.

Already entered letters are displayed inversely. For the purpose of support, the name of the location closest to the previous entry is displayed. The unit offers only the possible remaining letters for selection. If no other entries are available, the unit completes the place name automatically.
▶To accept the entry, press and hold the right rotary control ● for more than 2 seconds or select the small tick √ and briefly press the right rotary control ●
If the complete location name has been entered or completed automatically; i.e. the location entered exists only once in the country of destination, the unit will switch automatically to either the place selection list or the Road/ Centre entry. If there are no roads or only the centre is available for a particular town, the unit will switch directly to the Route menu.
If an incomplete location entry was confirmed, the location selection list is displayed.

The location name most similar to the entry appears in capital letters in the location selection list.
The scroll marks indicate that other locations, sorted in alphabetical order, can be selected.
▶A selection can be made by turning the right rotary control and pressing to confirm. (See “General instructions” on page 15.)
If a definite entry is given, the system switches to the Road/ Centre Entry. If there are no roads or only the centre is available for a particular town, the unit will switch directly to the Route menu.
The location distinguishing list is displayed if the selection is ambiguous.

▶Select the required location using the right rotary control and press the control to confirm.
The program returns to the Road or Centre Entry.
If there are no roads or only the centre is available for a particular town, the unit will switch directly to the Route menu.
Selecting destination via post code
The destination can also be selected via the town's post code.

▶Select the destination's POST CODE by turning the right rotary control ● and press to confirm the selection.

▶ Using the right rotary control ▶ enter the post code for the destination and press for more than 2 seconds to confirm the entry. To confirm, the small tick ▼ can also be selected and the right-hand rotary control ▶ pressed briefly.

The display then shows either the destination corresponding to the post code or, if the post code is shared among several towns, a list containing these towns.
▶Select the required location using the right rotary control ● and press to confirm.
If more than 9 locations share the same post code, the display will show the location input menu instead of the above-mentioned list. In that case, the town name is to be entered as described in "Entering a destination" on page 18.
The program returns to road or centre entry. If there are no roads in the selected town or only the centre can be selected, the unit will switch directly to the route menu.
Navigation mode
Entering the destination town

▶ Select ROAD with the right rotary control and press the control to confirm.

▶Select the letters one after another by turning the right rotary control and press to confirm. The selected letter appears enlarged at the right of the display.
Use multifunction button to delete the last confirmed letter. The complete entry can be deleted by pressing multifunction button for more than 2 seconds.

Already entered letters are displayed inversely. To help, the road name most similar to the entry so far is displayed. The unit offers only the possible remaining letters for selection.
If no other entries are available, the unit completes the road-name.
▶To accept the entry, press and hold the right rotary control ● for more than 2 seconds or select the small tick √ and briefly press the right rotary control ●
If the road name was entered completely or automatically completed, the program switches to either the road-distinguishing list (same road name exists more than once in the location selected) or returns to the Route menu.
If an incomplete location entry was confirmed, the road selection list is displayed.

The road name most similar to the entry appears in capital letters in the road selection list.
The scroll marks indicate that other roads, sorted in alphabetical order, can be selected.
▶Select the road by turning the right rotary control and press the control to confirm.
If a definite entry is given, the program returns to the Route menu.
If an entry is unclear (same road exists more than once in the same location), the road distinguishing list is shown.

▶Select the required part of town using the right rotary control and press the control to confirm.
Program switches to the Route menu.
Entering the destination town centre

▶ Select CENTRE with the right rotary control and press the control to confirm.
If the previously selected location has only one centre, the program immediately switches to the Route menu. If the number of centres is less than 10, the centre list is displayed.

▶Select the centre by turning the right rotary control and press the control to confirm.
If the number of centres is greater than 9, the program switches to centre entry.

▶Select the letters one after another by turning the right rotary control and press to confirm. The selected letter appears enlarged at the right of the display.
Use multifunction button to delete the last confirmed letter. The complete entry can be deleted by pressing multifunction button for more than 2 seconds.

Already entered letters are displayed inversely. For your help, the centre most similar to the entry so far is displayed. The unit offers only the possible remaining letters for selection. If no other entries are available, the unit completes the centre-name.
▶To accept the entry, press and hold the right rotary control ● for more than 2 seconds or select the small tick √ and briefly press the right rotary control ●
Once the complete centre name is entered or automatically completed, the program switches to the Route menu. The program switches to the centre list if the selection is ambiguous.

The centre most similar to the entry appears in capital letters in the centre list. The scroll marks indicate that other centres, sorted in alphabetical order, can be selected.
▶Select the centre by turning the right rotary control and press the control to confirm.
Program switches to the Route menu.
Navigation mode
Note:
By pressing the right rotary control ● for more than 2 seconds without previously entering a letter, a list of the possible location centres will immediately appear.
Destination input via coordinates
If the geographical coordinates (latitude and longitude) of a destination are known, these can be entered and route guidance to the destination started.

▶ Select COORDINATES with the right rotary control and press the control to confirm.

▶Enter the latitude of the destination using the right-hand rotary control ● Entries must be made in degrees, minutes, seconds and a direction as the crow flies, e.g. 11°38'34"N .
▶To confirm the entry, press and hold the right-hand rotary control ● for more than 2 seconds.
or
▶Select the small tick √ and briefly press the right rotary control ●

▶Enter the longitude of the destination using the right-hand rotary control ● as described above.
▶To confirm the entry, press and hold the right-hand rotary control ● for more than 2 seconds.
or
▶Select the small tick √ and briefly press the right rotary control ●
Note:
If the coordinates entered are located beyond the boundaries of the digital map, a message will appear notifying you of this. The system cannot navigate to a position beyond the boundaries of the digital map.
The navigation system then requests a name to be entered for the entered coordinates.
▶Enter a name as described in “Storing a destination in the destination memory” on page 25.
The program then switches to the Route menu.
Route guidance can now start.
Route menu
SAVE DESTINATION START-FAST R. HOUSE NUMBER
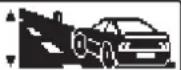
Selection of SAVE DESTINATION, START-FAST R., (START-SHORT R. or START-DYN. R.) HOUSE NUMBER, CROSSING and ROUTE SETTINGS by turning the right rotary control ● and press to confirm.
- SAVE DESTINATION
Accesses the entry menu for the destination memory (Page 25). - START-FAST R., START-DYN. R. or START-SHORT R. starts Navigation. Simultaneously, a prompt appears indicating the currently selected route option (-SHORT R. for the shortest route, -FAST R. for fastest route and -DYN. R. for a dynamic route).
• HOUSE NUMBER
The house number in the specified destination road can be entered here. This function is only possible if the information is contained on the Navigation CD
- CROSSING
Here a cross-street can be entered as a destination.
This function is only possible if the information is contained on the Navigation CD
- ROUTE SETTINGS
Here criteria such as Fastest Route, Shortest Route, Dynamic Route, Motorways, Ferries and Tolls can be selected.
Entering house number for destination road
▶ Select HOUSE NUMBER in the route menu with the right rotary control ● and press to confirm.

▶ Using the right rotary control center the house number for the destination road and press for more than 2 seconds to confirm the entry. To confirm, the small tick can also be selected and the right-hand rotary control pressed briefly.
Due to system configuration, route guidance will only be given to the area of the entered house number.
SAVE DESTINATION START-FAST R. ROUTE SETTINGS

Select START- to start route guidance. Select SAVE DESTINATION to jump to the destination memory menu.
Navigation mode
Select ROUTE SETTINGS to choose the route settings.
▶Select by turning the right rotary control and press to confirm selection.
Selecting intersection for destination road
▶ Select CROSSING in the route menu with the right rotary control and press to confirm.
EDINBURGH ROAD
GLASGOW ROAD
▶Select the intersection for the destination road by turning the right rotary control ● and press the control to confirm.
SAVE DESTINATION
START-FAST R.
ROUTE SETTINGS

Select START- to start route guidance. Select SAVE DESTINATION to jump to the destination memory menu.
Select ROUTE SETTINGS to choose the route settings.
▶Select by turning the right rotary control and press to confirm selection.
Selecting route settings
▶ Select ROUTE SETTINGS in the route menu with the right rotary control and press to confirm.
SHORT ROUTE
DYNAMIC ROUTE
FAST ROUTE

- FAST ROUTE
This selection calculates the shortest possible journey time.
- SHORT ROUTE
This selection calculates the shortest possible distance to the destination.
Note:
For larger cities or urban areas, the setting "SHORT ROUTE" is recommended.
• DYNAMIC ROUTE
Dynamic route guidance is used to calculate the route, taking current traffic announcements into account.
Note:
If dynamic route guidance is active, the routes are calculated using the "Fastest Route" setting.
Further information under "Dynamic route guidance with TMC" on page 30.
- RESTRICTIONS
Provides options for avoiding bridges, ferries, tunnels or toll roads
| MOTORWAY | WITH / WITHOUT |
| FERRIES | WITH / WITHOUT |
| TOLL | WITH / WITHOUT |
▶ Make your selection by turning the right rotary control ● and change any settings by pressing it. Press the control for more than 2 seconds to accept all settings and exit the menu.
Note:
Routes without motorways can only be calculated for short distances (up to at most 200 km depending on the density of digitisation).
Storing a destination in the destination memory
It is not mandatory for navigation to store a destination in the destination memory. However, it saves repeated manual entry if the destination is required again at a later date.
▶ Select SAVE DESTINATION in the Route menu and press the right rotary control ● confirm.
NAME: ABCDEFGHIJKLMNOPQRSTUVWXYZ YZ H E0AADD_0123456789',/()-.
A name of your choice consisting of up to 20 characters can be entered for the specified destination, and is stored automatically in the destination memory by pressing the right rotary control for more than 2 seconds. See “Destination memory” on page 38.
The destination can also be stored by selecting the small tick √ and briefly pressing the right rotary control ●
If you do not wish to enter a name of your choice, press and hold the right rotary control ● or more than 2 seconds to store the previously entered destination in the destination memory.
The last destination entered can be filed into any desired position in the Destination Memory by turning the right rotary control ● The memory position is confirmed by briefly pressing the right rotary control ●
A total of 50 destinations can be stored.
NEW DESTINATION START-FAST R. ROUTE SETTINGS
For final storage in the destination memory, either start route guidance or switch the program to a new destination entry by selecting NEW DESTINATION.
Navigation mode
Deleting a destination from the destination memory
▶Select destination memory (see page 38).

▶Select the destination to be deleted with the right rotary control ● and press the multifunction button DEL
Destination memory full

Appears when the destination memory is full and if no other destinations can be saved.
The destination memory is opened by pressing the right rotary control. Destinations can then be deleted from the destination memory, as described above, to make space for the new entry to be saved.
The save is interrupted by pressing the NAVI button.
Route guidance calculation

The message "Calculating route" indicates that the distance is being calculated; this may take several seconds.
After the first route guidance announcement, the prompt CD will continue to flash on the display until the route is completely calculated. When a distant destination is entered, it is recommend that you wait until CD has stopped flashing before departing.
Recalculating route.

If the current route is not followed due to road blocks, diversions, unintentionally driving in the wrong direction or failing to observe the recommendations, the system immediately calculates a new route. During this re-calculation, NEW ROUTE is displayed.
Stopover
Stopover offers the possibility of entering a stopover destination during the active route guidance.
Entering a stopover
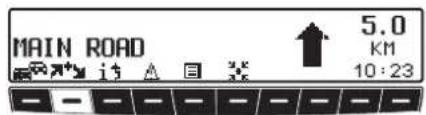
▶Press the multifunction button.

▶ Using the right rotary control ● make a selection and press the control to confirm.
- DEST. MEMORY (see page 38) Selecting a stopover from the destination memory.
- DESTINATION (see page 17) allows the entry of a stopover with the precise specification of the address.
·P.O.I.
(see page 38) enables the selection of special destinations as stopovers via LOCAL AREA, NEAR DESTINATION and TOWN/COUNTRY, e.g. petrol stations or airports.
Starting route guidance to a stopover
START

▶To start route guidance to the stopover, press the right rotary control ●
The route is calculated and route guidance begins.
Note:
During route guidance to a stopover, * is displayed inversely.
Deleting a stopover

▶Press the multifunction button.
DELETE STOPOVER? BACK = NAV
▶To delete the stopover, press the right rotary control within 8 seconds.
Stopover reached
YOU HAVE REACHED YOUR STOPOVER
After the message YOU HAVE REACHED YOUR STOPOVER, route guidance to the main destination begins automatically.
Detour function
This function allows you to block route sections ahead from the nearest junction and to calculate a detour route when a traffic jam or road block is directly ahead.
Entering length of traffic jam
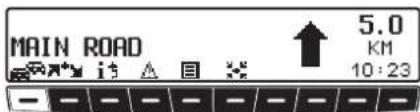
▶Press the multifunction button.

▶ Using the right rotary control ●-lect the length of the traffic jam and press the control to confirm.

is displayed inversely and the route is recalculated.
Navigation mode
Deleting traffic jam

▶Press the multifunction button.

▶To delete a block, press the right rotary control ● within 8 seconds.
Cancelling route guidance
▶Press NAVI

▶The route guidance is cancelled when the right rotary control is pressed within 8 seconds.
Otherwise route guidance will continue.
Explanation of navigation
After entering the destination (address), the system calculates the route and announces:
"Ready to drive off".
You will receive the navigation recommendations by voice messages and screen displays.
Press the left rotary control to have the current recommendation repeated.
If the route to be travelled is not clear, e.g. at an intersection where a change in direction is not specified, the direction to be taken can be displayed by pressing the right rotary control

Please follow the direction indicated by the arrow.
The display appears for 8 seconds after the right rotary control is pressed.

Warning
Accident hazard
Road traffic regulations always take priority when a vehicle is being driven in traffic. The navigation system is only an aid. Errors may occur in individual data items/entries. At all times, the driver must decide whether or not to heed the information provided.
We do not accept liability for erroneous data provided by the navigation system.
For clarification, the following contains some examples of possible driving recommendations:
- “If possible, please turn back.”
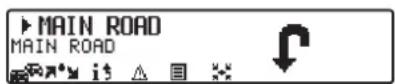
You are driving in the wrong direction and should turn around at the earliest opportunity.
- “Please turn right after 300 metres.”

The arrow indicator points to the next road into which you should turn. The progress bar on the right illustrates the distance and the black part decreases as you approach the intersection.
- “Please follow the road.”
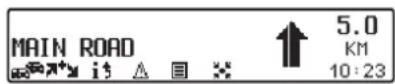
This display tells you that you should continue to follow the road that you are on.
- “Prepare to turn left” or “Please merge into left lane.”

This recommendation prepares you for the next turn to be taken.
“Please merge into left lane” does not mean, however, that you should immediately move into the left turn lane.
Note:
At junctions and roundabouts, only the end of the road which is to be passed is displayed.
- “Please leave the roundabout at the third exit on the right.”

This display shows you which exit (marked with the arrow) you must take at the roundabout.
- “Now drive straight ahead.”

At this point, you must drive straight ahead.
Navigation mode
- “Please follow the direction arrows.”

This display tells you that you are currently on a non-digitised road (i.e. car park, garage, multi-storey car park) which is not contained in the digitised road map. The arrow indicates the direction of the destination as the crow flies.
- "Keep right after 2 kilometres."

Keep right means that the road will split and that you should follow the corresponding direction of travel.
- “You have reached your destination.”
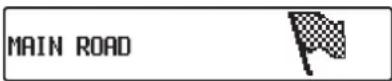
The specified destination has been reached and route guidance is terminated.
Dynamic route guidance with TMC
Note:
Dynamic route guidance is not possible in all countries.
When Dynamic Route Guidance is active, the navigation system may request the Navigation CD for possible route calculation (if the Navigation CD is not inserted).
What is dynamic route guidance?
Dynamic route guidance is used to calculate the route, taking current traffic announcements into account.
The traffic announcements are transmitted by a TMC radio station in addition to the radio programme and are received and analysed by the navigation system. The reception of traffic announcements is free of charge.
Note:
As the traffic announcements are transmitted by radio stations, we cannot assume responsibility for the completeness or accuracy of the announcements.

Austria: The location and event code was made available by ASFINAG and BMVIT.
Dynamic route guidance
In the Route menu, Dynamic Route Guidance can be started by selecting START-DYN. R..
If dynamic route guidance has been activated, a continuous check is made for the presence of relevant announcements for the selected route. The route is then calculated using the “Fastest route” option, while taking into account current traffic announcements. If it is determined during these continuous checks that a traffic announcement is of relevance for the route guidance, the unit will automatically re-calculate a new route to the destination.
NEW ROUTE is shown on the display. There is also the voice announcement "The route is being recalculated due to current traffic announcements".
i\$ is displayed inversely.
Note:
If no TMC station can be found, the display will show CURRENTLY TMC RECEPTION IS NOT POSSIBLE. The unit will switch back to the route guidance display after a short time. If no TMC stations can be found within 10 minutes, CURRENTLY TMC RECEPTION IS NOT POSSIBLE will appear on the display again and a short signal tone will sound.
Your navigation system can receive TMC information, whether a TMC station is selected or not. However, in order to guarantee optimal reception of TMC information, we recommend the selection of a TMC station.
Displaying traffic information
Current traffic announcements can be displayed in text form. There are several options for requesting current traffic information.
Traffic information can be requested via the multifunction buttons i and in the route guidance display and, in the case of inactive route guidance, via the multifunction button in the information menu.
Route guidance display:

▶By pressing the multifunction button ⚠, a list of all currently available traffic information will be displayed. or
▶By pressing the multifunction button i5, a list of all current traffic information relevant for the calculated route is displayed.
Navigation mode
Note:
If no other traffic information is available, NO TRAFFIC MESSAGES RECEIVED is displayed.
Information menu:
For inactive route guidance, the information menu can be requested by pressing the left rotary control ●

▶Press the multifunction button.
A list of currently available traffic information is displayed.
In the list of current traffic information, more detailed information on the individual announcements can be requested.
A5, Karlsruhe-Basel Border cross ▲ A5, Basel-Karlsruhe Exit A6, KaisersLautern-Mannheim Exit ▼
The scroll marks at the right edge of the display indicate that additional traffic information is available.
▶ A selection can be made by turning the right rotary control and pressing to confirm.
After confirming the traffic information desired, the information is shown in its entirety. A typical traffic announcement is shown as follows.
• a motorway or road number
- approximate direction information
• detailed location and direction information
• the event
• the cause, if known
A5, Basel-Karlsruhe Exit Appenweier Exit Achern
Scroll marks on the right side of the display indicate that more than 3 lines are required for the traffic information.
▶Pressing the NAVI on returns to the list of the current traffic information.
Information during route guidance
| LONDON | DISTANCE | ||
| ABERDEEN ROAD | 500 KM | ||
| 3337 | # | MOD | ETA 10:23 |
▶Press the left rotary control. ● The destination, the distance and the estimated time of arrival are displayed.
| LONDON | DISTANCE | ||
| ABERDEEN ROAD | 500 KM | ||
| 3337 | # | MOD | ETA 10:23 |
If a stopover has been specified, the stopover, the distance and the estimated time of arrival are displayed. The main destination can be displayed via multifunction button
▶To return to route guidance, press the left rotary control ●gain or wait for 8 seconds.
Requesting journey duration and kilometres travelled
▶Press the left rotary control.
| LONDON | DISTANCE | ||
| ABERDEEN ROAD | 500 KM | ||
| 3997 | # | MOD | ETA 10:23 |
▶Press the multifunction button.
| KM: 450.55 DURATION: 4:51:23 |
| AVERAGE SPEED: 120 KMH |
The journey duration, kilometres travelled and the average speed are displayed.
▶Pressing the right rotary control ● more than 2 seconds resets the values to zero.
▶Pressing the NAM on returns to the navigation display, if navigation is active. If navigation is not active, the display shows the information menu.
Displaying/changing settings during route guidance
▶During route guidance, press the left rotary control
| LONDON | DISTANCE | ||
| ABERDEN ROAD | 500 KM | ||
| 3992 | ∅ | MOD | ETA 10:23 |
▶Press the MODifunction button.
| SPEEDLIMITS: ON | ▲ |
| ROUTE: DYNAM. | |
| ETA: NORMAL | ▼ |
The current settings are displayed in a list.
You can display or change the following settings:
- ROUTE: Stipulations on the method of route calculation.
• ETA: Method of calculating the estimated time of arrival.
Navigation mode
• DURATION:
Setting as to whether ETA, the current time or the remaining travel time should be displayed on the right side of the display during navigation.
• MOTORWAY :
Stipulation as to whether the route is calculated with or without motorways.
• FERRY:
Stipulation as to whether the route is calculated with or without ferries.
• TOLL :
Stipulation as to whether the route is calculated with or without toll roads.
- SPEEDLIMITS:
Setting to stipulate whether speed limits are to be displayed during navigation.
▶Scroll through the list of settings by turning the right rotary control ●
▶To change a setting select the required entry and press the right rotary control ●
After 8 seconds without operation, or if the NAM1 on is pressed, the system returns to the route guidance display. The changes are then active.
Note:
After changing settings (ROUTE: , MOTORWAY: , FERRY: and TOLL:) the route must be recalculated by Indianapolis Pro. You may then have to insert the navigation CD.
Changing ROUTE :
▶ Select ROUTE: from the settings and press the right rotary control ●
SHORT ROUTE DYNAMIC ROUTE FAST ROUTE

▶Then turn the right rotary control ● select the required route calculation method.
▶The setting is accepted by pressing the right rotary control ●
The list of settings is displayed again.
Note:
Further information on setting options can be found under “Selecting route settings” on page 24.
Navigation mode
Changing ETA:
▶ Select ETA: from the settings and press the right rotary control ●

▶Then turn the right rotary control to select the required setting.
▶The setting is accepted by pressing the right rotary control ●
The list of settings is displayed again.
Note:
Further information on setting options can be found under “Influencing the calculation of ETA” on page 46.
Changing DURATION:
▶ Select DURATION: from the settings and press the right rotary control ●

▶Then turn the right rotary control ● to select the required setting.
▶The setting is accepted by pressing the right rotary control ●
The list of settings is displayed again.
Note:
Further information on setting options can be found under "Setting the time display" on page 47.
Changing MOTORWAY:, FERRY: or TOLL:
▶ Select MOTORWAY:, FERRY: or TOLL: from the settings and press the right rotary control ●
The setting FERRY: is shown here by way of an example.

▶By turning the right rotary control ● select either WITH or WITHOUT.
▶ The selection is accepted by pressing and holding the right rotary control ●
The list of settings is displayed again.
Note:
Further information on setting options can be found under "Selecting route settings" on page 24.
Navigation mode
Changing SPEEDLIMITS:
▶ Select SPEEDLIMITS: from the settings and press the right rotary control ●

▶By turning the right rotary control, ● select either ON or OFF.
▶ The selection is accepted by pressing and holding the right rotary control ● The list of settings is displayed again.
Note:
Further information on setting options can be found under "Switching the speed limits display on/off" on page 46.
Requesting current time
▶During navigation, press the left rotary control ●

▶Press the multifunction button.

Current time and current date are displayed.
After 8 seconds, the system returns to the navigation display.
Calling up current position
During route guidance, the current position can be requested.
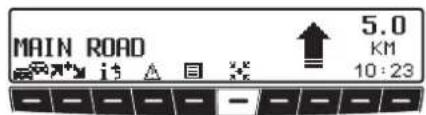
▶Press the multifunction button.

The current position with road name (if available), degrees longitude and latitude, altitude above sea level and the number of satellites received are displayed.
▶Pressing the right rotary control ● turns you to the route guidance display.
With inactive route guidance, the information menu can be requested by pressing the left rotary control ●

▶Press the multifunction button.

The current position with road name (if available), degrees longitude and latitude, altitude above sea level and the number of satellites received are displayed.
▶Pressing the right rotary control of the RSTN returns you to the information menu.
Calling up road list
During route guidance, the list of roads for the planned route can be called up.

▶Press the multifunction button.

The current road and the road names up to the destination are displayed. Scroll through the route list by turning the right rotary control ●
▶Pressing the right rotary control ● turns you to the route guidance display.
Note:
After entering the destination, it will take some time until the route list is compiled.
If the vehicle is currently in an "off road" area when the destination is entered, no route list can be compiled until a stored road is reached.
Navigation mode
Destination memory
▶In the Main Navigation Menu, select DEST. MEMORY with the right rotary control and press the control to confirm.
LAST DESTINATIONS
DEST. MEMORY
DESTINATION

The destination memory contains personally stored destinations.
Once a destination has been stored, it does not have to be manually re-entered.
AUNT MARY, MUNICH, MARI BUSSINESS, LONDON, ABERDEENROA
▶Select the desired destination using the right rotary control and press to confirm.
▶Then start route guidance.
P.O.I.
Menu for selecting points of interest from a predetermined list. Points of interest include petrol stations, airports or hospitals, for example.
DESTINATION
P.O.I. LAST DESTINATIONS
▶In the Main Navigation Menu, select P.O.I. with the right rotary control and press the control to confirm.
▶ Using the right rotary control ● make a selection and press to confirm.
• Special destinations LOCAL AREA/NEAR DESTINATION
Special destinations in the current surrounding area of the vehicle or special destinations near the destination can be selected.

▶ Using the right rotary control ● select a category and press the control to confirm.
NORTH MIDDLESEX 3,1 KM↑ WHIPPS CROSS HOSPI 3,1 KM+
Destinations are listed according to proximity. The figures in kilometres relate to the direct distance (as the crow flies) between the point of interest and the current location.
The arrows following the distance information indicate the direction of the relevant point of interest (e.g. point of interest lies in the direction of travel, point of interest lies in the opposite direction to that of travel).
▶Select the desired destination using the right rotary control ●
By pressing the left rotary control ● information on the selected destination is listed (i.e. a hospital).
NORTH MIDDLESEX HOSPITAL N18 1 LONDON TEL.: (44)-(20)-XXXXXX
▶Confirm selection with the right rotary control ● The system jumps to the route menu.
• P O TOWN/COUNTRY
You can select any point of interest of your choice in destination countries contained on the navigation CD.
GREAT BRITAIN TOWN NATIONWIDE
▶With the right rotary control ●-lect from the displayed country (in the example GERMANY see Page 17), TOWN or NATIONWIDE and press the control to confirm.
Selection TOWN
Points of interest in a specified town can be selected.
TOWN: ABCDEF G#I JKL MNO PQR STUW. YZ H ....
- Using the right rotary control ● select the town name and press the control to confirm. - Then select the town from the town selection list using the right rotary control ● and press again to confirm.
FORD SERVICE HOSPITAL MB CAR GARAGE
The points of interest for the selected town are displayed.
▶ Using the right rotary control ● select a category and press the control to confirm.
A list of POIs is displayed or, if there are more than 9 POIs in the list, you will be prompted to enter text
HOSPITAL: .B..EF....K..NO P....W..Z F ....
▶Enter the point of interest and confirm.
▶Confirm the point of interest in the displayed list by pressing the right rotary control ●
The system jumps to the route menu.
Note:
A list of possible points of interest is displayed by pressing the right rotary control ● for more than 2 seconds without having selected any letters.
Navigation mode
Selection NATIONWIDE

▶ Using the right rotary control ● select a category and press the control to confirm.
A list with special destinations is displayed or, if there are more than 9 entries in the list, you will be prompted to enter text.
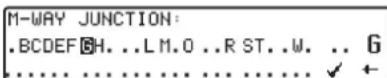
▶Enter the point of interest and confirm.
▶Confirm the point of interest in the displayed list by pressing the right rotary control ●
The system jumps to the route menu.
Note:
A list of possible points of interest is displayed by pressing the right rotary control ● for more than 2 seconds without having selected any letters.
Points of interest (P.O.I.) CD
The following contains a general description of the points of interest (or P.O.I.) CDs.
There are two methods for selecting a point of interest from a points of interest or P.O.I.-CD:
- During active navigation, a point of interest can be selected in the vicinity of the current position or near the entered destination.
- If navigation is not active, points of interest can be selected in the vicinity of the current position.
▶Insert the desired points of interest CD into the CD slot. After a short time, the following display appears:
SELECT DESTINATION = OK CANCEL = REMOVE CD
▶Press the right rotary control ●
The valid categories for the current points of interest CD are displayed.

The categories and points of interest shown in the illustrations are examples. The actual display is dependent upon the CD used.
▶Select the desired category with the right rotary control ●Then, press the right rotary control to confirm the category.
Note:
If the set user language is identical with one of the languages available on the CD, the categories are displayed in this language. If there is no correspondence, the categories are displayed in all available languages. This can be recognised by the country abbreviations in front of the category.
Navigation mode
If the points of interest CD is inserted during active navigation, the system requests information on the location of the point of interest (near to destination or in vicinity of current position).
If navigation is not active, this selection is skipped.

▶With the right rotary control, select either LOCAL AREA or NEAR DESTINATION.

After a short time, the available points of interest for the selected categories are displayed.
The arrows following the distance information indicate the direction of the relevant point of interest (e.g. *point of interest lies in the direction of travel, *point of interest lies in the opposite direction to that of travel).
▶Then, turn the right rotary control ● to select the desired point of interest. The point of interest is accepted by pressing the rotary control ●
Before confirming the point of interest, press the 16.041 in to return to the selection of categories in order to select a different point of interest, if required.
Press the left rotary control ● display information on the point of interest. This information may include prices, location description, general appraisal etc., for the point of interest.

Pressing the NAVI on or pressing the left rotary control ● returns you to the list of points of interest. Following selection of the point of interest, you are prompted to insert the navigation CD for route calculation.
If the point of interest was selected during active navigation, it will be treated as a stopover.
After a short time, route calculation to the selected point of interest is performed.
Note:
If a stopover has already been entered, it will be overwritten by the new point of interest.
In order to cancel navigation to the selected point of interest, you must either cancel navigation or cancel navigation to the stopover, as described in the complete operating guide.
In order to cancel the entry of a point of interest from the point of interest (P.O.I.) CD, you must eject the point of interest (P.O.I.) CD by pressing
Navigation mode
Terms of licence
You are granted a non-exclusive licence to use the database for your personal purposes, or, where applicable, for internal purposes in your business operations. The present licence does not authorise the granting of sublicenses. Use of the data is only permitted in this specific Becker system. It is forbidden to extract or make further use of significant parts of the database content, or to duplicate, copy, modify, adapt, translate, analyse, decompile or reverse engineer any part thereof. The maximum possible care has been taken in compiling this CD. Nevertheless, some data may be incorrect or outdated. Under no circumstances do we accept any liability.
System settings
▶Press the main in the navigation main menu.
The system settings menu is requested.

Select from
TIME,
SAVE POSITION, GAMES,
LANGUAGE*, ANIMATION,
MEASURING UNIT, ANNOUNCEMENT ETA,
ETA CALCULATION, SPEEDLIMITS,
TIME INFORMATION
by turning the right rotary control ● and confirm your choice by pressing it.
• TIME
The system's internal clock can be set to the local time.
- SAVE POSITION
The current position can be saved and stored in the Destination Memory.
• GAMES
A selection of games is available.
• LANGUAGE*
Language ukenglish
• ANIMATION
The Animation display can be turned on or off.
• MEASURING UNIT
The unit of measurement can be changed from kilometres to miles.
• ANNOUNCEMENT ETA
Announcement of the estimated time of arrival can be turned on or off.
• ETA CALCULATION
Calculation of the ETA can be influenced.
- SPEEDLIMITS
Display of speed limits can be switched on/off.
• TIME INFORMATION
Whether ETA, the current time or the remaining travel time should be displayed on the right side of the display during navigation, is a setting option.
Setting time
In order to achieve correct navigation on routes with time-dependent traffic guidance, and to calculate the estimated time of arrival, it is necessary to set the GMT time transmitted from satellites to the current time zone.

▶In the System Settings menu, select TIME and confirm.

▶With multifunction button 24H 12H, the time can be changed from 24- to 12-hour display.

▶With the multifunction buttons + or, the time will be changed in half-hour increments.
▶By pressing the right rotary control ● or multifunction button .The set time is accepted.
The program returns to the System Settings menu.
Saving position

▶ Set and confirm SAVE POSITION in the System Settings menu.

The display will show the co-ordinates (latitude/ longitude) for the current position.
▶Confirm by pressing the right rotary control ●.

▶Entering a Name for Position.
▶Press the right rotary control for more than 2 seconds to confirm the name entered.
or
▶Highlight the small tick and briefly press the right rotary control ●
Navigation mode
The Destination Memory is then called up automatically (see page 38).
With the right rotary control ●select the desired position in the Destination Memory and press to confirm.
Calling up Position
▶Call up Destination Memory (see page 38) and select destination with the right rotary control ●
Note:
If the position is outside a digitised area, the driver is guided along the digitised route nearest to the destination. The announcement "Your destination is nearby" is given. To reach the destination, follow the direction arrows.
Selecting a game
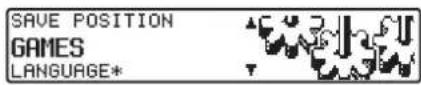
▶ Set and confirm GAMES in the System Settings menu.

▶Select a game using the right rotary control ●
Setting the language

▶ Set and confirm LANGUAGE* in the System Settings menu.

▶Select the language using the right rotary control ●The language selection is applied when the control is pressed, and the language is installed.
You can choose either a male or a female voice for certain languages.

▶Select the voice using the right rotary control ●The voice is applied and installed by pressing the control.
The system returns to the system settings menu after installation.
Animation
Whether ETA, the current time or the remaining travel time should be displayed on the right side of the display during navigation, is a setting option here.

▶ Set and confirm ANIMATIONEN in the System Settings menu.

▶You can select between animations ON and OFF by briefly pressing the right rotary control ●
Setting is confirmed and accepted by pressing and holding the right rotary control ●
The system returns to the system settings menu.
Switching announcement of arrival time on /off

▶Set and confirm ANNOUNCEMENT ETA in the System Settings menu.
ETA stands for Estimated Time of Arrival.

▶You can select between ETA announcement ON and OFF by briefly pressing the right rotary control ● Setting is confirmed and accepted by pressing and holding the right rotary control ●
The system returns to the System Settings menu.
Selecting the units of measurement

▶Set and confirm MEASURING UNIT in the System Settings menu.

▶Select the units of measurement using the right rotary control ●The units of measurement are accepted by pressing the control.
The system returns to the System Settings menu.
Note:
METRIC stands for calculation in metres. IMPERIAL stands for calculation in yards.
Navigation mode
Influencing the calculation of ETA

▶Set and confirm ETA CALCULATION in the System Settings menu. ETA stands for Estimated Time of Arrival.

▶ Use the right rotary control to select the desired setting.
- SPORTY
With this setting the unit adjusts ETA for faster drivers. An earlier ETA is calculated.
- NORMAL
This is the default setting. It offers a sufficiently accurate calculation of ETA for most drivers.
- LOW-RISK
With this setting the unit adjusts for drivers who may take longer for the planned journey. This setting could be used, for example, in areas of dense traffic.
▶The selection is accepted by pressing the right rotary control ●
The system returns to the System Settings menu.
Switching the speed limits display on/off
If the speed limits display is ON, the system will inform you of the maximum permissible speed limit for the route along which you are travelling during route guidance, insofar as this information is available.
Warning Accident hazard
Road traffic regulations always take priority when a vehicle is being driven in traffic. Road signs en-route should always be heeded. In some cases, the speed limit indicated by the navigation system may be incorrect. At all times, the driver must decide whether or not to heed the speed limit indicated. We do not accept liability for erroneous data provided by the navigation system.

▶ Set and confirm SPEEDLIMITS in the System Settings menu.

▶You can select between speed limits ON and OFF by briefly pressing the right rotary control ● Setting is confirmed and accepted by pressing and holding the right rotary control ●
If, when the speed limit display is ON, you travel along a route with a speed limit and this speed limit is stored on the navigation CD, the corresponding symbol will appear on the right-hand side of the display indicating the speed limit.
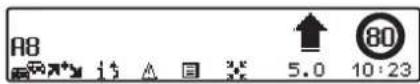
The distance to the next point at which for example a turn should be made is displayed below the navigation arrow, which appears in reduced format.
Note:
On routes with variable speed limits (dependent on weather conditions, time of day etc.) a symbol with the text Dyn. or a speed with an underscore (e.g.: "80") draws the driver's attention to the fact that the speed limit is variable.
As temporary speed limits (e.g. due to road works) are usually short-lived, these have not been included on the CD.
Setting the time display

▶Set and confirm TIME INFORMATION in the System Settings menu.

▶ Use the right rotary control to select the desired setting.
- REMAINING DRIVING TIME
The display shows the remaining travel time.
• ETA
The display shows the estimated time of arrival.
• TIME
The display shows the current time.
▶The selection is accepted by pressing the right rotary control ●
The system returns to the System Settings menu.
Radio mode
Switching on radio mode
▶Press RADIO
The last selected waveband is called up.
Switching on Radio Menu Mode
▶Press FLAEOio mode.

The radio menu mode is activated and displayed. The unit switches back to radio mode if no button is pressed within the next 8 seconds.
Selecting the FM waveband
▶Requesting radio menu mode.
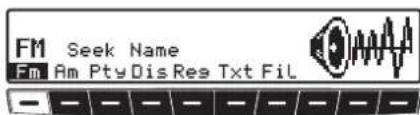
▶Press the multifunction button.
The last selected station and level are displayed.
By pressing repeatedly, you can choose between the levels Seek Quality, Seek Name, Stations RDS and Stations Fix.
- Seek Quality (see also page 85)
- Seek Name (see also page 85)
• Stations RDS (see also page 85)
• Stations Fix (see also page 85)
Selecting the AM waveband
▶Requesting radio menu mode.

▶Press the multifunction button.
The last selected waveband and station are set.
▶ To select the MW (Medium Wave), LW (Lons Wave) and SW (Short Wave) wavebands, repeatedly press multifunction button Runtil the desired waveband is set.
Settings for station selection
The desired station can be selected via dynamic autostore (FM), autostore (MW, LW), station search, scan search, manual tuning, and station buttons.
Dynamic autostore (FM-DAS)
▶Requesting radio menu mode.

▶Press multifunction button For peatedly until Seek Quality or Seek Name is displayed.
In the FM DAS mode, the receivable stations are displayed via the multifunction buttons depending on the settings.

Set the desired station by pressing the button directly below the abbreviated station designation. If the selected station broadcasts several programmes/regional programmes, a submenu is automatically displayed to select the desired programme.
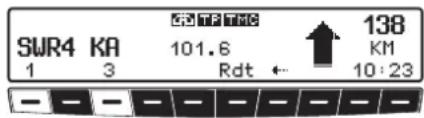
If a programme has previously been selected that belongs to the particular station programming chain, the last stored programme entry will be automatically selected.
Multifunction button -indicates that, by pushing this buttons, other stations can be displayed and selected.
If station names are being misused to send advertisements or messages, this station is indicated with L-1...L-Z (L = Local) instead of the abbreviated station name. This prevents the lower display line from constantly changing. When a station is selected, it is identified by a star (i.e. L*1).
The first time the unit is operated, or after the electrical supply has been interrupted, it may take the radio some time to evaluate the station signals. The display will appear incrementally as the evaluation progresses.
Station search FM-DAS
▶Turn the right-hand rotary control ● to the left or right.
The radio displays the receivable and identified stations in descending/ascending order.
Station search MW, LW, SW
▶ On the desired waveband (MW, LW, SW) turn the right rotary control ● the left or right.
The radio searches for reception frequencies in descending or ascending order of frequency.
Radio mode
Scan search
▶ On the desired waveband (FM, MW, LW, SW) press the right rotary control ●

sc appears on the display.
An automatic station search will be initiated. The first run is performed on an insensitive plane, all further runs on a sensitive plane. Receivable stations will remain audible for 8 seconds. If you wish to store one, press the right-hand rotary control
Note
With Seek Quality and Seek Name, Scan Search is conducted in alphabetical order.
Programme filtering for FM DAS
You have the option of filtering various stations from the FM DAS station list.
▶Requesting radio menu mode.

▶Press the Multifunction button.
The individual programmes can be selected using the right-hand rotary control by pressing the right rotary control you can choose between Play (programme unfiltered) and Skip (programme filtered out).
To turn the filter function on or off, press the multifunction button Repeatedly to turn the filter function on (Fil on) or off (No Fil).
Programme type selection (PTY)
▶Requesting radio menu mode.

▶Press the Multifunction button.
▶Afterward, select the desired PTY (see also page 85) using multifunction button Pty.
Note
Only the currently available PTYs can be selected.
Once a PTY has been selected, only those stations can be selected in FM DAS mode that are provided with this PTY.
If you select NO PTY in FM-DAS mode, all stations will once again be displayed.
Turning PTY display on / off
▶Selecting radio menu mode.
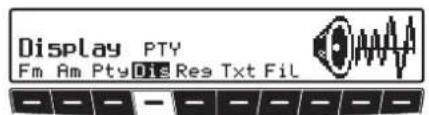
▶With multifunction button ☐sics lect either PTY (PTY Display On) or Frequency (PTY Display Off).
Calling up / storing FM stations
▶In the Radio Menu Mode, select level Stations RDS or Stations Fix using multifunction button Fm.
• Stations RDS (see also page 85)
• Stations Fix (see also page 85)
Storing:
12 frequencies or programmes can be stored per waveband.
▶Find desired station.

▶To store the desired station or programme, press the multifunction button 1 6 - 7 42 you hear a signal tone.
Note
To reach presets 7 - 12, press the multifunction button.
Calling up a preset:
▶Press multifunction button 4 6 or -7 and the stored station will be called up.
Calling up/storing MW, LW, SW stations
Storing:
In each case up to 12 stations can be stored using the station buttons.
▶Finding desired station.

▶To store the desired station, press the multifunction button -1 or 6 7 - until you hear a signal tone.
Note
To reach presets 7 – 12, press the multifunction button.
Calling up stations:
▶Press multifunction button 4 6 or -7 and the stored station will be called up.
Radio mode
Autostore MW, LW
▶Select radio menu mode within the desired waveband.
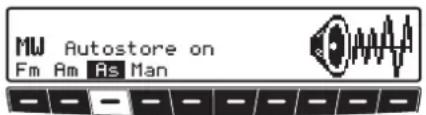
▶Press multifunction button peatedly until Autostore on is displayed.
▶Press multifunction button until
Seek Autostore is displayed.
The 6 stations with the best reception are stored under the station buttons in order of quality.
▶To exit the Autostore memory level, turn off the Autostore memory (Autostore off) with multifunction button .As
The radio switches back to the station button level.
Manual FM tuning
▶Selecting radio menu mode.
▶ Using the multifunction button Fm select the level Stations Fix.

▶Press the multifunction button twice.
▶Next, turn the right-hand rotary control ●
100 kHz tuning steps are performed. The display will show that manual tuning is currently active with MAN. If the right rotary control ● not turned after a short time, MAN will disappear from the display and manual tuning is turned off.
Manual Tuning MW, LW, KW
▶Select radio menu mode within the desired waveband.

▶Press the Multifunction button twice.
▶Next, turn the right-hand rotary control ●
9kHz (MW), 3kHz (LW) or 5kHz (SW) tuning steps are performed.
The display will show that manual tuning is currently active with MAN. If the right rotary control ● not turned after a short time, MAN will disappear from the display and manual tuning is turned off.
Regionalisation
The RDS diversity function is independent of region. As a result, the RDS diversity function can lead to the radio switching between various regional programmes which may vary in terms of broadcasting content. In such a case, the special regional programming must be selected directly.
If several regional programmes are transmitted by one station, this can only be seen when the station is selected.
Stations with additional regional transmitters are indicated with a star (i.e. 4*).

Upon selection of one of these stations (e.g. 4*), all receivable regional sub-programmes for this station will be displayed.

▶ Afterward, select the desired regional sub-programme (i.e. )Ma
Note
If the signal quality of a regional alternative drifts despite the RDS Diversity function, it may mean that regional alternatives are only transmitted on a few frequencies. Therefore, there are fewer frequencies with strong signals available for the unit to switch to.
Switching regionalisation on / off
▶Selecting radio menu mode.

▶ Use multifunction button return Regionalisation on (on) or off (off).
Turning frequency display on or off
▶Selecting radio menu mode.

▶ Use the Multifunction button to select either Frequency (Frequency display on) or PTY (Frequency display off).
Radio mode
Switching radio text on / off

Warning Accident hazard
Since information transmitted via radio text is constantly changing, we recommend displaying the radio text only when the vehicle is stationary to avoid unnecessary distraction for the driver. This is a necessary precaution for accident prevention.
▶Selecting FM radio menu mode.
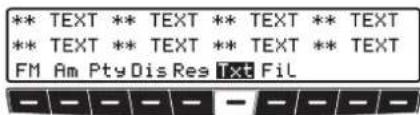
▶Press multifunction button Ttot switch on the radio text.
The car radio filters data transmitted by the radio station and displays it in the form of radio text.
Note
Radio text cannot be displayed unless the selected station also transmits radio text.
Poor reception or interference may distort the radio text or prevent it from being displayed completely.
▶In order to quit the radio text level, press the RADIO n.
Traffic programme (TP)
If an RDS Diversity station broadcasts TP announcements, it is possible to interrupt CD, MP3/WMA, CDC/AUX, MW, LW, SW play or the mute mode and to switch to the TP announcements. Moreover, you can listen to one FM station while receiving TP announcements transmitted by another FM station.
There are two ways to select a TP station:
- Automatic tracking
- Direct programming
Automatic tracking transmits TP bulletins over the FM station currently being received. If the selected FM station has poor signal quality or cannot function as a TP station, the unit applies specified criteria to search for a new TP station.
Direct programming enables a TP station to be programmed that is not the FM station being received. This means, for example, that a particular FM station can be listened to whilst TP announcements are received from another one.
If the programmed TP station reception is poor, the unit switches to automatic tracking until the programmed TP station can be restored.
If the unit detects a TP station, this is indicated on the display by TP.
TF appears on the display to indicate that the traffic programme is active.
Activating / quitting the TP menu
Activating:
▶Press the button twice.

▶Press the multifunction button.
Quitting:
▶Press the 📊 on; otherwise, the TP menu will automatically disappear after 8 seconds if no further operations are performed.
Switching TP on / off
In all modes and wavebands, TP can be turned on or off by pressing and holding the button TEL more than 2 seconds.
TP can also be switched on or off whilst in the TP menu:
Switching on:
▶Switching on TP menu.

▶Press multifunction button peatedly until TP on appears.
Switching off:
▶Switching on TP menu.

▶Press multifunction button peatedly until TP off appears.
TP is switched off after returning to normal display.
Radio mode
Selecting automatic tracking
In all modes and wavebands, automatic tracking can be turned on by pressing and holding the TELTON for more than 2 seconds.
In the TP menu:

▶Press multifunction button fepeatedly until TP on appears.
Attention:
If a TP station has already been programmed directly, it will once again be selected as the TP station.
Selecting / cancelling direct programming
▶Switching on TP menu.
Selecting:
▶Press the multifunction button.

▶ Using the right rotary control Select the desired TP station and press to confirm.
After a short delay and without actuation, the selected station is accepted.
Cancelling:
▶Press the Multifunction button.

▶ Select Autoselect with the right rotary control and press the control to confirm.
After a short delay and without actuation, direct programming is cancelled.
Switching mute on/off
Ensure that a TP or EON station is selected.
Switching on:
▶Press the Tutton twice.
TP Info - SWR3 Tp StaVol

The mute function is then activated. Only traffic announcements, navigation announcements and telephone calls will be switched through.
Switching off:
▶Again, press or TEL
▶Turn the left rotary control.
The mute function is cancelled.
Interrupting TP announcements
A current TP announcement can be inter- rupted.
▶If the system is in CD, MP3, or CDC mode, by briefly pressing the CD-t-ton.
or
▶If the system is in radio mode, by briefly pressing the RAOJON.
The unit switches back to the previously selected mode.
TP Announcement volume
▶Selecting TP Menu.
▶Press the multifunction button.

▶With the right rotary control, four different settings (0 - 3) can be selected.
This means that the volume can be raised by a fixed amount depending on the setting.
- Setting - no increase
- Setting 1 - slight increase
- Setting 2 - moderate increase
- Setting 3 - strong increase
Display for receivable TMC stations

If the system is receiving a TMC station, this is indicated on the display by the abbreviation TMCMC information can be received and analysed by the navigation system. The reception of these traffic announcements is free of charge.
Telephone muting
If a telephone is installed in the vehicle and its mute control is linked to the car radio, the User menu (Page 81) can be used to determine how it should behave. If Mute is selected, the radio is muted when a call is received.
With the setting Audio Sis. the sound of the telephone will be heard through the radio unit if a call comes in (vehicle ignition must be on).
This is only possible if, in addition to the telephone, a handsfree unit with loudspeaker output is installed and connected to the radio. In both cases Phone will be displayed.

CD mode
Notes on compact discs (CD)
Sound interruptions may occur if the CD is soiled. In order to ensure the highest tone quality, please note the following:
| Correct |  Incorrect Incorrect |
 Incorrect Incorrect |  Correct Correct |
• Always touch the CD at the edges only. Keep the disc clean and never touch the surface.
- Never stick anything on the CD.
- Protect the CDs against direct sunlight and from heat sources such as heaters etc.
- Before playing the CD, it should be cleaned with a special, commercially available cleaning cloth, wiping from the centre outwards. Solvents such as benzene, thinners or other commercially available cleaners and anti-static sprays must not be used.
Inserting / ejecting CDs
Inserting CDs:
▶Press and hold
The display folds downwards and the CD slot is then visible.
▶Insert the disc into the CD slot with the printed side upwards.
The unit pulls in the CD automatically and begins to play the disc from the first track. Then fold the display up again. After the last track has finished playing, the unit will automatically repeat the CD from the first track.
If there is already a CD in the slot, press the CD button. If CD-changer/AUX mode was selected last, the unit must be switched to CD mode by pressing the
CD multifunction button.

Ejecting CDs:
▶Press and hold 📤
The display folds downwards and the CD is ejected.
▶Removing CDs.
▶Fold the display up again.
Warning Accident hazard
For safety reasons, the portable panel may not be left open while driving.
Attention:
The CD is not ejected when the unit is switched off but remains in the CD slot.
Forward / backward track skipping
▶Turn right rotary control ● right / left.
Through further turning of the right rotary control ● several tracks can be skipped over in forward or reverse directions.
Note:
The unit switches to the first track once the last track is reached. In a similar manner, it switches from the first track back to the final track.
If a track has been playing for more than 10 seconds when the skip button is pressed, the unit will skip back to the beginning of the selected track.
Scan search
▶Pressing the Multifunction button activates the scan search function.

sc appears on the display.
All following tracks on the current CD are played for 10 seconds each. Press the Sc multifunction button again to terminate the scan search.
Fast forward / reverse
▶Fast forward (audible) is activated by pressing the multifunction button and fast reverse (audible) is activated by pressing the multifunction button.

▶Fast forward / reverse terminates when the multifunction button or ▶ is released.
Track repeat
▶“Track repeat” is activated by pressing the Froultifunction button.
The prompt Rpt is displayed inversely.

- Pressing the multifunction button again deactivates "Track repeat".
CD mode
Random play
- Pressing the Fonditifunction button activates the random play function.
Subsequently, the tracks on the current CD will be played in random order. The promptRnd is displayed inversely.

- Pressing the Fndltifunction button again deactivates the “Random Play” function.
CD settings menu
▶Press the button in CD mode.

The CD settings menu is displayed. As additional information, if available, CD text on the track currently playing is displayed.
If another function is selected in the CD settings menu, you can display the CD text again by pressing the Multi-function button.
Displaying number of tracks
▶Requesting CD settings menu.
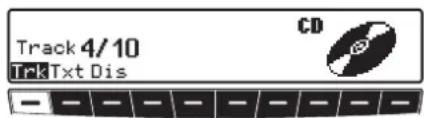
▶Press the multifunction button. The current track number and the total number of tracks are displayed.
Switching between Track/CD Text display
You can set here whether in the CD menu the track display is provided by the numerical track display or by displaying the CD text for the current track.
▶Requesting CD settings menu.

▶By pressing the Multifunction button, select either Numeric (track display), or Text (track name).
Temperature protection circuit
To protect the laser diode from excessive heat, a temperature protection circuit is integrated into the unit.
When the temperature threshold is activated, the following display is given for 8 seconds.

The unit switches to the operating mode selected before CD mode was activated. After a cool down period, the CD mode may be called up again. If the temperature is still too high, the unit will once again switch back to the previously selected signal source.
Notes on CD-R and CD-RWs
You can play CD-Rs (writeable CDs) and CD-RW (rewritable CDs) on this unit, but please comply with legal restrictions. These restrictions may vary from one country to another.
Depending on the recording device used to record the CD-R/CD-RW and / or the CD-R/CD-RW itself, it may not be possible to play some CD-Rs/CD-RWs on this unit.
CD-Rs/CD-RWs must be manufactured according to the “Red Book” standard (not applicable for MP3 CDs).
Notes on copy-protected CDs
In some cases, problems may arise when attempting to play copy-protected CDs, such as long reading times or a total inability to perform playback.
MP3 mode
General notes on MP3
The music that can be played when your unit is in MP3 mode is generally copyright-protected under applicable international and national laws. In several countries, the reproduction of copyrighted material is not permitted, even if only for personal use, without the express prior consent of the copyright holder. Please check the current copyright laws for your country and comply with them. These restrictions naturally do not apply to your own compositions and recordings, or for recordings for which authorisation has been obtained from the copyright holder.
Creating an MP3/WMA storage medium
- The maximum number of tracks per medium depends on the number of folders and file name length. Here, for a full file name length, it can be assumed that for 0 folders about 240 tracks and for, e.g., 50 folders a total of around 160 tracks are possible.
- Only MP3 and WMA tracks stored on a CD in compliance with ISO 9660 can be played.
- If the artist's name and track title are to be displayed, an ID3 tag must be added to the MP3 file. This unit supports versions ID3v1 and ID3v2.
- The display of artist's name and track title is restricted to a total maximum length of 24 characters.
- The MP3 formats MPEG1, MPEG2 and MPEG2.5 Layer3 are supported by the unit.
Fixed and variable bit rates of 8 - 320 kbit/s and scan rates of 8 - 48 kHz are supported. For creating MP3 files, we recommend using the MP3 encoder from Fraunhofer.
For WMA, WMA 9 with a bit rate of 64 - 320 kbit/s is supported. For creating WMA, we recommend using Windows Media Player Version 9 from Microsoft®.
- We recommend a bit rate of at least 160 kbit/s for compressing MP3 files. It should be noted that with MP3 files having a variable bit rate, the display of the elapsed playing time may deviate from real time.
- If both MP3/WMA data and conventional audio tracks are included on the CD it is usually referred to as a mixed-mode CD. On this kind of CD the audio tracks are generally located in the first directory on the CD.
- You can play CD-Rs (writeable CDs) and CD-RWs (rewritable CDs) on this unit,
You can also use multisession CDs, but a multisession CD must be finalized before it can be played.
Depending on the recording device used to record the CD-R/CD-RW and / or the CD-R/CD-RW itself, it may not be possible to play some CD-Rs/CD-RWs on this unit.
For further information about creating MP3/WMA files and ID3 tags, please consult your dealer or check on the Internet.
Note:
Due to the abundance of different kinds of CD burning software and their associated settings we cannot guarantee the playback quality of MP3/WMA CDs.
Creating a playlist
Due to the number of MP3 files that can be saved on an MP3 CD, the MP3 CD quickly becomes confusing. You can make it less confusing using playlists.
In a playlist, you can combine, for example, all the desired songs in a category (e.g. rock).
This playlist can then be burned on the CD together with the MP3 files that are stored in folders.
The unit recognises this playlist (several possible) on reading the MP3 CD and can then play the MP3 tracks in the order specified by the playlist.
In this case, the playlist mode must be activated as described in “Switching between folder/playlist” on page 65.
We used the freeware WINAMP in our trials for creating playlists. Other programs may also be used to create playlists.
The playlist formats M3U and PLS are supported by the unit.
Note:
Please not that M3U and PLS playlists are only supported by the unit if these have been created using relative specified paths.
For further information about creating playlists, please check on the Internet.
MP3 mode
Inserting /ejecting MP3 CDs
Inserting CDs:
▶Press and hold 📤 The display folds downwards and the CD slot is then visible.
▶Insert the MP3 CD into the CD slot with the printed side upwards.
The unit pulls in the MP3 CD automatically and begins to play the first track in the first folder (directory) of the CD. Then fold the display up again.
After the last track in the last folder on the MP3 CD has finished playing, the unit will automatically repeat the first track in the first folder on the CD.
If there is already an MP3 CD in the slot, press the CD button. If CD-changer/AUX mode was selected last, the unit must be switched to MP3 mode by pressing the multifunction button.

Ejecting CDs:
▶Press and hold
The display folds downwards and the MP3 CD is ejected.
▶Removing MP3 CDs.
▶Fold the display up again.
Warning Accident hazard
For safety reasons, the portable panel may not be left open while driving.
Attention:
The MP3 CD is not ejected when the unit is switched off but remains in the CD slot.
Also refer to the following sections under CD mode (Page 58):
- "Notes on compact discs (CD)" on page 58
- "Temperature protection circuit" on page 61
Switching between folder/playlist
If playlists are stored on the inserted MP3 CD, it is possible to switch between the folder display and the playlist display.
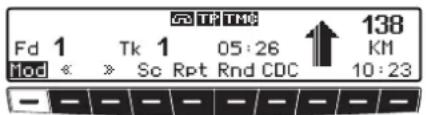
▶By pressing the multifunction button Mod select either Folder Mode or PlayList Mode.
- Folder Mode
In the folder display, all the MP3 tracks on the MP3 CD can be played. Active folder display can be recognised from the abbreviation Fd.
- Playlist Mode
In the playlist display, only the MP3 tracks saved in the various playlists can be played. Active playlist display can be recognised from the abbreviation PL.
Note:
The Modtifunction button is only displayed when playlists are saved on the inserted MP3 CD.
Forward / backward track skipping
▶Turn right rotary control to right / left.
Through further turning of the right rotary control ● several tracks can be skipped over in forward or reverse directions.
Note:
The unit switches to the first track in the folder or playlist once the last track in the folder or playlist has been reached. In a similar manner, it switches from the first track back to the final track. If a track has been playing for more than 10 seconds when the skip button is pressed, the unit will skip back to the beginning of the selected track.
Changing folder/playlist
▶Press the right rotary control ●
▶Turn the right rotary control Ⓞ select the desired folder or the desired playlist.
While making the selection, the folder names or playlist names are displayed.
Scan search
- Pressing the multifunction button activates the scan search function.

SC appears on the display.
All following tracks in the current folder or current playlist are played for 10 seconds each. Press the Multifunction button again to terminate the scan search.
MP3 mode
Fast forward / reverse
▶Fast forward (audible) is activated by pressing the multifunction button and fast reverse (audible) is activated by pressing the multifunction button.

▶Fast forward / reverse terminates when the multifunction button or ▶ is released.
Random Play
- Pressing the Fndltifunction button activates the random play function.
Subsequently, the tracks from the current folder or current playlist will be played in random order. The prompt Rnd is displayed inversely.

- Pressing the Rmultifunction button again deactivates the "Random Play" function.
Track repeat
▶“Track repeat” is activated by pressing the Routifunction button.
The promptRpt is displayed inversely.

- Pressing the Multifunction button again deactivates "Track repeat".
MP3 settings menu
▶Press the CD button whilst in MP3 mode.

The MP3 settings menu is displayed. As additional information, if available, the ID3 tag for the track currently playing is displayed.
If another function is selected in the MP3 settings menu, you can display the ID3 tag again by pressing the multifunction button .T×t
Number of folders/playlist tracks
▶Requesting MP3 settings menu.

▶Press the multifunction button. The current folder or playlist number and the current track number are displayed.

▶Press the multifunction button. The total number of playlists (PL), folders (Fd) on the MP3 CD and the total number of tracks (Tk) are displayed.
Displaying name of folder/playlist
▶Requesting MP3 settings menu.

▶Press multifunction button , if you are in the playlist display, multifunction button .PL
The name of the folder or the playlist is displayed.
Switching between track/ID3 tag display
Here you can set whether in the MP3 menu the track display is provided by the numerical track display or by displaying the ID3 tag for the current track.
▶Requesting CD settings menu.

▶By pressing the Multifunction button, select either Numeric (track display), or Text (track name).
Audio playback via an optional Apple™ iPod
Notes:
- The iPod™, the iPod mini™ and the iPod photo™ are portable MP3 players from Apple, with a hard disk as a storage medium.
• Apple, the Apple logo and iPod are Apple Computer, Inc. trademarks, registered in the USA and in other countries.
Instead of a CD changer you can connect an Apple iPod MP3 player to the Indianapolis Pro and operate it via the Indianapolis Pro.
The following Apple iPod series devices are supported:
- iPod 3rd generation
- iPod 4th generation
- iPod mini
- iPod photo
MP3 mode
To connect an iPod TM to the Indianapolis Pro you will need the remote kit iPod TM , which is available as an optional extra.
The remote kit iPod TM comes with connection and operating instructions.
More information can be found under www.becker.de.
Note:
If the connecting cable is attached to the Indianapolis Pro, it is not possible to attach a CD changer or a steering wheel remote control adapter.
Operational readiness of CD changer
If a CD changer is connected to the car radio, the CD changer is ready for operation as soon as the filled CD magazine is loaded. Close the sliding cover after loading. All further operation is performed from the car radio control panel.
Loading / ejecting the CD magazine
To remove the CD magazine, open the sliding cover on the changer and press the eject button. The magazine is ejected and can be removed.
When inserting CDs into the magazine, please note the instructions printed on the magazine.
Attention:
Incorrectly inserted CDs will not be played.
Note:
To allow for the fastest possible change of CDs, the magazine should be loaded successively, beginning with compartment 1.
Selecting CD changer mode
▶Press CD.
If the CD Changer mode was selected last, or if there is no CD or Navigation CD inserted into the CD player, the unit will now be in the CD Changer menu. If CD mode was selected last, the unit must be switched to CD changer mode by pressing the coultifunction button.
Playback begins with the last CD played, at the track playing before switching off.

Changing/selecting CDs
▶Activating CD changer mode.
▶Press the right rotary control ●
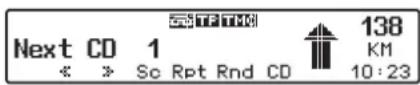
▶Turn the right rotary control to select the desired CD.
The selected CD is loaded.
During the selection time, Loading CD X is displayed.
The magazine compartment number or the name of the CD and the number of the current track on the selected CD are then displayed.

If no CD is loaded in the selected magazine compartment (e.g. compartment 2), NO CD X will briefly appear on the display and the previously played CD is played again.
After playing the last track of a CD, the unit automatically selects and plays the next CD in the magazine.
CD changer mode
For additional operating instructions, refer to CD mode (Page 58):
- “Notes on compact discs (CD)” on page 58
- "Forward / backward track skipping" on page 59
- “Scan search” on page 59
- “Fast forward / reverse” on page 59
- “Random play” on page 60
- "Track repeat" on page 59
CDC settings menu
▶Press the button in CDC mode.

The CDC settings menu is displayed. At the same time, the current CD number, the track number and the current track playing time are displayed.
Displaying track information
▶Requesting CDC settings menu.

▶Press the multifunction button.
The current CD number, the track number and the current track playing time are displayed.
Displaying number of tracks and total playing time
▶Requesting CDC settings menu.

▶Press the multifunction button. The current CD number, the number of tracks and the total playing time are displayed.
CD changer mode
Naming a CD
It is possible to assign a name to the CD currently playing, change a previously assigned name and delete stored names.
Note:
The entered name is stored in the CD changer.
Only a limited amount of memory is available for CD names.
If you replace your CD-changer, the stored names are lost.
Displaying names:
▶Requesting CDC settings menu.
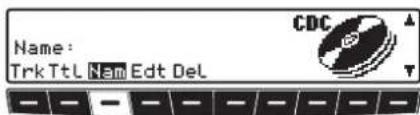
▶Press the multifunction button.
The assigned name is displayed. If no name was previously assigned to the current CD, the space after Name: is blank.
Assigning/changing names:
▶Requesting CDC settings menu.

▶Press the Multifunction button.
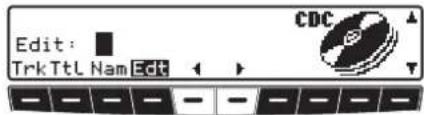
▶ Using multifunction buttons and , select the desired position (inverse editing symbol).

▶By turning the right rotary control, ● select the required letters and press the right rotary control to confirm.
This advances it by one character.
A maximum of 8 characters can be entered.
After exiting the CDC settings menu, the name is saved.
Deleting saved names:
▶Requesting CDC settings menu.
▶Press the multifunction button.
▶ Using the right rotary control, select the name to be deleted.

▶Now, press the Multifunction button to delete the name.
CD changer mode
CD filter function
You can filter out individual tracks on a CD. These tracks are then not included when the CD is played.
Note:
The filter function can only be activated if a name has been stored for the selected CD.
▶Requesting CDC settings menu.

▶Then press the F multifunction button.
Switching filter function on/off
▶By repeatedly pressing the Fil-tifunction button, the filter function is switched on (Fil on) and off (No Fil).
Filtering tracks:
Silverstone 7860 and 2660 CD changers.
▶The tracks to be filtered out of the current CD can be selected using the right rotary control ●
▶By pressing the right rotary control ● you can select PLAY (track unfiltered) and SKIP (track filtered out).
Note:
For the Silverstone 2630 and 2640 CD changers, you can choose between Play (track unfiltered) and Skip (track filtered out) for the current track by pressing the right rotary control
Below, you will find information on operating a mobile phone with Bluetooth® wireless technology, connected to the Indianapolis Pro.
Notes:
- The Indianapolis Pro can operate a mobile phone equipped with Bluetooth® wireless technology. We support the Bluetooth® wireless technology profile HFP1.0. Mobile phones without Bluetooth® wireless technology cannot be operated.
- It is possible that some of the functions described are not available with some mobile phones equipped with Bluetooth® wireless technology. Further information is available on the website www.becker.de.
- The Indianapolis Pro cannot access the mobile phone's number memory or the SIM card.
Notes:
- The name of a caller cannot be displayed.
- During an active telephone call, the navigation voice announcements are suppressed. Route guidance is given only in the display.
- During a telephone call you can adjust the volume by turning the left rotary control ●This volume setting is retained for telephone mode.
- With very long telephone numbers, the last digits of the number may be cut off in some displays.

Warning Risk of injury
Please ensure that you keep the mobile phone in an appropriate, safe holder. Only then can injuries be prevented in the event of an accident or due to sudden braking.
Telephone mode
Requesting telephone mode
▶To start up telephone mode, press the TEL key once.
Three states may occur when starting up telephone mode:
- Mobile phone already connected
• Mobile phone has just been connected - Mobile phone not yet connected
Mobile phone already connected
If a mobile phone is already connected to the Indianapolis Pro, then the telephone menu is displayed after starting up telephone mode.

The name of the connected mobile phone is displayed and you can now make a call or receive calls, as described under "Dialling numbers" on page 76.
Mobile phone has just been connected
If, while starting up telephone mode, an attempt is made to establish a connection, the following display appears.

Mobile phone not yet connected
If there is no mobile phone connected to the Indianapolis Pro, then the following display appears after starting up telephone mode.

The Bluetooth name of the Indianapolis Pro and a four-digit password (Pass-key) is displayed.
The Bluetooth name is composed of the device name Indianapolis and the last 3 digits of the serial number (indicated by three Xs in the example).
The four-digit password (Passkey) is a sequence of digits generated specifically for your Indianapolis Pro. You will require this sequence of digits for connecting a mobile phone to the Indianapolis Pro (indicated by four Xs in this example).
Telephone mode
Connecting mobile phone
The process of connecting a mobile phone with Bluetooth® wireless technology to the Indianapolis Pro must be started from the mobile phone. Follow the descriptions in the operating guide for your mobile phone.
The following contains a general description of this process.
▶ Switch on Bluetooth® on the mobile phone.
- Initiate a search for devices with Bluetooth® wireless technology from the mobile phone.
▶Select your Indianapolis Pro from the displayed list.
Your mobile phone will then prompt you to enter a password.
Note:
Please note that there is usually only a very short period of time available to enter the password. If this time period is exceeded, the attempt to establish a connection is aborted.
▶On the mobile phone, now enter the four-digit number displayed on the Indianapolis Pro next to Passkey: .
▶Confirm this number on your mobile phone.
Your mobile phone will then attempt to establish a connection to your Indianapolis Pro. Most mobile phones will provide you with confirmation that the connection is successful.
You can now receive calls and dial numbers on the Indianapolis Pro itself.
Note:
The Indianapolis Pro stores the last 5 mobile phones with Bluetooth® wireless technology that were connected to the device. When establishing a new connection, you will not be required to enter the password for the 5 stored mobile phones. The list of stored mobile phones can be deleted as described under "Bluetooth module reset" on page 84.
If a mobile phone with Bluetooth® wireless technology is connected, the symbol is displayed in radio, CD, MP3 or CD changer mode.

Telephone mode
Connecting automatically
After switching on the Indianapolis Pro, the Indianapolis Pro attempts to connect to the mobile phone with Bluetooth® wireless technology that was connected last. The connection attempts last until either the mobile phone connected last has been connected or another mobile phone with Bluetooth® wireless technology is connected.
Note:
If, instead of the currently connected mobile phone, you would like to connect another mobile phone with Bluetooth® wireless technology, you will first need to deactivate Bluetooth® on the current device. Then initiate an attempt to connect from the new mobile phone.
Dialling numbers
Note:
To use this function, a mobile phone with Bluetooth® wireless technology must be connected to the Indianapolis Pro.
▶Call up the telephone mode.

▶Press multifunction button .@

▶Enter the desired phone number using the multifunction buttons 1/to 0.
Notes:
- You can delete your entry by turning the right rotary control to the left.
- Press and hold the button to enter a plus sign.
- Press and hold the button to enter an asterisk.
- Press and hold the button to enter a hash (#) sign.
- For international calls, instead of the usual two zeros in front of the internationally valid country code, enter a plus sign (e.g. instead of 0049 for Germany use +49). When then entering the area code, you will need to omit any initial "0".
Telephone mode
▶Press the right-hand rotary control.

The Indianapolis Pro tries to establish a connection to the phone number entered.
Notes:
- Press the multifunction button to abort the call.
- If you have dialled a number from the mobile phone, Dialins appears in the display instead of a telephone number.
Once the connection has been established, the following message appears.

Number is busy
If the number called is busy, the busy tone sounds and the following message appears.

▶Press multifunction button .→X
▶After a short time, dialling is ended automatically.

The telephone menu then appears and you can, if desired, make a new call.
Call lists
Three call lists are available in the Indianapolis Pro. In each list, the last 9 numbers in each case are stored.
The call lists are in the telephone menu.
Note:
Calls without numbers are not displayed.
- Missed calls
(multifunction button)
This list contains the numbers for calls that you did not answer or rejected when the Indianapolis Pro was switched on and a mobile phone was connected.
- Calls received
(multifunction button)
This list contains the numbers for calls that you received when the Indianapolis Pro was switched on and a mobile phone was connected.
Telephone mode
- Numbers dialled
(multifunction button

This list contains the numbers you have dialled on the Indianapolis Pro.

▶Press one of the multifunction buttons Ex, ☑ to open the call list of your choice.
The list of missed calls is shown here by way of example.

▶It is possible to scroll through the list by turning the right rotary control ●
Calling a number from a call list
You can establish a connection to one of the numbers in the call lists directly.
▶Select the number to be dialled from the desired list.

▶Press the right-hand rotary control.
The Indianapolis Pro then tries to establish a connection to the phone number dialled.
Deleting call lists
You can delete all numbers from the individual call lists.

▶Select the call list to be deleted by pressing one of the multifunction buttons Ex, E← Eer.

▶Press multifunction button . 📄 The numbers in the selected list are then deleted.
Accepting a call
An incoming call is indicated by a ringing tone and a message in the display. If the caller transmits his/her phone number, this is also displayed.

▶Press multifunction button .☐← or
▶Press the right-hand rotary control. ● The call is accepted.
Notes:
- If the caller transmits his/her phone number, this is also displayed. If no phone number is transmitted, unknown number is displayed.
- During a telephone call, another call is ignored.
Rejecting a call
You can reject an incoming call.

▶Press multifunction button .☐☒ The signals indicating a call are ended. The caller hears a busy tone.
Terminating a call
An ongoing call can be terminated.

▶Press multifunction button .☐☒ The call is terminated. The telephone menu appears.
User settings
Opening / quitting User Settings menu
After calling up the user settings, the following basic settings can be made on two levels according to your personal preferences.
First level:
- Gal - Speed-dependent volume control (GAL)
- Tel - Telephone response
- Lum - Display brightness
- Led - Adjusting LED
• M/S - Adjusting reception optimisation
• Nav - Adjusting navigation announcements
Second level:
- Flux - Adjusting the AUX input
- Cmp - Adjustment of the Compass Display
- BeU - Adjusting signal tone volume
▶The user menu is requested by pressing the solution for longer than 2 seconds.

▶To access the second level of the User menu, press multifunction button →.
▶Press the solution again to quit the user menu.
Setting the GAL (Gal)
The GAL is a car radio control circuit, which automatically adjusts the car radio volume according to vehicle speed. This results in compensation of the driving noise produced at higher speeds.
▶Calling up the user menu.
▶Press the Multifunction button.
▶With the right rotary control, select either 0 or +15.

The GAL setting can be used to specify the starting point for the volume increase according to vehicle speed.
The setting is stored automatically.
The settings are:
- 0 - No volume increase
- +1 - Volume increase is initiated at low speed
• +15 - Volume increase is initiated at higher speed
Telephone mute function (Tel)
If a telephone with hands-free operation is installed, the call may be routed through the speaker system. This eliminates the need for an additional speaker. However, the signal leads (AF - Telephone input and Earth - Telephone input) must be connected to the car radio (see also page 93).
▶To set, call up user menu.
▶By pressing multifunction button Tel, select Audio Sis. or Mute.
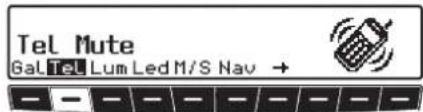
- Mute - Telephone Mute setting
- Audio Sis. - Telephone conversation via car radio
Display brightness (Lum)
With this function, the brightness of the display can be set.
▶ To set, call up user menu.
▶Press the multifunction button.
▶ With the right rotary control, select either 0 (dark) or 8 (light).

The setting is stored automatically.
LED setting
This function can be used to switch the LED function (flashes when the unit is switched off) on and off.
▶To set, call up user menu.
▶By pressing multifunction button Led select either bLinkins (LED On) or off (LED Off).

The setting is stored automatically.
User settings
Setting reception optimisation (M/S)
In order to suppress reception-related interference, three different parameters can be set for reception optimisation.
▶To set, call up user menu.
▶By pressing multifunction button M/S, select from Stereo, Mono and Auto.

- Auto - Setting for normal operation, i.e. depending on reception, the unit switches back and forth from stereo to mono (offers the optimum setting for almost all reception areas).
- Stereo - Setting for exceptional reception conditions - i.e. the unit is constantly set to stereo.
- Mono - Setting for reception conditions in which reflections constantly occur - i.e., the unit is constantly set to mono.
The setting is effective immediately and is also retained after power is turned off.
Setting navigation announcements (Nav)
With this function you can select how you wish to hear navigation announcements.
- only - The current audio source is turned off and only the navigation announcements can be heard.
-
mixed - The volume of the current audio source is lowered. The navigation announcement is set to the same volume as the current audio source but is still adjustable within a range of +/-6 dB. If the audio source volume is then changed, the navigation announcement volume is adjusted accordingly.
-
independ - The current audio source and the navigation announcements can be set to different levels.
▶To set, call up user menu.
▶With multifunction button Nase lect from only, mixed and inde- pend.

The setting is stored automatically.
AUX input (Aux)
This can be used to switch on the CD changer AF connections if no CD changer is connected. An external unit (Discman, Walkman, etc.) can then be connected.
▶To set, call up user menu.
▶By pressing multifunction button →, call up the 2nd level of the User menu.
▶With multifunction button Asex
lect either AUX Mode on (On) or
Aux Mode off (Off).

The setting is stored automatically. In CD mode, multifunction button Aux must be pressed to select AUX mode.
Display compass (Cmp)
When the navigation is not active, it is possible to have a compass and the current time shown on the right side of the display.
▶ To set, call up user menu.
▶By pressing multifunction button →, call up the 2nd level of the User menu.
▶With multifunction button C#
lect either Show compass (Com-
pass is displayed) or Hide
compass (Compass is not dis-
played).
If the compass display is switched off and navigation is not currently active, radio station abbreviations can be assigned to 9 multifunction buttons in FM-DAS mode.
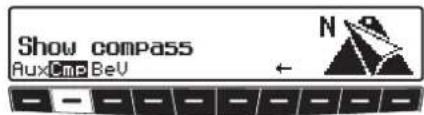
The setting is stored automatically.
Signal tone volume (BeV)
The volume of signal tones (e.g. storage confirmation) can be set using this function.
▶To set, call up user menu.
▶By pressing multifunction button → , call up the 2nd level of the User menu.
▶Press the Ballifunction button. With the right rotary control select between 0 (Low) or +5 (Loud).

The setting is stored automatically.
Service menu
Calling up / exiting service menu
The following information can be called up whilst in the Service menu:
- Model-No. : - Display of the model number
- Serial-No. : - Display of the serial number
- Chanser Reset - Reset triggering for CDC
- Phone Reset - Reset triggering for the Bluetooth module.
• GAL - Display of the current GAL adjustment - Radio Software: - Displays radio software version
- Radio BoLo: - Display of radio Bolo status
- Navi ROM/LIB: - Display of Navi Rom/Lib status
- Navi Flash: - Display of Navi Flash status
▶In radio mode, press emi and the multifunction button 40 the same time.

The individual entries can be selected by pressing multifunction buttons Nxt and P,or by turning the right-hand rotary control
To exit the Service menu, press multifunction button End
CD Changer reset
It is possible to reset the CD-changer here if the CD-changer malfunctions.
▶Requesting service menu.
▶Press multifunction button Net peatedly until Chanser Reset is displayed.
▶Press multifunction button Res
Bluetooth module reset
If a malfunction occurs that is associated with the Bluetooth module, you can perform a reset here. Connected devices and the call lists are deleted.
▶Call up service menu.
▶Press the Multifunction button repeatedly until Phone Reset is displayed.
▶Press the Multifunction button.
Unit reset
If a malfunction of the unit should occur, such that it becomes inoperable or defective in some other way, a restart of the internal unit software (reset) can be triggered with the following button combination:
To trigger a reset, simultaneously press multifunction button , multifunction button and the butt TEL
After a reset of the unit software, the Navigation CD must be re-inserted.
RDS SYSTEM
This car radio is capable of receiving RDS signals (RDS = Radio Data System) on the VHF bands. RDS is a technique for the transmission of inaudible information in the VHF broadcasting range. This means that the broadcaster sends information to be analysed by the car radio.
DAS Seek Qual. level
At the level DAS Seek Qual., all receivable and identifiable RDS programmes are stored in a list sorted by quality. The dynamic autostore, search and scan search functions access this list.
DAS Seek Name level
At the level DAS Seek Name all receivable and identifiable RDS programmes are stored in a list sorted alphabetically by name. The dynamic autostore, search and scan search functions access this list.
RDS Stations level
At the level Stations RDS only identified RDS stations can be stored. The unit constantly switches to the best receivable transmission frequency for the station.
During search for Stations RDS the unit will stop only at identifiable stations.
Stations Fix level
At the level Stations Fix frequencies can be assigned to the station buttons. RDS evaluation does not take place. The search for Stations Fix is equivalent to manual FM tuning (Page 52).
PTY (programme type)
With the PTY function, it is possible to select specific types of programmes, such as sport, pop music, classical music etc.
The PTY is broadcast by the RDS station, provided that the broadcaster has this function installed. The selected station programme type can be displayed or a search for a specific PTY station can be performed.
Examples of programme types are:
NEWS News services
POP M Pop music
AFFAIRS Politics and current affairs
ROCK M Rock music
INFO Special
talk programmes
SCIENCE Science
Explanations
EDUCATE Education
LIGHT M Light music
DRAMA Radio plays and literature
CLASSICS Classical music
CULTURE Culture, church, society
EASY M Musical entertainment
VARIED Light entertainment
SPORT Sport
OTHER M Special
music programmes
WEATHER Weather report
FINANCE Financial information
CHILDPRG Children's programmes
SOCIAL Social reports
RELIGION Religious reports
PHONE IN Interviews
TRAVEL Travel reports
LEISURE Leisure time reports
JAZZ Jazz music
COUNTRY Country music
NATION M National folk music
OLDIES Oldies
FOLK Folk music
DOCUMENT Documentation
NO PTY No PTY
Technical terminology glossary
Autostore
With this function, the stations with the strongest signals are stored in the auto-store memory, sorted by reception quality.
AUX
(Auxiliary)
Connection for external audio signals.
Balance
Volume setting between left and right loudspeakers.
Bluetooth
Technology for wireless data communication over short distances of up to approx. 10 metres.
CDC
(Compact Disc Changer)
CD-changer
CD-R
(Compact Disc Recordable) write-once CD.
CD-RW
(Compact Disc ReWritable) rewritable CD.
Code number
A secret number that must be entered to activate the unit.
Fader
Volume setting between front and rear loudspeakers.
Folder
Directory
Folder on a CD that contains MP3 or WMA tracks.
GAL
(Speed-dependent volume control) At high vehicle speeds, the volume is increased.
GPS
(Global Positioning System)
Positioning system. Basis for navigation.
ID3-Tag
“Contents” of an MP3 track. Contains information such as track, artists, album, year and genre.
Loudness
By increasing the treble and bass sounds, provides a better sound for low volumes.
M3U
Format for playlists supported by unit.
MP3
Special process for compressing audio data (e.g. music).
Playlist
A file that is stored on a CD together with MP3 files. It specifies the play sequence.
Technical terminology glossary
PLS
Format for playlists supported by unit.
PTY identification
(Programme Type identification) Identification of the programme transmitted by a station.
Radio text
Additional information that is transmitted by some VHF broadcasters via RDS.
RDS
(Radio Data System)
A process for transmission of inaudible information on the VHF band.
Regionalisation
Regional identification contained in RDS. Station transmits regional programme.
Reset
Reset the system to factory defaults.
Scan search
Plays receivable radio stations or CD tracks in succession for a short time.
TA
Traffic Announcement
TMC
(Traffic Message Channel)
Traffic messages that are transmitted by some VHF broadcasters via RDS. Basis for dynamic navigation
TP
(Traffic Programme)
Identification for traffic programme broadcasters.
WMA
(Windows Media Audio)
Special compression process developed by Microsoft ® for compressing audio data (i.e. music).
Index
A
Animation 45
Apple 67
Assigning CD names .....71
Autostore 52
AUX 83
Average speed 33
B
Balance 11
Bass 10
Block Deleting ....28
Entering 27
Bluetooth® 73
Brightness 81
Busy 77
C
Call Accepting....79
Ending 79
Rejecting .....79
Call list Calls received ....77
Deleting 78
Missed 77
Numbers dialled .....78
Call lists 77
Calling Dialling number....76
From call list 78
Calls received .....77
Cancelling navigation .....28
Cancelling route guidance .....28
CD Ejecting ....58
Inserting 58
Notes 58
CD changer 69
CDC 69
CD-R....61
CD-RW 61
Compass display 83
Connecting automatically .....76
Connecting mobile phone .....75
Control component Inserting....9
Removing 9
Copy protection 61
D
DAS 49
Deactivating detour function .....28
Deleting a stopover .....27
Deleting stopover .....27
Destination memory 25,38
Detour function .....27
Dialling number 76
Dialling telephone number .....76
Display brightness 81
Displaying current position .....36
Displaying road list .....37
Displaying the route list .....37
Displaying traffic information .....31
Driven route .....33
Dynamic autostore .....49
Dynamic navigation 24,30
Dynamic Route 24
Dynamic route guidance ..... 24, 30
E
Entering a town .....18
Entering a town centre .....21
Entering coordinates .....22
Entering destination .....17
Entering destination address .....17
Entering roads .....20
ETA announcement 45
Index
F
Fader 11
Fader control .....11
Fast forward CD ....59 MP3/WMA ....66
Fast reverse CD ....59 MP3/WMA ....66
Fastest Route....24
Ferries 25
Filter CDC....72 Radio....50
FM reception optimisation .....82
Folder 65
Frequency display ....53
G
GAL 80
Games 44
H
House number .....23
I
ID3 tag 62
Imperial 45
Intersection .....24
iPod operation....67
J
Journey duration 33
Journey time ....33
L
LED 81
Loudness....11
M
M3U 63
Manual tuning AM....52 FM....52
Maximum speed .....46
Metric 45
Missed calls 77
Motorway 25
MP3 62,64
Mutc Traffic programme ....56
Mute function Telephone 57,81
N
Navigation CDs 13
Number is busy .....77
Numbers dialled .....77
P
Playlist 63, 65
M3U....63
PLS 63
PLS 63
Point of interest .....38
Nationwide 40
Near destination .....38
P.O.I.-CD 40
Surrounding area .....38
Town/Country 39
Points of interest CD .....40
Portable panel Inserting ....9 Removing ....9
Position Displaying ....36 Saving ....43
Postcode 19
Program type ....50
Programme filter .....50
PTY....50
Index
R
Radio Menu Mode .....48
Radio mode .....48
Radio text .....54
Random play CD ....60 MP3/WMA ....66
Regional programme ....53
Regionalisation ....53
Repeat CD ....59 MP3/WMA ....66
Restrictions 25
Route block Deleting .....28 Entering .....27
Route settings ....24 changing ....33 Displaying ....33
S
Saving a destination ..... 22, 23, 25
Scan CD ....59 MP3/WMA ....65 Radio ....50
Scan search CD .....59 MP3/WMA .....65 Radio .....50
Selecting a country .....17
Selecting destination country .....17
Selecting the destination town .....18
Selecting voice 44
Setting navigation language .....44
Setting the language .....44
Setting units of measurement .....45
Shortest Route .....24
Signal tone 83
Sound setting 10
Speed limit 46
Speed-dependent volume .....80
Station Requesting ....51 Saving ....51
Station memory AM....51 FM....51
Station search FM ....49 MW, LW, SW ....49
Stopover 26
Storing location 43
Subwoofer 11
Summer time ....43
Switching off 10
Switching on ....10
T
Telephone call Accepting ....79 Ending ....79 Rejecting ....79
Telephone mode ....73 Starting ....74
Temperature protection circuit .....61 Time
Requesting ....36 Setting ....43
Time display ETA ....47 Remaining travel time ....47 Setting ....47 Time ....47
Time of arrival calculation .....46
TMC ....30 Displaying messages ....31
Index
Toll road 25
Tone menu 10
TP 54
Announcement volume .....57
Interruption of announcement ....57
Menu 55
Switching off ....55
Switching on ....55
Track change CD ....59 MP3/WMA ....65
Track filter 72
Track repeat CD ....59 MP3/WMA ....66
Track skip CD ....59 MP3/WMA ....65
Traffic Programme ....54
Traffic programme .....54 Announcement volume .....57 Interruption of announcement ..57 Menu .....55 Mute .....56 Switching off .....55 Switching on .....55
Treble 10
Tuning steps 52
U Unknown number .....79
V Volume Navigation announcements ..... 15, 82 Signal tone ..... 83 Speed-dependent ..... 80 Subwoofer ..... 11 TP announcement ..... 57 Unit ..... 10
W Waveband AM....48 FM....48
Winter time ....43 WMA ....62
- Wavebands:
FM 87.5 MHz - 108 MHz
MW 531 kHz - 1620 kHz
LW 153 kHz - 282 kHz
SW 5800 kHz - 6250 kHz
- Frequency range:
20 Hz - 20 kHz for CD-mode
30 Hz - 15 kHz for FM
50 Hz - 2.5 kHz for MW, LW, SW
- Output:
4 x 18 Watt
• Line cross section:
0.75 mm² min.
- Loudspeaker impedance:
min. 4 Ω
- Line out:
4 x analog Line Out (Va max 3Veff at 10 kΩ)
• GAL:
In order to utilise the GAL, a square wave voltage with a mass-related amplitude of +4 V to +12 V must be provided by the vehicle's electronic speedometer. Volume is increased in 15 increments of 1.25dB each.
- Antenna:
Impedance 50 Ω
• AF telephone input:
Max. input voltage 8 V (if interference occurs, a commercially available 1:1 repeater should be connected into the signal cable).
- AUX input:
16 KΩ Input resistance, max. input voltage 1.7 Veff
- Telephone mute:
Low active level < 2 Volt
• Supply voltage:
12 Volt
- CD Connection:
Becker Silverstone 2630, Silverstone 2640, Silverstone 2660 and Silverstone 7860 CD changers can be connected.
- Playable CDs:
Only CDs which comply with DIN EN 60908 can be used. The use of 8 cm CDs with an adapter is not recommended
NOTICE
Dear Listener,
In conformance with current EC guidelines, any person may operate this radio receiver.
This unit conforms to the current valid European or harmonised national standards. This designation is your guarantee that the unit conforms to the applicable specifications regarding electromagnetic compatibility. This means that interference with other electrical/electronic devices caused by the unit, or interference with this unit caused by other electrical/electronic devices is largely prevented.
The EC type-approval mark (e1) issued by the Federal Office for Transport (KBA) in accordance with European Directive 95/54/EC governing the EMC of motor vehicles authorises installation and operation of the unit in motor vehicles (classes M, N and O).
With regard to the following European standards, the EMC requirements that apply specifically to this unit have been met:
- EN 55013
- EN 55020

024371
Correct disposal of this product (waste for electrical and electronic equipment)
(Applicable in European Union countries and other European countries with a separate collection scheme)
The label on the product or on the accompanying literature indicates that at the end of its life it cannot be disposed of together with normal household waste. Dispose of this unit separately from other waste so as not to harm the environment or human health through uncontrolled waste disposal. Recycle the unit to promote the sustained reuse of material resources.
Private users should contact the dealer where the product was brought or the responsible authorities to find out how they can recycle the unit in a environmentally friendly manner.
Commercial users should contact their supplier and consult the conditions of the sales contract. This product must not be disposed of together with other commercial waste.
Installation Guide
Prior to installation
Before starting installation, please read this installation guide carefully. In particular, please pay attention to the safety and installation instructions.
Symbols used in the installation guide

denotes instructions which are important for your safety and the safety of others.

denotes instructions which are important for the installation and function of the unit.
Safety instructions

Incorrect installation
Incorrect installation may result in damage to the unit or to the vehicle. Specialist knowledge and skills are required to install the unit and its components. We strongly recommend that you have the unit installed by a specialist workshop.

Risk of injury
Installing the components incorrectly may lead to injuries in the event of a road traffic accident or render safety devices ineffective. Please refer to the instructions provided by the vehicle manufacturer.

Damage to the airbag
Installing the components in the wrong location may damage the airbag or impair its operation. Do not install the components within the operating range of the airbag.

Risk of injury due to inadequate fastening
Fix the components in place so that they cannot be loosened in the event of a collision or sudden braking.
Installation Guide
Installation instructions

Damage due to reverse polarity or short-circuit Incorrect cable connections and short-circuits can seriously damage the unit. Disconnect the vehicle battery before installing the unit.

In order to avoid short-circuits and malfunctions, install the cables so that they cannot be pinched, kinked, chafed or detached.

Before installation, park the vehicle in a safe and level place and remove the ignition key.

In order to avoid malfunctions, it is absolutely essential to observe the relevant cable cross-section when using branch connections/cable connectors.

In order to avoid short-circuits and any associated risk of fire, cables which have to be cut must be properly insulated.
Connection diagram for the navigation system
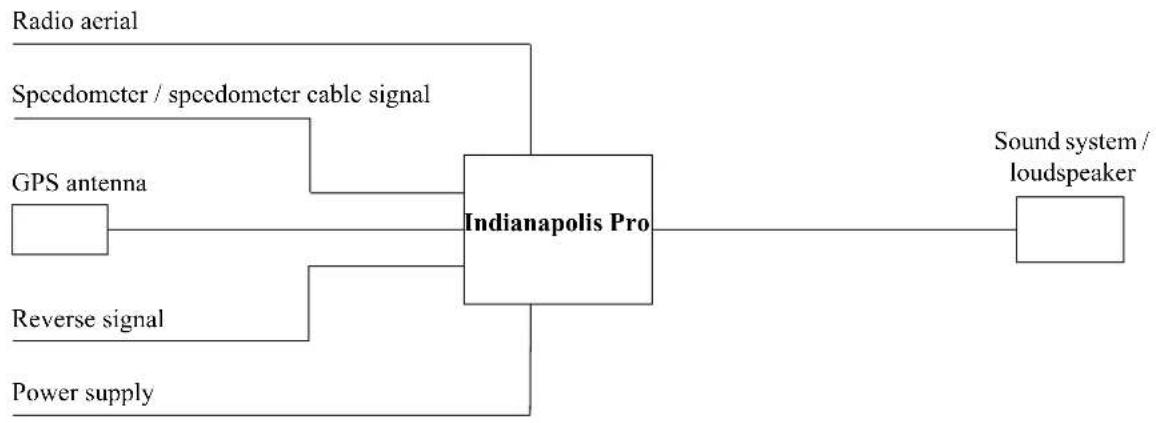
flowchart
graph LR
    A["Radio aerial"] --> B["Indianapolis Pro"]
    C["GPS antenna"] --> B
    D["Reverse signal"] --> B
    E["Power supply"] --> B
    F["Speedometer / speedometer cable signal"] --> B
    G["Sound system / loudspeaker"] --> H["Output"]
Note: Connection options are described in detail on Page 123.
Installation of the GPS antenna

Risk of injury
People with pacemakers should avoid physical contact with the magnetic antenna and should not carry the antenna on their person, as this may affect the function of the pacemaker.
Keep the magnetic antenna away from data storage media (disks, credit cards, magnetic cards etc.) and electronic and precision engineering equipment, as this may cause data to be deleted.
Do not use the antenna in areas at risk of explosion.
The antenna is to be affixed in such a manner that it cannot detach in the event of a collision or sudden braking.
Possible installation positions
- Outside the vehicle
a. Attach the antenna to a flat, pre-washed metal surface.
b. Then guide the antenna cable into the vehicle interior.

Risk of injury
The maximum vehicle speed for the antenna if magnetically attached is 180 km/h. The antenna must be removed or specially secured at higher speeds.
The antenna is not suitable for car-wash facilities.
- Inside the vehicle

The GPS antenna is not suitable for installation in vehicles with anti-glare windows (metalised thermo-glass or metal foil (can be seen on the window label - SIGLA SOL, SIGLA CHROM, SIGLA, KOOL-OF, SUNGATE, etc.) and vehicles with fine-meshed heating wires in the windows.

Information on installation position
When selecting the installation position, ensure that the antenna has a clear view in all directions, and that it is not covered by the windscreen wipers. Obstructions caused by the bonnet, window crossbeams and roof should be avoided as far as possible.
Concealed installation beneath the vehicle console is not permitted.
Installation on the vehicle side windows is not permissible.
The antenna cable should not run parallel to other cables in the vehicle.
The antenna cable should be routed via the shortest distance from the navigation system to the antenna. The excess cable should be attached directly below the antenna.
Installation Guide
a. Secure the antenna to the base plate (1) with magnets.
b. Remove protective strip from top of adhesive tape (2) and stick to the centre of the base plate underside.
c. Remove protective strip from bottom of adhesive tape (2) and stick the antenna and base plate onto the vehicle console beneath the windscreen at the installation position.


GPS reception can be affected by screens with screen antenna, windscreen heating or thermally insulated screens. Some thermally insulated screens are coated with titanium or silver oxide. Installation of the GPS antenna in the vehicle interior can considerably impair the function of the navigation system.
Installation of the microphone
The microphone should be placed in the vehicle to allow optimal recognition of the speaker's voice. Possible positions in the vehicle for the microphone can be seen in the following diagram.

The installation position should be as far away from the loudspeakers, and as near to the speaker, as possible. If problems occur, different positions should be tested. In order to pick up as little background noise as possible, the microphone has a narrow pick-up angle and must consequently be directed towards the driver.

natural_image
Line drawing of a person driving a car, showing steering wheel and dashboard (no text or symbols)A: Optimal installation position
B: Alternative installation position
C: Speaking direction on microphone
D: Velcro strip for attachment

Attach the hands-free microphone using the Velcro strip D (clean adhesion surfaces).

In order to avoid short-circuits and malfunctions, install the cables so that they cannot be pinched, kinked, chafed or detached.
Installation Guide
Connecting a microphone to the Indianapolis Pro
Insert the plug on the microphone connecting cable (A) into the jack provided (with the stop spring facing upwards) on the rear of the Indianapolis Pro.
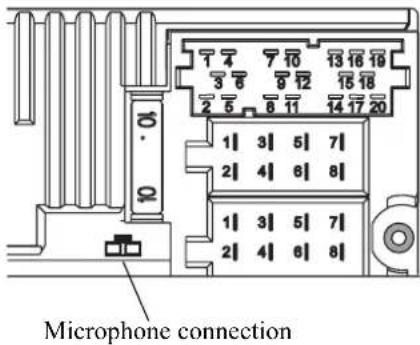

natural_image
Pure mechanical diagram showing a shaft and housing with no text or symbolsConnection of the reverse signal

The pick-up points for the reverse signal vary from vehicle to vehicle.
If you are in any doubt, please contact your vehicle manufacturer or authorised specialist workshop.
If the switch on the gearbox or shift linkage is accessible:
- Connect a separate lead to the activated contact.
Connect lead to socket A, pin 2.
Low - level = earth, high - level 12 V - 16 V
If the switch is not accessible:
- Check which lead is routed to the reversing lamp. Then, if necessary, remove the inner cover for the reversing light.
Connect a separate lead to the activated lead of the reversing lamp and connect to socket A pin 2.
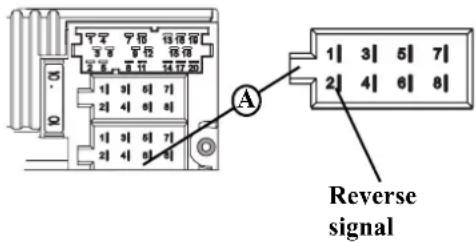
Connection of the speed signal (GAL) from the speedometer/speedometer cable

Accident hazard
Incorrectly connected wiring may result in damage to or destruction of vehicle components and safety devices. If you are in any doubt, please contact your vehicle manufacturer or authorised specialist workshop.
Electronic speedometer
- Remove the signal from the speedometer, extend and connect to socket A pin 1.

Depending on the vehicle equipment, the lead for the GAL signal is usually connected to the DIN - ISO plug of the car radio. The assignment of the DIN - ISO plug may vary depending on the vehicle type.
- Minimum requirement for the signal: 0 Hz - 4 kHz / square-wave signal (no inductive sensor) Low - level < 1.5 V, high - level 5 V - 16 V

If you do not know the exact installation position / location of the speed signal, please consult the vehicle manufacturer.

Mechanical speedometer with built-in speed sensor in the speedometer cable
- Remove the signal from the speed sensor, extend and connect to socket A pin 1.
- Minimum requirement for the signal: 0 Hz - 4 kHz / square-wave signal (no inductive sensor) Low - level < 1.5 V, high - level 5 V - 16 V

If you do not know the exact installation position / location of the speed signal, please consult the vehicle manufacturer.

Mechanical speedometer without speed sensor in the speedometer cable
A speed sensor must be built into the speedometer cable to generate a digital speed-dependent signal.
The VDO Adapter 2152.30300000 or a vehicle-specific adapter that fulfils the minimum requirements can be used. The VDO speed sensor is suitable for direct installation on the gearbox (no further installation parts required) or in the speedometer cable (in conjunction with additional universal installation parts).

If the sealed speedometer cable is released, a correct display cannot be guaranteed. Incorrect installation leads to improper functioning of the navigation system or of the speedometer.

natural_image
Technical line drawing of a mechanical connector or cable assembly (no text or symbols)Installation Guide
Installing the speed sensor directly on the gearbox
- Release the speedometer cable and screw speed sensor onto gearbox. Screw released speedometer cable onto the speed sensor and connect the wires.
Cable connections for the speed sensor
Brown - earth (terminal 31) Black - power supply (terminal 15), 9 - 16V, 30 mA Blue/red - signal for socket A pin 1
Installing the speed sensor in the speedometer cable
In this case, please contact your dealer or a VDO branch.
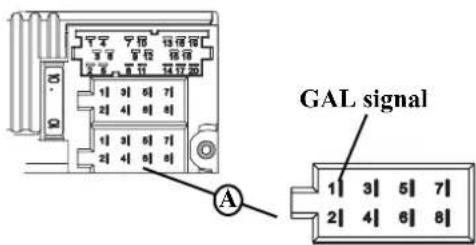
Installation/Removal of the unit
- Installation:
A universal bracket for DIN installation slots is integrated into this unit. An installation frame is not required. The unit is inserted into the installation slot and secured with the slides supplied.
To install, complete all electrical connections. Then push the unit into the installation slot. Subsequently, insert slides into the openings on the front of the unit until the first detent position (Fig. A). Now lock the radio in by pulling on both slides as shown in Fig. B. Subsequently, remove the slides.

The installation angle of the unit must not exceed 0irc to +35irc or +55irc - +90irc depending on the type of device.
- Removal:
To remove the unit, it must first be unlocked. To do this, push in both slides to the second detent position as shown in Figure A. Subsequently, withdraw the unit with both slides (Fig. C). Then remove the slides by pressing the springs on the right and left sides of the unit.
If the unit was previously installed in another vehicle, it may be necessary to adjust the springs on the unit before installation. To adjust the springs, insert slide as shown in Fig. D and subsequently adjust as shown in Fig. E (gently press slide in the direction of 1 while at the same time moving the slide in the direction of 2).
A

natural_image
Front view of a black audio recording device with control knobs and a digital display (no visible text or symbols)B
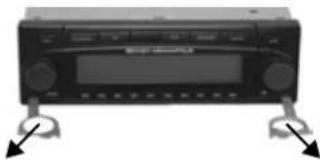
natural_image
Black electronic device with a digital display and two hanging connectors (no visible text or symbols)©

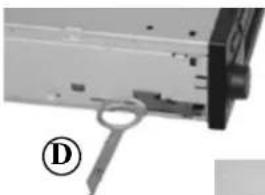
natural_image
Close-up of a mechanical component with a metallic key and part, labeled (D) in the corner (no readable text or symbols)
Installation Guide
Using GPS for the first time, and sensors
- Switch on the vehicle ignition to start using GPS for the first time and for the sensor test. Switching on the unit. Enter the code (see the operation guide for a detailed description).
- Press multifunction button and multifunction button at the same time.
- This calls up the menu for the initial GPS start-up and for the sensor test.
- Move the vehicle several metres forwards or backwards for the speed signal function test.

The number under Speed must change (even at a low speed). The number under Speed should not increase when idling or pressing the accelerator when the vehicle is parked.
- Engage the reverse gear for the reverse signal function test.

The arrows under Direction must change direction on engaging the reverse gear.
| TPTIC | GPS WAIT | |
| SWR4 KA | 101.6 | F: 1 S: 2 |
| Ant Rdt Res Rpr | S Swr + | ALM: 02 |
| Speed000 | Direction↓↓↓ | GPS WAITF: 1 S: 2ALM: 02 |
| Speed012 | Direction↓↓↓ | GPS WAITF: 1 S: 2ALM: 02 |
| Speed000 | Direction | GPS WAITF: 1 S: 2ALM: 02 |
- When using the GPS for the first time, the vehicle must be parked outdoors, while ensuring that it has a clear view in all directions (not in the immediate vicinity of buildings).
Information on the GPS reception is given in the right-hand part of the display.
Four different messages may appear:
- GPS OK: GPS reception is already available.
- GPS WAIT: It is necessary to wait for GPS reception. You must wait until GPS OK is displayed.
- GPS ANTENNA ERRORR: The GPS antenna is not properly connected.
- GPS MODUL ERROR: If this message is displayed, you will need to insert the navigation CD. If the message is still displayed, please contact the hotline.
| Speed012 | Direction↓↓↓ | GPS OKF: 3 S: 6ALM: 22 |
| Speed012 | Direction↓↓↓ | GPS WAITF: 1 S: 2ALM: 02 |
| Speed012 | Direction↓↓↓ | GPSANTENNAERROR |
| Speed012 | Direction↓↓↓ | GPSMODULERROR |

You must wait until GPS OK, F: 2 and ALM: 22 (or a higher value) are displayed.
This procedure (first reception of the necessary GPS data) may take a few minutes. The unit must remain switched on for the entire duration of this procedure. The vehicle must not be moved. If after 5 minutes there has been no change in the values, the parked position (clear view in all directions as far as possible) or the installation location of the GPS antenna must be checked.
- The menu for initial GPS start-up and for the sensor test is quit by simultaneously pressing the multifunction button and multifunction button .10

Installation Guide
Installation of the Navigation Software
• P
1 NAVi
S S
- Insert the Navigation CD to install the software for the navigation system.
• After the navigation software has been installed, the adjacent display appears. The language selection is then requested. - With the right rotary control, select language. The language selection is accepted by pressing the control.
With some languages, a selection can be made between male and female voices.
With the right rotary control select voice. The voice is applied and installed by pressing the control.
The adjacent display appears after installation. Then press the right rotary control ● confirm.

The language selection can be changed at a later time, as described in the operating guide.
NAVIGATION IS BEING ACTIVATED! PLEASE OBSERVE RTR
DEUTSCH
ENGLISH GB
ENGLISH US
FEMALE 1
MALE 1
LANGUAGE IS LOADED PRESS OK

Calibration
After commissioning, a calibration journey is required. During the journey, the speed signal (GAL) is automatically adapted to the vehicle-specific data and the gyro sensor is automatically adapted to the installation position of the unit.
The distance to be covered depends on the type of vehicle and the local conditions.

The navigation system is only ready for operation on completion of the calibration journey. The main navigation menu is displayed. Final precision is only achieved after a further journey.
- The adjacent display appears after the language installation.
It is possible that GPS reception has deteriorated as a result of changing the vehicle position and due to obstructions. In this case, the adjacent display appears.

Adequate GPS reception must be ensured for the calibration journey. This means at least 2-D FIX. With GPS FIX 3-D the calibration will be quicker. However: a lower accuracy of the GPS signal (2-D FIX) does not lead to a poorer calibration, but instead will mean that the time and distance needed for the calibration will increase.
If, even after a relatively long period of time, the display with the request CALIBRATION RIDE CAN START! does not appear, then
CALIBRATION RIDE CAN START! WHEEL: 3451, GYRO: 30, SAT: 4 54°49'14N 11°38'34E
PLEASE WAIT FOR GPS RECEPTION! CALIBRATION RIDE NOT POSSIBLE 27.10.2003 10:22 1-D FIX
Installation Guide
you should check the GPS reception conditions again (as under Service Mode in the Section Function test of the GPS antenna (GPS-INFO) 116).
As soon as the display with the request CALIBRATION RIDE CAN START! appears, the calibration journey can be started.

A calibration journey can also be performed in a non-digitised area. The insertion of the Navigation CD is not absolutely necessary after the navigation software has been installed. Without the Navigation CD inserted, no location is displayed.
- The basic requirement for a calibration journey is: driving 200 - 300 metres in a straight line, then turning by at least 60 degrees and then driving 200 - 300 metres in a straight line again, and turning again.

The direction you turn is of no significance. If these conditions cannot be fulfilled due to the road or the fact that you do not always have optimum GPS reception, this will not lead to a poorer calibration, but will simply mean the time and distance necessary for the calibration ride will be longer. If the unit is switched off during the calibration ride, language installation is requested when the unit is switched on again. Re-installation can be skipped by pressing the
Installation Guide
- Calibration has been completed successfully if the main navigation menu is displayed.
- For correct navigation on routes with time-dependent traffic guidance, the time should be set correctly as described under “System settings” in the operation guide.
Service Mode
In Service Mode, various functions can be checked in detail and the calibration can be modified.
- Switch on the unit (see operating guide) Enter code (see operating guide)
- If the unit has already been calibrated, select the Main Navigation Menu by pressing the NAVI If the unit has not been calibrated, proceed as described in the next point but one.
- By pressing the key one N408 in, you access the System Settings.
- Press and hold the multifunction buttons. Now press and hold the multifunction button. This calls up the Service Mode.

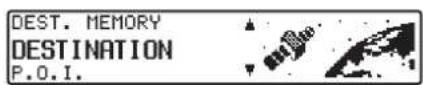

Installation Guide
The following functions can be selected in the Service Mode:
• GPS-INFO - Test of GPS Function
- CALIBRATION - Function to delete the calibration or to enter a new calibration
• CALIBRATION RIDE - Calibration Journey Display
• MODULE TEST - Internal Component Test
• SENSORS - Sensor Function Test
• SPEECH TEST - Test of language
• DEMO - Setting of the Demo mode
• VERSION - the Navigation CD version is displayed
By turning the right rotary control ●elect the desired entry (upper-case letters) and press to confirm.
Function test of the GPS antenna (GPS-INFO)
In the Service Mode, select GPS-INFO with the right rotary control and press to confirm.
When functionality and GPS reception are working correctly, the number of satellites received (i.e. 3), date and time (i.e. 17.12.03) and the type of positioning FIX: currently possible (i.e. 40) are displayed.

For successful and fast calibration, a minimum of FIX 20 is required. A certain amount of time may be required to reach this value (do not move the vehicle during this period).
In order to quit the GPS test, press the 16.2V1n. The unit switches back to the Service Mode.



Changing the calibration (CALIBRATION)
Deleting the calibration:
If the navigation system is removed from one vehicle and installed in another, the calibration must be performed again. However, to do so, the current calibration data must be deleted.
In the Service Mode, select CALIBRATION with the right rotary control and press to confirm.
With the right rotary control select DELETE and press to confirm. The calibration is deleted and the unit returns to the Service Mode.
Calibration setting:

Calibration settings should only be made when the values to be entered are known. The unit cannot perform correct route calculations if incorrect values are entered.
It is possible to provide calibration settings.
In the Service Mode, select CALIBRATION with the right rotary control and press to confirm.
With the right rotary control select MODIFY and press to confirm.
Unit rotation can be selected in degrees by turning the right rotary control and pressing to confirm.



Installation Guide

Unit rotation corresponds to horizontal rotation. A positive value means rotation of the front of the unit towards the driver (LHD).
The unit inclination can now be selected in degrees by turning the right rotary control and pressing to confirm.

Unit inclination corresponds to vertical inclination. A positive value means upward inclination of the front of the unit.
The number of wheel impulses per wheel revolution (if known) can then be selected by turning the right rotary control and pressing to confirm.

If the number of wheel impulses per wheel revolution is not known, UNKNOWN must be selected. It is then not possible to enter tyre data.
The previously entered data is displayed once more. If the data entered is correct, press the right rotary control ● If correction is necessary, select MODIFY by turning the right rotary control and press to confirm. The values can then be re-entered.
Once the previously entered data has been confirmed, the tyre data can be entered or self-calibration can be started. To enter the tyre data, select INPUT TYRE VALUES by turning the right rotary control and press to confirm.
UNIT INCLINATION
+0
WHEEL IMPULSES
UNKNOWN
TURN: +0 INCL: 25 IMP: 48 MODIFY
START SELF-CALIBRATION
INPUT TYRE VALUES
Installation Guide
Enter the correct tyre size using the right rotary control and confirm the entry by pressing for more than 2 seconds.

The letter "R" cannot be entered. 3 numbers must be entered before and after the slashes. Insert a "0" before any missing numbers.
Example:
Specification in vehicle registration papers: 185/55R15 81T
Input into unit: 185/055/015
Then select between NEW TYRE TREAD and USED TYRE TREAD to specify approximately the tread depth by turning the right rotary control ●
Press the right rotary control to confirm the selection.
The previously entered data is displayed once more. If the data entered is correct, press the right rotary control ●
If correction is necessary, select MODIFY by turning the right rotary control and press to confirm. The values can then be re-entered.
After confirming the tyre data or the previously confirmed point START SELF-CALIBRATION, the adjacent display appears.
After a short time, the unit switches to the main navigation menu or the calibration journey is requested.

The unit is now in calibration status 2. Absolute precision is, however, only achieved as of calibration status 3.
| INPUT TYRES | |
| TYRE SIZE: ----/----/---- | 5 |
| 01234678 9 | √ + |
NEW TYRE TREAD ( > 5 MM) USED TYRE TREAD (<= 5 MM)
185/055/015, NEW MODIFY
INPUT DONE VALUES TRANSFERRED PRESS OK
Installation Guide
Status of the calibration journey (CALIBRATION RIDE)
In the Service Mode, select CALIBRATION RIDE with the right rotary control and press to confirm.
The calibration status (i.e. STATUS: 2) and the type of positioning (i.e. 3D) are displayed. After calibration is completed, instead of WHEEL and REV., the road currently being driven on is displayed (provided it is included in the digital map).
Testing the system components (MODULE TEST)
A test program automatically tests the internal components of the navigation system.
In the Service Mode, select MODULE TEST with the right rotary control and press to confirm.
If OK is displayed, press the NAVI button. The unit switches back to the Service Mode.
Function test of the GAL signal, reverse signal, unit-internal sensors (SENSORS)
- In the Service Mode, select SENSORS with the right rotary control and press to confirm.
- Move the vehicle several metres forwards or backwards for the GAL signal function test.

The number value after WHEEL must increase (also at low speed).
The number value after WHEEL should not increase when the vehicle is in neutral or when the accelerator is pressed while the vehicle is parked.

STATUS: 1 3D-FIX
WHEEL: 4567 REV.:1
X:5105287 Y:9329742 SAT:6/9


WHEEL: 35150 REV.
GYRO: 10
- Engage the reverse gear for the reverse signal function test.

The number value after REV. must jump from 0 to 1 (1 to 0).
In order to quit the sensor test, press the ☐. The unit switches back to the Service Mode.
Test language (SPEECH TEST)
A test program is used to test the voice.
- In the Service Mode, select SPEECH TEST with the right rotary control and press to confirm.
The announcement "Please insert Navigation CD" is given. By pressing the right rotary control the announcement can be repeated.
Press the [REDACT] in after completing the test. The unit switches back to the Service Mode.

Installation Guide
Demo Mode (DEMO)
The Demo Mode is intended for demonstration purposes. A fixed location is given to the unit (Hamburg Werderstraße).
- In the Service Mode, select and press to confirm. DEMO with the right rotary control
Select between ON and OFF by briefly pressing the right rotary control by holding down the right rotary control, the selection is confirmed.
- You can now enter a destination as described in the operation guide.
To exit the Demo Mode, select OFF with the right rotary control and press to confirm.


Connections

Socket A
1 Speed Signal (GAL)
2 Reversing lamp signal
3 Telephone mute / clearing function
4 Permanent positive (Terminal 30)
5 Control output for automatic antenna / amplifier
6 Illumination (Terminal 58)
7 Switched positive (Terminal 15)
8 Earth (Terminal 31)
Socket B
1 Loudspeaker right rear +
2 Loudspeaker right rear -
3 Loudspeaker right front +
4 Loudspeaker right front -
5 Loudspeaker left front +
6 Loudspeaker left front -
7 Loudspeaker left rear +
8 Loudspeaker left rear -
Socket C1
1 LineOut left rear
2 LineOut right rear
3 A F E a r t h
4 LineOut left front
5 LineOut right front
6 Subwoofer LineOut
Socket C2
7-12 Specific connection for Becker CD changer
Socket C3
13 AF - Telephone input
14 Earth – Telephone input
15-17 Specific connection for Becker CD changer
18 CD AF Earth (AUX)
19 CD AF left (AUX)
20 CD AF right (AUX)


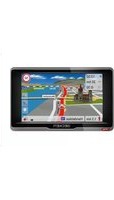
- Safety instructions 5
- Information regarding
- general road safety 6
- Arrangement of controls 7
- Anti-theft device 8
- General Operation 10
- Navigation mode 12
- Destination entry 17
- Route menu
- Storing a destination in the
- Route guidance calculation 26
- Stopover
- Detour function
- Explanation of navigation 28
- Dynamic route guidance
- Information during
- Destination memory 38
- System settings 42
- Contents
- Radio mode 48
- CD mode 58
- MP3 mode 62
- CD changer mode 69
- Telephone mode 73
- User settings 80
- Service menu
- Explanation
- Technical terminology glossary
- Technical data
- NOTICE
- Installation Guide 96
- Safety instructions
- Information regarding general road safety
- Anti-theft device
- Entering the code number
- Example:
- Note
- Attention:
- Removing the portable panel
- Warning Accident hazard
- Attaching the portable panel
- General operation
- Switching on/off
- Note:
- Setting the volume
- Activating the tone menu
- Setting the bass
- Setting the treble
- Fader
- Setting the balance
- Linear adjustment
- Adjusting the volume of the subwoofer or centre speaker
- Switching loudness on / off
- Navigation mode
- What is navigation?
- Navigation CDs
- Navigation with four European CDs
- Notes:
- General instructions
- Selecting navigation
- Main navigation menu
- Destination entry
- Selecting a country
- Entering a destination
- Selecting destination via post code
- Entering the destination town
- Entering the destination town centre
- Destination input via coordinates
- • HOUSE NUMBER
- - CROSSING
- - ROUTE SETTINGS
- Entering house number for destination road
- Selecting intersection for destination road
- EDINBURGH ROAD
- Selecting route settings
- • DYNAMIC ROUTE
- - RESTRICTIONS
- Storing a destination in the destination memory
- Deleting a destination from the destination memory
- Destination memory full
- Route guidance calculation
- Recalculating route.
- Entering a stopover
- Starting route guidance to a stopover
- START
- Deleting a stopover
- Stopover reached
- Entering length of traffic jam
- Cancelling route guidance
- Explanation of navigation
- Warning
- Accident hazard
- Dynamic route guidance with TMC
- What is dynamic route guidance?
- Displaying traffic information
- Information during route guidance
- Requesting journey duration and kilometres travelled
- Displaying/changing settings during route guidance
- Changing ROUTE :
- Changing ETA:
- Changing DURATION:
- Changing SPEEDLIMITS:
- Requesting current time
- Calling up current position
- Calling up road list
- Destination memory
- P.O.I.
- • P O TOWN/COUNTRY
- Points of interest (P.O.I.) CD
- Terms of licence
- System settings
- Setting time
- Saving position
- Calling up Position
- Selecting a game
- Setting the language
- Animation
- Switching announcement of arrival time on /off
- Selecting the units of measurement
- Influencing the calculation of ETA
- Switching the speed limits display on/off
- Setting the time display
- Radio mode
- Switching on radio mode
- Switching on Radio Menu Mode
- Selecting the FM waveband
- Selecting the AM waveband
- Settings for station selection
- Dynamic autostore (FM-DAS)
- Station search FM-DAS
- Station search MW, LW, SW
- Scan search
- Programme filtering for FM DAS
- Programme type selection (PTY)
- Turning PTY display on / off
- Calling up / storing FM stations
- Storing:
- Calling up a preset:
- Calling up/storing MW, LW, SW stations
- Calling up stations:
- Autostore MW, LW
- Manual FM tuning
- Manual Tuning MW, LW, KW
- Regionalisation
- Switching regionalisation on / off
- Turning frequency display on or off
- Switching radio text on / off
- Traffic programme (TP)
- Activating / quitting the TP menu
- Activating:
- Quitting:
- Switching TP on / off
- Switching on:
- Switching off:
- Selecting automatic tracking
- Selecting / cancelling direct programming
- Selecting:
- Cancelling:
- Switching mute on/off
- Interrupting TP announcements
- TP Announcement volume
- Display for receivable TMC stations
- Telephone muting
- CD mode
- Notes on compact discs (CD)
- Inserting / ejecting CDs
- Inserting CDs:
- Ejecting CDs:
- Forward / backward track skipping
- Fast forward / reverse
- Track repeat
- Random play
- CD settings menu
- Displaying number of tracks
- Switching between Track/CD Text display
- Temperature protection circuit
- Notes on CD-R and CD-RWs
- Notes on copy-protected CDs
- MP3 mode
- General notes on MP3
- Creating an MP3/WMA storage medium
- Creating a playlist
- Inserting /ejecting MP3 CDs
- Switching between folder/playlist
- Changing folder/playlist
- MP3 settings menu
- Number of folders/playlist tracks
- Displaying name of folder/playlist
- Switching between track/ID3 tag display
- Audio playback via an optional Apple™ iPod
- Operational readiness of CD changer
- Loading / ejecting the CD magazine
- Selecting CD changer mode
- ▶Press CD.
- Changing/selecting CDs
- CD changer mode
- CDC settings menu
- Displaying track information
- Displaying number of tracks and total playing time
- Naming a CD
- Displaying names:
- Assigning/changing names:
- Deleting saved names:
- CD filter function
- Switching filter function on/off
- Filtering tracks:
- Warning Risk of injury
- Telephone mode
- Requesting telephone mode
- Mobile phone already connected
- Mobile phone has just been connected
- Mobile phone not yet connected
- Connecting mobile phone
- Connecting automatically
- Dialling numbers
- Number is busy
- Call lists
- - Missed calls
- - Calls received
- - Numbers dialled
- Calling a number from a call list
- Deleting call lists
- Accepting a call
- Rejecting a call
- Terminating a call
- User settings
- Opening / quitting User Settings menu
- Setting the GAL (Gal)
- Telephone mute function (Tel)
- Display brightness (Lum)
- LED setting
- Setting reception optimisation (M/S)
- Setting navigation announcements (Nav)
- AUX input (Aux)
- Display compass (Cmp)
- Signal tone volume (BeV)
- Calling up / exiting service menu
- CD Changer reset
- Bluetooth module reset
- Unit reset
- RDS SYSTEM
- DAS Seek Qual. level
- DAS Seek Name level
- RDS Stations level
- Stations Fix level
- PTY (programme type)
- Explanations
- Autostore
- AUX
- Balance
- Bluetooth
- CDC
- CD-R
- CD-RW
- Code number
- Folder
- GAL
- GPS
- ID3-Tag
- Loudness
- M3U
- MP3
- Playlist
- PLS
- PTY identification
- Radio text
- RDS
- Reset
- TA
- TMC
- TP
- WMA
- Index
- A
- B
- C
- D
- E
- F
- G
- H
- I
- J
- L
- M
- N
- P
- R
- S
- T
- Correct disposal of this product (waste for electrical and electronic equipment)
- Installation Guide
- Prior to installation
- Symbols used in the installation guide
- Incorrect installation
- Risk of injury
- Damage to the airbag
- Risk of injury due to inadequate fastening
- Installation instructions
- Connection diagram for the navigation system
- Installation of the GPS antenna
- Possible installation positions
- - Outside the vehicle
- Information on installation position
- Installation of the microphone
- Connecting a microphone to the Indianapolis Pro
- Connection of the reverse signal
- If the switch on the gearbox or shift linkage is accessible:
- If the switch is not accessible:
- Connection of the speed signal (GAL) from the speedometer/speedometer cable
- Electronic speedometer
- Mechanical speedometer with built-in speed sensor in the speedometer cable
- Mechanical speedometer without speed sensor in the speedometer cable
- Installing the speed sensor directly on the gearbox
- Cable connections for the speed sensor
- Installing the speed sensor in the speedometer cable
- Installation/Removal of the unit
- Using GPS for the first time, and sensors
- Installation of the Navigation Software
- Calibration
- Service Mode
- Function test of the GPS antenna (GPS-INFO)
- Changing the calibration (CALIBRATION)
- Status of the calibration journey (CALIBRATION RIDE)
- Testing the system components (MODULE TEST)
- Function test of the GAL signal, reverse signal, unit-internal sensors (SENSORS)
- Test language (SPEECH TEST)
- Demo Mode (DEMO)
- Socket A
- Socket B
- Socket C1
- Socket C2
- Socket C3
Brand : BECKER
Model : Indianapolis Pro 7951
Category : Car radio