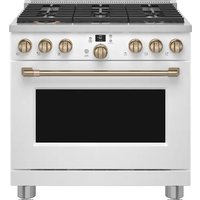
C2Y366P4TW2 - Cooker Café - Free user manual and instructions
Find the device manual for free C2Y366P4TW2 Café in PDF.


| Product Type | Professional Gas Range |
| Brand | Café |
| Model | C2Y366P4TW2 (also C2Y366, C2Y486) |
| Dimensions | 91 cm (36 in) or 121 cm (48 in) |
| Power Source | Natural gas (convertible to propane) |
| Surface Burners | Sealed burners: round, air induction, multi-ring |
| Griddle | Present, thermostatic control 200-450 °F (93-232 °C) |
| Oven | Dual capacity (48 in models), modes: bake, convection, broil, warm, proof, self-clean, steam clean |
| Wi-Fi and Connectivity | Wi-Fi compatible, SmartHQ app, Bluetooth Chef Connect |
| Temperature Probe | Included, for precise cooking |
| Racks | Partial extension racks, low profile rack, roasting rack |
| Maintenance and Cleaning | Steam cleaning, self-cleaning cycle, removable burners, drip tray |
| Safety | Anti-tip device, door lock, auto shut-off, flame detection |
| Spare Parts | Available via CAFÉ customer service |
| Repairability | Repair by qualified technician; parts and accessories online |
| General Information | 133-page manual, 1-year limited warranty |
Frequently Asked Questions - C2Y366P4TW2 Café
User questions about C2Y366P4TW2 Café
0 question about this device. Answer the ones you know or ask your own.
Ask a new question about this device
Download the instructions for your Cooker in PDF format for free! Find your manual C2Y366P4TW2 - Café and take your electronic device back in hand. On this page are published all the documents necessary for the use of your device. C2Y366P4TW2 by Café.
USER MANUAL C2Y366P4TW2 Café
natural_image
Top-down view of a festive dining table setup with plates, cutlery, and decorative floral arrangements (no text or symbols visible)
natural_image
Solid dark green rectangle with no visible text, symbols, or features.CAFE
DISTINCT BY DESIGN
Owner's Manual

natural_image
Solid red rectangular background with no text, symbols, or discernible features.
natural_image
Top-down view of fresh mushrooms on a wooden cutting board with garlic and herbs (no text or symbols visible)TM
Owner's Manual
36" and 48" Professional Dual Fuel Ranges
Models: C2Y366, C2Y486
Contents
Safety Information....3
Using the Range
Connecting Your Wifi Enabled Range 8
Features of the Range and Cooktop 9
Surface Burners ....
Top-of-the-Range Cookware 12
Wok Cooking 12
Griddle 13
Features of the Oven ....
Oven Control and Timer 15
Settings 16
Oven Air Vents ....
Aluminum Foil and Oven Liners 18
Oven Racks ....
Oven Modes 20
Temperature Probe 26
Oven Cooking Guide 28
Oven Cookware Guidelines 28
Air Fry Cooking Guide 30
Care And Cleaning
Control Panel and Knobs 31
Broiler Pan,Grid, and Roasting Rack 31
Oven Exterior 3:
Oyen Interior 32
Steam-Cleaning 32
Self-Cleaning 33
Oven Racks 34
Low Profile Oven Rack 35
Temperature Probe ....
Oven Bottom 35
Oven Door 36
Oven Lights 37
Round, Inspiral, and Multi-Ring Burners ..... 3 8
Spark Igniter and Electrodes 39
Burner Grates 39
Grease Trough 39
Griddle 39
Troubleshooting Tips 40
Limited Warranty 43
Consumer Support 44
Write the model and serial numbers here:
Model # ____
Serial # ____
You'll find them on a label located below the control panel on the rating label which is visible when the oven door is opened.
English • Français • Español
THANK YOU FOR MAKING CAFÉ A PART OF YOUR HOME.
We take pride in the craftsmanship, innovation and design that goes into every Café product, and we think you will too. Among other things, registration of your appliance ensures that we can deliver important product information and warranty details when you need them.
Register your Café appliance now online. Helpful websites are available in the Consumer Support section of this Owner's Manual. You may also mail in the pre-printed registration card included in the packing material.
CAFÉ
DISTINCT BY DESIGN™
IMPORTANT SAFETY INFORMATION READ ALL INSTRUCTIONS BEFORE USING THE APPLIANCE
WARNING
If the information in this manual is not followed exactly, a fire or by result, causing property damage, personal injury or death.
- Do not store or use gasoline or other flammable vapors and liquids in the vicinity of this or any other appliance.
- WHAT TO DO IF YOU SMELL GAS
■ Do not try to light any appliance.
■ Do not touch any electrical switch; do not use any phone in your building.
- Immediately call your gas supplier from a neighbor's phone. Follow the gas supplier's instructions.
■ If you cannot reach your gas supplier, call the fire department.
- Installation and service must be performed by a qualified installer, service agency or the gas supplier.
ANTI-TIP DEVICE
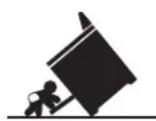
WARNING
Tip-Over Hazard
- A child or adult can tip the range and be killed.
• Install the anti-tip bracket to the wall or floor. - Engage the range to the anti-tip bracket by sliding the range back such that the foot is engaged.
- Re-engage the anti-tip bracket if the range is moved.
- Failure to do so can result in death or serious burns to children or adults.
To reduce the risk of tipping the range, the range must be secured by a properly installed anti-tip bracket. See installation instructions shipped with the bracket for complete details before attempting to install.
For Professional Gas Ranges
To check if the bracket is installed and engaged properly, look underneath the range to see that the rear leveling leg is engaged in the bracket. On some models, the kick panel can be removed for easy inspection. If visual inspection is not possible, slide the range forward, confirm the anti-tip bracket is securely attached to the floor or wall, and slide the range back so the rear leveling leg is under the anti-tip bracket.
If the range is pulled from the wall for any reason, always repeat this procedure to verify the range is properly secured by the anti-tip bracket.
Never completely remove the leveling legs or the range will not be secured to the anti-tip device properly. Anti-Tip Bracke
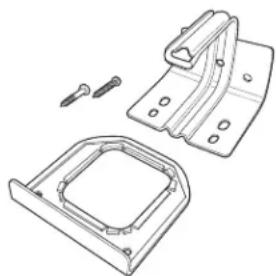
natural_image
Technical line drawing of a mechanical bracket assembly with mounting holes and a separate view (no text or symbols)Anti-Tip Bracket Kit Included
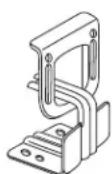
Rear View
READ AND SAVE THESE INSTRUCTIONS
IMPORTANT SAFETY INFORMATION READ ALL INSTRUCTIONS BEFORE USING THE APPLIANCE
WARNING
Read all safety instructions before using the product. Failure to follow these instructions may be theatrical shock, serious injury or death.
WARNING
GENERAL SAFETY INSTRUCTIONS
WARNING
NEVER use this appliance as a space heater to heat or warm the room. Doing so may result in carbon monoxide poisoning and overheating of the oven.
- Use this appliance for its intended purpose as described in this owner's manual.
■ Have your range installed and properly grounded by a qualified installer in accordance with the provided installation instructions.
■ Any adjustment and service should be performed only by a qualified gas range installer or service technician. Do not attempt to repair or replace any part of your range unless it is specifically recommended in this manual. - Your range is shipped from the factory set for use with natural gas. It can be converted for use with propane (LP). If required, these adjustments must be made by a qualified technician in accordance with the installation instructions and local codes. The agency performing this work assumes responsibility for the conversion.
■ Have the installer show you the location of the range gas shut-off valve and how to turn it off if necessary.
■ Dual Fuel: If the heating element in the oven develops a glowing spot or shows other signs of damage, do not use that area of the range. A glowing spot indicates the element may fail and present a potential burn, fire, or shock hazard. Turn the heating element off immediately and have it replaced by a qualified service technician.
■ Before performing any service, unplug the range or disconnect the power supply at the household distribution panel by removing the fuse or switching off the circuit breaker.
■ Be sure all packing materials are removed from the range before operating to prevent ignition of these materials. - Avoid scratching or impacting glass displays. Doing so may lead to glass breakage. Do not cook on a product with broken glass. Shock, fire, or cuts may occur.
■ Do not leave children alone or unattended in an area where an appliance is in use. They should never be allowed to climb, sit or stand on any part of the appliance.
Do not store items of interestinets above an oven - childrenven to reach items could be
■ CACHON Do not store items of interest to children in cabinets above an oven - children climbing on the oven to reach items could be seriously injured.
■ Never block the vents (air openings) of the range. They provide the air inlets and outlets that are necessary for the range to operate properly with correct combustion. Air openings are located at the rear of the cooktop, at the top and bottom of the oven door, and at the bottom of the range.
■ Use only dry pot holders—moist or damp pot holders on hot surfaces may result in burns from steam. Do not let pot holders touch surface burners, burner grate, or oven heating element. Do not use a towel or other bulky cloth in place of pot holders.
- Do not touch the heating elements or the interior surface of the oven. These surfaces may be hot enough to burn even though they are dark in color. During and after use, do not touch, or let clothing or other flammable materials contact any interior area of the oven; allow sufficient time for cooling first. Other surfaces of the appliance may become hot enough to cause burns. Potentially hot surfaces include the burners, grates, oven vent opening, surfaces near the opening, crevices around the oven door, metal trim parts above the door, any backguard, or high shelf surface.
■ Do not heat unopened food containers. Pressure could build up and the container could burst, causing an injury.
■ Cook food thoroughly to help protect against foodborne illness. Minimum safe food temperature recommendations can be found at IsItDoneYet.gov and fsis.usda.gov. Use a food thermometer to take food temperatures and check several locations.
CAUTION
READ AND SAVE THESE INSTRUCTIONS
IMPORTANT SAFETY INFORMATION READ ALL INSTRUCTIONS BEFORE USING THE APPLIANCE
GENERAL SAFETY INSTRUCTIONS (cont.)
■ Do not allow anyone to climb, stand or hang on the oven door, drawer or cooktop. They could damage the range or tip it over causing severe injury or death.
- Keep the ventilator hood and grease filters clean to maintain good venting and to avoid grease fires. Turn the ventilator OFF in case of a fire or when intentionally "flaming" liquor or other spirits on the cooktop. The blower if in operation, could spread the flames.
KEEP FLAMMABLE MATERIALS AWAY FROM THE RANGE
Failure to do so may result in fire or personal injury.
- Do not store or use flammable materials in an oven or near the cooktop, including paper, plastic, pot holders, linens, wall coverings, curtains, drapes and gasoline or other flammable vapors and liquids.
■ Never wear loose-fitting or hanging garments while using the appliance. These garments may ignite if they contact hot surfaces causing severe burns.
■ Do not let cooking grease or other flammable materials accumulate in or near the range. Grease in the oven or on the cooktop may ignite.
IN THE EVENT OF A FIRE, TAKE THE FOLLOWING STEPS TO PREVENT INJURY AND FIRE SPREADING
- Do not use water on grease fires. Never pick up a flaming pan. Turn the controls off. Smother a flaming pan on a surface unit by covering the pan completely with a well-fitting lid, cookie sheet or flat tray. Use a multi-purpose dry chemical or foam-type fire extinguisher.
■ If there is a fire in the oven during baking, smother the fire by closing the oven door and turning the
oven off or by using a multi-purpose dry chemical or foam-type fire extinguisher.
If there is a fire in the oven during self-clean, turn the oven off and wait for the fire to go out. Do not force the door open. Introduction of fresh air at self-clean temperatures may lead to a burst of flame from the oven. Failure to follow this instruction may result in severe burns.
SELF-CLEANING OVEN SAFETY INSTRUCTIONS
The self-cleaning feature operates the oven at temperatures high enough to burn away food soils in the oven. Follow these instructions for safe operation.
■ Do not touch oven surfaces during self-clean operation. Keep children away from the oven during self-cleaning. Failure to follow these instructions may cause burns.
■ Before operating the self-clean cycle, remove pans, shiny metal oven racks, and other utensils from the oven. Only porcelain-coated oven racks may be left in the oven.
■ Before operating the self-clean cycle, wipe grease and food soils from the oven. Excessive amount of grease may ignite leading to smoke damage to your home.
If the self-cleaning mode malfunctions, turn the oven off and disconnect the power supply. Have it serviced by a qualified technician.
- Do not use a protective coating to line the oven and do not use commercial oven cleaner unless certified for use in a self-cleaning oven.
- Do not clean the door gasket. The door gasket is essential for a good seal. Care should be taken not to rub, damage or move the gasket.
■ IMPORTANT: The health of some birds is extremely sensitive to the fumes given off during the self-cleaning cycle of any range. Move birds to another well-ventilated room.
READ AND SAVE THESE INSTRUCTIONS
IMPORTANT SAFETY INFORMATION READ ALL INSTRUCTIONS BEFORE USING THE APPLIANCE
WARNING
COOKTOP SAFETY INSTRUCTIONS
WARNING
NEVER Operate the
Top Surface Cooking Section of this Appliance Unattended.
- Failure to follow this warning statement could result in fire, explosion, or burn hazard that could cause property damage, personal injury, or death.
- If a fire should occur, keep away from the appliance and immediately call your fire department.
DO NOT ATTEMPT TO EXTINGUISH AN OIL/GREASE FIRE WITH WATER.
■ Never leave oil unattended while frying. If allowed to heat beyond its smoking point, oil may ignite resulting in fire that may spread to surrounding cabinets. Use a deep fat thermometer whenever possible to monitor oil temperature.
■ To avoid oil spillover and fire, use the minimum amount of oil when using a shallow pan-frying and avoid cooking frozen foods with excessive amounts of ice.
■ Use proper pan size and avoid pans that are unstable or easily tipped. Select cookware that is matched to the size of the burner. Burner flames should be adjusted so that they do not extend beyond the bottom of the pan. Excessive flame may be hazardous.
■ Always use the LITE position when igniting the top burners and make sure the burners have ignited.
■ When using glass/ceramic cookware, make sure it is suitable for cooktop service; others may break because of sudden change in temperature.
■ To minimize the possibility of burns, ignition of flammable materials and spillage, the handle of a container should be turned toward the center of the range without extending over nearby burners.
■ Do not use a wok with a round metal support ring. The ring may trap heat and block air to the burner resulting in a carbon monoxide hazard.
■ Do not attempt to lift the cooktop. Doing so may damage the gas tubing to the surface burners resulting in a gas leak and risk of fire.
■ Do not use aluminum foil to cover the grates or line any part of the cooktop. Doing so may result in carbon monoxide poisoning, overheating of the cooktop surfaces, or a potential fire hazard.
READ AND SAVE THESE INSTRUCTIONS
IMPORTANT SAFETY INFORMATION READ ALL INSTRUCTIONS BEFORE USING THE APPLIANCE
OVEN SAFETY INSTRUCTIONS
NEVER cover any slots, holes, or passages in the oven bottom or cover an entire rack with materials such as aluminum foil or oven liners. Doing so blocks air flow through the oven and may cause carbon monoxide poisoning. Never place foil or oven liners on the oven bottom. They can trap heat causing risk of smoke or fire.
■ Stand away from the range when opening the oven door. Hot air or steam which escapes can cause burns to hands, face and/or eyes.
■ Never place cooking utensils, pizza or baking stones, or any type of foil or liner on the oven floor. These
items can trap heat or melt, resulting in damage to the product and risk of shock, smoke or fire.
■ Place oven racks in desired location while oven is cool. If rack must be moved while oven is hot, be careful to avoid touching hot surfaces.
- Do not leave items such as paper, cooking utensils, or food in the oven when not in use. Items stored in an oven can ignite.
■ Do not leave items on the cooktop near the oven vent. Items may overheat resulting in a risk of fire or burns.
■ Never broil with door open. Open-door broiling is not permitted due to overheating of control knobs.
How to Remove Protective Shipping Film and Packaging Tape
Carefully grasp a corner of the protective shipping film with your fingers and slowly peel it from the appliance surface. Do not use any sharp items to remove the film. Remove all of the film before using the appliance for the first time.
To assure no damage is done to the finish of the product, the safest way to remove the adhesive from packaging tape on new appliances is an application of a household liquid dishwashing detergent. Apply with a soft cloth and allow to soak.
NOTE: The adhesive must be removed from all parts. It cannot be removed if it is baked on.
READ AND SAVE THESE INSTRUCTIONS
On initial setup, this range requires a software update to enable all features. To perform the update, download the SmartHQ app and then follow instructions to connect the range to your home wifi network. Some features are available only via the SmartHQ app. For more information on how to get connected, reference the "Wifi & Remote Enable" section of this guide.
CONNECTING YOUR WIFI ENABLED RANGE
Your range is designed to provide you with two-way communication between your appliance and smart device. By using the SmartHQ mobile app, you will be able to control essential range operations such as temperature settings and cooking modes using your smartphone or tablet.*
What you will need
Your range uses your existing home WiFi network to communicate between the appliance and your smart device. In order to setup your range, you will need to gather some information:
- Each range has connected appliance information that includes an Appliance Network Name and Password. These are the two important details that you will need to connect to the appliance. This information is found in the WiFi Settings menu on the unit display.
- Have your smart phone or tablet ready with the ability to access the internet and download apps.
- You will need to know the password of your home WiFi router. Have this password ready while you are setting up your range.
Connect your range
- On your smart phone or tablet visit Cafeppliances.com/connect to learn more about connected appliance features and to download the SmartHQ mobile app. In Canada, visit cafeappliances.ca/connect.
- Follow the app onscreen instructions to connect your range.
- Once the process is complete, the connection icon will change to a solid on state when connection is successful.
- If the connection icon does not change to a solid on state, follow the instructions on the app to reconnect. If issues continue please call at 800.220.6899 and ask for assistance regarding range wireless connectivity.
To connect additional smart devices, repeat steps 1 and 2. Note that any changes or modifications to the remote enable device installed on this range that are not expressly approved by the manufacturer could void the user's authority to operate the equipment.
* Compatible Apple or Android devices and home WiFi network required.
REMOTE ENABLE EQUIPMENT
This device complies with part 15 of the FCC Rules. Operation is subject to the following two conditions: (1) This device may not cause harmful interference, and (2) this device must accept any interference received, including interference that may cause undesired operation.
The wireless communication equipment installed on this range has been tested and found to comply with the limits for a Class B digital device, pursuant to part 15 of the FCC Rules. These limits are designed to:
(a) provide reasonable protection against harmful interference in a residential installation. This equipment generates, uses, and can radiate radio frequency energy and, if not installed and used in accordance with the instructions, may cause harmful interference to radio communications. However, there is no guarantee that interference will not occur in a particular installation. If this equipment does cause harmful interference to radio or television reception, which can be determined by turning the equipment off and on, the user is encouraged to try to correct the interference by one or more of the following measures:
- Reorient or relocate the receiving antenna.
- Increase the separation between the equipment and receiver.
- Connect the equipment into an outlet on a circuit different from that to which the receiver is connected.
- Consult the dealer or an experienced radio/TV technician for help.
(b) accept any interference received, including interference that may cause undesired operation of the device.
Note that any changes or modifications to the wireless communication device installed on this range that are not expressly approved by the manufacturer could void the user's authority to operate the equipment.
FEATURES OF THE RANGE AND COOKTOP
(Not all features are on all models. Appearance may vary.)
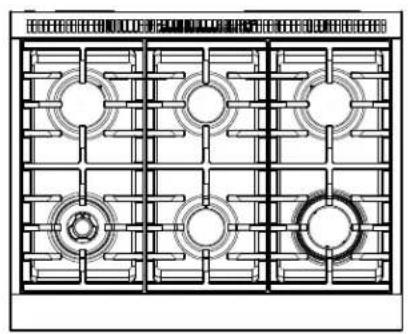
natural_image
Architectural grid layout with circular and rectangular elements, no text or symbols present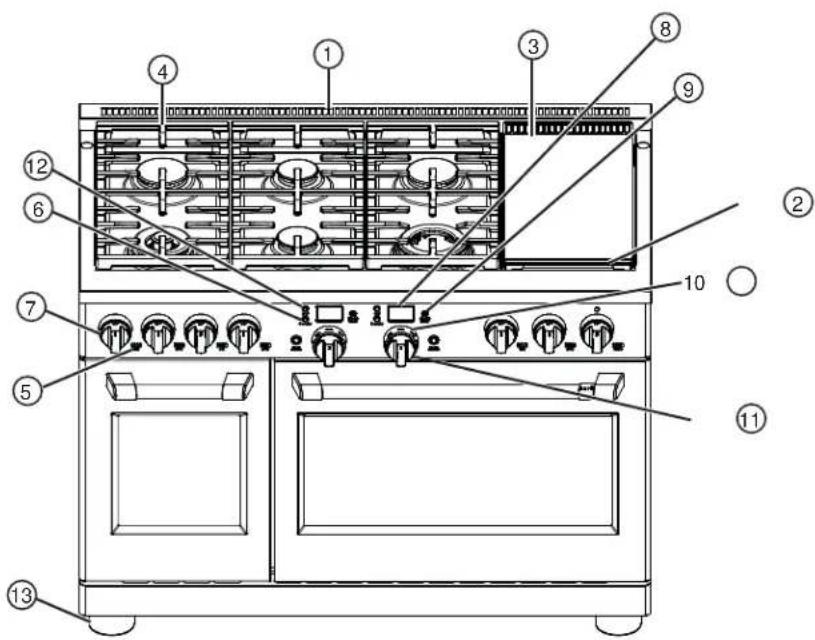
| Feature Index Page | ||
| 1 Oven Vents 18 | ||
| 2 Grease Trough (on some models) 39 | ||
| 3 Griddle (on some models) 13, 39 | ||
| 4 Cooktop Burner Grates 12,39 | ||
| 5 Burner Location Indicator | ||
| 6 Oven Light 15, 37 | ||
| 7 Burner Control Knob 10, 11, 31 | ||
| 8 Oven Display 15 | ||
| 9 Mini Knob(to select PROBE, TIMER, and SETTINGS) | 15, 16 | |
| 10 Oven Mode Selector 15, 20, 31 | ||
| 11 Oven Temperature Knob 15, 20, 31 | ||
| 12 Kitchen Timer | 15, 16 | |
| 13 Leveling System (4) | ||
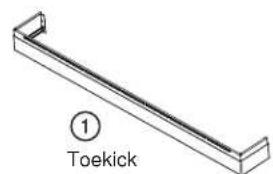
| Optional Accessories Page | ||
| 1 Toekick | ||
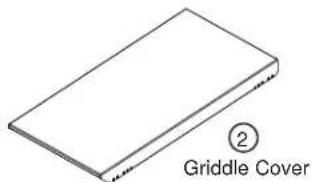
| 2 Griddle Cover | ||
Using the Range
IN CASE OF A POWER FAILURE
In the event of a power failure, the oven is inoperable and no attempt should be made to operate it. However, the surface burners may be lit with a match. extreme caution, hold a lit match near the ports beneath
the surface burner cap, then slowly turn the knob to the LITE position. Once lit, surface burners will continue to Uspagate normally.
SURFACE BURNERS
Lighting a Surface Burner
WARNING
Burners should be operated only when covered by cookware. Burner flames not covered by cookware present a risk of fire or clothing ignition. Never let flames extend beyond the sides of the cookware. Failure to comply may result in serious injury.
Make sure all burners are in their correct locations and fully assembled before attempting to operate any burner.
Select a burner and find its control knob. Push the knob in and turn it to the LITE position.
You will hear a clicking the sound of the electric spark igniting the burner. When one burner is turned to LITE, all burners will spark. Sparking will continue as long as the knob remains at LITE. Once gas is ignited, turn the knob to adjust the flame size.
noise
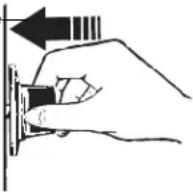
Push the control knob in and turn it to the LITE position.
Automatic Reignition
The burners on this range will automatically relight if the flame goes out.
Selecting a Flame Size
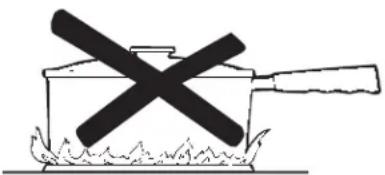
Watch the flame, not the knob, as you adjust heat. When rapid heating is desired, the flame size should match the size of the cookware you are using. Flames larger than the bottom of the cookware will not heat faster and may be hazardous.
natural_image
Simple line drawing of a cooking pan with a crossed-out black X mark and flames at the base (no text or symbols)These flames are too large for the pot
Using the Surface Burners
NOTES:
- Do not operate the burner for an extended time without cookware on the grate. The finish on the grate may discolor or chip without cookware to absorb the heat.
■ Do not attempt to disassemble any burner while another burner is on. Damage to the product may occur.
■ Be sure the burners and grates are cool before you place your hand, a pot holder or cleaning materials on them.
Your rangetop has sealed gas burners that offer periodic, cleanability and flexibility for a wide range of cooking applications.
Using the Range
SURFACE BURNERS (cont.)
Types of Surface Burners
Round Burner
Use this burner for general cooking purposes. Size cookware appropriately to the flames.
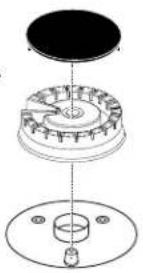
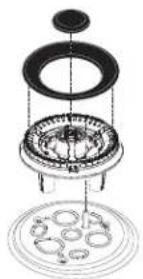
Inspiral Burner
Use this efficient inward firing burner that is ideal for medium and large cookware and wok cooking but not ideal for delicate foods.
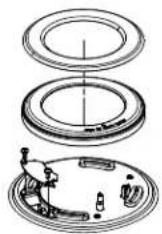
Multi-ring Burner
Use this burner for large cookware or for simmering applications.
natural_image
Exploded view diagram of a mechanical assembly with concentric rings and internal components (no text or labels)Inspiral Burner
The Inspiral burner uses an inward flame pattern delivering more even heat to the bottom of the pan as well as increased heat efficiency. Ideal for medium and large cookware and wok cooking but not ideal for simmering delicate foods.
Inspiral burners will produce the most heat when in the high position and then reduce the amount of heat as you turn to the simmer position. The burner is supplied with a copper enamel cap and an alternative black enamel cap.
Multi-Ring Burner
The Multi-Ring Burner has an inner and outer ring of flame. For large cookware, activate all rings by setting the burner between Hi and Med.
For small cookware or low heating applications, only activate the inner rings by setting the burner between Lo and Sim.
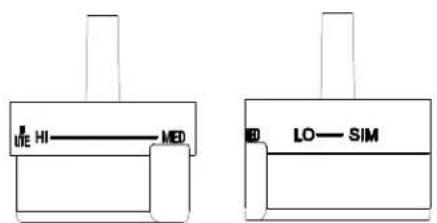
Top View Of The Multi-Ring Burner Knob
Using the Range
TOP-OF-RANGE COOKWARE
Aluminum: Medium-weight cookware is recommended because it heats quickly and evenly. Most foods brown evenly in an aluminum skillet. Use saucepans with tight-fitting lids when cooking with minimum amounts of water.
Stainless Steel: This metal alone has poor heating properties and is usually combined with copper, aluminum or other metals for improved heat distribution. Combination metal skillets usually work satisfactorily if they are used with medium heat or as the manufacturer recommends.
Cast-Iron: If heated slowly, most skillets will give satisfactory results.
Enamelware: Under some conditions, the enamel of some cookware may melt. Follow the cookware manufacturer's recommendations for cooking methods.
Glass: There are two types of glass cookware—those for oven use only and those for top-of-range cooking (saucepans, coffee and teapots). Glass conducts heat very slowly.
Heatproof Glass Ceramic: Can be used for either surface or oven cooking. It conducts heat very slowly and cools very slowly. Check the cookware manufacturer's directions to be sure it can be used on gas ranges.
WOK COOKING
WARNING
Do not use a wok support ring. Placing the ring over the burner or grate may cause the burner to work improperly, resulting in carbon monoxide levels above allowable standards. This could be hazardous to your health.
The burner grate above the Inspiral burner accommodates wok sizes from 14" to 16" in diameter without the need of a separate ring. Large flat bottom pots also can use the wok grate for general cooking. This wok grate should only be located above the front right Inspiral burner.
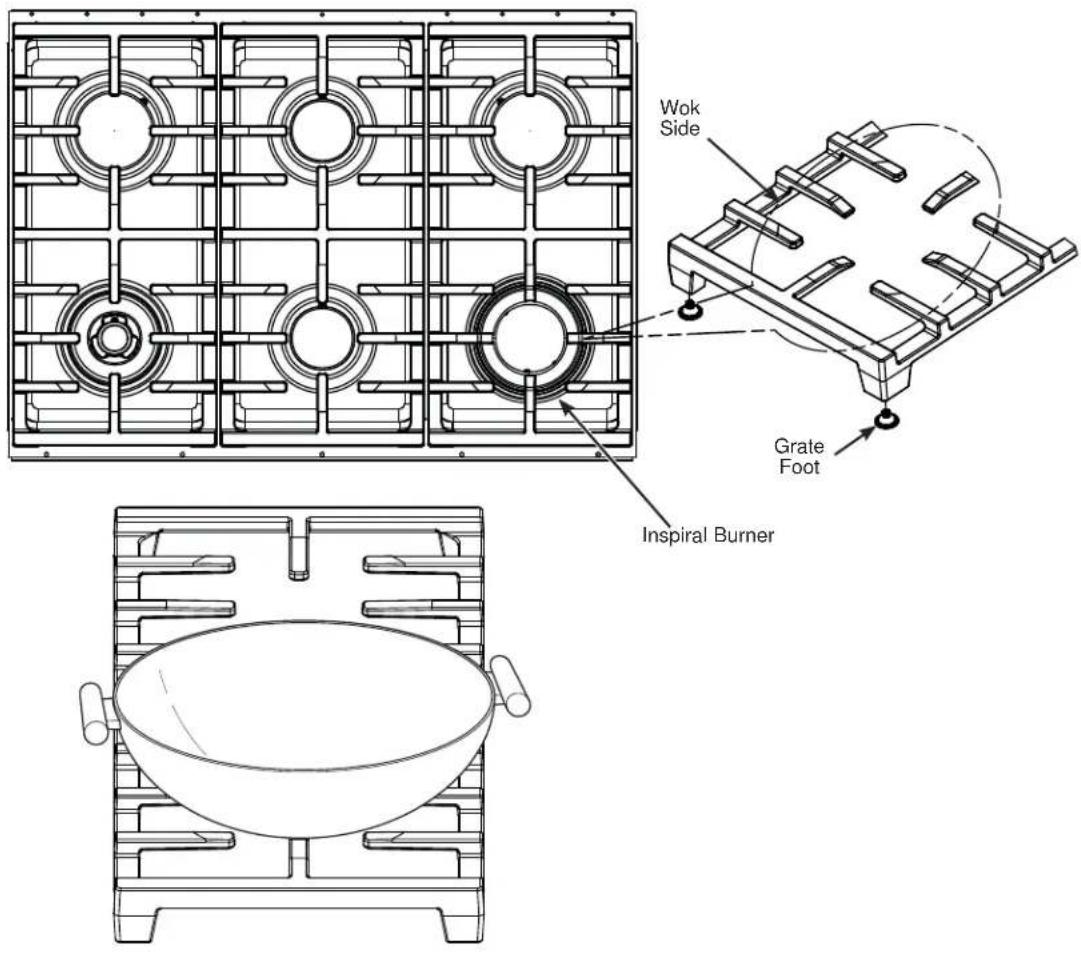
GRIDDLE
WARNING
Fire Hazard
■ Use care when cooking greasy foods. Spilled grease may result in fire.
■ Never place any items on the griddle when it is not in use. Heat from surrounding burners can heat the griddle and may result in fire.
■ Place and remove the griddle only when griddle is cool and all surface burners are turned OFF.
GRIDDLE SAFETY PRECAUTIONS, LEVELING (on some models)
Remove the metal cover before turning the griddle on.
The griddle assembly should not be removed for cleaning.
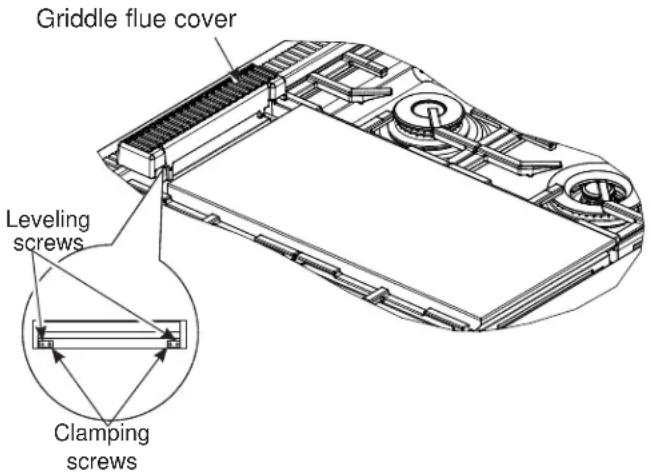
Once the unit is in position, the griddle can be leveled. Remove the flue cover by lifting it straight up. Be careful not to scratch the surrounding stainless steel surfaces during removal of the flue cover.
The two inner screws are clamping screws for securing the griddle in place. Loosen these two screws before leveling. Do not remove these two screws.
The two outer screws are leveling screws. Do not remove these two screws. They can be turned to level the griddle or to provide a forward slope to help grease and oils to drain away from the food being cooked. After the first few uses, you will be able to judge the slope best suited for the foods you are cooking and personal preference.
After leveling the griddle, tighten the clamping screws to secure griddle in place. Hand tighten screws; do not over-tighten.
USING THE GRIDDLE
Clean the griddle thoroughly with hot soapy water before first use and after subsequent uses. The griddle surface is made of durable, highly polished Type 304 stainless steel backed by an aluminum plate for even heat distribution. Apply a light coating of cooking oil to the griddle surface to help prevent food from sticking.
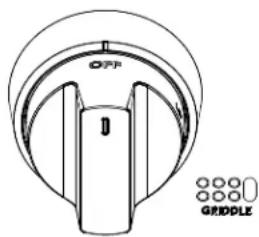
To heat the griddle, push in and turn the control knob to the desired temperature setting. The light on the bezel will glow to indicate that the thermostat control is working. The griddle is thermostatically controlled and can be set to maintain any temperature from 200^ F to 450^ F. Permit the griddle to preheat for 10 minutes before placing food on it.
NOTE: Unlike the surface burners which use spark igniters, the griddle uses a Glo-Bar for ignition. Gas flows to the griddle burner and ignition occurs approximately 45 seconds after the control knob is turned to a set temperature.
| Food Item Temperature Setting | |
| Pancakes 375°F | |
| Hamburgers 400°F | |
| Bacon* 400°F | |
| Grilled Cheese 350°F | |
| Eggs 275°F | |
*NOTE: Place bacon on a cold griddle. Do not preheat.
FEATURES OF THE OVEN
①
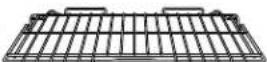
Low Profile Oven Rack
②
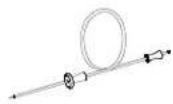
Temperature Probe
③
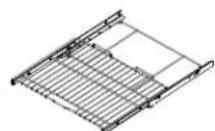
Partial Extension Rack
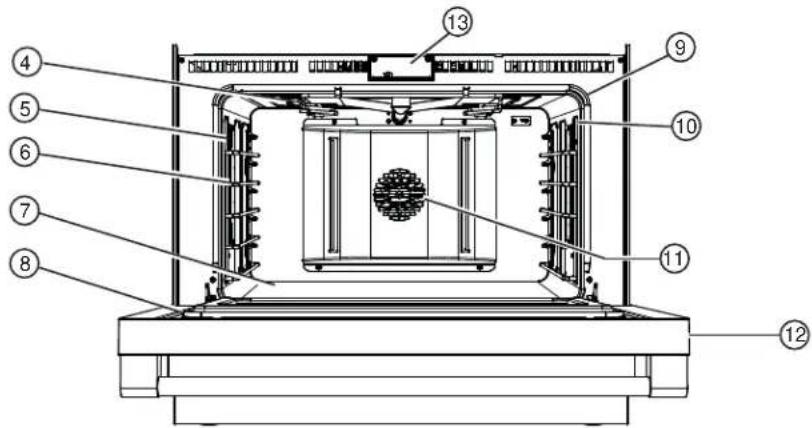
| Feature Index Page | ||
| 1 Low Profile Oven Rack— 2 in oven (right Oven on 48" models)— 1 in left oven | 19, 35 | |
| 2 Temperature Probe - one per oven 26, 27, 35 | ||
| 3 Partial Extension Rack -— 1 in oven (right Oven on 48" models)— 1 in left oven | 18, 19, 34 | |
| 4 Brvil System | ||
| 5 Halogen Oven Columns 37 | ||
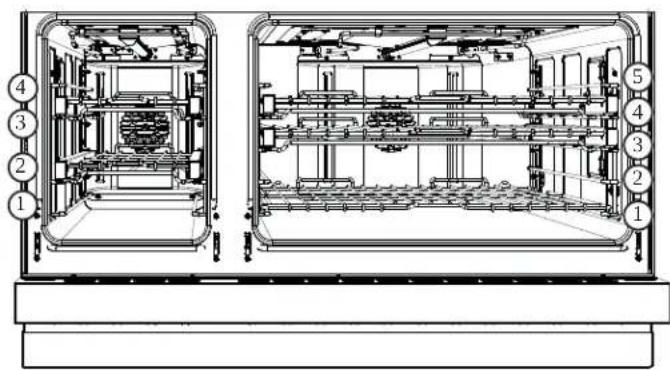
| 6 Oven Rack Supports— 5 positions in oven (right Oven on 48" models)— 4 positions in left oven | 18, 19, 37 | |
| 7 Hidden Bake Burner (under oven floor) | ||
| 8 Oven Door Seal 33 | ||
| 9 Oven Frame Seal 33 | ||
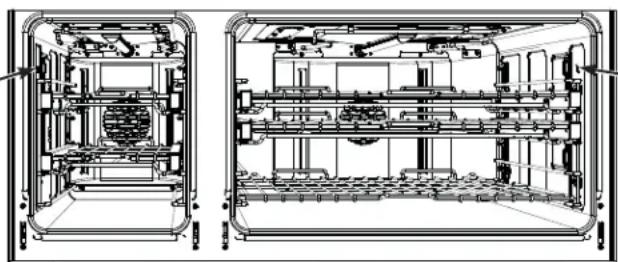
| 10 Temperature Probe Outlet-- right side in oven (right Oven on 48" models)-- left side in left oven | 26, 27 | |
| 11 Convection Fan 20, 22 | ||
| 12 Soft-Close Oven Door 36 | ||
| 13 Automatic Oven Door Latch | ||
| Optional Accessories Page | ||
| 1 Full Extension Oven Rack (qty 1) 34 | ||
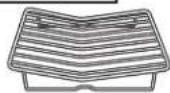
| 2 Broiler Pan and Grid 23, 31 | ||
| 3 Roasting Rack 23, 31 | ||
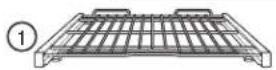
Full Extension Oven Rack
②
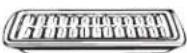
Broiler Pan and Grid Roasting Rack
③
NOTE: On models equipped with 2 ovens, both ovens have same features.
OVEN CONTROL AND TIMER
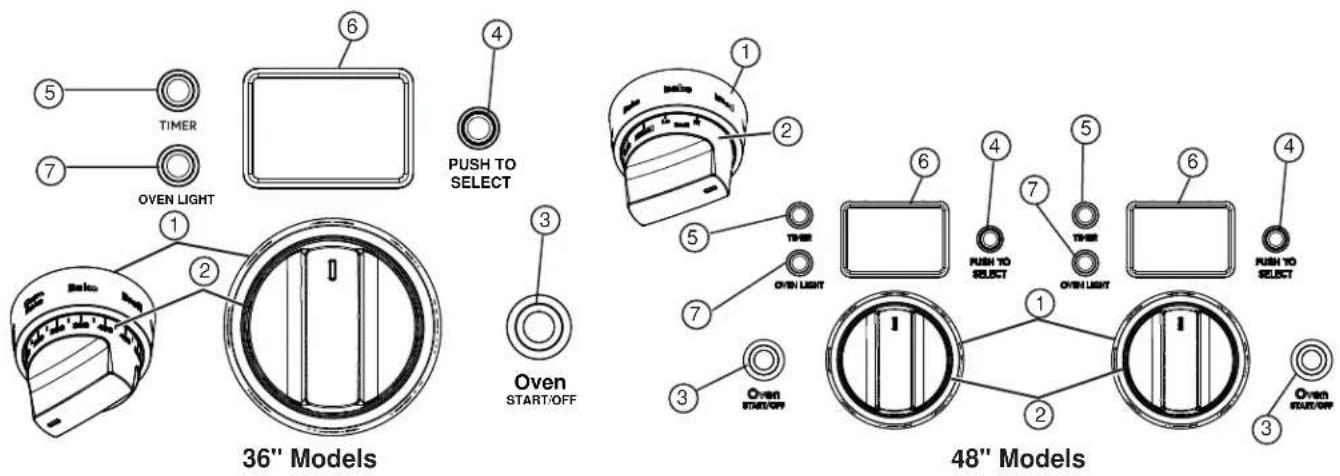
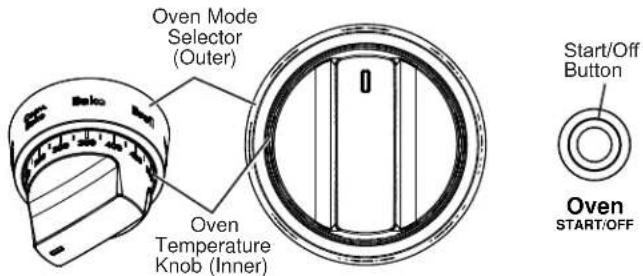
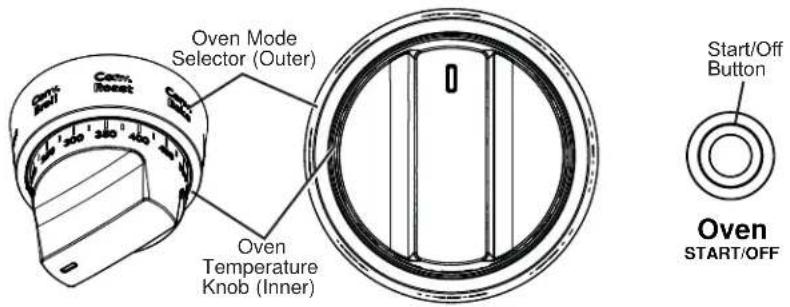
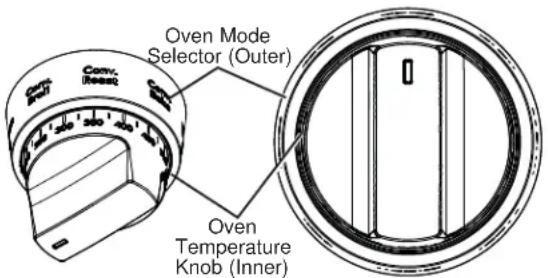
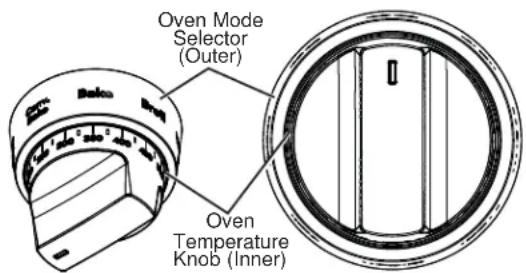
1 Oven Mode Selector – Turn outer ring to select:
Traditional Cooking Modes: Your oven has the following traditional cooking modes: Bake, and Broil.
Convection Cooking Modes: Convection cooking mode uses increased air circulation to improve performance.
Warm: Warm mode is designed to keep hot foods at a higher temperature for up to 3 hours.
Proof: Proof mode maintains a warm environment for rising yeast-leavened dough.
See the Oven Modes section for more information.
Clean: Select for the self-cleaning and steam-cleaning function. See the Self-Cleaning and Steam-Cleaning section of this manual.
2 Oven Temperature Knob – Turn to select:
Temperatures from 175°F to 550°F.
LOW BROIL – A lower broiling temperature is automatically set.
HIGH BROIL – A higher broiling temperature is automatically set.
CLEAN – The clean temperature is automatically set.
3 Oven START/OFF Button – Must be pressed to start any cooking, or cleaning function. Cancels ALL oven operations except the timer.
4 Mini Knob – Turn to select and push to enter PROBE or TIMER settings. Press the Mini Knob when the display is idle to access more detailed menus for additional functions. See the Settings section for more information.
5 Timer Button – Push to select the kitchen timer function that works as a countdown timer. The oven will continue to operate when the timer countdown is complete. Turn to select and push to enter TIMER settings.
NOTE: The timer cannot be used while the oven is self-cleaning. (On double oven models, the timer for the oven that is not in the self-cleaning mode may be used.)
6 Oven Display – Displays oven functions such as oven and probe temperatures and kitchen timer.
7 Oven Light - Push to turn Oven Light ON and OFF.
The Oven Mode Selector (1) AND the Oven Temperature Knob (2) must be set together in one of the following valid pairings:
| Oven Mode Selector Oven Temperature Knob | |
| BAKE 175 ^ to 550 ^ F | |
| CONV BAKE 175 ^ to 550 ^ F | |
| CONV ROAST 175 ^ to 550 ^ F | |
| CONV BROIL 175 ^ to 550 ^ F | |
| BROIL HIGH or LOW BROIL | |
| WARM — | |
| PROOF | — |
| CLEAN | CLEAN |
After Mode and temperature are selected, press oven START/OFF button to turn the oven ON or OFF.
To cancel a feature, press oven START/OFF button.
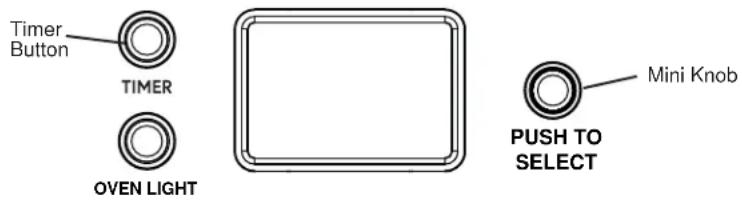
Timer
NOTE: The timer is independent of all the other functions and does not control the oven.
To set the timer:
- Push the TIMER button.
- Turn the Mini Knob to adjust any length of time up to 12 hours and push to select it.
On double oven models, each oven control has its own timer function. Each timer can be set independently.
The control will beep with 1 minute remaining and the display will show seconds until the timer counts down to :00. When the timer reaches :00, the control will beep 3 times followed by one beep every 6 seconds until the Mini Knob is pushed.
To cancel the timer:
Press and hold the Mini Knob for 3 seconds.
SETTINGS
Mini Knob opens up more detailed menus in the display that allow access to additional functions. For each setting you select the function in the display by pressing and turning the Mini Knob. Press the Mini Knob to select the option. You can exit at any time by selecting Back in the display.
WiFi Connect and Remote Enable
Your oven is designed to provide you with two-way communication between your appliance and smart device. By using the WiFi Connect features, you will be able to control essential oven operations such as temperature settings, timers and cooking modes using your smartphone or tablet.*
Select Settings then Wifi - follow the instructions on your oven display and phone app. It is necessary to turn on WiFi before using Remote Enable on your oven.
See the Connecting Your Wifi Enabled Range section, on page 8, for the full process of how to connect the range.
Bluetooth® - Chef Connect
This is a pairing feature for use with other compatible Chef Connect enabled products like an over-the-range microwave oven or range hood. To pair those products to the range, press the Mini Knob and select Bluetooth®. Select Pair and follow the corresponding instructions included with the mating Chef Connect enabled product. The range will cancel pairing mode after two minutes if no mating device is detected. Select Remove to confirm product is paired or to un-pair from range.
SETTINGS (cont.)
Auto Conv (Auto Conversion)
When using Convection Bake and Convection Roast cooking, Auto Recipe Conversion will automatically convert the regular baking temperatures entered to convection bake cooking temperatures when turned on. Note that this option does not convert convection bake cooking times, it only converts temperatures. This feature may be turned On or Off. Press the Mini Knob and turn to select AUTO CONVERT then follow the prompts to turn this feature on or off.
Auto Off
This feature shuts the oven down after 12 hours of continuous operation. It may be enabled or disabled. Press the Mini Knob and turn to select 12HR SHUTOFF to turn this feature on or off.
Sound
You can adjust the volume and type of alert your appliance uses. Press the Mini Knob and turn to select SOUND. Follow prompts for making volume adjustments or for changing between repeated and single alert tones. A repeated setting will continue to sound a tone until a button on the control is pressed. The oven tone volume can be adjusted. The control will sound the oven tone at the new volume level each time the sound level is changed.
F/C (Fahrenheit or Celsius)
The oven control is set to use Fahrenheit temperatures (F), but you can change it to use Celsius temperatures (C). Press the Mini Knob and turn to select TEMP UNIT. Select F/C to alter between temperature scales displayed.
Oven Thermostat Adjustment
This feature allows the oven baking temperature to be adjusted up to 35^ hotter or down to 35^ cooler. Use this feature if you believe your oven temperature is too hot or too cold and wish to change it. This adjustment affects every cooking mode except broil.
- Turn the Mini Knob and push to select ADJUST TEMP.
- Turn the Mini Knob again to select the oven thermostat you want to adjust and push to select.
- Turn the Mini Knob to adjust the oven thermostat up to 35^ hotter or (-) 35^ cooler in 1^ increments.
Oven Info
Select Settings, More, and Oven Info to turn this feature on or off. This setting displays Model Number and Software Version.
Model and Serial Number
Press the Mini Knob and turn to select MODEL SERIAL to display the model and serial number for your unit.
Using the Range
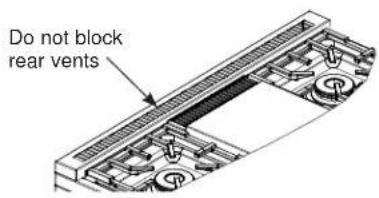
OVEN AIR VENTS
Never block the vents (air openings) of the range. They provide the air inlet and outlet that are necessary for the range to keep cool and operate properly with correct combustion.
Air openings are located at the rear of the cooktop, at the top and bottom of the oven door, and at the bottom of the range.
ALUMINUM FOIL AND OVEN LINERS
CAUTION
Do not use any type of foil or oven liner to cover the oven bottom. These items can trap heat or melt, resulting in damage to the product and risk of shock, smoke or fire. Damage from improper use of these items is not covered by the product warranty.
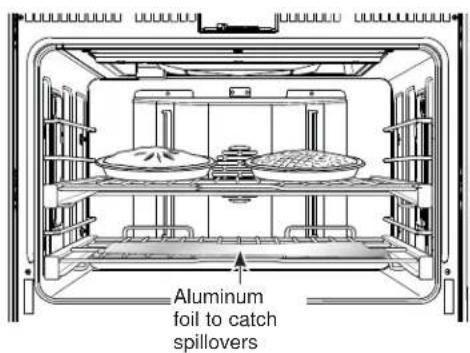
Foil may be used to catch spills by placing a sheet on a lower rack, several inches below the food. Do not use more foil than necessary and never entirely cover an oven rack with aluminum foil. Keep foil at least 1-1/2" from oven walls to prevent poor heat circulation.
OVEN RACKS
Partial Extension Oven Racks
CAUTION
To avoid possible burns, place the racks in the correct position before turning on the oven.
The correct rack position depends on the kind of food and the browning desired.
The racks have a frame that locks into the rack supports on both sides. Once the frame is locked into place, always pull the rack out, by its upper front rail, to its partial extension stop position, when placing or removing cookware.
Remove and Replace Oven Racks
To remove a rack:
- Make sure the rack is pushed all the way into the oven.
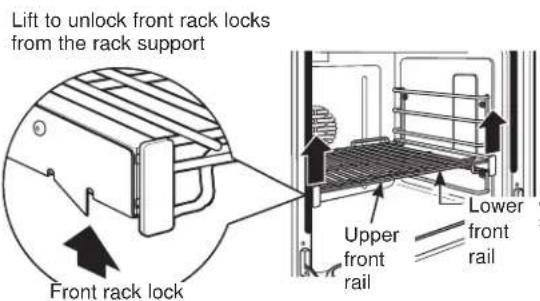
- Grasp the rack by both its upper front rail and its lower front rail and lift straight up to unlock the front rack locks from the rack supports.
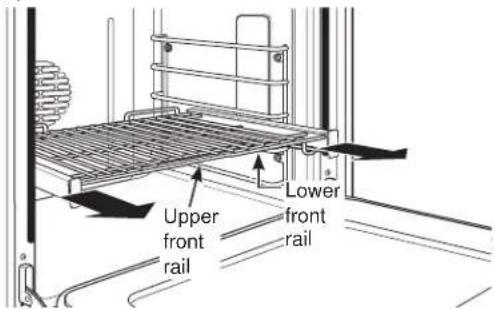
- Firmly holding onto both the upper and lower front rack rails, pull the rack forward and remove it from the oven.
OVEN RACKS (Cont.)
Partial Extension Oven Racks (Cont.)
To replace a rack:
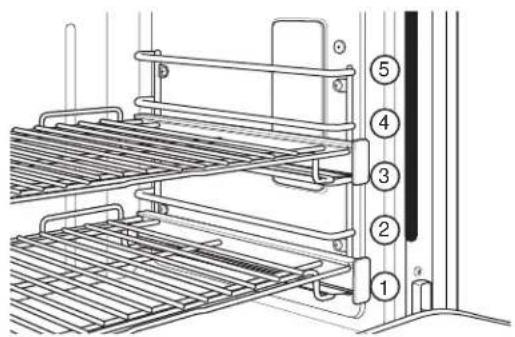
- Place the rear rack locks over and onto the rack supports (five rack positions are available including the top position).

natural_image
Technical line drawing of a mechanical assembly with an inset showing a magnified detail of a component (no text or symbols present)-
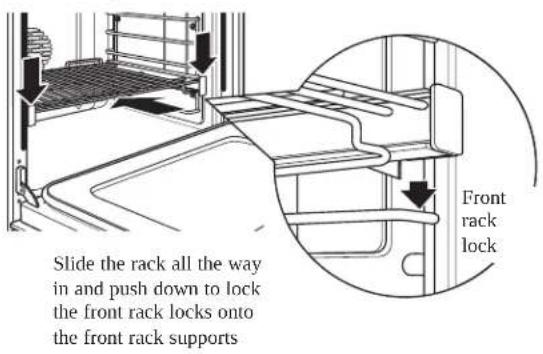
Slide the rack all the way in until the rear rack locks are secure on the rear rack supports and press the front rack locks onto the front rack supports.
-
Pull the rack all the way out to check that it is properly engaged. If extension racks are difficult to replace or remove, wipe the oven rack supports with cooking oil. Do not wipe oil on the rack slides.
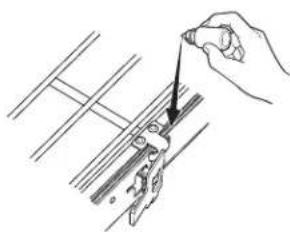
To lubricate the paddle:
Shake lubricant and apply to the moving parts of the paddle mechanisms as shown.
natural_image
Line drawing of a hand using a tool to cut or mark a grid pattern (no text or symbols)LOW PROFILE OVEN RACK
Removing and Replacing Flat Racks
When placing and removing cookware, pull the rack out to the bump (stop position) on the rack support.
To remove a rack, pull it toward you until it reaches the stop position, tilt up the front of the rack and pull it out.
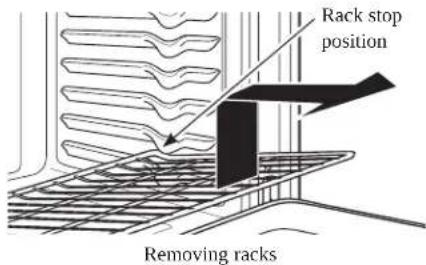
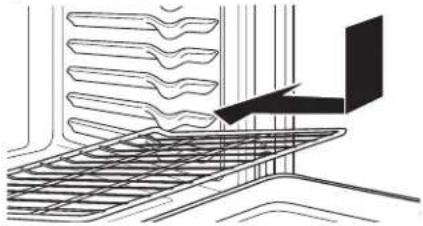
To replace a rack, place the curved end of the rack onto the rack supports. Tilt up the front of the rack and push
the rack in until it stops. Then lay the rack flat and push it in until it is all the way into the oven.
natural_image
Pure technical line drawing of a mechanical assembly without any text, numbers, or symbolsReplacing racks
Racks may become difficult to slide, especially after a self-clean cycle. To improve sliding conditions, use a soft cloth or paper towel to rub vegetable oil on the left and right edges of the racks and/or rack supports.
NOTE: Remove unused racks when using the oven for faster preheat, improved efficiency, and optimal cooking performance.
Using the Range
OVEN MODES
Your new oven has a variety of cooking modes to help you get the best results. The modes are described below. Refer to the Cooking Guide section for recommended rack positions and other tips for using these modes. Place racks in the desired position(s) prior to starting the oven.
For some cooking modes, such as Bake, Convection
Bake, and Convection Roast, the oven will preheat and a tone will sound when the oven is ready for cooking. Some cooking modes do not require preheating. To reduce preheat times, remove unused racks and avoid opening the oven door until the preheat tone sounds.
While in use, oven heaters and the convection fan will cycle on and off as needed to maintain appropriate cooking conditions. Avoid frequently opening the oven door, as this can impact cooking times and performance.
NOTE: A cooling fan will turn on to cool internal parts. This is normal, and the fan may continue to run even after the oven is turned off.
Baking
The Bake mode is intended for single rack cooking. When preparing baked goods such as cakes, cookies and pastries, always preheat the oven first.
How to Set the Oven for Baking
-
Turn the Oven Mode Selector to BAKE.
-
Using the Oven Temperature Knob, set the desired temperature, in 25^ F increments, from 175^ F to 550^ F.
-
After Bake Mode and temperature are selected, press oven START/OFF button to turn oven ON.
The oven will now begin to preheat. The temperature display will begin at 100^ F.
The preheat tune will sound when the oven is preheated and food can now be placed inside the oven.
- Press oven START/OFF button to turn oven OFF when baking is finished.
Use the temperature probe when a precise internal temperature is important. See the Temperature Probe section for more information.
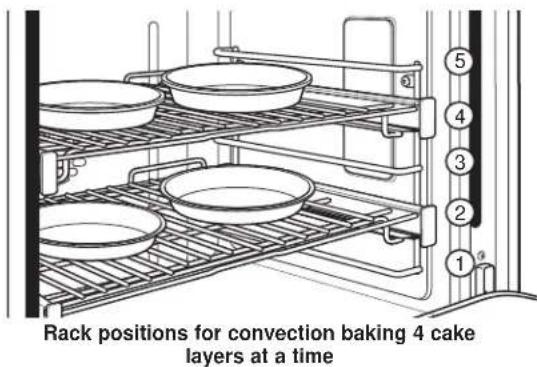
For best results when baking 4 cake layers, place four pans using racks 2 and 4. Cakes should be centered
front to back on both racks.
See the oven racks section for how to use, remove and replace the racks.
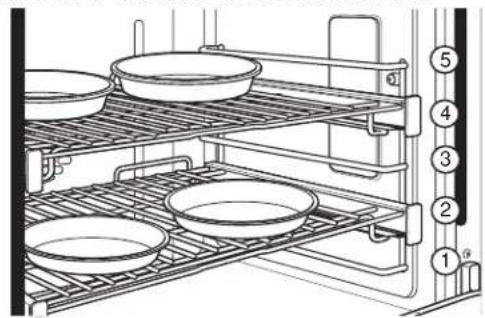
BAKING GUIDE
| TYPE OF FOOD | RECOMMENDED RACK POSITION(S) LEFT OVEN (48" models only) | RECOMMENDED RACK POSITION(S)OVEN or RIGHT OVEN (48" models only) |
| Layer cakes, sheet cakes, bundt cakes, quick breads on a single rack 2 2 or 3 | ||
| Layer cakes on multiple racks - 2 and 4 | ||
| Chiffon cakes (angel food) | 1 | 1 |
| Cookies, biscuits, scones, muffins on a single rack 2 | 2 | 0 |
| Yeast Breads 2 2 or 3 | ||
| Roasts | 2 2 or 3 | |
| Whole Chicken | 2 2 or 3 | |
| Bone-in chicken breasts, legs, thighs | 2 2 or 3 | |
| Boneless chicken breasts | 2 2 or 3 | |
| Whole turkey | 1 | 1 |
| Turkey breast | - | 1 or 2 |
| Casseroles | 2 or 3 | 2 or 3 |
| Pizza on a single rack | 2 2 or 3 | |
| Potato products, chicken nuggets, appetizers on a single rack | 2 2 or 3 | |
| Vegetables | 2 or 3 | 3 or 4 |
Suggested shelf positions are intended as general guidelines. Experiment with these positions for specific foods and personal preference.
OVEN MODES (Cont.)
Broiling
The Broil modes are intended for searing and crisping. Always broil with the oven door closed. Monitor food closely while broiling. Use caution when broiling on the upper rack positions as placing food closer to the broil burner increases smoking, spattering and the possibility of fats igniting.
Try broiling foods that you would normally grill. Adjust rack positions to adjust the intensity of the heat to the food. Place foods closer to the broil burner when a seared surface and rare interior is desired. Thicker foods and foods that need to be cooked through should be broiled on a lower rack position or by using a lower broil setting.
Use Broil High for thinner cuts of meat and/or when you would like to have a seared surface and rare interior. Use Broil Low for thicker cuts of meat and/or foods that you would like cooked all the way through. It is not necessary to preheat when using broil modes; however, preheating for 5-10 minutes is recommended for better searing results.
How to Set the Oven for Broiling
- Turn the Oven Mode Selector to BROIL
- Turn the Oven Temperature Knob to LO BROIL or HI BROIL. LO or HI will appear in the display.
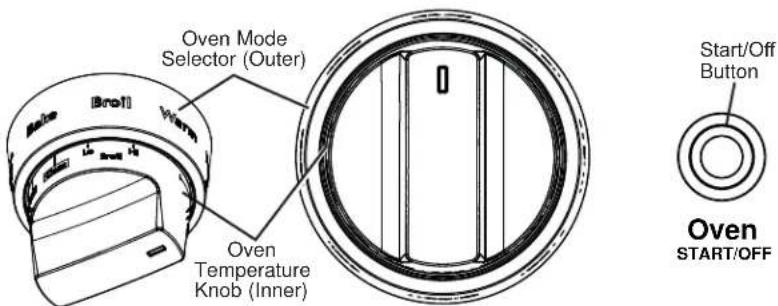
- After Broil Mode and setting are selected, press oven START/OFF button to turn oven ON.
NOTE: Always broil with the door closed. If the door is left open, the display will display "CLOSE DOOR" and the elements will not turn on until the door is shut.
- Press oven START/OFF button to turn oven OFF when broiling is finished.
NOTE: Broil can not be started if the temperature probe is plugged in. Never leave your temperature probe inside the oven during a broil cycle.
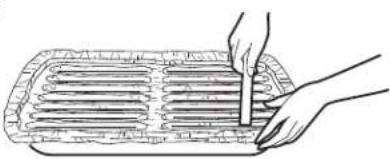
Aluminum Foil
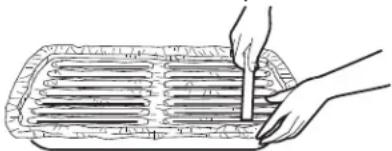
You can use aluminum foil to line the broiler pan and broiler grid. However, you must mold the foil tightly to the grid and cut slits in it just like the grid.
natural_image
Line drawing of a hand cutting through a rectangular container with horizontal strips (no text or symbols)Broiling Guide
Due to the variety of of meats and cuts available, you may select alternate rack positions based on personal preferences of doneness and external searing. For optimal searing, preheat oven for 5-10 minutes.
The size, weight, thickness, starting temperature and your preference of doneness will affect broiling times. This guide is based on meats at refrigerator temperature.
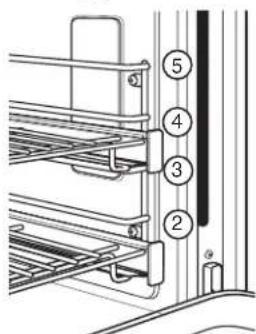
NOTE: In general, higher rack positions yield darker external searing and lower positions yield more doneness.
| TYPE OF FOOD SETTING | RECOMMENDED RACK POSITION(S)LEFT OVEN (48" models only) | RECOMMENDED RACK POSITION(S)OVEN or RIGHT OVEN (48" models only) | |
| Hamburgers HIGH 3 or 4 | 4 or 5 | ||
| Steaks & Chops HIGH 3 or 4 | 4 or 5 | ||
| Fish LOW 3 or 4 (1/2 inch thick or less) | 2 or 3 (>1/2 inch) | 4 or 5 (1/2 inch thick or less)3 or 4 (>1/2 inch) | |
| Bone-in chicken breasts, legs, thighs | LOW 2 2 or 3 | ||
| Boneless chicken breasts | LOW 2 2 or 3 | ||
| Vegetables LOW 2 or 3 | 3 or 4 | ||
The U.S. Department of Agriculture says "Rare beef is popular, but you should know that cooking it to only 140°F means some food poisoning organisms may survive." (Source: Safe Food Book. Your Kitchen Guide. USDA Rev. June 1985.)
Using the Range
OVEN MODES (Cont.)
Convection Cooking
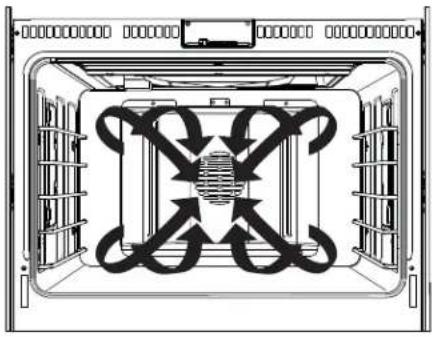
These modes utilize True European Precise Air to enhance cooking evenness, improve browning and/or reduce cooking times.
NOTE: The convection fan shuts off when the oven door is opened.
natural_image
Top-down schematic of a server rack with internal circuit patterns (no text or symbols)Convection Baking
The Convection Bake Multi Rack mode is intended for baking on multiple racks at the same time. This mode uses True European Precise Air to enhance cooking evenness. Your oven is equipped with Auto Recipe Conversion, so it is not necessary to adjust the temperature when using this mode. Always preheat when using this mode. Cooking times may be slightly longer for multiple racks than what would be expected for a single rack.
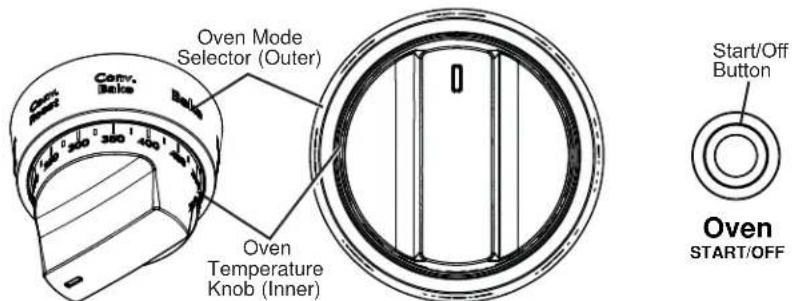
How to Set the Oven for Multi-Rack Convection Baking
- Turn the Oven Mode Selector to CONV BAKE.
- Using the Oven Temperature Knob, set the desired temperature, in 25^ F increments, from 175^ F to 550^ F.
- After Convection Mode and temperature are selected, press oven START/OFF button to turn oven ON.
The oven will now begin to preheat. The temperature display will begin at 100^ F.
The preheat tune will sound when the oven is preheated and food can be placed inside the oven.
| FOOD TYPE | RECOMMENDED RACK POSITION(S) LEFT OVEN (48" models only) | RECOMMENDED RACK POSITION(S) OVEN or RIGHT OVEN (48" models only) |
| Layer cakes on multiple racks | - 2 and 4 | |
| Cookies, biscuits, scones, muffins on multiple racks | 2 and 3 | 2 and 41, 3, and 5 |
| Pizza on multiple racks - 2 | and 4 | |
| Potato products, chicken nuggets, appetizers on multiple racks | 2 and 3 2 and 4 |
- Press oven START/OFF button to turn oven OFF when convection cooking is finished.
Use the temperature probe when a precise internal temperature is important. See the Temperature Probe section for more information.
For best results when baking 4 cake layers, place four pans using racks 2 and 4. Stagger the pans so that one pan is not directly above another as shown below.
See the oven racks section for how to use, remove and replace the racks.
OVEN MODES (Cont.)
Convection Roasting
The Convection Roast mode is intended for roasting vegetables and whole cuts of meat on a single rack. This mode uses True European Precise Air to improve browning and reduce cooking time. Check food earlier than the suggested recipe time. It is not necessary to preheat when using this mode.
How to Set the Oven for Convection Roasting
- Turn the Oven Mode Selector to CONV ROAST.
- Using the Oven Temperature Knob, set the desired temperature, in 25^ F increments, from 175^ F to 550^ F.
- After Convection Mode and temperature are selected, press oven START/OFF button to turn oven ON.
The oven will now begin to preheat. The temperature display will begin at 100^ F.
The preheat tune will sound when the oven is preheated and food can be placed inside the oven.
- Press oven START/OFF button to turn oven OFF when convection cooking is finished.
Use the temperature probe when a precise internal temperature is important. See the Temperature Probe section for more information.
See the oven racks section for how to use, remove and replace the racks.
Convection Roasting Tips
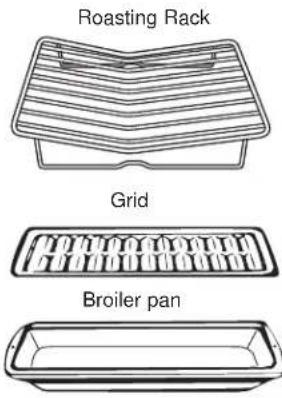
Use the broiler pan, grid and the roasting rack for best results when roasting large cuts of meat. Use the broiler pan when roasting vegetables. Use the broiler pan and grid when roasting small cuts of meats.
To assemble, place the grid on the broiler pan and put the roasting rack over them.
| FOOD TYPE | RECOMMENDED RACK POSITION(S) LEFT OVEN (48" models only) | RECOMMENDED RACK POSITION(S) OVEN or RIGHT OVEN (48" models only) |
| Roasts 2 2 or 3 | ||
| Whole Chicken 2 2 or 3 | ||
| Whole turkey - 1 or 2 | ||
| Turkey breast 1 or 2 2 or 3 | ||
| Potato products, chicken nuggets, appetizers on a single rack 2 2 or 3 | ||
| Vegetables 2 or 3 3 |
Suggested shelf positions are intended as general guidelines. Experiment with these positions for specific foods and personal preference.
Using the Range
OVEN MODES (Cont.)
Convection Broiling
The Convection Broil modes are intended for searing and crisping. Always broil with the oven door closed. Monitor food closely while broiling. Use caution when broiling on the upper rack positions as placing food closer to the broil burner increases smoking, spattering and the possibility of fats igniting.
Try broiling foods that you would normally grill. Adjust rack positions to adjust the intensity of the heat to the food. Place foods closer to the broil burner when a seared surface and rare interior is desired. Thicker foods and foods that need to be cooked through should be broiled on a lower rack position or by using a lower broil setting.
The Convection Broil modes use the broil heater along with air movement for improved searing and browning. Use Convection Broil High for thinner cuts of meat and/or when you would like to have a seared surface and rare interior. Use the Convection Broil Low for thicker cuts of meat and/or foods that you would liked cooked all the way through. It is not necessary to preheat when using Convection Broil modes; however, preheating for 5-10 minutes is recommended for better searing results.
How to Set the Oven for Convection Broiling
- Turn the Oven Mode Selector to CONV BROIL.
- Using the Oven Temperature Knob, set the desired temperature, in 25^ F increments, from 175^ F to 550^ F.
- After Convection Mode and temperature are selected, press oven START/OFF button to turn oven ON.
The oven will now begin to preheat. The temperature display will begin at 100^ F.
The preheat tune will sound when the oven is preheated and food can be placed inside the oven.
NOTE: Always broil with the door closed. If the door is left open, the display will display "CLOSE DOOR" and the elements will not turn on until the door is shut.
- Press oven START/OFF button to turn oven OFF when convection cooking is finished.
See the oven racks section for how to use, remove and replace the racks.
NOTE: Convection Broil can not be started if the temperature probe is plugged in. Never leave your probe inside the oven during a broil cycle.
Aluminum Foil
You can use aluminum foil to line the broiler pan and
broiler grid. However, you must mold the foil tightly to the grid and cut slits in it just like the grid.
natural_image
Illustration of a hand using a tool to cut through a tray with horizontal strips (no text or symbols)COVECTION BROILING GUIDE
Due to the variety of of meats and cuts available, you may select alternate rack positions based on personal preferences of doneness and external searing. For optimal searing, preheat oven for 5-10 minutes.
The size, weight, thickness, starting temperature and your preference of doneness will affect broiling times. This guide is based on meats at refrigerator temperature.
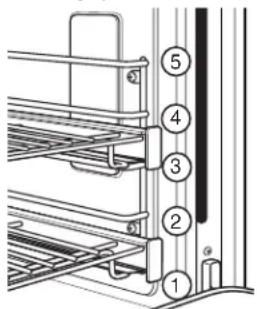
NOTE: In general, higher rack positions yield darker external searing and lower positions yield more doneness.
| TYPE OF FOOD SETTING | RECOMMENDED RACK POSITION(S)LEFT OVEN (48" models only) | RECOMMENDED RACK POSITION(S) OVEN or RIGHT OVEN (48" models only) | |
| Hamburgers HIGH 3 or 4 | 4 or 5 | ||
| Steaks & Chops HIGH 3 or 4 | 4 or 5 | ||
| Fish LOW 3 or 4 (1/2 inch thick or less) | 2 or 3 (>1/2 inch) | 4 or 5 (1/2 inch thick or less)3 or 4 (>1/2 inch) | |
| Bone-in chicken breasts, legs, thighs | LOW 2 | or 3 | |
| Boneless chicken breasts | LOW 2 | or 3 | |
| Vegetables LOW | 2 or 3 | 3 or 4 | |
The U.S. Department of Agriculture says “Rare beef is popular, but you should know that cooking it to only 140°F means some food poisoning organisms may survive.” (Source: Safe Food Book. Your Kitchen Guide. USDA Rev. June 1985.)
OVEN MODES (Cont.)
Warming
The Warm mode is intended to keep hot foods hot. Cover foods that need to remain moist and do not cover foods that should be crisp. Preheating is not required. Do not use this mode to heat cold food other than crisping crackers, chips or dry cereal. It is also recommended that food not be kept warm for more than 2 hours.
How to Set the Oven for Warming
- Turn the Oven Mode Selector to WARM. The display will show "WARM".
- When warm is finished, turn the Oven Mode Selector to OFF
Proofing
Proof mode maintains a warm environment for rising yeast-leavened dough. For best results, cover the dough while proofing and check early to avoid over-proofing.
How to Set the Oven for Proofing
Use rack position 2 or 3 in the oven (right Oven on 48" models). Use rack position 2 in the left oven.
- Turn the Oven Mode Selector to PROOF. The display will show "PROOF". PROOF mode will not operate when oven is above 125^ F. The display will scroll "too hot to proof". Allow the oven time to cool.
- When proofing is finished, turn the Oven Mode Selector to OFF.
CAUTION
Do not use the proofing mode for
warming food or keeping food hot. The proofing oven temperature is not hot enough to hold foods at safe temperatures.
Precision Cooking - Available on SmartHQ
These modes provide guidance or pre-set cooking algorithms to assist the user in cooking various types of food. The selection you make in the Precision Cooking menu will guide you to input the information required to help cook your food. At the end of estimated cooking time, check the food to see if it is done to your liking. Note that differences in food shape, preparation and preferences for doneness can impact the time required to cook the food.
Some cycles require the food temperature probe supplied with your oven. The target temperature for the probe is automatically set based on selections made for each food. Always check foods using a secondary food thermometer as temperature probe placement can impact the measured temperature. See the Temperature Probe section for more information.
OVEN MODES (Cont.)
Temperature Probe
Bake, Convection Bake and Convection Roast
WARNING
Consuming undercooked food can result in foodborne illness. Use temperature probe the following instructions to ensure all portions of the food reach minimum safe cooking recommendations for minimum safe food temperatures can be found at foodsafety.gov or

TIMER

OVEN LIGHT

PUSH TO SELECT
Mini Knob

Oven START/OFF
CAUTION
Use oven mitts when inserting or
removing the temperature probe from the hot oven. Areas around the temperature probe inlet can be very hot.
Internal food temperature is frequently used as an indicator of doneness, especially for roasts and poultry. The Probe mode monitors the internal food temperature and turns the oven off when the internal food temperature reaches the programmed temperature.
Always check the temperature at multiple locations in the food with a food thermometer after cooking to ensure that all portions of the food have reached the minimum safe internal temperature for that food.
The temperature probe can be used with the BAKE, CONV BAKE and CONV ROAST modes.
How to Set the Oven for Temperature Probe
- Push the tip of the temperature probe into the thickest part of the meat.
- Place the rack in the desired rack position.
- Set the oven controls. Turn the Oven Mode Selector to CONV BAKE, CONV ROAST or BAKE.
Turn the Oven Temperature Knob to desired oven temperature in 25^ F increments, from 175^ F to 550^ F. Allow the oven to preheat if necessary.
Temperature Probe Connector
- Use oven mitts to place the food in the hot oven. Insert the plug into the outlet. Make sure it is pushed all the way in. Close the oven door.
- Turn the Mini Knob to find the desired internal food temperature. Push the Mini Knob to select that temperature.
The words SET PROBE will flash in the display until a temperature is selected. If no temperature is set, the temperature probe will default to 100^ F.
The internal food temperature can be set from a minimum of 100^ F and up to 200^ F maximum.
6. When food reaches the set internal temperature, the display will beep and the oven will turn off. To stop the reminder beep, turn the Oven Mode Selector and the Oven Temperature Knob to OFF. Use oven mitts to remove the temperature probe from the oven outlet.
To change the set internal temperature anytime in the cooking process, push the Mini Knob and turn to adjust the temperature. Press the Mini Knob to select.
natural_image
Technical line drawing of a dual-panel industrial machine or control unit (no text or symbols visible)Temperature Probe Connector
OVEN MODES (Cont.)
Temperature Probe Care Guidelines
■ Use of probes other than the one provided with this product may result in damage to the probe outlet.
■ Use the handles of the probe and plug when inserting and removing them from the meat and outlet.
■ To avoid damaging your probe, do not use tongs to pull on the cable when removing it.
■ To avoid breaking the probe, make sure food is completely defrosted before inserting the probe.
■ To prevent possible burns, do not unplug the probe from the outlet until the oven has cooled.
■ Never leave the probe inside the oven during a broil, or self-clean cycle.
■ Do not store the probe in the oven.
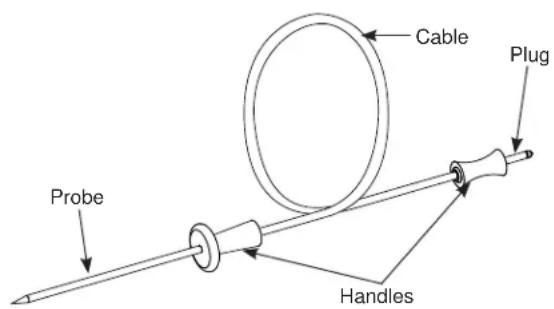
The temperature probe has a skewer-like probe at one end and a plug at the other end that goes into the outlet in the oven.
Proper Temperature Probe Placement
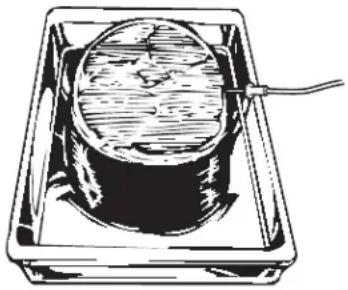
After preparing the meat and placing it on the cooking pan follow these instructions for proper probe placement.
- Insert the probe into the food, so that the tip of the probe will rest in the center of the thickest part of the food. For best performance the probe should be fully inserted into the food. If the probe is not located properly, it may not accurately measure the temperature of the coolest portion of the food. Some foods, particularly small items, are not well suited for cooking with the probe due to their shape or size
■ The probe should not touch bone, fat or gristle
■ For whole poultry insert the probe into the thickest part of the breast
■ For boneless roasts, insert the probe into the center of the roast
■ For bone-in ham or lamb, insert the probe into the center of the lowest large muscle or joint
■ For casseroles or dishes such as meatloaf, insert the probe into the center of the dish
■ For fish, insert the probe from just above the gill into the meatiest area, parallel to the backbone
natural_image
Line drawing of a cylindrical object mounted on a rectangular base with a cable inserted (no text or symbols)Using the Range
OVEN COOKING GUIDE
Cook food thoroughly to help protect against food borne illness. Minimum safe food temperature recommendations for food safety can be found at IsItDoneYet.gov. Use a food thermometer to measure food temperatures.
Oven Cookware Guidelines
The material, finish, and size of cookware affect baking performance.
Dark, coated and dull pans absorb heat more readily than light, shiny pans. Pans that absorb heat more readily can result in a browner, crisper, and thicker crust. If using dark and coated cookware check food earlier than minimum cook time. If undesirable results are obtained with this type of cookware consider reducing oven reducing temperature by 25F next time.
Shiny pans can produce more evenly cooked baked goods such as cakes and cookies.
Glass and ceramic pans heat slowly but retain heat well. These types of pans work well for dishes such as pies and custards.
Air insulated pans heat slowly and can reduce bottom browning.
Keep cookware clean to promote even heating.
Stoneware heats slowly and retains heat well. It is recommended to preheat this type of cookware if possible. Additional cook time may be required.
Cookware used in broil modes must be broil safe.
| FOOD TYPE | RECOMMENDED MODE(S) | RECOMMENDED RACK POSITION(S) LEFT OVEN (48" models only) | RECOMMENDED RACK POSITION(S) OVEN or RIGHT OVEN (48" models only) ADDITIONAL SUGGESTIONS |
| Baked Goods | |||
| Layer cakes, sheet cakes, bundt cakes, muffins, quick breads on a Single Rack | Bake 2 2 or 3 Use shiny cookware. | ||
| Layer cakes on Multiple Racks* | Bake Convection Bake Multi | -2 and 4 Ensure adequate airflow (see illustration below). | |
| Chiffon cakes (angel food) Bake 1 1 Use shiny cookware. | |||
| Cookies, biscuits, scones on a Single Rack | Bake 2 2 or 3 Use shiny cookware. | ||
| Cookies, biscuits, scones on Multiple Racks | Convection Bake Multi 2 and 3 | 2 and 4 1, 3, and 5 | Ensure adequate airflow. |
| Yeast Breads | Proof 1 or 2 2 or 3 | Cover dough loosely. | |
| Bake 2 2 or 3 | |||
Continued on next page
*For best results when baking 4 cake layers, place four pans using racks 2 and 4. Cakes should be centered front to back on both racks.
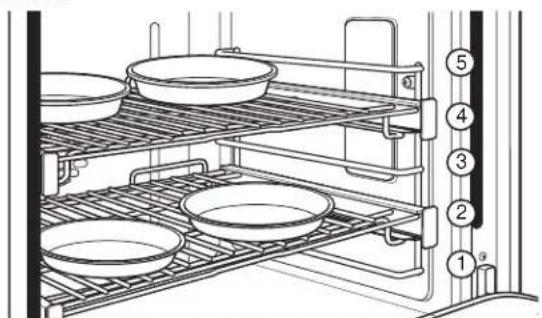
Rack positions for baking 4 cake layers at a time
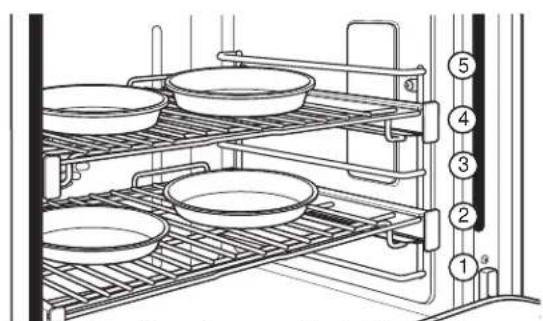
Rack positions for convection baking 4 cake layers at a time
OVEN COOKING GUIDE
| FOOD TYPE | RECOMMENDED MODE(S) | RECOMMENDED RACK POSITION(S) LEFT OVEN (48" models only) | RECOMMENDED RACK POSITION(S) OVEN or RIGHT OVEN (48" models only) ADDITIONAL SUGGESTIONS | |
| Bake 2 2 or 3 | ||||
| Beef & Pork | ||||
| Hamburgers | Broil High Convection Broil High | 3 or 4 4 or 5 | Use a broil pan; move food down for more doneness/ less searing. Watch food closely when broiling. For best performance center food below the broil heater. | |
| Steaks & Chops | Broil High Convection Broil High | 3 or 4 4 or 5 | Use a broil pan; move food down for more doneness/ less searing. Watch food closely when broiling. For best performance center food below the broil heater. | |
| Roasts | Bake Convection Roast | 2 2 or 3 | Use a low sided pan such as a broil pan. Preheating is not necessary. | |
| Casseroles Bake 2 or 3 2 or 3 | ||||
| Fish | Broil Low Convection Broil Low | 3 or 4 (1/2 inch thick or less) 2 or 3 (>1/2 inch) | 4 or 5 (1/2 inch thick or less) 3 or 4 (>1/2 inch) | Move food down for more doneness/less searing. Watch food closely when broiling. For best performance center food below the broil heater. |
| Frozen Convenience Foods | ||||
| Pizza on a Single Rack Bake | 2 2 or 3 Do not preheat. | |||
| Pizza on Multiple Racks Convection Bake Multi - 2 and 4 | Stagger pizzas left to right, do not place directly over each other. | |||
| Potato products, chicken nuggets, appetizers on a Single Rack | Bake Convection Roast | 2 | 2 | Do not preheat. Use dark cookware for more browning/ crisping; use shiny cookware for less browning. |
| Potato products, chicken nuggets, appetizers on Multiple Racks | Convection Bake Multi | 2 and 3 | 2 and 4 | Use dark cookware for more browning/crisping; use shiny cookware for less browning. |
| Poultry | ||||
| Whole chicken | Bake Convection Roast | 2 | 2 | o r |
| Bone-in chicken breasts, legs, thighs | Broil Low Convection Broil Low Bake | 2 2 or 3 | If breaded or coated in sauce avoid Broil High modes. Broil skin side down first. Watch food closely when broiling. For best performance when broiling, center food below the broil heater. | |
| Boneless chicken breasts | Broil Low Convection Broil Low Bake | 2 2 or 3 | Move food down for more doneness/less searing and up for greater searing/browning when broiling. For best performance when broiling, center food below the broil element or burner. | |
| Whole turkey | Bake Convection Roast | - | 1 or 2 | Use a low sided pan such as a broil pan. |
| Turkey Breast | Bake Convection Roast | - | 2 | Use a low sided pan such as a broil pan. |
| Vegetables | Bake Convection Roast Broil Low Convection Broil Low | 2 or 3 3 | Use dark cookware for more browning/crisping; use shiny cookware for less browning. | |
Cook food thoroughly to help protect against food borne illness. Minimum safe food temperature recommendations for food safety can be found at IsItDoneYet.gov. Make sure to use a food thermometer to take food temperatures.
Using the Range
Air Fry Cooking Guide (available on SmartHQ)
Air Fry is a special, no-preheat, cooking mode that is designed to produce foods with a crispier exterior than traditional oven cooking. Select Air Fry, then input the desired set temperature and press Start. The temperature can be set between 300°F and 500°F.
Air Fry Cookware Guidelines
- Only use broil safe cookware when using Air Fry mode.
- A dark sheet pan is recommended. A dark pan promotes better browning and crisping.
- Oven baking baskets and baking grids can also be used. A sheet pan should be placed on the rack below the foods to catch any drippings when using a baking basket.
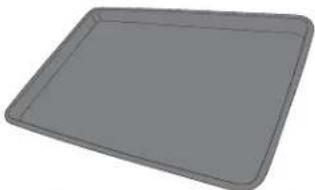
natural_image
3D rendering of a gray rectangular baking tray (no text or symbols)Primary recommended cookware
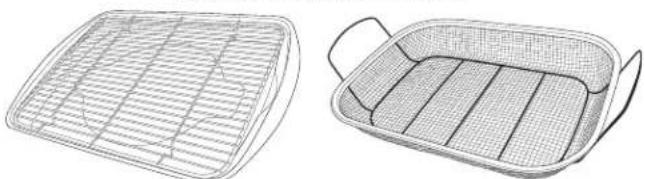
natural_image
Two wire mesh baskets with different internal patterns, one open and one closed (no text or symbols)Alternate cookware options
General Tips for Air Fry Mode
- The Air Fry mode is designed for cooking on a single rack.
- The Air Fry mode is designed to be used without preheating.
- Foods may cook faster than expected if the oven is already hot when food is placed in the oven.
- When air frying foods with sauce, it is recommended to apply the sauce at the end of cooking.
- If foods are browning too quickly, try a lower rack position or lower oven set temperature.
- For packaged foods, use traditional oven cooking instructions for set temperature and expected cook time.
- It is not necessary to flip or stir food during cooking
- Arrange food in a single layer on the pan, do not overload the pan.
- Always check internal food temperature to confirm minimum safe temperatures have been reached. Minimum safe food temperatures can be found on packages and at IsItDoneYet.gov.
| FOOD TYPE | RECOMMENDED RACK POSITION(S) | RECOMMENDED SET TEMPERATURES (F°) | RECOMMENDED COOK TIME (MIN) | NOTES |
| Fresh boneless fish or poultry pieces, breaded such as nuggets, tenders, fillets | 3 for Oven or Right Oven2 for Left Oven (48" Range only) | 375-400 15-30 | User lower set temperatures for larger pieces.Use shiny cookware. | |
| Fresh bone in chicken wings | 3 for Oven or Right Oven2 for Left Oven (48" Range only) | 375-400 25-40 | Salt wings or coat in a dry rub, if using sauce apply after cooking or toward the end of cooking | |
| Fresh bone in chicken drumsticks or thighs | 3 for Oven or Right Oven2 for Left Oven (48" Range only) | 375-400 30-55 User | lower set temperatures for larger pieces. | |
| Fresh French fries, thin (< 1⁄2 inch) | 3 for Oven or Right Oven2 for Left Oven (48" Range only) | 400-425 15-30 | Parchment paper is recommended when preparing fresh French fries. For crispier fries, toss fries in corn starch or rice flour before cooking. | |
| Fresh French fries, thick (> 1⁄2 inch) | 3 for Oven or Right Oven2 for Left Oven (48" Range only) | 375-400 20-35 | Parchment paper is recommended when preparing fresh French fries. For crispier fries, toss fries in corn starch or rice flour before cooking. | |
| Frozen packaged foods | 3 for Oven or Right Oven2 for Left Oven (48" Range only) | Use traditional oven(not Air Fry) cooking instructions as a guideline for set temperature and cook time.cook time beyond recommended package time may be required for some foods. If oven is hot when starting, food may cook faster than the minimum package time. | ||
Care And Cleaning
Be sure electrical power is off and all surfaces are cool before cleaning any part of the range
CONTROL PANEL AND KNOBS
It's a good idea to wipe the control panel after each use. Clean with mild soap and water or vinegar and water, rinse with clean water and polish dry with a soft cloth. Do not use abrasive cleansers, strong liquid cleansers, plastic scouring pads or oven cleaners on the control panel because they will damage the finish.
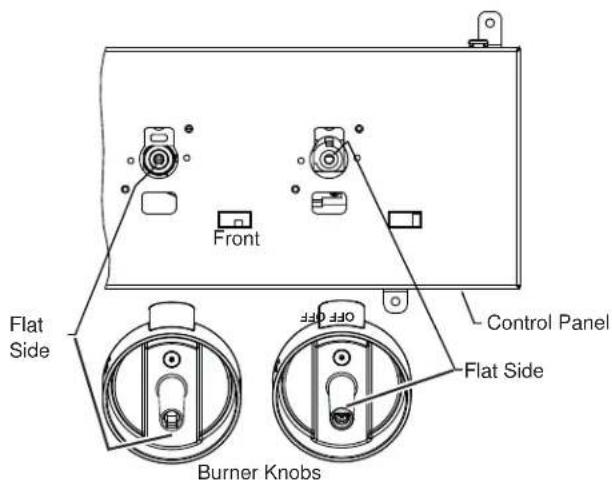
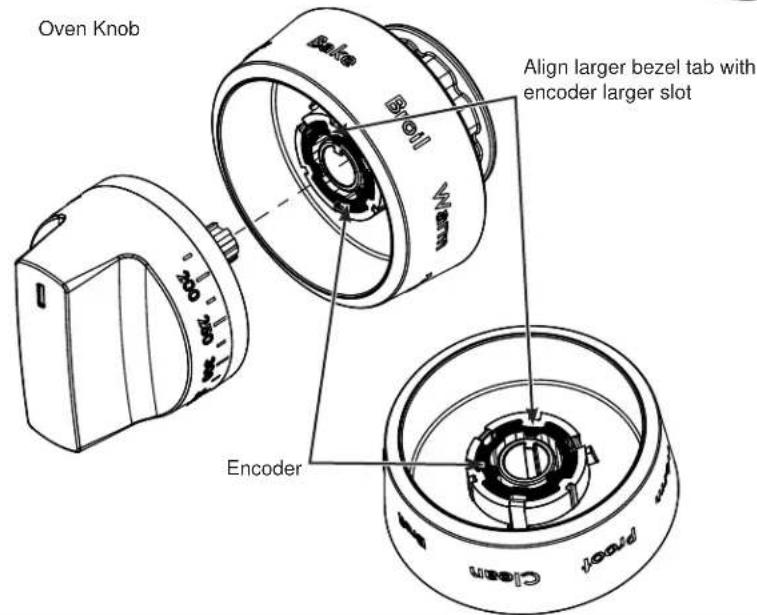
For easier cleaning, the control knobs may be removed by pulling them directly outwards once the knobs are in the OFF position. Do not pull knobs up or down or hang objects on them. This can damage the gas valve shaft. See the Surface Burner section for a detailed view of these knobs. The knobs can be washed by hand with soap and water.
When removing the oven and burner knobs, remember their location. The knobs are not interchangeable, these knobs must be placed in the same location after cleaning. See the Surface Burner and oven control sections for a detailed view of these knobs. To replace knobs after cleaning, align the bottom of the knob with the matching clip orientation to the shaft inside the bezel.
Push knob until completed seated.
Use a soft, non abrasive cloth to clean the inside of the bezel. Do not remove diffuser film. Do not expose to moisture or it will damage lighting electronics.
NOTE: The Mini Knob is not removable.
BROILER PAN, GRID AND ROASTING RACK (Optional Accessories)
CAUTION
Do not clean the broiler pan, grid or
roasting rack in a self-cleaning oven.
The broiler pan, grid and roasting rack are all dishwasher safe. However, baked on foods may require
washing by hand with a commercial oven cleaner or abrasive detergent.
Do not store a soiled broiler pan or grid anywhere in the oven. Always properly dispose of excess grease.

natural_image
Three technical diagrams showing different types of metal grates: grid, broiler pan, and a tray (no text or symbols present)Care and Cleaning
OVEN EXTERIOR
Do not use oven cleaners, abrasive cleansers, strong liquid cleansers, steel wool, plastic scouring pads, or cleaning powders on the interior or exterior of the oven. Clean with a mild soap and water or vinegar and water solution. Rinse with clean water and dry with a soft cloth. When cleaning surfaces, make sure that they are at room temperature and not in direct sunlight.
If stain on the door vent trim is persistent, use a mild abrasive cleaner and a sponge-scrubber for best results. Spillage of marinades, fruit juices, tomato sauces and basting liquids containing acids may cause discoloration and should be wiped up immediately. Let hot surfaces cool, then clean and rinse.
Painted Surfaces
Painted surfaces may include the door and trim around the control panel. Clean these with soap and water or a vinegar and water solution. Do not use commercial oven cleaners, cleaning powders, steel wool or harsh abrasives on any painted surface.
OVEN INTERIOR
The interior of your new oven can be cleaned manually or by using Steam Clean mode. Spillage of marinades, fruit juices, tomato sauces and basting liquids containing acids may cause discoloration and should be wiped up immediately. Let hot surfaces cool, then clean and rinse.
Manual Cleaning
Do not use oven cleaners (unless certified for self-cleaning oven), strong liquid cleansers, steel wool, or scouring pads on the interior of the oven. Clean with a mild soap and water, or vinegar and water solution. Rinse with clean water and dry with a soft cloth. When cleaning surfaces, make sure that they are at room temperature.
STEAM CLEANING
How to Set the Oven for Steam Cleaning
- Turn the Oven Mode Selector to CLEAN.
- Turn the Oven Temperature Knob to CLEAN.
- Push the Mini Knob to select Steam Clean.
The control automatically defaults to the recommended steam clean cycle time.
- Press oven START/OFF button to start the CLEAN cycle.
If "CLOSE door" shows in the display, the steam-clean cycle has been selected but the door is not closed. Close the oven door.
- After the steam clean cycle is complete, turn the Oven Mode Selector and the Oven Temperature Knob to OFF.
To interrupt a clean cycle, press over START/OFF
Stainless Steel
Do not use a steel wool pad; it will scratch the surface. To clean the stainless steel surface, use warm sudsy water or a stainless steel cleaner or polish. Always wipe the surface in the direction of the grain. Follow the cleaner instructions for cleaning the stainless steel surface. Cleaners with oxalic acid such as Bar Keepers Friend Soft Cleanser™ will remove surface rust, tarnish and small blemishes. Use only a liquid cleanser free of grit and rub in the direction of the brush lines with a damp, soft sponge. To inquire about purchasing cleaning products including stainless steel appliance cleaner or polish, see the Consumer Support section for further information.
Steam Clean Mode
Steam clean is intended to clean small spills using water and a lower cleaning temperature than Self-Clean.
To use the Steam Clean feature:
- Start with the oven at room temperature.
- Wipe excess grease and soils from the oven.
- Pour one cup of water onto the bottom of the oven.
- Close the door.
Do not open the door during the 30 minute Steam Clean cycle. At the end of the Steam Clean cycle, soak up the remaining water, and wipe the moisture-softened soil from the oven walls and door.
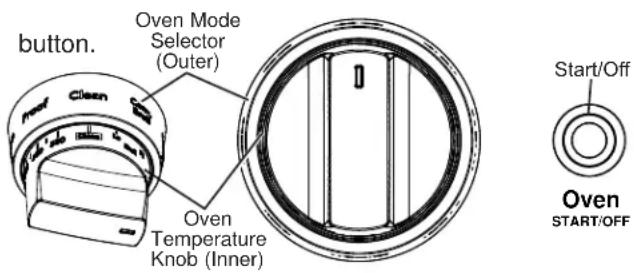
The default is STEAM CLEAN. Use the Mini Knob to change between STEAM CLEAN and SELF CLEAN
SELF-CLEANING OVEN
Safety
The self-clean oven feature is designed to make cleaning the inside of the oven easy by using very high temperatures to burn away food spills.
▲WARNING
Wipe up excess grease and other food spills with a damp cloth. Excessive food soils can ignite leading to smoke and heat damage.
■ Do not clean the oven seals, damage can occur.
■ Remove cookware, broiler pan, grid, probe and any aluminum foil from the oven.
■ Make sure the oven light lens and lens frame are in place.
■ Do not use commercial oven cleaners, abrasives or oven protectors in or near the self-cleaning oven.
■ We recommend venting your kitchen with an open window or using a ventilation fan/hood during the self-clean cycle.
■ Clean soil from around the frame and from around the oven door, outside the oven seals. These areas must be cleaned by hand.
■ The oven racks may be left in the oven during the self-clean cycle.
IMPORTANT: The health of some birds is extremely sensitive to the fumes given off during the self-cleaning cycle of any oven. Move birds to another well-ventilated room.
NOTE: During the self-clean cycle, the cooktop will be locked out and not functional. If a surface burner is turned on after the self-clean cycle has begun, a warning will be displayed on the Oven Display "err turn surf frnr off" and a beeping sound will be heard.
NOTE: Self-Clean will not work if the temperature probe is plugged in.
On double oven models, you cannot initiate Self Clean modes in both ovens at the same time. In addition, you cannot perform any other range function while one oven is performing a Self Clean. The oven not performing a Self Clean will be prevented from selecting another oven mode. If the cooktop burner is turned on, a screen message will prompt the user to turn off the burner or the Self Clean will automatically be cancelled.
How to Set the Oven for Self-Cleaning
- Turn off all surface burners. (The CLEAN cycle will not start until all surface burners have been turned off.)
- Turn the Oven Mode Selector to CLEAN.
- Turn the Oven Temperature Knob to CLEAN.
- Push and turn the Mini Knob to select Self-Clean.
The control automatically defaults to the recommended clean cycle time of 5 hours. The clean time may be adjusted to any time between 3 and 5 hours using the Mini Knob. The display will show the actual time remaining.
- Press START/OFF button to start the SELF-CLEAN cycle.
If "CLOSE DOOR" shows in the display, the self-clean cycle has been selected but the door is not closed. Close the oven door.
The symbol will flash as the oven door is locked. It will not be possible to open the oven door during the clean cycle.
- After the clean cycle is complete and the oven has cooled, the 🎨 will turn off. Press START/OFF button.
To interrupt a self-clean cycle, press START/OFF button. When the oven has cooled to a safe temperature, the symbol will turn off indicating the door may be opened.
An interrupted clean cycle cannot be restarted until after the oven is cool enough for the door to unlock.
After a Self Clean Cycle
You may notice some white ash in the oven. Wipe it up with a damp cloth after the oven cools.
If white spots remain, remove them with warm sudsy water and rinse thoroughly with a vinegar and water mixture. These deposits are usually a salt residue that cannot be removed by the clean cycle.
If the oven is not clean after one clean cycle, repeat the cycle.
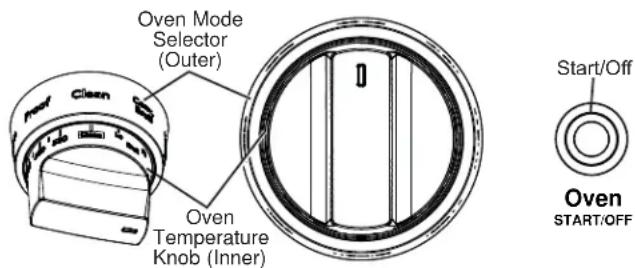
Care And Cleaning
OVEN RACKS
NOTE: The racks may remain in the oven during the self-cleaning cycle without being damaged.
Periodically, the oven racks may need to be lubricated using the Graphite Lubrication shipped with your range. To order additional Graphite Lubrication, call our National Parts Center at 800.626.2002 and reference WB02T10303.
-
Remove rack from the oven. See the Partial Extension Oven Racks section.
-
Fully extend the rack on a table or countertop. Newspaper may be placed underneath the rack for easy cleanup.
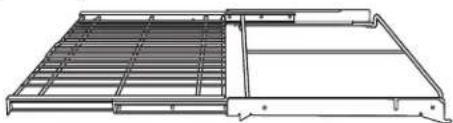
natural_image
Technical line drawing of a mechanical assembly with grid-like components (no text or symbols)- If there is debris in the slide tracks, wipe it away using a paper towel. NOTE: Any graphite lubricant wiped away must be replaced.
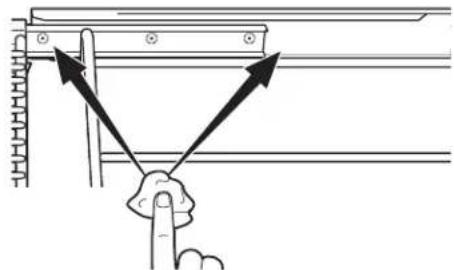
- Shake the graphite lubricant before opening it. Starting with left slide mechanism of the rack, place four (4) small drops of lubricant on the two (2) bottom tracks of the slide close to the bearing carriers.
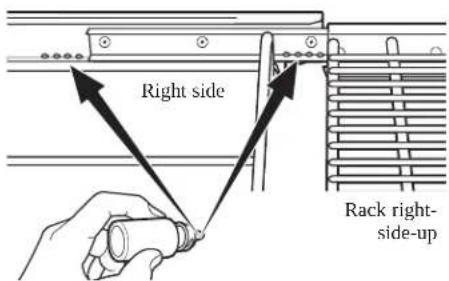
- Repeat for the right slide mechanism of the rack.
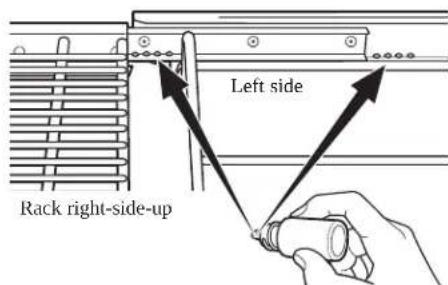
- Open and close the rack several times to distribute the lubricant.
- Replace the cap on the lubricant and shake it again. Turn the rack over and repeat steps 3, 4, 5 and 6.
- Close the rack, turn rack right-side-up and place in the oven. See the Partial Extension Oven Racks section.
- Repeat above steps for each rack.
NOTE: Do not use a cooking spray or other lubricant sprays on the slides.
Care And Cleaning
LOW PROFILE OVEN RACK
The gray porcelain-coated low profile rack may remain in the oven during the self-cleaning cycle without being damaged. It may also be cleaned using a mild abrasive cleanser. After cleaning, rinse the rack with clean water and dry with a clean cloth.
Periodically and after clean cycles, the low profile rack may need to be lubricated to aid sliding. Wipe the rack edges or oven rack supports with the Graphite Lubrication shipped with your range or vegetable oil.
To order additional Graphite Lubrication, call our National Parts Center at 800.626.2002 and reference WB02T10303.
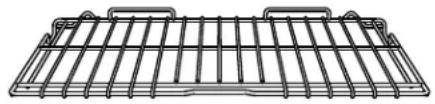
natural_image
Line drawing of a wire mesh grid (no text or symbols)TEMPERATURE PROBE
Allow the temperature probe to cool before cleaning.
The probe should be cleaned with soap and water by hand.
Do not immerse the temperature probe in water.
Do not store the temperature probe in the self-cleaning oven.
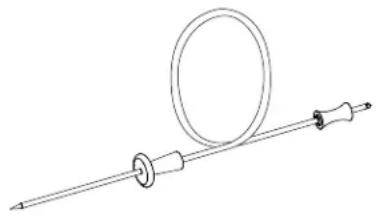
natural_image
Line drawing of a medical or laboratory instrument with a circular component and a rod-like tool (no text or symbols)OVEN BOTTOM
The oven bottom has a porcelain enamel finish. To make cleaning easier, protect the oven bottom from excessive spillovers. A smaller sheet of foil or sheet tray may be used to catch a spillover by placing it on the rack below the rack you are cooking on. This is particularly important when baking a fruit pie or other foods that are highly acidic. Hot fruit fillings or other foods that are highly acidic (such as tomatoes, sauerkraut and sauces with vinegar or lemon juice) may cause pitting and damage to the porcelain enamel surface and should be wiped up immediately.
Never fully cover a rack with aluminum foil. This will disturb the heat circulation and result in poor baking.
To clean up spillovers, use soap and water, an abrasive cleaner or soap-filled scouring pad. Rinse well to remove soap before self-cleaning.
Care and Cleaning
LIFT-OFF SOFT-CLOSE OVEN DOOR
The door is very heavy. Be careful when removing and lifting the door. Do not lift the door by the handle.
To remove the door:
-
Fully open the door.
-
Pull the hinge locks down toward the door frame, to the unlocked position. A tool, such as a small flat-blade screwdriver, may be required.
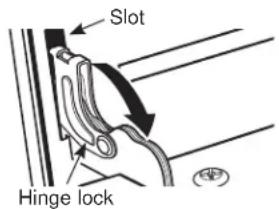
Pull hinge locks down to unlock
- Firmly grasp both sides of the door at the top.
- Close door to the door removal position, (approximately 15 degrees from closed) and lift it up and out until the hinge arm is clear of the slot.
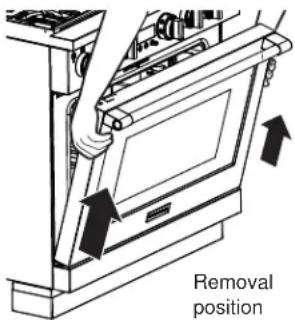
To replace the door:
- Firmly grasp both sides of the door at the top.
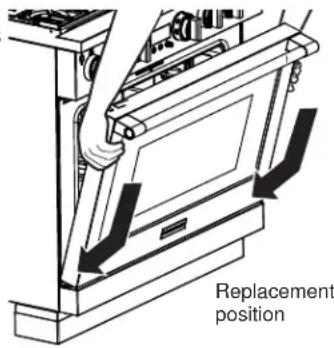
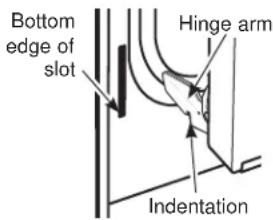
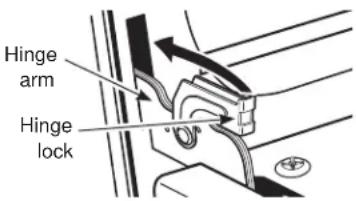
- With the door at the same angle as the removal position, seat the indentation of the hinge arm into the bottom edge of the hinge slot. The notch in the hinge arm must be fully seated into the bottom of the slot.
- Fully open the door. If the door will not fully open, the indentation is not seated correctly in the bottom edge of the slot.
- Push the hinge locks up against the front frame of the oven cavity, to the locked position.
- Close the oven door.
CLEANING THE OVEN DOOR
Cleaning the Door Interior
Do not allow excess water to run into any holes or slots in the door.
Wipe dish soap over any baked-on spatters on the glass. Use a single sided safety razor blade to clean it off. Then wipe over the glass with a soapy cloth to remove any residue and dry off.
The area outside the gasket can be cleaned with a soap-filled plastic scouring pad. Do not rub or clean the door gasket - it has an extremely low resistance to abrasion.
If you notice the gasket becoming worn, frayed or damaged in any way or if it has become displaced on the door, you should have it replaced.
Cleaning the Door Exterior
If a stain on the door vent trim is persistent, use a mild abrasive cleaner and a sponge-scrubber for best results. Do not use this method on any other surface.
Stainless Steel Surfaces (on some models)
Do not use a steel wool pad; it will scratch the surface. To clean the stainless steel surface, use warm sudsy water or a stainless steel cleaner or polish. Always wipe the surface in the direction of the grain. Follow the cleaner instructions for cleaning the stainless steel surface. To inquire about purchasing cleaning products including stainless steel appliance cleaner or polish, see the Consumer Support section for further information.
OVEN LIGHTS
WARNING
SHOCK OR BURN HAZARD: Before
replacing oven light bulb, disconnect the electrical power to the range at the main fuse or circuit breaker panel. Failure to do so may result in electric shock or burn.
CAUTION
BURN HAZARD: The glass cover and
bulb should be removed when cool. Touching hot glass with bare hands or a damp cloth can cause burns.
Each oven is equipped with halogen light columns located on the side walls of the oven. The lights come on when the door is opened or when the oven is in a cooking cycle.
Each light assembly consists of a removable light cover with two locking clips and a light compartment with three halogen bulbs.
Be sure to let the light cover and bulb cool completely. For your safety, do not touch a hot bulb with bare hands or a damp cloth.
To remove:
-
Remove the racks from the oven. See the Partial Extension Oven Racks section.
-
Using a 7/16" nutdriver, remove the four nuts holding the rack supports to the oven wall.
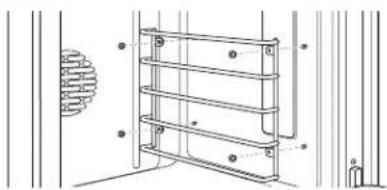
natural_image
Technical line drawing of a multi-tiered metal shelf assembly with mounting holes and a circular component on the left (no text or symbols)- Remove the glass light cover by pulling its back edge out and rolling it toward you. Do not remove any screws.
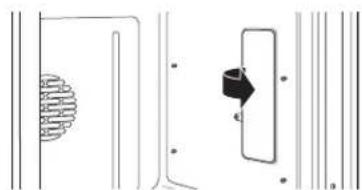
natural_image
Pure electrical circuit lines without any symbols- Using gloves or a dry cloth, remove the burned-out light bulb by pulling it straight out.
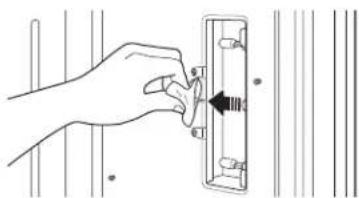
natural_image
Hand inserting a small component into a wall-mounted device (no text or symbols visible)To replace:
Use a new 120-volt Halogen bulb, with G8 pins, not to exceed 40 watts.
Replacement bulbs may be purchased by calling 800.626.2002. Order Part Number WB25X39610.
NOTE: Higher wattage bulbs will damage your oven.
Using gloves or a dry cloth, remove the bulb from its packaging. Do not touch the bulb with bare fingers. Oil from bare fingers may cause hot spots on the glass surface and lead to premature failure of the bulb. If you do touch the glass, clean it with alcohol prior to installation.
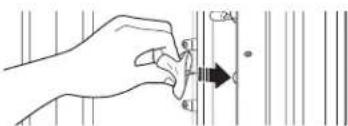
natural_image
Hand holding a tool with an arrow pointing to a vertical bar (no text or symbols visible)-
Push the bulb straight into the receptacle all the way.
-
Replace the light cover, by placing its front edge under the front two tabs in the light compartment. Roll the back edge into place, making sure that it is firmly seated.
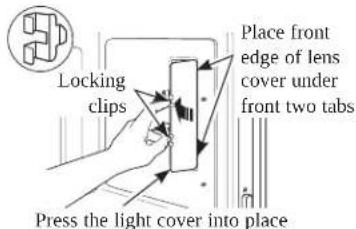
NOTE: If the locking clips fell from the glass lens cover, hold them on the cover, in the correct position, while replacing the cover on the light compartment.
The light cover must be in place when using the oven.
- Reinstall the rack support. Be sure to orient the support so that the top tabs for the nuts are closest to the top of the oven. Lightly secure with the four nuts removed earlier, but do not over-tighten or the enamel could be chipped.
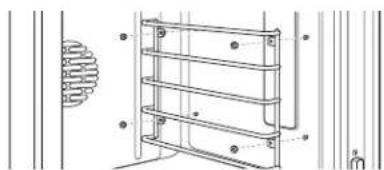
natural_image
Technical line drawing of a multi-tiered metal shelf assembly with mounting holes (no text or symbols)-
Replace the racks. See the Partial Extension Oven Racks section.
-
Reconnect electrical power to the oven.
Care and Cleaning
ROUND, INSPIRAL, AND MULTI-RING BURNERS
CAUTION
DO NOT OPERATE THE BURNER WITHOUT ALL BURNER PARTS IN PLACE.
Surface burners should be cleaned routinely, especially after bad spillovers, which could clog the slots and holes in the burner heads.
The electrode is located at the rear of each burner. Do not attempt to disassemble or clean around any burner while another burner is on. An electric shock may result.
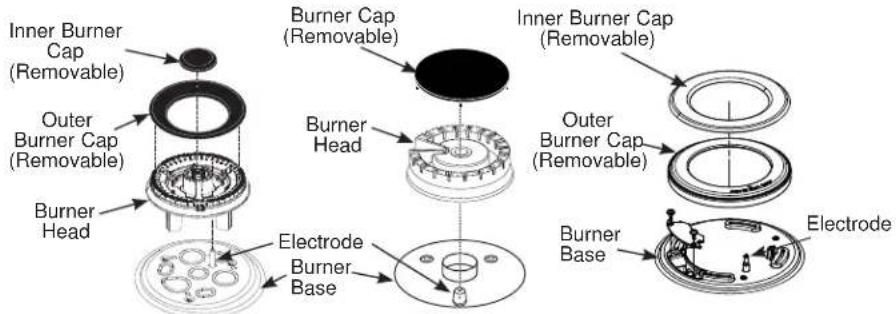
Multi-Ring Burner Single-Ring Burner Inspiral Burner
To remove the burner parts:
- Turn all controls OFF before removing any burner parts.
- When cool, you may lift off the burner grates, burner caps and burner heads for easier cleaning. Do not remove the burner bases.
NOTE: Be sure to replace the burners and grates in the same location and orientation.
Cleaning
Lift off burner parts only when cool. Wash in hot, soapy water.
To remove burned-on food, soak the burner heads in a solution of mild liquid detergent and hot water for 20–30 minutes. For more stubborn stains, use a plastic scouring pad or toothbrush.
If the spill goes inside the burner head assembly, wash it under running water and shake to remove excess water.
After Cleaning
Before replacing the burner parts, shake out excess water and then dry them thoroughly.
To replace the burner parts for Multi Ring:
Align the burner head as shown. Pass the igniter through the opening in the burner head while ensuring the ignitor arrow is pointing toward the ignitor. Make sure the burner lies flat. Install the burner caps taking care to check that they lie flat on the burner head. Check burner operation to ensure uniform, blue flame around the burner. If there are yellow or uneven flames, immediately turn the burner off, let it cool, and readjust the burner and burner caps.
To replace the burner parts for the Inspiral and round burner:
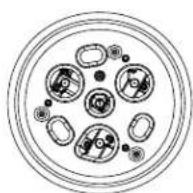
Cooktop without burner installed.
Top View
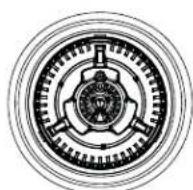
Burner in correct orientation.
Top View
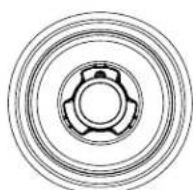
Burner with outer and inner cap.
Top View
Make sure that the burner parts are replaced in the correct location and orientation.
- Replace the burner head on top of the burner base, making sure that the hole in the burner head is properly aligned with the electrode in the burner base. A small gap between the base and head is normal.
- Place the burner cap on top of the burner head. Make sure that the burner cap is properly seated on the burner head.
Burner cap properly seated
Burner cap not properly seated
To replace the burner parts for Inspiral Burner:
Follow graphics to align spark ignitor
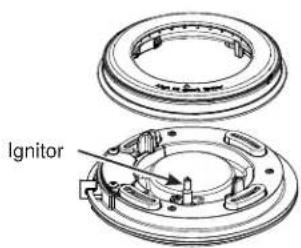
Care And Cleaning
SPARK IGNITER AND ELECTRODES
The electrode of the electronic ignition system is positioned at the rear of the burner base. When cleaning the cooktop, be careful not to snag the igniter with your cleaning cloth. Damage to the igniter could occur.
Be careful not to push in a control knob while cleaning. It could cause the igniter to spark.
Make sure that the white ceramic igniters on the cooktop are dry and clean. Clean the metal portion of the electrode with a soft cloth or emery board.
Do not attempt to remove the electrode from the cooktop.
Clean this metal part with an emery board.
Do not clean this white ceramic part with an emery board.
BURNER GRATES
The enameled cast-iron burner grates should be cleaned regularly.
Wash them in hot soapy water, rinse, and dry thoroughly.
Although they are durable, the grates will gradually lose their shine, regardless of the best care you can give them. This is due to their continual exposure to high temperatures.
Do not operate a burner for an extended period of time without cookware on the grate. The finish on the grate may chip without cookware to absorb the heat.
For stability, the frames have rubber pads on each corner. During cleaning and use, be careful not to damage or snag rubber pads.
GREASE TROUGH (on some models)
Grease from the griddle will drain into the enameled cast-iron grease trough at the front of the range. Ensure grease trough is pushed underneath the griddle lip in order to catch grease while cooking. Once the trough has cooled, it may be lifted out for easier cleaning.
To remove the cool grease trough from the griddle, slide it toward the front and lift up.
Do not allow grease to accumulate in the grease trough as it can be a fire hazard. Clean the grease trough as soon as they are cool. The grease trough can be cleaned by hand with hot soapy water or in the dishwasher. Wipe any spillage in the trough basin with a soft cloth.
Wok Side
Inspiral Burner
Grate Foot
Grease trough
GRIDDLE (on some models)
Thoroughly clean the griddle of grease and food particles, using a square-edged metal spatula, while it is still hot.
Wipe the griddle with a dry, heavy, coarse cloth to remove any remaining residue and food particles. If the griddle is cleaned with anything other than a dry, heavy,
coarse cloth, it will need to be reseasoned.
Never flood the hot griddle with cold water. This could cause the griddle to crack or warp.
NOTE: It is normal for the stainless steel griddle to discolor to a yellow-brown color after use.
Troubleshooting Tips
Save time and money! Review the charts on the following pages first and you may not need to call for service.
| Problem Possible Cause | |
| Oven Will Not Work A fuse in | your home may be blown or the circuit breaker tripped.The oven controls are not properly set.The oven controls are set for cleaning. If necessary, allow the oven to cool; then open the door.Make sure the Oven Mode Selector is set to BAKE and the Oven Temperature Knob is set to atemperature. |
| Surface Burners Light But Oven Does Not | The oven gas shut-off valve may have accidentally been moved during cleaning or moving. |
| Oven Light(S) Do Not Work | The light bulb is defective. Replace the bulb.The oven is set for Proof mode. The lights cycle on and off as necessary to maintain Proof temperature. |
| Food Does Not Bake Or Roast Properly | The oven controls are improperly set. See the Baking or Roasting section.Oven not preheated for a long enough time; wait for the oven to signal preheat.Incorrect cookware or cookware of improper size being used. See Baking Tips.Racks in the wrong position. See the Baking or Roasting section.8VH D IRLO WHQW WR VORZ GRZQ EURZQLQJ GXULQJ URDVWLQJOven thermostat needs adjustment. See the Oven thermostat adjustment section. |
| Food Does Not Broil Properly | This model is designed for closed door broiling only. Close the door. Always broil with the door closed.The oven controls are not set at BROIL. See the Broiling section.The temperature probe is plugged into the outlet in the oven. Remove the temperature probe from the oven.Improper rack position being used.&RRNZDUH LV QRW VXLWHG IRU EURLOLQJ 8VH WKH EURLOLQJ SDQ DQGLuminum foil used on the broiling pan and grid has not been fitted properly and slit as recommended. |
| Cracking Or Popping Sound | This is normal. This is the sound of the metal heating and cooling during both the cooking and cleaning functions. |
| Oven Temperature Too Hot Or Too Cold | Oven thermostat needs adjustment. See the Oven thermostat adjustment section. |
| F- And A Number Flash In The Display | The oven has a function error code. Turn the Oven Mode Selector and the Oven Temperature Knobs to OFF. Allow the oven to cool for one hour. Put the oven back into operation.Disconnect all power to the oven for 30 seconds and then reconnect power. If the function error code repeats, call for service. |
| Display Goes Blank The display | lay is blank when the oven or timer is not in use.A fuse in your home may be blown or the circuit breaker tripped. Replace the fuse or reset the circuit breaker. |
| “Probe” Appears In The Display | This is reminding you to enter a probe temperature after plugging in the temperature probe.Enter a probe temperature |
| Power Outage | If the oven was in use during a power outage or surge, the oven must be reset. Turn the Oven Temperature Knob and the Oven Mode Selector to OFF. Reset the controls to begin again. |
| Steam From The Vent | When using the convection mode, it is normal to see steam coming out of the oven vent. As the number of racks or amount of food being cooked increases, the amount of visible steam will increase. |
Troubleshooting Tips
| Problem Possible Cause | |
| Burning Or Oily Odor Emitting From The Vent | This is normal in a new oven and will disappear in time. |
| Strong Odor | This is temporary. An odor from the insulation around the inside of the oven is normal for the first few times the oven is used. |
| Fan Noise | A cooling fan or a convection fan (depending on the function you are using) may turn on. This is normal. The cooling fan will turn on to cool internal parts. It may run after the oven is turned off. The convection fan may cycle on and off until the function is over or the door is opened. |
| Convection Fan Not On All The Time | The convection fan (depending on the function you are using) may cycle on and off until the function is over or the door is opened for optimized performance. This is normal. In addition, the convection fan may cycle in the clockwise and counter clockwise direction until the function is over or the door is opened. |
| Burners do not light | Plug on range is not completely inserted in the electrical outlet. Make sure electrical plug is plugged into a live, properly grounded outlet. |
| Gas supply not connected or turned on. See the Installation Instructions that came with your range. | |
| A fuse in your home may be blown or the circuit breaker tripped. Replace the fuse or reset the circuit breaker. | |
| Burner parts not replaced correctly. See the Care and Cleaning of the range section. | |
| Burner slots near the electrode may be clogged. Remove the burners and clean them. Check the electrode area for burned-on food or grease. See the Care and Cleaning of the range section. | |
| Food residue on electrode Lightly polish flat tip of electrode with nail file or sandpaper until shiny. | |
| Top burners do not burn evenly | Improper burner assembly. Make sure the burner caps are seated correctly. See the Care and Cleaning of the range section. |
| Burner slots on the side of the burner may be clogged. Remove the burners for cleaning. See the Care and Cleaning of the range section. | |
| Burner flames are very large or yellow | Improper air to gas ratio. If range is connected to Propane gas, contact the technician who installed your range or made the conversion. |
| Condensation Or Fogging On The Inner Door Glass | Condensation or fogging on the inside of the oven door glass is normal during the preheating of the oven and will evaporate usually by the end of the preheating cycle. |
| Oven will not self clean | The oven temperature is too high to set a self-clean operation.Allow the oven to cool below the locking temperature and reset the controls.The controls are not properly set. See the Self-Cleaning Oven section. |
| Oven not clean after a clean cycle | The oven was heavily soiled. Clean up heavy spillovers before starting the clean cycle. Heavily soiled ovens may need to self-clean again.Oven is connected to a 208V electrical supply. Set your cleaning time for 5 hours.The oven controls are not properly set. See the Self-Cleaning Oven section. |
| Oven racks are difficult to slide | The racks were cleaned in the self-clean cycle and now need periodic lubrication.Do not spray with a cooking spray or other lubricant sprays. See Full extension oven racks in the Care and Cleaning section. |
| Timer does not work The timer | cannot be used while the oven is self-cleaning. |
| “Err turn surface burners off” appears in the display | Self-clean is in progress and the Cooktop Lockout feature is activated. No surface cooking is permitted during the self-clean operation. Wait until the self-cleaning operation has been completed. |
| “Close door” shows in the display | The self-clean cycle has been selected but the door is not closed.Close the oven door. The symbol will appear in the display |
Limited Warranty
cafeappliances.com
All warranty service is provided by our Factory Service Centers, or an authorized service technician. To schedule service online, visit us at cafeappliances.com/service. In Canada, visit cafeappliances.ca/service. Please have your serial number and your model number available when scheduling service.
Servicing your appliance may require the use of the onboard data port for diagnostics. This gives a Café factory service technician the ability to quickly diagnose any issues with your appliance and helps Café improve its products by providing Café with information on your appliance. If you do not want your appliance data to be sent to Café, please advise your technician not to submit the data to Café at the time of service.
| For the period of Café will replace | |
| One yearFrom the dateof the originalpurchase | Any part of the cooktop which fails due to a defect in materials or workmanship. During this limited one-year warranty, Café will provide, free of charge, all labor and in-home service to replace the defective part. |
What Café will not cover:
■ Service trips to your home to teach you how to use the product.
■ Discoloration of the oven racks.
■ Chipping of porcelain enamel grates or oven racks.
■ Replacement of house fuses or resetting of circuit breakers.
■ Incidental or consequential damage caused by possible defects with this appliance.
■ Damage after delivery.
■ Damage to the product caused by accident, fire, floods or acts of God.
■ Product damage or failure of the product if it is abused, misused, used for other than the intended purpose, or used commercially.
■ Improper installation, delivery or maintenance.
If you have an installation problem, contact your dealer or installer. You are responsible for providing adequate electrical, gas, exhausting and other connecting facilities as described in the Installation Instructions provided with the product.
■ Product not accessible to provide required service.
EXCLUSION OF IMPLIED WARRANTIES
Your sole and exclusive remedy is product repair as provided in this Limited Warranty. Any implied warranties, including the implied warranties of merchantability or fitness for a particular purpose, are limited to one year or the shortest period allowed by law.
This limited warranty is extended to the original purchaser and any succeeding owner for products purchased for home use within the USA. If the product is located in an area where service by a Café Authorized Servicer is not available, you may be responsible for a trip charge or you may be required to bring the product to an Authorized Café Service location for service. In Alaska, the limited warranty excludes the cost of shipping or service calls to your home.
Some states do not allow the exclusion or limitation of incidental or consequential damages. This limited warranty gives you specific legal rights, and you may also have other rights which vary from state to state. To know what your legal rights are, consult your local or state consumer affairs office or your state's Attorney General.
Warrantor: GE Appliances, a Haier company
Louisville, KY 40225
Canada : MC Commercial Inc., Burlington, ON L7R 5B6
Extended Warranties: Purchase a Café extended warranty and learn about special discounts that are available while your warranty is still in effect. You can purchase it online anytime at
cafeappliances.com/extended-warranty
Café Service will still be there after your warranty expires.
Consumer Support
CAFÉ Website
Have a question or need assistance with your appliance? Try the CAFÉ website 24 hours a day, any day of the year! You can also shop for more great CAFÉ products and take advantage of all our on-line support services designed for your convenience. In the US: cafeappliances.com In Canada: cafeappliances.ca
Register Your Appliance
Register your new appliance on-line at your convenience! Timely product registration will allow for enhanced communication and prompt service under the terms of your warranty, should the need arise. You may also mail in the pre-printed registration card included in the packing material. In the US: cafeappliances.com/register In Canada: cafeappliances.ca/registration
Schedule Service
Expert CAFÉ repair service is only one step away from your door. Get on-line and schedule your service at your convenience any day of the year. In the US: cafeappliances.com/service In Canada: cafeappliances.ca/service
Extended Warranties
Purchase a CAFÉ extended warranty and learn about special discounts that are available while your warranty is still in effect. You can purchase it on-line anytime. CAFÉ Service will still be there after your warranty expires. In the US: cafeappliances.com/extended-warranty In Canada: cafeappliances.ca/extended-warranty
Remote Connectivity
For assistance with wireless network connectivity (for models with remote enable), visit our website at cafeappliances.com/connect In Canada: cafeappliances.ca/connect
Parts and Accessories
Individuals qualified to service their own appliances can have parts or accessories sent directly to their homes (VISA, MasterCard and Discover cards are accepted). Order on-line today 24 hours every day. In the US: cafeappliances.com/parts
Instructions contained in this manual cover procedures to be performed by any user. Other servicing generally should be referred to qualified service personnel. Caution must be exercised, since improper servicing may cause unsafe operation.
Customers in Canada should consult the yellow pages for the nearest Mabe service center, visit our website at cafeappliances.com/parts
Contact Us
If you are not satisfied with the service you receive from CAFÉ, contact us on our website with all the details including your phone number, or write to:
In the US: General Manager, Customer Relations | CAFÉ Appliances, Appliance Park | Louisville, KY 40225 cafeappliances.com/contact
In Canada: Director, Consumer Relations, Mabe Canada Inc. | Suite 310, 1 Factory Lane | Moncton, N.B. E1C 9M3 cafeappliances.ca/contact
CAFE
DISTINCT BY DESIGN™
Plaque chauffante 39
natural_image
Technical line drawing of a mechanical bracket assembly with mounting holes and a separate view (no text or symbols)natural_image
Pure architectural floor plan lines without any text, numbers, or symbols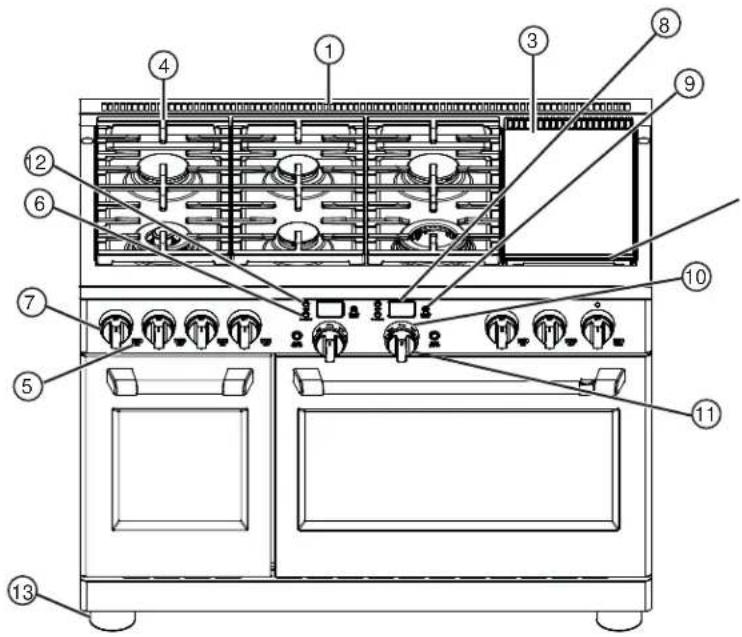
②
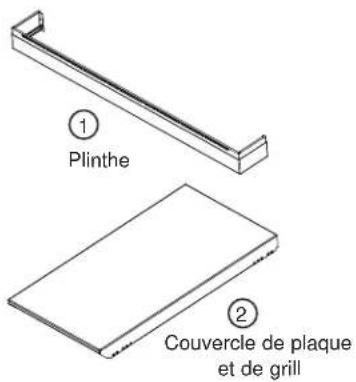
natural_image
Simple line drawing of a cooking pot with a crossed-out black X mark and flames (no text or symbols)natural_image
Exploded view diagram of a mechanical assembly with concentric rings and internal components (no text or labels)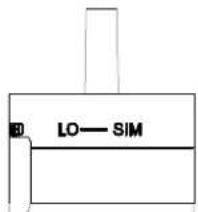
natural_image
Technical line drawing of a mechanical component with no visible text or symbols| Aliment Température | |
| Crêpes 375°F (190°C) | |
| Biftecks hachés 400°F (204°C) | |
| Bacon* 400°F (204°C) | |
| Fromage fondu 350°F (176°C) | |
| Œufs 275°F (135°C°) |
natural_image
Line drawing of a kitchen appliance rack with multiple bowls and numbered compartments (no text or symbols)GUIDE DE CUISSON
MODES DU FOUR (suite)
Cuisson Au Grill
natural_image
Illustration of hands using a tool to cut a rectangular object with horizontal lines (no text or symbols)MODES DU FOUR (suite)
natural_image
Top-down schematic of a multi-chamber air vent or control unit with no text or symbolsMODES DU FOUR (suite)
MODES DU FOUR (suite)
natural_image
Line drawing of a hand using a tool to cut through a rectangular tray (no text or symbols)GUIDE DE GRILLAGE PAR CONVECTION
MODES DU FOUR (suite)
MODES DU FOUR (suite)
natural_image
Technical line drawing of a mechanical assembly with internal components and housing (no text or symbols)MODES DU FOUR (suite)
natural_image
Illustration of a cylindrical object mounted on a rectangular base with a cable inserted (no text or symbols)GUIDE DE CUISSON AU FOUR
GUIDE DE CUISSON AU FOUR (suite)
natural_image
3D rendering of a gray rectangular baking tray (no text or symbols)natural_image
Two wire mesh woven baskets, one open and one closed, with no text or symbols visible.natural_image
Technical line drawing of a structural frame or panel assembly (no text or symbols)natural_image
Line drawing of a wire mesh grid with two rectangular handles (no text or symbols)SONDE DE TEMPÉRATURE
natural_image
Line drawing of a medical or laboratory probe with a circular component and two rod-like devices (no text or symbols)BAS DU FOUR
natural_image
Technical line drawing of a multi-tiered metal shelf assembly with mounting holes and a coiled wall (no text or symbols)natural_image
Pure electrical circuit lines without any symbolsnatural_image
Hand inserting a small object into a wall-mounted device (no text or symbols visible)natural_image
Illustration of a hand holding a tool with an arrow pointing to a vertical bar (no text or symbols)natural_image
Technical line drawing of a coiled metal frame structure with mounting holes (no text or symbols)For stability, the frames have rubber pads on each corner. During cleaning and use, be careful not to damage or snag rubber pads.
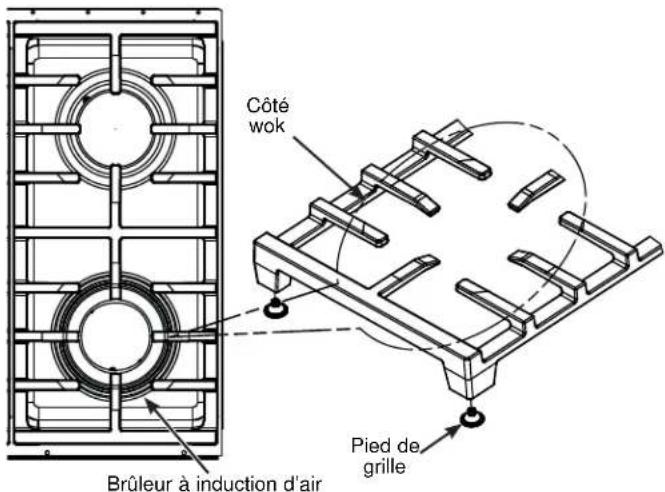
Garant : GE Appliances, a Haier company
Louisville, KY 40225
Au Canada : MC Commercial Inc., Burlington, ON L7R 5B6
cafeappliances.ca/extended-warranty
Au Canada : Produsupport.mabe.ca/crm/Products/ProductRegistration.aspx
natural_image
Technical line drawing of a mechanical bracket assembly with mounting holes and fasteners (no text or symbols)natural_image
Architectural floor plan diagram with grid layout and circular elements (no text or labels)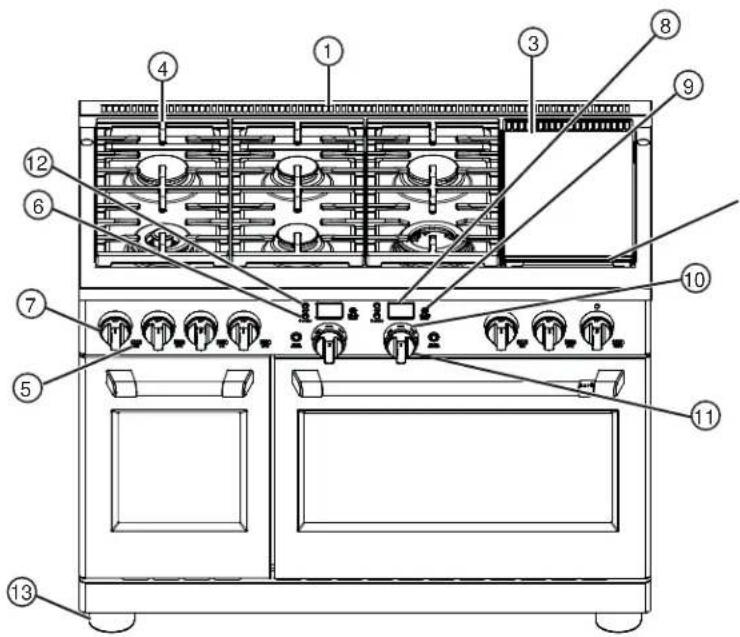
②
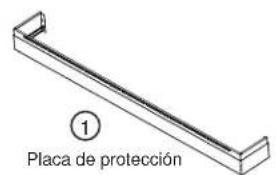
natural_image
Simple line drawing of a cooking pan with a crossed-out black X mark and flames (no text or symbols)natural_image
Exploded view diagram of a mechanical assembly with concentric rings and internal components (no text or labels)Quemador Espiralado
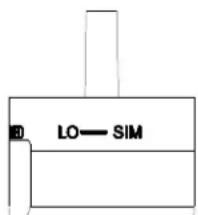
natural_image
Technical line drawing of a mechanical component with no visible text or symbolsnatural_image
Technical diagram of a mechanical assembly with an inset showing a detailed cross-section of internal components (no text or symbols present)natural_image
Line drawing of a hand using a tool to adjust or install a grid-like structure (no text or symbols)BANDEJA DEL HORNO DE BAJO PERFIL
natural_image
Pure technical line drawing of a mechanical component without any text, numbers, or symbolsGUÍA PARA HORNEAR
natural_image
Line drawing of a hand holding a pen over a tray with multiple tubes (no text or symbols)GUÍA DE ASADO
natural_image
Technical line drawing of a mechanical or electrical component with symmetrical internal flow patterns (no text or symbols)natural_image
Line drawing of a hand using a tool to cut through a rectangular tray with horizontal strips (no text or symbols)natural_image
Technical line drawing of a mechanical assembly inside two views (no text or symbols)natural_image
Line drawing of a cylindrical object placed inside a rectangular frame, with a cable inserted (no text or symbols)natural_image
Technical line drawing of a mechanical assembly with internal components (no text or symbols)natural_image
Line drawing of a wire mesh grid (no text or symbols)SONDA DE TEMPERATURA
natural_image
Line drawing of a medical or laboratory probe with a circular component and two probes (no text or symbols)BASE DEL HORNO
natural_image
Technical line drawing of a wall-mounted shelf assembly with mounting holes and a circular component (no text or symbols)natural_image
Pure electrical circuit lines without any symbolsnatural_image
Hand inserting a small object into a wall-mounted device (no text or symbols visible)Para reemplazar:
natural_image
Technical line drawing of a coiled metal panel or rack structure with mounting holes (no text or symbols)Louisville, KY 40225
Canada : MC Commercial Inc., Burlington, ON L7R 5B6
cafeappliances.com/extended-warranty
En EE.UU.: General Manager, Customer Relations | Café Appliances, Appliance Park | Louisville, KY 40225 cafeappliances.com/contact
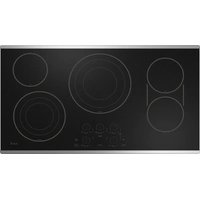
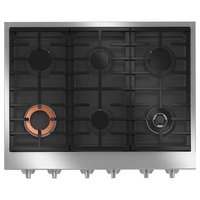
- CAFE
- Owner's Manual
- 36" and 48" Professional Dual Fuel Ranges
- Contents
- Safety Information....3
- Using the Range
- Care And Cleaning
- Troubleshooting Tips 40
- English • Français • Español
- THANK YOU FOR MAKING CAFÉ A PART OF YOUR HOME.
- IMPORTANT SAFETY INFORMATION READ ALL INSTRUCTIONS BEFORE USING THE APPLIANCE
- WARNING
- ANTI-TIP DEVICE
- For Professional Gas Ranges
- READ AND SAVE THESE INSTRUCTIONS
- GENERAL SAFETY INSTRUCTIONS
- CAUTION
- GENERAL SAFETY INSTRUCTIONS (cont.)
- KEEP FLAMMABLE MATERIALS AWAY FROM THE RANGE
- IN THE EVENT OF A FIRE, TAKE THE FOLLOWING STEPS TO PREVENT INJURY AND FIRE SPREADING
- SELF-CLEANING OVEN SAFETY INSTRUCTIONS
- COOKTOP SAFETY INSTRUCTIONS
- OVEN SAFETY INSTRUCTIONS
- How to Remove Protective Shipping Film and Packaging Tape
- CONNECTING YOUR WIFI ENABLED RANGE
- What you will need
- Connect your range
- REMOTE ENABLE EQUIPMENT
- FEATURES OF THE RANGE AND COOKTOP
- IN CASE OF A POWER FAILURE
- SURFACE BURNERS
- Lighting a Surface Burner
- Automatic Reignition
- Selecting a Flame Size
- Using the Surface Burners
- NOTES:
- SURFACE BURNERS (cont.)
- Types of Surface Burners
- Round Burner
- Inspiral Burner
- Multi-ring Burner
- TOP-OF-RANGE COOKWARE
- WOK COOKING
- GRIDDLE
- Fire Hazard
- GRIDDLE SAFETY PRECAUTIONS, LEVELING (on some models)
- USING THE GRIDDLE
- FEATURES OF THE OVEN
- OVEN CONTROL AND TIMER
- Timer
- To set the timer:
- To cancel the timer:
- SETTINGS
- WiFi Connect and Remote Enable
- Bluetooth® - Chef Connect
- SETTINGS (cont.)
- Auto Conv (Auto Conversion)
- Auto Off
- Sound
- F/C (Fahrenheit or Celsius)
- Oven Thermostat Adjustment
- Oven Info
- Model and Serial Number
- OVEN AIR VENTS
- ALUMINUM FOIL AND OVEN LINERS
- OVEN RACKS
- Partial Extension Oven Racks
- Remove and Replace Oven Racks
- To remove a rack:
- OVEN RACKS (Cont.)
- Partial Extension Oven Racks (Cont.)
- To replace a rack:
- To lubricate the paddle:
- LOW PROFILE OVEN RACK
- Removing and Replacing Flat Racks
- Baking
- How to Set the Oven for Baking
- OVEN MODES (Cont.)
- Broiling
- How to Set the Oven for Broiling
- Aluminum Foil
- Broiling Guide
- Convection Cooking
- Convection Baking
- How to Set the Oven for Multi-Rack Convection Baking
- Convection Roasting
- How to Set the Oven for Convection Roasting
- Convection Roasting Tips
- Convection Broiling
- How to Set the Oven for Convection Broiling
- COVECTION BROILING GUIDE
- Warming
- How to Set the Oven for Warming
- Proofing
- How to Set the Oven for Proofing
- Precision Cooking - Available on SmartHQ
- Temperature Probe
- How to Set the Oven for Temperature Probe
- Temperature Probe Care Guidelines
- Proper Temperature Probe Placement
- OVEN COOKING GUIDE
- Oven Cookware Guidelines
- Air Fry Cooking Guide (available on SmartHQ)
- Air Fry Cookware Guidelines
- General Tips for Air Fry Mode
- CONTROL PANEL AND KNOBS
- BROILER PAN, GRID AND ROASTING RACK (Optional Accessories)
- OVEN EXTERIOR
- Painted Surfaces
- OVEN INTERIOR
- Manual Cleaning
- STEAM CLEANING
- How to Set the Oven for Steam Cleaning
- Stainless Steel
- Steam Clean Mode
- SELF-CLEANING OVEN
- Safety
- ▲WARNING
- How to Set the Oven for Self-Cleaning
- After a Self Clean Cycle
- OVEN BOTTOM
- LIFT-OFF SOFT-CLOSE OVEN DOOR
- To remove the door:
- To replace the door:
- CLEANING THE OVEN DOOR
- Cleaning the Door Interior
- Cleaning the Door Exterior
- Stainless Steel Surfaces (on some models)
- OVEN LIGHTS
- To remove:
- To replace:
- ROUND, INSPIRAL, AND MULTI-RING BURNERS
- To remove the burner parts:
- Cleaning
- After Cleaning
- To replace the burner parts for Multi Ring:
- To replace the burner parts for the Inspiral and round burner:
- To replace the burner parts for Inspiral Burner:
- SPARK IGNITER AND ELECTRODES
- BURNER GRATES
- GREASE TROUGH (on some models)
- GRIDDLE (on some models)
- Troubleshooting Tips
- Limited Warranty
- cafeappliances.com
- What Café will not cover:
- EXCLUSION OF IMPLIED WARRANTIES
- Consumer Support
- CAFÉ Website
- Register Your Appliance
- Schedule Service
- Extended Warranties
- Remote Connectivity
- Parts and Accessories
- Contact Us
- MODES DU FOUR (suite)
- Cuisson Au Grill
- GUIDE DE GRILLAGE PAR CONVECTION
- GUIDE DE CUISSON AU FOUR
- SONDE DE TEMPÉRATURE
- BAS DU FOUR
- Quemador Espiralado
- BANDEJA DEL HORNO DE BAJO PERFIL
- GUÍA DE ASADO
- SONDA DE TEMPERATURA
- BASE DEL HORNO
- Para reemplazar:
- cafeappliances.com/extended-warranty
Brand : Café
Model : C2Y366P4TW2
Category : Cooker