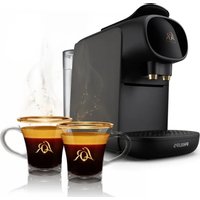
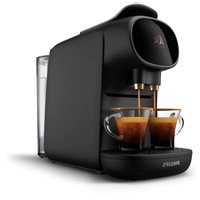
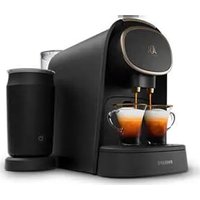
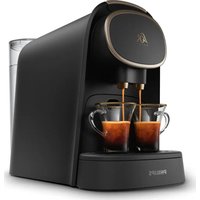
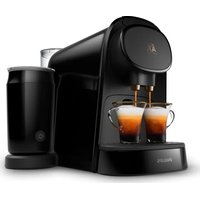
Barista LM9012 - Coffee machine L'or - Free user manual and instructions
Find the device manual for free Barista LM9012 L'or in PDF.


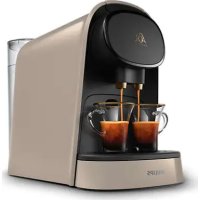
| Brand | L'or |
| Model | Barista LM9012 |
| Product type | Capsule coffee machine |
| Capsule compatibility | L'or Espresso (single dose) and L'or Barista (double dose) capsules, Nespresso* capsules and other JDE aluminum brands |
| Pressure | 19 bars (estimated) |
| Water tank capacity | 1.2 L (estimated) |
| Used capsule container capacity | Up to 10 capsules (estimated) |
| Dimensions (W x H x D) | Approximately 32 x 25 x 24 cm (estimated) |
| Weight | Approximately 5 kg (estimated) |
| Power supply | 220-240 V, 50-60 Hz (estimated) |
| Power | 1450 W (estimated) |
| Main functions | Instant start, auto shut-off, double capsule recognition, dual spout for 2 cups, volume customization |
| Coffee types | Ristretto (25 ml), Espresso (40 ml), Lungo (110 ml); double dose versions (50 ml, 80 ml, 220 ml) |
| Volume customization | Programmable via Ristretto, Espresso, Lungo buttons (adjustable ranges) |
| Heating time | Approximately 25 seconds |
| Auto shut-off | Yes, after each brew cycle |
| Cleaning and maintenance | Weekly cleaning of coffee circuit; descaling recommended with L'or Barista citric acid descaler (CA6530) |
| Parts cleaning | Drip tray, cup rest, capsule container, wastewater drawer: dishwasher-safe |
| Descaling indicator | Ristretto and Lungo buttons flash after brewing |
| Safety | Lever with sharp piercer; do not insert fingers into the chamber |
| Spare parts | Water tank, distribution spout, drip tray, cup rest, capsule container, wastewater drawer |
| Repairability | Philips support; website and hotline; user descaling |
| Warranty | Not specified in the manual |
| Country of origin | Not specified |
Frequently Asked Questions - Barista LM9012 L'or
User questions about Barista LM9012 L'or
0 question about this device. Answer the ones you know or ask your own.
Ask a new question about this device
Download the instructions for your Coffee machine in PDF format for free! Find your manual Barista LM9012 - L'or and take your electronic device back in hand. On this page are published all the documents necessary for the use of your device. Barista LM9012 by L'or.
USER MANUAL Barista LM9012 L'or
English 7 Dansk 24 Deutsch 41 Español 59 Français 77 Italiano 95 Nederlands 113 Norsk 131 Português 148 Svenska 166
General description
1 Ristretto button
2 Espresso button
3 Lungo button
4 Water tank lid
5 Water tank
6 Mains cord with plug
7 Used capsule compartment
8 Waste water drawer
9 Platform for large cups or bowls
10 Drip tray
11 Cup tray
12 Coffee dispensing spout
13 Coffee outlets
14 Capsule compartment
15 Lever
Introduction
Welcome to the L'OR Barista world! L'OR Barista is the only capsule coffee system that allows you to brew two cups of coffee at the same time thanks to the double spout and the exclusive L'OR Barista double-shot capsules with twice as much coffee. The L'OR Barista coffee machine is also compatible with the L'OR Espresso single-shot coffee capsules. Thanks to the Dual Capsule Recognition technology, the machine automatically recognizes the capsule size and adapts the volume accordingly. All you need to do is press the button for the type of coffee you desire.
Capsules and capsule compatibility
The L'OR Barista coffee machine has been designed to work with L'OR Espresso single-shot capsules and L'OR Barista double-shot capsules, as well as with Nespresso* capsules and aluminum capsules from coffee brands produced by Jacobs Douwe Egberts, such as Douwe Egberts, JACOBS, Jacqmotte, Jacques Vabre, Grand Mère, L'OR, Marcilla, Moccona, Saimaza and Senseo.
*brand of a third party not connected to JACOBS DOUWE EGBERTS and / or PHILIPS
L'OR aluminum capsules are available online at www.lorespresso.com and in shops. You can choose from a variety of coffee capsules for different types of coffee.
Direct start and auto switch-off
The direct start function allows you to brew the coffee you desire with just one press of a button. After the coffee has been prepared the machine switches off automatically to save energy.
Preparing for use
Before first use, remove all packaging materials from the machine.
When you use the machine for the first time or if you have not used it for 1 day or longer, perform the following steps:
1 Remove the water tank from the machine.
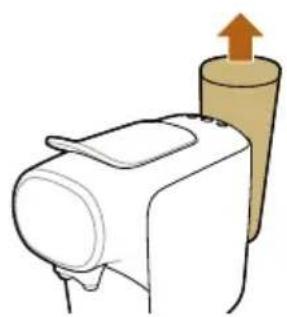
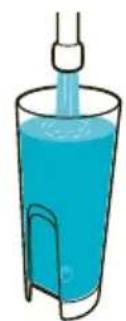
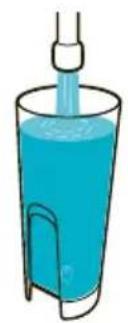
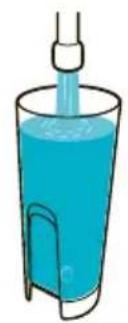
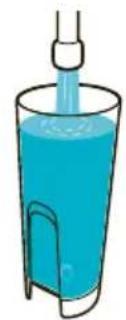
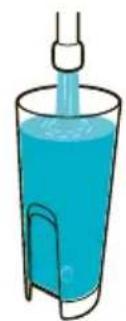
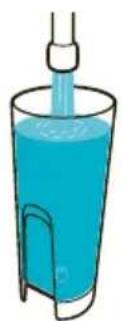
2 Rinse and fill the water tank under the tap. Place the water tank back onto the machine.
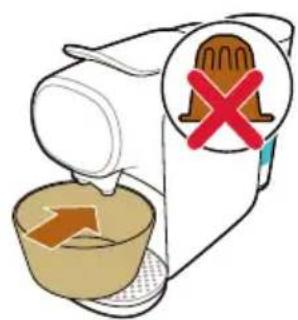
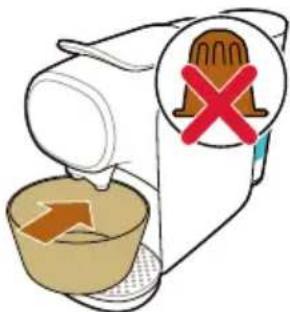
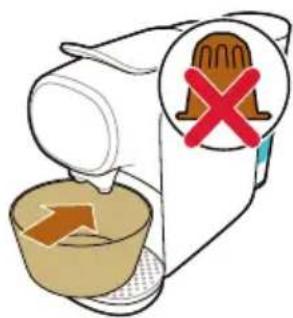
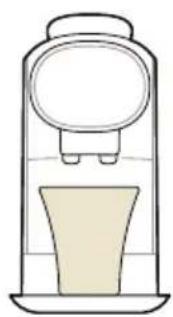
3 Place a bowl under the coffee dispensing spout. Do not insert a capsule and make sure that the lever is closed.
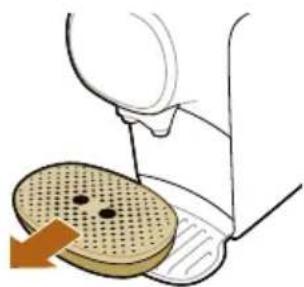
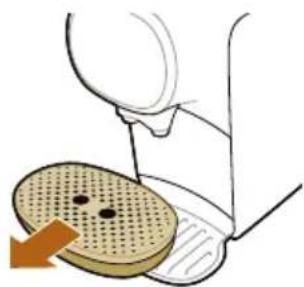
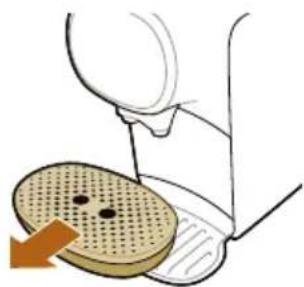
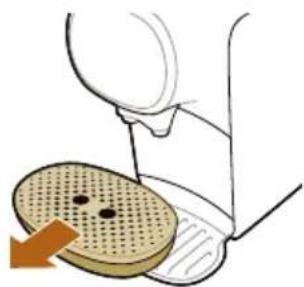
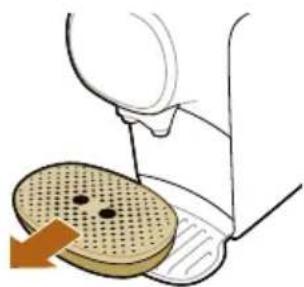
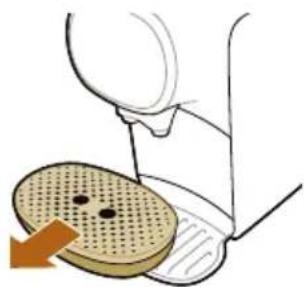
Note: You can remove the drip tray to create enough space to place a bowl under the coffee dispensing spout.
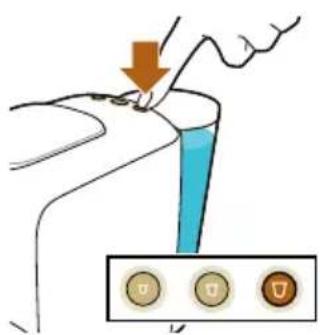
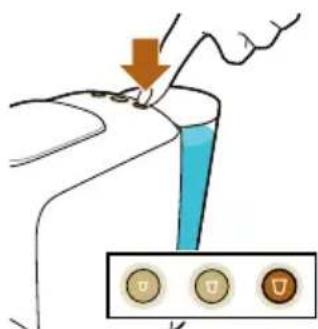
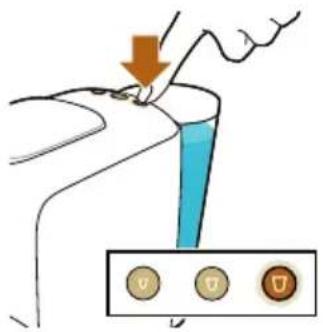
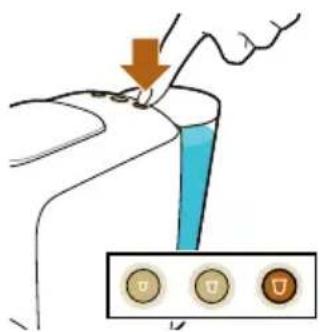
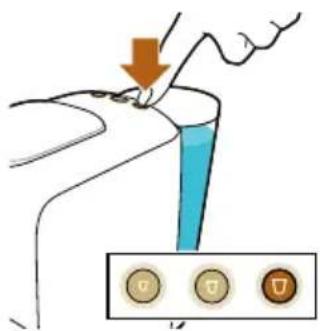
4 Press the lungo button.
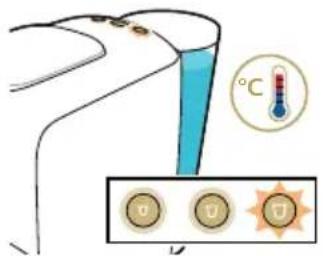
5 The machine heats up in about 25 seconds and starts rinsing. Water flows from the coffee dispensing spout into the bowl until the internal water circuit is empty.
Note: When the internal water circuit is empty, the machine produces a humming sound. When the machine dispenses water, it produces a less loud humming sound. This is normal.
6 Empty the drip tray and the waste water drawer.
The machine is now ready for use.
Brewing coffee
Beverages and capsules
Beverages
Thanks to the Dual Capsule Recognition technology, the machine automatically recognizes the capsule size and adapts the volume of your drink accordingly. All you need to do is press the button for the type of coffee you desire.
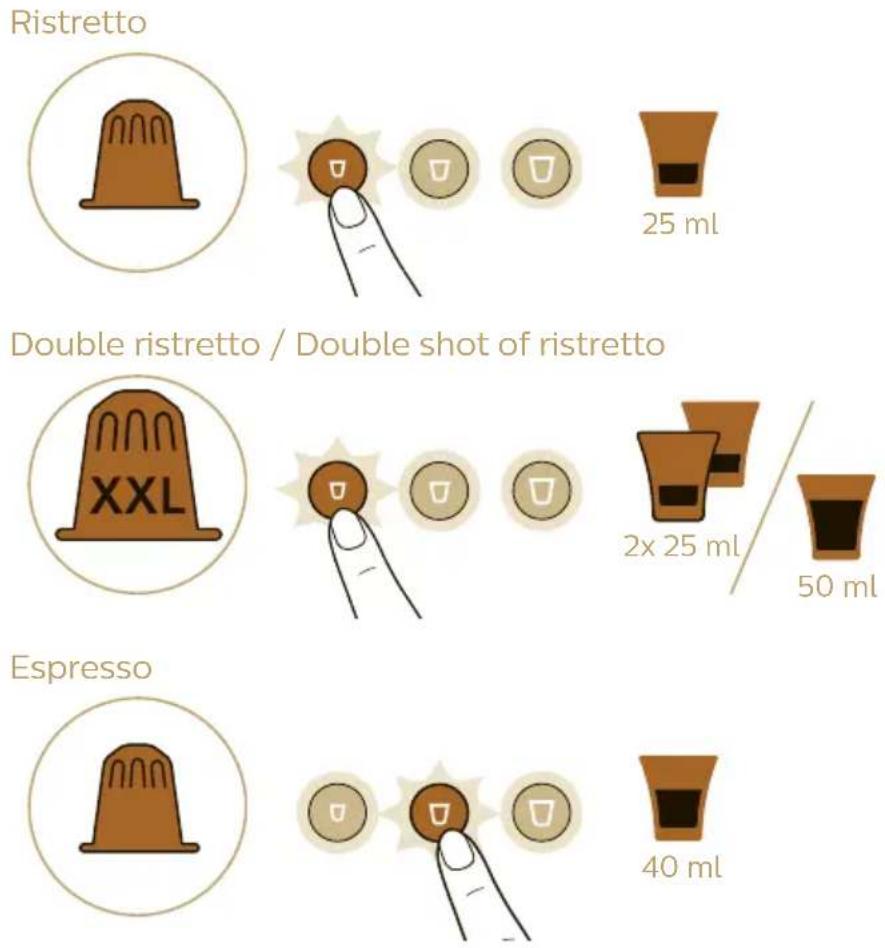
Double espresso / Double shot of espresso
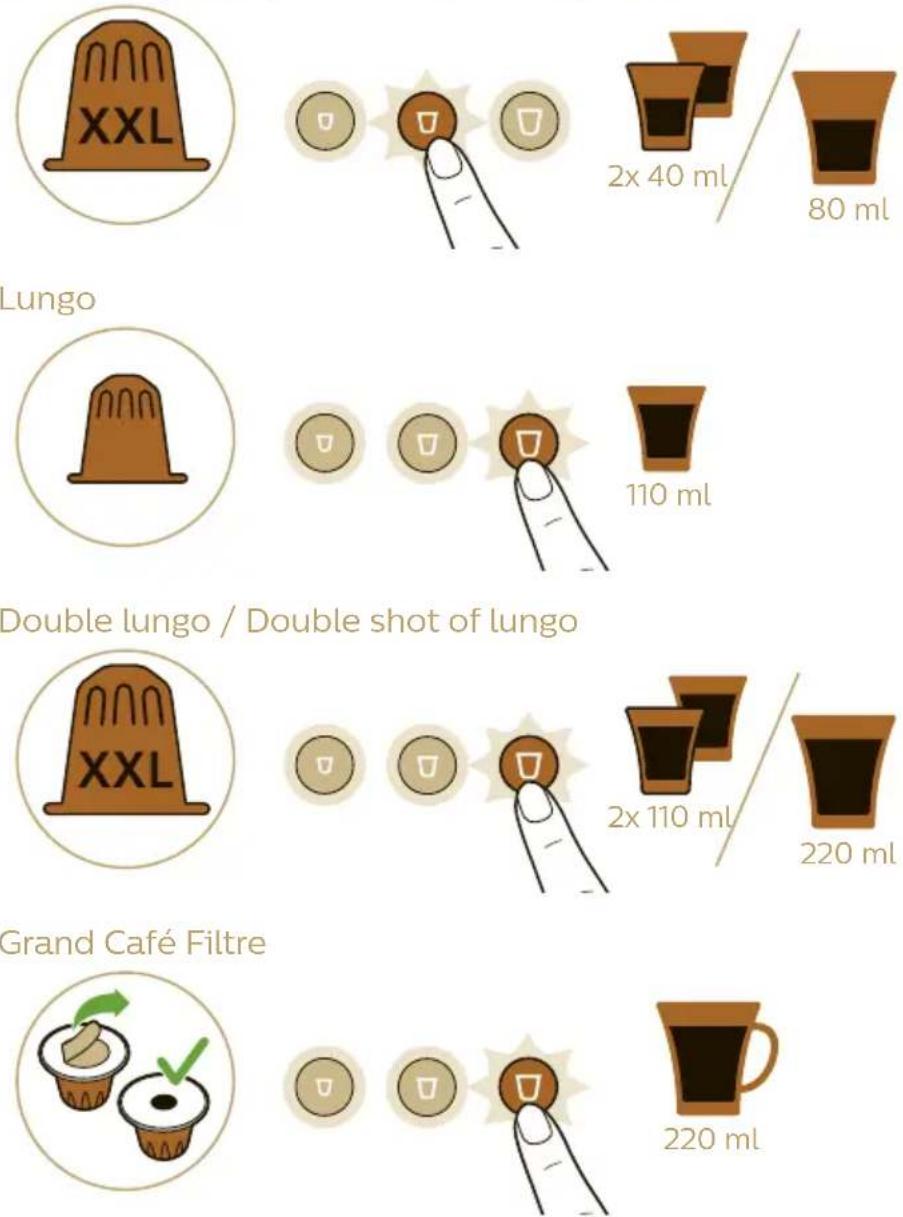
Preparing coffee
1 For one coffee, place one cup under the coffee dispensing spout.
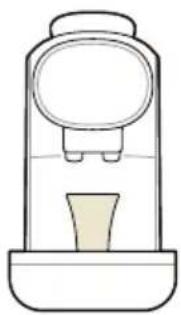

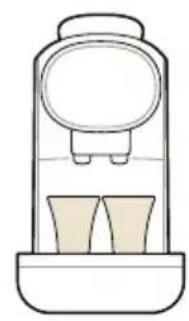
2 For two coffees, place two cups under the coffee dispensing spout.
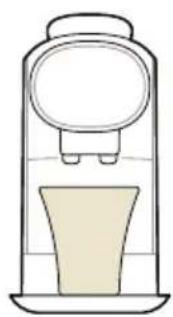
3 For a large coffee or Grand Café Filtre, remove the cup platform and the drip tray, place the cup platform on the lower drip tray and place a large cup or mug on the cup platform under the coffee dispensing spout.
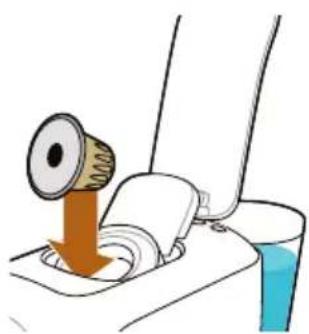
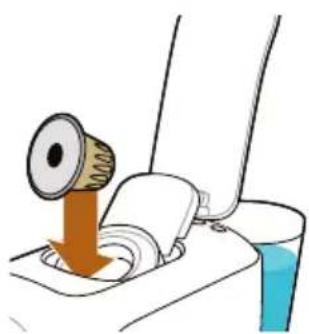
4 Lift the lever.
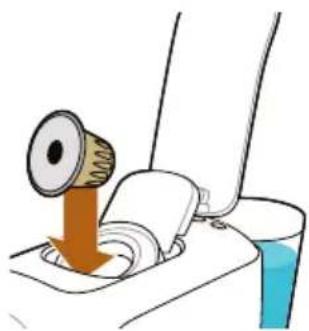
5 Insert a capsule.
- For a single cup of coffee, insert a L'OR Espresso single-shot capsule.
- For two cups of coffee or one large coffee, insert a L'OR Barista double-shot capsule.
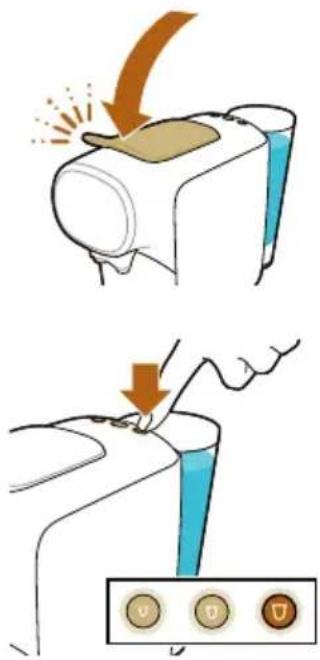
6 Close the lever by pushing it down.
Warning: Do not insert a finger into the brew chamber when closing the lever to avoid injury. There is an invisible sharp piercer on the inside of the lever.
7 Press the button for the type of coffee you desire. The button lights up and the machine starts heating up. When the heating-up process is finished, the machine starts brewing the desired coffee.
Caution: Do not lift the lever until the brewing process has finished. Brewing is finished when the lights stop flashing and no more coffee comes out of the coffee dispensing spout.
8 After the brewing process has finished, the machine switches off automatically to save energy.
Brewing Grand Café Filtre
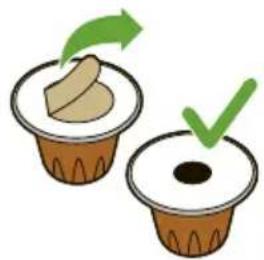
1 Remove the seal completely from the capsule.
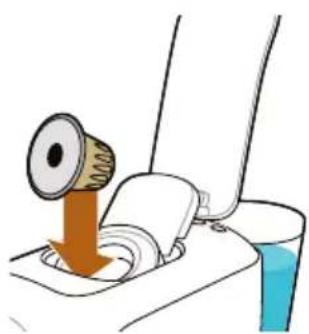
2 Lift the lever and insert the capsule.
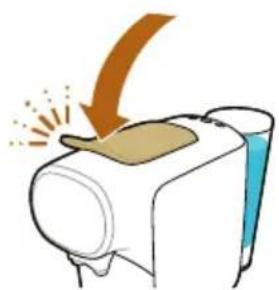
3 Close the lever.
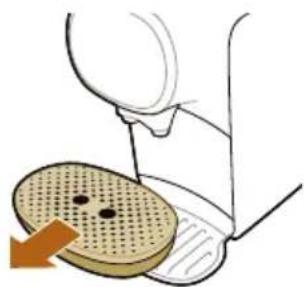
4 Remove the drip tray with the cup platform. Put the drip tray aside and place the cup platform on the lower drip tray.
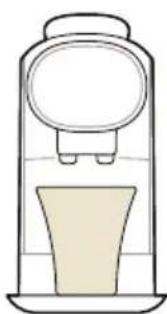
5 Place a large cup or mug on the cup platform under the coffee dispensing spout.
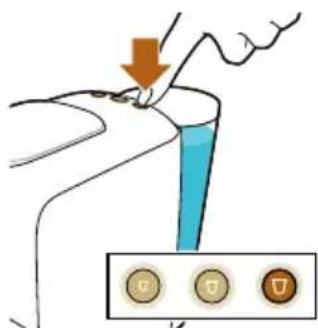
6 Press the lungo button to start the brewing process.
Drink personalization: program your drink volume
Each coffee button has been programmed to brew coffee at its ideal setting. Nevertheless, you can personalize your drink volume to your wishes, within a range that ensures the best coffee quality.
 | Standardpadrão/estandar | Min. Max. | |
| Ristretto 25 ml 20 ml | 40 ml | ||
| Espresso 40 ml 30 ml | 50 ml | ||
| Lungo 110 ml 50 ml | 135 ml | ||
 | Standardpadrão/estandar | Min. Max. | |
| Ristretto 50 ml 40 ml | 60 ml | ||
| Espresso 80 ml 60 ml | 100 ml | ||
| Lungo 220 ml 100 ml | 270 ml |
The volumes for normal and XXL capsules are adjusted separately:
1 Fill the water tank.
2 Insert a capsule and close the lever.
- If you want to adjust the volume for normal capsules, insert a L'OR single-shot espresso capsule.
- If you want to adjust the volume for an XXL capsule, insert a L'OR Barista double-shot capsule.
3 Press and hold the button of the coffee whose volume you want to adjust for 4 seconds until the button flashes quickly. Then release the button. The machine starts brewing coffee.
4 Press the same button again when the cup contains the desired volume. The button shows a light burst to indicate the new volume is stored.
Note: If you press the coffee button too early, the machine programs the minimum volume shown in the table above. If you do not press the coffee button, the machine programs the maximum volume shown in the table.
Resetting the drink volume
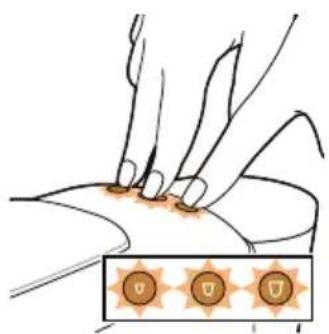
To reset the drink volumes to their factory settings:
1 Press and hold the ristretto, espresso and lungo buttons simultaneously until all buttons flash quickly to show that the machine has been reset to factory settings.
Cleaning and maintenance
Cleaning the used capsule drawer and waste water drawer
Check the used capsule compartment and waste water drawer regularly.
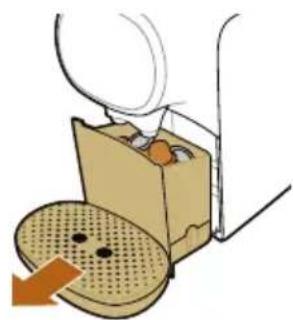
Note: For optimal hygiene, pull up the lever after use to ensure the last used capsule falls into used capsule compartment.
1 Pull the waste water drawer and capsule compartment out of the machine.
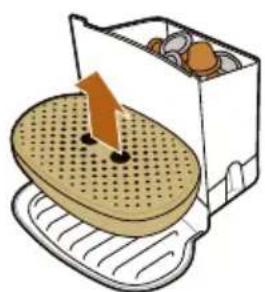
2 Remove the drip tray.
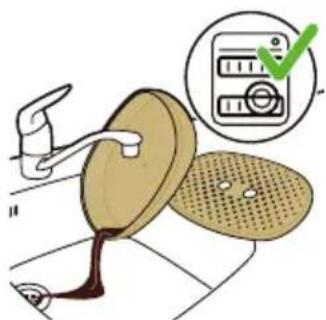
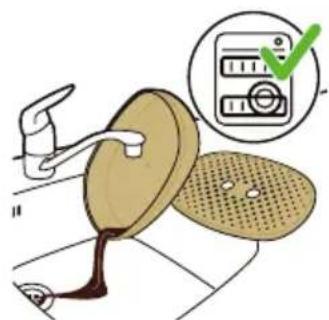
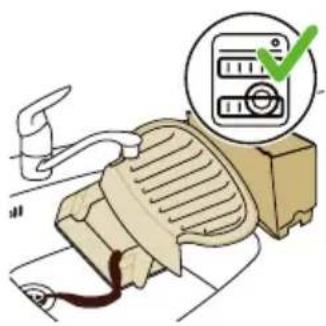
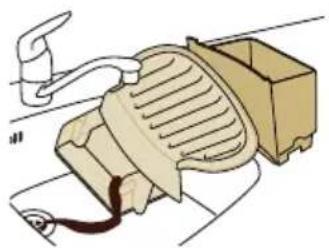
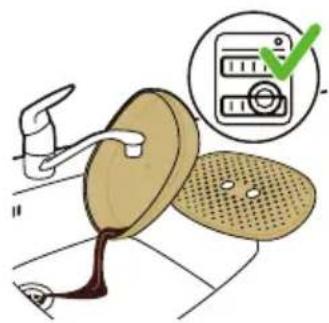
3 Rinse the drip tray and the cup tray under the tap or clean them in the dishwasher.
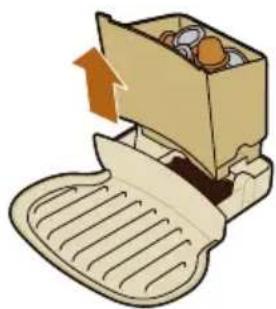
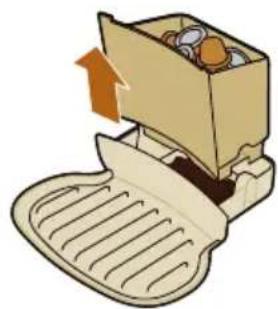
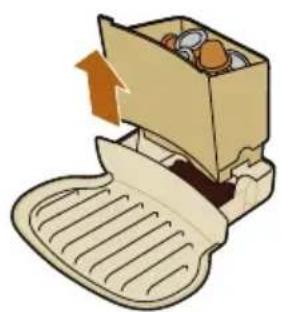
4 Lift the used capsule compartment off the waste water drawer and empty it.
Caution: Be careful when you remove the used capsule compartment. Capsules are still hot immediately after brewing.
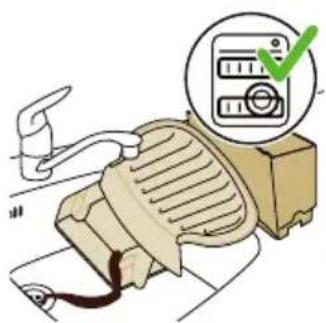
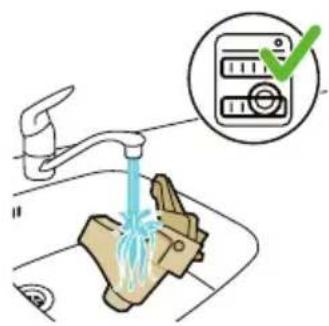
5 Rinse the waste water drawer and used capsule container under a tap. You can also clean all these parts in the dishwasher.
6 After cleaning, place the used capsule compartment on the waste water drawer.
7 Slide the waste water drawer with the used capsule container into the machine.
8 Place the drip tray back onto the lower drip tray. Place the cup tray on the drip tray.
Cleaning other parts of the machine
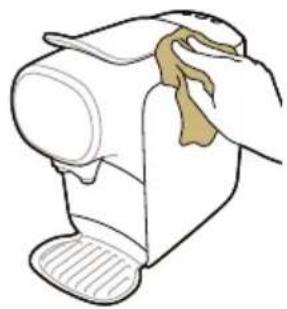
1 Clean the outside of the machine with a soft damp cloth.
Caution: Never use scouring pads, abrasive cleaning agents or aggressive liquids such as petrol or acetone to clean the machine.
Warning: Do not insert a finger into the capsule compartment to avoid injury. There is an invisible piercer on the inside of the lever.
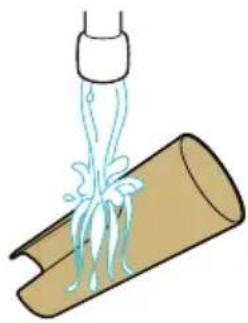
2 Clean the water tank by rinsing it under a warm tap.
Note: The water tank is not dishwasher-proof.
Note: Rinse the water tank and fill it with fresh water every 24 hours.
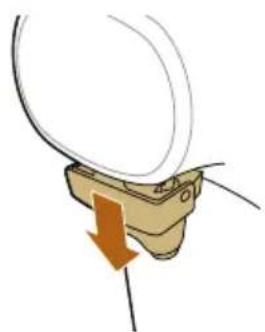
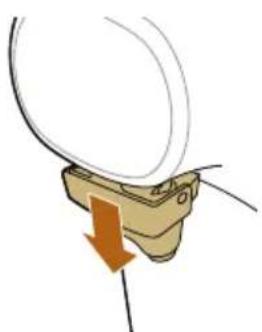
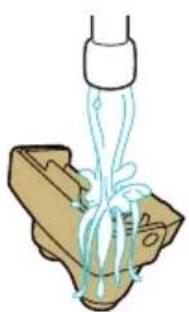
3 Pull the coffee dispensing spout off the machine.
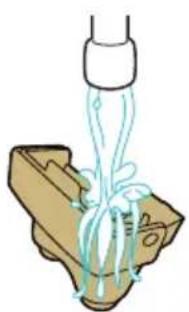
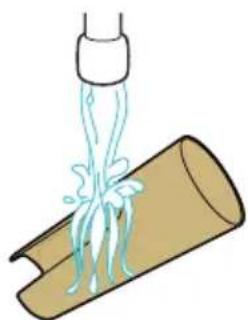
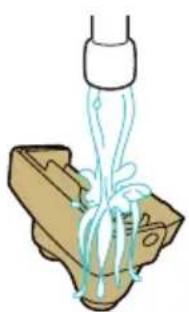
4 Rinse coffee dispensing spout under a warm tap.
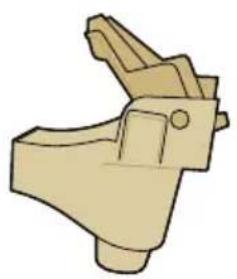
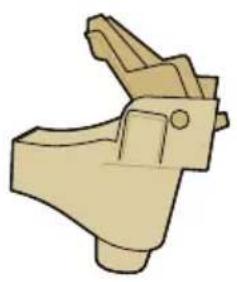
5 To clean the coffee dispensing spout thoroughly, open the cover.
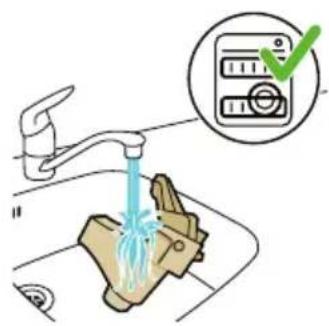
6 Rinse the coffee dispensing spout under a warm tap. You can also clean it in the dishwasher
Cleaning the coffee circuit
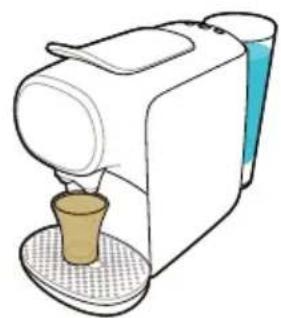
Clean the coffee circuit every week to ensure you get coffee with an optimum quality and taste.
1 Place a cup under the coffee dispensing spout.
2 Lift the lever to ensure the last used capsule falls into the used capsule compartment.
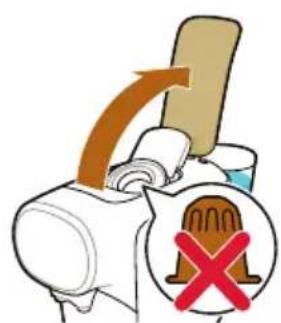
3 Do not insert a new capsule and close the lever.
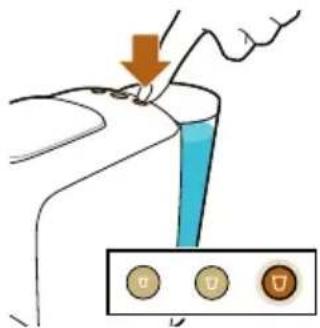
4 Press the lungo button.
5 Empty the cup after the machine has finished dispensing water.
6 Open the lever and repeat steps 3 to 5 to ensure proper cleaning of the coffee circuit.
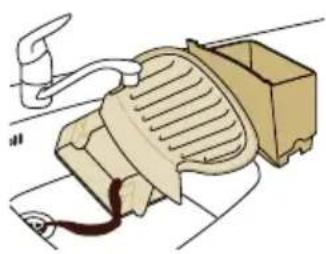
7 Empty the waste water drawer.
The machine is now ready for use.
Descaling
When to descale
![graph TD A["Start"] --> B{Decision} B -->|Yes| C["OK"] B -->|No| D["End"] C --> E["Output: D"] D --> F["Output: O"] D --> G["Output: U"]](/content/2026/04/702746/images/8e2e479a2974bae4d150e01a6fef48f3fcb3d459ffac4edb67e7984cacf079eb.jpg)
- Descale the machine when the ristretto and lungo button flash quickly a few times after brewing. The descaling procedure takes up to 40 minutes and consists of a descaling cycle and a rinsing cycle. Do not interrupt the descaling procedure.
Why to descale
Descaling is essential for the following reasons:
- It prolongs the life of your L'OR Barista coffee machine
- It ensures maximum cup volume
- It ensures maximum coffee temperature
- The machine produces less sound during brewing
- It prevents malfunctioning
If the descaling procedure is not performed correctly, scale residue remains behind in the machine. This causes scale to build up more quickly and may cause permanent and irreparable damage to the machine.
Use the correct descaler
Only citric acid-based descalers are suitable for descaling the L'OR Barista machine. This type of descaler descales the machine without damaging it.
We advise you to use the dedicated L'OR Barista liquid descaler (CA6530). It is available in bottles that contain liquid descaler for two descaling procedures. You need half a bottle for one descaling procedure and can store the other half for the next descaling procedure.
Descaling procedure
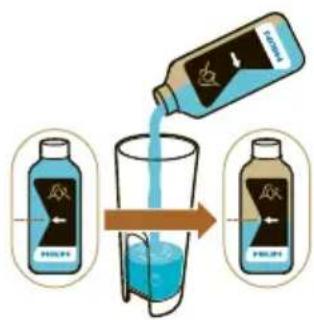
Note: If something goes wrong during the descaling procedure, e.g. because you accidentally interrupt the descaling cycle, you have to restart the descaling procedure from step 1.
1 Pour half a bottle of L'OR Barista liquid descaler (CA6530) into the water tank.
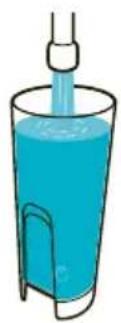
2 Fill up the water tank with fresh tap water.
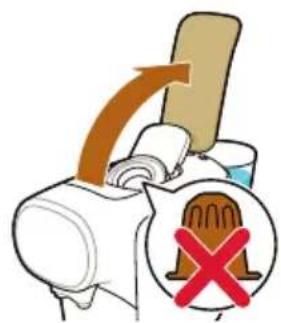
3 Make sure that there is no capsule in the capsule compartment.
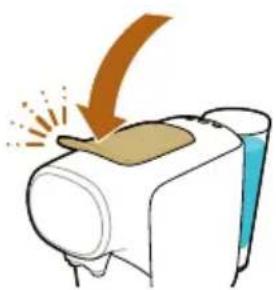
4 Close the lever.
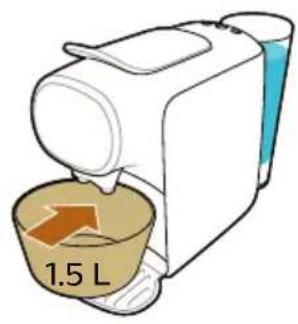
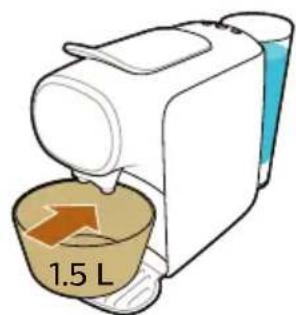
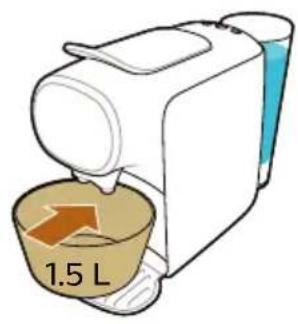
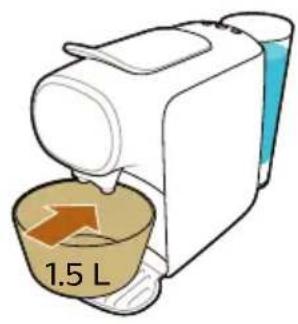
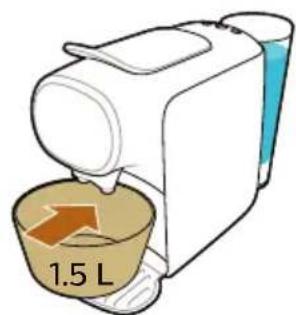
5 Place a bowl with a minimum capacity of 1.5 liters on the lower drip tray under the coffee dispensing spout to collect the descaling solution.
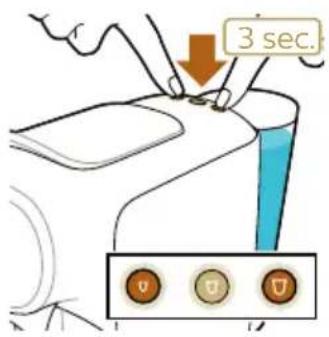
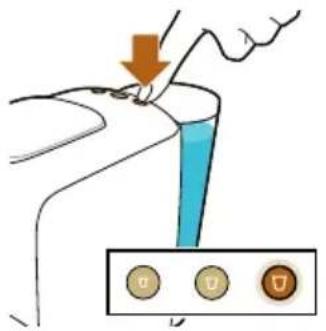
6 Press and hold the ristretto and lungo button for 3 seconds at the same time. The ristretto button starts to flash and the lungo button is steady on
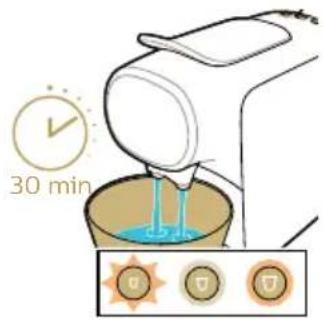
7 The machine dispenses the entire descaling solution at regular intervals. This takes up to 30 minutes.
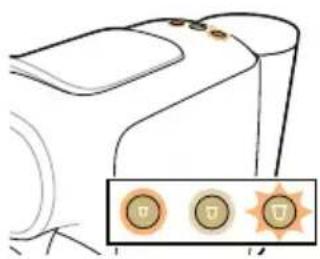
- When the lungo button start to flash quickly and the ristretto button is on, the first phase of the descaling cycle has finished
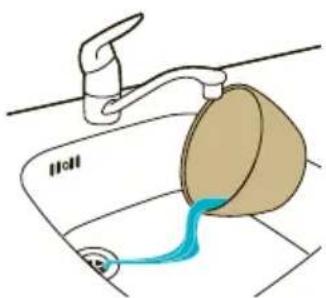
8 Remove and empty the bowl. Place the bowl back onto the lower drip tray under the coffee dispensing spout.
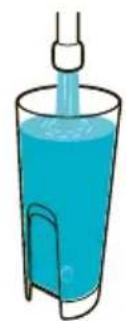
9 Remove the water tank and rinse it under the tap. Fill the water tank with cold tap water and place it back onto the machine.
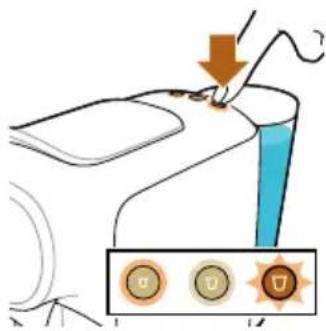
10 Press the flashing button to start the flushing cycle. The ristretto button is on and the lungo button flashes during the flushing phase
Note: The water tank will be emptied without interruption. The flushing cycle lasts about 3 minutes.
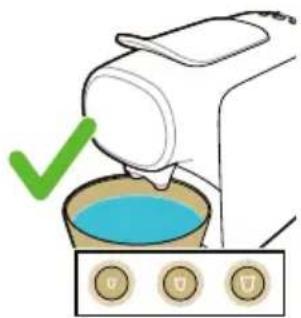
11 When the flushing cycle has finished, the ristretto and lungo button flash a few times.
Note: It is normal that some water remains behind in the water tank after the descaling procedure.
The machine switches off. The descaling procedure is finished.
Meaning of light signals
- The selected coffee button flashes slowly: the machine is preparing your drink.
- The selected coffee button flashes quickly: the water tank is empty, fill the water tank with tap water.
- The selected coffee button flashes intermittently: The new coffee quantity is saved and programming is active.
- The ristretto and lungo button flash simultaneously after brewing coffee: you need to descale the machine.
- All three buttons flash simultaneously: the machine needs to cool down. Wait approx. 2 minutes before you start brewing a new drink.
Troubleshooting
This chapter summarizes the most common problems you could encounter with your machine. If you are unable to solve the problem with the information below, visit www.lorbarista.com/support for a list of frequently asked questions or contact the Consumer Care Center in your country.
Problem Possible cause Solution
| The machine does not switch on. | The machine is not connected to the mains. | Put the plug in an earthed wall socket. |
| The coffee does not flow out of the machine immediately when I press the button. | The machine needs a few seconds to heat up before it starts brewing. | This is normal. |
| The brewing time is longer than before. | The machine is clogging up with scale. | Descale the machine. |
Problem Possible cause Solution
| The temperature of freshly brewed coffee gradually decreases. | The machine is clogging up with scale. | Descale the machine. |
| The pump makes a lot of noise. | There is not enough water in the water tank. | Fill the water tank with fresh tap water. |
| The water tank is not placed correctly. | Place the water tank correctly and push it downwards. | |
| The machine suddenly stops brewing coffee. | There is not enough water in the water tank. | Fill the water tank with fresh tap water. Press the button of the selected type of coffee again to continue brewing. When the cup is full, press the same button again to stop the brewing process. |
| The selected coffee button flashes quickly. | The water tank is empty. Fill the water tank with fresh tap water. Press the button of the selected type of coffee again to continue brewing. When the cup is full, press the same button again to stop the brewing process. | |
| I cannot close the capsule compartment lever completely. | Check if you use the recommended L'OR capsule. Other capsules may cause problems during use. | |
| The used capsule drawer is full. Empty the used capsule drawer and insert the capsule again. | ||
| The capsule is not inserted correctly. | Insert the capsule again and check if it is inserted correctly. | |
| The capsule is stuck. Open and close the lever a few times with moderate force to remove the capsule. | ||
| The lever does not open completely. | The used capsule drawer is full. Empty the used capsule drawer. | |
| The machine does not dispense coffee or only dispenses drops of coffee. | You have not flushed the machine before first use. | Flush the machine before first use (see 'Preparing for use'). |
| There is not enough water in the water tank. | Fill the water tank with fresh tap water. | |
| Scale has built up inside the machine (see 'Descaling'). | Descale the machine (see 'Descaling'). | |
Problem Possible cause Solution
| Coffee grounds end up in the cup of coffee. | A small amount of ground coffee will always end up on the bottom of the cup. | This is normal. |
| The coffee flow splits or is not straight. | The coffee dispensing spout cap is not placed correctly or it is missing. | Snap the coffee dispensing spout onto the coffee outlets. |
| The ristretto and lungo button lights are flashing after brewing. | This means it is time to descale the machine to prevent it from clogging with scale. | Descale the machine (see 'Descaling'). |
| Why do I find water in the waste water drawer? | The used capsule drawer and waste water drawer catch the residual water released after brewing coffee. | This is normal. Empty the capsule and waste water drawer frequently |
| The coffee volume is not what I expected. | The coffee volume has been adjusted. | Readjust the coffee volume (see 'Drink personalization: program your drink volume ') or reset the coffee volume (see 'Resetting the drink volume'). |
| My coffee is less warm. When you brew the first cup of the day or when it has been a while since your previous cup of coffee, the inside of the machine is still cold when you brew coffee. | You can pre-heat the machine and coffee cup by brewing a cup of coffee first without placing a coffee capsule. | |
| If you use a cold, thick-walled cup, the coffee will cool down immediately. | Use thin-walled cups, as thin-walled cups will absorb less heat from the coffee than thick-walled cups. Make sure the size of the cup matches the coffee quantity. Do not brew a small quantity of coffee in a large cup. | |
| The machine is clogged with scale. | Descale the machine when the ristretto and lungo button flash quickly a few times after brewing (see 'Descaling'). | |
| You used cold milk. If you drink coffee with cold, fresh milk, this will cool down your coffee. You can prevent this by preheating the milk. | ||
| The machine switches off after each brewing cycle. | This is the automatic shut-off function. | To save energy, the machine switches off automatically after each brewing cycle. |
Generel beskrivelse
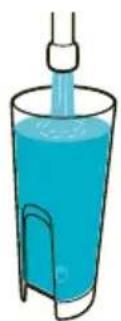

3 Luk håndtaget.
4 Fjern drypbakken med kopplatformen. Læg drypbakken til side, og placer kopplatformen på den nederste drypbakke.
2 Fjern drypbakken.
3 Skyl drypbakken og kopristen under hanen, eller vask dem i opvaskemaskinen.
4 Luk håndtaget.


3 Cierre la palanca.

3 Fermez le levier.

3 Retirez la buse de distribution de café de la machine.
4 Fermez le levier.
4 Alzate la leva.
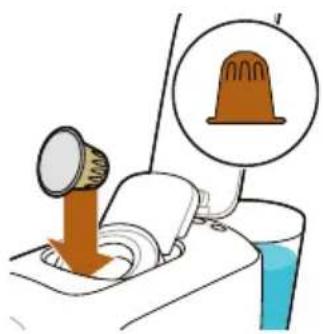
5 Inserite una capsula.
3 Chiudete la leva.

6 Duw de hendel omlaag.
3 Duw de hendel omlaag.
3 Spoel de lekbak en het plateau af onder de kraan of reinig ze in de vaatwasser.
5 Open de kap om de koffie-uitloop grondig te reinigen.
7 Leeg de restwaterbak.


4 Fjern dryppbrettet sammen med koppeplattformen. Sett til side dryppbrettet og plasser koppeplattformen på nedre dryppbrett.
5 Sett en stor kopp eller et krus under kaffetuten på koppeplattformen.
3 Trekk kaffetuten av maskinen.
4 Skyll kaffetuten under varmt vann.
3 Lukk hendelen uten å sette inn en ny kapsel.
4 Lukk hendelen.
8 Fjern og tøm skålen. Sett skålen tilbake på nedre dryppbrett under kaffetuten.

6 Baixe o manípulo para o fechar.
1 Retire o selo da cápsula por completo.
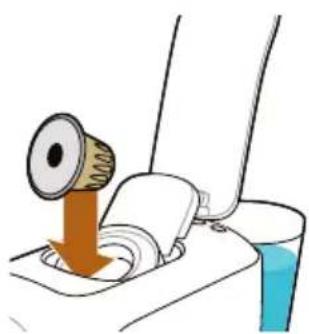
2 Levante o manípulo e insira a cápsula.
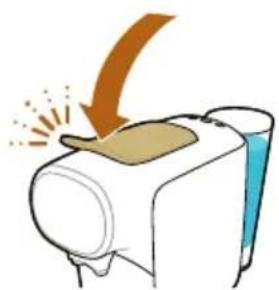
3 Feche o manípulo.

3 Stäng spaken.
2 Ta bort droppbrickan.

4 Stäng spaken.
- GENERAL DESCRIPTION
- INTRODUCTION
- CAPSULES AND CAPSULE COMPATIBILITY
- DIRECT START AND AUTO SWITCH-OFF
- PREPARING FOR USE
- BREWING COFFEE
- BEVERAGES AND CAPSULES
- BEVERAGES
- PREPARING COFFEE
- BREWING GRAND CAFÉ FILTRE
- DRINK PERSONALIZATION: PROGRAM YOUR DRINK VOLUME
- RESETTING THE DRINK VOLUME
- CLEANING AND MAINTENANCE
- CLEANING THE USED CAPSULE DRAWER AND WASTE WATER DRAWER
- CLEANING OTHER PARTS OF THE MACHINE
- CLEANING THE COFFEE CIRCUIT
- DESCALING
- WHEN TO DESCALE
- WHY TO DESCALE
- USE THE CORRECT DESCALER
- DESCALING PROCEDURE
- MEANING OF LIGHT SIGNALS
- TROUBLESHOOTING
- GENEREL BESKRIVELSE
Brand : L'or
Model : Barista LM9012
Category : Coffee machine