
DSC95P - Humidifier Wood's - Free user manual and instructions
Find the device manual for free DSC95P Wood's in PDF.
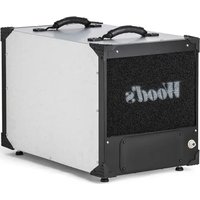


| Product type | Compressor dehumidifier |
| Brand | Wood's |
| Model | DSC95P |
| Maximum working area | 230 m² |
| Dehumidification at 20 °C and 70% RH | 23 L/24 h |
| Dehumidification at 30 °C and 80% RH | 42 L/24 h |
| Air flow (speed 1 / speed 2) | 200 m³/h / 300 m³/h |
| Power consumption | 500 W |
| Power supply | 220-240 V ~ 50 Hz |
| Recommended fuse | 10 A |
| Refrigerant | R290 (Propane) – 150 g |
| Dimensions (L x W x H) | 622 × 350 × 450 mm |
| Weight | Approximately 22 kg |
| Integrated drain pump | Yes (DSC95P only) |
| Air filter | Washable, clean regularly |
| Control panel | Wired remote panel (cable 2 m, max 10 m) |
| Operating modes | Normal, Comfort (EASY), Fan |
| Special functions | Automatic defrost, automatic restart after power failure, key lock |
| Safety | Flammable refrigerant R290 – follow safety instructions: room > 4 m², no ignition sources |
| Maintenance | Clean the air filter every 6 months; clean the coils with a damp cloth; do not use abrasive products |
Frequently Asked Questions - DSC95P Wood's
User questions about DSC95P Wood's
0 question about this device. Answer the ones you know or ask your own.
Ask a new question about this device
Download the instructions for your Humidifier in PDF format for free! Find your manual DSC95P - Wood's and take your electronic device back in hand. On this page are published all the documents necessary for the use of your device. DSC95P by Wood's.
USER MANUAL DSC95P Wood's
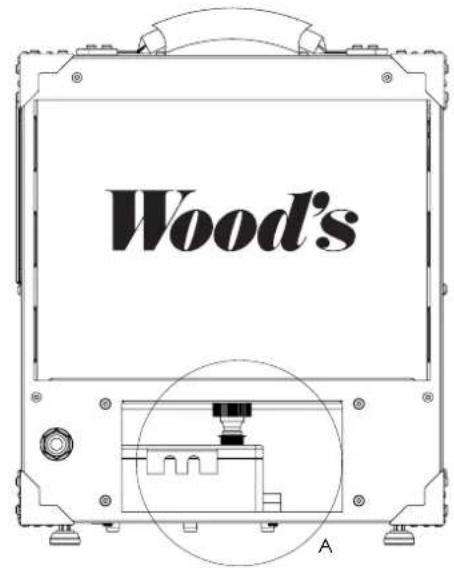
DETAIL 2 (DSC95P only)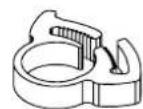
DETAIL 3 (DSC95P only)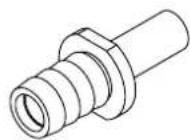



FLAMMABLE MATERIAL.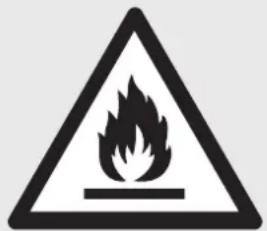
This appliance contains R290/Propane, a flammable refrigerant.

Refer to the operator's manual.

Read the technical manual.

Read the operator's manual.
SAFETY INFORMATION
Before installing and using the appliance, carefully read the supplied instructions. The manufacturer is not responsible if incorrect installation and use cause injuries and damages. Always keep the instructions with the appliance for future reference.
CHILDREN AND VULNERABLE PEOPLE'S SAFETY
WARNING
Risk of injury or permanent disability.
This appliance can be used by children aged eight years and above, persons with reduced physical, sensory or mental capabilities, or lack of experience and knowledge if they have been given supervision or instruction concerning the use of the appliance safely and understand the hazards involved. Do not let children play with the appliance.
Children of less than three years should be kept away unless continuously supervised.
Keep all packaging away from children. Cleaning and user maintenance shall not be done by children without supervision.
GENERAL SAFETY
This appliance is intended to be
used in households and similar environments such as basements, crawl spaces, staff kitchen areas in shops, offices and other working environments. Keep ventilation openings clear of obstruction.
Other than those recommended by the manufacturer, do not use mechanical devices or other means to accelerate the defrosting process. The appliance shall not be stored in a room where ignition sources are operating continuously (open flames, working gas appliance, operation electric heater, etc.). Do not pierce or burn. Be aware that refrigerants may not have an odour. Do not use water spray and steam to clean the appliance. Clean the appliance with a moist, soft cloth. Only use neutral detergents. Do not use abrasive products, abrasive cleaning pads, solvents or metal objects. If the power cord is damaged, it must be replaced by the manufacturer, its authorized Service Centre or similarly qualified persons to avoid a hazard.
SAFETY INSTRUCTIONS
WARNING
Only a qualified person can install this appliance.
Remove all packaging material. Do not install or use a damaged appliance. The appliance shall be installed, operated and stored in a room with a floor area larger than 4 m². Strictly follow the installation instruction supplied with the appliance. Always be careful when you move the appliance because it is heavy. Always wear safety gloves.
Make sure air can circulate around the appliance. Wait at least 4 hours before connecting the appliance to the power outlet. This is to allow the oil to flow back into the compressor. Do not install the appliance close to radiators or other heat sources. Do not install the appliance in direct sunlight.
ELECTRICAL CONNECTION
WARNING
Risk of fire and electrical shock.
The appliance must be connected to a grounded outlet. Ensure that the electrical information on the rating label is in accordance with the power supply. If not, contact an electrician. Always use a correctly installed shockproof socket. Do not
use multi-plug adapters and extension cables. Make sure not to cause damage to the electrical components (e.g. plug, cable). Contact the authorized Service Centre or an electrician to change the electrical components. The cable must stay below the level of the plug. Connect the plug to the power socket only at the end of the installation. Make sure that there is access to the plug after the installation. Do not pull the power cable to disconnect the appliance. Always unplug the power cable from the plug only.
USE
WARNING
Risk of injury, burns, electrical shock or fire.
Do not change the specification of this appliance. Be careful not to cause damage to the refrigerant circuit. It contains propane (R290), a natural gas with a high level of environmental compatibility. This gas is flammable. If damage occurs to the refrigerant circuit, make sure that there are no flames and sources of ignition in the room. Ventilate the room. Do not put flammable products or wet items with flammable products near or on the appliance.
DISPOSAL
WARNING
Risk of injury.
Disconnect the appliance from the mains supply. Cut off the mains cable and discard it. The refrigerant circuit of this appliance is ozone-friendly. Contact your local authority for information on how to discard the appliance correctly. Do not cause damage to the part of the cooling unit that is near the heat exchanger.
Product Description
USE WOOD'S DEHUMIDIFIER DSC95(P)
The Wood's DBC95P) is a powerful and sturdy delhumidifier suitable for crawl spaces, basements, laundry rooms, and large areas.
Any reference to a pump throughout this manual correlates to the DSC9SP only, as the DSC9S does not contain one.
Feature
Automatic defrost for use in lower temperatures, down to 2°C . Automatic pump (OS/C95P only) for water drainages to a sewer. - Duct connection for better distribution of the dried air. Automatic restart with memory function after Δ power cut. + Easy to use controls.
WORKINGS OF YOUR DEHUMIDIFIER
The Wood's CIS/CBS-PS is a compressor-driven dehumidifier. As the air is circulated through the room and drawn through the dehumidifier by the fan, the air passes over the cooling/drilling battery. The coils cool down the airied through, which causes its water content to condense on the coils
The condensate is collected in a tray underneath the cooling battery, led to the pump (DS-C99P only), and drained via an external hose. The remaining dry air is exhausted into the room.
As the dehumidifier condenses water vapor, heat energy is released. That is why a compressor dehumidifier will exhaust warm, dry air, which has extra benefits for drying clothes, laundry, wood, etc.
A compressor dehumidifier is the most energy-efficient way to remove excess moisture and foul odors. To achieve safe and reliable protection against mold and moisture damage, it is recommended to use a high-pressure air compressor.
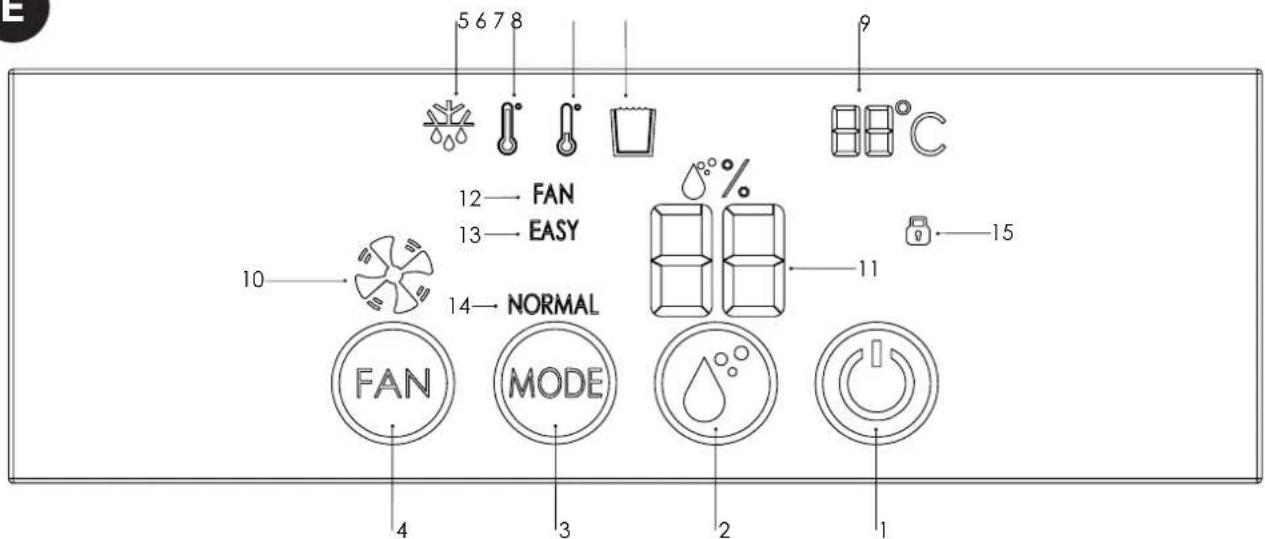
CONTROL PANEL FUNCTION DESCRIPTION
The Wood's DISC 951P is equipped with an intuitive wired remote-control panel for simple and convenient use. If the 2 m wire supplied with the unit is too short, it can be replaced by an RUT1/RUT2 modular cable with connectors at both ends. Please note that the length of the cable should not exceed 10 m.
Note that the control panel powers down to idle mode 20 seconds after connection of mains voltage or after the last input. It is revived by touching the area where the function keys are located. All keystrokes are confirmed with a beep.
FUNCTION KEYS
- ON/OFF: Switches the dehumidifier on and off. In off mode, the energy consumption equals 0.5 W.
- Setting of the desired humidity: Only active in program modes "Normal" and "High". A desired humidity can be set between 35% and 85% in 5% steps.
- Mode selection: Selection of the operating program, refer to points 12 - 14.
- Fan speed: The fan's speed in "Normal" and "Fan" mode may be set at low or high speed. Switching between the speeds takes place with a few seconds delay.
ALARMS/INFORMATION
5. Defrost: if necessary, the cooling circuit is defrosted automatically, whereby the compressor is switched off, and only the fan is in operation. The symbol goes out when the dehumidification process is restarted. 6. Too high ambient temperature: If the ambient temperature exceeds 35°C, the dehumidification process slows down and requires a longer time to reach the desired humidity (see below). The symbol
and restarts if the humidity rises above 50%.
- Normal Mode (NORMAL) - Used to set the target value for humidity and fan speed manually. When the set target value is reached, the compressor and fan shut off and restart if the humidity rises above the target value. Lock function - Used to prevent the settings from unintentionally being changed. The lock function is activated by simultaneously operating the PAN and MODE keys for 3 seconds. Disabling the lock function is done in the same way.
Operating Instructions
INSTALLATION AND PLACEMENT
Wood's dehumidifiers are easy to move around but keep in mind the following:
If the dehumidifier is transported, leave it standing for 4 hours before use. It is very important for the oil to flow back into the compressor, as the dehumidifier otherwise may take severe damage. - The dehumidifier should not be placed near radiators or other heat sources or exposed to direct sunlight, as it will reduce its performance. - Keep at least 25 cm distance from walls and other obstructions to maximize the airflow. For optimum performance, place the dehumidifier in the middle of the room. - Make sure that the airflow from the inlet and outlet isn't blocked.
NOTE
When placed in a shower or bathing area, the dehumidifier should be fixed in place. It is mandatory to check and follow the local bathroom electrical regulations before use.
INSTALLATION:
- Place the dehumidifier on flat and solid ground, preferably in the middle of the room.
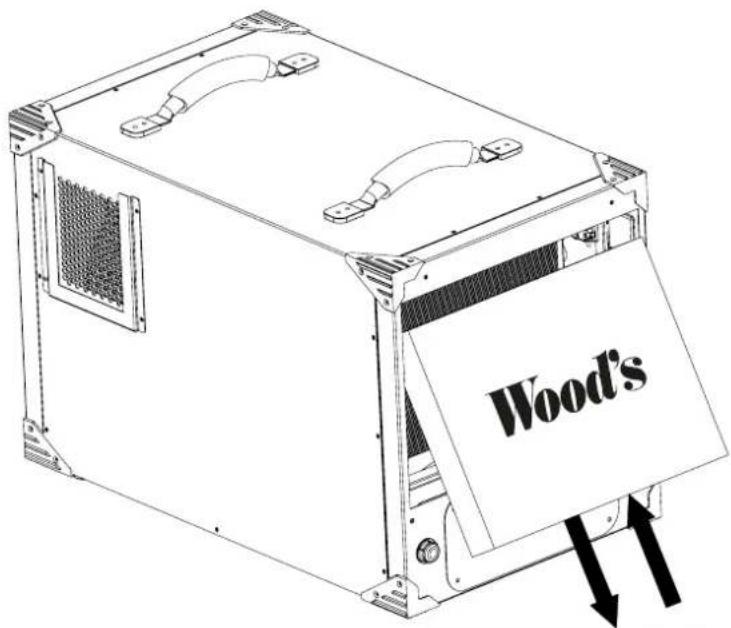
- Connect the air hose to the air duct connector by rotating the hose counterclockwise. Connect the air duct connector to the dehumidifier by sliding it downwards in the designated slot on the side of the unit. Route the hose to the desired position.
- Connect a water hose to the port on the unit. Refer to the section about water drainage.
- Close all windows and ventilation in the room. Otherwise, moist air from the outside will continue to flow into the room.
Ice forming on the cooling coils. The unit will defrost automatically when needed. When the unit is in defrost mode, the compressor shuts off, showing a symbol on the display. It will continue its operations once the defrost is completed.
AUTOMATIC WATER PUMP (DG9SP ONLY)
The DSC95P is equipped with a water pump that automatically will drain the condensate water when needed.
WATER DRAINAGE
A drain hose must be connected to the machine (hose not included). Lead the hose into a drain. If no sewer grip is available, the hose can be routed via another opening in a wall to dispose of the water to the outside. However, not upwards for the DSC95 (without pump).
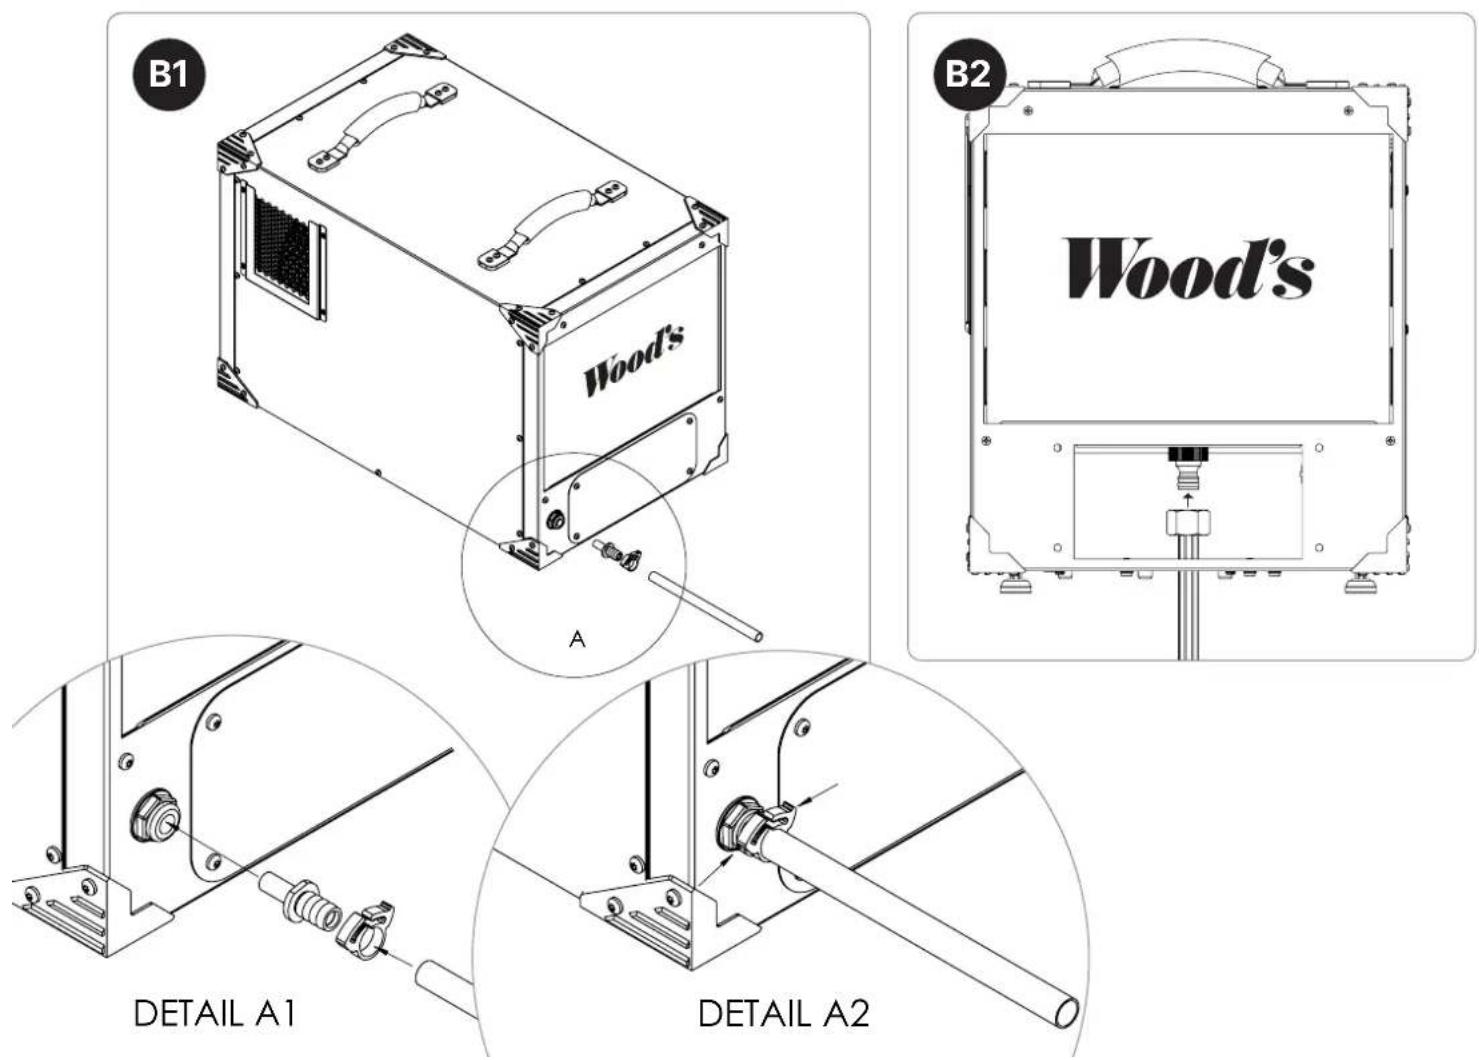
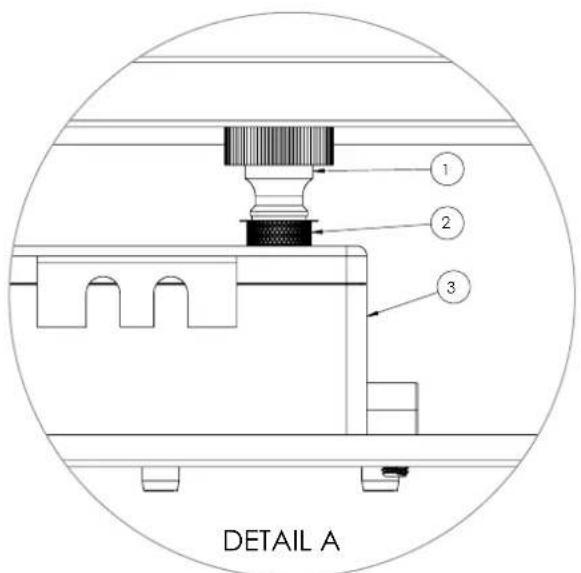
DSCSP with pump (page 2 image B1):
- Connect a 1" garden hose (not included) to the plastic nozzle and secure it with the hose head.
- Insert the nozzle fully into the bulkhead.
- Lead the free end of the hose to a drain. If the drain is located above the dehumidifier, this height should not exceed 10 m.
If the hose nozzle, for any reason, needs to be detached from the dehumidifier, press the locking collar of the bulkhead connector inward and pull the nozzle outwards.
DSC95 without pump (page 2 image B-2)
- Connect a garden hose with a garden hose pump.
- Lead the hose through the bottom hole and into a drain. ATTENTION! The drains must be turned on before you can use them.
- Screw on the supplied cover.
AIR EXHAUST HOSE
Connecting a hose to the air exhaust can lead the dirty, warm air to a connecting room or areas. This is especially beneficial for large or divided crawl spaces or basements with multiple rooms. Use of
the unit by removing the screws. Release the hoses and hold the pump and turn screw the garden hose connector underneath the collecting tray. Slide the pump outwards and lift it gently. Ensure that no strain is applied to either the hose or the wiring.
Remove and inspect the filter and clean it if necessary. Reassembly is conducted in reverse order relative to the description above.
NOTE
Unplug the power cord from the electrical outlet before cleaning.
HINTS
- For maximum dehumidification capacity in a room, it is recommended that the air fan from the outside and adjoining rooms are minimized to minimize the heat transfer losses. Place the dehumidifier in the middle of the room. Raise the temperature in the room for faster dehumidification. (Hot air can carry more water. Use a moist guard if the temperature drops below +2°C)
The dehumidifier extracts more water during the summer and autumn because the outdoor air is warm and moist. (The absolute humidity usually is higher.)
- The amount of moisture the dehumidifier removes depends on temperature, humidity level and pittance. The weather outdoors also affects dehumidifier performance. The relative humidity indoors drops in cold weather, thus reducing the dehumidifier's moisture absorption. Therefore, the dehumidifier is adapted for use in the temperature range of +2°C to +35°C.
RECOMMENDED LIMITS FOR USE
- Temperature: 2°C to +35°C *网址www.hmstock.com:35%10.907% Recommended humidity level: 50%
Operating Instructions
| TECHNICAL DATA | DSC95(P) |
| Max. working area | 230 m2 |
| Airflow step 1 | 200 m3/h |
| Airflow step 2 | 300 m3/h |
| Dehumidifying at 20°C and 70% r.h. | 23 L/24h |
| Dehumidifying at 30°C and 80% r.h. | 42 L/24h |
| Power at 20°C and 70% r.h. | 500 W |
| Power consumption at 20°C and 70% r.h. | 11 kWh/24 h |
| Refrigerant | 8260 |
| Charge | 150 g |
| Voltage | 220-240V |
| Frequency | 50 Hz |
| Fuse | 10A |
| IP Code | IPX1 |
| Dimensions in mm (L x W x H) | 622 × 360 × 450 |
| Technical changes and improvements may occur. All values are approximate and may vary depending on external circumstances such as temperature, ventilation and humidity. | |

| PROBLEM | REMEDY |
| The dehumidifier does not start | • Ensure that the dehumidifier is connected to the power socket and that the fuse has not blown. • Check that the humidity value in the machine's control panel is displayed by "waking up" the panel. The dehumidifier shall start within 5 minutes if this value exceeds the set value. |
| The dehumidifier fails | • Make sure the fan wheel is spinning. • Make sure that the air can flow freely through the dehumidifier. The air exhaust and air filter must be clean, and the dehumidifier must be positioned at least 25 cm from any wall. |
FLAMMABLE MATERIAL.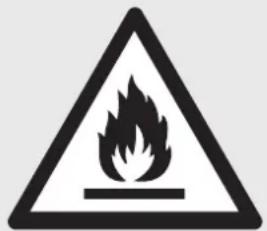
This machine contains R290/Propane - a flammable refrigerant.

See user manual.

Read service instructions.

Read user manual.
SAFETY INFORMATION
INSTALLATION AND PLACEMENT
Wood's dehumidifier is easy to fill and empty. Follow the instructions below:
- If the dehumidifier is transported, let it stand for 4 hours before use. It is very important that the appliance is placed upright; otherwise, the dehumidifier may be damaged. The dehumidifier should not be placed near radiators or other heat sources or in direct sunlight, as this will reduce its performance.
- Keep at least 25 cm of clearance from walls and other obstacles to maximize airflow. For optimal performance, place the dehumidifier in the middle of the room.
- Make sure that the air outlet is not blocked and that the air inlet is not obstructed.
NOTE: When placed in a bathroom or after a shower, the dehumidifier must be placed upright. It is obligatory to check and follow the local electrical regulations for bathrooms before use.
INSTALLATION:
CONTROL PANEL DESCRIPTION OF FUNCTIONS
The Wood's DS/951P-I, 60-pint dehumidifier has an intuitive control panel. The buttons are easy to use and clearly marked. If the buttons are not working properly, you can replace the control panel with the RU11RU12 model. The panel is attached on both sides. Note that the connection cable should not be longer than 30 meters. Note that the control panel will turn off 20 seconds after the last button press or after power is turned on. It will turn on again by touching the panel where the function indicator is. All button presses are confirmed with a beep.
FUNCTION BUTTONS
- POWER BUTTON: Turns the dehumidifier on and off. When off, the power consumption is 0.5 W.
- Setting the desired humidity level Active mode is indicated by "Normal" or "Dry".
INSTALLATION AND PLACEMENT
DRAIN HOSE CONNECTION
CONTROL PANEL DESCRIPTION OF FUNCTIONS
AIR EXHAUST VALVE
Oro Fila has been awarded Jura sozo univencipatio a prioria. Completes in novartisarmars, Toulouse pacaio-2.
Pauhmiir ir palkinirnir firac. jere mire, cialyktic. Suriinnas atienamas avinkintne varka (Zr. pirmiaar pateknt aayadym).
DEMESIO
Piesyvalydme indrauite matrinoia 公告编号:2018-036
PATARIMALI
Ssantan maximaalus oosusimimo pajgumpa taoipae, ie kereomodina/ama tumatm tiekama, aq. iifores irgretna paoi- uliydi runs in odvilius. Jot nannoma, oosauastuva stadylite paoipae vinydria. - Pedirolintine piritapios temperatang, kad oixi bolly sausainas greclau. Kartzos oixi gai piremti daugau venders). Naudkotte apsauga:nuo ulaltimo, jel temperatia nukeranta Zemaun +2°C - On staudituritas, vassam r tudenj dmuaia daugau venderes, nla uao oras yra sitts it drges. (Absolutio) drege pagsatr yra denean.)
- Oligodes heikle, luri oro saustivirias idraukliai dipatolos oori, pirolaiau noo sautiparatos temperatiorios, esmo drigemfis yleo irparastaryno vileo. Orosa gyslosa laue lapart i tali ooro saustivirua velamai. Sattu oru sanyilne drigemfa parate krenta, todum talmadai oro saustivio. Talmadai oro saustiviraa olo kato. Todai oro saustiviraa pitayas naudo temo terazionss intavale nuo +2°C i h + 35°C)
RECOMMENDED CONDITIONS
FOR PROPER OPERATION OF THE AIR DEHUMIDIFIER
Temperature: from +2°C to +35°C Relative humidity: from 35% to 90%
Re keno mandu qamws dngmgs hygs (aycktsld) 50% SOC
VATANAL
- Wood's oos ainsultinus tuf bub prjngas. 2. Tum kato, kuro lampa. 2-20-340 V 50 Hz
User manual
| TECHINIAL DUOMENYS | DSC95(P) |
| Maksimalus patatypi potas | 230 m² |
| Ono srautas 1 rezimu | 200 m³/h |
| Ono srautas 2 rezimu | 300 m³/h |
| Nadumas esant 20 °C ir 70 % sant. diagem. hygul | 23 l/24 h |
| Nadumas esant 30 °C ir 80 % sant. diagem. hygul | 42 l/24 h |
| Enerjios suvarojimas esant 20 °C ir 70 % sant. diagem. hygul | 500 W |
| Enerjios suvarojimas esant 20 °C ir 70 % sant. diagem. | 11 kWh,04 h |
| Saltneda | R290 |
| Jukova | 150 g |
| Jampa | 220-240 V |
| Dazira | 50 Hz |
| Saugilis | 10 A |
| IP kodos | P(X) |
| Mamennys mm (l * P = A) | 622 × 360 = 450 |

| PROBLEMA | TRIKČUŠALINIMAS |
| Oro sausintuves nejsijungla | • Jutkiniwhite, kad oro sausintuvas prijungtas prie martino lado irkad neismude saugilio. • Paskinenike, ar diregnes verte pretaiso valdymo slydeyiye r odoma „pabuduz“. Oro sausintuvas turt boti palestas per 5 minutes, je.si verte yra akittesne negu nustatyoi. |
| Oro sausintuves | • Jutkiniwhite, kad ventilatorius menes sukasi. • Paskinenike, kad oro sausitas gallengra cinkluori oro sausintuve. Oro ilatemimo zama ir oro fitrai turi boti svartos, o oro sausintuvas turt boti bent 25 cm attemtu nu silems. |
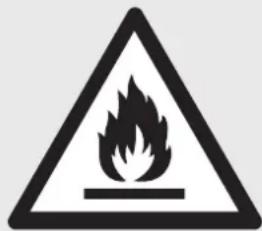
FLAMMABLE MATERIALS.
Contains R290/propane, a flammable refrigerant.

See operator's manual.

Read technical manual.

Read operator's manual.
SAFETY INFORMATION
Before installation and use, carefully read the instructions included with the device. The manufacturer is not responsible for injuries or damages caused by incorrect installation and use. Always keep the instructions near the device for future reference.
SAFETY OF CHILDREN AND VULNERABLE PERSONS
WARNING
Risk of injury or irreversible disability.
This device can be used by children over eight years of age, persons with reduced physical, sensory or mental capabilities, or lack of experience and knowledge, if they are supervised or have been given instructions on the safe use of the device and understand the risks involved. Do not allow children to play with the device. Do not allow children to operate this device.
Children under three years of age must not approach the device unless they are continuously supervised.
GAISA FILTRS
VADIBAS PANELIS
VADIBAS PANELIS UN FUNKCIJU APRAKSTS
The control panel is designed for use with the Wood s/DCS95/P (or similar models with built-in humidity control and other functions). If the installation kit includes a 2 m cable, it can be extended with a modular cable RUTI/LUT2 with shielded connectors. Please note that the cable length must not exceed 10 m.
Please note that the control panel's display may take up to 20 seconds to activate after power is applied or after a mode change. When activated, the functions are indicated by symbols in the display zone. FUNCTION BUTTONS
- ON/OFF: Turns the humidity regulator on and off. Standby power consumption is less than 0.5 W.
- The humidity level can be set between 3.5% and 75% in steps of 1% using the up and down buttons. The humidity setting is indicated on the display, and the setting is confirmed by a beep.
The humidity level can be set between 3.5% and 75% in steps of 1% using the up and down buttons. The humidity setting is indicated on the display, and the setting is confirmed by a beep.
- Setting the humidity: see section 12-14 of the operating program.
- Ventilator modes: The ventilator modes "Normal" and "Fan" can be selected using the mode button. The selected mode is indicated on the display.
OPERATING MODES
- Fan mode (FAN) - continuously ventilates at a low speed to remove excess humidity.
- Comfort mode (EASI) - the humidity regulator maintains a relative humidity of 50% when ventilation is required. When the humidity exceeds 50%, the compressor and ventilator are activated and operate until the humidity drops below 50%.
- Normal mode (NORMAL) - the humidity and ventilator are manually set. When the humidity exceeds the set value, the compressor and ventilator are activated and operate until the humidity drops below the set value.
- BioEkanas function: press the button, the device will be sterilized automatically. BioEkanas function: press and hold for 3 seconds to activate FAN and MODE. BioEkanas function will automatically turn off after the set time.
Instructions for use
INSTALLATION AND PLACEMENT
The humidity regulator can be installed easily, but do not place it near the following:
- If the humidity regulator is installed, it is allowed to be placed at least 4 inches away from walls, furniture, or other objects, and it should be placed on a flat surface.
- Do not install the humidity regulator near a radiator or other heat sources, or against a wall, as this will reduce its effectiveness. To ensure proper operation, the humidity regulator must be at least 25 cm away from the wall. To ensure proper ventilation, place the humidity regulator in the middle of the room.
- Do not install the humidity regulator near a radiator or other heat sources, or against a wall, as this will reduce its effectiveness. To ensure proper operation, the humidity regulator must be at least 25 cm away from the wall. To ensure proper ventilation, place the humidity regulator in the middle of the room.
- The device must be placed on a stable, level surface, away from heat sources and direct sunlight.
INSTALLATION The humidity regulator can be used in various rooms, it is easy to install. Before installation, check the electrical connections and the power supply.
INSTALLATION
- Place the humidity regulator on a flat surface and press firmly until it is secure.
- To connect the power cord, insert the plug into the socket. To connect the power cord to the regulator, press the button to open the cover. Then insert the cord into the slot.
- Prevent water from entering the device. Check the water level regularly.
OSC95(P) is an appliance with a function that provides automatic operation of the pump, indicating the need to connect the power supply to the pressure switch. The compressor starts automatically. If an error occurs during restart, the compressor turns off, indicating a malfunction. After the restart, the device continues to operate normally.
AUTOMATIC WATER DRAIN (ONLY DCS95P)
DSC95P is equipped with a water separator that automatically removes water from the compressed air.
WATER DRAINAGE
Check the water separator (if equipped) regularly. If the water separator is full, drain it by opening the drain valve. If the water separator is not equipped, drain the tank by opening the drain valve at the bottom. The DCS95P cannot be drained with the tank under pressure.
DSC95P (Fig. 2, item 81)
The thermostat is located on the regulator. The thermostat is located on the regulator, and the distance between the thermostat and the regulator must not exceed 10 m.
If the thermostat is not installed on the regulator, the temperature regulator may not function properly, and the compressor may not operate correctly.
DSC95 bet sikna (2. kapa, attels #2)
- Plevirofen/dzirac 3Glenir dizirac 3Glenir surgap.
- Plevirofen/dzirac 3Glenir dizirac 3Glenir surgap.
- plevirofen/dzirac 3Glenir dizirac 3Glenir surgap.
- plevirofen/dzirac 3Glenir dizirac 3Glenir surgap.
1.2ZsOyepnKmpeRtJauo
GAISA IZPLUDES SLUTENE
Piernovien gataa raksden cunusien (107), sausoo silvae gauw norebdi kibut hupu vai zan. Tae in paskadren fehu ve sadaliu hupu gadjum va
Aviavonji kajir minumaregulore no elektropadites. Avieniet kajir nefoces ganaepodces prusil, atsikovojet derivs. Atbryovets kajir sukurotura veiclen hitori unaskovotjet iem sievskifianas papelaks exofo daria sizhenes savenotiiu Bidlet kajir uz uzu unzamnijacelet tojdi Nodrovinit, kal sizhene var radni netkui nospogret!
enermeti parablafted fitriun un, ja nepaciclatam, nofret to Sanonbarlanu vuc apogranitac sebal, veiknrdlads lepkneia napta prakst.
EVERQUET!
Pirmi 115ang atienoepat dwhas wad no
kontantigda
PADOMI
Lai tetpa nodaritana maxsimilium tritumaa sarmazinana spesi, uticarmica piceiopsis saeismaita gasa pepeidoo liptuses un bilias tetipam - aianerid dunis an uanera. Ja espejems, novoketod tritumaa regulaoru tetipas vido. - Ardisira miyura aeridicala paaugthine gasi ateratunrtofipal. [Kartis gastv iar uanertiv widiokdns] Ja teratiranaonokitss zem +2°C amazortet al.saurzikktaq pre airdyadnol Vasara and rurudeni mrifuna regulators invade. vaidya odens, jha gassa in sitti um mirs. Abassonias mrifuna perasi uugustesi.
- The regulator setting is set using the adjustment screw. The regulator is designed for use in ambient temperature ranges from +2°C to +35°C.
Setting: Active agent, Normat (Iodine) and (redoxation) sodium bromide: Bromine bromide
Wood's Oshukui sat on Ithne Amber paligustida, kudipage alimes pigrast:
- Onkukutari transportme korsal jilte see enne kusamist 4 tuniks pust seema. On vajakuline, et di vovaka tagesi kompressotse, est vastate juhur wib Onkukutari tokeit kunjutada seeds.
- Onukuwarat o tni asstada radarotona vol mnda soojukasikate kore nae osa paskesawakutake kune, kune see vihendab sadme Dudust Chusovodumskiminoimmises paigutage steide sienstja muudest taistustest vinham 25 on kuaquluee. Optimalise (Dulucare tagamereks asophage Shukutaki kerat rootum Vendugre, et satisombo-ja viljalakasa thuvrode oblebkkeert.
TAHELEPANJI
- Tomato extract to haplopectin to aortic root tissue in aqueous lysis buffer (or amide)
- Oligomers to a double dopa-tocophosphate derivative eicosapentaenoate, EpoE polyunsaccharide (pol-20) and to 10 equiv-pentylpyrrole, to opoee pol-terpene via ungastricase to Tc epa. Ely to do depo-posed to do eeproto tseuayyra prrnsto yoe aoepeyto Ayo to oe aoepeyto and to oepoepyto, taote to e (Aoe peoepyto) To do depo-posed to depo-posed to depo-posed to depo-posed to depo-posed to depo-posed to depo-posed to depo
D6C95xupicavthia [aaiha2c06vaB2]
I. I. I. I. I. I. I. I. I. I. I. I. I. I. I. I. I. I. I. I. I. I. I. I. I. I. I. I. I. I. I. I. I. I. I. I. I. I. I. I. I. I. I. I. I. I. I. I. I. 2. Odyfnoe Tox coo kooi o 001y poio ty a 001r c 001 aonr tao n 000xH H a nooray yri rpi rvi pa 001r taia to 001 1. Bshnnt to nagcno oohy
EYKAMITTOIQAHNAI EARQTHIAEPA
To riva yaline oelagcnae kahimnpeeviae nana e aen O ovymptu oovymptu hivmrtura uovmrtu kei ve madravmrtur. jurov DCSS95P to gktpr try qvncikl k paplia vdo 14yctk rka. dvo, 203a, 204a, v gucnauuunur a cie 65 pnu. Aroauuutur tov gugnuudnir oto f popoletouu tov. Avcrti n Tepua oriy hanaos assoa npia Tepua oriy hanaos assoa npia [1] [2] [3] [4] [5] [6] [7] [8] [9] [10] Agapacite kro ischcagpato to qatao kro wopotato to 60d kro dnapatao, H toovadovopa odyocn poyaroduyoswadzuk toovadovopa odyocn poyaroduyoswadzuk toovadovopa odyocn poyaroduyoswadzuk toovadovopa odyocn poyaroduyoswadzuk
1
Amouyto to qauo tpoocdo 0
TAYIPOOYOMOTOWA
- 100% free to all users (no space, download time) a pupac, y uro tioe tioe tioe wou. o aoeepetop. The pahmert ane oohs, inotie thre. to apoyvipov oto vvo tvfoov
- Auditory test: (1) Spontaneous oto (2) Spontaneous y
- Tactile test: (2) Opiolytic (3) Chlorotic analgesic
- Verbal test: (4) Spontaneous (5) Verbal.
- Dysphoric test: (6) Spontaneous (7) Spontaneous (8) Spontaneous (9) Spontaneous (10) Spontaneous (11) Spontaneous (12) Spontaneous (13) Spontaneous (14) Spontaneous (15) Spontaneous (16) Spontaneous (17) Spontaneous (18) Spontaneous (19) Spontaneous (20) Spontaneous (21) Spontaneous (22) C O apovotvopovt ofoy apeo poteo po vpo at and Tnepa oto kai ovoipovkoi ta o tgeiavapov ot eoi o upepapc oioe o (tocov o) 1000000000000000000000000000000000000000000000
- H. monocytis try1vyspocia; try2vyspocia; spc003vyspocia; spct003vyspocia; trs003vyspocia; kra.try1vyspocia; K. oxydans trz1vyspocia; mepA/nuox; streptococcus clavib, try1vyspocia; try2vyspocia; H. oxydans spyc003vyspocia; streptococcus; spc003vyspocia
Operating instructions
| TEXNIA KAKAPKTHPIIKA | DSC 05 (P) |
| Metyetn stipovtua Actoxypylac | 230 m2 |
| Biljua porfc. atpca 1 | 200 m3/h |
| Biljua porfc. atpca 2 | 300 m3/h |
| Agingoyan / etocx 20 ° C xia oxynatm) uysoda 70% | 23 U/24 sL |
| Agingoyan / etocx 30 ° C xia oxynatm) uysoda 80% | 42 U/24 sL |
| Itjoc / etocx 20 ° C xia oxynatm) uysoda 70% | 500 W |
| Kottsviksaerunugoc / etocx 20 ° C xia oxynatm) uysoda 70% | 11 KMV/24 sL |
| Wartadis μeoo | R290 |
| dipron | 150 g |
| Tajin | 220-240 V |
| Iiyuottna | 50 Hz |
| Aepolica | 10 A |
| Kudukoc IP | IPK1 |
| dazanratac ac yliosenta (Mix f X Y) | 622 × 380 × 450 |

| IPIOBAHMA | ANTIMETQNIH |
| O apuypavrtipac;ev sevssvctat. | • Bépauleté:to o opuypavrtipac;evsevauovidebivoc atry tnpia kai da nyapalena bevcjx koi. |
| • Bépauleté:do n tru:trpvadipac:otov rivaovkayou tou puypavrtipac;upavl(c) cta otvo rivaovkay;etpicta andotrykataortan odepdvucac; O apuypavrtipac:piama va cvevnelejubera oc 5 kati, ov ouro n tui eluv opuvkabcpn anotrykataopdvucac: | |
| O apuypavrtipac;ev seynygatousa;epuypavrin. | • Bépauleté:to trpocó tovveqvrtipac:napippeptis; |
| • Elyutret:do o opuypavrtipac:va pésičaúpájua;o do vovapuypavrtipac; H etiyawiny:otpo kai to gpatoo atpo spintes;va siva kaiopa kai o opuypavrtipac;rpnetas va tomebriptye de oranovon tosukyertov 25 cm and onatoovdinyrto:tojo. | |
| • Akoovte:ov o duapeimetric kastaypiv, aluk kajitc umdpin de o apuypavrtipac;pupapi:va fipakncktc de kow.ko entyphyc. |

Register and find the latest updated user manual, usage advice, updated brochures, troubleshooting, and service information at woods.se
CUSTOMER CARE AND SERVICE
Always use original spare parts. When contacting our authorized service centre, ensure that you have the following data available: Model number, receipt, and serial number.


- SAFETY INFORMATION
- CHILDREN AND VULNERABLE PEOPLE'S SAFETY
- WARNING
- GENERAL SAFETY
- SAFETY INSTRUCTIONS
- ELECTRICAL CONNECTION
- USE
- DISPOSAL
- PRODUCT DESCRIPTION
- USE WOOD'S DEHUMIDIFIER DSC95(P)
- WORKINGS OF YOUR DEHUMIDIFIER
- CONTROL PANEL FUNCTION DESCRIPTION
- FUNCTION KEYS
- ALARMS/INFORMATION
- OPERATING INSTRUCTIONS
- INSTALLATION AND PLACEMENT
- NOTE
- INSTALLATION
- AUTOMATIC WATER PUMP (DG9SP ONLY)
- WATER DRAINAGE
- DSCSP WITH PUMP (PAGE 2 IMAGE B1)
- DSC95 WITHOUT PUMP (PAGE 2 IMAGE B-2)
- AIR EXHAUST HOSE
- HINTS
- RECOMMENDED LIMITS FOR USE
- CONTROL PANEL DESCRIPTION OF FUNCTIONS
- FUNCTION BUTTONS
- DRAIN HOSE CONNECTION
- AIR EXHAUST VALVE
- DEMESIO
- PATARIMALI
- RECOMMENDED CONDITIONS
- FOR PROPER OPERATION OF THE AIR DEHUMIDIFIER
- VATANAL
- USER MANUAL
- SAFETY OF CHILDREN AND VULNERABLE PERSONS
- GAISA FILTRS
- VADIBAS PANELIS
- VADIBAS PANELIS UN FUNKCIJU APRAKSTS
- OPERATING MODES
- INSTRUCTIONS FOR USE
- AUTOMATIC WATER DRAIN (ONLY DCS95P)
- DSC95P (FIG. 2, ITEM 81)
- DSC95 BET SIKNA (2. KAPA, ATTELS #2)
- GAISA IZPLUDES SLUTENE
- EVERQUET
- PADOMI
- TAHELEPANJI
- D6C95XUPICAVTHIA [AAIHA2C06VAB2]
- EYKAMITTOIQAHNAI EARQTHIAEPA
- CUSTOMER CARE AND SERVICE
Brand : Wood's
Model : DSC95P
Category : Humidifier