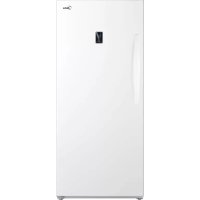
MRU07B3AWW - Freezer MIDEA - Free user manual and instructions
Find the device manual for free MRU07B3AWW MIDEA in PDF.
Download the instructions for your Freezer in PDF format for free! Find your manual MRU07B3AWW - MIDEA and take your electronic device back in hand. On this page are published all the documents necessary for the use of your device. MRU07B3AWW by MIDEA.
USER MANUAL MRU07B3AWW MIDEA
USER MANUAL Warning notices: Before using this product, please read this manual carefully and keep it for future reference. The design and specifications are subject to change without prior notice for product improvement. Consult with your dealer or manufacturer for details. The diagram above is just for reference. Please take the appearance of the actual product as the standard.LANGUAGES EN English Free 3 months extension of the original limited warranty period!* Simply text a picture of your proof of purchase to: *The warranty extension is for the three months immediately following the completion of the product’s original warranty period. Individuals do not need to register the product in order to get all the rights and remedies of registered owners under the original limited warranty.THANK YOU LETTER Thank you for choosing Midea! Before using your new Midea product, please read this manual thoroughly to ensure that you know how to operate the features and functions that your new appliance offers in a safe way. CONTENTS
PRODUCT INSTALLATION
CLEANING AND MAINTENANCE
DISPOSAL AND RECYCLING
01SAFETY INSTRUCTIONS Intended use Before switching on the appliance for the first time read the following safety hints! This appliance is intended to be used in household and similar applications such as staff kitchen areas in shops, offices and other working environments; farm houses and by clients in hotels, motels and other residential type environments; bed and breakfast type environments; catering and similar non-retail applications. If the appliance is used commercially or for purposes other than cooling food, please note that the manufacturer cannot accept any liability for any damage. Modifications or alterations to the unit are not permitted for safety reasons. Explanation of symbols Danger This symbol indicates that there are dangers to the life and health of persons due to extremely flammable gas. Warning of electrical voltage This symbol indicates that there is a danger to life and health of persons due to voltage. Warning The signal word indicates a hazard with a medium level of risk which, if not avoided, may result in death or serious injury. Caution The signal word indicates a hazard with a low degree of risk which, if not avoided, may result in minor or moderate injury. Attention The signal word indicates important information (e.g. damage to property), but not danger. Observe instructions This symbol indicates that a service technician should only operate and maintain this appliance in accordance with the operating instructions. Read these operating instructions carefully and attentively before using/ commissioning the unit and keep them in the immediate vicinity of the installation site or unit for later use! 02WARNING
- DANGER Risk of fire or explosion.Flammable refrigerant used. Do not use mechanical devices to defrost refrigerator.Do not puncture refrigerant tubing.
- DANGER Risk of fire or explosion.Flammable refrigerant used. To be repaired only by trained service personnel. Use only manufacturer authorized service parts. Any repair equipment used must be designed for flammable refrigerants. Follow all manufacturer repair instructions. Do not puncture refrigerant tubing. CAUTION
- CAUTION Risk of fire or explosion. Dispose of refrigerator properly in accordance with the applicable federal or local regulations. Flammable refrigerant used.
- CAUTION Risk of fire or explosion due to puncture of refrigerant tubing. Follow handling instructions carefully. Flammable refrigerant used. WARNING General safety
- Install in accordance with the manufacturer’s instructions.
- This product should not be recessed or built-in an enclosed cabinet. It is designed for freestanding installation only.
- WARNING - Keep ventilation openings, in the product, clear of obstruction.
- Do not install near any heat sources, such as radiators, heat registers, stoves, other cooking appliances or in direct sunlight.
- Do not store or use gasoline or any flammable liquids inside or in the vicinity of this refrigerator.
- Do not store explosive substances such as aerosol cans with a flammable propellant in this appliance.
- Do not use electrical appliances inside the food storage compartments of the appliance, unless they are of the type recommended by the manufacturer.
- Do not use mechanical devices or other means to accelerate the defrosting process, other than those recommended by the manufacturer.
- This appliance is not intended for use by persons (including children) with reduced physical, sensory or mental capabilities, or lack of experience and knowledge, unless they have been given supervision or instruction concerning use of the appliance by a person responsible for their safety.WARNING Electrical safety Incorrect electrical installation or excessive mains voltage can lead to electric shocks!
- Only connect your fridge-freezer to a properly installed earthed socket if the mains voltage of the socket corresponds to the specification on the rating label*.
- Do not use extension cords or ungrounded (two-pin) adapters.
- Make sure that all electrical cables outside the appliance are protected from damage (e.g. by animals or sharp edges).
- Do not locate multiple portable socket outlets or portable power supplies at the rear of the appliance.
- Improper power supply may result in fire or electric shocks.
- Avoid electrical overload.Disconnect the mains plug from the mains socket before carrying out care, maintenance and repair work on the unit.
- Switch off the unit and disconnect the mains plug from the mains socket when you are not using the unit.
- If the supply cord is damaged, it must be replaced by the manufacturer, its service agent or similarly qualified persons in order to avoid a hazard.
- If the products are equipped with LEDs, do not remove the lighting cover and LED yourself. Any replacement or maintenance of the LED lamps is intended to be made by the manufacturer, its service agent or similar qualified person. This product is not recommended for use with sockets or main switch with the A/GFCI function, otherwise it may cause false tripping.
1. It’s not pose a safety risk when tripped.
2. If tripping persists, it is recommended to replace the sockets or main switch without
- Children should be supervised to ensure that they do not play with the appliance.
- Destroy carton, plastic bags, and any exterior wrapping material immediately after the product is unpacked.
- Children should never use these items to play. Cartons covered with rugs, bedspreads, plastic sheets or stretch wrap may become airtight chambers, and can quickly cause suffocation.
- Remove all staples from the carton. Staples can cause severe cuts, and destroy finishes if they come in contact with other appliances or furniture. Risk of child entrapment. Before you throw away your old refrigerator or freezer:
- Leave the shelves in place so that children may not easily climb inside.CAUTION Risk of injury and damage!
- Never put frozen food in your mouth immediately after taking it out of the freezer.
- Avoid prolonged skin contact with frozen food, ice and the pipes in the freezer compartment.
- Do not store explosive substances such as aerosol cans with a flammable propellant in this appliance.Also do not place flammable products near the product.
- Do not store beer, drinks or other liquids in bottles or tightly closed containers in the freezer compartment! WARNING State of California Proposition 65 Warnings:
- This product can expose you to chemicals including lead, which is known to the State of California to cause cancer, and bisphenol A (BPA) and lead which are known to the state of California to cause birth defects or other reproductive harm. For more information go to www.P65Warnings.ca.gov. CAUTION To avoid contamination of food, please respect the following instructions:
- Opening the door for long periods can cause a significant increase of the temperature in the compartments of the appliance.
- Clean regularly surfaces that can come in contact with food and accessible drainage systems.
- Clean water tanks if they have not been used for 48h; flush the water system connected to a water supply if water has not been drawn for 5 days. (Note1)(*)
- WARNING: Fill with potable water only.(*)
- WARNING: Connect to potable water supply only. (Suitable for ice making machine)(*) ATTENTION (*): This feature varies depending on the model purchased. Please confirm whether it is applicable according to your product. 05Before The First Use The packaging must be undamaged. Check the device for transport damage. Do not connect a damaged device under any circumstances. In case of damage, please contact the supplier. Remove transport cover The unit and parts of the interior are protected for transport. You can remove all adhesive tapes on the right and left side of the device door as well as any adhesive residues with cleaning solvent. Remove all adhesive tapes and packaging parts from the interior of the device as well. After transport, the device should stand for 12 hours to allow the coolant to collect in the compressor. Non-observance could damage the compressor and thus lead to failure of the device. CAUTION Risk of damage! Set up device
- The ambient temperature affects the power consumption and proper functioning of the device. Therefore, the device should be placed in a well- ventilated and dry room with an ambient temperature corresponding to the climate class for which the device is designed.
- Do not place the device outdoors (e.g. balcony, terrace, garden shed, etc.). Do not use sharp knives or pointed objects when opening the device. Please observe the notes when setting up: “Tips for energy saving“ Remove the device doors
- If the unit does not fit through the apartment door,the unit doors can be unscrewed. ATTENTION The unscrewing of the unit doors may only be carried out by the customer service. 06CAUTION Notes For Cleaning
Disconnect the appliance from the power supply before cleaning.
- Dust behind the product and on the floor must be cleaned to improve the cooling effect and energy saving.
- Check the door gasket regularly to make sure there is no debris. Clean the door gasket with a soft cloth dampened with soapy water or diluted detergent.
- The interior of the product should be cleaned regularly to avoid odors.
- Please turn off the power before cleaning the interior, remove all foods, drinks, shelves, drawers, etc.
- Use a soft cloth or sponge to clean the inside of the product, with two tablespoons of baking soda and a quart of warm water. Then rinse with water and wipe clean. After cleaning, open the door and let it dry naturally before turning on the power.
- For areas that are difficult to clean inside the product (such as narrow places, gaps or corners), we recommend to wipe them regularly with a soft rag, soft brush, etc. and when necessary, with some tools (such as thin sticks) to ensure no contaminants or bacterial accumulation in these areas.
- Do not use soap, detergent, scrub powder, spray cleaner, etc., as these may cause odors inside the product or contaminat food.
- Clean the door tray, shelves and drawers with a soft cloth dampened with soapy water or diluted detergent. Dry with a soft cloth or dry naturally.
- Wipe the outer surface of the product with a soft cloth dampened with soapy water, detergent, etc., and then wipe dry.
- Do not use hard brushes, scouring pads, wire brushes, abrasives (such as toothpaste), organic solvents (such as alcohol, acetone, banana oil, etc.), boiling water, acid or alkaline items, which may damage the fridge surface and interior. Boiling water and organic solvents such as benzene may deform or damage plastic parts.
- Do not rinse directly with water or other liquids during cleaning to avoid short circuit or affect electrical insulation after immersion.SPECIFICATIONS Product model
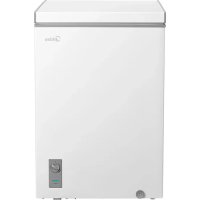
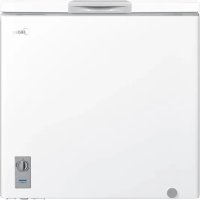
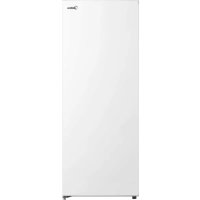
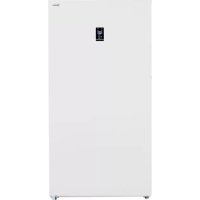
Volume 6.9cu.ft.(196L) Rated Voltage 115V~ Rated Frequency 60Hz Rated Current 1.5A Rated Power 150W Refrigerant R600a Amount 2.12oz(60g) Overall Dimension (W x D x H) 21.7 x 22.4 x 56.3 in(55.0 x 57.0 x 143.0 cm)PRODUCT OVERVIEW Names of components
Door ATTENTION The picture above is only for reference. The actual configuration will depend on the physical product or statement by the distributor 09PRODUCT INSTALLATION Install Instruction Finding a suitable location
- This freezer is designed to be free standing only, and should not be recessed or built-in.
- The freezer should be placed in a well-ventilated indoor place; the ground shall be flat and sturdy .
- Keep away from heat and avoid direct sunlight. Do not place the freezer in moist or watery places to prevent rust or reduction of insulating effect. Dimensions and Clearances
- Too small of a distance from adjacent items may result in the degradation of freezing capability and increased electricity costs. Allow over 100 mm of clearance from each adjacent wall when installing the appliance. Providing a proper power supply
- Check your local power source. This freezer requires a AC115 V, 60 Hz power supply.
- Use a receptacle that accepts the grounding prong. The power cord is equipped with a 3-prong (grounding) plug which mates with a standard 3-prong (grounding) wall outlet to minimize the possibility of electric shock hazard from this freezer. CAUTION The freezer should always be plugged into its own individual electrical outlet which has a voltage rating that matches the rating plate. Never unplug your freezer by pulling on the power cord. Always grip the plug firmlyand pull straight out from the outlet.
- The freezer shall stay in an upright position for half an hour before connecting power when it is firstly started.
- The freezer shall run 2 to 3 hours before loading fresh or frozen foods; the freezer shall run for more than 4 hours in summer in advance considering that the ambient temperature is high.Space requirement diagram (when the door is open and when the door is closed) B B
Notice: All dimensions in mmDoor right-left change (optional) Based on the location where you plan to use your refrigerator, you may find it more convenient to reverse the position of the door. CAUTION CAUTION: To avoid injury to yourself or your property, we recommend that someone assist you during the door reversal process. List of tools to be provided by the user Cross screwdriverThin-blade screwdriverMasking tape Parts to be used for door reverse
Right upper hinge 1 Pre -installed on the refrigerator, removed when the door is reversed, and kept for future use
Upper right hinge cover
Pre -installed on the refrigerator, still used when door is reversed
the attached plastic bag, take them out for use when door is reversed
Upper left hinge cover
1. Remove all food from door shelves. Fix the door by tapes.
2. Dismantle hinge hole cap, the upper right hinge cover, fitting screws of upper
right hinge, and remove the upper right hinge, please keep the door vertical in whole process for avoiding falling down; Hinge hole cap The upper hinge cover
123. Remove the door;
4. Dismantle the door stopper, and install it on other side;
5. Dismantle the lower hinge and leveling foot;
6. Install the lower hinge and leveling foot on lower left side of cabinet;
Hinge Leveling foot Hinge Leveling foot
7. Put the door on lower hinge vertically, and validate the gas tightness of door
gasket, take out the spare upper left hinge and hinge cover from accessory bag, then install the upper left hinge by fitting screws. finally to install the hinge cover , and cover the hinge hole cap on upper right side. 13Leveling feet To avoid vibration, the unit must be leveled. If required, adjust the leveling screws to compensate for the uneven floor. The front should be slightly higher than the rear to aid in door closing. Leveling screws can be turned easily by tipping the cabinet slightly. Turn the leveling screws counterclockwise to raise the unit, clockwise lower it.
Moving the appliance
1. Remove all food from inside the appliance.
2. Pull the power plug out, insert and fix it into the power plug hook at the rear or
on top of the appliance.
3. Tape parts such as shelves and the door handle to prevent from falling off
while moving the appliance.
4. Move the appliance with more than two people carefully. When transporting
the appliance over a long distance, keep the appliance upright.
5. After installing the appliance, connect the power plug into a socket out to
switch on the appliance. ATTENTION Precautions before operation: Before making changes the refrigerator must be disconnected from power. precautions should be taken to prevent any personal injury.
Tips for energy saving
- Do not place the appliance near cookers, radiators or other heat sources. If the ambient temperature is high, the compressor will run more frequently and for longer, resulting in increased energy consumption.
- Ensure that there is sufficient ventilation at the base of the appliance, on the sides of the appliance and at the back of the appliance. Never cover ventilation openings.
- Please also observe the spacing dimensions in the chapter „Installation“.
- The arrangement of drawers, shelves and racks as shown in the illustration offers the most efficient use of energy and should therefore be retained as far as possible. All drawers and shelves should remain in the appliance to keep the temperature stable and save energy.
- To obtain a larger storage space (e.g. for large refrigerated/frozen goods), the middle drawers can be removed. The top and bottom drawers and shelves should be removed last if necessary.
- An evenly filled refrigerator/freezer compartment contributes to optimal energy use. Therefore, avoid empty or half-empty compartments.
- Allow warm food to cool before placing it in the refrigerator/freezer. Food that has already cooled down increases energy efficiency.
- Allow frozen food to defrost in the refrigerator. The coldness of the frozen food reduces the energy consumption in the refrigerator compartment and thus increases the energy efficiency.
- Open the door only as briefly as necessary to minimise cold loss. Opening the door briefly and closing it properly reduces energy consumption.
- The door seals of your appliance must be perfectly intact so that the doors close properly and energy consumption is not increased unnecessarily.OPERATION INSTRUCTIONS Control Panel
- After the upright freezer is powered on, when the temperature control knob rotates clockwise, the temperature in the freezer will gradually decrease, and when it rotates counterclockwise, the temperature will gradually increase; when knob is adjusted within the scope of “COOLING”, the box is refrigerator, when knob is adjusted within the scope of “FREEZING”, the box is frozen.
- “OFF” file indicates stop.
- When selecting the refrigeration function, it is recommended that the temperature control knob be set in the middle of the refrigeration icon area. During refrigeration, there may be water drops on the inner wall of the liner, which is normal and the refrigerator can be used normally. ATTENTION The actual control panel may differ from model to model.
Tips on storing food
- The low temperature of upright freezer may keep food fresh for a long time and it is mainly used to store frozen foods and making ice.
- The upright freezer is suitable for storage of meat, fish, shrimp, dumplings, rice balls and other foods not to be consumed in short term.
- Chunks of meat are preferably to be divided into small pieces for easy access. Please be noted food shall be consumed within the shelf time. When the machine is in freezing mode, please cut off the power in time and defrost it manually under the following two conditions. Defrosting water shall be treated outside the cabinet, and the space inside shall be cleaned.
1. When the machine is in freezing mode for a long time, the inner wall of
the cabinet will frost, and the frost will thicken with time, which will affect its cooling effect. In this case, please cut off the power in time for manual defrosting, clean the inner wall and then power on to continue using the machine.
2. When the freezing mode is switched to the refrigeration mode, the
temperature inside the cabinet will rise. In order to avoid a large amount of defrosting water flowing out of the box and damaging the floor and other items, please cut off the power for manual defrosting before putting food in.CLEANING AND MAINTENANCE Defrosting Upright freezer shall be manually defrosted. Disconnect the plug from the wall socket, open the door and remove all the food to a cool place. It is recommended to remove the frost by a plastic scraper, or let the temperature rise naturally until the frost melts. Then wipe away the remaining ice and water, and plug in socket for switching on the freezer. ATTENTION Soft towels or sponge dipped in water and non-corrosive neutral detergents are suggested for cleaning. The freezer of shall be finally cleaned with clean water and dry cloth. Open the door for natural drying before the power is turned on. Do not use hard brushes, clean steel balls, wire brushes, abrasives, such as toothpastes, organic solvents (such as alcohol, acetone, banana oil, etc.), boiling water, acid or alkaline items clean refrigerator considering that this may damage the fridge surface and interior. CAUTION Other mechanical devices or other means shall not be used to accelerate except those recommended by the manufacturer. Do not damage the refrigerant circuit. Stop using Power failure: In case of power failure, even if it is in summer, foods inside the appliance can be kept for several hours; during the power failure, the times of door opening shall be reduced, and no more fresh food shall be put into the appliance. Long-time nonuse: The appliance shall be unplugged and then cleaned; then the doors are left open to prevent odor. Moving: Before the refrigerator is moved, take all objects inside out, fix the glass partitions, vegetable holder, freezing chamber drawers and etc. with tape, and tighten the leveling feet; close the doors and seal them with tape. During moving, the appliance shall not be laid upside down or horizontally, or be vibrated; the inclination during movement shall be no more than 45°. ATTENTION The appliance shall run continuously once it is started. Generally, the operation of the appliance shall not be nterrupted; otherwise the service life may be impaired. Foods can be preserved for a couple of hours even in summer in case of power failure; it is recommended to reduce the frequency of opening door.
TROUBLESHOOTING The following simple issues can be handled by the user. Please call the after-sale service department if the issues are not solved. Problem Possible reason Failed operation
Check whether the appliance is connected to power or whether the plug is in well contact
Check whether the voltage is too low
Check whether there is a power failure or partial circuits have tripped Odor
Odorous foods shall be tightly wrapped
Check whether there is any rotten food
Clean the inside of the refrigerator Long -time operation of the compressor
Long operation of the refrigerator is normal in summer
when the ambient temperature is high It is not suggestible having too much food in the appliance at the same time
Food shall get cool before being put into the appliance
The doors are opened too frequently Light fails to get lit
Check whether the refrigerator is connected to power supply and whether the illuminating light is damaged
Have the light replaced by a specialist Door can not be properly closed
The door is stuck by food packages Too much food is placed
The upright freezer is not placed properly. Loud noises
Check whether the floor is level and whether the refrigerator is placed stably
Check whether accessories are placed at proper locations19 Problem Possible reason Door seal fails to be tight
Remove foreign matters on the door seal
Heat the door seal and then cool it for restoration (or blow it with an electrical drier or use a hot towel for heating) Water pan overflows
There is too much food in the chamber or food stored contains too much water,resulting in heavy defrosting
The doors are not closed properly, resulting in frosting due to entry of air and increased water due to defrosting Hot housing
Heat dissipation of the built-in condenser via the housing, which is normal When housing becomes hot due to high ambient temperature, storage of too much food or shutdown of the compressor is shut down, provide sound ventilation to facilitate heat dissipation Surface condensation
Condensation on the exterior surface and door seals of the refrigerator is normal when the ambient humidity is too high. Just wipe the condensate with a clean towel. Abnormal noise
Buzz: The compressor may produce buzzes during operation, and the buzzes are loud particularly upon start or stop. This is normal.
Creak: Refrigerant flowing inside of the appliance may produce creak, which is normal.TRADEMARKS, COPYRIGHTS
logo, word marks, trade name, trade dress and all versions thereof are valuable assets of Midea Group and/or its affiliates (“Midea”), to which Midea owns trademarks, copyrights and other intellectual property rights, and all goodwill derived from using any part of an Midea trademark. Use of Midea trademark for commercial purposes without the prior written consent of Midea may constitute trademark infringement or unfair competition in violation of relevant laws. This manual is created by Midea and Midea reserves all copyrights thereof. No entity or individual may use, duplicate, modify, distribute in whole or in part this manual, or bundle or sell with other products without the prior written consent of Midea. All the described functions and instructions were up to date at the time of printing this manual. However, the actual product may vary due to improved functions and designs.
20DISPOSAL AND RECYCLING
Important instructions for environment Compliance with the W E E E Directive and Disposing of the Waster Product: This product complies with EU W E E E Directive (2012/19/EU). This product bears a classification symbol for waster electrical and electronic equipment (WEEE). This symbol indicates that this product shall not be disposed with other household wastes at the end of its service life. Used device must be returned to official collection point for recycling of electrical electronic devices. To find these collection systems please contact to your local authorities or retailer where the product was purchased. Each household performs important role in recovering and recycling of old appliance. Appropriate disposal of used appliance helps prevent potential negative consequences for the environment and human health. Compliance with RoHS Directive The product you have purchased complies with EU RoHS Directive (2011/65/EU). It does not contain harmful and prohibited materials specified in the Directive. Package information Packaging materials of the product are manufactured from recyclable materials in accordance with our National Environment Regulations. Do not dispose of the packaging materials together with the domestic or other wastes. Take them to the packaging material collection points designated by the local authorities.
For the provision of the services agreed with the customer, we agree to comply without restriction with all stipulations of applicable data protection law, in line with agreed countries within which services to the customer will be delivered, as well as, where applicable, the EU General Data Protection Regulation (GDPR). Generally, our data processing is to fulfil our obligation under contract with you and for product safety reasons, to safeguard your rights in connection with warranty and product registration questions. In some cases, but only if appropriate data protection is ensured, personal data might be transferred to recipients located outside of the European Economic Area. Further information are provided on request. You can contact our Data Protection Officer via MideaDPO@midea.com . To exercise your rights such as right to object your personal date being processed for direct marketing purposes, please contact us via MideaDPO@midea.com. To find further information, please follow the QR Code.WARRANTY 2324LANGUES FR FrançaisLETTRE DE REMERCIEMENT Nous vous remercions d’avoir choisi Midea ! Avant d'utiliser votre nouveau produit Midea, il faut lire attentivement ce manuel pour bénéficier des caractéris- tiques et fonctions de ce nouvel appareil en toute sécurité. SOMMAIRE