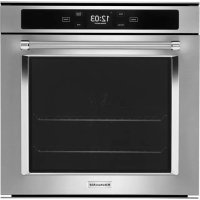
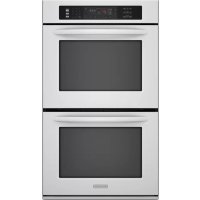
KOCE900HBS - Oven KITCHENAID - Free user manual and instructions
Find the device manual for free KOCE900HBS KITCHENAID in PDF.
Download the instructions for your Oven in PDF format for free! Find your manual KOCE900HBS - KITCHENAID and take your electronic device back in hand. On this page are published all the documents necessary for the use of your device. KOCE900HBS by KITCHENAID.
USER MANUAL KOCE900HBS KITCHENAID
FOUR INTELLIGENTTHANK YOU for purchasing this high-quality product. Register your built-in oven at register.kitchenaid.com. In Canada, register your built-in oven at register.kitchenaid.ca. For future reference, please make a note of your product model and serial numbers. They can be found on the label located on the bottom edge of the control panel, right hand side. Model Number_________________ Serial Number___________________
4 Using the +Powered Attachments 6 Storing the +Powered Attachments
8 SMART OVEN+ POWERED BAKING STONE ATTACHMENT
9 Installing the +Baking Stone Attachment 10 Using the +Baking Stone Attachment
13 SMART OVEN+ POWERED GRILL ATTACHMENT
14 Installing the +Grill Attachment 15 Using the +Grill Attachment
18 SMART OVEN+ POWERED STEAMER ATTACHMENT
19 Installing the +Steamer Attachment 20 Using the +Steamer Attachment 22 TROUBLESHOOTING 24 WARRANTY3 THANK YOU for purchasing this high-quality product. Register your built-in oven at register.kitchenaid.com. In Canada, register your built-in oven at register.kitchenaid.ca. For future reference, please make a note of your product model and serial numbers. They can be found on the label located on the bottom edge of the control panel, right hand side. Model Number_________________ Serial Number___________________
4 Using the +Powered Attachments 6 Storing the +Powered Attachments
8 SMART OVEN+ POWERED BAKING STONE ATTACHMENT
9 Installing the +Baking Stone Attachment 10 Using the +Baking Stone Attachment
13 SMART OVEN+ POWERED GRILL ATTACHMENT
14 Installing the +Grill Attachment 15 Using the +Grill Attachment
18 SMART OVEN+ POWERED STEAMER ATTACHMENT
19 Installing the +Steamer Attachment 20 Using the +Steamer Attachment 22 TROUBLESHOOTING 24 WARRANTY
INSTALLING THE +POWERED ATTACHMENTS
INSTALLATION The +Powered Attachments fit on the SatinGlide
Roll-Out Extension Rack for Smart Oven+ Attachments. They will not rock or wobble when installed correctly. Always fully extend the roll-out rack before placing the +Powered Attachments. The roll-out rack will lock in place when fully extended.
Insert the roll-out rack into the lowest rack position. Some force is required. Extend the rack. Roll-out rack Heating Element Base Pan Place the Base Pan and Heating Element on the roll-out rack. Push the Base Pan back and in until the feet lock into place. +Grill Attachment Place the desired +Powered Attachment on the Heating Element. Push the roll-out rack into the oven fully. A tone will sound and an icon will appear in the display. INSTALLING THE +POWERED ATTACHMENTS | 3USING THE +POWERED ATTACHMENTS HELPFUL TIPS: When moving the +Powered Attachments, carry only the pieces you will be using. It is not necessary to carry the whole unit at once. GETTING STARTED The +Powered Attachments are composed of several parts. The roll-out rack for powered attachments and Base Pan positions the +Powered Attachments in the oven and catches drips. The Heating Element provides even heat to the +Powered Attachments. One +Powered Attachment can be used at a time, but the +Baking Stone Attachment, +Grill Attachment, and +Steamer Attachment can be stacked together for easy storage with the Heating Element and Base Pan.
TIPS FOR BEST RESULTS
y Always fully extend the roll-out rack to gain easy access to the +Powered Attachments. y To avoid damage, do not cook food directly on the Heating Element. Steamer Lid Perforated Steamer Tray Water Basin Pan +Baking Stone Attachment +Grill Attachment Heating Element Base Pan Roll-out rack
for powered attachments
CLEANING Wash the Base Pan and +Powered Attachments after every use. Food spills can react with the coating and result in permanent stains, foods sticking to the attachments, or smoking while in use. y To avoid damage to the +Powered Attachments, do not use the oven’s self- cleaning function for the +Powered Attachments. y The Base Pan and +Powered Attachments are dishwasher-safe. The Heating Element is not dishwasher-safe. y If hand-washing, use soapy water and a soft cloth or sponge. y Do not immerse Heating Element in water. Electrical Shock Hazard Do not immerse heating element in water or place in dishwasher. Doing so can result in death or electrical shock. WARNING USING THE +POWERED ATTACHMENTS | 5STORING THE +POWERED ATTACHMENTS GETTING STARTED The +Powered Attachments are designed for ease of storage. The +Steamer Attachment, +Baking Stone Attachment, and +Grill Attachment conveniently stack together on top of the Heating Element and the Base Pan. There are many ways to store the +Powered Attachments, including: KITCHEN CABINET The +Powered Attachments can be stored inside any large enough kitchen cabinet by stacking them together. SMART OVEN+ The +Powered Attachments can be stored inside the Smart Oven+ cavity for ease of access. Place the +Grill and the +Baking stone attachment on top of the Heating Element inside the Base Pan, place the +Powered Attachments on the roll-out rack for powered attachments, and push the rack inside the oven. Place the +Steamer Attachment on a flat rack above the +Baking Stone Attachment. IMPORTANT: Remove the +Powered Attachments from the oven cavity before using non powered attachment modes or self-cleaning the oven.
The Smart Oven+ Baking Stone Attachment allows you to expand the possibilities of your baking. It can crisp a variety of dishes from seared kabobs to crab cakes to breakfast scones, and the stone's large size empowers you to stone-bake even a 14" (35.6 cm) pizza. Because it's integrated with the oven, the Smart Oven+ Baking Stone preheats in half the time of a non-integrated stone* and alerts you when preheating is complete. And you can control the baking stone through the display, or monitor and control it from a mobile device when remote-enabled.**
- Compared to baking stones of similar size, weight and material. **Wi-Fi & App required. Features subject to change. For details and privacy statement, visit kitchenaid.com/connect. 8 | SMART OVEN+ POWERED BAKING STONE ATTACHMENTINSTALLING THE +BAKING STONE ATTACHMENT INSTALLATION The +Powered Attachments fit on the SatinGlide Roll-Out Extension Rack for Smart Oven+ Attachments. They will not rock or wobble when installed correctly. Always fully extend the roll-out rack before placing the +Powered Attachments. The roll-out rack will lock in place when fully extended.
Insert the roll-out rack into the lowest rack position. Some force is required. Extend the rack. Place the Base Pan and Heating Element on the roll-out rack. Push the Base Pan in until the feet lock into place. Place the Baking Stone onto the Heating Element. Push the roll-out rack into the oven fully. A tone will sound and an icon will appear in the display. INSTALLING THE +BAKING STONE ATTACHMENT | 9USING THE +BAKING STONE ATTACHMENT GETTING STARTED Preheat the +Baking Stone Attachment before placing food. While the length of preheat time will vary depending on the oven temperature, the Heating Element will bring the +Baking Stone Attachment to temperature in under 30 minutes. The +Baking Stone Attachment is glazed for easy cleaning, but it can be lined with a sheet of parchment paper.
TIPS FOR BEST RESULTS
y To transfer multiple items on and off the +Baking Stone Attachment easily, place parchment paper on a non-rimmed cookie sheet and arrange the items on the parchment in a single layer. When the +Baking Stone Attachment is preheated, slide the parchment paper with the items onto the stone and bake as usual. When done, slide the parchment paper back onto the sheet. y Cover the +Baking Stone Attachment with a sheet of parchment paper for easier clean- up, especially when baking items such as free form pies, tarts, or fruit turnovers. Baked-on pie filling can be very difficult to remove from the +Baking Stone Attachment. y To gain easy access to the stone, extend the roll-out rack for powered attachments. Simply push the +Baking Stone Attachment fully back into the oven cavity (within 2 minutes) to continue the cycle. y Some items, such as bread and rolls, do not need to be turned. When baking items such as fresh breaded fish or chicken, turn halfway through baking. y Pizza up to 14" (35.6 cm) will fit on the +Baking Stone Attachment. y Long, skinny items, such as baguettes, can be placed diagonally on the +Baking Stone Attachment to better fit. 10 | USING THE +BAKING STONE ATTACHMENTUSING THE +BAKING STONE ATTACHMENT CLEANING Wash the +Baking Stone Attachment after every use. Food spills can react with the coating and result in permanent stains, foods sticking to the +Baking Stone Attachment, or smoking while in use. y To avoid damage, do not use the oven’s self-cleaning function for the +Baking Stone Attachment. y The +Baking Stone Attachment is dishwasher-safe. y If hand washing, use soapy water and a soft cloth or sponge. y Baking soda can aid in removing difficult spills. y Avoid extreme temperature changes. y Before cleaning, allow the +Baking Stone Attachment to cool. y Do not use +Baking Stone Attachment if damaged or chipped. y Use a plastic scraper to remove baked-on foods. y Do not use under the broiler. y Avoid bumping or dropping the +Baking Stone Attachment, which can break. y Avoid placing any other pan or rack on top of the +Baking Stone Attachment. y The +Baking Stone Attachment is metal utensil safe. y When placing the +Baking Stone Attachment on a surface, first cover surface with a sturdy material to avoid scratches. Electrical Shock Hazard Do not immerse heating element in water or place in dishwasher. Doing so can result in death or electrical shock. WARNING USING THE +BAKING STONE ATTACHMENT | 11SMART OVEN+ POWERED GRILL ATTACHMENT The Smart Oven+ Grill Attachment allows true grilling year-round. Its advanced design minimizes smoke and eliminates the flare-ups common with outdoor grills. It also heats evenly from edge to edge, providing consistent results and enabling you to use the entire grilling surface for everything from steak and burgers to pizza and scallops. And you can control the grilling process through the display, or monitor and control it from a mobile device when remote-enabled.* *Wi-Fi & App required. Features subject to change. For details and privacy statement, visit kitchenaid.com/connect. SMART OVEN+ POWERED GRILL ATTACHMENT | 13INSTALLING THE +GRILL ATTACHMENT INSTALLATION The +Powered Attachments fit on the SatinGlide
Roll-Out Extension Rack for Smart Oven+ Attachments. They will not rock or wobble when installed correctly. Always fully extend the roll-out rack before placing the +Powered Attachments. The roll-out rack will lock in place when fully extended.
Insert the roll-out rack into the lowest rack position. Some force is required. Extend the rack. Place the Base Pan and Heating Element on the roll-out rack. Push the Base Pan in until the feet lock into place. Place the Grill on the Heating Element. Push the roll-out rack into the oven fully. A tone will sound and an icon will appear in the display. 14 | INSTALLING THE +GRILL ATTACHMENTUSING THE +GRILL ATTACHMENT GETTING STARTED Preheat the +Grill Attachment per the recipe instructions before placing food. The +Grill Attachment has a nonstick coating for easy cleaning. Metal utensils may scratch or damage this coating. The +Grill Attachment has an additional Sear functionality for creating grill lines. While cooking, touch the Sear button on the console. The +Grill Attachment will reach a more intense heat for 5 minutes to sear grill lines into the food.
TIPS FOR BEST RESULTS
Food Notes Bone-In Chicken Breast (Up to 12 oz each) Start with skin-side down. Boneless Chicken Breast (Up to 8-10 oz each) Start with smooth-side down. Hamburger Patties (Up to nine 1/4 lb [115 g] patties) 80% lean or leaner will produce best results. Pizza (Up to 8" [20.3 cm] in diameter) Too many toppings or highly liquid sauces can make grilled pizzas soggy. Precooked or raw toppings that only need to be warmed should be used. Fruit Cook until both sides have grill marks and fruit is just warmed to the center. Do not overcook or fruit will become very soft. y Add 1 cup (240 mL) of water to the base pan when grilling to avoid smoke generation (recommended if broiling greasy/fatty foods such as burgers, rib eye steaks, etc.). y When grilling unevenly thick pieces of fish or meat, position the thickest parts in the center of the +Grill Attachment for more even results. y For best results, do not turn thin fillets of fish. y Remove excess fat from meats or poultry. With steaks or chops, slash the edges of fat to prevent meat from curling. y Choose items to be grilled that are about the same size and thickness. Leave 1" (2.5 cm) of space around each item being grilled. y Brush sauces or glazes on in the last few minutes. High-sugar sauces or glazes are more likely to burn if added too early. y Season with desired herbs and spices before grilling, but season with salt after grilling. y When grilling pizza, cook one side of the crust until grill marks are the desired darkness. Remove from the +Grill Attachment and put toppings on the grilled side. Slide pizza back onto the +Grill Attachment to finish cooking. y Opening the door will slow grilling and may adversely affect the browning. y Always use an instant-read meat thermometer to determine doneness. USING THE +GRILL ATTACHMENT | 15USING THE +GRILL ATTACHMENT CLEANING Wash the +Grill Attachment after every use. Food spills can react with the coating and result in permanent stains, foods sticking to the +Grill Attachment, or smoking while in use. y To avoid damage, do not use the oven’s self- cleaning function for the +Grill Attachment. y The +Grill Attachment is dishwasher-safe. y If hand washing, use soapy water and a soft cloth or sponge. Electrical Shock Hazard Do not immerse heating element in water or place in dishwasher. Doing so can result in death or electrical shock. WARNING
16 | USING THE +GRILL ATTACHMENTSMART OVEN+ POWERED
STEAMER ATTACHMENT The Smart Oven+ Steamer Attachment keeps foods tender and provides the benefits of steaming. It has the capacity to dramatically expand the capabilities of steam cooking across a wider range of foods. It can even prepare a complete dinner for four including meat or fish, potato or pasta, and vegetable. The attachment can also be used with the Steam Assist mode to create a humid cooking environment ideal for baked goods, breads and roasts. And you can control the attachment through the display, or monitor and control it from a mobile device when remote-enabled.* *Wi-Fi & App required. Features subject to change. For details and privacy statement, visit kitchenaid.com/connect. 18 | SMART OVEN+ POWERED STEAMER ATTACHMENTINSTALLING THE +STEAMER ATTACHMENT INSTALLATION The +Powered Attachments fit on the SatinGlide
Roll-Out Extension Rack for Smart Oven+ Attachments. They will not rock or wobble when installed correctly. Always fully extend the roll-out rack before placing the +Powered Attachments. The roll-out rack will lock in place when fully extended.
Insert the roll-out rack into the lowest rack position. Some force is required. Extend the rack. Place the Base Pan and Heating Element on the roll-out rack. Push the Base Pan in until the feet lock into place. Place the Steamer on the Heating Element. Push the roll-out rack into the oven fully. A tone will sound and an icon will appear in the display. INSTALLING THE +STEAMER ATTACHMENT | 19USING THE +STEAMER ATTACHMENT GETTING STARTED Pour approximately 4 cups (960 mL) of water into the Steamer Water Basin, and then place the Perforated Steamer Tray onto the Steamer Water Basin. The +Steamer Attachment was designed to hold 6 servings of food. Arrange food in a single layer on the Perforated Steamer Tray with space around each piece. Cover with the Steamer Lid.
The Steam Assist Mode combines the dry heat of a convection oven with steam to create a humid environment for cooking, enhancing the flavor and texture of foods. It is ideal for items like cheesecake, breads, and a whole chicken or turkey, as it results in a moist interior and perfectly browned exterior of the food. The Steam Assist Mode uses the +Steamer Attachment. When cooking with the Steam Assist Mode, do not use the Steamer Lid. This will allow the steam to escape and fill the oven cavity during the cooking process.
TIPS FOR BEST RESULTS
y Like-sized pieces will cook more evenly. y Different types foods, such as fish and vegetables, may be cooked at the same time without mixing their flavors. y For best results, choose foods that cook for approximately the same length of time. y Always open the Steamer Lid away from you to allow steam to escape. y Opening the oven and removing the Steamer Lid frequently during steaming will affect the quality of the food. Check food only when necessary. y When using Steam Assist for foods like cheesecake, place the food in a standard pan and set it directly in the Perforated Steamer Tray; set it inside the Steamer Water Basin, but do not cover with the Steamer Lid. y When using Steam Assist for items, like bread or poultry, place the food in a regular pan, according to baking instructions, and place it on the standard rack above the +Steamer Attachment. Steamer Lid Steamer
ater Basin Perforated Steamer Tray 20 | USING THE +STEAMER ATTACHMENTUSING THE +STEAMER ATTACHMENT CLEANING Wash the Steamer Lid, Perforated Steamer Tray, and Steamer Water Basin after every use. Food spills can react with the material and result in permanent stains, foods sticking to the Perforated Steamer Tray, or smoking while in use. y To avoid damage, do not use the oven’s self-cleaning function for the +Steamer Attachment. y The +Steamer Attachment is dishwasher-safe. y If hand washing, use soapy water and a soft cloth or sponge. Electrical Shock Hazard Do not immerse heating element in water or place in dishwasher. Doing so can result in death or electrical shock. WARNING
USING THE +STEAMER ATTACHMENT | 21TROUBLESHOOTING
First try the solutions suggested here. If you need further assistance or more recommendations that may help you avoid a service call, visit http://producthelp.kitchenaid.com. In Canada, visit http://www.kitchenaid.ca. Contact us by mail with any questions or concerns at the address below: In the U.S.A.: KitchenAid Brand Home Appliances Customer eXperience Center 553 Benson Road Benton Harbor, MI 49022-2692 In Canada: KitchenAid Brand Home Appliances Customer eXperience Centre
200 - 6750 Century Ave.
Mississauga, Ontario L5N 0B7 Please include a daytime phone number in your correspondence. GENERAL
1. Plug doesn’t line up – Check that
Roll-Out Extension Rack for Smart Oven+ Attachments is properly installed and lined up. If it is, make sure the Base Pan is properly placed. Base Pan “feet” should fit neatly on the 3rd and 10th spaces (from the left) on the rack. Once placed, gently slide the Base Pan back until it locks into place on the rack.
2. No tone for connection – There is
approximately a 2-second delay before the tone sounds. If you do not hear a tone, pull the Base Pan with heating element out fully and fully reinsert it. Wait for a tone.
3. Attachment not in right spot on the
roll-out rack for powered attachments – Check that the roll-out rack for powered attachments is positioned correctly. Make sure the correct attachment is being used. The Base Pan “feet” should fit neatly on the rack, in the 3rd and 10th spaces (from the left) on the rack.
4. +Powered Attachment disconnects
while cooking – Should the +Powered Attachment disconnect, a tone (different from the connection tone) will sound and the icon will disappear from the display. Open the oven and extend the roll-out rack for powered attachments to disconnect the Base Pan and +Powered Attachment from the plug. Once removed, push the roll-out rack for powered attachments back in to reconnect the +Powered Attachment to the plug. Make sure the connection tone sounds and the icon reappears in the display. This can be done with any attachment that is in use (+Grill Attachment, +Baking Stone Attachment, +Steamer Attachment, etc.). Note that only the +Grill Attachment secures to the Base Pan. 22 | TROUBLESHOOTINGTROUBLESHOOTING GENERAL
5. Oven is smoking – Should you notice smoke
during a cooking cycle, it is time to self clean the oven. Once the current cooking cycle is over and the +Powered Attachments have cooled down, remove them, along with the roll-out rack for powered attachments and begin a Self-Cleaning cycle. NOTE: Steam during a cycle is normal, and will dissipate quickly with very little odor.
6. +Grill Attachment is smoking – Once cool,
remove the +Powered Attachment, +Grill Attachment, and Base Pan from oven. The Base Pan and all +Powered Attachments are dish washer safe. Clean +Grill Attachment and/or Base Pan by hand washing or place in dishwasher.
7. Smoke/steam from oven changes the
User Interface (UI) (false touch) – If steam from the oven affects the UI, simply hit the Back button once to return to the preheat/ cooking timer. If steam completely canceled out of cooking mode, use the UI to return to previous cooking setting. TROUBLESHOOTING | 23WARRANTY KITCHENAID
+POWERED ATTACHMENTS WARRANTY FOR THE 50 UNITED STATES, THE DISTRICT OF COLUMBIA, PUERTO RICO, AND CANADA This warranty extends to the purchaser and any succeeding owner of the +Powered Attachments operated in the 50 United States, the District of Columbia, Puerto Rico, and Canada. Length of Warranty: One Year Full Warranty from date of purchase. KitchenAid Will Pay for Your Choice of: Hassle-Free Replacement of your +Powered Attachments. See the next page for details on how to arrange for service, or call the Customer eXperience Center toll-free at 1-800-541-6390.
The replacement parts and repair labor costs to correct defects in materials and workmanship. Service must be provided by an Authorized KitchenAid Service Center. KitchenAid Will Not Pay for: A. Repairs when your +Powered Attachments is used in other than normal single family home use. B. Damage resulting from accident, alteration, misuse, or abuse. C. Any shipping or handling costs to deliver your +Powered Attachments to an Authorized Service Center. D. Replacement parts or repair labor costs for +Powered Attachments operated outside the 50 United States, District of Columbia, Puerto Rico, and Canada. DISCLAIMER OF IMPLIED WARRANTIES; LIMITATION OF REMEDIES IMPLIED WARRANTIES, INCLUDING TO THE EXTENT APPLICABLE WARRANTIES OF MERCHANTABILITY OR FITNESS FOR A PARTICULAR PURPOSE, ARE EXCLUDED TO THE EXTENT LEGALLY PERMISSIBLE. ANY IMPLIED WARRANTIES THAT MAY BE IMPOSED BY LAW ARE LIMITED TO ONE YEAR, OR THE SHORTEST PERIOD ALLOWED BY LAW. SOME STATES AND PROVINCES DO NOT ALLOW LIMITATIONS OR EXCLUSIONS ON HOW LONG AN IMPLIED WARRANTY OF MERCHANTABILITY OR FITNESS LASTS, SO THE ABOVE LIMITATIONS OR EXCLUSIONS MAY NOT APPLY TO YOU. IF THIS PRODUCT FAILS TO WORK AS WARRANTED, CUSTOMER’S SOLE AND EXCLUSIVE REMEDY SHALL BE REPAIR OR REPLACEMENT ACCORDING TO THE TERMS OF THIS LIMITED WARRANTY. KITCHENAID AND KITCHENAID CANADA DO NOT ASSUME ANY RESPONSIBILITY FOR INCIDENTAL OR CONSEQUENTIAL DAMAGES. This warranty gives you specific legal rights and you may also have other rights which vary from state to state or province to province. 24 | WARRANTYWARRANTY HASSLE-FREE REPLACEMENT WARRANTY – 50 UNITED STATES,
DISTRICT OF COLUMBIA, AND PUERTO RICO
We’re so confident the quality of our products meets the exacting standards of KitchenAid that, if your +Powered Attachments should fail within the first year of ownership, KitchenAid will arrange to deliver an identical or comparable replacement to your door free of charge and arrange to have your original +Powered Attachments returned to us. Your replacement unit will also be covered by our one year limited warranty. If your +Powered Attachments should fail within the first year of ownership, simply call our toll-free Customer eXperience Center at 1-800-541-6390 Monday through Friday. Please have your original sales receipt available when you call. Proof of purchase will be required to initiate the claim. Give the consultant your complete shipping address (no P.O. Box numbers, please). When you receive your replacement +Powered Attachments, use the carton, packing materials, and prepaid shipping label to pack up your original +Powered Attachments and send it back to KitchenAid.
HASSLE-FREE REPLACEMENT WARRANTY – CANADA
We’re so confident the quality of our products meets the exacting standards of KitchenAid that, if your +Powered Attachments should fail within the first year of ownership, KitchenAid will arrange to deliver an identical or comparable replacement to your door free of charge and arrange to have your original +Powered Attachments returned to us. Your replacement unit will also be covered by our one year limited warranty. If your +Powered Attachments should fail within the first year of ownership, simply call our toll-free Customer eXperience Center at 1-800-807-6777 Monday through Friday. Please have your original sales receipt available when you call. Proof of purchase will be required to initiate the claim. Give the consultant your complete shipping address. When you receive your replacement +Powered Attachments, use the carton, packing materials, and prepaid shipping label to pack up your original +Powered Attachments and send it back to KitchenAid. WARRANTY | 25WARRANTY ARRANGING FOR SERVICE AFTER THE WARRANTY EXPIRES,