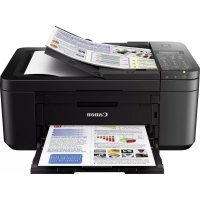
WG7250Z - Printer CANON - Free user manual and instructions
Find the device manual for free WG7250Z CANON in PDF.
Download the instructions for your Printer in PDF format for free! Find your manual WG7250Z - CANON and take your electronic device back in hand. On this page are published all the documents necessary for the use of your device. WG7250Z by CANON.
USER MANUAL WG7250Z CANON
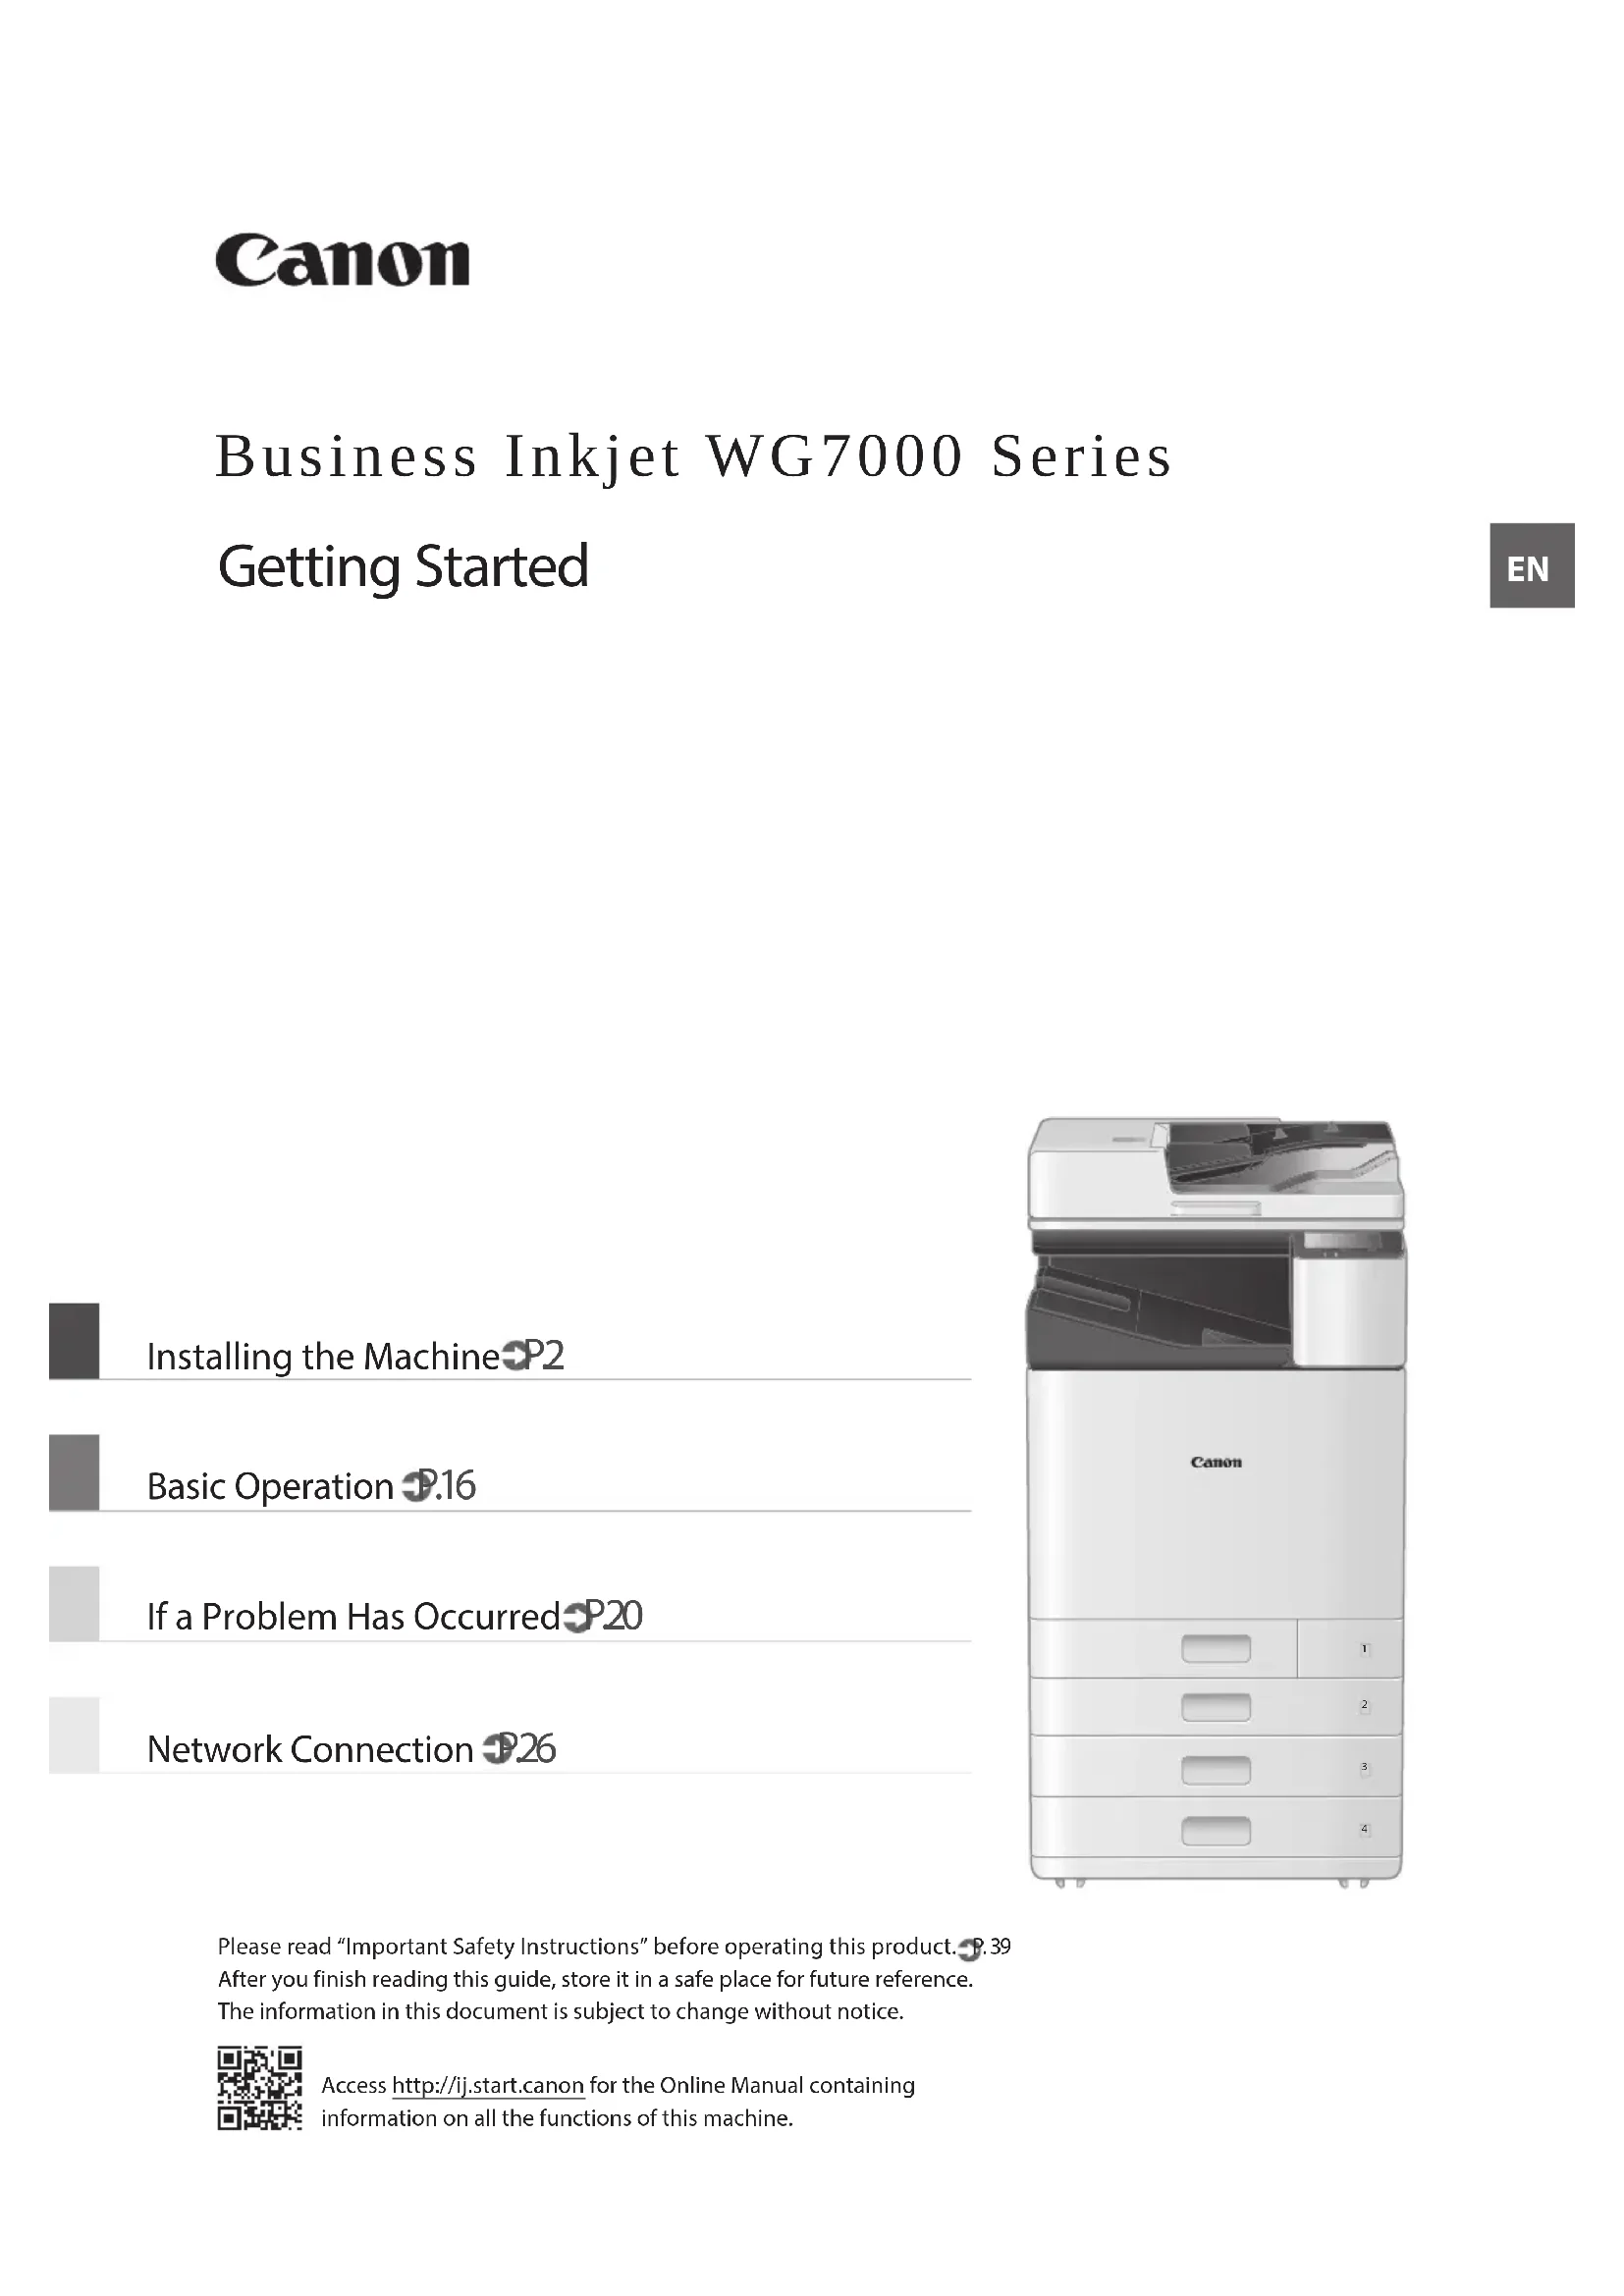
Please read “Important Safety Instructions” before operating this product. P. 39 After you finish reading this guide, store it in a safe place for future reference. The information in this document is subject to change without notice. Access http://ij.start.canon for the Online Manual containing information on all the functions of this machine. Basic Operation P.16 If a Problem Has Occurred P.20 Installing the Machine P.2 Network Connection P.26
Getting StartedEN <BK> <C>, <M>, <Y> Print Head and Maintenance Cartridge are set in the machine.* WG7250Z/WG7250FInstall on a flat level surface, providing a space of 3.94 inches (100 mm) or more around the machine. 23.23” (590 mm) 3.94” (100 mm) 21.06” (535 mm) 22.05” (560 mm) 3.94” (100 mm) 3.94” (100 mm) 14.37” (365 mm) Cassette Feeding Unit CF10 13.74” (349 mm) 34.65” (880 mm) 9.96” (253 mm) 3.94” (100 mm) CAUTION!The front cover is locked. Do not force it open. Installing the Machine Items Included with the Machine Installation Requirements 2EN If You Purchased an Optional Cassette Feeding Unit First install the cassette feeding unit (optional). Refer to the manual bundled with the cassette feeding unit for installation steps. CAUTION
- Do not hold the machine by its base, as fingers may get caught when placing the machine. Transporting the Machine
- Four people are required to move the machine. There are four handhold locations around the machine. Each person should place one hand in a handhold and use the other hand to stabilize the machine while lifting. To avoid back injuries, do not bend over when lifting. See below for handhold locations.•Never hold the machine by the feeder (auto document feeder), a paper drawer, etc. The machine could be dropped and cause injury. Front side Front side
With each person standing at a corner of the machine and a hand in one of the handholds as shown from to , lift the machine by bending at the knees. Front side Front side Front side Front side Front side 3EN Installing the Machine
- Remove all 4 stickers. After installing the optional cassette feeding unit, continue with the installation from step 4.
- Remove all of the tape.
- Remove all of the tape. Attach the clamp and power cord, and then affix the power cord with the clamp.•The shape of the power cord depends on your country or region.•Depending on the shape of the bundled power cord, you may not be able to attach a clamp. If you are unable, do not attach, and go to the next step.
Attach the Protective Cover at the bottom of the right side of the machine. Cassette Feeding Unit (optional) attached
Attach the Book Pocket to either the left or rear side of the machine.
- Store this guide here.
Store the glass cleaning sheet. Attach the Handhold Cover after turning on the machine. 5EN
Press <unlock> on the screen. •Do not open the front cover until the screen appears.
Remove the Shipping Lock Pin. Pull out the Print Head Locking Rod.
Raise the lever (blue) in , and pull the rod out completely in the direction indicated at Do not bend the rod. Installing the Machine Remove Packing Materials from Inside the Machine Initial Settings
Turn on the machine. (ON) NOTE When the machine is first powered on, a Setup Guide with a series of screens will appear to help you set up the machine.If the Setup Guide does not appear, refer to the Online Manual.For details "Setting Up Using the Setup Guide" in the Online Manual Set the language. •Follow the on-screen instructions. Set the time zone and current date/time.For details "Setting Up Using the Setup Guide" in the Online Manual 6EN
- Face the blue lever portion toward you, and then press the rod to the left and hook it.
- Place the right end on the hook.
- After placing both ends, turn the blue lever downward to lock it. The Print Head Locking Rod is required during transport. Do not throw it away.
Attach the Handhold Cover. Use a coin to turn the screws to fasten.
- Turn until tank clicks.•Install all four ink tanks in the correct slots.
- Filling begins, and takes about 40-70 minutes to complete.•Time required for filling depends on your environment.•Do not turn off the machine while ink is filling.•If filling is interrupted by turning off the machine, etc., additional ink tanks may be required.•While ink is filling, you can configure settings up to “Adjust the margins of the Cassette Feeding Unit (optional)” ( P.12).Next, configure the machine to send data. Press <Unlock> on the screen. •Do not open the front cover until the screen appears.
Install the Ink tanks 8EN Configure the Machine to Send Data In this survey, we will not send your personal information. For this reason, from the information that is sent to us, we are unable to identify specific customers.We are therefore unable to respond to requests to disclose any sent information.After you agree to the requests, the above information will be sent to Canon (if you are using your Canon product in China, to the legally approved research company) through the Internet. The Internet connection fee shall be borne by you.The sent information may be delivered to Canon's group companies. Read the messages and follow the on-screen instructions. Sending Data to Canon To develop and market products, and to provide special offers and services that better meet customer needs, Canon requests that information such as that below, related to your Canon product, be sent to Canon (if you are using your Canon product in China, to the legally approved research company) through the Internet.Information related to printer/scanner/fax/information devices•Basic information such as the printer ID number, installation date and time, country settings, etc.•Usage history such as the type of ink installed, ink usage information, the number of sheets printed, scanning frequency, and maintenance information, etc.
- Paper use information, printing environment/conditions, scan job setting, and questionnaire results•Basic device information such as the model name, OS version, language, and display setting information, etc.•Device driver and application software versions, usage history(Some of the above information may not be sent depending on your model and/or application software.)If your Canon product is shared for use, the above information recorded in the shared product will be sent. If you are to agree, please convey this fact to the users who share the product and obtain their agreement as well beforehand. 9EN Installing the Machine To connect via wireless LAN Press <Yes> on the connection method screen. Check that your computer and wireless router are properly connected. Check the network settings on the computer. Take note of the network name (SSID) and password (network key).•Check the label on your router for this information. Online Manual•Setup can also be performed via WPS on compatible routers. Online ManualBefore starting the configuration•There is risk of disclosing your personal information if the machine is connected to an unsecure network. Take precaution to secure your network from unknown parties.•The machine does not come with a router or LAN cables. Please have one ready.•The machine cannot be connected to a wired and wireless network at the same time.If you are using the Setup Guide, connection is by DHCP where the IP address is automatically assigned.To use set an IP address other than by DHCP, such as a fixed IP address, select <No> in the wireless LAN connection screen and exit the Setup Guide without connecting to the network.Once the Home screen is displayed, refer to the “Connecting to a Network with a Fixed IP Address” P.28 and configure settings.Choosing a connection method•To connect via wireless LAN: P.10•To connect via wired LAN: P.11•To connect via USB: P.12The above screen does not appear on WG7240. Connect via wired LAN or USB.Even in an environment without a wireless LAN, you can use Access Point Mode to connect directly to the machine wirelessly from your mobile device (Direct Connection). Exit the Setup Guide before you initiate Direct Connection (WG7250Z/WG7250F/WG7250). Online Manual Connecting to a Computer
- With a fixed IP address: Select <No> and adjust margins. P.12• By DHCP: Proceed with the following steps. 10EN
Press <OK>. •From the screen below, follow these instructions to enter your network's name (SSID) and password (network key). Press <SSID Settings>. Press <Select Access Point>. Select the network name (SSID), and press <Next>.1. Enter a password (network key), and press <Apply>.2. Press <Yes>.•An IP address will be automatically assigned.•<Connected.> is displayed. Video Tutorials You can find videos and guides to assist the process for the Wireless Network connection from the URL below. Viewing these guides will ensure a smooth setup of the device into your existing wireless environment. http://www.usa.canon.com/WirelessHelp To connect via wired LAN
Press <No> on the connection method screen.The machine does not come with a LAN cable. Please have one ready. Check that your computer and router are properly connected. Check the network settings on the computer. Connect the LAN cable.•After connecting the cable, wait a few minutes (until the IP address is set automatically). Next, adjust the margins of the Cassette Feeding Unit (optional). P.12 Next, adjust the margins of the Cassette Feeding Unit (optional). P.12
- With a fixed IP address: Select <No> and adjust margins. P.12
- By DHCP: Proceed with the following steps. 11EN Installing the Machine
Enter the values for <Left Margin for Drawer 3> and <Left Margin for Drawer 4> you checked at step 1 from the screen. Place the paper drawer back into the machine.CAUTIONBe careful not to catch your fingers when pushing in the paper drawer.Next, print out and check a nozzle check pattern. Adjust the margins of the Cassette Feeding Unit (optional) To connect via USB Press <No> on the connection method screen.•The machine does not come with a USB cable. Please have one ready.•Make sure that the USB cable you use is compatible with this designation.•Do not connect the USB cable before installing the software. If you did, disconnect the USB cable from the computer, close the dialog box, and then perform the procedure from step 1 of “Installing the Software”. P.14Next, adjust the margins of the CassetteFeeding Unit (optional). 12EN Print Out and Check a Nozzle Check Pattern
Press <Start> and print out a pattern. If the printed result appears okay, press <A> to complete the nozzle check.If streaks or unevenness appear in the printed result, press <B> to perform cleaning.•Depending on the condition of the nozzles, you may need to check and perform cleaning several times.•Settings are complete once the Home screen is displayed.Print out and check a nozzle check pattern to check the print head condition. If streaks or unevenness appear in the printed result, perform cleaning.Load A3, 11x17, LTR or A4 plain paper in the paper drawer. Loading at least 10 sheets of A3 or 11x17 paper is recommended.•Before you proceed further, ink must complete filling.•A progress bar is displayed until ink completes filling.
Load paper sideways to match the paper guides. Next, Network connection settings. 13EN Installing the Machine Installing the Software Next, configuring Fax Settings (WG7250Z/WG7250F) P.15•The procedures described here are for Windows. For more details on the software installation procedure, see the driver's manual.•If connecting by USB, do not connect until instructions to do so appear on the installation screen. If you did, disconnect the USB cable from the computer, close the dialog box, and then perform the following procedure from step 1.•Drivers for macOS are not bundled with your machine. The latest drivers can be downloaded from the Canon website.
If the screen is not displayed properly, re-insert the DVD-ROM or search for "D:\MInst.exe" on the Windows platform (This description assumes that "D:" is the DVD-ROM drive name).After exiting the Setup Guide, continue by making settings to connect the network. Items to set depend on the connection usage. Check settings that apply to the following conditions.If Using a Fixed IP AddressProceed to “Connecting to a Network with a Fixed IP Address ( P.28)”.OtherYou are not required to make settings in the following instances.Proceed to “Installing the Software ( P.14)”.•Obtain an IP address automatically with DHCP.•Since only a USB connection will be used, an IP address is not set. Network connection settings 14EN For details "Drivers" and "Configuring Initial Settings for Fax Functions" in the Online Manual Configuring Fax Settings (WG7250Z/WG7250F)
Set the reception mode. Answer the questions on how you will use the fax function to select the best settings. Connect to a telephone line.
Telephone line jack TelephoneHandset Press <End>. Press <OK>.Setup complete. Your machine is now ready to use.If your machine does not come with a telephone cable, have one ready, as necessary.Configure the fax settings, as shown below. Press <Fax>. Press <Set Up Now>. Register the machine's telephone number (fax number) and abbreviated user name (unit name).•The information below will be printed at the top part of the paper output from the destination machine as sender information.02/02 2017 10:00AM CANON123XXXXXXXFAX 0001Sent Time Unit Name Page NumberNumber's TypeFax Number 15EN Basic Operation On the platen glass Place originals face down.Place in the corner.Suitable for scanning books, magazines, and newspaper clippings. In the feeder Place originals face up.Adjust the slide guides.Suitable for scanning multi page documents.MachineOperation Panel ([Energy Saver] key) ([Home] key) ([Stop] key)Display (screen) Placing Originals Start the Operation from the Operation Panel Printing 1. Open the document to print, and select the print function of the application.2. Select the printer driver for the machine, and select [Preferences] or [Properties].3. Specify the paper size.4. Specify the paper source and paper type.5. Adjust print settings, if necessary.6. Select [OK].7. Select [Print] or [OK].For details "Printing" in the Online Manual 16EN Scanning
3. Select the type of scan, and enter any necessary information.
4. Press <B&W Start> or <Color Start>.
Types of scan ■Store in USB memory device ■Send by email ■Send to file server To scan from a computer ■WG Scan Utility For details "Scanning" in the Online Manual Copying
4. Enter the desired number of copies.
Useful copy settings ■N on 1 ■2-Sided or 1-Sided ■Enlarging or reducing ■Copying ID cards For details "Copying" in the Online Manual Faxing (WG7250Z/WG7250F)
Useful fax functions ■Sequential Broadcast ■Memory Reception ■PC Fax For details "Faxing" in the Online Manual 17EN In the following, the operations that are common to paper drawers 1 and 2 are described using drawer 2 as an example.
Slide the light blue knobs to adjust the positions of the paper guides.Align the protrusion to the appropriate paper size marking. First fan the paper stack well and then load it. Make sure that this line is not exceeded.The print side face upLoad the paper sideways to match the paper guides. Place the paper drawer back into the machine.CAUTIONBe careful not to catch your fingers when pushing in the paper drawer.If you have changed the paper type, be sure to change the paper settings. Press , and then select <Paper Settings>. Specify the size and type of paper, according to the screen. Basic Operation Loading Paper in the Paper Drawer 18EN
Adjust the position of the paper guides.Align the paper guides to the paper size markings.Tray extension NOTE Pull out the tray extension when loading large-sized paper. Fan the paper stack well, align the edges on a flat surface, and then load it. Make sure that this line is not exceeded.The print side face down Check the paper size and type, and press <Apply> on the screen. If the paper size/type setting does not match the paper you have loaded on the screen shown in step 4, change the setting manually.
Press <Standard Size>. Specify the paper size. Press <Change Ppr. Type>. Specify the paper type. Press <Apply>. For details "Loading Paper" in the Online Manual Loading Paper in the Multi Purpose Tray 19EN Check the following.•Is the power turned on?•Is the machine in sleep mode?If both the display and are not lit, press the power switch.Power switch (ON)
- Is the power cord connected correctly?If the problem persists, see the Online Manual. When paper is jammed, a screen, similar to the one below appears.Clear paper jams, according to the on-screen instructions. Ink Tank Canon genuine ink tankStandard•Black PGI-7200 <BK>•Cyan PGI-7200 <C>•Magenta PGI-7200 <M>•Yellow PGI-7200 <Y>Large•Black PGI-7200XL <BK>•Cyan PGI-7200XL <C>•Magenta PGI-7200XL <M>•Yellow PGI-7200XL <Y>Extra-large•Black PGI-7200XXL <BK>•Cyan PGI-7200XXL <C>•Magenta PGI-7200XXL <M>•Yellow PGI-7200XXL <Y> Maintenance Cartridge
- Maintenance Cartridge MC50 Paper Jams Have OccurredThe Machine Is Not Responding Replacing Consumables If a Problem Has Occurred 20EN Printing Results Are Not Satisfactory For details "Maintenance" and "Frequently Asked Questions" in the Online Manual Check first Did you check the paper and print quality? Check that settings in the machine’s operation panel or in the printer driver match the paper size, type, and print quality that you want to use. P.18 “Loading Paper in the Paper Drawer” P.16 “Printing” If settings match, increase the “resolution” print quality settings and print again. Increasing the “resolution” print quality settings in the machine’s operation panel or the printer driver might improve print results. NOTE Depending on the settings for <2-sided printing>, <Density/Drying Time Adjustment>, and <Ink Saving>, colors may be light. Printouts Are Faded/Colors Turn Out Differently/White Streaks (Lines) Appear Check 1 Did you check for clogging in the print head? Print out a nozzle check pattern, and then perform print head cleaning, etc. as necessary. P.22 “Printing/Checking a Nozzle Check Pattern” Check 2 Did you perform color correction (All Paper Types)? Perform color correction (All Paper Types). P.23 “Performing Color Correction (All Paper Types)” Check 3 If the procedures above did not resolve the problem, perform color correction (Single Paper Type). P.23 “Performing Color Correction (Single Paper Type)” Color Unevenness or Colored Streaks Check 1 Did you check the condition of the print head? Perform a print head diagnosis. P.24 “Performing a Print Head Diagnosis” Check 2 If the procedures above did not resolve the problem, perform color correction (Single Paper Type). P.23 “Performing Color Correction (Single Paper Type)” Colors Are Misaligned Check 1 Did you perform print head position adjustment? Adjust the position of the print head to correct misaligned colors, etc. P.24 “Aligning the Print Head” Copy Results Are Not Satisfactory Check 1 Is the original placed on the platen glass correctly? Place the original with the side to be scanned down. P.16 “Placing Originals” Check 2 Are you copying an original that was printed out on the machine? If copying an original that was printed out on the machine, printing may not turn out well depending on the original photo or document. Print directly from the machine, or directly from a PC where printing from a PC is possible. 21EN If a Problem Has Occurred Printing/Checking a Nozzle Check Pattern Check 3 Is the document feed scanning area dirty?Clean the document feed scanning area. P.25 “Cleaning the Document Feed Scanning Areas” You can print out a nozzle check pattern to check print head clogging and color misalignment.Prepare the following paper.For nozzle check pattern:Paper you want to check streaks and unevenness for (any of thin paper, plain paper, thick paper (cardboard), recycled paper, matte photo paper)Size: Any of A3, 11x17, LTR, or A4Number of sheets: 5 or moreFor print head position adjustment:Plain paper (you can also use recycled paper)Size: Any of A3, 11x17, LTR, or A4Number of sheets: 1•A3 or 11x17 is recommended.1. Place a sheet each “for nozzle check pattern” and “for print head position adjustment” in different paper drawers or the multi-purpose tray. Referring to P.18, also make paper settings.2. Press , and press <Menu>.3. Press <Adjustment/Maintenance> <Maintenance> <Nozzle Check Pattern> Select a paper type <OK> <Start>.4. Check the nozzle check pattern. - Follow on-screen instructions to clean the print head and align the print head as necessary. 22EN Performing Color Correction (All Paper Types) Performing Color Correction (Single Paper Type) Perform color correction. Prepare the following paper. Plain paper (you can also use recycled paper) Size: Any of A3, 11x17, LTR, or A4 Number of sheets: 2
- A3 or 11x17 is recommended.
1. Load paper in a paper drawer or the multi-
purpose tray. Referring to P.18, also make paper settings.
- Follow on-screen instructions.
- If the document feed scanning area is dirty, correction might not be performed correctly. P.25 “Cleaning the Document Feed Scanning Areas” Perform optimal color correction for each paper type. Prepare the following paper. Paper you want to correct colors for (any of thin paper, plain paper, thick paper (cardboard), recycled paper, matte photo paper) Size: Any of A3, 11x17, LTR, or A4 Number of sheets: 2
- A3 or 11x17 is recommended.
1. Load paper in a paper drawer or the multi-
purpose tray. Referring to P.18, also make paper settings.
- Select the paper type, and follow on-screen instructions.
- If the document feed scanning area is dirty, correction might not be performed correctly. P.25 “Cleaning the Document Feed Scanning Areas” For details "Correcting Colors" in the Online Manual 23EN If a Problem Has Occurred Adjust the position of the print head to correct misaligned colors, etc. Prepare the following paper. Plain paper (you can also use recycled paper) Size: Any of A3, 11x17, LTR, or A4 Number of sheets: 1
- A3 or 11x17 is recommended.
- Prepare paper that is white and clean on the front and back.
1. Load paper in a paper drawer or the multi-
purpose tray. Referring to P.18, also make paper settings.
4. Follow on-screen instructions.
- If the document feed scanning area is dirty, correction might not be performed correctly. P.25 “Cleaning the Document Feed Scanning Areas” Perform print head diagnosis, color diagnosis, and color alignment diagnosis, and resolve any problems. Prepare the following paper. Plain paper (you can also use recycled paper) Size: Any of A3, 11x17, LTR, or A4 Number of sheets: 5
- You may not use all 5 sheets.
- A3 or 11x17 is recommended.
- Prepare paper that is white and clean on the front and back.
- Image diagnosis and adjustment use ink and maintenance cartridge space.
1. Load paper in a paper drawer or the multi-
purpose tray. Referring to P.18, also make paper settings.
4. Follow on-screen instructions.
- If the document feed scanning area is dirty, correction might not be performed correctly. P.25 “Cleaning the Document Feed Scanning Areas” Aligning the Print Head Performing a Print Head Diagnosis 24EN Cleaning the Document Feed Scanning Areas Clean according to the steps on the labels on the feeder and inside of the platen glass. Labels Use the supplied glass cleaning sheet when cleaning the document feed scanning areas. Only use the glass cleaning sheet for cleaning the document feed scanning areas.
1. Open the feeder, and wipe the document feed
scanning area (long strip of glass) next to the platen glass with the included glass cleaning sheet. CAUTION! Do not use glass cleaner, alcohol solvent, etc.; may remove antistain coating.
2. Wipe the document feed scanning area (long
strip of glass) on the feeder.
3. Open the document scan cover and wipe the
document feed scanning area (long strip of glass) and its opposite area.
4. Push the document scan cover until it clicks
5. Close the feeder gently.
If streaks still appear Perform feeder cleaning.
<Maintenance> <Feeder Auto Cleaning> <Start>. For details "Maintenance" and "Frequently Asked Questions" in the Online Manual 25IP address With a TCP/IP connection, an assigned number for identifying devices on a network. IP addresses exist in IPv4 and IPv6 formats. Subnet mask A number for subdividing a network when using an IPv4 IP address. The range of IP addresses assigned to devices can be limited by the user. Gateway address The address of a device serving as a gateway for communication between different devices. In general, a router is a gateway by default. DNS (Domain Name System) A service providing name resolution for matching host names (domain names) with IP addresses via a server. Port Basically a doorway, where an IP address is like a street address. Assigning port numbers allows for increased security. Proxy The PC, software, etc. that handle HTTP communication with devices outside the network as a proxy, mostly for browsing websites, etc. Instead of communicating directly outside the network, connection is relayed outside via a proxy server. Router A communication device for connecting a network and devices. Wired and wireless types are available. SSID (network name) An access point identifier when using a wireless LAN. password (network key) An encryption key when connecting to a wireless LAN. Setting an encryption key that corresponds to an SSID allows connection to an access point. Firewall A system that blocks unauthorized access from outside a network, and prevents attack and intrusion into a network within a local area. Glossary
27Step 1 Check the network environment Before connecting to a network with a fixed IP address, you must check the network environment. Refer to the following list, and check necessary information beforehand. Required items Notes When connecting to a network with a fixed IP address (IPv4) IP address (the machine’s IP address) Subnet mask Gateway address When connecting by wireless LAN SSID for wireless router Network key DNS setting* Primary DNS server address Secondary DNS server address Proxy setting* HTTP proxy server address HTTP proxy server port number Proxy authentication username Proxy authentication password
- Required when using DNS settings or proxy settings. Connecting to a Network with a Fixed IP Address
Network Connection 28Step 2 Connect to a wired LAN/wireless LAN Connecting by wired LAN The machine does not come with a LAN cable. Please have one ready. In the Home screen, press <Menu>.
Select <Preferences> <Network> <Select Wired/ Wireless LAN>.Contact the network administrator for the system manager ID and security code (set to “7654321” by default). In the <Select LAN> screen, press <Wired LAN>. Connect the LAN cable.• Use the LAN cable to connect the machine to the router.• Press inward until the connector is all the way in the slot and clicks.Once connected, continue by setting a fixed IP address. P.34 “Step 3 Set a fixed IP address”
29Connecting by wireless LAN Do not connect the LAN cable to the machine. To connect to a wireless LAN manually by selecting an access point The “SSID (network name)” and “network key (password)” are required. The required information can be checked beforehand with the list P.28 or by contacting the network administrator. In the Home screen, press <Menu>. Select <Preferences> <Network>, and then press <Select Wired/Wireless LAN>.Contact the network administrator for the system manager ID and security code (set to “7654321” by default). In the <Select LAN> screen, press <Wireless LAN>. Connecting to a Network with a Fixed IP Address
- When <Do you want to enable the wireless LAN?> is displayed, press <Yes>.
- The machine searches for a wireless router that it can connect to. If a message is displayed indicating the access point is not found, refer to the online manual and try searching for the access point again. For details "Installation/Settings Problems" in the Online Manual
Press the wireless router you want to connect to.
- Select the device that matches the SSID you noted down, and press <Next>.
Enter the network key you noted down.
- Enter the network key, and then press <Apply>. SSID : XXXXXXXXXXXXNetwork key : XXXXXXXXXXXX
Press <Yes>. If an error message is displayed while you are configuring settings, select <Close>, check that the network key is correct, and then start again from step 4.
After <Connected.> is displayed, press <Close>. Once connected, continue by setting a fixed IP address. P.34 “Step 3 Set a fixed IP address” Connecting to a Network with a Fixed IP Address
Network Connection 32Push-button method Setting can be completed by push-button method if the following mark appears on the packaging box of the wireless router or if this button is available on the device itself. WPS PIN code method Not all WPS-capable routers accommodate the push-button method, and instead require setting by entering a PIN code. Check the WPS PIN code either on the packaging box or in the instruction manual. If the wireless router is configured to use WEP authentication, you may not be able to connect by WPS. To enter information manually If you want to specify security settings such as authentication and encryption in detail, enter and set the SSID and network key by yourself. For details "Connecting to a Wireless LAN" in the Online Manual
33Step 3 Set a fixed IP address Setting an IPv4 addressAn IPv4 address can be set with “Auto Acquire” to assign an address automatically using DHCP, or with “Manually Acquire” allowing you to enter information yourself. To set a fixed IP address, use “Manually Acquire”.
- When setting a fixed IP address, an “IP address”, “subnet mask”, and “gateway address” are required. Depending on your network configuration, information other than an IP address, subnet mask, and gateway address may be required. Contact the network administrator for required information.• To set an IPv6 address, refer to the online manual. In the Home screen, press <Menu>. Select <Preferences> <Network>.• When the login screen is displayed, enter the system manager ID and security code.• Contact the network administrator for the system manager ID and security code (set to “7654321” by default).
Select <TCP/IP Settings> <IPv4 Settings> <IP Address Settings>. Connecting to a Network with a Fixed IP Address
Press <Manually Acquire>. You must first set <Auto Acquire> to <Off> in step 4 before you can press <Manually Acquire>.
- Turn off the machine, wait 10 seconds, and then turn the machine back on. For details "Setting IPv6 Addresses" in the Online Manual
35Setting the DNS The DNS (Domain Name System) is information for matching host names with IP addresses. If the IP address is being obtained automatically, the required DNS information is set automatically. If you are entering the IP address manually, you must also enter the DNS information manually.Whether or not you must set the DNS depends on the network configuration. Contact the network administrator to check the necessity of setting the DNS in your environment and required setting information.
Select <Menu> <Preferences> <Network> <TCP/ IP Settings>, and then press <DNS Settings>.• When the login screen is displayed, enter the system manager ID and security code.• Contact the network administrator for the system manager ID and security code (set to “7654321” by default). Press <IPv4 DNS Server Address Settings>. Press <Primary DNS Server>. Connecting to a Network with a Fixed IP Address
If required, select <Secondary DNS Server> and enter the IP address for the secondary DNS server.
Set remaining items as required.
- For details on setting information, refer to the online manual.
- The online manual describes how to complete settings with the remote UI. Complete settings either from the control panel or the remote UI.
- The screen shown at right is displayed any time that settings are entered. If you are making settings several times, restart the machine after completing all settings. For details "Configuring DNS" in the Online Manual
37Step 4 Check the connection Checking that the machine has connected correctlyEntering the IP address directly on a PC on the same network as the machine displays the remote UI screen. The machine has connected to the network correctly if the remote UI screen is displayed. Start up the web browser. In the address entry bar, enter “http://<the machine’s IP address>/”, and then press [ENTER] on the keyboard. The remote UI screen is displayed.• If the screen shown at right is displayed, the machine has connected correctly.• If the remote UI screen is not displayed, refer to the online manual and check the network connection.Continue with settings from “Installing the Software”. P.14 Connecting to a Network with a Fixed IP Address For details "Starting Remote UI", "Installation/Settings Problems" in the Online Manual
Network Connection 38EN Important Safety Instructions This chapter describes important safety instructions for the prevention of injury to users of this machine and others, and damage to property. Read this chapter before using the machine, and follow the instructions to use the machine properly. Do not perform any operations not described in this manual. Canon will not be responsible for any damages resulting from operations not described in this manual, improper use, or repair or changes not performed by Canon or a third party authorized by Canon. Improper operation or use of this machine could result in personal injury and/or damage requiring extensive repair that may not be covered under your Limited Warranty. WARNING Indicates a warning concerning operations that may lead to death or injury to persons if not performed correctly. To use the machine safely, always pay attention to these warnings. CAUTION Indicates a caution concerning operations that may lead to injury to persons if not performed correctly. To use the machine safely, always pay attention to these cautions. IMPORTANT Indicates operational requirements and restrictions. Be sure to read these items carefully to operate the machine correctly and avoid damage to the machine or property. Installation To use this machine safely and in a trouble-free way, carefully read the following precautions and install the machine in an appropriate location. WARNING Do not install in a location that may result in a fire or electrical shock• A location where the ventilation slots are blocked (too close to walls, beds, sofas, rugs, or similar objects)• A damp or dusty location• A location exposed to direct sunlight or outdoors• A location subject to high temperatures• A location exposed to open flames• Near alcohol, paint thinners or other flammable substancesOther warnings• Do not connect unapproved cables to this machine. Doing so may result in a fire or electrical shock.• Do not place necklaces and other metal objects or containers filled with liquid on the machine. If foreign substances come in contact with electrical parts inside the machine, it may result in a fire or electrical shock.• When installing and removing the optional accessories, be sure to turn OFF the power, unplug the power plug, and then disconnect all the interface cables and power cord from the machine. Otherwise, the power cord or interface cables may be damaged, resulting in a fire or electrical shock.• Do not use extension cords or multi-plug power strips with the machine. Doing so may result in a fire or electrical shock.• Do not wrap the power cord or tie it in a knot, as this may result in a fire or electrical shock.• Insert the power plug completely into the AC power outlet. Failure to do so may result in a fire or electrical shock.• Remove the power plug completely from the AC power outlet during a thunder storm. Failure to do so may result in a fire, electrical shock, or damage to the machine.• Make sure that the power supply for the machine is safe, and has a steady voltage.• Keep the power cord away from a heat source; failure to do this may cause the power cord coating to melt, resulting in a fire or electrical shock.• If excessive stress is applied to the connection part of the power cord, it may damage the power cord or the wires inside the machine may disconnect. This could result in a fire. Avoid the following situations: – Connecting and disconnecting the power cord frequently. – Tripping over the power cord. – The power cord is bent near the connection part, and continuous stress is being applied to the power outlet or the connection part. – Applying excessive force on the power plug. CAUTION
- Install this machine near the power outlet and leave sufficient space around the power plug so that it can be unplugged easily in an emergency.• To reduce the risk of fire, use only No. 26 AWG or larger telecommunication line cord. IMPORTANT When connecting power• Do not connect the power cord to an uninterruptible power source. Doing so may result in malfunction of or damage to the machine at power failure.• If you plug this machine into an AC power outlet with multiple sockets, do not use the remaining sockets to connect other devices.• Do not connect the power cord to the auxiliary AC power outlet on a computer.Other precautionsElectrical noise may cause this machine to malfunction or lose data. Handling WARNING
- Immediately unplug the power plug from the AC power outlet and contact a dealer or service center if the machine makes an unusual noise, emits an unusual smell, or emits smoke or excessive heat. Continued use may result in a fire or electrical shock.• Do not disassemble or modify this machine. There are high-voltage and high-temperature components inside the machine. Disassembly or modification may result in a fire or electrical shock.• Place the machine where children will not come in contact with the power cord and other cables or gears and electrical parts inside the machine. Failure to do so may result in unexpected accidents.• Do not use flammable sprays near this machine. If flammable substances come into contact with electrical parts inside this machine, it may result in a fire or electrical shock.• If any foreign substance falls into this machine, unplug the power plug from the AC power outlet and contact a dealer or service center.Do not install in the following locationsThe machine may drop or fall, resulting in injury.• An unstable location• A location exposed to vibrations CAUTION Do not install in the following locationsDoing so may result in damage to the machine.• A location subject to temperature and humidity extremes, whether low or high• A location subject to dramatic changes in temperature or humidity• A location near equipment that generates magnetic or electromagnetic waves• A laboratory or location where chemical reactions occur• A location exposed to corrosive or toxic gases• A location that may warp from the weight of the machine or where the machine is liable to sink (a carpet, etc.)Supports (only for products with supports)Do not remove the machine's supports after the machine has been installed, as this may cause the machine to fall or tip over, resulting in personal injury.When using wireless LAN (only for products with a wireless LAN function)• Install the machine at a distance of 50 meters or less from the wireless LAN router.• As far as possible, install in a location where communication is not blocked by intervening objects. The signal may be degraded when passing through walls or floors.• Keep the machine as far as possible from digital cordless phones, microwave ovens, or other equipment that emits radio waves. CAUTION When using a cassette feeding unit with the Canon WG7000 Series printer, follow the instructions in the manual to securely attach the printer to the cassette feeding unit. Always use the following combinations of printer and cassette feeding unit.Canon WG7000 Series: Use Canon Cassette Feeding Unit CF10.Using a different combination of printer and cassette feeding unit than shown above, using a cassette feeding unit not listed above, or not attaching the printer securely to the cassette feeding unit may be unstable and may result in injury. Power Supply WARNING
- Use only a power supply that meets the specified voltage requirements. Failure to do so may result in a fire or electrical shock.• Do not use power cords other than the one provided, as this may result in a fire or electrical shock.• The provided power cord is intended for use with this machine. Do not connect the power cord to other devices.• Do not modify, pull, forcibly bend, or perform any other act that may damage the power cord. Do not place heavy objects on the power cord. Damaging the power cord may result in a fire or electrical shock.• Do not plug in or unplug the power plug with wet hands, as this may result in an electrical shock. Appendix 39EN
- When moving this machine, be sure to turn OFF the power of this machine, and then unplug the power plug and interface cables. Failure to do so may damage the power cord or interface cables, resulting in a fire or electrical shock.
- When plugging or unplugging a USB cable when the power plug is plugged into an AC power outlet, do not touch the metal part of the connector, as this may result in an electrical shock. If you are using a cardiac pacemaker This machine generates a low level magnetic flux. If you use a cardiac pacemaker and feel abnormalities, please move away from this machine and consult your physician immediately. CAUTION
- Do not place heavy objects on this machine as they may fall, resulting in injury.
- For safety, unplug the power plug if the machine will not be used for a long period of time.
- Use caution when opening and closing covers to avoid injury to your hands.
- Keep hands and clothing away from the rollers in the output area. If the rollers catch your hands or clothing, this may result in personal injury.
- Be careful not to drop a heavy object, such as a dictionary, on the platen glass. Doing so may damage the platen glass and result in injury.
- Do not carry the machine with the optional cassette feeding unit installed. Otherwise, the cassette feeding unit may fall and result in injury. Feeder
- Do not press down hard on the feeder when using the platen glass to make copies of thick books. Doing so may damage the platen glass and result in personal injury.
- Close the feeder gently to avoid catching your hands, as this may result in personal injury.
- Close the feeder gently to avoid catching your hands in the back of the feeder, as this may result in personal injury. Paper drawer
- Do not insert your hand into the machine while the paper drawer is pulled open, as this may result in personal injury. Energy Saver key (only for products with an Energy Saver key)
- Press (Energy Saver) for safety when the machine will not be used for a long period of time, such as overnight. Also, turn OFF the main power switch, and disconnect the power cord for safety when the machine will not be used for an extended period of time, such as during consecutive holidays. document, and/or of the use of the images scanned, printed or otherwise reproduced, you should consult in advance with your legal advisor for guidance.
- Certificates of Deposit
- Postage Stamps (canceled or uncanceled)
- Identifying Badges or Insignias
- Internal Revenue Stamps (canceled or uncanceled)
- Selective Service or Draft Papers
- Bonds or Other Certificates of Indebtedness
- Checks or Drafts Issued by Governmental Agencies
- Motor Vehicle Licenses and Certificates of Title
- Copyrighted Works/Works of Art without Permission of Copyright Owner Repairing, Lending, or Disposing of the machine If you have entered personal data, passwords and/or other sensitive information on the machine, such information may be stored in the machine. When sending the machine for repair, lending or transferring the machine to another person, or disposing of the printer, reset the machine to factory defaults to delete this information and prevent third parties from accessing it. Refer to Online Manual for details. Print Heads/Ink Tanks/ Maintenance Cartridges WARNING
- Do not throw print heads, ink tanks and maintenance cartridges into fire. This may cause an ignition, and result in burns or fire. CAUTION
- Keep ink tanks out of the reach of children. In case ink is accidentally licked or swallowed, rinse out mouth or give one or two glasses of water to drink. If irritation or discomfort occurs, obtain medical advice immediately.
- Do not attempt to disassemble or modify the print head, ink tanks, and maintenance cartridges.
- In case ink gets in contact with eyes, rinse with water immediately. In case ink gets in contact with skin, wash with soap and water immediately. If irritation to eyes or skin persists, obtain medical advice immediately.
- Never touch the electrical contacts on a print head after printing. The metal parts may be very hot and could cause burns.
- Avoid dropping or shaking print head, ink tanks, and maintenance cartridges. Ink When you use the Canon printer for the first time after you install the bundled ink tanks, the printer consumes a small amount of ink to enable printing by filling the nozzles of the Print Head with ink. For this reason, the number of sheets that can be printed with the first ink tanks is fewer than the succeeding ink tanks. To prevent clogging of the ink nozzles and maintain good printing results, the machine performs Other precautions
- Follow the instructions on the caution label attached to this machine.
- Do not subject the machine to strong shocks or vibration.
- Do not forcibly open and close doors, covers, and other parts. Doing so may result in damage to the machine.
- Do not turn OFF the main power switch or open the covers while the machine is in operation. This may result in paper jams or print head trouble.
- Use a modular cable that is shorter than 3 meters.
- Use a USB cable that is shorter than 3 meters. If the operating noise concerns you Depending on the use environment and operating mode, if the operating noise is of concern, it is recommended that the machine be Installed in a place other than the office. Maintenance and Inspections Clean this machine periodically. If dust accumulates, the machine may not operate properly. When cleaning, be sure to observe the following. If a problem occurs during operation, see Frequently Asked Questions in the online manual. If the problem cannot be resolved or you feel the machine requires an inspection, contact a dealer or service center. WARNING
- Before cleaning, turn OFF the power and unplug the power plug from the AC power outlet. Failure to do so may result in a fire or electrical shock.
- Unplug the power plug periodically and clean with a dry cloth to remove dust and grime. Accumulated dust may absorb humidity in the air and may result in a fire if it comes into contact with electricity.
- Use a damp, well wrung-out cloth to clean the machine. Dampen cleaning cloths with water only. Do not use alcohol, benzenes, paint thinners, or other flammable substances. Do not use tissue paper or paper towels. If these substances come into contact with electrical parts inside the machine, they may generate static electricity or result in a fire or electrical shock.
- Check the power cord and plug periodically for rust, bent prongs, fraying, cracks, or excessive heat generation. Use of poorly- maintained power cord or plug may result in a fire or electrical shock. CAUTION
- The inside of the machine has high- temperature and high-voltage components. Touching these components may result in injury or burns. Do not touch any part of the machine that is not indicated in the manual.
- When loading paper or removing jammed paper, be careful not to cut your hands with the edges of the paper. Legal Limitations on the Usage of Your Product and the Use of Images Using your product to scan, print or otherwise reproduce certain documents, and the use of such images as scanned, printed or otherwise reproduced by your product, may be prohibited by law and may result in criminal and/or civil liability. A non-exhaustive list of these documents is set forth below. This list is intended to be a guide only. If you are uncertain about the legality of using your product to scan, print or otherwise reproduce any particular 40EN with Class B limits in Subpart B of Part 15 of the FCC Rules. Do not make any changes or modifications to the equipment unless otherwise specified in the manual. If such changes or modifications should be made, you could be required to stop operation of the equipment.
Changes or modifications not expressly approved by the party responsible for compliance could void the user's authority to operate equipment. This transmitter must not be co-located or operating in conjunction with any other antenna or transmitter. The equipment complies with FCC radiation exposure limits for at uncontrolled equipment. This equipment should be installed and operated with minimum distance at least 20cm between the radiator and persons body (excluding extremities: hands, wrists, feet and ankles) and must not be colocated or operated with any other antenna or transmitter. Canon U.S.A., Inc. One Canon Park Melville, New York 11747 1-800-652-2666 Disclaimers
- The information in this document is subject to change without notice.
PROVIDED HEREIN, INCLUDING WITHOUT
LIMITATION, THEREOF, WARRANTIES AS TO
OR CONSEQUENTIAL DAMAGES OF ANY
NATURE, OR LOSSES OR EXPENSES RESULTING
FROM THE USE OF THIS MATERIAL. Users in the U.S.A. Pre-Installation Requirements for Canon Facsimile Equipment Pre-Installation Requirements Order Information When ordering service from the telephone company for this equipment, the following may be required. Universal Service Order Code (USOC): RJ11C The Facility Interface Code (FIC): 02LS2 Service Order Code (SOC): 9.0F Connection of the Equipment This equipment complies with Part 68 of the FCC rules and the requirements adopted by the ACTA. A label on this equipment contains, among other information, a product identifier in the format US:AAAEQ##TXXXX. If requested, this number must be provided to the telephone company. The REN is used to determine the number of devices that may be connected to a telephone line. Excessive RENs on a telephone line may result in the devices not ringing in response to an incoming call. In most but not all areas, the sum of RENs should not exceed five (5.0). To be certain of the number of devices that may be connected to a line, as determined by the total RENs, contact the local telephone company. The REN for this product is part of the product identifier that has the format US:AAAEQ##TXXXX. The digits represented by found to comply with the limits for a Class B digital device, pursuant to Part 15 of the FCC Rules. These limits are designed to provide reasonable protection against harmful interference in a residential installation. This equipment generates, uses and can radiate radio frequency energy and, if not installed and used in accordance with the instructions, may cause harmful interference to radio communications. However, there is no guarantee that interference will not occur in a particular installation. If this equipment does cause harmful interference to radio or television reception, which can be determined by turning the equipment off and on, the user is encouraged to try to correct the interference by one or more of the following measures:
- Reorient or relocate the receiving antenna.
- Increase the separation between the equipment and receiver.
- Connect the equipment into an outlet on a circuit different from that to which the receiver is connected.
- Consult the dealer or an experienced radio/ TV technician for help. Use of a shielded cable is required to comply with Class B limits in Subpart B of Part 15 of the FCC Rules. Do not make any changes or modifications to the equipment unless otherwise specified in the manual. If such changes or modifications should be made, you could be required to stop operation of the equipment. Canon U.S.A., Inc. One Canon Park Melville, New York 11747 1-800-652-2666 Users in the U.S.A. FCC Notice (U.S.A. Only) For 120V, 60Hz model Model Number: K10477/K10478/K10479 (Contains FCC Approved WLAN Module AW-NM383) Optional parts: Cassette Feeding Unit CF10 This device complies with Part 15 of the FCC Rules. Operation is subject to the following two conditions: (1) This device may not cause harmful interference, and (2) this device must accept any interference received, including interference that may cause undesired operation. Note: This equipment has been tested and found to comply with the limits for a Class B digital device, pursuant to Part 15 of the FCC Rules. These limits are designed to provide reasonable protection against harmful interference in a residential installation. This equipment generates, uses and can radiate radio frequency energy and, if not installed and used in accordance with the instructions, may cause harmful interference to radio communications. However, there is no guarantee that interference will not occur in a particular installation. If this equipment does cause harmful interference to radio or television reception, which can be determined by turning the equipment off and on, the user is encouraged to try to correct the interference by one or more of the following measures:
- Reorient or relocate the receiving antenna.
- Increase the separation between the equipment and receiver.
- Connect the equipment into an outlet on a circuit different from that to which the receiver is connected.
- Consult the dealer or an experienced radio/ TV technician for help. Use of a shielded cable is required to comply cleaning automatically. To do this, the machine occasionally draws ink from the nozzles, and thus may use a minute amount of ink.
- Even with black and white printing, ink colors other than black may be used depending on the type of paper being printed on or on settings in the printer driver. Other Precautions
- Do not remove the print head unnecessarily.
- Not printing for a long period of time may cause the print head to dry out and clog. It is recommended that the machine be used for printing at least once a month. Notice Caution for each safety standard mark and declaration Each safety standard mark and declaration is valid only for the voltage and frequency of the respective country or region where it applies. Safety-Related Symbols Protective earthing terminal CAUTION: Hot surface. Do not touch. Moving parts: Keep body parts away from moving parts. Keep body parts out of the motion path.
- This mark may not appear on your model. Product Name Safety regulations require the product's name to be registered. In some regions where this product is sold, the following name(s) in parentheses ( ) may be registered instead. RMC(Regulatory Model Code) WG7250Z (K10479) WG7250F (K10478) WG7250 (K10477) WG7240 (K10476) Precaution for Using This Product in Countries or Regions other than where It was Purchased This product, which is made for countries or regions where it was purchased, may not be used in other countries or regions due to their local laws and regulations. Please note that Canon should not be liable for penalties which will be caused by using this product in such countries or regions. About Radio Waves Do not use this product near medical equipment or electronic equipment. Radio wave interference can affect the operation or performance of the equipment. For models containing lithium battery
- Dispose of used batteries according to the local regulations.
- Risk of explosion if battery is replaced by an incorrect type. Users in the U.S.A. FCC Notice (U.S.A. Only) For 120V, 60Hz model Model Number: K10476 Optional parts: Cassette Feeding Unit CF10 This device complies with Part 15 of the FCC Rules. Operation is subject to the following two conditions: (1) This device may not cause harmful interference, and (2) this device must accept any interference received, including interference that may cause undesired operation. Note: This equipment has been tested and 41EN ## are the REN without a decimal point (e.g., 03 is a REN of 0.3). A plug and jack used to connect this equipment to the premises wiring and telephone network must comply with the applicable FCC Part 68 rules and requirements adopted by the ACTA. A compliant telephone cord and modular plug is provided with this product. It is designed to be connected to a compatible modular jack that is also compliant. See installation instructions for details. Connection to party lines is subjected to state tariffs. Contact the state public utility commission, public service commission or corporation commission for information. If your home has specially wired alarm equipment connected to the telephone line, ensure the installation of this equipment does not disable your alarm equipment. If you have questions about what will disable alarm equipment, consult your telephone company or a qualified installer. In Case of Equipment Malfunction Should any malfunction occur which cannot be corrected by the procedures described in the Online Manual, disconnect the equipment from the telephone line cable, turn off the power and disconnect the power cord. The telephone line cable should not be reconnected or the main power switch turned ON until the problem is completely resolved. Users should contact their local authorized Canon Facsimile Service Dealer for the servicing of equipment. Information regarding Authorized Service Facility locations can be obtained by calling the Canon Customer Center. Rights of the Telephone Company If this equipment causes harm to the telephone network, the telephone company may temporarily disconnect service. The telephone company also retains the right to make changes in facilities and services that may affect the operation of this equipment. When such changes are necessary, the telephone company is required to give adequate prior notice to the user. However, if advance notice is not possible, the telephone company will notify the customer as soon as possible. Also, the customer will be advised of his/her right to file a compliant with the FCC if he/she believes it is necessary. Warning The Telephone Consumer Protection Act of 1991 makes it unlawful for any person to use a computer or other electronic device to send any message via a telephone FAX machine unless such message clearly contains in a margin at the top or bottom of each transmitted page, or on the first page of the transmission, the date and time it is sent and an identification of the business or other entity, or other individual sending the message and the telephone number of the sending machine or such business, other entity, or individual. In order to program this information into your FAX machine, you should complete the procedure to register your name, unit's telephone number, time, and date. Refer to the Online Manual. For California, USA only This product contains an internal battery for backup purposes. Included battery contains Perchlorate Material- special handling may apply. See http://www.dtsc.ca.gov/hazardouswaste/ perchlorate/ for details. Users in Canada Pre-Installation Requirements for Canon Facsimile Equipment
IMPORTANT SAFETY INSTRUCTIONS
SAVE THESE INSTRUCTIONS
When using your telephone equipment, basic safety precautions should always be followed to reduce the risk of fire, electric shock and injury to persons, including the following:
1. Do not use this product near water, for
example, near a bath tub, wash bowl, kitchen sink or laundry tub, in a wet basement or near a swimming pool.
2. Avoid using this product during an electrical
storm. There may be a remote risk of electric shock from lightning.
3. Do not use this product to report a gas leak in
the vicinity of the leak. "CAUTION - To reduce the risk of fire, use only No. 26 AWG or larger telecommunication line cord."
- Windows is a trademark or registered trademark of Microsoft Corporation in the U.S. and/or other countries.
- Internet Explorer is a trademark or registered trademark of Microsoft Corporation in the U.S. and/or other countries.
- Apple, Bonjour, iPad, iPhone, iPod touch, Safari, Mac, macOS and OS X are trademarks of Apple Inc., registered in the U.S. and other countries.
- IOS is a trademark or registered trademark of Cisco in the U.S. and other countries and is used under license. 42EN
- Google Chrome, Android are either registered trademarks or trademarks of Google Inc. Third Party Software This Canon product (the “PRODUCT”) includes third-party software modules. Use and distribution of these software modules, including any updates of such software modules (collectively,the “SOFTWARE”) are subject to license conditions below. (1) You agree that you will comply with any applicable export control laws, restrictions or regulations of the countries involved in the event that the PRODUCT including the SOFTWARE is shipped, transferred or exported into any country. (2) Rights holders of the SOFTWARE retain in all respects the title, ownership and intellectual property rights in and to the SOFTWARE. Except as expressly provided herein, no license or right, expressed or implied, is hereby conveyed or granted by rights holders of the SOFTWARE to you for any intellectual property of rights holders of the SOFTWARE. (3) You may use the SOFTWARE solely for use with the PRODUCT. (4) You may not assign, sublicense, market, distribute, or transfer the SOFTWARE to any third party without prior written consent of rights holders of the SOFTWARE. (5) Notwithstanding the foregoing, you may transfer the SOFTWARE only when (a) you assign to a transferee all of your rights to the PRODUCT and all rights and obligations under the conditions governing the SOFTWARE and PRODUCT and (b) such transferee agrees in writing to be bound by all these conditions. (6) You may not decrypt, decompile, reverse engineer, disassemble or otherwise reduce the code of the SOFTWARE to human readable form. (7) You may not modify, adapt, translate, rent, lease or loan the SOFTWARE or create derivative works based on the SOFTWARE. (8) You are not entitled to remove or make separate copies of the SOFTWARE from the PRODUCT. (9) The human-readable portion (the source code) of the SOFTWARE is not licensed to you. Notwithstanding (1) through (9) above, the PRODUCT includes third-party software modules accompanying the other license conditions, and these software modules are subject to the other license conditions. Please refer to the other license conditions of third- party software modules described in Appendix of Manual for the corresponding the PRODUCT. This Manual is available at http://ij.start.canon. By using the PRODUCT, you shall be deemed to have agreed to all applicable license conditions. If you do not agree to these license conditions, please contact your service representative. ACCEPTANCE THE TERMS OF THIS THIRD PARTY SOFTWARE
STATED HERE OR IN RELATED WARRANTY
PROVISIONS SHALL BE DEEMED ACCEPTED UPON
DELIVERED WITH THE PRODUCT AND ALL
AGREEMENTS OR OTHER SERVICE
ARRANGEMENTS FOR THE PRODUCT WITH
L'EMPLOI DE CE MATERIEL. Users in Canada Pre-Installation Requirements for Canon Facsimile Equipment
IMPORTANT SAFETY INSTRUCTIONS
SAVE THESE INSTRUCTIONS
When using your telephone equipment, basic safety precautions should always be followed to reduce the risk of fire, electric shock and injury to persons, including the following:
1. Do not use this product near water, for
example, near a bath tub, wash bowl, kitchen sink or laundry tub, in a wet basement or near a swimming pool.
2. Avoid using this product during an electrical
storm. There may be a remote risk of electric shock from lightning.
3. Do not use this product to report a gas leak in
the vicinity of the leak. "CAUTION - To reduce the risk of fire, use only No. 26 AWG or larger telecommunication line cord."
fuite de gaz s'il est situé près de la fuite. "ATTENTION - Pour réduire les risques d'incendie, utiliser uniquement des conducteurs de télécommunications 26 AWG au de section supérleure." Users in Canada This device complies with Industry Canada license-exempt RSS standard(s). Operation is subject to the following two conditions: (1) this device may not cause interference, and (2) this device must accept any interference, including interference that may cause undesired operation of the device. This equipment complies with IC radiation exposure limits set forth for an uncontrolled environment and meets RSS-102 of the IC radio frequency (RF) Exposure rules. This equipment should be installed and operated keeping the radiator at least 20cm or more away from person's body (excluding extremities: hands, wrists, feet and ankles).