W10225948 - Cooker WHIRLPOOL - Free user manual and instructions
Find the device manual for free W10225948 WHIRLPOOL in PDF.
Download the instructions for your Cooker in PDF format for free! Find your manual W10225948 - WHIRLPOOL and take your electronic device back in hand. On this page are published all the documents necessary for the use of your device. W10225948 by WHIRLPOOL.
USER MANUAL W10225948 WHIRLPOOL
BACKSPLASH WITH SHELF
Use & Care / Installation Instructions For questions about features, operation/performance, parts, accessories or service, call: 1-800-422-1230 or visit our website at www.kitchenaid.com In Canada, for assistance, installation and service, call: 1-800-807-6777 or visit our website at www.Kitchenaid.ca
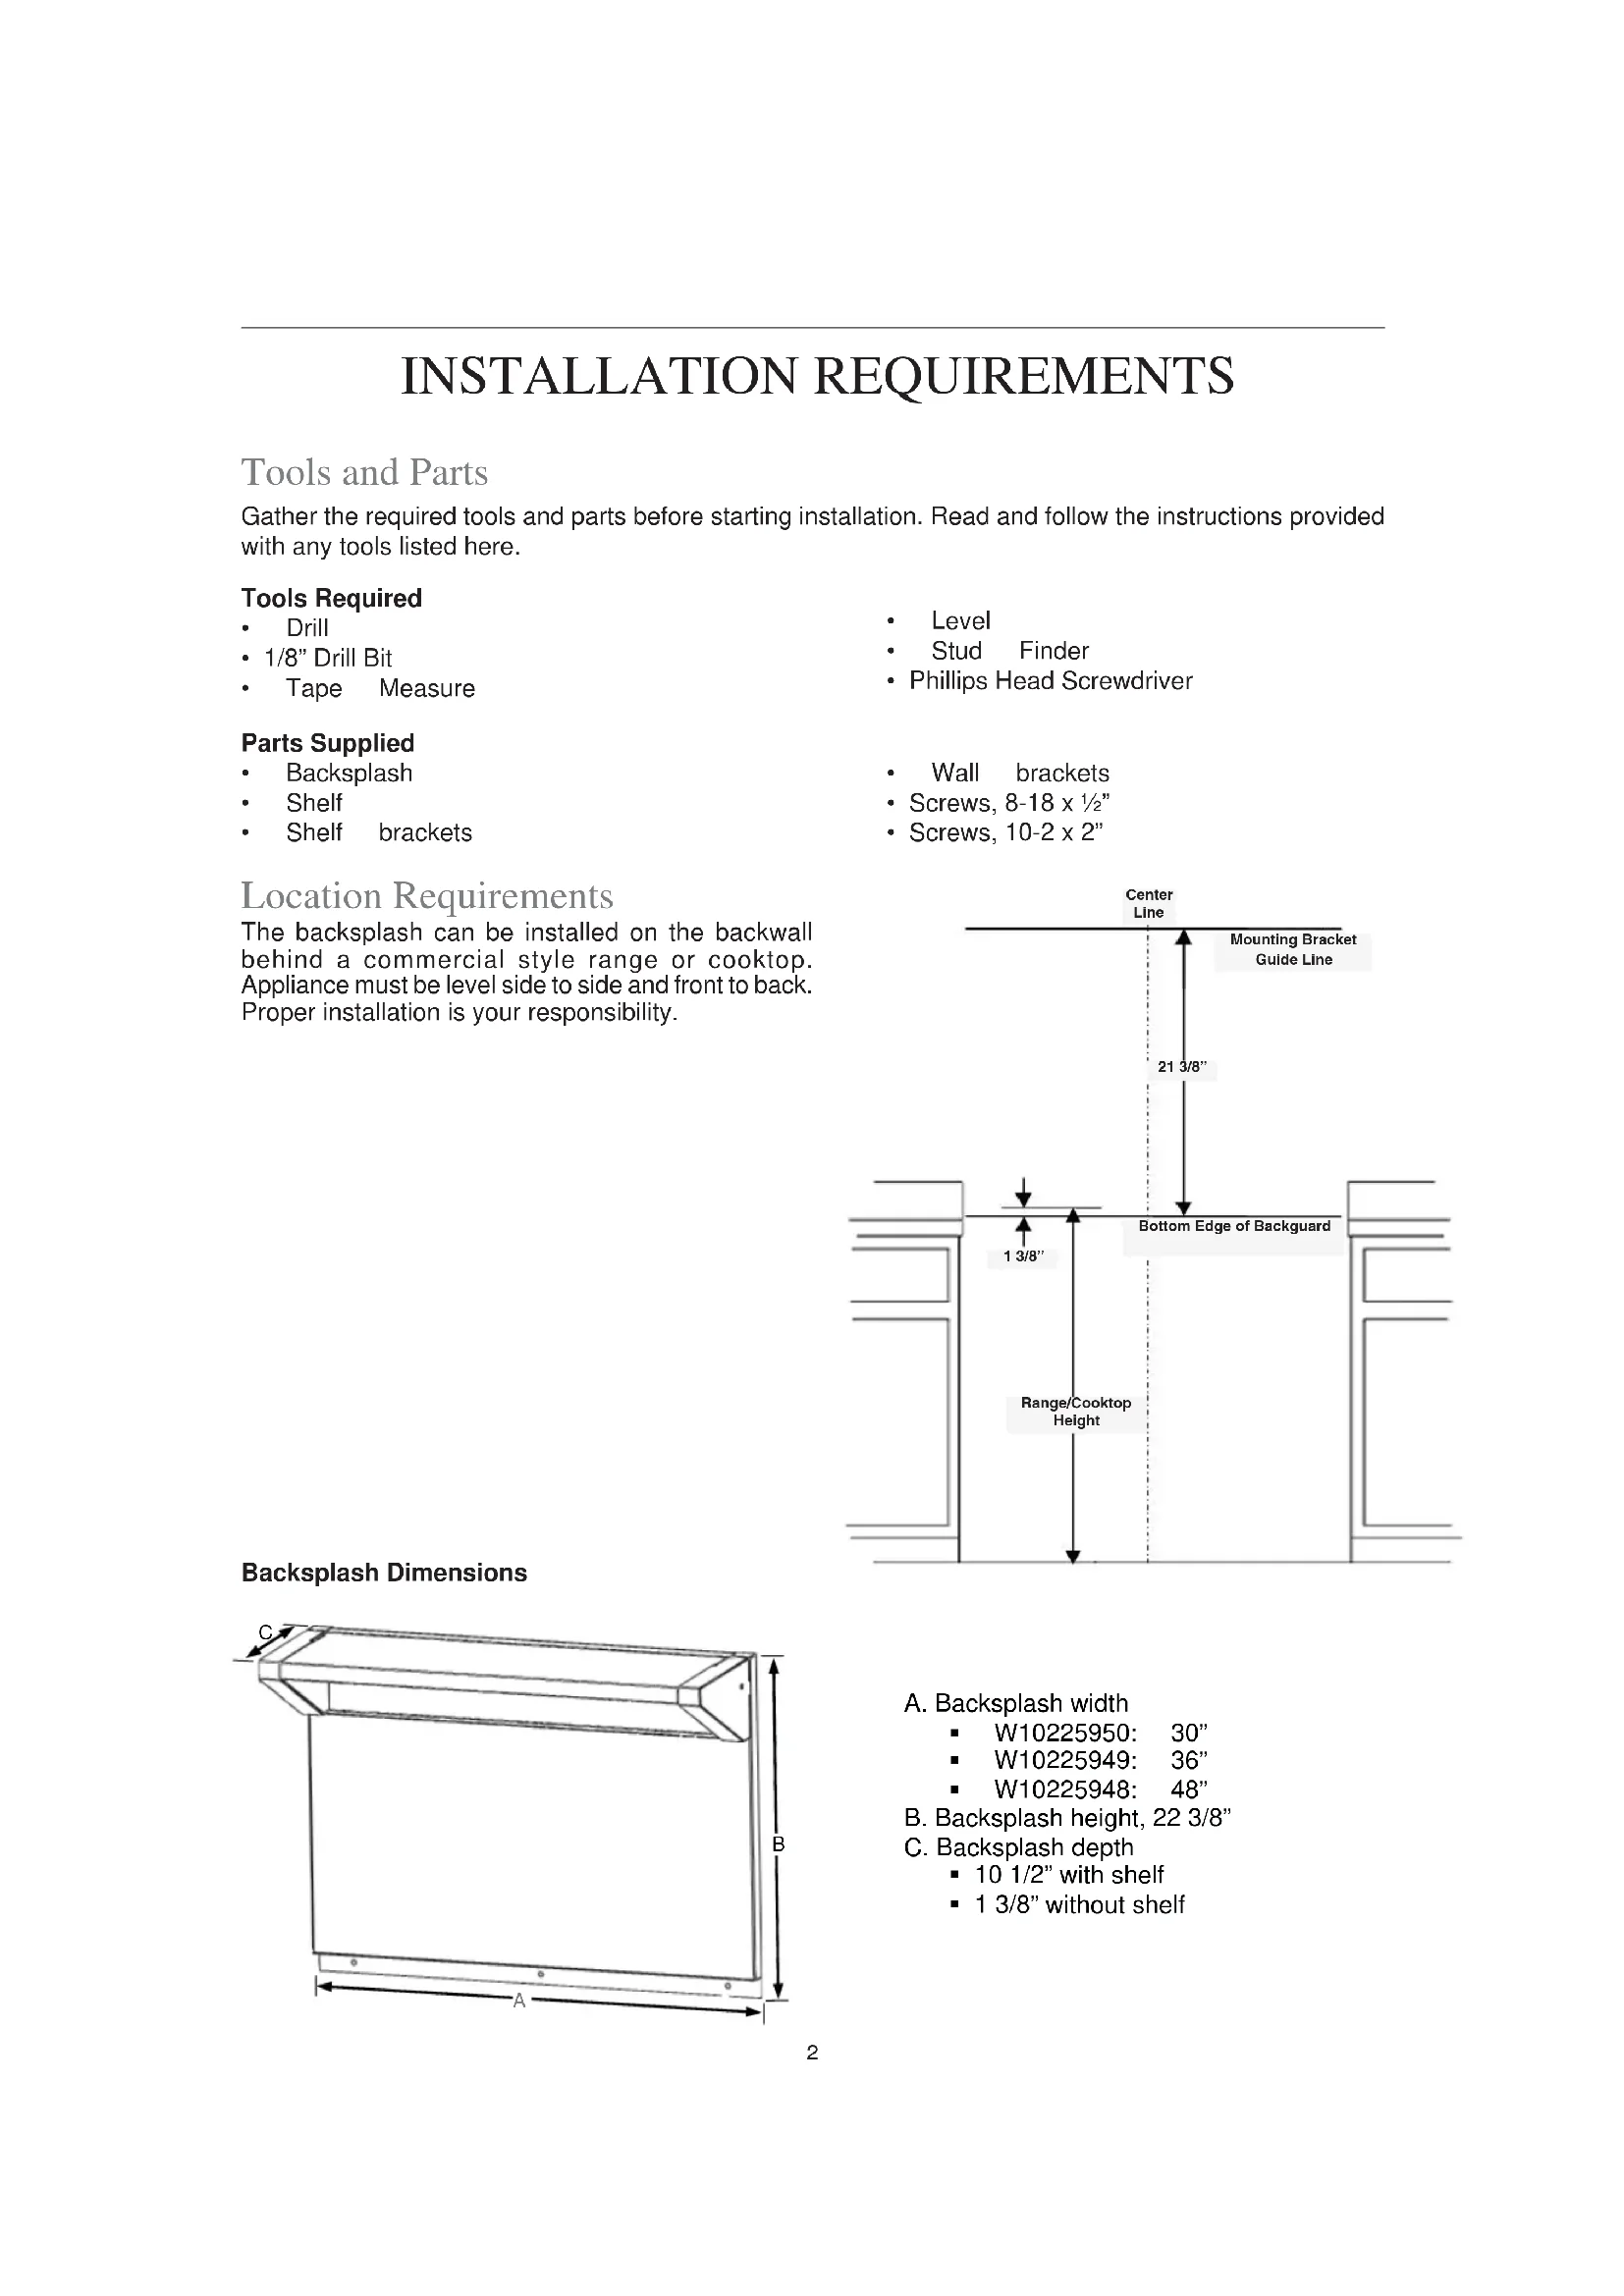
- Phillips Head Screwdriver Parts Supplied
- Screws, 10-2 x 2” Tools and Parts Gather the required tools and parts before starting installation. Read and follow the instructions provided with any tools listed here. Tools Required
- Tape Measure Location Requirements The backsplash can be installed on the backwall behind a commercial style range or cooktop. Appliance must be level side to side and front to back. Proper installation is your responsibility. Backsplash Dimensions
1. Mark a small line on the backwall at the height of the range or cooktop.
2. Measure 1 3/8” down from this line and scribe a level line the full length of the installation space. This
line represents the lower edge of the backsplash.
3. Position the bottom edge of the fl ange along the bottom edge of backsplash line. Align the center of
the backsplash with the center of the appliance. Mark each mounting hole (3 locations) with a pencil. Set panel aside.
4. Measure up 21 3/8” from the bottom edge of backsplash line and draw a level line the full length of
the installation space. This line represents where the mounting brackets will attach to the wall. Install Mounting Brackets
1. Using a stud fi nder, locate the edges of the wall studs within the installation space.
2. Mark the center of each stud and draw a line down the center of the stud.
3. Line up the top of the wall mounting bracket along the top edge line from “Mark Guide Lines” section.
4. Center a bracket along the centerline of each wall stud.
5. Mount each bracket to wall using two 10-12 x 2” screws per bracket (included with kit). A minimum of
two mounting brackets should be installed for the 30” and 36” models. The 48” model requires three mounting brackets. Attach Shelf Brackets
1. Place the shelf brackets on the top of the Backsplash as shown in the picture.
2. Attach the bracket to the Backsplash using two 8-18 x ½” screws.
Align this surface with the guide lineInstall Backsplash
1. Hook the fl ange on the back of the Backsplash over the mounting brackets attached to the wall.
2. Center the Backsplash and align the three holes at the bottom of the Backsplash with the marks on
the wall made in the “Mark Guide Lines” section.
3. Attach bracket to wall using the three 10-12 x 2” screws through the holes at the bottom of the fl ange.
1. Locate the hinge pin in each end of the shelf. View into the slot on either end of the shelf and the
hinge pin is visible. Install Shelf The shelf included with the backsplash can be installed in two different positions.
2. Grasp the shelf on each end with the shelf in the desired orientation.
3. Align the slots of the shelf with the shelf brackets and insert the hinge pins into the shelf bracket slot.
4. Slide shelf back until both hinge pins on each end are positioned into notch of the bracket.
1. Grasp the shelf on each end and pull shelf forward while lifting up. Shelf will be removed from the backsplash.
2. Determine desired shelf orientation.
3. See “Install Shelf” section for re-installation detail.
General Cleaning Do not use soap-fi lled scouring pads, abrasive cleaners, Cooktop Polishing Creme, steel-wool pads, gritty washcloths or abrasive paper towels. Damage may occur, even with one-time or limited use. Rub in direction of grain to avoid damaging. Cleaning Method:
- KitchenAid® Stainless Steel Cleaner and Polish: Follow the instructions found on the label of the cleaner.
- Liquid detergent or all-purpose cleaner: Rinse with clean water and dry with soft, lint-free cloth.
support. SHELF (REAR VIEW)