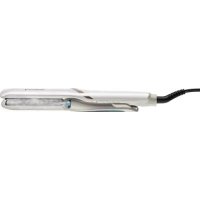
HYDRAluxe AS8901 - Hair Straightener REMINGTON - Free user manual and instructions
Find the device manual for free HYDRAluxe AS8901 REMINGTON in PDF.
Download the instructions for your Hair Straightener in PDF format for free! Find your manual HYDRAluxe AS8901 - REMINGTON and take your electronic device back in hand. On this page are published all the documents necessary for the use of your device. HYDRAluxe AS8901 by REMINGTON.
USER MANUAL HYDRAluxe AS8901 REMINGTON
Thank you for buying your new Remington® product. Please read these instructions carefully and keep them safe. Remove all packaging before use.
WARNING: This appliance is hot. Keep out of reach of children at all times.
IMPORTANT SAFEGUARDS
- This appliance can be used by children aged from 8 years and above and persons with reduced physical, sensory or mental capabilities or lack of experience and knowledge if they have been supervised/instructed and understand the hazards involved. Children shall not play with the appliance. Cleaning and user maintenance shall not be done by children unless they are older than 8 and supervised. Keep the appliance and cable out of reach of children under 8 years.
Do not use this appliance near bathtubs, showers, basins or other vessels containing water.
- When the appliance is used in a bathroom, unplug it after use since the proximity of water presents a hazard even when the appliance is switched off.
- For additional protection, the installation of a residual current device (RCD) having a rated residual operating current not exceeding 30 mA is advisable in the electrical circuit supplying the bathroom*.
- Currently, the tting in a bathroom of an electrical socket suitable or capable of operating the appliance is not permitted in the UK (see BS7671).
- If the supply cord of this unit becomes damaged, discontinue use immediately and return the appliance to your nearest authorised Remington® service dealer for repair or replacement in order to avoid a hazard.
- Always ensure the voltage to be used corresponds to the voltage stated on the unit before plugging the appliance into the mains socket.
- Keep direct airow away from eyes or other sensitive areas.
- Do not allow any part of the appliance touch the face, neck or scalp.
- During use, always ensure the inlet and outlet grilles are not blocked in any way as this will cause the unit to automatically stop. If this should occur, switch o and allow the unit to cool. ENGLISH
- Keep the power plug and cord away from heated surfaces.
- Do not leave the appliance unattended while plugged in.
- Do not place the appliance on any soft furnishings.
- Do not use attachments other than those we supply.
- Do not set the appliance down while still on.
- Do not twist or kink the cable, or wrap it round the appliance.
- Do not use the appliance if it is damaged or malfunctions.
- Check the cord regularly for any sign damage.
- This appliance is not intended for commercial or salon use. PARTS
1. 1200W power handle
2. Mixed bristle brush
Prepare the hair for styling
- Wash and condition the hair as normal.
- Squeeze out excess moisture with a towel and comb through.
- For best results, dry your hair as normal until it is about 70-80% dry.
- Divide the hair into sections, style the lower layers rst. To t the brush
- Fit the brush head before you turn on the appliance.
- Align the Usymbol on the brush with the mark on the body (g. A).
- Rotate the brush until the Lsymbol is aligned with the mark to secure (g. B). Speed and temperature settings
- Plug your product into the mains power supply.
- To turn your air styler on, turn the speed selector switch to the 1 (low) or 2 (high) setting.
- Your air styler has three temperature settings:
1. High (O): Thick and dicult to style hair
2. Hydracare ( ): Thin/ne, damaged or bleached hair
3. Cool (C): To set your style after styling
- Use the heat selector switch to select the appropriate temperature for your hair type. ENGLISH5 Creating volume
- To dry your roots and add volume, place the brush underneath the section close to the roots and hold for a few seconds, lifting the hair as you dry.
- Move the styler downward through the hair section.
- Repeat this around the head.
- Let the hair cool before further styling. Creating shaped ends
- To curl the ends in, place the brush underneath the section close to the ends and rotate the styler inwards allowing the hair to wrap around the barrel and hold for a few seconds.
- To curl the ends out, place the brush on top of the section close to the ends and rotate the styler outwards allowing the hair to wrap around the barrel and hold for a few seconds.
- Repeat this around the head.
- Let the hair cool before further styling. Creating smooth, sleek hair
- Starting at the roots, slowly brush through each section just as you would with a normal brush.
- To add additional volume, tip your head upside down and brush the underneath of your hair.
- Repeat this around the head.
- Let the hair cool before further styling. Hydracare setting
- The Hydracare setting gently dries the hair at a lower temperature for healthier styling.
- To activate select the Hydracare setting ( ) using the heat selector switch. Cool setting
- To set your style, use the cool setting. To operate move the temperature control switch to the C position.
STORAGE, CLEANING AND MAINTENANCE
- After use, turn the appliance o by turning the speed selector switch to the O position.
- When nished unplug the appliance and allow to cool before cleaning and storing away.
- Wipe all surfaces with a damp cloth.
- Don’t use harsh or abrasive cleaning agents or solvents.
- To maintain peak product performance and to prolong motor life, it is important to regularly remove any dust and dirt from the inlet grille.
- Clean the inlet grille with a cloth or soft brush. ENGLISH
- When nished unplug the appliance and allow to cool before cleaning and storing away.
- Align the Usymbol on the brush with the mark on the body (g. A).
- Rotate the brush until the Lsymbol is aligned with the mark to secure (g. B). Nastavitve hitrosti in temperature
- To maintain peak product performance and to prolong motor life, it is important to regularly remove any dust and dirt from the inlet grille.