
Pico 7 - Stroller i'coo - Free user manual and instructions
Find the device manual for free Pico 7 i'coo in PDF.
User questions about Pico 7 i'coo
0 question about this device. Answer the ones you know or ask your own.
Ask a new question about this device
Download the instructions for your Stroller in PDF format for free! Find your manual Pico 7 - i'coo and take your electronic device back in hand. On this page are published all the documents necessary for the use of your device. Pico 7 by i'coo.
USER MANUAL Pico 7 i'coo
Ito Gomi [J Am Rotz. Hagi 4 D 06242 Sociedad del newcoocao, 1-4-9-45N NAOY 4N 4N 4N 4N 4N 4N 4N 4N 4N 4N 4N 4N 4N 4N 4N 4N 4N 4N 4N 4N 4N 4N 4N 4N 4N 4N 4N 4N 4N 4N 4N 4N 4N 4N
pico 7
S2 #EPEER1.434746528101555 1
1
1
1
FOR SAPIERE VERWENDUNG AUFBEWAHREN IMPORTANT - KEEP IT FOR LATER READING IMPORTANT CONSERVE FOUR IN CONSU TATION ULLTERFUR
BELARGRIKH - BEWAR ALAS NALAGIOVERK IMPORTANTE - GUARDMAREP AQUELMEPOPOSTER IMPORTANTEF CONSERVAREP PER LUSI FUTUR


Inhalt
Read these instructions carefully before use and keep them for future reference. Your child's safety may be affected if you do not follow these instructions.
- The vehicle is intended for children from 0 years and up to 15kg ; when used in combination with a car seat or a pram body, the maximum weight as indicated on the car seat or pram body applies.
- Do not use the stroller with backrest in an upright position until your child is able to sit unassisted and is not younger than 6 month.
WARNING: It may be dangerous to leave your child unattended.
WARNING: Use a harness as soon as your child can sit unaided.
WARNING: Always use the crotch strap in combination with the waist belt.
WARNING: Ensure that all the locking devices are engaged before use.
WARNING: Any load attached to the handle affects the stability of the pushchair. Only use the indicated storage spaces and do not exceed the maximum permitted weight.
WARNING: Check that the pram body or seat unit attachment devices are correctly engaged. - Keep plastic packaging materials out of reach of children to avoid the danger of asphyxiation.
- When parking always use the parking brake.
- Avoid situations of extreme use that decrease your control over the child and the stroller. When using the stroller for your child, your speed should be limited to a walking speed. Running, jogging, or skating are not recommended. Do not use escalators or stairs and be careful when using the elevators while your child is in the stroller.
- Check, clean and oil this stroller regularly. Use non-aggressive cleansing agents and lubricants.
- The stroller may only be used for the transportation of one child.
- Use only original i'coo accessories and original
i'coo spare parts.
- Make sure that the child's hands stay out of range of possible pinching areas when the stroller or parts thereof are being folded, unfolded, or otherwise changed.
- WARNING: Bear in mind that small parts, such as the valve caps on the wheels, can be swallowed by your child, and may cause your child to choke.
- The maximum loading weight of the basket is 3kg .
THIS PRODUCT CONFORMS TO THE STANDARD
EN 1888: 2003-01 + A1 2005 -08 + A2
2005-08 + A3 2005-08
WARRANTY
Thank you for purchasing a quality i'coo product. This i'coo warranty is designed to provide you total satisfaction with your i'coo product purchase. In the event that service repairs are required with your i'coo product, please read the following outline to ensure that your product is covered by our i'coo Manufacturers Warranty:
- The warranty period is effective upon date-of-purchase, and is valid six months following your purchase. In order to confirm your warranty coverage please retain the original sales receipt as proof-of-date on your purchase.
- This warranty is non transferable.
- The warranty is valid solely to the product or products of that which were purchased by the original purchaser / owner.
- There are no extended warranties on products; including repaired products by i'coo.
- Product concerns should be first directed to the product retailer. If they cannot offer proper assistance or a solution, the product then can be returned to i'coo through the assistance of that retailer from where the product was purchased. Which must include: complete product, complaint description, as well as the original sales receipt with proof of date of purchase.
If any alterations are made to the product, after the initial purchase, this warranty will be considered void. -
The warranty does not include product defects caused by:
-
product neglect
- improper usage - as outlined in the instructions manual.
- accidental damage inflicted by the product user.
START
The package consists of:
frame
- seat, hood and bumper bar
Assembling sequence:
1 Unlock frame lock(see FOLDING/UNFOLDING).
2 Unfold frame.
3 Attach seat (see SEAT).
4 Attach bumper bar (see BUMPER BAR).
5 Attach hood (see HOOD).
FOLDING AND UNFEDDING
Folding and unfolding is easiest if you stand behind the stroller.
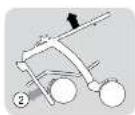
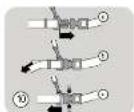
Unfolding:
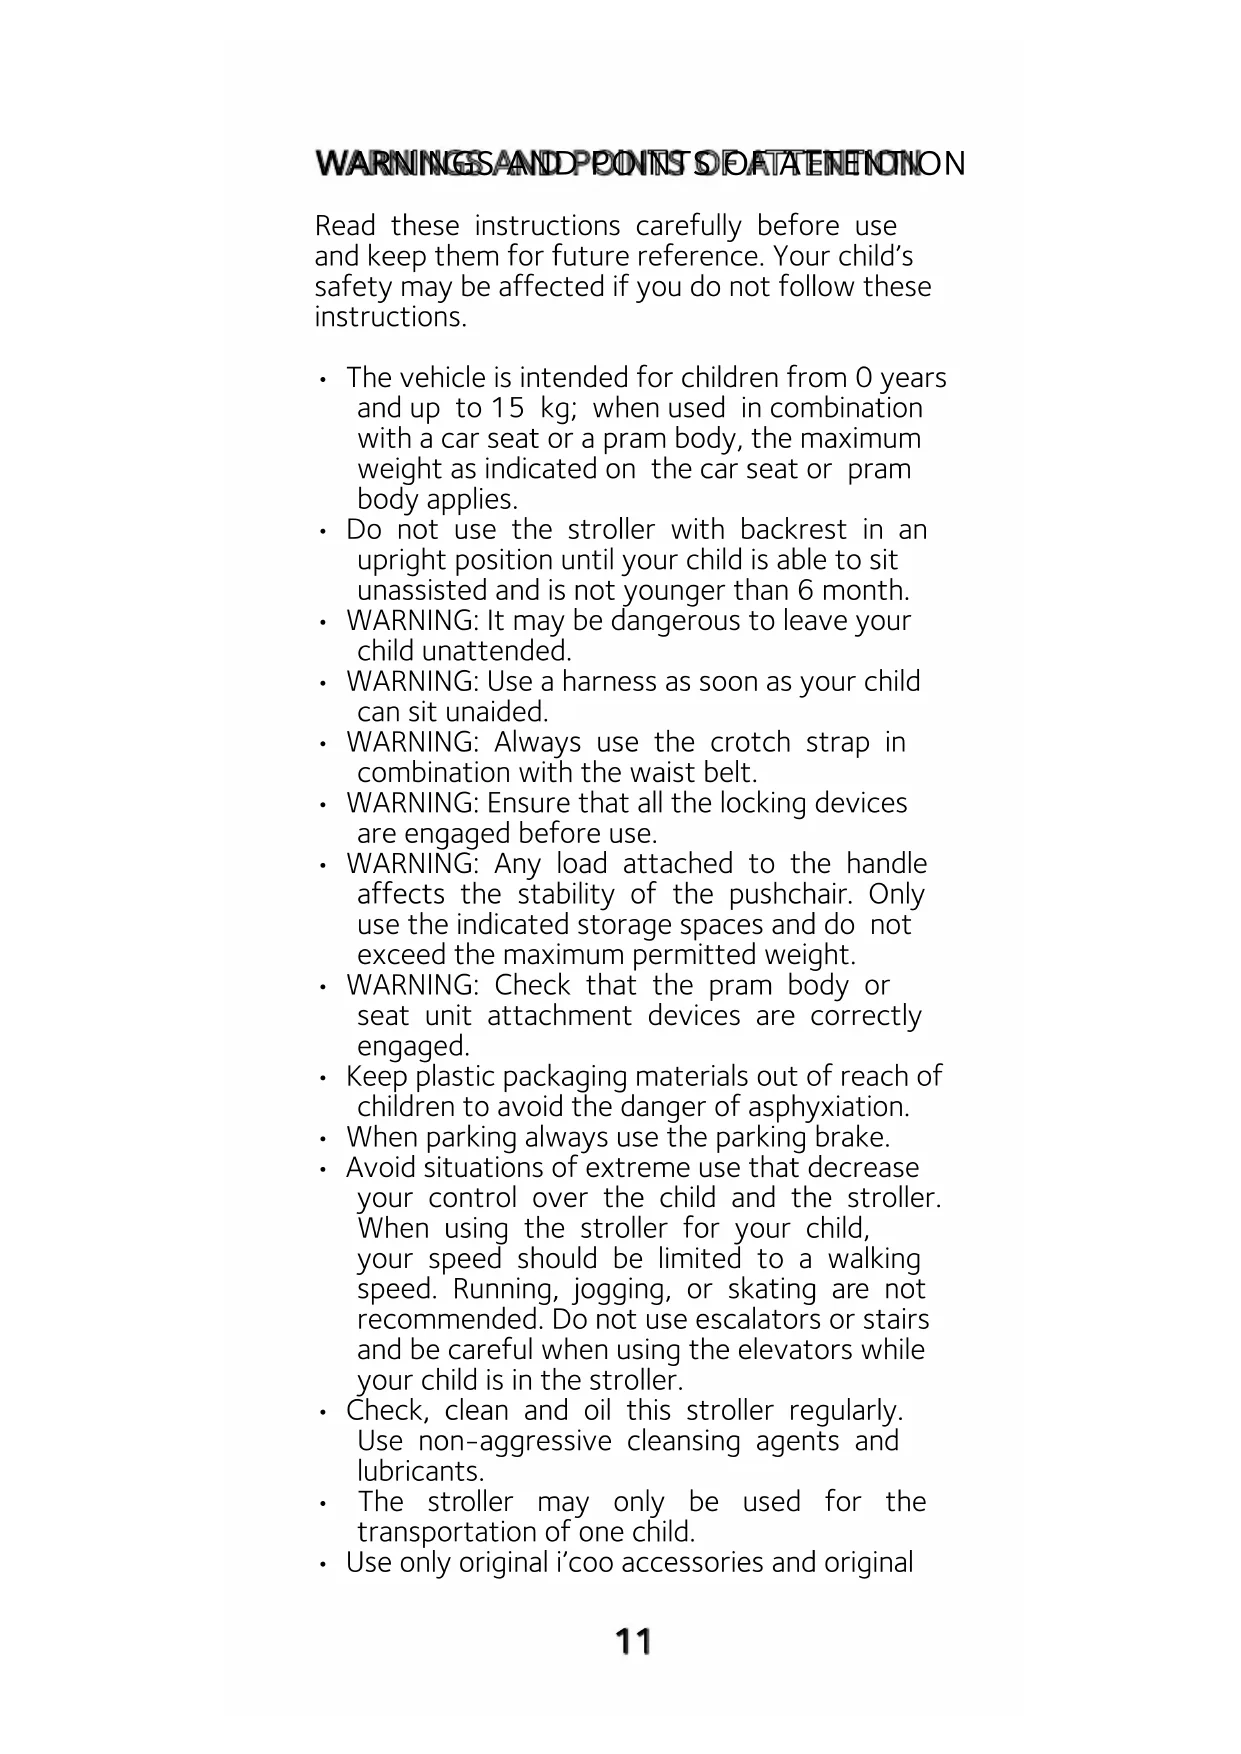
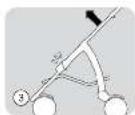
- Release the frame lock by pulling the plastic part marked with the arrow (on the left-hand side of the push bar) towards you (1).
Now pull the push bar upwards (2). - When the stroller is almost unfolded, you can lock the frame with a short upward push on the push bar (3). The frame is locked when you hear a click on both sides. Check that the frame is properly locked by applying light pressure to the push bar.
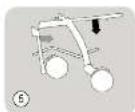
Folding:
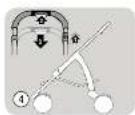
- Release the locked frame by pulling the plastic part marked with the arrow (on the left-hand side of the push bar) towards you while pushing the push bar to the lowest position (4).
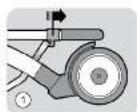
- Bring the push bar down (5) until it is locked to the frame and the entire stroller has been folded (6).
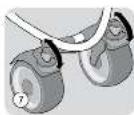
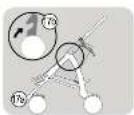
WHEELS
The front wheels have 2 positions (7):
- put the handles on the wheel blocks up for free steering wheels.
- put the handles down to fix the wheels in straight forward position.
SEAT
Assembling:
To attach the seat to the frame, close all straps and snaps of the seat:
- Put the side parts (8 a) around the tubes and close the snaps.
- Attach the upper strap through the special plastic
parts (8b) and then fasten the snaps
- Attach the 2 side straps (8 c) around the basket tube (behind the rear legs).
- Attach the small strap under the seat to the thin black tube (8d).
- Attach the lower elastic strap (8 e) around the leg rest.
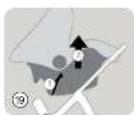
Adjustments:
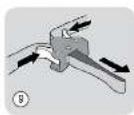
- The backrest can be lowered/raised with the strap at the back of the backrest (9). The backrest can be placed in the desired position by pressing the plastic part and changing the length of the strap.
- To adjust the leg rest, simultaneously push the buttons on both sides of the leg rest hinge and rotate the leg rest to the desired position.
NOTE: Never allow the child to sit or stand on the leg rest or backrest. SAFETYHARNESSE
SAFETYHARNESS
Apply the parking brake before carefully placing the child in the stroller.
- Fasten the lap and shoulder belts to the crotch strap (10a).
- Adjust the belts to suit the size of your child with the buckle (10b).
- Push the buttons to unbuckle (10c).
- Check regularly to make sure your child is safe.
- D-rings are provided to fit an additional harness. Ensure that it conforms to BS 6684 regulations.
BUMPER BAR
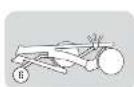
- Attach the bumper bar by sliding the ends of the bumper bar over the grips of the seat until you hear a click on both sides (11).
- To adjust the height of the bumper bar, push the buttons on the sides of the bumper bar and turn it into the desired position.
- The bumper bar can be removed by simultaneously pushing the buttons on the inside of the armrests and sliding the bumper bar upwards.
NOTE: never use the bumper bar to lift the stroller.
HOOD
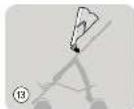
- Click the hood onto the plastic connection part above the rearleg connection (13).
- Close the clip around the tube.
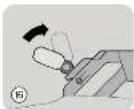
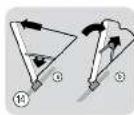
- To open the hood, push the front of the hood
forward and the hood stretchers downward (14a).
- To close the hood, push the hood stretchers upward and the front of the hood backwards (14b).
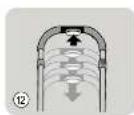
PUSH BAR
- Press the knob on the handle of the push bar to adjust the height (12).
- Release the knob and move the push bar until it locks.
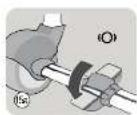
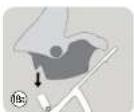
PARKING BRANCH
- To apply the brake: push the brake pedal down with your foot (15a). The brake is engaged when the red stripe is visible.
- Press the pedal backwards to release the brake (15b).
STORAGE SPACES
- Underneath the frame, between the wheels, there is a shopping basket. The maximum permitted weight in this basket is 3kg .
- On the back of the hood there is a storage space (max. load 0,5 kg). This can be accessed through the zipper.
- The reclining part of the seat has a back pocket (max. load 0,5 kg).
NOTE: Use only the indicated storage spaces and do not exceed the maximum permitted weight.
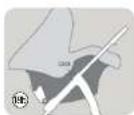
CAR SEATTE-CARRE(sold separately)
For newborn children you can also use the e-care. The e-care is a seat that can be used both as a car safety seat and on the i'coo stroller (using the e-care adapter set).
Please take care thatt the car-seat is fixed against the direction of motion so the child looks to the mother.
- Put the bumperbar in the highest position by pushing the buttons on both sides of the bumperbar simultaneously and turn (16)
- Pull out the carseat locking hooks on both sides. They are situated at the inside of the hood, close to the frame connection (17a).
- Ensure that both hooks are fully erected. (17b).
- Place the carseat on the bumperbar and push the carseat down until a distinct click sound can be heard. (18a-c)
- The carseat is now in locked position.
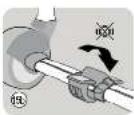
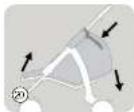
To release the carseat from the stroller, simply push the unlockbuttons on both sides under the edge of the carseat and lift the carseat. (19)
SOFTCARRERCCSSYCOOMsoksepaately)
- Remove the bumper bar by simultaneously pushing the buttons on the inside of the armrests and sliding the bumper bar upwards.
NOTE: never use the bumper bar to lift the stroller.
- Lift the legrest to horizontal position (20a)
- Lower the back of the seat to maximum with the backrestadjustment on the back of the seat. (20b)
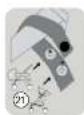
- Bring the back of the seat into softcarrier position by repositioning the snap on both sides of the seat. (21)
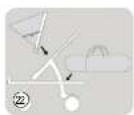
- Replace the hood in reversed position on the plastic part on the frame and close the clip around the tube on both sides. (22)
- Place the softcarrier inside the stroller (23a) and connect the clips of the softcarrier to the D-rings in the seat. (23b)
ACCESSORESS
In addition to the e-care car seat the following accessories are available: foot muff, back pack (for diapers), rain cover, the e-care adapter set, and a travel bag for the stroller.
MAINTENANCE
- To prolong the life span of your stroller, dry with a soft cloth after use in rainy weather.
- Clean the wheels and the metal parts regularly to keep the stroller functioning smoothly.
- Use mild detergents and lukewarm water for cleaning.
- Do not use aggressive solvents.
- The seat and the shopping basket should not be washed in the washing machine.
- For safety reasons use original i'coo parts only.
Maintenance of wheels:
- The metal parts must be cleaned regularly. Regular treatment with a silicon spray prevents corrosion / deposit.
NOTE: The chance of corrosion is especially prevalent with use at the beach. Riding through seawater is not recommended. Thoroughly clean the wheels after a trip to the beach. This also applies for use under wintry conditions in which salting of roads may have the same results.