Party Mix - DJ Equipment NUMARK - Free user manual and instructions
Find the device manual for free Party Mix NUMARK in PDF.
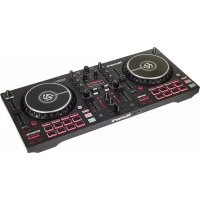
| Technical Features | 2-channel DJ controller, compatible with Serato DJ Lite, 16 RGB backlit pads, volume and crossfader sliders, RCA audio output, 1/4" headphone output. |
|---|---|
| Usage | Ideal for beginners and mobile DJs, allows easy mixing thanks to an intuitive interface, compatible with Windows and Mac computers. |
| Maintenance and Repair | Regularly clean surfaces, check audio connections, update Serato DJ Lite software for better performance. |
| Safety | Use only with an appropriate power adapter, avoid exposure to moisture, do not force audio connections. |
| General Information | Lightweight for easy transport, compact dimensions, ideal for parties and events, 1-year limited warranty. |
Frequently Asked Questions - Party Mix NUMARK
User questions about Party Mix NUMARK
0 question about this device. Answer the ones you know or ask your own.
Ask a new question about this device
Download the instructions for your DJ Equipment in PDF format for free! Find your manual Party Mix - NUMARK and take your electronic device back in hand. On this page are published all the documents necessary for the use of your device. Party Mix by NUMARK.
USER MANUAL Party Mix NUMARK
User Guide (English)
Introduction
Box Contents
Party Mix
Software Download Card
User Guide
Safety & Warranty Manual
Support
For the latest information about this product (system requirements, compatibility information, etc.) and product registration, visit numark.com.
For additional product support, visit numark.com/support.
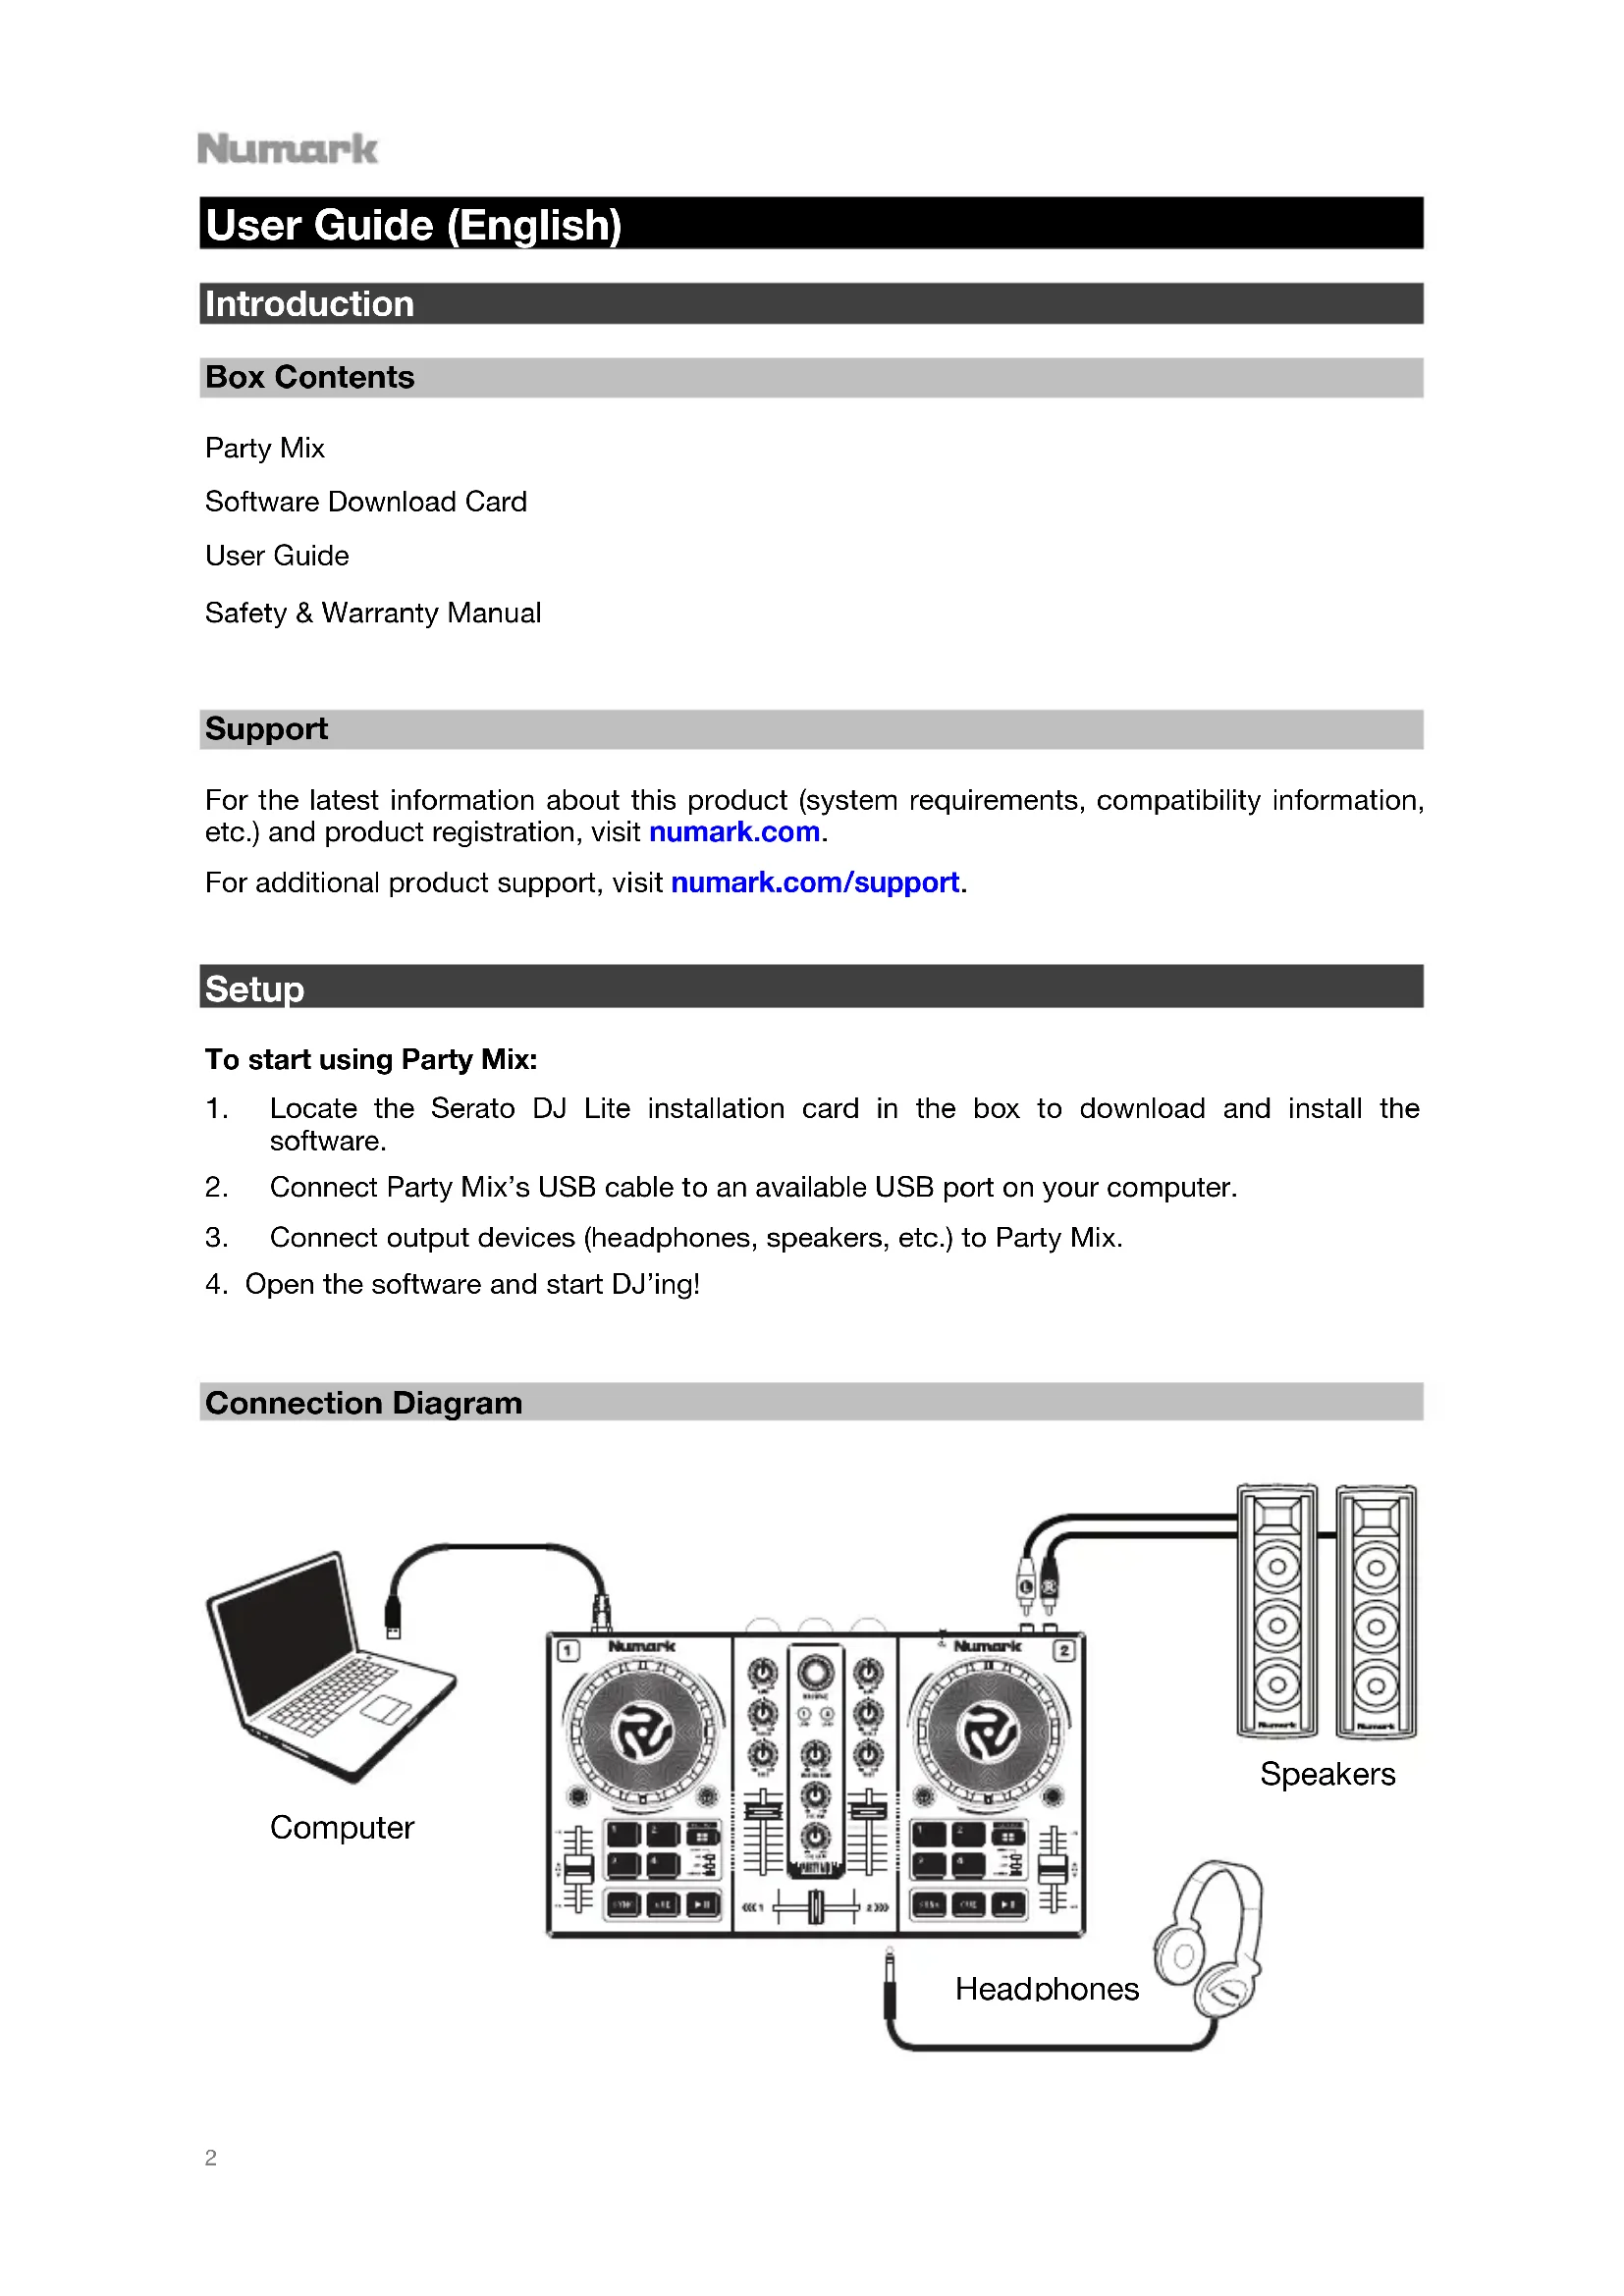
Setup
To start using Party Mix:
- Locate the Serato DJ Lite installation card in the box to download and install the software.
- Connect Party Mix's USB cable to an available USB port on your computer.
- Connect output devices (headphones, speakers, etc.) to Party Mix.
- Open the software and start DJ'ing!
Connection Diagram

flowchart
graph TD
    A["Computer"] -->|USB| B["1"]
    B --> C["2"]
    C --> D["3"]
    D --> E["4"]
    E --> F["5"]
    F --> G["6"]
    G --> H["7"]
    H --> I["8"]
    I --> J["9"]
    J --> K["10"]
    K --> L["11"]
    L --> M["12"]
    M --> N["13"]
    N --> O["14"]
    O --> P["15"]
    P --> Q["16"]
    Q --> R["17"]
    R --> S["18"]
    S --> T["19"]
    T --> U["20"]
    U --> V[" Speakers"]
    W["Headphones"] --> X["Speaker 1"]
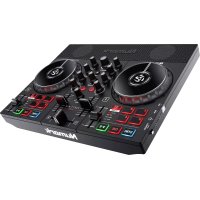
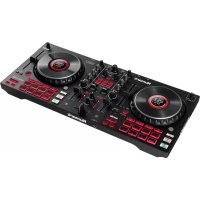
Features
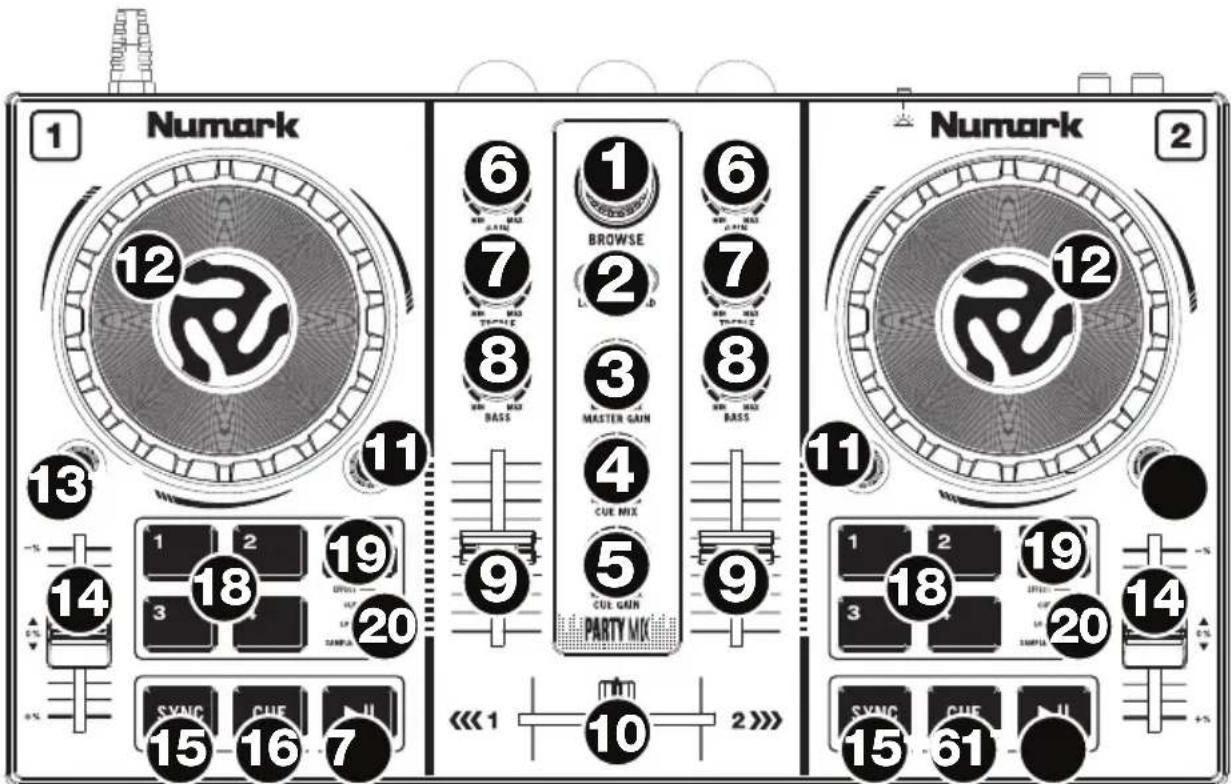
Front Panel
text_image
Numark 12 6 1 BROWSE 7 L 8 MASTER GAIN 9 CUE MIX 10 PARTY MIX 11 Numark 12 18 19 20 SYNC CUE II SYNC CUE III 15 16 7 << 1 2 >>- Browse Knob: Rotate this knob to cycle through crates and tracks. Press it to move forward in the software panels.
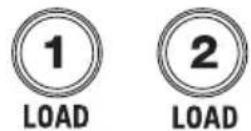
- Load: Press one of these buttons while a track is selected to assign it to Deck 1 or 2, respectively, in the software.
- Master Gain: Adjusts the master volume in the software.
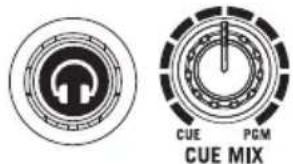
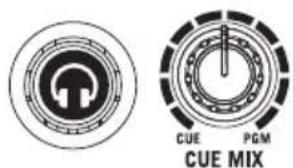
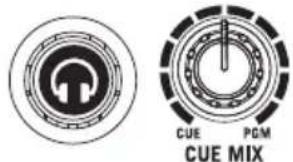
- Cue Mix: Adjusts the software's audio output to the headphones, mixing between the cue output and the master mix output.
- Cue Gain: Adjusts the volume for headphone cueing in the software.
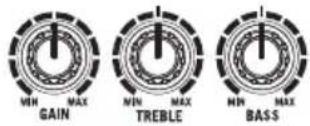
- Gain: Adjusts the pre-fader, pre-EQ audio level of the corresponding channel in the software.
- High EQ: Controls the treble frequencies for the individual channels.
- Low EQ: Controls the bass frequencies for the individual channels.
- Channel Volume: Adjusts the volume of the individual channels in the software.
- Crossfader: Controls the blend between the two decks.
- PFL/Cue: Press this button to send this channel's pre-fader signal to the Cue Channel for monitoring. When engaged, the button will be lit. By pressing one PFL button at a time, you will cue that channel alone (and deactivate PFL monitoring for the other channels). To cue to multiple channels simultaneously, press the PFL buttons for those channels at the same time.
- Platter/Jog Wheel: This jog wheel controls the audio when the wheel is moved. When the Scratch button is not active, use the jog wheel to bend the pitch of the track. When the Scratch button is active, use the jog wheel to grab and move the audio, "scratching" the track as you would with a vinyl record.
Numark
-
Scratch Button: Activate this button to use the Platter/Jog Wheel to grab and move the audio, "scratching" the track as you would with a vinyl record.
-
Pitch Fader: This controls the speed of the music. Moving towards the “+” will speed the music up, while moving towards the “-” will slow it down.
-
Sync: Press this button to automatically match the corresponding Deck's tempo with the opposite Deck's tempo and phase.
-
Cue: When the Deck is paused, you can set a Temporary Cue Point by moving the Platter to place the playhead at the desired location and then pressing the Cue button.
During playback, you can press the Cue button to return the track to this Temporary Cue Point. (If you did not set a Temporary Cue Point, then it will return to the beginning of the track.)
-
Play/Pause: Starts and suspends playback.
-
Performance Pads: These pads can be used to trigger Hot Cues, Loops and Samples, and to apply effects. To change the function of the pads, press the Pad Mode button.
-
Pad Mode: Press this button to change the current function of the Performance Pads.
- Cue: Each pad assigns at Hot Cue Point, or returns the track to that Hot Cue Point. When a pad is unlit, you can assign a Hot Cue Point by pressing it at the desired point in your track.
- Loop: Each pad triggers and auto-loop of a different length.
- Sampler: Each pad triggers a sample in Serato DJ Lite.
- Effects: Pads 1–3 on each deck trigger an effect. Pad 4 on each deck cycles through time divisions for beat-based effects, from 1/16 to 8 beats.
- Pad Mode Indicator: These LEDs indicate the current setting of the Performance Pads.
Rear Panel

text_image
MASTER ① PARTY MIX ③ ④ Numark ②- Master Output (RCA): Use standard RCA cables to connect this output to speakers or an amplifier system.
- USB: This USB connection sends and receives audio and control information from a connected computer.
- Party Ball Mode: Press this button to cycle between the different lighting modes for the Party Balls.
i. Serato DJ Lite color-controlled (default when powered on)
Note: In this mode, you can select from three lighting control patterns in the Serato DJ Lite Setup > Mixer menu.
ii. Serato DJ Lite beat-controlled
iii. Fixed-timing random
iv. All on
v. Off
- Party Balls: When activated, these lights will illuminate according to the current Party Ball Mode setting.
Front Panel
- Headphone Output: Connect headphones to this 1/8" (3.5 mm) jack for monitoring the signal. The headphone volume is controlled using the Cue Gain knob.
natural_image
Technical line drawing of a mechanical component with no visible text or symbolsBeat-Matching and Mixing with Party Mix and Serato DJ Lite
Below is an example of how to mix tracks using Party Mix and Serato DJ Lite:
-
Start with the Gain and EQ knobs at the 12 o'clock position. You can adjust these after the tracks are loaded.
-
Turn the Browse knob to scroll through your music library.
-
Load tracks with similar BPM onto Decks 1 and 2 by pressing the Load 1 and Load 2 buttons on Party Mix.
-
Move the crossfader on Party Mix all the way to the left to send the audio from Deck 1 to the main outputs. If you are listening through the headphone output, turn the Cue Mix knob all the way to the right to PGM.
-
Play the track that is loaded on Deck 1.
-
Press the PFL/Cue button on Deck 2, and turn the Cue Mix knob to the left toward CUE to preview the audio through the headphone output.
-
Play the track that is loaded on Deck 2 to preview it in your headphones. Press Sync on Deck 2 to match its BPM with Deck 1.
-
While the track is playing, press the Cue button to return to the beginning of the track.
-
Play the track that is loaded on Deck 2.
-
Move the crossfader on Party Mix toward the right to crossfade from Deck 1 to Deck 2.


text_image
CUE PGM CUE MIX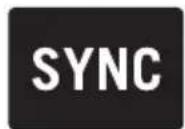


text_image
MASTER 1 PARTY MD 3 4 Numark 2natural_image
Line drawing of a mechanical component with a numbered label (1) and no visible text or symbolstext_image
MIN MAX GAIN MIN MAX TREBLE MIN MAX BASS


natural_image
Pure mechanical diagram showing a shaft and housing assembly with an arrow indicating direction (no text or symbols)
text_image
CUE PGM CUE MIX


natural_image
Line drawing of a mechanical device with a numbered label (1) and no visible text or symbolsnatural_image
Pure mechanical diagram showing a shaft and housing assembly with an arrow indicating direction (no text or symbols)text_image
MASTEN ① PARTY MD ③ ④ Numark ②natural_image
Line drawing of a mechanical device with a numbered label (1) on the base, no text or symbols present.natural_image
Line drawing of a mechanical component with a numbered label (1) and no visible text or symbolstext_image
MIN MAX GAIN MIN MAX TREBLE MIN MAX BASS

natural_image
Pure mechanical diagram showing a shaft and housing with an arrow indicating direction (no text or symbols)
text_image
CUE PGM CUE MIX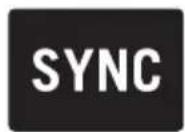


Appendix (English)
Technical Specifications
| Outputs | 1 RCA stereo pair1 1/8” (3.5 mm) TRS |
| Power | via USB |
| Dimensions(width x depth x height) | 12.8” x 7.75” x 2.0”325 x 197 x 51 mm |
| Weight | 1.75 lbs.0.8 kg |
Specifications are subject to change without notice.
Trademarks & Licenses
Numark is a trademark of inMusic Brands, Inc., registered in the U.S. and other countries.
Serato and Serato DJ Lite are registered trademarks of Serato Audio Research.
All other product or company names are trademarks or registered trademarks of their respective owners.