AWR4002DU - Radio bidirectionnelle Advanced Wireless Communications - Free user manual and instructions
Find the device manual for free AWR4002DU Advanced Wireless Communications in PDF.
Download the instructions for your Radio bidirectionnelle in PDF format for free! Find your manual AWR4002DU - Advanced Wireless Communications and take your electronic device back in hand. On this page are published all the documents necessary for the use of your device. AWR4002DU by Advanced Wireless Communications.
USER MANUAL AWR4002DU Advanced Wireless Communications
Advanced wireless Communication
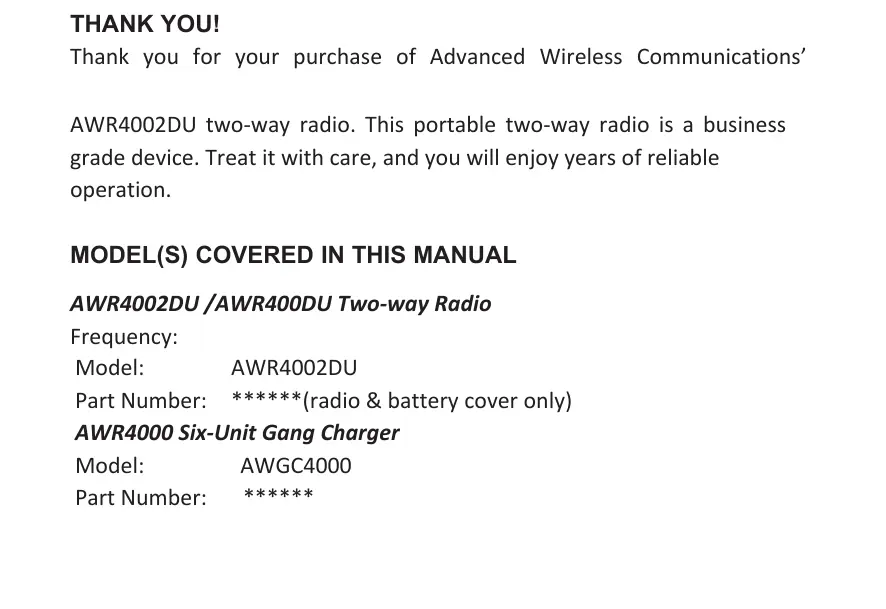
Thank you for your purchase of Advanced Wireless Communications”
AWR4002DÙ two-way radio. This portable two-way radio is a business
grade device. Treat it with care, and you will enjoy years of reliable operation.
MODEL(S) COVERED IN THIS MANUAL AWR4002DU /AWR400DU Two-way Radio Frequency:
Part Number: **#*##%
Product Safety and RF Exposure for Portable Two-Way Radios Compliance with RF Energy Exposure Standards
NOTICE: This radio is intended for use in occupational/controlled applications where users have been made aware of the potential for exposure and can exercise control over their exposure. This radio device is NOT authorized for general population, consumer or
BEFORE USING THIS RADIO, READ THE TRAINING MATERIAL BELOW WHICH CONTAINS IMPORTANT OPERATING INSTRUCTIONS FOR SAFE USAGE AND RF ENERGY AWARENESS AND CONTROL INFORMATION FOR COMPLIANCE WITH RF ENERGY EXPOSURE LIMITS IN APPLICABLE NATIONAL AND INTERNATIONAL STANDARDS.
Federal Communication Commission (FCC) Regulations
The FCC has established limits for safe exposure to radio frequency (RF) emissions from portable two-way radios. The FCC requires manufacturers to demonstrate
compliance with RF exposure limits before portable two-way radios can be marketed in the U.S. When two-way radios are approved for occupational/controlled environment exposure limits, the FCC requires users to be fully aware of, and exercise control over, their exposure. Awareness and control of RF exposure can be accomplished by the use of labels, or by education and training through appropriate means such as information and instructions in user manuals or safety booklets. Your Advanced Wireless Commu- nications’ two-way radio has an RF exposure information label in the battery compartment. The training material below includes useful information about RF exposure and helpful instructions on how to control your RF exposure. Your Advanced Wireless Communications two-way radio is designed and tested to comply with a number of national and international standards and guidelines (listed below) regarding human exposure to RF electromagnetic energy. In terms of measuring RF energy for compliance with FCC exposure guidelines, your radio radiates measurable RF energy only while it is transmitting (during talking), not when it is receiving (listening) or in
Compliance and Control Guidelines and Operating Instructions for Portable Two-Way Radios To control your exposure and ensure compliance with the occupational/con- trolled environment exposure limits, always adhere to the following procedures: *Transmit no more than 50% of the time. To transmit (talk), push the PushTo-Talk (PTT) button. To receive calls, release the PTT button. Transmitting 50% of the time or less is important since the radio generates measurable RF energy exposure only when transmitting (in terms of measuring standards compliance).
*For body-worn operation, always place the radio in an AWC approved belt-clip or similar accessory that contains no metallic components and provides a minimum separation distance of 0 cm between the back of the radio and the user's body. AWC approved accessories, antennas, and device combinations comply with the occupational/controlled environment RF exposure limits. Using non-AWC approved
accessories may result in exposure levels which exceed the FCC's occupational/controlled environment RF exposure limits. AWC-approved accessories have been tested and comply with FCC RF exposure requirements.
*if you are not using a body-worn accessory and are not using the radio held in front of the face, ensure the radio is kept at a minimum of 2.5 cm from the body when transmitting. Keeping the radio at a proper distance is important since RF exposure decreases with increasing distance from the antenna.
«Use only FCC-approved, supplied or replacement headsets, batteries, and accessories intended for use with this radio. Use of non-FCC approved headsets, batteries and accessories may exceed FCC RF exposure guidelines.
FCC License Information
Your Advanced Wireless Communications radio operates on communications
frequencies which are subject to FCC (Federal Communications Commission) Rules & Regulations. FCC Rules require that all operators using Private Land Mobile radio frequencies obtain a radio license before operating their equipment. Application for license must be made on FCC form 601, and schedules D, E, and G.
FAX: Forms can be obtained by fax from the FCC Fax-On-Demand system. Call 1-202- 418-0177 from your fax machine and request document number 000600 for the form, schedules, and instructions.
MAIL: Forms can be ordered by telephone, and will be sent to you by first class mail. Call the FCC Forms Hotline at 1-800-418-FORM (1-800-418-3676).
INTERNET: Form 601 and instructions can be downloaded from the FCC Forms website at: http://www.fcc.gov/Forms/Form601/601.html
Before filling out your Form 601 application Technical Data section, you must
decide which frequency (or frequencies) you will operate on.
Questions? Call the FCC for license application questions at 1-888-CALL-FCC (1-888-
225-5322). If you have any questions, call Advanced Wireless Communications at 1-800475-5852
This device complies with Part 15 of the FCC Rules. Operation is subject to the following two conditions:
(1) this device may not cause harmful interference, and
(2) this device must accept any interference received, including interference that may cause undesired operation.
One or more of the following statements may be applicable:
FCC WARNING This equipment generates or uses radio frequency energy. Changes or modifications to this equipment may cause harmful interference unless the modifications are expressly
approved in the instruction manual. The user could lose the authority to operate this
equipment if an unauthorized change or modification is made.
This device contains licence-exempt transmitter(s)/receiver(s) that comply with Innovation, Science and Economic Development Canada's licence-exempt RSS(s). Operation is subject to the following two conditions:
(1) This device may not cause interference.
(2) This device must accept any interference, including interference that may cause
undesired operation of the device.
L'émetteur/récepteur exempt de licence contenu dans le présent appareil est conforme aux CNR d'innovation, Sciences et Développement économique Canada applicables aux appareils radio exempts de licence. L'exploitation est autorisée aux deux conditions
susceptible d'en compromettre le fonctionnement.
This EUT is compliance with SAR for controlled exposure limits in IC RSS-102 at operating duty cycle of up to 50% and had been tested in accordance with the measurement methods and procedures specified in IEEE 1528 and IEC 62209. This equipment should be installed and operated with a minimum distance of 2.5 cm must be maintained when held-to-face,
and body-worn operations are restricted to the approved original accessories (Belt Clip and
headset), a minimum distance of O0 cm.
Cet EUT est conforme au SAR pour les limites d'exposition contrôlées dans IC RSS-102 à un cycle de fonctionnement allant jusqu'à 50 % et a été testé conformément aux méthodes et procédures de mesure spécifiées dans IEEE 1528 et CEI 62209. Cet équipement doit être installé et utilisé avec une distance minimale de 2,5 cm doivent être maintenus lorsqu'ils sont tenus face à face, et les opérations portées sur le corps sont limitées aux accessoires d'origine approuvés (Clip de ceinture et casque), une distance minimale de 0
INFORMATION TO THE DIGITAL DEVICE USER REQUIRED BY THE FCC This equipment has been tested and found to comply with the limits for a Class B digital device, pursuant to Part 15 of the FCC Rules. These limits are designed to provide reasonable protection against harmful interference in residential installations. This equipment generates, uses and can generate radio frequency energy and, if not installed and used in accordance with the instructions, may cause harmful interference to radio communications. However, there is no guarantee that the interference will not occur in a particular installation. If this equipment does cause harmful interference to radio or television reception, which can be determined by turning the equipment off and on, the user is encouraged to try to correct the interference by one or more of the following measures:
+ Increase the separation between the equipment and receiver.
+ Connect the equipment to an outlet on a circuit different from that to which the receiver
+ Consult with the dealer for technical assistance.
Your wireless portable two-way radio has been designed using a low power transmitter. When the PTT switch is pressed, the radio generates radio frequency (RF) electromagnetic energy (EME). This radio is designed to comply with the FCC Report and Order FCC 96-326 (August, 1996).
User Safety Information
PLEASE READ THIS IMPORTANT INFORMATION BEFORE USING YOUR ADVANCED WIRELESS COMMUNICATIONS PORTABLE TWO-WAY RADIO.
© Only qualified technicians are allowed to maintain this product.
© To avoid electromagnetic interference, turn off your radio in places where posted notices instruct you to do so. Hospitals or health care facilities may be using equipment that is sensitive to external RF energy. When traveling on aircraft, turn off your radio when the aïrline crew instructs you to do so.
© When in vehicles equipped with an air bag, do not place a portable radio in
the airbag deployment area.
© Turn off your radio prior to entering any area with a potentially explosive atmosphere. Do not remove, install, or charge batteries in such areas.
© To avoid possible interference with blasting operations, turn off your radio
when you are near electrical blasting caps.
© Do not expose the radio to direct sunlight for long periods of time. Do not
place the radio in direct contact with any heating source.
CONTENTS Thank You! … FCCD Declaration 2
Contents. Getting Acquainted … Product Inspection... Radio View LCD Display Symbols..
Safety and Care Instructions...
VOX Level / Voice Delay Time... Scan for a Channel / CTCSS / DCS...
Wireless Cloning.…..
GETTING ACQUAINTED PRODUCT INPSECTION Thank you for your purchase of Advanced Wireless Communications AWR4002DU Portable Two-way Radio. Before use, please inspect the product as follows. First check the shipping carton for any signs of damage. If any damage has occurred, please contact your dealer or Advanced Wireless Communications immediately. Confirm the supplied product against the packing slip to assure accuracy.
10. Power switch/ Volume Knob
SYMBOL FUNCTION WELLCOME Channel number/Channel alias/Channel frequency
RSSI High Power: the current channel is high power (H/M/L)
LED flashlight function enable
Bluetooth earpiece connected
The current channel is in scan list
The current channel is prior channel
SAFETY AND CARE INSTRUCTION SAFETY PRECAUTIONS Please observe the following safety precautions when setting up and using this product.
-+ LCD panel - The LCD panel is made of glass, and may break if the unit is dropped or impacted.
+ Heat sources - Keep the product away from heat sources such as radiators, stoves, heaters, and other heat-generating products.
+ Water and moisture - Do not use the product in or near water or in high moisture areas such as a bathroom. Indoor use only.
CARING FOR THIS PRODUCT To ensure you receive the maximum benefit from using this product, please observe the following guidelines.
*+ Cleaning - Use a damp cloth. Do not use liquid cleaning agents, benzene, thinner, or aerosols.
+ Repair - Do not attempt to repair the product or modify the circuitry by yourself. Only replacement parts that are recommended by Advanced Wireless Communications (AWC) should be used. You can contact AWC at 1-800-4755852.
+ Do not scratch hard objects against the LCD display as this may cause damage.
-+ To avoid risk of fire or injury, do not attempt to charge non-rechargeable batteries. Please turn off the unit while charging.
-+ Replace only batteries with the same or equivalent type recommended by the
- Please dispose of old, defective batteries in an environmentally friendly manner in accordance with the relevant laws and regulations.
+ Do not dispose this product as unsorted municipal waste. Collection of such waste separately for special treatment is necessary.
+ Do not expose equipment and accessories to open flames, such as lighted candles, etc.
- To reduce the risk of electric shock, do not expose equipment to rain or moisture.
GETTING STARTED INSTALLING THE SWIVEL BELT HOLSTER
1. Slide the bottom of the radio into the holster until it snaps into place. 2. To remove, push the tab on the holster and pull the radio away from the holster.
Note: In case of loss, please contact your point-of-sale or call 1-800-475- 5852 to request replacement part number ****%*,
INSTALLING THE BATTERY Your radio uses a rechargeable Lithium lon (Li lon) battery
1. Ifthe battery door is already in place, push down on the three bars on the door and slide it off the radio.
2. Insert the battery, printed arrows first, into the battery compartment and press down to secure firmly in place.
3. Slide and snap the battery door into place.
Charging the Battery
Use only the charger supplied with the radio, or other Series power accessories. For optimum battery life, do not charge the battery for prolonged periods after it is fully charged. Charging the battery over the weekend is acceptable.
Using the Drop-in Charger
1. Place the charger on a flat surface.
2. Insert the plug of the power cord into the jack on the charger.
3. Plug the cord into an AC outlet.
4. Turn the radio off. If the radio is on while charging, it will take longer to fully charge.
5. Insert the radio (with battery installed) into the front charging pocket.
Note: The radio will fit in the charger with the holster on.
The drop-in charger will also sequentially charge a spare SNN5571 Li lon battery.
The spare battery will not begin to charge until the radio battery is fully charged. Both batteries will charge in approximately 2-6 hours.
WARNING: There is a danger in which incorrectly placing the battery can cause an explosion. Always make sure the radio is switched off before installing or changing the battery. Replace only with the same or equivalent type. Use ONLY with Lithium 3.7V 830 mAH rechargeable batteries. Contact Advanced Wireless Communications at 1-
800-475-5852 or www.advancedwireless.com for more information.
Using the 56531 Multi-Unit Charger
The Multi-Unit Charger (MUC) allows drop-in charging of up to 6 radios or batteries.
Batteries can be charged inside the radios or removed and placed in the MUC Separately. Each of the 6 charging pockets can hold a radio or battery, but not both.
1. Place the charger on a flat surface.
2. Insert the power cord plug into the jack on the MUC.
3. Plug the cord into an AC outlet. 4. Turn the radio off. 5. Insert the radio or battery into the charging pocket.
Charging Status LEDs
On the drop-in charger, the radio and battery charging pockets have their own LEDs.
On the MUC, each of the 6 charging pockets has an LED. The LEDs are grouped into pairs to show which charging pockets are paired (for cloning, see page 32).
The LED is solid red when the battery is charging, and solid green when charging is complete.
IMPORTANT: Charge the battery for 12 hours on the first charge. After that, it should take 4 or less hours to charge.
- To completely disconnect from power, the adapter should be disconnected from the 6
- Batteries should not be exposed to excessive heat such as direct sunlight or fire.
- The 6 Unit Gang Charger and adapter should not be exposed to wet conditions. No objects filled with liquid, such as vases, should be placed on the main unit and adapter.
-+ To maintain the battery life of your two-way transceiver it is recommended that you only charge the battery when needed. Overcharging the battery will reduce performance.
- For best results ensure that the unit is turned off before charging.
+ Remove batteries before storing your radio for extended periods. Batteries corrode
over time and may cause permanent damage to your radio.
TURN THE UNIT ON/OFF Turn (OÙ ciockwise to turn the radio on, and counterclockwise to turn the radio
off. When you turn the radio on, the radio will chirps and the display briefly shows all features and display segments.
ADJUSTING THE VOLUME Turn 0 ciockwise to increase the volume, and counterclockwise to decrease the volume. Note: Do not hold the radio too close to your ear when adjusting the volume.
TALKING AND RECEIVING For best transmission speak about 2” away from the radio and leave a short pause
before speaking once you have pressed the PTT button.
To talk to another radio (transceiver):
1. Press and hold “S/M” to check if the channel is free. 2. Press and hold PTT button and speak into the microphone to transmit.
3. Release the PTT button once you have finished speaking to allow other radios to
respond. The radio transceiver will automatically hear received transmissions.
NOTE: You can only communicate with another radio (transceiver) that is on the same channel and using the same CTCSS/DCS code as your radio (transceiver).
Signal Strength and Channel Busy Indicators When there is activity on a frequency, the radio displays Yuil and the green
When there is activity on the same frequency and code as your radio (your radio is receiving), the radio displays Yailand a signal strength from 1 (weakest) to 4 (strongest). This can help determine when a radio is moving out of range.
Note: Obstacles that block the signal path may affect the strength of the incoming signal.
KEYPAD LOCK To avoid accidentally changing the channel and the unit's preferred settings, you can lock the keypad. To lock or unlock the keypad:
Press and hold F button for 2.0 seconds. a appears when the keypad is locked.
NOTE: While key lock is “on” you can still use the PTT button .
SELECT À CHANNEL The transmitter and receiver must be on the same channel using the same CTCSS code
or DCS code in order for you to communicate with another party.
To select between maximum 16 channels (the CTCSS code or DCS code is set by
1. Press (a) to increase channel number. To activate auto scan for available channels,
press and hold CAor more than 2.0 seconds.
2. Press M decrease channel number.
VOX LEVEL / VOICE DELAY TIME The Voice Activated Transmission (VOX) function allows your voice to activate transmission automatically when the transceiver is used with an optional hands-free microphone / headset. If the unit is set to VOX level 1, 2, …...9, it will automatically detect and transmit your voice through to the selected channel. The VOX level and transmission delay time should be adjusted according to your voice loudness and personal preference.
To set up a headset: 1. To switch the radio off. 2. Plug in the headset.
3. To switch the radio back on again.
NOTE: This product is only compatible with AWC headsets, please ask your local
Account Manager for further information. Pressing the PTT button disables VOX.
WIRELESS CLONING The AWR4002DU is capable of Wireless Cloning. For details on this function, contact Advanced Wireless Communications at 800-475-5852
TROUBLESHOOTING See below for some common problems and their remedies. DO NOT attempt any repairs
yourself. This will invalidate your warranty.
PROBLEM POSSIBLE CAUSES / REMEDIES Can't turn the radio on
+ Check that the battery is correctly installed and has been fully charged.
Can't communicate with other radios
+ For this and all other issues contact Advanced Wireless Communications at 1-800-475-5852 or visit www.advancedwireless.com for more
VOX function is not working
+ Check the headset is correctly plugged
in and is compatible with the radio
2015 Advanced wireless Communication. All rights reserved.