AN-420-AP-D - Point d'accès Wi-Fi Araknis - Free user manual and instructions
Find the device manual for free AN-420-AP-D Araknis in PDF.
Download the instructions for your Point d'accès Wi-Fi in PDF format for free! Find your manual AN-420-AP-D - Araknis and take your electronic device back in hand. On this page are published all the documents necessary for the use of your device. AN-420-AP-D by Araknis.
USER MANUAL AN-420-AP-D Araknis
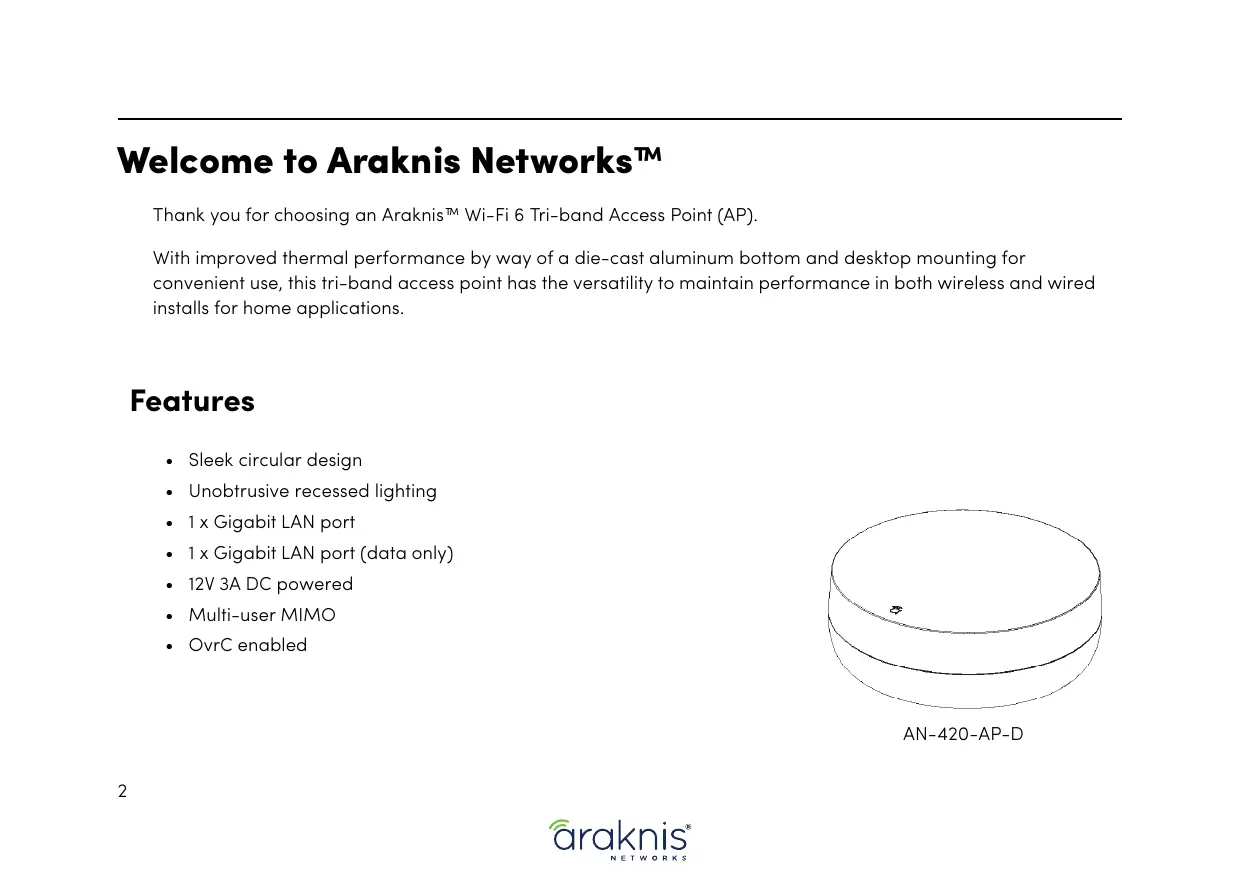
AN-420-AP-D Wi-Fi 6 Tri-band Access Point
NETWORKS Quick Start Guide
Welcome to Araknis Networks"
Thank you for choosing an Araknis® Wi-Fi 6 Tri-band Access Point (AP).
With improved thermal performance by way of a die-cast aluminum bottom and desktop mounting for convenient use, this tri-band access point has the versatility to maintain performance in both wireless and wired installs for home applications.
+ Sleek circular design
+ Unobtrusive recessed lighting
+ 1x Gigabit LAN port
+_1x Gigabit LAN port (data only) +_12V 3A DC powered
Note: You must use the 12V 3A DC power supply.
Place the AP on a desk, table, or shelf. Perform a thorough site survey to determine the best area to install the AP in the house.
Internet Router Switch AP DC power supply
LED No LED The AP is not powered on
Solid White The AP is in a startup process at the uboot stage
Blinking White | The AP is in a startup process at the kernel stage
Solid Blue The AP started correctly and is running in an operational state Blinking Blue | The AP is operating but is underpowered
The AP is not connected to the internet
The AP is performing a firmware update
The AP failed a firmware update and needs to be recovered
The AP is non-functional
The reset button AP's cable bay.
Hold the reset button for 1-9 seconds Blinking Green | Restarts the AP Hold the reset button for 10-19 seconds* Blinking Orange | Resets the username and password only Hold the reset button for more than 20 seconds | Blinking Red Resets the AP to factory defaults
* This action is only available when the Reset Password toggle is disabled in the web interface.
Step 5: Configuration
Araknis APs can be configured through OvrC or the local interface. The local interface is accessible using OvrC's WebConnect feature, typing the AP's DHCP address into your browser's address bar, or using the AP's default IP address.
Configuring the AP in OvrC OvrC provides Wi-Fi management, remote device management, real-time notifications, and intuitive customer management, using your computer or mobile device. Setup is plug-and-play, with no port forwarding or DDNS address required.
To add this device to your OvrC account:
1... Connect the AP to the internet
2. Log into OvrC (www.ovrc.com)
3. Scan the site using an OvrC Pro device, or add the AP manually by entering the MAC address and Service Tag.
Logging in to the Local Interface
Log into the AP using the default credentials:
You must update the password after initial login.
Saving and Applying Changes 1. Click the Save button after applying changes to a page. This holds the new settings in the Apply Changes
2. After all desired changes have been made, click the flashing Apply Changes button, at the bottom of the left menu, to review the new settings. Click Apply to make the changes or Revert to cancel the changes.
Other Access Methods: DHCP IP Address
The AP is configured to DHCP by default so that the DHCP server can assign an IP address when the AP is connected to the network (the DHCP server is usually the router). This address can be used for accessing the web interface.
Use one of these methods to find the IP address of the AP:
+ Check the device list in OvrC. + Check the client table on your router.
+ Use a network scanner (e.g. Fing) to scan the network. The Araknis AP manufacturer field displays SnapAV.
+ See the highlighted field in the Fing screenshot to the right for an example of an Araknis device being identified.
the AP is not given an IP address on the network, or needs to be accessed while not connected to a network, you can configure your computer's network connection to access the AP using the default IP address, 192.168.20.253.
Windows 10 screenshots shown for reference.
1... Connect your PC to the AP 2. Open the Control Panel and 3. Click Network and Sharing using an Ethernet cable. click Network and Internet. Center.
CSSS Lt—Q Computer AP Cr agen
Windows 10 screenshots shown for reference.
4. Click Change adapter 5.
Right-click the icon for the settings.
wired network connection, then left-click Properties.
Windows 10 screenshots shown for reference.
In the General tab, click Use the following IP address: and enter the IP address and subnet mask, then click OK.
IP Address 192.168.20.2
Open a browser and navigate to
https://192.168.20.253/.
Log in using the default credentials:
Subnet Mask | 255.255.255.0
Simtete near es Peferedons san rares
Set your computer's IPv4 Properties back to Obtain an IP address automatically, then click Ok.
This device complies with part 15 of the FCC Rules. Operation is subject to the following two conditions: (1) This device may not cause harmful interference, and (2) this device must accept any interference received, including interference that may cause undesired operation.
NOTE: This equipment has been tested and found to comply with the limits for a Class B digital device, pursuant to part 15 of the FCC Rules. These limits are designed to provide reasonable protection against harmful interference in a residential installation.
This equipment generates, uses and can radiate radio frequency energy and, if not installed and used in accordance with the instructions, may cause harmful interference to radio communications. However, there is no guarantee that interference will not occur in a particular installation.
If this equipment does cause harmful interference to radio or television reception, which can be determined by turning the equipment off and on, the user is encouraged to try to correct the interference by one or more of the following measures:
—Reorient or relocate the receiving antenna.
—Increase the separation between the equipment and receiver.
—Connect the equipment into an outlet on a circuit different from that to which the receiver is connected. —Consult the dealer or an experienced radio/TV technician for help.
Changes or modifications not expressly approved by the party responsible for compliance could void the user's authority to operate the equipment.
This device has been evaluated to meet general RF exposure requirement.
This equipment complies with FCC radiation exposure limits set forth for an uncontrolled environment. This equipment should be installed and operated with a minimum distance of 20 cm between the radiator and a human body.
This device contains licence-exempt transmitter(s) that comply with Innovation, Science and Economic Development Canada's licence-exempt RSS(s). Operation is subject to the following two conditions:
(1) this device may not cause interference, (2) this device must accept any interference, including interference that may cause undesired operation of the device.
L'émetteur exempt de licence contenu dans le présent appareil est conforme aux CNR d'innovation, Sciences et Développement économique Canada applicables aux appareils radio exempts de licence. L'exploitation est autorisée aux deux conditions suivantes :
This equipment complies with ISED radiation exposure limits set forth for an uncontrolled environment. This equipment should be installed and operated with a minimum distance of 20 cm between the radiator and a human body.
Cet équipement est conforme aux limites d'exposition aux rayonnements ISED établies pour un environnement non
contrôlé. Cet équipement doit être installé et utilisé avec une distance minimale de 20 cm entre le radiateur et un corps humain.
This devices are restricted to indoor operation only in the band 5150-5250MHz.
For chat and telephone, visit snpl.co/techsupport + Email: TechSupport@SnapOne.com. Visit snpl.co/te for discussions, instructional videos, news, and more.
Warranty and Legal Notices
Find details of the products Limited Warranty at snapone.com/legal/ or request a paper copy from Customer Service at 866.424.4489. Find other legal resources, such as regulatory notices and patent and safety information, at snapone.com/legal/
Copyright ©2022, Snap One, LLC. All rights reserved. Snap One its respective logos are registered trademarks or trademarks of Snap One, LLC (formerly known as Wirepath Home Systems, LLC), in the United States and/or other countries. 4Store, ASight, Control4, Control4 My Home, SnapAV, Araknis Networks, and OvrC are also registered trademarks or trademarks of Snap One, LLC. Other names and brands may be claimed as the property of their respective owners. Snap One makes no claim that the information contained herein covers all installation scenarios and contingencies, or product use risks Information within this specification subject to change without notice. All specifications subject to change without notice.