PowerView Gen 3 Gateway - Home Automation Hunter Douglas - Free user manual and instructions
Find the device manual for free PowerView Gen 3 Gateway Hunter Douglas in PDF.
Download the instructions for your Home Automation in PDF format for free! Find your manual PowerView Gen 3 Gateway - Hunter Douglas and take your electronic device back in hand. On this page are published all the documents necessary for the use of your device. PowerView Gen 3 Gateway by Hunter Douglas.
USER MANUAL PowerView Gen 3 Gateway Hunter Douglas
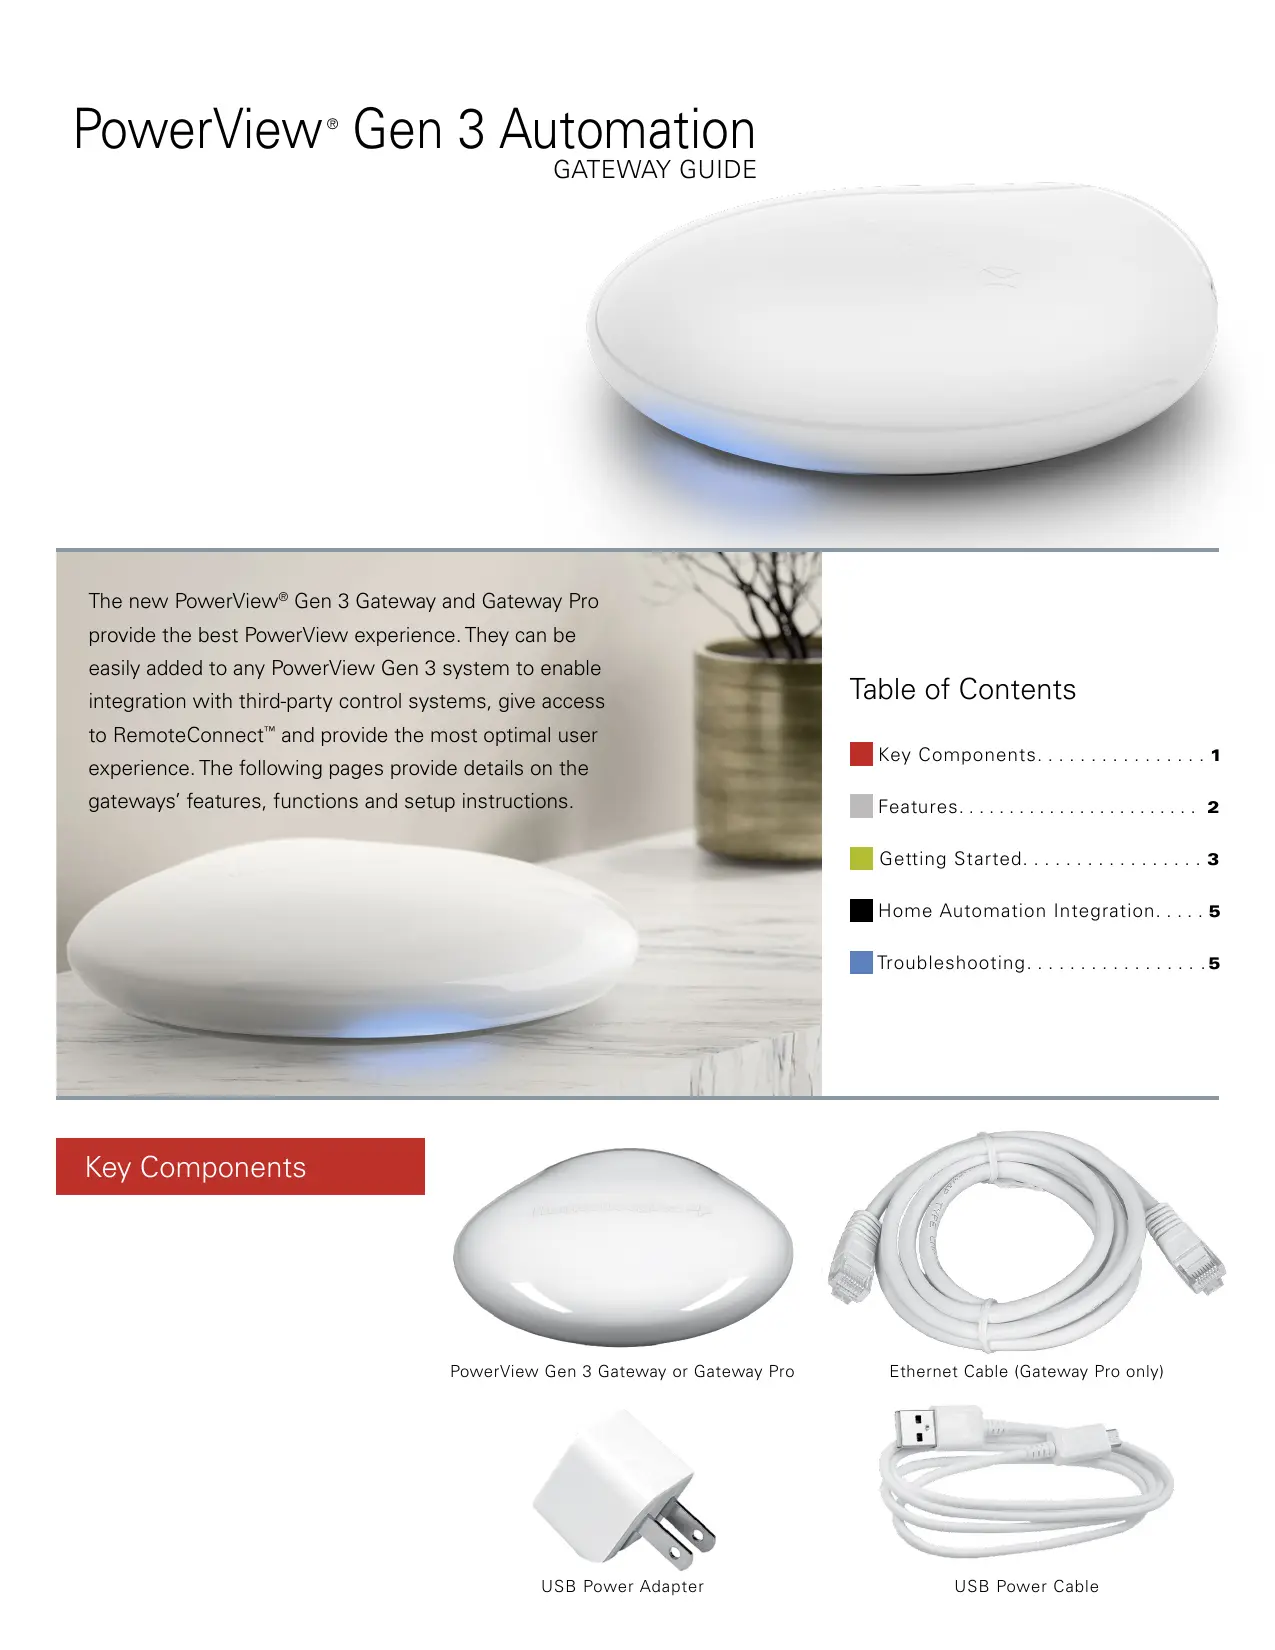
- PowerView: Gen 3 Automation GATEWAY GUIDE The new PowerView® Gen 3 Gateway and Gateway Pro provide the best PowerView experience. They can be easily added to any PowerView Gen 3 system to e integration with third-party control systems, give to RemoteConnect"” and provide the most optim experience. The following pages provide details gateways' features, functions and setup instri Table of Contents E Key Components p. 1
- E Features p. 2
- I Getting Started p. 3
- MhHome Automation Integration p. 5
- Mroubleshooting PowerView Gen 3 Gateway or Gateway Pro p. 5
USB Power Adapter Ethernet Cable (Gateway Pro only)
The new PowerView® Gen 3 Gateway and Gateway Pro provide the following features and benefits:
1. Home automation compatibility and
voice control of your shades*
2. RemoteConnect"— create, edit and
delete Scenes and Schedules, as well as control individual shades, from anywhere in the world
3. Reduced latency for large homes
4. Range extender for large homes
5. Shade synchronization (hembar
alignment) for more than 4 shades
6. Best whole home control when
shades are in multiple rooms
7. Ensures Schedules always stay
on time and in sync “Some features require additional hardware and/or third-party equipment. Visit hunterdouglas.com for detail.
POWERVIEW GEN 3 WITH À GATEWAY Phone or tablet sends command directly to shades Phone, tablet or third-party control system sends command to gateway; gateway then sends command to shades
OPTIONS The gateway is offered in two different models to fit a variety of needs. Both feature an aesthetic design that blends into any home décor.
Wi-Fi Power Over Br Number Enabled Ethernet Ethernet 8rd Party no of Shades {Both 2.4 Enabled (PoE) Integrations and 5 GHz) Enabled Gateway 15 X X Gateway Pro 30 X X X X
IMPORTANT: All gateways (regardiess of how many are in a project) are set up solely through the PowerView® App. To download the PowerView App from the Google Play or App Store, go to www.hdpvapp.com or scan this OR code: PowerView
PLACEMENT IN THE HOME
Place your gateway in a central location to all shades in the home. If you have more than one gateway, space them out in the home. This will help ensure your gateway connects to every shade.
CONNECT POWER TO GATEWAY
1. Connect one end of the USB power
cable to the USB power adapter.
2. Plug the USB power adapter into
an AC outlet or power strip.
3. Plug the other end of the USB
power cable into the power port on the back of the gateway. NOTE: During the boot-up process, the gateway's LED will display different behavior to visually communicate its status. Please refer to the LED Chart in the PowerView App. Navigate to “More” > "Accessories" = “Gateways” 2 "LED Chart” to view this chart. Do not interrupt the gateway boot-up process until the gateway is ready to be added to the PowerView Home.
CONNECT USING AN ETHERNET
CABLE (OPTIONAL, AVAILABLE
FOR GATEWAY PRO ONLY) Connect the Ethernet cable from the PowerView Gen 3 Gateway Pro to an open LAN port on your router. NOTE: The PowerView Gen 3 Gateway Pro offers Powerover-Ethernet (PoE). You must have a separate POE injector or PoE capable switch for your router. 3
Do you have a Gateway to add to your Home ? ADDING À GATEWAY (OR GATEWAYS)
TO YOUR POWERVIEW® HOME
NOTE: All gateways (regardiess of how many are in a project) must be set up through the PowerView® App. IMPORTANT. If you are an installer, you do NOT need the Homeowner's Home Wi-Fi network credentials to set up a gateway. After the homeowner accepts ownership of the PowerView Home in the PowerView App, the homeowner will be prompted to connect their gateway{s) to their Home Wi-Fi network to complete the gateway setup.
Finish Al Rooms in Range Sue! Al Rooms are within acceptable range the Gateway. Add Another Gateway Gateways can be set up in one of two ways:
1. During the initial Home setup
2. After the Home is created
by navigating to “More” = “Accessories” > “Gateways” The PowerView App will guide you through the entire process of configuring your gateways. Please follow each step carefully in the app to successfully set up all gateways
Confure Gateway Next Some Rooms Not in Range Some Rooms rent in moning he Gateway lose ta those Rooms and try again Gateway Room um shade capacity, and t af range another to be ae IMPORTANT: AI! Rooms must be in range of the gateway. If some Rooms are not in range, those shades will not connect successfully to the gateway. Reposition the gateway in the home and select “Try Again" |f, after attempting this multiple times, all Rooms still are not in range, we recommend adding another gateway to the PowerView Home. F4 shade si Pin Becroom © Æ snade 3 e SclectWiFiNetwork GC Next When se Finetork, we recommend a tvork if possible for optimal Gateway performance. NETGEAR-123 NETGEAR12345 Nathans House Nathans House guest Add Network
CONNECT YOUR GATEWAY TO
If Wi-Fi was not added during the initial home setup and the homeowner did not add the Wi-Fi network upon receiving ownership of the PowerView Home, follow the steps below to connect your gateway to your Wi-Fi network.
1. Navigate to "More" >
“Accessories” = “Gateways”
2. Select the desired gateway
3. Select “Info & Options”
4. Select “Set Up Wi-Fi”
NOTE: If your Wi-Fi network does not appear in the list of available networks, select the “Refresh" button in the top-right corner of the screen and try again. If it still does not appear, select ‘Add Network" to manually add your Wi-Fi network. Fi shade 4 e Ain Bedroom ©
1. Open the PowerView App and
navigate to “More” = “Accessories” = “Gateways”
2. Select the desired gateway
3. Select “Info & Options”
4. Select “Delete Gateway"
IMPORTANT: if you have more than one gateway in the home, you will need to reconfigure your gateway network. This Will ensure all shades that were assigned to the deleted gateway are assigned to an active gatewawy. To reconfigure the gateway network, navigate to “More” = “Accessories” “Gateways” æ “Gateway Network” = “Reconfigure Network."
Home Automation Integration PowerView® Automation integrates with a variety of leading third-party control systems and devices. To add a third-party control system or device, navigate to "More" “Integrations" For more instructions, please visit Attos://help.hunterdouglas.com/ To learn more about integration, please contact your local Hunter Douglas dealer or visit https://www.hunterdouglas.ca/ smart-automation Troubleshooting LED Color Meaning Solid White (eo) Gateway is starting up. Blink Green/Purple Gateway is ready to be set up but is not connected to the internet O0) © | Biink Green @ | Gateway is ready to be set up. Blink Green/Amber @© Gateway is registering shades and finishing home setup. Blink Blue/Purple Gateway is connected to the home but is not connected to the internet. Solid Blue Gateway is connected to the home. Blink Blue Gateway is connecting to shades for operation Flash Blue/Red Gateway is unable to connect to shades for operation. Solid Amber @ | The?" button has been pressed and held on the gateway. The gateway is awaiting a command in the app. Blink Amber © | Gatewayis updating ts fimware Blink Red/Amber Gateway factory reset is in progress.
1. What do the colors mean from
the gateway LED? + The gateway's LED displays different colors to visually communicate its status. To view the Gateway LED chart in the PowerView App, navigate to “More” æ "Accessories" > “Gateways" “LED Chart
2. What do the “P” and “R” buttons
CONNEXION À L'AIDE D'UN
CÂBLE ETHERNET (EN OPTION,
DISPONIBLE UNIQUEMENT POUR
LA PASSERELLE PRO) Connectez le câble Ethernet de la passerelle PowerView Gen 3 Pro à un port LAN ouvert de votre routeur. REMARQUE : La passerelle PowerView Gen 3 Pro offre la fonctionnalité d'alimentation électrique par câble Ethernet (« Power-over-Ethernet », PoE). Vous devez disposer d'un injecteur PoE séparé où d'un commutateur compatible PoE pour votre routeur.
Do you have a Gateway to add to your Home ? AJOUT D'UNE (OU PLUSIEURS)