
D-M39 SCPW - Hi-Fi System DENON - Free user manual and instructions
Find the device manual for free D-M39 SCPW DENON in PDF.
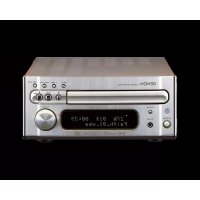
| Product type | Hi-Fi Micro System |
| Brand | DENON |
| Model | D-M39 SCPW |
| Color | Premium Silver / Cherry wood |
| Output power | 2 x 30 W (6 Ω, 1 kHz) |
| Dimensions (amplifier-tuner) | 210 x 115 x 308,5 mm |
| Weight (amplifier-tuner) | 4,3 kg |
| Dimensions (speaker) | 145 x 238 x 234 mm |
| Weight (speaker) | 3,5 kg |
| Power supply | 230 V, 50 Hz |
| Power consumption | 80 W max (0.3 W standby) |
| Playback formats | CD audio, CD-R/RW, MP3, WMA |
| Sources | CD, FM, USB (iPod/iPhone/iPad), optical digital input, RCA analog input |
| Speaker type | 2-way, 12 cm woofer, 25 mm tweeter |
| Frequency response (speaker) | 45 Hz - 40 kHz |
| Nominal impedance | 6 Ω |
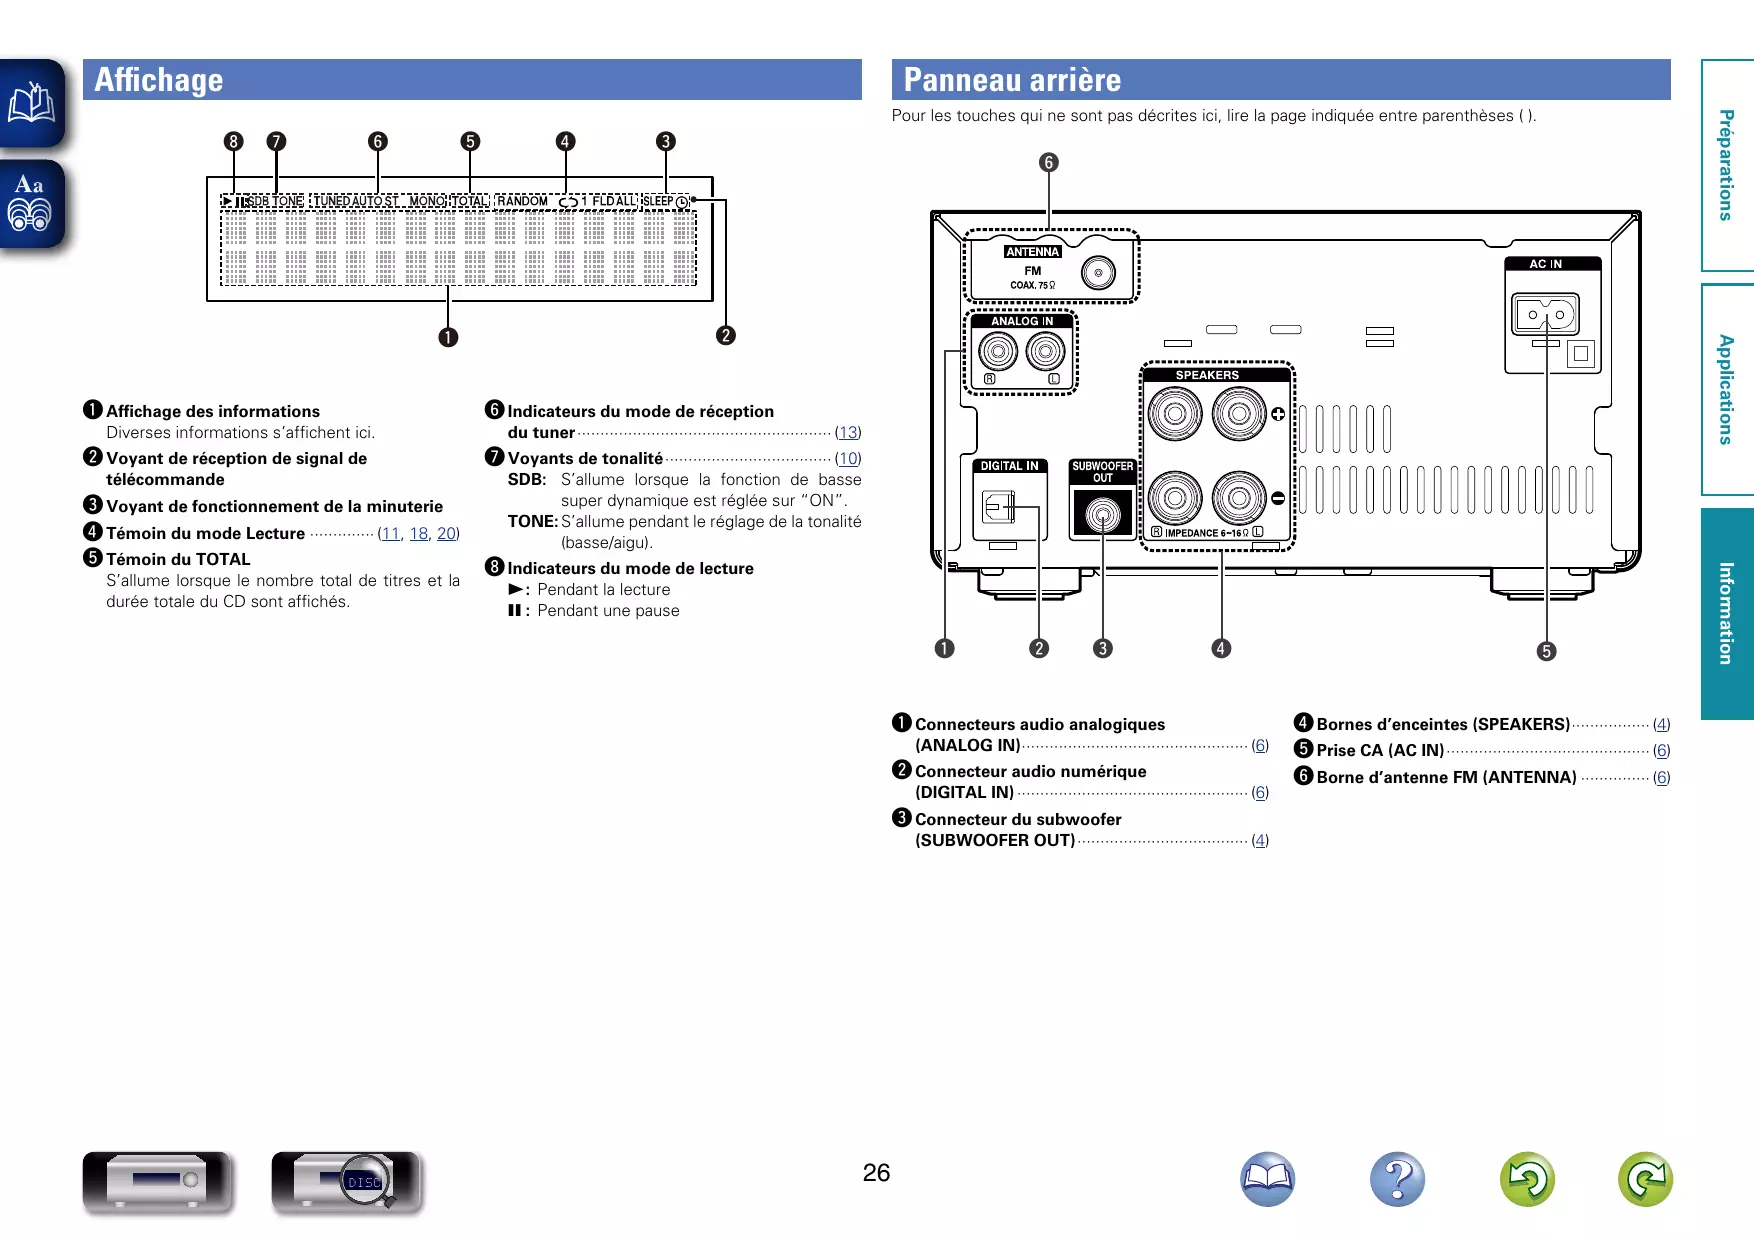
| Connections | 2 x RCA input, 1 x optical, 1 x subwoofer, 1 x headphones, 1 x USB, speaker terminals |
| Special features | Tone control, SDB, Source Direct, alarm timer, auto standby, iPod charging in standby |
| Supplied accessories | RC-1162 remote control, batteries, FM antenna, speaker cables, manual |
| Warranty | 2 years (according to applicable legislation) |
Frequently Asked Questions - D-M39 SCPW DENON
User questions about D-M39 SCPW DENON
0 question about this device. Answer the ones you know or ask your own.
Ask a new question about this device
Download the instructions for your Hi-Fi System in PDF format for free! Find your manual D-M39 SCPW - DENON and take your electronic device back in hand. On this page are published all the documents necessary for the use of your device. D-M39 SCPW by DENON.
USER MANUAL D-M39 SCPW DENON
consumption eco friendly


MP3

WMA
RDS
Radio TEXT

LA MICRO-CHAINE D-M39 AVEC AMPLI-TUNER/LECTEUR DE CD OFFRE UN SON DE HAUTE QUALITÉ DEPUIS UNE MULTITUDE DE SOURCES.

iPod nano 3rd generation (video) 4GB 8GB

iPod nano 4th generation (video) 8GB 16GB

iPod nano 5th generation (video camera) 8GB 16GB

iPod nano h generation 8GB 16GB
- iPod touch

iPod touch 1st generation 8GB 16GB 32GB

iPod touch 2nd generation 8GB 16GB 32GB

iPod touch 3rd generation 32GB 64GB

iPod touch 4th generation 8GB 32GB 64GB
iPhone

iPhone 4GB 8GB 16GB

iPhone 3G
8GB 16GB

iPhone 3GS 8GB 16GB 32GB

iPhone 4 8GB 16GB 32GB

iPhone 4S 16GB 32GB 64GB
VOLUME 00 - 49, VOLUME MAX

"Made for iPod" and "Made for iPhone" mean that an electronic accessory has been designed to connect specifically to iPod, or iPhone, respectively, and has been certified by the developer to meet Apple performance standards.
Apple is not responsible for the operation of this device or its compliance with safety and regulatory standards.
ONCE ALARM (XXXXXX) (XXXXXX)
ONCE ALARM EVERYDAY ALARM
DIGITAL IN ANALOG IN
AAC (Advanced Audio Coding)
Manuelle delie isuzio1000000000000000000000000000000000000000000000000000000000
Redignungsanleitung
Manual del usuario
Gebruiksaanwijzing
Bruksanvisning
Connect to amplifier's side: Plain core
Connectee au cote - de l' amplificateur : Ame itself Collegare al lao - dell' amplificateur: Anima liscia
一端子用分一元:紅毛印刷不
An die -"Seite des verskarten's anschlten. Limalbrige Adei Connecte al lado"- del amplificator: Nucleo simple
Aansluitopee"an deversterker Effen daad
Anslut til forstarkarens -sida: Kabel utan rand Pankopnyte K YCNUTENIO CO STOPOHN "Tnpank nycepeyuk
Thank you for purchasing this DENON product. To ensure proper
operation, please read this owner's manual carefully before using the product.
After reading them, be sure to keep them for future reference.
AC
①Oyster's Manual
1Owner's Manual 2Service station list
③Speaker cable.
④Foam plug
⑤ Anti-slip pads (8 pcs. / 1 sheet)
D.
Before using
Note on use
Cautions on installation
The quality of the sound produced from the speaker is affected by the size and type of the room, as well as by the method of installation. Consider the points listed below before installing the speaker.
- If the bass sound is overemphasized when the speakers are installed directly on the floor, set them on concrete blocks and
Note that placing the speaker on the same stand or shelf as a record player may result in howling.
- Also note that if there is a magnet or any device generating the same color of the TV, it will be the same color. The speakers can cause the colors on the TV to become blotty.
WARNING
-
Be sure to fasten the speaker cables to a wall, etc., to prevent people from tripping over them or otherwise pulling on them accidentally, causing the speakers to fall.
-
Be sure to check for safety after installing the speakers. Afterwards perform safety inspections at regular intervals to be
sure there is no danger that the speakers will fall. DENON will not
be liable for damages or accidents caused by inappropriate choice
of the place of installation or improper installation procedures.
Cleaming
-
Use a dry wiping cloth and wipe lightly to remove dirt from the cabinet and operation panel.
-
When using chemically treated cloths, follow the precautions provided for them.
-
Do not use benzene, thinners, or other organic solvents or insecticides on the speakers since they may cause a change in quality or color.
□Othercautions
-
Raising the amplifier's volume excessively and playing with distorted sound could damage the amplifier and speakers. Enjoy the sound at a reasonable volume level.
-
When moving the unit, note that applying strong force to the surface of the speaker through the saran net could damage the unit.
Removing the Speaker Net
The net on the front of the speakers can be removed.
To remove, grasp both sides of the net and pull forward.
speaker net with the holes in the four corners of the cabinet and press in.
Acutis Spence
A. Acoustic sponge
may emphasized. Insert sound foam plug in the bass-reflex duct at the back of the SC-M39. (202A)
You can adjust the bass sound with the amount of sound foam plug you insert.
NOTE
-
Do not insert the foam plug too deep. The foam plug could fall in and get stuck inside.
-
If the foam plug cannot be removed or falls inside, stop using the unit immediately and consult your store of purchase or your nearest repair and inquiry center.
How to Install
Attach four of the included anti-slip pads to the bottom of the unit. (30")
Connections
When connecting the speakers to an amplifier, he sure to read the
amplifier's owner's manual carefully and connect properly.
Connect the input terminals on the port serial of the amplifier with
-
Connect the input terminals on the rear panel of the speaker with the speaker output terminals on the amplifier, using the included cable.
-
Connect the speaker for the left channel to the "L" terminal on the device, and then use the "R" terminal on
the amplifier, the speaker of the right channel to the "R" terminal (in this case, making sure to check the polarities (^+ + and - - ) . ± 10^
Amplifiers have various speaker output terminals.
Check the owner's manual of the amplifier you are using for details.
NOTE
-
Be sure to turn the amplifier's power off before connecting the engine to the amplifier.
-
If the polarities are inverted, the phase may be off and the sound may have no bass component, making it seem unnatural. Be sure to connect the polarities properly.
1 Twist firmly the wires by hand so that they do
not stick out and cause short-circuits. (D)
2 Loosen the terminal by turning to the left and insert the peaker cable through the hole in the
insert the speaker cable through the hole in the speaker terminal.
3 Tighten the terminal by turning to the right
and check that the core wire is not protruding from the head.
from the hole.
Once connections are completed, pull gently on the speaker cables
to check
NOTE
- Do not let the core wires of two speaker cables touch each other. Doing so will short-circuit the amplifier circuitry and damage the amplifier.
一
Speci
Type: 2-way
Reflexive
Frequency range: 45 Hz ~ 40 kHz
linear impedance: 2.6 ohms
Input impedance: 61/ohm Max input: 60W/L
Sensitivity: 83 dB (1 W)
Crossover
Speakers: 12 cm (4-3/4") cone bass-mid x 1
Maximum external
dimensions:
Weight: 3.5 kg (7 lbs 11.5 oz)
For improvement purposes, specifications and design are subject to change with the time.
Noux you remercions d'voir acquis cet appeareil DENON. Afin illes ne socrn hien funestionment en ciller lires attentiement a
Precaution sull installation


Brand : DENON
Model : D-M39 SCPW
Category : Hi-Fi System