
MX400 - Hand blender INVENTUM - Free user manual and instructions
Find the device manual for free MX400 INVENTUM in PDF.
| Product type | Immersion blender |
| Brand | Inventum |
| Model | MX400 |
| Power supply | Alternating current on earthed plug |
| Power | Not specified (estimated 400 - 600 W) |
| Graduated beaker capacity | 400 ml |
| Main functions | Immersion blending, whisk, chopper mill, variable speed, Turbo function |
| Variable speed control | Yes, continuous adjustment |
| Turbo function | Yes, maximum speed by impulse |
| Included accessories | Immersion blender shaft, whisk, chopper mill with blade, graduated beaker with non-slip lid, wall bracket |
| Material of immersion blender shaft | Stainless steel (estimated) |
| Motor block | Removable, do not immerse |
| Care and cleaning | Dishwasher-safe accessories (shaft, whisk, beaker, lid, mill, blade); motor block wiped with damp cloth |
| Safety | Automatic stop when releasing button; do not immerse motor block; do not use continuously for more than 45 s (blender) or 30 s (mill) |
| Operating temperature | Do not immerse the shaft in hot liquid on the stove |
| Warranty | 24 months from date of purchase |
| Repairability | Original spare parts recommended; repair by professional |
| Weight | Not specified (estimated 1 - 1.5 kg) |
| Cable length | Not specified (estimated 1 m) |
Frequently Asked Questions - MX400 INVENTUM
User questions about MX400 INVENTUM
0 question about this device. Answer the ones you know or ask your own.
Ask a new question about this device
Download the instructions for your Hand blender in PDF format for free! Find your manual MX400 - INVENTUM and take your electronic device back in hand. On this page are published all the documents necessary for the use of your device. MX400 by INVENTUM.
USER MANUAL MX400 INVENTUM
Legislation requires that all electrical and electronic equipment must be collected for reuse and recycling. Electrical and electronic equipment marked with the symbol indicating separate collection of such equipment must be returned to a municipal waste collection point.
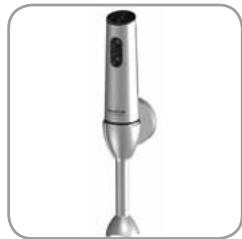
DESCRIPTION OF THE APPLIANCE
PAGE 4 + 16
- SAFETY INSTRUCTIONS
PAGE 16
- BEFORE FIRST USE
PAGE 17
OMSCHRIJVING VAN HET APPARAAT
DESCRIPTION OF THE APPLIANCE
- Knob for variable speed setting
- On-switch
- Turbo-switch
- Motor part
- Lid for chopper
- Knife
- Chopper bowl
8.Blender shaft - Anti-slip base / lid for measuring beaker
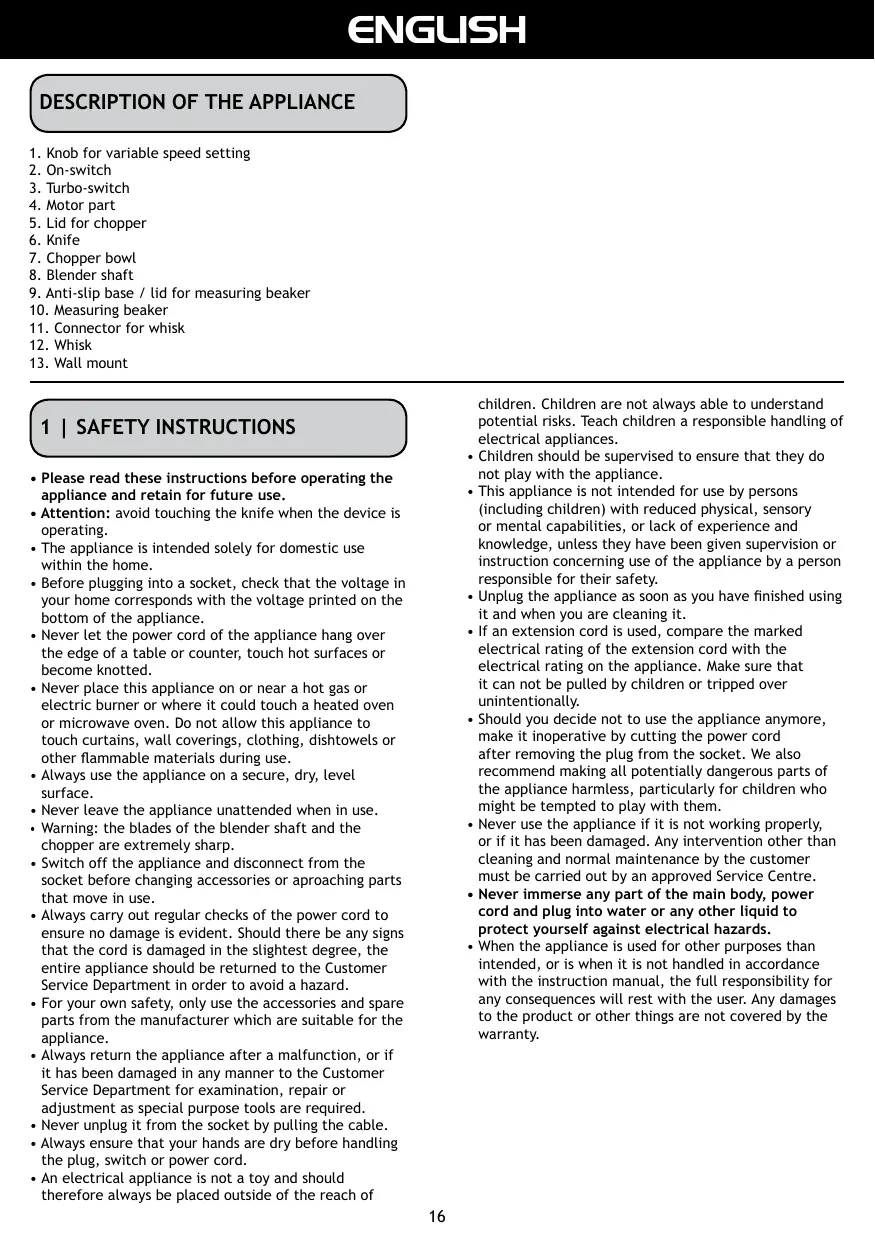
- Measuring beaker
- Connector for whisk
- Whisk
- Wall mount
1 | SAFETY INSTRUCTIONS
- Please read these instructions before operating the appliance and retain for future use.
- Attention: avoid touching the knife when the device is operating.
- The appliance is intended solely for domestic use within the home.
- Before plugging into a socket, check that the voltage in your home corresponds with the voltage printed on the bottom of the appliance.
- Never let the power cord of the appliance hang over the edge of a table or counter, touch hot surfaces or become knotted.
- Never place this appliance on or near a hot gas or electric burner or where it could touch a heated oven or microwave oven. Do not allow this appliance to touch curtains, wall coverings, clothing, dishtowels or other flammable materials during use.
Always use the appliance on a secure, dry, level surface. - Never leave the appliance unattended when in use.
- Warning: the blades of the blender shaft and the chopper are extremely sharp.
- Switch off the appliance and disconnect from the socket before changing accessories or approaching parts that move in use.
- Always carry out regular checks of the power cord to ensure no damage is evident. Should there be any signs that the cord is damaged in the slightest degree, the entire appliance should be returned to the Customer Service Department in order to avoid a hazard.
- For your own safety, only use the accessories and spare parts from the manufacturer which are suitable for the appliance.
- Always return the appliance after a malfunction, or if it has been damaged in any manner to the Customer Service Department for examination, repair or adjustment as special purpose tools are required.
- Never unplug it from the socket by pulling the cable.
Always ensure that your hands are dry before handling the plug, switch or power cord. - An electrical appliance is not a toy and should therefore always be placed outside of the reach of
children. Children are not always able to understand potential risks. Teach children a responsible handling of electrical appliances.
- Children should be supervised to ensure that they do not play with the appliance.
- This appliance is not intended for use by persons (including children) with reduced physical, sensory or mental capabilities, or lack of experience and knowledge, unless they have been given supervision or instruction concerning use of the appliance by a person responsible for their safety.
- Unplug the appliance as soon as you have finished using it and when you are cleaning it.
- If an extension cord is used, compare the marked electrical rating of the extension cord with the electrical rating on the appliance. Make sure that it can not be pulled by children or tripped over unintentionally.
- Should you decide not to use the appliance anymore, make it inoperative by cutting the power cord after removing the plug from the socket. We also recommend making all potentially dangerous parts of the appliance harmless, particularly for children who might be tempted to play with them.
- Never use the appliance if it is not working properly, or if it has been damaged. Any intervention other than cleaning and normal maintenance by the customer must be carried out by an approved Service Centre.
- Never immerse any part of the main body, power cord and plug into water or any other liquid to protect yourself against electrical hazards.
- When the appliance is used for other purposes than intended, or is when it is not handled in accordance with the instruction manual, the full responsibility for any consequences will rest with the user. Any damages to the product or other things are not covered by the warranty.
2 BEFORE FIRST USE
Before you use the appliance for the first time, please do as follows: Carefully unpack the appliance and all the accessories and remove all the packaging material. Warning: the blades of the blender shaft and the chopper are extremely sharp. Keep the material (plastic bags and cardboard) out of reach of children. Check the appliance after unpacking for any damage, possible from transportation. Rinse all the accessories with warm soapy water and dry them thoroughly.
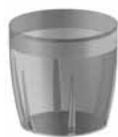
- blender shaft 8
whisk 12 - measuring beaker with anti-slip base/ lid 9+10
- chopper bowl 7
- lid for chopper 5
knife 6
Wipe the motor part and the connector with a damp cloth. Always roll out the cord completely. Make sure that all the parts are dry before you use the appliance.
Warning: the blades of the blender shaft are
extremely sharp. Take the motor part 4 and the blender shaft 8. Attach the blender shaft to the motor part by turning the blender shaft clockwise.
Check that the knob for the variable speed 1 is on the lowest setting - o .
Place the ingredients in the measuring beaker 10. Make sure the measuring beaker is not too full.
Plug in the appliance. The orange lighting around the edge of the buttons light up.
Press the turbo-switch 3 for the maximum speed or press the on-switch 2 to use the speed setting you have set on top of the motor part with the knob (variable speed setting).

As soon as you release the switch (on or turbo), the stick mixer will stop.
max
medium
low
When you have finished mixing or blending and released the button wait until the knives have stopped turning, before you approach the blender shaft.
The turbo-switch can also be used for instant power pulses without having to set the speed.
Attention: Do not activate the stick mixer constantly, this can cause engine problems. Do not use the stick mixer for more than 45 seconds continuously, wait until the engine is completely cooled down before you operate it again. Blend larger quantities in multiples sessions.
Always unplug the appliance from the supply if it is left unattended and before assembling, disassembling and during cleaning. The orange lighting will extinguish. To remove the blender shaft after use, turn it anti clockwise from the motor part.
You can operate the stick mixer in the measuring beaker and also in another bowl. When blending directly in a saucepan while cooking, take the pan from the stove first to protect the appliance from overheating.
The anti-slip base 9 is also an airtight lid.
4 | USING THE WHISK
Use the whisk for example for making whipped cream or beating egg whites.
Take the motor part 4, the connector 11 and the whisk 12. Attach the connector to the whisk. Attach the complete whisk to the motor part by turning the connector clockwise.
Check that the knob for the variable speed 1 is on the
lowest setting - o. You will reach the best result.
Place the ingredients in the measuring beaker 10. Make sure the measuring beaker is not too full (max. 400ml ). Plug in the appliance. Place the whisk in the measuring beaker and press the on-switch 2 to use the speed setting you have set on top of the motor part with the knob (variable speed setting).
As soon as you release the on-switch, the whisk will stop. Always unplug the appliance from the supply if it is left unattended and before assembling, disassembling and during cleaning. To remove the whisk after use, turn it anti clockwise from the motor part.

5 | USING THE CHOPPER
Warning: the blades of the chopper are extremely sharp. Be careful while assembling, emptying the
chopper bowl and cleaning.
The chopper is suited for chopping meat, cheese, onions, herbs, garlic, carrots, nuts, etc. Attention: do not chop any hard ingredients such as ice cubes.
Place the chopper bowl 7 on a flat surface. Place the knife 6 on the axle in the centre of the bowl. Pay attention - the knives are extremely sharp.
Place the ingredients in the bowl and place the lid 5. Take the motor part 4 and attach it by turning it clockwise on to the lid of the chopper.

7
6

5
Press the turbo-switch 3 for maximum speed or press the on-switch 2 to use the speed setting you have set on top of the motor part with the knob 1 (variable speed setting).
During processing, hold the motor part with one hand and the chopper bowl with the other hand.
Attention: Do not activate the chopper constantly, this can cause engine problems. Do not use the chopper for more then 30 seconds continuously, wait 2 minutes before you operate it again.
As soon as you release the switch (on or turbo), the chopper will stop. Wait until the knife stops turning before you take the lid of.
The turbo-switch can also be used for instant power pulses without having to set the speed.
Always unplug the appliance from the supply if it is left unattended and before assembling, disassembling and during cleaning.
To remove the motor part after use, turn it anticlockwise from the lid.
6 | CLEANING & MAINTENANCE
Always unplug the appliance from the supply if it is left unattended and before assembling, disassembling and during cleaning. Disassemble the motor part from the accessory according to the instructions in the pictures.
- Wipe the motor part and the connector with a damp cloth.
- Rinse the lid of the chopper with water.
- Do not use any abrasive or strong detergents. These can damage the housing.
-
Never place the motor part, the power cable or the plug in water or any other liquid.
-
The accessories are dishwasher proof:
-
measuring beaker with anti-slip base/lid 9+10
- blender shaft 8
whisk 12 - chopper bowl 7
knife 6
Be careful when cleaning the accessories by hand. The knives of the blender shaft and the chopper are extremely sharp.
7 | MOUNTING
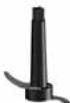
This stick mixer is supplied with a wall mount.
Attach the bracket (I) with the enclosed screws to the wall and slide the wall mount (II) over it.
Now the wall mount is ready to hold the stick mixer.
GARANTIE & SERVICE
- This product is guaranteed for a period of 2 years from the date of purchase against mechanical and electrical defect.
- Guarantee can only be given if proof of purchase (e.g. till receipt) can be shown. Therefore keep it in a safe place. The guarantee period starts at date of purchase.
-
Guarantee is not valid in case of:
-
normal wear;
- damage through misuse use or when the instructions were not followed correctly;
- lack of maintenance;
- not following the operation- and safety instructions;
- incompetent montage or repairs made by yourself or others;
- using accessories and spare parts which are not suitable for the appliance; for assessment by our technical department.
The guarantee is not valid for:
- normal wear;
- external cables;
- (interchangeable) signal- and controllamps for assessment by our technical department.
Return the appliance, including proof of purchase and description of the complaint, stamped to:
Inventum Holland BV
Generatorstraße 17
3903 LH VEENENDAAL
The Netherlands
Website: www.inventum.eu
IES Import Electronic Service GmbH
Lembekstrasse 36
22529 Hamburg
GERMANY
- Pack it carefully (preferably in the original carton).
Ensure unit is clean. - Enclose your name and address and quote model number on all correspondence.
When the guarantee is no longer valid or when the period of guarantee has passed, we will charge any costs that flow out of an assessment and/or repairing.
On request we will supply a statement before repairing. Without requesting a statement, we assume that you, by sending the appliance, automatically order to repair the appliance.
A guarantee period of two months is valid for repairs done by our technical department and the used spare parts, counting from the repairdate. When a malfunction occurs within this period which directly flows out of the repairs and the used spare parts, the consumer has the right of repairs without any costs.
Inventum Holland BV

- DESCRIPTION OF THE APPLIANCE
- OMSCHRIJVING VAN HET APPARAAT
- | SAFETY INSTRUCTIONS
- BEFORE FIRST USE
- Warning: the blades of the blender shaft are
- | USING THE WHISK
- | USING THE CHOPPER
- Warning: the blades of the chopper are extremely sharp. Be careful while assembling, emptying the
- chopper bowl and cleaning.
- | CLEANING & MAINTENANCE
- | MOUNTING
- GARANTIE & SERVICE
Brand : INVENTUM
Model : MX400
Category : Hand blender