
AS60GDWV0 - Air-conditioner LG - Free user manual and instructions
Find the device manual for free AS60GDWV0 LG in PDF.
Download the instructions for your Air-conditioner in PDF format for free! Find your manual AS60GDWV0 - LG and take your electronic device back in hand. On this page are published all the documents necessary for the use of your device. AS60GDWV0 by LG.
USER MANUAL AS60GDWV0 LG
- ENGLISH DEUTSCH ESPAÑOL OWNER'S MANUAL ITALIANO AIR PURIFIER FRANÇAIS POLSKI SVENSKA Read this owner’s manual thoroughly before operating the appliance and keep it handy for reference at all times. Model Name: AS60GD Series MFL69726815 Rev.00_081617 www.lg.com Copyright © 2017 LG Electronics. All Rights Reserved. D+_Air_Cleaner_18PY_UG_EU_ENG_DE_ES_IT_FR_POL_SV_170726.indb 1 2017-08-16 2:34:22 D+_Air_Cleaner_18PY_UG_EU_ENG_DE_ES_IT_FR_POL_SV_170726.indb 2 2017-08-16 2:34:22 This manual is produced for a group of products and may contain images or content different from the model you purchased. ENGLISH Table of Contents This manual is subject to revision by the manufacturer. Safety Instructions p. 4
- Smart Functions p. 31
- Disposal of waste batteries/accumulators 10 Disposal of your old appliance p. 10
- Using the Smart ThinQ Application p. 31
- Diagnosis Using Sound p. 32
- Unpacking p. 11
- Maintenance p. 34
- Parts p. 11
- Removing Packing Materials p. 12
- Remote Control Setup p. 14
- Installation p. 15
- Cleaning the Exterior p. 35
- Cleaning the Filter p. 36
- Replacing the Filter p. 36
- Cleaning the Dust Sensor p. 37
- Storage p. 37
- Transporting or Moving the Product p. 15
- Installing the Product p. 15
- Before Calling for Service p. 39
- Operation p. 16
- Product Specifications p. 43
- Product Overview p. 16
- Getting Started p. 22
- Using Smart Mode p. 22
- Using Booster Mode p. 23
- Using Normal Mode p. 23
- Adjusting the Purifier Fan Speed p. 24
- Adjusting the Clean Booster Fan Speed 24 Rotating the Clean Booster p. 25
- Checking the Air Quality p. 26
- Using the Air Ionizer p. 29
- Setting the Sleep Timer p. 29
- Locking the Control Panel Buttons D+_Air_Cleaner_18PY_UG_EU_ENG_DE_ES_IT_FR_POL_SV_170726.indb 3 2017-08-16 2:34:22 Safety Instructions p. 30
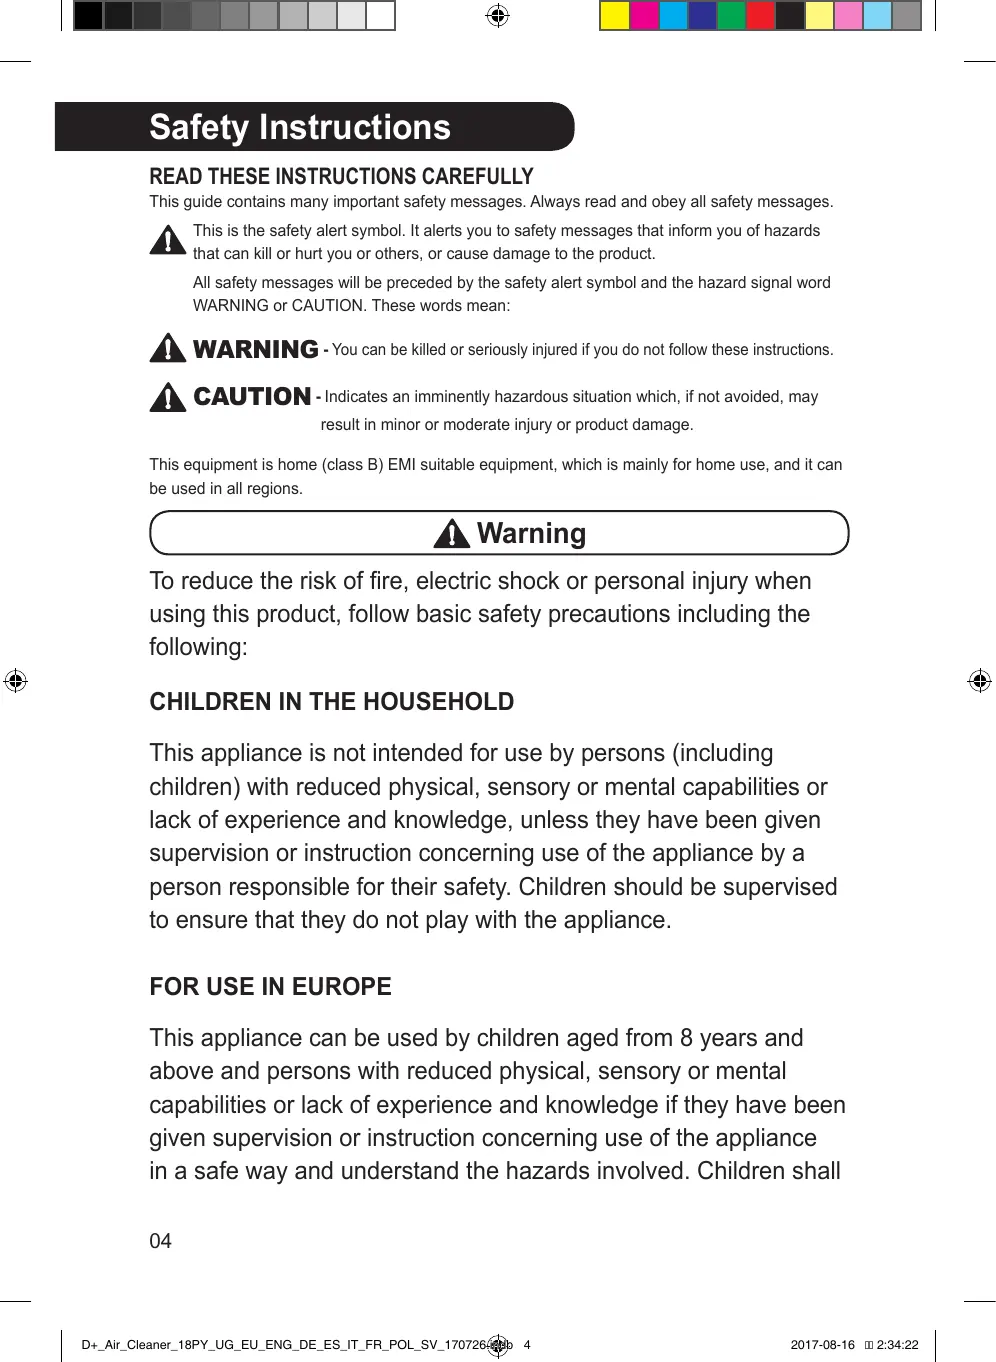
READ THESE INSTRUCTIONS CAREFULLY
This guide contains many important safety messages. Always read and obey all safety messages. This is the safety alert symbol. It alerts you to safety messages that inform you of hazards that can kill or hurt you or others, or cause damage to the product. All safety messages will be preceded by the safety alert symbol and the hazard signal word WARNING or CAUTION. These words mean: WARNING - You can be killed or seriously injured if you do not follow these instructions. CAUTION - Indicates an imminently hazardous situation which, if not avoided, may result in minor or moderate injury or product damage. This equipment is home (class B) EMI suitable equipment, which is mainly for home use, and it can be used in all regions. Warning To reduce the risk of fire, electric shock or personal injury when using this product, follow basic safety precautions including the following:
CHILDREN IN THE HOUSEHOLD
This appliance is not intended for use by persons (including children) with reduced physical, sensory or mental capabilities or lack of experience and knowledge, unless they have been given supervision or instruction concerning use of the appliance by a person responsible for their safety. Children should be supervised to ensure that they do not play with the appliance.
This appliance can be used by children aged from 8 years and above and persons with reduced physical, sensory or mental capabilities or lack of experience and knowledge if they have been given supervision or instruction concerning use of the appliance in a safe way and understand the hazards involved. Children shall
D+_Air_Cleaner_18PY_UG_EU_ENG_DE_ES_IT_FR_POL_SV_170726.indb 4 2017-08-16 2:34:22 ENGLISH not play with the appliance. Cleaning and user maintenance shall not be made by children without supervision. INSTALLATION
- •Install the product near an easily accessible electrical outlet.
- •Do not install the product on an uneven or inclined surface.
- •Do not install the product in a damp area and keep away from splashing rain or water.
- •Do not install the product in an area exposed to direct sunlight or near heat-generating equipment.
- •Do not install the product in a place where combustible gas may leak or industrial oil or metallic particulates are present. POWER
- •This product is for AC 220–240 V. Always check the supply voltage before using it.
- •Be careful not to let the power plug pressed by the back of the product.
- •Remove the power plug when you clean the product or replace the filter.
- •Do not touch the power plug with wet hands.
- •Insert the plug into the outlet tightly after removing the moisture and dust on it completely.
- •When unplugging the power cord, always pull it by the plug.
- •Unplug the product during thunder or lightning or when not in use for a long time.
- •Do not bend the power cable excessively or place a heavy object on top of it.
- •Do not extend the length of the power cable or alter it.
- •Do not use several devices on a multi-socket extension outlet.
- •The appliance shall be disconnected from its power source during service and when replacing parts.
- •Take care to ensure that power cable could not be pulled out or damaged during operation. There is risk of fire or electric shock.
- •If the supply cord is damaged, it must be replaced by the manufacturer, its service agent or similarly qualified person in order to avoid a hazard. USE
- •If the product is immersed in water, stop using it and contact the LG Electronics service center.
- •If there is a gas leakage (isobutane, propane, LNG, etc.), do not touch the product or power plug and ventilate the area immediately.
- •Do not clean the product with brushes, cloths or sponges with rough surfaces or which are made of metallic material.
- •If you detect any abnormal noise, odor or smoke, unplug the product immediately and contact an LG Electronics service center.
- •Only an authorized repair person from LG Electronics service center should disassemble, repair, or modify the product.
- •Do not use or store fire, combustibles (ether, benzene, alcohol, drugs, propane, butane, combustible spray, insecticide, air freshener, cosmetics etc.) or flammable materials (candles, lamps etc.) near the product.
- •Do not place the power cord under rugs, carpeting or mats.
- •Do not allow animals or pets to chew on the power cord.
- •Do not allow children to climb on or play with the product.
- •Do not move the product when it is in operation.
- •Do not place coffee, flower vase or drinks on top of the product.
- •Do not insert hands or metal objects into the air inlet or outlet.
- •Do not impact the product.
- •Be careful not to allow any part of your body to be pinched when you detach and re-attach parts of the product.
- •Unplug the product when not in use for a long time.
- •Do not install and use broken parts.
- •Do not clean the product when it is plugged in.
- •Do not put flammables into the product.
- •Do not operate the product while its cover is open.
- •Do not swallow the battery. It may cause injury, including damage to the internal organs or death. DISPOSAL
- •Dispose of the packing materials (vinyl, styrofoam etc.) to keep them out of reach of children.
D+_Air_Cleaner_18PY_UG_EU_ENG_DE_ES_IT_FR_POL_SV_170726.indb 7 2017-08-16 2:34:23 Caution To reduce the risk of fire, electric shock, or personal injury when using the product, follow basic safety precautions, including the following: INSTALLATION
- •Do not tilt the product to pull or push it while transporting.
- •Do not install the product in transportation equipment (vehicle/ vessel etc.).
- •Do not place the product near a TV or a stereo equipment.
- •Do not place the product under bright light.
- •The appliance shall be installed in accordance with national wiring regulations.
- •When moving or storing the product, wrap the power cord around the base of the product to prevent personal injury, damage to the cord or damage to floors. USAGE
- •Do not use the product for removal of toxic gas such as carbon monoxide.
- •Do not use the product for ventilation purposes.
- •Do not use the product for a long time in a region with unstable voltage.
- •Do not place obstacles around the air inlet or outlet.
- •For safe use of the product, children or others with reduced mental capabilities need to be closely monitored by a person who is responsible for their safety.
- •Do not place the product near curtains.
D+_Air_Cleaner_18PY_UG_EU_ENG_DE_ES_IT_FR_POL_SV_170726.indb 8 2017-08-16 2:34:23 ENGLISH
- •Do not use the product for special purposes such as preserving plants, precision instrument, artworks etc.
- •Do not climb or place objects on top of the product.
- •Do not operate the product with wet hands.
- •Do not let the moisture from the humidifier directly touch the product.
- •Do not use the product while it is not in upright position.
- •Do not use the product near objects vulnerable to heat.
- •Use the filter only for its intended purpose.
- •Do not use detergents, cosmetics, chemicals, air fresheners, or disinfectants in the product.
- •Do not place magnetic or metal objects on top of the product.
- •Do not clean with strong detergents of solvent types, but use soft cloth.
- •Do not operate the Booster arbitrarily.
- •Do not insert any objects into the Booster.
- •Do not operate the product while the Booster cover and grill are separated.
- •Do not insert hands or metal objects into the Booster.
- •Do not modify the battery arbitrarily. It may cause a fire or electric shock.
- •Misplaced battery may cause an explosion.
- •Do not recharge or take apart the battery. It may result in explosion.
- •Do not throw the battery in the fire for disposal or leave it near the heat. It may result in explosion.
D+_Air_Cleaner_18PY_UG_EU_ENG_DE_ES_IT_FR_POL_SV_170726.indb 9 2017-08-16 2:34:23 Disposal of waste batteries/accumulators
- This symbol may be combined with chemical symbols for mercury (Hg), cadmium (Cd) or lead (Pb) if the battery contains more than 0.0005% of mercury, 0.002% of cadmium or 0.004% of lead.
- All batteries/accumulators should be disposed separately from the municipal waste stream via designated collection facilities appointed by the government or the local authorities.
- The correct disposal of your old batteries/accumulators will help to prevent potential negative consequences for the environment, animal and human health. The correct disposal of Your old batteries/ accumulators will help to prevent potential negative consequences for the environment, animal and human health.
- For more detailed information about disposal of your old batteries/ accumulators, please contact your city office, waste disposal service or the shop where you purchased the product. (http://www.lg.com/ global/sustainability/environment/take-back-recycling/global-networkeurope) Disposal of your old appliance
- This crossed-out wheeled bin symbol indicates that waste electrical and electronic products (WEEE) should be disposed of separately from the municipal waste stream.
- Old electrical products can contain hazardous substances so correct disposal of your old appliance will help prevent potential negative consequences for the environment and human health. Your old appliance may contain reusable parts that could be used to repair other products, and other valuable materials that can be recycled to conserve limited resources.
- You can take your appliance either to the shop where you purchased the product, or contact your local government waste office for details of your nearest authorised WEEE collection point. For the most up to date information for your country please see www.lg.com/global/recycling
- • The appearance or components of the product may differ depending on the model.
- • The shape of the power plug differs depending on the country.
Unpack the product and remove any packing tape or protective vinyl before using the product.
Support Pull out the product from the packaging and remove the fixing tape attached on the product. Grab the top end of the back cover and gently pull it.
- • You will see "PM 1.0 & GAS SENSOR SYSTEM" on the back cover of the product.
Remove the support located at the filter inlet. Remove the cover from the product.
Remove the filter and its protective vinyl.
Install the filter in the product.
- • Make sure that the handle faces upward. Handle
Insert the fixing parts at the bottom of the cover into the holes at the bottom of the product before you close the cover. Caution
- • Failure to remove the support may affect the performance of the product. Please be sure to remove it before use.
- • Make sure that you remove the filter's protective vinyl prior to use otherwise it may result in product malfunction.
- • Pay attention to the direction of the filter when you install the filter otherwise it may cause malfunction or failure of the product.
With the backside of the remote controller facing up, remove the battery tray from the remote control. Insert the battery provided with the product to the tray.
- • The (+) electrode of the battery must face upward. Warning
- • A button/coin-shaped battery is used in the remote control of the product.
- • Do not swallow the battery. It may cause injury, including damage to the internal organs or death.
- • If you accidentally swallowed the battery, go to the doctor immediately for emergency treatment. If you fail to receive first aid within 2 hours after you swallowed it, you may experience damage to your internal organs or death in severe cases.
- • Keep the battery out of reach of children.
- • If the battery tray is not secured firmly, stop using the product instantly and keep it away from children. Caution
- • Do not modify the battery arbitrarily. It may cause a fire or electric shock.
- • Misplaced battery may cause an explosion.
Insert the battery tray to the remote control. Back
- • Do not recharge or take apart the battery. It may result in explosion.
- • Do not throw the battery in the fire for disposal or leave it near the heat. It may result in explosion. Note
- • If the battery runs out of charge, replace it with a new one (CR2025).
- • If the remote control does not work as expected, try to replace the battery or check the polarity (+, -) of the battery. If the problem continues, contact the Service Center.
- • Dispose of the used battery according to the environmental regulations.
D+_Air_Cleaner_18PY_UG_EU_ENG_DE_ES_IT_FR_POL_SV_170726.indb 14 2017-08-16 2:34:27 Transporting or Moving the Product Caution Transport the product in a well-secured and upright position. Impacts may cause product damage. Hold the bottom of the product with both hands to move the product safely.
- • Dropping the product may cause personal injury or product malfunction. Installing the Product Caution Install the product on a strong level surface. Installing the product on a weak or tilted surface may cause noise and vibration or tipping, resulting in injury. Allow a 1 m clearance between the product and surrounding surfaces or objects. The air inlet needs space to function properly.
- • Do not hold the outer cover when you carry the product. The cover may open accidentally, causing the product to drop. When moving or storing the product, wrap the power cord around the base of the product to prevent personal injury, damage to the cord or damage to floors. ENGLISH Installation
Install the product where you can easily remove the power plug. Otherwise, electric shock or fire may be caused. The performance of the product may differ depending on the operating environment (such as temperature and humidity).
- • 40–70 % of humidity is recommended for optimal performance.
- • It discharges purified air through the filter. Use it to check the settings of the product and the air quality.
- • You can control the direction of the air so that it reaches every corner of the room. Control Panel Light Lamp It displays the overall air quality using a colored light. Air Inlet (Front and Rear Covers)
- • Air goes into the purifier through the inlet. You may remove the front or rear cover separately. Use it to set the product functions. Receiver for Remote Control Signal Air Ionizer
- • It generates negative ions and removes harmful bacteria in the air.
- • It is built in the lower part of the air purifier.
- • The appearance or components of the product may differ depending on the model.
D+_Air_Cleaner_18PY_UG_EU_ENG_DE_ES_IT_FR_POL_SV_170726.indb 16 2017-08-16 2:34:28 ENGLISH Back View Smart Diagnosis Part Smell (Gas) Sensor In the event of a malfunction or failure, It detects a smell (gas). you can use the Smart Diagnosis option to check the product condition. Filter (See Smart Functions.) It removes allergic materials, yellow dust/ultra-fine dust, possible sources of sick house syndrome, smog and other odor. PM 1.0 (super ultra-fine dust) sensor It detects the concentration of dust.
D+_Air_Cleaner_18PY_UG_EU_ENG_DE_ES_IT_FR_POL_SV_170726.indb 17 2017-08-16 2:34:29 Filter System Total Harmful Gas Care Filter It removes harmful smells (gas) that are generated in everyday life such as bathroom smell, cigarette smoke (smell) and food smell. Total Allergen Collection Care Filter It removes super ultra-fine dust, yellow dust and cigarette smoke particles from the air. Ultra-fine Filter It is attached on the exterior of the Total Allergen Collection Care Filter, primarily removing large particles floating in the air, including pet hair. Filter Handle Use it to separate the filter from the product. Caution
- • The Total Harmful Gas Care Filter and Total Allergen Collection Care Filter are assembled together. Do not try to detach them from each other.
- • Do not throw the filter or use it for other purposes. Note
- • Keep the windows or doors closed while using the product. However, if you operate the product for a long time in a closed space, carbon dioxide concentration may rise. So be sure to ventilate the indoor air regularly.
- • Carbon monoxide (CO) is a harmful gas that is mainly introduced from outside and cannot be removed with a filter.
- • The deodorization function of the air purifier operates by trapping the smell (gas) in the filter. If you use the product for a long time in a room with excessive smell, the performance of the filter may drop significantly. The Total Harmful Gas Care Filter may sometimes become the source of excessive smell if used for a long time in a room with excessive smell.
- • If excessive smell is present in the room, first ventilate the indoor air to remove the smell. Then use the air purifier to remove the remaining smell.
- • Press and hold it for 3 seconds or more to turn on or off the ionizer. (See Using the Air Ionizer.) Use it to set the operation mode.
- • Press and hold the button for 3 seconds or more to turn on/off the Light lamp. (See Turning on/off the Light Lamp.) Speed Button It allows you to adjust the wind strength of the product.
- • Pressing and holding the button for more than 3 seconds activates the Wi-Fi registration mode.
- • Buttons to turn Wi-Fi off Pressing and holding the Start/ Stop button and the Speed button at the same time for more than 3 seconds turns off Wi-Fi. After finishing the product registration and while Wi-Fi is off, pressing and holding the Speed button for more than 3 seconds turns on Wi-Fi so that you can control the product using a smartphone that has it registered. Swing Button It allows you to set the clean booster to turn left or right. Indicator Button You can check the concentration of the airborne dust by its particle size. Sleep Timer Button Use it to schedule the time to turn off the product.
- • Press and hold it for 3 seconds or more to lock or unlock the Control Panel buttons. (See Locking the Control Panel Buttons.)
D+_Air_Cleaner_18PY_UG_EU_ENG_DE_ES_IT_FR_POL_SV_170726.indb 19 2017-08-16 2:34:30 Status Display Panel Display of air quality Icons 1 Overall air quality (color) 2 Dust particle size and dust concentration (color) Icon 3 Dust concentration or sleep timer time 4 Smell concentration (color) Description It turns on when it is time to replace the filter. It turns on when the Wi-Fi function is activated. Displays operating mode It turns on when the sleep timer function is activated. Displays speed and booster speed It turns on when the 'On/Off Reservation' is set in the LG Smart ThinQ application. Speed: Displays the air purifier's wind strength. Booster speed: Displays the clean booster's wind strength. It turns on when the control panel is locked. It turns on when the ionizer turns On.
- • Do not press multiple buttons at the same time. It may cause the product to stop operating or malfunction. ENGLISH Remote Control
- • Do not kick or step on the remote control. It may result in damage.
- • Do not use it where there is too much water or moisture. It may result in fire or electric shock.
- • Do not use it where there is fire or heat. It may result in a fire or product deformation.
- • Remove and store the battery in a safe location if you don't intend to use the remote control for a long time. It may result in leakage of the battery liquid and lead to a failure. Start/Stop Button Note You can start or stop the operation.
- • To use the remote control, direct the signal sending area of the remote control toward the signal reception area of the product. Speed Button It allows you to adjust the wind strength of the product.
- • If you are away from the product (front) by more than 7 m, the remote control may not work. Sleep Timer Button
- • If the remote control does not work even after replacing the battery, contact the nearest service center. Use it to schedule the time to turn off the product. Booster Speed Button It allows you to adjust the wind strength of the clean booster. Light Button Use it to turn on or off the Light Lamp.
- • The remote control may not work properly where there is a strong light, such as those from a 3-wavelength fluorescent lamp or a neon sign.
- • If you lost the remote control, you can purchase a new one in a nearby service center. Mode Button Use it to set the operation mode. Swing Button It allows you to set the clean booster to turn left or right.
D+_Air_Cleaner_18PY_UG_EU_ENG_DE_ES_IT_FR_POL_SV_170726.indb 21 2017-08-16 2:34:31 Getting Started Using Smart Mode Press the Start/Stop button to start the operation. It automatically controls the operation mode and wind strength based on the overall air quality. Press the Mode button to choose Smart mode.
- • Each time you press the button, the operation mode changes in the following order: Smart → Booster → Normal. Note
- • If you operate the product for the first time, it enters Booster mode.
- • If you stop and resume the operation, it starts cleaning with the mode you selected last time. Even if power is lost due to a blackout, the product remembers the mode you used last time.
- • Once the operation starts, the sensor stabilizes (for approx. 30 seconds) before the dust concentration is displayed. During the sensor stabilization period, you will see (ready) on the status panel. You can specify the sensor stabilization time in the 'Air Quality Sensor Operation Time' option in the LG Smart ThinQ application. Note
- • While in Smart mode, the Speed, Booster Speed and Swing buttons do not work.
- • Smart mode operates either the clean booster or the air purifier to adapt to the air quality. –– 'Always On': The sensor stabilization turns on only once at the beginning. –– 'Only During Operation': The sensor stabilization turns on every time you start/stop the operation.
D+_Air_Cleaner_18PY_UG_EU_ENG_DE_ES_IT_FR_POL_SV_170726.indb 22 2017-08-16 2:34:32 Using Normal Mode The clean booster cleans the air and quickly sends it to a long distances to circulate the indoor air. This is a basic operation mode for air purification, enabling you to control the wind strength as desired. Press the Mode button to choose Booster mode. Press the Mode button to choose Normal mode.
- • Each time you press the button, the operation mode changes in the following order: Smart → Booster → Normal.
- • Each time you press the button, the operation mode changes in the following order: Smart → Booster → Normal. ENGLISH Using Booster Mode Caution Keep your hands out of the moving part of the clean booster. Note
- • If you choose Booster mode, the clean booster rises at the degree of 55 and pushes the air forward to circulate the indoor air.
- • For more information on how to control the wind strength of the clean booster, see Adjusting the Clean Booster Fan Speed.
- • To rotate the clean booster left and right, see Rotating the Clean Booster.
- • If you happen to unplug the power cord from the outlet before the Clean Booster closes completely, plug in the cord again. The Clean Booster will swing left and right and then close completely.
D+_Air_Cleaner_18PY_UG_EU_ENG_DE_ES_IT_FR_POL_SV_170726.indb 23 2017-08-16 2:34:33 Adjusting the Purifier Fan Speed Adjusting the Clean Booster Fan Speed You can adjust the wind amount of the purifier. You can adjust the wind amount of the clean booster. Press the Speed button during the operation. While in Booster mode, press the Booster Speed button.
- • Each time you press the button, the speed changes in the following order: Auto → Low → Middle → High → Turbo. Displaying Purifier Speed If you adjust the speed, it is displayed on the status panel. It increases by 2 grids at a time. [Example of Purifier Speed 'Middle']
- • Each time you press the button, the speed changes in the following order: Auto → Low → Middle → High → Turbo. Displaying Booster Speed If you adjust the booster fan speed, it is displayed on the status panel. It increases by 2 grids at a time. [Example of Booster Speed 'Middle'] Note
- • The speed is set to Auto when you first start the operation. Auto mode controls the wind speed automatically according to the contamination level of the indoor air.
- • You can control the wind speed only in the Booster and Normal modes. Note
- • If you choose Auto, the fan inside the clean booster is adjusted according to the speed of the purifier. For example, if you change the speed of the purifier to 'Low', the booster fan speed is changed to 'Low' as well.
- • You may control the booster fan speed only in Booster mode. In the other modes, you will hear a warning sound and won't be able to control the function.
D+_Air_Cleaner_18PY_UG_EU_ENG_DE_ES_IT_FR_POL_SV_170726.indb 24 2017-08-16 2:34:34 ENGLISH Rotating the Clean Booster The clean booster rotates left and right. While in Booster mode, press the Swing button. Caution Keep your hands out of the moving part of the clean booster. Note
- • The rotating angle of the clean booster is 35°.
- • You may use the clean booster rotation function only in Booster mode. In the other modes, you will hear a warning sound and won't be able to control the function.
D+_Air_Cleaner_18PY_UG_EU_ENG_DE_ES_IT_FR_POL_SV_170726.indb 25 2017-08-16 2:34:35 Checking the Air Quality You can check the cleanliness of the indoor air by looking at the Light lamp and the status panel. Understanding the Overall Air Quality The overall air quality is calculated based on the dust and smell (gas) concentrations and is categorized into 4 levels including green, yellow, orange or red depending on the contamination of the air. PM density (μg/m³) Odor Level Overall Air Quality State PM 10 (fine dust) PM 2.5 (ultra fine dust) PM 1.0 (super ultra fine dust) State Level Red Poor 255 or more 56 or more 56 or more Very strong
Yellow Moderate 55–154 13–35 13–35 Normal
Green Good 54 or less 12 or less 12 or less Weak
- • Overall air quality can be determined based on the Light lamp and the air quality) on the status panel. color (overall
- • The color of overall air quality is determined based on whichever is worse between the dust concentration and smell (gas) concentration. Checking the Air Quality Using the Light Lamp Four different colors are used to indicate the overall air quality based on the dust concentration and smell (gas) concentration. Turning on/off the Light Lamp You can press and hold the Mode button for 3 seconds or more to turn it on/off. Light Lamp Note The Light lamp turns on white for the sensor stabilization period (30 seconds). The smell (gas) sensor is stabilized 2 minutes after you start the operation. During this period, the smell (gas) concentration is not reflected in the overall air quality. Note
- • When the sleep timer is set, the Light lamp turns off.
- • If you turn on the Light lamp after setting the sleep timer, you will see the overall air quality on the status panel as well as on the Light lamp.
D+_Air_Cleaner_18PY_UG_EU_ENG_DE_ES_IT_FR_POL_SV_170726.indb 26 2017-08-16 2:34:36 You may check the overall air quality, dust concentration, and smell concentration on the status panel.
- • Overall air quality: You can check the color (overall air quality) on the status panel to determine the overall air quality.
- • Dust concentration: You can check the dust concentration by looking at the dust concentration value and the particle size indicator color. It shows the worst status among the PM 10 (fine) / PM 2.5 (ultra-fine) / PM 1.0 (super ultra-fine dust). –– If the dust concentrations of all categories are 'good', the concentration of the 'PM 10' is displayed. –– If it is worse than 'moderate', the color and concentration of the dust with the highest contamination level are displayed. If they share the same contamination level, the contamination level is displayed according to the following order: PM 1.0, PM 2.5 and PM 10.
- • Smell concentration: You can check the color (smell concentration) on the status panel to determine the smell concentration. [Example of the Display Showing Air Quality] Dust particle size and concentration color The above picture displays PM10/PM2.5/ PM1.0, meaning that the concentration of super ultra-fine dust is higher than those of fine dust and ultra-fine dust. ENGLISH Checking Air Quality on the Status Panel While the color of the dust particle size is solely determined based on the dust concentration and the color of the (smell concentration) is solely determined based on the smell concentration, the color of the (overall air quality) is determined based on the worse cause between the dust and smell. If the smell is ‘normal’ and the PM 1.0 (super ultra-fine dust) concentration is 50 μg/m3, which is ‘unhealthy’, the overall air quality is displayed in orange as the worst cause is the dust. On the other hand, if the smell is ‘very strong’, the overall air quality is displayed in red because the smell becomes the worst cause. Checking the Dust Concentration You can check the airborne dust concentration by its particle size. Press the Indicator button during the operation.
- • Whenever you press the button, the display changes in the following order: PM10 → PM2.5 → PM1.0.
- • The concentration of the selected dust particle is displayed for about 10 seconds. Overall air quality Smell concentration color Dust concentration
D+_Air_Cleaner_18PY_UG_EU_ENG_DE_ES_IT_FR_POL_SV_170726.indb 27 2017-08-16 2:34:38 Note
- • PM (particulate matter) density is displayed in increments of 1 unit, from 8 to 999. PM density values are based on the data sheet provided by the sensor manufacturer.
- • The PM10 and PM2.5 air quality values follow those provided by the United States EPA (Environmental Protection Agency) for –– The overall air quality level displayed on the product may differ from the level announced by the EPA.
- • The PM1.0 density is displayed in the same manner as the PM2.5 density and is based on LG Electronics standards.
- • The PM10 and PM2.5 densities displayed by the product could differ from the EPA forecast and from densities measured by other products or devices.
- • The dust density displayed may change with environmental factors such as the presence of sofas, beds, carpets, vacuum cleaners, humidity, smoke, bugs, pets, or cooking oils.
- • The PM densities may be affected by changes in the outside environment such as construction, heavy traffic, or pollen.
- • The micro dust density could be higher near outside doors, windows, vents, or in areas where outside air enters.
- • Use ONLY water to clean the sensor. Using anything else could cause product failure.
- • The fine dust density could be affected by cooking or using humidifiers, sprays, or other products which generate steam or fine particles. –– Differences in PM density values may be the result of different methods of measuring or differences in the actual PM density levels. –– The PM density measurement was tested using LG Electronics’ standard test materials.
- • Using the product near a humidifier, mister, air-conditioner, or other device which generates steam or micro-particles could affect the PM densities.
- • The overall air quality level is a result of both PM densities and the odor level. It may differ from the PM10, PM2.5, and PM1.0 density levels.
- • Even two products placed in the same space could measure the PM10 density differently due to air circulation.
- • The chemicals contained in air fresheners, perfumes, deodorizers, or cosmetics may affect the overall air quality display.
D+_Air_Cleaner_18PY_UG_EU_ENG_DE_ES_IT_FR_POL_SV_170726.indb 28 2017-08-16 2:34:38 Setting the Sleep Timer To generate ions to remove various bacteria from the air. You can set the product to stop automatically after running for the duration you set. Press the Booster Speed button for more than 3 seconds while operating. Press the Sleep Timer button during the operation.
- • Each time you press the button, the Sleep Timer changes in the following order: After 2 hours→ After 4 hours → After 8 hours → After 12 hours → Cancel. (Ionizer) is displayed on the status display. ENGLISH Using the Air Ionizer
- • Once the sleep timer is set, the status panel displays only the sleep timer icon except for a few other icons. Note
- • When the operation is stopped, the ionizer function can not be used.
- • The ionizer function is available in all operating modes. Note
- • For your deep sleep, the speed is set to Low by default for a certain period of time. After the time passes, the speed is controlled automatically depending on the air quality.
- • Even when the sleep timer is set, you can still change the speed by pressing the Speed button.
- • If you press the Sleep Timer button once more while the sleep timer is set, you can check the preset time and press the button repeatedly to cancel the sleep timer.
- • The sleep timer remains on even if the power goes off or if there is a blackout.
D+_Air_Cleaner_18PY_UG_EU_ENG_DE_ES_IT_FR_POL_SV_170726.indb 29 2017-08-16 2:34:39 Locking the Control Panel Buttons You can lock the buttons on the Control Panel to prevent the product from operating due to unforeseen reasons, such as a child manipulating the buttons. Press the Sleep Timer button for at least 3 seconds during the operation.
(Lock) is displayed on the status panel. Note
- • You can turn off the lock function in the same way as turning it on.
- • The control panel can be locked even when the product is off.
- • If you pull out the power plug in lock set status, the lock function is cleared.
D+_Air_Cleaner_18PY_UG_EU_ENG_DE_ES_IT_FR_POL_SV_170726.indb 30 2017-08-16 2:34:40 Using the Smart ThinQ Application Install the "LG Smart ThinQ" application on your smartphone to use the product more conveniently. Installing Smart ThinQ Find and install ‘LG Smart ThinQ’ from the App Store/Google Play Store on your smartphone. For more information on how to use 'LG Smart ThinQ’, refer to the Help in the app. Wi-Fi function Smart diagnosis When the product malfunctions or fails, you can check the product conditions through the smart diagnosis function and solve issues more conveniently. Settings You can configure the product management and alert settings. Note
- • Wi-Fi only supports 2.4 GHz frequency. (Pressing the button more than once initiates the Wi-Fi registration mode.)
- • A wireless router and an Internet connection cable are separate purchase items required to use the app and you need to install them separately. ENGLISH Smart Functions
- • To use the wireless network, you can contact an Internet service provider or install the wireless router on your own. When you install the wireless router on your own, please refer to the user manual enclosed with the wireless router.
- • Install the wireless router at a location close to the product. The strength of the signal may be different based on the location and distance between the product and the wireless router, resulting in difference in the data transmission time thereby.
- • The connection may not be established depending on the network environment. If you cannot connect to the network or there is a problem with the network settings, contact the network administrator or the Internet service provider.
- • If the security protocol of the router is set to WEP, you may fail to set up the network. Please change it to other security protocols (WPA2 is recommended) and register the product again.
- • When registering the product, make sure that the Wi-Fi connection of the smartphone is on.
- • Be sure to use any alphanumeric combination to set the wireless network name (SSID), which appears when you search for Wi-Fi.
- • If you can’t register the product by pressing the product’s Wi-Fi registration button, press the Wi-Fi registration button again. If you deleted the registered product from the app while Wi-Fi is off, the product registration may not work in one attempt when you press the Wi-Fi registration button again to register the product.
- • When you search for a wireless router to connect to the wireless network, wireless routers other than the one you are using may also be found. Using other people's routers is illegal and, if you do so, you may be subjected to legal actions. You must connect to the wireless router authorized to use the network.
- • To turn on the Wi-Fi function that has been off, press the Wi-Fi registration button just once and wait. The Wi-Fi connection will be re-established within 1 minute.
- • The contents of this manual may vary depending on the version of the "LG Smart ThinQ" application, and they may be changed without prior notice.
D+_Air_Cleaner_18PY_UG_EU_ENG_DE_ES_IT_FR_POL_SV_170726.indb 31 2017-08-16 2:34:40 Wireless LAN Module Specifications Model LCW-003 Frequency Range 2412 - 2472 MHz Output Power (max) IEEE 802.11b: 18.37 dBm IEEE 802.11g: 17.67 dBm IEEE 802.11n: 17.67 dBm Open Source Software License Notice Please visit http://opensource.lge.com to obtain open source codes developed under GPL, LGPL, MPL or other open source licenses that are included in this product. In addition to source codes, you can also download the contents of all licenses, copyright indications and indication of no warranty. For consideration of the user, this device should be installed and operated with a minimum distance of 20 cm between the device and the body. If you request open source codes for any software included in this product by sending an email to opensource@lge.com within three years of purchasing the product, we will send the codes on a CD-ROM with minimal charges for the CD and shipping. EU Conformity Notice Smart Diagnosis function Wireless function S/W version : V 1.0
- • This only applies to the models with the logo. Hereby, LG Electronics declares that the radio equipment type Air purifier is in compliance with Directive 2014/53/EU. The full text of the EU declaration of conformity is available at the following internet address: http://www.lg.com/global/support/cedoc/ cedoc# LG Electronics European Shared Service Center B.V. Krijgsman 1 1186 DM Amstelveen The Netherlands. Smart diagnosis When the product malfunctions or fails, you can check the product conditions through the smart diagnosis function and solve issues more conveniently by using Smart ThinQ application. Diagnosis Using Sound
- • This only applies to the models with the logo. Use this function if you need an accurate diagnosis by an LG Electronics service center when the product malfunctions or fails. Use this function only to contact the service representative, not during normal operation. Smart Diagnosis™ can not be activated unless the appliance is connected to power.
Follow the instructions on the smart phone.
Press and hold the Indicator button for 5 seconds or more to execute the Smart Diagnosis function. ENGLISH
After the data transfer is complete, the service agent will explain the result of the smart diagnosis.
- • After the service agent explains the diagnosis result, take the recommended measures. Note
- • The Smart Diagnosis function depends on the local call quality.
- • The communication performance will improve and you can receive better service if you use the home phone.
Place the phone near the product.
- • The microphone on your phone should face the Smart Diagnosis ( ) logo on the back. Do not remove the phone from the product while data is being transmitted.
- • The diagnosis data transmission may not be smooth due to poor communication quality, in that case, the smart diagnosis service may not be provided properly.
- • You need to keep the phone near the product while the data is being transmitted for Smart Diagnosis.
- • The data transfer sound may be harsh to the ear while the smart diagnosis data is being transmitted but do not take the phone off the product for accurate diagnosis until the data transfer sound has stopped.
D+_Air_Cleaner_18PY_UG_EU_ENG_DE_ES_IT_FR_POL_SV_170726.indb 33 2017-08-16 2:34:42 Maintenance Caution
- • You must stop operating the product and unplug it before you clean and replace the filter.
- • Do not spray water directly on the product.
- • Assemble the product in the reverse order of disassembly after cleaning the product and replacing the filter.
- • How to distinguish between the front and back of the product: There is an LG logo on the front, while 'PM 1.0 & GAS SENSOR SYSTEM' is written on the back. Scheduled Maintenance Component Cleaning Frequency Replacement Frequency Only ultra-fine filter Filter If contaminated, clean the ultrafine filter with a vacuum cleaner or soft brush. 2 months
- • Filters are sold at the nearest Service Center or via the Consumables shop on the LG Electronics site (www.lg.com).
- • You may also request cleaning or replacement of the filter to the Service Center. You will be charged a certain fee for filter cleaning and replacement services.
- • If there are no changes to the dust concentration on the status panel, clean the sensor regardless of the cleaning frequency (2 months) of the PM 1.0 sensor. For more information on cleaning the PM1.0 sensor, please see Cleaning the Dust Sensor. Alerts on the Status Panel When you see an alert message on the status panel, do the following: The whole filter Alert 1 year Measures
- • The operating environment and operation hours may affect the cleaning frequency. We recommend that you should clean it more often in a dusty environment.
- • Filter replacement alerts appear based on the maximum usage time, taking into account the operating hours of the product. The replacement frequency is determined by the operating hours and environment.
- • For more information on how to disable a filter replacement alert, see Replacing the Filter.
- • A filter is a consumable item. Therefore you must buy a new one for replacement when it has reached the end of its lifespan even during the warranty period.
- • If you do not clean the product according to the cleaning frequency, you may experience a bad odor and poor performance.
ENGLISH Caution Wipe the exterior with soft cloth.
- • Do not disassemble the clean booster arbitrarily.
- • If the clean booster cover comes apart, secure it by aligning the 3 hooks with the slots before you use the product. Caution
- • Do not clean the product with an alkaline detergent.
- • Do not unscrew the 2 screws fixing the clean booster grille on the back while the product is running.
- • Do not wipe the product surface using sulfuric acid, hydrochloric acid or organic solvent (thinner, kerosene etc.) or attach a sticker on the product. Otherwise the product surface may get damaged.
- • Do not allow the water enter inside the product. Note Cleaning the Exterior
Remove dust from the air inlet and outlet using a vacuum cleaner. If you find it difficult to clean the front and rear covers, separate them first and wash with water. Then, dry them completely under the shade.
Separate the cover from the product.
- • For more information on how to remove and mount the cover, please see Removing Packing Materials. Remove the cover and replace the filter.
- • For more information on how to remove the cover and replace the filter, please see Removing Packing Materials. Remove dust from the ultra-fine filter with a vacuum cleaner or soft brush.
- • To avoid polluting the surroundings when replacing the filter, place a newspaper on the floor before you remove the filter.
Once you have replaced the filter, disable the filter replacement alert. Disabling a Filter Replacement Alert Caution
- • Do not wash the filter with water. It may reduce the lifespan of the filter. Press and hold the Speed and Indicator buttons simultaneously for 3 seconds or more. (Filter Replacement Alert) is
- • The disabled and the replacement alarm is reset.
- • Be careful not to damage the ultra fine filter when you use a vacuum cleaner. Note The filter replacement alert is disabled automatically if 24 hours have passed since it was displayed or if the product is disconnected from the power source.
D+_Air_Cleaner_18PY_UG_EU_ENG_DE_ES_IT_FR_POL_SV_170726.indb 36 2017-08-16 2:34:45 PM 1.0 (super ultra-fine dust) sensor detects the fine dust as well as coarse dust. Therefore, you need to clean its lens regularly.
Close the sensor cover. Remove the rear cover from the product.
- • For more information on how to remove and mount the cover, please see Removing Packing Materials.
ENGLISH Cleaning the Dust Sensor Open the sensor cover. Note Do not wipe the sensor with material other than water. It may cause a product failure. Storage If the product is not used for a long period of time, store it at a shaded and dry place.
Clean the lens with the cotton swab soaked with water and clean it again with a dry cotton swab. Operate the product in Normal mode for one hour or more on a fine day.
- • This removes the moisture and prevents molds from building up inside the product.
Turn off the power and unplug it from the electrical outlet.
- • Wind the power cord around the bottom of the product. Note The shape of the power plug differs depending on the country.
Package the product to prevent the dust or foreign substance from entering the product. Store the packaged product at a shaded place. Caution Do not store the product at a humid place or at a place exposed to the direct sunlight. Otherwise the product may be deformed, malfunction or generate odor.
D+_Air_Cleaner_18PY_UG_EU_ENG_DE_ES_IT_FR_POL_SV_170726.indb 38 2017-08-16 2:34:48 ENGLISH Before Calling for Service If a failure occurs in the product, check the following before contacting the Service Center. Symptom Cause Solution The product does not operate. Is the power plug unplugged from the outlet?
- • Plug it into the outlet properly. Did dust accumulate in the ultra fine filter?
- • Clean the ultra fine filter properly. Did dust accumulate in the Total Allergen Collection Care Filter?
- • Replace the whole filter. Is the indoor contamination severe?
- • Ventilate the indoor air before you use the product. Did dust accumulate in the ultra fine filter?
- • Clean the ultra fine filter properly. Did dust accumulate in the Total Allergen Collection Care Filter?
- • Replace the filter. Fan is noisy even on the lowest speed. The indoor air is not purified well enough. There is a smell, but the Light lamp does not change. Are you using it in a place that is too spacious or too open?
- • Use a product that fits the size of the room.
- • Avoid a well-ventilated place such as a gate, window, etc. Is there any obstacle nearby?
- • Remove the obstacle. Is the product installed at a corner?
- • Move the product and install it again. Is the Light lamp turned on red or orange?
- • The color of overall air quality is determined based on whichever is worse between the dust concentration and smell (gas) concentration. Check if the dust concentration is worse than before.
- • The Smell(gas) sensor is designed to detect harmful gases. Strong food odors may not register as harmful, but the Total Harmful Gas Care Filter will remove them.
D+_Air_Cleaner_18PY_UG_EU_ENG_DE_ES_IT_FR_POL_SV_170726.indb 39 2017-08-16 2:34:48 Symptom The Light lamp continues to stay red. The buttons on the control panel do not work. The concentration of the fine dust does not change. The concentration of fine dust continues to remain high. The overall air quality color does not match the dust concentration value. Cause Doesn’t the color change even if it is moved to a clean room? Solution
- • If the amount of the smell is more than the capacity of the product, the display may not change.
- • Clean the sensor area.
- • Remove the power plug from the outlet and reconnect it one minute later. Did you use a spray near the product?
- • Do not use a spray near the product. Is the (Lock) turned on on the status panel?
- • Press and hold the Sleep Timer button for 3 sec. or longer to disable the lock function. Is there a foreign substance on the sensor?
- • Clean the PM 1.0 (super ultrafine dust) sensor. Is the product used in a closed space?
- • In a closed space, the cleanliness level may continue to stay the same without change. Does the air continue to flow in from the outside to the location where the product is installed?
- • In an environment where outside air is supplied continuously, the concentration may continue to remain high. Does the color of the overall air quality match the color that indicates the smell concentration?
- • The overall air quality is displayed by evaluating the smell and dust concentration comprehensively.
- • Even if the dust concentration is low, if the odor is strong, the overall air quality color may not match the dust concentration value.
D+_Air_Cleaner_18PY_UG_EU_ENG_DE_ES_IT_FR_POL_SV_170726.indb 40 2017-08-16 2:34:48 The overall air quality is different from that of the Ministry of Environment guide. A strange smell comes out from the air outlet as well as the filter. Cause Solution Is the guide from the Ministry of Environment different from the product dust concentration?
- • The Ministry of Environment guide shows the average value over a certain period of time, but the overall air quality displayed on the product is measured in real time. So they may be different from each other. Did you purchase the product lately?
- • The odor of activated charcoal is not harmful. This is similar to the smell you may experience in a brand new car. We assure it will go way 1-2 weeks after its first use. Is the product used at a place with a lot of smoke or smell?
- • In a place with a lot of smoke or smell, the air cleaning function may deteriorate. Ventilate the room first and then use the product. Does the filter have a bad smell?
- • Replace the filter. The filter replacement frequency may differ depending on the usage environment. Is the product installed in an environment where a lot of odor occurs? The clean booster is not working. Is the operation mode set to the Clean Booster mode? ENGLISH Symptom
- • If you use the product for a long period of time while you cook or broil fish/meat, the filter lifespan may be rapidly decreased.
- • If possible, open the window for ventilation while cooking, and use the product to remove the smell left after the ventilation.
- • The booster fan speed and booster fan rotation functions work only in the Clean Booster mode.
- • It means that the clean booster is trying to look for the correct location. I can't connect to the product in the LG Smart ThinQ app. I can't register the product in the LG Smart ThinQ app. The dust concentration levels are different between the product and the LG Smart ThinQ app. Is the power plug unplugged from the outlet? Is the wireless router connected with the product not working?
- • Plug in the power cord of the product.
- • Power off the wireless router and on again.
- • Check if there is an Internet connection problem with the router. Is the product too far away from the wireless router?
- • Move the wireless router near the product. Is your wireless router working properly?
- • Some carriers provide routers that are available to their members only. If you have an outdated model, contact your carrier to have it replaced with a newer one. Are you looking at the same dust particle?
- • Make sure that the levels of the super ultra-fine/ultrafine/fine dust are displayed consistently between the LG Smart ThinQ app and your product.
- • The difference in the values could be caused by the difference in update time between the LG Smart ThinQ app and the product.
D+_Air_Cleaner_18PY_UG_EU_ENG_DE_ES_IT_FR_POL_SV_170726.indb 42 2017-08-16 2:34:48 ENGLISH Product Specifications Height Depth Width The external appearance and dimensions of the product are subject to change without prior notice. Model AS60GD Series Power AC 220–240 V 50/60 Hz Exterior dimensions (Width X Height X Depth) When the clean booster is not running: 360 mm x 587 mm x 360 mm When the clean booster is running: 360 mm x 824 mm x 360 mm