
CD3 - CD Player AUDIO RESEARCH - Free user manual and instructions
Find the device manual for free CD3 AUDIO RESEARCH in PDF.


| Brand | Audio Research |
| Model | CD3 |
| Product type | CD player / digital transport with built-in DAC |
| Category | CD player |
| Country of manufacture | United States |
| Digital-to-analog converter | Bitstream (bitstream signal processing) |
| Analog outputs | 1 RCA pair (single-ended), 1 XLR pair (balanced) |
| Digital outputs | 1 BNC coaxial output, 1 XLR output (transformer-coupled) |
| Output stage | Pure Class A high-current |
| Power supply | Two transformers, extended regulation |
| Playback functions | Play, Pause, Stop, Previous, Next |
| Remote control | Yes, with direct track selection (0-9) |
| Startup delay | Approximately 40 seconds (silence on analog output) |
| Standby mode | Standby with power maintained to analog stages |
| Electrical safety | Grounding via a 3-conductor power cord |
| Care and cleaning | Clean the chassis with a soft, dry cloth |
| Included accessories | Remote control, RCA/BNC adapter, power cord |
| Regulatory compliance | FCC Part 15 |
| Repairability | Have any repairs performed by a qualified technician |
| General information | Designed and assembled in the United States |
Frequently Asked Questions - CD3 AUDIO RESEARCH
User questions about CD3 AUDIO RESEARCH
0 question about this device. Answer the ones you know or ask your own.
Ask a new question about this device
Download the instructions for your CD Player in PDF format for free! Find your manual CD3 - AUDIO RESEARCH and take your electronic device back in hand. On this page are published all the documents necessary for the use of your device. CD3 by AUDIO RESEARCH.
USER MANUAL CD3 AUDIO RESEARCH
Owner's Manual
Model CD3
CD PLAYER-DIGITAL TRANSPORT
Model CD3
Section Page No.
Preface.... 1
Introduction 1
Warnings 1
Packaging 1
Power-up Procedure 1, 2
Front Panel Control Functions 2
Remote Control Functions 2
CD Door Functions/Warnings. 3
Maintenance 3
Connections 3
Digital Outputs 3
Analog Outputs 3
Installation Instructions 3,4
Operating Procedure 4
Servicing 4
Cleaning 4
Disposal and Recycling Guidelines 4
FCC Rules 5
Warranty Terms and Conditions 5
Specifications 6


audio research
PLYMOUTH, MINNESOTA MADE IN U.S.A.
THIS DEVICE COMPLIES WITH PART 15 OF THE FCC RULES OPERATION IS SUBJECT TO THE FOLLOWING TWO CONDITIONS: (1) THIS DEVICE MAY NOT CAUSE HARMFUL INTERFERENCE. AND (2) THIS DEVICE MUST ACCEPT ANY INTERFERENCE RECEIVED INCLUDING INTERFERENCE THAT MAY CAUSE UNDERSIRED OPERATION

MODEL CD3MKII CD PLAYER


Preface
Please take the time to carefully read this instruction manual prior to installation or use of your CD3 compact disc player. Because it is a highly advanced electronic instrument, there are several facts and procedures you should know before you place it in operation.
Introduction
We believe the CD3 breaks new ground in the retrieval and transmission of digital data from the CD format. In fact, that's a large part of the fun: just as in the past, when a new cartridge and tonearm combination brought music to life with startlingly improved resolution, subtlety and dynamics, so too you will discover layers of musical information you never knew were there in the mirrored surface of the compact disc.
What's the reason for this superior performance? Well, a look inside the CD3 reveals a wealth of proven Audio Research design philosophy. Circuit boards are Audio Research engineered, with beefy construction, careful hand soldering and layouts optimized for lowest digital noise. Sophisticated electronic "jitter stripping" techniques help minimize jitter in the overall circuit. Advanced massive power supply design, with two transformers and extensive regulation, has proved crucial even in digital applications like the CD3. The BNC and XLR digital outputs are transformer coupled and are driven by a high-current balanced line driver. Mechanical damping theory has also been applied to internal mounting of key components and to critical aspects of the transport and chassis structures (including tuned polymer feet), to minimize vibration-induced noise.
A bitstream digital-to-analog converter and a high-current pure class A analog output stage allow the CD3 to be used directly with a line-level preamplifier or integrated amplifier for immediate music enjoyment. Both single-ended (RCA) and balanced (XLR) outputs are included. Alternatively, the owner may use the CD3 as a high-quality CD transport in conjunction with an external digital processor.
The CD drive mechanism itself represents the latest thinking from digital engineers, and offers performance clearly superior to older drives. In part, this is because even the servos of the CD3 drive operate fully in the digital domain, whereas older transport models were actually hybrid designs using analog servos, which placed greater demands on power supply reserves. The CD3 drive also has a superior eye pattern for more effective resolution of CD data and, again, lower jitter.
In appearance, the CD3 is pure Audio Research: heavy bevelled front panel, with handles flanking the controls on the right and the readout display on the left. Both controls and display readout are recessed within bevelled openings for a more sculptured appearance. A convenient handheld remote control of all front-panel functions and additional functions is also included.
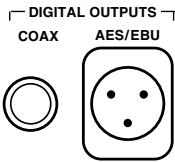
On the rear chassis panel you will find BNC coaxial and XLR digital outputs. (An RCA/BNC adaptor is included with each unit.) Analog outputs include single-ended (RCA) and balanced (XLR).
Warnings
- To prevent fire, or shock hazard, do not expose your CD3 to rain or moisture.
- This unit contains voltages which can cause serious injury or death. Do not operate with cover removed. Refer servicing to your authorized Audio Research dealer or other qualified personnel.
- The detachable power cord on your CD3 is equipped with a heavy gauge, 3-conductor cable and a standard three-prong grounding plug. For absolute protection, do not defeat the ground power plug. This provides powerline grounding of the CD3 chassis to provide absolute protection from electrical shock.
- For continued protection against fire hazard, replace the fuse only with the same type and rating as specified at the fuse holder.
- Do not operate the CD3 player without the supplied CD3 clamp installed on the CD.
Packaging
Save all packaging in a dry place away from fire hazard. Your CD3 compact disc player is a precision electronic instrument and should be properly cartoned any time shipment is made. You may not have occasion to return your unit to the factory for service, but if that should prove necessary, or other occasion requiring shipment occurs, the original packaging will protect your CD3 from unnecessary damage or delay.
Power-up Procedure
The CD3 has a timer circuit that mutes the analog output signal of the unit for about the first 40 seconds after being plugged into a live outlet, or each time after it is powered up from an outlet that has been turned off by a switch controlling power to it, or when plugged into an outlet that has temporarily lost power to it. The delay is to allow the operating points of the CD3 to stabilize. The digital outputs of the CD3 will function immediately when the unit is connected to a live outlet. When the CD3 is left plugged into a continuously live power outlet, the Standby switch only turns on or off power to the transport and the front panel
display and control functions, while the analog stages are always powered up for best sonics. To avoid analog output signal delay after initial turn on, the CD3 must be left plugged into a continuously live power outlet.
Also, after being plugged in or after power is restored to the CD3 after an interruption, and with the CD door fully closed, the unit will default to the operate setting (display, transport and front panel controls are activated). The CD3 may be continuously left on in the operate mode so it is ready for use at any time.
Front Panel Control Functions
(Functions in [ ] indicate labeling abbreviations appearing on remote control unit.)
STANDBY O [STBY]: Essentially an on/off switch, turns off display and controls when in STANDBY. Note: The CD3 has current flow to keep circuitry warm when in STANDBY mode. The CD3 is fully “on” (in operate mode) when the display is lit.
PAUSE ||: Interrupts play (display will read "PAUSE"). Release PAUSE by pressing it a second time to resume playing disc.
STOP ■: Stops play. (Number of tracks and total disc track time appear on display.)
PLAY ▶: Starts play. CD door must first be fully closed. Begins to play first track unless another is selected. Restarts track if pressed during play. (Track number and elapsed track time appear on display.)
PREV ◀: Selects the previous track to play. Continue pressing to cycle backward through previous tracks. (Track number will appear on display.)
NEXT ▶: Selects the next track to play. Continue pressing to cycle forward through tracks. (Track number will appear on display.)
Remote Control Functions
The remote control unit includes all of the above described CD3 front panel control functions plus the following additional functions.
0-9 BUTTONS: Pressing numbered button(s) corresponding to the disc track number will advance disc to desired track. Also used to select tracks when compiling a custom disc playback program (see PROGRAM [PROG] function description below).
SCAN: With a stopped CD and the CD door closed, press SCAN and the first 10 seconds of each track will be played in sequence. ("SCAN" will light up on display, then 10 seconds are counted out next to each track number.) To hear a track in full that player is presently scanning, press SCAN button again which will cancel SCAN function.
PROGRAM [PROG]: Allows compiling a custom track selection and playback order of up to 20 tracks on a disc. With the player in STOP mode, enter the desired first track number and then press the PROGRAM button. The word "PROGRAM" will light and the display will show the total number of tracks programmed and total programmed time. If a second track selection is entered, the word "PROGRAM" flashes, indicating that other track(s) have already been stored in the program memory. Press the PROGRAM button to save the second track selection. Repeat procedure to program additional tracks as desired. This programming procedure, with readout of the cumulative total number of programmed tracks and total programming time (including time between tracks), works for any of the first 13 numbered tracks on a disc. You may program track numbers higher than 13, but from then on no track time information will appear on the display. To preview a program before playing it, press PLAY and then use the NEXT ▶ and PREV ▶ buttons to cycle through track selections. Pressing PLAY will begin playing program. Pressing STOP once will stop program play. Pressing PLAY again will resume play from beginning of program. To cancel program, press STOP twice.
TIME: Pressing and releasing TIME repeatedly will cycle through the following information on the display: current track time elapsed (default setting initially seen on display), total disc time elapsed, and total disc time remaining.
A/B: Press the A/B button once while music is playing, then press it again; the musical passage in the interval between pressing the buttons is then repeated in a loop until pressing the A/B button once again to discontinue it. Display reads "A—B" to show activation. Note: you must discontinue the A/B loop before pressing PLAY to resume normal playback.
◀◀: Pressing and holding this button down will fast search backward through the track that is playing until it is released. Rate of search accelerates as button is held down.
▶▶: Pressing and holding this button down will fast search forward through the track that is playing until it is released. Rate of search accelerates as button is held down.
SHUFFLE [SHUF]: Press SHUFFLE. "SHUFFLE" lights up on display, and tracks will now play in random order. Press SHUFFLE again to return to normal play sequence.
REPEAT [REP]: Press REPEAT once to repeat the entire disc continuously (“REPEAT” lights up on display). Press REPEAT once more to continuously repeat the track now playing (“REPEAT 1” lights up on display). Press REPEAT once again to discontinue track repeat mode.
Note: The FAST and DISC buttons on the remote control unit are not used.
CD Door Functions/Warnings
- Do not attempt to play a CD without first installing the supplied CD3 magnetic disc clamp on the CD.
- Use only the supplied CD3 clamp in your CD3 player.
- CD door must be fully closed for the CD3 to operate.
- All front panel and remote control functions and display are deactivated when CD door is open (defaults to STANDBY mode), to prevent exposure to laser. Do not attempt to bypass this lockout feature. The CD3 will stop playing and go into STANDBY mode if the CD door is opened while running.
- If the CD door is closed without a CD in the player and the CD3 is powered up and out of STANDBY mode, the display will read "No disc".
- If a CD is inserted in the CD3, the CD door is fully closed and the CD3 is powered up (out of STANDBY mode), the CD will spin for a few seconds while the track information is accessed. The number of tracks and total disc time will then be displayed, indicating the CD is ready to play.
- Keep the CD door closed when the CD3 is not in use to keep dust out of the lens and drive area.
Maintenance
THE CDs
- Keep the shiny surface of the CD clean and free of scratches. Use a soft lint-free cloth and always wipe the CD in a straight line from center to outer edge.
- Never use cleaning agents for conventional records on CDs.
- Detergents or abrasive cleaning agents should not be used on CDs.
PROBLEMS AND THEIR LIKELY CAUSES
If a problem occurs, run through the points listed below before taking your player in for repair.
Check whether:
– condensation has formed on the lens of the laser due to a dramatic change in temperature; this will disappear naturally after some time.
– the CD has been inserted correctly with the printed side up and that there is a CD in the compartment and the cover is fully closed.
– the CD is dirty, badly scratched, warped or defective.
– the player has been inadvertently connected to the PHONO inputs of the preamplifier.
If the problem remains, try to clear it by switching the player off and on again, or unplugging it and plugging it in again. If this also fails to help, consult your Audio Research dealer.
Under no circumstances should you repair the player yourself as this will invalidate the warranty!
Connections
The CD3 offers two standard digital output options. Which option is best for your system will depend on your personal listening preference, the nature of your system installation requirements, and the options allowed by your external digital processor.
WARNING: The digital outputs supply only a digital signal and should therefore only be connected to an input which is suitable for this signal. Never connect either of these digital outputs to a non-digital input of a preamplifier (such as those labeled CD, AUX, PHONO, TAPE, etc.) or to a power amplifier. To do so is to risk damage to your system and may void any or all warranties involved.
Digital Outputs
BNC COAXIAL: Use 75-ohm impedance coaxial cable with locking BNC-type connectors. An RCA/BNC adaptor is also supplied.
BALANCED XLR: For connection to digital processors having the AES/EBU-Standard interface.
Analog Outputs
SINGLE-ENDED (RCA): For connection to the inputs of a line-level preamplifier or integrated amplifier,
BALANCED (XLR): For connection to the balanced inputs of a line-level preamplifier.
Installation Instructions
While the CD3 does not dissipate an unusual amount of heat, it is important that it be provided with reasonable airflow to assure long, trouble-free operation. In addition, the following installation guidelines will help insure maximum sonic performance as well as reliable service.
- Upright and level horizontal mounting is mandatory, preferably on solid, non-metal shelving.
-
Do not stack the CD3 on top of another component: not only could this cause overheating, but hum may be introduced into the system.
-
Do not place any objects on top of the CD3; its suspension feet are tuned for the specific weight of the CD3.
- Do not place or operate your CD3 on a soft or irregular surface such as a rug. This can prevent proper leveling and restrict ventilation
- Do not operate your CD3 without the top and bottom covers installed. These are required both for safety as well as shielding from interference (except in service operations by qualified personnel).
- If side-by-side mounting with other equipment is employed, place the CD3 to the left of the other chassis, so as to provide maximum spacing between the transformers of the CD3 and the other component.
Operating Procedure
Start-Up:
- Secure all rear-panel connections between CD3 and line-level preamplifier (or digital converter).
- Plug 3-prong powerline cord into rear of CD3, then plug into grounded AC wall receptacle.
- Press Standby switch to "On". Green LED readout display will glow.
- Activate other system components.
- See instructions for specific functions.
Shut-Down
- Set preamplifier Mute switch to "Mute" position.
- Press CD3 Standby switch to turn off display (or CD3 may be left on continuously).
Servicing
CAUTION: Your CD3 contains sufficient levels of voltage and current to be lethal. Do not tamper with a component or parts inside the unit. Refer any needed service to your authorized Audio Research dealer or other qualified technician.
Should service be necessary, please contact your Audio Research dealer, or Audio Research Customer Service (763) 577-9700.
Cleaning
To maintain the visual appearance of your CD3, occasionally wipe the front panel and top cover surfaces with a soft damp (not wet) cloth to remove dust. A mild, non-alkaline soap solution may be used to remove fingerprints or similar smudges. Cleaners containing abrasives should not be used as they will damage the brushed grain of the front panel finish, as well as the LED display window. A dry 2-inch pure bristle paint brush works well to remove dust from bevels, reliefs and switches. The CD3 CD compartment may be gently dusted: carefully avoid touching the laser assembly area to prevent possible damage.

Disposal and Recycling Guidelines
To dispose of this electronic product, do not place in landfill. In accordance with the European Union Waste Electrical and Electronic Equipment (WEEE) directive effective August 2005, this product may contain regulated materials which upon disposal require special reuse and recycling processing.
Please contact your dealer or importing distributor for instructions on proper disposal of this product in your country. Or, contact Audio Research Corporation (763-577-9700) for the name of your importing distributor and how to contact them.
Packing and shipping materials may be disposed of in a normal manner.
FCC Rules
NOTE: This equipment has been tested and found to comply with the limits for a Class B digital device, pursuant to Part 15 of the FCC Rules. These limits are designed to provide reasonable protection against harmful interference in a residential installation. This equipment generates, uses and can radiate radio frequency energy and, if not installed and used in accordance with the instructions, may cause harmful interference to radio communications. However, there is no guarantee that interference will not occur in a particular installation. If this equipment does cause harmful interference to radio or television reception, which can be determined by turning the equipment off and on, the user is encouraged to try to correct the interference by one or more of the following measures:
Reorient or relocate the receiving antenna.
Use interconnect cables of no more then one meter in length.
Increase the separation between the equipment and receiver.
Connect the equipment into an outlet on a circuit different from that to which the receiver is connected.
Consult the dealer or an experienced radio/TV technician for help.
Limited Warranty
Audio Research Corporation products are covered by a 3-Year Limited Warranty (all products except CD players, transports, and vacuum tubes), a 2-Year Limited Warranty (CD players and transports), or a 90-Day Limited Warranty (vacuum tubes). This Limited Warranty initiates from the date of purchase, and is limited to the original purchaser, or in the case of demonstration equipment, limited to the balance of warranty remaining after original shipment to the retailer or importer.
In the United States, the specific terms, conditions and remedies for fulfillment of this Limited Warranty are listed on the warranty card accompanying the product in its shipping carton, or may be obtained from the authorized retailer or from the Audio Research Customer Service Department. Outside the United States, the authorized importing retailer or distributor has accepted the responsibility for warranty of Audio Research products sold by them. The specific terms and remedies for fulfillment of the Limited Warranty may vary from country to country. Warranty service should normally be obtained from the importing retailer or distributor from whom the product was purchased.
In the unlikely event that technical service beyond the ability of the importer is required, Audio Research will fulfill the terms and conditions of the Limited Warranty. Such product must be returned at the purchaser's expense to the Audio Research factory, along with a photocopy of the dated purchase receipt for the product, a written description of the problem(s) encountered, and any information necessary for return shipment. The cost of return shipment is the responsibility of the purchaser.
Specifications
OUTPUTS, ANALOG: (Stereo)
- Balanced XLR 5.4V RMS (+14.6dBv) max.
- Single-Ended RCA 2.7V RMS (+8.6dBv) max.
OUTPUT IMPEDANCE: (Analog)
400 ohms BAL, 200 ohms SE.
FREQUENCY RESPONSE:
0.5–20,000Hz + 0 -1dB.
SIGNAL TO NOISE RATIO: 90dBA
DISTORTION: .025% 1kHz
RESOLUTION: 24 BIT DELTA-SIGMA DAC.
CHANNEL SEPARATION: 92dB 1kHz.
OUTPUTS, DIGITAL: (to external Digital-to-Analog Converter)
- XLR Balanced AES/EBU 110-ohm 4V P-P.
- BNC coax SPDIF 75-ohm 0.7V P-P.
SIGNAL FORMAT (disc):
Sampling frequency: 44.1kHz.
Quantization Bit: 16bit linear per channel.
Channel bit rate: 4.3218Mb/sec.
Channel modulation code: EFM (8 -14 modulation).
Error correction: CIRC (cross interleave Reed Solomon Code).
DRIVE MECHANISM (top load):
Wow & Flutter: Unmeasurable (Quartz stability).
Discs: Accepts 5" (12cm) and 3" (8cm) sizes.
OPTICAL PICKUP:
Type: 3-beam LDGU (Laser Diode & Grating Unit), with holographic diffraction light pen.
Laser: GaAlAs semiconductor, 780nm, 0.5mW maximum output.
Servo: Digitally-controlled low-inertia linear positioning actuator.
JITTER REDUCTION: High-stability crystal-controlled re-clocking for all outputs.
DISPLAY: Six-digit vacuum fluorescent, with optical filter.
POWER REQUIREMENTS (detachable power cord):
100-135VAC 60Hz (200-270VAC 50/60Hz), 40 watts maximum. (26 watts standby)
COMPLIANCE: RF Interference complies with FCC and CE MARK.
FRONT PANEL CONTROL FUNCTIONS:
STANDBY ☐ operate/standby mode
PAUSE II program
STOP ■ disc
PLAY ▶ disc
PREV ▶ selection
NEXT ▶ selection
INFRARED REMOTE CONTROL FUNCTIONS:
(Standard RC5 code, 30ft max distance)
0–9 digit entry keys
SCAN ten seconds each track
PAUSE program
REP track/disc
STOP program
PLAY disc
SHUF random sequence play
search, REV
search, FWD
STBY operate/standby mode
PROG enters selection on program list
TIME elapsed, remaining track; remaining disc
A/B repeats segment
previous track
next track
DIMENSIONS : 19" (48 cm) W x 5 1/4 " (13.4 cm) H x 12 1/4 "
(31.1 cm) D. Handles extend 11/2 " (3.8 cm) forward of the front panel. Rear connectors extend 3/4 " (1.9 cm).
WEIGHT: 25 lbs. 11.4 kg) Net; 35 lbs. (15.9 kg) Shipping.
Specifications subject to change without notice.


- OWNER'S MANUAL
- MODEL CD
- CD PLAYER-DIGITAL TRANSPORT
- AUDIO RESEARCH
- PREFACE
- INTRODUCTION
- WARNINGS
- PACKAGING
- POWER-UP PROCEDURE
- FRONT PANEL CONTROL FUNCTIONS
- REMOTE CONTROL FUNCTIONS
- CD DOOR FUNCTIONS/WARNINGS
- MAINTENANCE
- THE CDS
- PROBLEMS AND THEIR LIKELY CAUSES
- CONNECTIONS
- DIGITAL OUTPUTS
- ANALOG OUTPUTS
- INSTALLATION INSTRUCTIONS
- OPERATING PROCEDURE
- START-UP
- SHUT-DOWN
- SERVICING
- CLEANING
- DISPOSAL AND RECYCLING GUIDELINES
- FCC RULES
- LIMITED WARRANTY
- SPECIFICATIONS
- OUTPUTS, ANALOG: (STEREO)
Brand : AUDIO RESEARCH
Model : CD3
Category : CD Player