
MFO24EME4R118-BK - Cooker MIDEA - Free user manual and instructions
Find the device manual for free MFO24EME4R118-BK MIDEA in PDF.


| Product Type | Freestanding Electric Cooker |
| Brand | MIDEA |
| Model | MFO24EME4R118-BK |
| Color | Black |
| Energy Source | Electric (230 V / 60 Hz) |
| Cooktop Type | Radiant ceramic glass |
| Number of Cooking Zones | 4 |
| Oven Capacity | 100 liters (approx.) |
| Oven Type | Electric multifunction with convection |
| Oven Functions | Bake, broil, convection bake, defrost |
| Timer | Digital programmable timer |
| Control Type | Knobs and electronic display |
| Width | 61 cm (24 inches) |
| Height | 91.4 cm (36 inches) |
| Depth | 63.5 cm (25 inches) |
| Weight | 50 kg (approx.) |
| Cleaning | Easy-clean enamel interior and removable oven door |
| Safety Features | Child lock, anti-tip bracket, cool-touch handle |
| Spare Parts and Repair | Replacement heating elements, knobs, and thermostats available |
| Warranty | 2 years (standard) |
| Includes | Oven rack, broiler pan, user manual |
Frequently Asked Questions - MFO24EME4R118-BK MIDEA
User questions about MFO24EME4R118-BK MIDEA
0 question about this device. Answer the ones you know or ask your own.
Ask a new question about this device
Download the instructions for your Cooker in PDF format for free! Find your manual MFO24EME4R118-BK - MIDEA and take your electronic device back in hand. On this page are published all the documents necessary for the use of your device. MFO24EME4R118-BK by MIDEA.
USER MANUAL MFO24EME4R118-BK MIDEA
Free-Standing Oven
USER MANUAL
MFO24EME4R118-SS
MFO24EME4R118-BK
MFO24EME4R118-WH
Warning notices: Before using this product, please read this manual carefully and keep it for future reference.
The design and specifications are subject to change without prior notice for product improvement.
Consult with your dealer or manufacturer for details.
The Illustration is for reference only. Please take the appearance of the actual product as the standard.
THANK YOU LETTER
Thank you for choosing Midea! Before using your new Midea product, please read this manual thoroughly to ensure that you know how to operate the features and functions that your new appliance offers in a safe way.
CONTENTS
THANK YOU LETTER 01
SAFETY INSTRUCTIONS 02
SPECIFICATIONS 08
PRODUCT OVERVIEW 10
QUICK START GUIDE 11
PRODUCT INSTALLATION 12
OPERATION INSTRUCTIONS 17
CLEANING AND MAINTENANCE 23
TROUBLESHOOTING 25
DISPOSAL AND RECYCLING 26
SAFETY INSTRUCTIONS
Intended use
The following safety guidelines are intended to prevent unforeseen risks or damage from unsafe or incorrect operation of the appliance. Please check the packaging and appliance on arrival to make sure everything is intact to ensure safe operation. If you find any damage, please contact the retailer or dealer. Please note modifications or alterations to the appliance are not allowed for your safety concern. Unintended use may cause hazards and loss of warranty claims.
Explanation of symbols

Danger
This symbol indicates that there are dangers to the life and health of persons due to extremely flammable gas.

Warning of electrical voltage
This symbol indicates that there is a danger to life and health of persons due to voltage.

Warning
This symbol indicates a hazard with a medium level of risk which, if not avoided, may result in death or serious injury.

Caution
This symbol indicates a hazard with a low degree of risk which, if not avoided, may result in minor or moderate injury.

Attention
This symbol indicates important information (e.g. damage to property), but not danger.

Observe instructions
This symbol indicates that a service technician should only operate and maintain this appliance in accordance with the operating instructions.
Read these operating instructions carefully and attentively before using/commissioning the unit and keep them in the immediate vicinity of the installation site or unit for later use!

WARNING
- This appliance is not intended for use by persons (including children) with reduced physical, sensory or mental capabilities, or lack of experience and knowledge, unless they have been given supervision or instruction concerning use of the appliance by a person responsible for their safety.
- Ensure that the appliance is switched off before replacing the lamp to avoid the possibility of electric shock.
- The appliance and its accessible parts become hot during use. Care should be taken to avoid touching heating elements. Children less than 8 years of age shall be kept away unless continuously supervised. (EN standard)
- Accessible parts may become hot during use. Young children should be kept away.

PROHIBIT
- Steam cleaner is not to be used.
- Do not use harsh abrasive cleaners or sharp metal scrapers to clean the oven door glass since they can scratch the surface, which may result in shattering of the glass.
- The appliance must not be installed behind a decorative door in order to avoid overheating.
- The openings and slots used for ventilation and dispersion of heat on the rear and below the control panel must never be covered.
- The user must not replace the supply cable of this appliance. Always call an after-sales servicing centre authorized by the seller in the case of cable damage or replacement.
- Anumber of fundamental rules must be followed when using electrical appliances. The following are of particular importance:
- Do not touch the appliance when your hands or feet are wet.
- Do not use the appliance barefooted.
- Do not allow the cooker to be used unsupervised by children or persons unfamiliar with it.
- Never allow the Mains Cable to be stretched, pulled or damaged if the Cooker is moved for cleaning etc. Do not use the cooker if the Mains Cable is damaged, consult a qualified electrician.
- Necessity to allow disconnection of the appliance from the supply after installation, unless the appliance incorporates a switch complying with 24.3. The disconnection may be achieved by having the plug accessible or by incorporating a switch in the fixed wiring in accordance with the wiring rules.
- Danger of fire: do not store items on the cooker surfaces.
- To avoid accidenbital spillage do not use cookware with uneven or deformed bottoms on the burners or on the electric plates.
- Never use flammable liquids such as alcohol or gasoline, etc. near the appliance when it is in use.
- When the appliance is in use the, heating elements and some parts of the oven door become extremely hot. Make sure you don't touch them and keep children well away.
- Do not line the inside of the oven with foil, as this may cause the appliance to overheat.
- Do not allow children or persons who are not familiar with the appliance to use it, without supervision.
- Do not let anyone sit or stand on the appliance.
- Do not remove accessories while the oven is hot.
- Do not heat unopened food or containers as pressure can build up and cause them to burst.
- Do not store chemical/food scraps, pressurized containers in or on appliances, or near appliances.
- Do not place flammable or plastic items on or near the appliance.
- When frying, do not fill the frying pan with more than 1/3 of the oil, or use a lid.
- Do not use this appliance as a room heater.
- Do not use the grill to heat dishes.
- Do not dry the hob or anything on the oven door.
- Do not install the device next to curtains or other soft furniture.
- Do not use steam cleaners.
- Do not cook directly on the hob surface without a cooking utensil, as this will result in damage to the surface of the hob.
- Do not use the hob as a worktop surface as damage may occur to the smooth surface of the hob.
- Do not drag or slide utensils on the hob surface, as this will cause scratches in the surface of the hob.
- Do not allow a cooking utensil to come into contact with the hob surround.
- Do not leave any utensils, food or combustible items on the hob when it is not in use.
- Do not place aluminum or plastic foil, or plastic containers on the hob.
- Do not leave the hotplates or cooking areas switched on unless they are being used. We recommend not to place larde preserving pans or fish kettles across two heating areas.
- Do not leave utensils partly covering the heated areas. Always ensure that are placed centrally over the heated areas and have the same diameter as the heating area used.

NOTICE
- Children should be supervised to ensure that they do not play with the appliance.
- If the supply cord is damaged, it must be replaced by the manufacturer, its service agent or similarly qualified persons in order to avoid a hazard.
• Surface of a storage drawer can get hot. - During use the appliance becomes hot. Care should be taken to avoid touching heating elements inside the oven.
- After removing the packaging, check that the appliance is not damaged. If you have any doubt, do not use the appliance, contact your nearest service centre of the store where you buy the appliance.
- Keep packaging components (plastic bags, Styrofoam, nails, etc.) out of the reach of children as they are a source of potential hazards.
- The appliance must be installed only by a qualified person in compliance with the instructions provided. The manufacturer declines all responsibility for improper installation which may harm persons and animals and damage property.
- The electrical safety of this appliance can only be guaranteed if the cooker is correctly and efficiently earthed, in compliance with current regulations on electrical safety. Always ensure that the earthing is efficient; if you have any doubts call in a qualified electrician to check the system. The manufacturer declines all responsibility for damage resulting from a system which has not been earthed.
- Check that the electrical capacity of the system and sockets will support the maximum power of the hob, as indicated on the rating label. If you have any doubts, call in a qualified technician.
- There may be an unpleasant odor upon first use, which disappears after a period of use.
- When first using the cooker, ensure that the room is well ventilated (e.g. open a window or use an extractor fan) and that persons who may be sensitive to the odour avoid any fumes. It is suggested that any pets be removed from the room until the smell has ceased. This odour is due to temporary finish on oven liners and elements and also any moisture absorbed by the insulation.
- Ensure that the appliance is switched off before maintenance, by switching off the main switches and turning all knobs to “OFF” position.
- The user must not replace the supply cable of this appliance. Always call an after-sales servicing centre authorized by the seller in the case of cable damage or replacement.
- This appliance must be used for the purpose for which it was expressly designed. Any other use is considered to be improper and consequently dangerous. The manufacturer declines all responsibility for damage resulting from improper and irresponsible use.
- Always switch off the electrical supply to the cooker and allow it to cool down before carrying out any cleaning operations etc.
- Special care should be taken when using chip pans etc. in order to avoid splashing or spillage of hot oil. They should not be used unattended since overheated oil may boil over and could also ignite.
- Parts of this appliance, cooking surfaces, retain heat for considerable periods after switching off. Care should, therefore, be taken when touching these areas before they have completely cooled down.
- Make sure the knobs are in its “OFF” position when the appliance is not in use. Also make all potentially dangerous parts of the appliance, safe, above all for children who could play with the appliance.
- If you use the power cable for single phase, the minimum cross-sectional area is 10mm2 . For there phases, the minimum cross-sectional area is 2.5mm2 .
- Any spillage should be removed from the lid before opening and the hob surface should be allowed to cool before closing the lid. You must colse the door when grill.
- You must colse the door when grill.
- Turn controls off when you have finished cooking and when not in use.
- Stand back when opening an oven door to allow any build up of steam or heat to disperse. Use dry good quality oven gloves when removing items from the oven/grill.
- Place pans centrally over the hotplate making sure handles are kept away from the edge of the hob and cannot become heated by other hotplate/pans.
- Take care to avoid heat/steam burns when operating the controls.
- Turn off the electricity supply before cleaning and allow the appliance to cool.
- Make sure the shelves are in the correct position before switching on the oven.
- Take care when removing items from the grill when the lower oven is on as the contents will be hot.
- Keep the appliance clean, as a build up of grease or fat from cooking can cause a fire.
- Follow the basic principles of food handling and hygiene to prevent the possibility of bacterial growth.
- Keep ventilation slots clear of obstructions.
• Refer servicing to a qualified appliance service engineer. - Take care to avoid touching heating elements inside the oven, as during use the oven becomes hot.
- If you use the power code for single phase, the minimum cross-sectional area is 4mm2 . For three phases, the minimum cross-sectional area is 2.5mm2 .
- WARNING: In order to prevent tipping of the appliance, this stabilising means must be installed. Refer to instructions for installation.


Caution, possibility of tilting Anti-tip restraints
SPECIFICATIONS
Model
MFO24EME4R118-SS
MFO24EME4R118-BK
MFO24EME4R118-WH
Power Supply 220-240 V\~, 50-60 Hz
Electric Power 10000W (Oven: 4000W Hob: 6000W)

A: 1800W
B: 1200W
C: 1800W
D: 1200W
Fuse
Min.50A
Cable type / section
When the user owns wiring, it can be equipped with H07RN-F power cord at least 4mm^2, or at least 4mm^2 cable.
Cable length
Max.2m
ENERGY CONSUMPTION
Product information for power consumption and maximum time to reach applicable low power mode.
Standby mode
0.8 W
The maximum time needed for the oven to automatically reach the applicable low power mode or condition
20 minutes
ENERGY EFFICIENCY
Product Information and Product Information Sheet according to EU and UK Ecodesign and Energy Labelling Regulations
| Oven Top Oven Bottom Oven | ||
| Energy Efficiency Index | 93.0 94.0 | |
| Energy efficiency class A A | ||
| Energy consumption with a standard load, conventional mode | 0.66kWh/cycle* | ----kWh/cycle* |
| Energy consumption with a standard load, fan-forced mode | ----kWh/cycle* | 0.79kWh/cycle* |
| Heat source | Electricity Electricity | |
| Volume | 38L 69L | |
| Type of oven | Free-Standing Oven | |
| Number of cavities 2 | ||
PRODUCT OVERVIEW
Electric Cooker
- Hob
- Control panel
- Insulation Shield
- Door handle
- Door glass

Accessories

Grill rack X2 Grill tray
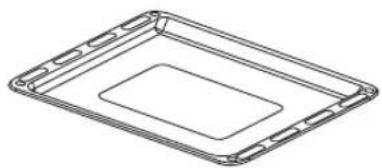

Small grill rack
Accessories use


QUICK START GUIDE
Control Panel

K6K5 Timer for bottom ovenK1 K2 K3 k
| K1~K4 | Hob control knob. |
| K5 | Top oven temperature control knob. |
| K6 | Bottom oven temperature control knob. |
| +/- | Adjust the time. |
| Press and hold for 3 seconds to enter or exit the child lock state. | |
| Cooking mode selection. | |
| Top oven operation indicator light | |
| Bottom oven operation indicator light |
NOTES
- The oven light is a main function, which is used by users to observe the cooking state of food and to check the oil stains and residues in the cavity when cleaning. After turning on the oven lamp function, you need to turn it off actively before the oven can return to the standby state.
- When cooking is finished, please turn the knob to the closed position.
- When the oven is running, the corresponding oven operation indicator light will illuminate.
PRODUCT INSTALLATION
Stove foot installation
- 2Please wear gloves to prevent cuts. Lay the product flat on the ground as shown in the figure below (this process requires at least two people).
Fix four feet on the bottom of the oven by rotating.
- Put the product upright.


NOTE
- If you don't install the feet correctly, the oven may not work properly.
Anti-tilting chain installation
- Punch a hole in the appropriate location on the wall behind the unit and drive the pin into the hole.

- Secure the chain to the back of the appliance.

- Screw the hook type screw into the pin.

- Hang the other end of the chain on the hook screw.

NOTE
- Stability chain to be as short as practicable to avoid oven tilting forward and diagonal to avoid oven side tilting.
- Cooker stability chain for cookers not designed with bracket engagement slot.
Power line connection
Please use a screwdriver to open the junction box on the back of the machine (as shown in the figure below).
The electric furnace is powered by a set of terminals for permanent wiring or terminals with power lines.


Connection mode is as follows:
| Voltage | Wiring Cable type | ||
| 220-240V~ |  |  | 3G4.0mm2or 3G6.0mm2H05RR-FH05RN-FH07RN-F |
| L,L1,L2,L3=Phase, N=Neutral, PE=Earth | |||
Important
The power cord should be placed to avoid the temperature exceeding 50° C.
Installation Important Instructions
Content that means [mandatory]
- The safe operation of this appliance can only be guaranteed if it has been installed to a professional standard in accordance with these installation instructions. The installer shall be liable for any damage resulting from incorrect installation.
- The entire installation process requires two professional installers. Wear dry protective gloves during installation to avoid scratch or electric shock.
- Fitted units must be heat-resistant up to 90° C, and adjacent unit fronts up to 70° C.
Content that means [prohibit]
- Do not install the appliance behind a decorative door or the door of a kitchen unit, as this may cause the appliance to overheat.
- After unpacking, check whether the equipment is damaged. Do not use the equipment if it is damaged during transportation.
- Use extreme caution when moving or installing the appliance. It is very heavy, do not lift the appliance by the door handle.
- If the power cord or power plug is damaged, stop using the appliance immediately, to avoid fire, electric shock or other injuries.
⚠️ Content that means [note]
- Be very careful when moving or installing the appliance to avoid damage to the appliance or damage to the cupboards.
- Before starting up the appliance, remove all packaging materials and accessories from the cavity.
- The power socket shall be accessible to users (such as next to the cupboard) for easy power-off.
- After installation is complete, make sure that the power plug is firmly inserted into the socket.
Installation diagram
- Please make sure the installation size requirements in the picture below.
- The cabinet dimension is in mm.
- Height of furnace foot is adjustable.


OPERATION INSTRUCTIONS
First Use
- To avoid fire, remove all shipping protection and make sure there are no residual packaging items (eg foam, cardboard, etc.) in the oven cavity.
- Clean the oven cavity and accessories with soapy water and a soft cloth.
- Open kitchen windows and cooker hoods to maintain high ventilation.
- Do not let children or pets into the kitchen and close the doors of adjacent rooms.
- After connecting the power, activate the oven mode, time, and temperature in the table below to remove odors in the cavity.
- After the first use, please open the oven door at a small angle and wait for the cooling to complete.
| Oven Temperature Time | ||
| MAX 0.5 HourTop | Oven | |
| MAX 0.5 HourBottom | Oven | |
Oven Operation Steps

K6K5 Timer for bottom ovenK1 K2 K3 k
Top Oven
- Turn Knob K5 to select the temperature.
- Please observe the cooking progress of the food through the window or set a cooking reminder time on your phone.
- After cooking is finished, please rotate all knobs to the off position.
Bottom Oven (Method 1)
- Turn Knob K6 to select the temperature.
- Cooking mode settings
- After cooking is finished, please rotate all knobs to the off position.
Bottom Oven (Method 2)
- Turn Knob K6 to select the temperature.
- Please observe the cooking progress of the food through the window or set a cooking reminder time on your phone.
- After cooking is finished, please rotate all knobs to the off position.
NOTE
- Be careful when opening the oven door 'as steam may escape. Exiting steam can scald your hands, face and/or eyes.
- Oven and hob can be used at the same time.
- Keep the oven door closed during cooking.
- When removing attachments or food from the oven, always use heat-resistant gloves.
- Do not place any items on the oven door.
- When baking larger foods, make sure to leave at least 25 mm of space between the food and the top and back of the oven.
- The max temperature setting of grill mode is 200° C。
Mode setting

Functional key -/+ key Start/Cancel key
When the power supply is connected, "0:00" is displayed, "⚡" flashes, and press any key to exit.
In standby mode, press the "☐" key continuously to select functions: clock → Alarm setting → duration setting → clock setting → clock (*: for default).
NOTE
Press and hold the "+" or "-" key to quickly adjust the time.
Clock setting
Before using the oven, please complete the clock setting.
-
Press the "☐" key to select the "☐".
-
Press the "+" or "-" key to adjust the time. Do not operate for 5 seconds, and display the current time.
Alarm setting
-
Press the "☐" key to select the "☐".
-
Press the "+" or "-" key to adjust the alarm clock time. Wait for 5 seconds and start the countdown.
NOTES
-
When the countdown shows "0:00", the prompt sounds. Press any key to exit the alarm clock function.
-
During work, press the "+" or "-" key to adjust the alarm clock time.
-
During work, press the "L" key once to enter the cooking time setting.
Duration time setting
- Press the "L" key to select "|→|" in standby or alarm clock state.
- Press the "+" or "-" key to adjust the cooking time, wait for 5 seconds to complete the confirmation, and start the countdown.
NOTE
- When the countdown is over, the prompt sounds. Press any key to cancel the tone. Press the "☐" key to return to standby.
- During cooking, press the "L" key to query and change the cooking time.
Cooking state
- When the icon "|→|" lights up, it means that the oven has set the cooking time. At this time, after turning the control knob to select the function and temperature, the oven will work. When the countdown to cooking time ends, the oven will stop working.
- When the oven control knob is not in the "off" position, and the cooking time and end time are not set, the oven will always work.
Child lock function
- In any state, press the "☐" key for 3 seconds to enter the child lock state.
- In the child lock state, press and hold the "☐" key for 3 seconds to release the child lock state.
Hob introduce

Knob


Location of cooking area
0 OFF
1 Lowest setting (Keep food warm)
11 Highest setting (quick heating up quick cooking)
After heating is completed, the surface of the hob is still very hot, please do not touch it.
| Knob Position Type of foods | |
| 1 or 2 To melt butter, chocolate, etc. | |
| 3 or 4 To heat foods gently.To keep small amount of water simmering.To heat sauces, containing egg yolks and butter.To simmer: stews, meat, fish, vegetables, fruit. | |
| 5 or 6 To heat solid and liquid foods.Keeps water boiling.Thaw frozen vegetables.Make 2-3 egg omelettes. | |
| 7 or 8 To cook foods, just above simmering.To maintain “rolling” boil for preserve making. | |
| 9 or 10 To seal meat and fry fish. | |
| 11 Frying potatoes. | Bringing water to the boil.Deep fat frying.Dissolve sugar for preserve making. |
Hob Operation Steps
- Turn the hob control knob to select gear.
- Please observe the cooking progress of the food through the window or set a cooking reminder time on your phone.
- After cooking is finished, please rotate all knobs to the off position.
Tips
- Do not use cookware with jagged edges or a curved base.

- Make sure that the base of your pan is smooth, sits flat against the glass, and is the same size as the cooking zone. Always centre your pan on the cooking zone.

- Always lift pans off the ceramic hob - do not slide, or they may scratch the glass.

CLEANING AND MAINTENANCE
Cleaning
Before each cleaning, disconnect the power supply. To ensure the longevity of cooker, cooker should be cleaned frequently and thoroughly, keeping in mind:
- After the oven is completely cooled, remove the accessories, wash and dry it with warm soapy water.
- Wash the interior of the oven with hot soapy water and wipe down with a damp cloth.
- Leave the door open until the inside is dry, then put the accessories in the oven.
- You should regularly wipe over the control panel, oven door, oven sides and hob using a soft cloth and mild liquid detergent as spilt liquids may damage the enamel.
- Wash enameled or chrome plated parts of the oven with warm soapy water or with nonabrasive detergents.
NOTE
- To prevent spilled or spilled food residue from burning and being difficult to remove, clean the oven after each use.
- Do not use abrasive pads to clean the interior of the oven as this may remove the enamel, which will affect the efficiency of your oven.
- Do Not use harsh, abrasive cleaners or sharp metal scrapers to clean the oven door glass since they can scratch the surface, which may result shattering of the glass.
- Never use abrasive pads to clean enameled chromed or stainless steel surfaces.
- When using commercially available stainless steel cleaning products avoid cleaning any lettering or symbols, as they can become damaged.
Lamp Replacement
- To prevent the lamp from being damaged, put a towel in the cavity.
- Turn counterclockwise to remove the glass cover.
- Pull out the wick and replace it (don't turn it).
- Install the glass cover back and take out the towel.
- The product contains a light source of energy efficiency class:G.

1


2
Warning
To avoid electric shocks-please ensure that the electricity supply to the appliance is switched off and the appliance is fully cold. before removing the lamp lens.
Clean the oven door
-
Please fully open the oven door.
-
Press the switches on both sides of the oven door and push downward in the direction indicated by the arrow (to remove the top cover).
-
Slide the door glass in the direction indicated by the arrow and lift it out.
-
The installation steps are the reverse of the removal steps.


TROUBLESHOOTING
Before contacting the authorized service center in case of problems while using your cooker, check the problem quite below; there may be nothing wrong with your cooker.
| Problem Possible reason Solution | ||
| Unable to start | Power is not connected connect power supply | |
| The main power switch is not turned on | Turn on the power switch | |
| Oven door not closed Close the oven door | ||
| light does not come on It's broken Contact after-sales service | ||
| Has a pungent odor or smoke | first use | No processing required |
| Food is not cooked | Temperature is too low | Use a higher temperature |
| Food portion is too large | Cook food in smaller pieces or extend the cooking time. | |
| Burnt or uneven food | The temperature is set too high or the heating time is too long | Adjust the cooking temperature or time |
| The food is too close to the heating tube | Adjust the placement layers of accessories | |
| The fan did not stop working after stopping the heating | Fan delays blowing for heat dissipation | No processing required |
DISPOSAL AND RECYCLING
Important instructions for environment
Compliance with the WEEE Directive and Disposing of the Waster Product: This product complies with EU WEEE Directive (2012/19/EU). This product bears a classification symbol for waster electrical and electronic equipment (WEEE).
This symbol indicates that this product shall not be disposed with other household wastes at the end of its service life. Used device must be returned to official collection point for recycling of electrical electronic devices. To find these collection systems please contact to your local authorities or retailer where the product was purchased. Each household performs important role in recovering and recycling of old appliance. Appropriate disposal of used appliance helps prevent potential negative consequences for the environment and human health.

Compliance with RoHS Directive
The product you have purchased complies with EU RoHS Directive (2011/65/EU). It does not contain harmful and prohibited materials specified in the Directive.
Package information
Packaging materials of the product are manufactured from recyclable materials in accordance with our National Environment Regulations. Do not dispose of the packaging materials together with the domestic or other wastes. Take them to the packaging material collection points designated by the local authorities.

IMPORTANT
Activate your Warranty

0333 034 8425
midea.warrantyonline.co.uk

Aidea

make yourself at home
- USER MANUAL
- THANK YOU LETTER
- CONTENTS
- SAFETY INSTRUCTIONS
- INTENDED USE
- EXPLANATION OF SYMBOLS
- DANGER
- WARNING OF ELECTRICAL VOLTAGE
- WARNING
- CAUTION
- ATTENTION
- OBSERVE INSTRUCTIONS
- PROHIBIT
- NOTICE
- SPECIFICATIONS
- MODEL
- ENERGY CONSUMPTION
- ENERGY EFFICIENCY
- PRODUCT OVERVIEW
- ELECTRIC COOKER
- ACCESSORIES
- ACCESSORIES USE
- QUICK START GUIDE
- NOTES
- PRODUCT INSTALLATION
- STOVE FOOT INSTALLATION
- NOTE
- ANTI-TILTING CHAIN INSTALLATION
- POWER LINE CONNECTION
- INSTALLATION IMPORTANT INSTRUCTIONS
- CONTENT THAT MEANS [MANDATORY]
- CONTENT THAT MEANS [PROHIBIT]
- ⚠️ CONTENT THAT MEANS [NOTE]
- INSTALLATION DIAGRAM
- OPERATION INSTRUCTIONS
- FIRST USE
- OVEN OPERATION STEPS
- TOP OVEN
- BOTTOM OVEN (METHOD 1)
- BOTTOM OVEN (METHOD 2)
- MODE SETTING
- CLOCK SETTING
- ALARM SETTING
- DURATION TIME SETTING
- COOKING STATE
- CHILD LOCK FUNCTION
- HOB INTRODUCE
- KNOB
- HOB OPERATION STEPS
- TIPS
- CLEANING AND MAINTENANCE
- CLEANING
- LAMP REPLACEMENT
- CLEAN THE OVEN DOOR
- TROUBLESHOOTING
- DISPOSAL AND RECYCLING
- IMPORTANT INSTRUCTIONS FOR ENVIRONMENT
- COMPLIANCE WITH ROHS DIRECTIVE
- PACKAGE INFORMATION
- IMPORTANT
- ACTIVATE YOUR WARRANTY
Brand : MIDEA
Model : MFO24EME4R118-BK
Category : Cooker