
NPBT-60 - Refrigerator Magic Chef - Free user manual and instructions
Find the device manual for free NPBT-60 Magic Chef in PDF.
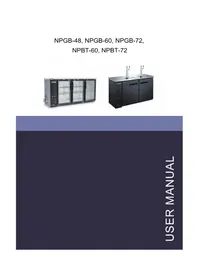


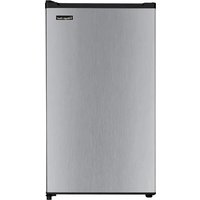
| Product Type | Refrigerator |
| Brand | Magic Chef |
| Model | NPBT-60 |
| Capacity | 1.6 cu ft |
| Dimensions (W x D x H) | 17.3 x 17.4 x 18.7 inches |
| Weight | 26 lbs |
| Power Supply | 115V / 60Hz |
| Energy Efficiency | Energy Star certified |
| Adjustable Thermostat | Yes |
| Reversible Door | Yes |
| Shelves | Wire shelves |
| Door Storage | Yes |
| Defrost Type | Manual |
| Refrigerant | R600a (environmentally friendly) |
| Temperature Range | 32°F to 50°F |
| Noise Level | Less than 40 dB |
| Cord Length | 3 ft |
| Control Type | Dial |
| Interior Light | Yes |
| Maintenance | Clean with warm water and mild detergent |
| Safety Certification | ETL approved |
Frequently Asked Questions - NPBT-60 Magic Chef
User questions about NPBT-60 Magic Chef
0 question about this device. Answer the ones you know or ask your own.
Ask a new question about this device
Download the instructions for your Refrigerator in PDF format for free! Find your manual NPBT-60 - Magic Chef and take your electronic device back in hand. On this page are published all the documents necessary for the use of your device. NPBT-60 by Magic Chef.
USER MANUAL NPBT-60 Magic Chef
NPGB-48, NPGB-60, NPGB-72,
NPBT-60, NPBT-72

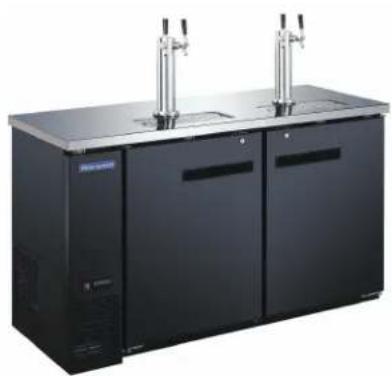
TABLE OF CONTENTS
Introduction
Safety
Disposal
Installation
Electrical
Start Up
Sealing Cabinet to Floor
Maintenance & Cleaning
Cleaning the Condenser Coil
Stainless Steel Care & Cleaning
Congratulations! You have selected one of the finest commercial refrigeration units made. It is manufactured under strict quality controls with only the best quality materials available. When properly maintained your cooler will give you many years of trouble free service.
Notice: Use this appliance for its intended purpose as described in this User Manual.
PLEASE READ HANDBOOK BEFORE USING EQUIPMENT
INSTRUCTION BOOK FOR NPGB / NPSB SERIES BACK BAR COOLERS
GENERAL INSTRUCTIONS
- When the cooler is installed or used, all the packaging (including carton and plastic wrap) should be removed.
- Keep the cooler stable to avoid vibration and noise.
- The cooler should be installed in a place with good ventilation and a space of at least 4" should be allowed between the surrounding walls and the cabinet wall for air circulation.
- Unit should be placed far from any heating source to avoid decrease of refrigeration efficiency.
• Install the cooler in a dry place to prevent rust from forming on the compartment body, which may affect the electrical insulation.
CAUTION
- The cooler must be grounded correctly, never with a heating pipe and coal gas pipe.
- In case of damage to the electrical cord and plug, please contact after sale service and never do it yourself.
- When unplugging unit, please grasp by the plug, not the cord.
- If the voltage is unstable, please select a suitable automatic voltage regulator.
- If the power cuts off, you should wait for at least 5 minutes before turning on the unit again to avoid damage to the compressor.
- Never store any flammable, explosive or corrosive liquid or gas in or near the cooler.
SAFETY
When using electrical appliances basic safety precautions should be followed:
- This cooler must be properly installed and located in accordance with the Installation instructions before it is used.
- Do not allow children to climb, stand or hang on the shelves in the cooler. They could damage the unit and seriously injure themselves.
- Do not store or use gasoline or other flammable vapors and liquids in the vicinity of this or any other appliance.
- Setting the temperature controls to the 0 (zero) position does not remove power to the light circuit, perimeter heaters or evaporator fans.
- Unplug the unit from the electrical outlet before cleaning or making repairs.
NOTE: It is strongly recommended that any servicing be performed by an authorized service representative.
PROPER DISPOSAL OF EQUIPMENT
DANGER! RISK OF CHILD ENTRAPMENT
Child entrapment and suffocation are not problems of the past. Junked or abandoned refrigerators are still dangerous . . . even if they will sit for "just a few days." If you are getting rid of an old refrigerator, please follow the below instructions to help prevent a terrible accident.
- Remove the doors
- Leave shelves in place to prevent children from easily climbing inside.
REFRIGERANT DISPOSAL
Your old refrigerator may have a cooling system that used "ozone depleting" chemicals. If you are throwing away your old refrigerator, be sure the refrigerant is removed for proper disposal by a qualified service technician. If you intentionally release any refrigerants you can be subject to fines and imprisonment under the provisions of the environmental regulations.
INSTALLATION
Tools required: Phillips screw driver.
- Use a phillips screw driver to remove the four (4) screws from the L-bracket connecting the unit to the wood skid (see image 1). Then remove the L-bracket from the unit (see image 2).

Image 1 Removing bracket from skid

Image 2 Removing bracket from cabinet
- Remove skid by unscrewing all base rail anchor brackets. Place skid to the side.
- Carefully upright cabinet.
When lifting unit do not use the countertop as a lifting point. Also remember to leave cabinet upright for 24-hours before plugging into power source.
- Set unit in its final location. Make sure there is adequate ventilation in this location. Under extreme heat conditions (+100°F / +38°C) an exhaust fan may be necessary. Warning: Installation without proper ventilation will void the manufacturer's warranty.
- Proper leveling of the unit is critical to operating success (for non-mobile models). Effective condensate removal and door operation will be affected by leveling.
- The cooler should be leveled front to back and side to side with a level.
ELECTRICAL
Do not under any circumstances cut or remove the grounding prong from the power cord. For safety this appliance must be properly grounded at all times.
• The power cord of this cooler is equipped with a grounding plug which mates with a standard grounding wall outlet to minimize the possibility of electric shock hazard.
- If the outlet is a standard 2-prong outlet, it must be replaced with the properly grounded wall outlet. NEVER USE AN ADAPTER PLUG!
- Have the wall outlet and circuit checked by a qualified electrician to make sure the outlet is properly grounded. Check the incoming voltage with a voltmeter. If the results are anything less than 100% of the rated voltage for operation is noted, it must be corrected immediately.
WARNING: Compressor warranties are voided if compressor burns out due to low voltage.
- DO NOT USE EXTENSION CORDS. The use of extension cords to connect the cooler will void the warranty. The unit must be close enough to the electrical supply so that extension cords are never used.
- The cooler should always be plugged into its own dedicated circuit with a voltage rating that matches the rating plate. This provides the best performance and also prevents overloading wiring circuits which could become a fire hazard from overheated wires.
- Never unplug your cooler by pulling on the power cord. Always grip the plug firmly and pull straight out from the outlet.
- Repair or replace immediately all power cords that have become frayed or otherwise damaged. Do not use a power cord that has cracks or abrasion damage along its length or at either of its ends.
- When removing the cooler away from the wall be careful not to run over or damage the power cord.
It is strongly recommended that any servicing be performed by an authorized service representative.
NOTE: Wiring diagram can be referenced by removing the front louvered grill, and looking on the inside cabinet wall.
START UP
Plug in the cooler and the compressor is ready to operate.
- Temperature control set at #4 position gives the cooler an approximate temperature of 35°F . Allow unit to function several hours, completely cooling cabinet before changing the control setting
- Excessive tampering with the control could lead to service difficulties. Should it ever become necessary to replace the temperature control it should be ordered from your dealer or recommended service agent.
- Good air flow in your cooler is critical. Be careful to load product so that it neither presses against the back wall nor comes within four (4) inches of the evaporator housing. Refrigerated air off the coil must circulate down the back wall.
LIGHT SWITCH LOCATION:
The switch is located on the front of the evaporator housing toward the right of the cabinet. Open the front door
NOTE:
If the unit is disconnected or shut off, wait five (5) minutes before re-starting unit.
RECOMMENDATION
Before loading product the unit should be run for 2 to 3 days. This allows confirmation that the electrical wiring and installation are correct and no shipping damage has occurred. Remember that the factory warranty does not cover product loss.
REPLACEMENT PARTS
We maintains a record of the cabinet model number and serial number for your cooler. If at any time during the life of your cooler a replacement part is needed, call the factory office with the model number and serial number of your unit to place an order for the part.
SEALING CABINET TO FLOOR
Step 1 - Position Cabinet
Allow one (1) inch between the wall and rear of the refrigerated bar equipment to assure proper ventilation.
Step 2 - Level Cabinet
Cabinet should be level side to side and front to back. Place a carpenter's level in the interior cabinet floor in four places:
A Postion level in the inside floor of the unit near the door. Level should be parallel to cabinet front.
B Postion level at the inside rear of cabinet. Level should be placed parallel to cabinet back.
C Perform similar procedures to steps A and B by placing the level on inside floor left and right sides parallel to the depth of the cooler. Level cabinet.
Step 3 - Applying Sealant
- Draw an outline on the base of the floor.
- Raise and block the front side of the cabinet.
- Apply a bead of NSF Approved Sealant (see list below) to floor half an inch inside the outline drawn. The bead must be heavy enough to seal the entire cabinet surface when it set down on the sealant.
- Raise and block the rear of the cabinet.
- Apply sealant on floor as outlined above on other 3 sides.
- Examine to see that the cabinet is sealed to floor around entire perimeter.
NSF APPROVED SEALANTS:
Minnesota Mining #ECU800 Caulk
Minnesota Mining #ECU2185 Caulk
Minnesota Mining #ECU1055 Bead
Minnesota Mining #ECU1202 Bead
Armstrong Cork - Rubber Caulk
Products Research Co #5000 Rubber Caulk
GE Silicone Sealer
Dow Corning Silicone Sealer
NOTE:
Asphalt floors are very susceptible to chemical attack. A layer of tape on the floor prior to applying the sealant will protect the floor.
MAINTENANCE AND CLEANING
Condensers accumulate dirt and dust and require cleaning every 30 days. Dirty condensers result in compressor failure, product loss, and lost sales -- which are not covered by warranty.
Air is pulled through the condenser continuously along with dust, lint, grease, etc. If you keep the condenser clean you will minimize your service expense and lower your electrical costs. The condenser requires scheduled cleaning every days or as needed. A dirty condenser can result in non-warranted part and compressor failures and product loss.
Proper cleaning involves removing debris from the condenser by using a soft brush or vacuuming the condenser with a shop vac or using Co2, nitrogen or pressurized air.
If you cannot remove the debris adequately please call you refrigeration service company.
On most of the reach-in units the condenser is accessible at the rear of the unit. You must remove the cabinet grill to expose the condenser. The condenser looks like a group of vertical fins. You need to be able to see through the condenser for the unit to function at maximum capacity. Do not place filter material in front of condensing coil. This material blocks air flow to the coil which is similar to having a dirty coil.
CLEANING THE CONDENSER COIL
Required Tools
• Phillips screwdriver
- Stiff bristle brush
- Adjustable wrench
When using electrical appliances basic safety precautions should be followed.
- Disconnect power to unit.
• Take off lower grill assembly by removing all screws. - Remove bolts anchoring compressor assembly to frame rails and carefully slide out -- tube connections are flexible.
- Clean off accumulated dirt from condensing coil with the stiff bristle brush.
- Lift cardboard cover above fan at plastic plugs and carefully clean condenser coil and fan blades.
• After brushing condenser coil, vacuum dirt from coil and interior floor. - Replace cardboard cover, carefully slide compressor assembly back into position and replace bolts.
- Reinstall louver assembly onto unit with appropriate fasteners and clips. Tighten all screws.
- Connect unit to power and check to see if condenser is running.
STAINLESS STEEL CARE AND CLEANING
CAUTION: Do not use any steel wool, abrasive or chlorine based products to clean stainless steel surfaces.
Stainless Steel Enemies
There are three basic items that can break down stainless steel's passivity layer and allow corrosion to occur.
- Scratches from wire brushes, metal scrapers and steel pads are just a few examples of items that can be abrasive to stainless steel's surface.
- Deposits left on stainless steel can leave spots. Hard water can leave spots. Hard water that is heated can leave deposits if left to sit for too long. These deposits can cause the passive layer to break down and rust stainless steel. All deposits left from food prep or service should be removed as quickly as possible.
- Chlorides are present in table salt, food and water. Household and industrial cleaners are the worst type of chlorides to use.
8 Steps that can help prevent rust on stainless steel
- Use the correct cleaning tools. Use non-abrasive tools when cleaning your stainless steel products. The stainless steel's passive layer will not be harmed by soft cloths and plastic scouring pads.
- Clean along the polish lines. Polish lines or grain are visible on some stainless steel. Always scrub parallel to visible lines. Use a plastic scouring pad or soft cloth when grain is not visible.
- Use alkaline, alkaline chlorinated or non-chloride containing cleaners. While many traditional cleaners are loaded with chlorides, the industry is providing an ever increasing choice of non-chloride cleaners. If unsure of chloride content contact the cleaner supplier. If present cleaner contains chlorides, ask for an alternative. Avoid cleaners containing quaternary salts as they can attack stainless steel causing pitting and rusting.
- Water treatment. To reduce deposits, use soft water whenever possible. Installation of certain filters can be an advantage. Contact a treatment specialist about proper water treatment.
- Maintain cleanliness of food equipment. Use cleaners at recommended strength (alkaline, alkaline chlorinated or non-chloride). Avoid buildup of hard stains by cleaning frequently
- When using chlorinated cleaners you must rinse and wipe dry immediately. It is better to wipe standing cleaning agents and water as soon as possible. All stainless steel equipment to air dry. Oxygen helps maintain the passivity film on stainless steel.
- Hydrochloric acid (muriatic acid) should never be used on stainless steel.
• Regularly restore/passivate stainless steel.
STAINLESS STEEL EQUIPMENT CARE AND CLEANING
Recommended cleaners for stainless steel
- Soap, ammonia and detergent medallion applied with a soft cloth or sponge for routine cleaning.
- Arcal 20, Loc-O-Nu Ecoshine provide a barrier film for fingerprints and smears.
- Cameo, Talc, Zud First Impression is for stubborn stains and discoloration. Rub in direction of polish lines.
- Easy-off and De-Grease It oven aid are excellent for removals on all finishes for grease-fatty acids, blood and burnt-on foods.
- Any good commercial detergent can be applied with a sponge or soft cloth to remove grease and oil.
- Benefit, Super Sheen, Sheila Shine are good for restoration/passivation.

- TABLE OF CONTENTS
- PLEASE READ HANDBOOK BEFORE USING EQUIPMENT
- INSTRUCTION BOOK FOR NPGB / NPSB SERIES BACK BAR COOLERS
- GENERAL INSTRUCTIONS
- CAUTION
- SAFETY
- PROPER DISPOSAL OF EQUIPMENT
- DANGER! RISK OF CHILD ENTRAPMENT
- REFRIGERANT DISPOSAL
- INSTALLATION
- ELECTRICAL
- START UP
- LIGHT SWITCH LOCATION
- NOTE
- RECOMMENDATION
- REPLACEMENT PARTS
- SEALING CABINET TO FLOOR
- STEP 1 - POSITION CABINET
- STEP 2 - LEVEL CABINET
- STEP 3 - APPLYING SEALANT
- NSF APPROVED SEALANTS
- MAINTENANCE AND CLEANING
- CLEANING THE CONDENSER COIL
- STAINLESS STEEL CARE AND CLEANING
- STAINLESS STEEL ENEMIES
- STAINLESS STEEL EQUIPMENT CARE AND CLEANING
Brand : Magic Chef
Model : NPBT-60
Category : Refrigerator