RM/348 - Blender Ramtons - Free user manual and instructions
Find the device manual for free RM/348 Ramtons in PDF.
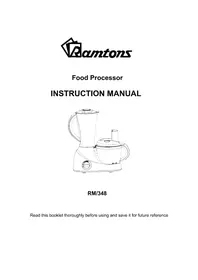


| Product Type | Blender |
| Brand | Ramtons |
| Model | RM/348 |
| Power Consumption | 600 Watts |
| Capacity | 1.5 Litres |
| Number of Speeds | 2 speeds plus pulse |
| Blade Material | Stainless Steel |
| Jar Material | Glass |
| Safety Lock | Yes, interlock system |
| Non-Slip Base | Yes, with suction feet |
| Overheat Protection | Built-in thermal fuse |
| Cleaning | Detachable jar and blade assembly |
| Dimensions (H x W x D) | 38 x 20 x 20 cm |
| Weight | 3.2 kg |
| Cord Length | 1.2 m |
| Power Supply | 220-240V, 50/60Hz |
| Warranty | 1 year |
| Included Accessories | Stirring rod, measuring cap |
Frequently Asked Questions - RM/348 Ramtons
User questions about RM/348 Ramtons
0 question about this device. Answer the ones you know or ask your own.
Ask a new question about this device
Download the instructions for your Blender in PDF format for free! Find your manual RM/348 - Ramtons and take your electronic device back in hand. On this page are published all the documents necessary for the use of your device. RM/348 by Ramtons.
USER MANUAL RM/348 Ramtons
RM/348
Read this booklet thoroughly before using and save it for future reference
IMPORTANT SAFEGUARDS
Before using the electrical appliance, the following basic precautions should always be followed including the following:
- Read all instructions, and save it for future reference.
- Before use, check that the voltage of wall outlet corresponds to the one shown on the rating plate.
- If the supply cord is damaged it must be replaced by the manufacturer or a authorized service agent or a qualified technician in order to avoid a hazard.
- To protect against risk of electrical shock, do not put the base in water or other liquid.
- Do not let cord hang over edge of table or hot surface.
- Unplug from outlet when not in use, before putting on or taking off parts, and before cleaning.
- Do not operate the appliance for other than its intended use.
- Close supervision is necessary for any appliance being used by or near children.
- Keep hands and utensils out of container while blending to reduce the risk of severe injury to persons or damage to the blender.
- Keep hands, hair, clothing, as well as spatulas and other utensils away from whisk during operation to reduce the risk of injury to persons, and damage to the whisk.
- Avoid contacting moving parts.
- Never use your fingers to push food down the feed tube. Always use the Pusher.
- Be certain cover is securely locked in place before operating appliance.
- For coffee grinder, check bowl for presence of foreign objects before using.
- Before removing the lid from the bowl from the power unit, switch off the unit, wait until the blades have come to a complete stop.
- Always make sure juicer cover is clamped securely in place before motor is turned on. Do not unfasten clamps while juicer is in operation.
- Be sure to turn switch to 0 position after each use of your juicer. Make sure the motor stops completely before disassembling.
- Do not put your fingers or other objects into the juicer opening while it is in operation. If food becomes lodged in opening, use food pusher or another piece of
fruit or vegetable to push it down. When this method is not possible turn the motor off and disassemble juice to remove the remaining food.
- Do not use the scraper while the unit is still running.
- Always operate blender with cover in place.
-
Do not attempt to defeat the cover interlock mechanism.
-
Do not open the cover until blades stop.
-
The metal blades and disk are extremely sharp, handle with care. Always hold the blade assembly by the finger grip or stem, away from the cutting edge, both when handling and cleaning.
-
The use of attachments not recommended or sold by the manufacturer may cause fire.
-
Always remove the blade assembly before pouring contents from bowl.
-
This appliance is not intended for use by persons (including children) with reduced physical, sensory or mental capabilities, or lack of experience and knowledge, unless they have been given supervision or instruction concerning use of the appliances by a person responsible for their safety.
-
Children should be supervised to ensure that they do not play with the appliance.
-
Do not use outdoors.
-
Save these instructions.
HOUSEHOLD USE ONLY
KNOW YOUR FOOD PROCESSOR

The attachments for coupler

The attachments for spindle

BEFORE FIRST USE
Carefully unpack the food processor and remove any package material or label or stickers. Cleaning all the parts except Base following the instructions in Cleaning and Maintenance. Handle the metal blade or disk with extreme care as they are sharp.
Using the food processor
The appliance has two power outlets, the couple and the spindle, the coupler can be fix with the blender and the coupler cover. The spindle is used with the following attachments: the metal blade, plastic blade, shredding/slicing/chipping disks set, whisk, centrifugal juicer. The detail see the below. The food processor can be used for kneading, beating and whisking, mincing the meat, vegetable and fruit, shredding, slicing and chipping the vegetables or potatoes, blending the smooth soup, sauces, creams, fruit purees, milk and so on. Using the different attachment to perform different task.
Note: during operation, if any of which bowl, bowl lid, coupler cover, jar or top lid is loose, the motor will stop rotating within 1.5s.
USING THE ATTACHMENTS FOR BLENDER
a) Place the jar on the Motor Unit and slightly turn the jar clockwise as the arrow on the jar show, until the jar locks with the base as illustrated (see fig.1).
b) Peeled or cored the fruit or vegetables and then cut it into small dices, put the food piece into the jar. Usually certain amount of purified water has to be add to facilitate the smooth running of appliance, The amount of mixture should not exceed the max level as indicated on the jar.
Note: never use boiling liquids or run the appliance empty.
c) Replace the Top Cover on the jar and turn it clockwise, ensure that the Top Cover can fix with the jar securely. If the Top Cover is not or is badly positioned, the blender cannot be locked into place on the food processor and will not work.
d) You may add ingredient into the jar through the center opening of Top Cover during operation, then replace Measuring Cup if necessary. Let the tab of Measuring Cup aligns with the groove of Top Cover, put down and turn in anti-clockwise until the measuring cup is fixed with the top cover.
Caution: While you are using coupler, i.e. when you use the blender, you must leave the bowl into place, make sure that the lid is locked, if the lid is unlock, the interlock switch is malfunction. The coupler will not operate. When using the coupler, once plugging the power outlet, the spindle also is rotating, this is normal, but never put food into the bowl. This may be damage the motor.
e) Connect the plug to wall outlet and set Speed Selector to your desired speed. The detailed information of Speed Selector is as following figure 2.
f) The total operating time should not more than 3 minutes.
g) Turn the Speed Selector to 0 Position once the mixture has been blended to your desired consistency.
h) Remove the jar from the Motor Unit (turning the jar anti-clockwise), carefully take down the Top Cover, then pour and serve.

Fig.1

Fig.2
CLEANING
- Disconnect the power supply before cleaning.
- Pour a little warm water into the jar and turn the speed selector to P position for a few seconds.
- Remove the jar and rinse and rinse under running water. Remove Top cover and measuring cup, then immerse the top cover, measuring cup in water and clean them with a soft brush, finally clean them with dump cloth.
Caution: the blade cannot be disassembled for cleaning.
- Wipe the outside of base with a damp cloth. Never immerse it in water as electric shock is possible to occur. Then dry thoroughly. Ensure the interlock area is free of food particles.
USING THE ATTACHMENTS FOR SPINDLE
Caution: While using spindle, the coupler cover must be locked into place.
1. Chopping
a) Place the bowl on the Motor unit and turn it clockwise using the handle as the arrow on the bowl show until the bowl locks with the base.
b) Slide the metal blade onto the spindle (see fig.3).
c) Place the lid on the bowl and turn it clockwise until it clicks into position. The spur on the lid sticks out of the base of the lid-locking slot (see fig.4)
d) Connect the appliance to power supply. Set Speed Selector to your desired speed.
You can blend up to 1L of soups, stewed fruit, etc. in two seconds. Set the speed selector in the high speed to start the appliance. In 15-30 seconds, you can chop up to 600g of following foodstuff:
Hard substance: cheese, dried fruits, and certain vegetables (carrots, celery...)
Soft substance: certain vegetables (onions, spinach...)
Raw and cooked meat (boned and sliced)
e) The total operating time should not more than 3 minutes.
f) Turn the speed selector to 0 position after chopping. Remove the bowl from the Motor Unit (turning the bowl anti-clockwise), take down the lid and empty the bowl.

Fig.3

Fig.4
CLEANING
- Disconnect the power supply before cleaning.
- Empty the bowl and remove the lid, the metal blade, pusher, then immerse them in water and clean them with damp cloth or soft brush. Extreme caution must be taken when handling blade as it is very sharp.
- Wipe the outside of base with s damp cloth. Never immerse it in water as electric shock is possible to occur. Then dry thoroughly. Ensure the interlock area is free of food particles
2. Kneading/mixing
a) Place the bowl on the Motor unit and turn it clockwise using the handle as the arrow on the bowl show until the bowl locks with the base.
b) Slide the plastic blade onto the spindle.
c) Place the lid on the bowl and turn it clockwise until it clicks into position. The spur on the lid sticks out of the base of the lid-locking slot (see fig.4)
d) Set the speed selector on high speed. Stop the process as soon as the pastry starts to form a ball. The appliance allows you to make the maximum quantity of mixture is 1000g. The proportion of the flour and water is 54:46 Make sure the quality of the water and the flour is not more than the maximum quantity of mixture.
Note: Add some more water if the processing speed slows down during operating so as to make the motor run smoothly, otherwise the motor may be damaged.
e) Do not run the appliance for more than 2 minutes per time. Minimum 2 minutes rest period is required between two consecutive cycles.
CLEANING
- Disconnect the power supply before cleaning.
- Empty the bowl and remove the lid, the plastic blade, pusher, then immerse them in water and clean them with a damp cloth or soft brush.
- Wipe the outside of base with a damp cloth. Never immerse it in water as electric shock is possible to occur. Then dry thoroughly. Ensure the interlock area is free of food particles
3. Beating and whisking
a) Place the bowl onto the lower power outlet, and turn it by using the handle until it locks into place.
b) Slide the whisk onto the spindle.(see fig.5)
c) Place the ingredient into the bowl.
d) Place the lid onto the bowl and turn it clockwise until you hear it click into position. The spur on the lid sticks out of the base of the lid-locking slot (see fig.5).
e) Set the speed selector between low speed and high speed.
f) You can use it to prepare mayonnaise, sauces, egg whites, meringues (2-6 egg whites), and whip cream (up to 0.5L).
Note: Never use this whisk to knead dough or mix cake mixtures.
g) Do not run the appliance for more than 3 minutes per time. Minimum 2 minutes rest period is required between two consecutive cycles.
CLEANING
- Disconnect the power supply before cleaning.
- Empty the bowl and remove the lid, the whisk, then immerse them in water and clean them with a soft brush, finally clean it with damp cloth.
- Wipe the outside of base with cloth. Never immerse it in water as electric shock is possible to occur. Then dry thoroughly. Ensure the interlock area is free of food particles
4. Shredding/slicing/chipping
a) Place the bowl on the Motor unit and turn it clockwise using the handle as the arrow on the bowl show until it locks into place.
b) Fit the shredding disk or slicing disk or chipping disk into the disk stand, place them in the bowl.

Fig.5
c) Place the lid on the bowl and turn it clockwise until you hear it clicks into position. The spur on the lid sticks out of the base of the lid-locking slot (see fig.6).
d) Use the pusher to feed food into the feeder tub.
e) Select the speed selector to your desired speed to start.
Note: the shredding/slicing/chipping disks can slice thickly-potatoes, onions, thinly-cucumbers, boot root, apples, and carrots...
f) The total operating time should not more than 3 minutes.


Fig.6
CLEANING
- Disconnect the power supply before cleaning.
- Empty the bowl and remove the shredding/slicing/chipping disks from the disk stand, the disk stand from the bowl, the pusher from the lid, the lid from the bowl, then immerse the lid, pusher, bowl, disk stand and the shredding/slicing/chipping disks in water and clean them with a soft brush. Extreme caution must be taken when handling disks as they are very sharp.
Note: For disassembling the disks from the disk stand, first push out one side with no block, then push out the other side. For assembling, first push in the no block side, then push in the other side.
- Wipe the outside of base with cloth. Never immerse it in water as electric shock is possible to occur. Then dry thoroughly. Ensure the interlock area is free of food particles
Note: Some food may discolor the disk stand. This is normal and will not harm the plastic or effect the flavor of food. Rub with cloth dipped with vegetable oil to remove discoloration
5. Centrifugal juicer
a) Place the bowl on the Motor unit and turn it clockwise using the handle as the arrow on the bowl show until it locks into place.
b) Place the filter for juice extractor into the spindle.
c) Place the lid for centrifugal juicer on the bowl and turning it clockwise until you hear it clicks into position. The spur on the lid sticks out of the base of the lid-locking slot (see fig.7).
Note: the lid for centrifugal juicer do not use for other attachments.

Fig.7
d) Wash fruits and vegetables well, cut into strips to fit into the feeding funnel.
e) Insert the prepared ingredients into the feeding funnel and gently push down by pusher.
f) Select the speed selector to your desired speed to start the appliance.
Note:
- The juice cannot process bananas, peaches, apricots, etc. because no juice can be squeezed from those fruits.
- The juice cannot process coconut or other hard items because they may damage the motor and the filter.
- Peels must be removed from citrus fruits. Remove pits from cherries, prunes, etc. before feeding them into the funnel.
- When the unit is shaking, turn off the switch and to empty the pulp in the filter.
- The total operating time should not more than 3 minutes.
CLEANING
- Disconnect the power supply before cleaning.
- Empty the bowl and remove the lid from the bowl, the filter from the bowl, the pusher from the lid, then immerse them in water and clean them with a soft brush.
Note: during cleaning, it must be carefully as the teeth into the filter are sharp. - Wipe the outside of base with cloth. Never immerse it in water as electric shock is possible to occur. Then dry thoroughly. Ensure the interlock area is free of food particles
- Some food may discolor the filter. This is normal and will not harm the plastic or effect the flavor of food. Rub with cloth dipped with vegetable oil to remove discoloration.
Environment friendly disposal

You can help protect the environment!
Please remember to respect the local regulations: hand in the non-working electrical equipments to an appropriate waste disposal center


- IMPORTANT SAFEGUARDS
- HOUSEHOLD USE ONLY
- BEFORE FIRST USE
- USING THE ATTACHMENTS FOR BLENDER
- NOTE: NEVER USE BOILING LIQUIDS OR RUN THE APPLIANCE EMPTY
- CLEANING
- USING THE ATTACHMENTS FOR SPINDLE
- CHOPPING
- KNEADING/MIXING
- BEATING AND WHISKING
- SHREDDING/SLICING/CHIPPING
- CENTRIFUGAL JUICER
- NOTE
- ENVIRONMENT FRIENDLY DISPOSAL
Brand : Ramtons
Model : RM/348
Category : Blender