
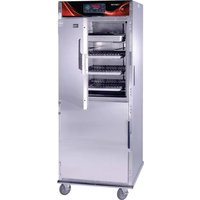
CO151X185DX - Oven Cres Cor - Free user manual and instructions
Find the device manual for free CO151X185DX Cres Cor in PDF.


| Product Type | Convection Oven |
| Brand | Cres Cor |
| Model | CO151X185DX |
| Intended Use | Commercial kitchen food service |
| Construction | Stainless steel interior and exterior |
| Insulation | High-density fiberglass insulation |
| Number of Racks | 5 chrome-plated wire racks included |
| Pane Capacity | 5 full-size sheet pans (18" x 26") |
| Temperature Range | 200 - 500 °F (93 - 260 °C) |
| Timer | 60-minute mechanical timer with audible alarm |
| Cooking Technology | Forced-air convection for even baking |
| Power Source | Electric, 208-240V, 60Hz, 10.8 kW |
| Electrical Ratings | Single-phase or three-phase options |
| Door Type | Double-pane thermal glass with stay-open hinge |
| Safety Features | Cool-touch handle, auto shut-off, overheat sensor |
| Controls | Digital thermostat with LED display |
| Interior Dimensions | 29" W x 26" D x 20" H |
| Exterior Dimensions | 39" W x 35" D x 57.5" H |
| Weight | 350 lbs (160 kg) |
| Cleaning | Removable crumb tray, easily accessible interior |
| Maintenance | Replaceable door gasket and heating elements |
| Certifications | NSF, UL, CSA listed |
| Warranty | 1 year parts and labor warranty |
| Accessories Included | 5 wire racks, instruction manual |
Frequently Asked Questions - CO151X185DX Cres Cor
User questions about CO151X185DX Cres Cor
0 question about this device. Answer the ones you know or ask your own.
Ask a new question about this device
Download the instructions for your Oven in PDF format for free! Find your manual CO151X185DX - Cres Cor and take your electronic device back in hand. On this page are published all the documents necessary for the use of your device. CO151X185DX by Cres Cor.
USER MANUAL CO151X185DX Cres Cor
| Convection Oven | FL-2378 |
| Rev. 1 (2/15) | Page 1 of 14 |
INSTALLATION, OPERATION and MAINTENANCE MANUAL for Cres Cor Undercounter AquaTemp™ HUMIDITY OVENS and CONVECTION OVENS 2000 WATTS

CO151XUA5DE1201
CO151XUA5DX1201
CO151X185DE1201
CO151X185DX1201

CO151XWUA5DE1201
CO151XWUA5DX1201
| Convection Oven | FL-2378 |
| Rev. 1 (2/15) | Page 2 of 14 |
CRES COR®
5925 Heisley Road • Mentor, OH 44060-1833
TABLE OF CONTENTS
SUBJECT
INSTALLATION INSTRUCTIONS ....3
OPERATING INSTRUCTIONS
First Time Operation....4
How to Use Control for Cooking & Holding (For All Models)....4
How to Save and Use Recipes (For All Models) ....5
"Quick Recipe" and Other Menu settings (For All Models). 5
How to use AquaTemp Control for Humidity (CO151XWUA5D Only)....6
MAINTENANCE INSTRUCTIONS
How to Clean the Unit ....7
Trouble Shooting Guide 8,9
Cabinet Replacement Parts....10
Electrical Replacement Parts 11
Wiring Diagram For Ovens Without Aquatemp Control ....12
Wiring Diagram For Ovens With Aquatemp Control....13
SERVICE POLICY and AGENCY LIST....FL-1400

| Convection Oven | FL-2378 |
| Rev. 1 (2/15) | Page 3 of 14 |
INSTALLATION INSTRUCTIONS
VENTING YOUR OVEN:
-
This cabinet passes the EPA 202 test and complies with section 59 of UL710B for emission of grease-laden air.
-
According to UL, this cabinet does not need to be placed under a ventilation hood.
-
Installation must conform with local codes. The authority having jurisdiction of enforcement of the codes will have the responsibility for making interpretations of the rules.
ELECTRICAL SPECIFICATIONS:
| Model Nos. Volts | Watts Amps Hertz Phase NEMA | |||||
| CO151XUA5DE1201 | 120 | 2000 16.6 60 1 L5-20P | ||||
| CO151X185DE1201 | ||||||
| C0151XWUA5DE1201 | ||||||
| CO151XUA5DX1201 | ||||||
| CO151X185DX1201 | ||||||
| C0151XWUA5DX1201 | ||||||
All ovens have two air heaters at 925 watts each.
Model CO151XWUA5D Series also has a water pan heater at 1850 watts.
All models are designed for AC Service. Model numbers may have the letters: B, L, M, S, I, U, or Z.
HOW TO INSTALL OVENS:
- Remove all packing material from inside and outside of oven.
- Position oven on level floor; install the oven interior (pan slides) if not already installed.
- Plug power cord into proper wall receptacle.
FOR MODEL CO151XWUA5DE(or DX)1201 ONLY WHEN USING HUMIDITY OPTION:
- MANUAL FILL: Fill water pan with three (3) gallons of HOT water (see CAUTION).
- AUTO FILL: Attach water valve on back bottom of unit to water supply (see "How to use Automatic fill kit on page 7).
LOW WATER LIGHT:
MANUAL FILL: When water needs to be added to the pan, the Low Water Light will stay on and the humidity will not work until the pan is refilled.
AUTO FILL: If water level is low and water supply is not connected, an error code will display after a time limit.
CAUTION
Use of treated water is recommended for proper operation and to maintain warranty. It will reduce scaling.
HOW TO CHANGE FROM °F TO °C (if needed)
- Push the switch on; the light will come on.
- Push and hold the "SET" button and the button in the lower left hand corner together for 5 seconds. You have now entered into the menu.
- Scroll over the "Unit" and change it to "C", then scroll to the "END".
NOTE: A new oven needs to "burn off" manufacturing oils and excessive adhesive before its first use. Do NOT load food into oven until this has been done!
- Push the switch to on; the light will come on.
NOTE: The letters "LOTPR" (low temperature) will show on the control panel until it reaches 140°F (60°C).
- Press the "COOK" button.
- Push down and turn the control knob to show 200° F. Push the knob again to set the temperature. Run the unit for one (1) hour.
- Turn the unit off and let cool.
- Wipe the inside clean with detergent and hot water.
| Convection Oven | FL-2378 |
| Rev. 1 (2/15) | Page 4 of 14 |
CRES COR®
5925 Heisley Road • Mentor, OH 44060-1833
ROAST-N-HOLD OPERATING INSTRUCTIONS
For All Models

HOW TO USE THE ROAST-N-HOLD CONTROL:
*Push the lighted switch on the control panel; the oven will start heating and stay in HOLD mode.
*The display will read “LOTPR” (low temperature) below 140°F. (60°C.).
NOTES: Preheat for one (1) hour after start up before loading the food for best results when retherming or cooking heavy loads.
If a power outage occurs or the cabinet is shut off during a cook cycle, when it is turned on again all lights on the control will flash to indicate a disruption. Control will resume the last cook cycle used. Press any button to stop the blinking.
If your model does not have a food probe, continue to section "-DE OVENS" below.
If your model has a food probe, skip to section "-DX OVENS" on page 5.
If your model has an AquaTemp Control, see page 7 also.
-DE OVENS:
Cooking:
- Press the COOK button.
- Turn the control knob to the desired cooking temperature between 180° F ( 82° C) and 350° F ( 176° C).
- Push the knob to set the temperature.
- The control automatically switches to allow you to set HOLD temp. (Continue to step 1 below).
Holding:
(To use as holding cabinet only, skip steps 1-4 above and press HOLD button. Complete steps 1-3 below.)
- Turn the control knob to the desired holding temperature between 80° F ( 26° C) and 220° F ( 104° C).
- Push the knob to set the temperature.
- The control automatically switches to allow you to set cook time.
Setting the Timer:
- Turn the control knob to the desired hours/minutes.
- Push the knob to set the time.
- The control automatically switches to PREHEAT mode and will display "PrEHt"
Running the Cycle:
- The control will flash "PUSH StArt" after the cabinet has preheated to the set temp and the alarm will sound.
NOTE: A short beep will occur every 90 seconds as a reminder. This can be turned off in the user menu by holding the knob and the TIME buttons together for 5 seconds, then scrolling to "PSrE", changing "y" to "n", scrolling to "End", and pushing the knob to set.
- Load foods into oven and close the door.
- Push the START button to begin the Cooking process. Display will change between the setpoint temperature and the countdown of the timer.
- The alarm will sound after the time is done and the oven will switch back into HOLD mode. The timer will now count up, showing how long the food has been holding.
| Convection Oven | FL-2378 |
| Rev. 1 (2/15) | Page 5 of 14 |
OPERATING INSTRUCTIONS (continued)

-DX OVENS
Cooking:
- Press the COOK button.
- Turn the control knob to the desired cooking temperature between 180°F (82°C) and 350°F (176°C).
- Push the knob to set the temperature.
- The control automatically switches to allow you to set HOLD temp. (Continue to step 1 below).
Holding:
(To use as holding cabinet only, skip steps 1-4 above and press HOLD button. Complete steps 1-3 below.)
- Turn the control knob to the desired holding temperature between 80° ( 26° C) and 220° F ( 104° C).
- Push the knob to set the temperature.
- The control automatically switches to allow you to set cook time.
If cooking with timer, continue to step 1 below. If cooking with food probe, skip to section "Cooking with Food Probe".
Cooking with Timer:
- Turn the control knob to the desired hours/minutes. Oven will switch from COOK to HOLD mode when this time is done.
- Push the knob to set the time.
- Oven will switch to PREHEAT mode and control will display "PrEHt".
Cooking with Food Probe:
NOTE: Make sure probe was plugged in after step 1 of Holding above. If not, press the PROBE button and continue to next step below.
- Turn the control knob to the desired temperature. The oven will switch from COOK to HOLD mode when the probe reaches this temp.
-
Push the knob to set the temperature.
-
Oven will switch to PREHEAT mode and control will display "PrEHt".
Running the Cycle:
-
The control will flash "PUSH StArt" after the cabinet has preheated to the set temp and the alarm will sound.
NOTE: A short beep will occur every 90 seconds as a reminder. This can be turned off in the user menu by holding the knob and the TIME buttons together for 5 seconds, then scrolling to "PSrE", changing "y" to "n", scrolling to "End", and pushing the knob to set. -
Load foods into oven, insert probe (if applicable) and close the door.
-
Push the START button to begin the Retherm/Cook process.
a. If cooking with timer, display will alternate between the setpoint temperature and the countdown of the timer.
b. If cooking with probe, display will show the probe temp.
- The alarm will sound after the time is done and the oven will switch back into HOLD mode. The timer will now count up, showing how long the food has been holding.
NOTE: At any time, the CANCEL button can be pushed to return the oven back to HOLD mode at the previous set temperature.
The DISPLAY button shows (cycles through) all the values when in each mode:
- “PrEHt” or “PUSH StArt”: Momentarily shows actual oven temperature.
- "COOK (timed)": Shows home screen, set point, count down time, actual oven temperature.
- "COOK (probe)": Shows home screen, set point, count up time, actual oven temperature.
- "HOLD": Shows home screen, set point, count up time, actual oven temperature.
| Convection Oven | FL-2378 |
| Rev. 1 (2/15) | Page 6 of 14 |
CRES COR®
5925 Heisley Road • Mentor, OH 44060-1833
OPERATING INSTRUCTIONS (continued)

-DX OVENS, continued
RECIPES:
The -DX control can hold up to 18 saved recipes.
To save a recipe:
- Press the RECIPE button.
- Turn the knob through the menu until you get to "Edit" and press the knob.
- Turn the knob to reach the recipe you want to edit. There are 18 blank recipes to customize and save.
- Press the knob and enter the cook, hold and time values.
- After the entering the final value, "Edt" will show again, allowing you to edit another recipe.
- Press the knob to edit more recipes or turn to "End" to exit the menu.
To use one of the recipes:
- Push the RECIPE button.
- Turn the knob to the desired recipe; "rcP01", "rcP02", "rcP03", etc.
- Push the set button to select and start the preset process. Unit will begin to preheat.
- Run the cycle as described above by pressing START button after oven has preheated.
Note: The display button will cycle through all the values as before, but will include the recipe number, if using a saved recipe.
Additional Menu Settings:
Press and hold both the TIME button and the knob for 5 seconds to get into the menu.
Here you can set the recipes, temperature units (°C or °F), PUSH START reminder and the datalog settings (USB connection required):
"RECE" allows you to enable or disable the data record feature.
“RECF” allows you set how often (in minutes) a datapoint will be recorded.
“RECD” allows you to set how long (in days) you would like the data to be stored in memory.
| Convection Oven | FL-2378 |
| Rev. 1 (2/15) | Page 7 of 14 |
AQUATEMP OPERATING INSTRUCTIONS
For Model CO151XWUA5DE1201 or CO151XWUA5DX1201 Only

HOW TO USE THE AQUATEMP HUMIDTY CONTROL:
*The units of the humidity control are approximate % relative humidity. The amount of moisture will vary for the same %RH value at different cabinet temperatures.
* The LOW WATER Light comes on when water pan needs to be refilled.
*Press the ON/OFF button to turn it on.
Setting the Humidity:
-
At any time, press the knob and the setpoint %RH will flash.
-
Turn the knob to the value you desire.
-
Press the knob to set the value.
For use with the Roast-N-Hold Control:
- On the Roast-N-Hold control, when selecting the COOK temperature, the humidity setpoint will be flashing on the AquaTemp control.
- Turn the knob on the humidity control to the desired "Cook Humidity" value.
- On the Roast-N-Hold control, when selecting the HOLD temperature setpoint, the humidity setpoint will be flashing on the AquaTemp control.
- Turn the knob on the humidity control to the desired "Hold Humidity" value.
NOTE: These humidity values then are set and switch automatically based upon which Roast-N-Hold mode it is in.
The DISPLAY BUTTON momentarily shows the approximate relative humidity in the cabinet. When water level is low, %RH is not correct, so no value is displayed.
How to use the Automatic Water Fill:
There is a water fill connection under the bottom right rear of the oven. Remove the plug on the end of the connector.
- Connect the plastic tubing provided to the connector and the other end to your water supply. Turn water supply on.
- Press and hold both the DISPLAY button and the knob of the AquaTemp humidity control for five seconds.
- Turn the knob until when the display shows FILL, select "Y" for yes and press the knob to set.
- Go to END to exit the menu. Auto water fill should start.
To shut down:
- Press and hold both the DISPLAY button and the knob of the Aquatemp humidity control.
- Turn the knob to FILL and push to enter. Select "N" for no; go to END to exit the menu.
- Turn off your water supply and clean out the water pan after it cools (See "Maintenance Instructions" on page 8).
| Convection Oven | FL-2378 |
| Rev. 1 (2/15) | Page 8 of 14 |
MAINTENANCE INSTRUCTIONS HOW TO CLEAN THE UNIT
FOR CO151XWUA5D SERIES ONLY:
MAINTENANCE: WATER PAN
Drain, wipe and fill water pan daily.
(Clear vinyl drain-hose is provided).
- Push hose onto drain nozzle under the base.
- Turn knob to open the drain.
To Fully Dry Out:
- Drain until 1/8" of water is left in pan bottom.
- Run oven at 350°F (173°C) until water is gone.
- Wipe out pan.

CAUTION
Delime or descale water pan parts as required, to prevent damaging build-up. WARRANTY COVERAGE MAY BE AFFECTED WITHOUT PROPER CLEANING.
MAINTENANCE: CABINET (ALL MODELS)
- Wipe the inside of cabinet after daily use.
- Leave doors slightly open to fully dry interior.

WARNING
BEFORE cleaning the cabinet:
- Unplug cord from wall. Allow cabinet to cool.
- Do NOT hose cabinet with water.
- Do NOT get water on controls.
- Do NOT use abrasives or harsh chemicals.
- Do NOT use "Cres Clean" (or any citrus cleaner) on labels or plastic parts.
Cleaning Hints:
- Use the mildest cleaning procedure that will do the job.
-
Always rub in the direction of the polish lines to avoid scratching the surface.
-
Use only a soft cloth, sponge, fibrous brushes, plastic or stainless steel pad for cleaning and scouring.
- Rinse thoroughly with fresh water after every cleaning operation.
- Always wipe dry to avoid water marks.
HOW TO CLEAN THE UNIT:
| SOIL CLEANER METHOD | |||
| CABINETInside and Outside(Stainless Steel) | ROUTINE CLEANING | Soap, ammonia or mild detergent* and water. | 1. Sponge on with cloth2. Rinse |
| STUBBORN SPOTS, STAINS | Mild abrasive made for Stainless Steel. | 1. Apply with damp sponge or cloth.2. Rub lightly. | |
| BURNT ON FOODS OR GREASE | Chemical oven cleaner made for Stainless Steel. | Follow oven cleaner manufacturer's directions. | |
| HARD WATER SPOTS & SCALE | Vinegar | 1. Swab or wipe with cloth.2. Rinse and dry. | |
| *Mild detergents include soaps and non-abrasive cleaners | |||
| Convection Oven | FL-2378 |
| Rev. 1 (2/15) | Page 9 of 14 |
MAINTENANCE INSTRUCTIONS TROUBLE-SHOOTING GUIDE, continued
HOW TO ADJUST THE DOOR LATCH:
- For vertical (up and down movement) adjustment:
a. Loosen (2) screws located in magnetic strike.
b. Move strike up or down for alignment to magnet on latch.
c. Tighten screws to secure
- For horizontal (greater or lesser magnetic draw) adjustment:
a. Loosen (4) screws in door latch.
b. Move latch forward or backward to adjust magnetism.
c. Tighten screws to secure.
TROUBLE-SHOOTING GUIDE
WARNING
IF OVEN GETS TOO HOT OR WON'T SHUT OFF, DISCONNECT POWER AT BRANCH PANEL. DO NOT UNPLUG CORD!
If unit is NOT working, first check the following causes:
- Cord is unplugged from wall outlet.
-
Circuit breaker/fuse to wall outlet is blown.
-
Switch is turned off.
- Fuse on back of unit is blown.
NOTE: Vent fans will not operate until the control compartment requires ventilation to limit temperatures. Replacement of electrical components must be done by a qualified electrician.
Refer to our Service Agency list, FL-1400 (found in the back of this manual), of authorized service centers. Instructions for replacing parts are included in replacement parts list.
| Convection Oven | FL-2378 |
| Rev. 1 (2/15) | Page 10 of 14 |
CRES COR®
5925 Heisley Road • Mentor, OH 44060-1833
MAINTENANCE INSTRUCTIONS
TROUBLE-SHOOTING GUIDE (continued)
| PROBLEM POSSIBLE CAUSE | SOLUTION | |
| Oven does not turn on | 1. Power switch is bad2. Retherm control is bad. | 1. Replace2. Replace |
IF THE OVEN TURNS ON:
| PROBLEM POSSIBLE CAUSE SOLUTION | ||
| Oven does not heat, or doesn't heat properly | 1. Sensor2. Heater contactor3. Loose wiring at heater contactor4. Oven control5. High Limit | 1. Replace2. Replace3. Replace4. Replace5. Replace |
| Blowers do not operate | 1. Blower2. Oven control | 1. Replace2. Replace3. Replace |
| Heater will not shut off | 1. Control defective2. Heater contactor | 1. Replace2. Replace |
| Vent fans do not shut off | 1. Vent fan switch defective2. Control compartment is still hot. | 1. Replace2. Wait until it coolsCheck “Heater will not shut off” |
| Vent fans do not operate (See Note) | 1. Vent fan switch defective2. Vent fan defective | 1. Replace2. Replace |
| Control will not switch from “COOK” to “HOLD” (timed mode) | 1. Oven is in “PROBE” mode (DX oven)2. Oven control defective | 1. Cancel recipe and switch to “TIMED” mode2. Replace |
| Control will not switch from “COOK” to “HOLD” (probe mode in DX oven only) | 1. Oven is in the “TIMED” mode2. Probe not plugged in3. Probe defective4. Oven control defective | 1. Cancel recipe and switch to “PROBE” mode2. Plug in probe3. Replace4. Replace |
| Control will not switch to “COOK” (probe mode in DX oven only) | 1. Oven in “TIMED” mode2. Probe temperature setting lower than probe temperature3. Probe not plugged in4. Oven control defective | 1. Switch to “PROBE” mode2. Set probe temperature to desired temperature3. Plug in probe4. Replace |
| No Humidity (CO151XWUA5D1201) | 1. Water element defective2. AquaTemp control | 1. Replace2. Replace |
ERROR CODES:
| CODE DISPLAYED CAUSE SOLUTION | ||
| no p No meat probe Plug in probe | ||
| Err0 Temp probe bad Replace | ||
| Err1 (CO151XWUA5D1201) Water fill time out Connect water supply |
| Convection Oven | FL-2378 |
| Rev. 1 (2/15) | Page 11 of 14 |
REPLACEMENT PARTS
Include all information on nameplate when ordering parts
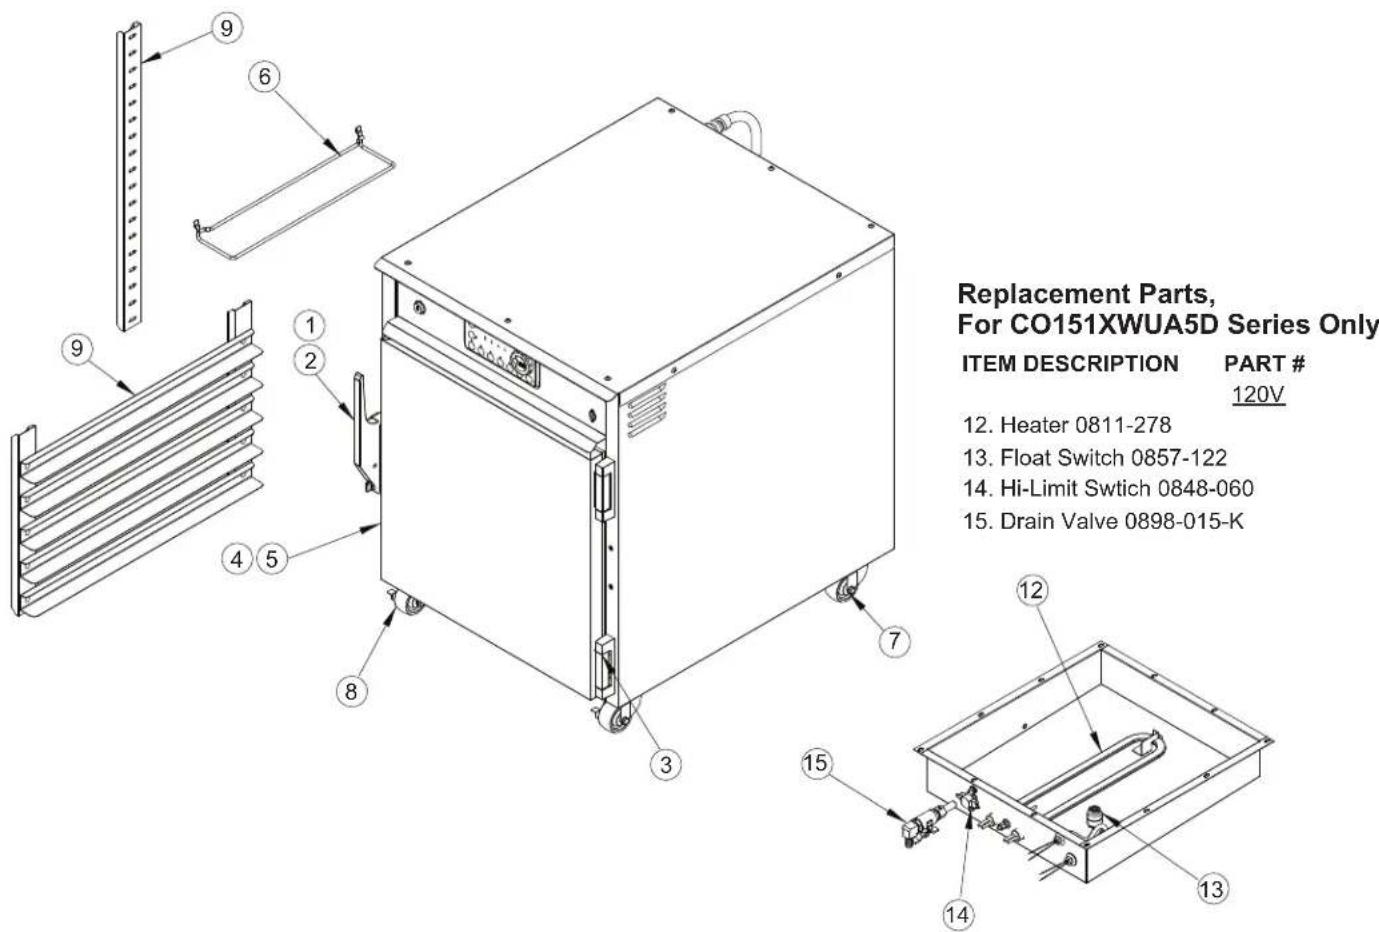
Cabinet Replacement Parts:
| MODEL PREFIX CO-151 | ||||
| Item No | DESCRIPTION -X185DE | DX -XUA5DE, DX | -XWUA5DE, DX | |
| 1 Door Latch Kit 1006-122-01 | -K 1006-122-01-K 1006-122-01-K | |||
| 2 Door Strike 1006-122-02-K | 1006-122-02-K 1006-122-02-K | |||
| 3 Door Hinge 0519-109-K 0519-109-K 0519-109-K | ||||
| 4 Door Assembly | 1221-614-K 1221-597-K 1221-597-K | |||
| 5 Door Gasket | 0861-251-K 0861-250-K 0861-250-K | |||
| 6 | Angles Kit (Set of 2) | - | 0621-281-K | 0621-281-SS-K |
| 7 Casters | 0569-310-K 0569-310-K 0569-310-K | |||
| 8 | Casters w/Brake | 0569-310-BK | 0569-310-BK | 0569-310-BK |
| 9 Posts or Insert | 1104-117 0696-252 | 0696-252 | ||
| Air Tunnel | 0546-162 | 0546-162 | 0546-162 | |
| Pan, Drip | 1017-098 | 1017-098 | 1017-098 | |
| Convection Oven | FL-2378 |
| Rev. 1 (2/15) | Page 12 of 14 |
CRES COR®
5925 Heisley Road • Mentor, OH 44060-1833
REPLACEMENT PARTS
Include all information on nameplate when ordering parts
Electrical Replacement Parts:
ITEM DESCRIPTION Part No. ITEM DESCRIPTION Part No.
| 1 Switch (On/Off) 0808-125 9 Terminal Block 0852-091 | |||||
| 2, 2A Thermostats, Digital See Chart Below | 10 Fuse | 0807-151 | |||
| 3 | Probe Connector ("DX" Ovens Only) | 0848-106-02 | Fuse Holder | 0807-150 | |
| 11 | Vent Fan | 0769-165 | |||
| 4 Blower | 0769-180-K | 12 Fan Guard | 0769-167 | ||
| Blower CO151XWUA5D | 0769-180-SS-K | 13 | Heaters, 2000W | 0811-074 | |
| 5 | Fan Switch | 0848-034 | 14 | Power Cord Kit | 0810-065 |
| 6 | Transformer | 0769-197 | 15 | Strain Relief | 0818-050 |
| 7 | Hi Limit | 0848-077 | 16 | Alarm Assy | 0908-009-01 |
| 8 Relay, DPDT | 0857-130 | ||||


REAR VIEW

FRONT VIEW
CO151XWUA5DE1201 OR
CO151XWUA5DX1201 ONLY

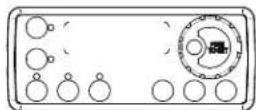
② "DX" ROAST-N-HOLD CONTROL
② "DE" ROAST-N-HOLD CONTROL
| FOR MODEL NOS. | |||||
| ITEM | DESCRIPTION | CO151XUA5DE, CO151X185DE | CO151XUA5DX, CO151X185DX | CO151XWUA5DE | CO151XWUA5DX |
| 2 | Roast-N-Hold Thermostat | 0848-092-22-K | 0848-092-06-K | 0848-092-23-K | 0848-092-07-K |
| 2A | Aquatemp Thermostat | NONE | NONE | 0848-092-05-K | 0848-092-05-K |
| Sensor | 0848-091-K | 0848-091-K | 0848-091-K | 0848-091-K | |
| Convection Oven | FL-2378 |
| Rev. 1 (2/15) | Page 13 of 14 |
Wiring Diagram For CO151X185D, -XUA5D 2000W, 120V Dry Ovens

Call Toll-free: 877-CRES COR (273-7267) • Fax: 800-822-0393 • www.crescor.com
| Convection Oven | FL-2378 |
| Rev. 1 (2/15) | Page 14 of 14 |
CRES COR®
5925 Heisley Road • Mentor, OH 44060-1833
Wiring Diagram For CO151XWUA5D 2000W, 120V Humidity Ovens

Call Toll-free: 877-CRES COR (273-7267) • Fax: 800-822-0393 • www.crescor.com

- INSTALLATION, OPERATION AND MAINTENANCE MANUAL FOR CRES COR UNDERCOUNTER AQUATEMP™ HUMIDITY OVENS AND CONVECTION OVENS 2000 WATTS
- CRES COR®
- TABLE OF CONTENTS
- SUBJECT
- OPERATING INSTRUCTIONS
- MAINTENANCE INSTRUCTIONS
- INSTALLATION INSTRUCTIONS
- VENTING YOUR OVEN
- HOW TO INSTALL OVENS
- FOR MODEL CO151XWUA5DE(OR DX)1201 ONLY WHEN USING HUMIDITY OPTION
- LOW WATER LIGHT
- CAUTION
- HOW TO CHANGE FROM °F TO °C (IF NEEDED)
- ROAST-N-HOLD OPERATING INSTRUCTIONS
- HOW TO USE THE ROAST-N-HOLD CONTROL
- DE OVENS
- COOKING
- HOLDING
- SETTING THE TIMER
- RUNNING THE CYCLE
- OPERATING INSTRUCTIONS (CONTINUED)
- DX OVENS
- COOKING WITH TIMER
- COOKING WITH FOOD PROBE
- DX OVENS, CONTINUED
- RECIPES
- TO SAVE A RECIPE
- TO USE ONE OF THE RECIPES
- ADDITIONAL MENU SETTINGS
- AQUATEMP OPERATING INSTRUCTIONS
- HOW TO USE THE AQUATEMP HUMIDTY CONTROL
- SETTING THE HUMIDITY
- FOR USE WITH THE ROAST-N-HOLD CONTROL
- HOW TO USE THE AUTOMATIC WATER FILL
- TO SHUT DOWN
- MAINTENANCE INSTRUCTIONS HOW TO CLEAN THE UNIT
- FOR CO151XWUA5D SERIES ONLY
- MAINTENANCE: WATER PAN
- TO FULLY DRY OUT
- MAINTENANCE: CABINET (ALL MODELS)
- WARNING
- BEFORE CLEANING THE CABINET
- CLEANING HINTS
- MAINTENANCE INSTRUCTIONS TROUBLE-SHOOTING GUIDE, CONTINUED
- HOW TO ADJUST THE DOOR LATCH
- TROUBLE-SHOOTING GUIDE
- IF OVEN GETS TOO HOT OR WON'T SHUT OFF, DISCONNECT POWER AT BRANCH PANEL. DO NOT UNPLUG CORD
- IF UNIT IS NOT WORKING, FIRST CHECK THE FOLLOWING CAUSES
- TROUBLE-SHOOTING GUIDE (CONTINUED)
- REPLACEMENT PARTS
- INCLUDE ALL INFORMATION ON NAMEPLATE WHEN ORDERING PARTS
- ELECTRICAL REPLACEMENT PARTS
Brand : Cres Cor
Model : CO151X185DX
Category : Oven