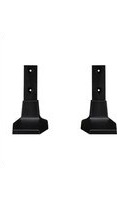
KT-T65E - Touchscreen kit LG - Free user manual and instructions
Find the device manual for free KT-T65E LG in PDF.


| Product Type | Interactive touch screen kit |
| Brand | LG |
| Model | KT-T65E |
| Compatible Display Size | 65 inches (163.9 cm) diagonal |
| Touch Technology | Infrared (IR) optical touch sensing |
| Touch Points | Up to 10 simultaneous touch points |
| Interface | USB 2.0 (plug and play) |
| Dimensions (W x H x D) | 1470 mm x 850 mm x 35 mm |
| Net Weight | 5.2 kg |
| Power Supply | USB powered, 5V/1A |
| Operating Temperature | 0°C to 50°C |
| Operating Humidity | 20% to 80% relative humidity, non-condensing |
| Main Functions | Multi-touch interaction, gesture recognition, palm rejection, annotation support |
| Installation | Bezel mounted with included brackets; no disassembly of the display required |
| Cleaning and Maintenance | Wipe with a soft dry cloth; avoid alcohol or abrasive cleaners |
| Safety and Compliance | CE, FCC, RoHS certified; low-voltage safety design |
| Spare Parts and Repairability | Modular design allows replacement of sensor modules and controller boards |
| Package Contents | Touch frame, mounting brackets, USB cable, calibration software CD, quick start guide |
Frequently Asked Questions - KT-T65E LG
User questions about KT-T65E LG
0 question about this device. Answer the ones you know or ask your own.
Ask a new question about this device
Download the instructions for your Touchscreen kit in PDF format for free! Find your manual KT-T65E - LG and take your electronic device back in hand. On this page are published all the documents necessary for the use of your device. KT-T65E by LG.
USER MANUAL KT-T65E LG
Multi-touch Overlay Kit
Please read this manual carefully before operating your set and retain it for future reference.
KT-T32E KT-T55E
KT-T43E KT-T65E
KT-T49E KT-T75E
TABLE OF CONTENTS
SAFETY PRECAUTIONS ......3
ASSEMBLY AND
PREPARATION......4
- Applicable models....4
- Accessories....4
- Precaution When Using the Touch Pen......6
- Portrait Layout....7
- Assembly Instructions....8
HOW TO ATTACH THE IR ..... 16
INSTALLATION INSTRUCTIONS ..17
- Connecting Touch USB Cable....17
BEFORE USE 18
PRODUCT SPECIFICATIONS... 19
- Touch Specifications....19
- Product Specifications ....19
- OS Support Availability....20
- Product Dimensions....21
TROUBLESHOOTING......27
Warning: This equipment is compliant with Class A of CISPR 32. In a residential environment this equipment may cause radio interference.

CAUTION
• Always use genuine components to ensure safety and product performance.
- The product warranty will not cover damage or injury caused by the use of counterfeit components.

NOTE
• The accessories provided with your product may vary depending on the model or region.
- Product specifications or contents in this manual may be changed without prior notice due to upgrade of product functions.
SAFETY PRECAUTIONS
- if you are a professional installer, please read this manual carefully before installing the product.
- If you are a professional installer, please give this manual to the user after installation and ensure that the user also reads the manual carefully and retains it for future reference.
• After reading the manual, please keep it handy for future reference.

WARNING
- The product should be installed by a qualified professional specified by the retail store.
- Product installation by non-qualified personnel is very dangerous and may cause personal injury.
- When moving or replacing the product after installation, contact a qualified installer specified by the retail store.
- Installation or movement of the product must be carried out by a skilled professional. If an unqualified person moves or installs the product, it may cause safety risks.
- Do not hang the power cable and signal cable on the back of the monitor when mounting the monitor to the wall.
- Damaged cables may result in fire, electric shock, or damage to the product.
- Keep the monitor upright when mounting the monitor to the wall.
• The product should be installed where its weight can be fully supported.
- If the product is installed on a weak surface, the product may fall, causing injury.
-
Check the maximum allowed weight of the wall mount (total weight is 75 kg).
-
Do not hang on this product. Protect it from severe impact after installation.
- The product may fall and cause injury.
• Models attached to the Multi-touch Overlay Kit cannot be installed on stands. - The product may fall.
ASSEMBLY AND PREPARATION
Applicable models
KT-T32E, KT-T43E, KT-T49E, KT-T55E, KT-T65E:
Applicable only for **SH7E, **SH7ED, **SM5E, **SE3E, **SL5E, **SH7DD, **SM5D, **SM5KD, **SE3D, **SE3KD, **SM5C, **SM5KC, **SM3C, **SE3C, **SE3KC, **SM5B, **SM5KB, **SM3B, **SE3B, **SE3KB, **SL5B (except for 32SL5B).
KT-T75E : Applicable only for 75UH5C and 75UM3C.
• Applicable models may be added.
• For details about applicable models, contact the retail store.
Accessories
- Check your product box for the following items. If there are any missing accessories, contact the local dealer where you purchased your product.
• The illustrations in this manual may differ from the actual product and accessories.
• Extra screws are provided for user convenience.
KT-T32E

CD (Owner's Manual)/Cards


Fixer Top (2 ea) Fixer Side (2 ea) Fixer Bottom Center (1 ea)


IR Bracket (1 ea) ∅3 x L6 Screw (1 ea) M4 x L6 Screw (13 ea)
KT-T43E / KT-T49E

CD (Owner's Manual)/Cards


Fixer Top (3 ea) Fixer Side (4 ea) Fixer Bottom Center (1 ea)


IR Bracket (1 ea) ∅3 x L6 Screw (1 ea) M4 x L6 Screw (19 ea)
KT-T55E / KT-T65E

CD (Owner's Manual)/Cards


Fixer Top (3 ea) Fixer Side (4 ea) Fixer Bottom (2 ea)


Fixer Bottom Center (1 ea) ∅3 x L6 Screw (1 ea) M4 x L6 Screw (23 ea) IR Bracket (1 ea)
KT-T65E only

Pen Tray (1 ea) Touch Pen (2 ea)


M4 x L8 Screw (2 ea)
KT-T75E

CD (Owner's Manual)/Cards

Fixer Top (3 ea) Fixer Side (4 ea) Fixer Bottom (1 ea)


IR Bracket (1 ea) M3 x L5.5 Screw (1 ea) M4 x L6 Screw (19 ea) M4 x L8 Screw (2 ea)

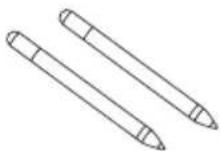
Pen Tray (1 ea) Touch Pen (2 ea)
Precaution When Using the Touch Pen
(KT-T65E, KT-T75E only)
If you hold down below the guide line when using the touch pen, it may occur a break or touch error.

Portrait Layout
When installing in a portrait layout, rotate the monitor counterclockwise 90 degrees (when facing the screen).
![graph TD A[" "] --> B[" "] style A fill:#fff,stroke:#000 style B fill:#fff,stroke:#000](/content/2026/08/1577128/images/3d9d17169a7bc014dcb1345f26608cbc97bceca9ed096e069f9f4777140a1d79.jpg)

NOTE
• The Pen Tray can only be used in the landscape position.
Assembly Instructions
• The picture may differ from the actual product.
NOTE
- Before installing the product, if there are any water drops or foreign materials on the inner/outer side of the glass, wipe them out with a soft cloth.
- While using the product, if there are any water drops or foreign materials on the inner/outer side of the glass, wipe them out with a soft cloth and install it again.
- Assemble the product in a clean, uncontaminated area to prevent dust or foreign material from entering it.
1 Place a soft cloth on the table and place the Multi-touch Overlay Kit over it as illustrated.

2 Remove the internal protective film using the handle at the upper right corner of the glass as illustrated.

3 Place a soft cloth on another table, place the display product as shown, and remove the LG Logo Bracket.
-For models with LG Logo Brackets only.
-The image may be different according to the model.

4 Place the display product on the Multi-touch Overlay Kit as illustrated.

5 Use the screws (M4 x L6) to attach the Fixer Top.
KT-T32E

KT-T43E / KT-T49E / KT-T55E / KT-T65E / KT-T75E

6 Use the screws (M4 x L6) to attach the Fixer Side.
KT-T32E

KT-T43E / KT-T49E / KT-T55E / KT-T65E / KT-T75E

7 Use the screws (M4 x L6) to attach the Fixer Bottom.
KT-T32E

KT-T43E / KT-T49E

KT-T55E / KT-T65E

KT-T75E

8 Use the screws (M4 x L8) to attach the Pen Tray.
KT-T65E

KT-T75E

9 Remove the external protective film using the handle at the upper right corner of the glass as illustrated.

HOW TO ATTACH THE IR
The image may be different according to the model.
1 Remove the IR sensor from the set.

2 Attach the IR sensor to the IR bracket.

3 Use the screws ( 3 × L6 ) or (M3 x L5.5) to attach the IR sensor to the IR bracket.

• (03 x L6): KT-T32E / KT-T43E / KT-T49E / KT-T55E / KT-T65E
(M3 x L5.5): KT-T75E
NOTE
• The IR sensor may differ depending on the model.

INSTALLATION INSTRUCTIONS
Connecting Touch USB Cable
1 Connect the touch USB cable extending from the side of the product to the PC.

CAUTION
The product may not work if you use a USB extension cable.
- While connecting a USB cable or within 3 seconds after connecting it, any tapping on the touch screen may not respond correctly.
2 Connect the TOUCH USB cable on the side of the product to the USB port on the back of the monitor.

CAUTION
• It may not be supported depending on the model.
• The image may be different according to the model.
- If there is a change in installation environment (lights etc.), please remove and reconnect the TOUCH USB cable.
- The touch screen may recognize and respond to a finger or object that is not touching the glass. This is a characteristic of the IR touch screen.
BEFORE USE
Set the video mode of the monitor to the Education mode or Game mode.
For details about settings, refer to the owner's manual of the monitor.
PRODUCT SPECIFICATIONS
Touch Specifications
“\~” refers to alternating current (AC), and “\~” refers to direct current (DC).
| Multi-touch 10 points | |
| Supported Operating Systems | Windows 7, Windows 8, Windows 8.1, Windows 10, Android (Kernel version 3.5 over), Linux(Kernel version 3.5 over), Mac OS X (10.9 over), Chrome (39 over) |
| Touch input method Pens, fingers, gloves, etc. | |
| Touch accuracy 2 mm | |
| Touch response time 15 ms | |
| Operating voltage 4.75 V to 5.25 V --- | |
| Power consumption 1.8 W (Max.) | |
| Rated Voltage 5 V 0.5 A --- | |
Product Specifications
| Dimensions (width x height x depth) / Weight | KT-T32E 768.4 mm | mm x 462.9 mm x 29.3 mm /4.2 kg (with accessories : 4.6 kg) |
| KT-T43E 1009.6 mm | mm x 597.8 mm x 29.3 mm /6.4 kg (with accessories : 7.1 kg) | |
| KT-T49E 1142.2 mm | mm x 672.4 mm x 29.3 mm /7.8 kg (with accessories : 8.5 kg) | |
| KT-T55E 1278 mm | mm x 748.8 mm x 29.3 mm /10.2 kg (with accessories : 11.1 kg) | |
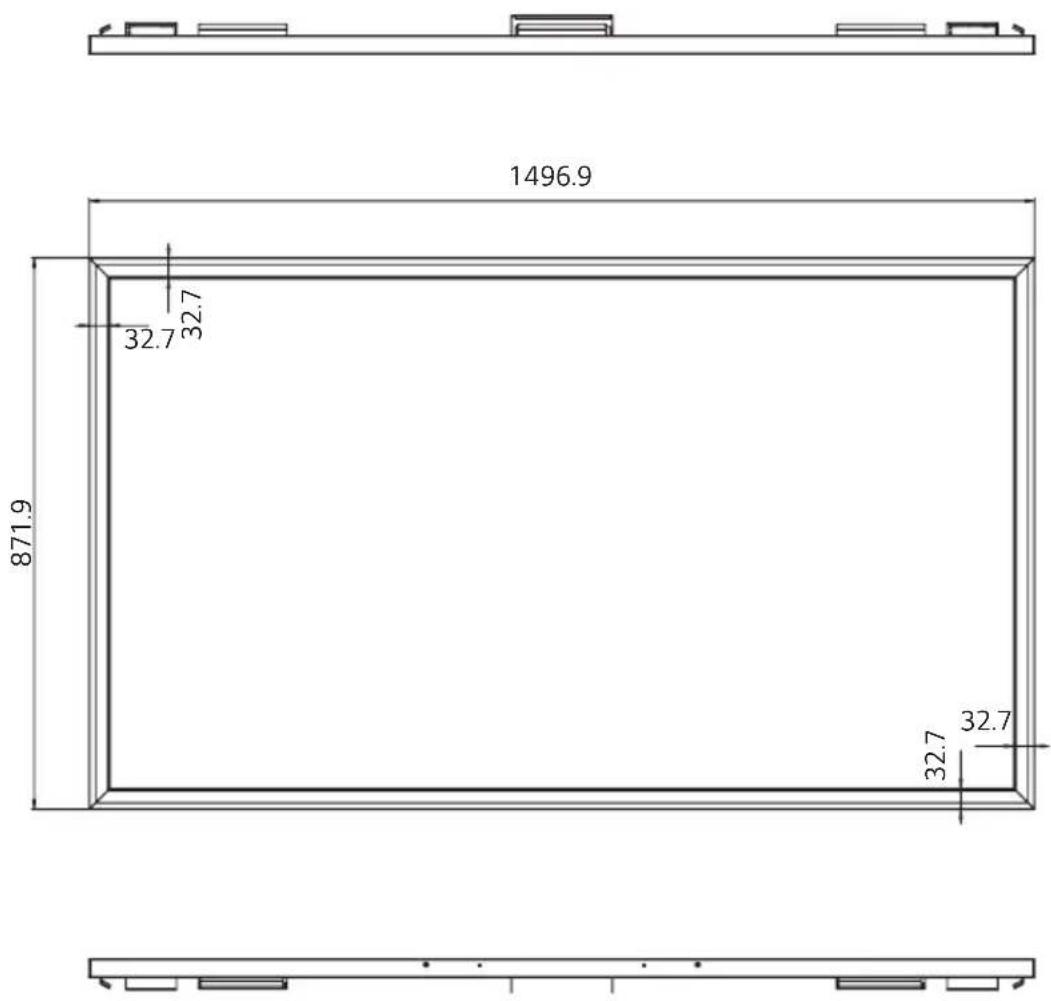
| KT-T65E 1496.9 mm | mm x 871.9 mm x 29.3 mm /12.9 kg (with accessories : 14.6 kg) | |
| KT-T75E 1722.1 mm | mm x 1000.3 mm x 29.3 mm /17 kg (with accessories : 18.9 kg) | |
| Environmental conditions Operating Temperature | 0 °C to 40 °C | |
| Operating Humidity | ||
| Storage Temperature | ||
| Storage Humidity | ||
OS Support Availability
| Mouse Digitizer Gestures Plug and Play | ||||
| Windows 10 0 0 0 | 0 | |||
| Windows 8 0 0 0 | 0 | |||
| Windows 7 & Embedded P | 0 0 0 0 | |||
| * Windows 7 Service Pack must be installed. | ||||
| Mac OS X O | 1 | O1 | O1 | O1 |
| Linux2 | 0 0 0 | (Kernel 3.5 Over) | 0 (Kernel 3.5 Over) | |
| Android2 | 0 0 0 | (Kernel 3.5 Over) | 0 (Kernel 3.5 Over) | |
| Chrome (39 over) 0 0 0 0 | ||||
| Functions Click, Drag, Double-Click | Mouse Functions, Right-Click, Flicks, Panning with Inertia | Mouse & Digitizer Functions, Press & Tap, Rotate, Zoom In/Out | ||
NOTE
• Windows 2000 and earlier versions of Windows are not supported.
- Operating systems other than Windows 10, Windows 8, Windows 8.1 and Windows 7P may not support multi-touch functionality.
- 1 Driver installation is required. The Mac drivers can be found on the provided CD.
- 2 For Android or Linux-powered equipment (set-top boxes etc.), the touch feature may not work if the Touch Driver is not activated in the operating system.
Product Dimensions
The illustrations in this manual may differ from the actual product and accessories.
The product specifications below may be changed without prior notice due to upgrade of product functions.
KT-T32E
(Unit: mm)

KT-T43E
(Unit: mm)


KT-T49E
(Unit: mm)


KT-T55E
(Unit: mm)


KT-T65E
(Unit : mm)

KT-T75E
(Unit: mm)


TROUBLESHOOTING
There is a problem with the touch screen.
| Problem Action | |
| Touch does not respond. Remove the USB cable and connect it again in 10 seconds.Check the USB cable connection.- This may occur when the USB cable between PC and monitor is not connected.Check the USB cable and make it firmly connected.* Check the connection on Windows 7, 8, 8.1, 10, Mac OS X (10.9 over).[Control Panel] → [System and Security] → [System]- Check the number of touch-points supported under [Pen and Touch].Check the PC power.- This may occur when the PC is powered off. Make sure that your PC's power cord is firmly plugged into a power outlet.Restart your PC.- Touch may not respond when the system is down due to the unstable network.Reconnect the LAN cable or restart your PC.Check the signal cable connection.- If your PC and monitor are not connected using a signal cable, touch does not respond. Check the signal cable connection.Check the monitor power.- Touch may not respond when the monitor is powered off.Always connect the power cord to a grounded outlet.- If you do not use a grounded outlet, it may cause a break or touch error.Check if the screen is currently on. | |
| The location of a touch does not correspond to the touch coordinates. | Change your tablet PC settings (Windows 7, 8, 8.1, 10, Mac OS X (10.9 over)).- This may occur when the touch screen is not calibrated properly.[Control Panel] → [Hardware and Sound] → [Tablet PC Settings] → [Display]→ [Display options] → [Calibrate] or [Reset]* For information about gestures and settings on Windows 7, 8, 8.1, 10, Mac OS X (10.9 over) refer to the Windows or Mac Help. |
| A touch is applied to a monitor other than the one I intended. | Set the monitor as the default monitor.- This may occur if the monitor is not set as the default monitor when you are using multiple monitors. Go to [Control Panel] → [Display] → [Settings tab] → Select the monitor → [Use this device as the primary monitor (U)] → [Apply (A)]Change your tablet PC settings (Windows 7, 8, 8.1, 10 , Mac OS X (10.9 over)).- This may occur when the touch screen is not calibrated properly. Go to [Control Panel] → [Hardware and Sound] → [Tablet PC Settings] → [Display] → [Display options] → [Calibrate] or [Reset] |
| Multi-touch does not respond. | Make sure that you use a content that supports Multi-touch points in Windows 7, 8, 8.1, 10 , Mac OS X (10.9 over).- The content played (e.g. Flash Player, Paint, etc.) may not support Multi-touch points.Remove the USB cable and connect it again in 10 seconds.Run the content (e.g. Flash Player, Paint, etc.) again.Restart your PC.A break or touch error may occur as below case.- If using the touch pen only with nail or fingertip- If using the touch pen without proper distance between fingers- If holding the touch pen or near the tip of the touch pen- If using the touch pen while pressing it with strong force on the screenOn the edge of the touch screen, multi-touch may work unstably. |

Make sure to read the Safety Precautions before using the product.
The model and serial numbers of the SET are located on the back and one side of the SET. Record it below should you ever need service.
MODEL ____
SERIAL ____
Temporary noise is normal when powering ON or OFF this device.
- MULTI-TOUCH OVERLAY KIT
- TABLE OF CONTENTS
- SAFETY PRECAUTIONS ......3
- ASSEMBLY AND
- PREPARATION......4
- HOW TO ATTACH THE IR ..... 16
- INSTALLATION INSTRUCTIONS ..17
- BEFORE USE 18
- PRODUCT SPECIFICATIONS... 19
- TROUBLESHOOTING......27
- CAUTION
- NOTE
- SAFETY PRECAUTIONS
- WARNING
- ASSEMBLY AND PREPARATION
- APPLICABLE MODELS
- ACCESSORIES
- PRECAUTION WHEN USING THE TOUCH PEN
- PORTRAIT LAYOUT
- ASSEMBLY INSTRUCTIONS
- HOW TO ATTACH THE IR
- INSTALLATION INSTRUCTIONS
- CONNECTING TOUCH USB CABLE
- BEFORE USE
- PRODUCT SPECIFICATIONS
- TOUCH SPECIFICATIONS
- OS SUPPORT AVAILABILITY
- PRODUCT DIMENSIONS
- TROUBLESHOOTING
Brand : LG
Model : KT-T65E
Category : Touchscreen kit