
ALX S8 - Video accessory Libec - Free user manual and instructions
Find the device manual for free ALX S8 Libec in PDF.
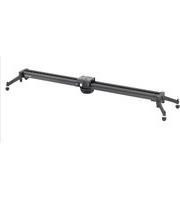


| Type of product | Video Tripod System with Fluid Head |
| Brand | Libec |
| Model | ALX S8 |
| Maximum payload | 8 kg (17.6 lbs) |
| Fluid head type | 3-step counterbalance, with pan and tilt drag |
| Tilt range | +90° / -70° |
| Pan range | 360° |
| Height range | 75.5 cm to 157.5 cm (29.7 in to 62 in) |
| Leg sections | 3 |
| Leg material | Aluminum alloy |
| Head base | 75 mm ball levelling |
| Weight | 3.7 kg (8.2 lbs) |
| Pan/tilt drag | Adjustable/2-step |
| Counterbalance | 3-step |
| Leveling bubble | Built-in |
| Power supply | None (manual) |
| Included accessories | Quick release plate, tripod legs, carrying bag |
| Maintenance | Clean with a soft dry cloth; avoid water and solvents |
| Safety features | Secure locks for pan, tilt and legs |
| Repairability | Spare parts available; user-replaceable plate and screws |
| General information | Designed in Japan for professional video production |
Frequently Asked Questions - ALX S8 Libec
User questions about ALX S8 Libec
0 question about this device. Answer the ones you know or ask your own.
Ask a new question about this device
Download the instructions for your Video accessory in PDF format for free! Find your manual ALX S8 - Libec and take your electronic device back in hand. On this page are published all the documents necessary for the use of your device. ALX S8 by Libec.
USER MANUAL ALX S8 Libec
J 取扱説明書
E Operating manual
© 使用说明书
Es Manual de instrucciones
J: 日本語
This equipment may cause harm, if not installed and used in accordance with this manual. Operating procedures and cautions to operate this product were written to prevent accident from occurring. For your own safety, read and follow these instructions before operating it. With adequate understanding, proper and safe operating manner can then be achieved. Please retain this manual for future references. This product has been designed with due consideration for safety. However, incorrect operation may cause camera to collapse, damaging of equipment and human injury.
- Please read all the cautions and procedures before use.
- Please follow all the cautions and safety contents that were written.
Caution
Injury may happen if the guidelines are not followed.
• Do not exceed the maximum capacity.
The maximum load capacity is 15kg/33lb (For table top).
Exceeding the load capacity may cause damage to equipment and unexpected accidents.
• Firmly tighten all locks, screws and clamp.
Failing to do so may cause damage to the camera or injury to others.
• Do not dismantle or modify
Dismantling and modifying the equipment may inflict injury to self and others, also are usually the root cause of accident.
Do not operate when the equipment is out of order, contact the dealer or our customer service for repairing.
Precaution before use
- Always remove the camera from the slider after use. Do not transport the slider with camera attached.
- Make sure to release the brake when operating the slider.
- This product is equipped with high-precision ball bearings. Entrance of sand or dust into the equipment may cause malfunction.
C: 中文

警告
1 Rail
2 Slider platform
3 Camera screw(3/8")
4 Friction knob
5 Bubble level
6 Leg base
7 Serration
8 Leg lock knob
9 Adjuster
10 Adjuster lock nut
11 Leg
12 Tripod mount adapter
13 ALLEX bowl clamp
14 Bearing plate
15 Brake knob
16 Bearing adjuster bolt
17 Bearing fixing bolt
18 Leg base knob
B: 脚を調整する
1 Loosen the leg lock knob.
2 Rotate the leg to the desired position.
3 Tighten the leg lock knob securely.
E
B : Ajuste las patas
J
C
C: 高さを調整する
1 Loosen the adjuster lock nut.
2 Rotate the adjuster to the desired height.
*If the height is set too high, the screw is likely to come off. Adjust the height at maximum of 15mm.
3 Tighten the adjuster lock nut securely.
C: 调整高度
1 Lock the brake.
2 Release the brake.
- The brake does not completely lock the slider platform in place. Accordingly, even if the brake is locked, the slider platform may happen to move along the rail in some circumstances.
D: 使用煞车器
1 Strong friction.
2 Weak friction.
Adjust to the desired friction.
E
J
C
F: ヘッドを取り付ける
The slider is attachable to a flat base head equipped with a 3/8" screw hole.
1 Lock the brake of the slider platform.
2 Lock the pan movement of the head.
3 Attach the head to the 3/8" camera screw on the slider platform.
Tighten the screw securely to prevent the head from coming loose.
- When using the TH-V H, please also see page 27, "Removing the TH-V H (head),"
F: 安装云台
(See "B: Adjust the legs".)
- Set the legs at right angles to the rail, which makes the slider most stable.
2 Mount the head.
(See "F: Mount the head".)
3 Use the adjuster and the bubble level, and set the slider to be level or to a desired angle.
(See "C: Adjust the height".)
(E) When using the ALX S12, make sure to use two tripods.
1 Set up a tripod. (The slider is attachable to 75mm tripods.)
- Maintain enough distance and tighten locks between tripod legs to ensure stability. Once the tripod legs are spread out and setup is complete, make sure to test operations to prevent instabilities including the tripod from falling over. - The tripod becomes more stable by adding a weight on the hook.
2 Lock the brake on the slider platform at the middle of the rail.
3 Set the tripod mount adapter on the tripod, and temporarily fix them together with the bowl clamp.
4 Set one of the leg at a 90-degree angle to the rail, adjust the leveling by using the bubble level, then fix the slider to the tripod with the bowl clamp.
- When moving away from the slider, make sure to remove the camera and lock the brake on the platform at the middle of the rail.
H: 安装于三脚架做使用
1: アクセサリーを取り付ける
I : Attach accessories
1 Leg base surface is equipped with 1/4" and 3/8" screw holes to attach accessories.
2 Separately sold AS-7K are attachable to the serration on the side surface of the leg base.
J
1: 安装配件
1 Store the bowl clamp into the case.
2 Attach the bowl clamp case to the velcro tape placed at the bottom of the slider case.
3 Loosen the leg lock knobs.
4 Fold the legs toward the rail.
5 Fix the legs by tightening the leg lock knobs.
6 Set the platform at the middle of the rail, and attach the protector.
7 Store the slider into the case with the adjuster side down.
- The slider is equipped with high-precision ball bearings. Please make sure to handle with care not to give impact to the product even after it is stored in the case.

J: 提袋收纳方法
| How to adjust platform operations for optimal performance. | Please see "M: Adjust the Usability" on page 20. |
| If the platform does not slide properly, please adjust usability. | Please perform rail maintenance.See "L: Maintenance" on page 18.*If no improvements are made, the rail or the platform will need to be replaced.For replacing the rail, see "P: Replace the Rail" on page 26, and for replacing the platform, see "N: Remove the Platform" and "O: Attach the Platform" on page 24 and 25 (deleted). |
| When replacing the rail | See "P: Replace the rail" on page 26. |
*After maintenance, always check product performance.
K: 维护说明
这种状况下
J
L: メンテナンス
- The slider is equipped with high-precision ball bearings. To ensure maximum performance of the product, prevent foreign objects from getting caught in the ball bearings.
1 Remove the platform.
See "N: Remove the Platform".
2 Remove dust from the eight-ball bearings with a cloth or supplied maintenance brush.
Clean all rail sides where bearings run on.
If dust is difficult to remove, use a cloth with mild detergent.
3 Attach the platform.
See "O: Attach the Platform".
4 If necessary, check the usability and make adjustments as shown in "M: Adjust the Usability".
L: 维护
M : Adjust the usability
- A wobble in the platform leads to poor results. If the platform wobbles, follow the procedures below to adjust usability.
The following procedures can also be used to adjust the platform usability for your convenience.
M-1 Preparation for the Adjustment :
1 Remove the head and the accessories from the slider.
2 Place the slider on a flat surface. Release the brake and friction of the platform.
3 Loosen the two bearing fixing bolts.
4 Loosen one bearing adjuster bolt to release the bearing plate.
M: 操作感的调整
J
M-2 調整作業:
1 Tighten the bearing adjuster bolt until he bearings reach the rail.
2 Slide the platform by pressing the four bearings (placed on the top surface against the rail) with your fingers. Check if the bearings rotate. If they do, they are in properly set.
*1 If a bearing does not rotate when pressed against the rail, tighten the bolt another 30 degrees. Make sure all bearings can rotate.
Excessive bolt tightening causes increased friction movements on the platform. Instead, fine-tune your adjustments.
3 Once Step 2 is complete, lock the platform brake.
4 Tighten the two bearing fixing bolts.

M-2 调整作业:

N: プラットフォームをはずす
N : Remove the Platform
1 Lock the platform brake.
2 Loosen the leg base knob located on the back side of the rail.
3 Remove the leg base.
4 Release the platform brake.
5 Remove the platform from the rail.
*1 Be careful not to lose the plastic part attached to the end of the brake part, as it may come off.
J
N: 卸下平台
J
C
O: プラットフォームを取り付ける
1 Check that the plastic part is attached to the end of the brake part.
2 Insert the platform into the rail.
3 Lock the brake of the platform.
4 Fit the leg base into the rail.
5 Adjust the leg base by tightening the leg base knob on the back side of the rail.
J
C
P:レールの交換
- If the rail is damaged, the slider cannot provide a smooth operation. Be cautious of debris. In this case, replacement of the rail is required.
- Please Be Advised. If the rail is damaged, a smooth operation will not be achieved.
1 Remove the platform.
See "N: Remove the Platform".
Remove the leg base from the other side as well.
2 Attach the platform to the new rail.
See "O: Attach the Platform".
Attach the leg base to the other side as well.
3 Check the functionality, and make adjustments as shown in "M: Adjust the Usability" if necessary.
P: 轨道交换
When the head is firmly tightened or fixed onto the slider, sometimes the head is difficult to remove.
In this case, insert the supplied hexagon wrench into the hole (located at the ball leveler) and turn it counter clockwise.
See above drawing for your reference.

Caution : When attaching the head to the slider, do not use the wrench to tighten the ball leveler. This may result in difficulties when removing the head.
Libec Sales of America, Inc. - U.S. Sales office
TEL: +1 310 787 9400
Libec Asia Pacific Pte. Ltd. - Singapore office
TEL: +65 6296 9930


- J: 日本語
- CAUTION
- PRECAUTION BEFORE USE
- C: 中文
- 警告
- B: 脚を調整する
- E
- B : AJUSTE LAS PATAS
- J
- C
- C: 高さを調整する
- C: 调整高度
- D: 使用煞车器
- F: ヘッドを取り付ける
- F: 安装云台
- H: 安装于三脚架做使用
- アクセサリーを取り付ける
- I : ATTACH ACCESSORIES
- 安装配件
- J: 提袋收纳方法
- K: 维护说明
- L: メンテナンス
- L: 维护
- M : ADJUST THE USABILITY
- M-1 PREPARATION FOR THE ADJUSTMENT
- M: 操作感的调整
- M-2 調整作業:
- M-2 调整作业:
- N: プラットフォームをはずす
- N : REMOVE THE PLATFORM
- N: 卸下平台
- O: プラットフォームを取り付ける
- P:レールの交換
- P: 轨道交换
Brand : Libec
Model : ALX S8
Category : Video accessory