
SX-G5 - Uncategorized PANASONIC - Free user manual and instructions
Find the device manual for free SX-G5 PANASONIC in PDF.


| Product Type | Compact Audio System |
| Brand | Panasonic |
| Model | SX-G5 |
| Color | Black |
| Dimensions (W x H x D) | 165 x 240 x 210 mm |
| Weight | 2.5 kg |
| Power Supply | AC 100-240V, 50/60 Hz |
| Power Consumption | 15 W |
| Output Power | 2 x 5 W RMS |
| Tuner Type | AM/FM Digital Tuner |
| Preset Stations | 20 (AM/FM) |
| Disc Player | CD Player (CD-R/RW compatible) |
| Cassette Deck | Analog Cassette Deck with Auto Stop |
| Speakers | 2 x 8 cm Built-in Speakers |
| Display | LCD Display with Clock |
| Controls | Volume, Bass, Treble, Tuning, Source Selection |
| Connectivity | Headphone Jack (3.5 mm), Antenna Terminals |
| Operation | Standby Timer, Sleep Timer |
| Care | Clean with soft dry cloth, avoid solvents |
| Safety | Automatic power off during power surges |
| Spare Parts | Genuine Panasonic replacement parts widely available |
| Reparability | Modular design for easy servicing |
Frequently Asked Questions - SX-G5 PANASONIC
User questions about SX-G5 PANASONIC
0 question about this device. Answer the ones you know or ask your own.
Ask a new question about this device
Download the instructions for your Uncategorized in PDF format for free! Find your manual SX-G5 - PANASONIC and take your electronic device back in hand. On this page are published all the documents necessary for the use of your device. SX-G5 by PANASONIC.
USER MANUAL SX-G5 PANASONIC
INDURO, SEDANO SX-05/0X-07/0X-F3 SQFG4532
For U.S.A.
"This equipment generates and uses radio frequency energy and if not installed and used properly, that is, in strict accordance with the manufacturer's instructions, may cause interference to radio and television reception. It has been type tested and found to comply with the limits for a Class B computing device in accordance with the specifications in Subpart J of Part 15 of FCC Rules, which are designed to provide reasonable protection against such interference in a residential installation. However, there is no guarantee that interference will not occur in a particular installation. If this equipment does cause interference to radio or television reception, which can be determined by turning the equipment off and on, the user is encouraged to try to correct the interference by one or more of the following measures:
— reorient the receiving antenna
— relocate the electronic musical instrument with respect to the receiver
— move the electronic musical instrument away from the receiver
— plug the electronic musical instrument into a different outlet so that electronic musical instrument and receiver are on different branch circuits.
If necessary, the user should consult the dealer or an experienced radio/television technician for additional suggestions. The user may find the following booklet prepared by the Federal Communications Commission helpful:
"How to Identify and Resolve Radio-TV Interference Problems." This booklet is available from the U.S. Government Printing Office, Washington, DC 20402. Stock No. 004-000-00345-4."
Technics
OWNER'S MANUAL
Voltage (except North America, Europe, Taiwan)
Be sure the voltage adjuster (G5: below the keyboard; G7·F3: on the rear panel) is in accordance with local voltage in your area before using this unit. Use a screwdriver to set the voltage adjuster to the local voltage.
IMPORTANT (for GREAT BRITAIN)
THE WIRES IN THIS MAINS LEAD ARE COLOURED IN ACCORDANCE WITH THE FOLLOWING CODE:
BLUE — NEUTRAL
BROWN — LIVE
As the colours of the wires in the mains lead of this unit may not correspond with the colored markings identifying the terminals in your plug, proceed as follows.
The wire which is coloured BLUE must be connected to the terminal with the letter N or coloured BLACK.
The wire which is coloured BROWN must be connected to the terminal marked with the letter L or coloured RED.
This apparatus was produced to BS 800: 1977
WARNING: TO REDUCE THE RISK OF FIRE OR ELECTRICAL SHOCK, DO NOT EXPOSE THIS PRODUCT TO RAIN OR MOISTURE.
BEFORE YOU PLAY, PLEASE READ THE CAUTIONARY COPY APPEARING ON PAGE 39.
Precaución
All buttons and tablets are equipped with LEDs which light up when in operation.
Tablet
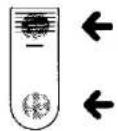
• Turns off when this part is pressed.
• The LED lights up and the function turns on when this part is pressed.
Controls
All levels and effects on the organ are controlled by 3- or 4-stage buttons, except for the rhythm tempo control.
Harmonic control


- When the right button is pressed, the brilliance of the sound is increased.
- If both buttons are pressed simultaneously, the sound returns to its normal, or intermediate, level.
- When the left button is pressed, the sound is "softened."
Volume, Effect


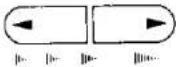


- When the right button is pressed, the LED on the button lights up and the volume or effect is at maximum.
- If both buttons are pressed simultaneously, the volume or effect returns to the normal, or intermediate, level and both LEDs turn on.
- When the left button is pressed, the LED on the button lights up and the volume or the effect is decreased.
- If the left button is pressed again, the volume or effect is at minimum and the LED turns off.
Power/Main Volume Controls
Pressing the power switch turns the organ on.
Main Volume adjusts the loudness of the entire organ.


The circled numbers on the separate color sheet correspond to the section numbers in this instruction manual.
① Musical Display (G7·F3)
■ For the SX-G5, refer to the separate operating instructions.
The LCD display shows the musical contents of what is being played and the function selected.
I. Display of selected functions
When a function is selected as illustrated below, it is indicated by its symbol, such as △, ◀, or ♣.

① Fullband Setting Computer (Refer to ⑱)
② Voice Setting Computer (Refer to ⑲)
③ Play Sequencer (Refer to ⑲)
④ Memory Pack (Refer to ③7, ③8)
⑤ Harmonic Coupler (Refer to ⑧)
⑥ Techni-Chord (Refer to ⑯)
⑦ Transpose (Refer to ⑳)
⑧ Program Chord Computer (Refer to ③4)
II. Display of Musical Contents/Stopwatch/Computation
Each time the mode button is pressed the mode indicated on the musical display changes. There are 3 primary modes:
- Tempo
-Stopwatch - Computation
a) Tempo
■ The tempo and rhythm beat are displayed. When the rhythm starts, the metronome on the display begins swinging.

■ When the function button is pressed, the accompaniment of the lower, and pedal keyboards are also displayed.
- Bass note (except for roots) is also displayed when you play the pedals in manual play or the Fingered mode of the Auto Play Chord.
- Chord names C#, D#, Gb, G#, and A# are displayed as Db, Eb, F#, Ab, and Bb, respectively.
- When the function button is pressed again, only the rhythm tempo and beat are displayed.

b) Stopwatch
The stopwatch function is assumed when the mode button is pressed. Now you can measure your performance time. The ⚡, ′, and " marks flash to indicate that the stopwatch is on standby. When the rhythm section or note is played the stopwatch starts. The stopwatch stops 2 seconds after play stops, and the total performance time is displayed. The measurement of performance time resumes when play resumes. Performances may be timed in this manner up to 59 minutes and 59 seconds.
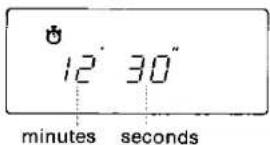
- The display is reset when the function button is pressed.
c) Computation
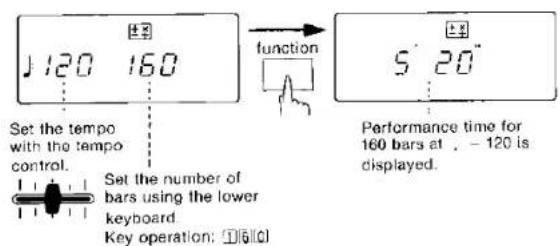
Pressing the mode button for the computation mode allows you to calculate the relationship between the tempo, the number of bars, and the performance time. This mode is also capable of arithmetical operations needed to determine the number of bars.
- White keys 0 through 9 and the black keys between them on the lower keyboard are used to input numerical information and perform calculations.
lower keyboard

- Set the tempo, enter the number of bars, and press the function button. Performance time for the preset tempo and number of bars will be displayed.
- Set the tempo and press the function button to set the performance time. Press the function button again and the number of bars for the preset tempo and performance time will be displayed.
![graph LR A["150"] --> B{2 30} B --> C["150 95"] D["Set the tempo with the tempo control."] --> E["function"] E --> F["Set the performance time. Key operation: [2/2"]/3/0/4] F --> G["The number of bars playable for 2 minutes and 30 seconds at y = 150 is displayed."]](/content/2026/07/1559321/images/9a68fb1f8b2407188e34283c64bb2647454678cb48c8501fa3e9b3ed681a3976.jpg)
- If the tempo is changed using the tempo control, the number of bars or the performance time changes accordingly. (If the function button is pressed, the preset number of bars or the preset performance time will be displayed.)
- If the rhythm tempo is changed to a different beat, the performance time and the number of bars of the new beat will be displayed.
- The arithmetical operation keys can be used to determine the number of bars.
- Up to 3 digits can be displayed without decimal fractions.
Example: 40 + 32 - 16 =
Key operation: 40 132 -16 - Numbers greater than 999 will result in the error display ( ).
III. Secondary display modes
When storing the harmonic coupler, organ presets, Transpose, Tuning, and Program Chord Computer etc, the contents being stored are displayed. See each section for details.
② Record

Record creates no effect of its own. This button is used to store functions such as Organ Presets, the Voice Setting Computer, and the Program Chord Computer. When you press record, its light goes on and the lights of all programable features flash quickly. Press the button for the feature you with to use. Its light will flash slowly and the lights of the other features will go out. NOTE: If you don't make your selection within about five seconds, all the lights will go out — just press record again and then make your choice.
While depressing the record button, you can also press the button for the feature you wish to use. For details, see the relevant sections.
Contents stored by using the record button remain in memory for about one week even when the power switch is turned off.
Upper Keyboard Split Functions
When recording certain functions, the lower manual keyboard is used to enter program information. At this time the lower manual voices may be monitored using the lower half keys on the upper keyboard. (The G5 or G7 has 19 such keys and the F3 has 31 such keys).



Initial Key
This initial key is used to set the tones and effects of the Technics organ or to return the stored contents to their factory preset state.
- Press the Fullband Setting Computer button to turn it on.
- Press the initial key on the lower keyboard. This returns any function to its factory preset state.
- If the initial key is pressed during storage, only the function involved returns to its factory preset state or is cleared of its stored contents. (For details, see the relevant sections.)

③ Orchestral Conductor
![graph TD A["orchestral conductor"] --> B["upper"] A --> C["lower"] B --> D["upper lab voices"] B --> E["percus-sive presets"] B --> F["orches-tral presets"] B --> G["solo synthe presets"] C --> H["lower lab voices"] C --> I["percus-sive presets"] C --> J["orches-tral presets"] C --> K["solo synthe p…](/content/2026/07/1559321/images/fd22ea6bfb89a8b28d15c0d70af03b53bcf336d24978b501750ae17b0f652b72.jpg)
(G7·F3)
The Orchestral Conductor is the nerve center of the Technics organ. It allows you to instantly set up complete groups of voices or instrumental effects; you can even change them as you play. This adds a versatility to your playing that few professionals enjoy.
Understanding the Orchestral Conductor is easy if you think of each button as an "on-off switch" that controls the voice group indicated. The buttons each have a light that shines when the button is pressed. Here is a basic description of each button that appears on the various models:
Tab voices allows you to set-up a complete voice tab combination (registration) for the upper keyboard (or lower keyboard) by merely pressing this one button.
NOTE: This button MUST be pressed whenever you wish to use any of the flute or string voices.
String ensemble brings in the rich, shimmering sound of strings.
Orchestral presets allows you to instantly add the sounds of such effects as wah brass, clarinet, and trombone.
Percussive presets brings in the sounds of instruments that are plucked or struck—plano, harpsichord, and vibraphone.
Solo synthe presels allows you to add contemporary effects to your instrumental sounds.
Vocal ensemble enables you to add choral effects to your music.
Organ presets lets you store your favorite organ sound.
All of these buttons are self-cancelling—to deactivate one, you must press another. If you wish to combine some of the sounds, press two or more buttons at the same time—or hold one down and press another.
Tab voices and organ presets cannot be used together.
- The voices of percussive presets, orchestral presets, solo synthe presets and vocal ensemble can be used on each keyboard independently but not on both at once.
The presets of the Technics organ are designed to reproduce true instrumental effects. They can also produce treble and bass sounds outside the range of the real instrument. Particularly in the bass range, the tones start up slowly. Therefore, if you play fast, use the treble range for the most effective performance.
④ Upper Tab Voices

F3
Footage Marks
To help you use the Technics solo voices most effectively, you should know something about the numbers that appear on many of the voice tabs. These are called footage marks because they refer to the lengths of pipe used to create musical tones on a pipe organ. The bigger the number (or length of pipe), the lower the tone.
Flutes
The clear, mellow sounds of this tone family provide the basis for most voice combinations (registrations) on the organ.
Experiment with each flute voice on your organ, playing on various parts of the upper keyboard. Try them in different combinations, too.
Strings
Like the flutes, strings are extremely versatile. They make beautiful solo voices, and they add sparkle and brilliance to any combination of tabs. String and flute combinations are the basis for many theater organ sounds. You can create an entire string section with String 8 when you play three- and four-note chords on your upper keyboard (or when you use the Techni-chord feature).
Volume buttons let you adjust the volume.
Flute volume Adjustment
The flute volume level of the tab voices are preadjustable.
■ To adjust the upper flute tab
- Press the record button.
- Press the upper tab voices button on the Orchestral Conductor.
- Adjust the flute volume levels using their tabs.


Press here to decrease the volume by one step.

Press here to increase the volume by one step.
•Volume levels can be adjusted in 7 steps.
- On the G7 and F3, volume levels appear on the Musical Display.
- Press the initial key to return to the factory preset mode.
- Press the record button again to turn it off.
- To adjust the lower flute tab, omit step 2 above and press the lower tab voices button on the Orchestral Conductor.
Musical Display
(G7·F3)
- Flute Footage Level Display Examples

'F3
Even if the footage is displayed, if there is no tablet for it, it cannot be stored.
⑤ Lower Tab Voices

⑥ Pedal Voices

These buttons utilize the PCM system to provide the full body of real-life bass sounds. These buttons are used individually, but bass 8 and bass 16 can be combined.
Bass 8 is useful for playing rhythmic music and adds definition to your pedal notes when combined with Bass 16. Use it alone for light, quiet bass tones.
Bass 16 is a deep, flute-like organ voice that provides a solid foundation for all your music; it is especially effective for sacred music and the classics.
Insemble bass is suitable for use as an accompaniment with orchestral music.(G7·F3)
These voices are heard when you play on the lower keyboard; they are used mostly for accompaniment, played by your left hand. Try them individually and in combination.
Flute 8, 4, 2 2/3 , 2, 1 1/3 , 1' are the voices you'll most often use for accompaniment, especially for the brighter-sounding solo voices.
String 8, 4 add brilliance to any voice combination. Try it with the flutes.
Volume buttons let you adjust the volume.
Acoustic bass adds the realistic sound of this instrument to your music.
Chopper bass is an exciting voice produced by the electric bass. (G7-F3)
Electric bass is suited to contemporary music.
Pipe bass I is a full voice pipe organ sound. (G7·F3)
Pipe bass II is one of the 16' principal voices. (G7-F3)
Tuba is similar to the orchestral instrument it's named after—a broad, full voice with a more defined sound than the bass 16 voice.
Synthe bass provides a good accompaniment for the contemporary electric orchestral and synthesized sounds.
Volume allows you to adjust the loudness of the pedal tones in relation to the upper and lower keyboard voices.
Harmonic control buttons adjust tone brilliance. (G7-F3)
⑦ Upper Percussive Tone
![graph TD A["volume"] --> B["long"] B --> C["percussive tone"] C --> D["test tube 1: 5/2"] C --> E["test tube 2/2"] C --> F["test tube 3"] C --> G["test tube 4"] style A fill:#f9f,stroke:#333 style B fill:#ccf,stroke:#333 style C fill:#cfc,stroke:#333 style D fill:#fcc,stroke:#333 style E fill:#fcc,s…](/content/2026/07/1559321/images/45b1f88c7a75c420e5094cf38d8910699c41f0d2325f27157d78110c83436343.jpg)
*G7-F3
This feature adds a tone with a fast initial attack to any of the upper voice tab sounds; or it may be used alone. The effect is what you hear when a player strikes a piano key or plucks a banjo string. It is particularly useful when you play jazz or rock organ sounds.
The tabs with footage numbers create tones of those pitch levels; use the fractional voice sparingly — as spices in cooking.
Click is used to provide a "pop" effect each time you press a key on your upper keyboard.
Long causes the percussive tones to decay more slowly.
Volume buttons let you adjust the volume
⑧ Harmonic Coupler

The harmonic coupler might be called "phantom voices" because they add sounds that were not built into the voice tab groups. To illustrate, set up the organ to play with only the flute 8 voice on the upper keyboard.
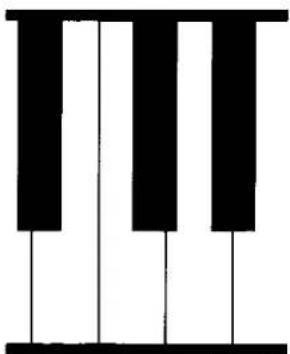
If you play the C key indicated in the illustration, you will hear the C note shown. Then, press upper harmonic coupler "2"-2/3". Play the key again and you will hear the C note plus the high G note shown.
To hear what the Harmonic Coupler can really do, press upper flutes 16, 8, and 4 and play the same C key. Then add harmonic 2-2/3 and play the key again—from three voices to six.
Harmonic couplers work with upper or lower tab voices and Upper Percussive Tone. It is effective on up to four notes played simultaneously on either keyboard.
When the tab voices is mixed with other voice groups, the harmonic coupler is deactivated. (When mixed with organ presets, its harmonic coupler is given priority.)
Musical=Display
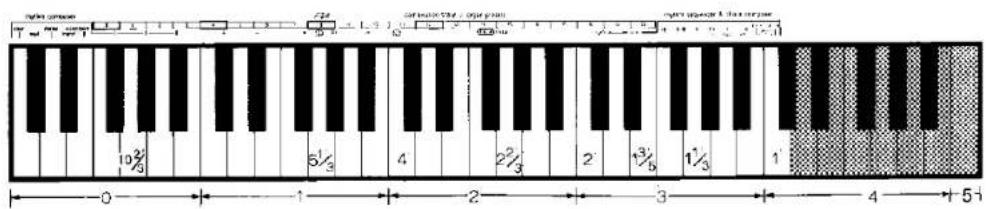
The name of the depressed key and its octave level are displayed.
(G5)

(G7·F3)

This number corresponds to the number of the keyboard octave of the following figure.
In addition, you can create your own harmonic couplers for storage with the program button.
- Press the record button.
- Press the program button. (The program button will flash slowly.)
- Press the key at the desired interval from the lowest C key on the lower keyboard.
In this case, the lower part of the upper keyboard monitors the lower harmonic coupler, and the upper part of the keyboard monitors the upper harmonic coupler effect.
- Pressing the program button again turns record off and completes the storage.
• Typical Harmonic Coupler Examples

F3
• To return to ordinary playing, press the cancel button.
⑨ Percussive Presets
U&L percussive presets

(G7-F3)
"Percussive" refers to instruments that are played by being struck or plucked.
These presets incorporate PCM technology that allows real instrument sounds to be reproduced. (G7·F3)
Acoustic piano provides an authentic voice—try it on a wide variety of songs.
Electric piano is now most commonly used, along with the piano. This sound goes well with a wide range of music, especially with new jazz and pops.
Harpalchord. The quaint, dry sound of this instrument sounds good on many classical selections or on certain popular favorites.
Clavi is best suited to backing "funky" music, etc.
Vibraphone is a rich, mellow sound
Glocken reproduces the real sound of the glockenspiel. (G7-F3)
Acoustic guitar is a soft and delicate voice that enhances many musical moods.
Jazz guitar works well as a solo sound or when combined with other instruments.
Steel drum is indispensable for music such as calypso. (G7·F3)
Banjo is a voice often used for country and western music.
Harmonic control buttons adjust tone brilliance.
Volume buttons let you adjust the volume.
- The Percussive Presets "Banjo" will remain silent when played by the C key at the right end of the lower keyboard. When transposed to a higher key, the number of keys which do not sound will equal the number of transposed keys. (SX-F3 only)
⑩ Orchestral Presets
U&L orchestral presets

(G7·F3)
You can use these voices as solo instruments, or in combination with other sounds.
Trombone is a full-bodied sound, especially useful as a solo instrument.
Trumpet dominates any voice combination because of its brilliant and sparkling tone. (G7·F3)
Saxophone, played on the lower half of your upper keyboard, sounds like a tenor sax.
French horn is a broad, soft, rich sound. (G7·F3)
Clarinet is a voice best suited for a soft, mellow solo.
Accordion blends well with other voices, such as flutes.
Wah brass can range from the old "wha-wha trumpet" to the newer sounds of today.
Synthe brass is a brass voice for greater playing enjoyment used with the phaser effect.
Harmonic control buttons adjust tone brilliance.
Volume buttons let you adjust the volume
⑪ Solo Synthesizer Presets
U&L solo synthesizer presets

(G7·F3)
Technics has made synthesizer effects easy — they're all preset sounds! Each voice produced by the PCM system is realistic with all the typical characteristics of each instrument. For example:
Violin is a full, rich sound on the lower part of your upper keyboard and a brilliant voice on the upper part. (G7·F3)
Harmonica makes a bright, delicate solo voice no matter what type of song you play. (G7·F3)
Trombone has a smooth, round tone that blends very well with strings or flutes.
Trumpet dominates any voice combination because of its brilliant and sparkling tone.
Saxophone has the tonal characteristics of a real tenor sax.
Clarinet is a voice best suited for a soft, mellow solo.
Flute is a pure, free voice that complements any melody.
Oboe is a thin yet soft tone. (G7·F3)
Pan flute sounds so real — the breathy attack, the soft, mellow tone — you'll hardly believe it's really your Technics organ.
⑫ String Ensemble

(G7·F3)
⑬ Vocal Ensemble
U&L vocal ensemble

Whistle is a novelty voice, yet is heard fairly often in synthesizer performances of music of all kinds. (G7·F3)
Rock guitar is a powerful voice suited for rock and fusion music. (G7-F3)
Cosmic recreates the sound of an electric guitar, complete with fuzz-tone effect.
Synthe chopper is a percussive voice with a "key pop" effect making it an ideal jazz or rock organ sound.
Key bender is an effect button that enables the voice of the pressed key to begin sounding at a halftone lower when playing legato. (G7-F3)
Harmonic control buttons adjust tone brilliance.
Volume buttons let you adjust volume levels
All these sounds are monophonic, which means they will sound on only one key at a time no matter how many you press. This gives you the advantage of using these voices in combination with others, yet they will remain solo sounds.
This feature allows you to create beautiful, shimmering string sounds, as either a solo voice or an entire string section.
Cello or violin sound can be selected. If you wish to mix these two sounds, press both buttons simultaneously. (G7·F3)
Upper volume adjusts the loudness of the String Ensemble on the upper keyboard.
Lower volume adjusts the loudness on the lower keyboard.
This feature enables you to create colorful and exciting choral effects on either your upper or lower keyboard. Your favorite effects can be selected by using the vocal ensemble button of the Orchestral Conductor. An "ah" tone is created with the ah/humming button off, but creates humming when the button is on (G7·F3). Their volume can also be adjusted with the U&L Vocal Ensemble controls.
⑭ Organ Presets
upper organ presets

![graph TD A["harmonic coupler control 25% program"] --> B["volume"] B --> C["slow attack"] C --> D["volume"] D --> E["long"] F["digital chambers"] --> G["low voltage 1.5V"] F --> H["low voltage 2.5V"] F --> I["low voltage 3.5V"] F --> J["low voltage 4.5V"] F --> K["low voltage 5.5V"] F --> L["low vol…](/content/2026/07/1559321/images/be378bf0aef437b56f8f0c5ae5fee7a6471123344e6686c69289897f1786a967.jpg)
![graph TD A["harmonic coupler"] --> B["cancel"] A --> C["2' program"] A --> D["lower"] A --> E["volume"] F["top voices"] --> G["digital database"] G --> H1["Hue 0"] G --> H2["Hue 4"] G --> H3["Hue 2½"] G --> H4["Hue 2"] G --> H5["Hue 1"] G --> H6["Hue 1"] G --> H7["Hue 5"] G --> H8["Hue 2"]](/content/2026/07/1559321/images/842a3eeeeae704fa1328fff8df735f86714bc5248acf632708a02e5fb55f07ed.jpg)
*F3 **G7·F3
Your favorite organ tones can be stored for use anytime.
- Tones and effects in the figure above are storable.
Combinations of four types (organ presets I\~IV) for the upper keyboard and one type (organ preset) for the lower keyboard can be stored.
- Set your favorite tone.
- Press the tab voices button of the Orchestral conductor to check the selected tone.
- With the record button held down, press the organ presets I\~IV button. (For the lower keyboard, press the lower organ preset button of the Orchestral Conductor.) This stores setting in the memory bank.
• To change to another combination, perform the above operation for new storage.
How to Use the Factory Preset Organ Sound
In addition to your original tones, you can choose 4 of your favorite sounds from the 20 factory preset organ tones on the lower keyboard. These can be stored in I through IV buttons.
!

2

3

Select your favorite sounds using the keys marked 1 to 20 on the lower keyboard.
- Playing the upper keyboard lets you check the sounds and effects since the upper keyboard splits in function. You can amend part of the selected sounds if you wish.
4

Press the button in which the sounds are to be stored. This turns the record button off, and the selected sounds and effects are stored in the button.
- In step 4, pressing the II button instead of the I button stores the selected sounds in the I button and readies the II button for storage. After the desired sounds are selected, press the II button to complete the storage. If further storage is desired, press the III button instead of the II button for continued operation.
The following organ tone groups are preset in keys 1 to 20.
- These organ tones include unique sounds and effects unavailable from using the buttons and tablets.
1\~5: Pop organs
6\~10: Jazz and rock organs
11\~15: Classical organs
16\~20: Special organs
How to use the digital drawbars
You can adjust the Flute levels Individually.
-
Press the record button on.
-
Press I, II, III, or IV organ presets button. (Or press the lower organ preset button of the Orchestral Conductor.)
-
Set your favorite tone.
-
For strings 8' and 4', percussive tone and slow attack, press the relevant tabs or buttons on.
- If you wish to change the flute levels of the 20 organ presets, choose your favorite preset from the lower keyboard.
- For flutes, adjust the footage levels using their tabs.


Pressing here decreases volume by one step.
Pressing here increases volume by one step.
•Volume levels can be adjusted in 7 steps.
- On the G7 and F3, volume levels appear on the Musical Display.
- Pressing the initial key turns off all the tablets and buttons.
- Press I, II, III or IV organ presets button. (Press the organ preset button of the Orchestral Conductor for the lower keyboard.) This turns record off, thereby completing storage operation.
Musical Display
(G7·F3)
- Flute Footage Level Display Exmaples

'F3
- Even if the footage is displayed, if there is no tablet for it, it cannot be stored.
• The footage is displayed by the 5 bars as follows:
| level | 0 off | 1 | 2 | 3 | 4 | 5 | 6 | 7 max |
| display |
(…… flashes )
⑮ Full Bass pedal
The full bass pedal system automatically selects the lowest tone being played on the lower keyboard. The bass note corresponding to the tone sounds only when the full bass pedal is pressed. The tones, volume levels, and effects are the same as those obtained through the pedal keyboard button.
- All tones on the lower keyboard are regulated in 16' steps. Accordingly, bass 8' and bass 16' produce a tone of the same pitch.
Bass solo...if the full bass pedal is pressed with the bass solo button on, the lower keyboard tones die out and only the bass solo is heard.

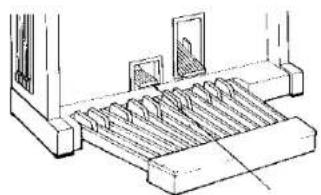
Full Bass pedal
■ Creation of a Walking Bass Using the Jazz Wood bass
(Between Ped and*, play the lower keyboard with the full bass pedal down.)

- You can use the full bass pedal to turn other functions on and off. (Refer to 36.)
⑯ Techni-Chord
Techni-Chord makes your melodies sound like those of a professional organist by transferring the chord tones you play on the lower keyboard to each melody note you play on the upper keyboard.

Set up your organ to play the example below — use either one-finger mode, or form your own.
Holy, Holy, Holy

Now press the on button and play the example again. Here's how your one-finger melody looks when written out—three-note melody chords!

Now press the close/open button to play the harmony style in the open position usually found in the brass ensemble and choral.
Techni-Chord functions for any sound other than the Solo Synthe.
Techni-Chords cannot be played using the lower part of the upper keyboard (an octave for G7 and two octaves for F3).
Effects
The basic effect of tremolo is a rapid change in volume (loudness).
Vibrato is a rapid change of pitch (high and low tones) that adds a warm, wavering quality to a musical tone.
Vibrato can be heard in a singer's voice and in the tone of most wind or string instruments.
U tab voices lets you bring any of the upper tab voices into the tremolo or vibrato effect.
L tab voices allows you to do the same with lower keyboard voices.
Slow/fast — In the off position, you will hear a very slow tremolo, especially suited to religious and classical music. Press the button to the on position and hear the faster effect, ideal for most other kinds of music.
Vibrato — Vibrato is given priority over multi-tremolo. When the vibrato button is pressed during use of the tremolo effect, the vibrato turns on and tremolo is cancelled. To return to the tremolo effect, press the vibrato button again to turn it off.
Multi-tramolo Speed Adjustment
The Technics organ allows the speed to be adjusted in the fast multi-tremolo position. The fast multi-tremolo creates an effect like two speakers rotating at different speeds. The fast and slow speeds are both adjustable.
-
Press the record button.
-
Fast speed adjustment: Press the upper tab voices button of the multi-tremolo. (The LED on the button will slowly flash.)
- Tap the lower part of the slow/fast button to increase the frequency. Tap the upper part to decrease it.
• The frequency is indicated on the musical display. - During speed adjustment, the multi-tremolo is automatically turned on for both the upper and lower keyboards. This allows you to carefully check how the tremolo effect is applied.
- Slow speed adjustment: Press the lower tab voices button of the multi-tremolo.
- Adjust the frequency using the slow/fast button.
-
When the adjustment is completed, press the record button to turn it off.
-
The vibrato and slow multi-tremolo speeds remain unchanged during this adjustment.
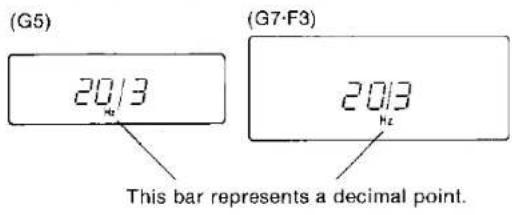
- Adjustment Range Fast speed: 8.4 Hz to 30.5 Hz Slow speed: 4.9 Hz to 8.1 Hz
- If you wish to return the speed to the factory preset state (20.3 Hz and 6.4 Hz), press the initial key in step 3 or 5 above.
Musical Display
The Multi-tremolo speed is displayed.
⑱ Effect Conductor
(G7·F3) ■ For celeste effect on the SX-G5, refer to the separate operating instructions.
Chorus, celeste, and phaser effects are available in 5 tone groups. Chorus and celeste effects provide beautiful, extended sound. The phaser effect provides a slow, gradual change in tone.
• These effects do not apply to percussive tones.
![graph TD A["Press two vertically aligned buttons to apply the phaser effect to the tones in the group."] --> B["phaser"] B --> C{effect conductor} C --> D["U"] C --> E["L"] D --> F["cancel"] D --> G["cancel"] D --> H["cancel"] D --> I["cancel"] D --> J["cancel"] D --> K["tab voices"] D --> L["percus…](/content/2026/07/1559321/images/2d5186011dd31148b93a7e07b30e0ba3b601179f967c44303edb41be20edef13.jpg)
⑲ Sustain Controls
These Technics models have sustain incorporated with their upper and lower keyboards and pedals.
Regardless of where it is used, sustain allows the sound of the notes to fade gradually away (decay).
Pedal sustain is always at work, the length of which can be adjusted by using the sustain control. To combine sustain with the upper tab voices, lower tab voices or percussive presets, press the respective button. This feature does not work when upper tab voices or lower tab voices are combined with orchestral presets or organ presets.
![graph TD A["upper"] --> B["on"] C["sustain"] --> D["on"] E["lower"] --> F["on"] G["bass"] --> H["on"] style A fill:#f9f,stroke:#333 style C fill:#f9f,stroke:#333 style E fill:#f9f,stroke:#333 style G fill:#f9f,stroke:#333](/content/2026/07/1559321/images/2705bc776597a154b024ca20bb680509e65e2136fac3fcb06e1203f764f073ef.jpg)
Knee Lever
- With the sustain button ON, operate the knee lever located under the keyboards with the right knee. This allows you to quickly turn sustain ON and OFF anytime during performance.
| Knee lever | Sustain button | upper lower | percussive presets |
| With sustain button ON | With sustain button ON | ||
| Turn left when not in use |  | Sustain at work for tab voices | Sustain at work for percussive presets |
| Raise when in use |  | No sustain at work | No sustain at work |
| Operate with the right knee | 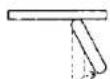 | Sustain at work for any group other than percussive presets and solo synthe presets of the orchestral conductor | Sustain at work for percussive presets |
You can turn other functions on and off by moving the knee lever. (Refer to 38.)
⑳ Reverb (G5)/Digital Reverb (G7·F3)
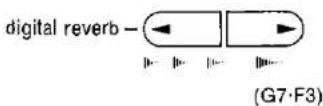
Reverb, is an abbreviation for reverberation. If you've walked down a narrow, uncarpeted hallway, you may recall that your footsteps "echoed", or became louder than usual. This was due to the sound waves bouncing from the walls and ceiling instead of being absorbed into the carpeting, furniture and draperies. Because the furnishings in most rooms usually absorb all the echo, your Technics organ is equipped with reverb to electronically replace the echo which is lost. Reverb is effective with most general settings.
②1 Slow Attack

When this button is not used, the response of the upper tab voices is instant — press a key and you will hear a musical tone immediately. Press the slow attack button, however, and you'll notice a slight hesitation between the time you press the key and the time you hear the tone. This effect is especially useful for imitating instruments that have a natural slow attack such as the accordion, harmonica, or the pipe organ.
⑳ Expression Pedal
The expression pedal regulates the loudness of ALL the organ voices, regardless of how individual volume controls may be set.
Pushing down with your toe makes the organ louder; pushing down with your heel makes the tone softer.
The "halfway down" position of the pedal represents the medium volume range — this is always a good starting point if dynamic marks don't appear in the music.

②3 Glide Control
The glide control switch is located on the left side of the expression pedal. When pressed to the left with the side of your foot, it lowers the pitch, or tuning, of the organ about
one half-step. The example below shows how you can achieve the Hawaiian guitar effect. Press the glide switch just before (*) you play the note you want to "bend".

⑳ Foot Switch — Glide/Rhythm

foot sw
This button allows you to use the left glide control switch for two purposes — to provide a means for you to conveniently turn the automatic rhythm on and off, and to help you add the "glide effect" to your music.
When the button is not on, the left foot switch provides the glide effect. Press the button to on and the left foot switch starts and stops the rhythm.
- The right foot switch allows you to turn the Fill in & Intro I on and off.
- You can turn other functions on and off by using these foot switches. (Refer to 16.)
⑳ Voice Setting Computer

All voices and effects can be programmed into the Voice Setting Computer. NOTE: No slide control setting can be recorded in the computer.
The button marked cancel lets you shut off the Voice Setting Computer and change to standard organ sounds.
Buttons I through VII are used to store the voices and effects for both keyboards and pedals.
- Set registration.
- With the Record button held down, press the I button. This stores your setting in the memory bank. That's all it takes!

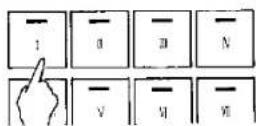
To change your custom registrations, just set up the tabs you want and then press record and the desired button. The previous setting is automatically replaced by the new one.
You can change the selected voice and effect from the memory by pressing any other button. The memory contents in the organ, however, remain unchanged.
How to Use the Factory-Preset VSC
In addition, the factory-preset 20 voices combinations allows you to choose your favorites for storage in I through VII buttons.
- Press the Record button.
- Press the I button to store the desired voices.
- Select your favorite voice from the keys marked from 1 to 20 on the lower keyboard. (Playing the upper and pedal keyboards lets you check the voices and effects.)
- Pressing the I button again turns the record button off, and the selected voice is stored in the I button.
- In step 4, when the II button is pressed instead of the I button, the selected voice is stored in the I button and the storage operation can be immediately continued for the II button.
After the desired voice is selected, pressing the II button again completes storage and turns the record button off. If further storage is desired, however, press the III button instead of the II button and continue as with the I and II buttons.
- The following voices are preset in the keys from 1 to 20.
- theater organ
- soft brass
- church organ
- big band brass
- pop organ (I)
- marching brass
- pop organ (II)
- synthe brass
- rock organ
- fusion guitar
- jazz organ
- new wave
- classical strings
- funk rock
- symphonic ensemble
- jazz guitar combo
- pop ensemble (I)
- mix combo
- pop ensemble (II)
- modern baroque
These voices include unique tones and effects unavailable with normal buttons and tablets.
![graph LR A[" playing keys "] --> B[" 1, 2, 3, 4, 5, 6, 7, 8 "] B --> C[" 1, 2, 3, 4, 5, 6, 7, 8 "] C --> D[" 1, 2, 3, 4, 5, 6, 7, 8 "] D --> E[" 1, 2, 3, 4, 5, 6, 7, 8 "] E --> F[" 1, 2, 3, 4, 5, 6, 7, 8 "]](/content/2026/07/1559321/images/ec5a773ca12ebdc0a3b372c34236740d35876d2f878dcc3b626e4f31eea585ac.jpg)
②6 Transpose
Suppose you learn to play a song — in the key of C, for example — and decide you want to sing it, only to find it's either too high or too low for your voice. Your choice is to either learn the song all over again, in a different key, or to use the Transpose feature. Here's how you can quickly and easily put the song in a comfortable vocal range:
- Press Record.
- Press Transpose.
- Press one of the keys in the section of the lower keyboard marked: C \~ C \~ FF/GF; this automatically puts the song in a different key. You might have to try several keys before you find one that's comfortable. Do this by playing in the upper keyboard. Note that the display will indicate correct key signature only if the initial key signature is "C".
Musical Display
The transposed key is displayed

•+, - indicate whether the transposed key is higher or lower than C.
transpose

- Press Transpose again to "lock in" the new key signature.
![graph LR A["1: record"] --> B["2: transpose"] B --> C["3: Transposed"] C --> D["4: Transpose"]](/content/2026/07/1559321/images/b20501f2c2729fe9e16372ce604353e254e837bf548058cb5a25bd2b0e551c63.jpg)
The light on the transpose button stays on continuously, telling you a transposition is in effect.
To change back to the original key, just press transpose again (and the light goes out). You can recall the transposition by just pressing transpose again.
Another good use for the Transpose feature is to allow you to play with certain other instruments — trumpet, saxophones, etc. — that are "built in different keys". The Transpose feature can allow you both to read the same music and what you play will sound good together.
- The pedal keyboard notes are lowered one octave when 8' notes are transposed higher than a major 3rd, and become one octave higher when 16' notes are transposed to lower than C.
- When the following voices are transposed to a lower key, the lowest keys equal to the number of keys transposed do not emit any sound.
■ G5 (Upper, Lower): solo synthesizer presets
G7, F3 (Lower): percussive presets (acoustic piano, electric piano, harpsichord, vibraphone, glocken, steel drum), solo synthesizer presets (whistle)
■ F3 (Upper): all voices
■ G5, G7, F3 (Lower): bass (full bass pedal)
⑳ Tuning
This function facilitates the adjustment of pitches when used for an ensemble with other instruments.
With the free set button off, the pitch is set at the standard 440 Hz.
Tuning
- Press the free set button on.
- Press the + control button intermittently or keep it held down to increase the pitch, and the - control button to decrease it. Adjust the pitch to any other instrument in use. When the pitch is higher than the standard 440 Hz, the LED on the + button illuminates. If lower, the LED on the - button illuminates.
When playing at the standard 440 Hz, turn the free set button off.
The pitch adjusted in step 2 is stored, making it possible to play at this pitch when the free set button is turned on again.
The pitch can be adjusted within the range from 438 Hz to 446 Hz. The LED will flash when the pitch reaches the upper or lower limit of the adjustment range.

Musical Display
- The pitch is displayed when the free set button is turned on. The pitch display turns automatically to the previous display about 5 seconds after finishing tuning.
Every time the + or the - button is pressed, the pitch changes by about 1/3 Hz.
The bars on the right indicate the decimal numbers as follows: _ indicates 0 Hz, = indicates 1/3 Hz, and = indicates 2/3 Hz.
• 443.0 Hz (G5)


⑳ Drum Percussion (Automatic Rhythm)

start / stop

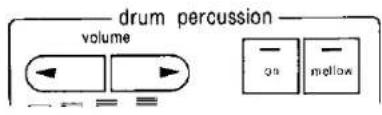
The rhythm unit, which employs a pulse code modulation (PCM) system for a more realistic sound, consists of rhythm selector buttons, start/stop devices, a downbeat light, and volume and speed controls.
The rhythm buttons themselves are self-cancelling — if one is pressed and you choose a new rhythm, the light on the first button goes out when you press the button for the new pattern. Pressing the two adjacent buttons simultaneously selects the rhythm indicated between them.
The start/slop button instantly starts and stops the drum rhythm. The rhythm always starts on the first beat of a measure. The LED light on this button indicates the downbeat by flashing on the first beat of each measure. This helps you relate the drum rhythms to the music and helps you keep track of "where you are" while playing.
Synchro starts the drum rhythm you've chosen only when a pedal or a key on the lower keyboard is pressed.
Volume allows you to adjust the loudness of the drums to be in balance with the keyboard voices.
Press drum percussion on button to turn on when you use Drum Percussion.
The mellow button softens the drum sounds.
The sliding tempo control adjusts the tempo.

Tempo Set

(G5·G7)
Two of your favorite tempos, once they are stored can be recalled at any time by simply pressing the appropriate tempo set button.
To store:
(Press tempo set buttons I and II simultaneously to turn them off.)
- Adjust the tempo to your favorite speed by sliding the tempo control.
-
With the record button pressed, press tempo set button I. This stores the tempo in button I.
-
You can store another favorite tempo using tempo set button II.
- To make more precise adjustments using the sliding tempo control, first press the Fine button.
- To adjust the tempo using the tempo control, first press tempo buttons I and II simultaneously to switch them off. (Manual mode)

Arrange Percussion
Arrange percussion is designed to change the patterns and to add various percussion instrument sounds to enrich each of the 23 rhythms.
I is the simplest rhythm pattern.
With II on, an enriched bass, for example, with a conga is added for pattern variations.
With III (I and II pressed simultaneously), an enriched treble, for example, with a tambourine, is added for greater pattern variations.

Fill In & Intro
This feature lets you use a one measure drum solo (or "fill") as an Introduction to a song, or to connect different sections of a song. Using the bossa nova rhythm, let's see how this works.
As an Intro (introduction):
- Press bossa nova I.
- Press fill in & intro — indicator lights up.
- Start the rhythm (press Rhythm start/stop). You'll hear the drums start with the intro and continue on to the bossa nova. After the intro, the indicator light goes out.
As a fill-in:
- Press bossa nova I.
- Start the rhythm.
- Whenever you want the "drummer" to "fill-in", press fill in & intro — the fill-in is immediately played for one measure, after which the bossa nova rhythm resumes.
Solo
Pressing the fill in & Intro I and II buttons simultaneously produces solo effects.
- The solo only slightly affects the sound of the automatic rhythm performance when there is constant movement on the keyboard, but a brilliant drum solo is produced when the

- Try this feature for all individual automatic rhythm patterns.
- Automatic rhythms are designed so that their patterns change according to performance conditions (such as the number of keys being pressed). This "play response" function creates a greater change of patterns when Arrange Percussion II or III is turned on.
fill in & intro


(G5·G7)


1 Measure

Press FILL IN & INTRO.
Two patterns, I and II, are available for Fill In & Intro. Try a variety of rhythms with these patterns.
notes are held or when the keyboard is not being played. Pressing the fill in & Intro I or II button returns the rhythm to normal after one measure of fill in is played.
- If the rhythm starts after the I and II buttons are pressed simultaneously, a solo introduction is brought in for 8 measures before the normal rhythm begins.
③2 Rhythmic Orchestra

These controls work exclusively in conjunction with the automatic rhythms. No matter which drum pattern you use, the rhythmic voices(s) provides chords that are perfectly synchronized with the automatic rhythm. Try all the drum patterns on your model and listen to the Rhythmic Orchestra voice with each.
Rhythmic Orchestra can be used with or without Auto Play Chord.
If you combine Rhythmic Orchestra with the lower keyboard voices, you will hear a combination of sustained (continuous) and rhythmic chord accompaniment.
- Pressing the rhythmic button allows chordal accompaniment.
- Pressing the melodic button allows melodic accompaniment.
- Pressing the I/II button further changes the accompaniment pattern.
NOTE: Pressing the lower harmonic coupler button (2', program) enhances the sound from the rhythmic button.
③3 Auto Play Chord

Auto Play Chord is an effective musical aid AND a source of enjoyment regardless of your previous musical experience. Combined with other exciting Technics features — Automatic Rhythm, and Techni-Chord — Auto Play Chord can help you create orchestral and full organ sounds using only one finger on each hand. Further, it can actually help you learn to play the organ in the traditional manner. Let's see how...
The fingered button, if pressed, automatically selects the One Finger mode when you play only one key on the lower keyboard or the Fingered mode when playing 3 or more keys.
One finger mode allows you to play a full chord and a bass tone by pressing any single key on your lower keyboard; these chords are called major, indicated by a chord symbol letter (C, E♭, etc.). To play seventh chords (G7, B♭7, etc.), press any long, light-coloured bass pedal as you play the appropriate key. To play minor chords (Am, F♯m, etc.), press any short, black bass pedal as you play the appropriate key. Occasionally you'll play minor seventh chords (Dm7, Gm7, etc.). As you play the lower manual key with the appropriate letter-name, press any long and short bass pedal, at the same time, with your left foot.
Fingered mode also allows you to form your own chords on the lower keyboard; the correct bass tone is automatically provided. If you press any bass pedal at this time, the sound of the relevant key is produced, allowing bass playing regardless of the APC system status.
Memory provides the sound of the chord and bass tone even if you release the lower manual key(s). The chord and bass continue to sound until you play another chord or stop the rhythm.
In addition to the features listed above, your Technics organ has a walking bass feature available at all times. This allows you to automatically re-create professional bass parts when you use either pedal voice along with any of the automatic rhythms.
Cancel shuts off the Auto Play Chord feature, permitting normal playing.
Set up lower keyboard and pedal voices and play the chord example below. If you use the One Finger mode, play the chord key indicated by the letter-name in each chord symbol. If you play in the Fingered mode, form the chords as shown with your left hand — use Memory to allow yourself time to find the correct notes.


Program Chord Computer
The Program Chord Computer, complete with a memory bank, is an amazing device that is exclusive to most Technics organ models. That's right — a computer built into the Technics organ! This makes it possible for you to program the chord accompaniment of an entire song and store it right inside the organ. The main advantage of this is that, while you're learning to play a song, the computer can play the accompaniment, complete with rhythm, while you concentrate on practicing the melody.
This feature is also used in conjunction with the Fullband Setting Computer, which is discussed on later pages.
There are two groups of controls that operate the Program Chord Computer — the buttons illustrated below, and the nine keys on the right of the lower keyboard.
NOTE: A total of a 100 chord entries may be made before the built-in Computer memory is full. A quarter measure (Q44) is counted as 2 chords. When the Computer memory is full, short beeps will sound.
PCC button prepares the computer for the storage of the chords of your choice (after Record is pressed).
The eight keys are used for the actual process of storing chords in the computer. Here is what they do:

stores a chord for an entire measure (one chord per

stores a chord for a half measure (two chords per ).

(pressing two keys at a time) stores a chord for a measure (four chords per measure).

keys (▶◀) are used to correct individual in a sequence, or to change chords already in the bank.


Can be pressed should you wish to start programming over from the beginning.
—(End) is pressed when the entire chord sequence is stored.
→ (pressing two keys at one time) completes storage so that performances can be automatically repeated.
→I → allows you to input a pause at any time during the recording. This pause is reproduced when the recording is played back.
The use of the § ◆ and D.S. key allows you to store chords according to the music, making storage operation easy. This is explained later in detail.
Musical-Display
| It's possible to store these types of chords: | |||||||||
| Major | Minor | Seventh | Minor Seventh | Augmented | Diminished | Minor Seventh Flat Fifth | Major Seventh | Minor Major Seventh | Seventh Suspended Fourth |
| C | Cm | C7 | Cm7 | Caug | C° or C dim. | C# or Cm7 (b5) | CM7 or C maj. 7 | CmM7 | C7sus4 |
Some of these chord types are not available as one-finger mode; no matter, however, since your computer easily mixes One-Finger and Fingered modes.
Use the following example to learn operations of the Program Chord Computer, the variety of chords presented will help you do this.

Storing Chords In the Computer
- Press Record and then PCC. Computer memory is now ready to receive the chords in the example.
Press and hold the C chord on your lower keyboard, either as a one-finger or fingered mode. DON'T PRESS THE FINGERED BUTTON, however, since doing so cancels the Record feature. While holding the C chord key(s), press the key marked HH. The chord sounds while you're holding it; as you press the HH key, you'll hear a "beep" — this tells you the chord is now in the memory. ALWAYS REMEMBER: When you hear the chord you want, THEN press HH or HH.

Since the C# diminished chord is not available as a one-finger mode, you'll have to form it yourself (C#-E-G-Bb). Hold it and press the H key again. The "beep" sounds and the first measure is complete.
The second measure contains only the Dm7 chord. If you don't form it yourself, you can press the one-finger D chord and add a short bass pedal (for minor) and a long pedal (for seventh). While holding this chord, press the key; the second measure is now complete.
Continue with the remaining chords in the example, entering half and whole measures as required. Incidentally, the notes of the Em7 (b5) chord are E-G-Bb-D. The last chord, C, is played for two measures. As you hold down the key(s), press the k̂ key twice — once for each measure.
- Press the —H (End) key. This closes the memory to further storage, and turns off the record switch. The LED light on the PCC button stays on, however.
Musical Display
The sequence number and chord name are displayed.
(G5)
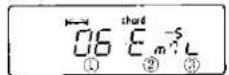
(G7·F3)

① Sequence number
② Chord name
③ Chord length
I → ... OH → ... L HH ... 1
Keys D.S., and —H are displayed as , and respectively. Pressing the D.S. key and —H key simultaneously displays .
Other facts you should know about storing chords...
- To store "no chord" (N.C.) press the 1 or 2 key, as necessary, without playing a chord.
When the programmed chord sequence is automatically played back, it stops after one play. For repeat automatic play, follow the procedures below in step 2 above.
• To repeat the programmed chord sequence until the rhythm is stopped:
Instead of the —H key, press the ➕ key (pressing the D.S. and —H keys at the same time).
- To specify the number of repetitions (up to 8 times): While holding the D.S. key down, press one of the keys 1 to 8 (on the lower keyboard) corresponding to the number of repetitions (e.g. the 3 key to repeat 3 times). Then press the _—|__ key.
If you press the *+ key when storing the chord sequence, the sequence will stop at the first beat of the next chord during automatic playback. Pressing the start/stop button resumes the sequence at the chord next to the stopped one.
- For example, press the G7 1 , 1+1 , C 1 and Am keys for storage. When automatically played back, the chord sequence stops at the first beat of the C chord after the G7. Pressing the start/stop button resumes the sequence at the Am chord.
Note: A quarter-measure or D.S. key is counted as two chords.
Playing the Programmed Chords
After making sure the PCC LED light is on, start the automatic rhythm or your choice. The stored chords are automatically repeated in sequence for the correct number of measures.
When you are playing a programmed chord sequence and you wish to replay a certain part of the program — maybe you missed a melody note — press the start/stop button. This stops the automatic rhythm and the chords; at the same time, the program returns to the beginning of the chord sequence, allowing you to restart and play again.
Modifying or Correcting Programmed Chords
Suppose you wanted to change the A7 chord in the example to an Eb7 — here are a couple of ways you could do it.
Using the Automatic Rhythm
- Press Record and PCC buttons.
- Press Start/Stop to begin chord sequence with rhythm.
-
Stop the rhythm when the sequence reaches the A7 chord.
-
Play and hold the new chord (E♭7) and press the key. The new chord is now in the position of the original chord.
- Press PCC again.
Using the Forward or Back Keys
Step 1 as above.
-
Press the ▶ Key once for each chord from the start of the program. In this case, the A7 is the seventh chord in the sequence; watch the example and press ▶ seven times.
-
Stop when you hear the chord you want to change.
Steps 4 and 5 as above.
The key is used the same way when you want to move one chord at a time from the end of the program to the beginning.
Other facts you should know about changing chords...
- The ▶ and ◀ keys operate only when the rhythm is stopped and the record and PCC buttons are pressed.
- Each press of the ▶ key advances one unit and each press of the ◀ key moves sequence back one unit, whether the unit is a whole measure, a half measure, or a quarter measure.
- Should you enter the wrong chord, press the key once and enter the correct chord.
Using the ♂Φ, D.S. keys
After pressing the symbol keys according to the music sheet, the chord of the measure is stored. Let's try to store the following music.


The memory procedure is as follows.

Music written with repeat marks other than ♂, D.S. can be stored with the following correspondence.

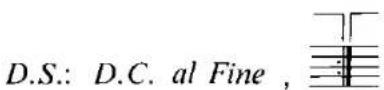
(For 3, press the ♦, D.S. keys in succession.)
Example

The memory procedure is as follows:

The following kinds of music cannot be stored by using ♂ ♂ D.S. keys.
- When the position of and to are the same.
- When the ranges of 2 repeats overlap.
- When the position of ± and D.C. or D.S. are the same.
Voice, Fill in & Intro Storage
This Program Chord Computer stores not only chords but voices from the Voice Setting Computer, as well as Fill in & intro and arrange percussion.
- For Voice storage:
Before storing a chord, press the voice setting computer button. This stores the selected voice at the beginning of the next measure. The voice will continue until the next voice is selected.
- For Fill in & Intro storage:
Pressing the fill in & intro button at the beginning of a song stores intro. Pressing the button after storage of a chord stores the fill-in for a measure at the beginning of the chord.
• For Arrange Percussion Storage:
Before storing a chord, press the arrange percussion button. This stores the selected arrange percussion at the beginning of the next measure.
- When the chord sequence is over, you can continue playing with the last voice selected. But when you stop playing, the first voice will return after six seconds.
- The voice will change a half beat ahead of the rhythm so that you can remain in tempo with the rhythm.
- Lets store the following:
| chord | C | F | C | G7 | Em | A7 | Dm G7 | C | |
| fill in & intro | Intro II | fill in | |||||||
| arrange percussion | II | I | |||||||
| VSC | I | II | |||||||
After first pressing the record button then the PCC button, perform the storage operation as follows:
![graph LR A["fill in & intro II"] --> B["arrange percussion ||"] B --> C["VSC I"] C --> D["C - ∽"] D --> E["F - ∽"] E --> F["C - ∽"] F --> G["G7 - ∽"] G --> H["fill in & intro I"] H --> I["arrange percussion I"] J["VSC ||"] --> K["Em - ∽"] K --> L["A7 - ∽"] L --> M["Dm - ∽"] M --> N["G7 - ∽"] N --> O…](/content/2026/07/1559321/images/5c1e609e4a66682f35eb3810f340176d2920d65bdbb9c3d198447d56a576b7b0.jpg)
- Up to 8 selections of the voice, Fill In & Intro, arrange percussion can be stored. (Storing voice, Fill In & Intro and arrange percussion in sequence is counted as one selection.)
- It is also possible to store voices, Fill In & Intro, and arrange percussion after a chords sequence has been entered. Let's store the previous example using the following procedure.
- When the song is repeated, the last voice of the song continues through the first voice of the second sequence. In order to specify the first voice of the second sequence, store the desired voice after the last chord is stored.
- First, store only the chords.
![graph LR A["C-"] --> B["F-"] B --> C["C-"] C --> D["G7-"] D --> E["Em-"] E --> F["A7-"] F --> G["Dm-"] H["G7-"] --> I["C-"] I --> J["-"]](/content/2026/07/1559321/images/16e92b019db9981f9bb2a8c50aaaa3680fe894fd48fa0325a8c778ed23cedd2a.jpg)
- Press the record button and then the PCC button.
- Press the fill in & intro II button.
- Press the arrange percussion II button.
- Press the I button of the Voice Setting Computer.
- Press the Forward key (▶) four times to advance chord to the G7 position.
- Press the fill in & Intro I button.
- Press the arrange percussion I button.
- Press the II button of the Voice Setting Computer.
- Press the PCC button.
③5 Program Rhythm Computer
In addition to providing a wide variety of standard rhythm patterns to complement your music, Technics has now made it possible for you to make up your own drum rhythms. Not only that—you can store them in a memory and recall them for use whenever you wish!
The controls illustrated below, along with the main portion of your lower keyboard, make all this possible.
![composer shuffle funk rock swing rock guaracha cha-cha I march 8 beat ballad rumba mambo waltz Ⅱ [ — I ] [ ICY ] [ N ] [ / ] [ / ] [ / ] [ — I ] [ R ] [ S ] [ / ] [ / ] [ / ] swing I 16 beat disco I bossanova I samba tango swing II samba rock disco II bossa nova I baion](/content/2026/07/1559321/images/3e1f95a80ae41c1d0dbd81cc17e55d044cea74df927a1cdc609f87543552f680.jpg)


Here's a brief description of each control button used in the composing and programming process:
Composer I, II and III (pressing two buttons at one time) are where your rhythms are stored (in memory). An indicator light tells you which button is in use. Each button is also pressed to play back the stored rhythms.
Rhythm Instruments. These fourteen voices provide the sounds for the rhythm patterns you create.
- Closed hi-hat
- Open hi-hat
- Cymbals
- Snare drum
- Tom-tom
- Rim shot
- Bass drum
- Hand clap
- Shaker
- Tambourine
- Agogo bell
- Cowbell
- Conga
- Bongo
The following keys on the lower keyboard are also used in programming your own rhythms:
Clear is pressed, when Compose I, II or III is activated, to cancel all voices assigned to that particular track. To cancel an individual voice from a rhythm you've created, press the button for that voice and then press the Clear key; all other voices will remain.
Beat is used to program any rhythm, other than four-beat rhythms.
2nd bar is used for storing two-measure rhythms such as the bossa nova, or certain rock and disco patterns. The rhythm in this measure continually alternates with the rhythm you program in the first measure.
Triplet is the black key used to store four-beat triplet rhythms, such as the rock ballad (12/8 time).
Accent/pitch is used to accent the voice of a specific timing or to change its pitch.
I, II, III provide frequently-used rhythms for storage and replay. All three are based on salsa rock, or Latin-disco, rhythms. (Preset keys).
Programming With Presets
The chart below shows the various rhythm patterns that are available when you use the three preset keys. Try all of them and become familiar with each.
| Preset keys → | I | II | III | |
| Closed hi-hat |  |  | 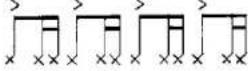 |  |
| Open hi-hat |  |  |  |  |
| Cymbals |  |  |  | 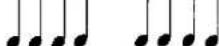 |
| Snare dru |  |  |  |  |
| Tom-tom. |  |  |  |  |
| Rim-shot |  |  |  |  |
| Bass drum |  |  |  |  |
 |  |  |  | |
| Hand clar |  |  |  |  |
| Shaker |  |  |  |  |
| Tambouri |  |  |  |  |
| Agogo bei |  |  |  |  |
 |  |  |  | |
| Cowbell |  |  |  |  |
| Conga |  |  |  |  |
| Bongo |  |  |  |  |
| rhythmic (guitar) |  |  |  |  |
| melodic (piano) |  |  |  |  |
 |  |  |  | |
Here is how you can create your own disco rhythm using only the preset keys.
- Press Record and either Composer I, II or III.
- Press Clear key to cancel anything recorded previously.
- Add each rhythm voice. Here's how, starting with the bass drum playing four beats per measure (disco style — see chart).
a. Press

Preset 1.
c. Press rhythm start/stop button to hear the pattern — you'll find it helpful to leave the rhythm on as you add the various voices so you can hear each one and decide if you with to use it or choose another.
Do this with each voice you wish to use, choosing the individual rhythms from the three preset keys.
- Press Record when programming is complete. To hear the rhythm, press the Composer button again and then the rhythm start/stop.
Modifying Preset Combinations
Suppose you wish to change the hi hat pattern to eighth notes (♩♩♩♩), in each measure...
-
Press Record.
-
Press
-
Press Preset III — the hi hat pattern is now changed.
-
Press Record, Composer, and rhythm start/slop to hear the changes you've made.
You'll be amazed at how many ways all these preset patterns can be combined to create colorful and exciting percussion sounds!
• To create Cymbal sounds, and keys must be pressed simultaneously.
- To create Rim shot sounds, the 甲 and 乙 keys must be pressed simultaneously.
- The same timing cannot be set for Open Hi-hat, Closed Hi-hat and Cymbals. This is also true of the Snare drum, Tom-tom, and Rim shot.
- For Latin percussions (shaker/tambourine, agogo bell/cowbell and conga/bongo), only one of the upper and lower buttons can be used. For example, a previously stored shaker pattern is cleared and replaced when a tambourine pattern is stored.
- In the factory preset state, the metronome sound is stored in the composer I, II and III buttons.
A Brief Look At Your Lower Keyboard
The 0 to 15 numbered keys on your lower keyboard are where the various percussion voices are stored in relation to the different beats in a measure. Keys 0 through 11 are used to store three-beat rhythms (ek.g. waltz), while all sixteen are used for other rhythm patterns (four beats per measure).
As illustrated below, each of the keys numbered 0 to 15 corresponds to one-sixteenth of a note per measure.
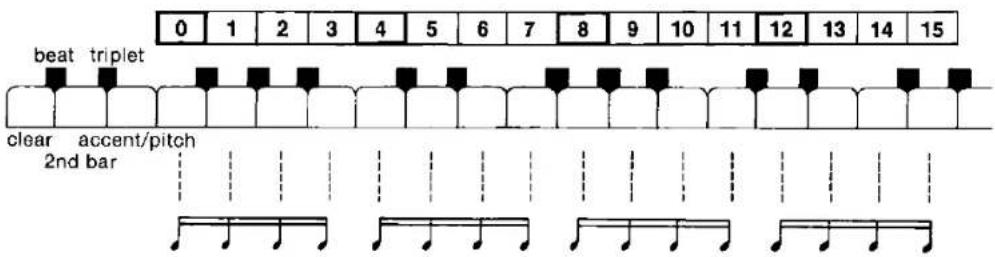
Using just the bass drum and snare drum, the following illustrations show where a basic waltz ① and soft rock ② pattern would be assigned to the lower keys. Keep in mind that each group of four sixteenth notes ( ) represents one beat; therefore, all sixteen numbered keys on your organ represent one four-beat (4/4) measure of music.

If you wanted to add the closed hi-hat playing an eighth note pattern ( ) to either example, you could use the Preset III key since this pattern is built-in. Merely take the steps outlined previously.
Here is what happens when you press the Triplet key:
♩ = ♩ ^ 3
IMPORTANT NOTE: The Program Rhythm Computer lets you easily mix Preset key rhythm patterns with those you create on your lower keyboard.
Programming Rhythms
Since it is possible to create such a wide variety of rhythms on your Technics, we'll consider specific patterns in order to help you understand how to use the Computer.
Rock rhythm

Programming The Rock Rhythm
- Press Record and either Composer I, II or III.
- Press Clear key.
- Press closed hi-hat and Preset III.
-
Press rhythm start/stop to check the pattern.
-
Press snare drum and Preset I.
- Press bass drum and lower keys 0, 2, 5, 8. This provides the bass drum figure shown in the example.
- Press Record to turn off programming feature.
Now, by pressing the Composer button and starting the rhythm, you should hear the complete rock rhythm.
Programming The Jazz Waltz
Remember that, since this is a three-beat pattern, only keys 0 through 11 will be used. Notice also that this is a two-measure example.
- Press Record and either Composer I, II or III.
- Press Clear key.
- Press Triplet and then Beat keys since the example contains three-beat triplets in the hi-hat cymbals.
- Press open hl-hat button.
- Press lower manual keys 0 and 8.
- Press closed hi-hat and lower keys 4 and 7. Hi-hat cymbal part for first measure is complete.
Jazz waltz

- Press bass drum button and lower manual key 0.
- Press snare drum button and lower keys 3 and 8.
For the second measure of the example...
-
Hold down the white 2nd Bar key and enter the snare drum on the lower manual key 4.
-
Press Record — programming is complete.
Press the Composer button again and start the rhythm to hear your two-measure jazz waltz pattern.
Modifying Programmed Rhythms
At any time, you can change any voice in any rhythm pattern you've programmed. All you do is:
- Press Record.
- If necessary, press Triplet or Beat.
-
Press button indicating voice you wish to change.
-
Press Clear key to erase existing pattern for that instrument.
- Enter new pattern.
- Press Record and the Composer button.
To Store Rhythms Other Than Four-Beat Rhythms
Three-beat Rhythms
- Press the record button.
- Select either Composer I, II, or III.
- Press the clear key.
- Press the beat key.
- Store the rhythm pattern for each instrument.
- In the preset mode, the first three beats are stored.
-
In the manual mode, the white keys 0 through 11 are used to store the rhythm.
-
Press the record button.
Two-beat Rhythms
Instead of step 4 in the above procedure, press the 2 key on the lower keyboard with the beat key held down. Then store the 2-beat rhythm patterns.
- In the preset mode, the first two beats are stored.
- In the manual mode, the white keys 0 through 7 are used.
Five-beat Rhythms (a three-beat measure + two-beat measure pattern)
- Press the record button.
- Select Composer I, II of III.
- Press the clear key.
- Press the beat key. With the beat and 2nd bar keys held down, press the 2 key on the lower keyboard.
- Store the two-measure pattern for each instrument.
- Press the record button.
- Similarly, to program seven-beat rhythms, store the two-measure pattern of the four- and three-beat rhythms.
How to Use the Accent/Pitch Key
This key lets you accent the rhythm pattern or change its pitch.
- The following instruments may be accented: Hi-hat, cymbals, snare drum, rim shot, bass drum, shaker and tambourine.
-
These instruments may be accepted by lowering the pitches.
Tom-tom, agogo bell, conga, cowbell and bongo
• The accent/pitch function is not available for hand claps -
Press the record button.
- Select Composer I, II, or III.
- Press the instrument button to be accented.
- With the accent/pitch key held down, press the white key to set the timing to be accented.
- Repeat steps 3 and 4 for all the instruments to be accented.
- Press the record button
- The Rhythmic Orchestra patterns, rhythmic and melodic, may be stored in a similar manner. The bass voice during automatic performance will be sounded in the rhythm patterns of a bass drum.
Using The Sequencer
In addition to making it possible for you to create your own rhythms, Technics also lets you store these rhythms for playing back in any sequence you choose. This applies to rhythms you've created for the Composer memory, the twenty-three patterns that are part of the Drum percussion selector, and even the Arrange Percussion and Fill In & Intro features.
Here are the control functions you'll need to sequence rhythms:
rhythm sequenser

Rhythm Sequencer button is pressed before you enter the various rhythms in the desired order. Press again when you wish to play back the sequence.
Lower manual keys 1-20 — Each key number represents that number of measures for sequencing purposes.
You'll easily understand the sequence function if you enter this sixteen-measure example using only standard rhythms.
| 4 | 4 | 4 | 4 |
| Bossa Nova I | Mambo + Arrange Perc II | Swing | Bossa Nova + Fill-In |
- Press Record.
- Press Rhythm Sequencer.
- Press Bossa Nova I and then lower key 4. The first four measures are now entered in the sequencer.
- Press Mambo and Arrange Percussion II, followed by lower key 4 once again. (Press Arrange Percussion I.)
-
Press Swing and lower key 4.
-
Press Bossa Nova I and key number 4.
-
Press either Fill In button twice to add this feature to the final section. NOTE: if Fill In is pressed only once, you'll get a half measure in 4/4 time or a third of a measure in 3/4 time. Fill In should be pressed only after the TOTAL number of measures in a section has been entered — in this case, four measures of bossa nova.
-
Press the —H key. This closes the memory to further storage, and turns off the record button.
- To repeat the programmed sequence until the rhythm is stopped:
Instead of pressing the —H key, simultaneously press the D.S. key and —H key. (☐)
- To specify the number of repetitions (up to 8 times): While holding the D.S. key down, press one of the keys 1 to 8 (on the lower keyboard) corresponding to the number of repetitions (e.g. the 3 key to repeat 3 times). Next press the —— key.
To hear the entire sequence, press rhythm start/stop. To use other rhythms, merely press Rhythm Sequence button.
- The Rhythm Sequencer allows you to make 48-measure designations.
- Instead of keys 1 through 20 on the lower keyboard, the R = 1 , R + 1 and R + 1 keys on the right can be used to store 3/4, 1/2 and 1/4 measures.
• The ♂ and D.S. keys can also be used to easily store music segments for repetition (refer to ③). - In addition to the rhythm, settings in the tempo set button, the rhythmic orchestra, and the volume can also be stored.
However, the tempo control and fine button functions cannot be stored.
- Pressing the -11 key as the rhythm is stored causes the music to stop at that point when played back automatically. Pressing the start/stop button resumes automatic play.
- If the 100 key is pressed while recording a two measure pattern, the preceding and succeeding measures will be interchanged.
③6 Program Function Switches
Many functions used during play can be stored in the function switches (knee lever, left and right foot switches, and full bass pedal). This makes it possible for you to change the tone and effect using your foot or knee. For example, the I button function of the Voice Setting Computer can be activated by the knee lever. This lets you change the tone and effect during play only by moving your knee. Function switches enable the storage and programming of the function buttons given below:
| Function switch | Original function | Storable function button |
Knee lever | Sustain ON/OFF | Voice Setting computer (I to VII), Multi-tremolo Slow/fast, Techni-Chord Fill in & intro (I, II and solo) |
Left foot switch(with glide/rhythm button on)or | Start/stop for drum percussion | Voice Setting Computer (I to VII), Multi-tremolo Slow/fast, Techni-Chord Drum percussion start/stop Fill in & intro (I, 2 and solo) |
Right foot switch | Fill in & Intro I | |
Full bass pedal(with bass solo button on)in   | Bass solo | Program Chord Computer (PCC), Fingered, Memory, and Play Sequender (solo, upper, lower and bass) |
For Storage
- Press the record button.
- Press the function switch to be used. (For example, push the knee lever to the right.)
- This causes a short beep to sound, and the LEDs of the buttons available for recording flash.
-
Press the button of the function you wish to store. (Press the I button of the Voice Setting Computer, for example.) This automatically turns the record button off and completes storage of the selected function in the switch. (In this example, the tones and effects change to those of the I button of the Voice Setting Computer while the knee lever is pushed to the right.)
-
The tones and effects can be changed only when the knee lever and full bass pedal remain on. However, they change with every press of the foot switches.
- To return the switches to their original function (e.g., sustain ON/OFF for the knee lever), press the initial key on the lower keyboard as in step 3 above.
③7 Play Sequencer
All parts, bass, lower, upper and solo can be stored at one time or parts can be played separately and then synchronized for storage.
For example, a bass line played on the pedal keyboard is first recorded. As it is played back, chords can be added using the lower keyboard. Then, as the new recording is played back, a melody line can be added using the upper keyboard. Solo synthesizer presets can also be used. The combined recording, or any of its elements, can be retrieved at any time.
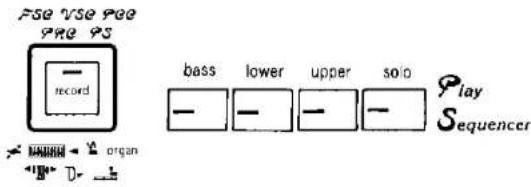
Solo button
A different melody from that stored in the upper button can be stored in the solo button using one of the solo synthesizer presets. Automatic performance using the lower, upper, and solo buttons produces the sound of three keyboards played at once.
■ Bass notes can most easily be stored in the Play Sequencer bass button by using the full bass pedal and playing the lower keyboard. Such stored notes may not all be heard or their pitch may change, however, if transposed. To store bass notes that can be accurately be transposed, use only the pedal keyboard.
For Storage:
I. Memory Pack Preparation and Registration
- Set the mode selector at the PS position and turn off the pack's memory protector. Then firmly insert the memory pack in the slot to the right of the upper keyboard.

-
Set the tones and effects for the song to be stored.
-
If an introduction is needed, turn on the Fill in & Intro button.
- If Play Sequencer storage operation is performed, this setting will be automatically stored in the memory pack.
- If necessary, store in advance the Voice Setting Computer, Organ Presets and the Program Rhythm Computer, etc.

① Open the slide door.
② Firmly insert the memory pack.
II. For Storage of Ordinary Performances
- Press the record button. The button will flash.
- Press the Play Sequencer buttons one at a time for the parts you wish to store (for example, the bass, lower, and upper). The buttons will then flash slowly.
- Check that the buttons for the parts you wish to store flash slowly.
-
At this time, turn off the solo button.
-
Play the song to be stored.
- Start the rhythm if desired and play the parts you wish to store. You can turn the rhythm on and off while playing the song.
- After playing, press the record button to turn it off.
- Instead of the record button, you may press the Play Sequencer button which turns off the Play Sequencer and ends the recording.
III. To Store Other Parts for Automatic Performance (Multiplex Storage)
- Turn off all four Play Sequencer buttons.
- Press the record button. The button will flash.
- Press the Play Sequencer button for the part to be stored first. The button will flash slowly.
- Play the part to be stored.
- After playing the part, press the Play Sequencer button for the next part to be stored. The button will flash slowly.
• The rhythm automatically stops. - Check at this time that the button for the previously stored part is still lit.
-
Instead of step 5, you may press the record button to turn it off. Then press the button again (the button will flash) and press the Play Sequencer button for the part you wish to store next. This button will then flash slowly.
-
Pressing the start/stop button begins the automatic performance of the previously stored part, to which you can add a second part.
- You can also begin a song which has no rhythm by pressing the start/stop button.
- To store one portion of a song, press the button for the part to be stored next. You need not wait for the automatic performance to be completed. In this case, do not stop the rhythm.
- Repeat steps 5 and 6 to complete storage in the other Play Sequencer buttons.
- Press the record button to turn it off.
- For storage in the solo button, the upper solo synthe preset button of the Orchestral Conductor is automatically turned on. Play a melody on the upper keyboard and it will be stored.
IV. To Modify Previously Stored Parts or Add a Solo Part
- Turn on the Play Sequencer button for the part to be automatically played.
- Press the record button. The button will flash slowly.
- Press the Play Sequencer button for the part to be replaced. The button will flash slowly.
-
Check at this time that the button for the part to be automatically played is still lit.
-
Pressing the start/stop button begins automatic performance of the stored part which may be modified or added to.
- You can also begin a song which has no rhythm by pressing the start/stop button.
- After playing, press the record button to turn it off.
The storage capacity is as follows:
| memory pack SY-P2 | memory pack SY-P3 | |||
| Upper | 200 tones | *400 tones | 500 tones | *1000 tones |
| Lower | 200 tones | 500 tones | ||
| Solo Synthe | 150 tones | *300 tones | 350 tones | *700 tones |
| Bass | 150 tones | 350 tones | ||
| Control | **35 steps | **60 steps | ||
★The storage capacity of the upper or lower is doubled if either is used alone without the other. The same is applies to the solo and to the bass. In this case, follow the storage procedure below.
- Press the record button.
- Press the Play Sequencer button to be used.
-
Press the Fullband Setting Computer button.
-
Press the white key 2 on the lower keyboard.
• Double capacity is indicated on the musical display. - Pressing the white key 1 returns the display to the original mode.
- Press the Fullband Setting Computer button.
**During storage using the upper keyboard, control data such as changes in the tones and effects being played can also be stored.
• How to Count the Number of Tones
The cycle of one key being pressed and released is counted as one tone.
- The rhythm tempo can be freely adjusted during playback. Therefore, it is possible to store contents by playing the keyboards slowly.
- If new songs are stored over songs already stored in the memory pack, the previously stored songs are cleared. If you wish to keep the stored songs, turn on the memory protector.
| mode selector | ||
| FSE | 1 | PS |
| off | 1 | on |
| memory protector | ||
• Together with the supplied SY-P2 memory pack, the optional SY-P2, SY-P3 enable you to form library of your own favorite songs. The SY-P3 memory pack has a tone storage capacity double that of the SY-P2.
Musical Display
The musical display indicates the number of tones that can still be stored. In the example below, 200 more tones can be stored in the lower keyboard.

§ ...Solo Synthe Presets
b(G5), B
If two or more Play Sequencer buttons are programmed simultaneously, the button which has the least number of tones remaining is displayed. E is displayed when no more storage is possible.
200 L
V. Registration Storage
■ Registration Storage
When Play Sequencer storage operation is performed, the contents set before the record button is pressed are automatically stored in the memory pack.
■ Checking and Modifying Registration Before Performance
When the record button and Play Sequencer button flash before performance, no modification or addition can be stored. If you wish to check or modify the registration, turn on the Fullband Setting Computer button. After checking and modifying the contents, turn off the Fullband Setting Computer button.
■ Readout of the Stored Registration
Turn on the Fullband Setting Computer button and press the 1 key on the lower keyboard. This will set the stored registrations.
■ Modification of the Stored Registration
To modify the registration for a song already stored in one of the Play Sequencer button:
- Set the registration you wish to store.
- Press the record button. The button will flash.
- Press the Fullband Setting Computer button. The button will flash slowly.
- Press the 1 key on the lower keyboard.
■ Storage of Changes in Registration during Performance
The upper button of the Play Sequencer stores changes in registration in the buttons on the control panel, excluding the main volume, Play Sequencer, and Fullband Setting Computer buttons. This information is stored along with the upper manual keyboard information.
For Automatic Performance of the Stored Contents
- Insert the memory pack in the slot to the right of the upper keyboard.
- To use the stored tones and effects, turn off the Fullband Setting Computer button and then press the 1 key on the lower keyboard.
- Press the Play Sequencer button to turn on the part you wish to perform automatically.
- Make sure that only the Play Sequencer button for the part you wish to perform automatically is lit. (If the Play Sequencer button for any other part is turned on, the wrong melody may be played or the rhythm may stop during performance.)
- If the solo synthe preset button of the Orchestral Conductor is turned on during automatic performance of the melody stored in the solo part of the Play Sequencer button, manually played voices will also be produced. This may adversely affect the solo synthe presets.
- Start the rhythm for automatic performance of the selected part.
- Press the start/stop button to begin a song which has no rhythm.
■ Ensemble-like Playing During Manual Performance
• Upper and Lower
During an automatic performance, you can also play the upper and lower keyboards to produce an ensemble-like effect. The maximum number of tones that can be simultaneously created by the upper and lower keyboards is 8 (4 when the harmonic coupler is used). For more than 8 tones, top priority is always given to those manually played.
• Bass and Solo
These parts are monotone and do not allow simultaneous automatic and manual performance. However, you can play these parts during automatic performance without a melody. (For the solo part, manual performance is possible only when the solo synthe preset button of the Orchestral Conductor is selected.)
![graph LR A["Manual performance"] --> B["Automatic performance"] B --> C["Automatic performance (with no melody)"] C --> D["Automatic performance"]](/content/2026/07/1559321/images/e7497b61d938960f70ded8d5f775d4f5a46e8c6c794c8a193d4bda0c8e84f918.jpg)
Solo Synthesizer Presets
■ When the Play Sequencer Solo Button is off:
If the solo synthe preset button of the Orchestral Conductor is turned on, the solo synthesizer presets can be performed by the Play Sequencer upper or lower button as in ordinary performances.
■ When the Play Sequencer Solo Button is on: Solo synthesizer presets can be performed as independent melodies.
- In this case, the solo synthe preset button of the Orchestral Conductor need not be selected.
- If the solo synthe preset button of the Orchestral Conductor is also selected, priority is given to manually played tones.
- Solo synthesizer presets cannot be performed by the Play Sequencer upper or lower button.
Precautions when using the Memory Pack
- The memory pack includes electronic components such as ICs and should never be dropped or hit.
- Do not touch the connector directly.
- Never try to disassemble the memory pack.
- Do not subject the memory pack to extreme temperatures or humidity.
- If the memory pack's built-in battery runs out, the stored contents will be cleared.
■ Protective Case
In order to prevent problems that may result from static electricity or dust, always store the memory pack in its protective case when not in use.

③8 Fullband Setting Computer
The Fullband Setting Computer is used to set tones, effects and rhythm combinations. It also allows storage in the digital memory pack of information needed to play songs such as the contents stored in the Program Chord Computer and Program Rhythm Computer. The stored contents in the digital memory pack can be freely retrieved for use whenever required.
- When Play Sequencer is employed, the memory pack allows storage of one song. Without the Play Sequencer, up to 4 songs can be stored in the SY-P2 memory pack (supplied and optional), and up to 8 songs in the optional SY-P3.


For Storage in the Memory Pack:
- Set the switches on the rear of the digital memory pack as illustrated in the diagram.
Storing with
Play Sequencer contents
Storing without
Play Sequencer contents
mode selector
mode selector

- When storing the Play Sequencer contents, use the memory pack in which these materials have already been stored.
- Insert the memory pack in the slot to the right of the upper keyboard.
① Slide the cover to the right.
② Firmly insert the memory pack.

- The tone and effect combinations registered for playing the song should be stored in the Voice Setting Computer
- Perform the storage operation in advance when using the organ presets and harmonic coupler programs.
- Store the functions, such as the Program Chord Computer, that you require.
- Set the tones, effects and rhythms at the beginning of the song being played.
- If you desire an "intro", press the Fill in & Intro button after stopping the rhythm.
Now you can store the above contents in the digital memory pack.
- First press the record button and then the Fullband Setting Computer button.
- Press key 1, 2, 3 or 4 on the lower keyboard within 5 seconds (or a key from 1 to 8 if using the SY-P3 memory pack). This stores the contents in the track of the memory pack that corresponds with the key number pressed.
- To store with Play Sequencer contents, press the key 1 on the lower keyboard.

Pressing this key stores the contents in track 1 of the memory pack.
In a similar manner, store the contents of your favorite songs in the remaining tracks of the memory pack.
- Write the titles of the stored songs on the index label of the memory pack.
- Steps 3 to 7 above remove the contents of the stored memory pack and store the new song. If you wish to keep the stored contents, turn on the digital memory pack's memory protector.
- By using the optional digital memory pack, you can form an original library of your favorite songs.
The memory pack allows storage of your performance in either the PS mode or the FSC mode. The PS mode stores 1 song including a melody while the FSC mode stores only the registration for 4 songs (SY-P2) or 8 songs (SY-P3).
■ To perform the stored contents, be sure to use the mode in which they were stored.
- When the other mode is used, either the stored contents cannot be performed or the organ may not operate properly.
When the organ does not operate properly:
- Press the Fullband Setting Computer button to turn it on.
- Press the initial key on the lower keyboard.
Let's Place the Memory Pack Contents in the Organ!
- Insert the memory pack in the slot to the right of the upper keyboard.
- Press the Fullband Setting Computer button.
- Press the keys on the lower keyboard that correspond to the number of the song you wish to play. The tones and effects played at the beginning of the song will be indicated by the LEDs.
- At the same time, the contents stored in the Program Chord Computer and Voice Setting Computer, etc. are also set automatically.
Musical Display
The Fullband Setting Computer number selected with the lower keyboard is displayed.
(G5)

For the SX-G5, the selected number is displayed only when the Fullband Setting Computer button is on.
(G7·F3)

Rhythm tempo
⑲ Connection Terminals
Below the lower keyboard:
(line out for ext speaker)


Phones For silent practice headphones may be used. When plugged in, the organ's speaker system is automatically switched off, and the entire organ is heard only through the headphones. (Use headphones with 16 ohm impedance.)
Mlc (input level 7.5 mV 10kΩ) The organ will accept a microphone of the uni-directional type. This type of microphone reduces feedback to the minimum.
Mic Volume balances instrumental or vocal sounds fed into the microphone with the loudness of the organ.
Aux (input level 150 mV, 10kΩ) Among the many items which can be connected to this are tape/disc pre-amps, portable synthesizers, etc.
Line Out (output level 300 mV, 600Ω) By plugging into a high-power amplifier, the organ sound, including microphone and auxiliary instruments, can be reproduced at a very high volume level. The organ can be tape recorded by using this method of connection also. A 2-channel output (LR) or a 3-channel output (1, 2, 3) can be selected with a switch.
Ext. I/O (FD)
An optional digital disk recorder may be connected to this terminal for the storage of longer music performances or groupings of songs.
Light (■off ■on) (F3)
Turns the panel light and the foot light on/off.
④0 Symptoms which appear to be signs of trouble
The following changes in performance may occur in the Technics organ but do not indicate trouble:
| Phenomenon | Remedy |
| Voices of flute tablets do not sound. | The flute volume levels are adjustable for each individual tablet. If set to 0, however, the voice of the tablet will not sound. Adjust the flute tablets to the desired levels. (Refer to 1) |
| An error buzzer sounds when a key on the lower keyboard is pressed, making playing impossible. (G7-F3) | If the mode button to the left of the musical display is set to the computation mode, playing is not possible. Press button to display either the metronome or the stopwatch mode. |
| Different voices are heard in the lower and upper half keys on the upper keyboard. | The lower portion of the upper manual keyboard is used to sound the lower manual voices when the lower manual keyboard is required for programming functions. |
| A rhythm does not start or no rhythm sounds. | No rhythm sounds if the drum percussion on button is turned off.If the PCC button has no stored chords. No rhythm will start when turned on. Press the cancel button.If the Composer button has no stored rhythm patterns, no rhythm will sound. Select other rhythm buttons. |
| Rhythm tempo control remains inoperative. | When the tempo set button is turned on:The tempo control does not operate if the fine button is turned off.If the fine button is turned on, fine adjustment possible in the tempo control. Press the tempo set buttons I and II simultaneously to turn them off. This allows the rhythm tempo to be adjusted with the tempo control. |
| The knee lever, foot switches and fullbass pedal do not operate properly. For example, the knee lever does not turn the sustain function on and off. | Any functional on and off operation other than the factory-presets are storable in these switches. For example, the knee lever can turn the Techni-Chord on and off. Store your favorite functions to turn them on and off. (Refer to 15.) |
| The fast multi-tremolo speed is improper. | The fast multi-tremolo speed is preadjustable. Adjust to your favorite speed. (Refer to 17.) |
| The contents of the Transpose, Program Chord Computer, Fullband Setting Computer, etc. cannot be stored. | After pressing the record, depress the necessary buttons within 5 seconds. The record button turns off after a lapse of 5 seconds, making storage operation impossible. Press the record button again. |
| When storing the created tones and effects in the Voice Setting Computer, voices other than those desired are stored. | To store your created tones and effects, press the I to VII buttons of the Voice Setting Computer while the record button is held down.To select your favorite voice from the 20 factory-preset voices, press the record button and depress one of the I to VII buttons on the Voice Setting Computer within 5 seconds. Then press the key corresponding to the preferred voice of the keys 1 to 20 on the lower keyboard. Finally press the selected I to VII button again. |
| Storage is not possible with the Program Chord Computer. | Check that the PCC button is slowly flashing. Pressing the Fingered Mode button turns off the record button, making storage operation impossible.Do not release the left hand (Chord designation) before pressing the measure keys (—, —, and —) keys. |
| Phenomenon | Cause and remedy |
| When the rhythm stored in the Rhythm Composer is played, the Rhythmic Orchestra and automatic bass accompaniment do not sound. | • Store patterns in the rhythmic and melodic buttons of the Rhythmic Orchestra, just as you would with other rhythmic instrumental effects.• The bass of auto play chord sounds with a drum bass, which should be stored. |
| Programs cannot be stored in the Play Sequencer or the Full-band Setting Computer or playback is not possible. | • These functions need a digital memory pack. Insert the memory pack in the slot to the right of the upper keyboard.• Storage is not possible if the memory protector on the memory pack is turned on. Turn it off during storage operation. |
| The stored registration cannot be used when performance is started with the Play Sequencer button turned on. | To use the stored registration, turn on the Fullband Setting Computer button and then press the 1 key on the lower keyboard. |
| The stored introduction is not reproduced during automatic performance. | • Set the beginning of a song, such as an introduction before turning on the record button.• To add an introduction after the record button and Play Sequencer button flash, set it after turning on the Fullband Setting Computer button. Then turn off the Fullband Setting Computer button. |
| No storage is possible even when the record button and Play Sequencer button are slowly flashing. | • No storage is possible when the Fullband Setting Computer button is turned on. Turn it off before playing.• If any Play Sequencer button is lit, press the start/stop button for automatic performance of the stored part. Another part can then be stored. |
| The quick rhythm tempo is delayed when the Play Sequencer is used. | This occurs when too many tones are played at one time.Slow down the tempo (to about ↓ = 250) or reduce the number of tones played at a time. |
| Different tones and effects are stored in the Fullband Setting Computer (FSC). | If the Voice Setting Computer (VSC) function is selected, the stored contents in this button are stored into the FSC.When the tones and effects selected by the VSC are changed, store them in the VSC again before storage in the FSC. |
| The cabinet and slide cover become heated to some degree. | The Technics organ has a built-in power source that heats the cabinet and slide cover to some degree. This is not an indication of trouble. |
| The buttons, tablets, keyboards, etc. malfunction. | • Press the Fullband Setting Computer button first to turn it on and then depress the Initial key on the lower keyboard.• If the buttons, tablets, keyboards, etc. do not return to normal, turn the power switch off once, then turn on again. |
④1 Cautions for Safest Use of This Unit
Installation Location
- A well-ventilated place.
Take care not to use this unit in a place where it will not receive sufficient ventilation, and not to permit the ventilation holes to be covered by curtains, or any similar materials.
- Place away from direct sunlight and excessive heat from heating equipment.
- A place where humidity, vibration and dust are minimized.
Power Source
- Be sure the line voltage selector is in accordance with local voltage in your area before connecting the plug to the socket.
Handling the power cord
- Never touch the power cord or its plug with wet hands.
-
Don't pull the power cord.
-
DC power cannot be used.
Metal Items Inside the unit may result in electric shock or damage.
Do not permit metal articles to get inside the unit.
Be especially careful with regard to this point if children are near this unit. They should be warned never to try to put anything inside.
If, nevertheless, some such article does get inside, disconnect the power cord plug from the electrical outlet, and contact the store where the organ was purchased.
If water gets into the unit...
disconnect the power cord plug from the electrical outlet, and contact the store where it was purchased.
As a precaution, it is suggested that flower vases and other containers which hold liquids not be placed on the top of this unit.
If operation seems abnormal...
immediately turn off the power, disconnect the power cord plug from the electrical outlet, and contact the store where it was purchased.
Discontinue using the unit at once. Failure to do so may result in additional damage or some other unexpected damage or accident.
- Because the power source is located inside the organ, it is normal for the cabinet or roll-top keyboard cover to become warm.
A word about the power cord...
If the power cord is scarred, is partially cut or broken, or has a bad contact, it may cause a fire or serious electrical shock if used. NEVER use a damaged power cord for any appliance. Moreover, the power cord should never be forcibly bent, and should be lengthened only by a professional electrician.
Don't touch the inside parts of this unit.
Some places inside this unit have high voltage potential. Never try to remove the top or back panels of this unit, nor to touch inside parts by hand or with tools.
Contact someone who is qualified in order to inspect the inside, or to replace a fuse, if such becomes necessary. Never attempt to do these things yourself.
SERVICE MUST BE CARRIED OUT BY DEALER OR OTHER QUALIFIED PERSON.
MAINTENANCE
The following suggestions will assist you in keeping the organ in top condition.
- Be sure to switch the instrument off after use, and do not switch the organ on and off in quick succession, as this places an undue load on the electronic components.
- To keep the lustre of the keys and tabs, simply use a clean, damp cloth; polish with a soft, dry cloth. Polish may be used but do not use thinners or petro-chemical-based polishes.
- A wax-based polish may be used on the cabinet, although you will find that rubbing with a soft cloth will suffice.
| SX-G7 | SX-F3 | ||
| keyboard | upper manual 49 keys lower manual 49 keys pedal keyboard 13 keys full base pedal 1 key | upper manual 51 keys lower manual 61 keys pedal keyboard 25 keys full bass pedal 1 key | |
| fullband setting computer | fullband setting computer, record*, digital memory pack | ||
| play sequencer | pass, lower, upper, solo, record*, digital memory pack | ||
| voice setting computer | I-VII, cancel, record*, 20 combination VSC (lower keyboard) | ||
| tone selector | orchestral conductor (upper...7, lower...7) | ||
| upper tones | tab voices | flute 16', 8', 5-1/3', 4', 2-2/3', 2', 1-1/3', 1', string 8', 4' volume, (record*...flute level) | flute 16', 8', 5-1/3', 4', 2-2/3', 2', 1-3/5', 1-1/3', 1', string 8', 4' volume, (record*...flute level) |
| (percussive tone) | 5-1/3', 4', 2-2/3', 2', click, long, volume | ||
| (harmonic coupler) | 2-2/3', program, cancel, record* | ||
| organ presets | I, II, III, IV, record*, 20 organ presets, digital drawbars | ||
| string ensemble | collo, violin, volume | ||
| vocal ensemble | ah/humming, volume | ||
| percussive presets | acoustic piano, electric piano, harpsichord, clavi, vibraphone, glooken, acoustic guitar, jazz guitar, steel drum, banjo, harmonic control, volume | ||
| orchestral presets | trombone, trumpet, saxophone, french horn, clarinet, accordion, wah brass, synthie brass, harmonic control, volume | ||
| solo synthesizer presets | violin, harmonica, trombone, trumpet, saxophone, clarinet, flute, oboe, pan flute, whistle, rock guitar, cosmic, synthie chopper, key bender, harmonic control, volume | ||
| lower tones | tab voices | flute 8', 4', 2', 1' string 8', 4', volume | flute 8', 4', 2-2/3', 2', 1-1/3', 1' string 8', 4', volume |
| (harmonic coupler) | 2', program, cancel, record* | ||
| organ presets | record*, digital drawbars | ||
| string ensemble | cello, violin, volume | ||
| vocal ensemble | O (U/L) | ||
| percussive presets | O (U/L) | ||
| orchestral presets | O (U/L) | ||
| solo synthesizer presets | O (U/L) | ||
| bass tones | bass 16', 8', acoustic bass, ensemble bass, electric bass, chopper bass, pipe bass I, II, synthie bass, tuba, harmonic control, volume | ||
| effects | bass solo | O | |
| sustain | (upper) on, control, (percussive presets) on, control, (lower) on, control, (bass) control | ||
| slow attack | upper | ||
| multi-tromola/vibrato | U tab voices, L tab voices, vibrato, slow/fast, (record*...tremolo speed) | ||
| effect conductor | chorus, celeste, phaser; U tab voices, U&L percussive presets, U&L orchestral presets, U&L solo syntre presets, L tab voices | ||
| digital reverb | O | ||
| glide | foot switch L | ||
| techni-chord | on, close/open | ||
| drum percussion (selectors) (controls) | march, shuffle, swing I, II, 8 beat, funk rock, 16 beat, samba rock, ballad, swing rock, discoI, II, rumba, guaracha, bossa roval I, II, mambo, cha-cha, samba, bacon, waltz, tango, jazz waltz | ||
| on, mellow, synchro, start/stop, volume, foot switch L, glide/yrhythm | |||
| tempo set | I, II, manual, fino, tempo, record* | ||
| arrargo percussion | I, II, III | ||
| fill in & intro | I, II, solo | ||
| rhythmic orchestra | rhythmic, melodic, I/II, volumé | ||
| auto play chord | fingered, memory, cancel | ||
| program chord computer | PCC, cancel, record*, #, ▶, ▶, ▶, ▶, ▶, D.S, #, ▶, ▶, ▶, ▶, ▶, ▶, ▶, ▶, ▶, ▶, ▶, ▶, ▶, ▶, ▶, ▶, ▶, ▶, ▶, ▶, ▶, ▶, ▶, ▶, ▶, ▶, ▶, ▶, ▶, ▶, ▶, ▶, ▶, ▶ | (lower keyboard) | |
| program rhythm computer | composer I, II, III, rhythm sequencer, record*, clear, beat, 2nd bar, triplet, accent/pitch, I, II, III, 0-15, #, ▶, ▶, ▶, ▶, ▶, ▶, ▶, ▶, ▶, ▶, ▶, ▶, ▶, ▶, ▶, ▶, ▶, ▶, ▶, ▶, ▶, ▶, ▶, ▶, ▶, ▶, ▶, ▶, ▶, ▶, ▶, ▶, | ||
| transpose | transpose, record*, O ~ O ~ @ | ||
| tuning | free set, + - | ||
| musical display | mode selector (mode, function), 1, -, =, ×7', 2/7" (lower keyboard) | ||
| program function switches | knee lever, foot switch R, L, full bass pedal, record* | ||
| others | power switch, main volume, expression pedal, headphone jack, input jack, microphone jack (with volume), output jack, 2 ch/3 ch, ext I/O terminal, initial (lower keyboard), panel-foot light switch (F3) | ||
| output | 230 W (4-channel) | ||
| speakers | 30 cm (11-13/16") × 1, 20 cm (7-7/8") × 3, horn tweeter × 2 | 30 cm (11-13/16") × 1, 20 cm (7-7/8") × 3, horn tweeter × 2, 10 cm (3-15/16") × 2 | |
| power requirement | 420 W 580 VA (Canada) | 490 W 650 VA (Canada) | |
| AC 120/220/240V 50/60 Hz | AC 120V 60 Hz North America, Taiwan AC 220V 50/60 Hz - Europe | ||
| cabinet W x H x D | 120.8 cm x 107.2 x 68.4 cm (47-9/16" x 42-7/32" x 26-15/16") | 131.1 cm x 118.1 cm x 69.5 cm (51-5/8" x 46-1/2" x 27-3/8") | |
| net weight without bench | 110 kg (242.5 lbs) | body 133 kg (293.2 lbs) pedal keyboard 22 kg (48.5 lbs) | |
| accessory | digital memory pack (SY-P2)...1 | ||
* Common "record" switch is used for these switches
Matsushita Electric Trading Co., Ltd.
P.O Box 288, Central Osaka, Japan
Printed in Japan
ENGLISH ESPAÑOL
960285K0 SQFQ4532


- FOR U.S.A
- TECHNICS
- PRECAUCIÓN
- TABLET
- CONTROLS
- HARMONIC CONTROL
- VOLUME, EFFECT
- POWER/MAIN VOLUME CONTROLS
- ① MUSICAL DISPLAY (G7·F3)
- DISPLAY OF SELECTED FUNCTIONS
- DISPLAY OF MUSICAL CONTENTS/STOPWATCH/COMPUTATION
- TEMPO
- STOPWATCH
- COMPUTATION
- SECONDARY DISPLAY MODES
- ② RECORD
- UPPER KEYBOARD SPLIT FUNCTIONS
- INITIAL KEY
- ③ ORCHESTRAL CONDUCTOR
- ④ UPPER TAB VOICES
- FOOTAGE MARKS
- FLUTES
- STRINGS
- FLUTE VOLUME ADJUSTMENT
- MUSICAL DISPLAY
- ⑤ LOWER TAB VOICES
- ⑥ PEDAL VOICES
- ⑦ UPPER PERCUSSIVE TONE
- ⑧ HARMONIC COUPLER
- MUSICAL=DISPLAY
- ⑨ PERCUSSIVE PRESETS
- ⑩ ORCHESTRAL PRESETS
- ⑪ SOLO SYNTHESIZER PRESETS
- ⑫ STRING ENSEMBLE
- ⑬ VOCAL ENSEMBLE
- ⑭ ORGAN PRESETS
- HOW TO USE THE FACTORY PRESET ORGAN SOUND
- HOW TO USE THE DIGITAL DRAWBARS
- ⑮ FULL BASS PEDAL
- ⑯ TECHNI-CHORD
- EFFECTS
- MULTI-TRAMOLO SPEED ADJUSTMENT
- ⑱ EFFECT CONDUCTOR
- ⑲ SUSTAIN CONTROLS
- KNEE LEVER
- ⑳ REVERB (G5)/DIGITAL REVERB (G7·F3)
- ②1 SLOW ATTACK
- ⑳ EXPRESSION PEDAL
- ②3 GLIDE CONTROL
- ⑳ FOOT SWITCH — GLIDE/RHYTHM
- ⑳ VOICE SETTING COMPUTER
- HOW TO USE THE FACTORY-PRESET VSC
- ②6 TRANSPOSE
- ⑳ TUNING
- TUNING
- ⑳ DRUM PERCUSSION (AUTOMATIC RHYTHM)
- TEMPO SET
- ARRANGE PERCUSSION
- FILL IN & INTRO
- SOLO
- ③2 RHYTHMIC ORCHESTRA
- ③3 AUTO PLAY CHORD
- PROGRAM CHORD COMPUTER
- STORING CHORDS IN THE COMPUTER
- OTHER FACTS YOU SHOULD KNOW ABOUT STORING CHORDS
- PLAYING THE PROGRAMMED CHORDS
- MODIFYING OR CORRECTING PROGRAMMED CHORDS
- USING THE AUTOMATIC RHYTHM
- USING THE FORWARD OR BACK KEYS
- USING THE ♂Φ, D.S. KEYS
- VOICE, FILL IN & INTRO STORAGE
- ③5 PROGRAM RHYTHM COMPUTER
- PROGRAMMING WITH PRESETS
- MODIFYING PRESET COMBINATIONS
- A BRIEF LOOK AT YOUR LOWER KEYBOARD
- PROGRAMMING RHYTHMS
- PROGRAMMING THE ROCK RHYTHM
- PROGRAMMING THE JAZZ WALTZ
- MODIFYING PROGRAMMED RHYTHMS
- TO STORE RHYTHMS OTHER THAN FOUR-BEAT RHYTHMS
- THREE-BEAT RHYTHMS
- TWO-BEAT RHYTHMS
- HOW TO USE THE ACCENT/PITCH KEY
- USING THE SEQUENCER
- ③6 PROGRAM FUNCTION SWITCHES
- FOR STORAGE
- ③7 PLAY SEQUENCER
- SOLO BUTTON
- MEMORY PACK PREPARATION AND REGISTRATION
- FOR STORAGE OF ORDINARY PERFORMANCES
- TO STORE OTHER PARTS FOR AUTOMATIC PERFORMANCE (MULTIPLEX STORAGE)
- TO MODIFY PREVIOUSLY STORED PARTS OR ADD A SOLO PART
- REGISTRATION STORAGE
- CHECKING AND MODIFYING REGISTRATION BEFORE PERFORMANCE
- READOUT OF THE STORED REGISTRATION
- MODIFICATION OF THE STORED REGISTRATION
- STORAGE OF CHANGES IN REGISTRATION DURING PERFORMANCE
- FOR AUTOMATIC PERFORMANCE OF THE STORED CONTENTS
- ENSEMBLE-LIKE PLAYING DURING MANUAL PERFORMANCE
- UPPER AND LOWER
- BASS AND SOLO
- SOLO SYNTHESIZER PRESETS
- PRECAUTIONS WHEN USING THE MEMORY PACK
- PROTECTIVE CASE
- ③8 FULLBAND SETTING COMPUTER
- FOR STORAGE IN THE MEMORY PACK
- LET'S PLACE THE MEMORY PACK CONTENTS IN THE ORGAN
- ⑲ CONNECTION TERMINALS
- EXT. I/O (FD)
- ④0 SYMPTOMS WHICH APPEAR TO BE SIGNS OF TROUBLE
- ④1 CAUTIONS FOR SAFEST USE OF THIS UNIT
- INSTALLATION LOCATION
- POWER SOURCE
- HANDLING THE POWER CORD
- METAL ITEMS INSIDE THE UNIT MAY RESULT IN ELECTRIC SHOCK OR DAMAGE
- IF WATER GETS INTO THE UNIT
- IF OPERATION SEEMS ABNORMAL
- A WORD ABOUT THE POWER CORD
- DON'T TOUCH THE INSIDE PARTS OF THIS UNIT
- SERVICE MUST BE CARRIED OUT BY DEALER OR OTHER QUALIFIED PERSON
- MAINTENANCE
Brand : PANASONIC
Model : SX-G5
Category : Uncategorized