SDA1865 - Toaster DAEWOO - Free user manual and instructions
Find the device manual for free SDA1865 DAEWOO in PDF.


| Product Type | Toaster |
| Brand | Daewoo |
| Model | SDA1865 |
| Number of Slots | 2 |
| Power | 850 W |
| Voltage | 220-240 V, 50/60 Hz |
| Cord Length | 0.8 m |
| Dimensions (approx.) | 270 x 170 x 200 mm |
| Weight (approx.) | 1.2 kg |
| Material | Plastic and stainless steel |
| Control Type | Electronic with push-button controls |
| Browning Levels | 7 settings |
| Functions | Reheat, Defrost, Cancel |
| Extra-wide Slots | Yes |
| Removable Crumb Tray | Yes |
| Automatic Shut-off | Yes |
| Indicator Light | Yes |
| Cool-touch Housing | Yes |
| Non-slip Feet | Yes |
| Cord Storage | Yes |
Frequently Asked Questions - SDA1865 DAEWOO
User questions about SDA1865 DAEWOO
0 question about this device. Answer the ones you know or ask your own.
Ask a new question about this device
Download the instructions for your Toaster in PDF format for free! Find your manual SDA1865 - DAEWOO and take your electronic device back in hand. On this page are published all the documents necessary for the use of your device. SDA1865 by DAEWOO.
USER MANUAL SDA1865 DAEWOO
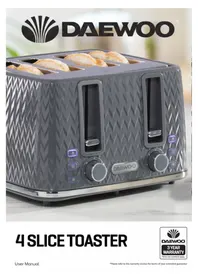
4 SLICE TOASTER

Important Safegauards
When using electrical appliances, basic safety precautions should always be followed. These instructions should be saved for future reference:
- Read and familiarise yourself with all operating instructions before using this Toaster.
- Before plugging your unit into the mains, visually check that the unit is intact and has not suffered any transit damage.
- The bread may burn, therefore do not use the toaster near or below combustible material such as curtains or cupboards.
- Do not use this toaster with an external timer or separate remote-control system or any other device that switches the toaster on automatically.
- The Crumb tray must be removed and emptied regularly.

- The outer surface may get hot when the appliance is operating.
- Do not use this toaster with an extension cable.
- Check that the voltage indicated on the data plate corresponds with that of the local network before connecting the appliance to the mains power supply.
- This appliance can be used by children aged from 8 years and above and persons with reduced physical, sensory or mental capabilities or lack of experience and knowledge if they have been given supervision or instruction concerning use of the appliance in a safe way and understand the hazards involved. Children shall not play with the appliance. Cleaning and user maintenance shall not be made by children unless they are older than 8 and supervised.
- Keep the appliance and its cord out of reach of children less than 8 years.
- Do not immerse the appliance or its cord in water or any other liquids.
- Do not leave the appliance unattended during use.
- Do not leave the appliance unattended whilst connected to the mains supply.
• Always use this appliance on a solid, level, non-flammable surface.
- Do not use this appliance outdoors.
- It is imperative to unplug the power cord after the appliance has been used, before it is cleaned and whilst being repaired.
• Repairs to electrical appliances should only be performed by a qualified electrician. Improper repairs may place user at serious risk.
- Do not operate this appliance with a damaged plug or cord, after a malfunction or after being dropped or damaged in any way.
- Regular, periodic checks should be carried out on the mains cable to ensure no damage is evident. Should there be any signs of damage the appliance should not be used.
- If the power cable is damaged, it should only be replaced by the manufacturer or a suitable qualified after-sales-service in order to avoid a hazard
- Do not allow the mains cable to hang over sharp edges or come in contact with hot surfaces.
- Do not run the mains cable under carpets, rugs, etc.
- Allow the unit to cool before storage.
- Before cleaning, disconnect the appliance from the mains supply and allow to cool.
- This appliance is intended for household use only and should not be used for industrial purposes.
- Do not use any accessories or attachments with this appliance other than those supplied or recommended by supplier.
- Do not use this appliance for anything other than its intended use.
- Do not push objects into any openings as damage to the appliance and/or electric shock may occur.
- Unplug after each use. Grasp the plug, not the cord
THIS APPLIANCE MUST BE EARTHED
NB During the first few minutes of initial use, you may notice a slight odour and a little smoke. This is normal and will quickly disappear, It is the coating applied to the heating elements to prevent any corrosion during transit.
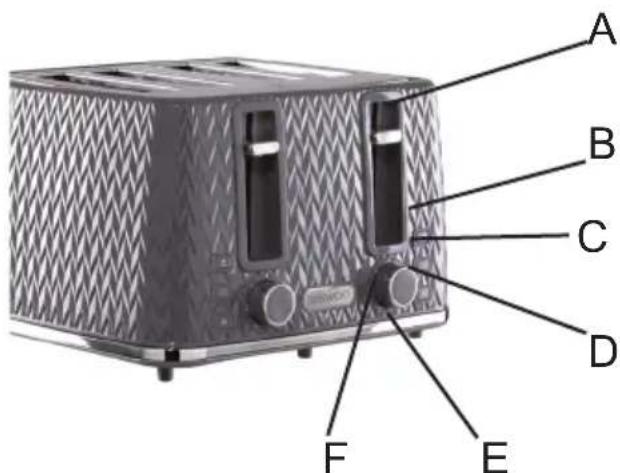
Description of parts
A. Bread Carriage Lever
B. Cancel Button
C. Re-Heat Button
D. Defrost Button
E. Crumb Tray
F. Browning Control
Before the first time you use your toaster
Please read these operating instructions thoroughly and keep them in a safe place for future reference.
Remove all packing materials and discard responsibly.
Operating Instructions
Toasting
- Place the toaster on a solid level nonflammable surface.
- Insert the mains plug into the mains socket and switch on (if applicable)
- Place the slices of bread into the bread slots.
- Select the desired browning level using the Browning Control. Rotate the control clockwise to increase browning and anticlockwise to decrease browning.
- Push the Bread Carriage Lever down to begin toasting, the lever will lock down and then pop up once the toasting is complete.
- If you wish to cancel the toasting at any time, simply press the Cancel Button.
Reheat Feature
- This feature is used for reheating toast that has previously been made but has gone cold.
- Place the slices of bread into the Bread Slots, push the Bread
- Carriage Lever down then
- immediately press the Reheat Button. The Bread Carriage Lever will pop up once the reheat cycle has completed.
- If you wish to cancel the reheating mode at any time, simply press the Cancel Button.
Defrost feature
- This feature is used for toasting slices of bread from frozen.
- Place the slices of frozen bread into the Bread Slots.
- Select the desired browning level using the Browning Control. Rotate the control clockwise to increase browning and anticlockwise to decrease browning.
- Push the Bread Carriage Lever down then immediately press the Defrost Button. The Bread Carriage Lever will pop up once the defrost and toasting cycle has completed.
- If you wish to cancel the defrosting mode at any time, simply press the Cancel Button.
NB do not insert bread slices that are too thick for the Bread Slots, always ensure that the Carriage Lever is free to move up and down.
Care and Use of your Toaster
• Always disconnect the toaster from the mains power supply and allow to cool before cleaning.
• After each use remove the Crumb Tray from the toaster and empty out any crumbs.
- Clean outside of the toaster with a clean damp cloth. Never clean with harsh or abrasive cleaners.
- Do not submerge any part of the toaster in water or any other liquids.
- Do not use metal implements (i.e. Knife, fork, etc.) to remove trapped debris.
Electrical Connections
This appliance is fitted with a fused three-pin plug to BS 1363. If the plug has to be removed, it should be cut off and carefully disposed of immediately. To avoid a possible shock hazard, do not insert the discarded plug into a mains socket.
Fitting a new plug
If for any reason you need to fit a new plug, the flexible mains lead must be connected as shown below. The wires in the mains lead fitted to this appliance are coloured in accordance with the following code:
Connect Green & Yellow to Earth (E)
Connect Blue to Neutral (N)
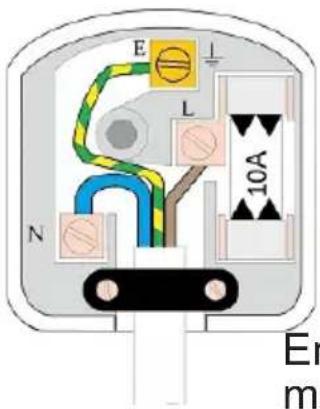
Connect Brown to Live (L)
Ensure the outer sheath of the mains lead is securely held by the cable clamp
- The Blue wire must be connected to the terminal marked N or coloured Black.
- The Brown wire must be connected to the terminal marked L or coloured Red.
- The Green and Yellow wire must be connected to the terminal marked E or coloured Green.
- Check that there are no cut or stray strands of wire inside the plug.
- Use a 10 Amp BS 1362 fuse, only use BSI or ASTA approved fuses.
- If you are in any way unsure which plug or fuse to use, always refer to a qualified electrician.
- After replacing or changing a fuse on a moulded plug, the cover must be refitted to the plug; the appliance must not be used without a fuse cover.
Technical Data
Voltage : 220-240V \~ 50/60Hz
Rated power : 1350-1600W
Protection class : 1 (This appliance must be earthed)
Model : SDA1865
Customer Support
Should you require any product information, replacement parts or accessories, please contact our customer care team at help@daewooelectricals.com or call 0161 831 7879.
● Replacement parts and accessories are guaranteed for 1 year from the date of purchase.
- It is important to note that your warranty becomes invalid should non Daewoo parts or accessories be used with this appliance
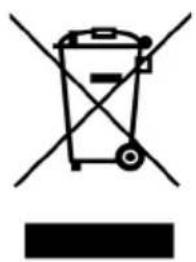
Waste electrical products should not be disposed of with household waste. Please recycle where facilities exist. Check with your Local Authority or retailer for recycling advice.
CE
WARRANTY
Thank you for purchasing your Daewoo product.
As part of our commitment to quality we are offering you an extra 2 years warranty in addition to your 1 year guarantee.
Your Daewoo product is guaranteed for 1 year from the date of original purchase, with proof of purchase or receipt. If any defects should arise due to faulty workmanship or material, your faulty product should be returned to the place of purchase, replacement or refund is at the discretion of the retailer.
The guarantee is subject to the following provisions:
- The product must be correctly installed and operated in accordance with the requirements contained in the instruction manual.
• The product must be used solely for domestic purposes.
- It does not cover general wear and tear, damage, misuse or any consumable parts.
• The Guarantee is rendered invalid if the product has been resold or has been damaged through inexpert repair.
• The guarantee is only valid within the UK and Eire.
Your standard 1 year guarantee will only be extended to the maximum available for your individual product upon registration. (Note: products must be registered individually and covers the main body and housing) If you do not register your product within 28 days of the original purchase date, your product will only be guaranteed for 1 year.
To validate your extended 2 year warranty* please register your purchase online within 28 days of the original purchase date by registering at
www.daewoowarrantyregistration.com/warranty-registration
*Your extended warranty is only valid with proof of purchase receipt and subject to the conditions outlined above.
ESG Ltd
Manchester M3 1JS
www.esgltd.com
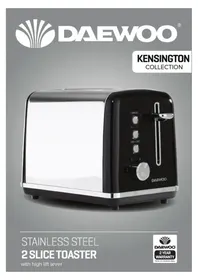
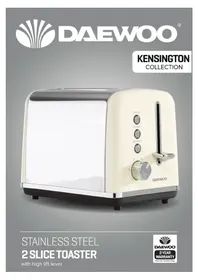
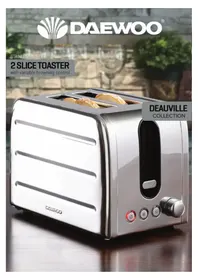
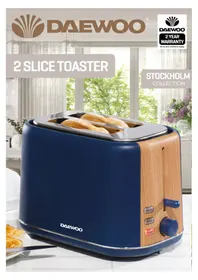
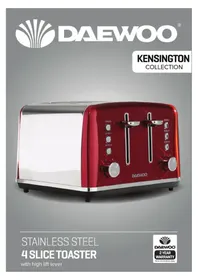
- 4 SLICE TOASTER
- IMPORTANT SAFEGAUARDS
- WHEN USING ELECTRICAL APPLIANCES, BASIC SAFETY PRECAUTIONS SHOULD ALWAYS BE FOLLOWED. THESE INSTRUCTIONS SHOULD BE SAVED FOR FUTURE REFERENCE
- THIS APPLIANCE MUST BE EARTHED
- DESCRIPTION OF PARTS
- BEFORE THE FIRST TIME YOU USE YOUR TOASTER
- OPERATING INSTRUCTIONS
- TOASTING
- REHEAT FEATURE
- DEFROST FEATURE
- CARE AND USE OF YOUR TOASTER
- ELECTRICAL CONNECTIONS
- FITTING A NEW PLUG
- TECHNICAL DATA
- CUSTOMER SUPPORT
- WARRANTY
Brand : DAEWOO
Model : SDA1865
Category : Toaster