
CFD-600 - Hi-Fi System SONY - Free user manual and instructions
Find the device manual for free CFD-600 SONY in PDF.


| Product Type | Portable Hi-Fi System |
| Brand | Sony |
| Model | CFD-600 |
| Color | Black |
| Dimensions (approx.) | 500 x 250 x 300 mm |
| Weight (approx.) | 5 kg |
| Power Supply | AC 120V/60Hz or DC 12V (8 x D batteries) |
| CD Player | Yes, plays CD/CD-R/CD-RW |
| Cassette Deck | Yes, stereo player/recorder |
| Radio Tuner | AM/FM with digital tuning and 30 station presets |
| Speaker Output Power | 10W per channel (RMS) |
| Audio Input | 3.5mm auxiliary input (front panel) |
| Headphone Jack | Yes, 3.5mm stereo |
| Display | LCD with clock, tuner, and track information |
| Remote Control | Included (RMT-120) |
| Additional Features | Sleep timer, wake-up timer, auto power off, EQ presets |
| Maintenance | Clean with soft dry cloth; do not use liquids or solvents |
| Safety | Keep away from moisture; do not open; use specified voltage only |
| Spare Parts | Batteries (D size), remote control, antenna |
Frequently Asked Questions - CFD-600 SONY
User questions about CFD-600 SONY
0 question about this device. Answer the ones you know or ask your own.
Ask a new question about this device
Download the instructions for your Hi-Fi System in PDF format for free! Find your manual CFD-600 - SONY and take your electronic device back in hand. On this page are published all the documents necessary for the use of your device. CFD-600 by SONY.
USER MANUAL CFD-600 SONY
CD Radio Cassette-Corder
CFD-600
CFD-610
Operating Instructions
WARNING
To prevent fire or shock hazard, do not expose the player to rain or moisture.

CAUTION
RISK OF ELECTRIC SHOCK DO NOT OPEN

CAUTION: TO REDUCE THE RISK OF ELECTRIC SHOCK.
DO NOT REMOVE COVER (OR BACK).
NO USER-SERVICEABLE PARTS INSIDE.
REFER SERVICING TO QUALIFIED SERVICE PERSONNEL.

This symbol is intended to alert the user to the presence of uninsulated "dangerous voltage" within the product's enclosure that may be of sufficient magnitude to constitute a risk of electric shock to persons.

This symbol is intended to alert the user to the presence of important operating and maintenance (servicing) instructions in the literature accompanying the appliance.
CAUTION
The use of optical instruments with this product will increase eye hazard.
For customers in Canada
To prevent electric shock, match wide blade of plug to wide slot, fully insert.
Information
For customers in the United States
This equipment has been tested and found to comply with the limits for a Class B digital device, pursuant to Part 15 of the FCC Rules. These limits are designed to provide reasonable protection against harmful interference in a residential installation. This equipment generates, uses, and can radiate radio frequency energy and, if not installed and used in accordance with the instructions, may cause harmful interference to radio communications. However, there is no guarantee that interference will not occur in a particular installation. If this equipment does cause harmful interference to radio or television reception, which can be determined by turning the equipment off and on, the user is encouraged to try to correct the interference by one or more of the following measures:
—Reorient or relocate the receiving antenna.
—Increase the separation between the equipment and receiver.
—Connect the equipment into an outlet on a circuit different from that to which the receiver is connected.
—Consult the dealer or an experienced radio/TV technician for help.
You are cautioned that any changes or modifications not expressly approved in this manual could void your authority to operate this equipment.
Owner's Record
The model and serial numbers are located at the rear of the CD radio cassette-corder. Record these numbers in the spaces provided below. Refer to theses numbers whenever you call your Sony dealer regarding this product.
Model No. ____ Serial No. ____
Table of Contents
| Welcome! 4About This Manual 4Precautions 5 | |
| Setting Up | Looking at the Controls 6Connecting the Speakers 10Choosing Power Sources 11Selecting the Audio emphasis 12 |
| Operations | Inserting CDs 13Playing a CD (normal play) 14Playing Specific Tracks 15Playing CDs in the Desired Order (CDs Program Play) 16Playing Tracks in the Desired Order (Tracks Program Play) 17Enjoying Other Useful CD Modes 18Playing Tracks Repeatedly 18Checking Time and Track Order 20Listening to the Radio 21Playing a Tape 22Recording 23Setting Up a P-A System 24 |
| For Your Information | Maintenance 25Specifications 26Troubleshooting Guide 27 |
Welcome!
Thank you for purchasing the Sony CFD-600 or CFD-610 CD Radio Cassette-Corder. The CFD series CD radio cassette-corder is packed with fun features.
Here are just a few:
• A CD changer system that allows you to play up to 6 CDs in a row
- ONE TOUCH CD RELAY PLAY buttons for continuous playing are suitable for BGM.
• A seamless Recording system that gives you continuous recording from CDs
- A Mega Bass sound system that boosts low frequency range audio to provide deep, powerful bass through the bass reflex speakers
- A Sound Mode feature that adjusts the audio quality for playing
- A Surround feature that produces the surround effect without connecting surround speakers (CFD-610 only)
- A display window with back light enables you to see the operation
- A remote commander that gives you control of the music from your seat
About This Manual
The instructions in this manual are for the CFD-600 and CFD-610. Before you start reading, check your model number. The CFD-610 is the model used for illustration purposes.
One difference between CFD-600 and CFD-610 is the design of the speakers. The CFD-610 also has the SURROUND feature. This difference in operation is clearly indicated in the text, for example, "CFD-610 only".
Differences in appearance
CFD-600

CFD-610

On safety
- As the laser beam used in the CD player section is harmful to the eyes, do not attempt to disassemble the casing. Refer servicing to qualified personnel only.
- Should any solid object or liquid fall into the player, unplug the player, and have it checked by qualified personnel before operating it any further.
On power sources
- For AC operation, use the supplied AC power cord; do not use any other type.
- For battery operation, use eight size D (R20) batteries.
- Unplug the player from the wall outlet when it is not to be used for an extended period of time.
- When the batteries are not to be used for a long time, remove them to avoid damage that can be caused by battery leakage or corrosion.
- The nameplate indicating operating voltage, power consumption, etc. is located at the rear.
On placement
- Do not leave the player in a location near heat sources, or in a place subject to direct sunlight, excessive dust or mechanical shock.
- Do not place anything within 10 mm of the side of the cabinet. The ventilation holes must be unobstructed for the player to operate properly and to prolong the life of its components.
- If the player is left in a car parked in the sun, be sure to choose a location in the car where the player will not be subjected to the direct rays of the sun.
- Since a strong magnet is used for the speakers, keep personal credit cards using magnetic coding or spring-wound watches away from the player to prevent possible damage from the magnet.
On operation
- When the player is first used and/or the batteries for the memory data are not installed, or the power has been disconnected for a long time, wait about 10 seconds after turning the power on to operate the player.
- When CD(s) is/are in the player, do not bump or shake it.
- When you carry the player, turn the power off.
- If the player is brought directly from a cold to a warm location, or is placed in a very damp room, moisture may condense on the lens inside the CD player section. Should this occur, the player will not operate properly. In this case, remove the CD and wait about an hour for the moisture to evaporate.
- If the player has not been used for a long time, set it in the playback mode to warm it up for a few minutes before inserting a CD or cassette.
Note on using a cassette with more than 90 minutes of play time
The use of a cassette with more than 90 minutes of play time is not recommended except for long, continuous recording or playback.
If you have any questions or problems concerning your player, please consult your nearest Sony dealer.
Close-up of Front Control Panel

1 SOUND button (12)
2 SURROUND button (CFD-610 only) (12)
3 PLAY MODE button (16, 17, 18, 19)
4 DISPLAY button (20)
5 ONE TOUCH CD RELAY PLAY buttons (18)
CONTINUE button
SHUFFLE button
6 ENTER button (16, 17)
7 DISC MODE button (14, 16, 17, 19)
8 MEGA BASS button (12)
Radio and Tape Player

1 FM STEREO indicator (21)
2 Telescopic antenna (21)
3 Cassette compartment
4 Tape operation buttons
5 Dial scale and pointer
6 TUNING control (21)
Rear Panel

1 AC IN (AC power input) socket (11)
Connect to the AC power outlet.
2 SPEAKER OUTPUT terminals
③ RESET button (27)
Use only to eliminate instability in micro computer control caused by variations in power supply characteristics.
4 ISS (interference suppress switch) (23)
5 MIX MIC (mixing microphone) jack (mini-jack)
(24)
6 Battery compartment (11)
7 Speaker wires (10)
Display Window

1 MEGA BASS indication
② SURROUND indication (CFD-610 only)
3 Volume indication
4 ALL DISCS/1 DISC indication
5 CD play mode indications
6 OVER 16 indication
7 Music calendar
8 Disc number indication
9 Disc number/track number/time indications
10 Sound mode indications
11 SINGLE OPERATION indication
Remote Commander

Controls on the remote commander with the same name as those on the deck have the same function. Some controls such as the number buttons are located only on the remote commander.
1 POWER switch
When you operate the player on batteries, you cannot turn on the power with the remote commander.
② DISC 1-6 and SINGLE OPERATION buttons
③ VOL (volume) buttons
4 PLAY MODE button
5 MUTE button (12)
6 Battery compartment
7 MEGA BASS button (12)
8 FUNCTION button
9 SOUND button (12)
10 DISC MODE button
11 CD operation buttons
▶ (play)
II (pause)
■ (stop)
/ (AMS)
◀◀ (search)
▶▶ PGM CHECK (search/program check)
12 CLEAR button
13 Number buttons (17)
14 ONE TOUCH CD RELAY buttons
CONTINUE button
SHUFFLE button
Installing batteries
Insert two size AA (R6) batteries (not supplied) into the battery compartment.

To avoid malfunction, keep the commander away from direct sunlight or strong illumination.
Connecting the Speakers
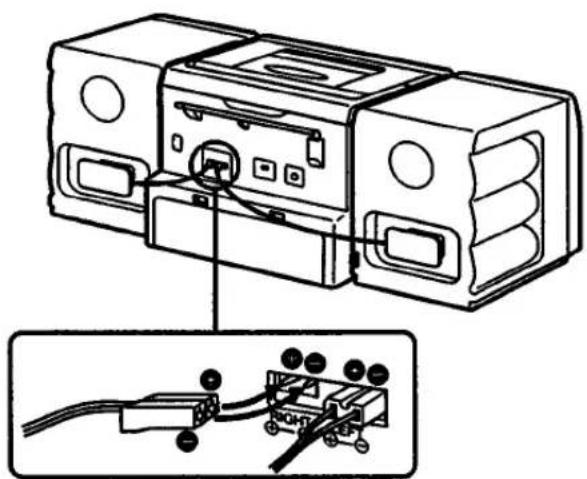
For easy transport, the dual speakers are detachable. Before you begin listening to music, attach the speaker boxes and connect the speaker plugs as shown below. Make sure you turn off the power before making any connections.
1 Align the grooves and slide the speaker box down until it snaps into place.

2 Connect the right speaker plug to the RIGHT connectors and the left speaker plug to the LEFT connectors.
To detach the speakers
Unlock the speaker Ⓗ and slide the speaker box all the way up and away from the player.
Choosing Power Sources
The CD cassette-corder has two separate power sources. Use the AC power source (house current) whenever you record because recording consumes the most power. Use eight size D (R20) batteries when the CD cassette-corder becomes a portable.
At all times keep four size AA (R6) batteries installed to maintain the programmed settings and the status of the CD(s) (whether or not CD(s) is/are in the player) in memory.
Installing batteries for the memory
Remove the CD from the player to prevent it from falling out. In the smaller compartment insert four size AA (R6) batteries (not supplied) for the memory.

Operating the player on AC power
Insert one end of the supplied power cord to the AC IN socket located at the rear of the player ① and the other end to the wall outlet ②.

to the wall outlet
Operating the player on batteries
To play your CD cassette-corder on batteries, the AC power cord must be disconnected from the player. Unplug the player and insert eight size D (R20) batteries (not supplied) in the compartment.
When you operate the player on batteries, the back light in the display window does not light.

When to replace the batteries
- Replace the size D (R20) batteries when: the OPR/BATT indicator dims or when the player stops operating.
- Replace the size AA (R6) batteries when: the AC power cord was removed and connected again but the memory data for the CD player was erased.
When the batteries are weak, replace all the batteries with new ones. Connect the player to the AC power source when replacing the size AA (R6) batteries so that the memory data for the CD player will not be erased.
Selecting the Audio emphasis
When playing CDs, tapes, or radio programs, use the MEGA BASS button, SOUND button, or the SURROUND (CFD-610 only) button to adjust the audio emphasis of the sound you are listening to.

To choose the sound characteristic
Press SOUND on the deck or on the remote commander to select the audio emphasis you want.
Choose one of the following options:
| Light, bright sounds emphasizing high and middle range audio | |
| Powerful, clean sounds, emphasizing low and high range audio | |
| Percussive sounds, emphasizing bass audio | |
| The presence of vocals, stressing middle range audio | |
| Normal mode (no indication) | The whole dynamic range for music such as classical music |
To reinforce the bass sound
Press MEGA BASS on the deck or on the remote commander.
The "MEGA BASS" indication appears in the display window.
To resume normal sound, press MEGA BASS again.
(CFD-610 only) To get the surround effect
Press SURROUND on the deck.
The "SURROUND" indication appears in the display window.
You can get the surround effect without connecting surround speakers.
To mute the sound
Press MUTE on the remote commander to extinguish the sound instantly; press again to resume sound. During mute, the volume indication in the display window flashes.
Inserting the CDs
In the SINGLE OPERATION tray, you can play 12 cm (5 inch) and 8 cm (3 inch) CDs without an adaptor. In the CD changer (DISC SELECTION 1–6), you can play 12 cm (5 inch) CDs only. Do not play 8 cm (3 inch) CDs in the CD changer.

1 Turn on the power and press CD.

2 Select the desired disc tray with DISC SELECTION 1-6 or SINGLE OPERATION.
3 Press ▲ OPEN/CLOSE to open the selected disc tray.

4 Holding the CD by the edge, place the CD in the disc tray with the label side up.

5 Press ▲ OPEN/CLOSE again.

The indicator of DISC SELECTION 1-6 or SINGLE OPERATION where you placed a CD lights up.
To insert CDs in other disc trays
Repeat steps 2-5.
To take out the CD
Select the desired disc tray with DISC SELECTION 1-6 or SINGLE OPERATION and press ▲ OPEN/CLOSE.
Notes
- When inserting a CD in the DISC SELECTION 1–6 tray, if a CD is in the SINGLE OPERATION disc tray, the "DISC" and "TAKE OUT" indications appear in the display window. After taking out the CD from the SINGLE OPERATION disc tray, repeat steps 2–5.
- When you insert a 8 cm (3 inch) CD in the SINGLE OPERATION disc tray, do not use an adaptor. If you use one, it may cause a malfunction.
- As you can not play 8 cm (3 inch) CDs in the DISC SELECTION 1–6 trays, do not insert an adaptor. If you do, it may cause a malfunction.
- If you remove the AC power cord when the batteries for memory are weak or not installed, the memory data for the CD player will be erased.
When turning the power on again, the DISC SELECTION 1-6 and SINGLE OPERATION indicators do not light up even if the CDs are placed inside.
Playing a CD (normal play)

To play CD(s) in DISC SELECTION 1-6
Make sure to take out the CD from the SINGLE OPERATION disc tray.
1 Insert the CD(s) in the DISC SELECTION 1-6 tray(s). (Sec page 13.)
2 Press DISC MODE to select "ALL DISCS" or "1 DISC". You can also select "ALL DISCS" or "1 DISC" while playing a CD.
ALL DISCS: The player plays CDs in numerical sequence.
1 DISC: The player plays only one CD.

3 Select the disc tray you want to start playing with DISC SELECTION 1-6. When you select "ALL DISCS" in step 2, play starts from the selected CD to the CD in the DISC SELECTION 6 tray. Play starts and the indicator of the selected disc tray blinks.

4 Adjust the volume and audio emphasis. (See Selecting the Audio emphasis on page 12.) (Be careful not to turn up the volume excessively while listening to a portion with very low audio input. If you do, the speakers may be damaged when a peak level plays.)

To play a CD in SINGLE OPERATION
1 Insert the CD in the SINGLE OPERATION disc tray. (See page 13.)
2 Press SINGLE OPERATION. "SINGLE OPERATION" indication appears in the display window. Play starts. The SINGLE OPERATION indicator blinks.

3 Adjust the volume and audio emphasis. (See Selecting the Audio emphasis on page 12.)
| To | Press | |
| Remote | Deck | |
| Stop play | ■ | ■ |
| Pause | ■ | ▷■ |
| Resume play after pause | ■/▶ | ▷■ |
| Remove the CD | — | First ■, then ▲ |
| Turn off the power | POWER | POWER |
You can find the beginning of a track or a point in a track while the player is playing or paused. Find a particular track by specifying the track number.

To find the beginning of a track
| To find | Press* |
| the beginning of the current track | once |
| the beginning of the previous tracks | repeatedly |
| the beginning of the next track | once |
| the beginning of the succeeding tracks | repeatedly |
* If one of the following indications is displayed, press the ■ (stop) button to clear the indication: REP 1, REP ALL, SHUF REP ALL, PGM REP ALL, PGM.
To find a point in a track
| To Search | Press down | |
| Remote | Deck | |
| by listening for the point you want to hear | ◀◀ or ▶▶ in play mode | ◀◀ or ▶▶▶ in play mode |
| by observing the time counter | ◀◀ or ▶▶▶ in pause mode | ◀◀ or ▶▶▶▶ in pause mode |
To listen to a specific track
Press the number buttons on the remote commander for the track you want to hear after selecting the desired disc tray. Play starts immediately. To play tracks with numbers equal to or greater than 10, press +10 first, then the number buttons 1 to 0. (See the examples below.)

Playing CDs in the Desired Order (CDs Program Play)
You can program the CD cassette-corder to play up to 6 CDs in the order you want.
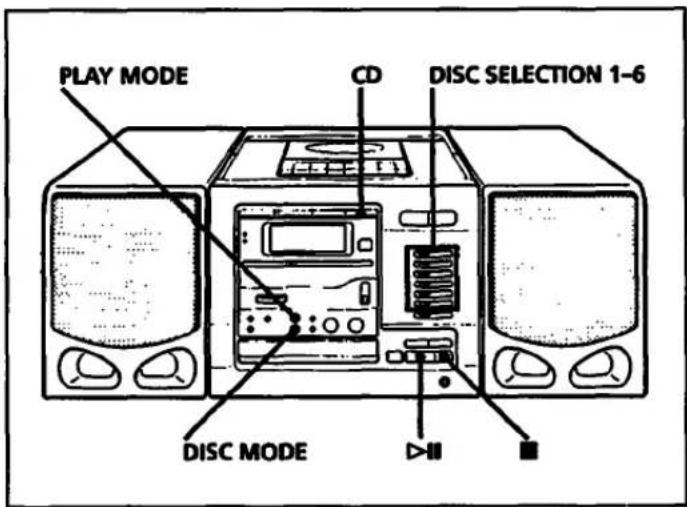
1 Press CD.

2 Press PLAY MODE until "PGM" appears in the display window.

Any previous programs will appear in the display window.
3 Press DISC MODE until "ALL DISCS" appears in the display window.

4 Press DISC SELECTION 1-6 for the CDs you want played in the order you want them played. Up to six CDs can be programmed.

If you make a mistake
Press CLEAR on the remote commander and re-enter the DISC SELECTION number.
5 Press ▷ (play/pause).
The CDs play in the order programmed.
| To | Press |
| Stop play | |
| Cancel program play | PLAY MODE until no indication appears in the display window |
To change the order of the CDs
To change the order of the CDs, you must erase the current program and create a new one.
To erase the current program
Press ■ (stop) once if the CD is stopped and twice if the CD is playing. The current program will be erased. Follow the steps in Playing CDs in the Desired Order (CDs Program Play) to create a new program.
To reprogram the CDs while programming on the deck
Press ENTER until the DISC SELECTION number that you want to change appears in the display window and re-enter the DISC SELECTION number.
Note
Programming the player for CDs Program Play will erase any previous program you have made for either CDs Program Play or Tracks Program Play.
Playing Tracks in the Desired Order (Tracks Program Play)
You can program the CD cassette-corder to play tracks on a single disc in any order you choose. Programs can be made only one disc at a time.

1 Press FUNCTION until "Cd" appears in the display window.

2 Press PLAY MODE until "PGM" appears in the display window.

Any previous programs will appear in the display window.
3 Press DISC MODE until "1 DISC" appears in the display window when you want to play CD in the DISC SELECTION 1-6. If you want to play a CD in the SINGLE OPERATION disc tray, skip this step.
4 Select the desired disc tray with DISC 1-6 or SINGLE OPERATION. The disc track numbers appear in the music calendar.

5 Press the number buttons on the remote commander for the tracks you want played in the order you want them played.
Up to 34 tracks can be programmed.

To check the total playing time while programming tracks
While you are programming the tracks, press DISPLAY The total playing time of the programmed selections will be displayed.
If you make a mistake
Press CLEAR on the remote commander and re-enter the track number.
6 Press ▶ (play).
The tracks play in the order programmed.
| To | Press |
| Stop play | ■ |
| Cancel program play | PLAY MODE until no indication appears in the display window |
To change the order of the tracks
To change the order of the tracks, you must erase the current program and create a new one.
To erase the current program
Press ■ (stop) once if the CD is stopped and twice if the CD is playing. The current program will be erased. Follow the steps in Playing Tracks in the Desired Order (Tracks Program Play) to create a new program.
To program the tracks on the deck
Press ◀◀/▶▶ (AMS/search) to select the track you want to program, and then Press ENTER. Repeat this procedure for up to 34 tracks.
To reprogram the tracks while programming on the deck
Press ENTER until the track number that you want to change appears in the display window and re-enter the track number.
Note
Programming the player for Tracks Program Play will erase any previous program you have made for either Tracks Program Play or CDs Program Play.
Enjoying Other Useful CD Modes
You can enjoy the following two modes with the ONE TOUCH CD RELAY PLAY buttons.
Make sure to take out the CD from the SINGLE OPERATION disc tray.

CONTINUE: All CDs placed in the CD changer play repeatedly in numerical sequence.
The "ALL DISCS REP ALL" indication appears in the display window.
SHUFFLE: All CDs placed in the CD changer play repeatedly in random order.
The "ALL DISCS SHUF REP ALL" indication appears in the display window.
Playing Tracks Repeatedly
You can play tracks repeatedly in normal, shuffle or program play (pages 16–17) modes. In shuffle play, the tracks play in a different order each time.
Repeat only one track or all the tracks.

Repeating a single track
1 Press PLAY MODE until "REP 1" appears in the display window.

2 Select the desired tray with DISC SELECTION 1-6 or SINGLE OPERATION.
3 Choose a track you would like repeated with I◀◀/▶▶▶ (AMS/search).
The track selected plays repeatedly.
Notes
- While playing in the "REP 1" mode, the "ALL DISCS" mode is not affected.
- When you select the "REP 1" mode while playing a CD, the playing track repeats.
Repeating all the tracks
1 Press PLAY MODE until "REP ALL" appears in the display window.

2 Press DISC MODE to select "ALL DISCS" or "1 DISC" when you want to play CD(s) in the DISC SELECTION 1-6 tray.
If you want to play a CD in the SINGLE OPERATION disc tray, skip this step.
ALL DISCS: The player repeats all CDs.
1 DISC: The player repeats only one CD.
3 Select the desired disc tray with DISC SELECTION 1-6 or SINGLE OPERATION.
Play starts.
When all the tracks have played once, the player starts playing from the first track again.
expecting tracks in random order
1 Press PLAY MODE until "SHUF REP ALL" appears in the display window.

2 Press DISC MODE to select "ALL DISCS" or "1 DISC" when you want to play CD(s) in the DISC SELECTION 1-6 tray.
If you want to play a CD in the SINGLE OPERATION disc tray, skip this step.
ALL DISCS: All the tracks of the CDs placed in the DISC SELECTION 1-6, play repeatedly in different order.
1 DISC: All tracks play repeatedly in different order on the selected CD.
3 Press ▷00. The 3 indication appears in the display window. In the "ALL DISCS" mode, the DISC SELECTION 1–6 indicators flash consecutively while the player is shuffling the tracks.
Shuffle play starts.
Note
When you press ◀◀, the CD returns to the beginning of the current track only.
"Repeating programmed CDs or tracks
1 Program CDs or tracks. (See pages 16–17.)
2 Press PLAY MODE until "PGM REP ALL" appears in the display window.

3 Press ▷II (play/pause). The CDs or tracks play repeatedly in the order programmed.

Checking the total playing time
Press ■ (stop) on the deck or on the remote commander during the time the CD is not playing.
The total playing time and the number of tracks appear in the display window.

Checking the remaining time
| To display | Press |
| Remaining time on the current track* | DISPLAY once |
| 2 08-02:05 |

Remaining time on the CD and the number of tracks left**
* If the CD has more than 16 tracks, the "OVER 16" indication appears in the display window.
For a track whose number is more than 16, remaining time appears as “--:--.”.
**If the remaining time is over 99 minutes or remaining tracks are over 99, the “-- --:-” indication appears.
When you select the "ALL DISCS" mode, remaining time and the number of tracks left from the playing CD to the CD in the DISC SELECTION 6 tray appears in the display window.
Checking the order of programmed tracks
Before playing the CD, press PGM CHECK on the remote commander, or ENTER on the deck. With each press, the selections appear in the program order.
Checking the total playing time of the programmed tracks
Before playing the CD, press DISPLAY on the deck. The total playing time appears.
But if the total time is over 99 minutes or a track whose number is more than 16 is programmed, the total playing time appears as "-- --:--".
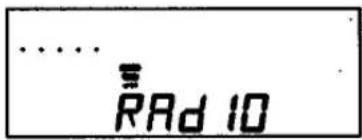
Whenever you want to listen to the radio, press the RADIO button.

1 Turn on the power and press RADIO.
2 Set BAND to FM or AM.
3 Turn TUNING to tune in a radio station. When the radio tunes to an FM stereo broadcast, the FM STEREO indicator lights up. If the received FM stereo is too weak, the reception becomes monaural, and the FM STEREO indicator will go off.
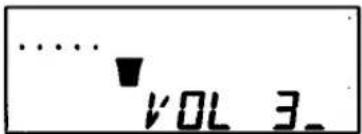
4 Press VOLUME to adjust the volume, and adjust the audio emphasis (see Selecting the Audio emphasis on page 12).
To turn off the radio
Press POWER.
To improve broadcast reception
Reorient the antenna (for FM) or the player itself (for AM).

We recommend you use TYPE I (normal) tape (printed on the tape cassette).

1 Turn on the power and press TAPE.

2 Press ■△ STOP/EJECT to open the tape compartment. Insert a recorded tape with the side you want to play facing up. Close the compartment.

3 Press ▶ PLAY to start playing.
4 Adjust the volume and audio emphasis (See Selecting the Audio emphasis on page 12).
| To | Press |
| Stop play | ■▲ STOP/EJECT |
| Pause | ■ PAUSE |
| Resume play after pause | ■ PAUSE |
| Fast forward* | ▶▶ FF |
| Rewind* | ◀◀ REW |
| Remove the cassette | ■▲ STOP/EJECT |
* For the side facing up.
Whenever you record, we recommend you operate the CD cassette-corder on house current instead of using batteries because recording consumes a lot of battery power. We recommend you use TYPE I (normal) tape (printed on the tape cassette).

1 Turn on the power and press RADIO or CD.
| To record from | Do |
| the radio | Tune in the desired radio station. |
| a CD | Insert the CD(s). (See page 13).Select the disc mode ("ALL DISCS" or "1 DISC") and select the desired disc tray. |
2 Press ■△ STOP/EJECT and put a blank tape with the side you want to record on facing up.
3 Press ● REC.
▶ PLAY will depress automatically and recording starts. CD recording starts after about 8 seconds.
Note
When you record from CDs in the "ALL DISCS" mode, even if the CD exchanging takes more than about 2 seconds, a blank space is inserted only for about 2 seconds. After the CDs have finished exchanging, recording and the playing of another CD track will automatically begin again.
The recording level is adjusted automatically
Adjusting the volume or the sound will not affect the recording level. However, these controls will change the sound levels you hear through speakers or headphones.
To reduce noise while AM recording
If the radio makes a whistling noise, set the ISS (Interference Suppress Switch) at the rear of the player to the position which most decreases the noise. Normally it is set to "2".
To stop recording
Press ■▲ STOP/EJECT.
To record in PGM (program) mode
1 Press CD.
2 Select PGM play (See Playing CDs in the Desired Order (CDs Program Play) on page 16 or Playing Tracks in the Desired Order (Tracks Program Play) on page 17).
3 Press ● REC.
Disc playing and recording will automatically start.
Saving a tape permanently
To prevent a tape from being accidentally recorded over, break off the cassette tab from side A or B as illustrated. If you later want to reuse the tape for recording, cover the broken tab with adhesive tape.

to erase a recording
1 Disconnect the microphone if connected at the MIX MIC jack.
2 Press TAPE.
3 Press ● REC.
Setting Up a P-A System
You can use the CD cassette-corder as a public address system. Also mix sounds by adding your voice or other audio through the microphone as you record. Use a monaural microphone with mini-plug (not supplied).

1 Plug the microphone into the MIX MIC jack and turn on the microphone.
2 Set FUNCTION to choose a sound source.
| To | Press |
| Use the CD cassette-corder as a public address system | TAPE or CD |
| Mix sound | TAPE, RADIO or CD |
3 Sing or speak into the microphone and adjust the volume.
To record mixed sounds
Insert a tape (TYPE I) and press ● REC. The recording level is adjusted automatically.
Note on the microphone
If acoustic feedback (howling) occurs, turn down the volume or move the microphone away from the speakers. We do not recommend you use a microphone that has an echo function.
Maintenance
Cleaning the tape heads and tape path
Contaminated heads cause poor recording or sound drop-out in playback. We recommend cleaning after every 10 hours of operation. To make the best possible recording, however, you should clean all surfaces over which tape travels before each recording.
Wipe the heads, the pinch rollers and the capstans with a cleaning swab slightly moistened with cleaning fluid or alcohol.
![graph TD A["Eraser head"] --> B["Record/ playback head"] C["Pinch roller"] --> B D["Capstan"] --> B B --> E["Audio equipment"]](/content/2026/07/1524536/images/2d65294e507147b8f108b2be42f055bed49be4fe09724f98167a4a5748f28c19.jpg)
After cleaning the heads, rollers and the tape path, insert a tape when the areas cleaned are completely dry.
Demagnetizing the tape heads
After 20 to 30 hours of use, enough residual magnetism will have built up on the heads to begin to cause loss of high frequency sound and hiss. At this time, you should demagnetize the heads and all metal parts in the tape path with a commercially available tape head demagnetizer.
Cleaning the cabinet
Clean the cabinet, panel and controls with a soft cloth slightly moistened with a mild detergent solution. Do not use any type of abrasive pad, scouring powder or solvent, such as alcohol or benzene.
Notes on Compact Discs
- Before playing, clean the CD with a cleaning cloth. Wipe the CD from the center out.

- Do not use solvents such as benzene, thinner, commercially available cleaners or anti-static spray intended for vinyl LPs.
- Do not expose the CD to direct sunlight or heat sources such as hot air ducts, nor leave it in a car parked in direct sunlight as there can be a considerable rise in temperature inside the car.
• After playing, store the CD in its case.
If there is a scratch, dirt or fingerprints on the CD, it may cause tracking error.
AUDIO POWER SPECIFICATIONS
POWER OUTPUT AND TOTAL HARMONIC DISTORTION
CFD-600: With 4-ohm loads, both channels driven from 150-15,000 Hz; rated 2 W per channel-minimum RMS power, with no more than 10 % total harmonic distortion in AC operation.
CFD-610: With 3.2-ohm loads, both channels driven from 150-15,000 Hz; rated 2.5 W per channel-minimum RMS power, with no more than 10 % total harmonic distortion in AC operation.
Other Specifications
| CD player section | ||||
| System | Compact disc digital audio system | For 8-32 ohms impedance headphones | ||
| Laser diode properties | Material: GaAlAs | Speaker terminals: | ||
| Wave length: 780 nm | CFD-600: for supplied 4 ohms impedance speaker | |||
| Emission duration: Continuous | CFD-610: for supplied 3.2 ohms impedance speaker | |||
| Laser output: Less than 44.6 μW | ||||
| (This output is the value measured at a distance of about 200 mm from the objective lens surface on the optical pick-up block.) | Power output (excluding USA model) | CFD-600: | ||
| Spindle speed | 200 r/min (rpm) to 500 r/min (rpm) (CLV) | 3 W + 3 W (at 4 ohms, 10% harmonic in DC operation) | ||
| Error correction | Sony Refined Super Strategy | CFD-610: | ||
| Cross Interleave Reed Solomon Code | 4.5 W + 4.5 W (at 3.2 ohms, 10% harmonic in DC operation) | |||
| Number of channels | 2 | |||
| Frequency response | 20-20,000 Hz +1/-2 dB | |||
| Wow and flutter | Below measurable limit | |||
| Radio section | Power requirements | For CD radio cassette-corder: | ||
| 240 V AC, 50 Hz (Australian model) | ||||
| Frequency range | FM: 87.6-108 MHz | 120 V AC, 60 Hz (Other models) | ||
| AM: 530-1,710 kHz | DC 12 V, 8 size D (R20) batteries | |||
| Antennas | FM: Telescopic antenna | For memory: | ||
| AM: Built-in ferrite bar antenna | 6V DC, 4 size AA (Ro) batteries | |||
| For remote commander: | ||||
| 3V DC, 2 size AA (R6) batteries | ||||
| Cassette-corder section | ||||
| Recording system | 4-track 2-channel stereo | Power consumption | CFD-600: AC 25 W | |
| Frequency response | TYPE I (normal) cassette: 80-10,000 Hz | CFD-610: AC 28 W | ||
| Battery life | For CD radio cassette-corder: | |||
| FM recording Tape playback CD playba | ||||
| General | Sony SUM-1 (NS) | approx. 11 h | approx. 7 h | |
| Speaker | Woofer: CFD-600: 10 cm (4 inches) dia., 4 ohms cone type × 2 CFD-610: 10 cm (4 inches) dia., 3.2 ohms cone type × 2 Tweeter: 2 cm (% inches) × 2 Mixing microphone input jack (minijack): Sensitivity 2.45 mV For low impedance microphone | Dimensions | Approx. 652 × 250 × 291 mm (w/h/d) (25% × 9% × 11% in.) incl. projecting pa Mass Supplied accessories | approx. 6 mo Approx. 652 × 250 × 291 mm (w/h/d) (25% × 9% × 11% in.) incl. projecting pa Mass Supplied accessories AC power cord (1) Remote commander (1) Design and specifications subject to change without notice. |
| Inputs | ||||
Troubleshooting Guide
| Symptom | Remedy | |
| General | The power does not come on.There's no audio. | Connect the AC power cord securely.Insert the batteries with the correct polarity, p. 11.Replace the batteries with new ones if they are weak, p. 11.Make sure the function button is pressed to the function you want to operate.Adjust the volume.Unplug the headphones when listening through speakers. |
| Radio | The audio is weak or poor quality.The picture of the TV is unstable. | Replace all the batteries with new ones if they are weak, p. 11.Move the player away from the TV.If you are listening to an FM program near the TV with an indoor antenna, move the player away from the TV. |
| CD Player | The CD does not play.The CD does not play in DISC SELECTION 1-6The sound drops out. | Place the CD with the label facing up.Clean the CD, p. 25.Take out the CD and leave the disc compartment open for about an hour to dry moisture condensation.Make sure the CD button is pressed to CD.Take out the CD from the SINGLE OPERATION disc tray.Make sure the CD is 12 cm (5inch) CD. 8 cm CDs cannot be played.Reduce the volume.Clean the CD, or replace it if the CD is badly damaged.Place the player in a location free from vibration. |
| Tape Player | The tape does not move when you press an operation button.The ● REC button does not function.The tape does not erase completely.The audio is weak.The audio quality is poor. | Close the cassette compartment.Make sure the safety tab of the cassette is in place, p. 23.Make sure the TAPE button is pressed.Clean the erasing heads.Replace all the batteries with new ones if they are weak, p. 11.Clean the heads, pinch rollers and capstans, p. 25.Demagnetize the heads using a demagnetizer, p. 25. |
| Remote Commander | The remote commander does not function. | Replace all the batteries in the remote commander with new ones if they are weak, p. 9.Make sure you are pointing the remote commander at the remote sensor on the deck.Remove any obstacles in the path of the remote commander and the player.Make sure the remote sensor is not exposed to strong light such as direct sunlight or fluorescent lamp light.Move closer to the deck when using the remote commander. |
In case of other troubles not described above, pressing the RESET button at the rear of the player may return the player to normal operation.

- CFD
- WARNING
- CAUTION
- FOR CUSTOMERS IN CANADA
- INFORMATION
- FOR CUSTOMERS IN THE UNITED STATES
- OWNER'S RECORD
- WELCOME
- ABOUT THIS MANUAL
- DIFFERENCES IN APPEARANCE
- ON SAFETY
- ON POWER SOURCES
- ON PLACEMENT
- ON OPERATION
- NOTE ON USING A CASSETTE WITH MORE THAN 90 MINUTES OF PLAY TIME
- REMOTE COMMANDER
- INSTALLING BATTERIES
- CONNECTING THE SPEAKERS
- TO DETACH THE SPEAKERS
- CHOOSING POWER SOURCES
- INSTALLING BATTERIES FOR THE MEMORY
- OPERATING THE PLAYER ON AC POWER
- OPERATING THE PLAYER ON BATTERIES
- WHEN TO REPLACE THE BATTERIES
- SELECTING THE AUDIO EMPHASIS
- TO CHOOSE THE SOUND CHARACTERISTIC
- TO REINFORCE THE BASS SOUND
- (CFD-610 ONLY) TO GET THE SURROUND EFFECT
- TO MUTE THE SOUND
- INSERTING THE CDS
- TO INSERT CDS IN OTHER DISC TRAYS
- TO TAKE OUT THE CD
- NOTES
- PLAYING A CD (NORMAL PLAY)
- TO PLAY CD(S) IN DISC SELECTION
- TO PLAY A CD IN SINGLE OPERATION
- TO LISTEN TO A SPECIFIC TRACK
- PLAYING CDS IN THE DESIRED ORDER (CDS PROGRAM PLAY)
- TO CHANGE THE ORDER OF THE CDS
- TO ERASE THE CURRENT PROGRAM
- TO REPROGRAM THE CDS WHILE PROGRAMMING ON THE DECK
- NOTE
- PLAYING TRACKS IN THE DESIRED ORDER (TRACKS PROGRAM PLAY)
- TO CHECK THE TOTAL PLAYING TIME WHILE PROGRAMMING TRACKS
- IF YOU MAKE A MISTAKE
- TO CHANGE THE ORDER OF THE TRACKS
- TO PROGRAM THE TRACKS ON THE DECK
- TO REPROGRAM THE TRACKS WHILE PROGRAMMING ON THE DECK
- ENJOYING OTHER USEFUL CD MODES
- PLAYING TRACKS REPEATEDLY
- REPEATING A SINGLE TRACK
- REPEATING ALL THE TRACKS
- EXPECTING TRACKS IN RANDOM ORDER
- REPEATING PROGRAMMED CDS OR TRACKS
- CHECKING THE TOTAL PLAYING TIME
- CHECKING THE REMAINING TIME
- CHECKING THE ORDER OF PROGRAMMED TRACKS
- CHECKING THE TOTAL PLAYING TIME OF THE PROGRAMMED TRACKS
- THE RECORDING LEVEL IS ADJUSTED AUTOMATICALLY
- TO REDUCE NOISE WHILE AM RECORDING
- TO RECORD IN PGM (PROGRAM) MODE
- SAVING A TAPE PERMANENTLY
- TO ERASE A RECORDING
- SETTING UP A P-A SYSTEM
- TO RECORD MIXED SOUNDS
- NOTE ON THE MICROPHONE
- MAINTENANCE
- CLEANING THE TAPE HEADS AND TAPE PATH
- DEMAGNETIZING THE TAPE HEADS
- CLEANING THE CABINET
- NOTES ON COMPACT DISCS
- AUDIO POWER SPECIFICATIONS
Brand : SONY
Model : CFD-600
Category : Hi-Fi System