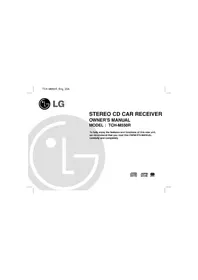
TCH-M550R - Car radio LG - Free user manual and instructions
Find the device manual for free TCH-M550R LG in PDF.


| Product Type | Car Radio |
| Brand | LG |
| Model | TCH-M550R |
| Dimensions (W x H x D) | 178 x 50 x 165 mm (1 DIN) |
| Weight | Approximately 1 kg |
| Power Supply | 12V DC (negative ground) |
| Max Power Output | 4 x 50W |
| Supported Media | CD, CD-R/RW, MP3, USB flash drive |
| Radio Bands | FM, AM |
| Preset Stations | 30 (FM) + 15 (AM) |
| Audio Features | MP3 ID3 Tag display, Bass/Treble control, Loudness |
| Connectivity | Front AUX input, USB 2.0, ISO connectors |
| Display | LCD with white backlight |
| Remote Control | Included |
| Steering Wheel Control Compatible | Yes (with adapter) |
| Clock | Yes, 12/24 hour format |
| Bluetooth | No |
| Audio Outputs | 2-channel preamp output (RCA) |
| Care and Cleaning | Wipe with a soft, dry cloth. Do not use solvents. |
| Safety | For professional installation. Disconnect battery before installation. |
| Spare Parts and Repairability | Contact LG service center for parts and repairs. |
| General Information | User manual available for download in PDF format. |
Frequently Asked Questions - TCH-M550R LG
User questions about TCH-M550R LG
0 question about this device. Answer the ones you know or ask your own.
Ask a new question about this device
Download the instructions for your Car radio in PDF format for free! Find your manual TCH-M550R - LG and take your electronic device back in hand. On this page are published all the documents necessary for the use of your device. TCH-M550R by LG.
USER MANUAL TCH-M550R LG
To fully enjoy the features and functions of this new unit, we recommend that you read this OWNER'S MANUAL carefully and completely.


Precautions

CAUTION
RISK OF ELECTRIC SHOCK DO NOT OPEN

CAUTION: TO REDUCE THE RISK OF ELECTRIC SHOCK DO NOT REMOVE COVER(OR BACK) NO USER SERVICEABLE PARTS INSIDE. REFER SERVICING TO QUALIFIED SERVICE PERSONNEL.
Explanation Graphical Symbols:

The lightning flash with arrowhead symbol, within an equilateral triangle is intended to alert the user to the presence of uninsulated dangerous voltage within the product's enclosure that may be of sufficient magnitude to constitute a risk of electric shock to persons.

The exclamation point within an equilateral triangle is intended to alert the user to the presence of important operating and maintenance(servicing) instructions in the literature accompanying the appliance.
WARNING
TO REDUCE THE RISK OF FIRE OF ELECTRIC SHOCK, DO NOT EXPOSE THIS APPLIANCE TO RAIN OR MOISTURE. To avoid electrical shock, do not open the cabinet, Refer servicing to qualified personnel only.
CAUTION
Use of controls or adjustments or performance of procedures other than those specified here in may result in hazardous radiation exposure.
Laser component in this product is capable of emitting radiation exceeding the limit for Class 1.
This label is located on the interior.
CAUTION: INVISIBLE LASER RADIATION WHEN OPEN AND INTERLOCKS DEFEATED. AVOID EXPOSURE TO BEAM. WARNING: OSYNLIG LASERSTRÄLNING NÄR DENNA DEL ÄR ÖPPNAD STRÅLEN ÄR FARLIG.
This Compact Disc player is classified as a CLASS 1 LASER product. The CLASS 1 LASER PRODUCT label is located on the exterior.
The apparatus shall not be exposed to dripping or splashing and that no objects filled with liquids, such as vases, shall be placed on the apparatus.
Warning:
Do not install this equipment in a confined space such a book case or similar unit.

Before Use
- Do not attempt to disassemble this unit. Laser rays from the optical pickup are dangerous to the eyes.
- Make sure that pins or other foreign objects do not inside the unit; they may cause malfunctioning, or a safety hazard such as electrical shock or exposure of laser rays.
- When your car is parked under direct sunlight in summer, there may be a considerable rise in temperature inside the car. Ensure to let the ambient temperature cool down before operating the unit.
- This unit is designed to be operated on a 12 volt DC negative ground electrical system only.
- When replacing the fuse, be sure to use the fuse whose amperage rating is identical. Use of a fuse with higher amperage may cause serious damage to the unit.
- Periodically wipe the contacts on the back of the front panel with a cotton swap moistened with alcohol.

Notes on CD
- A defective or soiled disc inserted into unit can cause sound to drop out during playback.
- Handle the disc by holding its inner and outer edges.
-
Do not touch the surface of the unlabeled side of the disc.
-
Do not stick paper or tape etc. on the surface.
- Do not expose the disc to direct sunlight or excessive heat.
- Clean the disc before playback. Wipe the disc from the center outward with a cleaning cloth.
- Never use solvents such as benzine or alcohol to clean the disc.
- This unit cannot be operated by 8cm disc (using 12cm disc only).


Table of Contents
INSTRUCTION
Precautions....2
Before Use....3
Table of Contents....4
Display Window....4
Front panel/Rear panel 5
Installation....6
Detachable Front Panel....7
Connection diagram 8
Connection 9
OPERATION
Basic operation....10
CD/MP3 CD Basic Operation....11
CD Advanced Operation 12
Radio operation 13-14
RDS operation 15-18
CD changer Player(Optional)....19-20
REFERENCE
Specifications 21
Display Window

- DISC indicator
- MP3 indicator
- STEREO indicator
- INTRO SCAN (SCAN) indicator
- REPEAT (RPT) indicator
- SHUFFLE (SHF) indicator
-
RDS indicator
-
EQUALIZER (EQ) indicator
-
XDSS indicator
-
SIGNAL LEVEL indicator
-
MAIN DISPLAY SECTION
-
DISC PLAY indicator

Front Panel/Rear Panel


- EJECT (▲) button
- • CONTROL UP/DOWN dial
• SELECTION(SEL) button - DISPLAY WINDOW
- CD disc slot
- EQUALIZER (EQ) button
- PROGRAM TYPE (PTY) button
- • ALTERNATIVE FREQUENCIES (AF) button
- REGIONAL (REG) button
- XDSS button
- RELEASE (▲) button
-
DISPLAY (DISP) button
-
TRAFFIC ANNOUNCEMENT (TA) button
- AS/PS (auto store/preset scan) button
- FUNCTION (FUNC) button
- BAND button
- • Preset Station buttons (1\~6)
- CD PLAY/PAUSE (▶/III) button
- INTRO SCAN (SCAN) button
- REPEAT (RPT) button
• SHUFFLE (SHF) button
• DISC SELECTOR (D-/+ ) button (Optional)
• MP3 TRACK -10 /+10 (D-/+ ) button -
POWER (PWR) / MUTE button
-
• CD SKIP/SEARCH(◀/▶) button
- SEEK/TUNE (+/-) button
- ANTENNA JACK
19 LINE OUT JACK (Optional) - CD CHANGER JACK (Optional)
- POWER/ SPEAKER CONNECTOR
Installation


Basic Installation
Before installing, make sure that the ignition-switch is set to OFF and remove the terminal of the car battery to avoid short-circuiting.
1 Remove the existing receiver unit.
2 Make the necessary connections.
3 Install the installation sleeve.
4 Install the unit in to the installation sleeve.
Removing existing receiver unit
If there is already an installation sleeve for the receiver unit in the dashboard, it must be removed.
ISO-DIN Installation
1 Slide radio into ISO-DIN frame.
2 Install screws removed from old radio.
3 Slide radio and frame into dash opening.
4 Install dash panel or adapter plate.
5 Install trim ring to radio. The notch on trim ring must be positioned at the
6 Install faceplate by fitting right edge into position then pushing left edge closed.
When removing the unit from the installation sleeve
If you need to remove the unit from the installation sleeve, proceed as follows.
1 Remove the rear supporter from the unit.
2 Remove the front panel from the unit.
3 Insert the lever into hole on one side of the unit, and pull the lever toward you. Do the same operation on the other side and pull out the unit from the installation sleeve.

Detachable Front panel


Detachable Front panel
The Front panel is designed to be removable for antitheft purposes. It is recommended that you remove and carry the front panel with you when leave your car. A protective case is provided with the unit for this purpose.
1 Press the RELEASE(▲) button to open the front panel.
2 Hold the right part the front panel.
3 Pull it toward you gently.
4 Plase the front panel in the supplied protective case.
Attachable Front panel
1 Align the left side of the panel with stopper.
2 push the right side or panel into the unit until clicks.
Notes
- When detaching or attaching the front panel, do not press the display or control buttons.
-
The control buttons may not work properly if the front panel is not attached properly. If this occurs, gently press the front panel.
-
Do not leave the front panel in any area exposed to high temperatures or direct sunlight.
- Do not drop the front panel or otherwise subject it to strong impact.
- Do not allow such volatile agents as benzine, thinner, or insecticides to come into contact with the surface of the front panel.
- Do not try to disassemble the front panel.
Connection Diagram
![graph TD A["CD CHANGER (optional)"] --> B["LEFT: WHITE RIGHT: RED"] B --> C["Phone Line (ORANGE)"] C --> D["GROUND (BLACK)"] D --> E["Dimmer (PINK)"] E --> F["TO IGNITION (RED)"] F --> G["TO BATTERY : BACK UP (YELLOW)"] G --> H["POWER ANT (BLUE)"] H --> I["POWER AMPLIFIER CONTROL :REMOTE ON (BLUE/WH…](/content/2026/07/1522916/images/cc1dbb5b579805eb61ba99aff89d16313e085b04e6dbe66e54f2f55ae07e38ba.jpg)

Connection
Precaution
Before connecting, make sure that ignition switch is set to OFF, and remove the terminal of the battery to avoid short circuits.
Notes
- Make correct connections as illustrated in the connection diagram.
- Never use the cord of each speaker in common.
A From antenna
From power amplifier's input jack (2 channel or 4 channel Optional)
To the wiring of vehicle Colors of leads
- BLUE/WHITE : This lead is for connection to the power amplifier (Remote on)
• ORANGE : This lead is for connection to the Phone line. - YELLOW: This lead is for connection to the Battery (back-up) terminal from which the power is always supplied.
- BLUE: This lead is for connection to the full automatic power antenna. Power antenna load to be connected to
the terminal of the control relay switch for vehicles equipped with a power antenna.
This lead is not used for vehicles with manual or semiautomatic antennas.
- PINK: This lead is for connection to the Dimmer line
- RED: This lead is for connection to the terminal from which the power is supplied when the ignition switch is set to ACC.
- BLACK: This lead is for connection to the Ground.
D Connect the CD changer (optional)
- Your car receiver works as control unit for a CD changer which you can buy, if not yet done, later.
- The suitable cord shown on the scheme will be provided together with the CD changer.
2-Speaker Connections

4-Speaker Connections

Basic Operation
POWER ON and OFF
- Press POWER (PWR) button or any other button to turn the unit on.
- When you insert the CD in the CD slot, it turns on
- Press POWER (PWR) for more than 2 seconds to turn it off.
- When the front panel is opened, it is turned automatically off.
Notes
- When you turn off, the unit is memorized automatically the volume level currently before you turn off.
- Whenever you turn on the unit, it will operate at the volume level memorized.
MUTE FUNCTION
- MUTE button is operated as MUTE state on/off.
- The releasing mode mute state is when any button is pressed again.
FUNCTION (FUNC.) Button
This button serves to switch over between CD and RADIO operation. (CD ↔ RADIO)
SELECTION (SEL) Button
1 Press the SELECTION (SEL) button repeatedly to select the mode you want to adjust from volume, bass, treble, balance and fader.
The mode indicator lights up in the following order.
→ VOL → BAS → TRB → BRL → FAD
2 Turn left or right CONTROL UP/DOWN dial to adjust the sound quality
| Turn right | Turn left | |
| VOL | Increase the volume level. | Decrease the volume level. |
| DAS | Increase the bass level. | Decrease the bass level. |
| TRB | Increase the Treble level. | Decrease the Treble level. |
| BAL | Decrease the level of the left speaker(s). | Decrease the level of the right speaker(s). |
| FAD | Decrease the level of the front speaker(s). | Decrease the level of the rear speaker(s). |
Note
The unit cannot adjust the bass and treble in the EQ on mode.
XDSS (Extreme Dynamic Sound System)
Press XDSS button to reinforce treble, bass and surround effect.
Each press of the EQ button switches the unit to the other equalizer mode, as follows.
Pop→Classic→Rock
- Pop : Optimized for R&B, soul and country music.
- Classic : Optimized for orchestral music.
- Rock: Optimized for hard rock and heavy metal music.
1 After you have selected the proper mode by using the SELECTION (SEL) button, control the desired function by turning this dial within 6 seconds. After you finish selecting modes, the unit returns to the initial mode.
2 Operating display in all modes: A numeric display is converted by turning this dial.

CD/MP3 CD Basic Operation
Basic Playback
1 Insert a disc with the labeled side up to start playback. If a disc is already inserted, press FUNCTION (FUNC) to select the CD/MP3 CD operation. Disc indicator lights up, and the track number and elapsed playing time are displayed.
2 Adjust the volume by turning CONTROL UP/DOWN dial.
Switching between audio source
Press FUNCTION (FUNC) to stop CD/MP3 CD play and switch to radio play. Press again to resume CD/MP3 CD play at beginning of last track played.
Notes
- The disc is either inserted or ejected when the unit is not turned on.
- The playback starts from the first track on the disc only when inserting a disc. In other cases (when switching from the radio operation or turning on the unit), the playback starts from the beginning of the track being played when the playback has stopped.
- A disc can be inserted by putting it into the disc compartment slot, and either pushing it lightly with fingers or pressing
- Suitable CD: This unit is designed to be operated on a 12 cm (5") disc only.
- This unit can play a CD-R or CD-RW that contains audio titles or MP3 files.
CD/MP3 CD playback button
| ▲ | Eject a disc.To withdraw the CD, firmly depress.The unit automatically switches to radio reception. |
| ▶/II | Play or Pause.The track number and elapsed playing time flash on and off.To resume play, press again. |
| ▶ | Skip to the next track with a short press(for less than 1 second).Each extra press skips forward one extra track. |
| Forward on the disc. Press and hold down until the startof the desired passage, then release it. (Only CD) | |
| ◀ | Restart the track currently in play with a short press(for less than 1 second).Each extra press skips backward one extra track. |
| Reverse on the disc. Press and hold down until the startof the desired passage, then release it. (Only CD) |
CD Advanced Operation
INTRO SCAN Play
Press SCAN during playback.
SCAN indicator lights up and the first 10 seconds of all the tracks on the disc are played in order.
When the desired track is found, press SCAN again.
The unit returns to the normal playback.

Notes
- The intro scan play cannot be performed with the repeat or shuffle play.
• After the first 10 seconds of all the tracks on the disc are played in order, the unit repeats until the intro scan stopped.
REPEAT Play
Press RPT during playback. RPT indicator lights up and the currently selected track is played repeatedly. To cancel the repeat play, press RPT again.

Notes
- If the repeat play is not selected, all the tracks on the disc are played repeatedly.
• The repeat play cannot be performed with the intro scan or shuffle play.
SHUFFLE Play
Press SHF during playback. SHF indicator lights up and the tracks on the disc are played randomly. To cancel the shuffle play, press SHF again.

Notes
- The shuffle play cannot be performed with the intro play. If the repeat play is selected during the shuffle play, the shuffle play is canceled.
- During the shuffle play, even if ◀ is pressed repeatedly, the track currently in play is restarted.
MP3 file information
Press twice the DISP button during MP3 file playback.
- The information ID3 TAG(Title, Artist, Album) of the MP3 file will be shown in the display window.
- If there is no the information of the MP3 file, "NO ID3 TAG" indicator will be shown in the display window.
MP3 TRACK -10/+10
Durning playback, press the -10(D-) button to go back to the previous 10th track, and press +10(D+) button to go forward to the next 10th track.
For your reference
- Auto Loading
When the disc is ejected by pressing ▲ during playback, it will be loaded automatically after 10 seconds unless you pull out the disc from the unit.

Radio Operation

Presetting stations
Up to 6 stations for each band F1, F2, F3, MW can be stored on the preset station buttons.
1 Press BAND to select the desired band. If a CD is inserted in the unit, press FUNCTION (FUNC) button to select radio function.
2 Tune in the station to be preset by pressing TUNE(+/-) button.
- AUTO Tuning Press the TUNE(+/-) buttons for less than 1second.
- MANUAL Tuning the TUNE(+/-) buttons for more than 2 seconds and then buttons repeatedly until the desired station appears.
3 Press one of the preset station buttons (1 - 6) for more than 1 second. The number of the pressed preset station button is displayed.
4 Repeat step 2 and 3 to preset other stations.
Notes
- As F1, F2, F3 have the same frequency range, up to 18 station can be preset for FM.
- When a station is preset on the preset station button on which another station of the same band has already been preset, the previously preset station is automatically erased.
Automatic Store Stations
The automatic presetting function is used to automatically preset up to 6 stations for each band.
1 Press BAND to select the desired band.
2 Press and hold AS/PS (auto store/preset scan) down for more than 2 seconds.
The scanning starts from the currently displayed frequency to higher frequencies and stops when 6 stations have been preset or the receivable frequencies have been scanned once.
Radio Operation
Notes
- The presetting is not performed if there is no station to be tuned in.
- When the automatic presetting is performed, the previously preset stations are automatically erased
- To stop the automatic presetting, press AS/PS (auto store/preset scan) again or press any of the preset station buttons (1 - 6)
To scan the preset stations
Press AS/PS (auto store/preset scan) button briefly. Each preset station is tuned in for 5 seconds in order. To stop the scanning, press AS/PS again or any of the preset station buttons (1 - 6).
To tune in the preset stations
Press BAND to select the desired band and press the desired preset station buttons (1 - 6).
The number of the preset station button is displayed and the preset station is received.
Listening to the radio
1 Press any button (except 🔒) to turn on the unit.
The radio frequency is displayed. If the unit is in the CD operation, press FUNCTION (FUNC) to select the radio operation.
2 Press BAND to select the desired band.
The band indicator F1, F2, F3, MW is displayed.
3 Tuning the TUNE(+/-) buttons for more than 2 seconds and then buttons repeatedly until the desired station appears.
Press TUNE(+) to increase and TUNE(-) to decrease the frequency. To change the frequency rapidly, press and hold TUNE(+/-) down longer.
Seek Tuning
The seek function is used to search for the station automatically.
- Press TUNE(+/-) to start the seek function.
- Press TUNE (+) to search for the higher frequencies and TUNE (-) for the lower frequencies.
The seeking stops when the nearest station with good reception is tuned in. - Press TUNE(+/-) repeatedly until desired station is received.

RDS Operation
About RDS
RDS (Radio Data System) is a method for sending information signals together with the transmitter signals. Your tuner is capable of translating these signals and putting the information on the display. These codes contain the following informations. Program Service Name (PS), A list of program Type(PTY), Traffic Announcement(TA), Clock Time(CT), Radio Text(RT)
RDS Display Options
The RDS system is capable of transmitting a wide variety of information in addition to the initial call sign that appears when a station is first tuned. In normal RDS operation the display will indicate the station name, broadcast network or call letters.
Pressing DISP on the front panel enables you to cycle through the various data types in the sequence:
(CT→FREQUENCY→PTY→RT→PS)
- CT (Time controlled by the channel): Enable the unit to receive the actual time and show it on the display window.
- PTY (Program type recognition): The program type is shown on the display window.
- RT (Radio text recognition): The radio station's information is displayed on the display window.
- PS (Program Service name): The program title is displayed on the display window.
Note
Some RDS stations may not choose to include some of these additional features. If the data required for the selected mode is not being transmitted, the Display Window will show a NO CLOCK, PTY NONE, RT NONE message.
• PI (Program Identification) contains additional information for regional program operation
• AF (Alternative Frequencies for the actual program)
• TP (Traffic Program Identification)
• TA (Traffic Announcement Identification)
• EON (Enhanced Other Networks) Information on other programs to use their services like traffic announcement etc
Notes
• RDS is only available for FM reception.
- The PS function allows station names to be displayed in clear letters.
- Network Tracking reception uses the PI and AF codes. The PI code identifies the country, area and broadcast system. AF lists up which reception frequencies at the area are broadcasting the same program and automatically changes to the best reception quality offering frequency without the need to interrupt the program by a seek function.
- Traffic programmes and announcements can be automatically received using the TP/TA features.
- EON-TA: With activated EON function traffic announcements can be heard when listening programs which do not broadcast such information by the selves. To do this, the tuner changes to another program only for announcements, returning automatically afterwards to the previous listened program.
- PTY program type selection enables to select the contents of programs who are supporting this service.
RDS Operation
STATION NAME DISPLAY
The station name is displayed automatically when a RDS station is received.
RDS AF/REG FUNCTION
To switch on or off the AF function (Network-Tracking), shortly press the 'AF' button. To switch on or off the REG function (Regional Network Tracking), press the 'AF' button longer than 2 seconds.
- Mode 1 (AF: on/REG: on):
Network-Tracking is activated. Regional mode is engaged (AF function changes between stations broadcasting the same program at all times). Regional mode shall be selected only in case of driving in certain local areas.
- Mode 2 (AF: on/REG: off):
Network-Tracking is activated. AF function changes between stations belonging to the broadcast network being received.
A station broadcasting a different regional program in the same network
may be received at certain times. This can happen only in case of listening to regionalized programs; in mode 2 this is no malfunction!
- Mode 3 (AF: off):
Network-Tracking is deactivated. Only station name will be displayed. In case of poor reception no alternative station can be used!
Network-Tracking reception
When you are driving in an area where RDS data is broadcasted by stations in a network, following procedures are operated in modes 1 and 2 if a RDS station is tuned:
A flashing of the AF indicator in the LCD display shows, the processor is still collecting the complete set of RDS data of this program. Whenever the flashing stops, all data are complete and the RDS functions of TCH-M550R can be used as far as they are supported by the program.
If AF functions are activated: When the reception quality drops, the tuner automatically changes to another station
in the network, broadcasting a better reception quality, using the PI and AF codes. This mean: wherever you drive, you can continue to listen to the same programme without interruptions.
PI SEEK procedure: If the reception quality drops too much without finding a better quality alternative frequency from the AF list, after a while the PI SEEK function starts (Display: 'SEEK-PI'). The tuner is searching a station of the same program not regarding the AF list, which has the same PI code.

RDS Operation
The same program can be received on different frequencies.

RDS data for preset buttons
When a preset button is pressed, if the station with that frequency is received with a sufficient quality, the receiver will tune to that frequency. When the reception quality is not sufficient for good reception, referring to its AF list, the receiver will change to a station of the same program which is broadcasting the best reception quality (a station broadcasting the same program contents may not be received when mode 2 (REG off) is selected and a regional program is selected).
If a sufficient quality station cannot be found in the AF list, PI-seek tuning starts automatically.
LOCAL/DX selection in EON-TA mode In the EON-TA mode, press the TA button for more than 2 seconds, causes only local and strong stations to be received. When TA button is pressed for more than 2 seconds, it receives all stations, including distant and weak ones. It is recommended to set TA button to the local position to receive local stations with good sound quality.
REG FUNCTION(Regional)
(Only available in certain countries)
- When the AF button is pressed for more than 2 seconds, the indication "REG" appears on the display and the radio activates the search for regional programmes being transmitted by the same broadcasting station.
- When the REG function is enabled, you can only hear regional programmes.
- When the REG function is enabled, you can also listen to various programmes by means of the alternative frequencies.
- The regional function covers restricted areas of transmission, hence it is advisable to use it only for short distances.
PROGRAM TYPE FUNCTION
To select a certain program type out of the reception band, following procedure can be operated.
1 Press BAND to select in FM mode.
2 After, pressing PTY button one by one activated as selecting each mode.
music group→speech group→search off
3 Press one of the PRESET (1-6) button shortly. Each time this button is pressed, the programs changes as follow.
| Button | Music group |
| 1 | Pop M→Rock M |
| 2 | Easy M→Light M. |
| 3 | Classics→Other M |
| 4 | Jazz→Country |
| 5 | Nation M→Oldies |
| 6 | Folk M |
| Button | Speech group |
| 1 | News→Affairs→Info |
| 2 | Sport→Educate→Drama |
| 3 | Culture→Science→Varied |
| 4 | Weather→Finance→Children |
| 5 | Social→Religion→Phone In |
| 6 | Travel→Leisure→Document |
RDS Operation
Notes
- The Program Type data is supplied from the broadcast station. If the program contents do not match with the selected program type this is no fault of the TCH-M550R processor but it is desired by the broadcast station.
- Some programs do not support the PTY function with data. If none of the receivable stations in the FM band support the selected program type, another program type can be selected or the PTY function can be switched off.
RECEPTION FREQUENCY DISPLAY
As long as there was no RDS data reception, the LCD display shows the actual reception frequency. After PS data was read from RDS signal, steadily the station name (PS) is displayed unless the AF function decides to receive another frequency. In that case, for 3 sec. The new reception frequency will be shown automatically.
RDS MODE Adjustment
1 Press the SEL button for more than 2 seconds it is activated selecting mode.
2 After, pressing SEL button one by one activated as selecting each mode.
3 Turn left or right control up/down dial to select the indicator.
| TA ALARM → | 2ndPI SOUND → | 3rdRETUNE L → | 4thBEEP 2ND |
| TA SEEK | PI MUTE | RETUNE S | BEEP ALL |
TA SEEK mode
When the newly tuned station does not receive TP information for 5 sec, the receiver retunes to next station which has no same PI as the last station's, but has the TP information.
TA ALARM mode
When a newly tuned station has no TP information for 5 sec, double beep sound is output.
PI SOUND mode
If the sound of a station with different PI is heard once in a while, the receiver mutes the sound after 1 second.
PI MUTE mode
If the situation described above is occurred, the receiver mutes the sound right now.
RETUNE L mode
The waiting time for starting TA search or PI search is selectable. Retune time is set to 90 seconds.
RETUNE S mode
The waiting time for starting TA search or PI search is selectable. Retune time is set to 30 seconds.
BEEP 2ND mode
The beep is only generated when key is pressed long (1 sec)
BEEP ALL mode
The beep is generated when every key is pressed.

CD Changer player(Optional)
You can play CDs with this unit by connecting the optional compact disc changer.
Make sure that the disc magazine loaded with the discs is inserted into the connected compact disc changer.
1 Press POWER button to turn on the power of the car stereo.
2 Slip a CD in the magazine with the sticker upwards.
3 Insert the magazine in the CD changer.
4 Press FUNCTION button to activate the CDC function, one of the disc will be played automatically. If the CD changer is not connected, the CDC function is not activated.
5 Press D -/+ button to select the CD.
6 Press one of buttons (◀/▶) to select another except of music from the disc being played.
7 Press and hold the(◀/▶) button during playback.
The track is scanned by spiral in the forward or backward direction.
Release the button to resume playback at the desired location.
Basic Play
To start play, press the(▶/■) button To pause, press it again. The disc and track number appears in the display window.
Repeat Play
• To play one track repeatedly, press RPT button (The RPT indication is displayed).

- To play all tracks repeatedly, press RPT button for more than 1.5 seconds (The RPT indication is displayed).

- To cancel the repeat play, press RPT button again.
Notes
- If the repeat play is not selected, all the discs are played repeatedly.
• The repeat play cannot be performed with the intro scan or shuffle play.
Shuffle play
- To play one disc randomly, press SHF button (The SHF indication is displayed).

• To play all discs randomly, press SHF button for more than 1.5 seconds (The SHF indication is displayed).

- To cancel the repeat play, press SHF button again.
Notes
- The shuffle play cannot be performed with the intro scan play. If the repeat play is selected during the shuffle play, the shuffle play is canceled.
- During the shuffle play, even if is pressed repeatedly, the track currently in play is restarted.
CD Changer player(Optional)
Intro Scan
Press SCAN button to scan a CD by playing only the first 10 seconds of each track.
• To play one disc intro scan, press SCAN button (The SCAN indication is displayed).

• To play the first 10 seconds of each track on all the discs intro scan, press SCAN button for more then 1.5 seconds (The SCAN indication is displayed).

When the desired track is found, press SCAN again. The unit returns to the normal playback
Note
The intro scan play cannot be performed with the repeat or shuffle play.
CD CHANGER DISPLAY


Specifications
GENERAL
| Output Power | .50W x 4CH(Max.) |
| Power Source | .DC 12-15 V |
| Speaker impedance | .4 Ω |
| Ground System | .Negative |
| Dimensions(W x H x D) | .188 x 58 x 166 mm(Without Front Panel) |
| Net Weight | .1.3 kg |
CD SELECTION
| Frequency Response | 40 Hz-20 kHz |
| S/N Ratio | 60 dB |
| Distortion | 0.5% |
| Channel Separation(1kHz) | 50 dB |
RADIO SELECTION
FM
| Frequency Range | 87.5-108 MHz |
| S/N Ratio | .55 dB |
| Distortion | .0.5% |
| Channel Separation | .25 dB |
AM(MW)
| Frequency Range | .522-1620 kHz |
| S/N Ratio | 45 dB |
| Distortion | 1.0% |
LW(Optional)
| Frequency Range | 144-281 kHz |
| S/N Ratio | 45 dB |
| Distortion | 1.0% |
Notes
- The design and specification are subject to change without notice in the course of product improvement.

LG
P/NO : 3834RR0023A



- PRECAUTIONS
- CAUTION
- EXPLANATION GRAPHICAL SYMBOLS
- WARNING
- BEFORE USE
- NOTES ON CD
- TABLE OF CONTENTS
- INSTRUCTION
- OPERATION
- REFERENCE
- DISPLAY WINDOW
- FRONT PANEL/REAR PANEL
- INSTALLATION
- BASIC INSTALLATION
- ISO-DIN INSTALLATION
- WHEN REMOVING THE UNIT FROM THE INSTALLATION SLEEVE
- DETACHABLE FRONT PANEL
- ATTACHABLE FRONT PANEL
- NOTES
- CONNECTION
- PRECAUTION
- A FROM ANTENNA
- FROM POWER AMPLIFIER'S INPUT JACK (2 CHANNEL OR 4 CHANNEL OPTIONAL)
- TO THE WIRING OF VEHICLE COLORS OF LEADS
- D CONNECT THE CD CHANGER (OPTIONAL)
- BASIC OPERATION
- POWER ON AND OFF
- MUTE FUNCTION
- FUNCTION (FUNC.) BUTTON
- SELECTION (SEL) BUTTON
- NOTE
- XDSS (EXTREME DYNAMIC SOUND SYSTEM)
- CD/MP3 CD BASIC OPERATION
- BASIC PLAYBACK
- SWITCHING BETWEEN AUDIO SOURCE
- CD ADVANCED OPERATION
- INTRO SCAN PLAY
- REPEAT PLAY
- SHUFFLE PLAY
- MP3 FILE INFORMATION
- MP3 TRACK -10/+10
- FOR YOUR REFERENCE
- AUTO LOADING
- RADIO OPERATION
- PRESETTING STATIONS
- AUTOMATIC STORE STATIONS
- TO SCAN THE PRESET STATIONS
- TO TUNE IN THE PRESET STATIONS
- LISTENING TO THE RADIO
- SEEK TUNING
- RDS OPERATION
- ABOUT RDS
- RDS DISPLAY OPTIONS
- STATION NAME DISPLAY
- RDS AF/REG FUNCTION
- MODE 1 (AF: ON/REG: ON)
- MODE 2 (AF: ON/REG: OFF)
- MODE 3 (AF: OFF)
- NETWORK-TRACKING RECEPTION
- RDS DATA FOR PRESET BUTTONS
- REG FUNCTION(REGIONAL)
- PROGRAM TYPE FUNCTION
- RECEPTION FREQUENCY DISPLAY
- RDS MODE ADJUSTMENT
- TA SEEK MODE
- TA ALARM MODE
- PI SOUND MODE
- PI MUTE MODE
- RETUNE L MODE
- RETUNE S MODE
- BEEP 2ND MODE
- BEEP ALL MODE
- CD CHANGER PLAYER(OPTIONAL)
- BASIC PLAY
- INTRO SCAN
- CD CHANGER DISPLAY
- SPECIFICATIONS
- GENERAL
- CD SELECTION
- RADIO SELECTION
- FM
- AM(MW)
- LW(OPTIONAL)
Brand : LG
Model : TCH-M550R
Category : Car radio